KAMN27UHFTA - Screen Kogan - Free user manual and instructions
Find the device manual for free KAMN27UHFTA Kogan in PDF.


| Product Type | 27" Ultra HD 4K IPS Monitor |
| Model | KAMN27UHFTA |
| Brand | Kogan |
| Screen Size | 27" |
| Resolution | 3840 x 2160 (4K UHD) |
| Panel Type | IPS |
| Backlight | E-LED |
| Refresh Rate | 60Hz |
| Response Time | 5ms |
| Viewing Angle | ≥178°(H) / 178°(V) |
| Contrast Ratio | 1000:1 |
| Color Support | 1.07 Billion |
| FreeSync | Yes (Adaptive Sync) |
| Flicker Free | Yes |
| Signal Input | DP x1, HDMI 1.4 x1, HDMI 2.0 x1 |
| Audio Output | 3.5mm Audio Out (No built-in speakers) |
| VESA Mount | 100 x 100 mm, Screw size M4 x 12mm |
| Dimensions (with stand) | 613.4 x 190.89 x 452.6 mm |
| Dimensions (without stand) | 613.4 x 41 x 364.95 mm |
| Net Weight | 5.7 kg |
| Gross Weight | 6.9 kg |
| Power Supply | DC 12V, 3A (adapter included) |
| Angle Adjustment | Forward 5° / Backward 15° (built-in stand) |
| Cleaning | Wipe with dry microfiber cloth when off; avoid alcohol/ammonia |
| Safety Warnings | Unplug before cleaning; don't block vents; don't open back panel |
Frequently Asked Questions - KAMN27UHFTA Kogan
User questions about KAMN27UHFTA Kogan
0 question about this device. Answer the ones you know or ask your own.
Ask a new question about this device
Download the instructions for your Screen in PDF format for free! Find your manual KAMN27UHFTA - Kogan and take your electronic device back in hand. On this page are published all the documents necessary for the use of your device. KAMN27UHFTA by Kogan.
USER MANUAL KAMN27UHFTA Kogan
natural_image
Front view of a black desktop computer monitor with a circular base (no visible text or symbols)27" ULTRA HD 4K IPS FREESYNC MONITOR
(3840 X 2160)
KAMN27UHFTA
SAFETY & WARNINGS
Read all instructions before using the appliance and retain for reference.
• Unplug the monitor before cleaning it with a slightly damp, clean cloth.
- Wiping the screen once it has been turned off with a dry microfiber cloth is recommended.
- Do not use cleaning alcohol or ammonia-based liquids or other harsh cleaners.
- This monitor is designed with ventilation holes on the back of the casing. Do not cover or block them.
- Avoid placing the monitor near heaters, stoves, fireplaces or other sources of heat, as well as in rooms lacking in adequate ventilation.
- Do not insert any objects or spray any liquids into the vents.
- Do not position the monitor in unsafe locations. If the monitor falls, it may be damaged and may injure nearby people.
• Unplug the monitor if it is not going to be used for an extended period.
- Do not place heavy objects on the monitor, its power cord or any connected cables.
- Do not open the back panel of the monitor, as it contains a high-voltage current even when not plugged in.
OVERVIEW
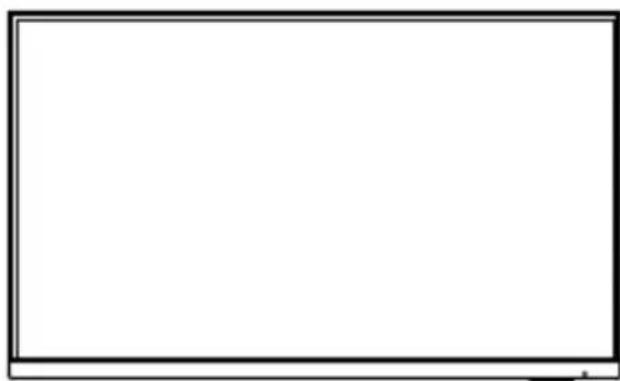
natural_image
Blank white rectangle with black border (no text or symbols)A
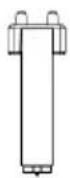
B

C
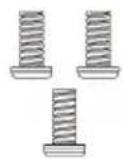
D
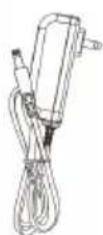
E
F
G
A. Monitor
B. Stand Connector
C. Stand Base
D. M4 x 12mm Screws (x 3)
E. Power Adapter
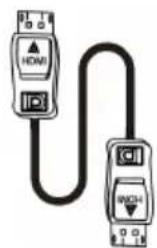
F. HDMI Cable
G. User Guide
ASSEMBLY
Built-in stand
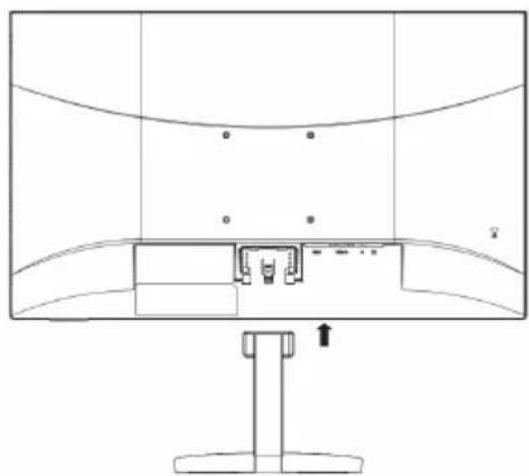
- Lay the monitor on a cloth with the LCD panel facing down to prevent the LCD panel from being damaged. Install the bracket body to the stand base with screws.
natural_image
Top-down architectural floor plan showing curved walls, a central room with furniture, and a small building (no text or labels)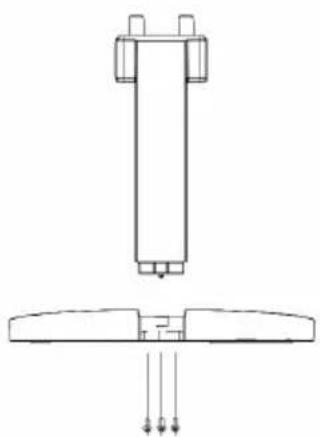
natural_image
Technical line drawing of a mechanical component with no visible text or symbols- Attach the stand base by pressing it on to the LCD panel.
natural_image
Line drawing of a computer monitor with top and side views, showing internal components and a stand (no text or symbols)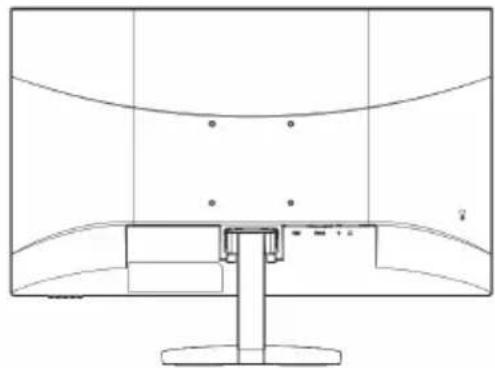
natural_image
Technical line drawing of a computer monitor with curved screen and base mount (no text or symbols)Angle adjustment
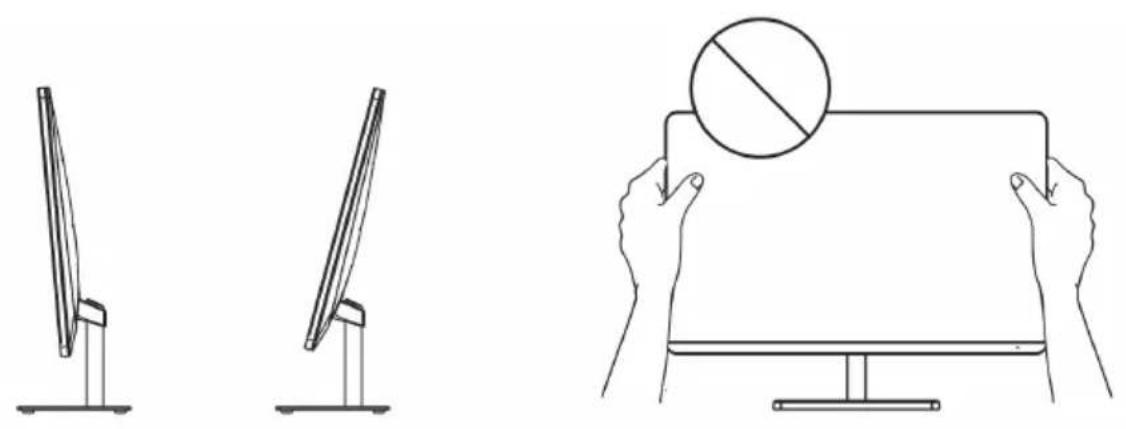
The viewing angle of the built-in stand can be adjusted forward 5^ or backward 15^ for a comfortable viewing experience.
Note:
• The above illustrations are for reference only.
• Take care not to touch the screen area when adjusting the angle of the monitor.
VESA mount
Before installing this monitor on a desk or wall mount, make sure to detach the stand.
Consult a professional technician for wall mount installations. Kogan accepts no liability for installations not performed by a professional technician.
To ensure sufficient ventilation, Install the monitor at least 10 cm away from the wall and leave about 10 cm of space at each side of the monitor.
- Place a clean, dry and lint-free cloth on a flat, stable surface.
- Gently lay the monitor on the cloth with the LCD screen facing down.
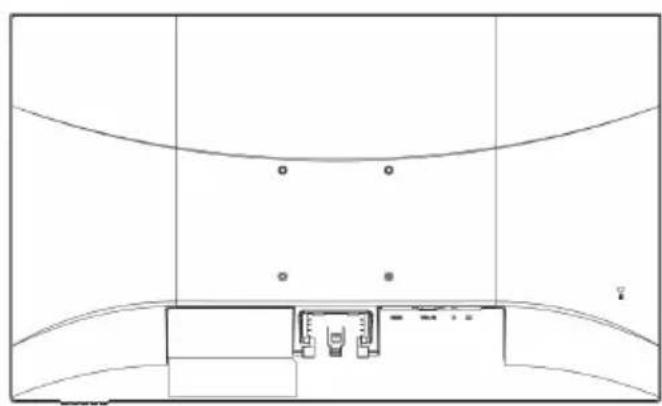
- Identify the four wall mounting screw holes on the back of the monitor.
- Install the wall mounting bracket (not supplied) on the back of the monitor and attach the monitor to the wall according to the mounting bracket's instructions.
- Make sure that all screws (not supplied) are tightened and secured properly.
Note:
- Ensure the wall mounting bracket and screws conform to VESA standards.
- For more information, refer to the user manual for the wall mounting bracket.
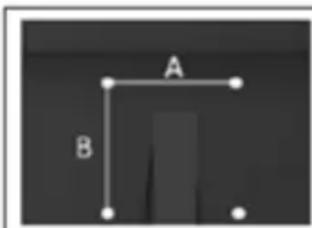
Wall mount: (A x B) 100 x 100 mm
Screw size: M4 x 12 mm
CONNECTIVITY
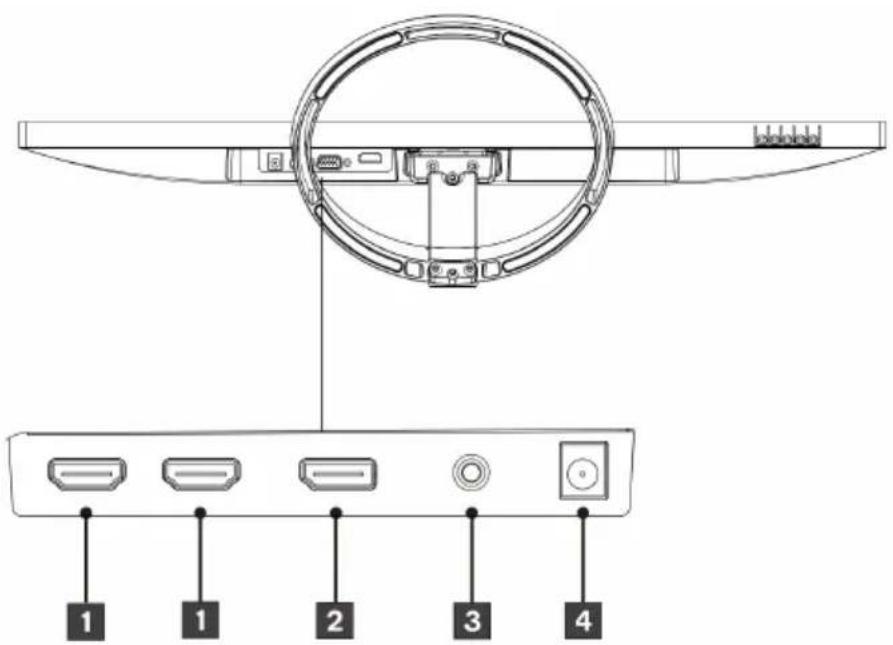
Turn off the PC and the monitor before connecting them.
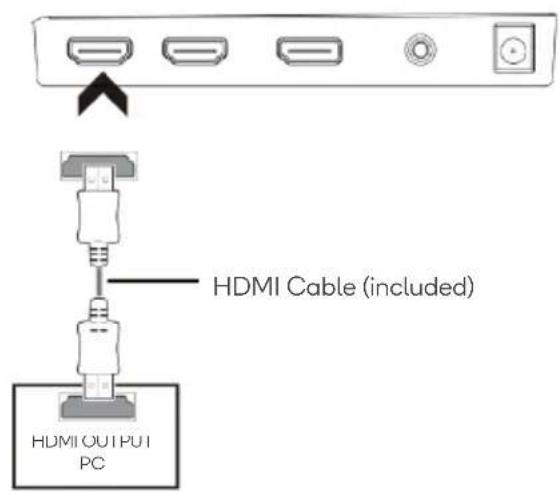
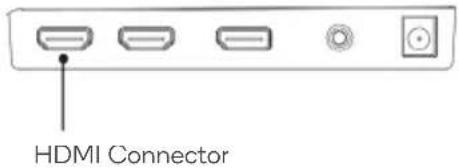
1 HDMI
Connect an HDMI cable from your PC to the monitor.
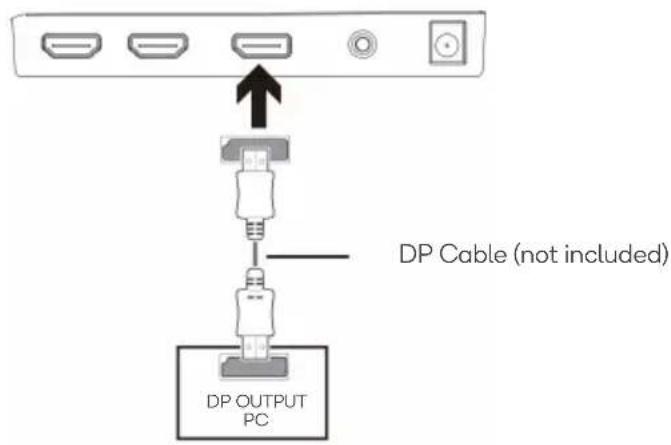
2 DisplayPort
Connect a DisplayPort cable from your PC to the monitor.
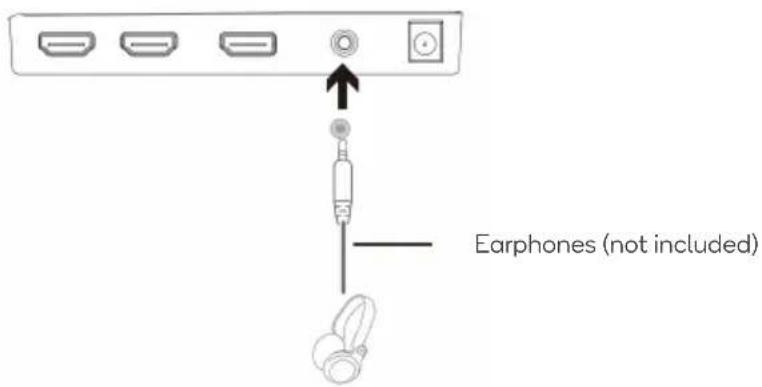
3 3.5mm Audio Out
Earphones or speakers can be connected to receive sound output from your monitor. Note that the sound output on your PC must be set to the monitor.
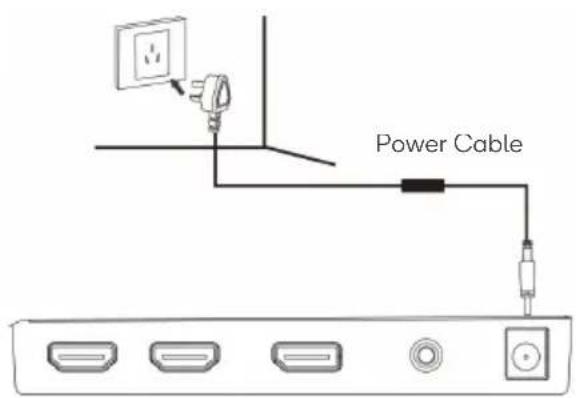
4 Power Cable
Connect the included power cable to the monitor power port, then connect the other end into a power outlet.
OPERATION
Setup
- Connect your PC to the monitor using the included HDMI cable.
-
Connect the power cable to your monitor then connect the other end to your power source. It is recommended that you use a surge protector with adequate voltage if a wall outlet cannot be reached directly.
-
Locate the power button on the monitor and press it to turn the monitor on.
FreeSync
The feature itself is on by default when setting 60Hz refresh rate. In order to use this feature, note you must have hardware with FreeSync capability, an HDMI cable and the latest graphic drivers.
Connect to the monitor using an HDMI cable. After connecting, you may receive a prompt to enable the feature on your computer. If you do not receive the prompt, you may need to enable the function in your graphics card menu. See your graphics card manufacturer's documentation for instructions on how to turn on and/or enable FreeSync.
Controls
You can easily control the functions of the monitor through the control buttons.
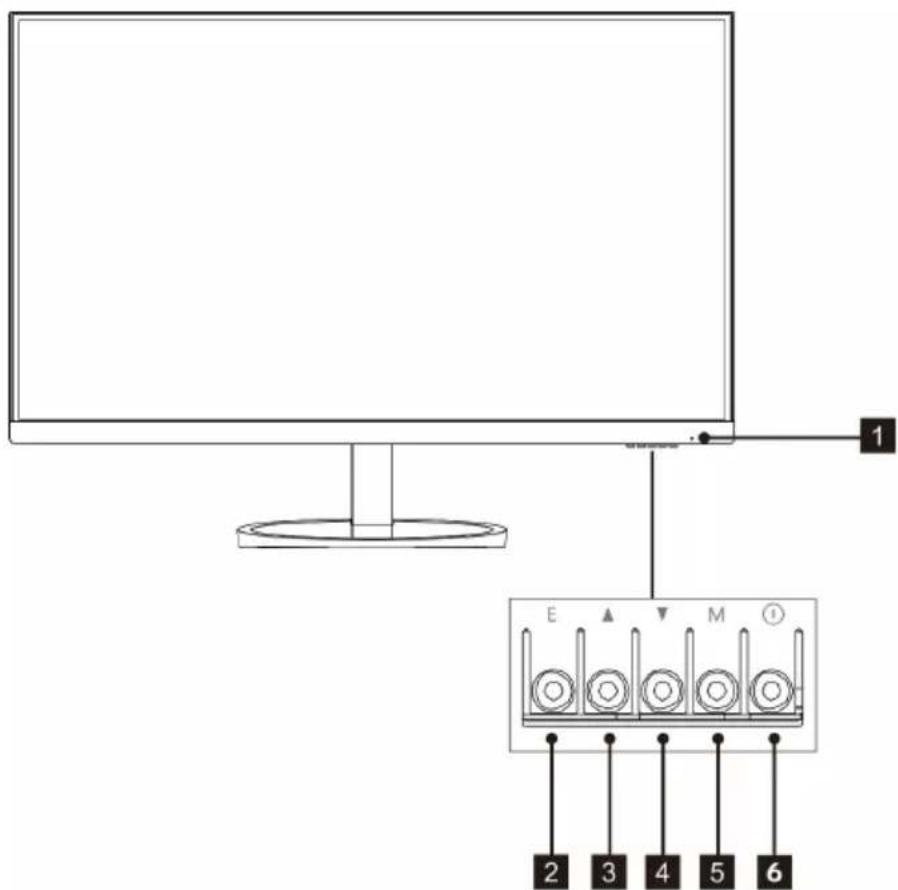
1 LED Indicator: Changes colors to indicate status.
The below table shows the monitor status indicated by the indicators.
| LED indicator | Monitor status |
| Blue Power on | |
| Red | Standby mode / No signal |
| No light | Power off |
2 E Exit Button: Press to exit.
3 ▲Up Button: Press to move up in the menus.
4 ▼Down Button: Press to move down in the menus.
5 M Menu Button: Press to display the OSD menu or enter sub-menus.
6 Power Button: Press to turn the monitor on/off.
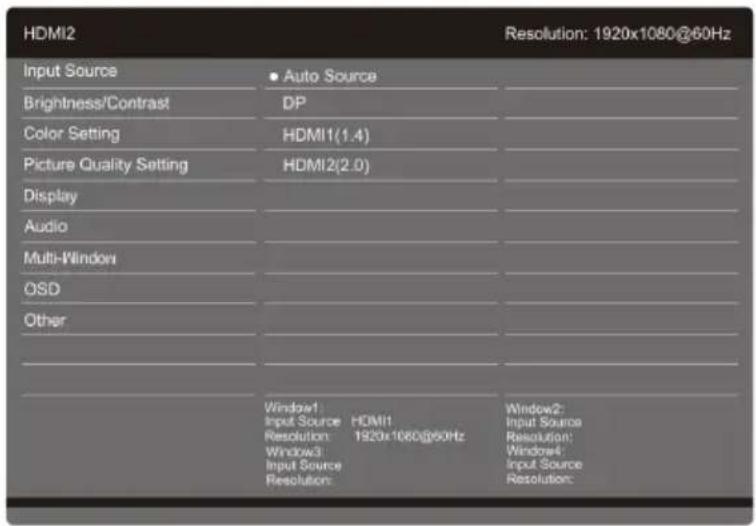
- To view the OSD menu, press the control button at the bottom right of the monitor.
- Use the buttons (E, ▼, ▲, M, ⏻) to configure options.
- To return to the previous menu to set other menu items, press E.
- Press E to exit the OSD menu.
| Main Menu | Sub-Menu | Options | Description |
| Input Source | DP N/A | Select input | |
| HDMI 1 (1.4) N/A | |||
| HDMI 2 (2.0) N/A | |||
| Brightness/Contrast | Brightness | 0~100 | Adjust display brightness |
| Contrast | 0~100 | Adjust display contrast | |
| DCR On, Off | Turn DCR function on/off | ||
| Color Setting | Gamma | 1.8, 2.0, 2.2, 2.4, 2.6 | Set gamma |
| Picture Mode | Standard, Photo, Movie, Game | Set visual mode | |
| Color Temperature | Normal, Warm, Cool, USER | Adjust color temperature | |
| Hue | 0~100 | Adjust display hue | |
| Saturation | 0~100 | Adjust display saturation | |
| Picture Quality Setting | Sharpness | 0~100 | Set display sharpness |
| Response Time | Off, High, Middle, Low | Set screen response time | |
| Noise Reduction | Off, High, Middle, Low | Reduce noise caused by signal source interference | |
| Super Resolution | Off, High, Middle, Low | When the resolution of the display screen is low, this function can be turned on to enhance the image resolution. | |
| Dynamic Luminous Control | On, Off | Turn dynamic luminous control on/off | |
| Audio | Mute On, Off Turn mute mode on/off | ||
| Volume 0~100 Adjust audio volume | |||
| Audio Source | Auto Source, DP, HDMI 1 (1.4), HDMI 2 (2.0) | Select audio signal input via HDMI or DisplayPort | |
| Multi-Window | Multi-Window | Off, PIP Mode, PBP 2Win, PBP 3Win, PBP 4Win | Select PIP/PBP modes according to the number of input signals etc. |
| Sub Win2 Input | DP, HDMI 1 (1.4), HDMI 2 (2.0) | Select according to input signal for PIP/PBP mode | |
| Sub Win3 Input | |||
| Sub Win4 Input | |||
| PIP Size | Small, Medium, Large | Adjust the PIP/PBP window size | |
| PIP Position | Top Left, Bottom Left, Top Right, Bottom Right | Adjust the PIP/PBP window position | |
| Swap | N/A | Swap the PIP/PBP signal sources | |
| OSD | Language | English, 简体中文,||||, Русский, Español, 日本語, Français | Set OSD language |
| OSD H-Position | 0~100 | Adjust the OSD's horizontal position | |
| OSD V-Position | 0~100 | Adjust the OSD's vertical position | |
| OSD Transparency | 0~100 | Adjust the OSD transparency value | |
| OSD Timeout | 5~60 | Set how long the OSD remains | |
| OSD Rotation | Normal, 90, 180, 270 | Set OSD rotation direction | |
| Other | FreeSync [Adaptive Sync] | On, Off Turn FreeSync on/off | |
| Reset | N/A | Reset monitor configurations | |
SPECIFICATIONS
| Model | KAMN27UHFTA |
| Screen Size | 27" |
| Aspect Ratio | 16:9 |
| Backlight | E-LED |
| Brightness | 250cd/m² |
| Panel | IPS |
| Resolution | 3840x2160 |
| Refresh Rate | 60Hz |
| Response Time | 5ms |
| Viewing Angle | ≥178°(H) / 178°(V) |
| Contrast Ratio | 1000:1 |
| VESA Mounting | 100 x 100mm |
| Colours | 1.07B |
| FreeSync | YES |
| Signal Input | DP (x1), HDMI 1.4 (x1), HDMI 2.0 (x1) |
| Power | DC 12V =3A |
| Audio | |
| Speakers | NO |
| Audio Out | YES |
| Additional Functions | |
| Low Blue Light | NO |
| Flicker Free | YES |
| Physical Dimensions | |
| Dimensions (w. Stand) | 613.4 x 190.89 x 452.6 mm |
| Dimensions (w/o Stand) | 613.4 x 41 x 364.95 mm |
| Net Weight | 5.7kg |
| Gross Weight | 6.9kg |
Need more information?
We hope that this user guide has given you
the assistance needed for a simple set-up.
For the most up-to-date guide for your product,
as well as any additional assistance you may require,
head online to help.kogan.com
kogan.com
Brand : Kogan
Model : KAMN27UHFTA
Category : Screen