
NS-SDSKB553 - Office INSIGNIA - Free user manual and instructions
Find the device manual for free NS-SDSKB553 INSIGNIA in PDF.


| Product Type | 55" Black Standing Desk |
| Model Number | NS-SDSKB553 |
| Brand | Insignia |
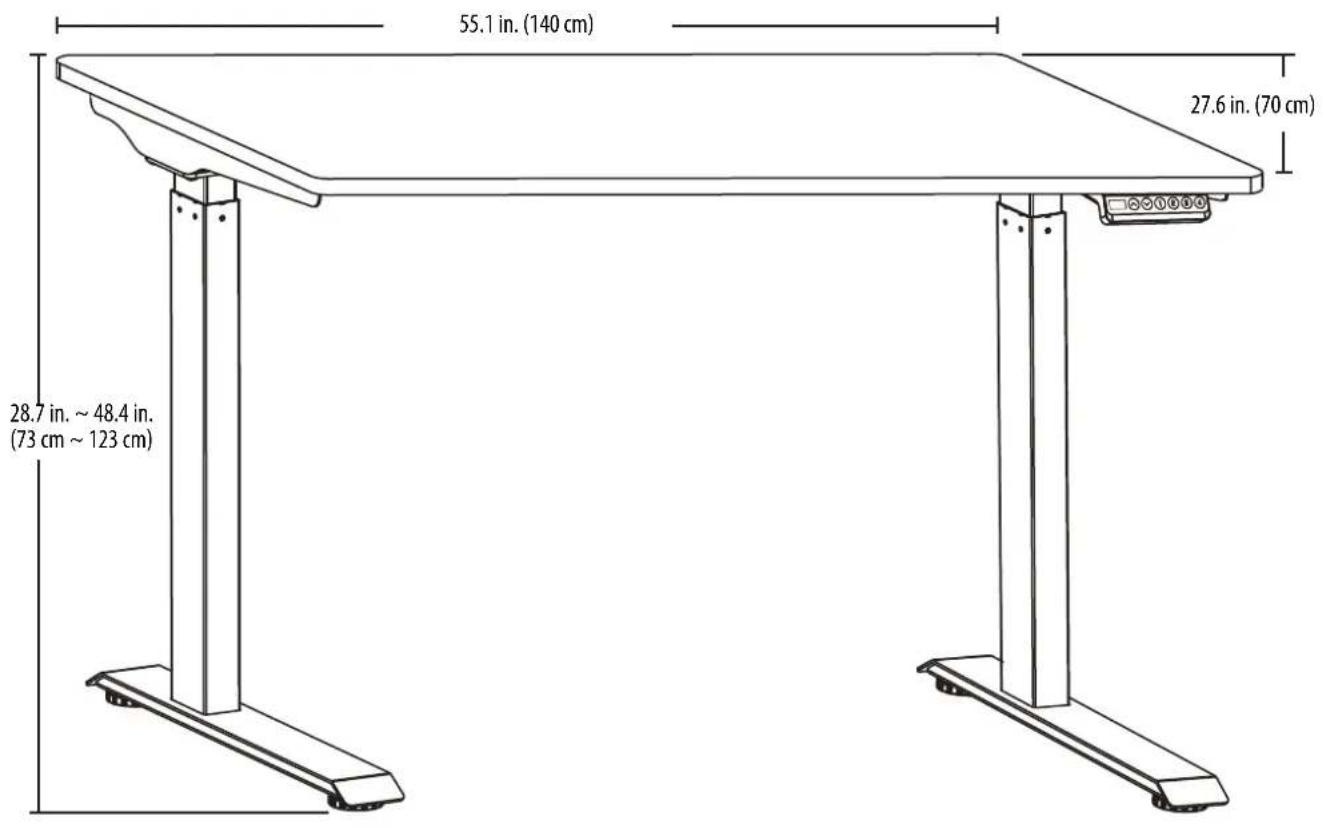
| Dimensions (Raised) | 48.4 × 55.1 × 27.6 in. (123 × 140 × 70 cm) |
| Dimensions (Lowered) | 28.7 × 55.1 × 27.6 in. (73 × 140 × 70 cm) |
| Weight | 77.3 lbs (35.1 kg) |
| Maximum Supported Weight | 110 lbs (50 kg) |
| Height Adjustment Range | 28.7 to 48.4 in. (73 to 123 cm) |
| Maximum Speed | 1.0 in./s (25 mm/s) |
| Column Stage | 2 stage (outer tube and inner tube) |
| Power Supply | AC 100 V – 240 V, 50/60 Hz |
| Operating Environment | 32° to 104° F (0° to 40°C) |
| Material | Steel frame with particle board tabletop |
| Memory Positions | 4 height positions |
| Anti-Collision Sensitivity | Adjustable (off, low, medium, high) – default medium (A-2) |
| Switch Type | Electronic push-button with LED display |
| Included Parts | Tabletop, 2 columns, 2 feet, switch, adapter, adapter cable, power cable, cable ties, hardware |
| Assembly Requirements | 2 people recommended; assemble on carpet to prevent damage |
| Cleaning Instructions | Dust or damp cloth only; no abrasive cleaners |
| Safety Certifications | Children 7+ with supervision; unplug before cleaning |
| Warranty | 1 year limited warranty |
Frequently Asked Questions - NS-SDSKB553 INSIGNIA
User questions about NS-SDSKB553 INSIGNIA
0 question about this device. Answer the ones you know or ask your own.
Ask a new question about this device
Download the instructions for your Office in PDF format for free! Find your manual NS-SDSKB553 - INSIGNIA and take your electronic device back in hand. On this page are published all the documents necessary for the use of your device. NS-SDSKB553 by INSIGNIA.
USER MANUAL NS-SDSKB553 INSIGNIA
55" Black Standing Desk
NS-SDSKB553
natural_image
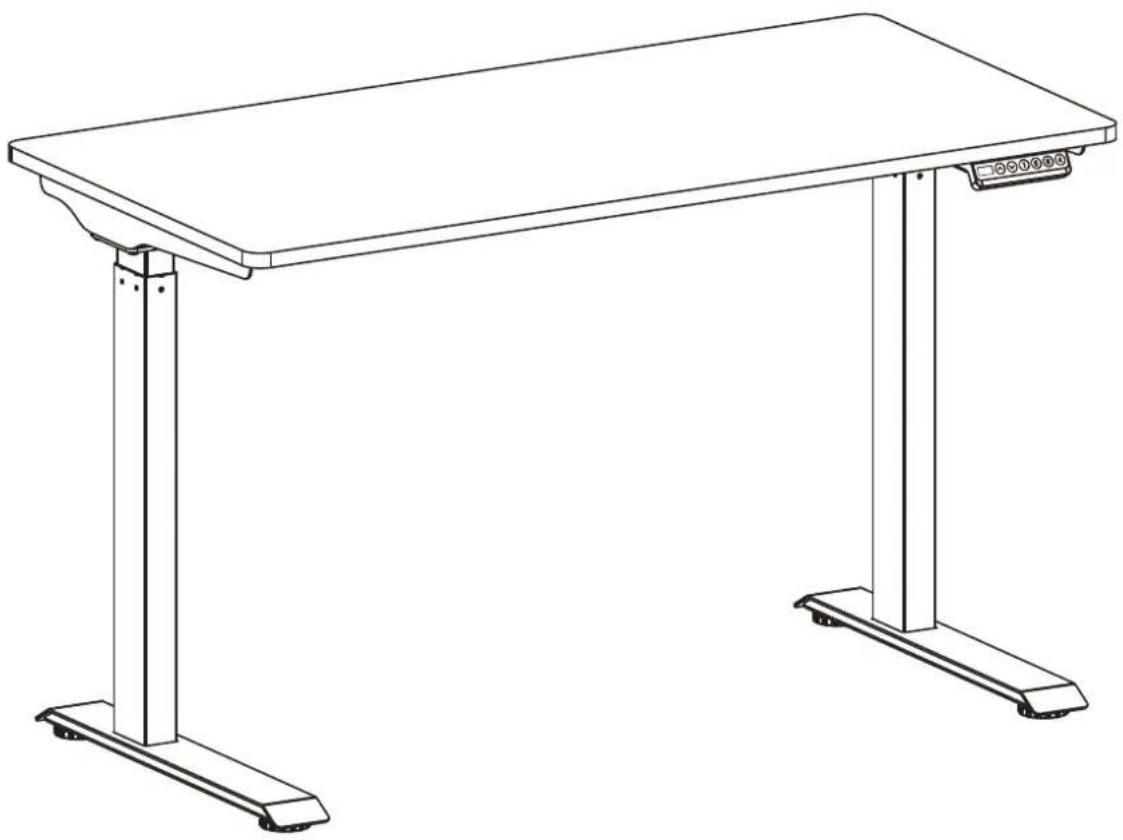
Line drawing of a simple rectangular table with two vertical supports and a small display panel on the right side (no text or symbols)INSIGNIA™
Contents
Safety information 2
Features....3
Dimensions....3
Parts included 4
Hardware included....4
Preparing to assemble your desk 5
Assembling your desk....5
STEP 1: Install the columns ....5
STEP 2: Install the feet: 7
STEP 3: Install the switch 8
STEP 4: Install the adapter....9
STEP 5: Connect and tie down the cables .....10
Using the switch 11
Adjusting the height....11
Saving a height position 12
Adjusting the anti-collision sensitivity 12
Resetting the switch 12
Clearing error codes 12
Cleaning your desk....12
Troubleshooting 12
Specifications....13
ONE-YEAR LIMITED WARRANTY....14
Safety information

CAUTION:
1 Unplug the power plug before cleaning. Wipe the dust from the surface with a slightly damp cloth. Be careful not to let the internal parts get wet. Do not loosen the adapter, switch, or motor connectors.
2 The electric box contains electronic components, metals, plastics, wires etc., so dispose of it in accordance with each country's environmental legislation, not with the general household waste.
3 Check carefully to ensure correct and complete assembly before using.
4 Be familiar with all functions and program settings of the product before first use.
5 Children are forbidden to play on the product because of unforeseen action when playing, so any dangerous consequences caused by this improper action will not be on manufacturers.
6 Slight noise caused by the V-ribbed belt or brake system due to structure will not have any effect on the use of the equipment.
7 Corrosive or abrasive materials are forbidden to clean the equipment. Must ensure that the cleaner used will not pollute the environment.
8 This appliance can be used by children aged from 7 years and above and persons with reduced physical, sensory or mental capabilities or lack of experience and knowledge if they have been given supervision or instruction concerning use of the appliance in a safe way and understand the hazards involved. Children shall not play with the appliance.
9Cleaning and user maintenance shall not be made by children without supervision.
10 If the supply cord is damaged, it must be replaced by the manufacturer, its service agent or a similarly qualified person in order to avoid a hazard.
11 Please make sure there are no hazard sources in your operating environment. e.g., do not litter the tools around. Always be careful to treat the packaging materials in order to avoid any possible danger, e.g. plastic bag may lead to choking hazard to children.
12 Keep the original package of the equipment if necessary in case of the future use in transportation.
Features
- Adjusts electronically up to 48.4 in. (123 cm) to move between standing and sitting
- Easy to access switch effortlessly raises or lowers the desk height
• Memory function remembers up to four different height positions
• Steel frame with particle board tabletop provides a stable work surface and holds up to 110 lbs. (50 kg) - Hardware included for quick and easy assembly
Dimensions
Parts included
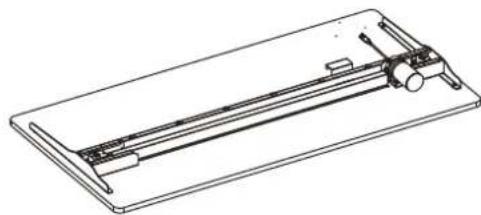
natural_image
Technical line drawing of a mechanical assembly with no visible text or symbols1 Tabletop (1)
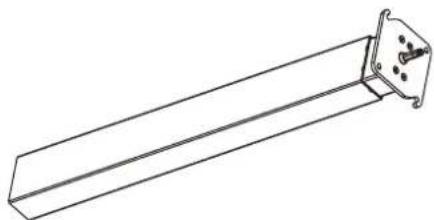
natural_image
Technical line drawing of a long rectangular mechanical component with mounting bracket (no text or symbols)2 Column (2)
natural_image
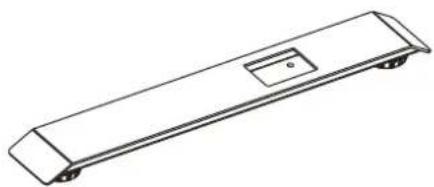
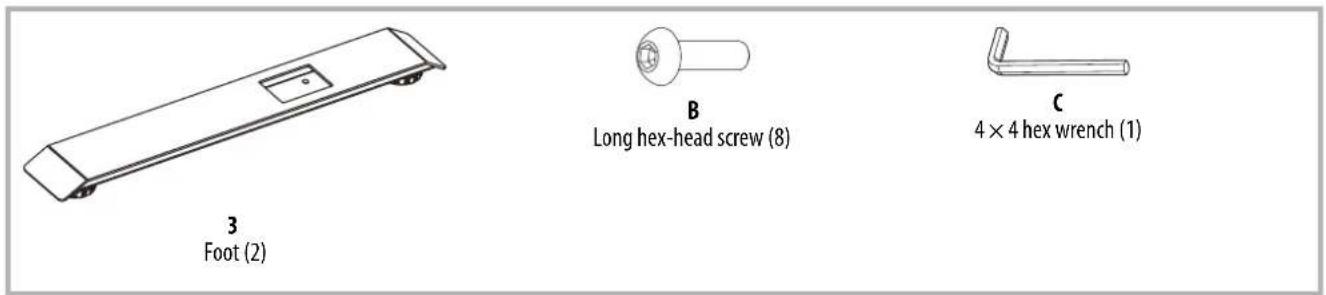
Line drawing of a rectangular electronic device with a small square button and mounting feet (no text or symbols)3 Foot (2)
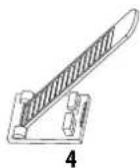
Cable tie (4)
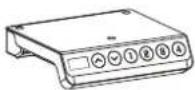
5
Switch (1)
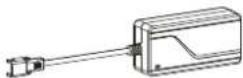
6
Adapter (1)
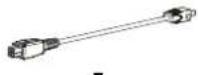
Adapter cable (1)
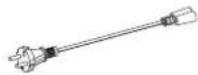
8
Power cable (1)
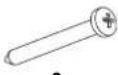
Switch screw (3)
Hardware included
| LABEL | PART QTY LABEL PART QTY | |
| A |  Short hex-head screw Short hex-head screw | 4 |
| B | 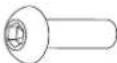 Long hex-head screw Long hex-head screw | 8 |
| C | 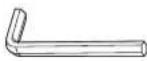 4×4 hex wrench 4×4 hex wrench | 1 |
| D | 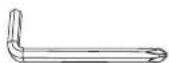 5×5 hex wrench with Phillips head 5×5 hex wrench with Phillips head | 1 |
Preparing to assemble your desk
1 Make sure that all parts and hardware are included.
2 To prevent product damage, assemble your desk on a carpet.
3Have another person help you with lifting and assembly.
4 For the best results, do not fully tighten the screws until you have assembled all the other parts.
Assembling your desk
STEP 1: Install the columns
You need:
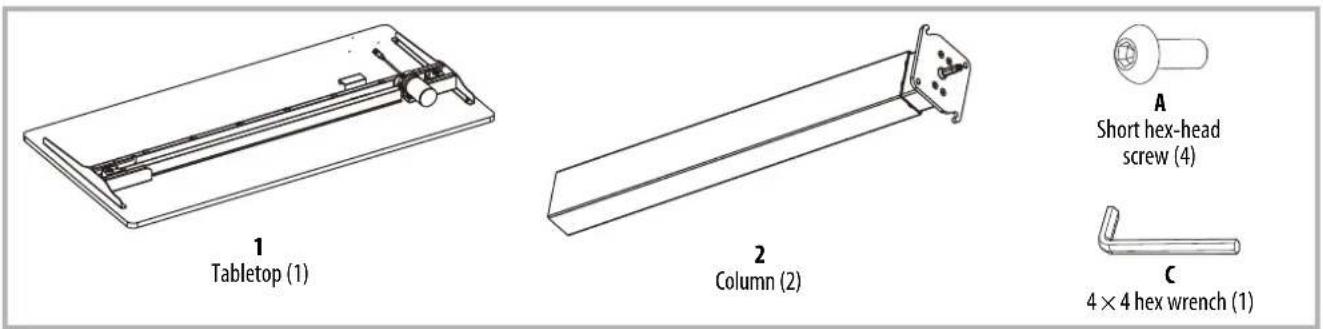
1 Turn the tabletop (1) face down on a carpet to prevent scratches.
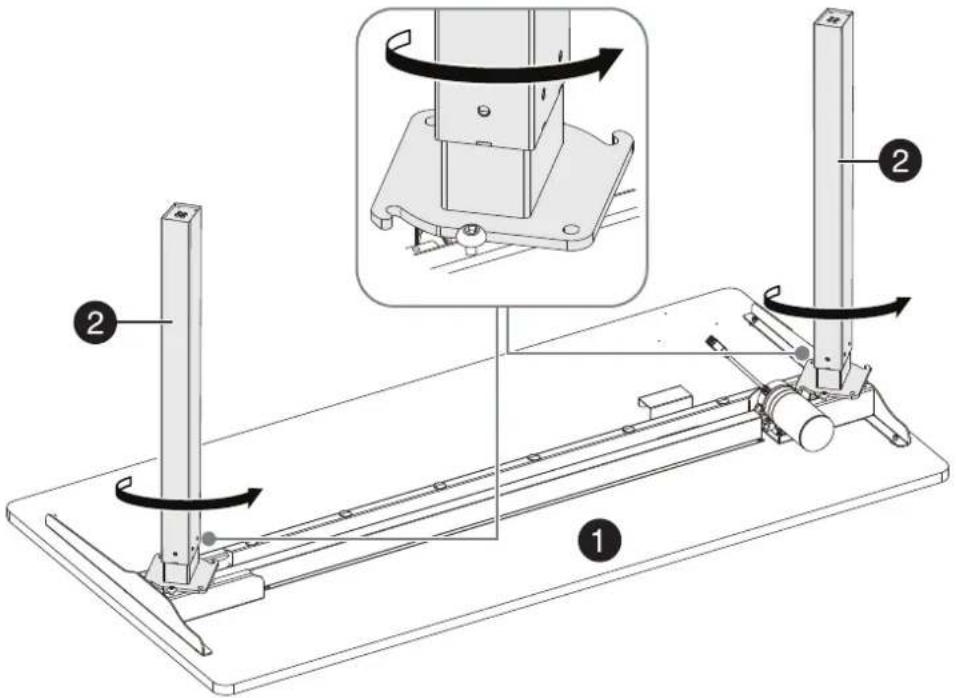
2 Align the hooks on one column (2) with the screw holes on the column facing the front and back of the tabletop, then insert the post on the column into the post hole on the tabletop.
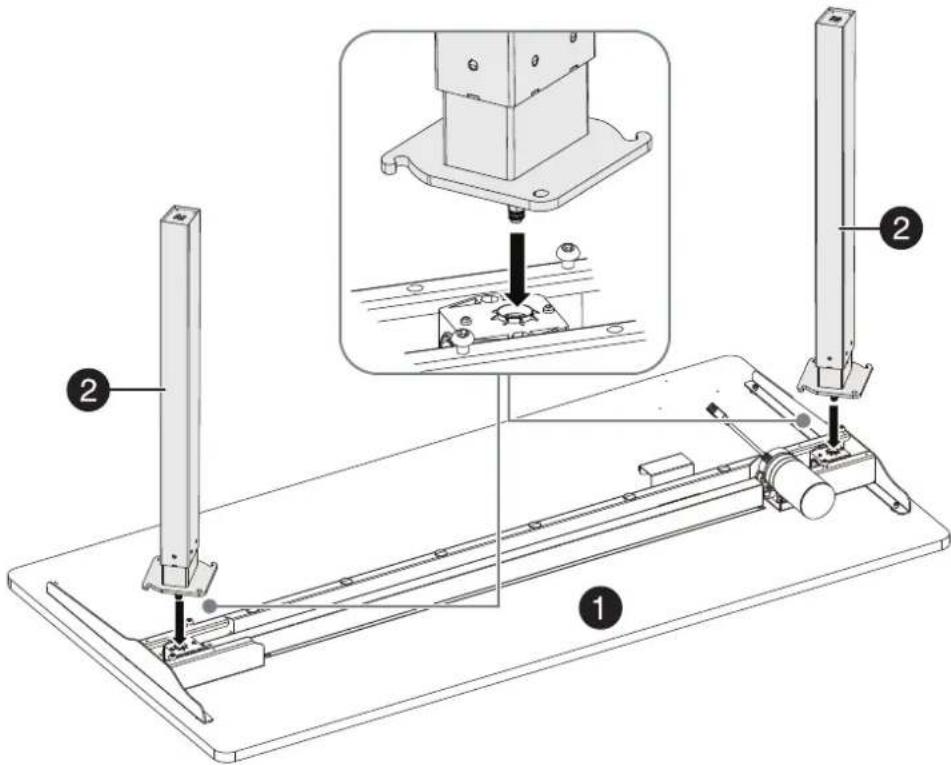
3 Rotate the column counter-clockwise until the column hooks are under the pre-installed screws on the tabletop.
4 Insert two short hex-head screws (A) through the screw holes on the column and into the tabletop. Tighten the screws with the 4 × 4 hex wrench (C).
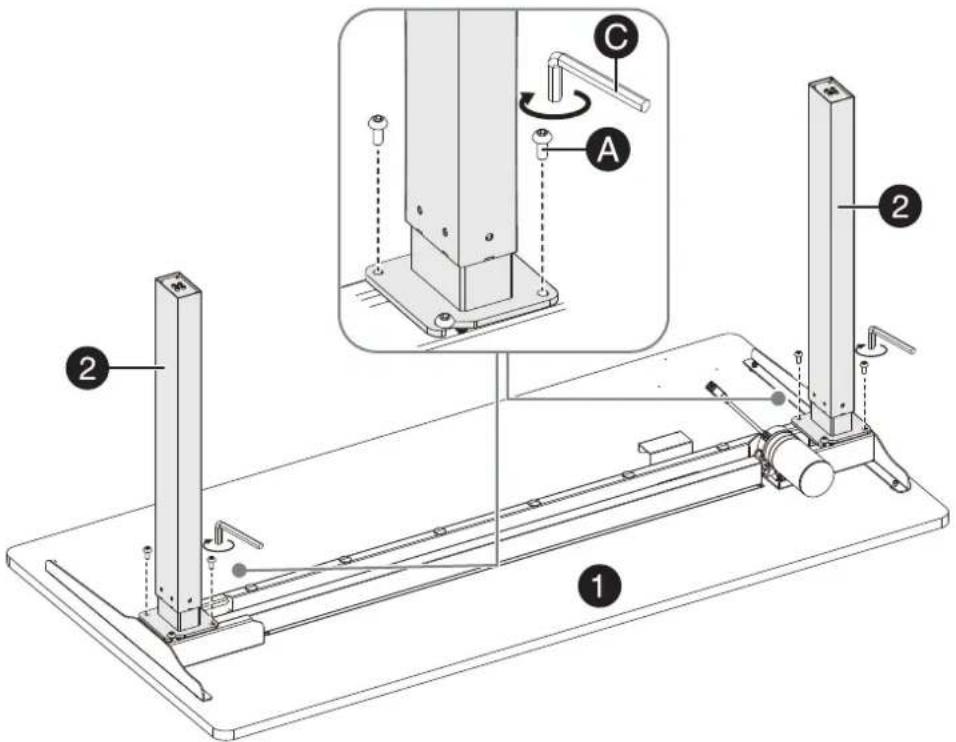
5Repeat these steps to install the other column.
STEP 2: Install the feet:
1 Align the screw holes on the bottom of one foot (3) with the screws on the end of the column.
2 Insert four long hex-head screws (B) through the holes on the foot and into the holes on the column, then tighten the screws with the 4 × 4 hex wrench (C).
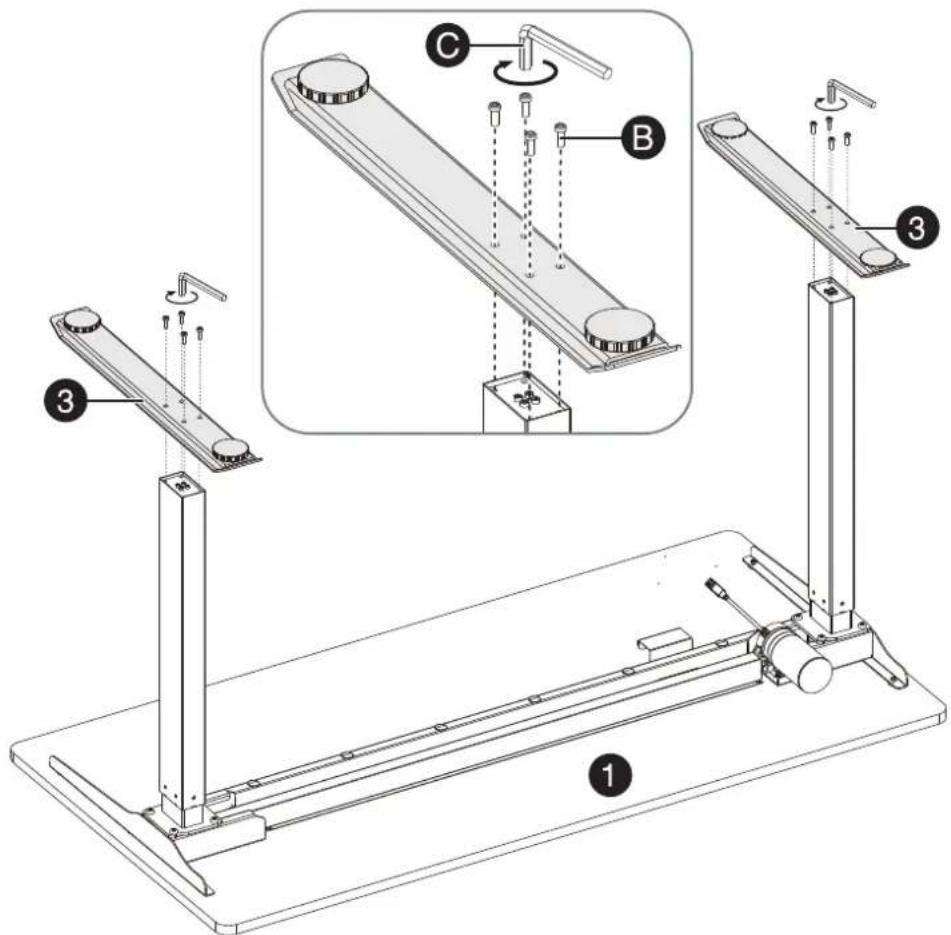
3Repeat these steps to install the other foot.
STEP 3: Install the switch
You need:
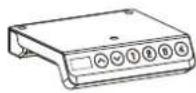
5
Switch (1)
9
Switch screw (3)
D
5 × 5 hex wrench with Phillips head
(1)
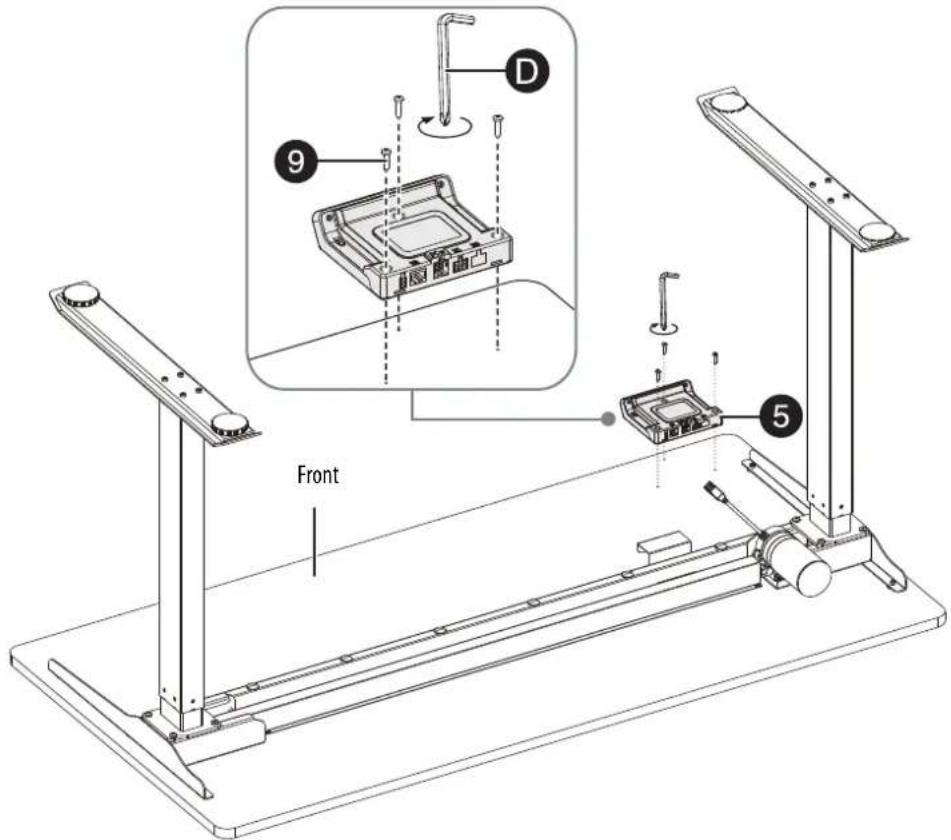
1 Place the switch (5) on the tabletop with the buttons facing the front of the tabletop. Align the screw holes in the switch with the screw holes in the tabletop.
2 Insert three switch screws (9) through the holes on the switch and into the holes on the tabletop. Tighten the screws with the 5 × 5 hex wrench with Phillips head (D).
STEP 4: Install the adapter
You need:
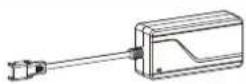
6
oter (1)
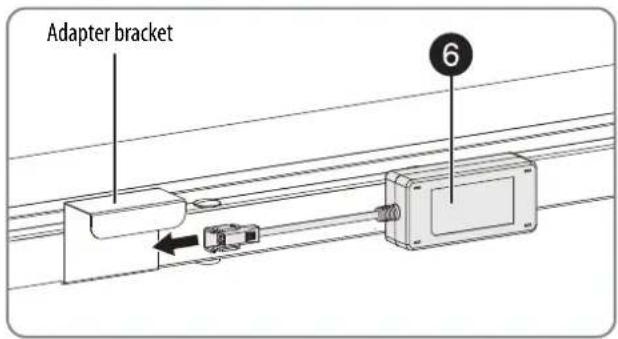
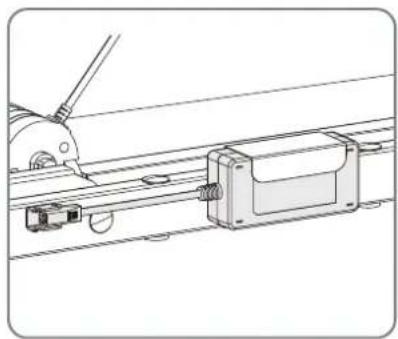
- Slide the adapter (6) into the adapter bracket. Make sure that the adapter connector points to the nearest column.
Note: For clarity, the adapter shown below is viewed from the switch side of the tabletop.
natural_image
Technical line drawing of a mechanical assembly with a tool and railings (no text or symbols)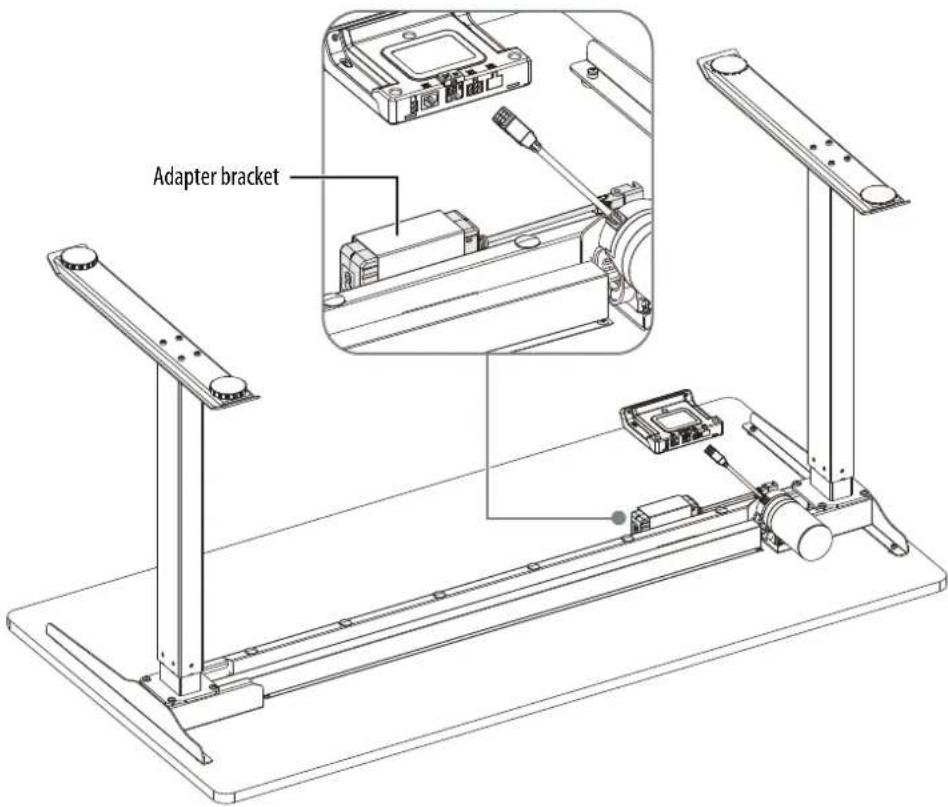
STEP 5: Connect and tie down the cables
You need:
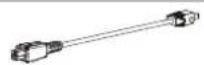
7
Adapter cable
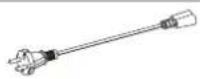
8
Power cable
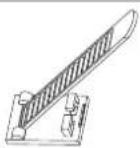
4
Cable tie (4)
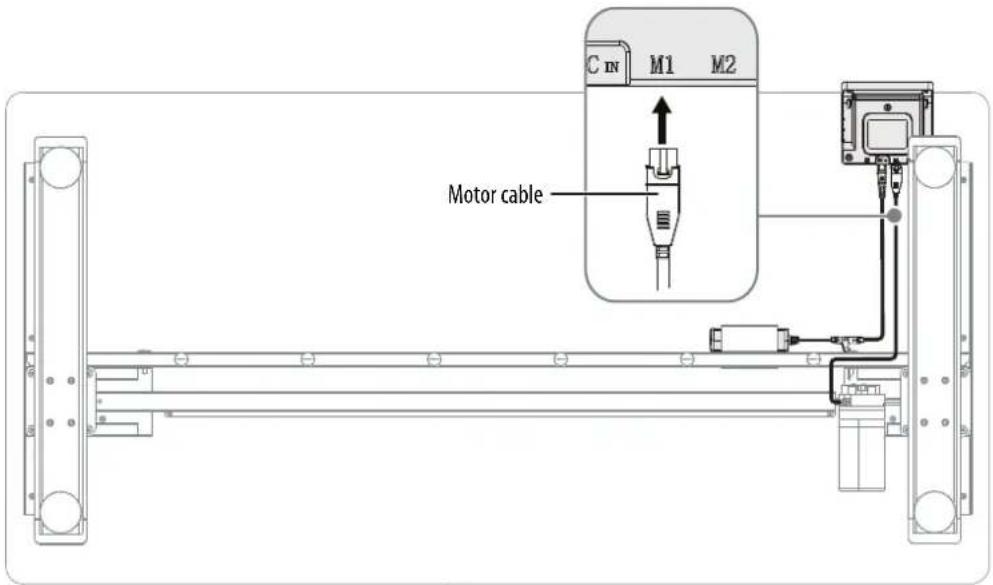
1 Plug one end of the adapter cable (7) into the adapter connection, then plug the other end of the cable into the DC IN port on the switch.
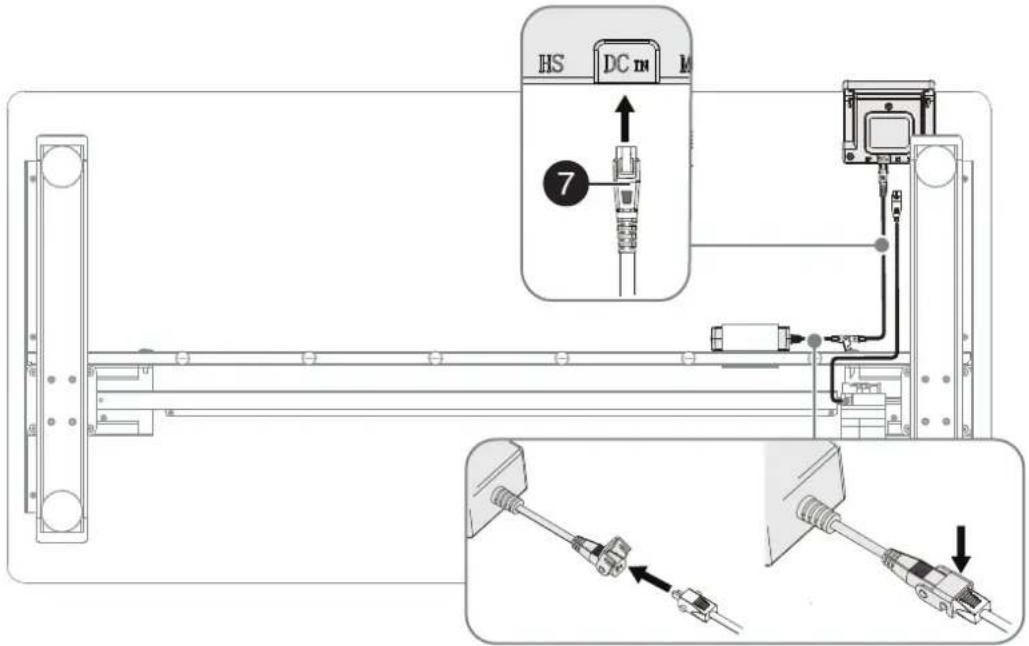
2 Plug the motor cable on the bottom of the tabletop into the M1 port.
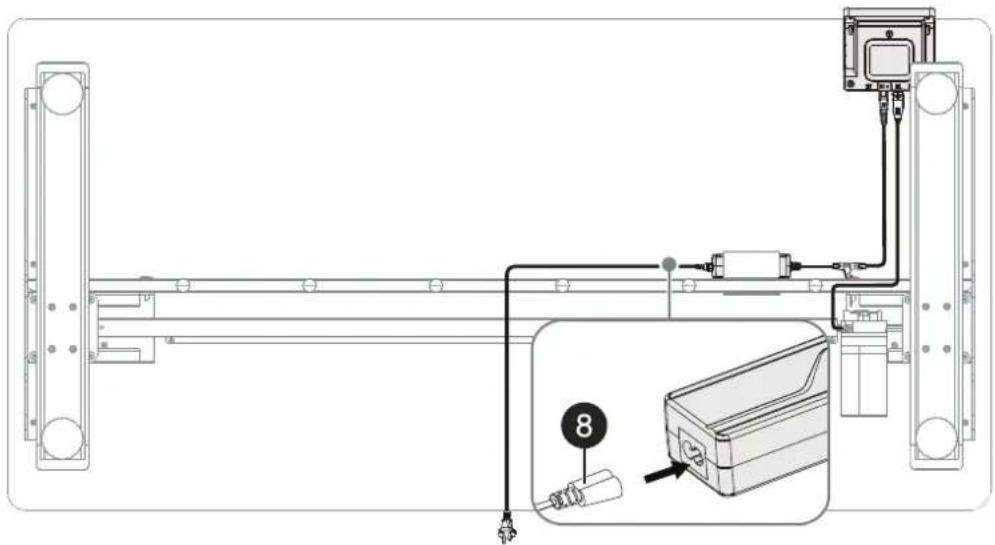
3 Plug the power cable (8) into the connector on the adapter.
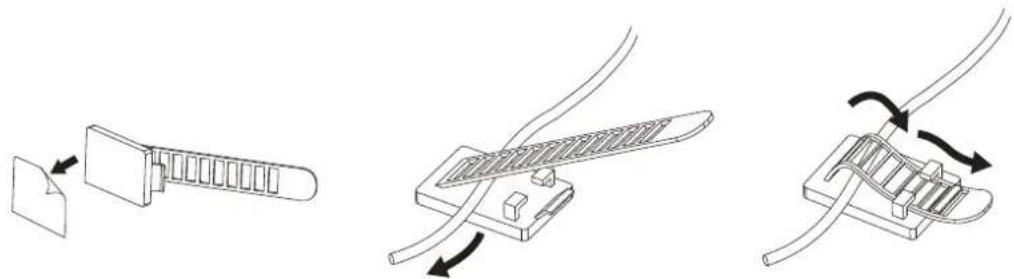
4 Open a cable tie (4), slide the base of the tie under a cable, loop the cable tongue over the top of the cable, then slide the end of the tongue into the tie bracket.
natural_image
Three technical diagrams showing cable installation steps: inserting a folder, adding a cable to a device, and connecting a cable into a final connector (no text or symbols present)You can attach the cables to the bottom of the desktop with the provided cable ties.
Using the switch
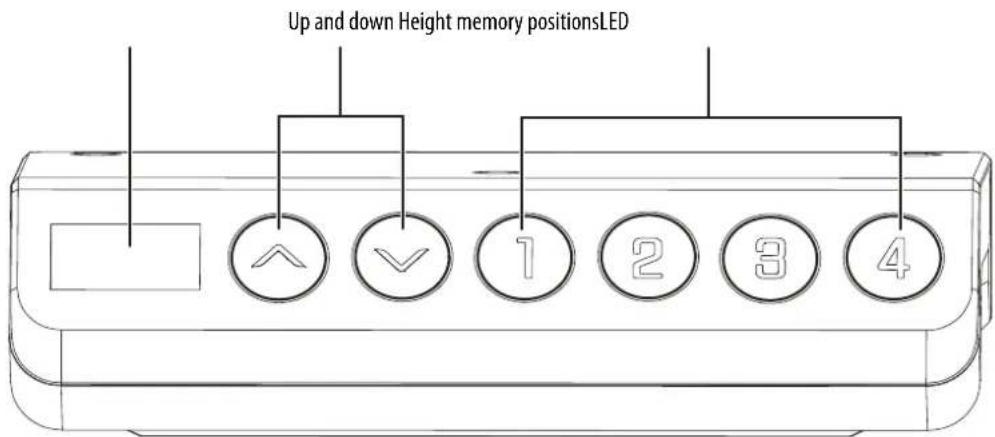
Adjusting the height
- Press the (up) button to raise your desk or press the (down) button to lower your desk.
Note: The LED shows the height for 10 seconds.
Saving a height position
Your can save four height positions.
1 Adjust your desk to the height you want to save. The LED shows the height for 10 seconds.
2 Press and hold a height position button (1, 2, 3, or 4) for three seconds, then release the button. The height position is saved and the LED shows S-1, S-2, S-3, or S-4.
3 To automatically adjust the height of your desk to the saved position, press 1, 2, 3, or 4.
Adjusting the anti-collision sensitivity
When the lifting system's built-in sensor encounters resistance, the lifting system pauses, then reverses motion and stops.
- Simultaneously press and hold the (up) and (down) buttons for five seconds to switch the sensitivity level, then release the buttons. Repeat to select another sensitivity level. You can select:
- A-0 Turns off the anti-collision function
• A-1 Sets the sensitivity to low
• A-2 Sets the sensitivity to medium
• A-3 Sets the sensitivity to high
The default setting is A2.
Resetting the switch
- When the LED shows of AS press and hold the (down) button until the tabletop reaches the lowest level and rebounds, then release the button. The LED shows the lowest position.
Clearing error codes
If the LED shows error codes other than for and the (down) button doesn't respond:
- Make sure that the power cord isn't damaged, then unplug the cord from the outlet. Wait two minutes, then plug the cord back in. When the LED shows RST, press and hold the (down) button to reset the switch.
- If the LED shows E01 or E02, unplug the cord from the outlet. Wait at least 18 minutes, then plug the cord back in and try again. When the LED shows RST or rST, press and hold the (down) button to reset the switch.
- If the LED still shows an error code, contact Customer Support.
Cleaning your desk
- Clean the surface of your desk with a duster or damp cloth only.
- Do not use abrasive cleaners.
Troubleshooting
| PROBLEM POSSIBLE SOLUTIONS | |
| The tabletop won’t raise or lower | Make sure that all cables are securely connected.Make sure that the tabletop is not overloaded. The maximum weight shouldn’t exceed 110 lbs. (50 kg).Reset the switch.Unplug the power plug and try again after 18 minutes.If you still have a problem, contact Customer Support. |
Specifications
| Dimensions (H × W × D) Raised: | 48.4 × 55.1 × 27.6 in. (123 × 140 × 70 cm)Lowered: 28.7 × 55.1 × 27.6 in. (73 × 140 × 70 cm) |
| Weight 77.3 lbs (35.1 kg) | |
| Maximum supported weight 110 lbs. (50 kg) | |
| Maximum speed 1.0 in./s (25 mm/s) | |
| Lowest position 28.7 in. (73 cm) | |
| Highest position 48.4 in. (123 cm) | |
| Column stage 2 stage: (outer tube and inner tube) | |
| Power supply AC100 V - 240 V, 50/60 HZ | |
| Operating environment 32° to 104° F (0° to 40°C) | |
ONE-YEAR LIMITED WARRANTY
Definitions:
The Distributor* of Insignia branded products warrants to you, the original purchaser of this new Insignia-branded product ("Product"), that the Product shall be free of defects in the original manufacturer of the material or workmanship for a period of one (1) year from the date of your purchase of the Product ("Warranty Period").
For this warranty to apply, your Product must be purchased in the United States or Canada from a Best Buy branded retail store or online at www.bestbuy.comor www.bestbuy.ca and is packaged with this warranty statement.
How long does the coverage last?
The Warranty Period lasts for 1 year (365 days) from the date you purchased the Product. Your purchase date is printed on the receipt you received with the Product.
What does this warranty cover?
During the Warranty Period, if the original manufacture of the material or workmanship of the Product is determined to be defective by an authorized Insignia repair center or store personnel, Insignia will (at its sole option): (1) repair the Product with new or rebuilt parts; or (2) replace the Product at no charge with new or rebuilt comparable products or parts. Products and parts replaced under this warranty become the property of Insignia and are not returned to you. If service of Products or parts are required after the Warranty Period expires, you must pay all labor and parts charges. This warranty lasts as long as you own your Insignia Product during the Warranty Period. Warranty coverage terminates if you sell or otherwise transfer the Product.
How to obtain warranty service?
If you purchased the Product at a Best Buy retail store location or from a Best Buy online website (www.bestbuy.com or www.bestbuy.ca), please take your original receipt and the Product to any Best Buy store. Make sure that you place the Product in its original packaging or packaging that provides the same amount of protection as the original packaging.
To obtain warranty service, in the United States and Canada call 1-877-467-4289. Call agents may diagnose and correct the issue over the phone.
Where is the warranty valid?
This warranty is valid only in the United States and Canada at Best Buy branded retail stores or websites to the original purchaser of the product in the country where the original purchase was made.
What does the warranty not cover?
This warranty does not cover:
- Food, beverage, and or medicine loss/spoilage.
- Customer instruction/education
- Installation - Setup adjustments
- Cosmetic damage
- Damage due to weather, lightning, and other acts of God, such as power surges
- Accidental damage
- Misuse
• A b u s e
- Negligence
- Commercial purposes/use, including but not limited to use in a place of business or in communal areas of a multiple dwelling condominium or apartment complex, or otherwise used in a place of other than a private home.
- Modification of any part of the Product, including the antenna
• Display panel damaged by static (non-moving) images applied for lengthy periods (burn-in).
- Damage due to incorrect operation or maintenance
- Connection to an incorrect voltage or power supply
- Attempted repair by any person not authorized by Insignia to service the Product
- Products sold "as is" or "with all faults"
- Consumables, including but not limited to batteries (i.e. AA, AAA, C etc.)
- Products where the factory applied serial number has been altered or removed
- Loss or Theft of this product or any part of the product
- Display panels containing up to three (3) pixel failures (dots that are dark or incorrectly illuminated) grouped in an area smaller than one tenth (1/10) of the display size or up to five (5) pixel failures throughout the display. (Pixel based displays may contain a limited number of pixels that may not function normally.)
- Failures or Damage caused by any contact including but not limited to liquids, gels or pastes.
REPAIR REPLACEMENT AS PROVIDED UNDER THIS WARRANTY IS YOUR EXCLUSIVE REMEDY FOR BREACH OF WARRANTY. INSIGNIA SHALL NOT BE LIABLE FOR ANY INCIDENTAL OR CONSEQUENTIAL DAMAGES FOR THE BREACH OF ANY EXPRESS OR IMPLIED WARRANTY ON THIS PRODUCT, INCLUDING, BUT NOT LIMITED TO, LOST DATA, LOSS OF USE OF YOUR PRODUCT, LOST BUSINESS OR LOST PROFITS. INSIGNIA PRODUCTS MAKES NO OTHER EXPRESS WARRANTIES WITH RESPECT TO THE PRODUCT, ALL EXPRESS AND IMPLIED WARRANTIES FOR THE PRODUCT, INCLUDING BUT NOT LIMITED TO ANY IMPLIED WARRANTIES OF AND CONDITIONS OF MERCHANTABILITY AND FITNESS FOR A PARTICULAR PURPOSE, ARE LIMITED IN DURATION TO THE WARRANTY PERIOD SET FORTH ABOVE AND NO WARRANTIES, WHETHER EXPRESS OR IMPLIED, WILL APPLY AFTER THE WARRANTY PERIOD. SOME STATES, PROVINCES AND JURISDICTIONS DO NOT ALLOW LIMITATIONS ON HOW LONG AN IMPLIED WARRANTY LASTS, SO THE ABOVE LIMITATION MAY NOT APPLY TO YOU. THIS WARRANTY GIVES YOU SPECIFIC LEGAL RIGHTS, AND YOU MAY ALSO HAVE OTHER RIGHTS, WHICH VARY FROM STATE TO STATE OR PROVINCE TO PROVINCE.
Contact Insignia:
1-877-467-4289
www.insigniaproducts.com
INSIGNIA is a trademark of Best Buy and its affiliated companies.
* Distributed by Best Buy Purchasing, LLC
7601 Penn Ave South, Richfield, MN 55423 U.S.A
©2022 Best Buy. All rights reserved.
INSIGNIA™
For product inquiries, please contact us with the information below:
1-877-467-4289
www.insigniaproducts.com
INSIGNIA is a trademark of Best Buy and its affiliated companies.
Distributed by Best Buy Purchasing, LLC
7601 Penn Ave South, Richfield, MN 55423 U.S.A.
©2022 Best Buy. All rights reserved.
- 55" Black Standing Desk
- INSIGNIA™
- Contents
- Safety information
- CAUTION:
- Features
- Parts included
- Hardware included
- Preparing to assemble your desk
- Assembling your desk
- STEP 2: Install the feet:
- STEP 3: Install the switch
- You need:
- STEP 4: Install the adapter
- STEP 5: Connect and tie down the cables
- Using the switch
- Adjusting the height
- Saving a height position
- Adjusting the anti-collision sensitivity
- Resetting the switch
- Clearing error codes
- Cleaning your desk
- Troubleshooting
- ONE-YEAR LIMITED WARRANTY
- Definitions:
- How long does the coverage last?
- What does this warranty cover?
- How to obtain warranty service?
- Where is the warranty valid?
- What does the warranty not cover?
Brand : INSIGNIA
Model : NS-SDSKB553
Category : Office