
PAC 122 W - Air Conditioning Equator - Free user manual and instructions
Find the device manual for free PAC 122 W Equator in PDF.


| Product Type | Portable Air Conditioner |
| Brand | Equator |
| Model | PAC 122 W |
| Dimensions (H x W x D) | 30 x 18.5 x 14 inches |
| Weight | 65 lbs (29.5 kg) |
| Power Supply | 115V, 60Hz |
| Cooling Area | Up to 296 sq ft |
| Air Circulation | 14126 ft³/h |
| Noise Level | 54 dB |
| Operating Modes | Cool, Dry, Air Purifier/Fan |
| Fan Speeds | High, Medium, Low |
| Filter Type | HEPA filter (replaceable) |
| Timer | 1–24 hours |
| Sleep Mode | Yes (gradual temperature increase) |
| Swing | Yes (adjustable louvers) |
| Remote Control | Included |
| Drainage | Upper and lower drain outlets with plug |
| Compressor Protection | 3-minute restart delay |
| Accessories Included | Inlet/Exhaust hoses, window kit, drain hose, remote control |
| Warranty | 1 year (USA and Canada) |
Frequently Asked Questions - PAC 122 W Equator
User questions about PAC 122 W Equator
0 question about this device. Answer the ones you know or ask your own.
Ask a new question about this device
Download the instructions for your Air Conditioning in PDF format for free! Find your manual PAC 122 W - Equator and take your electronic device back in hand. On this page are published all the documents necessary for the use of your device. PAC 122 W by Equator.
USER MANUAL PAC 122 W Equator
Portable Air Conditioner
PAC 122 W
natural_image
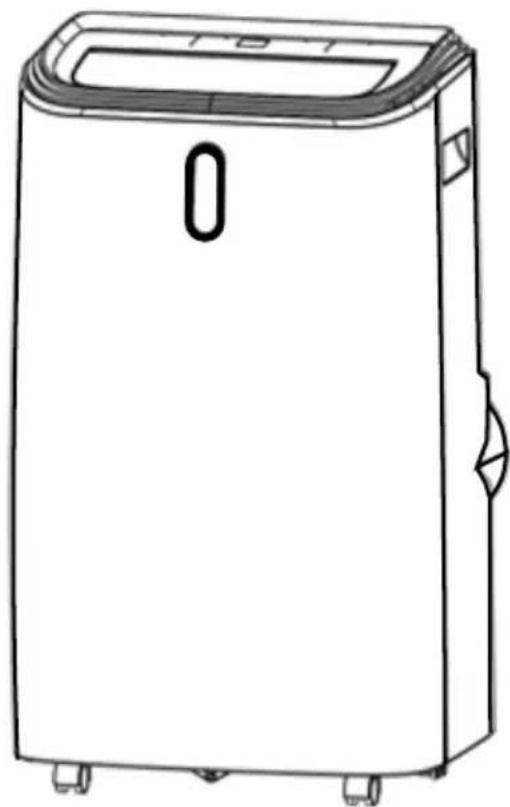
Line drawing of a portable air purifier with control panel and wheels (no text or symbols)OWNER'S MANUAL
Warranty
Equator Appliances undertakes to the consumer/owner to repair or, at our option, to replace any part of this product which proves to be defective in workmanship or material under normal personal, family or household use in USA and Canada, for a period of one year from the date of original purchase. During this period, we will provide all labor and parts necessary to correct such defect, free of charge, if the appliance has been installed and operated in accordance with the written instructions with the appliance.
Exclusions
In no event shall Equator Appliances be liable for incidental or consequential damages or for damages resulting from external causes such as abuse, misuse, incorrect voltage or acts of God. This warranty does not cover service calls which do not involve defective workmanship or materials covered by this warranty. Accordingly, diagnosis and repair costs for a service call which does not involve defective workmanship or materials will be the responsibility of the consumer-owner.
Specifically, the following work is not covered under warranty and does not constitute warranty work:
Installation - e.g. Insufficient spacing around appliance Maintenance - e.g. Cleaning the appliance using solvents Mishandling - e.g. Breakage of window kit or hoses
Most work is covered. The defining factor is, has the machine malfunctioned (Equator Appliances is responsible) or has the customer omitted or done something to cause the appliance to malfunction (customer is responsible). Some States do not allow the exclusion or limitations of incidental or consequential damages, so the above limitation or exclusion may not apply to you.
WARRANTY SERVICE
This warranty is given by:
Equator Appliances
10222 Georgibelle Drive, Suite 200,
Houston, Texas 77043-5249
For Customer Service:
Appliance Desk
Business hours: 9:00 am to 5:00 pm weekdays
You can register your Warranty by either of the following methods:
- Scan the QR Code
QR Code

-
Open Smart Phone
-
Open Photo
-
Scan QR Code
-
Click the Link
-
Online at: ApplianceDesk.com/Warranty
GENERAL
Since it is a responsibility of the consumer-owner to establish the warranty period by verifying the original purchase date, Equator Appliances recommends that a receipt, delivery slip or some other appropriate payment record be kept for that purpose.
This warranty gives you specific legal rights, and you may also have other rights which vary from State to State.
All rights reserved. Manual subject to change without notice.
Safety

Keep the appliance away from volatile and flammable substances.
Keep ventilation openings clear of obstructions.
Use a power outlet that is grounded and the correct voltage.
When positioning the appliance, ensure the electrical cord is not trapped or damaged.
Never unplug the appliance by pulling on the power cord. Grip the plug firmly and pull straight out to remove from wall socket.
Ensure that the following is NOT done:
- Place multiple portable socket-outlets at the rear of the appliance.
• Use a damaged power cord. - Use an extension cord or an adapter plug.
- Operate the unit with wet hands, to prevent electric shock.
- Insert fingers or other objects into the air outlet.
- Touch the air inlet or the fins of the unit.
• Discharge the refrigerant into the atmosphere.
Children should be supervised to ensure that they do not climb on or play with the appliance.
This appliance is not intended for use by persons (including children) with reduced physical, sensory or mental capabilities, or lack of experience and knowledge, unless they have been given supervision or instruction.
Please dispose of this appliance in accordance with local regulations.
Introduction
This self-contained compact appliance operates as an air conditioner, air purifier/fan or dehumidifier. It is easily portable with castors and does not require permanent installation.
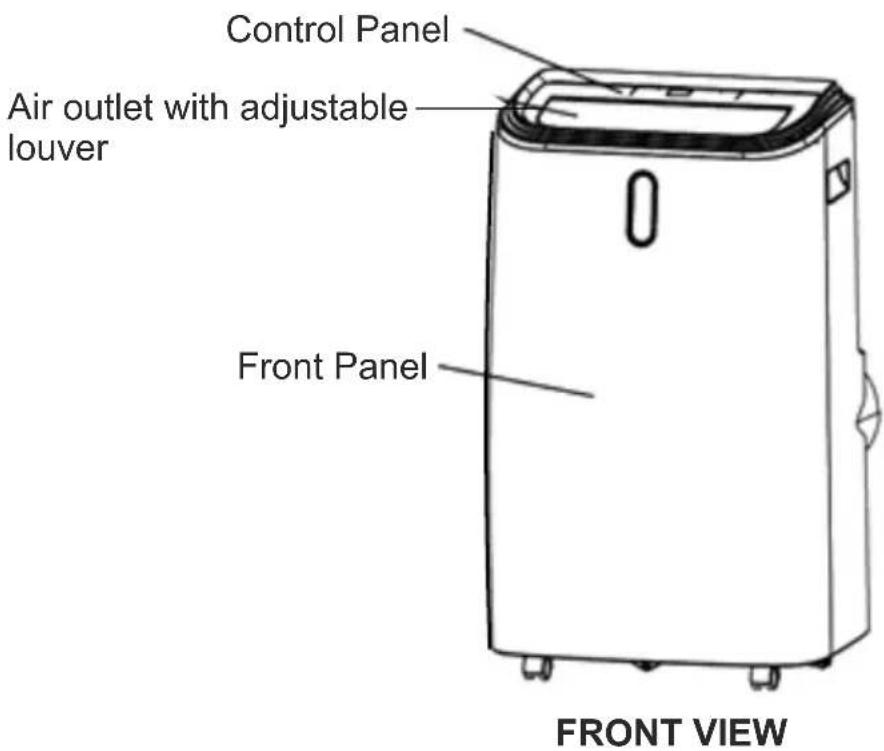
Accessories
1
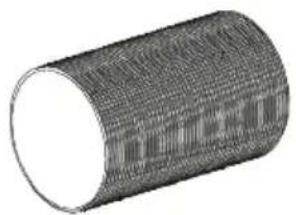
natural_image
3D rendered image of a cylindrical object with textured surface (no text or symbols)2
natural_image
Pure circular diagram with segmented lines and arrows, no text or symbols present3
natural_image
Pure mechanical diagram showing two overlapping circular components with no text or symbols4

natural_image
Gray rectangular button with a white oval on the right side (no text or symbols)5
6
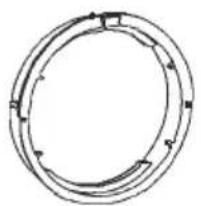
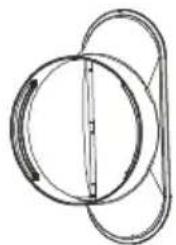
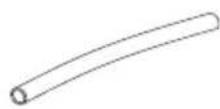
- Inlet / Exhaust hoses
- Hose connectors
- Window kit adapters
- Window kit
- Drain Hose
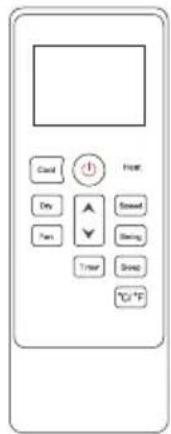
- Remote control
Specifications Table
| Model | PAC 122 W |
| Air Circulation / Flow | 14126 Ft3/h |
| Application Area | 296 Sq Ft |
| 115V / 12V 2AAdapter Input / Output | |
| Noise Level | 54 dB |
| Net Weight | 65 lbs |
| Product Dimensions (HxWxD) | 30" x 18.5" x 14" |
Placement
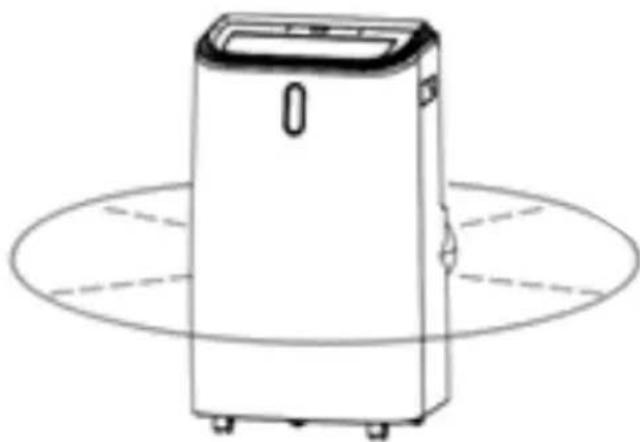
natural_image
Line drawing of a portable air conditioner unit with circular base and wheels (no text or symbols)20 inches space around unit
Place the unit on a firm, level surface in an area with at least 20 inches (50 cm) of free space around it to allow for proper air circulation.
If tipped more than 45^ , allow the unit to stand upright for at least 24 hours before starting it. It allows compressor to stabilize.
Ensure the unit is not operated in close proximity to walls, curtains, or other objects that may block air inlet and outlet. Keep the air inlet and outlet free of obstacles.
Ensure the unit is not immersed or exposed to rain, moisture or any other liquid.
Never install the unit where it could be affected by:
- Heat sources such as radiators, stoves or other products that produce heat.
- Direct sunlight
• Mechanical vibration or shock - Excessive dust
- Lack of ventilation, such as cabinets or bookcases
- Uneven surfaces
Installation
Attaching the Hoses
This is an advanced portable AC where there are 2 hoses: The Right Hose brings fresh air into the unit. The Left Hose blows hot exhaust air to the outdoors.
Do not replace or extend the hoses which will result in decreased efficiency, or even worse shut down the unit due to low back pressure.
Follow these steps to install both hoses:
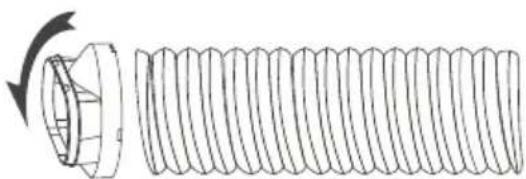
Step 1: Connect the hose connector to one end of the hose.
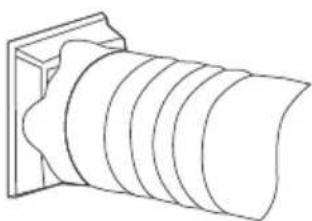
natural_image
Line drawing of a cylindrical object with curved internal bands, mounted on a rectangular base (no text or symbols)Step 2: Connect the windows kit adapter to the other end of the hose.
natural_image
Diagram of a threaded bolt with a flanged head and directional arrow indicating rotation (no text or symbols)Step 3: Extend the adjustable window kit the length of your window. Connect the hose to the window kit.
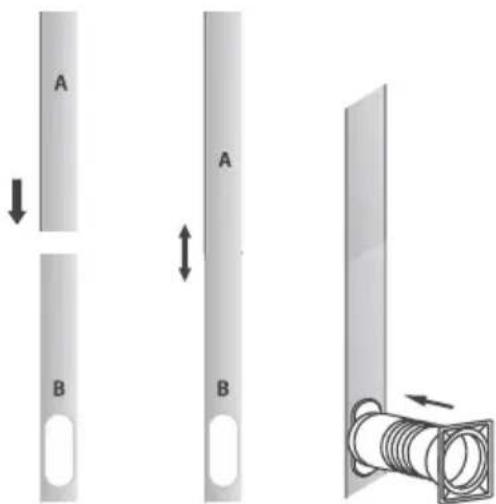
Step 4: Close your window to secure the kit in place. To hold the window kit firmly in place, secure the window kit with duct tape if required. It is recommended that the gap between the adapter and the sides of the window should be sealed off for maximum efficiency.
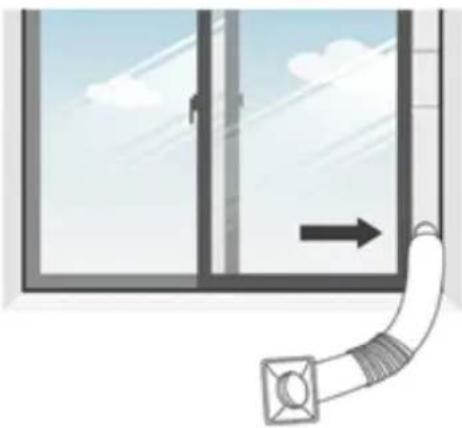
natural_image
Diagram showing a window with a curved pipe extending into the corner, indicating airflow or fluid flow direction (no text or symbols)Step 5: Attach the hose connector to the window kit adapter.
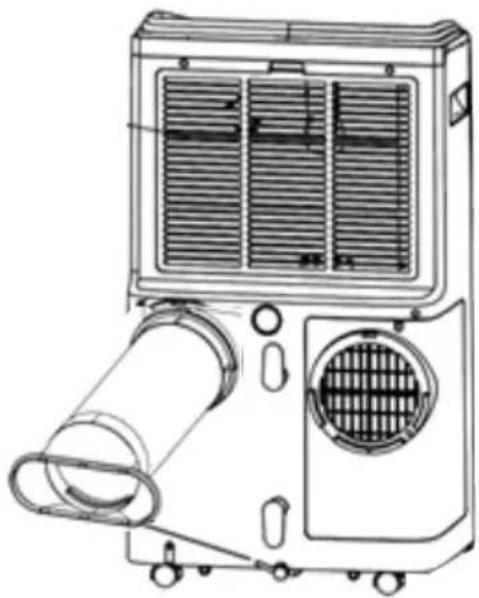
natural_image
Technical line drawing of a portable air conditioner unit with ventilation grilles and cooling fans (no text or symbols)Step 6: Adjust the length of the flexible hose and avoid bends in the hose. Then place the appliance near an electrical outlet, and plug it in.
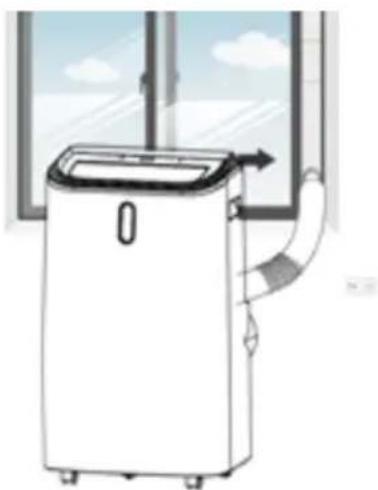
natural_image
Line drawing of a white air conditioner unit with airflow direction indicated by arrows, next to a window (no text or symbols)Step 7: Adjust the louver at the air outlet, and then switch on the unit.
Note: Repeat these steps to install the second hose.
Operation
CONTROL PANEL AND DISPLAY
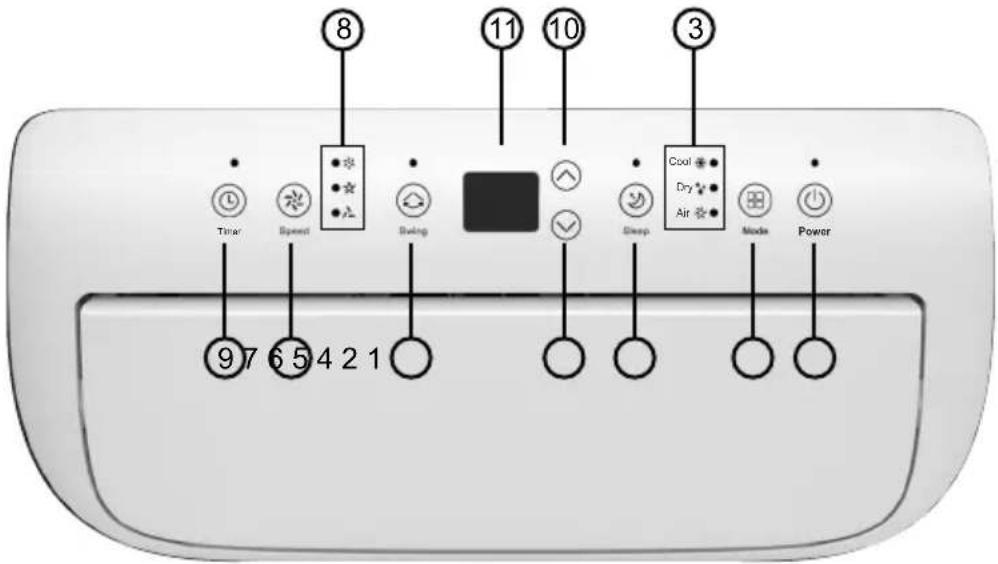
| 1 | Power | Press to switch the unit on or off. |
| 2 | Mode | Press to switch the operation mode between Cool, Dry and Air (Air Purifier/Fan). |
| 3 | Mode Indicator | Displays the Mode: Cool, Dry and Air. |
| 4 | Sleep | Press to turn Sleep mode on or off. |
| 5 | Down | Press to decrease the desired temperature or timer setting. |
| 6 | Swing | Select the air flow. |
| 7 | Speed | Press to select the fan speed: High, Medium or Low. |
| 8 | Speed Indicator | Displays the speed: High, Medium or Low. |
| 9 | Timer | Set a time for the unit to automatically stop. |
| 10 | Up | Press to increase the desired temperature or timer setting. |
| 11 | Digital Display | Displays timer setting and temperature. |
Operation
Start-up and Shutdown
Press Power to turn the unit on or off.
Air (Air Purifier/Fan) mode is the default.
Press Mode button to select the desired operation mode. The unit has three operation modes: Cool, Dry and Air (Air Purifier/Fan).
Cool - Air Conditioner
Press Mode button repeatedly until the Cool icon lights up.
Press Up/Down arrows to adjust the temperature which is displayed on the screen. The temperature can be set between 60.8°F and 89.6°F
Press Speed button to select the desired fan speed.
Press the Swing button to keep the air flow steady or to have the louvers move up and down.
Note: The air conditioner stops if the room temperature is lower than the selected temperature.
Air - Air Purifier/Fan/Ventilation
Press Mode button repeatedly until the Air icon lights up. In Air Purifier mode the air is filtered through a HEPA Filter, and clean air is circulated in the room. There is no cooling.
Press Speed button to select the desired speed.
Dry - Dehumidifier
Press Mode button repeatedly until the Dry icon lights up. The dehumidifier removes moisture from the air and collects the water inside the appliance. Connect a hose to either of the drain outlets at the back of the unit. This allows the water to drain out.
Note: In this mode, the fan is at low speed and the temperature cannot be selected.
Dehumidifier Drainage
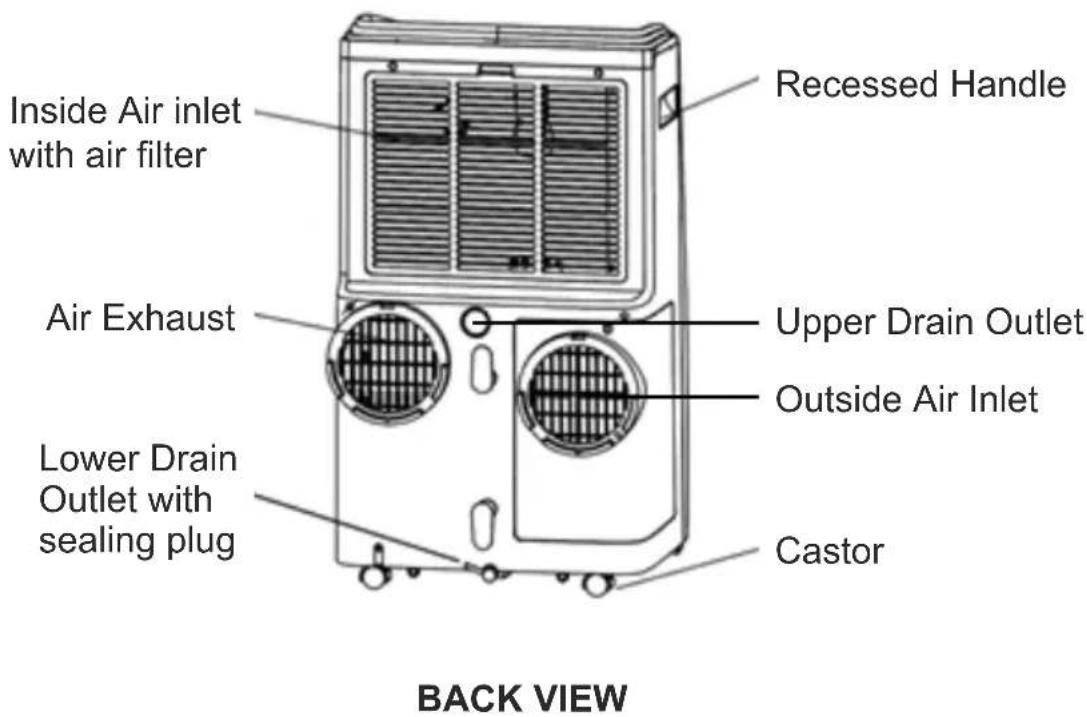
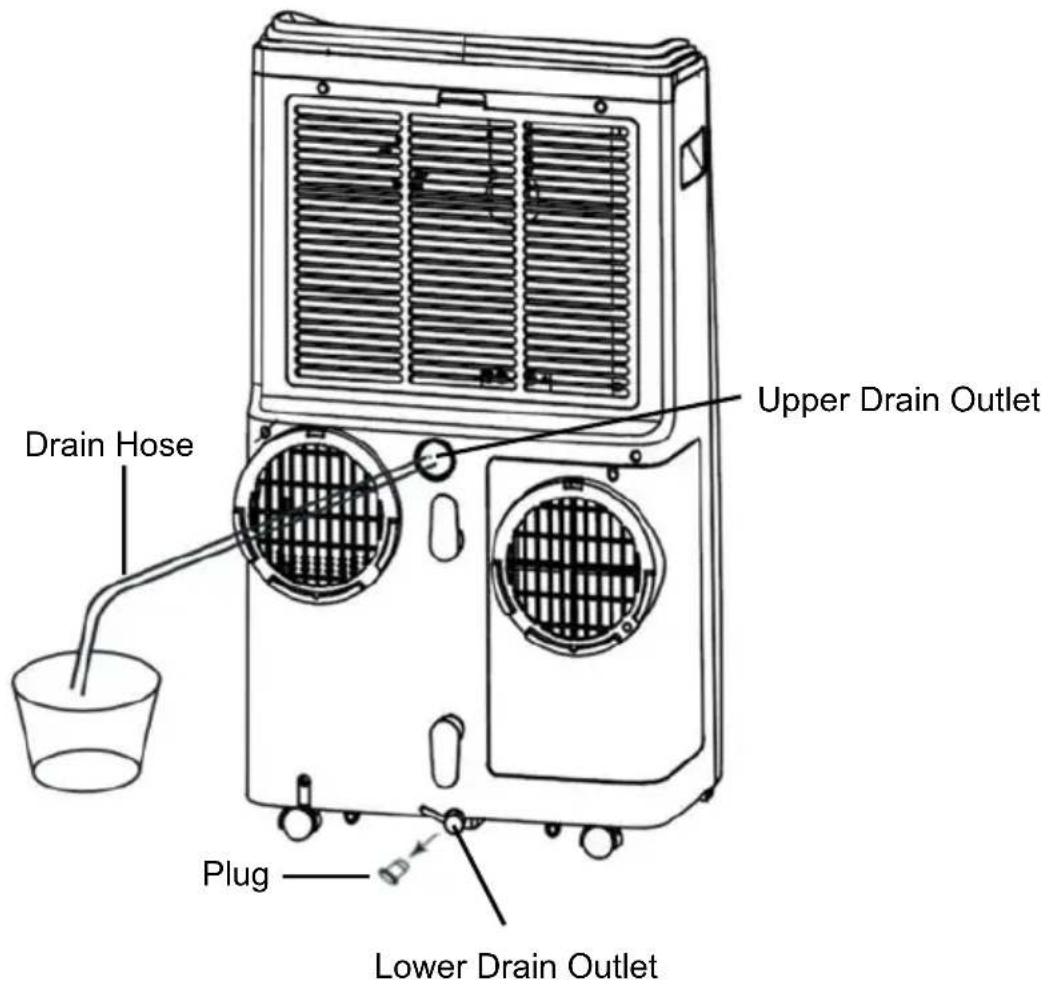
When using the Dehumidifier, water collects in the unit and needs to be drained either continuously or when it gets full. Water can be drained either from the Upper Drain Outlet or from the Lower Drain Outlet.
For continuous draining, while the unit is operating as a Dehumidifier:
- Securely connect the drain hose provided to the unit at the Upper Drain Outlet. Place the other end of the drain hose into a drain pan or bucket.
• Water will continuously flow from the drain outlet into the collecting bucket. - Check and empty the bucket periodically to avoid overflow of water.
Sleep mode
Press the Sleep button when the unit is in Cool mode.
After 1 hour the preset temperature is increased by one degree, after another hour the preset temperature will again be increased by one degree.
Timer (1 hour – 24 hours)
Press the Timer button and the Up and Down arrows to select how long (hours) the unit is set to operate.
Remote Control
The selections on the Control Panel can also be made on the Remote Control device.
Note: Overload Protection - In the event of power loss, there is a 3-minute delay before the compressor restarts. This is to protect the compressor.
If not continuously drained, the unit will need to be drained manually.
Note: When the water collection tank in the unit gets full, it will stop working and an error code of “Ft” will be displayed on the Control Panel.
- Turn off the appliance and unplug it.
- If the unit needs to be moved, do it carefully to prevent water from spilling.
- Securely connect the drain hose provided to the unit at the Lower Drain Outlet.
- Place the other end of the drain hose into a drain pan below the Lower Drain Outlet.
- Remove the Lower Drain Plug to drain the water. The unit can be tilted slightly backwards up to 20 degrees, to drain completely.
• After draining the water, replace the plug.
Note: When draining the Dehumidifier
- Ensure that the water flows freely and the hose is straight and not kinked, bent or obstructed in any way.
- Use only the drain hose that is provided, as another one may not fit properly over the opening.
- Ensure that the end of the hose is not submerged in the collected water, otherwise it can cause an air lock in the hose.
Maintenance
Disconnect the appliance from its power source during cleaning or when being serviced.
Do not clean the appliance with any chemicals or abrasive materials.
The unit is equipped with a HEPA filter which should be replaced as needed. HEPA filters are sold separately.
Warning!!!
Do not touch the evaporator surface with bare-hands as this could cause injury of fingers.
Troubleshooting
| Problem Possible Cause Solution | ||
| The unit is not operating | Check the power connection | Insert the power cord securely into the wall outlet |
| Check if water tank in unit is full | Empty the water tank by removing the drain plug | |
| Check the room temperature | The operating temperature range is 41-95°F (5-35°C) | |
| The unit works with reduced capacity | Check the air filter for debris | Replace the air filter as necessary |
| Check if the air duct is blocked | Clear the obstacle | |
| Check if the room door or window is open | Keep the door and windows closed | |
| Check if the desired operating mode is selected and the temperature is properly set | Set the mode and temperature at proper set-point according to the manual | |
| Check if the exhaust hose is detached | Make sure the exhaust hose is securely attached | |
| Water Leakage | Overflow while moving the unit | Empty the water tank before transport |
| Check if the drain hose is securely attached and kinked or bent | Secure and straighten the hose | |
| Excessive Noise | Check if the unit is securely positioned | Place the unit on flat and firm ground |
| Check if any loose, vibrating parts | Secure and tighten the parts | |
| Noise sounds like water flowing | Noise comes from flowing refrigerant. This is normal | |
Error Codes
| Error Codes | E0 | Communication faults between main PCB and display PCB | Check the wire harness of the display PCB for damage |
| E1 | Ambient temperature sensor failure | Check connection or replace it. Clean or replace the temperature sensor | |
| E2 | Coil temperature sensor failures | Check connection or replace it. Clean or replace the temperature sensor | |
| Ft | Water tank is full | Empty the water tank |
Storage
If you will not be using the unit for an extended period of time (more than a few weeks) it is best to clean the unit and dry it out completely. Prepare the unit for storage as follows:
- Unplug the unit, remove hoses and window kit, and store with the unit.
- Drain any water from the unit and dry it completely.
- Store the unit in an upright position, in a dry indoor space.
ATTENTION:
The evaporator inside the machine has to be dried out before the unit is packed to avoid component damage and mold. Unplug the unit and place it in a dry open area for a few days to dry it out. Another way to dry the unit is turn it on and operate it in Air mode on low speed.
Congratulations on your purchase. We hope you enjoy your new appliance and it gives you many years of joy.
Please do not hesitate to contact us, if we can assist you any way.
- Portable Air Conditioner
- OWNER'S MANUAL
- Warranty
- Exclusions
- WARRANTY SERVICE
- Equator Appliances
- For Customer Service:
- Appliance Desk
- GENERAL
- Safety
- Introduction
- Accessories
- Placement
- Installation
- Follow these steps to install both hoses:
- Operation
- Dehumidifier Drainage
- Sleep mode
- Maintenance
- Warning!!!
- Error Codes
- Storage
- ATTENTION:
Brand : Equator
Model : PAC 122 W
Category : Air Conditioning