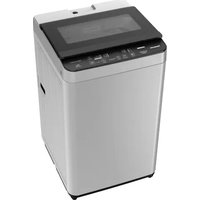
USER MANUAL NA-F70S10HRM PANASONIC
Operating & Installation Instructions
Fully Automatic Washing Machine
(Household use)
Model No.
NA-F70S10HRM
NA-F75S10BRM
NA-F80S10BRM

Contents
| Safety Precautions | 2 |
| Part Names | 3 |
| Operation Panel |
| Variety of Programs | 4 |
| Detergent | 5 |
| Washing |
| Washing OptionsDelicateBlanketAir DryWash/Rinse/SpinClean Master | 6 |
| Convenient Functions | 7 |
| Installation |
| Maintenance | 9 |
| Troubleshooting | 10 |
| Error Display | 11 |
| Specifications |

CERTIFIED
Product Safety
License No. Q-1234
Thank you for buying
Panasonic Washing Machine
- Read these instructions carefully for optimum performance and safety before use.
- Keep this manual for future reference.
AWW9901CWF04
FA0822MB0
Printed in the Philippines
Read and follow these safety precautions.

WARNING

May cause serious injury or death.
Never do the following to the power plug and cord
(To prevent fire or electric shock)
- Do not plug in or unplug the power cord with wet hands.
- Do not hold or pull on the cord when removing the plug from the socket.
- Do not use a power cord or plug that is damaged. If the power cord is damaged, it must be replaced by the manufacturer, its service agent or similarly qualified persons to avoid a hazard.
Observe the following about the power plug and cord
(To prevent fire or electric shock)
- Use a socket that satisfies the rating requirement solely for this appliance. Do not use a plug adaptor or extension cord. Always fully insert the power plug into the socket.
- Wipe the power plug periodically with a dry cloth. (Accumulated dust collects moisture, which may cause insulation failure, resulting in fire.)
- Unplug the power cord before cleaning.
Never disassemble, repair, or modify the appliance yourself.
- In case of malfunction or failure, immediately stop use, unplug the power cord, and ask your nearest Panasonic Customer Care Center for repair.
Do not allow children to use on their own.
- This appliance is not intended for use by persons (including children) with reduced physical, sensory or mental capabilities, or lack of experience and knowledge, unless they have been given supervision or instruction concerning use of the appliance by a person responsible for their safety.
- Children should be supervised to ensure that they do not play with the appliance.
Keep away from fire. Do not put flammable materials or clothes with such things attached, in the tub. Keep them away from the appliance.
(To prevent explosion or fire)
- For example: Kerosene, gasoline, benzine/thinner, alcohol, etc.
Do not touch the tub until it completely stops.
(To prevent injury)
- If the tub does not stop within 15 seconds when the lid is opened during spin process, switch off the appliance immediately and call Panasonic Customer Care Center.
Provide a ground.
(To prevent electric shock by short circuit)
- Ask a service person to do the grounding work.
Keep magnets and magnetized objects away from the operation panel.
The tub may rotate even when the lid is open, resulting in injury.

CAUTION

May cause injury or property damage.
Do not wash, rinse, or spin waterproof sheets or clothes.
(To prevent injury, damage to the main unit, walls, floor or laundry, or water leakage if the appliance falls over or oscillates extremely while spinning)
• Raincoats, wet suits, etc.
Turn off the water faucet after operation.
(To prevent water leakage)
This appliance is only suitable for textiles labelled washing machine washable.
Observe the following
- New hose-sets supplied with the appliance are to be used and old hose-sets should not be reused.
- Be careful not to get your fingers caught when opening and closing the lid.
- Do not insert your hands or feet under the main unit. (To prevent injury by rotating parts.)
- Do not climb or put heavy objects on the appliance. (To prevent deformation and breakage resulting in injury)
- If the lid is broken, immediately stop using the appliance. (To prevent deformation and breakage resulting in injury)
- Do not connect to the hot water supply.
- Do not directly pour hot water of 50 °C or higher into the tub.
- Do not obstruct the openings of the bottom face with carpet, etc.
For maintenance and service.
Panasonic Customer Care Center:
SMS (Text only): TYPE Panasonic message and send to
21584703 (Globe/TM subscribers)
Email: pmpc_csdcic@ph.panasonic.com
Website: http://www.panasonic.com/ph
Contact Number: (02) 8-706-7603; Fax (02) 8706-7612; Fax: (02) 8-706-7612
Toll Free: 1800-10-7262782 (PLDT), 1800-82-934357 (Globe)
Part Names

Accessories
□Water supply hose* (1) (P. 9)
* The hose supplied depends on the countries the unit is sold in.
(Joint type)

• Length: 1.0 m
or
(Screw type)

• Length: 1.0 m
□ External drain water hose (1) (P. 9)

□ Water tap adaptor* (1) (P. 9)

* For Joint type only
☐ Bottom cover (1)
(P. 8)

□ Screw (1)
(P. 8)
Attached with tape.

Operation Panel
![graph TD A["Operation panel of NA-F70S10"] --> B["Water level / Detergent Volume"] B --> C["The detergent volume guideline corresponding to the water level indication is shown below. (✓: 1 scoop of detergent)"] C --> D["Water level / Remaining Time"] D --> E["Indicates the selected program (No.)"] E…](/content/2026/05/956395/images/155b1b9805b2241b8da1cafabd17dc26a7e55bac8737592b66da63a8e7c11b63.jpg)
Change Water Level
During the wash process, press "Water Level" to change the water level.
- Some water levels cannot be selected depending on the program.
- When the remaining time is displayed, press "Water Level" to check the water level.

Set the time to finish washing (Hrs.) (e.g.) 8 hours later
10·15·20 Wash
1·2·3 Rinse
5·7·9 Spin


Preset
- Setting range: 2-24 hours later, in one-hour increments. (3-24 hours later for the Clean Master) • Not Available for the following programs.
② Delicate ⑥ Air Dry ⑦ Tub Hygiene
Manual Timer
- Press Process button first then Preset button, to manually select the specified time and process of use for Wash, Rinse and Spin (in min.)
Variety of Programs
| Purpose | Program | Maximum capacity |
| NA-F70S10 | NA-F75S10 | NA-F80S10 |
| Everyday clothes | Daily washing | 1 Normal (P. 5) | 7.0 kg | 7.5 kg | 8.0 kg |
| Delicates | Washing delicates gently | 2 Delicate (P. 6) | 3.5 kg | 3.5 kg | 3.5 kg |
| Clothes for babies & people with sensitive skin | Rinsing thoroughly | 3 Baby-care | 7.0 kg | 7.5 kg | 8.0 kg |
| Blankets | 4 Blanket (P. 6) | 4.2 kg | 4.2 kg | 4.2 kg |
| Saving energy and time* Reduces the power consumption of 1 Normal program by 5%. | Speedy washing for light soil | 5 Speedy | 7.0 kg | 7.5 kg | 8.0 kg |
| Tub cleaning | Preventing black mould and smell | 6 Air Dry (P. 6) | — | — | — |
| 7 Tub Hygiene (P. 9) |
| If black mould or smell is present | 7 Tub Hygiene (P. 9) | — | — | — |
| Drying synthetic fibre clothes | 6 Air Dry (P. 6) | 2.0 kg | 2.0 kg | 2.0 kg |
| Clean Master | C Clean Master (P. 6) | 7.0 kg | 7.5 kg | 8.0 kg |
NOTE
- 1 Normal program is recommended for a normally soiled load at the rated capacity of this washing machine.
Contents of Programs
• Total time is an estimation. (When the standard water supply rate is 15 L / min) - Total time may increase depending on low water pressure, bad draining conditions, and the amount and type of clothes.
1) Remaining time of 90 minutes or less will be displayed.

2) This includes washing and soaking time.
Laundry preparation and check
For clothes that lose color easily, wash separately.

Pre-laundry check
To prevent damage to clothes, malfunction, and drainage failure
- Remove coins, pins, paper clips, nails, etc.
- Fasten buttons and close zippers.
- Do not wash items (such as paper diapers) other than laundry.
- Turn clothes inside out if the surface is likely to flake off.
- Use a brush to remove pet and human hair, sand, etc.
- Tie strings, etc.
For delicate underwear only, use laundry nets.
• Underwire brassieres • Lacy clothes, lingerie, and stockings. When using a net: - Do not overpack. - Put the zipper's slider into the cover. (To prevent damage to clothes and the main unit) - Do not use the ⑥ Air Dry program. (To prevent uneven drying and wrinkles)
Put in detergent, bleach, and softener according to the water level displayed.
- Follow the instructions on each package.

■ Softener - Turn the tub by hand if it is difficult to put in the softener inlet. (P. 7)
Putting in detergent
- When powdered detergent is poorly soluble, dissolve in warm water before putting in.

- Put in the detergent little by little while stirring to prevent it from getting hard or remaining in the powder state.
Water approx. 30 °C (approx. 5 L)
- If there are many thick or large clothes (jeans, sheets, etc.) in the tub, the detergent may remain undissolved. Dissolve the detergent according to the above method, or reduce the amount of laundry.
- In case of excessive foaming, reduce the amount of detergent or change the detergent.
Putting in bleach
- Do not use chlorine bleach for coloured clothes to prevent loss of colour.
- After using chlorine bleach, wash the tub with the ⑦ Tub Hygiene program without bleach. (P. 8)
- Do not use bleach for the ② Delicate program.
Putting in softener
- Softener is automatically released during the final rinse process.
- To add softener during operation, press "Pause" first.
- Up to about 40 ml can be added.
- When using concentrated softener, dilute it with water before putting it in.

NOTE
- Do not use separated or solidified softener.
- If "Pause" is pressed during cycle, the softener will be added too early and its effectiveness will decrease.
- The softener will not be added automatically if not put in by the time wash process is complete.
Washing
Preparation:
- Check if the washing machine is properly installed. (P. 8)
- Turn on the water faucet.
NOTE: For Full Operation Panel see (P. 3)
![graph LR A["Timer preset"] --> B["Preset"] B --> C["Manual Timer (Press Process)"] C --> D["Program"] D --> E["(Press 5 sec)"] E --> F["Start Pause"] F --> G["Power"]](/content/2026/05/956395/images/608f32da8b9ed02bf401579e50ad6167d63926c348e4b81975fa05dc18d97b05.jpg)
1

After loading laundry
Turn the power on
2

Select a program (P. 4)
■ Timer preset
3

Start. The pulsator moves without water and measures the amount of laundry (approx. 5 seconds).
![graph TD A["Water level indication\n(approx. 5 seconds)"] --> B["Water begins to be supplied."]](/content/2026/05/956395/images/cdf3a2ef17cc90580ccb170dc75c15ed7f2d22db986799342321086db789ed7a.jpg)
Remaining time indication
• To check the water level → Press "Water level".
• To check the program → Press "Program".
4
According to the water level indication, put in detergent.
5
Close the lid.

Operation ends with beeps.
Set how many hours later to finish operation. (P. 3)

- 2 minutes after start-up, all indications except "Preset" turn off.
- To confirm after the timer has been set, press "Preset".
- To cancel or change, press "On/Off".
- The hours can be set differently depending on the program.
■ After pressing "Start"
- You can change the water level until the end of the wash process.
- You cannot change the program.
Wash / Rinse / Spin
Preparation: Turn on the water faucet.

After loading laundry.
Turn the power on

According to your purpose
Change process settings.
- Change the water level as necessary
- You select any Manual Setting process individually.
(Not available for Normal Program)

After closing the lid
Start.

Operation ends with beeps.
Manual Timer
Manual Timer Option is available for Normal Program only


Press Process Button to select either Wash, Rinse or Spin Option
• The light indicator will light up


Press Manual Timer to select the specified time of use for Wash, Rinse and Spin
- Wash - 10, 15, 20 mins.
Rinse - Refill Times (1, 2, 3)
Spin - 5, 7, 9 mins.


To Skip a Manual Process select "0" time then press Process button again
- The light indicator will disappear if you skip a process

Press Start to confirm

Operation ends with beeps.
Delicate
Use this program to gently wash delicate clothes and stylish garments
Load laundry evenly.
- Load lighter items first and press them from above.
- Use laundry nets for delicate underwear only.
- Amount that can be washed at one time: 42 L 3.5 kg

NOTE
- Do not use bleach. • Use liquid detergent • After operation ends, take out clothes immediately. (To prevent wrinkles and colour staining)
Air Dry
Water is removed from clothes by the air blown from the tub rotation.
■ Clothes that can be dried
• Material: Synthetic fibre
• Weight: 2 kg or less

After loading clothes and closing the lid.
Turn the power on

Select ⑥ Air dry program.


After 90 minutes, drying ends with beeps.
Blanket
■ Washable blankets
• Material: 100% synthetic fibre or 100% cotton • Weight: 4.2 kg or less - Blankets with a machine-washable tag attached.
- You can place the blanket in a laundry net bag and load it in the tub.

The zipper part should face up. (To prevent damage to the net)

NOTE
- Use liquid detergent
- The water level indication shows the maximum and cannot be changed.
Clean Master
• Enhances soaking process to remove stubborn stains. - The washing process involves alternate soaking and washing during the wash cycle to better loosen dirt and stains.


After loading clothes and closing the lid.
Turn the power on


Select © Clean Master


Start.

Operation ends with beeps.
Convenient Functions
Setting Child Lock
To prevent children from falling into the tub and drowning, if the lid is opened while the washing machine is operating, this function sounds a buzzer until it is closed. Not closing it within 10 seconds flushes the water out.
- This function does not lock the lid and button operations.
- When water is drained forcibly, "U 99" is displayed. (P. 11)
1

After closing the lid, turn the power on.
2

Press and hold for 5 seconds. 2 short beeps.


To cancel, do the same procedure.
4 short beeps.
Installation
Cancelling end buzzer
1
While the Washing Machine is OFF
Press
Start
Pause
then

together
and then hold on for 3 seconds
2 short beeps
• To reset, do the same procedure.
4 short beeps
Turning the Tub by hand
If it is difficult to reach the softener inlet.
1

Turn the power on
2
When a clicking sound is heard
Turn the tub.
(Clockwise or Counterclockwise)

NOTE
- If there is water in the tub or "Start" is pressed, the tub cannot be turned.
1. Check the location.
■ Avoid the following locations for installation.
- Locations with a possibility of freezing
- Damp locations or locations where the unit may be exposed to rain, etc. (To prevent electric shock or fire)
- Locations exposed to direct sunlight. (To prevent malfunction or deformation.)
- Uneven or unstable locations (on blocks, timbers, a platform with wheels, etc.)
2. Attach the bottom cover.
Preparation: Set a cardboard, etc. and lay the washing machine on it, avoiding product damage and deformation. (Face the front side down.)
1 Insert the bottom cover with its screw hole set at the bottom.

2 Set 6 holes to the corresponding projections and fix with one screw.


3. Attach the external drain water hose.
1 Connect.
- Insert all the way until it stops.

2 Slide the hose band in the arrow direction.
- Slide Hose band onto the middle portion of the inserted hose.

NOTE
- Do not put the hose tip under water.
- Do not raise the hose higher than 10 cm above the floor.
- Do not extend the overall length to more than 3 m.


■ It is recommended to contact a service personnel for installation. Do not install by yourself. (P. 2) If the installation, test run and inspection of the washing machine are not carried out following this installation method, Panasonic will not be liable for any accident or damage caused.
4. Connect the water tap adaptor and water supply hose.
■ Joint type


CAUTION
- Tighten the nut firmly.
- Do not twist, squash, modify or cut the hose.

1 Connect the water tap adaptor to the water faucet.
1 Turn part A to the left until approx. 4 mm of the thread becomes visible. 2 Loosen the 4 screws. 3 Connect to the faucet and tighten the screws. 4 Turn part A to the right and tighten securely. (To prevent water leakage)
2 Connect the water supply hose to the water tap adaptor.
Insert the hose into the adaptor while pushing down the lever, and hook the claw of the lever on the flange of the adaptor.
3 Connect the water supply hose to the water supply valve screw.
1 Hold the elbow and tighten the nut. 2 Check that the elbow is not loose.
■ Screw Type
1 Attach one end of the hose to the tap and tighten by hand.

2 Connect the water supply hose to the water supply valve screw.
1 Hold the elbow and tighten the nut 2 Check that the elbow is not loose.

5. Connect the power plug and grounding wire.
- Connect the Power Plug

- Ask a service person to do the grounding work.
![graph LR A["Input"] --> B{Decision} B -->|Yes| C["Process Step"] B -->|No| D["Output"]](/content/2026/05/956395/images/61237ea40ddba4d81355468b0d2399b5511b47fedc676b888c27c04c827f375b.jpg)
6. Check that the washing machine does not wobble.
■ If the washing machine wobbles.
1 Turn the adjustable leg knob to the left to loosen.

To lower To raise
Turn to the right to tighten.
- Check that there is no water leakage, abnormal sounds or error display.
Maintenance
Lint Filter
After each operation
Lint filter,

1 Remove the filter.

2 Open the filter and remove the lint.
- If lint is difficult to remove, soak and wash the filter in water.


3 Attach the filter in its original position.


NOTE
- Do not wash laundry without the filter. (To prevent damage to clothes)
- Turn the tub by hand if it is difficult to remove the filter.
- If the filter is broken, purchase a new one at the nearest Panasonic Customer Care Centre.
Water Supply Filter
If water does not flow smoothly
- Follow the procedure below to prevent splashing of water.
1

After turning off the water faucet.
Turn the power on

2

Start
3

After approximately 10 seconds, turn the power off.
4
Loosen the nut and remove the hose.

5
Remove the filter and clean off any dirt.


Tub
Once a week
1. After operation ends, run the ⑥ Air Dry
Run the ⑥ Air Dry program without any laundry. (See page 6)

Once a month
Preparation: Turn on the water faucet.
1

Without loading any laundry, turn the power on.
2

Select ⑦ Tub Hygiene Program 7 Program
3
Start
Pause
Start.

When the tub is filled with water
Pause.

4
Put bleach in the tub.
• Use chlorine bleach for clothes.

Approx. 200 ml
5
After closing the lid,
Start.

After approx. 2 hours, tub cleaning ends.
Main unit, lid
If stained with detergent or softener
Wipe with a soft cloth.
(To prevent damage to plastic parts or metal corrosion)
- For heavy soil, wipe with a neutral kitchen detergent.
- Do not splash water.

| Symptoms | Points to be checked |
| Time | Time indication increases or does not change | · Time indication is approximate. Remaining time is corrected during operation and displayed. |
| Operation time is longer than the time indication. Operation does not stop even after the preset time. | · The operation time may be longer if laundry is concentrated on one side or the water supply or drainage is not good.(P. 11 "U 11" "U 14") |
| Main unit | No operation | · Power failure?· Is the lid closed completely during Spinning?· Has the power fuse blown or the breaker tripped?· Is the power plug inserted completely?· Is the water faucet turned on?· Did you press "Start"?· Is the timer preset? |
| Wash | No water supply | · Is the water faucet turned on?· Water outage?· Is the water supply filter clogged with dirt? (P. 7) |
| Water is supplied in the middle of wash process. | · If the water level drops, water is added automatically.· With a large amount of laundry, water is added several times automatically. |
| The water level is too high for the amount of laundry. | · If laundry is wet or there is water in the tub before operation, the water level may be higher. |
| The water level is too low for the amount of laundry. | · With light clothes (of synthetic fibre, etc.), the water level may be lower. |
| Rinse/Spin | Operation started with rinse, but water is not supplied. | · If there is no water in the tub, water is supplied after spin.· If there is water in the tub, water is supplied after water discharge. |
| Operation suddenly changes to rinse process in the middle of spin. Only spin is desired, but operation starts with rinse. | · If clothes are concentrated on one side of the tub, the washing machine automatically corrects unevenness by starting rinse process.(Place clothes as evenly as possible.) |
| Irregular rotation during spin | · The tub rotation speed is adjusted to reduce foaming during spin. |
| Others | Power failure/ The breaker has tripped. | · Operation will resume from the point where it was stopped when the power is recovered (Auto Restart). |
| Water outage | · When water supply is recovered, remove the water supply hose, release turbid water from the faucet, and then start the washing machine. |
| Operation stops in the middle of wash or rinse process. | · Is the lamp flashing?→The pulsator occasionally stops to soak clothes while the lamp keeps flashing. This is not abnormal. |
- The buzzer sound and "U"/"H" and a number are alternately displayed.
- Cancel Child Lock (P. 7) if it is set.
| Error Display | Points to be checked |
| U 11 | Water cannot drain.Check the drain water hose for the following abnormalities:Is it crushed? Is it partially raised higher than 10 cmIs it clogged with lint? above the floor (P. 9)Is the hose tip under water? Is the total length longer than 3 m(including the extension hose)? (P. 9)When the above problems are solved, you can resume operation by opening and closing the lid. |
| U 12 | The lid is open.Did you try to run the washing machine in Spin Function with the lid open?Did you try to open the lid while the washing machine is draining water?→Close the lid when U 12 appears or if there is a buzzer sound. |
| U 13 | Spin or Air Dry is not possible.Are clothes concentrated on one side of the tub?→Distribute the clothes evenly and close the lid.Is the washing machine installed on an unstable or inclined surface?→You can resume operation by opening and closing the lid.  |
| U 14 | Water cannot be supplied.Is the water faucet turned on?Water outage?Is the water supply filter clogged with dirt? (P. 7)→Unplug the power cord and plug it in again after 5 seconds. |
| U 99 | Water has been forcibly drained.Water has been forcibly drained because the lid was open for 10 seconds or more with Child Lock (P. 7) set.→Unplug the power cord and plug it in again after 5 seconds. |
| H ☐☐☐ | Inspection is required.Unplug the powet cord. Then, report the error displayed (2-digit number after “H”) to a service person. |
Specifications
| Model No. | NA-F70S10HRM | NA-F75S10BRM | NA-F80S10BRM |
| Rated voltage | 230 V~ |
| Rated frequency | 60 Hz |
| Rated power consumption | 450 W | 475 W | 500 W |
| Standard water amount | 52 L | 55 L | 55 L |
| Maximum capacity | 7.0 kg | 7.5 kg | 8.0 kg |
| Product dimensions (mm) | 525 × 571 × 929 | 525 × 571 × 959 |
| Product weight | 27 kg | 28 kg |
| Pressure of tap water | 0.01 - 1 MPa |
Panasonic Manufacturing Philippines Corporation
Laguna Technopark, Sta. Rosa Laguna, Philippines
http://www.panasonic.com/ph
© Panasonic Manufacturing Philippines Corporation 2022