
75907 - Clock Equity - Free user manual and instructions
Find the device manual for free 75907 Equity in PDF.


| Product Type | Analog Wall Clock |
| Display | Analog dial with hour and minute hands |
| Dimensions | 30 cm diameter x 5 cm depth (12 x 2 inches) |
| Weight | 0.7 kg (1.5 lbs) |
| Power Source | 1 AA battery (not included) |
| Functions | Time display, silent sweep movement, large numerals |
| Mounting | Wall mounting bracket and hardware included |
| Materials | Plastic frame, glass lens |
| Maintenance | Wipe with dry cloth; do not use water or cleaners |
| Battery Replacement | Replace when clock stops; use fresh AA battery |
| Operating Temperature | 0°C to 40°C (32°F to 104°F) |
| Accuracy | Quartz movement, ±1 minute per month |
| Safety | Use only specified battery; keep away from children under 3 |
| Repairs | No user-serviceable parts; contact support for repairs |
| Warranty | 1 year limited warranty |
| Certifications | CE, RoHS |
| Package Contents | 1x clock, 1x battery, 1x mounting kit, 1x manual |
Frequently Asked Questions - 75907 Equity
User questions about 75907 Equity
0 question about this device. Answer the ones you know or ask your own.
Ask a new question about this device
Download the instructions for your Clock in PDF format for free! Find your manual 75907 - Equity and take your electronic device back in hand. On this page are published all the documents necessary for the use of your device. 75907 by Equity.
USER MANUAL 75907 Equity
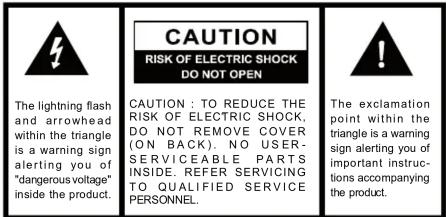
WARNING: TO REDUCE THE RISK OF FIRE OR ELECTRICAL SHOCK, DO NOT EXPOSE THIS APPLIANCE TO RAIN OR MOISTURE.
Caution: To prevent electrical shock do not use this (polarized) plug with an extension cord, receptacle, or other outlet unless the blades can be fully inserted to prevent blade exposure.
ATTENTION : POUR PRÉVENIR LES CHOCS ÉLECTRIQUES NE PAS UTILISER CETTE FICHE POLARISÉE AVEC UN PROLONGATEUR, UNE PRISE DE COURANT, OU UNE AUTRE SORTIE DE COURANT SAUF SI LES LAMES PEUVENT ETRE INSÉRÉES À FOND SANS EN LAISSER AUCUNE PARTIE À DÉCOUNVERT.
Two Year Limited Warranty (U.S.A.)
Equity products are warranted for two years from the date of consumer purchase against defects in material and workmanship. During this period such defects will be repaired, or the product will be replaced at Equity's option, without charge. This warranty does not cover damage caused by misuse or negligence. ALL IMPLIED WARRANTIES, INCLUDING BUT NOT LIMITED TO IMPLIED WARRANTIES OR FITNESS AND MERCHANTABILITY, ARE LIMITED IN DURATION TO A PERIOD ENDING TWO YEARS FROM DATE OF PURCHASE. Some states do not allow limitations on how long an implied warranty lasts so the above limitation may not apply to you. This warranty gives you specific legal rights and you may also have other rights which vary from State to State.
If your product is not working properly, please send:
- the product
- a letter explaining the problem
- and \$5.00 for postage and handling to :
Equity by La Crosse
Warranty Department
2830 26th St. S.
La Crosse, WI 54601
Made in China
Printed in China
www.equitybylacrosse.com/support
Setting The Alarm Time
* Slide the TIME-LOCK-ALARM set switch to ALARM set position.
* The hour digits will flash indicating it needs to be set. Press numeric buttons to enter hour digits.
The LED display will show the numbers that you have entered.
* After 4 seconds, the minute digits will flash indicating it needs to be set.
Press numeric buttons to enter minute digits. The LED display will show the numbers that you have entered.
* Press RESET button to change your setting. Press PM button to show pm time.
Slide TIME-LOCK-ALARM set switch to LOCK after Alarm was set.
Using The Alarm
* Slide the HI/LO/OFF alarm switch to HI position for loud alarm sound.
The alarm indicator will be lit.
* Slide the HI/L0/OFF alarm switch to L0 position for regular alarm sound.
The alarm indicator will be lit.
* Slide the HI/L0/OFF alarm switch to 0FF position to turn OFF alarm.
The alarm indicator will turn off.
Using The Snooze
* Press the SNOOZE button when the alarm sounds to stop the alarm sound.
The alarm will sound again in nine minutes.
* The snooze function can be repeated.
* Slide the HI/LO/OFF alarm switch to OFF position to turn off the alarm.
Using The Display Dimmer Switch
* Slide the HI/L0 display dimmer switch to HI position for brighter display.
* Slide the HI/L0 display dimmer switch to L0 position for normal display
Battery Backup
* Insert two "AAA" batteries into the battery compartment at the back of the clock. If the power is interrupted. The battery will keep the alarm and time settings until the power is restored. The LED display will not light-up but the alarm will sound at the preset alarm time. If there is no battery installed but the power is interrupted, the display will flash at 12:00 and the time and alarm need to be set again.
Battery Instruction
- Always purchase the correct size and grade of battery most suitable for the intended use.
- Replace all batteries of a set at the same time.
- Clean the battery contacts and also those of the device prior to battery installation.
- Ensure the batteries are installed correctly with regard to polarity (+ and -).
- Remove the batteries from equipment which is not to be used for an extended period of time.
- Remove used batteries promptly.
FCC INFORMATION:
NOTE: This equipment has been tested and found to comply with the limits for a Class B digital device, pursuant to Part 15 of the FCC Rules. These limits are designed to provide reasonable protection against harmful interference in a residential installation. This equipment generates, uses and can radiate radio frequency energy and, if not installed and used in accordance with the instructions, may cause harmful interference to radio communications. However, there is no guarantee that interference will not occur in a particular installation. If this equipment does cause harmful interference to radio or television reception, which can be determined by turning the equipment off and on, the user is encouraged to try to correct the interference by one or more of the following measures:
- Reorient or relocate the receiving antenna.
- Increase the separation between the equipment and the receiver.
- Connect the equipment into an outlet on a circuit different from that to which the receiver is connected.
- Consult the dealer or an experienced radio/TV technician for help.
Caution: Changes or modifications not expressly approved by the party responsible for compliance could void the user's authority to operate the equipment.
www.equitybylacrosse.com/support

1.8" LED Display Quick-Set Alarm Clock Model 75905 / 75907

Please read this before operating your clock
Power Supply
* Begin by plugging in the power cord into a standard household outlet.
Setting The Time
* After powering your clock, slide the TIME-LOCK-ALARM set switch to TIME set position.
* The hour digits will flash indicating it needs to be set. Press numeric buttons to enter hour digits. The LED display will show the numbers that you have entered.
* After 4 seconds, the minute digits will flash indicating it needs to be set. Press numeric buttons to enter minute digits. The LED display will show the numbers that you have entered.
* Press RESET button to change your setting. Press PM button to show pm time. Slide TIME-LOCK-ALARM set switch to LOCK after time was set.
* Press RESET button to return to hour setting.
www.equitybylacrosse.com/support
Safety Instructions
- Read Instructions-All the safety and operating instructions should be read before the appliance is operated.
- Retain Instructions - The safety and operating instructions should be retained for future reference.
- Water and Moisture - The appliance should not be used near water - for example, near a bathtub, washbowl, kitchen sink, laundry tub, in a wet basement, or near a swimming pool, and the like.
-
Ventilation - The appliance should be situated so that its location or position does not interfere with its proper ventilation. For example, the appliance should not be situated on a bed, sofa, rug, or similar surface that may block the ventilation openings, or, place in a built-in installation, such as a bookcase or cabinet that may impede the flow of air through the ventilation openings.
-
Heat - The appliance should be situated away from heat sources such as radiators, heat registers, stoves, or other appliances (including amplifiers) that produce heat.
-
Power Sources-The appliance should be connected to a power supply only of the type described in the operating instructions or as marked on the appliance.
-
Grounding or Polarization-The precaution should be taken so that the grounding or polarization means of an appliance is not defeated.
-
Power-Cord Protection - Power supply cords should be routed so that they are not likely to be walked on or pinched by items placed upon or against them, paying particular attention to cords at plugs, convenience receptacles, and the point where they exit from the appliance.
-
Cleaning - The appliance should be cleaned only as recommended by the manufacturer.
-
Object and Liquid Entry - Care should be taken so that objects do not fall and liquids are not spilled into the enclosure through openings.
-
Damage Requiring Service - The appliance should be serviced by qualified service personnel when:
A. The power -supply cord or the plug has been damaged; or
B. Objects have fallen, or liquid has been spilled into the appliance; or
C. The appliance has been exposed to rain; or
D. The appliance does not appear to operate normally or exhibits a marked change in performance; or
E. The appliance has been dropped, or the enclosure damaged.
-
Servicing - The user should not attempt to service the appliance beyond that described in the operating instructions. All other servicing should be referred to qualified service personnel.
-
Do not mix old and new batteries,
Do not mix alkaline, standard (carbon-zinc), or rechargeable (ni-cad, ni-mh, etc.)
Warning: Changes or modifications to this unit not expressly approved by the party responsible for compliance could void the user's authority to operate the equipment
Brand : Equity
Model : 75907
Category : Clock