
NP-NWC18 - Cooker Zojirushi - Free user manual and instructions
Find the device manual for free NP-NWC18 Zojirushi in PDF.


| Product Type | Pressure Induction Heating Rice Cooker & Warmer |
| Model Number | NP-NWC18 |
| Brand | Zojirushi |
| Rated Voltage | 120 V AC, 60 Hz |
| Power Consumption | 1370 W (Cooking), 36 W (Keep Warm average) |
| External Dimensions (W x D x H) | 11-1/8 x 16-1/2 x 10-1/8 inches (28 x 42 x 25.5 cm) |
| Height with Lid Open | 18-7/8 inches (47.5 cm) |
| Weight | Approx. 15 lbs (6.5 kg) |
| Cooking Capacity (Max White Rice) | 1.8 L (10 cups) |
| Inner Cooking Pan | Nonstick coated, markings for water levels |
| Cooking Menus | White (Regular, Softer, Harder), Umami, Quick, Mixed, Sushi/Sweet, Jasmine, Porridge, Congee, Brown, GABA Brown, Steel Cut Oatmeal |
| Pressure Cooking | Yes (applies pressure for most menus) |
| Clock | 24-hour display, lithium battery backup |
| Timer | Two programmable timers (Timer 1 and Timer 2) |
| Keep Warm | Regular (up to 12 hours) and Extended (up to 24 hours) |
| Reheat Function | Yes, during Keep Warm mode |
| Sound Signals | Selectable: Melody, Beep, Silent |
| Safety Features | Pressure control valve, safety valve, lid lock, automatic shutoff |
| Power Cord Length | 3' 3" (1.0 m) |
| Accessories Included | Inner cooking pan, spatula, spatula holder, measuring cup for most rice (clear), measuring cup for rinse-free rice (green) |
| Cleaning | Remove and clean inner lid set, steam vent set, inner lid filter regularly; wipe exterior with damp cloth |
| Repairability / Replacement Parts | Inner lid set, inner cooking pan, spatula, spatula holder, measuring cups, inner lid filter available for purchase |
| FCC Compliance | Complies with 47CFR Part 2 and 18 for consumer ISM equipment |
Frequently Asked Questions - NP-NWC18 Zojirushi
User questions about NP-NWC18 Zojirushi
0 question about this device. Answer the ones you know or ask your own.
Ask a new question about this device
Download the instructions for your Cooker in PDF format for free! Find your manual NP-NWC18 - Zojirushi and take your electronic device back in hand. On this page are published all the documents necessary for the use of your device. NP-NWC18 by Zojirushi.
USER MANUAL NP-NWC18 Zojirushi
PRESSURE INDUCTION HEATING RICE COOKER & WARMER
OPERATING INSTRUCTIONS
NP-NWC10 / NP-NWC18
- Please read and follow these operating instructions carefully. Misuse of this Rice Cooker may be dangerous because of the high pressure. Please keep these operating instructions at hand for easy reference.
INDEX
IMPORTANT SAFEGUARDS....2
ABOUT THE INNER COOKING PAN....6
PART NAMES AND FUNCTIONS....7
TIPS FOR DELICIOUS RICE....9
HOW TO SET THE CLOCK....10
SOUND SIGNALS AND HOW TO CHANGE THEM....10
COOKING RICE
BASIC COOKING STEPS....11
HOW TO SELECT THE RINSE-FREE SETTING....13
TIPS FOR COOKING VARIOUS RICE MENUS....14
ESTIMATED COOKING TIME....15
ACTIVATED BROWN RICE (GABA BROWN)....15
KEEPING RICE WARM
REGULAR KEEP WARM AND EXTENDED KEEP WARM....16
REHEATING RICE....18
USING THE TIMER TO COOK RICE
USING THE TIMER....19
RECIPES
CONGEE....21
HAND-ROLLED SUSHI....21
SWEET RICE COOKED WITH ADZUKI BEANS....22
PAELLA....22
CLEANING AND MAINTENANCE.
TROUBLESHOOTING GUIDE....28
ERROR DISPLAYS AND THEIR MEANINGS....31
REPLACEMENT PARTS....32
SPECIFICATIONS....32
IMPORTANT SAFEGUARDS
BASIC SAFETY PRECAUTIONS SHOULD ALWAYS BE FOLLOWED WHEN USING ELECTRICAL APPLIANCES, INCLUDING THE FOLLOWING.
1 Read all instructions thoroughly.
2 Avoid touching hot surfaces and do not close or clog the steam vent opening under any circumstances. The handles and knobs are provided for your safety and protection.
3 To prevent hazardous operation or electric shock, do not immerse power cord, power plug, or rice cooker (except inner cooking pan) in water or other liquids.
4 Close supervision is necessary when the appliance is used by or near children.
5 Unplug from outlet when not in use and before cleaning. Allow the appliance to cool before adding or removing parts, and before cleaning the appliance. Make sure appliance is OFF when not in use, before putting on or taking off parts, and before cleaning.
6 Do not use or operate the appliance with a damaged cord or plug. If the appliance malfunctions or has been damaged in any manner, unplug the appliance and return it to the nearest authorized service facility or dealer for examination, repair or adjustment.
7 The use of accessories or attachments not recommended by the appliance manufacturer may be hazardous or may cause malfunction.
8 Do not use outdoors.
9 Keep the power cord away from hot surfaces and do not let the cord hang over the edge of tables or counters.
10 Do not place the appliance on or near a heated surface such as a gas or electric stove, or in a heated oven.
11 Always use extreme caution when moving appliances containing hot contents or liquids.
12 Plug the cord into a household electrical outlet. To disconnect, turn the power control to OFF, then remove plug from wall outlet.
13 Do not use the appliance for other than intended or specified purposes.
14 To reduce the risk of electric shock, use only the supplied inner cooking pan.
15 The heating element surface is subject to residual heat after use.
16 This appliance cooks under pressure. Improper use may result in scalds and injuries. Make sure unit is properly closed before operating.
17 Do not cook foods such as applesauce, cranberries, pearl barley or other cereals, split peas, noodles, macaroni, rhubarb or spaghetti. These foods tend to foam, froth or splatter and may block the pressure release device.
18 Always check the pressure release devices for clogging before use.
19 Do not open the pressure rice cooker until the unit has cooled and the internal pressure has been reduced.
20 Do not use this pressure rice cooker for pressure frying with oil.
SAVE THESE INSTRUCTIONS
THIS APPLIANCE IS FOR HOUSEHOLD USE ONLY.
This appliance is supplied with a short power cord to reduce the risk of becoming entangled in or tripping over. Extension cords may be used if care is exercised in their use. If an extension cord is used, the marked electrical rating of the cord should be at least as great as the electrical rating of the appliance, and a longer cord should be arranged so that it will not drape over the countertop or tabletop where it can be pulled on by children or tripped over unintentionally.
This appliance has a polarized plug (one blade is wider than the other). To reduce the risk of electric shock, this plug was designed to fit into a polarized outlet in only one direction. If the plug does not fit fully into the outlet, do not attempt to force it or modify it in any way. Simply reverse the plug and insert. If it still does not fit, contact a qualified electrician.
IMPORTANT SAFEGUARDS
Be sure to follow these instructions.
These WARNINGS and CAUTIONS are intended to prevent property damage or personal injury to you and others.
■ The degree of danger or damage by the misuse of this product is indicated as follows

WARNINGS
Indicates risk of serious injury or death.

CAUTIONS
Indicates risk of injury, household or property damage if mishandled.
■ Prohibited or required actions are indicated as follows

Indicates a prohibited operation.

Indicates a requirement or instruction that must be followed.

WARNINGS
To Cook Rice Safely in This Rice Cooker
Because pressure is applied during cooking, mishandling may be hazardous, as rice or other ingredients may boil over, resulting in burns or injury.

This Rice Cooker is designed for cooking rice and keeping rice warm as indicated in the Operating Instructions and recipes. Do not use it for anything other than its intended purposes.
Cooking the following types of foods may clog the steam exhaust route, which can cause steam to come out from the gap between the Outer Lid and the Main Body or the Outer Lid to open suddenly. Please do not cook the following.
- Foods using ingredients that increase in size while cooking (pastes, beans, noodles, etc.).
Boil beans in a separate pot before using them.
● Foods that may bubble over such as those using baking soda.
● Thick foods such as curry and stews.
● Foods with large amounts of oil.
● Foods that bubble up such as jams.
Never open the Outer Lid or move the Rice Cooker when pressure is applied during cooking.
Do not fill with water above the Maximum Water Level Line (indicated on the Inner Cooking Pan as MAX) and cook.


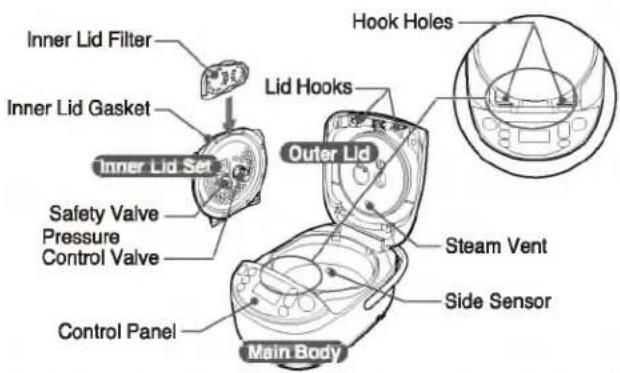
Always check that rice or other matter is not stuck around the Lid Hooks, the Hook Holes of the Main Body, the gap between the Main Body and the Outer Lid, the Inner Lid Gasket, the Pressure Control Valve, the Safety Valve, the Inner Lid Filter, or around the Steam Vent before cooking.
- Rice or other matter stuck on these areas may prevent the Outer Lid from closing completely. It may also cause steam to come out from the gap between the Outer Lid and the Main Body, or the Outer Lid may open suddenly and rice or other ingredients may boil over. Additionally, for safety purposes, it may prevent the Rice Cooker from cooking.
●The Outer Lid may not open if rice or other matter is stuck.
Push down on the Outer Lid until you hear it click shut.
- The Outer Lid may open during cooking or Keep Warm mode if it is not closed securely.
Press down on the center front edge of the Outer Lid.


When opening the Outer Lid during cooking, be sure that the PRESSURE indication on the Display has gone out before opening the Outer Lid.

IMPORTANT SAFEGUARDS (cont.)
| WARNINGS | |
| Do not modify the Rice Cooker. Only a repair technician may disassemble or repair this unit.Attempting to do so may cause fire, electric shock or injury. Make any repair inquiries to Zojirushi Customer Service. | |
| Do not place your hands or face near the Steam Vent.Doing so may cause burns or scalding. Take special precautions with children and infants. | Do not plug or unplug the Power Cord if your hands are wet.Doing so may cause electric shock or injury. |
| Do not immerse the Rice Cooker in water or splash it with water. Do not pour water directly into the Rice Cooker. Doing so may cause short circuit or electric shock.Do not allow liquid to come in contact with the Power Plug or Power Cord.Doing so may cause short circuit or electric shock. | |
| Do not use the Rice Cooker if the Power Plug or Power Cord is damaged or if the Power Plug is loosely inserted into the electrical outlet.Doing so may cause electric shock, short circuit or fire.Do not damage the Power Cord. Do not bend, pull, twist, bundle or attempt to modify the Power Cord. Do not place it on or near high temperature surfaces or appliances, under heavy items or between objects.A damaged Power Cord can cause fire or electric shock.Do not use a power source other than 120V AC.Use of any other power supply voltage may cause fire or electric shock.Do not allow the Power Plug to come into contact with steam.Allowing the Power Plug to come into contact with steam after inserting it into the electrical outlet may cause short circuit or fire. When using on a slide-out table or shelf, place the Rice Cooker in a position where the Power Plug does not come into contact with steam.Do not allow children to use the Rice Cooker unsupervised.Keep it out of the reach of infants.Children are at risk of burns, electric shock or injury.Do not drop metal objects such as pins or wires into the Air Intake Duct or Exhaust Duct.Doing so may cause electric shock or malfunction, resulting in injury. | Electrical Outlet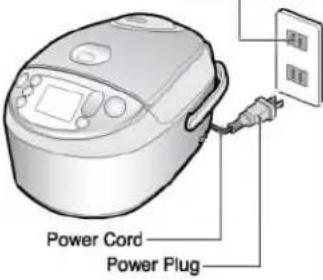  |
| Insert the Power Plug completely and securely into the electrical outlet.A loosely inserted Power Plug may cause electric shock, short circuit, smoke or fire.Use only an electrical outlet rated at 15 amperes minimum, and do not plug other devices into the same outlet.Plugging other devices into the same outlet may cause the electrical outlet to overheat, resulting in fire.If the blades or surface of the Power Plug become soiled, wipe them clean.A dirty Power Plug may cause fire.This appliance is not intended for use by persons (including children) with reduced physical, sensory or mental capabilities, or lack of experience and knowledge, unless they have been given supervision or instruction concerning use of the appliance by a person responsible for their safety.Children should be supervised to ensure that they do not play with the appliance.Stop using immediately if you notice any of the following symptoms indicating a malfunction or breakdown.Continued use of the Rice Cooker may cause smoke, fire, electric shock or injury.The Power Plug or Power Cord has become very hot.The Power Cord is damaged or the electricity turns on and off when touched.The body of the Rice Cooker is deformed or unusually hot.Smoke is produced from the Rice Cooker or there is a burning smell.Some part of the Rice Cooker is cracked, loose or unstable.The fan at the bottom does not work during cooking. etc.If any of the above occurs, unplug the Rice Cooker immediately and contact the store where you purchased it or Zojirushi Customer Service for inspection and/or repair. | |
IMPORTANT SAFEGUARDS (cont.)

CAUTIONS

Do not touch hot surfaces during or immediately after use. Be careful of steam when opening the Outer Lid. Be careful not to touch the Inner Cooking Pan when loosening rice.
Touching hot surfaces may cause burns.
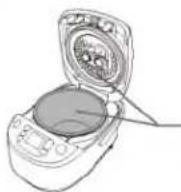
Be especially careful with metal parts such as the Inner Lid Set and Inner Cooking Pan.

Do not use the Rice Cooker where it may come into contact with water or near heat sources.
Doing so may cause electric shock, short circuit, or can damage the Rice Cooker.
Do not use cookware other than the provided Inner Cooking Pan.
Doing so may cause the cookware to overheat or the Rice Cooker to malfunction.
Do not use the Rice Cooker on an aluminum sheet or an electric carpet.
The aluminum material may be heated and may cause smoke or fire.
Do not use the Rice Cooker on a surface where the Air Intake Duct or Exhaust Duct can get blocked or covered (such as on paper, cloth, plastic bag or aluminum sheet).
Doing so may cause breakdown of the Rice Cooker.
Do not place or use the Rice Cooker on unstable surfaces or on surfaces that are vulnerable to heat.
Doing so may cause fire.
Do not use the Rice Cooker on a slide-out table or shelf with insufficient load capacity.
Doing so may damage the slide-out table or shelf, causing the Rice Cooker to fall, resulting in injury or burns. The slide-out table or shelf should have a load capacity of 33 lbs./15 kg or more for the 1.0 L model, and 44 lbs./20 kg or more for the 1.8 L model.
Do not use the Rice Cooker near walls or furniture. Allow enough room for steam to escape if using beneath shelving.
Failing to allow enough room may cause breakdown. Steam or heat may also damage, discolor or deform walls, furniture or shelving.
Do not touch the Open Button when moving the Rice Cooker.
Doing so may cause the
Outer Lid to open,
resulting in injury or burns.
Open Button


Unplug the Power Plug from the outlet when the Rice Cooker is not in use.
Leaving the Power Plug connected to an outlet may cause the insulation to become damaged, resulting in burns, injury, electric shock, short circuit or fire.

Please allow the Rice Cooker to cool down before cleaning.
Hot parts such as the Inner Lid, Inner Cooking Pan and heating element may cause burns.
Always unplug the Rice Cooker by holding the Power Plug, not by pulling the Power Cord.
Pulling the Power Cord to unplug the Rice Cooker may cause electric shock, short circuit or fire.
If the Power Plug or Power Cord is damaged, it must be replaced by the manufacturer, its service agent or similarly qualified persons to avoid hazards.
Individuals using a medical pacemaker should consult with a physician before using the Rice Cooker.
Using the Rice Cooker may affect a pacemaker.
IMPORTANT
● Do not cover the Main Body, especially the Steam Vent, with a cloth or other object.
Doing so may cause breakdown.

- Do not operate the Rice Cooker if rice or other matter is stuck on the inside of the Main Body, the outside surface of the Inner Cooking Pan or the Side Sensor.
Doing so may burn the rice or otherwise cause imperfect cooking.
IMPORTANT (cont.)
- Do not place electronics or objects that are susceptible to magnets in close range of the Rice Cooker.
Doing so may cause interference with TV, radio, computer, intercom, transceiver, telephone, etc. It may also erase magnetically recorded data (credit card, train pass, audio tape, etc.).
● Always hold the Rice Cooker by the Handle when carrying it. Do not tilt the Main Body. Doing so may cause the contents to spill. - Do not damage, drop or deform the Inner Cooking Pan. A damaged Inner Cooking Pan may not cook properly.
- Do not splash the Rice Cooker with water or place it on top of something wet.
Doing so may cause electric shock or breakdown.
● Do not cook when the Inner Cooking Pan is empty. Doing so may cause breakdown of the Rice Cooker. -
Do not use the Rice Cooker on top of an induction heating cooker. Doing so may cause breakdown.
● Do not use the Rice Cooker in direct sunlight. Doing so may cause discoloration of the Rice Cooker. -
Do not unplug the Power Plug from the electrical outlet during cooking. Steam may billow out, which can be dangerous.
- Do not use the Rice Cooker where its steam may come into contact with other electrical appliances. The steam may cause fire, malfunction, discoloration or deformation of other electrical appliances.
● Clean the Rice Cooker and the surrounding area before using it. This Rice Cooker is equipped with the Air Intake Duct and Exhaust Duct to improve function and performance, but if dust or insects enter the Air Intake Duct or Exhaust Duct, the Rice Cooker may malfunction. If the Rice Cooker malfunctions due to insects, etc. entering the Air Intake Duct or Exhaust Duct, there will be a charge for repairs.
● This appliance is intended for household use and similar applications listed below.
- Staff (employee) kitchen area in shops, offices and other working environments.
*This appliance is not intended for use by many unspecified people for a long period of time.
This appliance must not be used in the following areas.
· Farm houses.
- By clients in hotels, motels and other residential type environments.
- Bed and breakfast type environments.
ABOUT THE INNER COOKING PAN
In order to use the Inner Cooking Pan for many years to come, please obey the following.
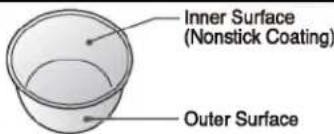
Inner Surface (Nonstick Coating)
The Nonstick Coating can peel off if damaged. Please take special care to prevent damage and follow these precautions

- Remove foreign matter (such as stones) from the rice before cleaning.
- Do not use utensils such as whisks to clean the rice.
● Do not place a metal strainer in the Inner Cooking Pan when cleaning rice.
● Use the Inner Cooking Pan only for this Rice Cooker.

→ pg. 23
- Do not place utensils or dishes inside the Inner Cooking Pan.
- Do not place in a dishwasher or dish dryer.
● Clean the Inner Cooking Pan immediately after using any seasonings.
● Only use soft cleaning implements such as a sponge when cleaning.

- Do not use such items as thinner, abrasive cleaners, bleach, scrubbing brushes (nylon, metal, etc.), melamine sponges or sponges with a nylon surface.

The Nonstick Coating may wear out with use.
●The Nonstick Coating may eventually discolor or peel off. This will not affect the cooking / Keep Warm performances or its sanitary properties, and is harmless to your health.
- If concerned with the peeling of the Nonstick Coating or if the Inner Cooking Pan deforms, please replace it by purchasing a new one. → pg. 32
Outer Surface
● Heat may cause some discoloration, but this does not affect the cooking results.
● The outer surface touches important sensitive sensors. Be careful not to allow it to get dirty or damaged.
- Note that firmly pushing the bottom surface of the Inner Cooking Pan against a sink, table, or similar items may damage or discolor such items.
PART NAMES AND FUNCTIONS

PART NAMES AND FUNCTIONS (cont.)

Spatula
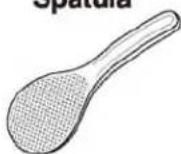
Spatula Holder


Measuring Cups
For measuring most types of rice (1 Cup = approx. 6.1 oz./approx. 180 mL)

For measuring rinse-free white rice only (Green Cup) (1 Cup = approx. 5.8 oz./approx. 171 mL)
TIPS FOR COOKING DELICIOUS RICE
● Measure rice accurately
Be sure to use the Measuring Cup provided, as other measuring cups may differ. Level the rice off at the top of the cup to maintain accuracy.
● Clean rice quickly Prepare a bowl to pool water
① Rinse rice .... First, pour plenty of water into the Inner Cooking Pan from the bowl and stir the rice loosely by hand 2 or 3 times (for 10 seconds or less). Drain the water immediately afterwards. Repeat twice.
2 Wash rice .... Wash by stirring the rice by hand 30 times, pour plenty of water from the bowl and stir the rice loosely again. Drain the water immediately afterwards. Repeat this washing process 2-4 times.
③ Rinse rice .... Lastly, pour plenty of water from the bowl and rinse the rice. Repeat twice.
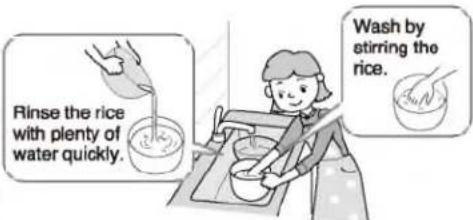
(Complete steps ①-③ within 10 minutes.)
- Use a different method to wash jasmine white rice and steel cut oatmeal if such a method is written on the bag containing the rice or oatmeal. If no washing method is written on the bag, follow the instructions given above.
Warning!
Do not clean the rice or adjust the amount of water using hot water (95°F / 35°C or above). Doing so will cause the rice to be cooked improperly.
● Adjust the amount of water accordingly
Be sure to adjust the amount of water on a flat surface. The water scale level is a guideline. Adjust the amount of water according to preference, rice type, and crop age.
| Type of Rice | New crop | Old crop |
| Water Adjustment | Reduce water slightly from the normal level | Add a little water to the normal level |
- If you add too much water, it may boil over through the Steam Vent.
● Do not use strongly alkalized ionic water
Do not use alkalized ionic water that is over pH 9. Rice cooked with strongly alkalized ionic water may appear yellow or become too glutinous.
When Cooking 6 Cups of White Rice or Rinse-Free Rice

● Stir and loosen rice immediately after cooking has completed
Doing so releases excess moisture, resulting in rice that is perfectly cooked with a fluffy texture. Loosen the rice within 10 minutes after cooking completes. Not loosening the rice may cause it to clump, become too glutinous or burn.
TIPS FOR USING THE KEEP WARM MODE
● When keeping rice in the Inner Cooking Pan for later consumption, use the Keep Warm mode.
- If rice is left in the Inner Cooking Pan even though the Power Plug has been disconnected from the electrical outlet or Keep Warm mode has been cancelled, the rice may develop a foul odor or condensed moisture may fall on the rice, making it sticky.
● To prevent the rice from becoming dry, wet, developing an odor or turning yellow, do not use the Keep Warm mode for the following.
- Keeping a small amount of rice warm for a long period. - Keeping rice warm for 12 hours or more in Regular Keep Warm mode or 24 hours or more in Extended Keep Warm mode. (This may differ depending on the menu setting.)
- Adding additional rice while keeping rice warm.
● Reheating cold rice.
- Keeping porridge, congee, or steel cut oatmeal warm.
- Keeping rice warm when it contains additional ingredients and seasonings (mixed rice or sweet rice).
- Keeping foods other than rice warm such as croquettes or miso soup.
- Keeping rice warm with the Spatula left inside the Rice Cooker.
● When keeping a small amount of rice warm, gather the rice toward the center of the Inner Cooking Pan.
- As the amount of rice kept warm decreases, the rice may dry or become wet. To minimize this, gather the rice toward the center of the Inner Cooking Pan while keeping warm.

HOW TO SET THE CLOCK
If the clock is inaccurate, set the correct time as shown below.
●The clock is displayed in 24-hour (military) time.
e.g. If the current time is 15:01 but displays 14:56.
1 Set the Inner Cooking Pan and insert the Power Plug into an electrical outlet.
2 Press the ▲ or ▼ button to initiate the Time Setting and adjust the clock to the current time while the time display is blinking.

: Each press advances the time in 1-minute increments.
: Each press reverses the time in 1-minute increments.
- Press and hold either button to quickly adjust in 10-minute increments.
3 The time display will stop blinking after 3 seconds, indicating the Time Setting is completed.
If the time display still does not show the current time, repeat Step 2 to readjust the time.

- Although the clock is set before shipment from the factory, certain conditions such as room temperature may cause it to display an inaccurate time.
- If the clock is inaccurate, cooking will not be completed at the time you set for the Timer.
● The clock cannot be changed during Cooking, Reheating, Regular Keep Warm, Extended Keep Warm or Timer Cooking. - Although the clock display turns off when the Power Plug is disconnected, the current time will reappear when the Power Plug is connected again.
SOUND SIGNALS AND HOW TO CHANGE THEM
This product is equipped with a Sound Signal function, which will inform you when the Rice Cooker begins cooking, when the Timer is set, or when cooking has completed.
Types of Sound Signals
You can choose the Sound Signals from the following
| Indication\Types of Sound Signals and their meanings | Melody | Beep | Silent |
| Default setting at the time of shipment from the factory. | Choose this setting to change from a Melody. | Choose this setting to disable the Sound Signal. | |
| Cooking has begun | “Twinkle, Twinkle, Little Star” | a beep | |
| Timer is set | “Twinkle, Twinkle, Little Star” | a beep | |
| Cooking/Reheating has completed | “Amaryllis” | beeps 5 times | no sound |
| The Outer Lid is not closed during Keep Warm | four short beeps | no sound | |
| The rice has not been loosened after cooking completion | four short beeps | no sound | |
How to Change the Sound Signal
1 Set the Inner Cooking Pan and insert the Power Plug into an electrical outlet.
2 Hold the TIMER button for more than 3 seconds.
Each time the TIMER button is held for more than 3 seconds, the Sound Signal will change.
● You cannot change the Melody Signal for the initiation of Reheating.
● You cannot change the Sound Signal during Cooking, Reheating, Regular Keep Warm, Extended Keep Warm or Timer Cooking.
- If you find it difficult to change/select the Sound Signal, please start over from Step 1.
![graph LR A["① Melody\nIt will play "Amaryllis" when the sound setting is completed."] --> B["② Beep\nIt will beep 3 times when the sound setting is completed."] B --> C["③ Silent\nIt will beep 1 time when the sound setting is completed."] C --> A](/content/2026/05/955487/images/244fae712bc2e70ae7fe325d2aa632128e776166e2c6ba682d00eeba467b32c9.jpg)
3 The setting is completed when the desired Sound Signal is heard.
● The selected Sound Signal is stored even if the Power Plug is disconnected from the electrical outlet.
● The Menu setting at the time of shipment from the factory is WHITE (REGULAR).
● Please wash the Inner Cooking Pan, Inner Lid Set, Steam Vent Set and accessories before initial use. → pg. 23-27
Check the parts of the Main Body before cooking.
Check that all parts are clean and free of foreign matter before cooking. Make sure that rice or other matter is not stuck to the parts illustrated on the right. → pg. 24
● Rice or other matter stuck on these areas may prevent the Outer Lid from closing completely. It may also cause steam to come out from the gap between the Outer Lid and the Main Body, or the Outer Lid may open suddenly and rice or other ingredients may boll over. Additionally, for safety purposes, it may prevent the Rice Cooker from cooking.
1
Measure the rice with the provided Measuring Cup.
Overfill the Measuring Cup with rice, then level off.

WHEN COOKING RINSE-FREE RICE
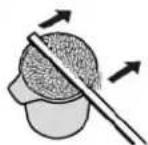
Rinse-free rice → Use the green Measuring Cup for rinse-free white rice. (1 Cup = approx. 5.8 oz./approx. 171 mL)
2
Clean the rice and adjust the amount of water.
①Clean the rice. → See "TIPS FOR COOKING DELICIOUS RICE" on pg. 9
②On a flat surface, pour water over the rice in the Inner Cooking Pan, filling to the water measure line that matches the number of cups of rice you are cooking and the Menu setting. → pg. 14
②For an accurate measurement, level the surface of the rice.
● The rice may be cooked immediately after cleaning rice, as soaking is not required. Soaking the rice will soften the texture of the rice.
● The water level serves as a standard guideline and the amount of water should be adjusted according to preference. (Adjust 1-2 mm above or below the indicated water level.)
WHEN COOKING RINSE-FREE RICE
Add enough water to cover the rice and gently stir 2-3 times to separate the grains, and then adjust the amount of water.
Use the same water level for WHITE.
● Depending on the rice polishing method, starch may be left on the surface of the rice. If the water becomes cloudy, change the water and rinse once or twice to prevent scorching, boiling over or imperfect cooking.
3
Place the Inner Cooking Pan into the Main Body, and attach the Inner Lid Set and Steam Vent Set. Close the Outer Lid.
Be sure to wipe moisture and foreign matter off the outer surface of the Inner Cooking Pan, the inside of the Main Body, the Inner Lid Set, and the Steam Vent Set.
● Be sure to attach the Inner Lid Filter to the Inner Lid Set.
● The Outer Lid may not close smoothly as it is designed to lock during cooking for safety purposes. Push down on the Outer Lid until you hear it click shut.
Insert the Power Plug into an electrical outlet.
● The clock will appear when you connect the Plug.
Select the desired Menu setting by pressing the Ⓜ MENU button.

WHEN COOKING RINSE-FREE RICE
Press the RINSE FREE button, and RINSE FREE will appear on the Display. Select the menu by pressing the MENU button.
● JASMINE, CONGEE, BROWN, GABA BROWN, and STEEL CUT OATMEAL menu settings cannot be selected while RINSE-FREE is selected. → See "HOW TO SELECT THE RINSE-FREE SETTING" on pg. 13.
Each press of the button changes the item that is indicated on the Display; WHITE (REGULAR) → WHITE (SOFTER) → WHITE (HARDER) → UMAMI → QUICK → MIXED → SUSHI/SWEET → JASMINE → PORRIDGE → CONGEE → BROWN → GABA BROWN → STEEL CUT OATMEAL.
- Menu settings such as WHITE (REGULAR, SOFTER, HARDER), UMAMI, JASMINE, BROWN, and GABA BROWN will remain selected until you change the setting.
Press the (START) button.
The START/REHEAT light will turn on and the melody/beep to start cooking will sound. The Display shows the estimated time until cooking completion in minutes.
● Rice or other matter stuck on the Rice Cooker may prevent the Outer Lid from closing completely. It may also cause steam to come out from the gap between the Outer Lid and the Main Body, or the Outer Lid may open suddenly and rice or other ingredients may boil over. Additionally, for safety purposes, it may prevent the Rice Cooker from cooking.
● Four short beeps will sound if the Outer Lid is not closed completely. Please note that this does not indicate a malfunction. Close the Outer Lid completely until you hear it click shut.
● Make sure the Rice Cooker is not in Keep Warm mode, then press the START/REHEAT button. If the Keep Warm light is on, the reheating process will start.
→ See pg. 18.
- Press the TIME SETTING ▲ or ▼ button to check the current time during cooking. If the stored lithium battery is dead and the current time was not set, the Display will not show the current time.
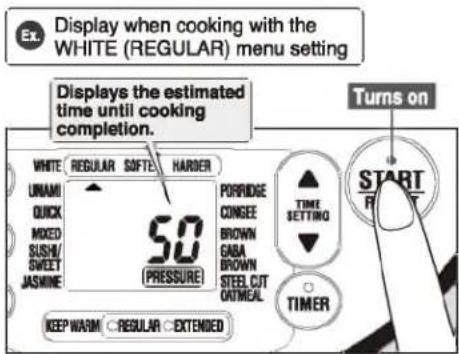
● The estimated time until cooking completion may differ from the actual time required. The actual time until cooking completion may vary depending on factors such as the room or water temperature, the voltage, or the water measurement.
● The Rice Cooker will make adjustments to the estimated time until cooking completion when it reaches the steaming process. The estimated time until cooking completion may increase or decrease suddenly during this process.
7
When the melody or beep to indicate cooking completion sounds, stir and loosen the rice immediately to give the rice a deliciously fluffy texture.
Before opening the Outer Lid, make sure that steam is not coming out from the Steam Vent and that the PRESSURE Indicator has disappeared from the Display.
After cooking has completed, the Rice Cooker automatically switches to the Keep Warm mode and the REGULAR KEEP WARM light turns on. The Display will show the elapsed Keep Warm time in hour(s).
Stir the rice and loosen it immediately to release excessive moisture, thereby preventing the rice from clumping, becoming too wet, or burning.

● Be careful not to burn yourself when stirring and loosening rice.
- If you cancel the Keep Warm mode followed by switching back to the Keep Warm mode, the Display shows 0h.
● Four short beeps will sound if the rice has not been loosened after cooking completes. Please note that this does not indicate a malfunction. Loosen the rice and close the Outer Lid.
● The sound setting to indicate cooking completion can be changed. If changed to silent mode, the beeps that remind you to close the Outer Lid or to loosen the rice will not sound. → pg. 10
8
After use, press the (CANCEL) button, then unplug the Power Cord.
● Do not begin cleaning the Rice Cooker until the Main Body has cooled.
Be careful that the contents do not boil over.
When adjusting the amount of water to the PORRIDGE, CONGEE, or STEEL CUT OATMEAL Water Level, do not cook using Menu settings other than PORRIDGE, CONGEE, or STEEL CUT OATMEAL. Using any other Menu setting may cause the contents to boil over.
● The PORRIDGE, CONGEE, and STEEL CUT OATMEAL menu setting selections will not be saved. When cooking porridge, congee, or steel cut oatmeal, select the corresponding menu setting each time.
NOTE
You can switch Sound Signals (melody, beep, silent) that alert you when certain actions occur.
→ See "SOUND SIGNALS AND HOW TO CHANGE THEM" on pg. 10
IMPORTANT
Before opening the Outer Lid, make sure that steam is not coming out from the Steam Vent and that the PRESSURE indicator has disappeared from the Display.
-
If it becomes necessary to open the Outer Lid during cooking or to cancel cooking, press and hold the CANCEL button for 1 second or longer. Be cautious of the Steam Vent as steam will be forced out.
● Even if the PRESSURE indicator has disappeared, if you feel resistance when pressing the Open Button to open the Outer Lid, do not force it open. Allow the Rice Cooker to cool, and then try again. If you force the Outer Lid open, the contents may boil over, which could cause burns. -
When cooking more than one pot of rice consecutively, or cooking right after cancelling the Keep Warm mode, allow the Rice Cooker to cool for 50 minutes or longer. If the Main Body and the Outer Lid are hot, the rice may not cook well.
Cooking rice without first allowing the Rice Cooker to cool may lead to a longer cooking time. (Up to approximately 60 minutes.) Also, the estimated time until cooking completion may not be displayed for some time in this situation.
REMARKS
To cool the Main Body and Outer Lid quickly, please try the following:
- Fill the Inner Cooking Pan with cold water and place it in the Main Body. - Open the Outer Lid, remove the Inner Lid Set and allow the Radiator Plate to cool.
HOW TO SELECT THE RINSE-FREE SETTING
TO SELECT
THE RINSE-FREE SETTING
TO CANCEL
THE RINSE-FREE SETTING
Press the RINSE-FREE button, and RINSE-FREE will appear on the Display.
- If the RINSE-FREE button is pressed while JASMINE, CONGEE, BROWN, GABA BROWN, or STEEL CUT OATMEAL menu setting is selected, the menu setting will automatically change to WHITE (REGULAR).
Press the RINSE FREE button, and RINSE-FREE will
disappear from the Display.

*Capacity is measured in the supplied rice measuring cup, using uncooked rice.
| Type of rice you want to cook | Type of rice to use | Menu Setting | Water Level | Cooking Capacity [cups]* | Notes and Advice |
| White Rice Regular | Short/Medium Grain White Rice, Rinse-Free Rice | WHITE REGULAR | WHITE | 1.0 L: 0.5-5.5 | • Cooks white rice to a regular consistency. |
| White Rice Softer | Short/Medium Grain White Rice, Rinse-Free Rice | WHITE SOFTER | • Cooks white rice to a more glutinous and softer texture than WHITE (REGULAR). | ||
| White Rice Harder | Short/Medium Grain White Rice, Rinse-Free Rice | WHITE HARDER | 1.8 L: 1-10 | • Cooks white rice to a less glutinous and harder texture than WHITE (REGULAR). | |
| Umami | Short/Medium Grain White Rice, Rinse-Free Rice | UMAMI | • Soaks and steams rice longer for a sweeter taste. | ||
| Quick Cooking | Short/Medium Grain White Rice, Rinse-Free Rice | QUICK | • Cooks white rice faster. Please note that the rice texture may be slightly harder. | ||
| Mixed Rice | Short/Medium Grain White Rice, Rinse-Free Rice | MIXED | WHITE | 1.0 L: 0.5-41.8 L: 2-6 | • The recommended amount of ingredients should be 30-50% of the rice weight.• Chop ingredients into small pieces and place evenly on top of the rice (do not mix into the rice).• Seasonings should be mixed with soup stock or water and then added to the rice. After adjusting the amount of water, stir thoroughly. If the seasonings are added directly to the rice or if not mixed properly, scorching or imperfect cooking may occur. |
| Sushi Rice | Short/Medium Grain White Rice, Rinse-Free Rice | SUSHI/ SWEET | SUSHI | 1.0 L: 0.5-5.51.8 L: 1-10 | • Rice is firmer than rice cooked using the WHITE (HARDER) setting. |
| Sweet Rice | Sweet Rice Only or Sweet Rice + Short/Medium Grain White Rice or Rinse-Free Rice | SUSHI/ SWEET | SWEETWhen cooking sweet rice mixed with white rice, use slightly above the water level for SWEET. | 1.0 L: 1-41.8 L: 2-6 | • Wash the rice and drain it in a strainer for approximately 30 minutes.• Place ingredients on top of rice after adjusting the water.• Seasonings should be mixed with soup stock or water and then added to the rice. After adjusting the amount of water, stir thoroughly. |
| Jasmine White Rice | Jasmine White Rice | JASMINE | JASMINE | 1.0 L: 0.5-5.51.8 L: 1-10 | • Depending on the rice brand, it may be slightly harder than normal. |
| Porridge | Short/Medium Grain White Rice, Rinse-Free Rice | PORRIDGE | PORRIDGE | 1.0 L: 0.5-1.51.8 L: 0.5-2.5 | • The recommended amount of ingredients should be 30-50% of the rice weight.• Chop ingredients into small pieces and place on top of rice without mixing them into the rice.• Ingredients that do not cook easily should not be used in large amounts.• Boil green leaf vegetables separately and add them after the rice porridge has finished cooking.• Brown rice cannot be used to make porridge. |
| Congee | Jasmine White Rice | CONGEE | CONGEE | 1.0 L: 0.5-11.8 L: 0.5-1.5 | • The recommended amount of ingredients should be 30-50% of the rice weight.• Chop ingredients into small pieces and place on top of rice without mixing them into the rice.• Ingredients that do not cook easily should not be used in large amounts.• Boil green leaf vegetables separately and add them after the rice porridge has finished cooking.• Brown rice cannot be used to make porridge. |
| Brown Rice | Short/Medium Grain Brown Rice | BROWN | BROWN | 1.0 L: 1-41.8 L: 2-8 | • Cooks brown rice.• If white rice or rinse-free rice is mixed with brown rice, it may boil over or imperfect cooking may occur. Therefore, a mixture like this is not recommended. |
| GABA Brown Rice | Short/Medium Grain Brown Rice | GABA BROWN | • Activates brown rice for increased nutritional values. → pg. 15 | ||
| Steel Cut Oatmeal | Steel Cut Oatmeal | STEEL CUT OATMEAL | STEEL CUT OATMEAL | 1.0 L: 0.5-2.51.8 L: 1-3 | • Adjust the amount of water according to your preference.For firmer oats → Use less water.For a more moist porridge → Use more water. |
- When using rinse-free rice, see pg. 11 & 12 "WHEN COOKING RINSE-FREE RICE".
- When measuring rinse-free rice, use the provided green Rinse-Free Measuring Cup.
ESTIMATED COOKING TIME/MENU SETTINGS THAT APPLY PRESSURE
| Menu Settings that Apply Pressure | Regular Rice | Rinse-Free Rice | ||||
| 1.0 L model | 1.8 L model | 1.0 L model | 1.8 L model | |||
| WHITE | REGULAR | ● | Approx. 49 minutes - 55 minutes | Approx. 52 minutes - 58 minutes | Approx. 51 minutes - 58 minutes | Approx. 53 minutes - 60 minutes |
| SOFTER | ● | Approx. 52 minutes - 58 minutes | Approx. 55 minutes - 61 minutes | Approx. 54 minutes - 60 minutes | Approx. 57 minutes - 66 minutes | |
| HARDER | ● | Approx. 47 minutes - 55 minutes | Approx. 48 minutes - 57 minutes | Approx. 47 minutes - 57 minutes | Approx. 52 minutes - 60 minutes | |
| UMAMI | ● | Approx. 67 minutes - 74 minutes | Approx. 70 minutes - 82 minutes | Approx. 70 minutes - 77 minutes | Approx. 78 minutes - 85 minutes | |
| QUICK | ● | Approx. 26 minutes - 35 minutes | Approx. 31 minutes - 46 minutes | Approx. 30 minutes - 43 minutes | Approx. 32 minutes - 47 minutes | |
| MIXED | ● | Approx. 65 minutes - 72 minutes | Approx. 57 minutes - 64 minutes | Approx. 68 minutes - 74 minutes | Approx. 57 minutes - 64 minutes | |
| SUSHI | — | Approx. 57 minutes - 67 minutes | Approx. 59 minutes - 69 minutes | Approx. 57 minutes - 67 minutes | Approx. 62 minutes - 71 minutes | |
| SWEET | — | Approx. 57 minutes - 65 minutes | Approx. 61 minutes - 67 minutes | Approx. 55 minutes - 63 minutes | Approx. 62 minutes - 68 minutes | |
| JASMINE | ● | Approx. 52 minutes - 59 minutes | Approx. 54 minutes - 63 minutes | — | ||
| PORRIDGE | — | Approx. 62 minutes - 68 minutes | Approx. 61 minutes - 76 minutes | Approx. 62 minutes - 68 minutes | Approx. 61 minutes - 76 minutes | |
| CONGEE | — | Approx. 83 minutes - 91 minutes | Approx. 82 minutes - 91 minutes | — | ||
| BROWN | ● | Approx. 76 minutes - 83 minutes | Approx. 64 minutes - 80 minutes | — | ||
| GABA BROWN | ● | Approx. 198 minutes - 205 minutes | Approx. 200 minutes - 214 minutes | — | ||
| STEEL CUT OATMEAL | — | Approx. 59 minutes - 66 minutes | Approx. 60 minutes - 66 minutes | — | ||
● The above table is based on the testing conditions of 120 volts, a room temperature of 68° F ( 20° C), and water at a starting temperature of 64.4° F ( 18° C).
● The above lengths of time are measured from Cooking until the Keep Warm process. Actual times may vary depending on the voltage, room temperature, season, and the amount of water used.
● The MIXED menu setting requires a longer cooking time to allow the rice to absorb seasonings. (Takes about 30 minutes for preheating.)
ACTIVATED BROWN RICE (GABA BROWN)
This Rice Cooker has two settings for cooking brown rice. The GABA BROWN setting on the menu activates brown rice for increased nutritional value.
GABA BROWN SETTING:
When GABA BROWN is selected on the menu, the Rice Cooker will begin activating the brown rice, after which it will start cooking automatically. During the brown rice activation process, the temperature in the Inner Cooking Pan is kept at approx. 104°F(approx. 40°C) for approx. 2 hours. Cooking will take longer to complete.
→ See "ESTIMATED COOKING TIME".
By activating brown rice, GABA (gamma-aminobutyric acid), a naturally occurring nutrient in brown rice, increases to 150% of the amount contained in non-activated brown rice. This process also makes brown rice softer, thus making it readily edible.
※ What is GABA?
GABA (gamma-aminobutyric acid) is a type of amino acid said to lower blood pressure and relieve stress.
You can choose the Regular Keep Warm mode or Extended Keep Warm mode by pressing the KEEP WARM button while the KEEP WARM light is on.
● The Extended Keep Warm mode is not available during the following (the Rice Cooker will beep and automatically start the Regular Keep Warm mode)
● MIXED, PORRIDGE, CONGEE, BROWN, GABA BROWN, STEEL CUT OATMEAL menu settings.
- If 12 hours of Regular Keep Warm has already elapsed.
- If the temperature of the Inner Cooking Pan is low because the Keep Warm mode has been cancelled, or power failure.
![graph TD A["KEEP WARM button"] --> B["MENU"] B --> C["KEEP WARM"] C --> D["QUICK MIXED SUSH/SWEET JASMINE"] D --> E["CONGEB BROWN GABA BROWN STEEL CUT OATMEAL"] C --> F["KEEP WARM: ● REGULAR ● EXTENDED"] F --> G["KEEP WARM lights"]](/content/2026/05/955487/images/09a504f3aa352dfcf1b3dd835afb641790c16241e99c8cad8004f2c09585686f.jpg)
REGULAR KEEP WARM
This keeps the rice warm at a higher temperature, so the rice develops odors less easily.
When cooking completes, the Rice Cooker automatically switches to Regular Keep Warm mode and the REGULAR KEEP WARM light turns on.
● To turn on the Regular Keep Warm mode when the Rice Cooker is turned off, press the KEEP WARM button.
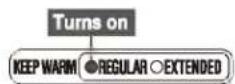
EXTENDED KEEP WARM
Use this function when keeping rice warm for a longer period of time. Drying and yellowing of rice will be reduced by maintaining the temperature slightly lower.
This function can be activated during Regular Keep Warm mode.
1 Check to make sure the REGULAR KEEP WARM light is on.
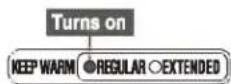
2 Press the KEEP WARM button.

The EXTENDED KEEP WARM light will turn on.
How to change from Extended Keep Warm mode to Regular Keep Warm mode

The setting will return to Regular Keep Warm mode and the REGULAR KEEP WARM light will turn on.
- When it returns to Regular Keep Warm mode, the fan will start to adjust the temperature.
ABOUT KEEP WARM TIMES
- Be sure to observe the length of time for which rice can be kept warm as shown in the table below.
- You cannot select EXTENDED KEEP WARM for menus marked with a “—”. REGULAR KEEP WARM is automatically selected.
- After cooking, all menus default to Keep Warm mode. However, do not use Keep Warm mode for menus with an "X" below. Doing so can cause spoilage and foul odors.
| Menu KEEP WARM | WHITE (REGULAR, SOFTER, HARDER)· UMAMI·QUICK·SUSHI·JASMINE | MIXED·SWEET*1·PORRIDGE· CONGEE·STEEL CUT OATMEAL | BROWN· GABA BROWN |
| REGULAR KEEP WARM | Up to 12 hours | × | Up to 12 hours |
| EXTENDED KEEP WARM | Up to 24 hours | — | — |
- For each menu setting, after the time listed in the table above has elapsed, the number will begin to blink as a warning. Consume the rice as soon as possible.

- For the menus with an "X" above, the number will begin blinking at "0(h)". Do not use Keep Warm mode for these menus.
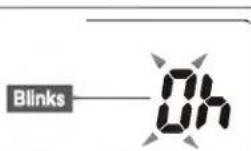
*1 Since sweet rice is cooked using the SUSHI/SWEET menu setting (see pg. 14), the number on the display will not begin blinking at "0(h)". However, do not keep this kind of rice warm.
HOW TO KEEP RICE WARM AGAIN
■ When you want to keep rice warm after canceling the Keep Warm mode.
Press the

button.
The REGULAR KEEP WARM light turns on, and the time elapsed display returns to "0h".
- If the temperature of the rice and the Inner Cooking Pan are low, do not keep warm again. Trying to keep contents warm again when the rice and Inner Cooking Pan temperatures are low will cause "0(h)" to blink.
Turns on
Turns on
When you are concerned about the odor
● Foul odors or the growth of bacteria may occur depending on how well the unit is cleaned, the room temperature based on the season or usage environment, frequent opening and closing of the Outer Lid, the type of rice used, or the way the rice was cleaned. If you are concerned about odors, cleaning the Rice Cooker according to "THE INTERIOR" on pg. 24 and then using REGULAR KEEP WARM should be effective. It can be even more effective to increase the warming temperature, as described under "Change the Keep Warm Temperature" below.
NOTE
- If you want to know the current time during Keep Warm mode, press the ▲ or ▼ button and the Display will switch. Press the ▲ or ▼ button again to return to the display for Keep Warm time elapsed. If you do not return the display to the Keep Warm time elapsed, the next time you cook rice, the Keep Warm time elapsed will not be displayed. If the Keep Warm time elapsed display is blinking, you cannot switch.
IMPORTANT
- When keeping rice in the Inner Cooking Pan for later consumption, use the Keep Warm mode.
When you are concerned about foul odors, color changes or dryness in the rice...
Change the Keep Warm Temperature
Depending on the region or environment, the Keep Warm temperature may lower, and this can cause foul odors in the rice. If the Keep Warm temperature rises, this can cause the rice to change color or become dry. If the rice smells, changes color or becomes dry, try changing the Keep Warm temperature settings as follows.
● REGULAR KEEP WARM and EXTENDED KEEP WARM will change at the same time.
■ How to Change the Keep Warm Temperature Settings
1
Set the Inner Cooking Pan and insert the Power Plug into an electrical outlet.
The current time is displayed.

3
Press the ▲ or ▼ to set the temperature.
If you press the ▲, the setting changes in the direction of the ➡. If you press the ▼, the setting changes in the direction of the ➡.
If you are worried about odors in the rice, select [1]-[3] to increase the Keep Warm temperature.

If you are worried about changes in color or dryness in the rice, select [-1]–[-3] to decrease the Keep Warm temperature.
2
Press and hold the RINSE-FREE button for 3 seconds or longer.
You will hear 3 beeps and the current setting will blink. (Default setting is "0".)
Press and hold for 3 seconds or longer.


4
Press the RINSE-FREE button.
The setting is saved when the setting stops blinking and you hear 3 beeps.
After the beeps, the display returns to the current time.


NOTE
● Settings cannot be changed during Cooking, Reheating, Regular Keep Warm, Extended Keep Warm or Timer Cooking.
- If you are unable to successfully complete the operation the first time, start again from Step 1.
- Once you change the setting, that setting will be saved even if you unplug the Power Plug from the electrical outlet.
- If 15 seconds or more elapse without any action while you are changing the setting, the display will revert to the current time and the setting will not be changed.
If there is no improvement after you change the Keep Warm temperature setting, return it to the original setting, as the changed setting may cause odors, color changes or dryness.
REHEATING RICE
You can use this function during Regular Keep Warm mode or Extended Keep Warm mode.
●This Reheat function is for reheating the rice during Keep Warm mode to make the rice hotter. Particularly, when the rice is kept warm at a lower temperature by the Extended Keep Warm mode, the Reheat function will reheat the rice to the best serving temperature.
●You can reheat the rice only when the KEEP WARM light is on.
1
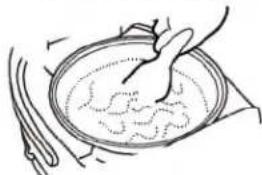
Loosen and level the surface of the rice that is being kept warm.
● Be sure to loosen the rice to prevent scorching or the rice from becoming hard.
● To reheat a small amount of rice, add 1 tablespoon of water for each bowl of rice (approx. 5.5 oz./approx. 160 g), mix well, and gather the rice toward the center of the Inner Cooking Pan. Doing so will minimize dryness.
● Be careful not to burn yourself when stirring and loosening rice.

2
Make sure that the KEEP WARM light is on, and
Press the

button.
Turns on
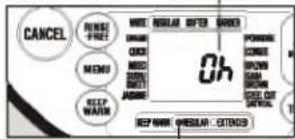
KEEP WARM REGULAR EXTENDED
If you press the START/REHEAT button when the REGULAR and EXTENDED KEEP WARM lights are off, the cooking process will start.
A melody will sound, and reheating will start.
The KEEP WARM light turns off, the START/REHEAT light blinks, and the display looks like the one in the illustration.
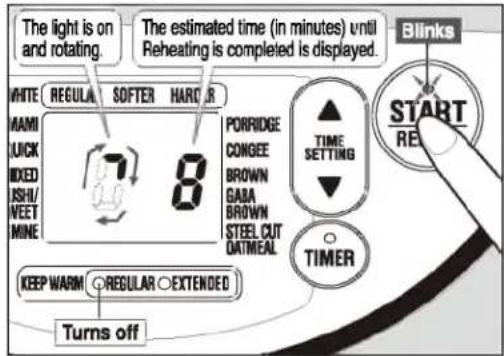
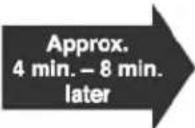
Standard times required for reheating
The melody sounds and Reheating is finished.
The REGULAR KEEP WARM light turns on, the START/REHEAT light turns off, and the Display returns to the screen from before reheating.
3
Loosen the rice.
● Loosen and level the surface of the rice, as the rice at the bottom may be harder.
● Be careful not to burn yourself when stirring and loosening rice.
Do not reheat for the following cases
- Do not use the Reheat function to reheat food other than white rice, as reheating other types of rice may cause scorching or discoloring.
● Do not repeat the Reheat function as doing so may cause scorching or dryness. - Do not use the Reheat function if the amount of rice left over is above water level 3 (for 1.0L model) or 6 (for 1.8L model) for WHITE as the rice may not be warmed adequately.
- Do not use the Reheat function if the rice is cold or the temperature of the Inner Cooking Pan is too low as doing so may cause scorching, foul odors or the rice may become hard.
To cancel the Reheat mode
Press
the
CANCEL
button.
The START/REHEAT light turns off, and the current time display returns.
To cancel the Reheat mode and return to Keep Warm mode
Press
the

button.
The START/REHEAT light turns off, and the KEEP WARM light turns on.
USING THE TIMER TO COOK RICE
USING THE TIMER
- This function sets the Rice Cooker to automatically finish cooking by a specific time. Once set, the timer settings are stored in "Timer 1" or "Timer 2".
● The initial settings are 6:00 for "Timer 1", 18:00 for "Timer 2". - Set the clock to the current time before setting the Timer function. If the clock is inaccurate, the cooking will not be completed at the time you set for the Timer. → pg. 10
- For pre-cooking preparations, see steps 1 through 4 under "BASIC COOKING STEPS" on pg. 11-12
1
Press the MENU button to select the desired
Menu setting. → See step 5 under "BASIC COOKING STEPS" on pg. 12
● The Timer function is not available for QUICK and MIXED menu settings.
- Do not use the Timer function for SWEET.

When setting Timer 1 to "7:30". (Cooking with the WHITE (REGULAR) menu setting)
2
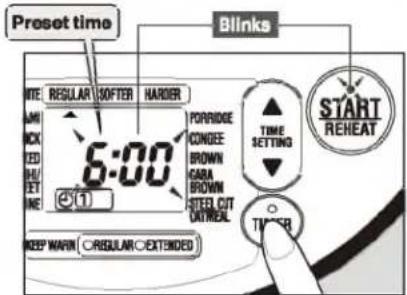
Press the ○TIMER button to select
①① (Timer 1) or ② (Timer 2).
The preset time for "Timer 1" and the START/REHEAT light will blink.
- Press the button again and the preset time for "Timer 2" will appear.
3
Press the ▲ or ▼ button to set a specific time to finish cooking.
▲ : Each press advances the time in 10-minute increments.
: Each press reverses the time in 10-minute increments.
● Press and hold the button to quickly adjust the time in 10-minute increments.
● The time can only be changed when the time display is blinking.
● You do not need to set the time again when using the same settings.

4
Press the START button.
The melody sounds and the Timer setting is complete.
The START/REHEAT light turns off, and the time you wish to finish cooking and the TIMER light turn on.
● The START/REHEAT button must be pressed to set the TIMER.
● Cooking will be completed at the specified time. → See step 7 under "BASIC COOKING STEPS" on pg. 13
● To cancel the Timer setting while using the Timer function, press the CANCEL button.

USING THE TIMER TO COOK RICE (cont.)
Suggested Lengths for the Timer Setting
| Regular Rice | Rinse-Free Rice | ||||
| 1.0 L model | 1.8 L model | 1.0 L model | 1.8 L model | ||
| WHITE | REGULAR | 1 hour 10 minutes – 13 hours | 1 hour 10 minutes – 13 hours | ||
| SOFTER | 1 hour 10 minutes – 13 hours | 1 hour 15 minutes – 13 hours | 1 hour 15 minutes – 13 hours | ||
| HARDER | 1 hour 10 minutes – 13 hours | 1 hour 10 minutes – 13 hours | |||
| UMAMI | 1 hour 25 minutes – 13 hours | 1 hour 35 minutes – 13 hours | 1 hour 30 minutes – 13 hours | 1 hour 35 minutes – 13 hours | |
| SUSHI | 1 hour 20 minutes – 13 hours | 1 hour 20 minutes – 13 hours | |||
| JASMINE | 1 hour 10 minutes – 13 hours | 1 hour 15 minutes – 13 hours | — | ||
| PORRIDGE | 1 hour 20 minutes – 13 hours | 1 hour 25 minutes – 13 hours | 1 hour 20 minutes – 13 hours | 1 hour 25 minutes – 13 hours | |
| CONGEE | 1 hour 40 minutes – 13 hours | — | |||
| BROWN | 1 hour 35 minutes – 13 hours | 1 hour 30 minutes – 13 hours | — | ||
| GABA BROWN | 3 hours 35 minutes – 13 hours | 3 hours 45 minutes – 13 hours | — | ||
| STEEL CUT OATMEAL | 1 hour 15 minutes – 13 hours | — | |||
IMPORTANT
- Do not use the Timer function if you are adding ingredients and/or seasonings to the rice. Ingredients may spoil or seasonings may settle to the bottom of the Inner Cooking Pan and your results may not be satisfactory.
- Be sure to set the Timer for 13 hours or less (8 hours or less for rinse-free rice and steel cut oatmeal), especially during summer, to prevent the soaked rice from spoiling due to the higher room temperature.
NOTE
● The estimated time until cooking completion will not be displayed when the Timer is set.
- If the Timer is set for less than the suggested length, a beep will sound, the Rice Cooker will start cooking immediately, and the estimated time until cooking completion will be displayed.
- Cooking may not complete at the set time if the temperature of the room or water is too low. In addition, the cooking time may be affected by the amount of water or voltage.
- When cooking using the Timer function, the rice absorbs extra moisture, which can make the rice softer or cause the bran to collect at the bottom and bum.
- If you want to know the current time while using the Timer function, press the ▲ or ▼ button and the Display will switch.
The measurements used in these Recipes
■ 1 Tablespoon = 0.5 oz. (15 mL)
■1 teaspoon = 0.2 oz. (5 mL)
■ Measure the rice with the provided Measuring Cup.
White rice, sweet rice, jasmine white rice, brown rice, and steel cut oatmeal....Use the clear Measuring Cup for most types of rice. (1 Cup = approx. 6.1 oz./approx. 180 mL)
Rinse-free rice……Use the green Measuring Cup for rinse-free white rice only. (1 Cup = approx. 5.8 oz./approx. 171 mL)
CONGEE
Menu Setting: CONGEE
1.0 L model Ingredients (4-5 servings)
0.5 cup Jasmine white rice
2 cans (29 oz.) Chicken Broth (33% reduced salt; 14.5 oz./can)
A 1\ tsp.\ Sesame oil \ 1/2\ Tbsp.\ Shaoxing wine (Chinese rice wine) \ Ginger (julienne cut) as needed \ 1\ piece Dried scallop meat
Salt as needed
White pepper as needed
Green onion (chopped into small pieces) to taste
1.8 L model ingredients (8-10 servings)
1 cup Jasmine white rice
4 cans (58 oz.) Chicken Broth (33% reduced salt; 14.5 oz./can)
A 2 tsp. Sesame oil 1 Tbsp. Shaoxing wine (Chinese rice wine) Ginger (julienne cut) as needed 2 pieces Dried scallop meat
Salt as needed
White pepper as needed
Green onion (chopped into small pieces) to taste
How to cook
1 Clean the jasmine white rice, add the chicken broth, pour water to 0.5 (for the 1.0 L model) or 1 (for the 1.8 L model) for

CONGEE, and then mix well from the bottom of the Inner Cooking Pan.
2 Place "A" on top of the ingredients from Step 1 and level the surface.
- Do not mix the ingredients with the rice. Changing the amounts of rice and ingredients may cause imperfect cooking.
3 Press the MENU button, select CONGEE, and then press the START/REHEAT button to start cooking.
4 When cooking is complete, season with salt and white pepper.
5 Serve in bowls and garnish with green onions as desired.
HAND-ROLLED SUSHI
Menu Setting: SUSHI/SWEET
When using rinse-free rice, select RINSE-FREE.
Ingredients (4-5 servings)
3 cups Rice
Mixed vinegar
4 Tbsp. Rice vinegar
1 Tbsp. Sugar
1-1/2 tsp. Salt
Suggested Toppings
Sashimi (tuna, squid, prawns, etc.)
Japanese pickles (e.g. pickled radish)
Avocado and ham
Natto (fermented soy bean) and green onions
Bacon and asparagus
Salmon roe, sea eel and rolled egg
Carrots, cucumbers and celery
Seaweed, wasabi (horse radish), soy sauce and pickled red ginger to taste
How to cook
1 Clean rice well and fill the Inner Cooking Pan with water to water level 3 for SUSHI.
2 Press the MENU button, select SUSHI/SWEET and press the START/REHEAT button to start cooking.
3 When cooking is complete, place the rice into a place the rice
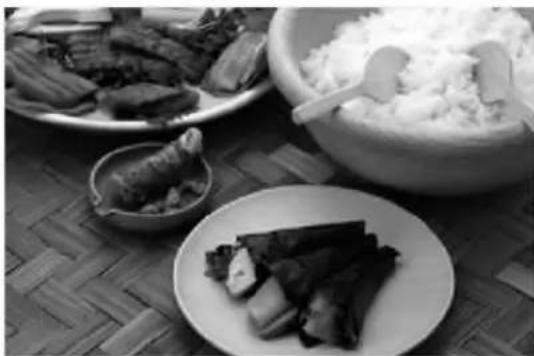
into a separate container (wiped with a clean wet cloth). Pour the mixed vinegar over the rice and mix thoroughly while cooling it with a fan.
- Hand-rolled sushi is simple and quick, wrapping your favorite sashimi, ingredients and sushi rice with Nori (seaweed). You can also use a lettuce leaf to wrap your hand-rolled sushi.
SWEET RICE COOKED WITH ADZUKI BEANS
Menu Setting: SUSHI/SWEET
Boil the adzuki beans, separate them into beans and stock, and then cool them at room temperature before use. Cooking adzuki beans that have not been boiled first will lead to the beans Increasing in size. This may lead to burns due to problems such as the Pressure Control Valve and Safety Valve clogging. When adjusting the amount of water, add the stock as a substitute for water.
Ingredients (4-5 servings)
3 cups Sweet rice
2 oz. (50 g) Adzuki beans
Salt with parched sesame to taste
How to cook
1 Clean rice and drain in a strainer for about 30 minutes.
2 Rinse the adzuki beans, put into a saucepan with 2 cups of water and boil for 2 minutes. Then add 3 cups of water and boil for 20 minutes until the beans become soft enough to break by pressing with your fingertip. Drain the beans but keep the stock.
3 Put the rice from Step 1 into the Inner Cooking Pan, add the stock from Step 2, and pour water to water level 3 for SWEET. Mix the ingredients well, stirring from the bottom of the pan, place the adzuki beans from Step 2 on top and level the surface.
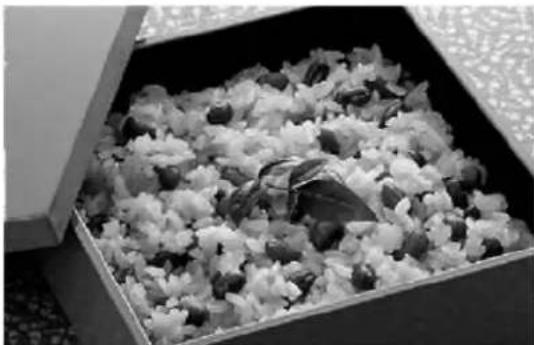
- Do not mix the ingredients with the rice. Changing the amounts of rice and ingredients may cause imperfect cooking.
4 Press the MENU button and select SUSHI/SWEET and press the START/REHEAT button to start cooking.
5 When cooking is complete, loosen the rice. Serve in a bowl and sprinkle the salt with parched sesame on top. - When adding regular white rice or rinse-free rice to the sweet rice, add water to slightly above the water level for SWEET.
PAELLA
Menu Setting: MIXED
When using rinse-free rice, select RINSE-FREE.
Ingredients (4-5 servings)
3 cups Rice
4-6 pieces Prawns
4-6 pieces clams (mussels, if available)
5.3 oz. (150 g) Squid
3 pieces Green peppers
2 Tbsp. Olive oil
1/2 tsp. Salt
[1 cube Soup stock (cube)
A 1/2 tsp. Saffron
(1/2 tsp. Turmeric can be substituted)
How to cook
1 Peel and devein prawns. Remove sand from clams and wash. Cut squid into small pieces. Cut green peppers into small cubes.
2 Stir-fry ingredients from Step 1 with olive oil. Season with salt and cover with lid until clam shells open up. Put the ingredients aside and reserve 2 Tbsp. of the liquid.
3 Finely chop soup stock cubes.

4 Rinse rice and add water to cover the rice. Add "A" to the Inner Cooking Pan and fill with more water to water level 3 for WHITE. Mix well from the bottom of the pan.
5 Press the MENU button, select MIXED and press the START/REHEAT button to start cooking.
6 When cooking is complete, open the Outer Lid, add the ingredients from Step 2 along with the reserved liquid and mix well with the rice. Serve immediately.
When cooking rice with additional ingredients and/or seasonings
Seasonings
- Seasonings should be diluted with soup stock or water and then added to the rice. After adjusting the amount of water, stir thoroughly. If the seasonings are added directly to the rice or if not mixed properly, scorching or imperfect cooking may occur.
Ingredients
- Chop ingredients into small pieces and place evenly on top of the rice (do not mix into the rice).
- The recommended amount of ingredients should be about 30 - 50% of the rice volume. Excessive amount of additional ingredients may not cook properly.
- Pre-cook ingredients that do not cook easily.
CLEANING AND MAINTENANCE
● Clean the Rice Cooker thoroughly after every use.
- Be sure to unplug the Power Cord and allow the Main Body and the Inner Cooking Pan to cool down.
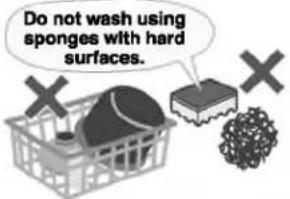
- Do not use such items as thinner, abrasive cleaners, bleach, scrubbing brushes (nylon, metal, etc.), melamine sponges or sponges with a nylon surface. (Doing so may damage the surface, causing discoloration, scratches, degradation in quality, or corrosion.)
- Do not use a dishwasher or dish-dryer. Doing so may cause scratches, deformation or discoloration.
● Be sure to reattach the Inner Lid Set, Steam Vent Set and Spatula Holder correctly.
THE EXTERIOR
Wipe clean with a well-wrung soft cloth.
- If using a cloth that is chemically treated, use sparingly to avoid transferring the chemical smell and do not scrub the Rice Cooker forcefully. (Doing so may damage the surface, causing discoloration, scratches, degradation in quality, or corrosion.)
Open Button
If the Open Button becomes clogged with rice or other matter, remove with a bamboo skewer.
● Otherwise the Outer Lid may not open.
Control Panel
Wipe with a dry soft cloth.
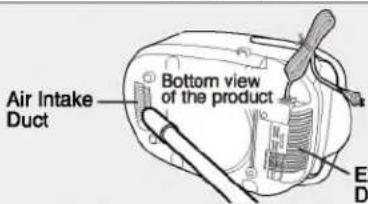
Air Intake Duct
(bottom front of the Main Body)
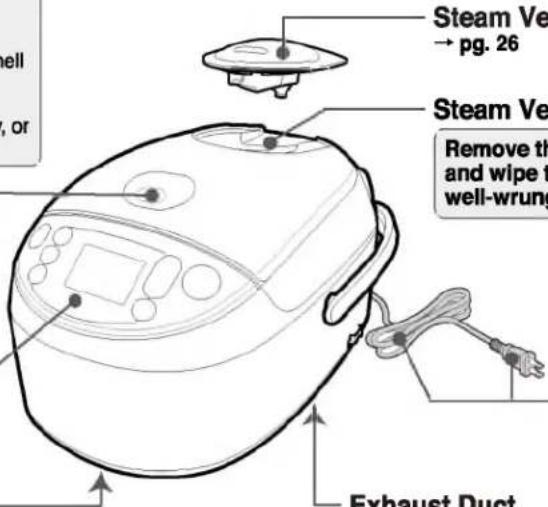
Steam Vent Set → pg. 26
Steam Vent Set Receptacle
Remove the Steam Vent Set, and wipe the Outer Lid with a well-wrung soft cloth.
Exhaust Duct
(bottom back of the Main Body)
Power Plug/Power Cord
Wipe with a dry soft cloth.
Clean using a vacuum cleaner (once a month).
If you use the Rice Cooker while there is dust or other matter stuck to the Air Intake Duct or Exhaust Duct, the internal temperature may become abnormally high, resulting in breakdown.
Inner Cooking Pan (→ pg. 6)/Spatula
Wash using a neutral kitchen detergent and a soft sponge.
- Do not use polishing powder, metal or nylon scrubbing brushes.
● Handle gently. Do not strike it or rub it too hard.

Measuring Cup/Spatula Holder
Wash using a soft sponge.
To wash thoroughly, use a neutral kitchen detergent.

IF THERE IS AN ODOR
1 Fill the Inner Cooking Pan with water up to water level 1 for WHITE for 1.0 L model, and water level 2 for 1.8 L model.
- Do not put other matter such as kitchen detergents in the Inner Cooking Pan.
2 Close the Outer Lid and press the MENU button to select the QUICK menu setting.
3 Press the START button.
4 When a melody/beep sounds and the Rice Cooker switches to the Keep Warm mode, press
the CANCEL button.
5 Wait until the Main Body cools down, discard the water and clean accordingly.
- Open the Outer Lid and dry the Rice Cooker in a well ventilated place.
CLEANING AND MAINTENANCE (cont.)
THE INTERIOR
Pressure Control Valve
Push the ball inside the Pressure Control Valve with your finger to make sure it is not clogged with foreign matter. If it becomes clogged with rice or other matter, remove it with a bamboo skewer.
- Immediately after cooking, It will be very hot and can cause burns, so please do not touch it.

Rinse in warm or cold water, wash using a soft sponge, and wipe thoroughly dry.
- If scratched or left with rice, other matter, or moisture on the surface, brown discoloration and rusting or peeling may occur.
- Do not disassemble. Doing so may cause breakdown.
(Front)

Filter Receptacle
If it becomes clogged with rice or other matter, remove it with a bamboo skewer.
(Back)

Inner Lid Gasket
- Remove rice or other matter. If not removed, steam may leak through, rice may dry, or cooking and Keep Warm may be imperfect.
● The Inner Lid Gasket cannot be removed.
Inner Lid Filter
If it becomes clogged with rice or other matter, remove it with a bamboo skewer.
- Detach and clean the Inner Lid Filter after every use.
Inner Lid Set
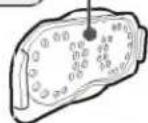

● HOW TO DETACH AND ATTACH THE INNER LID SET → pg. 27
● HOW TO DETACH AND ATTACH THE INNER LID FILTER → pg. 27
Safety Valve
Push the Safety Valve with your finger 2 to 3 times to make sure that it moves smoothly. If it becomes clogged with rice or other matter, remove it with a bamboo skewer.

CLEANING AND MAINTENANCE (cont.)
Lid Hooks
Remove rice or other matter with a bamboo skewer.
- If the Outer Lid isn't completely closed, cooking may be prevented for the sake of safety, or the Outer Lid may not open.

Outer Lid

Hook Holes of the Main Body
Remove rice or other matter with a bamboo skewer.
- If the Outer Lid isn't completely closed, cooking may be prevented for the sake of safety, or the Outer Lid may not open.

Wipe with a well-wrung soft cloth. Remove any rice or residue on the inside of the Outer Lid.
- If left dirty or wet, the color may change to brown or rust may form.
● Hold the Outer Lid securely while cleaning.

Outer Lid Gasket
Wipe with a well-wrung soft cloth. Remove any rice or residue.
● The Outer Lid Gasket cannot be removed.

Side Sensor
Wipe with a well-wrung soft cloth. If it becomes clogged with rice or other matter, remove it with a bamboo skewer.
Condensation Collecting Area
Wipe with a well-wrung soft cloth.
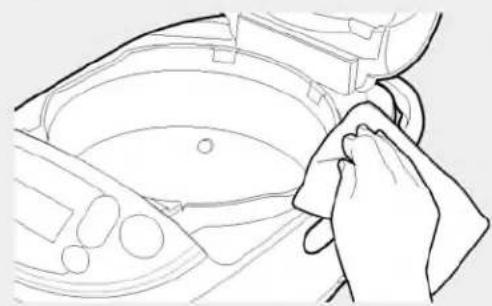
Gap Between the Main Body and Outer Lid (Shaded Area)
Wipe off stuck-on rice or other matter using a well-wrung-out soft cloth.
● The Outer Lid may not open if it is closed with rice or other matter left in this area.
HOW TO CLEAN THE STEAM VENT SET Please allow the Rice Cooker to cool down before cleaning.
Wash the outside and inside of the Steam Vent Set under running water.
HOW TO DETACH THE STEAM VENT SET
Hold the rear part and pull up.

HOW TO ATTACH THE STEAM VENT SET
Hold the rear part and push down.

HOW TO REMOVE THE STEAM VENT CASE
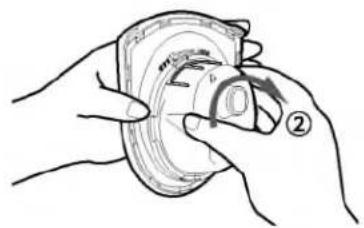
Turn the Steam Vent Case counterclockwise, align the “△” mark of the Steam Vent Case with the “▽” mark on the Steam Vent Cap and remove. (①)
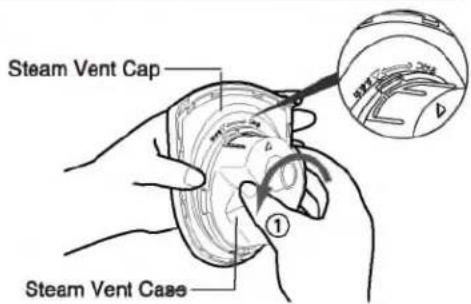
HOW TO ATTACH THE STEAM VENT CASE
Align the “△” mark of the Steam Vent Case with the “▽” mark on the Steam Vent Cap. Then turn the Steam Vent Case clockwise to reattach firmly. (②)
HOW TO DETACH AND ATTACH THE STEAM VENT GASKET
HOW TO DETACH
Insert a toothpick in the small opening to remove the Steam Vent Gasket.
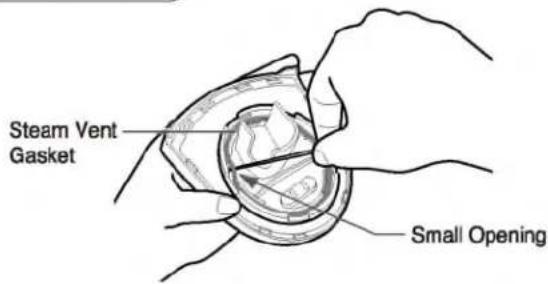
HOW TO ATTACH
Attach the Steam Vent Gasket to the groove of the Steam Vent Cap firmly.
Make sure that the Steam Vent Gasket is not twisted.
● An incorrectly attached Steam Vent Gasket may cause steam or condensation to leak.
HOW TO DETACH AND ATTACH THE INNER LID SET
HOW TO DETACH THE INNER LID SET
Hold the Inner Lid Knob (①) and push up the Inner Lid Set Holder (②) to detach.
- Do not pull the Inner Lid Knobs toward you without pressing the Inner Lid Set Holder. (May cause the Inner Lid Set and Outer Lid to break.)

HOW TO ATTACH THE INNER LID SET
Insert the fixtures found at the bottom sides of the Inner Lid Set into the Outer Lid and push it toward the Outer Lid until you hear it click into place.
- Do not catch the Outer Lid Gasket on the Inner Lid Set when attaching the Inner Lid Set. Also, do not push on the Inner Lid Gasket to attach the Inner Lid Set.

HOW TO DETACH AND ATTACH THE INNER LID FILTER
HOW TO DETACH THE INNER LID FILTER
Slide the Inner Lid Filter up with one hand while holding the Inner Lid Set in the other hand.
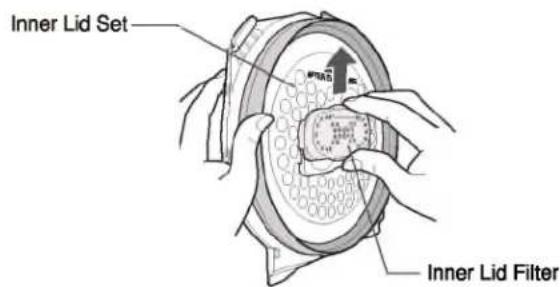
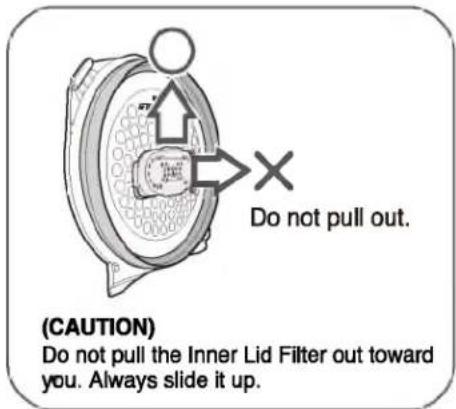
HOW TO ATTACH THE INNER LID FILTER
Fit the fixtures on both sides of the Inner Lid Filter to the attachments on the Inner Lid Set and slide the Inner Lid Filter down until you hear it click into place.

| Problems | Cause (Points to check) | |
| COOKING RICE | Rice cooks too hard or too soft | ● Increase or decrease water by 1-2 mm from the Water Level Line according to your preference.● If the amount of water is adjusted with the Rice Cooker on a tilted surface, the amount of water may be too high or too low, which will lead to changes in the hardness of the cooked rice.● The texture of rice varies depending on the brand of the rice, where it was harvested, and how long it was stored (new crop or old crop).● The texture of rice varies depending on the room and water temperatures.● Using the Timer may result in softer rice.● Using the QUICK menu settings may result in harder or wet rice.→ Please try using the WHITE (REGULAR) or UMAMI menu setting.● Make sure the Inner Cooking Pan has not deformed.● Rice may not have been cleaned sufficiently, leaving too much bran on the rice.● Did you measure white rice with the White Rice Measuring Cup and not the green Rinse-Free Rice Measuring Cup?● Did you loosen the rice after cooking was completed?→ Loosen the rice immediately after cooking is completed.● Is there moisture or foreign matter on the outer surface of the Inner Cooking Pan, the inside of the Main Body, the Inner Lid Set, or the Steam Vent Set?→ Wipe them off.● JASMINE white rice may be slightly harder than normal.→ To make it softer, fill the water slightly higher than the marked line on the Inner Cooking Pan (to a point within half the distance to the next marked line) and cook. However, please note that adding too much water may cause it to boil over. |
| Rice is scorched | ● Foreign matter such as rice may be stuck to the bottom of the Inner Cooking Pan or on the Side Sensor.● Rice may not have been cleaned sufficiently, leaving too much bran on the rice.● If you soak the rice for a long time or cook rice using the Timer, the bran may collect at the bottom, and the rice will be more easily scorched.● Make sure the Inner Cooking Pan has not deformed. | |
| The surface of the cooked rice is uneven | ● Depending on the heat convection while cooking, the surface of the cooked rice may look uneven.● Make sure the Inner Lid Set has not deformed.● Make sure the Inner Cooking Pan has not deformed. | |
| Boils over while cooking | ● Make sure the Steam Vent Set is attached.● Rice may not have been cleaned sufficiently, leaving too much bran on the rice.● Make sure the Inner Cooking Pan has not deformed.● Did you use the wrong Menu setting or amount of water? → pg. 14When cooking using the PORRIDGE, CONGEE, or STEEL CUT OATMEAL menu setting, the contents are particularly likely to boil over, so be sure not to use the wrong amount of water.→ See “Be careful that the contents do not boil over.” on pg. 13 | |
| Unable to start cooking or the buttons do not respond | ● Make sure the Power Plug is plugged in securely.● Does the Display show “E01” or “E02” ? → pg. 31● Was the Inner Cooking Pan inserted correctly?→ Set the Inner Cooking Pan correctly.● Is the REGULAR KEEP WARM or EXTENDED KEEP WARM light on?→ Press the CANCEL button and press the START/REHEAT button.● Is the Outer Lid closed securely?→ Push down on the Outer Lid securely until you hear it click shut.● Foreign matter such as rice may be stuck to the Hook Holes of the Main Body.→ Remove it with a bamboo skewer and push down on the Outer Lid until you hear it click shut. | |
| Steam comes out from the gap between the Outer Lid and the Main Body | ● Please check that the Inner Lid Set has not been dropped or deformed, and that the Inner Lid Gasket is not torn.● Has the Inner Lid Gasket become soiled?→ Clean the Inner Lid Gasket.● Make sure that the Pressure Release Ball in the Pressure Control Valve is not stuck and can move freely.● Make sure that the hole of the Safety Valve is not clogged and that foreign matter is not stuck on it.● Make sure the Outer Lid Gasket is not caught on Inner Lid Set.→ Reattach the Inner Lid Set correctly.● Make sure that the holes of the Inner Lid Filter are not clogged and that foreign matter is not stuck on them.→ If this part is dirty, clean it.● Make sure the Inner Cooking Pan has not deformed. | |
| COOKING RICE/ KEEP WARM | A noise is heard during Cooking/ Keep Warm | ●The noise is the microprocessor (MICOM) adjusting the heat power of the Rice Cooker. ●The rotary noise is the internal fan operating to release excess heat. ●The low noise is the pressure level being controlled during cooking. ●The mechanical noise is the sound of the device that controls the pressure level during cooking. ●The rolling noise is the movement of the Pressure Release Ball in the Pressure Control Valve, controlling the pressure level. ●The hissing sound from pressure being released may be heard when rice completes cooking. ●The mechanical noise and rolling noise heard immediately after cooking is initiated or when the Timer is set are for making sure the Outer Lid is closed securely. |
| ●The whistling noise warns that the Pressure Control Valve or Safety Valve is clogged. A louder noise may be heard when pressure is released. →Press and hold the CANCEL button for more than 1 second to cancel cooking. The pressure inside the Inner Cooking Pan may become too high because of the clogged Pressure Control Valve or Safety Valve. (If this happens, be cautious of the Steam Vent as steam will be forced out.) Clean the Inner Lid Set and Outer Lid after the PRESSURE indicator disappears from the Display. | ||
| The Reheat function does not work | ●Has the Keep Warm mode been canceled? → pg. 18 | |
| KEEP WARM | During Keep Warm, rice has an odor, or rice becomes watery | ●Was the rice kept warm with the Spatula left in the Inner Cooking Pan? ●Was cold rice reheated? ●Did you loosen the rice after cooking was completed? →Loosen the rice immediately after cooking is completed. ●Rice may not have been cleaned sufficiently, leaving too much bran on the rice. ●Some odor may remain after cooking mixed rice. →Clean the Inner Cooking Pan thoroughly and perform "IF THERE IS AN ODOR" on pg. 23 ●The Keep Warm mode may not have been used for keeping rice warm. →Leaving rice in the Inner Cooking Pan without using the Keep Warm mode may cause unwanted odor. →pg. 9 ●Was the Extended Keep Warm mode used for 24 hours or more? (This may differ depending on the menu setting.) →pg. 16 ●Did you clean the Rice Cooker thoroughly after every use? →Foul odors or the growth of bacteria may occur depending on how well the unit is cleaned, the room temperature based on the season or usage environment, frequent opening and closing of the Outer Lid, the type of rice used, or the way the rice was cleaned. If you are concerned about odors, cleaning the Rice Cooker according to "THE INTERIOR" on pg. 24 and then using REGULAR KEEP WARM on pg. 16 should be effective. |
| During Keep Warm, rice becomes yellow or dry | ●Are you keeping warm a small amount of rice in the Inner Cooking Pan? ●Was the Regular Keep Warm mode used for 12 hours or more or the Extended Keep Warm mode used for 24 hours or more? (This may differ depending on the menu setting.) →pg. 16 ●The type of rice and water used may make the rice appear yellow. ●If you're worried because the rice changes color or is dry, see "Change the Keep Warm Temperature" on pg. 17. It may be effective to reduce the Keep Warm temperature. | |
| Extended Keep Warm is not accepted | ●Did you select a menu setting for which the Extended Keep Warm mode is not available? →pg. 16 ●Was the Keep Warm mode used for more than 12 hours? →If the Keep Warm mode is used for more than 12 hours, the Extended Keep Warm mode will not be accepted. ●Is the rice in the Inner Cooking Pan cold? →If the temperature of the Inner Cooking Pan is low, the Extended Keep Warm mode will not be accepted. | |
| The Display does not show the elapsed Keep Warm time | ●Does the Display show the current time? →Press the Time Setting buttons to change the display. →pg. 17 "NOTE." | |
| The Keep Warm elapsed time display is blinking | ●If the temperature of the rice is low, or if the Keep Warm time has exceeded 24 hours for Extended Keep Warm mode or 12 hours for Regular Keep Warm mode, the Keep Warm elapsed time will blink. (This may differ depending on the menu setting.) →pg. 16 | |
| Beeps sound during Keep Warm mode | ●The beeps remind you to loosen the rice after cooking completes. →Loosen the rice and close the Outer Lid. ●Is the Outer Lid open? →Close the Outer Lid. | |
| TIMER COOKING | The Rice Cooker starts cooking immediately after the Timer is set | ● Is the current time set correctly? → The clock is displayed in 24-hour (military) time. Please check and set it again.● If the Timer is set to a shorter time than suggested, the Rice Cooker will begin cooking immediately. |
| The rice is not ready at the set time | ● Is the current time set correctly? → The clock is displayed in 24-hour (military) time. Please check and set it again.● Cooking may not complete at the set time if the temperature of the room or water is too low. In addition, the cooking time may be affected by the amount of water or voltage. | |
| The Timer cannot be set | ● Did you press the START/REHEAT button after setting the time?→ The START/REHEAT button must be pressed to complete setting the Timer.● Is "7:00" blinking on the Display?→ Unless the current time is set, the Timer function will not be accepted. → pg. 10● Have you selected a Menu setting that doesn't work with the Timer function?→ The Timer function is not available in the QUICK and MIXED menu settings.● Is the Outer Lid closed securely?→ Close the Outer Lid securely.● Foreign matter such as rice may be stuck to the Hook Holes of the Main Body.→ Remove it with a bamboo skewer and push down on the Outer Lid securely until you hear it click shut. | |
| OTHER | The Outer Lid won't close or is difficult to close | ● Is rice or other foreign matter stuck to the area around the Lid Hooks, the Hook Holes of the Main Body, between the Main Body and the Outer Lid, on the Inner Lid Gasket, the Pressure Control Valve, the Safety Valve, or the Steam Vent? → Remove the foreign matter. → pg. 24● Is the Inner Lid Set attached correctly? → If the Inner Lid Set is not attached when the Inner Cooking Pan has been placed inside the Main Body, the Outer Lid is constructed so that it will not close, for safety's sake. This is not a malfunction.● In order to allow high-pressure rice cooking, the gaskets are extremely airtight. When closing the Outer Lid, you may feel resistance. Push down on the Outer Lid slowly and securely until you hear it click shut. |
| The Outer Lid cannot be opened | ● The Outer Lid is locked during high-pressure rice cooking and cannot be opened. If it is necessary to open the Outer Lid during cooking, press and hold the CANCEL button for 1 second or longer.→ See "IMPORTANT" on pg. 13.● If you press the edge of the Open Button, the Outer Lid may be difficult to open. Be sure to press the center of the Open Button. | |
| The Outer Lid opens during cooking | ● Did you close the Outer Lid completely?→ Be sure to close the Outer Lid until you hear a clicking sound. | |
| There's a resinous odor, such as that of plastic | ● When you use this Rice Cooker for the first time, there will be a resinous smell, such as that of plastic, but the odor will lessen as you use the Rice Cooker. If you are concerned about the odor, please see pg. 23 "IF THERE IS AN ODOR". | |
| You hear a sound when opening or closing the Outer Lid | ● The rattling sound you hear when opening and closing the Outer Lid is the sound of the Pressure Release Ball moving. | |
| You mistakenly put the rice and water directly into the Main Body | ● Putting rice and water directly into the Main Body may cause a malfunction. Contact the store where you purchased the Rice Cooker or Zojirushi Customer Service. | |
| When power failure occurs | ● If too many appliances are used simultaneously, an overload may occur and the breaker will cut off the electricity.→ If another appliance is plugged into the same outlet as the Rice Cooker, unplug it before resetting the breaker. If the electric supply recovers within 10 minutes, the Rice Cooker will resume cooking automatically. | |
| Sparks from the Power Plug | ● There may be sparks when plugging in or unplugging the Power Plug from the electrical outlet. This is common in IH rice cookers, and does not indicate a malfunction. | |
| The estimated time until cooking completion is not displayed | ● When pots of rice are cooked consecutively, the estimated time will not be displayed until the Main Body cools down, but the rice cooking will start. This is not a malfunction. | |
| There is rust colored dirt on the inside of the Outer Lid or the Inner Lid Set | ● If rice residue is stuck on the Outer Lid or the Inner Lid Set and has discolored, clean it.→ pg. 24 | |
ERROR DISPLAYS AND THEIR MEANINGS
| Panel Display | Cause (Points to check) | |
| Error Display | E01 E02 E07E 13 | Indicates malfunction.→ Please contact the store where you purchased the Rice Cooker or Zojirushi Customer Service. |
| E06 | In case of voltage abnormality, the unit automatically stops to prevent a breakdown.→ Recheck the rated voltage of the outlet to see if it complies with the Rice Cooker. If not, use another outlet. | |
| E17 H17 | The Outer Lid is not completely closed.→ Press the CANCEL button, make sure that the Outer Lid is completely closed, and then press the START/REHEAT button. If this does not solve the problem, please contact the store where you purchased the Rice Cooker or Zojirushi Customer Service. | |
| H01 H02 | The temperature of the Lid Sensor or the Side Sensor is too high.→ Press the CANCEL button and open the Outer Lid for more than 50 minutes and allow the interior to cool down. (Be careful not to burn yourself.) To cool faster, see pg. 13. | |
| H04 | The Inner Cooking Pan is not inserted.→ Set the Inner Cooking Pan securely. | |
| The Display is blank | Is the Power Plug unplugged from the electrical outlet?→ The Display turns off when the Power Plug is not connected. | |
| 7:00 blinks when the Power Plug is connected | The built-in lithium battery is dead.The Display will turn off and stored information (current time, menu selection, and Keep Warm settings) will be erased when the Power Plug is unplugged from the electrical outlet. However, the Rice Cooker will function normally once the Power Plug is connected and the time is set.If rice is cooked while the display shows a blinking 7:00, the current time will not be shown during the cooking process.→ Contact Zojirushi Customer Service to have the lithium battery replaced (a fee will be charged for the replacement). | |
| PRESSURE Is blinking | The Rice Cooker has stopped cooking while there is still pressure inside. Please wait until the PRESSURE indicator disappears from the Display (approx. 5-10 minutes.) Use of the buttons will not be accepted while the PRESSURE indicator is blinking. | |
| Odd Display | Unplug the Power Cord and plug it in again.(If the Display shows a blinking 7:00, please reset the time.) → pg. 10 | |
REPLACEMENT PARTS
● Please replace damaged parts for optimum performance.
- When replacing parts, please check the model number and the parts name beforehand, then contact the store where you purchased the Rice Cooker or Zojirushi Customer Service.
Zojirushi Customer Service
1-800-733-6270
www.zojirushi.com
| Part Name | Part Number |
| Inner Lid Set (1.0 L model) | C162-GR |
| Inner Lid Set (1.8 L model) | C163-GR |
| Inner Cooking Pan (1.0 L model) | B572-6B |
| Inner Cooking Pan (1.8 L model) | B573-6B |
| Spatula | SHAKN-6B |
| Spatula Holder | 618112-00 |
| Measuring Cup for most types of rice (Clear Cup) | 615784-00 |
| Measuring Cup for rinse-free white rice only (Green Cup) | 617824-00 |
| Inner Lid Filter | BU201011L-00 |
SPECIFICATIONS
| Model No. | NP-NWC10 | NP-NWC18 | ||||
| Cooking Capacity (approx. L) [cups]*1 | WHITE (Short/medium grain white rice) (REGULAR, SOFTER, HARDER) | 0.09-1.0 | [0.5-5.5] | 0.18-1.8 | [1-10] | |
| Rinse-Free Rice | 0.09-0.94 | [0.5-5.5] | 0.17-1.71 | |||
| UMAMI (Short/medium grain white rice) | 0.09-1.0 | [0.5-5.5] | 0.18-1.8 | [1-10] | ||
| Rinse-Free Rice | 0.09-0.94 | [0.5-5.5] | 0.17-1.71 | |||
| QUICK (Short/medium grain white rice) | 0.09-1.0 | [0.5-5.5] | 0.18-1.8 | [1-10] | ||
| Rinse-Free Rice | 0.09-0.94 | [0.5-5.5] | 0.17-1.71 | |||
| MIXED (Short/medium grain white rice) | 0.09-0.72 | [0.5-4] | 0.36-1.08 | [2-6] | ||
| Rinse-Free Rice | 0.09-0.68 | [0.5-4] | 0.34-1.03 | |||
| SUSHI (Short/medium grain white rice) | 0.09-1.0 | [0.5-5.5] | 0.18-1.8 | [1-10] | ||
| Rinse-Free Rice | 0.09-0.94 | [0.5-5.5] | 0.17-1.71 | |||
| SWEET (Sweet rice only or sweet rice + short/medium grain white rice) | 0.18-0.72 | [1-4] | 0.36-1.08 | [2-6] | ||
| Rinse-Free Rice | 0.17-0.68 | [1-4] | 0.34-1.03 | |||
| JASMINE | 0.09-1.0 | [0.5-5.5] | 0.18-1.8 | [1-10] | ||
| PORRIDGE (Short/medium grain white rice) | 0.09-0.27 | [0.5-1.5] | 0.09-0.45 | [0.5-2.5] | ||
| Rinse-Free Rice | 0.09-0.26 | [0.5-1.5] | 0.09-0.43 | |||
| CONGEE | 0.09-0.18 | [0.5-1] | 0.09-0.27 | [0.5-1.5] | ||
| BROWN (Short/medium grain brown rice) | 0.18-0.72 | [1-4] | 0.36-1.44 | [2-8] | ||
| GABA BROWN (Short/medium grain brown rice) | 0.18-0.72 | [1-4] | 0.36-1.44 | [2-8] | ||
| STEEL CUT OATMEAL | 0.09-0.45 | [0.5-2.5] | 0.18-0.54 | [1-3] | ||
| Rating | AC 120 V 60 Hz | |||||
| Electric Consumption | 1240 W | 1370 W | ||||
| Average Power Consumption during Keep Warm | 29 W | 36 W | ||||
| Rice Cooking System | PRESSURE IH System | |||||
| Power Cord Length | 3' 3" (1.0 m) | |||||
| External Dimensions | 10-1/8(W) × 15-3/8(D) × 8-5/8(H) (16-3/8*2) | 11-1/8(W) × 16-1/2(D) × 10-1/8(H) (18-7/8*2) | ||||
| 25.5 (W) × 39 (D) × 22 (H) (41.5*2) | 28 (W) × 42 (D) × 25.5 (H) (47.5*2) | |||||
| Weight | approx. 13 lbs. ( approx. 5.5 kg ) | approx. 15 lbs. ( approx. 6.5 kg ) | ||||
●The average power consumption during Keep Warm is calculated with the Rice Cooker at maximum capacity and at a room temperature of 68° F ( 20° C).
● This product may not operate properly in certain environments or places with high altitudes or extreme weather conditions. Please avoid using this product in such areas.
● This product cannot be used in areas where power supply voltage or power supply frequency is different.
*1 Capacity is measured in the supplied rice measuring cup, using uncooked rice. Other grains may vary.
*2 Height with the Outer Lid open.
DECLARATION OF CONFORMITY WITH FCC RULES
According to 47CFR, Part 2 and 18
We, Zojirushi America Corporation.
Located at : 19310 Pacific Gateway Drive, Suite 101 Torrance, CA 90502, USA
Telephone Number : 310-769-1900
Declare under sole responsibility that the product:
Trade Name: ZOJIRUSHI
Kind of equipment: Electric Rice Cooker & Warmer
Model Name: NP-NWC10, NP-NWC18
Complies with 47CFR Part 2 and 18 of the FCC rules as a Consumer, Industrial, Scientific and medical equipment. Each product marketed, is identical to the representative unit tested and found to be compliant with the standards.
Records maintained continue to reflect the equipment being produced can be expected to be within the variation accepted, due to quantity production and testing on a statistical basis as required by 47CFR §2.909.
Operation is subject to the following two conditions: (1) This device may not cause harmful interference, and (2) This device must accept any interference received, including interference that may cause undesired operation.
The above named party is responsible for ensuring that the equipment complies with the standards of 47CFR §18.301 to 18.311.
Signature of Party Responsible:

Date of issue: January 21, 2020
www.zojirushi.com
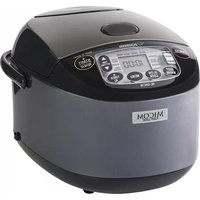
- Pressure induction heating rice cooker & warmer
- Operating instructions
- NP-NWC10 / NP-NWC18
- Index
- Important safeguards
- Save these instructions
- Warnings
- To cook rice safely in this rice cooker
- Important safeguards (cont.)
- Cautions
- Important
- Important (cont.)
- About the inner cooking pan
- Inner surface (nonstick coating)
- → Pg. 23
- The nonstick coating may wear out with use
- Outer surface
- Part names and functions
- Tips for cooking delicious rice
- ● Measure rice accurately
- ● Clean rice quickly prepare a bowl to pool water
- (Complete steps ①-③ within 10 minutes.)
- Warning
- ● Adjust the amount of water accordingly
- ● Do not use strongly alkalized ionic water
- ● Stir and loosen rice immediately after cooking has completed
- Tips for using the keep warm mode
- ● When keeping rice in the inner cooking pan for later consumption, use the keep warm mode
- ● To prevent the rice from becoming dry, wet, developing an odor or turning yellow, do not use the keep warm mode for the following
- ● When keeping a small amount of rice warm, gather the rice toward the center of the inner cooking pan
- How to set the clock
- E.g. if the current time is 15:01 but displays 14:56
- Sound signals and how to change them
- How to change the sound signal
- Check the parts of the main body before cooking
- 1
- Measure the rice with the provided measuring cup
- 2
- Clean the rice and adjust the amount of water
- When cooking rinse-free rice
- 3
- Place the inner cooking pan into the main body, and attach the inner lid set and steam vent set. close the outer lid
- Press the (start) button
- 7
- 8
- Be careful that the contents do not boil over
- Note
- Remarks
- How to select the rinse-free setting
- Activated brown rice (gaba brown)
- Gaba brown setting
- You can choose the regular keep warm mode or extended keep warm mode by pressing the keep warm button while the keep warm light is on
- Regular keep warm
- Extended keep warm
- About keep warm times
- How to keep rice warm again
- When you are concerned about the odor
- Change the keep warm temperature
- Reheating rice
- You can use this function during regular keep warm mode or extended keep warm mode
- Loosen and level the surface of the rice that is being kept warm
- Press the
- Button
- Standard times required for reheating
- Loosen the rice
- Do not reheat for the following cases
- To cancel the reheat mode
- Press
- To cancel the reheat mode and return to keep warm mode
- Using the timer to cook rice
- Using the timer
- Press the menu button to select the desired
- Menu setting. → see step 5 under "basic cooking steps" on pg. 12
- Press the ○timer button to select
- ①① (Timer 1) or ② (timer 2)
- Press the ▲ or ▼ button to set a specific time to finish cooking
- 4
- Press the start button
- Using the timer to cook rice (cont.)
- Congee
- Menu setting: congee
- 1.0 L model ingredients (4-5 servings)
- 1.8 L model ingredients (8-10 servings)
- How to cook
- Hand-rolled sushi
- Menu setting: sushi/sweet
- When using rinse-free rice, select rinse-free
- Ingredients (4-5 servings)
- Sweet rice cooked with adzuki beans
- Paella
- Menu setting: mixed
- When cooking rice with additional ingredients and/or seasonings
- Seasonings
- Ingredients
- Cleaning and maintenance
- The exterior
- Wipe clean with a well-wrung soft cloth
- Open button
- Control panel
- Air intake duct
- Steam vent set receptacle
- Exhaust duct
- Clean using a vacuum cleaner (once a month)
- Inner cooking pan (→ pg. 6)/Spatula
- Wash using a neutral kitchen detergent and a soft sponge
- Measuring cup/spatula holder
- Wash using a soft sponge
- If there is an odor
- Cleaning and maintenance (cont.)
- The interior
- Pressure control valve
- Filter receptacle
- Inner lid gasket
- Inner lid filter
- Safety valve
- Lid hooks
- Hook holes of the main body
- Outer lid gasket
- Side sensor
- Condensation collecting area
- How to clean the steam vent set please allow the rice cooker to cool down before cleaning
- How to detach the steam vent set
- How to attach the steam vent set
- How to remove the steam vent case
- How to attach the steam vent case
- How to detach and attach the steam vent gasket
- How to detach
- How to attach
- How to detach and attach the inner lid set
- How to detach the inner lid set
- How to attach the inner lid set
- How to detach and attach the inner lid filter
- How to detach the inner lid filter
- How to attach the inner lid filter
- Error displays and their meanings
- Replacement parts
- Declaration of conformity with fcc rules
- According to 47CFR, part 2 and 18
Brand : Zojirushi
Model : NP-NWC18
Category : Cooker