
WASPcam 9905 Wi-Fi - Camcorder COBRA - Free user manual and instructions
Find the device manual for free WASPcam 9905 Wi-Fi COBRA in PDF.


| Product Type | Action-Sports Camera |
| Brand | Cobra |
| Model | WASPcam 9905 Wi-Fi |
| Video Resolution | 1080p/30fps, 720p/60fps, WVGA/60fps, VGA/120fps |
| Photo Resolution | 12MP, 8MP, 5MP |
| Lens | 170° Wide Angle |
| Memory | Micro SD card up to 32GB (Class 10 required) |
| Wi-Fi | 802.11b/g/n |
| Remote Control | 2.4GHz RF Wireless Wrist Remote |
| Battery | Lithium-ion rechargeable, 1050mAh |
| Screen | 1.5 inch LCD |
| Waterproof Depth | Up to 30 meters (98 feet) without external housing |
| Connectivity | Micro USB, HDMI, TV Out (via Micro USB) |
| Audio | Built-in microphone and speaker |
| Video Format | .mov |
| Image Format | JPG |
| Sensor | 5 CMOS Sensor |
| Accessories Included | Micro USB cable, bar mount, helmet mount, tripod mount adapter, straight joint mount, J-hook buckle, 3M stickers, Li-ion battery, wrist remote, curved and flat adhesive mounts |
| Power Source | USB charging (5V) or rechargeable battery |
| Operating Temperature | 0°C to 40°C (32°F to 104°F) |
| Cleaning | Wipe with a slightly damp soft cloth; clean lens with a lens cloth or air blower |
| Safety Precautions | Avoid extreme temperatures, dust, and water; do not open casing; use only approved accessories |
Frequently Asked Questions - WASPcam 9905 Wi-Fi COBRA
User questions about WASPcam 9905 Wi-Fi COBRA
0 question about this device. Answer the ones you know or ask your own.
Ask a new question about this device
Download the instructions for your Camcorder in PDF format for free! Find your manual WASPcam 9905 Wi-Fi - COBRA and take your electronic device back in hand. On this page are published all the documents necessary for the use of your device. WASPcam 9905 Wi-Fi by COBRA.
USER MANUAL WASPcam 9905 Wi-Fi COBRA
WASPcam™ 9905 Wi-Fi Action-Sports Camera
User Manual
Please read through this user manual before using the product and keep the manual for future reference. Product appearance and/or specifications are subject to change without notice. Before using this camera, please insert a micro SD card (class 10 card, no larger than 32GB) into the WASPcam™ 9905 Wi-Fi camera. Camera functions will not work without a micro SD card inserted into the camera. Please note the camera does not include a micro SD card inside the package, the micro SD card must be purchased separately.
WASPcam is a division of Cobra Electronics
6500 W. Cortland St. Chicago, IL 60707
1 (800) 263-3028
WASPcam™ 9905 Wi-Fi User Manual
Table of Contents
Manual Disclaimer ....3
Safety Precautions....3
System Requirements....4
Accessories....5
Camera Function Quick Guide Diagram....6
Button Functions....7
Basic Camera Functions ....8
Installing the Micro SD Card....8
Using the LED Lights....8
Charging the Battery 8
Turning the Camera On/Off 8
Screen Icons 9
Zoom In/Out....9
Menu Interface Introduction ......9
Recording Functions....9
Photos 11
Deleting / Protecting Files / Slide Show....12
Video Menu Settings....12
System Settings 13
Photo Menu Settings....14
Enabling the Camera's Wi-Fi....14
Installing the WASPcam App ....14
Using the Camera's Wi-Fi....15
Connecting to External Devices 18
WASPcam™ 9905 Wi-Fi User Manual
Manual Disclaimer
Every effort has been made to ensure that the contents of this manual are correct and up to date. However, no guarantee is maderegarding the accuracy of the contents. The manufacturer reserves the right to change the manual contents and product specifications without notice.
Safety Precautions
- Do not store the product in dusty, dirty, or sandy areas, as its components may be damaged.
- Do not leave the camera in places exposed to extremely high temperatures, such as direct sunlight for extended periods of time. High temperatures can shorten the life of electronic devices, damage batteries and warp or melt certain plastics.
- Do not store the product in cold areas. When the product warms up to its normal temperature, moisture can form inside, which may damage the electronic circuits.
- Cobra Electronics is not responsible for any legal repercussions from the use of the WASPcam™ 9905 Wi-Fi or from the sharing of footage.
- Do not attempt to open the casing or attempt your own repairs. High-voltage internal components create the risk of electric shock when exposed.
- Do not drop or knock the product. Rough handling may damage the internal components.
- Do not use harsh chemicals, cleaning solvents or strong detergents to clean the product. Wipe the product with a slightly damp soft cloth.
- Do not open the battery cover while an image is being recorded. Doing so will not only make storage of the current image impossible, it can also corrupt other image data already stored on the micro SD card.
- It is recommended to use the camera in temperatures between 0^ C to 40^ C ( 32^ F to 104^ F).
- It is normal for the camera to be warm after long periods of use.
- Please use a lens cleaning cloth or camera air blower to clean fingerprints or dust from the lens.
• Always test for proper operation before using the camera. - Cobra Electronics is not responsible for any damage or personal injuries resulting from the use of the WASPcam™ 9905 Wi-Fi or for replacing it if lost or stolen.
WASPcam™ 9905 Wi-Fi User Manual
System Requirements
The camera requires a computer with the following minimum specifications for full HD 1080p/30fps and 720p/60fps video playback:
- Windows® 7 / MAC OS X 10.8
- Intel® Core Duo™ / AMD Dual-Core CPU
- 2 GB of RAM
- DirectX 9 compatible graphics solution
• Available hard disk space
The camera requires a computer with the following minimum specifications for full WVGA/VGA video playback:
- Windows® Vista / MAC OS X 10.5
- Intel® / AMD Dual-Core CPU and later
- 1 GB of RAM
- DirectX 9 compatible graphics solution
• Available hard disk space
Minimum requirements for connecting the camera to a PC or Mac:
- Standard USB 2.0 port
Features
The camera offers a variety of features and functions including:
• Full HD 1080p/30fps
• Wi-Fi: 802.11b/g/n
• H.264 Video Compression
- 170° Wide Angle Lens
• 2.4GHz RF Remote Control
• 12 Megapixel Photos
• Li-ion Rechargeable Battery
- Smartphone App Supported – WASPcam App or WASPcam 9905 App
WASPcam™ 9905 Wi-Fi User Manual
Accessories
The following items should be included in the camera package. If any items are missing or damaged, contact your dealer immediately.
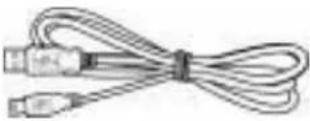 Micro USB Cable Micro USB Cable | 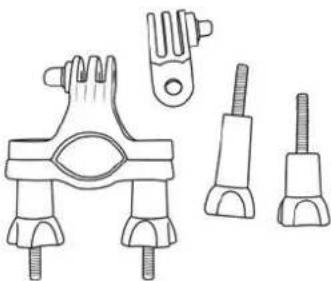 Bar Mount Bar Mount | 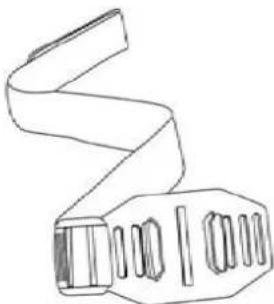 Helmet Mount Helmet Mount |
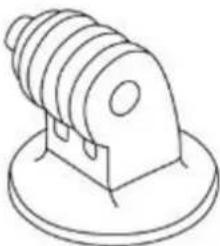 Tripod Mount Adapter Tripod Mount Adapter | 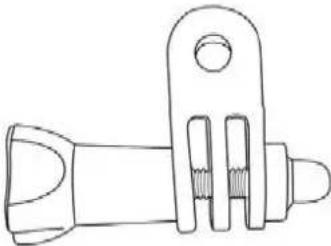 Straight Joint Mount Straight Joint Mount | 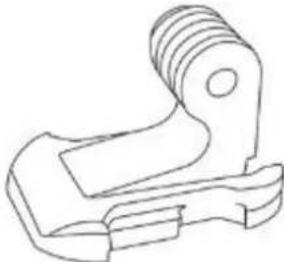 J-Hook Buckle J-Hook Buckle |
 User Manual User Manual |  3M Stickers 3M Stickers |  Li-ion Battery Li-ion Battery |
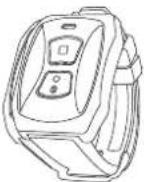 Wrist Remote Wrist Remote | 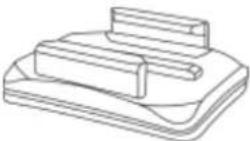 Curved Adhesive Mount Curved Adhesive Mount | 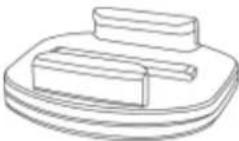 Flat Adhesive Mount Flat Adhesive Mount |
Camera Function Quick Guide Diagram
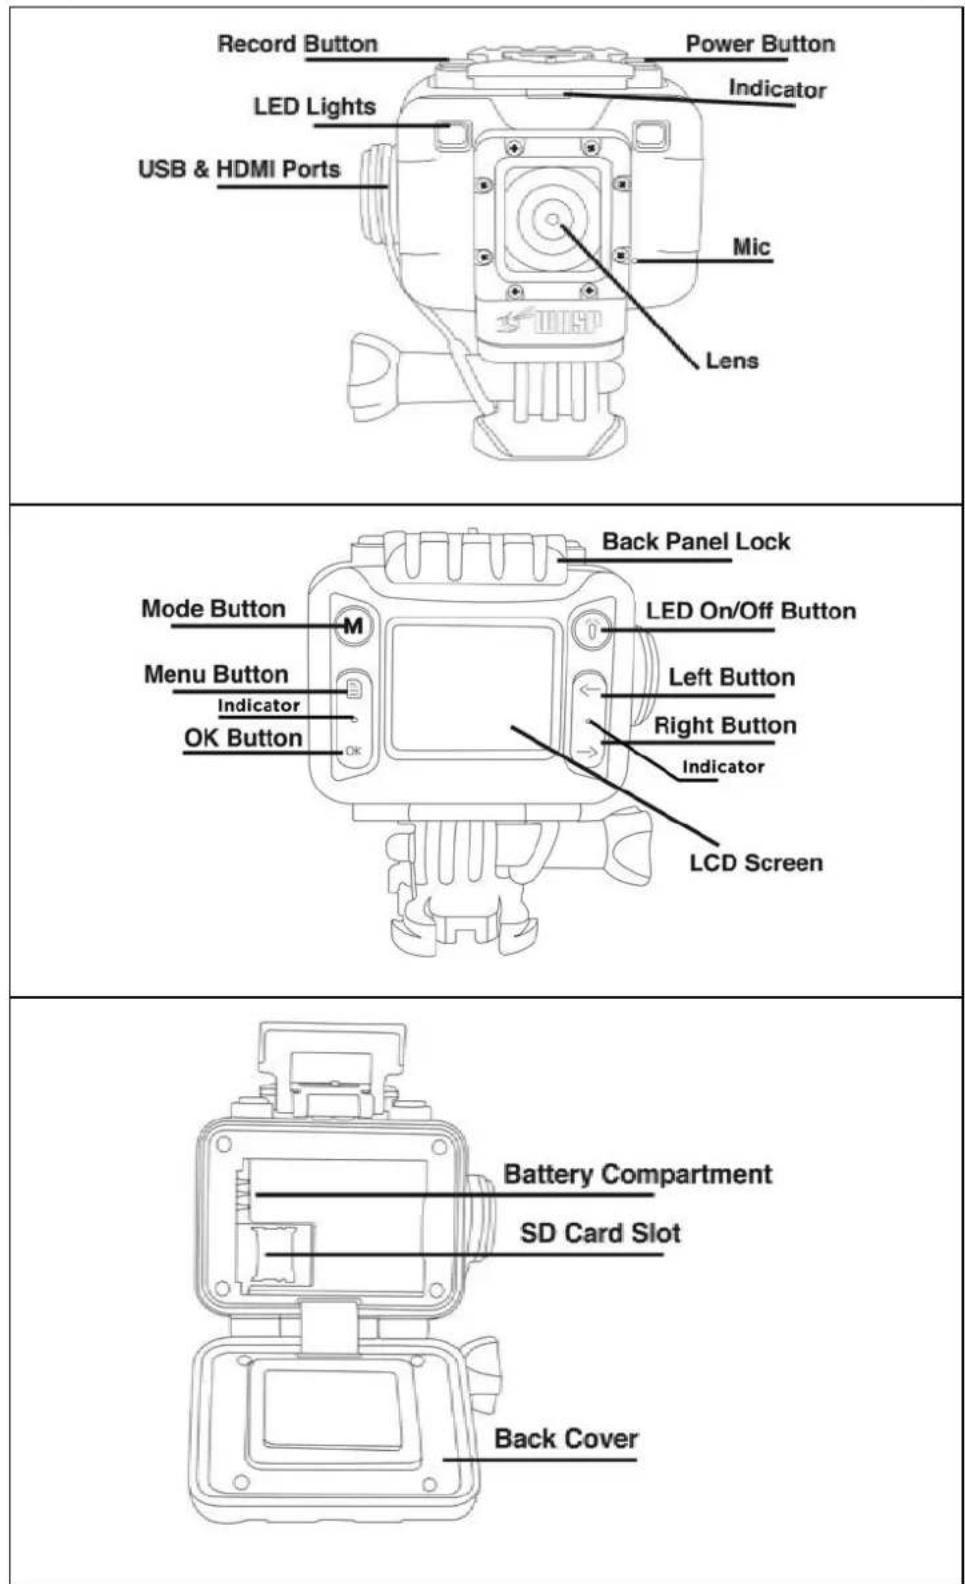
Refer to the following illustrations to familiarize yourself with the buttons and controls of this camera.
Button Functions
| Button | Function |
| Power Button (Top Left)[CVOZ] | Turn the camera on & off.Clear the screen.Delete files under playback mode.Press once in video mode to take a photo while recording video. |
| Mode ButtonM | Switch to picture mode, video mode and playback mode. |
Record Button (Top Right) | Start and stop taking photos/videos.Returns to the photo/video mode when you are in the menu. |
Menu Button | Enter / exit menu settings. |
| OK ButtonOK | Browse photos and videos, to enter and confirm settings under setting mode. |
| Left Button[SCDC] | Choose the last menu or file, zoom in on photos and videos.Reduce volume during playback. Press and hold to rewind playback video. |
| Right Button[6ZZX] | Choose the next menu or file, to zoom out on photos and videos.Increase volume during playback. Press and hold to fast forward playback video. |
| LED Light On/Off Button[KV07] | Turn the LED light on and switch between bright, normal, flashing and off. |
Basic Camera Functions
Installing the Micro SD Card
To insert the SD card
- With the camera off open the back cover
- Slide the silver card lock down and gently pull up
- Place the SD card in the slot
- Close and push the card lock up to secure the card in place
**Note – Please use a minimum speed Class 10 card, maximum 32GB storage capacity Follow these steps in reverse order to remove the SD card
**Note - Please ensure that the SD Card is inserted in the correct direction or you may damage the SD card and/or SD card reader.
Using the LED Lights
Press the LED Lights button 🏠 to turn on the LED lights in bright mode, press again for normal mode, press a 3rd time to make the LED lights flash and press a 4th time to turn the lights off.
Charging the Battery
Connect camera and power supply using the included USB cable. The red indicator at the back of the camera will remain on while the camera is charging. Once it is fully charged the red indicator light will turn off. When plugged into a power source, the camera will turn on and off, and then begin charging. The camera can be turned back on to record while charging.
**Note - To improve the charging efficiency of the camera, please turn the camera off while it is charging
Turning the Camera On/Off
To turn on the camera, press the power button for 3 seconds. A chime will sound, the WASPcam™ 9905 Wi-Fi LCD screen will turn on and the red indicator light at the front of the camera will also turn on. To turn off the camera, press the power button again for 3 seconds until the chime sounds and the screen goes black.
WASPcam™ 9905 Wi-Fi User Manual
Screen Icons
At the left of the LCD screen it displays the video icon, loop recording icon, white balance icon and the audio record icon.
At the right of LCD screen it displays the remaining recording time, resolution, SD card icon, and the battery icon. On the bottom of the LCD screen it displays the date and time.
Zoom In/Out
While in record or photo mode, use the left and right arrow buttons to zoom in/out.
Menu Interface Introduction
When in standby mode, press the menu button to enter settings, press the left/right arrow buttons to choose the options, then press the OK button to confirm. Press the menu button again to quit.
Recording Functions
Normal Recording
In video mode press the record button to start a video. The green LED light between the arrows will flash and the recorded time and recording icon will be displayed on the top of the LCD screen.
Press the record button again to stop recording and save the file – the estimated remaining recording time is displayed at the top of the LCD screen.
Loop recording
In video mode press the menu button and use the right arrow to turn on Looping (for more details refer to Video Settings). Exit the menu and press the record button to start a video. The LED light between the 2 arrows will flash green and the red flashing recording icon and the recording time will be displayed at the top of the LCD screen.
After the looping duration, the camera will stop recording automatically and save the video, and then continue recording a new video file without missing a second of footage.
When the SD card is full, camera will delete the oldest video footage automatically and continue recording.
At any time while recording, you can press the record button to stop and save the video. The remaining time is displayed at the top of the LCD screen.
WASPcam™ 9905 Wi-Fi User Manual
Motion Detection
1) In video mode press the menu button and use the right arrow to turn on Motion Detection and choose 30 SEC for example (for more options refer to Video Settings). Press REC to enter Motion Detection mode. The screen will say Motion Detecting.
2) If there is movement, the camera will auto record for 30sec (or the configured time) and stop. If there is no movement, the camera will stop recording automatically. If there is constant movement, the camera will detect this and the camera will keep recording in 30sec intervals (or the configured time).
** Note – If you need to pause recording, press the record button once to pause. If you need to cancel motion detection – please turn off this setting in the menu.
** Note – This setting will not work if the Loop Record is turned on
Image Rotation
If your WASPcam™ 9905 Wi-Fi camera is mounted upside down, enter the menu and select Image Rotation. This will rotate the video/images being recorded 180^ , and the screen will show rotated images. Footage can also be rotated in most video editing software if required.
WASPcam™ 9905 Wi-Fi User Manual
Photos
Snap Shots
While you are recording video you can press the power button to take a snap shot.
**Note - when you are taking a snap shot, video is still being recorded continuously. You can only view the snap shots in playback mode.
Normal photo
Press the Mode button until the camera is in photo mode, indicated by a camera icon in the top left corner. Additional icons are shown in this mode for the white balance, exposure, ISO icons, SD Card & battery icons.
The LCD screen will also display the remaining amount of photos and resolution. Press the record button to take a photo.
**Note - when taking pictures – please hold the camera steady or it may affect the picture quality.
1) Self-timer Mode (Single/3s/10s/30s Timer)
When the Self-timer is turned on, press the record button and the camera will count down the configured time and then take a photo. Press the record button again to stop the count down.
2) Auto Photo (Off/3/5/10 seconds)
When Auto Photo is turned on, press the record button and the camera will take a photo at the configured interval continuously. The screen will show the countdown and when the time is up the camera will take a photo automatically, save the photo, and then continue photographing according to the configured time.
3) Burst (On/Off)
When Burst is turned on, press the record button and the camera will take and save 3 consecutive photos.
4) Quick Review (Off/2seconds/5seconds)
When Quick Review is turned on and a photo is taken, the camera will display the photo on the screen for 2 or 5 seconds (according to the menu setting) and then return to photo standby mode.
Playback mode
Press the mode button until the camera is in playback mode, indicated by the playback (▶) icon in the top left corner. Press the arrow buttons to choose the file you want to review and press the OK button to confirm. During video playback press OK to pause the video and
WASPcam™ 9905 Wi-Fi User Manual
resume playback. During Video playback press the right/left arrows to adjust the volume and press and hold the right or left arrow buttons to fast forward or reverse playback.
Deleting / Protecting Files / Slide Show
Deleting Files
In playback mode press the menu button to enter settings and press the left/right arrows to select Delete and the OK button to confirm. Press the left/right arrows to Delete all or Delete Current, then press the OK button to confirm. Press the left/right arrow buttons to choose Cancel to keep the file or OK to delete the file.
Protecting Files
In playback mode press the menu button to enter settings and press the left/right arrow buttons to select the protect setting. Press OK to confirm, and then press the left/right arrow buttons to select Lock Current, Unlock Current, Lock All, Unlock All, then press OK to confirm. Press the Menu button to exit
Slide Show (Off/2/5/8 seconds)
In playback mode press the menu button to enter settings and turn on Slide Show. Press the menu button to return to video playback and the camera will scroll through the files in playback mode at the specified rate.
Video Menu Settings
From Video mode, press the menu button to enter video settings. Navigate with the left/right arrow buttons to choose the options and the OK button to confirm. Press the menu button again to exit the settings menu.
| MENU OPTION | SETTINGS |
| Resolution | 1080p/30fps 720p/60fps WVGA/60fps VGA/120fps |
| Looping | Off / 2 Minutes / 5 Minutes / 10 Minutes |
| Exposure | +2.0 / +1.5 / +1.0 / +0.5 / +0.0 / -0.5 / -1.0 / -1.5 / -2.0 |
| White Balance | Auto / Daylight / Cloudy / Tungsten / Fluorescent / Underwater |
| Motion Detection | Off / 30 Seconds / 1 Minute / 5 Minutes |
| Record Audio | Off/On |
WASPcam™ 9905 Wi-Fi User Manual
System Settings
From standby mode and playback mode, press the menu button twice to enter the system settings. Navigate with the left/right arrow buttons to choose the options and the OK button to confirm. Press the menu button again to exit the settings menu.
| MENU OPTION | SETTINGS |
| Wi-Fi | On/Off |
| Wi-Fi SSID | Username setting, the default is WASPcam |
| Wi-Fi Password | Password setting, the default is 12345678 |
| Image Rotation | On/Off |
| Anti-shaking | On/Off |
| LCD Off | 30secs/1min/Off(Length of time with no activity before the screen shuts off) |
| Remote Control | Off/On/Remote Match (For pairing with the camera) |
| Date / Time | YYYY / MM / DD / HH / MM / SS |
| Date Stamp | Off / Date / Date & Time |
| Auto Power Off | Off / 1 min / 5 mins(Length of time with no activity before the camera shuts off) |
| Language | English, French, Spanish, Portuguese, German, Italian, 简体中文,繁體中文, PYCCKIЙ, 日本语, 한국어, Polski |
| TV Mode | NTSC/PAL |
| TV Out | Off / On |
| Beep Sound | Off / 30% / 60% / 100% |
| Indicator Lights | Off / On |
| Frequency | 50 HZ / 60HZ |
| Format SD Card | Cancel / Ok |
| Default | Cancel / Ok |
| Version | FWVer: X.X /XXXX XX XX |
WASPcam™ 9905 Wi-Fi User Manual
Photo Menu Settings
From Photo mode, press the menu button to enter photo settings. Navigate with the left/right arrow buttons to choose the options and the OK button to confirm. Press the menu button again to exit the settings menu.
| MENU OPTION | SETTINGS |
| Self-timer | Single / 3s / 10s / 30s Timer |
| Auto Photo | Off / 3 / 5 / 10 seconds |
| Photo Resolution | 12MP / 8MP / 5MP |
| Burst | Off / Burst 3 |
| Quality | Fine / Normal / Economy |
| Sharpness | Strong / Normal / Soft |
| White Balance | Auto / Daylight / Cloudy / Tungsten / Fluorescent / Underwater |
| Color | Color / Black&White / Sepia |
| ISO | Auto / 100 / 200 / 400 |
| Exposure | +2.0 / +1.5 / +1.0 / +0.5 / +0.0 / -0.5 / -1.0 / -1.5 / -2.0 |
| Quick Review | Off / 2 / 5 seconds |
Enabling the Camera's Wi-Fi
1) Before using this function, download and install the WASPcam App or WASPcam 9905 App to your Apple iPhone® or Android™ smartphone.
2) Before using this function, please insert a micro SD card (class 10 card, no larger than 32GB) into the WASPcam™ 9905 Wi-Fi camera. The Wi-Fi function will not work without a micro SD card inserted into the camera.
Installing the WASPcam App
Apple iPhone ^® (iOS system)
There are two ways to download the WASPcam App or WASPcam 9905 App to your iPhone:
- Download from iTunes Store through your computer
- Download from the App store through your iPhone
Note: Before you do the following steps, please confirm that your computer has the iTunes program installed and you have set up an Apple account. It needs to be Apple iOS 6.0 system or above.
Download from iTunes
| Click iTunes icon to open iTunes | |
| Click iTunes Store Icon to open the iTunes Store |
WASPcam™ 9905 Wi-Fi User Manual
| Enter “WASPcam App” or “WASPcam 9905 App” into the search barClick download under the WASPcam App or WASPcam 9905 App Icon | |
| Once it’s finished the WASPcam App or WASPcam 9905 App icon will show on your home screen |
Download from iPhone
 | Click the App Store icon | |
 | Click the search field and enter WASPcam App or WASPcam 9905 App, click the blue search button | |
 | ||
 | Click the icon and click download | |
| Once it's finished the WASPcam App or WASPcam 9905 App icon will show on your home screen | ||
Android Smartphone
 | Open the Google Play store on your phone | |
| Enter “WASPcam 9905” or “WASPcam App” into the search bar and hit search | ||
 | Click on the WASPcam 9905 or WASPcam App icon to view the app page | |
 | Click the install button to install the WASPcam App or WASPcam 9905 App to your phone | |
| Once download is complete, the WASPcam App or WASPcam 9905 App will appear in your application menu. | ||
Using the Camera's Wi-Fi
From video standby mode or playback mode press the menu button twice to enter system settings. Press the left/right arrow buttons to choose Wi-Fi and select open. The Wi-Fi icon will show on the screen. Search the WLAN using your mobile phone and find the network name "WASPcam", connect and enter the password 12345678 (shown on the camera screen) and confirm. Connection is successful when the LCD screen shows "Wi-Fi connected".
Open the WASPcam App or WASPcam 9905 App to preview the camera's view, take video and photos, and change menu settings directly from the connected smartphone.
WASPcam™ 9905 Wi-Fi User Manual
WASPcam 9905 APP Interface Description
 | Open WIFI and to connect, click the WASPcam TACT icon to enter the APP | |
 | This will show on your screen when the app is starting up | |
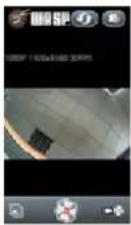 | After connecting, your smartphone will enter standby mode and live viewing screen will be showing on your phone | |
 | Press this icon to switch to recording and photos | |
 | Press this icon to record video or photo | |
 | Press this icon to enter settings:Video ResolutionPhoto SizeLoop RecodingRecord AudioAuto OffClear CacheWi-Fi | |
 | Press this icon to see all the files | |
 | Press this icon to download files from the camera to smartphone | |
 | Press this icon to see the files that have been downloaded to your smartphone | |
 | Press this icon to change your WIFI setting. Connect to the internet network and open the downloaded photo/video on your smartphone and press [icon] to select where to share | |
WASPcam™ 9905 Wi-Fi User Manual
Updating Wi-Fi Name & Password
Updating the Wi-Fi Network Name
Turn the camera on and press the menu button twice to enter system settings, press the left/right arrow buttons to choose WIFI SSID. Press the OK button to select then press the menu button to select Del then press the Ok button to delete the WIFI name. Then you can enter new a new WIFI name. Press the menu button to select uppercase/lowercase letters or numbers, press the left/right arrow buttons to choose the letters to spell the word you want then press the Ok button to confirm. Press the menu button to select and Ok to confirm the setting.
Updating the Wi-Fi Password
Turn the camera on and press the menu button twice to enter system settings, press the left/right arrow buttons to choose WIFI password. Press the OK button to select then press the menu button to select Del then press the Ok button to delete the WIFI password. Then you can enter a new WIFI password. Press the left/right arrow buttons to choose the letters to spell the word you want then press the Ok button to confirm. Press the menu button to select and Ok to confirm the setting.
Note: The WIFI name and passwords need to be at least 8 characters comprised of upper/lower case letters and numbers
Remote Control
Under standby mode, press the menu button to enter system settings, press the left/right arrow buttons to choose remote then select Remote Match. The message on the LCD Screen is “Wait Remote Match” and camera enters pairing mode. Press both buttons on the remote controller to start pairing. Pairing is successful when the LCD screen shows “Remote Match OK”.
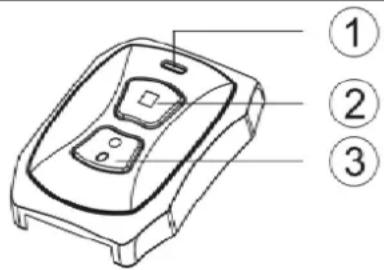
Press the Inquiry/Record Button (3) and the Photo button (2) simultaneously to enter Pairing mode
1 - Indicator light
2 - Photo Button - press to take photos
3 – Inquiry/Record Button – press to start/stop recording, press and hold for 3 seconds to check the present status of the camera (see below)
| Remote Control Indicator Light Status | |||
| Status/LED | Red LED Light | Blue LED Light | |
| Status Inquiry | Standby (Flashes) | 1 time/sec for 5sec | Off |
| Recording | Off | On for 3 seconds, then off | |
| Power Off (Flashes) | 3 secs, then off | Off | |
| Pairing Mode | Pairing | On | On |
| Success (Flashes) | 3 secs, then off | 3 secs, then off | |
| Failure | Off | Off | |
| Start recording (Flashes) | 2 times/sec for 5sec | Off | |
| Stop recording (Flashes) | 1 time/sec for 5sec | Off | |
| Photo | Off | Flashes once each time you take a photo | |
Connecting to External Devices
Playback on HD TV
Turn the camera on, connect the HDMI port in the camera to the TV via an HDMI cable (not included) and choose the HDMI mode on TV. The LCD screen on the camera will turn off automatically and now all operations and functions can be seen on the TV.
WASPcam™ 9905 Wi-Fi User Manual
Playback on TV
Turn the camera on; connect the camera to the TV with the Video cable. Select USB mode on the TV then go into the camera menu settings and make sure the TV Out is set to "On". The LCD screen on the camera will turn off automatically and now all operations and functions can be seen on the TV.
**Note: TV Video cable is not included and when connected it will only transmit images/videos but no sound.
View Files on PC / MAC
Connect the camera to the computer using the included USB cable. The LCD Screen displays Mass Storage and Camera. Press the left/right buttons to select Mass Storage and the record button to confirm. . Click on the CARDV folder on the computer. There are two sub folders MOVIE and PHOTO. Open and view the corresponding files.
Web cam – PC Only
Connect the camera to the computer using the included USB cable. The LCD Screen displays
Technical Specifications
| Sensor | 5 CMOS Sensor |
| Video Resolution | 1080p/30fps, 720p/60fps, WVGA/60fps, VGA/120fps |
| Image Size | 12MP / 8MP / 5MP |
| Memory | Micro SD card up to 32GB – Class 10 |
| Lens | 170° Wide View Angle |
| Video Format | .mov |
| Image Format | JPG |
| Wi-Fi | 802.11b/g/n |
| Remote | 2.4G Remote Control |
| Audio | Built-in Mic, Speaker |
| Port | Micro USB, HDMI, TV OUT (Connects to Video Cable via Micro USB port) |
| Battery | Lithium-ion Rechargeable Battery 1050mAh |
| Screen | 1.5 inch LCD |
| Waterproof | Down to 98 feet (30 meters) without an external housing |
WASPcam™ 9905 Wi-Fi User Manual
© Copyright 2016
All rights reserved. No part of this publication may be reproduced, transmitted, transcribed, stored in a retrieval system or translated into any language or computer language, in any form or by any means, electronic, mechanical, magnetic, optical, manual or otherwise, without the prior written permission of WASPcam / Cobra Electronics.
For manuals in additional languages, please visit www.waspcam.com
Apple and the Apple logo are trademarks of Apple Inc., registered in the U.S. and other countries. App Store is a service mark of Apple Inc.
Android, Google Play and the Google Play logo are trademarks of Google Inc.
© 2016 Cobra Electronics Corporation, 6500 W Cortland Street, Chicago, IL 60707 WASPcam, the WASP design and PROVE IT! are proprietary trademarks of Cobra Electronics Corporation, USA. Other trademarks and trade names are those of their respective owners
- WASPcam™ 9905 Wi-Fi Action-Sports Camera
- User Manual
- WASPcam™ 9905 Wi-Fi User Manual
- Table of Contents
- Manual Disclaimer
- Safety Precautions
- System Requirements
- Features
- Accessories
- Camera Function Quick Guide Diagram
- Basic Camera Functions
- Installing the Micro SD Card
- Using the LED Lights
- Charging the Battery
- Turning the Camera On/Off
- Screen Icons
- Zoom In/Out
- Menu Interface Introduction
- Recording Functions
- Normal Recording
- Loop recording
- Motion Detection
- Image Rotation
- Photos
- Snap Shots
- Normal photo
- 1) Self-timer Mode (Single/3s/10s/30s Timer)
- 2) Auto Photo (Off/3/5/10 seconds)
- 3) Burst (On/Off)
- 4) Quick Review (Off/2seconds/5seconds)
- Playback mode
- Deleting / Protecting Files / Slide Show
- Deleting Files
- Protecting Files
- Slide Show (Off/2/5/8 seconds)
- Video Menu Settings
- System Settings
- Photo Menu Settings
- Enabling the Camera's Wi-Fi
- Installing the WASPcam App
- Apple iPhone ® (iOS system)
- Download from iPhone
- Android Smartphone
- Using the Camera's Wi-Fi
- Updating Wi-Fi Name & Password
- Updating the Wi-Fi Network Name
- Updating the Wi-Fi Password
- Remote Control
- Connecting to External Devices
- Playback on HD TV
- Playback on TV
- View Files on PC / MAC
- Web cam – PC Only
- © Copyright 2016
Brand : COBRA
Model : WASPcam 9905 Wi-Fi
Category : Camcorder