
CCP-10 - Coffee maker CUISINART - Free user manual and instructions
Find the device manual for free CCP-10 CUISINART in PDF.


| Product Type | Electric Cookie Press |
| Brand | Cuisinart |
| Model | CCP-10 |
| Power Supply | 120V AC, 60Hz |
| BPA-Free | Yes |
| Number of Cookie Discs | 12 |
| Number of Pastry Tips | 8 |
| Maximum Dough Capacity | Max fill line (approx. 25-40 cookies per fill) |
| Disc and Tip Material | Stainless steel |
| Motor Body Material | Plastic (wipe clean) |
| Cleaning Removable Parts | Wash with warm soapy water; rinse and dry thoroughly |
| Cleaning Motor Body | Wipe with damp cloth; do not immerse |
| Safety Features | Polarized plug; short cord to reduce tripping hazard |
| Warranty | Limited 3-year warranty for household use |
| Included Accessories | 12 cookie discs, 8 pastry tips, pastry tip adapter, tube cover, shaft, shaft adapter |
Frequently Asked Questions - CCP-10 CUISINART
User questions about CCP-10 CUISINART
0 question about this device. Answer the ones you know or ask your own.
Ask a new question about this device
Download the instructions for your Coffee maker in PDF format for free! Find your manual CCP-10 - CUISINART and take your electronic device back in hand. On this page are published all the documents necessary for the use of your device. CCP-10 by CUISINART.
USER MANUAL CCP-10 CUISINART
natural_image
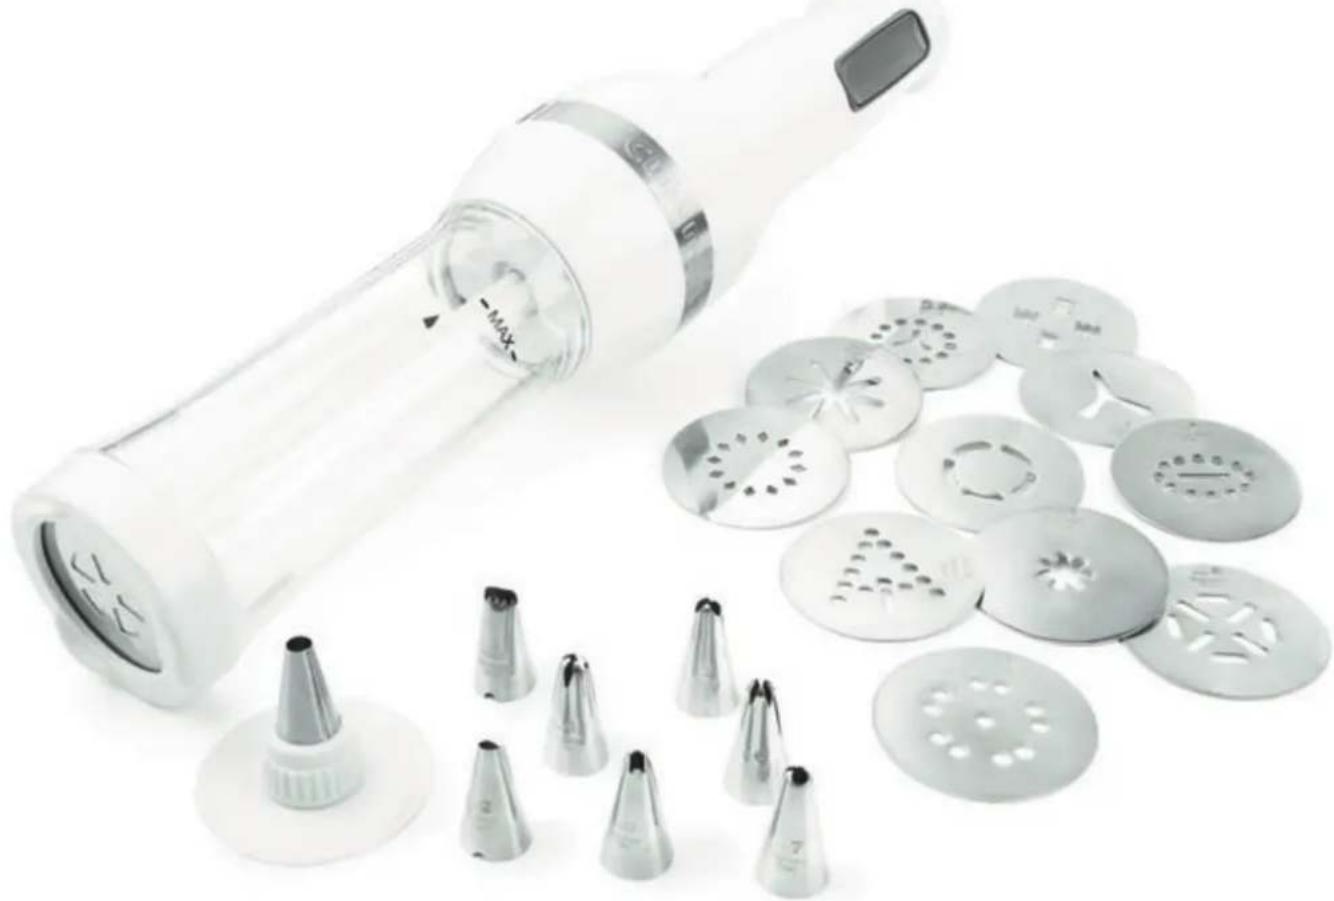
Product photo of a white electric brush tool with multiple circular filter designs and small conical tips (no visible text or symbols)Electric Cookie Press
For your safety and continued enjoyment of this product, always read the instruction book carefully before using.
IMPORTANT SAFEGUARDS
Basic safety precautions should always be followed when using electrical appliances:
- Read entire instruction booklet carefully.
- Do not immerse or rinse motor body, cord or plug in water or any other liquid.
- This appliance is not for use by or near children.
- The unit should be unplugged when not in use, before putting on or taking off parts, and before cleaning.
- Do not touch moving parts.
- Using attachments that are not recommended or sold by the manufacturer of this appliance can result in fire, electric shock, or injury.
- For indoor use only.
- Keep hands, hair and clothing, as well as utensils, away from moving parts, discs, and tips while processing, to prevent the risk of severe injury to persons or damage to the cookie press.
- Handle discs and tips carefully when removing, inserting or cleaning.
- Lock cover and tube securely in place before operating appliance. Do not try to remove tube or tube cover while in use.
SAVE THESE INSTRUCTIONS HOUSEHOLD USE ONLY
POLARIZED PLUG
To reduce the risk of electric shock, this polarized (one prong larger than the other) plug will fit into a polarized outlet only one way. If it does not fit correctly into the outlet, reverse the plug. If the plug still does not fit, consult a professional electrician. Modifying the plug in any way will defeat this safety feature and increase the risk of injury.
SHORT POWER CORD
To reduce the hazards resulting from a longer cord, a short power-supply cord is supplied. If desired, use an extension cord and make sure the marked electrical rating is at least as great as the electrical rating of the appliance. The extension cord should not hang over the counter or tabletop where it could be tripped over or pulled on.
BEFORE FIRST TIME USE:
- Unpack the cookie press and all accessories with care.
- Wash cookie discs, pastry tips, pastry tip adapter, tube cover, pastry tip cover, tube, shaft adapter, press disc and shaft with warm, soapy water. Rinse and dry completely.
- Wipe all surfaces of the motor body with a slightly moistened, soft cloth and dry thoroughly. MAKE SURE THE UNIT IS UNPLUGGED.
- Never immerse the motor body, plug or cord in water or any other liquid, and do not use steel wool, scouring pads or abrasive cleansers as they will damage the finish.
- Dry all parts completely to ensure that no water enters the motor body.
GETTING TO KNOW YOUR ELECTRIC COOKIE PRESS
ASSEMBLY INSTRUCTIONS
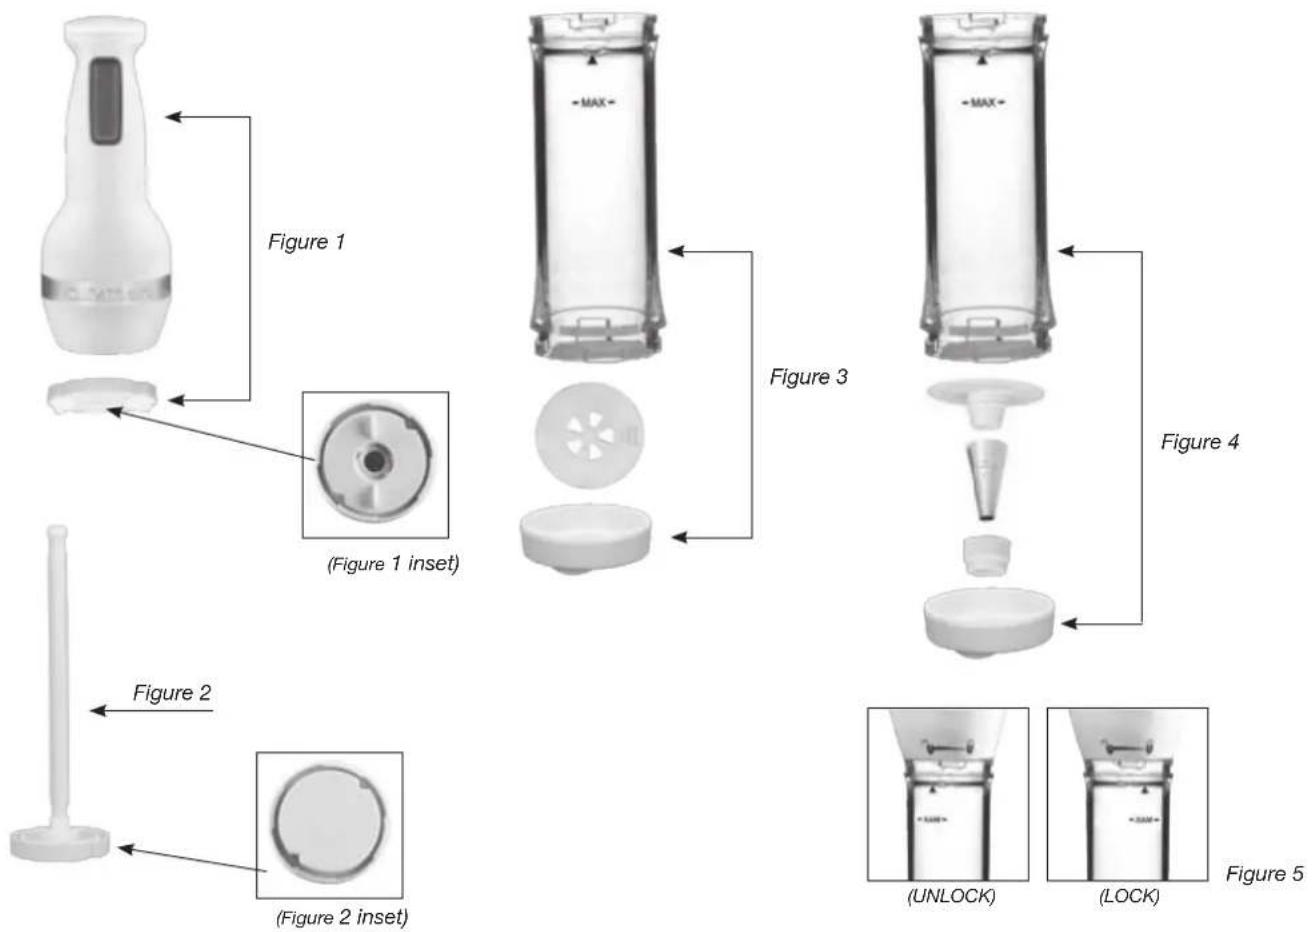
- Place the shaft adapter onto the motor body and turn slightly to align the arrows (see Figure 1).
- Insert the stem of the shaft into the shaft adapter center hole. Push the shaft completely inside the unit and press firmly into place (see Figure 2). The outside contours of the discs on the shaft and the shaft adapter should line up.
- Choose your preferred disc and place it inside the tube cover. Place the tube cover onto the tube and turn clockwise until it locks in place (see Figure 3).
If you are using a pastry tip, refer to Figure 4. Put the desired tip over the pastry tip adapter and secure with the pastry tip cover. Put the pastry tip assembly into the tube cover, place the tube cover onto the tube and turn clockwise to a locked position.
- Load freshly prepared cookie dough or filling into the unit with a spoon or spatula.
NOTE: Do not fill the tube past the MAX fill line.
- Align the long ridges on the inside of the tube with the outside contours of the shaft disc. The arrow on the tube will line up with the UNLOCK position on the motor body. Grasp tube firmly and turn clockwise until the top arrow on the
tube lines up with the LOCK position. You will hear a click when it is in the proper position (see Figure 5).
- You are now ready to begin making cookies.
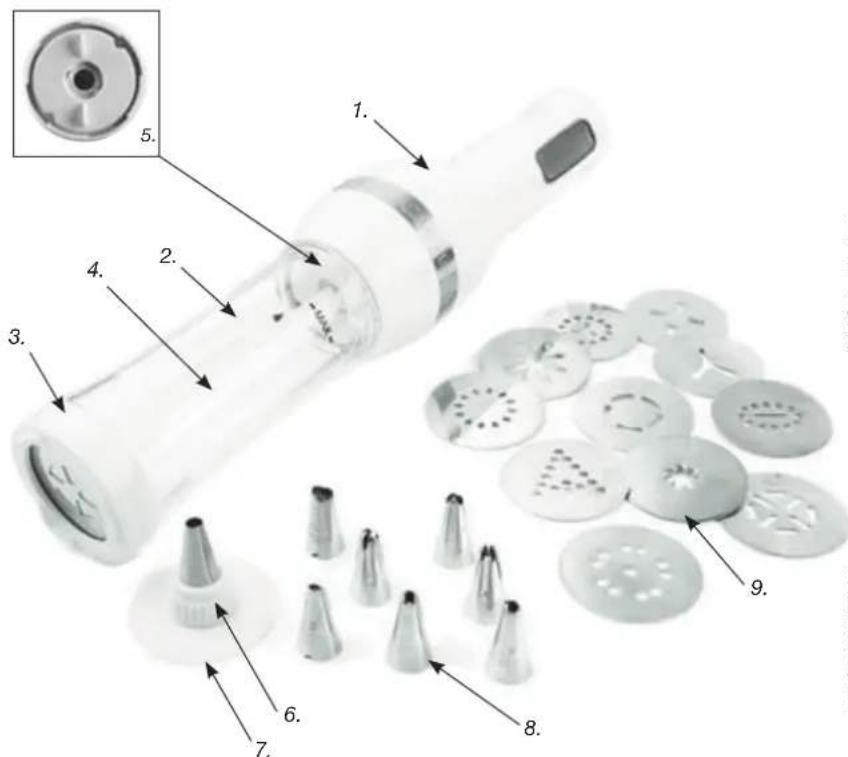
- Motor Body
- Tube
- Tube Cover
- Shaft
- Shaft Adapter
- Pastry Tip Cover
- Pastry Tip Adapter
- Pastry Tips
- Cookie Discs
INSTRUCTIONS FOR MAKING COOKIES
The proper consistency of cookie dough is critical. If it is too stiff, the dough will not release from the cookie press. If it is too soft or sticky, the cookies will not retain their shape. It is best to use the recipes in this booklet until you get a feel for the optimum consistency of the dough. Store-bought refrigerated cookie doughs are not recommended for use in this cookie press. Neither is chilling homemade dough. Practice, practice, practice. That is what it takes to achieve perfect cookies. It is well worth it, for you will have beautiful cookies in the fraction of the time it would take to roll and cut out cookie dough.
- Once you have your Cuisinart® Electric Cookie Press assembled, fill with dough to the MAX fill line.
- Plug the filled cookie press (BPA-Free) into a standard 120V AC outlet.
- Stand the cookie press in the upright position with the tube cover resting on an unlined/ungreased baking sheet. Before pressing your first cookie, all of the air pockets must be pressed out of the dough. To do so, hold down the On/Off button until the dough just starts to be pressed out of the disc.
- To form a cookie, hold the button down for 1 to 2 seconds, depending on the type of dough you prepared or the disc you are using. After pressing for 1 to 2 seconds, gently lift the cookie press from the pan and then repeat to press your next cookie, and so on. You should always have the tube cover resting on the cookie sheet when pressing cookies. Failing to do so will prevent the cookies from forming properly.
REFILLING THE COOKIE PRESS
Most recipes provided require the user to refill the cookie press at least once. Depending on the size of the cookie that you are pressing, you can usually get 25 to 40 cookies per fill.
- In order to refill the press, remove the tube from the motor body, press the shaft to disengage, and reassemble as instructed on page 2.
- Refill with dough to MAX fill line. Again, press all air pockets out of the dough by holding down the On/Off button, and then press your next batch of cookies.
NOTE: if you wish to use a different type of dough or if dough has built up in the shaft adapter, it may be necessary to take apart and clean the entire cookie press before refilling. Always clean and reassemble your cookie press as directed in this manual, and be sure to adhere to food safety guidelines.
HELPFUL HINTS
- Using store-bought refrigerated dough is not recommended.
- Never grease or line your cookie sheets when using the cookie press. If you do, your cookie dough will not stick to the pan, therefore preventing the cookies from maintaining a consistent shape.
- Consistency of the cookie dough is very important. If it is too stiff or dry, it will not be able to be pressed out. You want the dough to be slightly sticky so it will adhere to the pan. If dough is too soft, the cookies will not hold their shape. This will definitely take some practice, but use our recipes as a guide when making your own dough.
- We do not recommend chilling the dough, for it will be too difficult to press. Always use the dough immediately after making. This will yield the best results.
- Cookie doughs must be smooth in texture. If you are flavoring with nuts, be sure that they are very finely ground. This will prevent the cookie press from being clogged.
- The dough should be pliable enough to come out of the disc easily and keep its shape on the cookie sheet.
- If dough is too sticky or soft, refrigerate it for 15 minutes. Another option is to beat a small amount of flour into the dough.
- If the dough is too stiff, mix in a little beaten egg.
- Once dough has been placed into the unit, use it immediately.
- You will find your shapes improving as you become accustomed to the rhythm and timing that works best for each cookie type.
- To make cookies, use discs with cookie dough.
- To decorate candies, cookies, and desserts or to insert pastry or hors d'oeuvres fillings, etc, use pastry tips.
- If the dough is not moist enough to hold decorations, lightly brush a small amount of water, milk or honey where you wish to place the decorations.
- Depending on the recipe, the cookie disc used, and the size of the cookies desired, the amount of cookies yielded will vary.
-
The Cuisinart® Electric Cookie Press comes with 12 cookie discs to make many different shaped cookies with the same dough.
-
Some doughs, ones that are thicker or stickier, tend to fare better with the discs that have larger openings, such as discs 3, 5, 6 and 10.
- Doughs that are not smooth in consistency, such as the Cheese Crackers on page 12 in the recipe booklet, require the same discs with larger openings.

Disc 1


Disc 2 Disc 3


Disc 4


Disc 5 Disc 6


Disc 7


Disc 8


Disc 9

Disc 10


Disc 11


Disc 12
PASTRY TIP SHAPES
The Cuisinart® Electric Cookie Press also serves as an electric piping tool. It comes with 8 different pastry tips to suit all of your decorating and piping needs. From cakes and cookies to filling cream puffs, and from topping savory hors d'oeuvres to filling deviled eggs, there is a tip for everything.
The consistency of what you are to pipe is very important. In most cases, frostings will have to be thicker than normal in order to achieve best results. If the frosting, especially for decorating, is too thin, it will not hold its shape. You will notice that most frostings, decorating or not, will need to be thicker than normal, such as Royal Icing.
We recommend practicing what you are to pipe before you go to the final product. There is a learning curve to getting it just right.
Whether you are filling pâte à choux or piping a decoration on a cake, it is advised to pulse the On/Off button as opposed to holding it down continuously. This allows for more control on
the amount of filling or frosting that will be used at one time.
When piping on a cookie or a cake, for decorating, quickly pulse once and then gauge your work from there. It is better to go under in time than over. There will always be more frosting/filling than expected pressed out of the tip, so go slowly. As when using a traditional pastry bag for decorating, you want to guide the frosting as if it were a ribbon, as opposed to forcing it in place.
When filling, be it cream puffs or deviled eggs, pipe desired amount and then pause between each, making sure all of the filling is removed from the tip before moving on to the next one.
To decorate and add textures, colors, or flavors to cookies, cakes and candies, use the pastry tips. Following are the uses we suggest.
1 Round Tip: Use to make cream puffs or gougères
2 Ribbon/Rose: Can also be used to make flowers on cakes
3 3-Prong Star: Use to make stars for decorating cakes/cupcakes
4 Ridged Border: Makes an elegant ridged border
5 Ribbed/Basket Weave: An easy way to make a beautiful basket weave on cakes.
6 Classic Star Tip: Use for decorating cakes and filling cream puffs
7 Simple Border: Great for piping borders on cakes
8 3-Prong Border: Beautiful when used to pipe cream or meringues on tarts/pies.
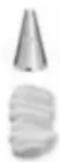
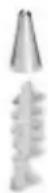
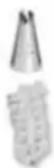
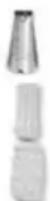
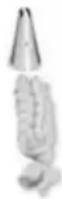
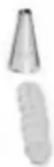
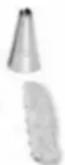
Round Tip
Ribbon/Rose
3 Prong Star
Ridged Border
Ribbed/ Basket Weave
Classic Star Tip
Simple Border
3 Prong Border
CARE, CLEANING AND MAINTENANCE
To keep your cookie press in optimum operating condition, we recommend cleaning after each different filling is used.
- Unplug unit.
- To unlock the tube cover and the cookie disc or tip, hold the tube pointing downward with one hand and turn the tube cover counterclockwise. Remove the disc or tip assembly.
- Holding the motor body with one hand, and the tube with the other hand, turn the tube counterclockwise. The arrow on the tube should line up with the UNLOCK position on the motor body. Pull off to remove. Slide out the shaft and turn the shaft adapter counterclockwise to remove.
- Wash all removable parts and accessories in warm, soapy water immediately after use. Rinse and dry thoroughly.
- Discs and tips are stainless steel and should be cleaned with a soft cloth or sponge. Make sure to dry immediately to avoid spotting.
- Wipe the exterior of the motor body with a soft, damp cloth and dry completely.
- Do not use steel wool, scouring pads or abrasive cleansers, as they will damage the finish.
- When the disks and tips have been used for a while, they may darken in color. This is to be expected and does not interfere with the product performance.
- A stiff brush can be used to clean the inside of the tube and pastry tips.
- Any other servicing should be performed by an authorized service representative.
STORAGE
- Clean the cookie press as instructed.
- Put the cookie press and parts in the original box and store in a clean, dry location.
NOTE: When the unit is not in use, be sure it is unplugged.
CUISINART® ELECTRIC COOKIE PRESS
LIMITED 3-YEAR WARRANTY
This warranty is available to consumers only. You are a consumer if you own a Cuisinart® Electric Cookie Press that was purchased at retail for personal, family or household use. Except as otherwise required under applicable law, this warranty is not available to retailers or other commercial purchasers or owners.
We warrant that your Cuisinart ^® Electric Cookie Press will be free of defects in materials and workmanship under normal home use for 3 years from the date of original purchase.
We recommend that you visit our website, www.cuisinart.com for a fast, efficient way to complete your product registration. However, product registration does not eliminate the need for the consumer to maintain the original proof of purchase in order to obtain the warranty benefits. In the event that you do not have proof of purchase date, the purchase date for purposes of this warranty will be the date of manufacture.
If your Cuisinart® Electric Cookie Press should prove to be defective within the warranty period, we will repair it, or if we think necessary, replace it. To obtain warranty service, simply call our toll-free number 1-800-726-0190 for additional information from our Customer Service Representatives, or send the defective product to Customer Service at Cuisinart, 7811 North Glen Harbor Blvd., Glendale, AZ 85307.
To facilitate the speed and accuracy of your return, please enclose \$10.00 for shipping and handling of the product.
Please pay by check or money order (California residents need only supply proof of purchase and should call 1-800-726-0190 for shipping instructions).
NOTE: For added protection and secure handling of any Cuisinart® product that is being returned, we recommend you use a traceable, insured delivery service. Cuisinart cannot be held responsible for in-transit damage or for packages that are not delivered to us. Lost and/or damaged products are not covered under warranty. Please be sure to include your return address, daytime phone number, description of the product defect, product model number (located on bottom of product), original date of purchase, and any other information pertinent to the product's return.
Your Cuisinart® Electric Cookie Press has been manufactured to the strictest specifications and has been designed for use with the authorized accessories and replacement parts.
This warranty expressly excludes any defects or damages caused by accessories, replacement parts, or repair service other than those that have been authorized by Cuisinart.
This warranty does not cover any damage caused by accident, misuse, shipment or other ordinary household use.
This warranty excludes all incidental or consequential damages. Some states do not allow the exclusion or limitation of these damages, so these exclusions may not apply to you.
CALIFORNIA RESIDENTS ONLY:
California law provides that for In-Warranty Service, California residents have the option of returning a nonconforming product (A) to the store where it was purchased or (B) to another retail store that sells Cuisinart ^® products of the same type.
The retail store shall then, at its discretion, either repair the product, refer the consumer to an independent repair facility, replace the product, or refund the purchase price less the amount directly attributable to the consumer's prior usage of the product. If the above two options do not result in the appropriate relief to the consumer, the consumer may then take the product to an independent repair facility if service or repair can be economically accomplished. Cuisinart and not the consumer will be responsible for the reasonable cost of such service, repair, replacement, or refund for nonconforming products under warranty.
California residents may also, according to their preference, return nonconforming products directly to Cuisinart for repair, or if necessary, replacement, by calling our Consumer Service Center toll-free at 1-800-726-0190.
Cuisinart will be responsible for the cost of the repair, replacement, and shipping and handling for such products under warranty.
BEFORE RETURNING YOUR CUISINART® PRODUCT
If you are experiencing problems with your Cuisinart® product, we suggest that you call our Cuisinart® Service Center at 1-800-726-0190 before returning the product to be serviced. If servicing is needed, a Representative can confirm whether the product is under warranty and direct you to the nearest service location.
Important: If the nonconforming product is to be serviced by someone other than Cuisinart's Authorized Service Center, please remind the servicer to call our Consumer Service Center at 1-800-726-0190 to ensure that the problem is properly diagnosed, the product is serviced with the correct parts, and the product is still under warranty.
©2011 Cuisinart
150 Milford Road
East Windsor, NJ 08520
Printed in China
10CE113646
FIB-9262B
Nutritional information per serving: Calories 54 (70% from fat) • carb. 7g • pro. 3g • fat 4g • sat. fat 7g • chol. 108mg • sod. 144mg • calc. 159g • fiber 0g
-
Pipe a rosetie on each white in place of the yolk. Pause between each egg, making sure any of the fillings is removed from tip before moving on to the next egg. Sprinkle with paprika before serving.
-
Fit the Cuisinar/Electric Cooke Press with the pasty tip assembly using the star tip (#6) as instructed on page 5. Load the egg filling to the MAX fill line.
-
Pulse in the remaining ingredients and process until smooth, about 45 seconds to 1 minute. Taste and adjust seasoning accordingly.
-
Remove yokes and put them into the work bowl of a Cuisine Food Processor fitted with the metal chopping blade; process until smooth, about 45 seconds.
-
Peel the cooked eggs and carefully slice in half. Place the egg white halves on a clean work surface.
Masks 24 serivings 12 Large hard-boiled eggs ½ cup mayonnaise ½ teaspoons Dion-style mustard 1½ teaspoons fresh lemon juice 1 teaspoon Worcestershire sauce 2 tablespoons capers, drained ½ teaspoon kosher salt ½ teaspoon freshy ground black pepper ¾ teaspoon freshly ground black pepper paprika for garnish
The quintessential hors d'oeuvre – with a party-ready look.
Devised Eqs
Calories 46 (82% from fat) • carb. 0g • pro. 2g • fat 4g • sat. fat 3g • chol. 13mg • sod. 70mg • calc. 16mg • fiber 0g
Nutritional information per serving (1 tablespoon):
* Refer to piping tips on page 5 for best results.
-
Pipe cheese spread onto crackers or vegetables as desired.*
-
Fit the Cuisine Electric Cookie Press with the pasty tip assembly using the star tip as instructed on page 5. Load the cheese spread to the MAX fill line.
-
Put the scalloirs, parsley, chill, zest, salt and pepper into the work of a Cuisian® Food Processor fitted with the metal chopping blade. Bow of a Cuisian® Food Processor filled with the cream cheese, chieve it necessary, about 45 seconds to 1 minute. and lemon juice and process until fully incorporated, scraping bowl and limon juice and process until fully incorporated, scraping bowl
4 ounces cheese (soft goat cheese) 12 teaspoon fresh lemon juice
1/8. teaspoon freshly ground black pepper g ounces cream cheese, cubed and at room temperature
2 tablespoons fresh dill ^1 teaspoon lemon zest ^1 /4 teaspoon kosher salt ^1 /4 teaspoon kosher
2 scalloons, cut into 1-inch pieces ^1/4 cup Italian parsley leaves, packed
Makes 1% cups
A fresh cheese spread, ideal for both crackers and culites.
Herbed Cheese Spread
Nutritional information per cracker: Calories 24 (56% from fat) • carb. 2g • pro. 0g • fat 1g • sat. fat 1g • chol. 4mg • sod. 1mg • calc. 1mg • fiber 0g
* Note: Due to the shredded cheese in this dough, we recommend using discs 3, 5, 6, 10 or 12.
-
Cool crackers before removing from pan.
-
Bake in the preheated oven for 10 to 12 minutes, or until inghtly golden around the edges.
-
Fit the Cuisinia Electric Cookie Press with desired disc*, as instructed on page 5. Load the cracker dough to the MAX fill line. Press dough out onto an ungrazed/unlinded baking pan, about 2 inches apart.
-
In a large mixing bowl, combine the butter and the cheese. Using a Cuisine? Hand or Stand Mixer fitted with the mixing batters/paddle, mix until fully compiled. Add the remaining ingredients and mix on low until compiled.
-
Percent oven to 400°F.
pinch caffeine 1½ cups unbleached, all-purpose flour
^1/2 teaspoon freshly ground black pepper
1/2 teaspoon sea salt
at room temperature 8 ounces sharp cheddar cheese, finely shredded
4 tablespoons unsalted butter, cubed and
Makes about 65 medium-size crackers
So simple, whip these up before your next party.
Cheddar Cheese Crackers
Calories 13 (61% from fat) • carb. 1g • pro. 0g • fat 1g • sat. fat 0g • chol. 5mg • sod. 17mg • calc. 7mg • fiber 0g
Nutritional information per gougere:
-
Serve immediately.
-
Place the pan of priced gougets in the preheated oven. Turn the oven off and let sit in the hot oven for 10 minutes. Turn the oven back on and set to 300°F. Let bake for 20 to 25 minutes, or until the gougets are hollow, incely browned, and not wet inside. To ensure seven color, turn baking sheets halfway through baking.
-
Fit the Canadian Electric Cookie Press with the pasty tip assembly, using the basic round tip (#1) as instructed on page 5. Load the batter to the MAX still line. Pipe the batter out into 1-inch rounds onto a parchment paper-lined baking pan, about 1 inch apart. To achieve the best results, instead of holding the ON/OFF button down, pulse and let the batter slowly come out of the press.
Once the dough has achieved the correct consistency, add the remaining ingredients. Mix on low to combine.
5.
hold its shape.
Once the dough has cooled, after about 2 to 3 minutes, start adding the eggs, one at a time, mixing each until fully incorporated before adding the next. The dough is ready when it becomes a pale yellow color and is thickened. Typically, gougers batter should drop from the paddle in a slow and steady stream, but for use in the cookie press, the desired consistency is between a thick cake batter and a soft cookie dough. If the dough is too difficult slowly, begin to add them, little by little until the batter is running slowly, begin to add them, little by little until the batter is correct. Be sure not to make the dough too runny or it will not
4.
Remove from heat and put mixture into the bowl of a Cuisine. Stand Mixer, fitted with the mixing paddle. Mix on a low speed to release steam and cool.
3.
Put the water, butter, % teaspoon salt, and sugar into a smell or medium saucepan and set over medium heat. Once the mixture comes to a boil, remove from heat and stir in all of the flour. Return to bumper and raise the heat to medium-high. Using a wooden spoon, continuously stir the mixture until it draws out. You will know it is done when the dough leaves a thick hard film on the bottom of the pot. It is better to overlook at this stage, than not enough.
- Percent oven to 500°F.
1% teaspoon paprika
1/2 teaspoon caffeine
^1/2 teaspoon freshly ground black pepper
1 cup finely shredded Gruyere cheese, divided
2 large eggs, plus 2 more if necessary
1/2 cup plus 2 tablespoons unbleached, all-purpose flour
1/2 teaspoon granulated sugar
^1/_2 teaspoon fine sea salt or table salt, divided
4 tablespoons unsalted butter
1/2 cup water
Makes about 95 one-inch gougeres
Although Gruyere is the classic ingredient for gougetes, you may substitute your favorite cheese.
Gouqeres
Nutritional information per serving (1 tablespoon): Calories 24 (0% from fat) • carb. 6g • pro. 0g • fat 0g • chol. 0mg • sod. 4mg • calc. 0mg • fiber 0g
* Please refer to piping tips on page 5 for best results.
Note: While this foresting is best used right away, it can be stored in an airlight container in the refrigerator overnight.
-
Fit the Cuisin's Electric Cooke Press with the pasty tip assembly, using desired tips as instructed on page 5. Load the icing to the MAX fill line. Pipe as desired.*
-
Transfer the bowl to a towel set on a countertop. And the vanilla and continue to mix on high for another 2 to 3 minutes, or until the frosting is thickened with stiff peaks. The frosting should have a soft, fluffy marshmallow cream texture.
-
Place the mixing bowl over a pot of simmering water set over medium heat. While still using the hand mixer, beat on high for about 7 minutes, or until an instant-read thermometer registers 160°F.
-
Combine the sugars, corn syrup, egg wipes, cream of later and the warm water in a large mixing bowl. Using a Cuisine® Hand Mixer fitted with the ciners' wists, beat on medium-look speed for about 1 minute, or until fully combined and slightly thickened.
1 teaspoon pure vanilla extract
3 tablespoons warm water
1/4 teaspoon cream of tarar
2 large egg whites
^1/_3 cup light corn syrup
1 cup granulated sugar
Makes about 3 cups
This frosting is perfect on cupcakes. It is especially delicious when paired with chocolate cake.
Fluffy Frosting
Nutritional information per serving (1 tablespoon): Calories 137 (74% from fat) · carb. 9g · pro. 0g · fat 12g · sat. fat 7g · chol. 30mg · sod. 2mg · calc. 4mg · fiber 0g
* Please refer to piping tips on page 5 for best results.
Tip: If using coloring or flavoring extract for the icing, add it with the vanilla and corn syrup in step 2.
-
Fit the Cuisinarian Electric Cooke Press with the pasty tip assembly, using desired tip as instructed on page 5. Load the ring to the MAX fill line. Pipe as desired.
-
Add the vanilla and corn syrup. Mix until completely smooth.
padde, mix until light and creamy.
- In a large mixing bowl, combine the butter and sugar. Using a Cuisinart® Hand or Stand Mixer fitted with the mixing beaters/
1 tablespoon light corn syrup
1 tablespoon pure vanilla extract
2 cups confectioners, sugar, sified
at room temperature
3% cup (1½ sticks) unsalted butter, cubed and
Makes about 1% cups
to this icing every time.
A did that professional touch to your cakes with this simple decorating icing. From borders to flowers, you'll turn back
Decoratingicing
Nutritional information per serving (1 teaspoon); Calories 22 (7% from fat) • carb, 6g • pro, 0g • fat 0g • chol, 0mg • sod, 1mg • calc, 1mg • fiber 0g
Tips: Royal icing is best used immediately. If you are not using right after step 2. If using coloring or flavoring extract for the icing, and it with the milk and lemon juice in step 2. *Please refer to piping tips on page 5 for best results.
- With the mixer running, slowly and the egg white. Once the egg white is completely incorporated, slowly and the milk and lemon juice. Continue to mix on speed 1, gradually increasing to speed 3 until the mixture has formed soft peaks.
-
Fit the Cuising Electric Cookie Press with the pasty tip assembly, using desired tip as instructed on page 5. Load the icing to the MAX fill line. Pipe as desired.*
-
Put the sugar into a large mixing bowl. Using a CuisineHand Mixer fitted with the cherts' whisk, mix on speed 1.
1 teaspoon fresh lemon juice
2 tablespoons whole milk
1 large egg white, slightly beaten
4 cups confectioners, sugar, sitted
Makes about 1% cups
This icing is great for decorating sugar cookies or cakes. You can use food coloring to color it or extra cuts to flavor it.
Royalcing
Nutritional information per serving (1 teaspoon): Calories 37 (59% from fat) • carb. 49 • pro. 0g • fat 29 g • chol. 5mg • sod. 8mg • calc. 4mg • fiber 0g
-
Once the gauche has cooled, fit the Caucasian Cooke Press with the pasty tip assembly, using the round pasty tip (#1). Load the gauche to the MAX fill line. Pipe as desired. Please refer to piping tips on page 5 for best results.
-
Cool the garage until thickened, about 1 hour at room temperature, or 20 minutes in the refrigerator.
-
And the corn syrup and salt. Whisk until mixture is smooth and shiny. If the chocolate did not fully melt, set over a pot of slimming water and whisk to fully combine. Please note, the more the gauche is whisked; the shiner and smoother it will be.
-
Pour the hot cream over the reserved chocolate. Let sit for 5 to 10 minutes to melt.
heart.
- Put the chocolate into a medium heat-proof mixing bowl. Reserve.
- Bring the cream just to a boil in a small saucepan set over medium. 3.
pinch sea salt
1 tablespoon light corn syrup
^1/_3 cup heavy cream
chocolate chips)
½ cup semisweet chocolate, chopped (may also use
Makes about 1/2 cup
the centers of the baked cookies.
Pipe some of the ganche in
Ganche
Nutritional information per cookie: Calories 215 (71% from fat) • carb, 14g • pro, 29 g • fat 17g • sat, fat 17g • chol. 48mg • sod, 13mg • calc, 28mg • fiber 19
**Refer to piping tips on page 5 for best results.
If using for cream puts, we recommend the star tip (#6).
-
Pipe mouse as desired**.
-
Fit the Cuisine Electric Cooke Press with the pasty tip assembly, using desired tip as instructed on page 5. Load the mouse to the MAX fill line.
-
Carefully fold the whipped cream into the cooled chocolate mixture in three additions by using a large rubber spatula until mixture is homogeneous. Cover with plastic and chill for about 30 minutes.
-
Using a Cuisinhardt and of Stand Mixer fitted with the wish attachment, while the cream on a medium speed, gradually increasing to high speed until cream holds firm peaks, about 1% minutes.
-
Pour the scaled cream over the chocolate and stir so that chocolate is completely melted and smooth. Let chocolate cool to room temperature. Put the remaining heavy cream and kathula into a separate mixing bowl.
-
Put the chocolate into a large, heat-proof mixing bowl. Pour 1 cup of the heavy cream into a small saucepan and bring just to a boil.
2½ cups heavy cream, divided
12 ounces semi-sweet chocolate, chopped
Makes about 4½ cups
For a special treat, use this mouse as a filling for cream pulls.
Simpie Chocolate Mousese
Nutritional information per serving (1 tablespoon): Calories 96 (61% from fat) · carb. 8g · pro. 2g · fat 7g · sat. fat 4g · chol. 67mg · sod. 74mg · calc. 37mg · tiber 0g
**Please refer to piping tips on page 5 for best results.
* Using a small, sharp knife, cut the vanilla bean in half-lengthwise and then scrape the seeds from inside the bean with the knife tip.
·6u1s9
Note: The lightered pasty cream is best used the same day as prepared. If not using right away, it is best to prepare the pasty cream through step 5 and then lightering it with the heavy cream before
Fit the Cushing Electric Cookie Press with the pasty tip assembly, using desired tips* instructed on page 5. We recommend using the star tip (#6). Load the lightened pasty cream to the MAX fill line. Pipe as desired.*
7.
-
Once the pasty cream has fully cooled, why the remaining 1/2 cup of heavy cream to medium peaks. Fold into the cooled pasty cream until smooth.
-
To prevent a skin from forming, cover directly with plastic wrap and cool completely before using. To speed up the cooling process, set the mixing bowl over a bowl of ice and water.
-
Return mixture to the saucan pan over medium heat. Bring to a boil and cook while whisking continuously, being sure to wish until thickened. Stirring constantly is very important to avoid the entire surface of the pan. Wish for about 2½ minutes
5.
- Once the milk/cream mixture has reached a heavy slimmer, and one third slowly to the your/sugar mixture while whisking. Withsk until completely combined. And the remaining mixture slowly while mixing.
4.
the whisk attachment, while the ingredients until light in color and thicknessed.
-
Put egg yolks, remaining sugar and contrast into a large mixing bowl. Using either a Cuisinart Hand or Stand Mixer, fitted with
-
Put the milk, 12 cup cream, 14 cup sugar, salt, vanilla extract, vanilla bean seeds and pod into a saucan pan over medium heat. Bring mixture to a heavy simmer.
2 tablespoons constarch
4 large egg yolks
1 vanilla bean, halved and seeds scraped*
% tablespoon pure vanilla extract
1/2 teaspoon salt
½ cup granulated sugar, divided
1 cup heavy cream, divided
1% cups whole milk
Makes about 3½ cups
fresh fruit tarts or as a cake filling.
The essential filling for cream puts, this is also delicious in
Lighened Pasty Cream
• chol. 21mg • sod. 38mg • calc. 3mg • fiber 0g
Calories 26 (60% from fat) • carb. 2g • pro. 1g • fat 2g • sat. fat 1g
Nutritional information per choux:
work well.
(recipe follows) or the Simple Chocolate Mousse on page 9 – both
For a sweet finish to your meal, the Lightheaded Pasty Cream
d'oeuvre, we suggest the Herbed Cheese Spread on page 13.
- Let choux cool, and then fill with desired filling. For a beautiful hors
even color, turn baking sheet halfway through baking.
choux are hollow, nicely browned, and not wet inside. To ensure
on and set to 300°F. Let bake for 20 to 25 minutes, or until the
off and let sit in the hot oven for 10 minutes. Turn the oven back
- Place the pan of piped choux in the preheated oven. Turn the oven
out of the press.
ON/OFF button down, pulse and let the batter slowly come
1 inch apart. To achieve the best results, instead of holding the
rounds onto a parchment paper-linded baking pan, about
Load the batter to the MAX fill line. Pipe the batter out into 2-inch
assembly, using the basic round tip (#1) as instructed on page 5.
Fit the Cuisine® Electric Cookie Press with the pasty tip
.9
5.
shape.
beat the remaining two eggs together and, with the mixer running, slowly begin to add them, little by little, until the dough is correct. Be sure not to make the dough too runny or it will not hold its
pare yellow color and is thickened. Typically, plate a choux batter should drop the paddle in a slow and steady steam, but for use in the cookie press, the desired consistency between a whisk clear batter and a soft cookie dough. If the dough is too thick, clear batter and a soft cookie dough. If the dough is too thick, clear batter and a soft cookie dough.
Once the dough has cooled, after about 2 to 3 minutes, start adding the eggs, one at a time, mixing each until fully incorporated before adding the next. The dough is ready when it becomes a
4.
release steam and cool.
Stand Mixer, fitted with the mixing paddle. Mix on a low speed to Remove from heat and put mixture into the bowl of a Cuisine
3.
Put the water, butter, salt and sugar into a small or medium saucedan and set over medium heat. Once the mixture comes to a boil, remove and raise the heat to medium-high. Using a wooden spoon, bumper and raise the heat to medium-high. This is continuously stir the mixture until it dies out. You will know it is done when the dough leaves a thick hard film on the bottom of the pot. It is better to overlook at this stage, than not enough.
- Percent oven to 500°F.
2 large eggs, plus 2 more if necessary
1/2 cup plus 2 tablespoons bread flour
½ teaspoon granulated sugar
% teaspoon fine sea salt or table salt
4 tablespoons unsalted butter
1/2 cup water
Makes about 40 two-inch choux or puts
savory preparations.
Very versatile, plate a choux can be used for both sweet and
Pate a Chowx - Cream Puffs
• chol. 1mg • sod. 25mg • calc. 2mg • fiber 0g
Calories 51 (42% from fat) • carb. 7g • pro. 1g • fat 2g • sat. fat 1g
Nutritional information per cookie:
using discs 3, 4, 5, 6 or 10.
* Note: Due to the consistency of this cookie dough, we recommend
-
Cool cookies before removing from pan.
-
Bake in the preheated oven for 12 to 15 minutes, or until just set.
about 2 incomes apart.
- Fit the Cuisine Electric Cookie Press with desired disc*, as instructed on page 2. Load the cookie dough to the MAX fill line. Press cookie dough out onto an ungrazed/unlinded baking pan,
completely consolidated.
- In a large mixing bowl, combine the butter and sugars. Using a Cuisine³Hand or Stand Mixer filled with the mixing beters/ paddle, mix until light and creamy. Add the egg and yolk, one at a time; mix until fully combined. Add half of the reserved dry moalasses, milk and vinegar. Increases to medium-low speed and ingredients and mix on low. Once almost fully combined, add the ingredients and mix on low, once almost fully combined, add the milasses, milk and vinegar. Add remaining ingredients and mix until
Bowl. Whisk to combine; reserve.
-
Put the flour, baking soda, salt and spices into a small mixing
-
Percent oven to 350°F.
½ tablespoon distilled white vinegar
½ tablespoon whole milk
1/3 cup molasses
1 large egg yolk
1 large egg
3 tablespoons packed light brown sugar
^1/_3 cup granulated sugar
at room temperature
6 tablespoons unsalted butter, cubed and
% teaspoon ground cardamom
½ teaspoon ground cloves
3% teaspoon ground ginger
1 teaspoon ground cinnamon
1/2 teaspoon salt
3% teaspoon baking soda
3 cups unbleached, all-purpose flour
Makes about 65 medium-size cookies
with a Cuisine® Spice Grinder.
To give these cookies a stronger flavor, freshly grind your spices
Ginger Cookies
• chol. Tmg • sod. 20mg • calc. 2mg • fiber 0g
Calories 27 (35% from fat) • carb. 49 • pro. 09 • fat 19 • sat. fat 19
Nutritional information per cookie:
- Cool cookies before removing from pan.
golden around the edges.
- Bake in the preheated oven for about 12 minutes, or until eligibility
about 1 inch apart.
Fit the Cuising Electric Cooke Press with desired disc as instructed on page 2. Load the cookie dough to the MAX fill line. Presses cookie dough out onto an ungrazed/unlined baking pan,
4.
dry ingredients and mix on low, until just combined.
Custinart® Hand or Stand Mixer fitted with the mixing batters/ padable, mix until light and fluffy. Add the vanilla and then the eggs, one at a time, until completely combined. Add the reserved
- In a large mixing bowl, combine the butter and sugars. Using a
Bowl. Wish to combine; reserve.
-
Put the flour, baking soda, salt and spices into a small mixing
-
Preheat oven to 350°F.
2 large eggs
1 teaspoon pure vanilla extract
1/4 cup packed light brown sugar
1/2 cup granulated sugar
1/2 cup unsalted butter, melted and cooled
^1/_8 teaspoon freshly ground black pepper
^1/_8 teaspoon ground ginger
^1/_8 teaspoon ground nutmeg
^1/_8 teaspoon ground cloves
1/4 teaspoon ground cinnamon
1/2 teaspoon table salt
1/2 teaspoon baking soda
2½ cups unbleached, all purpose flour
Makes about 100 medium-size cookies
a nice kick.
This traditional French spice blend gives these cookies
Quatre Eprice Cookies
Nutritional information per cookie: Calories 24 (59% from fat) · carb. 2g · pro. 1g · fat 2g · sat. fat 1g · chol. 4mg · sod. 27mg · calc. 6mg · tiber 0g
-
Cool cookies before removing from pan. Note: Due to the consistency of this cookie dough, we recommend using discs 3, 4, 5, 6 or 10.
-
Fit the Cusinsinelectric Cookie Press with desired disc*, as instructed on page 2. Load the cookie dough to the MAX fill line Presses the cookie dough out onto an ungrasese/unlined baking pan, about 1 inch apart.
-
Bake in preheated oven for about 10 to 12 minutes, until just set.
-
In a large mixing bowl, combine the butter, softening and sugars. Using a Cruiser Hand or Stand Mixer fitted with the mixing batters/paddle, mix until vanilla and creamy. Mix in the peanut butter until combined. Mix in the vanilla and then the eggs, one at a time, until completely corniand. Add the reserved dry ingredients and mix on low, until just combined.
-
Prepared oven to 350°F.
- Put the flour, baking soda, baking powder, and salt into a small mixing bowl, Whisk to combine; reserve.
at room temperature 4 tablespoons shortening (preferably non-hydrogenated) 3 tablespoons packed light brown sugar 3 tablespoons granulated sugar 3% cup peanut butter (creamy, but not natural) 1 teaspoon pure vanilla extract 2 large eggs, at room temperature
Makes about 125 medium-size cookies 1% cups unbleached all-purpose flour 3% teaspoon baking soda 1/2 teaspoon baking powder 1/2 teaspoon salt 4 tablespoons unsalted butter, cut into 8 pieces and
This traditional-style peanut butter cookie is an old-time favorite.
Peanut Butter Cookies
Nutritional information per cookie: Calories 5† (42% from fat) • carb. 7g • pro. 1g • fat 2g • sat. fat 1g • chol. 1 mg • sod. 25 mg • cals. 2 mg • fiber 0 g
-
Cool cookies before removing from pan.
-
Bake in the preheated oven for 10 to 15 minutes, or until implicitly golden around the edges.
-
In a large mixing bowl, combine the butter and sugar. Using a Cuisturat ^® Hand of Stand Mixer filled with the mixing bearers/paddle, mix until light and creamy. Add the vanilla eggs, ingredients and mix on low, until just combined.
-
Fit the Cuistinar Electric Cooke Press with desired disc, as instructed on page 2. Load the cookie dough to the MAX fill line. Press cookie dough out onto an ungreased/unlined baking pan, about 2 inches apart.
-
Preheat oven to 350°F.
- Put the flour, cream of tarter, baking soda and salt into a small mixing bowl, Whisk to combine: reserve.
at room temperature 1½ cups granulated sugar 1 teaspoon pure vanilla extract 2 large eggs
Makes about 85 medium-size cookies 2% cups unbleached, all-purpose flour 1 teaspoon baking soda 1 teaspoon baking soda 7% teaspoon salt ½ pound (2 sticks) unsalted butter, cubed and
A favorite of both the young and old, these are sure to disappear quickly!
Sincerodoles
Nutritional information per cookie: Calories 43 (46% from fat) • carb. 5g • pro. 0g • fat 2g • sat. fat 1g • chol. 5mg • sod. 20mg • calc. 12mg • fiber 0g
-
Cool cookies before removing from pan.
-
Bake in the preheated oven for about 12 minutes, or until just set.
-
Fit the Chinese Electric Cookie Press with desired disc as instructed on page 2. Load the cookie dough to the MAX fill line. Press cookie dough out onto an ungrazed/unlinded baking pan, about 1 inch apart.
-
In a large mixing bowl, combine the butter and sugar. Using a Chinese Hand or Stand Mixer filled the mixing beaters/ paddle, mix until light and fuzzy. Mix in the egg and yolk, one at the reserved dry ingredients and mix on low, until just combined. Add a time, and then the milk mixture until completely combined. Add the time, and then the milk mixture until completely combined. Add the reserved dry ingredients and mix on low, until just combined.
-
Combine the milk, espresso powder and vanilla in a small bowl. Sift to blend; reserve. Put the flour, cocoa, baking powder and salt into a separate small mixing bowl. Whisk to combine; reserve.
-
Preheat oven to 350°F.
Makes about 130 medium-size cookies 2 tablespoons milk (may use low-fat) 1 tablespoon instant espresso powder 1 tablespoon pure vanilla extract 3 cups unbleached, all-purpose flour 2 tablespoons unsweetened cocoa powder 1½ teaspoons baking powder 3% teaspoon salt at room temperature 2 cups granulated sugar 1 large egg egg 1 large egg yolk
These delicious sugar cookies have a deep mocha flavor.
Mocha Sugar Cookies
Nutritional information per cookie: Calories 30 (46% from fat) • carb, 359 • pro, 39 • fat 29 • sat, fat 19 • chol, 3mg • sod, 30mg • calc, 17mg • fiber 0g
-
Cool cookies before removing from pan.
-
Bake in the preheated oven for about 12 minutes, or until agility golden around the edges.
-
Fit the Customers Electric Cookie Press with desired disc as instructed on page 2. Load the cookie dough to the MAX fill line. Press cookie dough out onto an ungrazed/unlinded baking pan, about 1 inch apart.
-
Cin satellite, Hand of Stand Mixer filled with the mixing bearers/ paddle, mix until light and fluffy. Mix in the vanilla egg, one at a time, until completely completed. Add the reserved dry ingredients and mix on low, until just combined.
-
Put the flour, baking soda, salt and cinnamon into a small mixing bowl. Whisk to combine; reserve.
-
Preheat oven to 350°F.
2 teaspoons pure vanilla extract 3 large eggs
½ cup packed light brown sugar
1 cup (2 sticks) unsalted butter, melted and cooled 1 cup granulated sugar
1% teaspoon ground cinnamon
1 teaspoon salt
1 teaspoon baking soda
3 ^2 /3 cups unbleached, all purpose flour
Makes about 130 medium-size cookies
The perfect all-purpose sugar cookie!
Sugar Cookies
Nutritional information per cookie: Calories 5† (55% from fat) • carb. 5g • pro. 1g • fat 3g • sat. fat 2g • chol. 9mg • sod. 13mg • calc. 3mg • fiber 0g
* Note: All cookie press discs can be used, except #2.
- Cool cookies before removing from pan.
golden around the edges.
- Bake in the preheated oven for 10 to 12 minutes, or until slightly
about 2 incomes apart.
- Fit the Cuisine Electric Cookie Press with desired class*, as instructed on page 2. Load the cookie dough to the MAX fill line. Presses cookie dough out onto an ungrazed/unlinded baking pan,
until just combined.
- In a large mixing bowl, combine the butter and the sugar. Using a Cuisian® Hand or Stand Mixer fitted with the mixing batters with a blend, add the reserved dry ingredients and mix on lov, until combined. Add the reserved dry ingredients and mix on lov,
Whisk to combine; reserve.
-
Put the flour, ground almonds and salt into a small mixing bowl.
-
Percent oven to 350°F.
1 large egg
1 teaspoon pure almond extract
1 teaspoon pure vanilla extract
^1 /3 cups granulated sugar
at room temperature
1% cups (2½ sticks) unsalted butter, cubed and
1% teaspoon salt
1/2 cup very finely ground toasted almonds
2½ cups unbleached, all-purpose flour
Makes about 100 medium-size cookies
favorite variety of nut for the almonds.
It is important that the toasted almonds are very finely ground, or they can cling the cookie press. If you wish, substitute your
Toasted Almond Cookies
Calories 29 (50% from fat) • carb. 3g • pro. 0g • fat 2g • sat. fat 1g • chol. 6mg • sod. 1 mg • calc. 2 mg • fiber 0g
Nutritional information per cookie:
-
Cool cookies before removing from pan.
-
Bake in the preheated oven for 10 to 12 minutes, or until just set.
about 2 inches apart.
- Fit the Cuising Electric Cookie Press with desired disc, as instructed on page 2. Load the cookie dough to the MAX fill line.
low, until just combined.
- In a large mixing bowl, combine the butter and sugars. Using a Cuistan ^® Hand or Stand mixer fitted with the mixing beaters padable, mix until light and creamy. And the vanilla egg; mix until fully combined, add the reserved dry ingredients and mix on
Whisk to combine; reserve.
-
Put the flour, cocoa powder and salt into a small mixing bowl.
-
Repeat oven to 350°F.
1 large egg
1% tablespoons pure vanilla extract
^1/4 cup packed light brown sugar
1 cup concentrations, sugar
at room temperature
1/2 pound (2 sticks) unsalted butter, cubed and
1/2 teaspoon salt
^1/_3 cup unsweetened cocoa powder, sitted
2% cups unbleached, all-purpose flour
Makes about 120 medium-size cookies
For the chocolate lovers – treat yourself to these simple cookies!
Chocolate Spritz Cookies
Nutritional information per cookie: Calories 39 (47% from fat) · carb. 5g · pro. 1g · fat 2g · sat. fat 1g · chol. 7mg · sod. 13mg · calc. 2mg · tiber Og
-
Cool cookies before removing from pan.
-
Fit the Caucasian Electric Cookie Press with desired disc, as instructed on page 2. Load the cookie dough to the MAX fill line. Presses cookie dough out onto an ungrazed/unlined baking pan, about 2 inches apart.
-
Bake in the preheated oven for 10 to 12 minutes, or until eligibility golden around the edgegs.
-
In a large mixing bowl, combine the butter, sugar and zest. Using a Cuisture Hand on Stand Mixer fitted with the mixing beaters/eg; mix until light and creamy. Add the vanilla, lemon juice and mix on low, until just combined.
-
Preheat oven to 350°F.
- Put the flour and salt into a small mixing bowl. Whisk to combine: reserve.
3 cups unbleached, all-purpose flour ½ pound (2 sticks) unsalted butter, cubed and at room temperature ½ cups confectioners, sugar 1½ tablespoon lemon zest 1 teaspoon pure vanilla extract 2 tablespoons fresh lemon juice 1 large egg
Makes about 95 medium-size cookies
Lemon really stands out in these cookies. They are delicious when paired with a cup of tea.
Citrus Butter Cookies
Nutritional information per cookie: Calories 35 (44% from fat) • carb. 5g • pro. 0g • fat 2g • sat. fat 1g • chol. brng • sod. 12mg • calc. 1mg • fiber 0g
* Using a small, sharp knife, cut the vanilla bean in half lengthwise and then scrape the seeds from inside the bean with the knife tip.
-
Cool cookies before removing from pan.
-
Bake in the preheated oven for 12 to 15 minutes, or until ingenuity golden around the edges.
-
In a large mixing bowl, combine the butter and the sugar. Using a Cuisine® Hand or Stand Mixer filled with the mixing batters/paddle, mix until light and creamy. Add the vanilla, vanilla bean结晶, mixed and creamy and mix on low, until just combined.
-
Fit the Cuisine Electric Cookie Press with desired disc, as instructed on page 2. Load the cookie dough to the MAX fill line. Press cookie dough out onto an ungrazed/unlined baking pan, about 2 inches apart.
-
Put the flour and salt into a small mixing bowl. Whisk to combine; reserve.
-
Percent oven to 350°F.
1 large egg
1 vanilla bean, seeds scraped*
1% tablespoons pure vanilla extract
1% cups concentrations, sugar
at room temperature
^1/_2 pound (2 sticks) unsalted butter, cubed and
1/2 teaspoon salt
2½ cups unbleached, all-purpose flour
Makes about 1 TO medium-size cookies
A sweater version of our classic cookie. If you cannot locate whole vanilla beans, increase the extract to 2 tablespoons.
Sweet Vanilla Butter Cookies
Calories 45 (60% from fat) • carb. 49 • pro. 09 • fat 39 • sat. fat 29 • chol. 10mg • sod. 10mg • calc. 2mg • fiber 0g
Nutritional information per cookie:
| 1. | Preheat oven to 350°F. |
| 2. | Put the flour and salt into a small mixing bowl. Whisk to combine: reserve. |
| 3. | In a large mixing bowl, combine the butter and the sugar. Using a Cuisine Hand or Stand Mixer fitted with the mixing beaters/paddle, mix until light and creamy. Add the vanilla and egg; mix until combined. Add the reserved dry ingredients and mix on low, until just combined. |
| 4. | Fit the Cuisine Electric Cookie Press with desired disc, as instructed on page 2. Load the cookie dough to the MAX fill line. Press cookie dough out onto an ungrazed/unlined baking pan, about 2 inches apart. |
| 5. | Bake in the preheated oven for 10 to 12 minutes, or until Ighilty golden around the edges. |
| 6. | Cool cookies before removing from pan. |
| Traditional cookie press cookies are even sweater when topped with a piping of gancache (page 10).Makes about 125 medium-size cookies3% cups unbleached, all-purpose flour1⁄2 teaspoon salt1 pound (4 sticks) unsalted butter, cubed andat room temperature1% cups confectioners, sugar2 tablespoons pure vanilla extract1% cups confectioners, sugar1 large egg |
Classic Butter Cookies
| Classif. Butter Cookies | 2 |
| Sweet Vanilla Butter Cookies | 3 |
| Citrus Butter Cookies | 3 |
| Toasted Almond Cookies | 4 |
| Sugar Cookies | 5 |
| Mocha Sugar Cookies | 5 |
| Silicardoodles | 6 |
| Peanut Butter Cookies | 6 |
| Quarite Friece Cookies | 6 |
| Ginger Cookies | 7 |
| Pane a Choux - Cream Puffs | 8 |
| Lightened Pasty Cream | 8 |
| Simiple Chocolate Mousse | 9 |
| Ganache | 10 |
| Decoating Icing | 11 |
| Fluffy Frosting | 11 |
| Cougures | 12 |
| Cheddar Cheese Crackers | 12 |
| Herbed Cheese Spread | 13 |
| Devised Eggs | 13 |
RECEIPE5
For your safety and continued enjoyment of this product, always read the instruction book carefully before using.
Electric Cookie Press

Reverse Side
Booklet
instruction
Quisination®
Version no.: CCP10 IB-9262B
IB Size: 203mm(W) x 178mm(H)
Die Cut: IB-9262A
Material: COVER:157gsm matt artpaper
INSIDE:120gsm gloss artpaper
Coating: gloss varnishing in cover
Colors(Cover): 4C+1C(BLACK)
(Inside): 1C+1C
Date: JAN/25/2011 Co-ordinator: Astor You/Andy WS Chan
F CCP10 IB-9262B (0.0) Operator: Retise Ver

宝发柯式印刷有限公司
Tel: 0769-87720314 87886328 Fax: 0769-87720324
E-MAIL: potatprepress@potat.com


- Electric Cookie Press
- IMPORTANT SAFEGUARDS
- SAVE THESE INSTRUCTIONS HOUSEHOLD USE ONLY
- POLARIZED PLUG
- SHORT POWER CORD
- BEFORE FIRST TIME USE:
- GETTING TO KNOW YOUR ELECTRIC COOKIE PRESS
- ASSEMBLY INSTRUCTIONS
- INSTRUCTIONS FOR MAKING COOKIES
- REFILLING THE COOKIE PRESS
- HELPFUL HINTS
- PASTRY TIP SHAPES
- Round Tip: Use to make cream puffs or gougères
- Ribbon/Rose: Can also be used to make flowers on cakes
- 3-Prong Star: Use to make stars for decorating cakes/cupcakes
- Ridged Border: Makes an elegant ridged border
- Ribbed/Basket Weave: An easy way to make a beautiful basket weave on cakes.
- Classic Star Tip: Use for decorating cakes and filling cream puffs
- Simple Border: Great for piping borders on cakes
- 3-Prong Border: Beautiful when used to pipe cream or meringues on tarts/pies.
- CARE, CLEANING AND MAINTENANCE
- STORAGE
- CUISINART® ELECTRIC COOKIE PRESS
- LIMITED 3-YEAR WARRANTY
- CALIFORNIA RESIDENTS ONLY:
- BEFORE RETURNING YOUR CUISINART® PRODUCT
- Herbed Cheese Spread
- Cheddar Cheese Crackers
- Gouqeres
- Lighened Pasty Cream
- Pate a Chowx - Cream Puffs
- Quisination®
- 宝发柯式印刷有限公司
Brand : CUISINART
Model : CCP-10
Category : Coffee maker