
Contact Grill Plus TXG-603 - Oven PowerXL - Free user manual and instructions
Find the device manual for free Contact Grill Plus TXG-603 PowerXL in PDF.


| Product Type | Contact Grill |
| Brand | PowerXL |
| Model | TXG-603 |
| Power Supply | 120V, 60Hz |
| Rated Power | 1200W |
| Grill Plate Dimensions | 9.8" x 10.2" |
| Cooking Surface Area | 8.9" x 7.9" |
| Temperature Range | 302°F - 374°F (150°C - 190°C) |
| Non-Stick Coating | Yes |
| Drip Tray | Detachable |
| Indicator Lights | Red (power), Green (preheat ready) |
| Overheating Protection | Yes |
| Grounding | Required (polarized plug) |
| Control Type | Manual (on/off via plug) |
| Weight | Approximately 10 lbs |
| Recipes Included | Yes |
| Warranty | 90-day money-back guarantee; 1-year replacement guarantee |
| Cleaning | Hand wash recommended; do not immerse |
Frequently Asked Questions - Contact Grill Plus TXG-603 PowerXL
User questions about Contact Grill Plus TXG-603 PowerXL
0 question about this device. Answer the ones you know or ask your own.
Ask a new question about this device
Download the instructions for your Oven in PDF format for free! Find your manual Contact Grill Plus TXG-603 - PowerXL and take your electronic device back in hand. On this page are published all the documents necessary for the use of your device. Contact Grill Plus TXG-603 by PowerXL.
USER MANUAL Contact Grill Plus TXG-603 PowerXL
PowerXL™ products that excel
CONTACT GRILL PLUS

RECIPES INCLUDED
Owner's Manual
Save These Instructions - For Household Use Only
MODEL: TXG-603
When using electrical appliances, basic safety precautions should always be followed. Do not use the PowerXL Contact Grill Plus™ until you have read this manual thoroughly.
Visit TristarCares.com for tutorial videos, product details, and more. Guarantee Information Inside
BEFORE YOU BEGIN
The PowerXL Contact Grill Plus™ will provide you many years of delicious family meals and memories around the dinner table. But before you begin, it's very important that you read this entire manual, making certain that you are completely familiar with this appliance's operation and precautions.
Appliance Specifications
| Model Number | Supply Power | Rated Power | Grill Plate Dimensions | Cooking Surface Area |
| TXG-603 | 120V 1200W 9.8" x 10.2" 8.9" x 7.9" | |||
Table of Contents
IMPORTANT SAFEGUARDS 4
Parts & Accessories 6
Instructions for Use 8
Cooking Guidelines & Tips 9
Recipes 10
Cleaning & Storage 13
Troubleshooting 14
Frequently Asked Questions 12
Money-Back Guarantee 15

WARNING
When using electrical appliances, basic safety precautions should always be followed, including the following:
- READ AND FOLLOW all instructions carefully.
- This appliance is not intended for use by persons (including children) with reduced physical, sensory, or mental capabilities, or lack of experience and knowledge, unless they have been given supervision or instruction concerning use of the appliance by a person responsible for their safety.
- Close supervision is necessary when any appliance is used by or near children.
- This appliance has a polarized plug (one blade is wider than the other). This plug is intended to fit into a polarized outlet only one way. If the plug does not fit fully into the outlet, reverse the plug. If it still does not fit, contact a qualified electrician. DO NOT ATTEMPT to modify the plug in any way.
- ALWAYS attach the plug to the appliance first, then plug the cord into the wall outlet. To disconnect, remove the plug from the wall outlet.
- This appliance MUST be grounded. Connect only to properly grounded outlet (see the "GROUNDING INSTRUCTIONS" section).
- This appliance should be serviced ONLY by qualified service technicians. Contact Customer Service using the information located on the back of this manual.
- DO NOT operate this appliance if it has a damaged cord or plug, if it is not working properly, or if it has been damaged or dropped. Contact Customer Service using the information on the back of this manual.
- Before operating, MAKE SURE the appliance is properly plugged into a dedicated wall socket without any other appliances on the same outlet.
- KEEP the appliance and its power cord out of the reach of children when it is in operation or in the cooling down process.
- NEVER use this appliance with an extension cord. A short power supply cord is provided to reduce the risk of entanglement or tripping over a longer cord. See the "Grounding Instructions" section.
- KEEP the power cord away from water and heated surfaces.
- DO NOT let the power cord hang over the edge of a table or counter.
- DO NOT leave this appliance unattended while in operation.
-
NEVER operate this appliance with any external timers or remote-control systems.
-
The use of accessory attachments not recommended by the appliance manufacturer may cause injuries.
- UNPLUG the appliance from outlet when not in use and before cleaning. ALLOW to cool before handling, putting on or taking off parts, cleaning, or storing.
- UNPLUG the appliance when not in use. ALLOW the appliance at least 30 minutes to cool before handling, cleaning, or storing.
- Should the appliance emit black smoke, UNPLUG IMMEDIATELY and wait for smoking to stop before handling the appliance.
- The appliance's outer surfaces may become hot during use. NEVER touch hot surfaces or place hands inside the appliance unless it is thoroughly cooled. Use the handles to open.
- After cooking, WEAR OVEN MITTS before opening or removing accessories. The accessories will likely be hot, and the appliance may release hot air when opened.
- When cooking, DO NOT place the appliance against a wall or near other appliances. Leave at least 5 inches of free space on the back and sides and above the appliance. DO NOT place anything on top of the appliance.
- DO NOT store or use outdoors.
- NEVER immerse the main unit housing or heating elements in water, or rinse under tap.
- To protect against electrical shock, DO NOT immerse or expose the cord or plug to water or other liquid.
- DO NOT plug in the power cord or operate the appliance controls with wet hands.
- DO NOT place or use this appliance near water.
- DO NOT place or use this appliance on or near a gas or electric burner, or in a heated oven.
- DO NOT place your appliance on a cooktop, even if cool, because it could cause a fire or damage the appliance, your cooktop, and your home.
- A fire may occur if this appliance is covered by or touching flammable material, including curtains, draperies, walls, and the like, when in operation.
- NEVER expose the appliance to corrosive chemicals or vapors.
- DO NOT place anything inedible inside the appliance, or place the appliance in any container or small confined space while the appliance is heated or in operation.
- ALWAYS operate the appliance on a horizontal surface that is level, stable, and noncombustible.
- Before using your appliance on any countertop surface or other fragile surface, such as a glass tabletop, CHECK WITH your manufacturer or installer for recommendations about using appliances on your surfaces. Some manufacturers and installers may recommend protecting your surface by placing a hot pad or trivet under the appliance for heat protection. Your manufacturer or
installer may recommend that hot pans, pots, or electrical appliances should not be used directly on top of the countertop. If you are unsure, place a trivet or hot pad under the appliance before using it.
- Oversized foods, metal foil packages, or utensils MUST NOT be inserted in the appliance as they may involve a risk of fire or electric shock. DO NOT overfill the appliance.
- DO NOT attempt to open or remove food from the appliance while in operation.
- DO NOT attempt to unlatch, open, or remove food from the appliance while in operation.
- USE EXTREME CAUTION when moving an appliance containing hot oil or other hot liquids, when removing the tray, or disposing of hot grease.
-
DO NOT use sharp utensils with the appliance. These implements can damage the appliance's protective non-stick coating.
-
When cleaning the appliance interior, use ONLY mild, nonabrasive soaps or detergents applied with a sponge or soft cloth.
- DO NOT clean with metal scouring pads. Pieces can break off the pad and touch electrical parts, creating risks of electric shock.
- This appliance is for home use only. If the appliance is used improperly or for professional or semi-professional purposes or if it is not used according to the instructions in the user manual, the guarantee becomes invalid and Tristar will not be held liable for damages.
- SAVE THESE INSTRUCTIONS.

WARNING:
For California Residents
his product can expose you to Di(2-ethylhexyl)phthalate, which is known to the State of California to cause cancer and birth defects or other reproductive harm. For more information go to www.P65Warnings.ca.gov.
SAVE THESE INSTRUCTIONS - FOR HOUSEHOLD USE ONLY.
Electric Power
This appliance should be operated on a dedicated electrical outlet. If the electrical outlet is overloaded with other appliances, your new appliance may not operate properly.
Shut-Off
To shut off this appliance you will need to unplug it from the electrical outlet.
Overheating Protection
Should the inner temperature control system fail, the overheating protection system will be activated and the appliance will not function. Should this happen, unplug the appliance. Allow time for the appliance to cool completely before restarting or storing.
Electromagnetic Fields
This appliance complies with all standards regarding electromagnetic fields. If handled properly and according to the instructions in the user manual, the appliance is safe to use based on scientific evidence available today.
Grounding Instructions
This appliance must be grounded. In the event of an electrical short circuit, grounding reduces the risk of electric shock by providing an escape wire for the electric current. This appliance is equipped with a cord with a grounding wire and grounding plug. The plug must be plugged into an outlet that is properly installed and grounded. Consult a qualified electrician or serviceman if the grounding instructions are not completely understood or if doubt exists as to whether the appliance is properly grounded. If it is necessary to use an extension cord, use only a 3-wire extension cord that has a 3-pronged grounding plug and a 3-slot receptacle that will accept the plug on the appliance.
- A short power-supply cord is provided to reduce the risks resulting from becoming entangled in or tripping over a longer cord.
- Longer cord sets or an extension cord should not be used unless the following precautions are followed (see 3, below).
- If a long cord or extension cord is used: a. The marked electrical rating of the cord set or extension cord should match the rating of the appliance.
b. The extension cord must be a grounding-type 3-wire cord.
c. The longer cord should be arranged so that it will not drape over the countertop or tabletop where it can be pulled on by children or tripped over.
Parts & Accessories

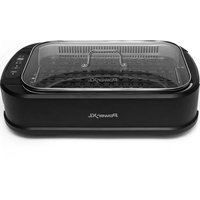
- APPLIANCE BASE
- HANDLE: Use to lift open the top lid/grill plate.
- TOP GRILL PLATE
- BOTTOM GRILL PLATE: Place food here.
-
DRIP TRAY: Detachable tray catches drippings and slides out for cleanup.
-
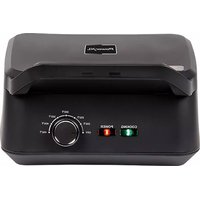
INDICATOR LIGHTS: The red Indicator Light illuminates when the appliance is plugged in. The green Indicator Light illuminates when the appliance has finished preheating and will cycle on and off to show that the temperature is being maintained.
-
POWER CORD: The red indicator light should turn on when the appliance is properly plugged in.
Parts & Accessories

NOTE: Unpack all contents from the packaging. Contents vary by model. Please remove any clear or blue protective film on the components before use.
IMPORTANT: Please make sure that your appliance has been shipped with the components that you ordered (some accessories may be sold separately). Check everything carefully before use. If any part is missing or damaged, do not use this product. Contact the shipper using the customer service number located on the back of this manual.
General Operating Instructions
Before First Use
- Read all material, warning stickers, and labels
- Remove all packing materials, stickers, and labels from the appliance.
- Hand-washing is recommended. Wash all parts and accessories used in the cooking process with warm, soapy water.
- Wipe the inside and outside of the cooking appliance with a warm, moist cloth and mild detergent. Rinse with a clean, moist cloth. Never submerge the appliance.
- Preheat the appliance for a few minutes to burn off the manufacturer's protective coating of oil (a slight odor or smoking might occur during this process; this is normal):
a. Locate the appliance on a dry, level, stable, heat-resistant surface.
b. Ensure the appliance is closed and upright.
c. Plug the power cord into a 120V dedicated outlet. The red Indicator Light will illuminate.
d. Wait for the appliance to finish preheating (the green Indicator Light will illuminate and cycle off and on to indicate that the appliance is maintaining its temperature).
e. Let the appliance run for 3 minutes. Then, unplug the appliance and wait 30 minutes for the appliance to cool.
f. Wipe the appliance interior to remove any residue.
Using the Appliance
- Locate the appliance on a dry, level, stable, heat-resistant surface.
- Ensure the appliance is closed, and upright, and the grill plates are attached.
- Plug the power cord into a 120V dedicated outlet. The red indicator light will light up to indicate the appliance is powered on and preheating. The Green light will illuminate once it come to temperature, then cycle on and off showing it is maintaining temperature.
- Wait for the appliance to finish preheating, indicated by indicator light. The Green light will illuminate once it come to temperature, then cycle on and off showing it is maintaining temperature.
- Open the appliance, being careful not to touch the interior. Add your food.
- Close the appliance. The appliance can be opened to check on the status of the food. The appliance can be closed again to continue the cooking process for more well-done food. Use caution
when opening the appliance during the cooking process. Steam can build up while the food is cooking.
-
When the food is done cooking, it can be removed from the appliance. Wear oven gloves/mitts before handling to protect against escaping steam. Open the appliance. Then, use plastic/wooden/rubber utensils to carefully lift the food onto a plate. DO NOT use sharp metal utensils that may scratch the nonstick coating in the appliance.
-
Unplug the appliance and let it cool for 30 minutes before cleaning the appliance [see the "Care & Cleaning" section].
This appliance has a nonstick coating.
DO NOT use nonstick sprays with this appliance. Nonstick sprays can cause build-up. A small amount of vegetable oil can be applied to the grill to help keep food from sticking.
It is normal for steam to escape and condensation to build up on the sides of the appliance during cooking.
Cooking Guidelines & Tips
Tips
- Be careful not to transfer germs from raw meat to cooked meat. Use separate utensils and platters for raw and cooked meat.
- When marinating food, always use a tightly covered nonmetal dish and turn the food occasionally. Be sure to refrigerate all meats while marinating.
-
If leftover wet marinade is to be used as a sauce with the cooked food, be sure to place it in a small pan and heat to a rolling boil before serving to eliminate bacterial growth.
-
To prevent scratching the coating, use only nonmetallic utensils. Do not cut food on the Grill Plate using sharp utensils, such as forks or knives, that can scratch the cooking surface.
- Do not use steel wool or other metal pads. They could leave coarse scratches. Always rinse thoroughly and dry immediately with a soft towel.
- If food is cooking unevenly, make sure to spread out the food evenly on the grill plate.
Cooking Chart
| Food Item | Time | Internal Temperature | It's Done When |
| Fish | 12–15 mins. (1-in. thick) | 145° F/63° C | Opaque/Flaky Texture |
| Shrimp 2–4 mins. (perside) | 145° F/63° C Opaque & Red Edges | ||
| Chicken Drumsticks | 30–45 mins. 165° F/74° C Juice Runs Clear | ||
| Chicken Wings | 20–25 mins. 165° F/74° C Juice Runs Clear | ||
| Kabobs | 12–15 mins. - Your Preference | ||
| Steak | 3–9 mins. (per side) | 140° F/60° C - 165° F/74° C | Your Preference |
| Pork Chops | 20–25 mins. | 155° F/68° C | No Pink Meat |
| Burgers | 10–15 mins. 160° F/71° C Your Preference | ||
| Sausages | 15–25 mins. | 155° F/68° C | No Pink Meat |
| Bacon | 1–2 mins. (per side) | NA | Crispy |
- Use a meat thermometer to check internal meat temperature.
- Cooking times are suggested and will vary depending on the thickness of the food and personal preferences. Foods can be grilled at maximum temperature. However, you may wish to reduce the temperature for certain items. Low temperatures will keep foods warm once cooked.
Grilled Steakhouse Burger
Serves 4
4 5-oz hamburger patties
2 tsp. steakhouse seasoning
4 slices American cheese
4 hamburger rolls
1 cup shredded lettuce
4 slices tomato
8 pickle chips
1/4 cup Russian dressing
- Plug in the grill and let preheat for 5 minutes.
- Season each hamburger with 1/2 tsp. steakhouse seasoning.
- When the grill has preheated: Place the hamburgers on the grill and close the lid. Cook until the desired doneness is reached (5 minutes for medium and 8-10 minutes for well done).
- Open the grill and top each hamburger with 1 American cheese slice. Cook until the cheese melts.
- Assemble the burgers: Place a hamburger on the bottom half of a roll. Top with 1/4 cup lettuce, 1 tomato slice, 2 pickle chips, 1 tbsp. Russian dressing, and the top half of the roll.
Grilled New York Strip Steaks with Butter Sauce
Serves 2
2 10-oz New York strip steaks
1 tsp. sea salt
1 tsp. ground black pepper
1 tsp. granulated garlic
Butter Sauce
3 tbsp. butter
2 cloves garlic, minced
1 tbsp. Worcestershire sauce
juice of 1 lemon wedge
- Plug in the grill and let preheat for 5 minutes.
- Season the steaks with the salt, black pepper, and granulated garlic.
- When the grill has preheated: Place the steaks on the grill and close the lid. Cook until the desired doneness is reached (6 minutes for medium and 8-10 minutes for well done).
- Remove the steaks and let rest for 5 minutes.
- In a sauté pan over medium heat on the stove top, add the butter and garlic and sauté until slightly golden.
- Add the Worcestershire sauce and lemon to complete the Butter Sauce and remove from the heat.
- Sauce the steaks with the Butter Sauce before serving.
Grilled BBQ Chicken
Serves 2
2 6-oz chicken breasts, trimmed
1/4 cup barbeque sauce
2 tbsp. orange juice
1 tsp. dried onion
- In a sealable bag, combine all the ingredients. Seal the bag and shake to mix all the ingredients together. Refrigerate the bag for at least 4 hours.
- When the chicken is done marinading: Plug in the grill and let preheat for 5 minutes.
- When the grill has preheated: Place the chicken on the grill and close the lid. Cook until the chicken is fully cooked (5-6 minutes).
- Serving recommendation: Serve with a salad or in a sandwich.
Chili Lime Grilled Pork Medallions
Serves 4
4 4-oz pork medallions
Marinade
juice of 2 limes
4 cloves garlic, minced
1/2 tsp. smoked paprika
1 tbsp. chili powder
1 tbsp. honey
1/4 cup olive oil
1 tsp. salt
-
In a shallow pan, combine the Marinade ingredients and mix together. Marinate the pork in the marinade for at least 4 hours (preferably overnight) in the refrigerator.
-
When the pork is done marinading: Plug in the grill and let preheat for 5 minutes.
-
When the grill has preheated: Place the pork on the grill and close the lid. Cook until an instant-read thermometer inserted into the pork reads 150° F/66° C.
-
Let the pork rest for 10 minutes before serving.
Monte Cristo
Serves 2
4 slices brioche bread
6 slices Swiss cheese
8 thin slices ham
2 large eggs
1/4 cup half and half powdered sugar, for serving raspberry jam, for serving
-
Assemble the sandwiches: Top 1 bread slice with 2 Swiss cheese slices, 4 ham slices (folded to fit on the bread), 1 Swiss cheese slice, and 1 bread slice.
-
Plug in the grill and let preheat for 5 minutes.
-
When the grill has preheated: In a shallow bowl, combine the eggs and half and half and mix together. Dip each sandwich in the egg batter, place the sandwiches on the grill, and close the lid. Cook for 5-6 minutes.
-
When the bread is golden, cut and serve with the raspberry jam and powdered sugar.
Grilled Dill- & Lemon-Marinated Salmon
Serves 4
4 5-oz salmon fillets
Marinade
1 shallot, minced
1/4 bunch dill, chopped
1 tbsp. soy sauce
juice of 1 lemon
2 tbsp. white wine
½ tsp. ground black pepper
-
In a shallow pan, combine the Marinade ingredients and mix together. Marinate the salmon in the marinade for 2 hours in the refrigerator.
-
When the salmon is done marinading: Plug in the grill and let preheat for 5 minutes.
-
When the grill has preheated: Place the salmon on the grill and close the lid. Cook until done (6-8 minutes).
-
Serving recommendation: Serve over rice or with salad.
Cleaning & Storage
Care & Cleaning
Remove the power cord from the wall socket and be certain the appliance is thoroughly cooled before cleaning.
Clean the appliance after each use. DO NOT soak or submerge the appliance in water or wash in a dishwasher. Never use abrasive cleaning materials or utensils. Parts with caked-on food should be soaked in warm, soapy water for easy removal. The cooking accessories may or may not be dishwasher-safe.
-
Wipe the outside of the appliance with a warm, moist cloth and mild detergent.
-
Clean the inside of the appliance with warm water, a mild detergent, and a nonabrasive cloth or sponge.
-
If necessary, remove unwanted food residue with a soft nylon bristle brush. Rinse the appliance with a clean, damp cloth. Use a clean, dry cloth to dry the appliance interior. Do not leave standing water in the appliance.
-
If any other service needs to be performed, contact Customer Service, using the contact information on the back of this manual.
Storage
- Unplug the appliance and let it cool thoroughly.
- Make sure the appliance is clean and dry.
- Place the appliance in a clean, dry place.
If Your appliance Is Not Working Properly
- Make sure the Power Cord is plugged into an electrical socket.
- The appliance may not be able to draw enough operating power from the outlet. Try switching the Power Cord to an outlet that has no other appliances attached to it.
Problem Possible Cause Solution
| The appliance does not work | The appliance is not plugged in. Plug power cord into wall socket. | |
| The appliance has not been turned on by setting the preparation time and temperature. | Set the temperature and time. | |
| The appliance is plugged into an outlet that is shared with other devices. | Plug the appliance into a dedicated power outlet. | |
| Food not cooked | The appliance is overloaded. | Use smaller batches for more even cooking. |
| The temperature is set too low. | Raise temperature and continue cooking. | |
| Food is not fried evenly | Some foods need to be turned during the cooking process. | Check halfway through process and turn food if needed. |
| Foods of different sizes are being cooked together. | Cook similar-sized foods together. | |
| If using multiple racks, trays need to be rotated. | Rotate trays from top to bottom and vice versa. | |
| White smoke coming from appliance. | Oil is being used. Wipe down to remove excess oil. | |
| Accessories have excess grease residue from previous cooking. | Clean the components and appliance interior after each use | |
Frequently Asked Questions
- Does the appliance need time to heat up?
Yes. The appliance will preheat automatically when plugged into an electrical outlet. The indicator light illuminates when preheating is finished and cooking can begin.
- How hot does the appliance get?
The temperature range is 302° F- 374° F ( 150° C- 190° C).
- How will I know when cooking is complete?
Check your food after 5-7 minutes. Food may come with instructions on cook times, or you may check the list of cooking times in this manual.
- How do I stop operation/cool the appliance?
You must unplug the appliance to stop the heating process and allow at least 30 minutes to cool.
- What happens if the appliance still does not work after I have tried all the troubleshooting suggestions?
Never attempt home repair. Contact Customer Service and follow the procedures set forth by the manual. Failure to do so could render your guarantee null and void.
PowerXL™ products that excel
CONTACT GRILL PLUS
90-Day Money-Back Guarantee
The PowerXL Contact Grill Plus is covered by a 90-day money-back guarantee. If you are not 100% satisfied with your product, return the product and request a replacement product or refund. Proof of purchase is required. Refunds will include the purchase price, less processing and handling. Follow the instructions in the Return Policy below to request a replacement or refund.
Replacement Guarantee Policy
Our products, when purchased from an authorized retailer, include a 1-year replacement guarantee if your product or component part does not perform as expected, the guarantee extends only to the original purchaser and is not transferable. If you experience an issue with one of our products within 1 year of purchase, return the product or the component part for replacement with a functionally equivalent new product or part. The original proof of purchase is required, and you are responsible to pay to return the unit to us. In the event a replacement unit is issued, the guarantee coverage ends six (6) months following the receipt date of the replacement unit or the remainder of the existing guarantee, whichever is later. Tristar reserves the right to replace the unit with one of equal or greater value.
Return Policy
If, for any reason, you would like to replace or return the product under the money-back guarantee, your order number can be used as the return merchandise authorization number (RMA). If the product was purchased in a retail store, return the product to the store or use "RETAIL" as the RMA. Return your product to the address provided below for a replacement, which will incur no additional processing and handling fees, or for the refund of your purchase price, less processing and handling. You are responsible for the cost of returning the product. You can locate your order number at www.customerstatus.com. You can call customer service at 973-287-5129 or email info@tvcustomerinfo.com for any additional questions. Pack the product carefully and include in the package a note with (1) your name, (2) mailing address, (3) phone number, (4) email address, (5) reason for return, and (6) proof of purchase or order number, and (7) specify on the note whether you are requesting a refund or replacement. Write the RMA on the outside of the package.
Send the product to the following return address:
PowerXL Contact Grill Plus
Tristar Products
500 Returns Road
Wallingford, CT 06495
If the replacement or refund request has not been acknowledged after two weeks, please contact Customer Service at 973-287-5129.
Refund
Refunds requested within the money-back guarantee timeframe will be issued to the payment method used at purchase if the item was purchased directly from Tristar. If the item was purchased from an authorized retailer, proof of purchase is required, and a check will be issued for the item and sales tax amount. Processing and handling fees are non-refundable.
PowerXL™ products that exceed
CONTACT GRILL PLUS
We are very proud of the design and quality of our PowerXL Contact Grill Plus.
This product has been manufactured to the highest standards.Should you have any questions, our friendly customer service staff is here to help you.
For parts, recipes, accessories, and everything Shaq, go to tristarcares.com or scan this QR code with your smartphone or tablet:

To contact us, email us at customerservice@tristarproductsinc.com or call us at 973-287-5129.

Distributed by:
Tristar Products, Inc.
Fairfield, NJ 07004
© 2021 Tristar Products, Inc.
Made in China
PXL-CGP_IB_WM_ENG_V1_210514


- POWERXL™ PRODUCTS THAT EXCEL
- CONTACT GRILL PLUS
- OWNER'S MANUAL
- BEFORE YOU BEGIN
- TABLE OF CONTENTS
- IMPORTANT SAFEGUARDS 4
- WARNING
- WHEN USING ELECTRICAL APPLIANCES, BASIC SAFETY PRECAUTIONS SHOULD ALWAYS BE FOLLOWED, INCLUDING THE FOLLOWING
- FOR CALIFORNIA RESIDENTS
- SAVE THESE INSTRUCTIONS - FOR HOUSEHOLD USE ONLY
- ELECTRIC POWER
- SHUT-OFF
- OVERHEATING PROTECTION
- ELECTROMAGNETIC FIELDS
- GROUNDING INSTRUCTIONS
- PARTS & ACCESSORIES
- GENERAL OPERATING INSTRUCTIONS
- BEFORE FIRST USE
- USING THE APPLIANCE
- COOKING GUIDELINES & TIPS
- TIPS
- GRILLED STEAKHOUSE BURGER
- SERVES 4
- GRILLED NEW YORK STRIP STEAKS WITH BUTTER SAUCE
- SERVES 2
- BUTTER SAUCE
- GRILLED BBQ CHICKEN
- CHILI LIME GRILLED PORK MEDALLIONS
- MARINADE
- MONTE CRISTO
- GRILLED DILL- & LEMON-MARINATED SALMON
- CLEANING & STORAGE
- CARE & CLEANING
- STORAGE
- IF YOUR APPLIANCE IS NOT WORKING PROPERLY
- FREQUENTLY ASKED QUESTIONS
- 90-DAY MONEY-BACK GUARANTEE
- REPLACEMENT GUARANTEE POLICY
- RETURN POLICY
- REFUND
- POWERXL™ PRODUCTS THAT EXCEED
Brand : PowerXL
Model : Contact Grill Plus TXG-603
Category : Oven