
Captuvo SL62 - Scanner HONEYWELL - Free user manual and instructions
Find the device manual for free Captuvo SL62 HONEYWELL in PDF.


| Product Type | Enterprise Sled with Integrated Imager |
| Brand | Honeywell |
| Model | Captuvo SL62 |
| Scanner Type | 2D Imager |
| Supported Barcodes | Linear, 2D (PDF417, Data Matrix, QR, Aztec, etc.), Postal (Postnet, Planet, etc.) |
| Connectivity | Compatible with Apple iPod touch, iPhone5, iPad mini via Lightning connector |
| Power Source | Rechargeable battery (charger included) |
| Operating Temperature | 0°C to 35°C (32°F to 95°F) |
| Reading Techniques | Red aiming beam; centering, preferred symbology, video reverse |
| Programming Method | Scanning programming barcodes from manual |
| Optional Feature | Magnetic Stripe Reader (MSR) available |
| Warranty | Limited warranty; refer to www.honeywellaidc.com/warranty_information |
| Cleaning Instructions | Use gentle dish soap, 10% bleach, 70% isopropyl alcohol wipes, or approved disinfectants (for healthcare unit) |
| Inspection | Check cables and connectors for wear regularly |
| Repairs | Return only sled to Honeywell; not an authorized Apple repair center |
Frequently Asked Questions - Captuvo SL62 HONEYWELL
User questions about Captuvo SL62 HONEYWELL
0 question about this device. Answer the ones you know or ask your own.
Ask a new question about this device
Download the instructions for your Scanner in PDF format for free! Find your manual Captuvo SL62 - HONEYWELL and take your electronic device back in hand. On this page are published all the documents necessary for the use of your device. Captuvo SL62 by HONEYWELL.
USER MANUAL Captuvo SL62 HONEYWELL
Honeywell International Inc. ("HII") reserves the right to make changes in specifications and other information contained in this document without prior notice, and the reader should in all cases consult HII to determine whether any such changes have been made. The information in this publication does not represent a commitment on the part of HII.
HII shall not be liable for technical or editorial errors or omissions contained herein; nor for incidental or consequential damages resulting from the furnishing, performance, or use of this material.
This document contains proprietary information that is protected by copyright. All rights are reserved. No part of this document may be photocopied, reproduced, or translated into another language without the prior written consent of HII.
© 2014 Honeywell International Inc. All rights reserved.
Other product names or marks mentioned in this document may be trademarks or registered trademarks of other companies and are the property of their respective owners.
Web Address: www.honeywellaidc.com
Apple, iPod touch, iPhone5, and iPad mini are trademarks of Apple Inc., registered in the U.S. and other countries. App Store is a service mark of Apple Inc.
Other product names or marks mentioned in this document may be trademarks or registered trademarks of other companies and are the property of their respective owners.
Patents
For patent information, please refer to www.hsmpats.com.
Table of Contents
Chapter 1 - Getting Started
Introduction 1-1
Out of the Box 1-1
Operating Temperature.... 1-1
Reading Techniques 1-2
Setting Custom Defaults 1-2
Resetting the Custom Defaults 1-3
Resetting the Factory Defaults.... 1-4
Chapter 2 - Input/Output Settings
Good Read and Error Indicators 2-1
Beeper – Good Read 2-1
Beeper Volume – Good Read 2-1
Manual Trigger Mode 2-2
Mobile Phone Read Mode.... 2-2
Centering.... 2-2
Preferred Symbology 2-4
High Priority Symbology 2-5
Low Priority Symbology.... 2-5
Preferred Symbology Time-out 2-5
Preferred Symbology Default 2-6
Output Sequence Overview 2-6
Require Output Sequence.... 2-6
Output Sequence Editor 2-6
To Add an Output Sequence.... 2-7
Other Programming Selections 2-7
Output Sequence Editor 2-9
Partial Sequence 2-9
Require Output Sequence.... 2-10
Multiple Symbols 2-10
No Read 2-11
Video Reverse.... 2-11
Working Orientation 2-12
Chapter 3 - Data Editing
Prefix/Suffix Overview....3-1
To Add a Prefix or Suffix:....3-1
To Clear One or All Prefixes or Suffixes ......3-2
To Add a Carriage Return Suffix to All Symbologies3-3
Prefix Selections ......3-3
Suffix Selections ......3-4
Function Code Transmit 3-4
Chapter 4 - Data Formatting
Data Format Editor Introduction....4-1
To Add a Data Format 4-1
Other Programming Selections......4-3
Terminal ID Table 4-4
Data Format Editor Commands 4-4
Move Commands....4-8
Search Commands 4-9
Miscellaneous Commands....4-12
Data Formatter....4-15
Data Format Non-Match Error Tone ....4-16
Primary/Alternate Data Formats 4-17
Single Scan Data Format Change 4-17
Chapter 5 - Symbologies
All Symbologies ....5-2
Message Length Description 5-2
Codabar 5-3
Codabar Concatenation....5-4
Code 39 5-6
Code 32 Pharmaceutical (PARAF) .....5-8
Full ASCII....5-9
Code 39 Code Page ....5-9
Interleaved 2 of 5....5-10
NEC 2 of 5 ....5-12
Code 93....5-14
Code 93 Code Page.... 5-14
Straight 2 of 5 Industrial (three-bar start/stop) ..... 5-15
Straight 2 of 5 IATA (two-bar start/stop).... 5-16
Matrix 2 of 5 5-17
Code 11....5-18
Code 128....5-19
ISBT 128 Concatenation 5-19
Code 128 Code Page.... 5-21
GS1-128....5-22
Telepen 5-23
UPC-A 5-24
UPC-A/EAN-13 with Extended Coupon Code 5-26
UPC-E0 5-27
UPC-E1 5-30
EAN/JAN-13....5-31
Convert UPC-A to EAN-13 5-31
ISBN Translate 5-33
EAN/JAN-8....5-34
MSI 5-36
GS1 DataBar Omnidirectional.... 5-38
GS1 DataBar Limited 5-38
GS1 DataBar Expanded.... 5-39
Trioptic Code.... 5-40
Codablock A.... 5-40
Codablock F 5-42
PDF417 5-43
MicroPDF417 5-44
GS1 Composite Codes 5-45
UPC/EAN Version 5-45
GS1 Emulation 5-46
TCIF Linked Code 39 (TLC39)...... 5-47
QR Code 5-47
Data Matrix.... 5-49
Data Matrix Code Page 5-50
MaxiCode 5-51
Aztec Code 5-52
Aztec Code Page....5-53
Chinese Sensible (Han Xin) Code 5-54
Postal Codes - 2D....5-55
Single 2D Postal Codes:....5-55
Combination 2D Postal Codes:......5-56
Postal Codes - Linear 5-58
China Post (Hong Kong 2 of 5)......5-58
Korea Post 5-60
Chapter 6 - Serial Programming Commands
Conventions....6-1
Menu Command Syntax 6-1
Query Commands....6-2
Responses....6-2
Resetting the Custom Defaults 6-4
Menu Commands 6-5
Chapter 7 - Maintenance
Repairs 7-1
Healthcare Housing Cleaning Directions (Healthcare unit only)....7-1
Inspecting Cords and Connectors 7-1
Troubleshooting....7-1
Chapter 8 - Customer Support
Technical Assistance 8-1
Appendix A - Reference Charts
Symbology Charts ...... A-1
Linear Symbologies ......A-1
2D Symbologies.....A-3
Postal Symbologies ......A-3
ASCII Conversion Chart (Code Page 1252)...... A-4
Lower ASCII Reference Table ...... A-5
ISO 2022/ISO 646 Character Replacements ......A-10
Introduction
The Captuvo Enterprise Sleds include an optional integrated imager for scanning all types of bar codes. You have the capability to configure the scan engine in the sled using the programming bar codes included in this user's guide; however, the application being used might override the settings you have programmed. An optional magnetic stripe reader (MSR) for reading cards with magnetic stripes is also available.
Out of the Box
Verify that the box contains the following items:
- Captuvo Enterprise Sled
- Charger (if appropriate)
- USB Cable
- Quick Start Guide
- Regulatory Sheet
Note: If you ordered accessories for your sled, verify that they are also included with the order.
Be sure to keep the original packaging in case you need to return the sled for service.
Note: Honeywell is not an authorized Apple repair center. Please return only your sled to us for repair. Honeywell is not liable for any non-Honeywell product shipped to our repair center.
Note: Refer to your Apple device's documentation for important product and safety information.
Operating Temperature
The maximum operating temperature range for the Captuvo sled is 0^ C to 35^ C ( 32^ F to 95^ F).
Reading Techniques
The sled has a view finder that projects a bright red aiming beam that corresponds to the sled's horizontal field of view. The aiming beam should be centered over the bar code, but it can be positioned in any direction for a good read.
Linear bar code 2D Matrix symbol
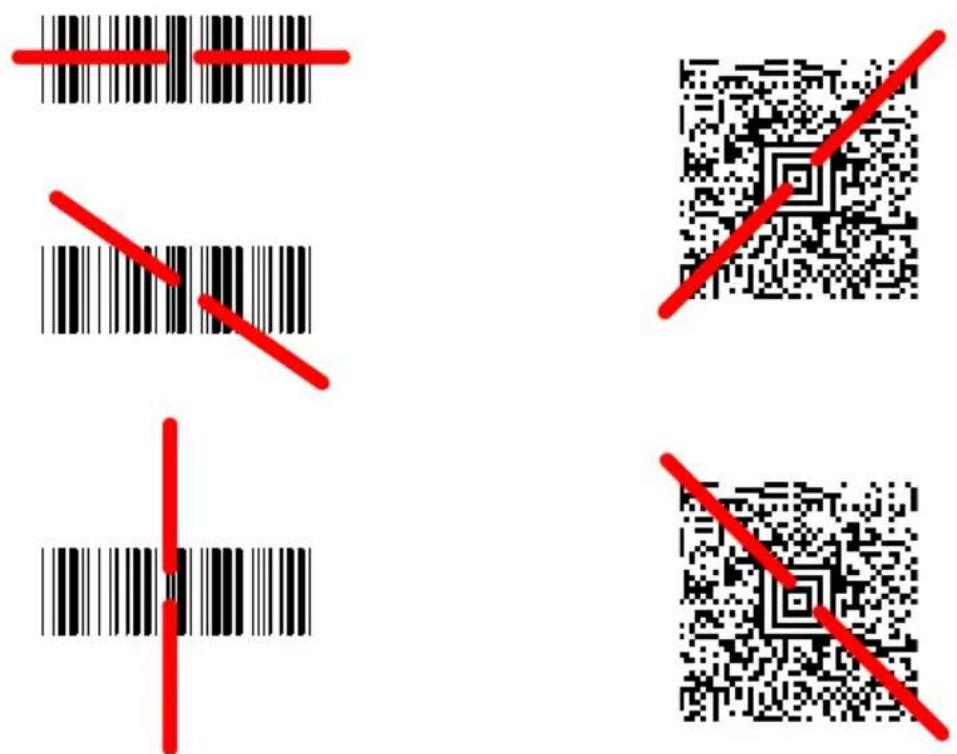
The aiming beam is smaller when the sled is closer to the code and larger when it is farther from the code. Symbologies with smaller bars or elements (mil size) should be read closer to the unit. Symbologies with larger bars or elements (mil size) should be read farther from the unit. To read single or multiple symbols (on a page or on an object), hold the sled at an appropriate distance from the target, pull the trigger, and center the aiming beam on the symbol. If the code being scanned is highly reflective (e.g., laminated), it may be necessary to tilt the code up 15^ to 18^ to prevent unwanted reflection.
Setting Custom Defaults
You have the ability to create a set of menu commands as your own, custom defaults. To do so, scan the Set Custom Defaults bar code below before scanning the menu commands for your custom defaults. If a menu command requires scanning numeric codes from the back cover, then a Save code, that
entire sequence will be saved to your custom defaults. When you have entered all the commands you want to save for your custom defaults, scan the Save Custom Defaults bar code.
Set Custom Defaults
MNUCDS.
Save Custom Defaults
You may have a series of custom settings and want to correct a single setting. To do so, just scan the new setting to overwrite the old one. For example, if you had previously saved the setting for Beeper Volume at Low to your custom defaults, and decide you want the beeper volume set to High, just scan the Set Custom Defaults bar code, then scan the Beeper Volume High menu code, and then Save Custom Defaults. The rest of the custom defaults will remain, but the beeper volume setting will be updated.
Resetting the Custom Defaults
If you want the custom default settings restored to your sled, scan the Activate Custom Defaults bar code below. This is the recommended default bar code for most users. It resets the sled to the custom default settings. If there are no custom defaults, it will reset the sled to the factory default settings. Any settings that have not been specified through the custom defaults will be defaulted to the factory default settings.
DEFAULT.
Activate Custom Defaults
Resetting the Factory Defaults

This selection erases all your settings and resets the sled to the original factory defaults. It also disables all plugins.
If you aren't sure what programming options are in your sled, or you've changed some options and want to restore the sled to factory default settings, first scan the Remove Custom Defaults bar code, then scan Activate Defaults. This resets the sled to the factory default settings.
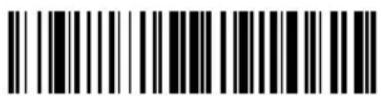
DEFOVR
Remove Custom Defaults
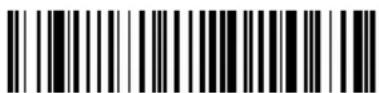
DEFAULT.
Activate Defaults
The Menu Commands, beginning on page 6-5 list the factory default settings for each of the commands (indicated by an asterisk (*) on the programming pages).
Good Read and Error Indicators
Beeper – Good Read
The beeper may be programmed On or Off in response to a good read. Turning this option off, only turns off the beeper response to a good read indication. All error and menu beeps are still audible. Default = Beeper - Good Read On.
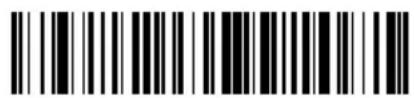
BEPBEPO.
Beeper - Good Read Off
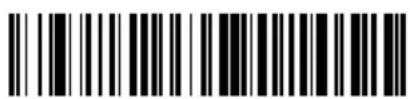
BEPBEP1.
* Beeper - Good Read On
Beeper Volume – Good Read
The beeper volume codes modify the volume of the beep the sled emits on a good read. Default = High.
BEPLVL1.
Low
BEPLVL2.
Medium

BEPLVL3.
* High
BEPLVLO.
Off
Manual Trigger Mode
When in manual trigger mode, the scanner scans until a bar code is read, or until the trigger is released. Normal mode offers good scan speed and the longest working ranges (depth of field). Default = Manual Trigger-Normal.
PAPHHF
Manual Trigger - Normal
Mobile Phone Read Mode
When this mode is selected, your sled is optimized to read bar codes from mobile phone or other LED displays. However, the speed of scanning printed bar codes may be slightly lower when this mode is enabled.
PAPHHC
Hand Held Scanning - Mobile
Phone
Note: To turn off Mobile Phone Read Mode, scan a Manual Trigger Mode bar code (see page 2-2).
Centering
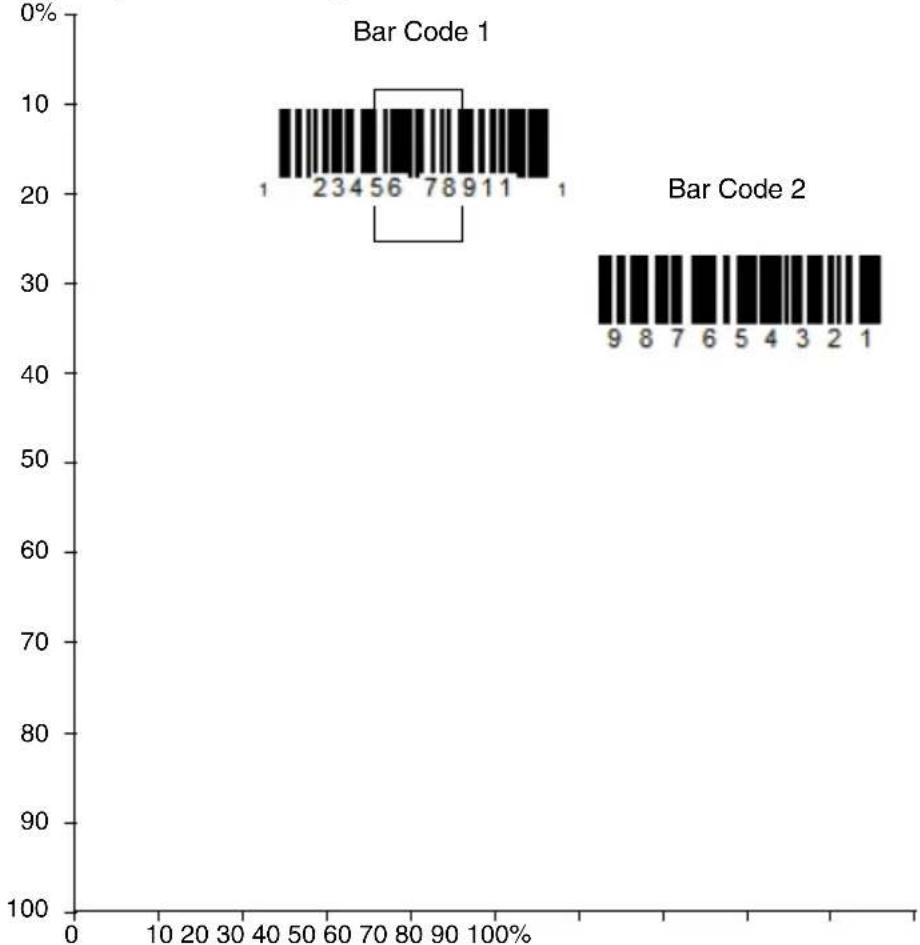
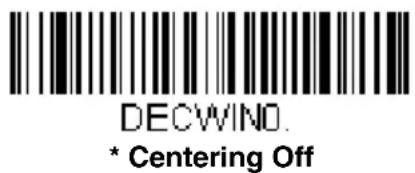
Use Centering to narrow the sled's field of view to make sure the sled reads only those bar codes intended by the user. For instance, if multiple codes are placed closely together, centering will insure that only the desired codes are read.
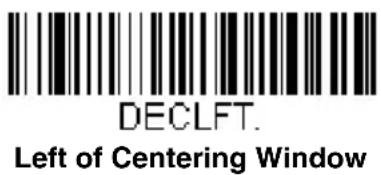
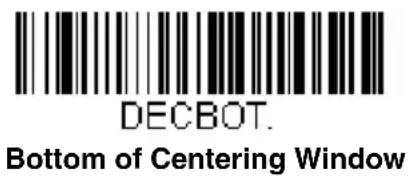
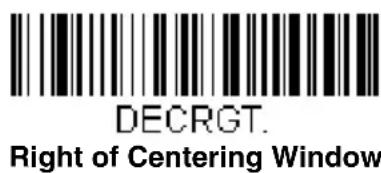
If a bar code is not touched by a predefined window, it will not be decoded or output by the scanner. If centering is turned on by scanning Centering On, the scanner only reads codes that pass through the centering window you specify using the Top of Centering Window, Bottom of Centering Window, Left, and Right of Centering Window bar codes.
In the example below, the white box is the centering window. The centering window has been set to 20% left, 30% right, 8% top, and 25% bottom. Since Bar Code 1 passes through the centering window, it will be read. Bar Code 2 does not pass through the centering window, so it will not be read.
bar
| Bar Code | Value | | -------- | ----- | | 1 | 23 | | 2 | 4 | | 3 | 5 | | 4 | 6 | | 5 | 7 | | 6 | 8 | | 7 | 9 | | 8 | 10 | | 9 | 11 | | 10 | 12 |Note: A bar code needs only to be touched by the centering window in order to be read. It does not need to pass completely through the centering window.
Scan Centering On, then scan one of the following bar codes to change the top, bottom, left, or right of the centering window. Then scan the percent you want to shift the centering window using digits on the inside back cover of this manual. Scan Save. Default Centering = 40% for Top and Left, 60% for Bottom and Right.
Preferred Symbology
The sled can be programmed to specify one symbology as a higher priority over other symbologies in situations where both bar code symbologies appear on the same label, but the lower priority symbology cannot be disabled.
For example, you may be using the sled in a retail setting to read U.P.C. symbols, but have occasional need to read a code on a drivers license. Since some licenses have a Code 39 symbol as well as the PDF417 symbol, you can use Preferred Symbology to specify that the PDF417 symbol be read instead of the Code 39.
Preferred Symbology classifies each symbology as high priority, low priority, or as an unspecified type. When a low priority symbology is presented, the sled ignores it for a set period of time (see Preferred Symbology Time-out on page 2-5) while it searches for the high priority symbology. If a high priority symbology is located during this period, then that data is read immediately.
If the time-out period expires before a high priority symbology is read, the sled will read any bar code in its view (low priority or unspecified). If there is no bar code in the sled's view after the time-out period expires, then no data is reported.
Note: A low priority symbol must be centered on the aiming pattern to be read.
Scan a bar code below to enable or disable Preferred Symbology. Default = Preferred Symbology Off.
Preferred Symbology On
* Preferred Symbology Off
High Priority Symbology
To specify the high priority symbology, scan the High Priority Symbology bar code below. On the Symbology Charts on page A-1, find the symbology you want to set as high priority. Locate the Hex value for that symbology and scan the 2 digit hex value from the Programming Chart (inside back cover). Scan Save to save your selection. Default = None
High Priority Symbology
Low Priority Symbology
To specify the low priority symbology, scan the Low Priority Symbology bar code below. On the Symbology Charts on page A-1, find the symbology you want to set as low priority. Locate the Hex value for that symbology and scan the 2 digit hex value from the Programming Chart (inside back cover).
If you want to set additional low priority symbologies, scan FF, then scan the 2 digit hex value from the Programming Chart for the next symbology. You can program up to 5 low priority symbologies. Scan Save to save your selection. Default = None
PRFBLK
Low Priority Symbology
Preferred Symbology Time-out
Once you have enabled Preferred Symbology and entered the high and low priority symbologies, you must set the time-out period. This is the period of time the sled will search for a high priority bar code after a low priority bar
code has been encountered. Scan the bar code below, then set the delay (from 1-3,000 milliseconds) by scanning digits from the inside back cover, then scanning Save. Default = 500 ms.
Preferred Symbology Time-out
Preferred Symbology Default
Scan the bar code below to set all Preferred Symbology entries to their default values.
PRFDFT.
Preferred Symbology Default
Output Sequence Overview
Require Output Sequence
When turned off, the bar code data will be output to the host as the sled decodes it. When turned on, all output data must conform to an edited sequence or the sled will not transmit the output data to the host device.
Note: This selection is unavailable when the Multiple Symbols Selection is turned on.
Output Sequence Editor
This programming selection allows you to program the sled to output data (when scanning more than one symbol) in whatever order your application requires, regardless of the order in which the bar codes are scanned.
Reading the Default Sequence symbol programs the sled to the Universal values, shown below. These are the defaults. Be certain you want to delete or clear all formats before you read the Default Sequence symbol.
Note: You must hold the trigger while reading each bar code in a sequence.
Note: To make Output Sequence Editor selections, you'll need to know the code I.D., code length, and character match(es) your application requires. Use the Alphanumeric symbols (inside back cover) to read these options.
To Add an Output Sequence
-
Scan the Enter Sequence symbol (see Require Output Sequence, page 2-10).
-
Code I.D.
On the Symbology Charts on page A-1, find the symbology to which you want to apply the output sequence format. Locate the Hex value for that symbology and scan the 2 digit hex value from the Programming Chart (inside back cover).
- Length
Specify what length (up to 9999 characters) of data output will be acceptable for this symbology. Scan the four digit data length from the Programming Chart. (Note: 50 characters is entered as 0050. 9999 is a universal number, indicating all lengths.) When calculating the length, you must count any programmed prefixes, suffixes, or formatted characters as part of the length (unless using 9999).
- Character Match Sequences
On the ISO 2022/ISO 646 Character Replacements, page A-10, find the Hex value that represents the character(s) you want to match. Use the Programming Chart to read the alphanumeric combination that represents the ASCII characters. (99 is the Universal number, indicating all characters.)
- End Output Sequence Editor
Scan F F to enter an Output Sequence for an additional symbology, or Save to save your entries.
Other Programming Selections
- Discard
This exits without saving any Output Sequence changes.
Output Sequence Example
In this example, you are scanning Code 93, Code 128, and Code 39 bar codes, but you want the sled to output Code 39 1st, Code 128 2nd, and Code 93 3rd, as shown below.
Note: Code 93 must be enabled to use this example.

A - Code 39
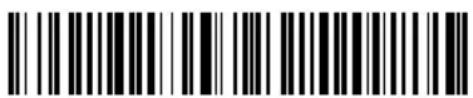
B - Code 128

C - Code 93
You would set up the sequence editor with the following command line:
SEQBLK62999941FF6A999942FF69999943FF
The breakdown of the command line is shown below:
SEQBLKsequence editor start command
62 code identifier for Code 39
9999 code length that must match for Code 39, 9999 = all lengths
41 start character match for Code 39, 41h = "A"
FF termination string for first code
6A code identifier for Code 128
9999 code length that must match for Code 128, 9999 = all lengths
42 start character match for Code 128, 42h = "B"
FF termination string for second code
69 code identifier for Code 93
9999 code length that must match for Code 93, 9999 = all lengths
43 start character match for Code 93, 43h = "C"
FF termination string for third code
To program the previous example using specific lengths, you would have to count any programmed prefixes, suffixes, or formatted characters as part of the length. If you use the example on page 2-8, but assume a
SEQBLK62001241FF6A001342FF69001243FF
The breakdown of the command line is shown below:
SEQBLKsequence editor start command
62 code identifier for Code 39
0012 A - Code 39 sample length (11) plus CR suffix (1) = 12
41 start character match for Code 39, 41h = "A"
FF termination string for first code
6A code identifier for Code 128
0013 B - Code 128 sample length (12) plus CR suffix (1) = 13
42 start character match for Code 128, 42h = "B"
FF termination string for second code
69 code identifier for Code 93
0012 C - Code 93 sample length (11) plus CR suffix (1) = 12
43 start character match for Code 93, 43h = "C"
FF termination string for third code
Output Sequence Editor
SEQBLK
Enter Sequence
SEQDFT.
Default Sequence
Partial Sequence
If an output sequence operation is terminated before all your output sequence criteria are met, the bar code data acquired to that point is a "partial sequence."
Scan Discard Partial Sequence to discard partial sequences when the output sequence operation is terminated before completion. Scan Transmit Partial Sequence to transmit partial sequences. (Any fields in the sequence where no data match occurred will be skipped in the output.)
SEQTTS1
Transmit Partial Sequence
SEQTTS0.
* Discard Partial Sequence
Require Output Sequence
When an output sequence is Required, all output data must conform to an edited sequence or the sled will not transmit the output data to the host device. When it's On/Not Required, the sled will attempt to get the output data to conform to an edited sequence but, if it cannot, the sled transmits all output data to the host device as is.
When the output sequence is Off, the bar code data is output to the host as the sled decodes it. Default = Off.
Note: This selection is unavailable when the Multiple Symbols Selection is turned on.
Multiple Symbols
When this programming selection is turned On, it allows you to read multiple symbols with a single pull of the trigger. If you press and hold the trigger, aiming at a series of symbols, it reads unique symbols once, beeping (if turned on) for each read. The sled attempts to find and decode new symbols as long as the trigger is pulled. When this programming selection is turned Off, the sled will only read the symbol closest to the aiming beam. Default = Off.
No Read
With No Read turned On, the sled notifies you if a code cannot be read. If using an EZConfig Tool Scan Data Window (see page 9-3), an "NR" appears when a code cannot be read. If No Read is turned Off, the "NR" will not appear. Default = Off.
If you want a different notation than "NR," for example, "Error," or "Bad Code," you can edit the output message (see Data Formatting beginning on page 4-1). The hex code for the No Read symbol is 9C.
Video Reverse
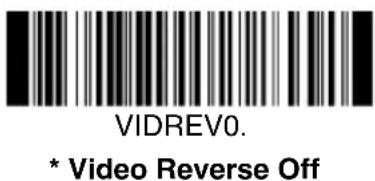
Video Reverse is used to allow the sled to read bar codes that are inverted. The Video Reverse Off bar code below is an example of this type of bar code. Scan Video Reverse Only to read only inverted bar codes. Scan Video Reverse and Standard Bar Codes to read both types of codes.
Note: After scanning Video Reverse Only, menu bar codes cannot be read. You must scan Video Reverse Off or Video Reverse and Standard Bar Codes in order to read menu bar codes.
Note: Images downloaded from the unit are not reversed. This is a setting for decoding only.
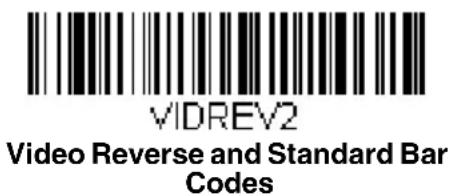
Working Orientation
Some bar codes are direction-sensitive. For example, KIX codes and OCR can misread when scanned sideways or upside down. Use the working orientation settings if your direction-sensitive codes will not usually be presented upright to the scanner. Default = Upright.
Upright:
-
-
-
-
-
-
-
- 1.
-
-
-
-
-
-
Vertical, Top to Bottom: (Rotate CW 90°)
Upside Down:
1
Vertical, Bottom to Top: (Rotate CCW 90°)
-
-
-
-
-
-
-
-
-
-
-
-
-
-
-
-
-
-
-
-
-
-
-
-
-
-
-
-
-
-
-
-
-
-
-
-
-
-
-
-
-
-
-
-
-
-
-
-
-
-
-
-
-
-
-
-
-
-
-
-
-
-
-
-
-
-
-
-
-
-
-
-
-
-
-
-
-
-
-
-
-
-
-
-
-
-
-
-
-
-
-
-
-
-
-
-
-
- 99.
-
-
-
-
-
-
-
-
-
-
-
-
-
-
-
-
-
-
-
-
-
-
-
-
-
-
-
-
-
-
-
-
-
-
-
-
-
-
-
-
-
-
-
-
-
-
-
-
-
-
-
-
-
-
-
-
-
-
-
-
-
-
-
-
-
-
-
-
-
-
-
-
-
-
-
-
-
-
-
-
-
-
-
-
-
-
-
-
-
-
-
-
-
-
-
-
P111111111111111
Default = Upright.
ROTATNO.
* Upright
ROTATN2.
Upside Down
ROTATN1
Vertical, Bottom to Top
ROTATN3
Vertical, Top to Bottom
Prefix/Suffix Overview
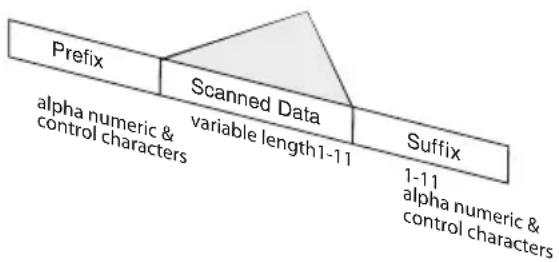
When a bar code is scanned, additional information is sent to the host computer along with the bar code data. This group of bar code data and additional, user-defined data is called a “message string.” The selections in this section are used to build the user-defined data into the message string.
Prefix and Suffix characters are data characters that can be sent before and after scanned data. You can specify if they should be sent with all symbologies, or only with specific symbologies. The following illustration shows the breakdown of a message string:
flowchart
graph TD
    A["Prefix"] --> B["Scanned Data"]
    B --> C["Suffix"]
    D["alpha numeric & control characters"] --> E["variable length 1-11"]
    F["1-11"] --> G["alpha numeric & control characters"]
Points to Keep In Mind
- It is not necessary to build a message string. The selections in this chapter are only used if you wish to alter the default settings. Default prefix = None. Default suffix = None.
- A prefix or suffix may be added or cleared from one symbology or all symbologies.
- You can add any prefix or suffix from the ASCII Conversion Chart (Code Page 1252), beginning on page A-4, plus Code I.D. and AIM I.D.
- You can string together several entries for several symbologies at one time.
- Enter prefixes and suffixes in the order in which you want them to appear on the output.
- When setting up for specific symbologies (as opposed to all symbologies), the specific symbology ID value counts as an added prefix or suffix character.
- The maximum size of a prefix or suffix configuration is 200 characters, which includes header information.
To Add a Prefix or Suffix:
Step 1. Scan the Add Prefix or Add Suffix symbol (page 3-3).
Step 2. Determine the 2 digit Hex value from the Symbology Chart (included in the Symbology Charts, beginning on page A-1) for the
symbology to which you want to apply the prefix or suffix. For example, for Code 128, Code ID is "j" and Hex ID is "6A".
Step 3. Scan the 2 hex digits from the Programming Chart inside the back cover of this manual or scan 9, 9 for all symbologies.
Step 4. Determine the hex value from the ASCII Conversion Chart (Code Page 1252), beginning on page A-4, for the prefix or suffix you wish to enter.
Step 5. Scan the 2 digit hex value from the Programming Chart inside the back cover of this manual.
Step 6. Repeat Steps 4 and 5 for every prefix or suffix character.
Step 7. To add the Code I.D., scan 5, C, 8, 0. To add AIM I.D., scan 5, C, 8, 1. To add a backslash (), scan 5, C, 5, C.
Note: To add a backslash () as in Step 7, you must scan 5C twice – once to create the leading backslash and then to create the backslash itself.
Step 8. Scan Save to exit and save, or scan Discard to exit without saving. Repeat Steps 1-6 to add a prefix or suffix for another symbology.
Example: Add a Suffix to a specific symbology
To send a CR (carriage return) Suffix for U.P.C. only:
Step 1. Scan Add Suffix.
Step 2. Determine the 2 digit hex value from the Symbology Chart (included in the Symbology Charts, beginning on page A-1) for U.P.C.
Step 3. Scan 6, 3 from the Programming Chart inside the back cover of this manual.
Step 4. Determine the hex value from the ASCII Conversion Chart (Code Page 1252), beginning on page A-4, for the CR (carriage return).
Step 5. Scan 0, D from the Programming Chart inside the back cover of this manual.
Step 6. Scan Save, or scan Discard to exit without saving.
To Clear One or All Prefixes or Suffixes
You can clear a single prefix or suffix, or clear all prefixes/suffixes for a symbology. If you have been entering prefixes and suffixes for single symbologies, you can use Clear One Prefix (Suffix) to delete a specific character from a symbology. When you Clear All Prefixes (Suffixes), all the prefixes or suffixes for a symbology are deleted.
Step 1. Scan the Clear One Prefix or Clear One Suffix symbol.
Step 2. Determine the 2 digit Hex value from the Symbology Chart (included in the Symbology Charts, beginning on page A-1) for the symbology from which you want to clear the prefix or suffix.
Step 3. Scan the 2 digit hex value from the Programming Chart inside the back cover of this manual or scan 9, 9 for all symbologies.
Your change is automatically saved.
To Add a Carriage Return Suffix to All Symbologies
Scan the following bar code if you wish to add a carriage return suffix to all symbologies at once. This action first clears all current suffixes, then programs a carriage return suffix for all symbologies.
VSUFCR.
Add CR Suffix
All Symbologies
Prefix Selections
PREBK2.
Add Prefix
PRECA2.
Clear All Prefixes
PRECL2.
Clear One Prefix
Suffix Selections
SUFBK2.
Add Suffix
SUFCL2.
Clear One Suffix
SUFCA2.
Clear All Suffixes
Function Code Transmit
When this selection is enabled and function codes are contained within the scanned data, the sled transmits the function code to the terminal. Charts of these function codes are provided in Supported Interface Keys starting on page 8-2. Default = Enable.
RMVFNCO.
* Enable
RMVFNC1
Disable
Data Format Editor Introduction
You may use the Data Format Editor to change the sled's output. For example, you can use the Data Format Editor to insert characters at certain points in bar code data as it is scanned. The selections in the following pages are used only if you wish to alter the output. Default Data Format setting = None.
Normally, when you scan a bar code, it is outputted automatically. However when you create a format, you must use a "send" command (see Send Commands on page 4-4) within the format program to output data.
Multiple formats may be programmed into the sled. They are stacked in the order in which they are entered. However, the following list presents the order in which formats are applied:
- Specific Terminal ID, Actual Code ID, Actual Length
- Specific Terminal ID, Actual Code ID, Universal Length
- Specific Terminal ID, Universal Code ID, Actual Length
- Specific Terminal ID, Universal Code ID, Universal Length
- Universal Terminal ID, Actual Code ID, Actual Length
- Universal Terminal ID, Actual Code ID, Universal Length
- Universal Terminal ID, Universal Code ID, Actual Length
- Universal Terminal ID, Universal Code ID, Universal Length
The maximum size of a data format configuration is 2000 bytes, which includes header information.
If you have changed data format settings, and wish to clear all formats and return to the factory defaults, scan the Default Data Format code below.
DFMDF3.
* Default Data Format
To Add a Data Format
Step 1. Scan the Enter Data Format symbol (page 4-2).
Step 2. Select Primary/Alternate Format
Determine if this will be your primary data format, or one of 3 alternate formats. This allows you to save a total of 4 different data formats. To program your primary format, scan 0 using the Programming Chart inside the back cover of this manual. If you are programming an alternate format, scan 1, 2, or 3, depending on which alternate format
you are programming. (See Primary/Alternate Data Formats on page 4-17 for further information.)
Step 3. Terminal Type
Refer to Terminal ID Table (page 4-4) and locate the Terminal ID number for your PC. Scan three numeric bar codes on the inside back cover to program the scanner for your terminal ID (you must enter 3 digits). For example, scan 0 0 3 for an AT wedge.
Note: 099 indicates all terminal types.
Step 4. Code I.D.
In the Symbology Charts, beginning on page A-1, find the symbology to which you want to apply the data format. Locate the Hex value for that symbology and scan the 2 digit hex value from the Programming Chart inside the back cover of this manual.
If you wish to create a data format for all symbologies, with the exception of some specific symbologies, refer to B8 (page 4-14).
If you are creating a data format for Batch Mode Quantity, use 35 for the Code I.D.
Note: 99 indicates all symbologies.
Step 5. Length
Specify what length (up to 9999 characters) of data will be acceptable for this symbology. Scan the four digit data length from the
Programming Chart inside the back cover of this manual. For example, 50 characters is entered as 0050.
Note: 9999 indicates all lengths.
Step 6. Editor Commands
Refer to Data Format Editor Commands (page 4-4). Scan the symbols that represent the command you want to enter. 94 alphanumeric characters may be entered for each symbology data format.
Step 7. Scan Save to save your data format, or Discard to exit without saving your changes.
DFMBK3.
Enter Data Format
MNUSAV
Save
MNUABT.
Discard
Other Programming Selections
Clear One Data Format
This deletes one data format for one symbology. If you are clearing the primary format, scan 0 from the Programming Chart inside the back cover of this manual. If you are clearing an alternate format, scan 1, 2, or 3, depending on the format you are clearing. Scan the Terminal Type and Code I.D. (see Symbology Charts on page A-1), and the bar code data length for the specific data format that you want to delete. All other formats remain unaffected.
Clear all Data Formats
This clears all data formats.
Save to exit and save your data format changes.
Discard to exit without saving any data format changes.
DFMCL3
Clear One Data Format
DFMCA3.
Clear All Data Formats
MNUSAV.
Save
MNUABT.
Discard
Terminal ID Table
| Terminal Model(s) Terminal ID | ||
| Serial RS232 | 000 | |
Data Format Editor Commands
When working with the Data Format Editor, a virtual cursor is moved along your input data string. The following commands are used to both move this cursor to different positions, and to select, replace, and insert data into the final output. For examples that use the Data Format Editor commands, refer to Data Formatter on page 4-15.
Send Commands
Send all characters
Send all characters
F1 Include in the output message all of the characters from the input message, starting from current cursor position, followed by an insert character. Syntax = F1xx where xx stands for the insert character's hex value for its ASCII code. Refer to the ASCII Conversion Chart (Code Page 1252), beginning on page A-4 for decimal, hex and character codes.
Send a number of characters
F2 Include in the output message a number of characters followed by an insert character. Start from the current cursor position and continue for "nn" characters or through the last character in the input message, followed by character "xx." Syntax = F2nnxx where nn stands for the numeric value (00-99) for the number of characters, and xx stands for the insert character's hex value for its ASCII code. Refer to the ASCII Conversion Chart (Code Page 1252), beginning on page A-4 for decimal, hex and character codes.
F2 Example: Send a number of characters

Send the first 10 characters from the bar code above, followed by a carriage return. Command string: F2100D
F2 is the "Send a number of characters" command
10 is the number of characters to send
0D is the hex value for a CR
The data is output as: 1234567890
F2 and F1 Example: Split characters into 2 lines
Send the first 10 characters from the bar code above, followed by a carriage return, followed by the rest of the characters.
Command string: F2100DF10D
F2 is the "Send a number of characters" command
10 is the number of characters to send for the first line
0D is the hex value for a CR
F1 is the "Send all characters" command
0D is the hex value for a CR
The data is output as: 1234567890
ABCDEFGHIJKLMNOPQRSTUVWXYZ
Send all characters up to a particular character
F3 Include in the output message all characters from the input message, starting with the character at the current cursor position and continuing to, but not including, the search character "ss," followed by an insert character. The cursor is moved forward to the "ss" character. Syntax = F3ssxx where ss stands for the search character's hex value for its ASCII code, and xx stands for the insert character's hex value for its ASCII code.
Refer to the ASCII Conversion Chart (Code Page 1252), page A-4 for decimal, hex and character codes.
F3 Example: Send all characters up to a particular character

Using the bar code above, send all characters up to but not including "D," followed by a carriage return.
Command string: F3440D
F3 is the "Send all characters up to a particular character" command
44 is the hex value for a 'D"
0D is the hex value for a CR
The data is output as: 1234567890ABC
Send all characters up to a string
B9 Include in the output message all characters from the input message, starting with the character at the current cursor position and continuing to, but not including, the search string "s...s." The cursor is moved forward to the beginning of the "s...s" string. Syntax = B9nnnns...s where nnnn stands for the length of the string, and s...s stands for the string to be matched. The string is made up of hex values for the characters in the string. Refer to the ASCII Conversion Chart (Code Page 1252), beginning on page A-4 for decimal, hex and character codes.
B9 Example: Send all characters up to a defined string

1234567890ABCDEFGHIJ
Using the bar code above, send all characters up to but not including "AB."
Command string: B900024142
B9 is the "Send all characters up to a string" command
0002 is the length of the string (2 characters)
41 is the hex value for A
42 is the hex value for B
The data is output as: 1234567890
Send all but the last characters
E9 Include in the output message all but the last "nn" characters, starting from the current cursor position. The cursor is moved forward to one position past the last input message character included. Syntax = E9nn where nn stands for the numeric value (00-99) for the number of characters that will not be sent at the end of the message.
Insert a character multiple times
F4 Send "xx" character "nn" times in the output message, leaving the cursor in the current position. Syntax = F4xxnn where xx stands for the insert character's hex value for its ASCII code, and nn is the numeric value (00-99) for the number of times it should be sent. Refer to the ASCII Conversion Chart (Code Page 1252), beginning on page A-4 for decimal, hex and character codes.
E9 and F4 Example: Send all but the last characters, followed by 2 tabs

1234567890ABCDEFGHIJ
Send all characters except for the last 8 from the bar code above, followed by 2 tabs.
Command string: E908F40902
E9 is the "Send all but the last characters" command
08 is the number of characters at the end to ignore
F4 is the "Insert a character multiple times" command
09 is the hex value for a horizontal tab
02 is the number of times the tab character is sent
The data is output as: 1234567890AB
Insert a string
BA Send "ss" string of "nn" length in the output message, leaving the cursor in the current position. Syntax = BAnnnns...s where nnnn stands for the length of the string, and s...s stands for the string. The string is made up of hex values for the characters in the string. Refer to the ASCII Conversion Chart (Code Page 1252), beginning on page A-4 for decimal, hex and character codes.
B9 and BA Example: Look for the string "AB" and insert 2 asterisks (**)

Using the bar code above, send all characters up to but not including "AB." Insert 2 asterisks at that point, and send the rest of the data with a carriage return after.
Command string: B900024142BA00022A2AF10D
B9 is the "Send all characters up to a string" command
0002 is the length of the string (2 characters)
41 is the hex value for A
42 is the hex value for B
BA is the "Insert a string" command
0002 is the length of the string to be added (2 characters)
2A is the hex value for an asterisk (*)
2A is the hex value for an asterisk (*)
F1 is the "Send all characters" command
0D is the hex value for a CR
The data is output as: 1234567890**ABCDEFGHIJ
Insert symbology name
B3 Insert the name of the bar code's symbology in the output message, without moving the cursor. Only symbologies with a Honeywell ID are included (see Symbology Charts on page A-1).
Refer to the ASCII Conversion Chart (Code Page 1252), page A-4 for decimal, hex and character codes.
Insert bar code length
B4 Insert the bar code's length in the output message, without moving the cursor. The length is expressed as a numeric string and does not include leading zeroes.
B3 and B4 Example: Insert the symbology name and length

1234567890ABCDEFGHIJ
Send the symbology name and length before the bar code data from the bar code above. Break up these insertions with spaces. End with a carriage return.
Command string: B3F42001B4F42001F10D
B3 is the "Insert symbology name" command
F4 is the "Insert a character multiple times" command
20 is the hex value for a space
01 is the number of times the space character is sent
B4 is the "Insert bar code length" command
F4 is the "Insert a character multiple times" command
20 is the hex value for a space
01 is the number of times the space character is sent
F1 is the "Send all characters" command
0D is the hex value for a CR
The data is output as: Code128 20 1234567890ABCDEFGHIJ
Move Commands
Move the cursor forward a number of characters
F5 Move the cursor ahead "nn" characters from current cursor position.
Syntax = F5nn where nn is the numeric value (00-99) for the number of characters the cursor should be moved ahead.
F5 Example: Move the cursor forward and send the data

1234567890ABCDEFGHIJ
Move the cursor forward 3 characters, then send the rest of the bar code data from the bar code above. End with a carriage return.
Command string: F503F10D
F5 is the "Move the cursor forward a number of characters" command
03 is the number of characters to move the cursor
F1 is the "Send all characters" command
0D is the hex value for a CR
The data is output as: 4567890ABCDEFGHIJ
Move the cursor backward a number of characters
F6 Move the cursor back "nn" characters from current cursor position. Syntax = F6nn where nn is the numeric value (00-99) for the number of characters the cursor should be moved back.
Move the cursor to the beginning
F7 Move the cursor to the first character in the input message. Syntax = F7.
FE and F7 Example: Manipulate bar codes that begin with a 1

Search for bar codes that begin with a 1. If a bar code matches, move the cursor back to the beginning of the data and send 6 characters followed by a carriage return. Using the bar code above:
Command string: FE31F7F2060D
FE is the "Compare characters" command
31 is the hex value for 1
F7 is the "Move the cursor to the beginning" command
F2 is the "Send a number of characters" command
06 is the number of characters to send
0D is the hex value for a CR
The data is output as: 123456
Move the cursor to the end
EA Move the cursor to the last character in the input message. Syntax = EA.
Search Commands
Search forward for a character
F8 Search the input message forward for "xx" character from the current cursor position, leaving the cursor pointing to the "xx" character. Syntax = F8xx where xx stands for the search character's hex value for its ASCII code.
Refer to the ASCII Conversion Chart (Code Page 1252), page A-4 for decimal, hex and character codes.
F8 Example: Send bar code data that starts after a particular character

Search for the letter "D" in bar codes and send all the data that follows, including the "D." Using the bar code above:
Command string: F844F10D
F8 is the "Search forward for a character" command
44 is the hex value for "D"
F1 is the "Send all characters" command
0D is the hex value for a CR
The data is output as: DEFGHIJ
Search backward for a character
F9 Search the input message backward for "xx" character from the current cursor position, leaving the cursor pointing to the "xx" character.
Syntax = F9xx where xx stands for the search character's hex value for its ASCII code.
Refer to the ASCII Conversion Chart (Code Page 1252), page A-4 for decimal, hex and character codes.
Search forward for a string
B0 Search forward for "s" string from the current cursor position, leaving cursor pointing to "s" string. Syntax = B0nnnnS where nnnn is the string length (up to 9999), and S consists of the ASCII hex value of each character in the match string. For example, B0000454657374 will search forward for the first occurrence of the 4 character string "Test." Refer to the ASCII Conversion Chart (Code Page 1252), page A-4 for decimal, hex and character codes.
B0 Example: Send bar code data that starts after a string of characters

Search for the letters "FGH" in bar codes and send all the data that follows, including "FGH." Using the bar code above:
Command string: B00003464748F10D
B0 is the "Search forward for a string" command
0003 is the string length (3 characters)
46 is the hex value for "F"
47 is the hex value for "G"
48 is the hex value for "H"
F1 is the "Send all characters" command
0D is the hex value for a CR
The data is output as: FGHIJ
Search backward for a string
B1 Search backward for "s" string from the current cursor position, leaving cursor pointing to "s" string. Syntax = B1nnnnS where nnnn is the string length (up to 9999), and S consists of the ASCII hex value of each character in the match string. For example, B1000454657374 will search backward for the first occurrence of the 4 character string "Test." Refer to the ASCII Conversion Chart (Code Page 1252), page A-4 for decimal, hex and character codes.
Search forward for a non-matching character
E6 Search the input message forward for the first non-“xx” character from the current cursor position, leaving the cursor pointing to the non-“xx” character. Syntax = E6xx where xx stands for the search character's hex value for its ASCII code.
Refer to the ASCII Conversion Chart (Code Page 1252), page A-4 for decimal, hex and character codes.
E6 Example: Remove zeroes at the beginning of bar code data
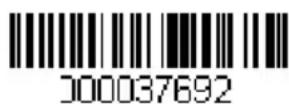
This example shows a bar code that has been zero filled. You may want to ignore the zeroes and send all the data that follows. E6 searches forward for the first character that is not zero, then sends all the data after, followed by a carriage return. Using the bar code above:
Command string: E630F10D
E6 is the "Search forward for a non-matching character" command
30 is the hex value for 0
F1 is the "Send all characters" command
0D is the hex value for a CR
The data is output as: 37692
Search backward for a non-matching character
E7 Search the input message backward for the first non-“xx” character from the current cursor position, leaving the cursor pointing to the non-“xx” character. Syntax = E7xx where xx stands for the search character's hex value for its ASCII code.
Refer to the ASCII Conversion Chart (Code Page 1252), page A-4 for decimal, hex and character codes.
Miscellaneous Commands
Suppress characters
FB Suppress all occurrences of up to 15 different characters, starting at the current cursor position, as the cursor is advanced by other commands. When the FC command is encountered, the suppress function is terminated. The cursor is not moved by the FB command. Syntax = FBnnxxyy ..zz where nn is a count of the number of suppressed characters in the list, and xxyy .. zz is the list of characters to be suppressed.
FB Example: Remove spaces in bar code data
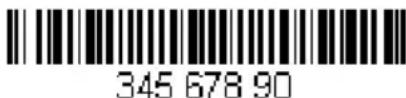
This example shows a bar code that has spaces in the data. You may want to remove the spaces before sending the data. Using the bar code above:
Command string: FB0120F10D
FB is the "Suppress characters" command
01 is the number of character types to be suppressed
20 is the hex value for a space
F1 is the "Send all characters" command
0D is the hex value for a CR
The data is output as: 34567890
Stop suppressing characters
FC Disables suppress filter and clear all suppressed characters. Syntax = FC.
Replace characters
E4 Replaces up to 15 characters in the output message, without moving the cursor. Replacement continues until the E5 command is encountered. Syntax = E4nnxx 1 xx 2 yy 1 yy 2 ...zz 1 zz 2 where nn is the total count of the number of characters in the list (characters to be replaced plus replacement characters); xx 1 defines characters to be replaced and xx 2 defines replacement characters, continuing through zz 1 and zz 2 .
E4 Example: Replace zeroes with CRs in bar code data
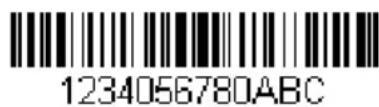
If the bar code has characters that the host application does not want included, you can use the E4 command to replace those characters with something else. In this example, you will replace the zeroes in the bar code above with carriage returns.
Command string: E402300DF10D
E4 is the "Replace characters" command
02 is the total count of characters to be replaced, plus the replacement characters (0 is replaced by CR, so total characters = 2)
30 is the hex value for 0
0D is the hex value for a CR (the character that will replace the 0)
F1 is the "Send all characters" command
0D is the hex value for a CR
The data is output as: 1234
5678
ABC
Stop replacing characters
E5 Terminates character replacement. Syntax = E5.
Compare characters
FE Compare the character in the current cursor position to the character "xx." If characters are equal, move the cursor forward one position.
Syntax = FExx where xx stands for the comparison character's hex value for its ASCII code.
Refer to the ASCII Conversion Chart (Code Page 1252), page A-4 for decimal, hex and character codes.
Compare string
B2 Compare the string in the input message to the string "s." If the strings are equal, move the cursor forward past the end of the string. Syntax = B2nnnnS where nnnn is the string length (up to 9999), and S consists of the ASCII hex value of each character in the match string. For example, B2000454657374 will compare the string at the current cursor position with the 4 character string "Test."
Refer to the ASCII Conversion Chart (Code Page 1252), page A-4 for decimal, hex and character codes.
Check for a number
EC Check to make sure there is an ASCII number at the current cursor position. The format is aborted if the character is not numeric.
EC Example: Only output the data if the bar code begins with a number
If you will only accept data from bar codes that begin with a number, you can use EC to check for the number.
Command string: ECF10D
EC is the "Check for a number" command
F1 is the "Send all characters" command
0D is the hex value for a CR
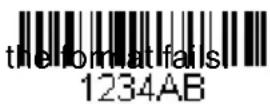
If this bar code is read,
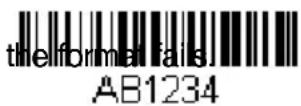
If this bar code is read:
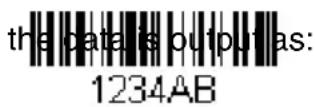
1234AB
Check for non-numeric character
ED Check to make sure there is a non-numeric ASCII character at the current cursor position. The format is aborted if the character is not numeric.
ED Example: Only output the data if the bar code begins with a letter
If you will only accept data from bar codes that begin with a letter, you can use ED to check for the number.
Command string: EDF10D
ED is the "Check for a non-numeric character" command
F1 is the "Send all characters" command
0D is the hex value for a CR
If this bar code is read,
If this bar code is read:
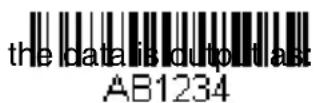
AB1234
Discard Data
B8 Discards types of data. For example, you may want to discard Code 128 bar codes that begin with the letter A. In step 4 (page 4-2), select 6A (for Code 128), and in step 5, select 9999 (for all lengths). Enter FE41B8 to compare and discard Code 128 bar codes that begin with the letter A. Syntax = B8.
The B8 command must be entered after all other commands.
The Data Format must be Required (see page 4-15) in order for the B8 command to work. If Data Format is On, but Not Required (page 4-16), bar code data that meets the B8 format is scanned and output as usual.
Other data format settings impact the B8 command. If Data Format Non-Match Error Tone is On (page 4-16), the scanner emits an error tone. If Data format Non-Match Error Tone is Off, the code is disabled for reading and no tone is sounded.
Data Formatter
When Data Formatter is turned Off, the bar code data is output to the host as read, including prefixes and suffixes.
DFM_END.
Data Formatter Off
You may wish to require the data to conform to a data format you have created and saved. The following settings can be applied to your data format:
Data Formatter On, Not Required, Keep Prefix/Suffix
Scanned data is modified according to your data format, and prefixes and suffixes are transmitted.
Data Formatter On, Not Required, Drop Prefix/Suffix
Scanned data is modified according to your data format. If a data format is found for a particular symbol, those prefixes and suffixes are not transmitted.
Data Format Required, Keep Prefix/Suffix
Scanned data is modified according to your data format, and prefixes and suffixes are transmitted. Any data that does not match your data format requirements generates an error tone and the data in that bar code is not transmitted. If you wish to process this type of bar code without generating an error tone, see Data Format Non-Match Error Tone.
Data Format Required, Drop Prefix/Suffix
Scanned data is modified according to your data format. If a data format is found for a particular symbol, those prefixes and suffixes are not transmitted. Any data that does not match your data format requirements generates an error tone. If you wish to process this type of bar code without generating an error tone, see Data Format Non-Match Error Tone.
Choose one of the following options. Default = Data Formatter On, Not Required, Keep Prefix/Suffix.
DFM_EN3.
Data Formatter On,
Not Required,
Drop Prefix/Suffix
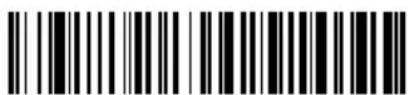
DFM_EN4.
Data Format Required,
Drop Prefix/Suffix
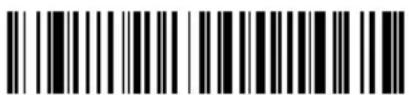
DFM EN1.
* Data Formatter On, Not Required,
Keep Prefix/Suffix
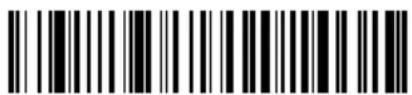
DFM_EN2.
Data Format Required, Keep Prefix/Suffix
Data Format Non-Match Error Tone
When a bar code is encountered that doesn't match your required data format, the sled normally generates an error tone. However, you may want to continue scanning bar codes without hearing the error tone. If you scan the Data Format Non-Match Error Tone Off bar code, data that doesn't conform to your data format is not transmitted, and no error tone will sound. If you wish to hear the error tone when a non-matching bar code is found, scan the Data Format Non-Match Error Tone On bar code. Default = Data Format Non-Match Error Tone On.
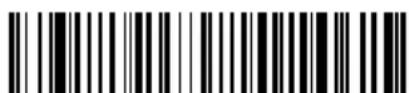
DFMDEC1
Data Format Non-Match
Error Tone Off
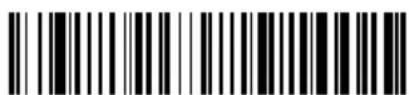
DFMDECO
* Data Format Non-Match Error Tone On
Primary/Alternate Data Formats
You can save up to four data formats, and switch between these formats. Your primary data format is saved under 0. Your other three formats are saved under 1, 2, and 3. To set your device to use one of these formats, scan one of the bar codes below.
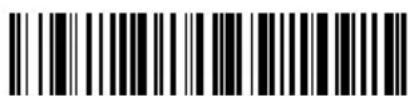
ALTFNMO
Primary Data Format
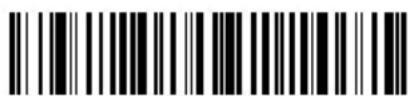
ALTFNM2
Data Format 2
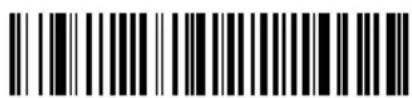
ALTFNM1
Data Format 1
ALTFNM3
Data Format 3
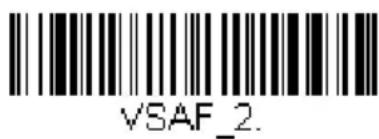
Single Scan Data Format Change
You can also switch between data formats for a single scan. The next bar code is scanned using an alternate data format, then reverts to the format you have selected above (either Primary, 1, 2, or 3).
For example, you may have set your device to the data format you saved as Data Format 3. You can switch to Data Format 1 for a single trigger pull by scanning the Single Scan-Data Format 1 bar code below. The next bar code that is scanned uses Data Format 1, then reverts back to Data Format 3.
Single Scan-Data Format 1
Single Scan-Primary Data Format
Single Scan-Data Format 3
Single Scan-Data Format 2
Symbologies
This programming section contains the following menu selections. Refer to Chapter 6 for settings and defaults.
- All Symbologies • Interleaved 2 of 5
- Aztec Code • Korea Post
• China Post (Hong Kong 2 of 5) • Matrix 2 of 5 - Chinese Sensible (Han Xin) Code • MaxiCode
• Codabar • MicroPDF417
• Codablock A • MSI
• Codablock F • NEC 2 of 5
• Code 11 • Postal Codes - 2D
• Code 128 • Postal Codes - Linear
• Code 32 Pharmaceutical (PARAF) • PDF417
• Code 39 • GS1 DataBar Omnidirectional - Code 93 • QR Code
- Data Matrix
• EAN/JAN-13
- Straight 2 of 5 IATA (two-bar start/stop)
- Straight 2 of 5 Industrial (three-bar start/stop)
• EAN/JAN-8 • TCIF Linked Code 39 (TLC39)
• GS1 Composite Codes • Telepen
• GS1 DataBar Expanded • Trioptic Code
• GS1 DataBar Limited
• GS1 DataBar Omnidirectional
- GS1 Emulation
GS1-128
- UPC-A
- UPC-A/EAN-13 with Extended Coupon Code
- UPC-E0
- UPC-E1
All Symbologies
If you want to decode all the symbologies allowable for your sled, scan the All Symbologies On code. If on the other hand, you want to decode only a particular symbology, scan All Symbologies Off followed by the On symbol for that particular symbology.
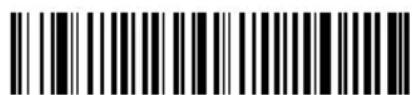
ALLENA1.
All Symbologies On
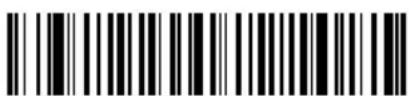
ALLENAD.
All Symbologies Off
Note: When All Symbologies On is scanned, 2D Postal Codes are not enabled. 2D Postal Codes must be enabled separately.
Message Length Description
You are able to set the valid reading length of some of the bar code symbologies. If the data length of the scanned bar code doesn't match the valid reading length, the sled will issue an error tone. You may wish to set the same value for minimum and maximum length to force the sled to read fixed length bar code data. This helps reduce the chances of a misread.
EXAMPLE: Decode only those bar codes with a count of 9-20 characters. Min. length = 09Max. length = 20
EXAMPLE: Decode only those bar codes with a count of 15 characters. Min. length = 15Max. length = 15
For a value other than the minimum and maximum message length defaults, scan the bar codes included in the explanation of the symbology, then scan the digit value of the message length and Save bar codes on the Programming Chart inside the back cover of this manual. The minimum and maximum lengths and the defaults are included with the respective symbologies.
Codabar
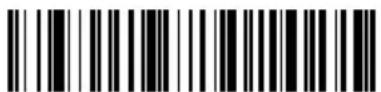
CBRDFT.
Codabar On/Off
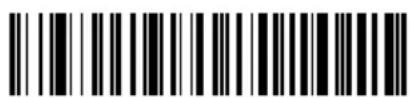
CBRENA1.
* On
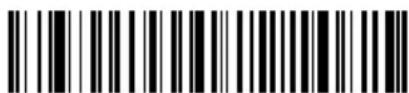
CBRENAD.
Off
Codabar Start/Stop Characters
Start/Stop characters identify the leading and trailing ends of the bar code. You may either transmit, or not transmit Start/Stop characters.
Default = Don't Transmit.
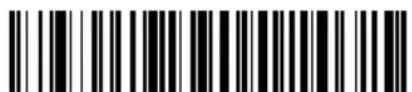
CBRSSX1
Transmit
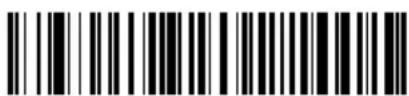
CBRSSXD.
* Don't Transmit
Codabar Check Character
Codabar check characters are created using different "modulos." You can program the sled to read only Codabar bar codes with Modulo 16 check characters. Default = No Check Character.
No Check Character indicates that the sled reads and transmits bar code data with or without a check character.
When Check Character is set to Validate and Transmit, the sled will only read Codabar bar codes printed with a check character, and will transmit this character at the end of the scanned data.
When Check Character is set to Validate, but Don't Transmit, the unit will only read Codabar bar codes printed with a check character, but will not transmit the check character with the scanned data.
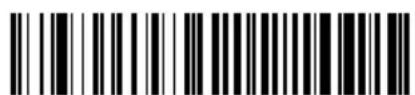
CBRCK20
* No Check Character
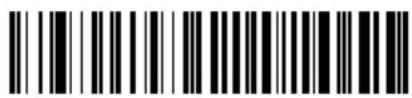
CBRCK22.
Validate Modulo 16 and Transmit
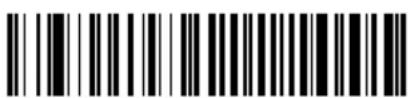
CBRCK21.
Validate Modulo 16, but Don't Transmit
Codabar Concatenation
Codabar supports symbol concatenation. When you enable concatenation, the sled looks for a Codabar symbol having a "D" start character, adjacent to a symbol having a "D" stop character. In this case the two messages are concatenated into one with the "D" characters omitted.

A 1 2 3 4 D D 5 6 7 8 A
Select Require to prevent the sled from decoding a single "D" Codabar symbol without its companion. This selection has no effect on Codabar symbols without Stop/Start D characters.
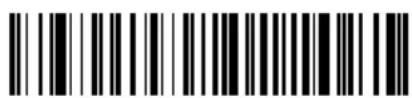
CBRCCT1.
On
CBRCCT2.
Require
CBRCCTD.
* Off
Codabar Message Length
Scan the bar codes below to change the message length. Refer to Message Length Description (page 5-2) for additional information. Minimum and Maximum lengths = 2-60. Minimum Default = 4, Maximum Default = 60.
CBRMIN. Minimum Message Length
CBRMAX. Maximum Message Length
Code 39
< Default All Code 39 Settings >
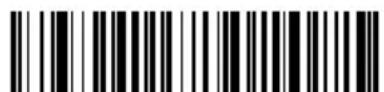
C39DFT.
Code 39 On/Off
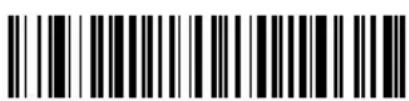
C39ENA1.
* On
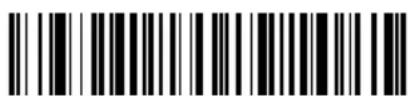
C39ENAD.
Off
Code 39 Start/Stop Characters
Start/Stop characters identify the leading and trailing ends of the bar code. You may either transmit, or not transmit Start/Stop characters. Default = Don't Transmit.
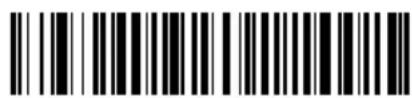
C39SSX1.
Transmit
C39SSX0.
* Don't Transmit
Code 39 Check Character
No Check Character indicates that the sled reads and transmits bar code data with or without a check character.
When Check Character is set to Validate, but Don't Transmit, the unit only reads Code 39 bar codes printed with a check character, but will not transmit the check character with the scanned data.
When Check Character is set to Validate and Transmit, the sled only reads Code 39 bar codes printed with a check character, and will transmit this character at the end of the scanned data. Default = No Check Character.
* No Check Character
Validate, but Don't Transmit
Validate and Transmit
Code 39 Message Length
Scan the bar codes below to change the message length. Refer to Message Length Description (page 5-2) for additional information. Minimum and Maximum lengths = 0-48. Minimum Default = 0, Maximum Default = 48.
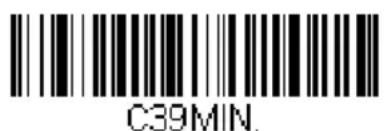
Minimum Message Length
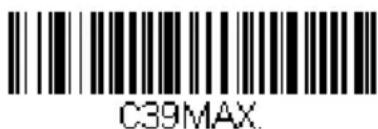
Maximum Message Length
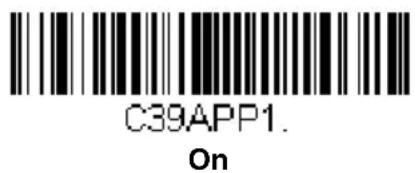
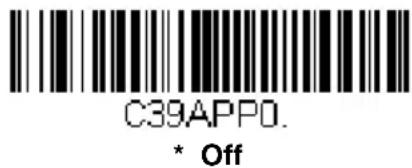
Code 39 Append
This function allows the sled to append the data from several Code 39 bar codes together before transmitting them to the host computer. When this function is enabled, the sled stores those Code 39 bar codes that start with a space (excluding the start and stop symbols), and does not immediately transmit the data. The sled stores the data in the order in which the bar
codes are read, deleting the first space from each. The sled transmits the appended data when it reads a Code 39 bar code that starts with a character other than a space. Default = Off.
Code 32 Pharmaceutical (PARAF)
Code 32 Pharmaceutical is a form of the Code 39 symbology used by Italian pharmacies. This symbology is also known as PARAF.
Note: Trioptic Code (page 5-40) must be turned off while scanning Code 32 Pharmaceutical codes.
Full ASCII
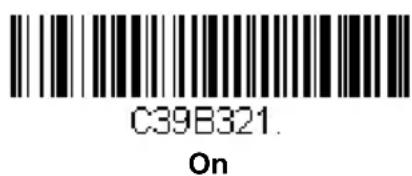
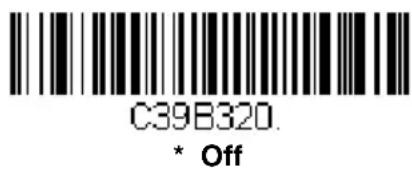
If Full ASCII Code 39 decoding is enabled, certain character pairs within the bar code symbol will be interpreted as a single character. For example: \$V will be decoded as the ASCII character SYN, and /C will be decoded as the ASCII character #. Default = Off.
| NUL %U DLE P | SP SPACE | 0 | 0 | @ | % | V | P | P | ‘ | % | W | |
| SOHA | DC1 Q | ! /A | 1 | 1 | A | A | Q | Q | a | +A | q | +Q |
| STXB | DC2 R | “ /B | 2 | 2 | B | B | R | R | b | +B | r | +R |
| ETXC | DC3 S | # /C | 3 | 3 | C | C | S | S | c | +C | s | +S |
| EOTD | DC4 T | /D | 4 | 4 | D | D | T | T | d | +D | t | +T |
| ENQ E | NAKU | % /E | 5 | 5 | E | E | U | U | e | +E | u | +U |
| ACK F | SYNV | & /F | 6 | 6 | F | F | V | V | f | +F | v | +V |
| BEL G | ETBW | ‘ /G | 7 | 7 | G | G | W | W | g | +G | w | +W |
| BS H | CANX | ( /H | 8 | 8 | H | H | X | X | h | +H | x | +X |
| HT I | EMY | ) /I | 9 | 9 | I | I | Y | Y | i | +I | y | +Y |
| LF J | SUBZ | * /J | : | /Z | J | J | Z | Z | j | +J | z | +Z |
| VT K | ESC %A | + /K | ; | %F | K | K | [ | %K | k | +K | %P | |
| FFL | FS %B | , /L | < | %G | L | L | \ | %L | l | +L | l | %Q |
| CR M | GS %C | - - | = | %H | M | M | ] | %M | m | +M | %R | |
| SON | RS %D | . . | > | %I | N | N | ^ | %N | n | +N | ~ | %S |
| SI $O | US %E | / /O | ? | %J | O | O | _ | %O | o | +O | DEL | %T |
Character pairs /M and /N decode as a minus sign and period respectively. Character pairs /P through /Y decode as 0 through 9.
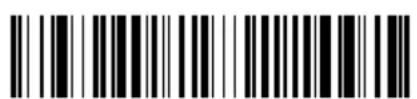
C39ASC1. Full ASCII On
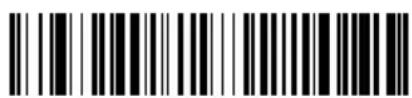
C39ASCO. * Full ASCII Off
Code 39 Code Page
Code pages define the mapping of character codes to characters. If the data received does not display with the proper characters, it may be because the bar code being scanned was created using a code page that is different from the one the host program is expecting. If this is the case, scan the bar code below, select the code page with which the bar codes were created (see ISO 2022/ISO 646 Character Replacements on page A-
10), and scan the value and the Save bar code from the Programming Chart on the inside the back cover of this manual. The data characters should then appear properly.
Interleaved 2 of 5
< Default All Interleaved 2 of 5 Settings >
Interleaved 2 of 5 On/Off
Check Digit
No Check Digit indicates that the sled reads and transmits bar code data with or without a check digit.
When Check Digit is set to Validate, but Don't Transmit, the unit only reads Interleaved 2 of 5 bar codes printed with a check digit, but will not transmit the check digit with the scanned data.
When Check Digit is set to Validate and Transmit, the sled only reads Interleaved 2 of 5 bar codes printed with a check digit, and will transmit this digit at the end of the scanned data. Default = No Check Digit.
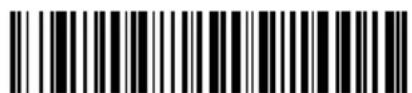
125CK20.
* No Check Digit
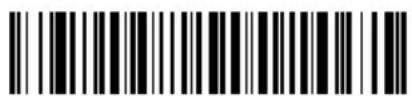
125CK21.
Validate, but Don't Transmit
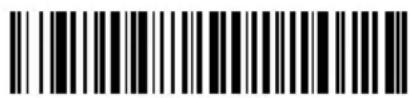
125CK22.
Validate and Transmit
Interleaved 2 of 5 Message Length
Scan the bar codes below to change the message length. Refer to Message Length Description (page 5-2) for additional information. Minimum and Maximum lengths = 2-80. Minimum Default = 4, Maximum Default = 80.
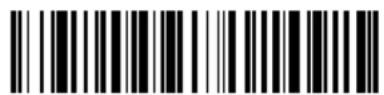
125MIN.
Minimum Message Length
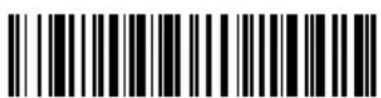
125MAX.
Maximum Message Length
NEC 2 of 5
< Default All NEC 2 of 5 Settings >

N25DFT.
NEC 2 of 5 On/Off
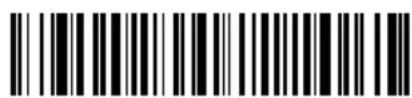
N25ENA1.
* On
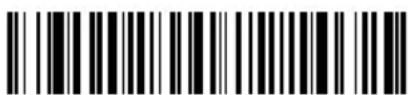
N25ENAD.
Off
Check Digit
No Check Digit indicates that the sled reads and transmits bar code data with or without a check digit.
When Check Digit is set to Validate, but Don't Transmit, the unit only reads NEC 2 of 5 bar codes printed with a check digit, but will not transmit the check digit with the scanned data.
When Check Digit is set to Validate and Transmit, the sled only reads NEC 2 of 5 bar codes printed with a check digit, and will transmit this digit at the end of the scanned data. Default = No Check Digit.
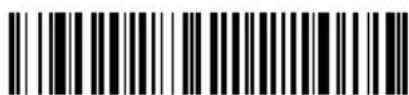
N25CK20.
* No Check Digit
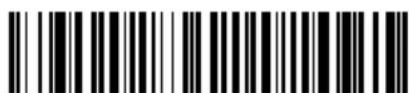
N25CK22.
Validate and Transmit
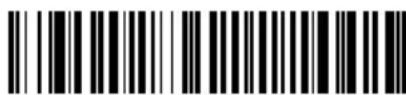
N25CK21
Validate, but Don't Transmit
NEC 2 of 5 Message Length
Scan the bar codes below to change the message length. Refer to Message Length Description (page 5-2) for additional information. Minimum and Maximum lengths = 2-80. Minimum Default = 4, Maximum Default = 80.
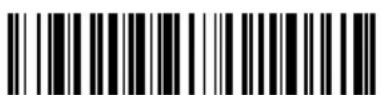
N25MIN. Minimum Message Length
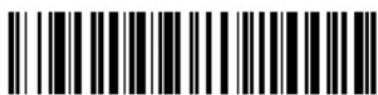
N25MAX. Maximum Message Length
Code 93
< Default All Code 93 Settings >
C93DFT.
Code 93 On/Off
C93ENA1.
* On
C93ENAD.
Off
Code 93 Message Length
Scan the bar codes below to change the message length. Refer to Message Length Description (page 5-2) for additional information. Minimum and Maximum lengths = 0-80. Minimum Default = 0, Maximum Default = 80.
C93MIN.
Minimum Message Length
C93MAX.
Maximum Message Length
Code 93 Code Page
Code pages define the mapping of character codes to characters. If the data received does not display with the proper characters, it may be because the bar code being scanned was created using a code page that is different from the one the host program is expecting. If this is the case, scan the bar code below, select the code page with which the bar codes were created (see ISO 2022/ISO 646 Character Replacements on page A-
10), and scan the value and the Save bar code from the Programming Chart on the inside the back cover of this manual. The data characters should then appear properly.
C93DCP
Code 93 Code Page
Straight 2 of 5 Industrial (three-bar start/stop)
R25DFT.
Straight 2 of 5 Industrial On/Off
R25ENA1.
On
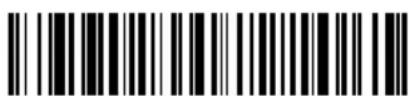
R25ENAD.
* Off
Straight 2 of 5 Industrial Message Length
Scan the bar codes below to change the message length. Refer to Message Length Description (page 5-2) for additional information. Minimum and Maximum lengths = 1-48. Minimum Default = 4, Maximum Default = 48.
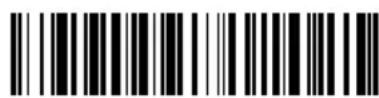
R25MIN
Minimum Message Length
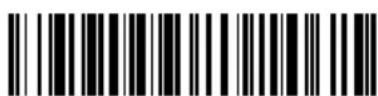
R25MAX
Maximum Message Length
Straight 2 of 5 IATA (two-bar start/stop)
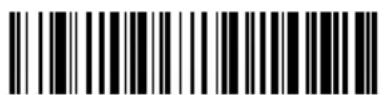
A25DFT.
Straight 2 of 5 IATA On/Off
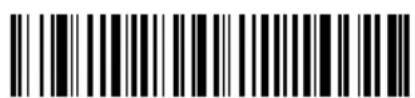
A25ENA1.
On
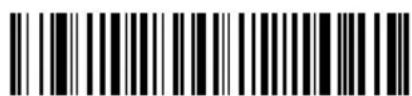
A25ENAD.
* Off
Straight 2 of 5 IATA Message Length
Scan the bar codes below to change the message length. Refer to Message Length Description (page 5-2) for additional information. Minimum and Maximum lengths = 1-48. Minimum Default = 4, Maximum Default = 48.
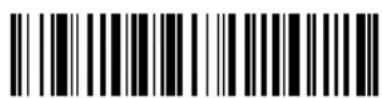
A25MIN.
Minimum Message Length
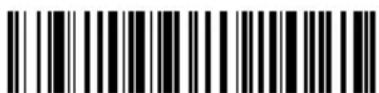
A25MAX
Maximum Message Length
Matrix 2 of 5
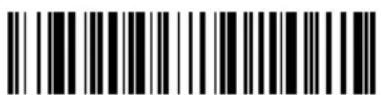
X25DFT.
Matrix 2 of 5 On/Off
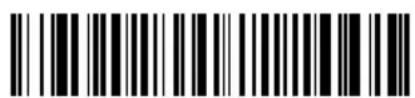
X25ENA1
On
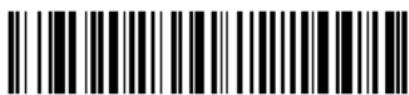
x25ENAD.
* Off
Matrix 2 of 5 Message Length
Scan the bar codes below to change the message length. Refer to Message Length Description (page 5-2) for additional information. Minimum and Maximum lengths = 1-80. Minimum Default = 4, Maximum Default = 80.
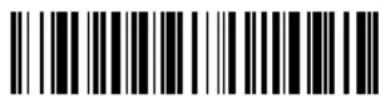
X25MIN.
Minimum Message Length
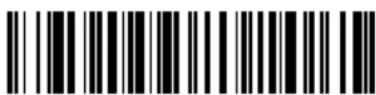
X25MAX
Maximum Message Length
Code 11
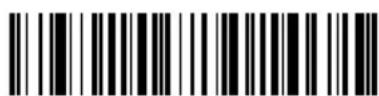
C11DFT.
Code 11 On/Off
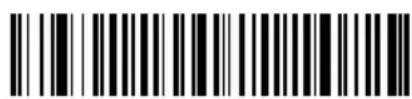
C11ENA1.
On
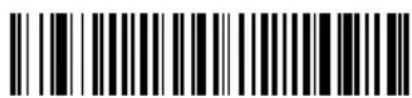
C11ENAD.
* Off
Check Digits Required
This option sets whether 1 or 2 check digits are required with Code 11 bar codes. Default = Two Check Digits.
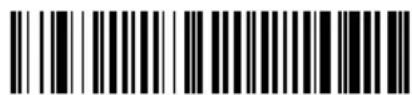
C11CK20.
One Check Digit
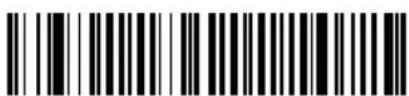
C11CK21.
* Two Check Digits
Code 11 Message Length
Scan the bar codes below to change the message length. Refer to Message Length Description (page 5-2) for additional information. Minimum and Maximum lengths = 1-80. Minimum Default = 4, Maximum Default = 80.
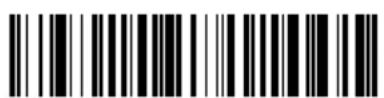
C11MIN
Minimum Message Length
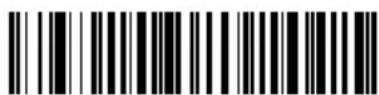
C11MAX.
Maximum Message Length
Code 128
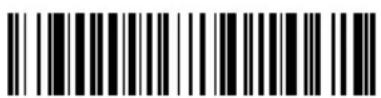
128DFT.
Code 128 On/Off
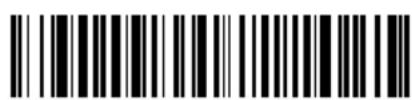
128ENA1.
* On
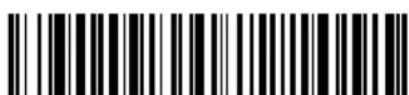
128ENAD.
Off
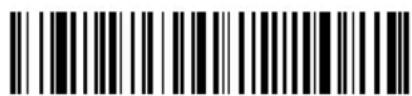
ISBT 128 Concatenation
In 1994 the International Society of Blood Transfusion (ISBT) ratified a standard for communicating critical blood information in a uniform manner. The use of ISBT formats requires a paid license. The ISBT 128 Application Specification describes 1) the critical data elements for labeling blood products, 2) the current recommendation to use Code 128 due to its high degree of security and its space-efficient design, 3) a variation of Code 128
that supports concatenation of neighboring symbols, and 4) the standard layout for bar codes on a blood product label. Use the bar codes below to turn concatenation on or off. Default = Off.
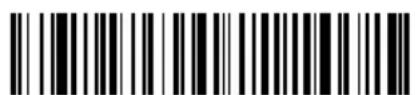
ISBENA1.
On
ISBENAO.
* Off
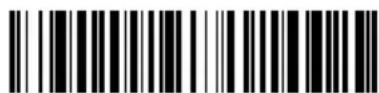
Code 128 Message Length
Scan the bar codes below to change the message length. Refer to Message Length Description (page 5-2) for additional information. Minimum and Maximum lengths = 0-90. Minimum Default = 0, Maximum Default = 90.
128MIN.
Minimum Message Length

128MAX
Maximum Message Length
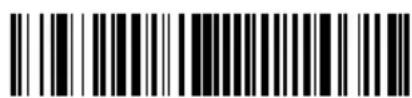
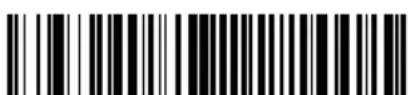
Code 128 Append
This function allows the sled to append the data from several Code 128 bar codes together before transmitting them to the host computer. When this function is enabled, the sled stores those Code 128 bar codes that start with a space (excluding the start and stop symbols), and does not immediately transmit the data. The sled stores the data in the order in which the bar codes are read, deleting the first space from each. The sled transmits the appended data when it reads a Code 128 bar code that starts with a character other than a space. Default = On.
C39APP1.
* On
C39APP0.
Off
Code 128 Code Page
Code pages define the mapping of character codes to characters. If the data received does not display with the proper characters, it may be because the bar code being scanned was created using a code page that is different from the one the host program is expecting. If this is the case, scan the bar code below, select the code page with which the bar codes were created (see ISO 2022/ISO 646 Character Replacements on page A-10), and scan the value and the Save bar code from the Programming Chart on the inside the back cover of this manual. The data characters should then appear properly.
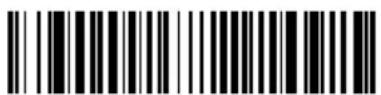
128DCP
Code 128 Code Page
GS1-128
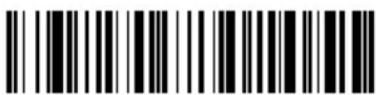
GS1DFT.
GS1-128 On/Off
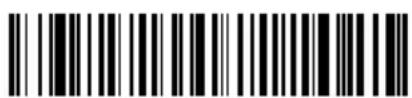
GS1ENA1.
* On
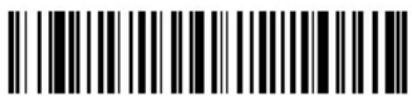
GS1ENAD.
Off
GS1-128 Message Length
Scan the bar codes below to change the message length. Refer to Message Length Description (page 5-2) for additional information. Minimum and Maximum lengths = 1-80. Minimum Default = 1, Maximum Default = 80.

GS1MIN.
Minimum Message Length
GS1MAX
Maximum Message Length
Telepen
Telepen On/Off
On
TELENAD.
* Off
Telepen Output
Using AIM Telepen Output, the sled reads symbols with start/stop pattern 1 and decodes them as standard full ASCII (start/stop pattern 1). When Original Telepen Output is selected, the sled reads symbols with start/stop pattern 1 and decodes them as compressed numeric with optional full ASCII (start/stop pattern 2). Default = AIM Telepen Output.
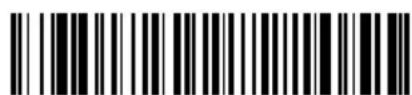
TELOLDO.
* AIM Telepen Output
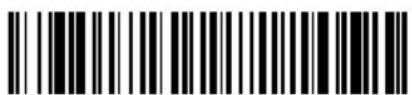
TELOLD1.
Original Telepen Output
Telepen Message Length
Scan the bar codes below to change the message length. Refer to Message Length Description (page 5-2) for additional information. Minimum and Maximum lengths = 1-60. Minimum Default = 1, Maximum Default = 60.
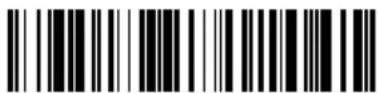
TELMIN.
Minimum Message Length
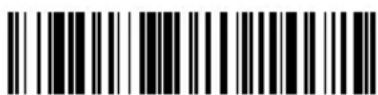
TELMAX.
Maximum Message Length
UPC-A
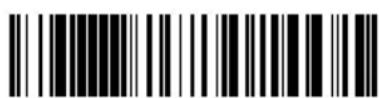
UPADFT
UPC-A On/Off
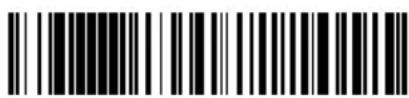
UPAENA1.
* On
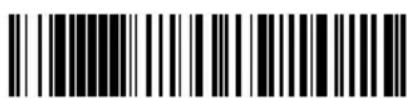
UPAENAD.
Off
Note: To convert UPC-A bar codes to EAN-13, see Convert UPC-A to EAN-13 on page 5-31.
UPC-A Check Digit
This selection allows you to specify whether the check digit should be transmitted at the end of the scanned data or not. Default = On.
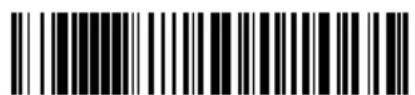
UPACK1
* On
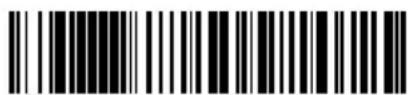
UPACKD.
Off
UPC-A Number System
The numeric system digit of a U.P.C. symbol is normally transmitted at the beginning of the scanned data, but the unit can be programmed so it will not transmit it. Default = On.
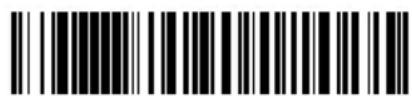
UPANSX1.
* On
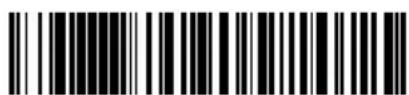
UPANSXD.
Off
UPC-A Addenda
This selection adds 2 or 5 digits to the end of all scanned UPC-A data. Default = Off for both 2 Digit and 5 Digit Addenda.
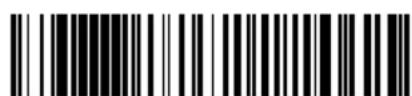
UPAAD21
2 Digit Addenda On
UPAAD20
* 2 Digit Addenda Off
UPAAD51
5 Digit Addenda On
UPAAD50
* 5 Digit Addenda Off
UPC-A Addenda Required
When Required is scanned, the sled will only read UPC-A bar codes that have addenda. You must then turn on a 2 or 5 digit addenda listed on page 5-25. Default = Not Required.
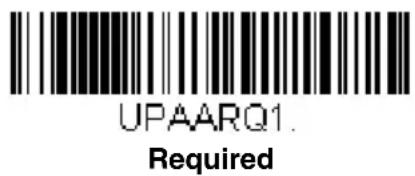
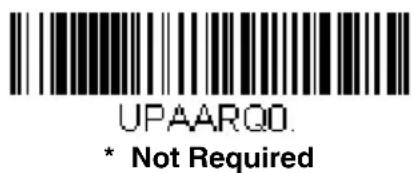
UPC-A Addenda Separator
When this feature is on, there is a space between the data from the bar code and the data from the addenda. When turned off, there is no space. Default = On.
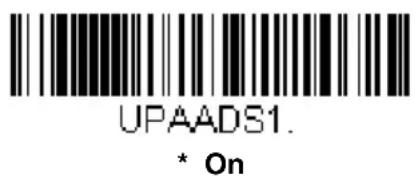
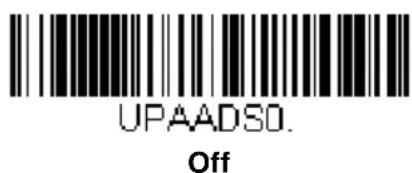
UPC-A/EAN-13 with Extended Coupon Code
Use the following codes to enable or disable UPC-A and EAN-13 with Extended Coupon Code. When left on the default setting (Off), the sled treats Coupon Codes and Extended Coupon Codes as single bar codes.
If you scan the Allow Concatenation code, when the sled sees the coupon code and the extended coupon code in a single scan, it transmits both as separate symbologies. Otherwise, it transmits the first coupon code it reads.
If you scan the Require Concatenation code, the sled must see and read the coupon code and extended coupon code in a single read to transmit the data. No data is output unless both codes are read.
Default = Off.
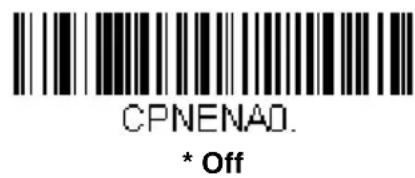
Require Concatenation
UPC-E0
UPC-E0 On/Off
Most U.P.C. bar codes lead with the 0 number system. To read these codes, use the UPC-E0 On selection. If you need to read codes that lead with the 1 number system, use UPC-E1 (page 5-30). Default = On.

UPC-E0 Expand
UPC-E Expand expands the UPC-E code to the 12 digit, UPC-A format. Default = Off.
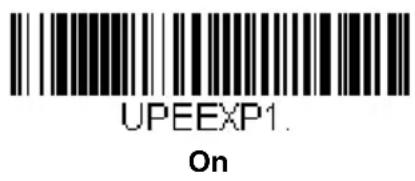
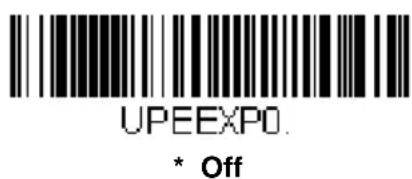
UPC-E0 Addenda Required
When Required is scanned, the sled will only read UPC-E bar codes that have addenda. Default = Not Required.
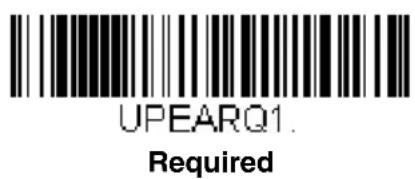
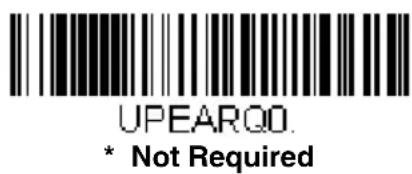
UPC-E0 Addenda Separator
When this feature is On, there is a space between the data from the bar code and the data from the addenda. When turned Off, there is no space. Default = On.
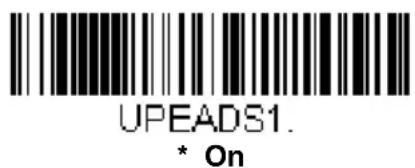
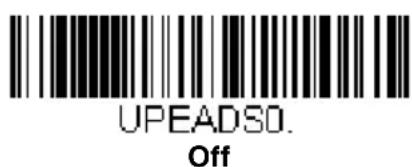
UPC-E0 Check Digit
Check Digit specifies whether the check digit should be transmitted at the end of the scanned data or not. Default = On.
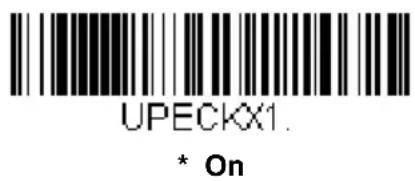
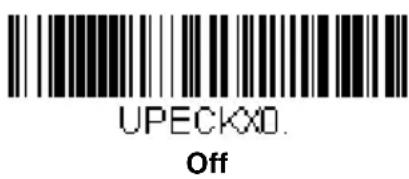
UPC-E0 Leading Zero
This feature allows the transmission of a leading zero (0) at the beginning of scanned data. To prevent transmission, scan Off. Default = On.
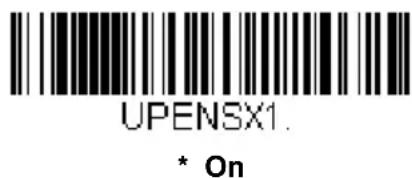
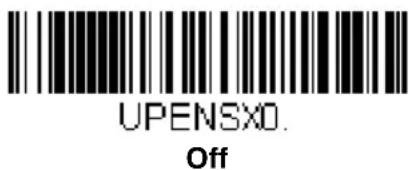
UPC-E0 Addenda
This selection adds 2 or 5 digits to the end of all scanned UPC-E data. Default = Off for both 2 Digit and 5 Digit Addenda.
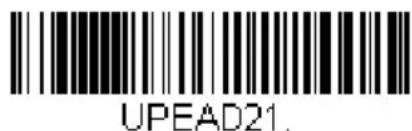
2 Digit Addenda On
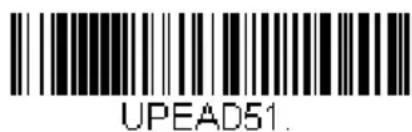
5 Digit Addenda On
* 2 Digit Addenda Off
* 5 Digit Addenda Off
UPC-E1
Most U.P.C. bar codes lead with the 0 number system. For these codes, use UPC-E0 (page 5-27). If you need to read codes that lead with the 1 number system, use the UPC-E1 On selection. Default = Off.
UPEEN11.
UPC-E1 On
UPEEN10.
* UPC-E1 Off
EAN/JAN-13
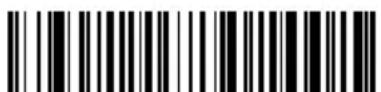
E13DFT
EAN/JAN-13 On/Off
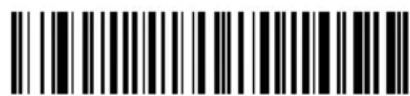
E13ENA1.
* On
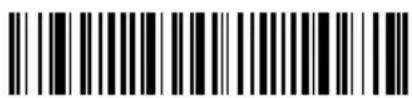
E13ENAD.
Off
Convert UPC-A to EAN-13
When UPC-A Converted to EAN-13 is selected, UPC-A bar codes are converted to 13 digit EAN-13 codes by adding a zero to the front. When Do not Convert UPC-A is selected, UPC-A codes are read as UPC-A.

UPAENAO.
UPC-A Converted to EAN-13
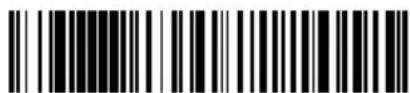
UPAENA1.
* Do not Convert UPC-A
EAN/JAN-13 Check Digit
This selection allows you to specify whether the check digit should be transmitted at the end of the scanned data or not. Default = On.
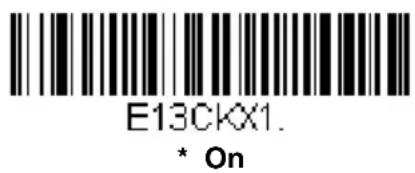
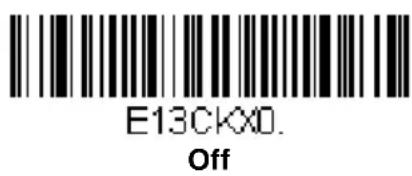
EAN/JAN-13 Addenda
This selection adds 2 or 5 digits to the end of all scanned EAN/JAN-13 data. Default = Off for both 2 Digit and 5 Digit Addenda.
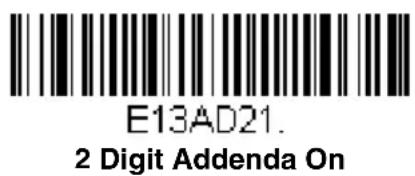
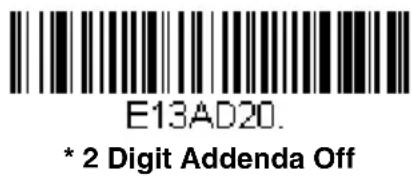
EAN/JAN-13 Addenda Required
When Required is scanned, the sled will only read EAN/JAN-13 bar codes that have addenda. Default = Not Required.
EAN/JAN-13 Addenda Separator
When this feature is On, there is a space between the data from the bar code and the data from the addenda. When turned Off, there is no space. Default = On.
Note: If you want to enable or disable EAN13 with Extended Coupon Code, refer to UPC-A/EAN-13 with Extended Coupon Code (page 5-26).
ISBN Translate
When On is scanned, EAN-13 Bookland symbols are translated into their equivalent ISBN number format. Default = Off.
EAN/JAN-8
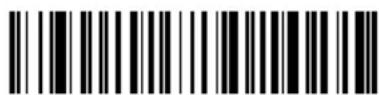
EASDFT.
EAN/JAN-8 On/Off
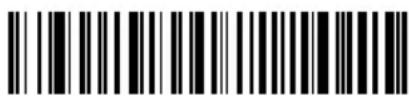
EA8ENA1.
* On
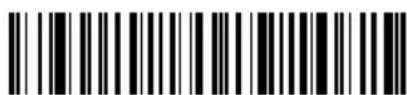
EASENAD
Off
EAN/JAN-8 Check Digit
This selection allows you to specify whether the check digit should be transmitted at the end of the scanned data or not. Default = On.
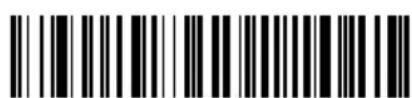
EA8CKX1.
* On
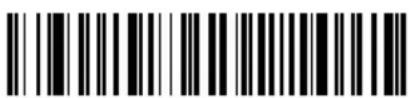
EABCKD.
Off
EAN/JAN-8 Addenda
This selection adds 2 or 5 digits to the end of all scanned EAN/JAN-8 data. Default = Off for both 2 Digit and 5 Digit Addenda.
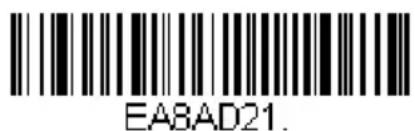
2 Digit Addenda On
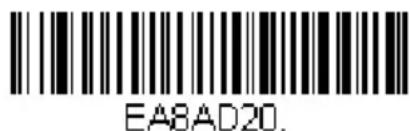
* 2 Digit Addenda Off
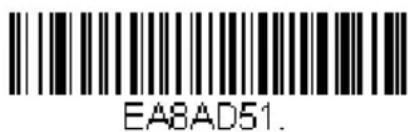
5 Digit Addenda On
* 5 Digit Addenda Off
EAN/JAN-8 Addenda Required
When Required is scanned, the sled will only read EAN/JAN-8 bar codes that have addenda. Default = Not Required.
EA8ARQ1.
Required
EASARQO.
* Not Required
EAN/JAN-8 Addenda Separator
When this feature is On, there is a space between the data from the bar code and the data from the addenda. When turned Off, there is no space. Default = On.
EA8ADS1
* On
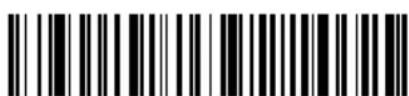
EABADSO.
Off
MSI
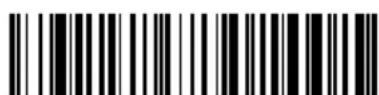
MSIDFT.
MSI On/Off

MSIENA1.
On
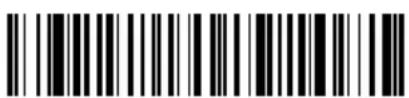
MSIENAD.
* Off
MSI Check Character
Different types of check characters are used with MSI bar codes. You can program the sled to read MSI bar codes with Type 10 check characters. Default = Validate Type 10, but Don't Transmit.
When Check Character is set to Validate Type 10/11 and Transmit, the sled will only read MSI bar codes printed with the specified type check character(s), and will transmit the character(s) at the end of the scanned data.
When Check Character is set to Validate Type 10/11, but Don't Transmit, the unit will only read MSI bar codes printed with the specified type check character(s), but will not transmit the check character(s) with the scanned data.
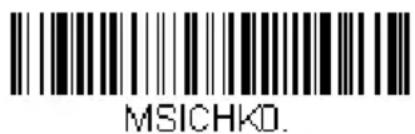
* Validate Type 10, but Don't Transmit
Validate Type 10 and Transmit
Validate 2 Type 10 Characters, but Don't Transmit
Validate 2 Type 10 Characters and Transmit
Validate Type 10 then Type 11 Character, but Don't Transmit
Validate Type 10 then Type 11 Character and Transmit
Disable MSI Check Characters
MSI Message Length
Scan the bar codes below to change the message length. Refer to Message Length Description (page 5-2) for additional information. Minimum and Maximum lengths = 4-48. Minimum Default = 4, Maximum Default = 48.
Minimum Message Length
Maximum Message Length
GS1 DataBar Omnidirectional
< Default All GS1 DataBar Omnidirectional Settings >
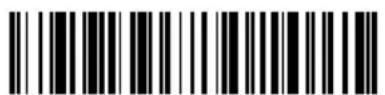
RSSDFT.
GS1 DataBar Omnidirectional On/Off
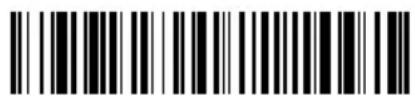
RSSENA1.
* On
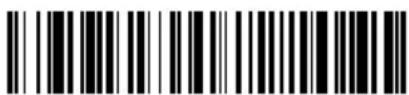
RSSENAD.
Off
GS1 DataBar Limited
< Default All GS1 DataBar Limited Settings >
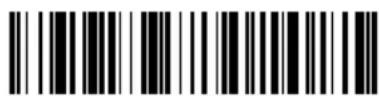
RSLDFT.
GS1 DataBar Limited On/Off
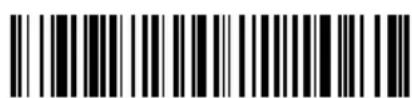
RSLENA1
* On
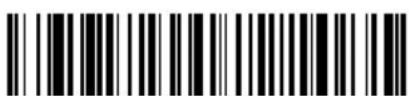
RSLENAD
Off
GS1 DataBar Expanded
< Default All GS1 DataBar Expanded Settings >
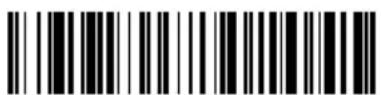
RSEDFT.
GS1 DataBar Expanded On/Off
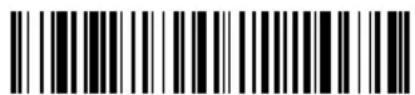
RSEENA1.
* On
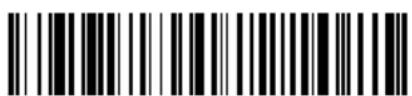
RSEENAD.
Off
GS1 DataBar Expanded Message Length
Scan the bar codes below to change the message length. Refer to Message Length Description (page 5-2) for additional information. Minimum and Maximum lengths = 4-74. Minimum Default = 4, Maximum Default = 74.
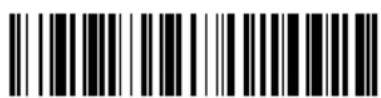
RSEMIN
Minimum Message Length
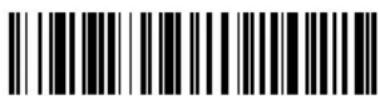
RSEMAX
Maximum Message Length
Trioptic Code
Note: If you are going to scan Code 32 Pharmaceutical codes (page 5-8), Trioptic Code must be off.
Trioptic Code is used for labeling magnetic storage media.
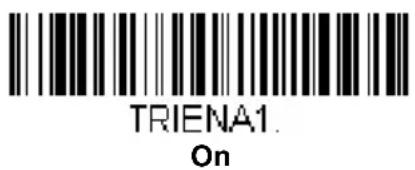
Codablock A
Codablock A On/Off
Codablock A Message Length
Scan the bar codes below to change the message length. Refer to Message Length Description (page 5-2) for additional information. Minimum and Maximum lengths = 1-600. Minimum Default = 1, Maximum Default = 600.
CBAMIN
Minimum Message Length
CBAMAX
Maximum Message Length
Codablock F

CBFDFT.
Codablock F On/Off
CBFENA1.
On
CBFENAD.
* Off
Codablock F Message Length
Scan the bar codes below to change the message length. Refer to Message Length Description (page 5-2) for additional information. Minimum and Maximum lengths = 1-2048. Minimum Default = 1, Maximum Default = 2048.
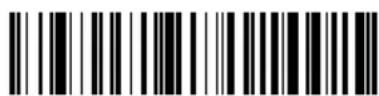
CBFMIN.
Minimum Message Length
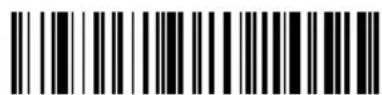
CBFMAX
Maximum Message Length
PDF417
< Default All PDF417 Settings >
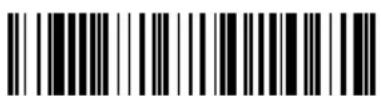
PDFDFT.
PDF417 On/Off
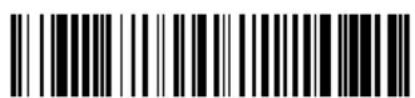
PDFENA1.
* On
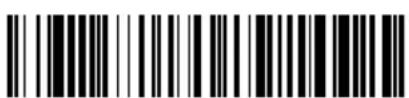
PDFENAD.
Off
PDF417 Message Length
Scan the bar codes below to change the message length. Refer to Message Length Description (page 5-2) for additional information. Minimum and Maximum lengths = 1-2750. Minimum Default = 1, Maximum Default = 2750.
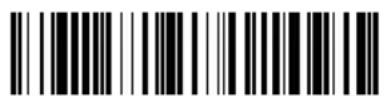
PDFMIN.
Minimum Message Length
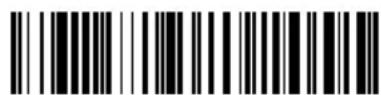
PDFMAX
Maximum Message Length
MicroPDF417
< Default All MicroPDF417 Settings >
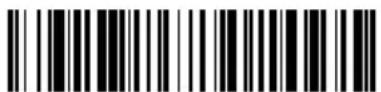
MPDDFT.
MicroPDF417 On/Off
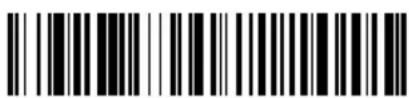
MPDENA1. On
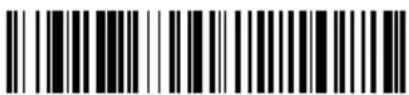
MPDENAO. * Off
MicroPDF417 Message Length
Scan the bar codes below to change the message length. Refer to Message Length Description (page 5-2) for additional information. Minimum and Maximum lengths = 1-366. Minimum Default = 1, Maximum Default = 366.
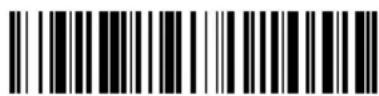
MPDMIN.
Minimum Message Length
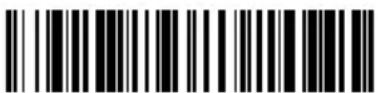
MPDMAX
Maximum Message Length
GS1 Composite Codes
Linear codes are combined with a unique 2D composite component to form a new class called GS1 Composite symbology. GS1 Composite symbologies allow for the co-existence of symbologies already in use.
UPC/EAN Version
Scan the UPC/EAN Version On bar code to decode GS1 Composite symbols that have a U.P.C. or an EAN linear component. (This does not affect GS1 Composite symbols with a GS1-128 or GS1 linear component.)
GS1 Composite Code Message Length
Scan the bar codes below to change the message length. Refer to Message Length Description (page 5-2) for additional information. Minimum and Maximum lengths = 1-2435. Minimum Default = 1, Maximum Default = 2435.
GS1 Emulation
The sled can automatically format the output from any GS1 data carrier to emulate what would be encoded in an equivalent GS1-128 or GS1 DataBar symbol. GS1 data carriers include UPC-A and UPC-E, EAN-13 and EAN-8, ITF-14, GS1-128, and GS1-128 DataBar and GS1 Composites. (Any application that accepts GS1 data can be simplified since it only needs to recognize one data carrier type.)
If GS1-128 Emulation is scanned, all retail codes (U.P.C., UPC-E, EAN8, EAN13) are expanded out to 16 digits. If the AIM ID is enabled, the value will be the GS1-128 AIM ID, ]C1 (see Symbology Charts on page A-1).
If GS1 DataBar Emulation is scanned, all retail codes (U.P.C., UPC-E, EAN8, EAN13) are expanded out to 16 digits. If the AIM ID is enabled, the value will be the GS1-DataBar AIM ID, ]em (see Symbology Charts on page A-1).
If GS1 Code Expansion Off is scanned, retail code expansion is disabled, and UPC-E expansion is controlled by the UPC-E0 Expand (page 5-28) setting. If the AIM ID is enabled, the value will be the GS1-128 AIM ID, ]C1 (see Symbology Charts on page A-1).
If EAN8 to EAN13 Conversion is scanned, all EAN8 bar codes are converted to EAN13 format.
Default = GS1 Emulation Off.
GS1-128 Emulation
EANEMU3
GS1 Code Expansion Off
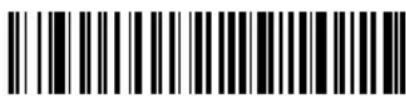
EANEMU0
* GS1 Emulation Off
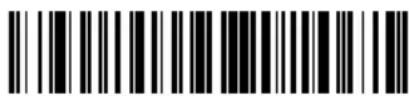
EANEMU2
GS1 DataBar Emulation
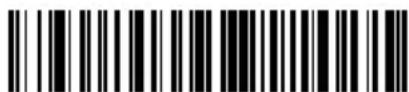
EANEMU4.
EAN8 to EAN13 Conversion
TCIF Linked Code 39 (TLC39)
This code is a composite code since it has a Code 39 linear component and a MicroPDF417 stacked code component. All bar code readers are capable of reading the Code 39 linear component. The MicroPDF417 component can only be decoded if TLC39 On is selected. The linear component may be decoded as Code 39 even if TLC39 is off. Default = Off.
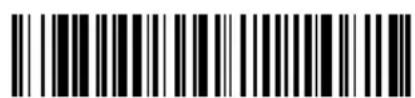
T39ENA1.
On
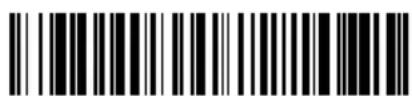
T39ENAD.
* Off
QR Code
< Default All QR Code Settings >
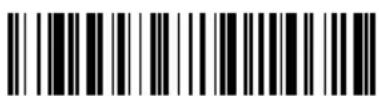
QRCDFT.
QR Code On/Off
This selection applies to both QR Code and Micro QR Code.
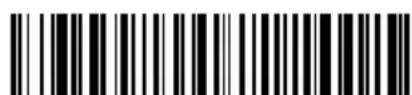
QRCENA1
* On
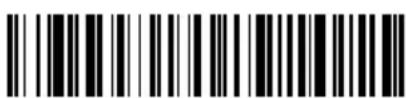
QRCENAD.
Off
QR Code Message Length
Scan the bar codes below to change the message length. Refer to Message Length Description (page 5-2) for additional information. Minimum and Maximum lengths = 1-7089. Minimum Default = 1, Maximum Default = 7089.
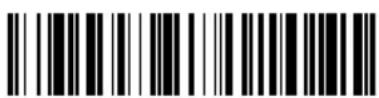
QRCMIN
Minimum Message Length
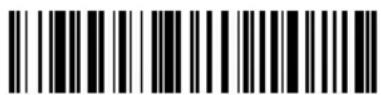
QRCMAX.
Maximum Message Length
Data Matrix
< Default All Data Matrix Settings >
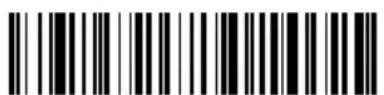
IDMDFT
Data Matrix On/Off
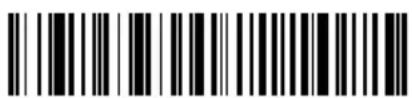
IDMENA1. * On
IDMENAO. Off
Data Matrix Message Length
Scan the bar codes below to change the message length. Refer to Message Length Description (page 5-2) for additional information. Minimum and Maximum lengths = 1-3116. Minimum Default = 1, Maximum Default = 3116.
IDMMIN. Minimum Message Length
IDMMAX. Maximum Message Length
Data Matrix Append
This function allows the scanner to append the data from several Data Matrix bar codes together before transmitting them to the host computer. When the scanner encounters an Data Matrix bar code with the append trigger character(s), it buffers the number of Data Matrix bar codes deter-
mined by information encoded in those bar codes. Once the proper number of codes is reached, the data is output in the order specified in the bar codes. Default = On.
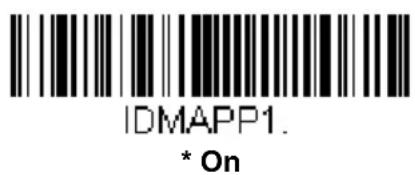
Data Matrix Code Page
Data Matrix Code pages define the mapping of character codes to characters. If the data received does not display with the proper characters, it may be because the bar code being scanned was created using a code page that is different from the one the host program is expecting. If this is the case, scan the bar code below, select the code page with which the bar codes were created (see ISO 2022/ISO 646 Character Replacements on page A-10), and scan the value and the Save bar code from the Programming Chart on the inside the back cover of this manual. The data characters should then appear properly.
MaxiCode
< Default All MaxiCode Settings >
MAXDFT.
MaxiCode On/Off
MAXENA1
On
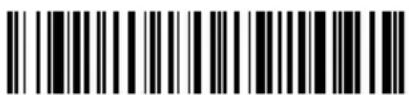
MAXENAD.
* Off
MaxiCode Message Length
Scan the bar codes below to change the message length. Refer to Message Length Description (page 5-2) for additional information. Minimum and Maximum lengths = 1-150. Minimum Default = 1, Maximum Default = 150.
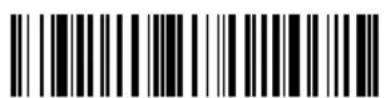
MAXMIN
Minimum Message Length
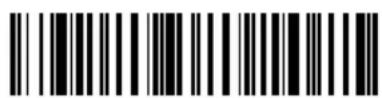
MAXMAX
Maximum Message Length
Aztec Code
< Default All Aztec Code Settings >
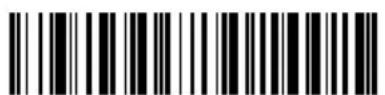
AZTDFT.
Aztec Code On/Off
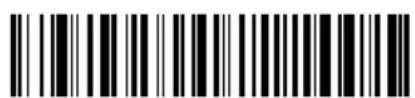
AZTENA1.
* On
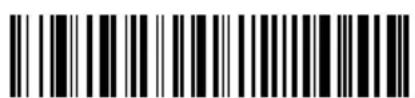
AZTENAD.
Off
Aztec Code Message Length
Scan the bar codes below to change the message length. Refer to Message Length Description (page 5-2) for additional information. Minimum and Maximum lengths = 1-3832. Minimum Default = 1, Maximum Default = 3832.
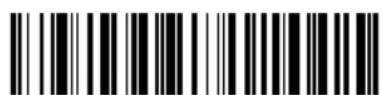
AZTMIN
Minimum Message Length
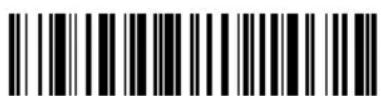
AZTMAX
Maximum Message Length
Aztec Append
This function allows the scanner to append the data from several Aztec bar codes together before transmitting them to the host computer. When the scanner encounters an Aztec bar code with the append trigger charac-
ter(s), it buffers the number of Aztec bar codes determined by information encoded in those bar codes. Once the proper number of codes is reached, the data is output in the order specified in the bar codes. Default = On.
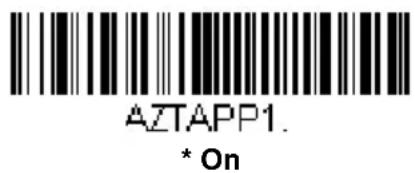
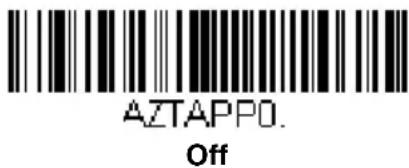
Aztec Code Page
Aztec Code pages define the mapping of character codes to characters. If the data received does not display with the proper characters, it may be because the bar code being scanned was created using a code page that is different from the one the host program is expecting. If this is the case, scan the bar code below, select the code page with which the bar codes were created (see ISO 2022/ISO 646 Character Replacements on page A-10), and scan the value and the Save bar code from the Programming Chart on the inside the back cover of this manual. The data characters should then appear properly.
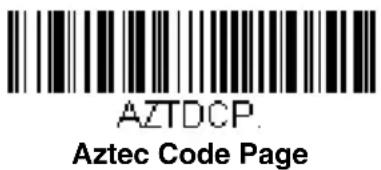
Chinese Sensible (Han Xin) Code
< Default All Han Xin Settings >
Han Xin Code On/Off
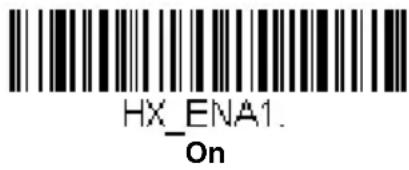
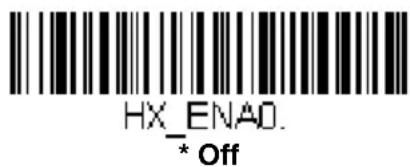
Han Xin Code Message Length
Scan the bar codes below to change the message length. Refer to Message Length Description (page 5-2) for additional information. Minimum and Maximum lengths = 1-7833. Minimum Default = 1, Maximum Default = 7833.
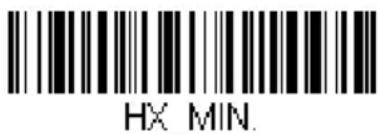
Minimum Message Length
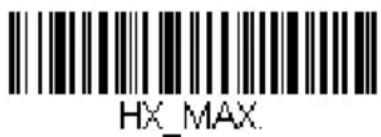
Maximum Message Length
Postal Codes - 2D
The following lists the possible 2D postal codes, and 2D postal code combinations that are allowed. Only one 2D postal code selection can be active at a time. If you scan a second 2D postal code selection, the first selection is overwritten. Default = 2D Postal Codes Off.
POSTALO.
* 2D Postal Codes Off
Single 2D Postal Codes:
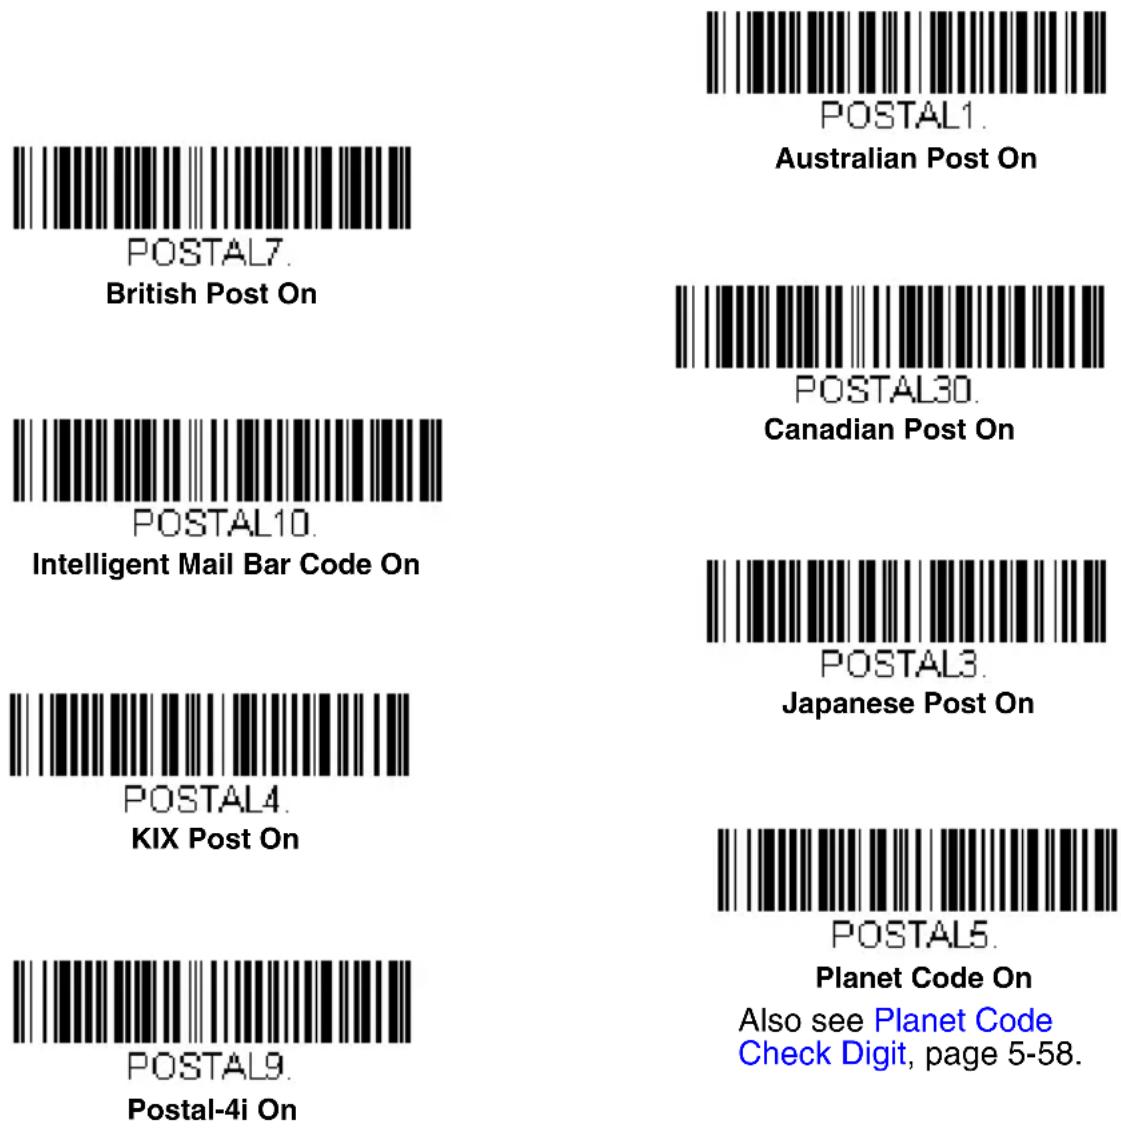
POSTAL7
British Post On
POSTAL10.
Intelligent Mail Bar Code On
POSTAL4
KIX Post On
POSTAL9
Postal-4i On
POSTAL1
Australian Post On
POSTAL30
Canadian Post On
POSTAL3
Japanese Post On
POSTALS
Planet Code On
Also see Planet Code
Check Digit, page 5-58.
POSTAL6.
Postnet On
Also see Postnet Check
Digit, page 5-58.
POSTAL11
Postnet with B and B' Fields On
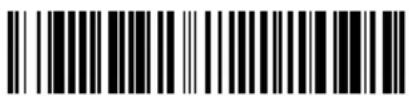
POSTAL2
InfoMail On
Combination 2D Postal Codes:
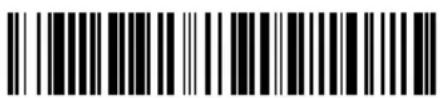
POSTAL20
Intelligent Mail Bar Code and Postnet with B and B' Fields On
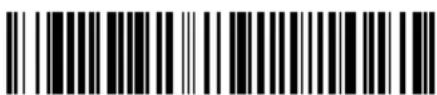
POSTAL16
Postnet and Intelligent Mail Bar Code On
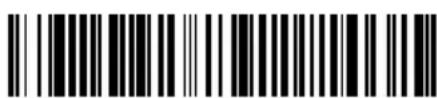
POSTAL19
Postal-4i and Postnet with B and B' Fields On
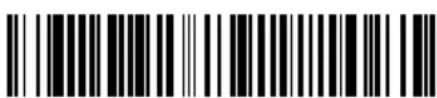
POSTAL18
Planet Code and Postnet with B and B' Fields On
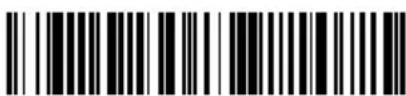
POSTAL8
InfoMail and British Post On
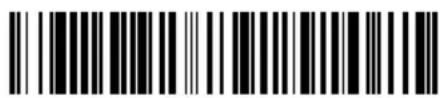
POSTAL14
Postnet and Postal-4i On
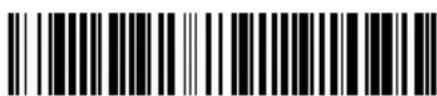
POSTAL17.
Postal-4i and Intelligent Mail Bar Code On
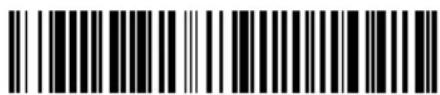
POSTAL12
Planet Code and Postnet On
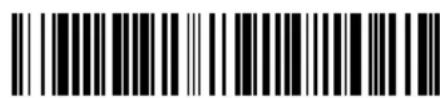
POSTAL15.
Planet Code and Intelligent Mail Bar Code On
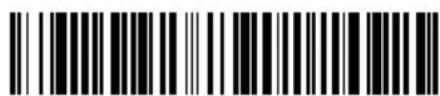
POSTAL22
Planet Code,
Postnet, and
Intelligent Mail Bar Code On
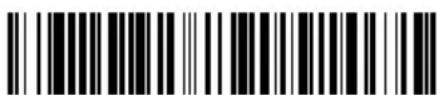
POSTAL24.
Postnet,
Postal-4i, and
Intelligent Mail Bar Code On
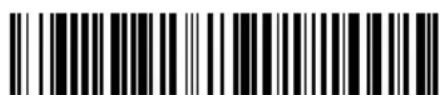
POSTAL26
Planet Code,
Intelligent Mail Bar Code, and
Postnet with B and B' Fields On
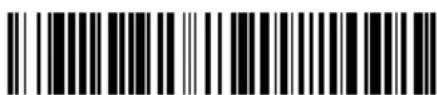
POSTAL28.
Planet Code,
Postal-4i,
Intelligent Mail Bar Code, and
Postnet On
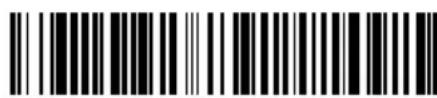
POSTAL13
Planet Code and Postal-4i On
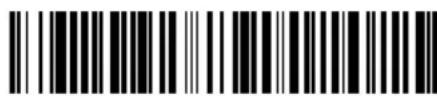
POSTAL21
Planet Code, Postnet, and Postal-4i On
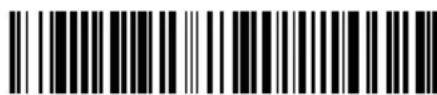
POSTAL23
Planet Code,
Postal-4i, and
Intelligent Mail Bar Code On
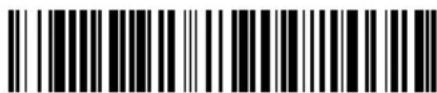
POSTAL25
Planet Code,
Postal-4i, and
Postnet with B and B' Fields On
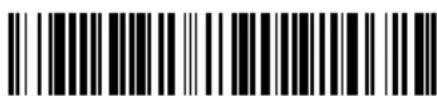
POSTAL27
Postal-4i,
Intelligent Mail Bar Code, and
Postnet with B and B' Fields On
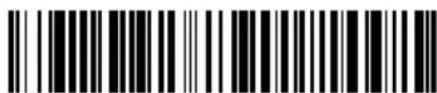
POSTAL29
Planet Code,
Postal-4i,
Intelligent Mail Bar Code, and
Postnet with B and B' Fields On
Planet Code Check Digit
This selection allows you to specify whether the check digit should be transmitted at the end of Planet Code data. Default = Don't Transmit.
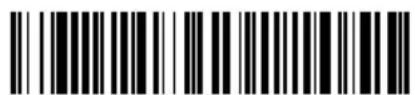
PLNCKX1.
Transmit Check Digit
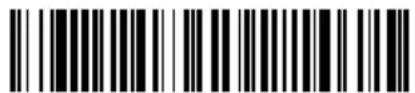
PLNCKXD.
* Don't Transmit Check Digit
Postnet Check Digit
This selection allows you to specify whether the check digit should be transmitted at the end of Postnet data. Default = Don't Transmit.
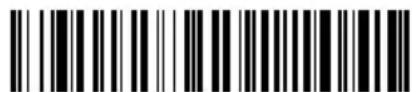
NETCKX1.
Transmit Check Digit
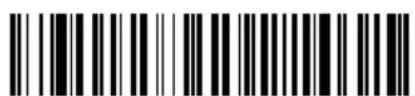
NETCKXD
* Don't Transmit Check Digit
Postal Codes - Linear
The following lists linear postal codes. Any combination of linear postal code selections can be active at a time.
China Post (Hong Kong 2 of 5)
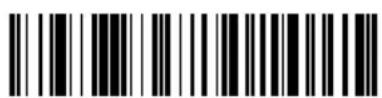
CPCDFT.
China Post (Hong Kong 2 of 5) On/Off
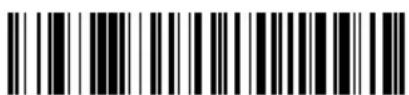
CPCENA1.
On
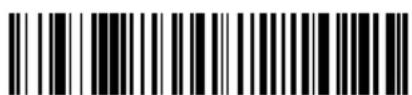
CPCENAD.
* Off
China Post (Hong Kong 2 of 5) Message Length
Scan the bar codes below to change the message length. Refer to Message Length Description (page 5-2) for additional information. Minimum and Maximum lengths = 2-80. Minimum Default = 4, Maximum Default = 80.
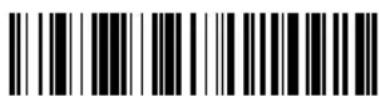
CPCMIN
Minimum Message Length
CPCMAX.
Maximum Message Length
Korea Post
Korea Post
Korea Post Message Length
Scan the bar codes below to change the message length. Refer to Message Length Description (page 5-2) for additional information. Minimum and Maximum lengths = 2-80. Minimum Default = 4, Maximum Default = 48.
Korea Post Check Digit
This selection allows you to specify whether the check digit should be transmitted at the end of the scanned data. Default = Don't Transmit.
Serial Programming Commands
Note: This section is for developers' reference only.
The serial programming commands can be used in place of the programming bar codes. Both the serial commands and the programming bar codes will program the sled. For complete descriptions and examples of each serial programming command, refer to the corresponding programming bar code in this manual.
The device must be set to an RS232 interface (see page 2-1). The following commands can be sent via a PC COM port using terminal emulation software.
Conventions
The following conventions are used for menu and query command descriptions:
parameter A label representing the actual value you should send as part of a command.
[option] An optional part of a command.
{Data} Alternatives in a command.
bold Names of menus, menu commands, buttons, dialog boxes, and windows that appear on the screen.
Menu Command Syntax
Menu commands have the following syntax (spaces have been used for clarity only):
Prefix Tag SubTag {Data} [, SubTag {Data}] [; Tag SubTag {Data}] [...] Storage
Prefix Three ASCII characters: SYN M CR (ASCII 22,77,13).
Tag A 3 character case-insensitive field that identifies the desired menu command group. For example, all RS-232 configuration settings are identified with a Tag of 232.
SubTag A 3 character case-insensitive field that identifies the desired menu command within the tag group. For example, the SubTag for the RS-232 baud rate is BAD.
Data The new value for a menu setting, identified by the Tag and Sub-Tag.
Storage A single character that specifies the storage table to which the command is applied. An exclamation point (!) performs the command's operation on the device's volatile menu configuration table. A period (.) performs the command's operation on the device's non-volatile menu configuration table. Use the non-volatile table only for semi-permanent changes you want saved through a power cycle.
Query Commands
Several special characters can be used to query the device about its settings.
^ What is the default value for the setting(s).
? What is the device's current value for the setting(s).
* What is the range of possible values for the setting(s). (The device's response uses a dash (-) to indicate a continuous range of values. A pipe (I) separates items in a list of non-continuous values.)
:Name: Field Usage (Optional)
This command returns the query information from the sled.
Tag Field Usage
When a query is used in place of a Tag field, the query applies to the entire set of commands available for the particular storage table indicated by the Storage field of the command. In this case, the SubTag and Data fields should not be used because they are ignored by the device.
SubTag Field Usage
When a query is used in place of a SubTag field, the query applies only to the subset of commands available that match the Tag field. In this case, the Data field should not be used because it is ignored by the device.
Data Field Usage
When a query is used in place of the Data field, the query applies only to the specific command identified by the Tag and SubTag fields.
Concatenation of Multiple Commands
Multiple commands can be issued within one Prefix/Storage sequence. Only the Tag, SubTag, and Data fields must be repeated for each command in the sequence. If additional commands are to be applied to the same Tag, then the new command sequence is separated with a comma (,) and only the SubTag and Data fields of the additional command are issued. If the additional command requires a different Tag field, the command is separated from previous commands by a semicolon (;).
Responses
The device responds to serial commands with one of three responses:
ACK Indicates a good command which has been processed.
ENQ Indicates an invalid Tag or SubTag command.
NAK Indicates the command was good, but the Data field entry was out of the allowable range for this Tag and SubTag combination, e.g., an entry for a minimum message length of 100 when the field will only accept 2 characters.
When responding, the device echoes back the command sequence with the status character inserted directly before each of the punctuation marks (the period, exclamation point, comma, or semicolon) in the command.
Examples of Query Commands
In the following examples, a bracketed notation [ ] depicts a non-displayable response.
Example: What is the range of possible values for Codabar Coding Enable?
Enter: cbrena*.
Response: CBRENA0-1[ACK]
This response indicates that Codabar Coding Enable (CBRENA) has a range of values from 0 to 1 (off and on).
Example: What is the default value for Codabar Coding Enable?
Enter: cbrena^.
Response: CBRENA1[ACK]
This response indicates that the default setting for Codabar Coding Enable (CBRENA) is 1, or on.
Example: What is the device's current setting for Codabar Coding Enable?
Enter: cbrena?.
Response: CBRENA1[ACK]
This response indicates that the device's Codabar Coding Enable (CBRENA) is set to 1, or on.
Example: What are the device's settings for all Codabar selections?
Enter: cbr?.
Response: CBRENA1[ACK], SSX0[ACK], CK20[ACK], CCT1[ACK], MIN2[ACK], MAX60[ACK], DFT[ACK].
This response indicates that the device's Codabar Coding Enable (CBRENA) is set to 1, or on;
the Start/Stop Character (SSX) is set to 0, or Don't Transmit; the Check Character (CK2) is set to 0, or Not Required; concatenation (CCT) is set to 1, or Enabled;
the Minimum Message Length (MIN) is set to 2 characters; the Maximum Message Length (MAX) is set to 60 characters; and the Default setting (DFT) has no value.
Resetting the Custom Defaults
If you want the custom default settings restored to your sled, scan the Activate Custom Defaults bar code below. This resets the sled to the custom default settings. If there are no custom defaults, it will reset the sled to the factory default settings. Any settings that have not been specified through the custom defaults will be defaulted to the factory default settings.
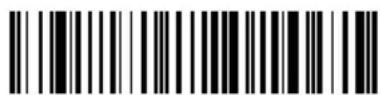
DEFAULT.
Activate Custom Defaults
The charts on the following pages list the factory default settings for each of the commands (indicated by an asterisk (*) on the programming pages).
Menu Commands
| Selection | Setting* Indicates default | Serial Command# Indicates a numeric entry | Page |
| Product Default Settings | |||
| Setting Custom Defaults | Set Custom Defaults MNUCDF 1-3 | ||
| Save Custom Defaults | MNUCDS 1-3 | ||
| Resetting the Custom Defaults | Activate Custom Defaults | DEFALT 1-3 | |
| Resetting the Factory Defaults | Remove Custom Defaults | DEFOVR 1-4 | |
| Activate Defaults DEFALT 1-4 | |||
| Input/Output Selections | |||
| Beeper - Good Read Off BEPBEP0 2-1 | |||
| Beeper Volume - Good Read | Off BEPLVL0 2-1 | ||
| Low BEPLVL1 2-1 | |||
| Medium | BEPLVL2 2-1 | ||
| *High | BEPLVL3 2-1 | ||
| Manual Trigger Mode | Manual Trigger - Normal | PAPHHF | 2-2 |
| Mobile Phone Read Mode | Hand Held Scanning - Mobile Phone | PAPHHC | 2-2 |
| Centering Window | Centering On | DECWIN1 | 2-3 |
| *Centering Off | DECWIN0 | 2-4 | |
| Left of Centering Window (*40%) | DECLFT### | 2-4 | |
| Right of Centering Window (*60%) | DECRGT### | 2-4 | |
| Top of Centering Window (*40%) | DECTOP### | 2-4 | |
| Bottom of Centering Window (*60%) | DECBOT### | 2-4 | |
| Preferred Symbology On PRFENA1 2-5 | |||
| *Off PRFENA0 2-5 | |||
| High Priority Symbology | PRFCOD## 2-5 | ||
| Low Priority Symbology | PRFBLK## 2-5 | ||
| Preferred Symbology Timeout (*500) Range 100-3000 | PRFPTO#### # 2-6 | ||
| Preferred Symbology Default | PRFDFT 2-6 | ||
| Output Sequence Editor | Enter Sequence SEQ BLK 2-9 | ||
| Default Sequence SEQ DFT 2-9 | |||
| Partial Sequence Transmit Partial Sequence | SEQTTS1 | 2-9 | |
| *Discard Partial Sequence | SEQTTS0 | ||
| Require Output Sequence | Required | SEQ_EN2 2-10 | |
| On/Not Required | SEQ_EN1 2-10 | ||
| *Off SEQ_EN0 2-10 | |||
| Multiple Symbols | On SHOTGN1 | 2-10 | |
| *Off SHOTGN0 | 2-10 | ||
| No Read | On SHWNRD1 | 2-11 | |
| *Off SHWNRD0 | 2-11 | ||
| Video Reverse | Video Reverse Only | VIDREV1 | 2-11 |
| Video Reverse and Standard Bar Codes | VIDREV2 | 2-11 | |
| *Video Reverse Off | VIDREV0 | 2-11 | |
| Data Editing Selections | |||
| Add CR Suffix to All Symbologies | VSUFCR | 3-3 | |
| Prefix Add Prefix PREBK2## 3-3 | |||
| Clear One Prefix PRECL2 3-3 | |||
| Clear All Prefixes PRECA2 3-3 | |||
| Suffix Add Suffix SUFBK2## 3-4 | |||
| Clear One Suffix SUFCL2 3-4 | |||
| Clear All Suffixes SUFCA2 3-4 | |||
| Function Code Transmit | *Enable RMVFNC0 3-4 | ||
| Disable | RMVFNC1 | 3-4 | |
| Data Formatter Selections | |||
| Data Format Editor | *Default Data Format (None) | DFMDF3 | 4-1 |
| Enter Data Format | DFMBK3## | 4-2 | |
| Clear One Data Format | DFMCL3 4-3 | ||
| Clear All Data Formats | DFMCA3 | 4-3 | |
| Data Formatter | Data Formatter Off | DFM_EN0 | 4-15 |
| *Data Formatter On, Not Required, Keep Prefix/Suffix | DFM_EN1 | 4-16 | |
| Data Format Required, Keep Prefix/Suffix | DFM_EN2 | 4-16 | |
| Data Formatter On, Not Required, Drop Prefix/Suffix | DFM_EN3 | 4-16 | |
| Data Format Required, Drop Prefix/Suffix | DFM_EN4 | 4-16 | |
| Data Format Non-Match Error Tone | *Data Format Non-Match Error Tone On | DFMDEC0 4-16 | |
| Data Format Non-Match Error Tone Off | DFMDEC1 4-16 | ||
| Primary/Alternate Data Formats | Primary Data Format | ALTFNM0 4-17 | |
| Data Format 1 ALTFNM1 4-17 | |||
| Data Format 2 ALTFNM2 4-17 | |||
| Data Format 3 ALTFNM3 4-17 | |||
| Single Scan Data Format Change | Single Scan-Primary Data Format | VSAF_0 4-18 | |
| Single Scan-Data Format 1 | VSAF_1 4-18 | ||
| Single Scan-Data Format 2 | VSAF_2 4-18 | ||
| Single Scan-Data Format 3 | VSAF_3 4-18 | ||
| Symbologies | |||
| All Symbologies All Symbologies Off ALLENA0 | 5-2 | ||
| ALL Symbologies On ALLENA1 5-2 | |||
| Codabar Default All Codabar Settings | CBRDFT 5-3 | ||
| Off CBRENA0 5-3 | |||
| *On CBRENA1 5-3 | |||
| Codabar Start/Stop Char. | *Don't Transmit CBRS | SX0 5-3 | |
| Transmit CBRSSX1 | 5-3 | ||
| Codabar Check Char. | *No Check Char. | CBRCK20 | 5-4 |
| Validate, But Don't Transmit | CBRCK21 5-4 | ||
| Validate, and Transmit | CBRCK22 5-4 | ||
| Codabar Concatenation | *Off CBRCCT0 5-4 | ||
| On CBRCCT1 5-4 | |||
| Require CBRCCT2 | 5-4 | ||
| Codabar Message Length | Minimum (2 - 60) *4 | CBRMIN## | 5-5 |
| Maximum (2 - 60)*60 | CBRMAX## | 5-5 | |
| Code 39 Default All Code | de 39 Settings | C39DFT 5-6 | |
| Off C39ENA0 5-6 | |||
| *On C39ENA1 5-6 | |||
| Code 39 Start/Stop Char. | *Don't Transmit C39SSX0 5-6 | ||
| Transmit C39SSX1 5-6 | |||
| Code 39 Check Char. | *No Check Char. | C39CK20 | 5-7 |
| Validate, But Don't Transmit | C39CK21 5-7 | ||
| Validate, and Transmit | C39CK22 5-7 | ||
| Code 39 Message Length | Minimum (0 - 48) *0 C39MIN## 5-7 | ||
| Maximum (0 - 48)*48 | C39MAX## | 5-7 | |
| Code 39 Append | *Off C39APP0 5-8 | ||
| On C39APP1 5-8 | |||
| Code 32 Pharmaceutical (PARAF) | *Off C39B320 | 5-8 | |
| On C39B321 | 5-8 | ||
| Code 39 Full ASCII | *Off C39ASC0 5-9 | ||
| On C39ASC1 5-9 | |||
| Code 39 Code Page C39DCP 5-10 | |||
| Interleaved 2 of 5 | Default All Interleaved 2 of 5 Settings | I25DFT | 5-10 |
| Off I25ENA0 | 5-10 | ||
| *On I25ENA1 | 5-10 | ||
| Interleaved 2 of 5 Check Digit | *No Check Char. | I25CK20 | 5-11 |
| Validate, But Don't Transmit | I25CK21 | 5-11 | |
| Validate, and Transmit | I25CK22 | 5-11 | |
| Interleaved 2 of 5 Message Length | Minimum (2 - 80) *4 | I25MIN## 5-11 | |
| Maximum (2 - 80)*80 | I25MAX## 5-11 | ||
| NEC 2 of 5 Default All | NEC2 of 5 Settings | N25DFT 5-12 | |
| Off N25ENA0 5-12 | |||
| *On N25ENA1 5-12 | |||
| NEC 2 of 5 Check Digit | *No Check Char. N25CK20 5-12 | ||
| Validate, But Don’t Transmit | N25CK21 5-12 | ||
| Validate, and Transmit | N25CK22 5-12 | ||
| NEC 2 of 5 Message Length | Minimum (2 - 80) *4 | N25MIN## 5-13 | |
| Maximum (2 - 80)*80 | N25MAX## 5-13 | ||
| Code 93 Default All Code | 93Settings | C93DFT 5-14 | |
| Off C93ENA0 5-14 | |||
| *On C93ENA1 5-15 | |||
| Code 93 Message Length | Minimum (0 - 80) *0 | C93MIN## 5-14 | |
| Maximum (0 - 80)*80 | C93MAX## 5-14 | ||
| Code 93 Code Page | C93DCP 5-15 | ||
| Straight 2 of 5 Industrial | Default All Straight 2of 5 Industrial Settings | R25DFT 5-15 | |
| *Off R25ENA0 5-15 | |||
| On R25ENA1 5-15 | |||
| Straight 2 of 5 Industrial Message Length | Minimum (1 - 48) *4 | R25MIN## 5-15 | |
| Maximum (1 - 48)*48 | R25MAX## 5-15 | ||
| Straight 2 of 5 IATA | Default All Straight 2of 5 IATA Settings | A25DFT | 5-16 |
| Selection | Setting* Indicates default | Serial Command# Indicates a numeric entry | Page | |
| Straight 2 of 5 IATA *Off A25ENA0 5-16 | ||||
| On A25ENA1 5-16 | ||||
| Straight 2 of 5 IATA Message Length | Minimum (1 - 48) *4 A25MIN## 5-16 | |||
| Maximum (1 - 48)*48 | A25MAX## 5-16 | |||
| Matrix 2 of 5 Default All Matrix 2 of 5 Settings | Matrix 2of 5Settings | X25DFT 5-17 | ||
| *Off X25ENA0 5-17 | ||||
| On X25ENA1 5-17 | ||||
| Matrix 2 of 5 Message Length | Minimum (1 - 80) *4 X25MIN## 5-17 | |||
| Maximum (1 - 80)*80 | X25MAX## 5-17 | |||
| Code 11 Default All Code 11 Settings | C11DFT 5-18 | |||
| *Off C11ENA0 5-18 | ||||
| On C11ENA1 5-18 | ||||
| Code 11 CheckDigits Required | 1 Check Digit C11CK20 5-18 | |||
| *2 Check Digits | C11CK21 5-18 | |||
| Code 11 Message Length | Minimum (1 - 80) *4 C11MIN## 5-19 | |||
| Maximum (1 - 80)*80 | C11MAX## | 5-19 | ||
| Code 128 | Default All Code 128 Settings | 128DFT | 5-19 | |
| Off 128ENA0 | 5-19 | |||
| *On 128ENA1 | 5-19 | |||
| ISBT Concatenation | *Off | ISBENA0 | 5-20 | |
| On ISBENA1 | 5-20 | |||
| Code 128 Message Length | Minimum (0 - 80) *0 128MIN## 5-20 | |||
| Maximum (0 - 90)*80 | 128MAX## | 5-20 | ||
| Code 128 Append | Off C39APP0 5-20 | |||
| *On C39APP1 5-20 | ||||
| Code 128 Code Page | Code 128 Code Page (*2) | 128DCP## 5-21 | ||
| GS1-128 Default All GS1-128 Settings | GS1DFT 5-22 | |||
| *On GS1ENA1 5-22 | ||||
| Off GS1ENA0 5-22 | ||||
| GS1-128 Message Length | Minimum (1 - 80) *1 | GS1MIN 5-22 | ||
| Maximum (0 - 80)*80 | GS1MAX 5-22 | |||
| Telepen Default All Telepen Settings | TELDFT 5-23 | |||
| *Off TELENA0 5-23 | ||||
| On TELENA1 | 5-23 | |||
| Telepen Output | *AIM Telepen Output | TELOLD0 | 5-23 | |
| Original Telepen Output | TELOLD1 | 5-23 | ||
| Telepen Message Length | Minimum (1 - 60) *1 | TELMIN## | 5-24 | |
| Maximum (1 - 60)*60 | TELMAX## | 5-24 | ||
| UPC-A | Default All UPC-A Settings | UPADFT | 5-24 | |
| Off UPAENA0 | 5-25 | |||
| *On UPAENA1 | 5-25 | |||
| UPC-A Check Digit | Off | UPACKX0 | 5-24 | |
| *On UPACKX1 | 5-25 | |||
| UPC-A Number System | Off UPANSX0 | 5-25 | ||
| *On UPANSX1 | 5-25 | |||
| UPC-A 2 Digit Addenda | *Off UPAAD20 5-25 | |||
| On UPAAD21 5-25 | ||||
| UPC-A 5 Digit Addenda | *Off UPAAD50 5-25 | |||
| On UPAAD51 5-25 | ||||
| UPC-A Addenda Required | *Not Required | UPAARQ0 | 5-26 | |
| Required | UPAARQ1 | 5-26 | ||
| UPC-A Addenda Separator | Off UPAADS0 5-26 | |||
| *On UPAADS1 5-26 | ||||
| UPC-A/EAN-13 with Extended Coupon Code | *Off CPNENA0 5-27 | |||
| Allow Concatenation CPNENA1 5-27 | ||||
| Require Concatenation | CPNENA2 5-27 | |||
| UPC-E0 Default All UPC-E Settings | UPEDFT 5-27 | |||
| UPC-E0 Expand *Off UPEEXP0 5-28 | ||||
| UPC-E0 Addenda Required | Required UPEARQ1 5-28 | |||
| *Not Required UPEARQ0 5-28 | ||||
| UPC-E0 Addenda Separator | *On UPEADS1 5-28 | |||
| Off UPEADS0 5-28 | ||||
| UPC-E0 Check Digit Off UPECKX0 5-29 | ||||
| UPC-E0 Number System | *On UPECKX1 5-29 | |||
| UPC-E0 Addenda | Off UPENSX0 5-29 | |||
| *On UPENSX1 5-29 | ||||
| UPC-E0 Addenda | 2 Digit Addenda On | UPEAD21 | 5-29 | |
| *2 Digit Addenda Off UPEAD20 5-29 | ||||
| 5 Digit Addenda On UPEAD51 5-29 | ||||
| *5 Digit Addenda Off UPEAD50 5-29 | ||||
| UPC-E1 *Off UPEEN10 5-30 | ||||
| EAN/JAN-13 Default All EAN/JAN Settings | E13DFT | 5-31 | ||
| EAN/JAN-13 Check Digit | Off E13CKX0 | 5-32 | ||
| *On E13CKX1 | 5-31 | |||
| EAN/JAN-13 2 Digit Addenda | 2 Digit Addenda On E13AD21 5-32 | |||
| *2 Digit Addenda Off E13AD20 5-32 | ||||
| 5 Digit Addenda On E13AD51 5-32 | ||||
| *5 Digit Addenda Off E13AD50 5-32 | ||||
| EAN/JAN-13 Addenda Required | *Not Required E13ARQ0 5-32 | |||
| Required E13ARQ1 5-32 | ||||
| EAN/JAN-13 Addenda Separator | Off E13ADS0 5-33 | |||
| *On E13ADS1 5-33 | ||||
| ISBN Translate *Off E13ISB0 5-33 | ||||
| On E13ISB1 5-33 | ||||
| EAN/JAN-8 Default All | EAN/JAN 8 Settings | EA8DFT 5-34 | ||
| Off EA8ENA0 5-34 | ||||
| *On EA8ENA1 5-34 | ||||
| EAN/JAN-8 Check Digit | Off EA8CKX0 5-34 | |||
| *On EA8CKX1 5-34 | ||||
| EAN/JAN-8 Addenda *2 Digit Addenda Off EA8AD20 5-35 | ||||
| 2 Digit Addenda On EA8AD21 5-35 | ||||
| *5 Digit Addenda Off EA8AD50 5-35 | ||||
| 5 Digit Addenda On EA8AD51 5-35 | ||||
| EAN/JAN-8 Addenda Required | *Not Required EA8ARQ0 5-35 | |||
| Required EA8ARQ1 5-35 | ||||
| EAN/JAN-8 Addenda Separator | Off EA8ADS0 5-35 | |||
| *On EA8ADS1 5-35 | ||||
| MSI | Default All MSI Settings | MSIDFT | 5-36 | |
| *Off MSIENA0 5-36 | ||||
| On MSIENA1 5-36 | ||||
| MSI Check Character * | Validate Type 10, but Don't Transmit | MSICHK0 5-37 | ||
| Validate Type 10 and Transmit | MSICHK1 5-37 | |||
| Validate 2 Type 10 Chars, but Don't Transmit | MSICHK2 5-37 | |||
| Validate 2 Type 10 Chars and Transmit | MSICHK3 5-37 | |||
| Validate Type 10 then Type 11 Char, but Don't Transmit | MSICHK4 5-37 | |||
| Validate Type 10 then Type 11 Char and Transmit | MSICHK5 5-37 | |||
| Disable MSI Check Characters | MSICHK6 5-37 | |||
| MSI Message Length Minimum (4 - 48) *4 MSI MIN## 5-37 | ||||
| Maximum (4 - 48)*48 | ||||
| GS1 DataBarOmnidirectional | Default All GS1 DataBarOmnidirectional Settings | RSSDFT 5-38 | ||
| Off RSSENA0 5-38 | ||||
| *On RSSENA1 5-38 | ||||
| GS1 DataBar Limited Default All GS1 DataBar Limited Settings | RSLDFT | 5-38 | ||
| Off RSLENA0 | 5-38 | |||
| *On RSLENA1 | 5-38 | |||
| Selection | Setting* Indicates default | Serial Command# Indicates a numeric entry | Page | |
| GS1 DataBar Expanded | Default All GS1 DataBar Expanded Settings | RSEDFT 5-39 | ||
| Off RSEENA0 5-39 | ||||
| *On RSEENA1 5-39 | ||||
| GS1 DataBar Expanded Msg. Length | Minimum (4 - 74) *4 RSEMIN## 5-39 | |||
| Maximum (4 - 74)*74 | RSEMAX## 5-39 | |||
| Trioptic Code *Off TRIENA0 5-40 | ||||
| Codablock A Default All | Codablock A Settings | CBADFT 5-40 | ||
| *Off CBAENA0 5-40 | ||||
| On CBAENA1 5-40 | ||||
| Codablock A Msg. Length | Minimum (1 - 600)*1 | CBAMIN#### 5-41 | ||
| Maximum (1 - 600)*600 | CBAMAX#### 5-41 | |||
| Codablock F Default All | Codablock F Settings | CBFDFT 5-40 | ||
| *Off CBFENA0 5-42 | ||||
| On CBFENA1 5-42 | ||||
| Codablock F Msg. Length | Minimum (1 - 2048)*1 | CBFMIN#### | 5-42 | |
| Maximum (1 - 2048)*2048 | CBFMAX#### | 5-42 | ||
| PDF417 | Default All PDF417 Settings | PDFDFT 5-43 | ||
| *On PDFENA1 5-43 | ||||
| Off PDFENA0 5-43 | ||||
| PDF417 Msg. Length | Minimum (1-2750)*1 | PDFMIN 5-43 | ||
| Maximum (1-2750)*2750 | PDFMAX 5-43 | |||
| MicroPDF417 Default | All Micro PDF417 Settings | MPDDFT 5-44 | ||
| On MPDENA1 5-44 | ||||
| *Off MPDENA0 5-44 | ||||
| MicroPDF417 Msg. Length | Minimum (1-366) *1 M | PDMIN 5-44 | ||
| Maximum (1-366)*366 | MPDMAX 5-44 | |||
| GS1 Composite Codes | On COMENA1 5-45 | |||
| *Off COMENA0 5-45 | ||||
| UPC/EAN Version On | COMUPC1 5-45 | |||
| *Off COMUPC0 5-45 | ||||
| GS1 Composite Codes Msg. Length | Minimum (1-2435)*1 | COMMIN 5-45 | ||
| Maximum (1-2435)*2435 | COMMAX 5-45 | |||
| GS1 Emulation | GS1-128 Emulation | EANEMU1 | 5-46 | |
| GS1 DataBar Emulation | EANEMU2 5-46 | |||
| GS1 Code Expansion Off | EANEMU3 5-46 | |||
| EAN8 to EAN13 Conversion | EANEMU4 5-46 | |||
| *GS1 Emulation Off | EANEMU0 5-46 | |||
| TCIF Linked Code 39 | On | T39ENA1 | 5-47 | |
| *Off T39ENA0 5-47 | ||||
| QR Code | Default All QR Code Settings | QRCDFT 5-54 | ||
| *On QRCENA1 5-47 | ||||
| Off QRCENA0 5-47 | ||||
| QR Code Msg. Length | Minimum (1-7089)*1 | QRCMIN 5-48 | ||
| Maximum (1-7089)*7089 | QRCMAX 5-48 | |||
| Data Matrix Default All | DataMatrix Settings | IDMDFT 5-49 | ||
| *On IDMENA1 5-49 | ||||
| Off IDMENA0 5-49 | ||||
| Data Matrix Msg. Length | Minimum (1-3116)*1 | IDMMIN 5-49 | ||
| Maximum (1-3116)*3116 | IDMMAX 5-49 | |||
| Data Matrix Append Off | IDMAPP0 5-50 | |||
| *On IDMAPP1 5-50 | ||||
| Data Matrix Code Page | Data Matrix Code Page (*51) | IDMDCP## 5-50 | ||
| MaxiCode Default All | MaxiCode Settings | MAXDFT 5-51 | ||
| *On MAXENA1 5-51 | ||||
| Off MAXENA0 5-51 | ||||
| MaxiCode Msg. Length | Minimum (1-150) *1 | MAXMIN 5-51 | ||
| Maximum (1-150)*150 | MAXMAX | 5-51 | ||
| Aztec Code | Default All Aztec Code Settings | AZTDFT | 5-52 | |
| *On AZTENA1 | 5-52 | |||
| Off AZTENA0 | 5-52 | |||
| Aztec Code Msg. Length | Minimum (1-3832)*1 | AZTMIN | 5-52 | |
| Maximum (1-3832)*3832 | AZTMAX 5-52 | |||
| Aztec Code Append | Off | AZTAPP0 | 5-53 | |
| *On AZTAPP1 | 5-53 | |||
| Aztec Code Page Aztec | Code Page(*51) | AZTDCP## 5-53 | ||
| Chinese Sensible(Han Xin) Code | Default All Han Xin Code Settings | HX_DFT 5-54 | ||
| On HX_ENA1 5-54 | ||||
| *Off HX_ENA0 5-54 | ||||
| Chinese Sensible(Han Xin) Code Msg.Length | Minimum (1-7833)*1 | HX_MIN 5-54 | ||
| Maximum (1-7833)*7833 | HX_MAX 5-54 | |||
| Postal Codes - 2D | ||||
| 2D Postal Codes *Off P | POSTAL0 5-55 | |||
| Single 2D PostalCodes | Australian Post On POSTAL1 5-55 | |||
| British Post On POSTAL7 5-55 | ||||
| Canadian Post On POSTAL30 5-55 | ||||
| Intelligent Mail Bar Code On | POSTAL10 | 5-55 | ||
| Japanese Post On | POSTAL3 5-55 | |||
| KIX Post On | POSTAL4 5-55 | |||
| Planet Code On POSTAL5 5-55 | ||||
| Postal-4i On | POSTAL9 5-55 | |||
| Postnet On | POSTAL6 5-56 | |||
| Postnet with B and B' Fields On | POSTAL11 | 5-56 | ||
| InfoMail On POSTAL2 5-56 | ||||
| Combination 2D Postal Codes | InfoMail and British Post On | POSTAL8 5-56 | ||
| Intelligent Mail Bar Code and Postnet with B and B’ Fields On | POSTAL20 5-56 | |||
| Postnet and Postal-4i On | POSTAL14 5-56 | |||
| Postnet and Intelligent Mail Bar Code On | POSTAL16 5-56 | |||
| Postal-4i and Intelligent Mail Bar Code On | POSTAL17 5-56 | |||
| Combination 2D Postal Codes (continued) | Postal-4i and Postnet with B and B' Fields On | POSTAL19 5-56 | ||
| Planet and Postnet On | POSTAL12 5-56 | |||
| Planet and Postnet with B and B' Fields On | POSTAL18 5-56 | |||
| Planet and Postal-4i On | POSTAL13 5-57 | |||
| Planet and Intelligent Mail Bar Code On | POSTAL15 5-57 | |||
| Planet, Postnet, and Postal-4i On | POSTAL21 5-57 | |||
| Planet, Postnet, and Intelligent Mail Bar Code On | POSTAL22 5-57 | |||
| Planet, Postal-4i, and Intelligent Mail Bar Code On | POSTAL23 5-57 | |||
| Postnet, Postal-4i, and Intelligent Mail Bar Code On | POSTAL24 5-57 | |||
| Planet, Postal-4i, and Postnet with B and B' Fields On | POSTAL25 5-57 | |||
| Planet, Intelligent Mail Bar Code, and Postnet with B and B' Fields On | POSTAL26 5-57 | |||
| Postal-4i, Intelligent Mail Bar Code, and Postnet with B and B' Fields On | POSTAL27 5-57 | |||
| Combination 2D Postal Codes (continued) | Planet, Postal-4i, Intelligent Mail Bar Code, and Postnet On | POSTAL28 5-57 | ||
| Planet, Postal-4i, Intelligent Mail Bar Code, and Postnet with B and B' Fields On | POSTAL29 5-57 | |||
| Planet Code Check Digit | Transmit PLNCKX1 5-58 | |||
| *Don't Transmit PLNCKX0 5-58 | ||||
| Postnet Check Digit Transmit NETCKX1 5-58 | ||||
| *Don't Transmit NETCKX0 5-58 | ||||
| Postal Codes - Linear | ||||
| China Post (Hong Kong 2 of 5) | Default All China Post (Hong Kong 2 of 5) Settings | CPCDFT 5-58 | ||
| *Off CPCENA0 5-59 | ||||
| On CPCENA1 5-59 | ||||
| China Post (Hong Kong 2 of 5) Msg. Length | Minimum (2 - 80) *4 CPCMIN## 5-59 | |||
| Maximum (2 - 80) *80 | CPCMAX## 5-59 | |||
| Korea Post | Default All Korea Post Settings | KPCDFT | 5-60 | |
| *Off KPCENA0 | 5-60 | |||
| On KPCENA1 | 5-60 | |||
| Korea Post Msg. Length | Minimum (2 - 80) *4 KPCMIN## 5-60 | |||
| Maximum (2 - 80) *48 | KPCMAX## | 5-60 | ||
| Korea Post Check Digit | Transmit Check Digit | KPCCHK1 | 5-60 | |
| *Don't Transmit Check Digit | KPCCHK0 5-60 | |||
Repairs
Honeywell is not an authorized Apple repair center. Please return only your sled to us for repair. Honeywell is not liable for any non-Honeywell product shipped to our repair center.
Healthcare Housing Cleaning Directions (Healthcare unit only)

Honeywell is not responsible for any damage to the Apple device. Since the Apple device can be affected by these cleaning agents, be sure to remove it before cleaning the sled.
Important: The following cleaning solutions have been tested to assure safe cleaning of your sled's disinfectant-ready housing. They are the only solutions approved for use with this sled. Damage caused by the use of cleaners other than those listed below may not be covered by the warranty.
- Gentle dish soap and water
• 409 ^® Glass and Surface Cleaner
• CaviWipes ™ - Clorox ® Bleach (10%)
- Isopropyl Alcohol Wipes (70%)
- Sani-Cloth ^ HB
- Sani-Cloth ® Plus
- Super Sani-Cloth ®
• V i® 256 e x
• W i ® Blued e x
Inspecting Cords and Connectors
Inspect the interface cable and connector for wear or other signs of damage. A badly worn cable or damaged connector may interfere with charging. Contact your distributor for information about cable replacement.
Troubleshooting
If your sled is not functioning properly, review the following Troubleshooting Guide to try to isolate the problem.
Is the power on? Is the red or green aiming illumination line on?
If the aiming line doesn't appear, check that:
- The battery is in the battery well.
- The battery has been charged for at least 4 hours.
- Make certain that the Honeywell Price Check Simulator application from the Apple App Store ^SM is loaded.
Is the sled having trouble reading your symbols?
If the sled isn't reading symbols well, check that the symbols:
- Aren't smeared, rough, scratched, or exhibiting voids.
- Aren't coated with frost or water droplets on the surface.
The sled won't read your bar code at all.
-
Scan the sample bar codes in the back of this manual. If the sled reads the sample bar codes, check that your bar code is readable. Verify that your bar code symbology is enabled (see Chapter 5).
-
If the sled still can't read the sample bar codes, scan "All Symbologies On" on page 5-2.
If you aren't sure what programming options have been set in the sled, or if you want the factory default settings restored, scan Resetting the Factory Defaults on page 1-4.
Technical Assistance
If you need assistance installing or troubleshooting your device, please contact us by using one of the methods below:
Knowledge Base: www.hsmknowledgebase.com
Our Knowledge Base provides thousands of immediate solutions. If the Knowledge Base cannot help, our Technical Support Portal (see below) provides an easy way to report your problem or ask your question.
Technical Support Portal: www.hsmsupportportal.com
The Technical Support Portal not only allows you to report your problem, but it also provides immediate solutions to your technical issues by searching our Knowledge Base. With the Portal, you can submit and track your questions online and send and receive attachments.
Web form: www.hsmcontactsupport.com
You can contact our technical support team directly by filling out our online support form. Enter your contact details and the description of the question/problem.
Telephone: www.honeywellaidc.com/locations
For our latest contact information, please check our website at the link above.
Product Service and Repair
Honeywell International Inc. provides service for all of its products through service centers throughout the world. To obtain warranty or non-warranty service, please visit www.honeywellaidc.com and select Support > Contact Service and Repair to see your region's instructions on how to obtain a Return Material Authorization number (RMA #). You should do this prior to returning the product.
Limited Warranty
Honeywell International Inc. ("HII") warrants its products to be free from defects in materials and workmanship and to conform to HII's published specifications applicable to the products purchased at the time of shipment. This warranty does not cover any HII product which is (i) improperly installed or used; (ii) damaged by accident or negligence, including failure to follow the proper maintenance, service, and cleaning schedule; or (iii) damaged as a result of (A) modification or alteration by the purchaser or other party, (B) excessive voltage or current supplied to or drawn from the interface connections, (C) static electricity or electro-static discharge, (D) operation under conditions beyond the specified operating parameters, or (E) repair or service of the product by anyone other than HII or its authorized representatives.
This warranty shall extend from the time of shipment for the duration published by HII for the product at the time of purchase ("Warranty Period"). Any defective product must be returned (at purchaser's expense) during the Warranty Period to HII factory or authorized service center for inspection. No product will be accepted by HII without a Return Materials Authorization, which may be obtained by contacting HII. In the event that the product is returned to HII or its authorized service center within the Warranty Period and HII determines to its satisfaction that the product is defective due to defects in materials or workmanship, HII, at its sole option, will either repair or replace the product without charge, except for return shipping to HII.
EXCEPT AS MAY BE OTHERWISE PROVIDED BY APPLICABLE LAW, THE FOREGOING WARRANTY IS IN LIEU OF ALL OTHER COVENANTS OR WARRANTIES, EITHER EXPRESSED OR IMPLIED, ORAL OR WRITTEN, INCLUDING, WITHOUT LIMITATION, ANY IMPLIED WARRANTIES OF MERCHANTABILITY OR FITNESS FOR A PARTICULAR PURPOSE, OR NON-INFRINGEMENT.
HII'S RESPONSIBILITY AND PURCHASER'S EXCLUSIVE REMEDY UNDER THIS WARRANTY IS LIMITED TO THE REPAIR OR REPLACEMENT OF THE DEFECTIVE PRODUCT WITH NEW OR REFURBISHED PARTS. IN NO EVENT SHALL HII BE LIABLE FOR INDIRECT, INCIDENTAL, OR CONSEQUENTIAL DAMAGES, AND, IN NO EVENT, SHALL ANY LIABILITY OF HII ARISING IN CONNECTION WITH ANY PRODUCT SOLD HEREUNDER (WHETHER SUCH LIABILITY ARISES FROM A CLAIM BASED ON CONTRACT, WARRANTY, TORT, OR OTHERWISE) EXCEED THE ACTUAL AMOUNT PAID TO HII FOR THE PRODUCT. THESE LIMITATIONS ON LIABILITY SHALL REMAIN IN FULL FORCE AND EFFECT EVEN WHEN HII MAY HAVE BEEN ADVISED OF THE POSSIBILITY OF SUCH INJURIES, LOSSES, OR DAMAGES. SOME STATES, PROVINCES, OR COUNTRIES DO NOT ALLOW THE EXCLUSION OR LIMITATIONS OF INCIDENTAL OR CONSEQUENTIAL DAMAGES, SO THE ABOVE LIMITATION OR EXCLUSION MAY NOT APPLY TO YOU.
All provisions of this Limited Warranty are separate and severable, which means that if any provision is held invalid and unenforceable, such determination shall not affect the validity of enforceability of the other provisions hereof. Use of any peripherals not provided by the manufacturer may result in damage not covered by this warranty. This includes but is not limited to: cables, power supplies, cradles, and docking stations. HII extends these warranties only to the first end-users of the products. These warranties are non-transferable.
Refer to www.honeywellaidc.com/warranty_information for your product's warranty information.
Reference Charts
Symbology Charts
Note: “m” represents the AIM modifier character. Refer to International Technical Specification, Symbology Identifiers, for AIM modifier character details.
Prefix/Suffix entries for specific symbologies override the universal (All Symbologies, 99) entry.
Refer to Data Editing beginning on page 3-1 and Data Formatting beginning on page 4-1 for information about using Code ID and AIM ID.
Linear Symbologies
| AIM Honeywell | ||||
| Symbology ID | Possible modifiers (m) | ID Hex | ||
| All Symbologies 99 | ||||
| Codabar ]Fm 0-1 a 61 | ||||
| Code 11 ]H3 h 68 | ||||
| Code 128 | ]Cm | 0, 1, 2, 4 | j | 6A |
| Code 32 Pharmaceutical (PARAF) | ]X0 | < | 3C | |
| Code 39 (supports Full ASCII mode) | ]Am | 0, 1, 3, 4, 5, 7 | b | 62 |
| TCIF Linked Code 39 (TLC39) | ]L2 | T | 54 | |
| Code 93 and 93i | ]Gm | 0-9, A-Z, a-m | i | 69 |
| EAN | ]Em | 0, 1, 3, 4 | d | 64 |
| EAN-13 (including Bookland EAN) | ]E0 | d 64 | ||
| EAN-13 with Add-On | ]E3 | d 64 | ||
| EAN-13 with Extended Coupon Code | ]E3 | d 64 | ||
| EAN-8 | ]E4 | D | 44 | |
| EAN-8 with Add-On | ]E3 | D | 44 | |
| AIM | Honeywell | |||
| Symbology | ID | Possible modifiers (m) | ID | Hex |
| GS1 | ||||
| GS1 DataBar ]em 0 | y | 7 | 9 | |
| GS1 DataBar Limited ]em { | 7B | |||
| GS1 DataBar Expanded ]em} | 7 D | |||
| GS1-128 | ]C1 | I | ||
| 2 of 5 | ||||
| China Post (Hong Kong 2 of 5) | ]X0 Q 51 | |||
| Interleaved 2 of 5 | ]Im | 0, 1, 3 | e | 65 |
| Matrix 2 of 5 | ]X0 m | 6D | ||
| NEC 2 of 5 | ]X0 Y | 59 | ||
| Straight 2 of 5 IATA | ]Rm | 0, 1, 3 | f | 66 |
| Straight 2 of 5 Industrial | ]S0 f 66 | |||
| MSI | ]Mm | 0, 1 | g | 67 |
| Telepen | ]Bm | t | 74 | |
| UPC | 0, 1, 2, 3, 8, 9, A, B, C | |||
| UPC-A | ]E0 c | 63 | ||
| UPC-A with Add-On | ]E3 c | 63 | ||
| UPC-A with Extended Coupon Code | ]E3 c | 63 | ||
| UPC-E | ]E0 E | 45 | ||
| UPC-E with Add-On | ]E3 E | 45 | ||
| UPC-E1 | ]X0 E | 45 | ||
| Add Honeywell Code ID | 5C80 | |||
| Add AIM Code ID | 5C81 | |||
| Add Backslash | 5C5C | |||
| Batch mode quantity | 5 | 35 |
2D Symbologies
| Symbology ID | AIM Honeywell | |||
| Possible modifiers (m) | ID Hex | |||
| All Symbologies 99 | ||||
| Aztec Code ]zm 0-9, A-C z 7A | ||||
| Chinese Sensible Code (Han Xin Code) | ]X0 H 48 | |||
| Codablock A ]O6 0, 1, 4, 5, 6 V 56 | ||||
| Codablock F ]Om 0, 1, 4, 5, 6 q 71 | ||||
| Code 49 | ]Tm | 0, 1, 2, 4 | I | 6C |
| Data Matrix | ]dm | 0-6 | w | 77 |
| GS1 | ]em | 0-3 | ||
| GS1 Composite | ]em | 0-3 | y | 79 |
| GS1 DataBar Omnidirectional | ]em | y | 79 | |
| MaxiCode | ]Um | 0-3 | x | 78 |
| PDF417 | ]Lm | 0-2 | r | 72 |
| MicroPDF417 | ]Lm | 3-5 | R | 52 |
| QR Code | ]Qm | 0-6 | s | 73 |
| Micro QR Code | ]Qm | s | 73 | |
Postal Symbologies
| Symbology ID | AIM Honeywell | |||
| Possible modifiers (m) | ID Hex | |||
| All Symbologies 99 | ||||
| Australian Post | ]X0 A 41 | |||
| British Post | ]X0 B 42 | |||
| Canadian Post | ]X0 C 43 | |||
| Symbology | AIM | Honeywell | ||
| ID | Possible modifiers (m) | ID | Hex | |
| China Post ]X0 Q 51 | ||||
| InfoMail ]X0 , 2c | ||||
| Intelligent Mail Bar Code ]X0 M | 4D | |||
| Japanese Post ]X0 J 4A | ||||
| KIX (Netherlands) Post ]X0 K 4B | ||||
| Korea Post ]X0 ? 3F | ||||
| Planet Code ]X0 L 4C | ||||
| Postal-4i | ]X0 N | 4E | ||
| Postnet | ]X0 P 50 | |||
ASCII Conversion Chart (Code Page 1252)
In keyboard applications, ASCII Control Characters can be represented in 3 different ways, as shown below. The CTRL+X function is OS and application dependent. The following table lists some commonly used Microsoft functionality. This table applies to U.S. style keyboards. Certain characters may differ depending on your Country Code/PC regional settings.
| Non-printableASCII control characters | Keyboard Control + ASCII (CTRL+X) Mode | ||||
| Control + X Mode Off(KBDCAS0) | Windows Mode Control + X ModeOn (KBDCAS2) | ||||
| DEC | HEX | Char | CTRL + X | CTRL + Xfunction | |
| 0 | 00 | NUL | Reserved | CTRL+ @ | |
| 1 | 01 | SOH | NP Enter | CTRL+ A | Select all |
| 2 | 02 | STX | Caps Lock | CTRL+ B | Bold |
| 3 | 03 | ETX | ALT Make | CTRL+ C | Copy |
| 4 | 04 | EOT | ALT Break | CTRL+ D | Bookmark |
| 5 | 05 | ENQ | CTRL Make | CTRL+ E | Center |
| 6 | 06 | ACK | CTRL Break | CTRL+ F | Find |
| 7 | 07 | BEL | Enter / Ret | CTRL+ G | |
| 8 | 08 | BS | (Apple Make) | CTRL+ H | History |
| 9 | 09 | HT | Tab | CTRL+ I | Italic |
| 10 | 0A | LF | (Apple Break) | CTRL+ J | Justify |
| 11 0B | VT Tab | CTRL+ K hyperlink | |||
| 12 0C | FF Delete | CTRL+ L | list,left align | ||
| 13 0D | CR Enter / Ret CTRL | L+ M | |||
| 14 0E | SO Insert | CTRL+ N | New | ||
| 15 | 0F | SI | ESC | CTRL+ O | Open |
| 16 | 10 | DLE | F11 | CTRL+ P | |
| 17 | 11 | DC1 | Home | CTRL+ Q | Quit |
| 18 | 12 | DC2 | PrtScn | CTRL+ R | |
| 19 | 13 | DC3 | Backspace | CTRL+ S | Save |
| 20 | 14 | DC4 | Back Tab | CTRL+ T | |
| 21 | 15 | NAK | F12 | CTRL+ U | |
| 22 | 16 | SYN | F1 | CTRL+ V | Paste |
| 23 | 17 | ETB | F2 | CTRL+ W | |
| 24 | 18 | CAN | F3 | CTRL+ X | |
| 25 | 19 | EM | F4 | CTRL+ Y | |
| 26 1A | SUB | F5 | CTRL+ Z | ||
| 27 1B | ESC | F6 | CTRL+ [ | ||
| 28 1C | FS F7 | CTRL+ \ | |||
| 29 1D | GS F8 | CTRL+] | |||
| 30 1E | RS | F9 | CTRL+ ^ | ||
| 31 1F | US | F10 | CTRL+ - | ||
| 127 | 7F | NP Enter | |||
Lower ASCII Reference Table
Note: Windows Code page 1252 and lower ASCII use the same characters.
| Printable Characters | ||||||||
| DEC | HEX | Character | DEC | HEX | Character | DEC | HEX | Character |
| 32 | 20 | 64 | 40 | @ | 96 | 60 | ` | |
| 33 | 21 | ! | 65 | 41 | A | 97 | 61 | a |
| 34 | 22 | " | 66 | 42 | B | 98 | 62 | b |
| 35 | 23 | # | 67 | 43 | C | 99 | 63 | c |
| Printable Characters (Continued) | ||||||||
| DEC | HEX | Character | DEC | HEX | Character | DEC | HEX | Character |
| 36 24 | $ 68 4 | 4 D 100 64 d | ||||||
| 37 25 | % 69 | 45 E 101 65 e | ||||||
| 38 26 | & 70 | 46 F 102 66 f | ||||||
| 39 27 | ' 71 47 | G 103 67 g | ||||||
| 40 28 | ( 72 48 | H 104 68 h | ||||||
| 41 29 | ) 73 49 | I 105 69 i | ||||||
| 42 2A | * 74 4 | A J 106 6A j | ||||||
| 43 2B | + 75 | 4B K 107 6B k | ||||||
| 44 2C | , 76 4 | C L 108 6C I | ||||||
| 45 | 2D | - | 77 | 4D | M | 109 | 6D | m |
| 46 | 2E | . | 78 | 4E | N | 110 | 6E | n |
| 47 | 2F | / | 79 | 4F | O | 111 | 6F | o |
| 48 | 30 | 0 | 80 | 50 | P | 112 | 70 | p |
| 49 | 31 | 1 | 81 | 51 | Q | 113 | 71 | q |
| 50 | 32 | 2 | 82 | 52 | R | 114 | 72 | r |
| 51 | 33 | 3 | 83 | 53 | S | 115 | 73 | s |
| 52 | 34 | 4 | 84 | 54 | T | 116 | 74 | t |
| 53 | 35 | 5 | 85 | 55 | U | 117 | 75 | u |
| 54 | 36 | 6 | 86 | 56 | V | 118 | 76 | v |
| 55 | 37 | 7 | 87 | 57 | W | 119 | 77 | w |
| 56 | 38 | 8 | 88 | 58 | X | 120 | 78 | x |
| 57 | 39 | 9 | 89 | 59 | Y | 121 | 79 | y |
| 58 3A | : 90 5 | A Z 122 7A z | ||||||
| 59 3B | ; 91 5B [ 123 7B { | |||||||
| 60 3C | < 92 5C \ 124 7C | | |||||||
| 61 3D | = 93 5D ] 125 7D } | |||||||
| 62 | 3E | > | 94 | 5E | ^ | 126 | 7E | ~ |
| 63 | 3F | ? | 95 | 5F | _ | 127 | 7F | △ |
| Extended ASCII Characters | |||||
| DEC | HEX | CP 1252 | ASCII | Alternate Extended | PS2 Scan Code |
| 128 | 80 | € | Ç | up arrow ↑ | 0x48 |
| 129 | 81 | ü | down arrow ↓ | 0x50 | |
| 130 | 82 | , | é | right arrow → | 0x4B |
| 131 | 83 | f | â | left arrow ← | 0x4D |
| 132 | 84 | ,, | ä | Insert | 0x52 |
| 133 | 85 | ... | à | Delete | 0x53 |
| Extended ASCII Characters (Continued) | |||||
| DEC | HEX | CP 1252 | ASCII | Alternate Extended | PS2 Scan Code |
| 13486† | å | H o m | e | ||
| 13587‡ | ç | E n d | |||
| 13688^ê P | Page Up 0x49 | ||||
| 13789‰ë | Page Down 0x51 | ||||
| 138 | 8A | Š | è | Right ALT | 0x38 |
| 139 | 8B | < | ï | Right CTRL | 0x1D |
| 140 | 8C | CE | î | Reserved | n/a |
| 141 | 8D | i | Reserved | n/a | |
| 142 | 8E | Ž | Ä | Numeric Keypad Enter | 0x1C |
| 143 | 8F | Ä | Numeric Keypad / | 0x35 | |
| 144 | 90 | É | F1 | 0x3B | |
| 145 | 91 | ‘ | æ | F2 | 0x3C |
| 146 | 92 | ’ | Æ | F3 | 0x3D |
| 147 | 93 | “ | ô | F4 | 0x3E |
| 148 | 94 | ” | ö | F5 | 0x3F |
| 149 | 95 | • | ò | F6 | 0x40 |
| 15096- | û | F 7 | 0 | ||
| 151 | 97 | — | ù | F8 | 0x42 |
| 152 | 98 | ~ | ÿ | F9 | 0x43 |
| 153 | 99 | TM | Ö | F10 | 0x44 |
| 154 | 9A | š | Ü | F11 | 0x57 |
| 155 | 9B | > | ¢ | F12 | 0x58 |
| 156 | 9C | œ | £ | Numeric Keypad + | 0x4E |
| 157 | 9D | ¥ | Numeric Keypad - | 0x4A | |
| 158 | 9E | ž | Pts | Numeric Keypad * | 0x37 |
| 159 | 9F | Ÿ | f | Caps Lock | 0x3A |
| 160 | A0 | á | Num Lock | 0x45 | |
| 161 | A1 | i | í | Left Alt | 0x38 |
| 162 | A2 | ¢ | ó | Left Ctrl | 0x1D |
| 163 | A3 | £ | ú | Left Shift | 0x2A |
| 164 | A4 | ¤ | ñ | Right Shift | 0x36 |
| 165 | A5 | ¥ | Ñ | Print Screen | n/a |
| 166 | A6 | | | a | Tab | 0x0F |
| 167 | A7 | § | o | Shift Tab | 0x8F |
| 168 | A8 | .. | ¿ | Enter | 0x1C |
| 169 | A9 | © | ¬ | Esc | 0x01 |
| 170 | AA | a | ¬ | Alt Make | 0x36 |
| 171 | AB | « | 12 | Alt Break | 0xB6 |
| 172 | AC | ¬ | 14 | Control Make | 0x1D |
| 173 | AD i Control Break 0x9D | ||||
| 174 | AE | ® | « | Alt Sequence with 1 Character | 0x36 |
| 175 | AF | — | » | Ctrl Sequence with 1 Character | 0x1D |
| 176 | B0° | ||||
| 177 | B1 ± | ||||
| 178 | B22 | ||||
| 179 | B33 | ||||
| 180 | B4' | ||||
| 181 | B5 μ = | ||||
| 182 | B6¶ - | ||||
| 183 | B7· | ||||
| 184 | B8,¶ | ||||
| 185 | B91 | ||||
| 186 | BA° | || | |||
| 187 | BB Ȧ | ||||
| 188 | BC | 1⁄4 | ‖ | ||
| 189 | BD | 1⁄2 | ‖ | ||
| 190 | BE 3⁄4 | ‖ | |||
| 191 | BF ¿ | ‖ | |||
| 192 | C0 À | L | |||
| 193 | C1 Á | ⊥ | |||
| 194 | C2 Â | T | |||
| 195 | C3 Ã | F | |||
| 196 | C4 Ä | — | |||
| 197 | C5 Å | í | |||
| 198 | C6 Æ | F | |||
| 199 | C7 Ç | ‖ | |||
| 200 | C8 É | L | |||
| 201 | C9 É | F | |||
| 202 | CA | Ê | ⊥ | ||
| 203 | CB | È | |||
| 204 | CC ì | ‖ | |||
| 205 | CD Í | = | |||
| 206 | CE Í | ‖ | |||
| 207 | CF Í ⊥ | ||||
| 208 | D0 Đ | ⊥ | |||
| 209 | D1 Ñ | ||||
| 210 | D2 Ô | ||||
| 211 | D3 | Ó | L | ||
| 212 D4 Ô ⊥ | |||||
| 213 D5 Ô F | |||||
| 214 D6 Ö ⊥ | |||||
| 215 D7 × ‡ | |||||
| 216 D8 ∅ ≠ | |||||
| 217 D9 Ú J | |||||
| 218 DA Ú Γ | |||||
| 219 DB Ú ■ | |||||
| 220 DC Ü ■ | |||||
| 221 DD Ý ■ | |||||
| 222 DE P ■ | |||||
| 223 DF β ■ | |||||
| 224 E0 à α | |||||
| 225 E1 á | ß | ||||
| 226 E2 â Γ | |||||
| 227 E3 ä π | |||||
| 228 E4 ä Σ | |||||
| 229 E5 å σ | |||||
| 230 E6 æ | μ | ||||
| 231 E7 ç τ | |||||
| 232 E8 è Φ | |||||
| 233 E9 é Θ | |||||
| 234 EA ê Ω | |||||
| 235 EB ë δ | |||||
| 236 EC i ∞ | |||||
| 237 ED í φ | |||||
| 238 EE î ε | |||||
| 239 EF i ∩ | |||||
| 240 F0 ð ≡ | |||||
| 241 F1 ñ | ± | ||||
| 242 F2 ò ≥ | |||||
| 243 F3 ó ≤ | |||||
| 244 F4 Ó ∫ | |||||
| 245 F5 Ó ∫ | |||||
| 246 F6 õ | ÷ | ||||
| 247 F7 ÷ ≈ | |||||
| 248 F8 ø | ° | ||||
| 249 F9 ù | . | ||||
| 250 FA ú | . | ||||
| 251 F | B û √ | ||||
| 252 F | C ü n | ||||
| 253 F | D y | 2 | |||
| 254 F | E p ■ | ||||
| 255 F | F y | ||||
ISO 2022/ISO 646 Character Replacements
Code pages define the mapping of character codes to characters. If the data received does not display with the proper characters, it may be because the bar code being scanned was created using a code page that is different from the one the host program is expecting. If this is the case, select the code page with which the bar codes were created. The data characters should then appear properly.
| Code Page Selection Method/Country | Standard Keyboard | Country | Honeywell Code Page Option |
| United States(standard ASCII) ISO/IEC | 646-IRV n/a 1 | ||
| Automatic National Character Replacement ISO/IEC 2022 n/a 2 (default) | |||
| Binary Code page n/a | n/a 3 | ||
| Default “Automatic National Character replacement” will select the below Honeywell Code Page options for Code128, Code 39 and Code 93. | |||
| United States ISO/IEC 646-06 0 | 1 | ||
| Canada | ISO /IEC 646-121 | 54 | 95 |
| Canada | ISO /IEC 646-122 | 18 | 96 |
| Japan | ISO/IEC 646-14 | 28 | 98 |
| China | ISO/IEC 646-57 | 92 | 99 |
| Great Britain (UK) | ISO /IEC 646-04 | 7 | 87 |
| Code Page Selection Method/Country | Standard | Keyboard Country | Honeywell Code Page Option |
| France ISO /IEC 646-69 3 | 83 | ||
| Germany ISO/IEC646-21 | 4 84 | ||
| Switzerland ISO /IEC 646-CH 6 | 86 | ||
| Sweden / Finland (extended Annex C) ISO/IEC 646-11 2 | 82 | ||
| Ireland ISO /IEC 646-207 | 73 97 | ||
| Denmark ISO/IEC 646-08 | 8 88 | ||
| Norway ISO/IEC 646-60 | 9 94 | ||
| Italy ISO/IEC 646-15 5 | 85 | ||
| Portugal ISO/IEC 646-16 | 13 92 | ||
| Spain ISO/IEC 646-17 10 | 90 | ||
| Spain ISO/IEC 646-85 51 | 91 | ||
| Dec | 35 | 36 | 64 | 91 | 92 | 93 | 94 | 96 | 123 | 124 | 125 | 126 | ||
| Hex | 23 | 24 | 40 | 5B | 5C | 5D | 5E | 60 | 7B | 7C | 7D | 7E | ||
| US 0 | 1 # | @ [ ] | ^` | ~ | |||||||||||
| CA | 54 95 | # à â ç ê î ô é | ù è | û | ||||||||||
| CA 18 | 96 | #à â ç ê É ô é | ù è | û | ||||||||||
| JP 28 | 98 | # @ [ ¥ ] ^ | { | } | - | ||||||||||
| CN 92 | 99 | # ¥ @ [ \ ] ^ | { | } | - | ||||||||||
| GB | 7 | 87 | £ @ [ ] ^ | | | ~ | |||||||||
| FR 3 | 83 | £ à ° ç § ^ μ é | ù è | .. | ||||||||||
| DE 4 | 84 | #§ Ä Ö Ü ^ | à ö ü | ß | ||||||||||
| CH | 6 | 86 | ù à é ç ê î ô | ä | ö ü û | |||||||||
| SE/FI | 2 | 82 | # | ¤ | É | Ä | Ö | Å | Ü | é | ä | ö | å | ü |
| DK | 8 | 88 | # | @ | Æ | ∅ | Å | ^ | ` | æ | ø | å | ~ | |
| NO | 9 | 94 | # | @ | Æ | ∅ | Å | ^ | ` | æ | ø | å | .. | |
| IE | 73 97 | £ | Ó | É | Í | Ú | Á | ó | é | í | ú | á | ||
| IT 5 | 85 | £ § ° ç é ^ ù à | ò | è | ì | |||||||||
| PT 13 | 92 | # | § | Ä | Ç | Õ | ^ | ` | ã | ç | õ | ° | ||
| ES 10 | 90 | # § i Ñ ¿ ^ ° ñ | ç ~ | |||||||||||
| ES 51 | 91 | #$ · | i Ñ Ç ¿ ` | ` ñ | ç .. | |||||||||
| COUNTRY | Country Keyboard | Honeywell CodePage | ISO / IEC 646 National Character Replacements | |||||||||||
Sample Symbols
UPC-A
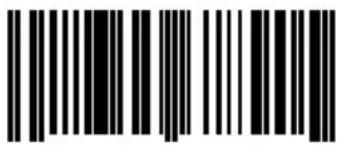
0 123456 7890
Code 128
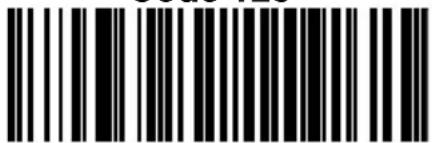
Code 128
Code 39
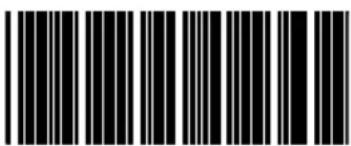
BC321
Code 93
123456-9\$
Interleaved 2 of 5
1234567890
EAN-13
9 780330 290951
Codabar
A13579B
Straight 2 of 5 Industrial
123456
Sample Symbols
Matrix 2 of 5
6543210
PDF417
Car Registration
GS1 DataBar
(01)00123456789012
Postnet

Zip Code
Data Matrix
Test Symbol
QR Code
Numbers
4-CB (4-State Customer Bar Code)

natural_image
Abstract pattern of vertical black lines on white background, no text or symbols present01,234,567094,987654321,01234567891
J18CUSA8E6N062315014880T
Sample Symbols
Aztec
Package Label
MaxiCode
natural_image
Abstract pattern of black dots and a central concentric circle (no text or symbols)Test Message
Micro PDF417
Test Message
Programming Chart
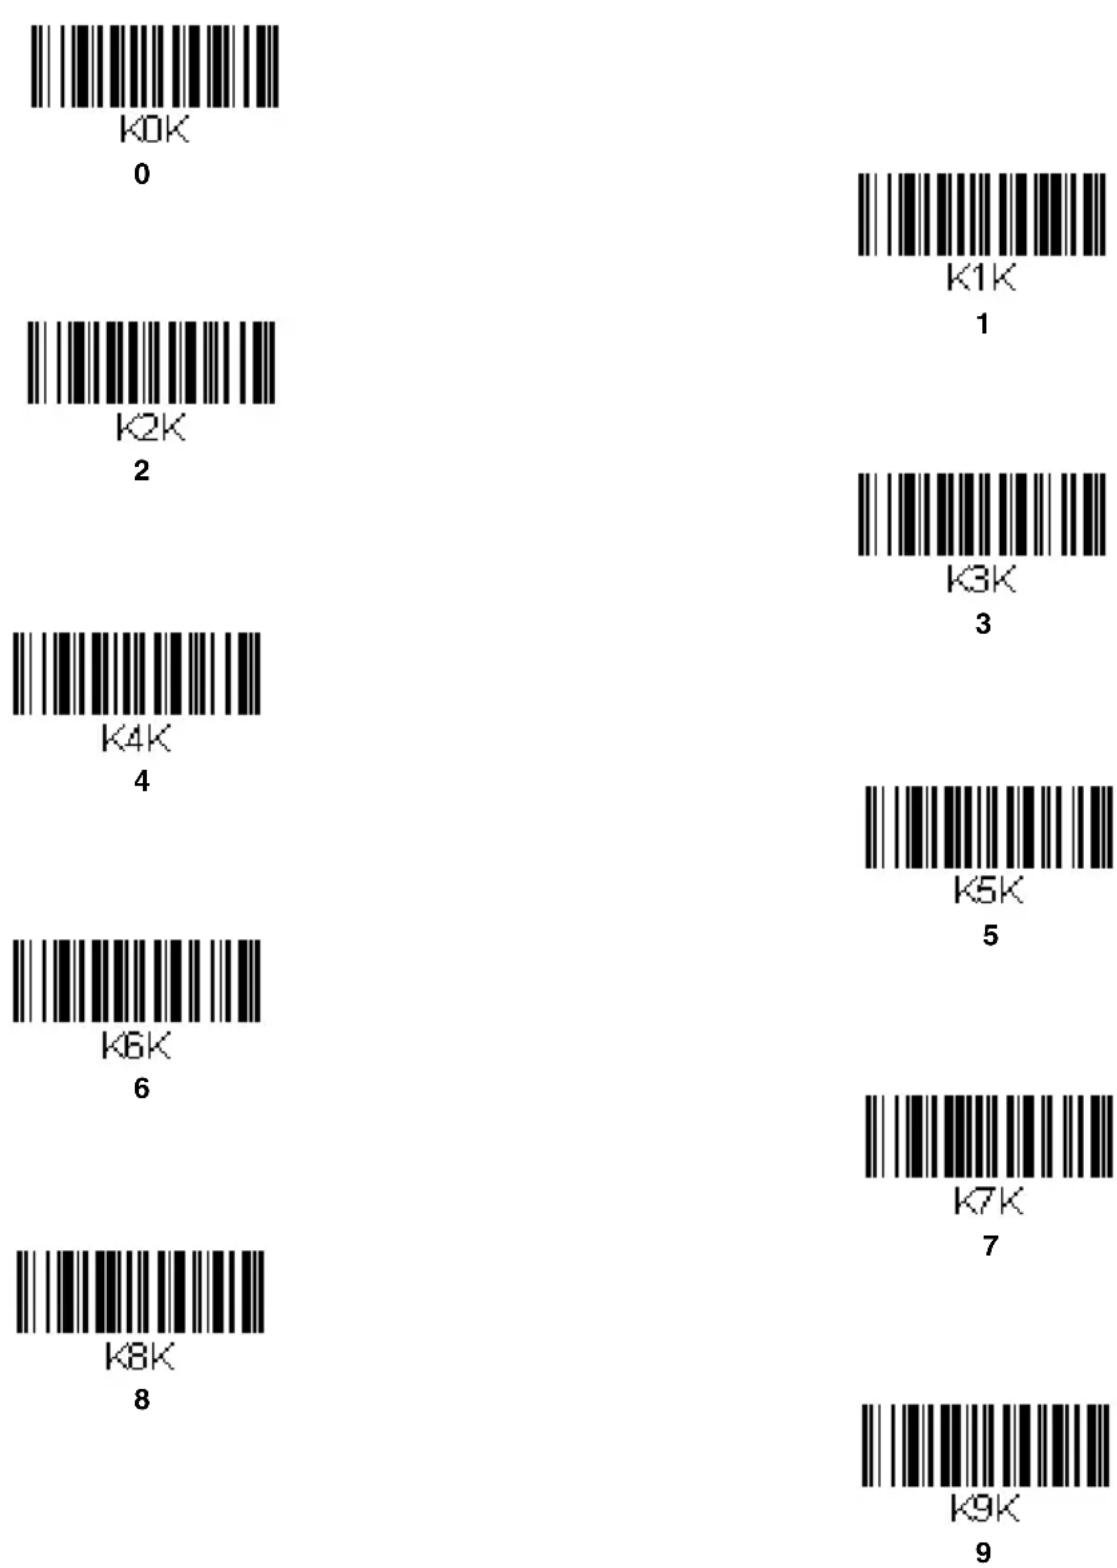
Programming Chart
A
B
C
D
E
F
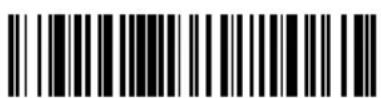
MNUSAV.
Save
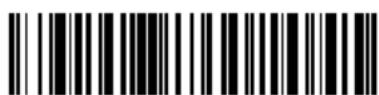
MNUABT.
Discard
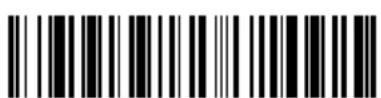
RESET_
Reset
Note: If you make an error while scanning the letters or digits (before scanning Save), scan Discard, scan the correct letters or digits, and Save again.
Honeywell Scanning & Mobility
9680 Old Bailes Road
Fort Mill, SC 29707
www.honeywellaidc.com
- Patents
- Table of Contents
- Chapter 1 - Getting Started
- Chapter 2 - Input/Output Settings
- Chapter 3 - Data Editing
- Chapter 4 - Data Formatting
- Chapter 5 - Symbologies
- Chapter 6 - Serial Programming Commands
- Chapter 7 - Maintenance
- Chapter 8 - Customer Support
- Appendix A - Reference Charts
- Introduction
- Out of the Box
- Operating Temperature
- Reading Techniques
- Setting Custom Defaults
- Resetting the Custom Defaults
- Resetting the Factory Defaults
- Good Read and Error Indicators
- Beeper – Good Read
- Beeper Volume – Good Read
- Manual Trigger Mode
- Mobile Phone Read Mode
- Centering
- Preferred Symbology
- High Priority Symbology
- Low Priority Symbology
- Preferred Symbology Time-out
- Preferred Symbology Default
- Output Sequence Overview
- Require Output Sequence
- Output Sequence Editor
- To Add an Output Sequence
- Other Programming Selections
- Output Sequence Example
- SEQBLK62001241FF6A001342FF69001243FF
- Partial Sequence
- Multiple Symbols
- No Read
- Video Reverse
- Working Orientation
- Prefix/Suffix Overview
- Points to Keep In Mind
- To Add a Prefix or Suffix:
- Example: Add a Suffix to a specific symbology
- To Clear One or All Prefixes or Suffixes
- To Add a Carriage Return Suffix to All Symbologies
- Prefix Selections
- Suffix Selections
- Function Code Transmit
- Data Format Editor Introduction
- To Add a Data Format
- Step 3. Terminal Type
- Step 4. Code I.D.
- Step 5. Length
- Step 6. Editor Commands
- Clear One Data Format
- Clear all Data Formats
- Terminal ID Table
- Data Format Editor Commands
- Send Commands
- Send all characters
- Send a number of characters
- Send all characters up to a particular character
- Send all characters up to a string
- B9 Example: Send all characters up to a defined string
- Send all but the last characters
- Insert a character multiple times
- Insert a string
- Insert symbology name
- Insert bar code length
- B3 and B4 Example: Insert the symbology name and length
- Move Commands
- Move the cursor forward a number of characters
- Move the cursor backward a number of characters
- Move the cursor to the beginning
- Move the cursor to the end
- Search Commands
- Search forward for a character
- Search backward for a character
- Search forward for a string
- Search backward for a string
- Search forward for a non-matching character
- Search backward for a non-matching character
- Miscellaneous Commands
- Suppress characters
- Stop suppressing characters
- Replace characters
- Stop replacing characters
- Compare characters
- Compare string
- Check for a number
- EC Example: Only output the data if the bar code begins with a number
- Check for non-numeric character
- ED Example: Only output the data if the bar code begins with a letter
- Discard Data
- Data Formatter
- Data Formatter On, Not Required, Keep Prefix/Suffix
- Data Formatter On, Not Required, Drop Prefix/Suffix
- Data Format Required, Keep Prefix/Suffix
- Data Format Required, Drop Prefix/Suffix
- Data Format Non-Match Error Tone
- Primary/Alternate Data Formats
- Single Scan Data Format Change
- Symbologies
- All Symbologies
- Message Length Description
- Codabar
- Codabar Start/Stop Characters
- Codabar Check Character
- Codabar Concatenation
- Codabar Message Length
- Code 39
- Code 39 Start/Stop Characters
- Code 39 Check Character
- Code 39 Message Length
- Code 39 Append
- Code 32 Pharmaceutical (PARAF)
- Full ASCII
- Code 39 Code Page
- Interleaved 2 of 5
- Interleaved 2 of 5 On/Off
- Check Digit
- Interleaved 2 of 5 Message Length
- NEC 2 of 5
- NEC 2 of 5 Message Length
- Code 93
- Code 93 Message Length
- Code 93 Code Page
- Straight 2 of 5 Industrial (three-bar start/stop)
- Straight 2 of 5 Industrial On/Off
- Straight 2 of 5 Industrial Message Length
- Straight 2 of 5 IATA (two-bar start/stop)
- Straight 2 of 5 IATA Message Length
- Matrix 2 of 5
- Matrix 2 of 5 Message Length
- Code 11
- Check Digits Required
- Code 11 Message Length
- Code 128
- Code 128 On/Off
- ISBT 128 Concatenation
- Code 128 Message Length
- Code 128 Append
- Code 128 Code Page
- GS1-128
- GS1-128 Message Length
- Telepen
- Telepen Output
- Telepen Message Length
- UPC-A
- UPC-A On/Off
- UPC-A Check Digit
- UPC-A Number System
- UPC-A Addenda
- UPC-A Addenda Required
- UPC-A Addenda Separator
- UPC-A/EAN-13 with Extended Coupon Code
- UPC-E0
- UPC-E0 On/Off
- UPC-E0 Expand
- UPC-E0 Addenda Required
- UPC-E0 Addenda Separator
- UPC-E0 Check Digit
- UPC-E0 Leading Zero
- UPC-E0 Addenda
- UPC-E1
- EAN/JAN-13
- Convert UPC-A to EAN-13
- EAN/JAN-13 Check Digit
- EAN/JAN-13 Addenda
- EAN/JAN-13 Addenda Required
- EAN/JAN-13 Addenda Separator
- ISBN Translate
- EAN/JAN-8
- EAN/JAN-8 Check Digit
- EAN/JAN-8 Addenda
- EAN/JAN-8 Addenda Required
- EAN/JAN-8 Addenda Separator
- MSI
- MSI Check Character
- MSI Message Length
- GS1 DataBar Omnidirectional
- GS1 DataBar Limited
- GS1 DataBar Expanded
- GS1 DataBar Expanded On/Off
- GS1 DataBar Expanded Message Length
- Trioptic Code
- Codablock A
- Codablock A Message Length
- Codablock F
- Codablock F Message Length
- PDF417
- PDF417 Message Length
- MicroPDF417
- MicroPDF417 Message Length
- GS1 Composite Codes
- UPC/EAN Version
- GS1 Composite Code Message Length
- GS1 Emulation
- TCIF Linked Code 39 (TLC39)
- QR Code
- QR Code On/Off
- QR Code Message Length
- Data Matrix
- Data Matrix Message Length
- Data Matrix Append
- Data Matrix Code Page
- MaxiCode
- MaxiCode Message Length
- Aztec Code
- Aztec Code Message Length
- Aztec Append
- Aztec Code Page
- Chinese Sensible (Han Xin) Code
- Han Xin Code Message Length
- Postal Codes - 2D
- Combination 2D Postal Codes:
- Planet Code Check Digit
- Postnet Check Digit
- Postal Codes - Linear
- China Post (Hong Kong 2 of 5)
- China Post (Hong Kong 2 of 5) On/Off
- China Post (Hong Kong 2 of 5) Message Length
- Korea Post
- Korea Post Message Length
- Korea Post Check Digit
- Serial Programming Commands
- Conventions
- Menu Command Syntax
- Query Commands
- :Name: Field Usage (Optional)
- Tag Field Usage
- SubTag Field Usage
- Data Field Usage
- Concatenation of Multiple Commands
- Responses
- Examples of Query Commands
- Repairs
- Healthcare Housing Cleaning Directions (Healthcare unit only)
- Inspecting Cords and Connectors
- Troubleshooting
- Technical Assistance
- Product Service and Repair
- Limited Warranty
- Reference Charts
- Symbology Charts
- ASCII Conversion Chart (Code Page 1252)
- Lower ASCII Reference Table
- ISO 2022/ISO 646 Character Replacements
- Sample Symbols
- Programming Chart
Brand : HONEYWELL
Model : Captuvo SL62
Category : Scanner