Everyday 1.5LB DBM150GBAQ01 - Bread maker Dash - Free user manual and instructions
Find the device manual for free Everyday 1.5LB DBM150GBAQ01 Dash in PDF.


| Product Type | Bread Maker |
| Model | DBM150GBAQ01 |
| Brand | Dash |
| Loaf Capacity | 1 lb or 1.5 lb |
| Programs | 12 programs: White, French, Whole Wheat, Artisan Dough, Sweet, Gluten-Free, Ultra-Fast, Dough, Jam, Packaged Mix, Cake, Bake |
| Crust Color Options | Light, Medium, Dark |
| Delay Timer | Up to 13 hours (not available for Ultra-Fast, Jam, Bake) |
| Keep Warm Function | Automatic 60-minute keep warm after baking |
| Memory Function | Resumes cycle if power interruption less than 10 minutes |
| Ingredient Dispenser | Removable for automatic addition of fruits/nuts |
| Kneading Blade | Removable, dishwasher safe |
| Baking Pan | Non-stick coating, dishwasher safe |
| Power Rating | 450W |
| Voltage | 120V ~ 60Hz |
| Lid | With viewing window |
| Safety Features | Automatic shut-off? (Not specified); warning displays: HHH (too hot), LLL (too cold), EEO (sensor error) |
| Dimensions (approx.) | Typical bread machine, about 12 x 10 x 12 inches (not specified in manual) |
| Weight (approx.) | About 10 lbs (not specified in manual) |
| Warranty | 1-year limited warranty from StoreBound, LLC |
| Customer Support | 1-800-898-6970, support@bydash.com |
Frequently Asked Questions - Everyday 1.5LB DBM150GBAQ01 Dash
User questions about Everyday 1.5LB DBM150GBAQ01 Dash
0 question about this device. Answer the ones you know or ask your own.
Ask a new question about this device
Download the instructions for your Bread maker in PDF format for free! Find your manual Everyday 1.5LB DBM150GBAQ01 - Dash and take your electronic device back in hand. On this page are published all the documents necessary for the use of your device. Everyday 1.5LB DBM150GBAQ01 by Dash.
USER MANUAL Everyday 1.5LB DBM150GBAQ01 Dash
natural_image
Exterior view of a modern PASK food processor with control panel and display (no readable text or symbols)DBM150
EVERYDAY 1.5LB
BREAD MAKER
Instruction Manual | Recipe Guide
natural_image
Red line drawing of a loaf of bread with cutlery and sliced pieces (no text or symbols)












EVERYDAY 1.5LB BREAD MAKER

Important Safeguards 4-7
Parts & Features 8-9
Bread-Making Process....11
Programs 12
Functions....14-15
Using Your Ingredient Dispenser 16-17
Using Your Bread Maker 18-27
Cleaning & Maintenance 28
Troubleshooting 29
Recipes 31-51
Notes 52-53
Customer Support 54
Warranty 55

IMPORTANT SAFEGUARDS IMPORTANT SAFEGUARDS
IMPORTANT SAFEGUARDS: PLEASE READ AND SAVE THIS INSTRUCTION AND CARE MANUAL.
When using electrical appliances, basic safety precautions should be followed, including:
- Read all instructions.
- Before using check that the voltage of wall outlet corresponds to that shown on the rating plate.
- Do not operate any appliance with a damaged cord or plug or after the appliance malfunctions, or it is dropped or damaged in any manner. Return the appliance to manufacturer or the nearest authorized service agent for examination, repair or electrical or mechanical adjustment.
- Do not touch hot surfaces.
• To protect against electric shock do not immerse cord, plugs, or housing in water or other liquid. - Unplug from outlet when not in use, before putting on or taking off parts, and before cleaning.
- Do not let cord hang over edge of table or hot surface.
• The use of accessory attachments not recommended by the appliance manufacturer may cause injuries.
• The appliance can be used by children aged from 8 years and above and persons with reduced physical, sensory or mental
capabilities or lack of experience and knowledge if they have been given supervision and understand the hazards involved. Children shall not play with the appliance. Cleaning and user maintenance shall not be made by children unless they are older than 8 and supervised.
- Keep the appliance and its cord out of reach of children less than 8 years.
- For maintenance, other than cleaning, please contact StoreBound directly at 1-800-898-6970 from 7AM-7PM PT Monday-Friday or by email at support@storebound.com.
- Do not place on or near a hot gas or electric burner, or in a heated oven
- Do not touch any moving or spinning parts of the machine when baking.
- Never switch on the appliance without properly placed Baking Pan filled with ingredients.
- Never beat the Baking Pan on the top or edge to remove the pan as this may damage the Baking Pan.
-
Metal foils or other materials must not be inserted into the bread maker as this can give rise to the risk of a fire or short circuit.
-
Never cover the bread maker with a towel or any other material, heat and steam must be able to escape freely. A fire can be caused if it is covered by, or comes into contact with combustible material.
- Do not operate the appliance for other than its intended use.
• Always use the appliance on a secure, dry level surface. - Do not use outdoors.
• The appliance is not intended to be operated by means of an external timer or separate remote-control system. -
This appliance is intended to be used in household and similar applications such as: Staff kitchen areas in shops, offices and other working environments; Farm houses; By clients in hotels, motels and other residential type environments; Bed and breakfast type environments.
• This appliance is not intended for commercial use. -
Do not operate the unit without Baking Pan placed in the chamber to avoid damaging the appliance.
- The surfaces are liable to get hot during use, do not touch hot surfaces when appliance in operation.
- Do not touch the handle of Baking Pan if it is hot, or use suitable gloves.
- Save these instructions.
IMPORTANT SAFEGUARDS: PLEASE READ AND SAVE THIS INSTRUCTION AND CARE MANUAL.
GARANTIES IMPORTANTES GARANTIES IMPORTANTES
GARANTIES IMPORTANTES: VEUILLEZ LIRE ATTENTIVEMENT CE MANUEL AVANT D'UTILISER L'APPAREIL.

natural_image
Modern kitchen air fryer with a baking bread oven, surrounded by fresh bread slices and a wooden counter (no visible text or symbols)BREAD-MAKING PROCESS
ABOUT THE BREAD-MAKING PROCESS
Your Bread Maker has 12 settings that cover every aspect of the bread-making process, from start to finish!

KNEADING
Combines ingredients into dough. If you have already prepared dough, be sure to choose a setting without kneading, like the "Bake" setting.
NOTE: The Bread Maker may shake while kneading. This is normal.
RISING
Allows yeast based breads to achieve perfect consistency. The Bread Maker will not appear to be baking or mixing, but the LCD Display will show that it is rising.
BAKING
The Bread Maker bakes the bread as it would in an oven. Time and temperature are set according to the program, as well as your chosen size and darkness.

KEEP WARM
Warms bread for up to 60 minutes after baking.
PROGRAMS
MENU BUTTON
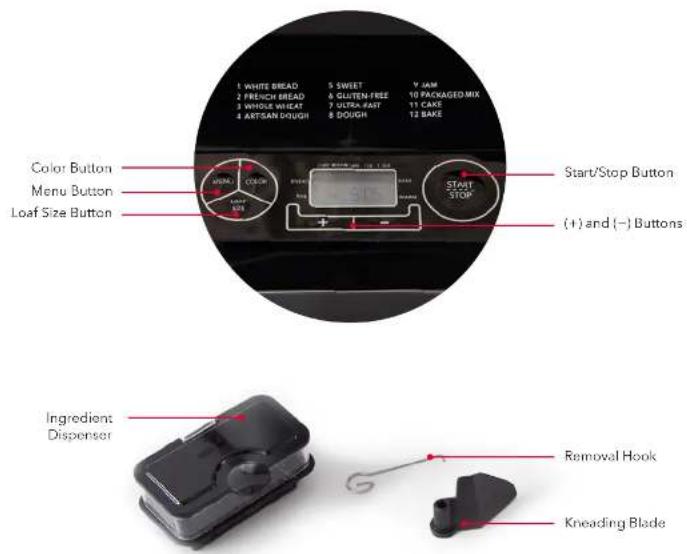
The Menu Button is used to set different programs. Each time it is pressed (accompanied by a short beep) the program will change. Press the button repeatedly to select your desired program, of those listed below.
| 1 | WHITE BREAD | Knead, rise and bake for normal bread. You may also add ingredients and toppings. |
| 2 | FRENCH BREAD | Knead, rise and bake, with a longer rise period. The bread baked in this function usually will have a crisper crust and lighter texture. |
| 3 | WHOLE WHEAT | Knead, rise and bake for whole wheat bread. With this function, it is not advised to use the delay function as this can produce poor results. |
| 4 | ULTRA-FAST | Knead, rise and bake in a shortened timespan. Usually the bread is smaller and more firm than bread baked with the normal time setting. |
| 5 | SWEET | Knead, rise and bake sweet bread. You may also add ingredients and toppings for flavor. Ideal for sweeter breads like brioche. |
| 6 | GLUTEN-FREE | Knead, rise and bake gluten free bread. You may also add ingredients and toppings for flavor. |
| 7 | ARTISAN DOUGH | Knead and rise only for artisanal dough. Best used for breads that require a longer rise time. Dough can then be baked using the Bake function. |
| 8 | DOUGH | Knead and rise for uncooked dough, without baking. Remove the dough and use for making bread rolls, pizza, steamed bread, etc. |
| 9 | JAM | Boil jams and marmalades. Fruit or vegetables must be chopped before putting them into the Baking Pan. |
| 10 | PACKAGED MIX | Knead, rise and bake for pre-packaged Bread Maker mixes. |
| 11 | CAKE | Knead, rise and bake, with soda or baking powder. |
| 12 | BAKE | Bake only, for dough that has already been prepared. You can also use this program to increase the baking time of other settings if your bread is not yet finished. |

natural_image
A modern electric bread oven setup with a baked cake, surrounded by fresh bread slices and a glass of bread (no visible text or symbols)FUNCTIONS FUNCTIONS
| COLOR | With the Color Button you can select a LIGHT, MEDIUM or DARK color for the crust. Press this button to select your desired color. |
| SIZE | Press this button to select the loaf size of 1 lb or 1.5 lb bread.Please note the total operation time may vary with the different loaf size. |
| DELAY FUNCTION | If you want to set a delay so your bread bakes later, use this button.Choose the delay time by pressing the (+) and (-) buttons.Please note that the delay includes baking time of the program. At the completion of the delay time that you choose, bread is ready to be served.To set the Delay time, first select the program and degree of browning. Then press the (-) or (-) Buttons to increase or decrease the delay time by an increment of 10 minutes. The maximum delay is 13 hours.NOTE: This function is not applicable for the programs Ultra Fast, Jam, and Bake.For time-delayed baking, do not use easily perishable ingredients such as eggs, fresh milk, fruits, vegetables, etc. as they may spoil if left for several hours. |
| KEEP WARM | Bread will be automatically kept warm by the Bread Maker's Keep Warm function for 60 minutes after baking. If you would like to take the bread out, switch the program off with the Start/Stop Button.Example:Now it is 8:30p.m, and you would like your bread to be ready next morning at 7 o'clock, i.e. in 10 hours and 30 minutes. Select your program, color, loaf size then press the (+) or (-) Buttons to add the time until 10:30 appears on the LCD Display. Then press the Start/Stop Button to activate this delay program.You can see the dot flash and the LCD Display will count down to show the remaining time. You will get fresh bread at 7:00 AM, and if you don't want to take the bread out immediately, the Keep Warm time of 1 hour will begin at 7:00 AM. |
| MEMORY | If power supply breaks while baking, the Bread Maker will automatically resume if the shortage is for less than 10 minutes. There is no need to press the Start/Stop Button.If the break time exceeds 10 minutes the memory cannot be kept and the Bread Maker must be restarted. If the dough is still in the kneading process when power shuts off, you can press the Stop/Start Button to restart the program entirely. |
| ENVIRONMENT | The machine may work well in a wide range of temperatures, but there could be a difference in loaf size between a very warm room and a very cold room. We suggest the room temperature should be between 60^ - 93^ F. |
| WARNING DISPLAY | If the display shows "HHH" accompanied by beeping sounds after the program has been started, the temperature inside is still too high and the program has to be stopped. Open the Lid and let the machine cool down for 10 to 20 minutes.If the display shows "LLL" accompanied by beeping sounds after pressing the Start/Stop Button (except for the Bake setting), it means the temperature inside is too low. Press the Start/Stop Button, open the Lid and let the Machine rest for 10 to 20 minutes to return to room temperature.If the display shows "EEO" after you have pressed the Start/Stop Button, the temperature sensor is disconnected. Please contact Customer Support. |
USING YOUR INGREDIENT DISPENSER USING YOUR INGREDIENT DISPENSER
The Ingredient Dispenser of the Bread Maker is easily removable so it can be rinsed and dried. To remove the Ingredient Dispenser, gently pull up to detach.
Clean the Ingredient Dispenser and Baking Pan of the Bread Maker thoroughly before first use. Once you are done cleaning, follow the instructions below to re-attach the Ingredient Dispenser.

natural_image
Hand holding a transparent cylindrical device with black casing, placed on a reflective surface (no visible text or symbols)When replacing the Ingredient Dispenser, ensure that the metal node on one side of the base is properly aligned with the node on the inside of the Bread Maker (photo A).
natural_image
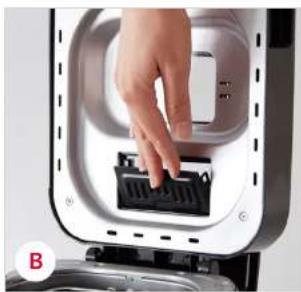
Hand inserting a black plastic device into a white appliance casing (no text or symbols visible)Lift the Lid of the Bread Maker and be sure the bottom of the Ingredient Dispenser is closed before adding your ingredients (photo B). Otherwise, add-ins will simply fall into the bread before it is ready

natural_image
Hand placing a black plastic device into a transparent container on a black appliance (no text or symbols visible)Open the Ingredient Dispenser from the top to add your ingredients (photo C).
natural_image
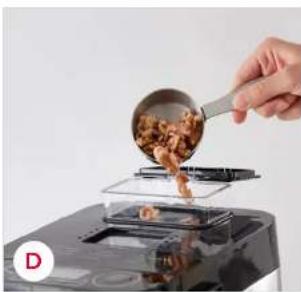
Hand pouring chopped meat into a glass stove on a stovetop (no text or symbols visible)Add ingredients and close (photo D).
USING YOUR BREAD MAKER USING YOUR BREAD MAKER
BEFORE FIRST USE
- Please check if all parts and accessories are complete and free of damage.
- Clean all parts of the Bread Maker according to the section "Cleaning and Maintenance".
- Set the Bread Maker to Bake and bake empty for about 10 minutes. After cooling it down clean once more.
- Dry all parts thoroughly before placing the Baking Pan in the Bread Maker.

natural_image
Person using a microwave oven on a kitchen appliance (no visible text or symbols)Place the Baking Pan in the Bread Maker (photo A).
natural_image
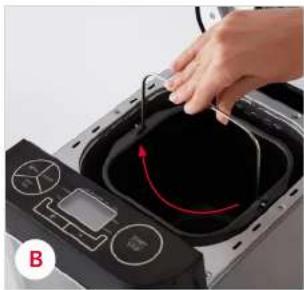
Close-up of a hand pressing down on a black appliance with a red curved line inside, no visible text or symbolsTurn Removal Handle clockwise until it clicks into place (photo B).

natural_image
Interior view of a square kitchen appliance with a red arrow pointing to a small component (no text or symbols visible)Insert the Kneading Blade onto the drive shaft. (photo C).
It is recommended to fill holes with butter or cooking spray prior to placing the Kneading Blade, this avoids the dough sticking beneath the Blade and makes it easier to remove.

natural_image
Close-up of a hand pouring liquid into a stainless steel microwave oven (no text or symbols visible)Place ingredients into the Baking Pan.
Water or other liquids should be added first,
then dry ingredients (photo D). Always add
yeast or baking powder as the last ingredient
(see photo E).
NOTE: The maximum quantity of flour and yeast is 4 cups/560g flour and 2 tsp yeast.
USING YOUR BREAD MAKER USING YOUR BREAD MAKER

natural_image
Close-up of a baked bread loaf inside a metal baking machine (no visible text or symbols)With your finger make a small indentation on one side of the flour. Add yeast to the indentation. Make sure it does not come into contact with the liquid ingredients or salt (photo E).

natural_image
Hand placing a plastic bag into a stainless steel kitchen appliance (no visible text or symbols)Close the Lid gently and plug the Power Cord into a wall outlet (photo F).
natural_image
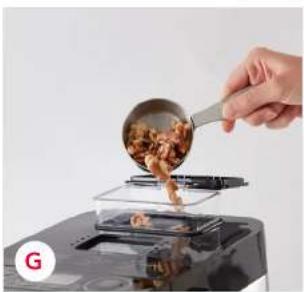
Hand pouring chopped meat into a pan on a stovetop (no text or symbols visible)If your recipe requires fruit and nut add-ins, you can add them to the Ingredient Dispenser at this time by unlatching the cover of the Ingredient Dispenser (photo G).
See full instructions for cleaning and using the Ingredient Dispenser on pages 16-17.

Press the Menu Button repeatedly until your desired program is selected (photo H).
USING YOUR BREAD MAKER USING YOUR BREAD MAKER
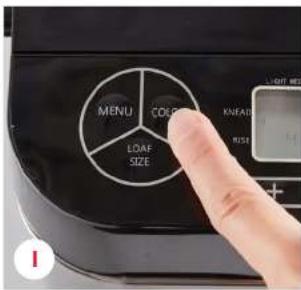
Press the Color Button to select the desired crust color (photo 1).

Press the Loaf Size Button to select the desired size (1 lb or 1.5 lb) (photo J).
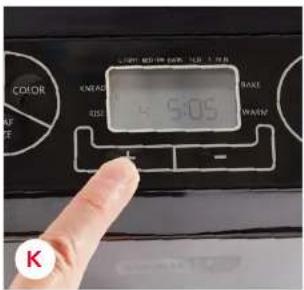
Set the delay time by pressing the (+) or (−) Button. This step may be skipped if you want the Broad Maker to start immediately (photo K).
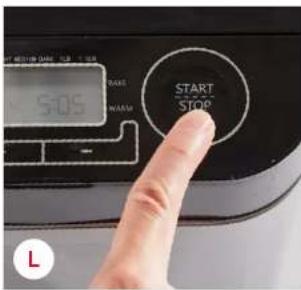
Press the Start/Stop Button to begin kneading and baking bread (photo L).
USING YOUR BREAD MAKER USING YOUR BREAD MAKER

For the programs White Bread, French Bread, Whole Wheat, Sweet, Gluten-Free, Ultra-Fast, and Packaged Mix, a beep will be heard during operation, after kneading. This is to let you know that fruit and nuts added to the Ingredient Dispenser have been added (photo M)
It is possible that steam will escape through the vents in the Lid during baking. This is normal.

Once baking is complete, a beep will be heard.
You can press Start/Stop Button for approx. 2 seconds to stop the process (photo N)

natural_image
Person using a bread maker machine to prepare bread, no visible text or symbolsRemove the bread using the Removal Tool to grab the handle of the Baking Pan (photo O). Be careful handling the Baking Pan after cooking, as it will be hot.
natural_image
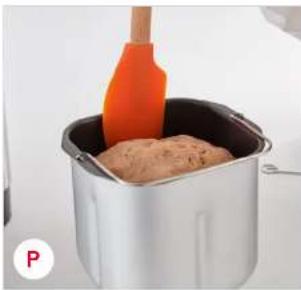
Close-up of a baking machine with a hand holding an orange spatula, containing a brown mixture (no text or symbols visible)Use a silicone or wood spatula to gently loosen the sides of the bread from the Baking Pan (photo P).
CAUTION: The Baking Pan and broad may be very hot! Always handle with care and use oven mitts, or a potholder.
USING YOUR BREAD MAKER USING YOUR BREAD MAKER
natural_image
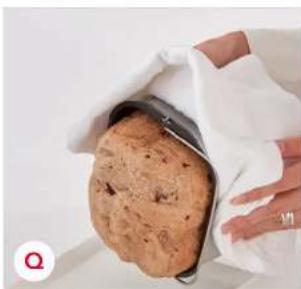
Close-up of hands holding a baking pan over a baked cake, no visible text or symbolsTurn the Baking Pan upside down onto a clean surface or cooling rack and gently shake until bread falls out (photo Q). Cool for about 20 minutes before slicing.
IMPORTANT: The Kneading Blade may stick in the bottom of the bread loaf when removing. Make sure to remove the Kneading Blade from the loaf of bread before slicing.

If you don't press the Start/Stop Button at the end of baking, the Keep Warm function will turn on and the bread will be kept warm automatically for 1 hour (photo R).
If you would like to take the bread out, switch your chosen program off with the Start/Stop Button.

natural_image
Modern kitchen toaster with digital display and bread slices on a white surface (no visible text or symbols)When not in use or done baking, unplug the Bread Maker's Power Cord.
CLEANING & MAINTENANCE
TROUBLESHOOTING
Disconnect the machine from the power and let it cool down prior to cleaning.
BAKING PAN
| Remove the Baking Pan by turning it counter-clockwise, then pulling the handle to remove it. Wipe inside and outside of Baking Pan with a damp cloth, do not use any sharp or abrasive agents, as these will damage the Baking Pan's non-stick coating. The pan must be dried completely before re-installing. Baking Pan is also dishwasher safe. |
KNEADING BLADE
| If the Kneading Blade is difficult to remove from the axle, fill the Baking Pan with warm water and allow it to soak for approx. 30 minutes. The Kneading Blade can then be more easily removed.To clean the Kneading Blade, wipe it down carefully with a damp cotton cloth. Both the Baking Pan and the Kneading Blade are dishwasher safe. |
Gently wipe the outer surface of the Bread Maker with a damp cloth. Do not use any abrasive cleaners as this will damage the surface. Never immerse the Bread Maker in water for cleaning. Before storing the Bread Maker, ensure that it is completely cooled and dry. Put the Knoading Blade in the Baking Pan for storage and close the Lid.
LID AND WINDOW Clean the Lid inside and outside with a slightly damp cloth.
HOUSING
| Gently wipe the outer surface of housing with a wet cloth. Do not use any abrasive cleaner to clean as this would degrade the high polish of the surface. Never immerse the housing into water for cleaning. |

Before the Bread Maker is packed away for storage, ensure that it has completely cooled down, is clean and dry, and put the Kneading Blade in the drawer, and close the Lid.
PROBLEM CAUSE SOLUTION
| Smoke comes out of the baking chamber or the vents. | The ingredients have stuck to the baking chamber or on the outside of the Baking Pan. | Unplug the Bread Maker and clean the baking compartment or the outside of the Baking Pan. |
| The bread goes down in the middle after baking and is moist on the bottom. | The bread was left in the pan for too long after baking. | Take bread out of the Baking Pan before the warming function has run the full time. |
| It is difficult to remove bread from the Baking Pan. | The bottom of the loaf is stuck to the Kneading Blade. | Clean the Kneading Blade and shaft after baking. If necessary, remove the Baking Pan from the Bread Maker and fill the Baking Pan with warm water and lot sit for 30 minutes. |
| The ingredients are not mixed or the bread is not baked correctly. | Incorrect program setting. | Check selected menu and other settings. |
| The Start/Stop Button was touched while baking. | Do not use the ingredients and start over again. | |
| The rotation of the Kneading Blade was blocked. | Check that the Kneading Blade is not blocked by removing it. Remove the Baking Pan and make sure that the drivers turn. If not, contact Customer Service. | |
| The appliance does not start. The Display shows HHH. | The Bread Maker was used too recently. | Unplug the Bread Maker, remove the Baking Pan, and let both cool. Then try again. |

natural_image
Modern kitchen bread maker with black and silver casing on a white counter, surrounded by food ingredients like tomatoes and pizza (no visible text or symbols)EVERYDAY 1.5LB BREAD MAKER
RECIPE GUIDE

Follow us @unprocessyourfood for recipes, videos, & daily inspiration

WHITE BREAD
Ingredients:
1 lb 1.5 lb
| water, room temperature (70°F) | 14 cup | 1 cup + 2 tbsp |
| unsalted butter, room temperature | 112 tbsp | 2 tbsp + 1 tsp |
| sugar | 112 tsp | 2 tsp |
| kosher salt | 14 tsp | 114 tsp |
| bread flour or unbleached all-purpose flour | 2 cups | 3 cups |
| nonfat dry milk powder | 2 tbsp | 3 tbsp |
| active dry yeast | 14 tsp | 1 tsp |
Directions:
- Place all the ingredients, in the order listed, into the Baking Pan fitted with the Kneading Blade. Click the Baking Pan into the Everyday 1.5lb Bread Maker.
- Plug in the Bread Maker. Press the MENU button to select White Bread, COLOR: Medium, LOAF SIZE: 1 lb or 1.5 lb. Press START/STOP to begin the bread-making process. Tip: For making sandwiches, try the LIGHT setting that gives a softer crust.
- At 8-10 minutes into the knead cycle, check the dough. It should feel tacky but not cling to your fingers. If it feels dry or hard, add water, 1 tsp at a time; if it's very sticky, add flour 1 tbsp at a time.

natural_image
Close-up of a textured, light-colored surface with no visible text or symbols- When 10 beeps sound the end of the second rise, check the dough. If doubled in size, press a finger into the dough near a corner. If it springs back, it needs more rising. Check again in 15 to 20 minutes. If the indentation holds and more than 15 minutes remain until baking starts, gently pull the dough away from the sides of the Bread Pan to dofflate it by a third.
- When the Bread Maker cycle is complete, remove the Bread Pan from the Bread Maker. Transfer the bread to a wire rack to cool completely before slicing. Unplug Bread Maker.
To Prepare Bread Using the Ultra-Fast Program
- Prepare the ingredients for the 1 lb or 1.5 lb loaf, replacing the yeast with 34 tsp fast-acting yeast.
- Plug in the Bread Maker. Press the MENU button to select Ultra-Fast program. Press START/STOP to begin the bread-making process.

Packaged Mixes
Some bread machine mixes use the Packaged Mix setting. Use th 1.5 lb setting for mixes calling for 2 lb setting.

FRENCH BREAD
Ingredients:
1 lb 1.5 lb
| water, room temperature (70°F) | 12 cup | 1 cup |
| olive oil | 2 tsp | 1 tbsp |
| sugar | 1 tbsp sugar | 112 tbsp |
| kosher salt | 1/2 + 3/4 tsp | 114 tsp |
| bread flour orunbleached all-purpose flour | 2 cups | 3 cups |
| active dry yeast | 1 tsp | 1 tsp |
Directions:
- Place all the ingredients, in the order listed, into the bread pan fitted with the Kneading Blade. Click the Bread Pan in place in the Bread Maker.
- Plug in the Bread Maker. Press the MENU button to select French Bread, COLOR: Medium. LOAF SIZE: 1 lb. or 1.5 lb. Press START/STOP to begin the bread-making process.
- At 8-10 minutes into the knead cycle, check the dough. It should feel tacky but not cling to your fingers. If it feels dry or hard, add water, 1 tsp at a time; if very sticky, add flour 1 tbsp at a time.
- When 10 boops sound the end of the second rise check the dough. If doubled in size, press a finger into the dough near a corner. If it springs back, it needs more rising. Check again in 15-20 minutes. If the indentation holds and more than 15 minutes remain until baking starts, gently pull the dough away from the sides of the Pan to deflate it by a third.
- When the cycle is complete, remove the Bread Pan from the machine. Transfer the bread to a wire rack to cool completely before slicing. Unplug the Bread Maker. TIP: The milder taste of olive oil is recommended for this bread.

WHOLE WHEAT BREAD
Ingredients:
1 lb 1.5 lb
| water, room temperature (70°F) | 34 cup | 1 cup + 2 tbsp |
| unsalted butter, at room temperature | 1 tbsp | 1 tbsp |
| sugar | 2 tsp sugar | 1 tbsp |
| kosher salt | 34 tsp | 1 tsp |
| whole wheat flour | 1 cup | 112 cups |
| bread flour or unbleached all-purpose flour | 1 cup | 112 cups |
| nonfat dry milk powder | 3 tbsp | 14 cup |
| active dry yeast | 1 tsp | 1 tsp |
Directions:
- Place all the ingredients, in the order listed, into the bread pan fitted with the Kneading Blade. Click the Bread Pan in place in the Bread Maker.
- Plug in the Bread Maker. Press the MENU button to select Whole Wheat, COLOR: Medium, LOAF SIZE: 1 lb. or 1.5 lb. Press START/STOP to begin the bread making process.
- At 8 to 10 minutes into the knead cycle, check the dough. It should feel tacky but not cling to your fingers. If it feels dry or hard, add water, 1 tsp at a time; if very sticky, add flour 1 Tbsp at a time.
- When 10 beeps sound the end of the second rise check the dough. If doubled in size, press a finger into the dough near a corner. If it springs back, it needs more rising. Check again in 15-20 minutes. If the indentation holds and more than 15 minutes remain until baking starts, gently pull the dough away from the sides of the Pan to deflate it by a third.
- When the Bread Maker cycle is complete, remove the Bread Pan from the machine. Transfer the bread to a wire rack to cool completely before slicing. Unplug Bread Maker.
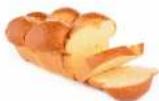
BRIOCHE LOAF
Ingredients:
1 lb 1.5 lb
| whole milk, room temperature (70°F) | 14 cup + 2 tbsp | 12 cup + 1 tbsp |
| unsalted butter, softened, divided | 5 tbsp | 6 12 tbsp |
| large eggs, room temperature, lightly beaten | 2 | 3 |
| nonfat dry milk powder | 1 tbsp | 1 12 tbsp |
| sugar | 4 tsp | 1 tbsp |
| kosher salt | 1 tsp | 14 tsp |
| unbleached all purpose flour | 2 cups + 1 tbsp | 3 cups |
| active dry yeast | 1 tsp | 1 14 tsp |
Directions
- Place all the ingredients, in the order listed, into the Bread Pan fitted with the Kneading Blade. Click the Bread Pan in place in the Bread Maker.
- Plug in the Bread Maker. Press the MENU button to select Sweet, COLOR: Medium, LOAF SIZE: 1 lb. or 1.5 lb. Press START/STOP to begin the bread-making process.
- At 8-10 minutes into the knead cycle, check the dough. It should feel tacky but not cling to your fingers. If it feels dry or hard, add water, 1 tsp at a time; if very sticky, add flour 1 tbsp at a time.
- When 10 beeps sound the end of the second rise check the dough. If doubled in size, press a finger into the dough near a corner, if it springs back, it needs more rising. Check again in 15-20 minutes. If the indentation holds and more than 15 minutes remain until baking starts, gently pull the dough away from the sides of the pan to deflate it by a third.
- When the Bread Maker cycle is complete, remove the Bread Pan from the machine. Transfer the bread to a wire rack to cool completely before slicing. Unplug Bread Maker.


GLUTEN-FREE SANDWICH BREAD
Ingredients: 1.5 lb
| warm whole milk (90°F) | 1 cup |
| soft unsalted butter | 4 tbsp |
| large eggs, room temperature, beaten | 4 |
| sugar | 3 tbsp |
| kosher salt | 114 tsp |
| gluten-free all purpose flour | 3 cups + 3 tbsp |
| xanthan gum | 114 tsp |
| instant yeast | 2 tsp |
Directions
- Place the milk, butter, eggs, sugar, and salt into the Bread Pan fitted with the Kneading Blade. Add the gluten-free flour. Sprinkle the xanthan gum over the flour. Make little indentation and place the yeast in it. Secure the Bread Pan in place in the Bread Maker.
- Plug in the Bread Maker. Press the MENU button to select Gluten-Free, COLOR: Medium, LOAF SIZE: 1.5 lb. Press START/STOP to begin the bread-making process.
- At 5 and 10 minutes after the Kneading Blade starts rotating, check and push any ingredients from the corners into towards the paddle so they get mixed in.
- When the cycle is complete, remove the Bread Pan from the Bread Maker and transfer the bread to a wire rack to cool completely before slicing. Unplug Bread Maker.
NOTE: For gluten-free flour, pick one that works with yeast. If it contains xanthan gum, do not add more. Those made with dried bean flour, such as chick pea or lava, are harder to digest, may taste "beany" and makes heavier results.

natural_image
Close-up of sliced white bread slices on a patterned plate (no text or symbols visible)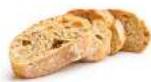
COUNTY FRENCH BREAD WITH OLIVES & ROSEMARY
Ingredients:
1 lb 1.5 lb
| water, room temperature (70°F) | 14 cup | 1 cup + 2 tbsp |
| extra virgin olive oil | 112 tsp | 214 tsp |
| salt | 14 tsp | 114 tsp |
| honey | 12 tsp | 1 tsp |
| finely chopped fresh rosemary | 1 tsp | 112 tsp |
| bread flour | 114 cups | 214 cups + 2 tbsp |
| whole wheat flour | 12 cup | 14 cup |
| rye flour | 3 tbsp | 14 cup |
| active dry yeast | 1 tsp | 114 tsp |
| pitted Kalamata olives, halved and blotted very well | 12 cup | 14 cup |
Directions:
- Place all the ingredients, except the olives, in the order listed, into the Bread Pan fitted with the Kneading Blade. Click the Bread Pan in place in the Bread Maker.
- Plug in the Bread Maker. Add halved olives to the Ingredient Dispenser. Press the MENU button to select French Bread, COLOR: Medium, LOAF SIZE: 1 lb. or 1.5 lb. Press START/STOP to begin the bread-making process.
-
At 8-10 minutes into the knead cycle, check the dough. It should feel tacky but not cling to your fingers. If it feels dry or hard, add water, 1 tsp at a time; if very sticky, add flour 1 tbsp at a time.
-
When 10 beeps sound the end of the second rise check the dough. If doubled in size, press a finger into the dough near a corner. If it springs back, it needs more rising. Check again in 15-20 minutes. If the indentation holds and more than 15 minutes remain until baking starts, gently pull the dough away from the sides of the pan to deflate it by a third.
- When the Bread Maker cycle is complete, remove the Bread Pan from the machine. Transfer the bread to a wire rack to cool completely before slicing. Unplug Bread Maker.

To blot the olives thoroughly, place in one layer between double sheets of paper towel and press very firmly. Repeat 3-4 times.
Serve accompanied by a dish of extra virgin olive oil for dipping.

natural_image
Close-up of a wooden scoop filled with dark brown berries, garnished with fresh green leaves and rosemary (no text or symbols visible)
FOCACCIA
Ingredients: Makes 4 servings
1 cup + 2 tbsp water,
room temperature (70°F)
1/4 cup extra virgin olive oil, divided
2¼ tsp Italian herb mix
1½ tsp kosher salt
3 cups + 3 tbsp bread flour or
unbleached all-purpose flour
1¼ tsp active dry yeast
- Put all ingredients, in the order listed, into Bread Pan fitted with Kneading Blade. Secure the Bread Pan into the Bread Maker.
- Plug in the Bread Maker. Press the MENU button to select Dough. Press START/STOP to begin the bread-making process.
- Set a rack in the center of the oven. Preheat the oven to 450°F. Brush an 8x12x ½" baking dish or 15x10" jellyroll pan with 1 tbsp of the oil (see tip on page 35).
- When the cycle is complete, place the dough in the prepared pan. With your fingers, push and press dough to fill the pan. Cover the pan loosely with plastic wrap. Set the pan in a warm place until the dough doubles in volume.
- With a fingertip, poke dimples at 1" intervals all over the dough. Drizzle the remaining oil over the top. Sprinkle the coarse salt over the top.
- Bake the Focaccia for 20 to 25 minutes, until it is golden brown and crusty. Transfer to a wire rack to cool in the Bread Pan. Cut the Focaccia into squares and serve.


PIZZA DOUGH
Ingredients:
1 cup water, room temperature (70°F)
1½ tbsp extra virgin olive oil
1½ tsp kosher salt
3 cups + 3 tbsp unbleached all-purpose flour
1 tsp active dry yeast
Directions: Makes 1.5 lb dough, four 10-inch pizzas
- Put all ingredients, in the order listed, into Bread Pan fitted with Kneading Blade. Secure the Bread Pan into the Bread Maker.
- Plug in the Bread Maker. Press the MENU button to select Dough. Press START/STOP to begin the bread-making process.
- When the cycle is complete, remove the dough and follow your favorite pizza recipe. Tightly wrap the dough in plastic wrap keeps in the refrigerator for up to 36 hours.

Refrigerating pizza dough overnight, develops fuller flavor.

PIZZA MARGHERITA
Ingredients: Makes 4 servings
1 pizza dough recipe (See page 44)
2 cups pizza sauce, prepared or homemade tomato sauce
4 oz. fresh mozzarella cheese, cut into 12 slices
8-16 fresh basil leaves
Directions:
- Set a rack in the lower third of the oven. If using a pizza stone, set it on the rack. Preheat the oven to 450°F.
- Punch down the prepared pizza dough. Divide it into 4 equal pieces. Place dough on a sheet pan, cover loosely with plastic wrap, and set in a warm place until the dough doubles in size, about 30 minutes.
- Sprinkle cornmeal on a work surface. Gently pat, pull and stretch a piece of dough into a 10-inch circle. Sprinkle a rimless cookie sheet with cornmeal. Carefully transfer the circle onto the cookie sheet. Top the dough with 12 cup of the sauce, spreading it within 12 -inch of the edge using the back of a spoon. Add 3 slices of cheese.
- Bake until the dough is crisp and browned, about 10 minutes or use the baking sheet like a pizza peel, slide the pizza onto the hot pizza stone and bake until crisp, about 8 minutes.
- To bake multiple pizzas at the same time, place oven racks in the upper and lower third of the oven. Shape the dough into 4 circles, transferring two each to two cornmeal-sprinkled sheet pans. Top with sauce and cheese, then positioning pans on opposite sides of the oven, bake as above.
- Top baked pizzas with fresh basil leaves. Serve and enjoy
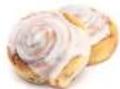
ICED CINNAMON SWIRL ROLLS
Ingredients:
12 cup reduced fat milk, room temperature (70°F)
2 large eggs, room temperature, beaten 4 tbsp unsalted butter, soft but still holding shape
½ cup sugar
14 tsp kosher salt
1 tsp pure vanilla extract
3 cups bread flour or 3 cups + 3 tbsp unbleached all-purpose flour
½ cup cornstarch
1¼ tsp active dry yeast
3 tbsp unsalted butter, melted
½ cup lightly packed brown sugar
3 tbsp granulated sugar
2 tsp ground cinnamon
icing.
1 cup confectioners' sugar
1½ tbsp butter, very soft
12 tsp pure vanilla extract
14 tsp lemon juice
4 tsp reduced fat milk
Directions:
- Put all the dough ingredients, in the order listed, into Bread Pan fitted with Kneading Blade. Click the Bread Pan into the Bread Maker.
- Plug in the Bread Maker. Press the MENU button to select Dough. Press START/STOP to begin the bread-making process.
-
Meanwhile, in a small bowl, combine the brown sugar, granulated sugar and cinnamon, and set aside.
-
When the cycle is complete, transfer the dough to a lightly floured work surface and punch it down. Divide the dough into two equal pieces. Let the dough sit, covered loosely with plastic wrap, for 20 minutes.
5 Preheat the oven to 350°F. Brush a 13x9" baking dish with 1 tablespoon of the melted butter. - Roll or pat and pull each piece of dough into a 13" wide rectangle 1/2" thick. Brush generously with melted butter, leaving a 1" border across the long edge farthest from you. Sprinkle the cinnamon sugar filling on evenly, leaving the border at the top uncovered. Starting at the edge nearest you, roll the dough up, pulling towards you as you work to make a tight roll. Pinch the dough along the long slide to seal the roll. With a serrated knife, cut each roll into 9 pieces.
- Stand the pieces in the prepared pan, cut side down, evenly spaced. Cover loosely with plastic wrap and set the pan in a warm place until the rolls double in size, about 30 minutes.
- Bake for 25 to 30 minutes, until the tops of the rolls are golden brown. Set the pan on a wire rack for 30 minutes.
- While the rolls cool, for the icing, in a bowl use a wooden spoon to combine the confectioners' sugar, butter, vanilla and lemon juice. Add the milk, a teaspoon at a time, until the mixture is smooth.
- With a fork, drizzle the icing over the rolls. Leave the rolls in the pan until the icing sets, 1 hour. Serve, or cover with plastic wrap and leave on the counter. These rolls keep well for 2 days, at room temperature.

To ice more heavily, remove cooled rolls from the baking pan. One at a time, dip the tops into the bowl of icing.
Bread flour makes light, airy rolls, and all purpose flour makes them more dense and chewy.

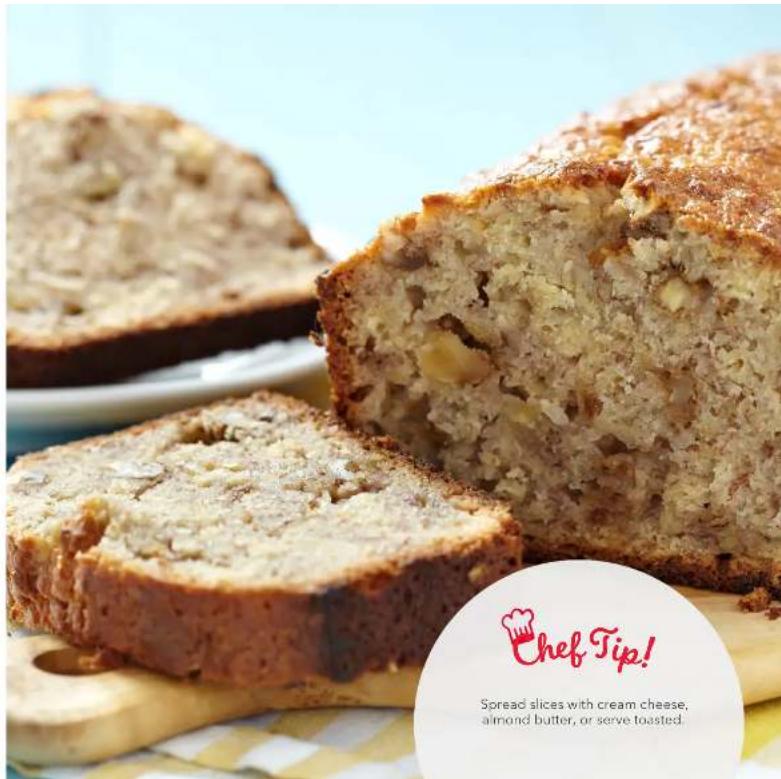
BANANA WALNUT BREAD
Ingredients: Makes 2 lb loaf
½ cup buttermilk, room temperature
8 tbsp (1 stick), unsalted butter,
room temperature
2 large eggs, room temperature, beaten
1 tsp pure vanilla extract
3 medium sized ripe bananas OR
1 cup mashed ripe banana
14 tsp kosher salt
1 cup sugar
2 cups unbleached all-purpose flour
1 tsp baking soda
34 tsp baking powder
12 cup walnuts, coarsely chopped
Directions:
- Place all the ingredients, in the order listed, into the Bread Pan fitted with the Kneading Blade. Secure the Bread Pan in place in the Bread Maker.
- Plug in the Bread Maker. Press the MENU button to select Cake, COLOR: Medium, LOAF SIZE: 1.5 lb. Press START/STOP to begin the bread making process.
- While the batter is mixing, check and, if necessary, scrape the sides of the Bread Pan with a flexible spatula to help the ingredients blend in fully.
- When the cycle is complete, remove Banana Walnut Bread from the Bread Pan and place it on a wire rack. Cool completely before slicing.

STRAWBERRY JAM
Ingredients: Makes 4 servings
4 cups, about 1 lb, ripe fresh strawberries, hulled and halved or quartered
1 cup sugar
4 tbsp powdered fruit pectin
1 tbsp fresh lemon juice
Directions: Makes 3½ cups
- In a food processor, pulse the strawberries until coarsely chopped.
- Put all the ingredients, in the order listed, into the Bread Pan fitted with Kneading Blade. Secure the Pan into the Bread Maker. Plug in the Bread Maker.
- Press the MENU button to select Jam. Press START/STOP to begin the jam-making process.
- When the cycle is complete, open the Lid and cool the jam in the pan for 30 minutes.
- Spoon the preserves into clean, dry jars. Cool the preserves completely on the counter, then cover. Store in the refrigerator for up to 3 weeks.

Cooling part way in the baking pan helps jam and preserves to set.

GINGER PEAR PRESERVES
Ingredients:
1 tbsp fresh lemon juice
1½ pounds ripe Bartlett pears,
about 4 medium-sized pears
1 tsp grated fresh ginger
1 cup sugar
14 cup powdered fruit pectin
2 tbsp finely chopped candied ginger
16 tsp salt
Directions: Makes 3 cups
- Place the lemon juice in a medium bowl. Peel, core and chop the pears into pieces 12 or smaller, adding them to the bowl and tossing them with the lemon juice as you work to keep them from turning brown.
- Put all the ingredients, in the order listed, into the Bread Pan fitted with Kneading Blade. Secure the Pan into the Bread Maker. Plug in the machine.
- Press the MENU button to select Jam. Press START/STOP to begin the jam-making process.
- When the cycle is complete, open the lid and cool the Ginger Pear Preserves in the pan for 30 minutes
- Spoon the preserves into clean, dry jars. Cool the preserves completely, then cover. Store in the refrigerator for up to 3 weeks.
NOTES
NOTES
CUSTOMER SUPPORT WARRANTY

Dash values quality and workmanship and stands behind this product with our Feel Good Guarantee™. To learn more about our commitment to quality, visit bydash.com/feelgood.
Our US-based customer support team is at your service Monday - Friday during the times below.
Reach us at 1 (800) 898-6970 or support@bydash.com

Hey Hawaii! You can reach our customer service team from 5AM to 5PM. And also, Alaska, feel free to reach out from 6AM - 6PM.
STOREBOUND, LLC - 1 YEAR LIMITED WARRANTY
Your StoreBound product is warranted to be free from defects in material and workmanship for a period of one (1) year from the date of the original purchase when utilized for normal and intended household use. Should any defect covered by the terms of the limited warranty be discovered within one (1) year, StoreBound, LLC will repair or replace the defective part. To process a warranty claim, contact Customer Support at 1(800) 898-6970 for further assistance and instruction. A Customer Support agent will assist you by troubleshooting minor problems. If troubleshooting fails to fix the problem, a return authorization will be issued. Proof of purchase indicating the date and place of purchase is required and should accompany the return. You must also include your full name, shipping address, and telephone number. We are unable to ship returns to a PO box. StoreBound will not be responsible for delays or unprocessed claims resulting from a purchaser's failure to provide any or all of the necessary information. Freight costs must be prepared by the purchaser.
Send all inquiries to support@storebound.com.
There are no express warranties except as listed above.
REPAIR OR REPLACEMENT AS PROVIDED UNDER THIS WARRANTY IS THE EXCLUSIVE REMEDY OF THE CUSTOMER. STOREBOUND SHALL NOT BE LIABLE FOR ANY INCIDENTAL OR CONSEQUENTIAL DAMAGES OR FOR BREACH OF ANY EXPRESS OR IMPLIED WARRANTY ON THIS PRODUCT EXCEPT TO THE EXTENT REQUIRED BY APPLICABLE LAW. ANY IMPLIED WARRANTY OF MERCHANTABILITY OR FITNESS FOR A PARTICULAR PURPOSE ON THIS PRODUCT IS LIMITED IN DURATION TO THE DURATION OF THIS WARRANTY. Some states do not allow the exclusion or limitation of incidental or consequential damages, or limitations on how long an implied warranty lasts. Therefore, the above exclusions or limitations may not apply to you. This warranty gives you specific legal rights and you may also have other rights, which vary from state to state.
Refurbished items or items not purchased through an authorized retailer are not eligible for warranty claims.
REPAIRS
DANGER! Risk of electric shock! The Dash Everyday 1.5lb Bread Maker is an electrical appliance.
Do not attempt to repair the appliance yourself under any circumstances.
Contact Customer Support regarding repairs to the appliance.
TECHNICAL SPECIFICATIONS
Model: DBM150
Voltage: 120V - 60Hz
Power Rating: 450W
Stock#: DBM150 20200824 V2

This product has passed food safety testing in accordance with FDA guidelines.


- DBM150
- EVERYDAY 1.5LB
- BREAD MAKER
- EVERYDAY 1.5LB BREAD MAKER
- IMPORTANT SAFEGUARDS IMPORTANT SAFEGUARDS
- IMPORTANT SAFEGUARDS: PLEASE READ AND SAVE THIS INSTRUCTION AND CARE MANUAL.
- GARANTIES IMPORTANTES GARANTIES IMPORTANTES
- GARANTIES IMPORTANTES: VEUILLEZ LIRE ATTENTIVEMENT CE MANUEL AVANT D'UTILISER L'APPAREIL.
- BREAD-MAKING PROCESS
- ABOUT THE BREAD-MAKING PROCESS
- KNEADING
- RISING
- BAKING
- KEEP WARM
- PROGRAMS
- MENU BUTTON
- USING YOUR INGREDIENT DISPENSER USING YOUR INGREDIENT DISPENSER
- USING YOUR BREAD MAKER USING YOUR BREAD MAKER
- BEFORE FIRST USE
- CLEANING & MAINTENANCE
- TROUBLESHOOTING
- RECIPE GUIDE
- WHITE BREAD
- Directions:
- To Prepare Bread Using the Ultra-Fast Program
- Packaged Mixes
- FRENCH BREAD
- WHOLE WHEAT BREAD
- BRIOCHE LOAF
- Directions
- GLUTEN-FREE SANDWICH BREAD
- COUNTY FRENCH BREAD WITH OLIVES & ROSEMARY
- FOCACCIA
- Ingredients: Makes 4 servings
- PIZZA DOUGH
- Ingredients:
- Directions: Makes 1.5 lb dough, four 10-inch pizzas
- PIZZA MARGHERITA
- ICED CINNAMON SWIRL ROLLS
- BANANA WALNUT BREAD
- Ingredients: Makes 2 lb loaf
- STRAWBERRY JAM
- Directions: Makes 3½ cups
- GINGER PEAR PRESERVES
- Directions: Makes 3 cups
- NOTES
- CUSTOMER SUPPORT WARRANTY
- STOREBOUND, LLC - 1 YEAR LIMITED WARRANTY
- REPAIRS
- TECHNICAL SPECIFICATIONS
Brand : Dash
Model : Everyday 1.5LB DBM150GBAQ01
Category : Bread maker