
Sure Tamp Steam - Coffee maker Bunn - Free user manual and instructions
Find the device manual for free Sure Tamp Steam Bunn in PDF.


| Product Type | Commercial Coffee Maker with Built-in Tamper and Steam Wand |
| Brew Capacity | Dual 1.9 liter brew chambers (3.8 liters total) |
| Dimensions (H x W x D) | 30 x 17 x 15 inches (76 x 43 x 38 cm) |
| Weight | 47 lbs (21.3 kg) |
| Power Supply | 120V, 60Hz, 15A |
| Power Consumption | 1800W |
| Water Connection | Hard plumbed or pour-over (depending on model) |
| Brew Temperature | 200°F (93°C) optimal range |
| Steam Wand | Commercial-grade stainless steel, adjustable steam pressure |
| Tamper Mechanism | Integrated automatic tamper with adjustable pressure |
| Grinder | Not included (requires separate grinder) |
| Filter Type | Paper or permanent mesh (depending on model) |
| Control Interface | Push-button with digital display for shot timing |
| Cleaning | Daily cleaning of brew basket and steam wand; weekly descaling recommended |
| Milk Frothing | Steam wand allows manual frothing |
| Safety Features | Automatic shut-off, safety valve, overheat protection |
| Certifications | UL, NSF, ETL listed |
| Warranty | 1 year parts and labor |
| Repairability | Modular design; spare parts available via authorized service centers |
Frequently Asked Questions - Sure Tamp Steam Bunn
User questions about Sure Tamp Steam Bunn
0 question about this device. Answer the ones you know or ask your own.
Ask a new question about this device
Download the instructions for your Coffee maker in PDF format for free! Find your manual Sure Tamp Steam - Bunn and take your electronic device back in hand. On this page are published all the documents necessary for the use of your device. Sure Tamp Steam by Bunn.
USER MANUAL Sure Tamp Steam Bunn
BUNN-O-MATIC CORPORATION
To ensure you have the latest revision of the Operating Manual, Illustrated Parts Catalog, Programming Manual, or Service Manual, please visit the Bunn-O-Matic website, at www.bunn.com. This is absolutely FREE, and the quickest way to obtain the latest catalog and manual updates. For Technical Service, contact Bunn-O-Matic Corporation at 1-800-286-6070.
Bunn-O-Matic® COMMERCIAL PRODUCT WARRANTY
Bunn-O-Matic Corp. ("BUNN") warrants the BUNN Espress®, Espresso Systems as further described below for a warranty period of 1 year parts and labor.
These warranty periods run from the date of installation. BUNN warrants that the equipment manufactured by it will be commercially free of defects in material and workmanship existing at the time of manufacture and appearing within the applicable warranty period. This warranty does not apply to any equipment, component or part that was not manufactured by BUNN or that, in BUNN's judgment, has been affected by misuse, neglect, alteration, improper installation or operation, improper maintenance or repair, nonperiodic cleaning and descaling, equipment failures related to poor water quality, damage or casualty. This warranty is conditioned on the Buyer 1) giving BUNN prompt notice of any claim to be made under this warranty by telephone at (217) 529-6601 or by writing to Post Office Box 3227, Springfield, Illinois 62708-3227; 2) if requested by BUNN, shipping the defective equipment prepaid to an authorized BUNN service location; and 3) receiving prior authorization from BUNN that the defective equipment is under warranty. Additionally, the following is excluded from the warranty period:
Warranty Exclusions:
- Parts such as, but not limited to, hoppers and lids, drip trays, steam wand sheaths, and plastic parts damaged due to improper handling or cleaning agents.
- Replacement of wear items such as, but not limited to, O-rings, gaskets, silicone tubes, hoses, and valve seats.
- Repairs made necessary due to poor water quality such as dispense valves, water inlet valves, scaling in the steam or hot water boilers. (Total Hardness recommended range of 4-7 gpg constant).
- Improper voltage. (See equipment operations manual for voltage specifications).
- Failure to use BUNN approved cleaning supplies constitutes improper maintenance.
- FailuretohaverequiredpreventivemaintenanceperformedbyBUNNtechnicianorauthorizedespressoserviceprovider.
- Parts replaced under the terms of this warranty carry the remainder on the machine's parts warranty term, or 60 days, whichever is greater.
THE FOREGOING WARRANTY IS EXCLUSIVE AND IS IN LIEU OF ANY OTHER WARRANTY, WRITTEN OR ORAL, EXPRESS OR IMPLIED, INCLUDING, BUT NOT LIMITED TO, ANY IMPLIED WARRANTY OF EITHER MERCHANTABILITY OR FITNESS FOR A PARTICULAR PURPOSE. The agents, dealers or employees of BUNN are not authorized to make modifications to this warranty or to make additional warranties that are binding on BUNN. Accordingly, statements by such individuals, whether oral or written, do not constitute warranties and should not be relied upon. If BUNN determines in its sole discretion that the equipment does not conform to the warranty, BUNN, at its exclusive option while the equipment is under warranty, shall either 1) provide at no charge replacement parts and/or labor (during the applicable parts and labor warranty periods specified above) to repair the defective components, provided that this repair is done by a BUNN Authorized Service Representative; or 2) shall replace the equipment or refund the purchase price for the equipment.
THE BUYER'S REMEDY AGAINST BUNN FOR THE BREACH OF ANY OBLIGATION ARISING OUT OF THE SALE OF THIS EQUIPMENT, WHETHER DERIVED FROM WARRANTY OR OTHERWISE, SHALL BE LIMITED, AT BUNN'S SOLE OPTION AS SPECIFIED HEREIN, TO REPAIR, REPLACEMENT OR REFUND. In no event shall BUNN be liable for any other damage or loss, including, but not limited to, lost profits, lost sales, loss of use of equipment, claims of Buyer's customers, cost of capital, cost of down time, cost of substitute equipment, facilities or services, or any other special, incidental or consequential damages.
392, A Partner You Can Count On, Air Infusion, AutoPOD, AXIOM, BrewLOGIC, BrewMETER, Brew Better Not Bitter, BrewWISE, BrewWIZARD, BUNN Espress, BUNN Family Gourmet, BUNN Gourmet, BUNN Pour-O-Matic, BUNN, BUNN with the stylized red line, BUNNlink, Bunn-OMatic, Bunn-O-Matic, BUNNserve, BUNNSERVE with the stylized wrench design, Cool Froth, DBC, Dr. Brew stylized Dr. design, Dual, Easy Pour, EasyClear, EasyGard, FlavorGard, Gourmet Ice, Gourmet Juice, High Intensity, iMIX, Infusion Series, Intellisteam, My Café, Phase Brew, PowerLogic, Quality Beverage Equipment Worldwide, Respect Earth, Respect Earth with the stylized leaf and coffee cherry design, Safety-Fresh, savemycoffee.com, Scale-Pro, Silver Series, Single, Smart Funnel, Smart Hopper, SmartWAVE, Soft Heat, SplashGard, The Mark of Quality in Beverage Equipment Worldwide, ThermoFresh, Titan, trifecta, TRIFECTA (sylized logo), Velocity Brew, Air Brew, Beverage Bar Creator, Beverage Profit Calculator, Brew better, not bitter., Build-A-Drink, BUNNSource, Coffee At Its Best, Cyclonic Heating System, Daypart, Digital Brewer Control, Element, Milk Texturing Fusion, Nothing Brews Like a BUNN, Picture Prompted Cleaning, Pouring Profits, Signature Series, Sure Tamp, Tea At Its Best, The Horizontal Red Line, Ultra are either trademarks or registered trademarks of Bunn-O-Matic Corporation. The commercial trifecta® brewer housing configuration is a trademark of Bunn-O-Matic Corporation.
CONTENTS
North American requirements .... 4
Site requirements....5
Installation -Sure Tamp....7
Installation -Refrigerator 8
Operating controls....9
Operation-Build-A-Drink....10
Operation-Self serve....11
Rinsing/cleaning....12
Menu options....13
Troubleshooting....16
USER NOTICES
Carefully read and follow all notices in this manual and on the equipment. All labels on the equipment should be kept in good condition. Replace any unreadable or damaged labels.
50052.0000
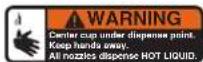
47075.0000
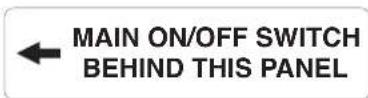
47074.0000
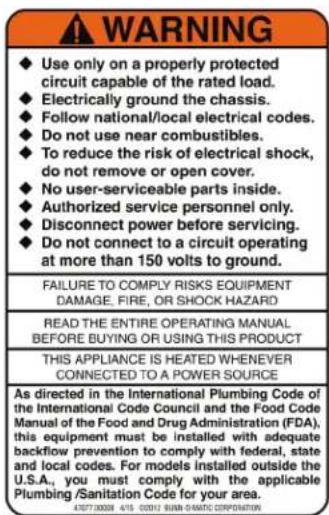
47077.0000

00824.0002
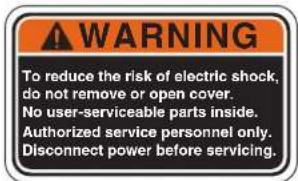
37881.0000
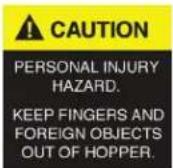
47150.0000
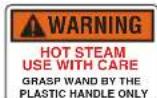
47622.0000
Steam model only
Warnings
- Unplug the machine or turn off the main switch before servicing the interior components of the machine.
- Never operate the machine without water.
- Never touch brew module, spouts, and hot water dispense pipes. They are HOT and could cause burns.
• The machine must be operated with clean water. Make sure to use water filters and/or softeners as needed.
• The operation of the equipment may allow a condition where milk or traces of dairy components are in cross-contact with recipes that are considered non-dairy. These traces of allergenic proteins can cause reactions in individuals having food allergies to those proteins. (Auto models only)
NORTH AMERICAN REQUIREMENTS
- This appliance must be installed in locations where it can be overseen by trained personnel.
- For proper operation, this appliance must be installed where the temperature is between 41^ to 95^ (5°C to 35^ ).
- Appliance shall not be tilted more than 10^ for safe operation.
- An electrician must provide electrical service as specified in conformance with all local and national codes.
- This appliance must not be cleaned by pressure washer.
- This appliance can be used by persons aged from 18 years and above if they have been given supervision or instruction concerning use of the appliance in a safe way and if they understand the hazards involved.
- Keep the appliance and its cord out of reach of children aged less than 18 years.
- Appliances can be used by persons 18 years and above with reduced physical, sensory or mental capabilities or lack of experience and knowledge if they have been given supervision or instruction concerning use of the appliance in a safe way and understand the hazards involved.
- Children under the age of 18 years should be supervised to ensure they do not play with the appliance.
- If the power cord is ever damaged, it must be replaced by the manufacturer or authorized service personnel with a special cord available from the manufacturer or its authorized service personnel in order to avoid a hazard.
- Machine must not be immersed for cleaning.
- Cleaning and user maintenance shall not be made by children unless they are older than 18 years and supervised.
- This appliance is intended for commercial use in applications such as:
– staff kitchen areas in shops, offices and other working environments;
– by clients in hotel and motel lobbies and other similar types of environments;
- Access to the service areas permitted by Authorized Service personnel only.
SITE REQUIREMENTS
Plumbing
- Quick connect assembly with adapter (supplied).
- 3/8" NPT fitting on water filter.
- These brewers must be connected to a cold water system with operating pressure between 20 and 90 psi (0.138 and 0.620 MPa) from a 1/2" or larger supply line. A shut-off valve should be installed in the line before the brewer. Install a regulator in the line when pressure is greater than 90 psi (0.620 MPa) to reduce it to 50 psi (0.345 MPa).
- Shut off valve should be present between water supply and machine.
- Vented drain available within 3.3 feet (1 meter) of machine.
- Flush the water line and securely attach it to the inlet fitting at the rear of the brewer.
- Turn on the water supply.
NOTE-Bunn-O-Matic recommends 1/4" copper tubing for installations of less than 25 feet and 3/8" for more than 25 feet from the 1/2" water supply line. A tight coil of copper tubing in the water line will facilitate moving the brewer to clean the counter top. Bunn-O-Matic does not recommend the use of a saddle valve to install the brewer. The size and shape of the hole made in the supply line by this type of device may restrict water flow.
Water Treatment
- No Chlorine.
- Water Hardness 3 to 6 grains
- Water Filtration System
NOTE: The water connections are at the lower rear of the machine.
Location of the Serial Number
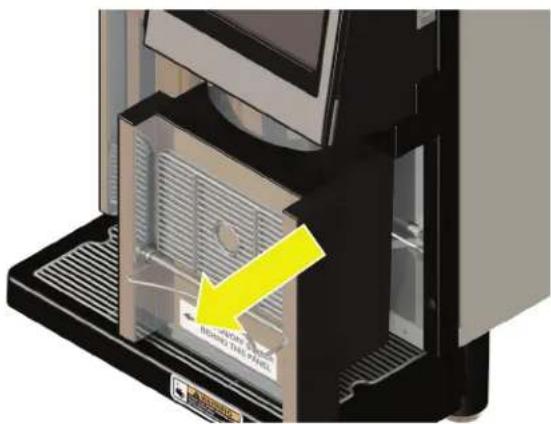
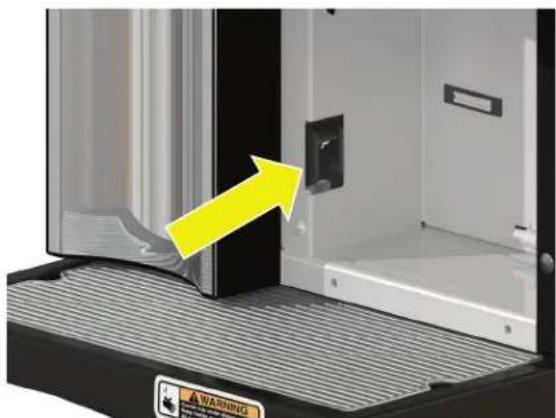
The serial number is located behind the puck bin on the right wall across from the power switch.
The complete serial number will need to be documented on all work orders and warranty tags.
As directed in the International Plumbing Code of the International Code Council and the Food Code Manual of the Food and Drug Administration (FDA), this equipment must be installed with adequate back flow prevention to comply with federal, state and local codes. For models installed outside the U.S.A., you must comply with the applicable Plumbing /Sanitation Code for your area.
natural_image
Close-up of a computer tower with a yellow arrow pointing to the interior panel (no visible text or symbols)REMOVE/INSTALL PUCK BIN
natural_image
Exterior view of a modern office building (no signage)- Counter able to support at least 200 pounds (90kg).
- Counter area large enough for machine and refrigerator.
- Minimum clearance of 2" around machine.
Electrical-SureTamp
- 208VAC, 2 wires with ground.
- Dedicated 30A circuit with proper breaker and receptacle.
- Receptacle within 5 feet (1.5 meter) of machine.
- Power cord with L6-30 plug supplied with machine.
Electrical-refrigerator (Auto models only)
- 120VAC, 2 wires with ground.
- Dedicated 15A circuit with proper breaker and receptacle.
- Receptacle within 5 feet (1.5 meter) of machine.
- Power cord with plug supplied with machine.
- Requires minimum 2 inches (50mm) in back and top.
WARNING -
The brewer must be disconnected from the power source until specified in Initial Set-Up. Refer to Data Plate on the Brewer, and local/national electrical codes to determine circuit requirements.
ELECTRICAL REQUIREMENTS
CAUTION – Improper electrical installation will damage electronic components.
- An electrician must provide electrical service.
- Determine the available on-site electrical service.
- Using a voltmeter, check the voltage and color coding of each conductor at the electrical source.
INSTALLATION-SURE TAMP
Drip Tray and Drain Install
- Install drip tray bracket with 3 screws (included in bag).
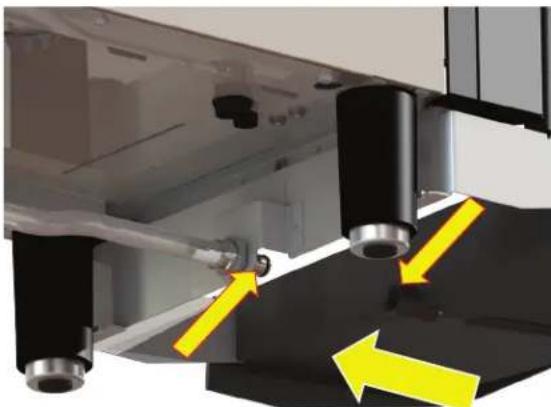
- Slide drip tray onto guide rails on front of machine. Push drip tray straight in until it engages fitting. To remove: Pull drip tray straight out.
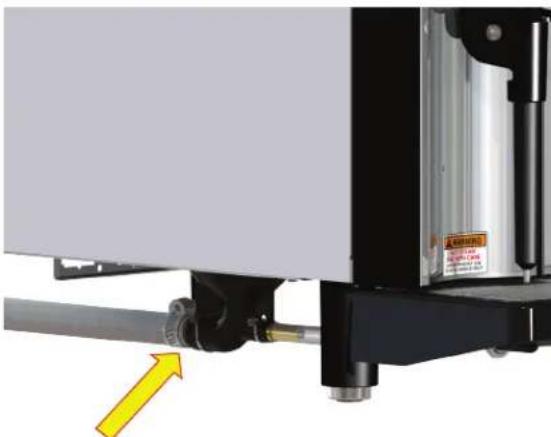
- Attach long drain hose to back of manifold and route to floor drain or sink, flowing downhill at all times.
- Secure hose above the drain to maintain the air gap.
Water Supply Install
- Ensure water is turned off.
- Install the water filtration system between the water supply and the machine inlet per manufacturer's installation recommendations.
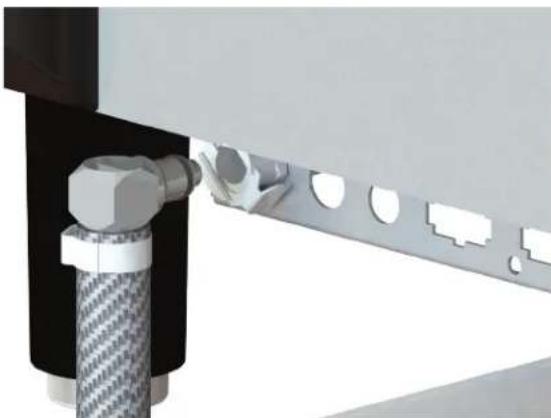
- Connect one end of the inlet hose assembly to the adapter and the other end to the water supply.
- DO NOT TURN ON THE MAIN WATER SUPPLY UNTIL REFRIGERATOR IS COMPLETELY CONNECTED (Auto models only). Check for leaks; resolve any leak issues before proceeding.
Electrical Install
WARNING–Improperelectrical installation will damage electronic components.
- Determine the available electrical service.
- Ensure the proper voltage at the electrical source.
WARNING -
The brewermustbe disconnectedfrom the powersource until specified in Initial Set-Up.
Refer to Data Plate on the Brewer, and local/national electrical codes to determine circuit requirements.
ELECTRICAL HOOK-UP (All Models)
CAUTION – Improper electrical installation will damage electronic components.
- An electrician must provide electrical service.
- Determine the available on-site electrical service.
- Using a voltmeter, check the voltage and color coding of each conductor at the electrical source.
- Uncoil the power cord completely and plug securely into the outlet or hard wire into electrical box.
natural_image
Mechanical assembly diagram showing components with yellow arrows indicating motion or force directions (no text or symbols present)INSTALL DRIP TRAY
natural_image
Mechanical assembly diagram showing a mounted device with a yellow arrow pointing to a component (no visible text or symbols)INSTALL DRAIN HOSE TO MANIFOLD
natural_image
Close-up of a mechanical assembly with a metallic bracket and threaded rod (no visible text or symbols)INSTALL WATER SUPPLY LINE
INSTALLATION-REFRIGERATOR (AUTO MODELS ONLY)
Milk Module Installation-counter top
- Align hoses and harnesses through holes in back of refrigerator and slide module into cabinet on the pre-installed brackets.
Milk Module Installation-under counter
- Align hoses and harnesses through hole on top of refrigerator and slide module into cabinet on the pre-installed brackets. Ensure holes in back are plugged.
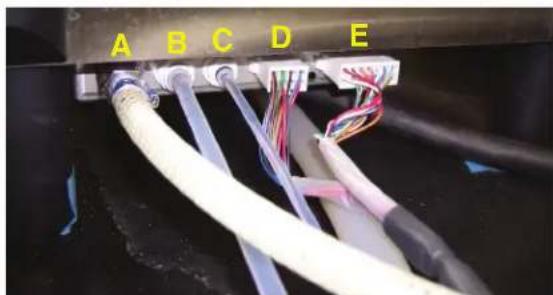
INSTALL SUPPLY LINES
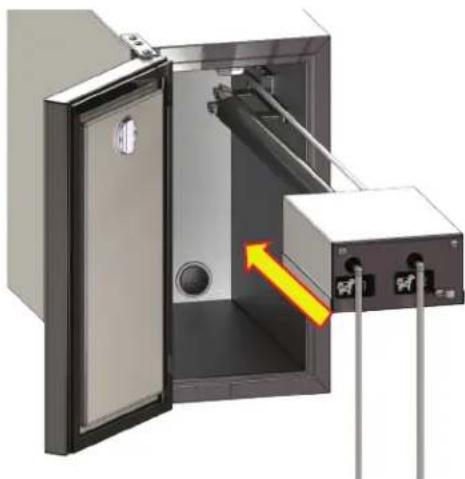
natural_image
Interior view of a stainless steel cabinet with open door and internal panel, showing internal components and a yellow arrow indicating movement (no text or symbols)Connect hoses and harnesses to machine as shown.
A. Water supply to espresso machine.
B. Water line to milk module.
C. Milk line from milk module.
D. 8 pin connector from milk module.
E. 14 pin connector from milk module.
Load milk containers.
A. Load a container of "non fat" milk towards the back and insert the number "2" hose into container.
B. Load a container of "regular" milk towards the front and insert the number "1" hose into container.
NOTE: Use either dairy or non dairy - not a mixture.
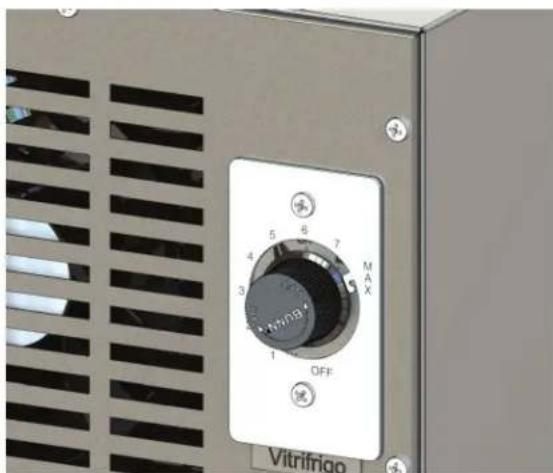
natural_image
Close-up of a Vitrifrigo industrial control panel with rotary dial and indicator lights (no readable text or symbols beyond labels)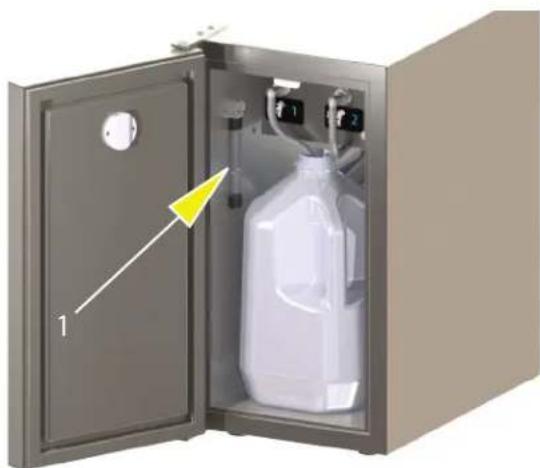
natural_image
Interior view of a stainless steel industrial cabinet with a water bottle inside, showing open door and labeled component (no text or symbols visible)Load milk containers.
A. Adjustrefrigeratorthermostatcontrolknobasneeded.
B. Temperature may be monitored with the thermometer hanging inside the cabinet (1). Range: 38°F to 43°F. Refertomanufacturers manual included with refrigerator for additional information.
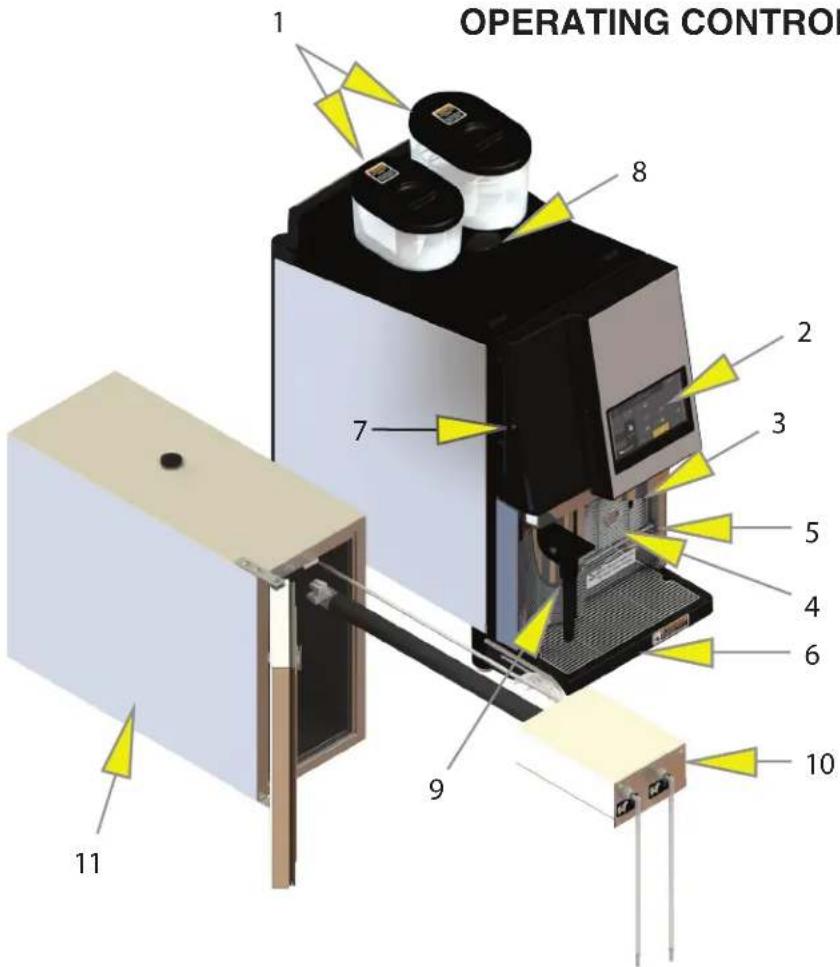
- Bean hopper:
Right-regular
Left-decaf - Touch screen display:
- Dispense nozzles:
- Small cup shelf:
- Puck bin:
- Drip tray:
- Key Lock:
- Cafiza coffee cleaning tablet chute:
- Steam wand:
(NOT USED ON AUTO MODEL) - Milk module:
(NOT USED ON STEAM MODEL) - Refrigerator:
(NOT USED ON STEAM MODEL)
Start up
- Pull puck bin out, turn the main switch on, replace puck bin.
- The filling process will proceed automatically. When the boilers are filled, unit will automatically start heating. You will see a message " Please wait - heating in progress".
- Install hoppers on top of brewer. NOTE: Brewer will not operate without hoppers in place. Open front door and pull each slide gate tab forward. (This also locks hoppers in place). Close door and fill hoppers as needed.
4a. (Auto) Select "Care &cleaning", select "Milk prime" 1 then 2 to introduce milk into the suction lines. Press "right" bean icon to return to home screen (Auto only).
4b. (Steam) Select rinse to introduce fresh water into the system or select cancel to proceed (Steam only).
- The machine is ready to use when "Ready to brew" is displayed.
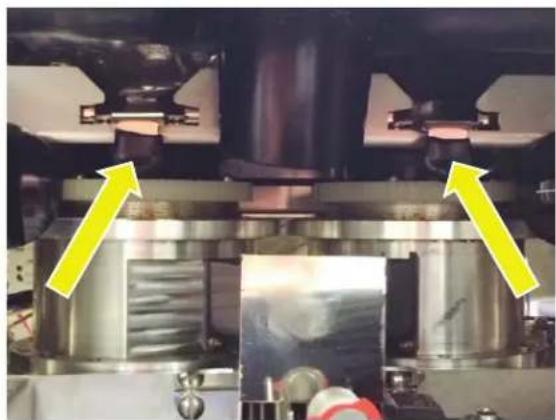
natural_image
Close-up of a mechanical assembly with two yellow arrows pointing to specific components (no visible text or symbols)PULL HOPPER SLIDE GATE TABS FORWARD
NOTE: POUR IN ONLY ENOUGH BEANS FOR THE DAY'S USE. DO NOT STORE BEANS IN HOPPER OVERNIGHT, FRESHNESS WILL BE COMPROMISED.
OPERATION - BUILD-A-DRINK
DRINK TYPES
- Americano (hot water added to espresso).
- Cappuccino (traditionally prepared with espresso, hot milk, and steamed-milk foam).
- Espresso: x1=single shot; x2=double shot; x3=triple shot (coffee brewed by forcing a small amount of nearly boiling water under pressure through finely ground coffee).
- Latte (hot milk added to espresso with a dollop of foam) (Auto only).
- Macchiato: espresso added to a small amount of milk foam (Auto only).
- Milk (hot milk for hot chocolate) (Auto only).
- Syrup icon leaves room in the drink volume to allow manually adding syrup without overflowing the cup.
- Select "cup preheat" to dispense hot water into cup before running a brew cycle. DO NOT USE CUP PREHEAT WITH PAPER OR STYROFOAM (OR SIMILAR) CUPS.
BREWING
-
Select between 📋 or bean hopper from the tabs on the top of touchscreen.
-
Place appropriate size cup on drip tray or shelf.
-
Select drink size.
-
Select desired options:
for non fat milk or for regular milk (Auto only). * for cold milk or for hot milk (Auto only). Syrup for additional room;
- Select one of the drink types.
STOP
STOP: Pressing the STOP button will stop brewing function, and will reset unit back to ready mode.
NOTE: Empty puck drawer when prompted.
DO NOT ALLOW USED PUCKS TO BACK UP INTO BREW CHAMBER AREA AS THIS CAN CAUSE DAMAGE!
OPERATION-SELF SERVE MODEL
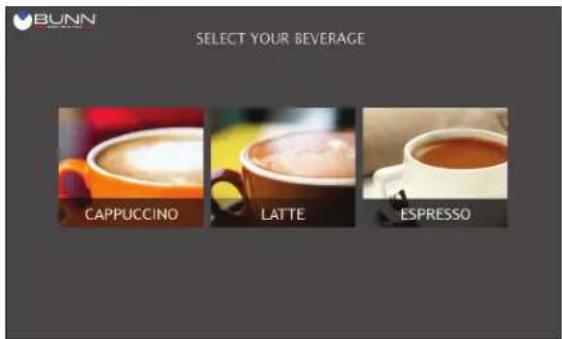
Step 1: Select drink type
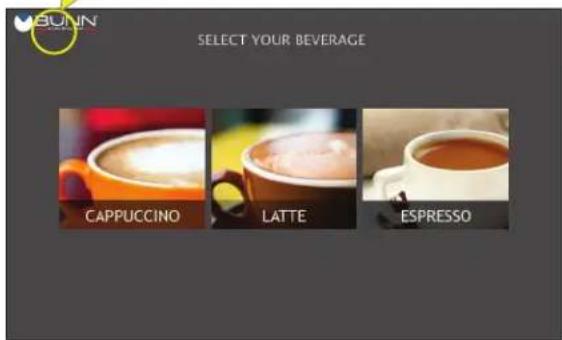
SELECT YOUR BEVERAGE



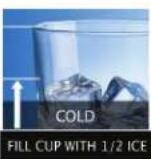
Step 2: Select hot or cold milk (If applicable)
SELECT MILK TEMPERATURE

Step 3: Select cup size (If applicable)
SELECT CUP SIZE
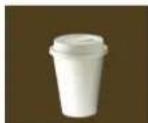
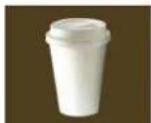
Step 4:
Selectregularor
low fat
(If applicable)
SELECT MILK TYPE

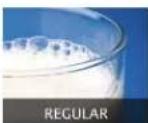
Step 5: Selectregularor decaf (If applicable)
SELECT COFFEE TYPE

Step 6: Press start
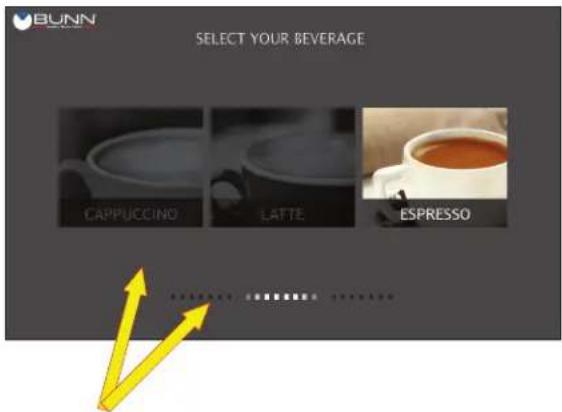
Grayed out icon(s) and light bar indicates attention is needed.
Examples:
Milk(s) empty, hopper(s) empty, puck bin full, reheating or refilling.
Return to previous screen

NOTE: This is just an example of "Self Serve" menu. Variations in setup will affect which screens will be displayed.
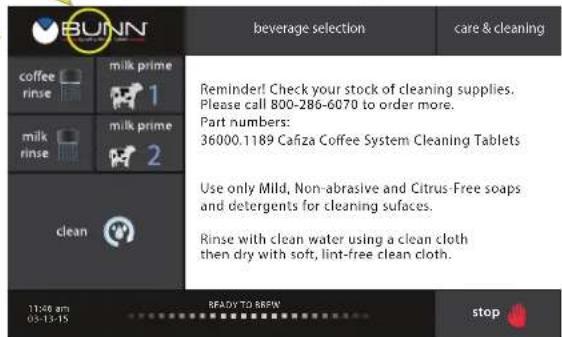
NOTE: To access the "care & cleaning" tab, press the "BUNN" logo (on the upper left corner of the screen) until the screen changes. Then press the "care & cleaning" tab.
RINSING/CLEANING
RINSING
Press the "care & cleaning" tab to access. Place container under dispense heads.
Coffee rinse: – Press "coffee rinse".
Milk rinse: – Press "milk rinse".
CLEANING CYCLE:
Cleaning due at 24 hours. A complete clean cycle is required to reset counter. Counter will not start until a brew cycle or milk prime has been initiated.
CLEANING MESSAGES:
"Cleaning interrupted": Must restart & complete clean cycle in order to reset the counter
"Cleaning due soon": Appears 22 hours after first drink or milk prime. Countdown of last 2 hours will be displayed.
"Clean due now": Appears 24 hours after first drink or milk prime. 2 hours remain until clean lockout.
"Clean lockout": Appears 26 hours after first drink or milk prime. Will not brew or dispense until a clean cycle is completed.
DAILY CLEANING
NOTE: You will need pitcher (supplied), brush, Cafiza coffee cleaning tablets, Rinza Milk System cleaning tablets and cleaning tube on hand.
- Press the "care & cleaning" tab on the touch screen.
- Press the "clean" icon . Follow the picture prompted cleaning guide.
- Wipe off dispense nozzle tips.
WEEKLY CLEANING
- Press the "care & cleaning" tab on the touch screen, follow the picture prompted cleaning guide.
- Open brew chamber door.
- Push hopper slide gate all the way in.
- Lift hopper with both hands. DO NOT LIFT HOPPER BY THE LID. Empty beans from hopper and wash/ rinse with mild nonabrasive detergent and fresh water.
MENU OPTIONS
Press and hold until "menu options" screen appears.
SURE TAMP STEAM
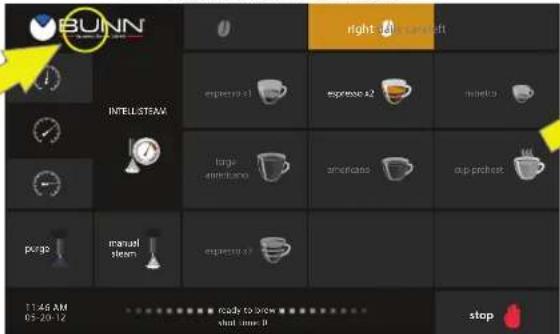
SURE TAMP AUTO
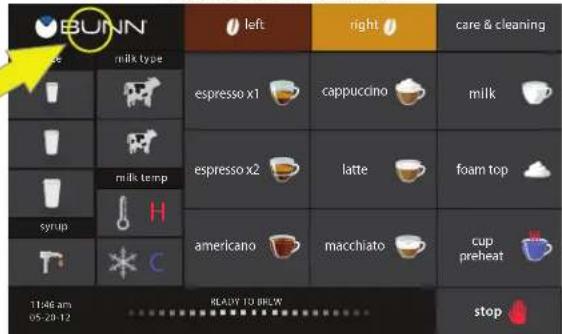
OR
SURE TAMP SELF SERVE
Press and hold until "care & cleaning" screen appears (approximately 12 second).
CARE & CLEANING SCREEN
Press and hold until "menu options" screen appears.
ALL MODELS
MENU OPTIONS SCREEN
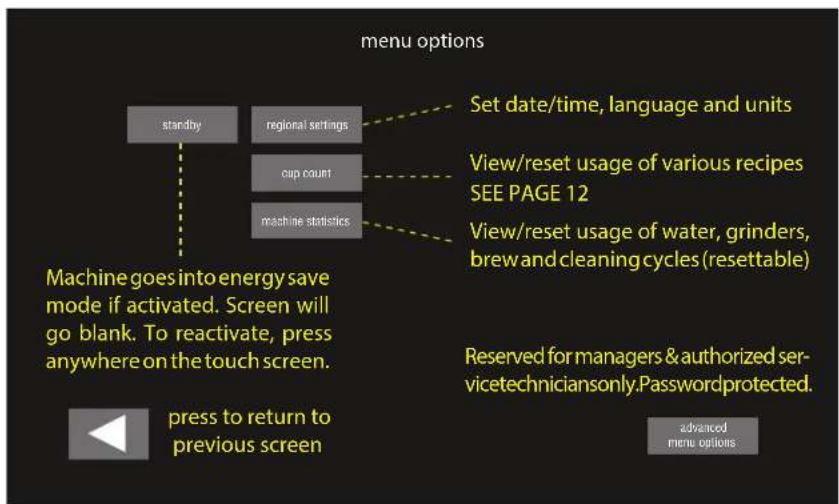
flowchart
graph TD
    A["standby"] --> B["regional settings"]
    B --> C["cup count"]
    C --> D["machine statistics"]
    D --> E["Set date/time, language and units"]
    E --> F["View/reset usage of various recipes SEE PAGE 12"]
    F --> G["View/reset usage of water, grinders, brew and cleaning cycles (resettable)"]
    G --> H["Reserved for managers & authorized servicetechniciansonly.Passwordprotected"]
    H --> I["advanced menu options"]
    J["Machine goes into energy save mode if activated. Screen will go blank. To reactivate, press anywhere on the touch screen."] --> K["press to return to previous screen"]
CONTINUED ON NEXT PAGE
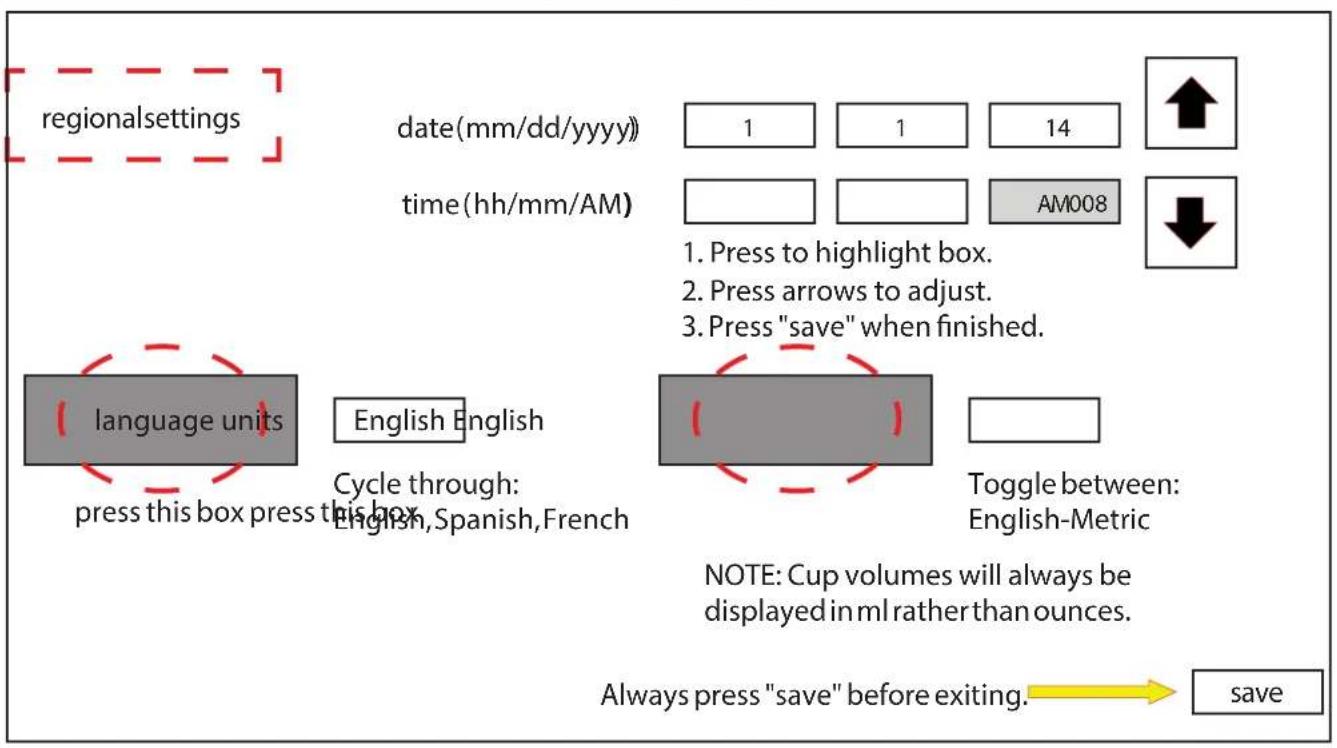
MENU OPTIONS
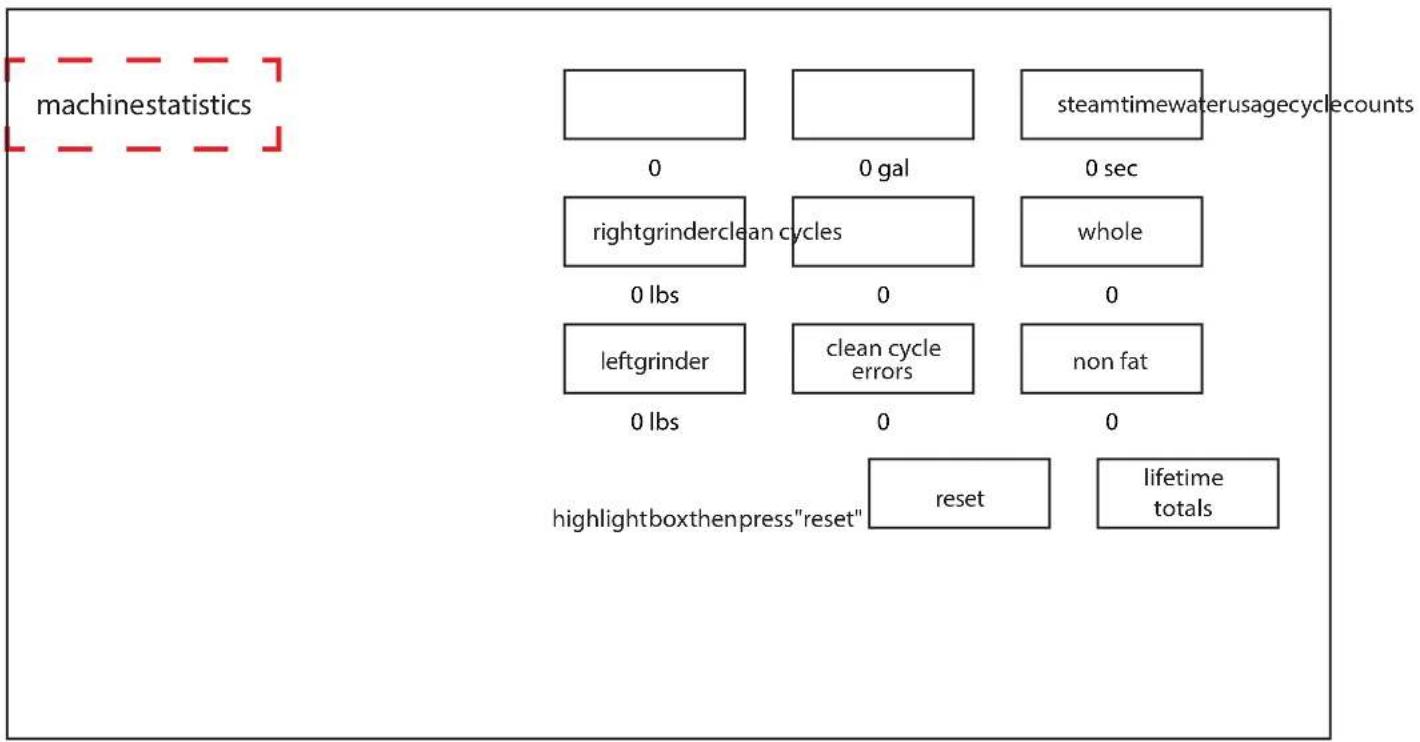
flowchart
graph TD
    A["machinestatistics"] --> B["0"]
    B --> C["rightgrinderclean cycles"]
    C --> D["leftgrinder"]
    D --> E["0 lbs"]
    E --> F["0 gal"]
    F --> G["0 sec"]
    G --> H["0 sec"]
    H --> I["0 sec"]
    I --> J["0 sec"]
    J --> K["0 sec"]
    K --> L["0 sec"]
    L --> M["0 sec"]
    M --> N["0 sec"]
    N --> O["0 sec"]
    O --> P["0 sec"]
    P --> Q["0 sec"]
    Q --> R["0 sec"]
    R --> S["0 sec"]
    S --> T["0 sec"]
    T --> U["0 sec"]
    U --> V["0 sec"]
    V --> W["0 sec"]
    W --> X["0 sec"]
    X --> Y["0 sec"]
    Y --> Z["0 sec"]
    Z --> AA["0 sec"]
    AA --> AB["0 sec"]
    AB --> AC["0 sec"]
    AC --> AD["0 sec"]
    AD --> AE["0 sec"]
    AE --> AF["0 sec"]
    AF --> AG["0 sec"]
    AG --> AH["0 sec"]
    AH --> AI["0 sec"]
    AI --> AJ["0 sec"]
    AJ --> AK["0 sec"]
    AK --> AL["0 sec"]
    AL --> AM["0 sec"]
    AM --> AN["0 sec"]
    AN --> AO["0 sec"]
    AO --> AP["0 sec"]
    AP --> AQ["0 sec"]
    AQ --> AR["0 sec"]
    AR --> AS["0 sec"]
    AS --> AT["0 sec"]
    AT --> AU["0 sec"]
    AU --> AV["0 sec"]
    AV --> AW["0 sec"]
    AW --> AX["0 sec"]
    AX --> AY["0 sec"]
    AY --> AZ["0 sec"]
    AZ --> BA["0 sec"]
    BA --> BB["0 sec"]
    BB --> BC["0 sec"]
    BC --> BD["0 sec"]
    BD --> BE["0 sec"]
    BE --> BF["0 sec"]
    BF --> BG["0 sec"]
    BG --> BH["0 sec"]
    BH --> BI["0 sec"]
    BI --> BJ["0 sec"]
    BJ --> BK["0 sec"]
    BK --> BL["0 sec"]
    BL --> BM["0 sec"]
    BM --> BN["0 sec"]
    BN --> BO["0 sec"]
    BO --> BP["0 sec"]
    BP --> BQ["0 sec"]
    BQ --> BR["0 sec"]
    BR --> BS["0 sec"]
    BS --> BT["0 sec"]
    BT --> BU["0 sec"]
    BU --> BV["0 sec"]
    BV --> BW["0 sec"]
    BW --> BX["0 sec"]
    BX --> BY["0 sec"]
    BY --> BZ["0 sec"]
    BZ --> CA["0 sec"]
    CA --> CB["0 sec"]
    CB --> CC["0 sec"]
    CC --> CD["0 sec"]
    CD --> CE["0 sec"]
    CE --> CF["0 sec"]
    CF --> CG["0 sec"]
    CG --> CH["0 sec"]
    CH --> CI["0 sec"]
    CI --> CJ["0 sec"]
    CJ --> CK["0 sec"]
    CK --> CR["0 sec"]
    CR --> CS["0 sec"]
    CS --> CT["0 sec"]
    CT --> CU["0 sec"]
    CU --> CV["0 sec"]
    CV --> CW["0 sec"]
    CW --> CX["0 sec"]
    CX --> CY["0 sec"]
    CY --> CZ["0 sec"]
    CZ --> DE["0 sec"]
MENU OPTIONS
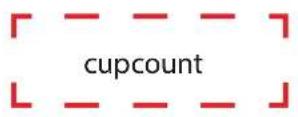
- Press left or right (hopper).
- Press to highlight/un-highlight box(s).
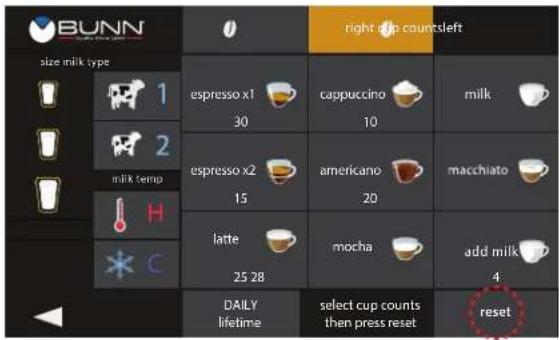
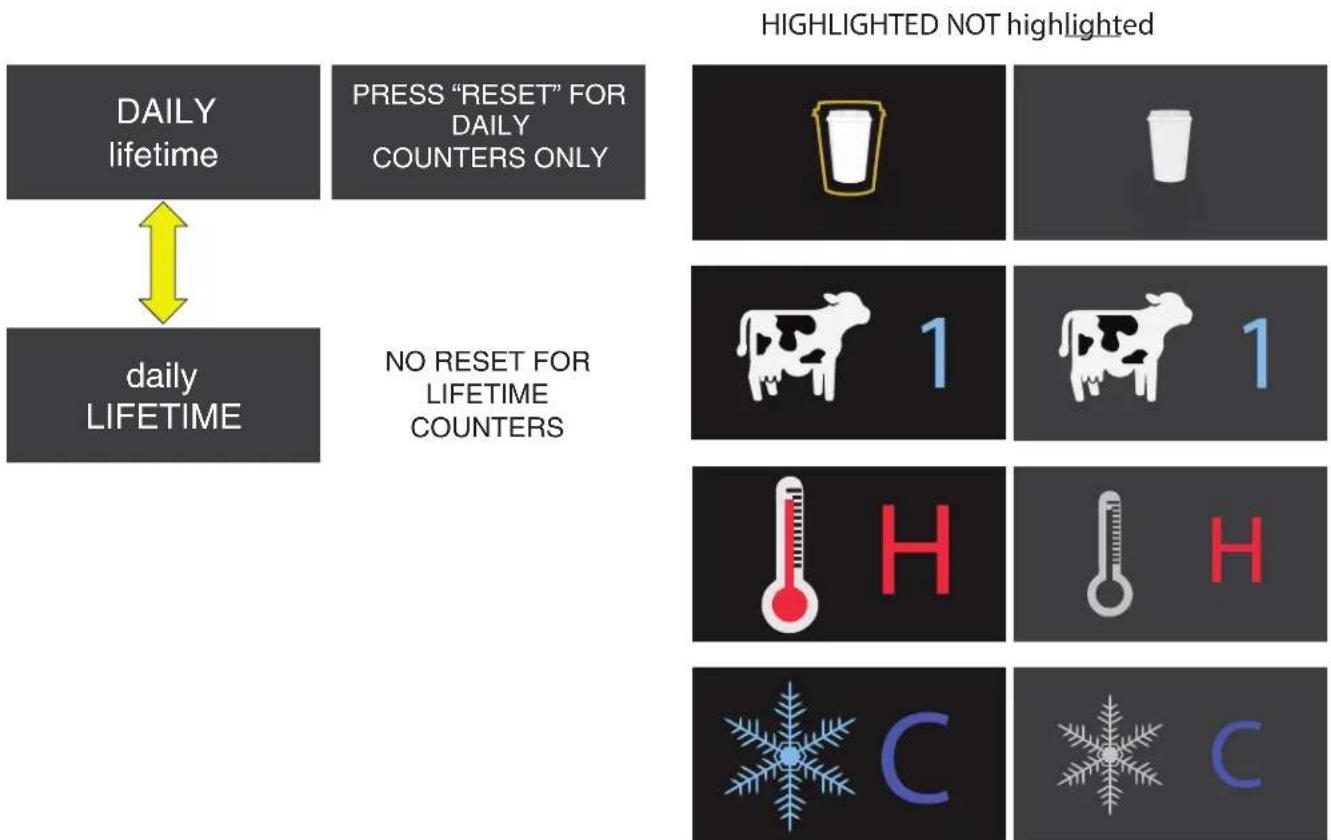
By default, all items on this screen start out highlighted (for totals). De-select individual items as desired to obtain individual counts by hopper, drink size/type and temperature. NOTE: only "daily" counters can be reset.
flowchart
graph TD
A["DAILY lifetime"] <--> B["daily LIFETIME"]
C["PRESS "RESET" FOR DAILY COUNTERS ONLY"] --> D["NO RESET FOR LIFETIME COUNTERS"]
E["HIGHLIGHTED NOT highlighted"] --> F["1 cup icon"]
E --> G["1 cow icon"]
E --> H["H"]
E --> I["H"]
E --> J["C"]
E --> K["C"]
TROUBLESHOOTING
| Notices | Description |
| "cleaning interrupted", Redo cleaning cycle to remove this error | |
| "cleaning due now - shut down", Machine will not dispense until cleaning is completed | |
| "check right hopper", Right hopper is out of beans. | |
| "check left hopper", Left hopper is out of beans. | |
| "right brew time too long", Grind size on right hopper needs to be adjusted. Coarsen by one turn at a time until error is cleared. | |
| "left brew time too long", Grind size on left hopper needs to be adjusted. Coarsen by one turn at a time until error is cleared. | |
| milk 1 or 2 empty Refer back to "loading" section. | |
| puck bin full empty puck bin to reset counter | |
| operator door open close door | |
| "steam wand temperature error", (N/A on AUTO) still be performed | |
On screen troubleshooting feature: Should there be an error message shown, additional help can be accessed by pressing the pop up? . This will start a picture prompted troubleshooting instruction.
For additional help, call the Espresso Hotline at 888-436-0297.
The decal shown below is located on the inside of the front door assembly.
50052.0000
- BUNN-O-MATIC CORPORATION
- Bunn-O-Matic® COMMERCIAL PRODUCT WARRANTY
- Warranty Exclusions:
- CONTENTS
- USER NOTICES
- 50052.0000
- 47075.0000
- 47074.0000
- 47077.0000
- 00824.0002
- 37881.0000
- 47150.0000
- 47622.0000
- Warnings
- NORTH AMERICAN REQUIREMENTS
- SITE REQUIREMENTS
- Plumbing
- Water Treatment
- Location of the Serial Number
- Electrical-SureTamp
- Electrical-refrigerator (Auto models only)
- WARNING -
- ELECTRICAL REQUIREMENTS
- INSTALLATION-SURE TAMP
- ELECTRICAL HOOK-UP (All Models)
- INSTALLATION-REFRIGERATOR (AUTO MODELS ONLY)
- Start up
- OPERATION - BUILD-A-DRINK
- DRINK TYPES
- BREWING
- OPERATION-SELF SERVE MODEL
- RINSING/CLEANING
- CLEANING CYCLE:
- CLEANING MESSAGES:
- DAILY CLEANING
- WEEKLY CLEANING
- MENU OPTIONS
- SURE TAMP SELF SERVE
- TROUBLESHOOTING
Brand : Bunn
Model : Sure Tamp Steam
Category : Coffee maker