
Xacti VPC-E7EX - Camera SANYO - Free user manual and instructions
Find the device manual for free Xacti VPC-E7EX SANYO in PDF.


| Product Type | Digital Camera |
| Brand | Sanyo |
| Model | Xacti VPC-E7EX |
| Category | Compact Camera |
| Image Sensor | 1/2.5-inch CCD |
| Effective Pixels | 7.1 Megapixels |
| Optical Zoom | 5x |
| Digital Zoom | 4x |
| Display Screen | 2.5-inch LCD |
| Storage Media | SD/SDHC Memory Card |
| Video Resolution | 640x480 (VGA) at 30fps |
| Still Image Resolution | 3072x2304 (7M) |
| Dimensions (WxHxD) | 4.3 x 2.6 x 1.2 inches (110 x 65 x 31 mm) |
| Weight (approx) | 4.2 oz (119 g) without battery |
| Power Source | Rechargeable Li-ion Battery (DB-L50) |
| Battery Life | Approx. 200 shots (CIPA standard) |
| Functions | Video recording, still capture, face detection, image stabilization |
| Interface | USB 2.0, AV out |
| Maintenance & Cleaning | Clean lens with soft, dry cloth; avoid solvents |
| Safety Instructions | Keep away from water; do not disassemble; use only approved accessories |
| Spare Parts & Repairability | Battery, charger, USB cable available; repair by authorized service center |
| General Information | Manual available in PDF; supports PictBridge; multilingual menu |
Frequently Asked Questions - Xacti VPC-E7EX SANYO
User questions about Xacti VPC-E7EX SANYO
0 question about this device. Answer the ones you know or ask your own.
Ask a new question about this device
Download the instructions for your Camera in PDF format for free! Find your manual Xacti VPC-E7EX - SANYO and take your electronic device back in hand. On this page are published all the documents necessary for the use of your device. Xacti VPC-E7EX by SANYO.
USER MANUAL Xacti VPC-E7EX SANYO
natural_image
Illustration of a silver digital camera with lens and buttons (no text or symbols)
Important note
This manual explains how to safely operate the VPC-E7EX and VPC-E7. Any information regarding only one of these products will be labeled as such.
Please read these instructions carefully before using the camera. Make sure to read and understand the separate booklet "SAFETY MANUAL". Keep this manual in a safe place for later reference.
Warning
TO PREVENT THE RISK OF FIRE OR ELECTRIC SHOCK, DO NOT EXPOSE THIS APPLIANCE TO RAIN OR MOISTURE
■FOR AMERICAN USERS
The following advisory is included in accordance with the laws of the State of California (USA):
WARNING:
This product contains chemicals, including lead, known to the State of California to cause cancer, birth defects or other reproductive harm. Wash hands after handling.
- This equipment has been tested and found to comply with the limits for a Class B digital device, pursuant to Part 15 of the FCC Rules. These limits are designed to provide reasonable protection against harmful interference in a residential installation. This equipment generates, uses and can radiate radio frequency energy and, if not installed and used in accordance with the instructions, may cause harmful interference to radio communications. However, there is no guarantee that interference will not occur in a particular installation. If this equipment does cause harmful interference to radio or television reception, which can be determined by turning the equipment off and on, the user is encouraged to try to correct the interference by one or more of the following measures:
- Reorient or relocate the receiving antenna.
- Increase the separation between the equipment and receiver.
- Connect the equipment into an outlet on a circuit different from that to which the receiver is connected.
- Consult the dealer or an experienced radio/TV technician for help.
- Changes or modifications not expressly approved by the party responsible for compliance could void the user's authority to operate the equipment.
Declaration of Conformity
Model number: VPC-E7
Trade Name: SANYO
Responsible party: SANYO FISHER COMPANY
Address: 21605 Plummer Street, Chatsworth, California 91311
Telephone No.: (818) 998-7322
This device complies with Part 15 of the FCC Rules. Operation is subject to the following two conditions:
(1) this device may not cause harmful interference, and
(2) this device must accept any interference received, including interference that may cause undesired operation.
i English
■FOR CANADIAN USERS
- This Class B digital apparatus complies with Canadian ICES-003.
■ FOR EU USERS
natural_image
Symbol of a trash bin with crossed lines indicating no waste, and a solid black rectangle below (no text or labels)Note:
- This symbol mark and recycle system apply only to EU countries and do not apply to countries in other areas of the world.
Your SANYO product is designed and manufactured with high quality materials and components which can be recycled and reused.
This symbol means that electrical and electronic equipment, at their end-of-life, should be disposed of separately from your household waste.
Please dispose of this equipment at your local community waste collection/recycling centre.
In the European Union there are separate collection systems for used electrical and electronic products.
Please help us to conserve the environment we live in!
■Symbols used in this manual
HINT Points giving some extended instructions or special points to pay attention to.
CAUTION Points that require special attention.
(page xx) Refer to the page indicated for detailed information.
You may find the answers to questions or problems concerning camera operation in the sections “COMMONLY ASKED QUESTIONS” (page 124) and “TROUBLESHOOTING” (page 130).
GETTING UP AND RUNNING
Install the battery pack
1 Use the supplied charger to charge the battery pack.
• The CHARGE indicator lights red during charging.
- The CHARGE indicator will turn off when the battery pack is fully charged.
- Charging takes approximately 90 minutes.
![CHARGE indicator [△] mark Battery pack Socket To power outlet Power cord](/content/2026/05/954550/images/eb68aaeb4e711f0462dcf64c9f5214bacd0f7eef6c80963bfbf27d9a92f0b14a.jpg)
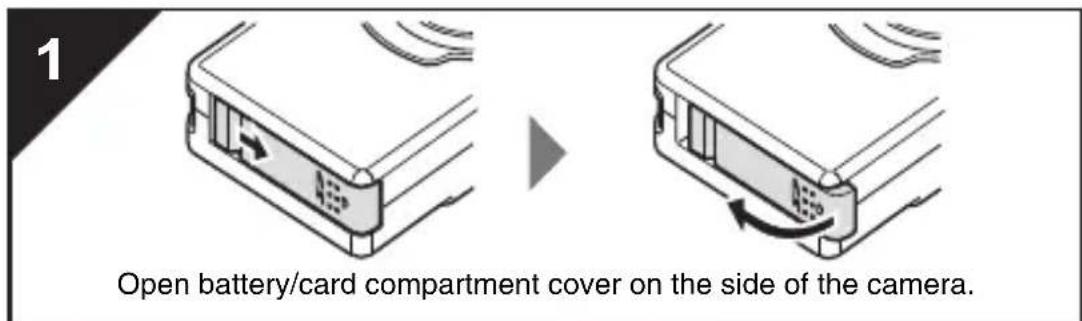
2 Open the battery/card compartment cover, and insert the battery pack.
- The battery/card compartment cover is located on the side of the camera.
- Press the ON/OFF button to turn the camera on.
![[△] mark](/content/2026/05/954550/images/c85213bf30613c27988f5c11244190c874cad960c14e9056d21390932bcf7423.jpg)
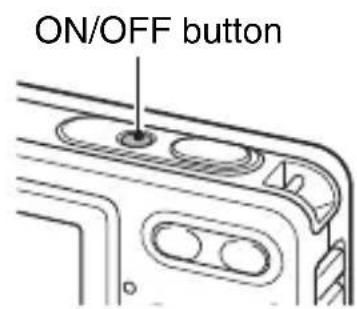
Shooting
1 Press the [▶] button.
• The shooting mode menu appears.
Single-shot
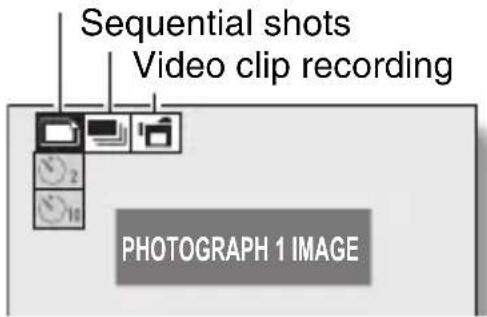
2 Press the [◀] or [▶] button to select the shooting mode.
3 Press the SET button.
• The shooting mode is indicated by an icon in the upper left area of the monitor.
4 Press the shutter button.
Single-shot mode:
A still image is captured.
Sequential shots mode:
Shooting begins. Release the shutter button to discontinue shooting.
Video clip recording mode:
Recording begins. To stop recording, press the shutter button again.
![Shutter button [◀] or [▶] button](/content/2026/05/954550/images/215774ce0696976709af3cd2cc67cf2dba01fd787adb4d99fbf4781622b56c09.jpg)
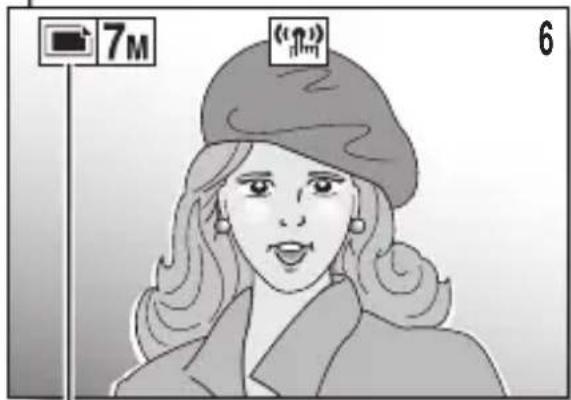
:Single-shot mode
Sequential shots mode
:Video clip recording mode
GETTING UP AND RUNNING
Playback
■Still image playback
1 Press the playback button [▶].
• The display switches to the Playback Screen.
- To view other images, press the [◀] or [▶] button.
- If the playback button [▶] is pressed, the display returns to the Shooting Screen.
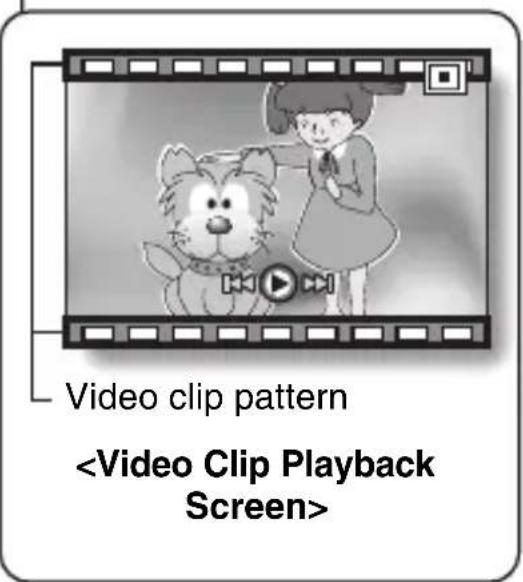
■Video clip playback
1 Press the playback button [▶].
• The display switches to the Playback Screen.
- Press the [◀] or [▶] button to display the video clip you wish to play back.
• Video clips are indicated by a video clip pattern along the top and bottom of the screen.
2 Press the SET button.
- Playback of the selected video clip begins.
- If the playback button [▶] is pressed again, the display changes to the Shooting Screen.
![ON/OFF button Playback button [◀] or [▶] button](/content/2026/05/954550/images/20f9ffb878c3d6adeecdf692f84de20b4a2ec07317ac0cfa16c01e6742df6cab.jpg)
When you are finished taking pictures...
Press the ON/OFF button to turn the camera off.
v English
CONTENTS
CONTENTS 1
CHECKING THE INCLUDED ACCESSORIES 7
GETTING THE MOST OUT OF YOUR CAMERA 10
SYSTEM MAP 12
SETUP
PARTS NAMES 13
CHARGING THE BATTERY PACK 15
INSTALL THE BATTERY PACK AND CARD 18
TURNING THE CAMERA ON AND OFF 20
DATE AND TIME SETTING 22
■ BASIC OPERATION
BEFORE TAKING PICTURES 25
CAPTURING AND PLAYING BACK STILL IMAGES 34
SHOOTING SEQUENTIAL SHOTS 44
FOCUS AREA SETTING 70
LIGHT-MEASURING MODE SETTING 72
ISO SENSITIVITY 73
WHITE BALANCE 74
EXPOSURE CORRECTION 75
DATE IMPRINT 76
1 English
■ PLAYBACK
DISPLAYING THE PLAYBACK MENU 77
IMAGE PROTECT 79
ROTATE IMAGE 81
CHANGING IMAGE SIZE (RESIZE) 82
CONTRAST CORRECTION 83
RED-EYE CORRECTION 85
COPY DATA 87
PRINT SETTINGS 89
SLIDESHOW PLAYBACK 94
DISPLAYING IMAGE PROPERTIES (INFORMATION SCREEN) .....95
OPTION
DISPLAYING THE OPTION MENU 96
SOUNDS 99
POST-VIEW SETTING 101
SCREEN LANGUAGE ....102
TV SYSTEM SETTING ....103
AUTO POWER OFF FUNCTION 104
FILE No. RESET FUNCTION 105
INITIALIZING THE CARD MEMORY AND INTERNAL MEMORY .....108
RESETTING THE CAMERA SETTINGS ....110
CHECKING THE REMAINING INTERNAL MEMORY AND CARD MEMORY ....111
CHECKING THE REMAINING BATTERY CHARGE 113
■ OTHER DEVICES AND CONNECTIONS
CONNECTING TO A TV 115
DIRECT PRINTING 116
■ APPENDICES
COMMONLY ASKED QUESTIONS 124
TROUBLESHOOTING 130
SPECIFICATIONS ....136
HINTS FOR TAKING PICTURES 144
Your camera has an abundance of convenient features and functions. From creating precisely the photo you want, to viewing images using various techniques, you can locate the exact operation for your purposes in the following table.
| Shooting/recording | ||
| Basic operation Convenient functions Additional functions | ||
| Getting started shooting“Recording a video clip” on page 45“Shooting single shots” on page 34“SHOOTING SEQUENTIAL SHOTS” on page 44 | Change the setting to sequential shots“How to use the best shot feature” on page 52Log the date and time of your photos“DATE AND TIME SETTING” on page 22Zoom in on the subject“USING THE ZOOM” on page 54Close-up photography“FOCUS RANGE” (macro mode) on page 59 | For more accurate focus“FOCUS RANGE” (manual focus) on page 59Set the focus to a narrow range“FOCUS AREA SETTING” on page 70Check the focus status“Zoom jump playback” on page 41 |
| Optimize the photo quality“RESOLUTION/VIDEO SIZE SETTING” on page 66 | ||
| Capture fast-moving subjects“USING THE SCENE FUNCTION” (sports mode) on page 49 | ||
| Shoot in dark conditions“EXPOSURE CORRECTION” on page 75“FLASH SETTING” on page 55“USING THE SCENE FUNCTION” (night view mode/fireworks mode/lamp mode) on page 49 | ||
| Increase the camera’s sensitivity“ISO SENSITIVITY” on page 73 | ||
| Photographing people“USING THE SCENE FUNCTION” (portrait mode/night view mode/face chaser mode) on page 49“FLASH SETTING” (red-eye reduction) on page 55 | ||
| Photographing landscapes“USING THE SCENE FUNCTION” (landscape mode) on page 49 | ||
| Take a self-photo“SELF-TIMER” on page 57 | ||
| Make images lighter or darker“EXPOSURE CORRECTION” on page 75 | Measure the brightness of a specific area“LIGHT-MEASURING MODE SETTING” on page 72Adjust the camera’s sensitivity“ISO SENSITIVITY” on page 73 | |
| Change the color of the images“USING THE SCENE FUNCTION” (monochrome/sepia) on page 49 | Make white appear natural“WHITE BALANCE” on page 74 | |
| Playback | ||
| Basic operation Convenient functions Additional functions | ||
| Getting started viewing images• “Playing back the video clip” on page 46 | Adjust the playback volume• “SOUNDS” on page 99 | |
| • “Viewing still images” on page 36 | Search for image data• “9-image display playback” on page 37• “Folder playback” on page 39• “Quick scroll playback” on page 38Magnify an image• “Magnifying (zooming in) the image” on page 40 | Check the focus status• “Zoom jump playback” on page 41Change the angle of view• “ROTATEIMA page 81 |
| Slideshow playback• “SLIDESHOW PLAYBACK” on page 94 | ||
| Adjust the monitor brightness• “Adjust the monitor brightness” on page 32 | ||
| Playback on a TV• “CONNECTING TO A TV” (for playback) on page 115 | Set the TV system• “TV SYSTEM SETTING” on page 103 | |
| Data managing/processing | |
| Basic operation Convenient functions Additional functions | |
| Edit photos“CONTRAST CORRECTION” on page 83“RED-EYE CORRECTION” on page 85 | |
| Copy files from the internal memory to the card, or vice versa“COPY DATA” on page 87 | |
| Delete files“Erasing files” onpage 42 | Protect images from accidental erasure“IMAGE PROTECT” on page 79Format a card“INITIALIZING THE CARD MEMORY AND INTERNALMEMORY” on page 108 |
| Specify the number of prints and date imprint“PRINT SETTINGS” on page 89 | |
| View the settings that were in effect when the image/audio data was recorded“DISPLAYING IMAGE PROPERTIES (INFORMATION SCREEN)” on page 95 | |
CHECKING THE INCLUDED ACCESSORIES
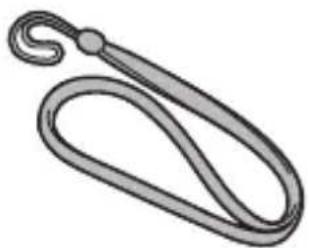
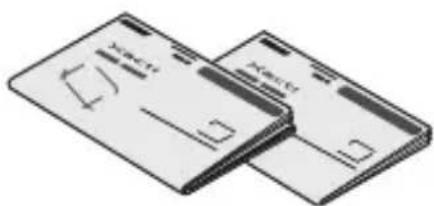
- Handstrap: 1 • SANYO Software Pack
natural_image
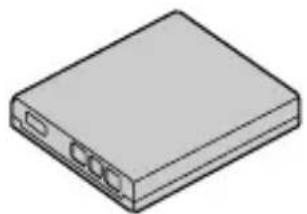
Simple line drawing of a keychain with a loop handle (no text or symbols)• Lithium-ion battery pack (battery pack): 1
natural_image
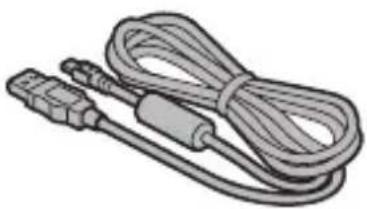
Isometric illustration of a rectangular electronic device with three ports (no text or symbols)• Dedicated USB interface cable: 1
natural_image
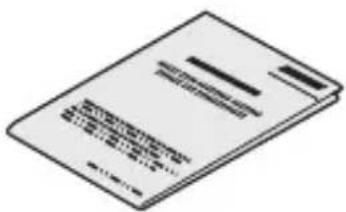
Illustration of a USB cable with connector port and connector plug (no text or symbols)- "SAFETY MANUAL" (safety precautions booklet) Please read this booklet carefully before using the digital camera.
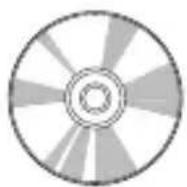
(CD-ROM): 1
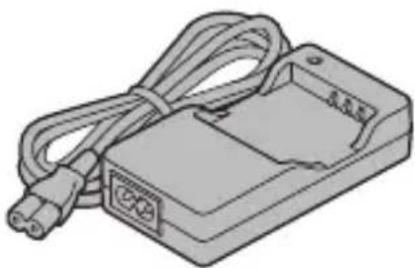
• Lithium-ion battery pack charger and power cord
natural_image
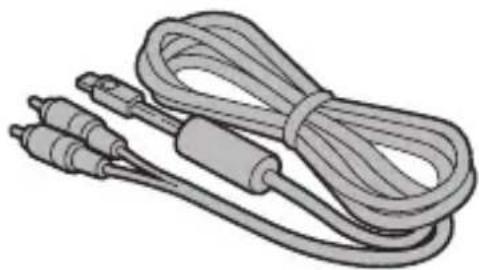
Illustration of a gray electronic device with cables and connectors (no text or symbols)• Dedicated AV interface cable: 1
natural_image
Illustration of a coiled cable with two connectors and a central connector (no text or symbols)- Quick Guide
natural_image
Illustration of two overlapping credit cards with no visible text or symbols on the cards themselves.7 English
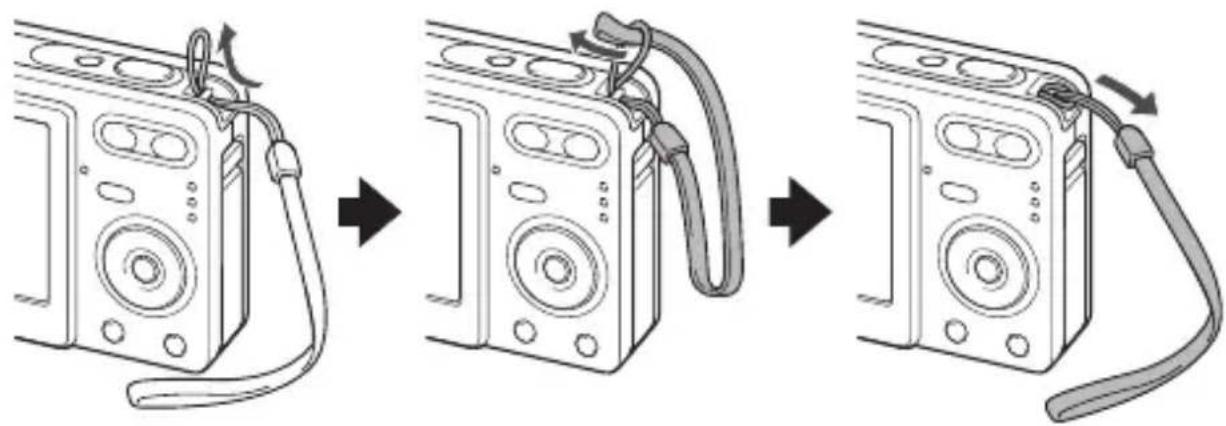
Attaching the handstrap
natural_image
Diagram showing three-step cable installation process of a speaker into a microphone (no text or symbols)CHECKING THE INCLUDED ACCESSORIES
Media cards that can be used with this camera
The types of card that can be inserted into and used with this camera are:
- SD Memory Card
- Multi Media Card
What "card" means in this manual
- In this manual, SD Memory Cards and Multi Media Cards that can be used in this digital camera are referred to as “card”.
- The cards in the illustrations in this manual are SD Memory Cards, but all installation and removal procedures are the same for both SD Memory Cards and Multi Media Cards.
GETTING THE MOST OUT OF YOUR CAMERA
It's loaded with lots of functions that are possible only in a digital camera, including a super-quick focus, an easy-to-understand guidance display on a large screen, a more extensive scene function, and more.
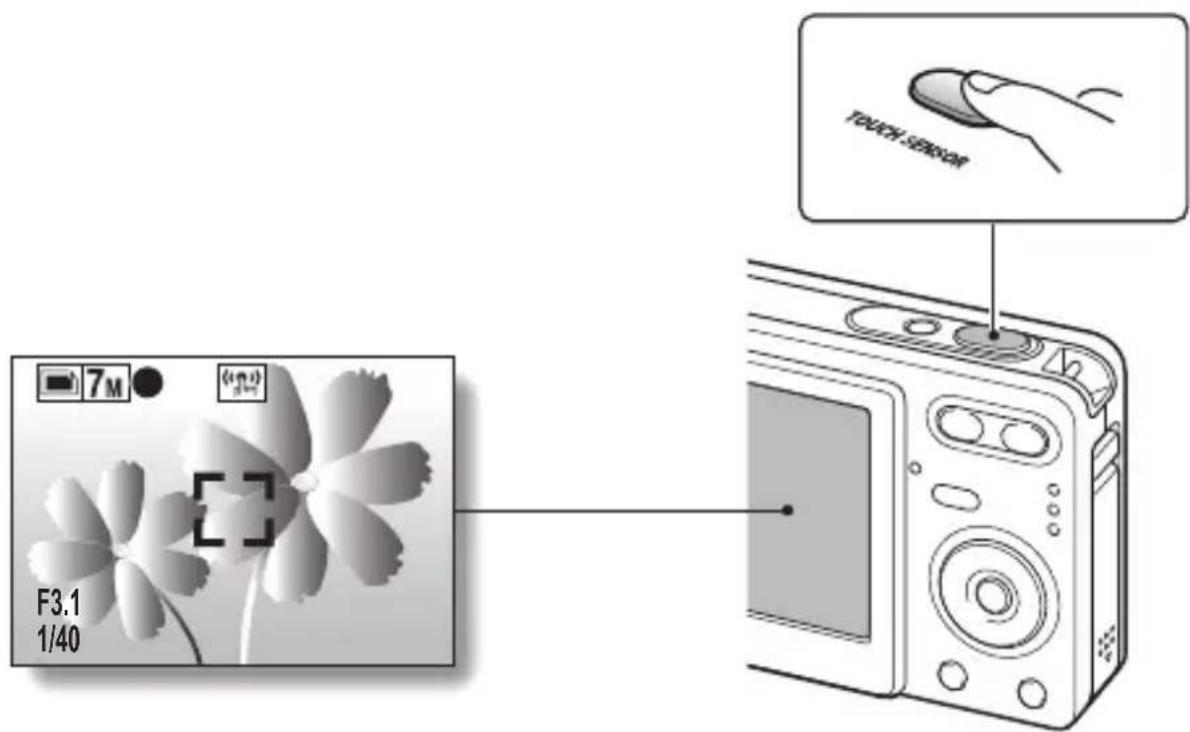
You'll never miss a photo opportunity, thanks to the quick focus: Touch focus (see page 65)
Just touch the shutter button lightly, and the touch sensor automatically focuses the image (touch focus).
GETTING THE MOST OUT OF YOUR CAMERA
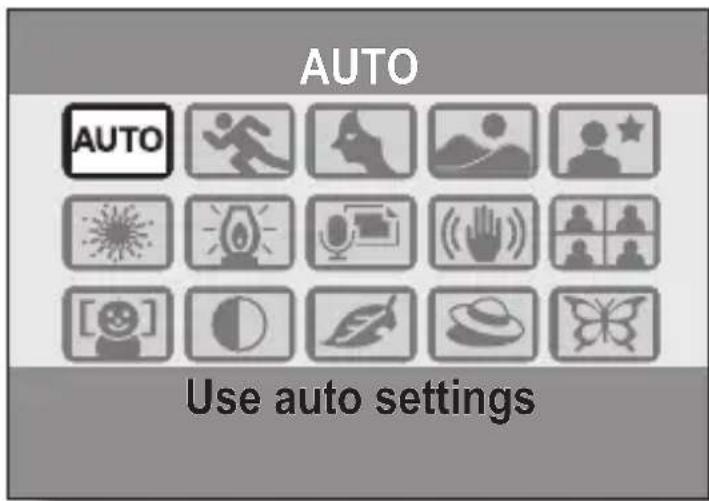
■Abundant scene functions
You can select from a variety of preset settings (aperture, shutter speed, etc.) for specific shooting conditions.
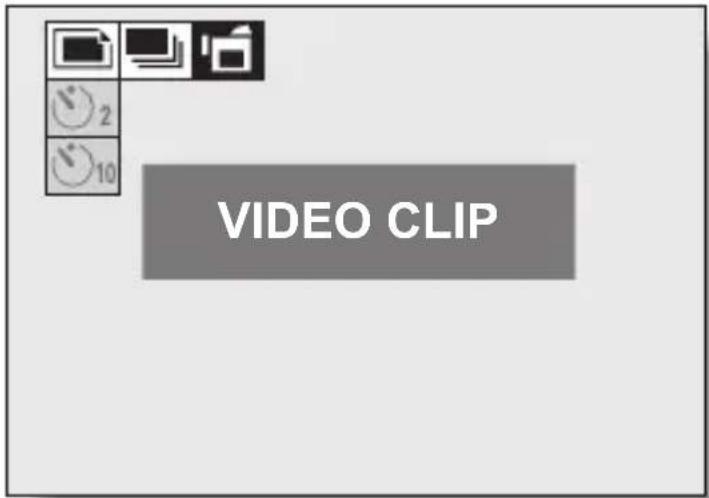
■Speedy mode-switching
Switch the shooting mode from still images to video clips to sequential shots with a single button operation.
11 English
SYSTEM MAP
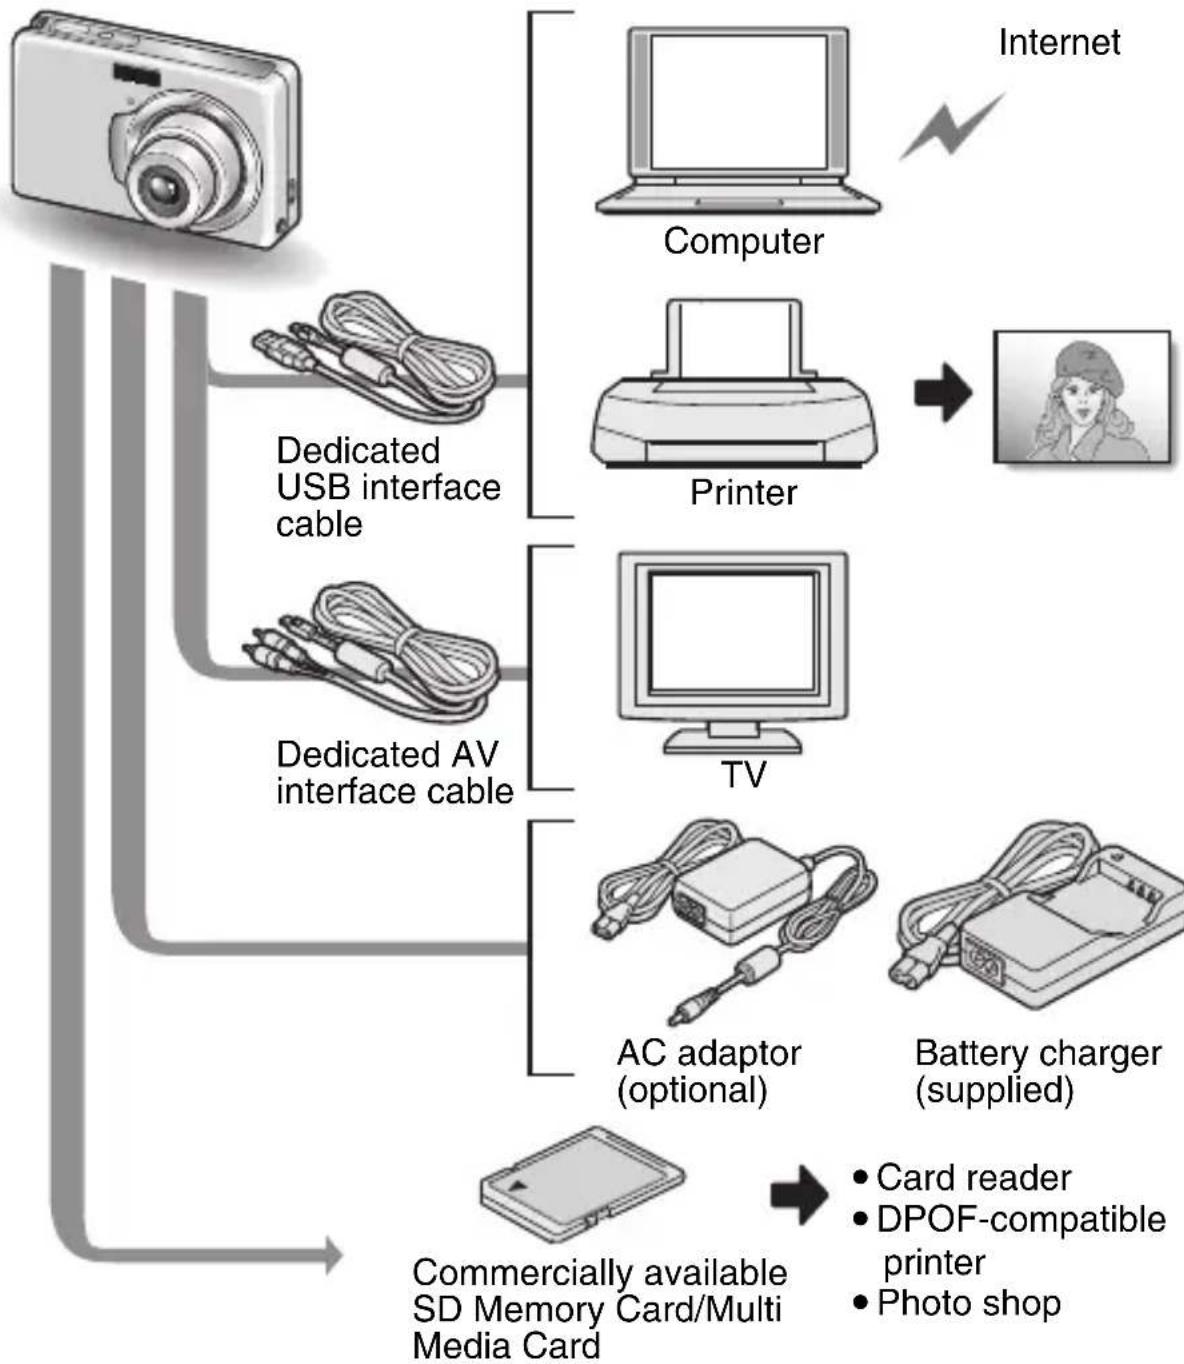
The included accessories can be used to connect your camera to a computer, printer or TV. By connecting the camera to your computer, you can, for example, copy your photos to the computer's hard disk. You can connect it to a printer for direct printing of your photos. Or take the card to a photo shop to have your photos printed there.
flowchart
graph TD
    A["Camera"] --> B["Dedicated USB interface cable"]
    A --> C["Dedicated AV interface cable"]
    B --> D["Computer"]
    C --> E["Printer"]
    D --> F["Internet"]
    E --> G["Image of person with photo"]
    C --> H["TV"]
    H --> I["AC adaptor (optional)"]
    H --> J["Battery charger (supplied)"]
    I --> K["Commercially available SD Memory Card/Multi Media Card"]
    J --> L["• Card reader\n• DPOF-compatible printer\n• Photo shop"]
PARTS NAMES
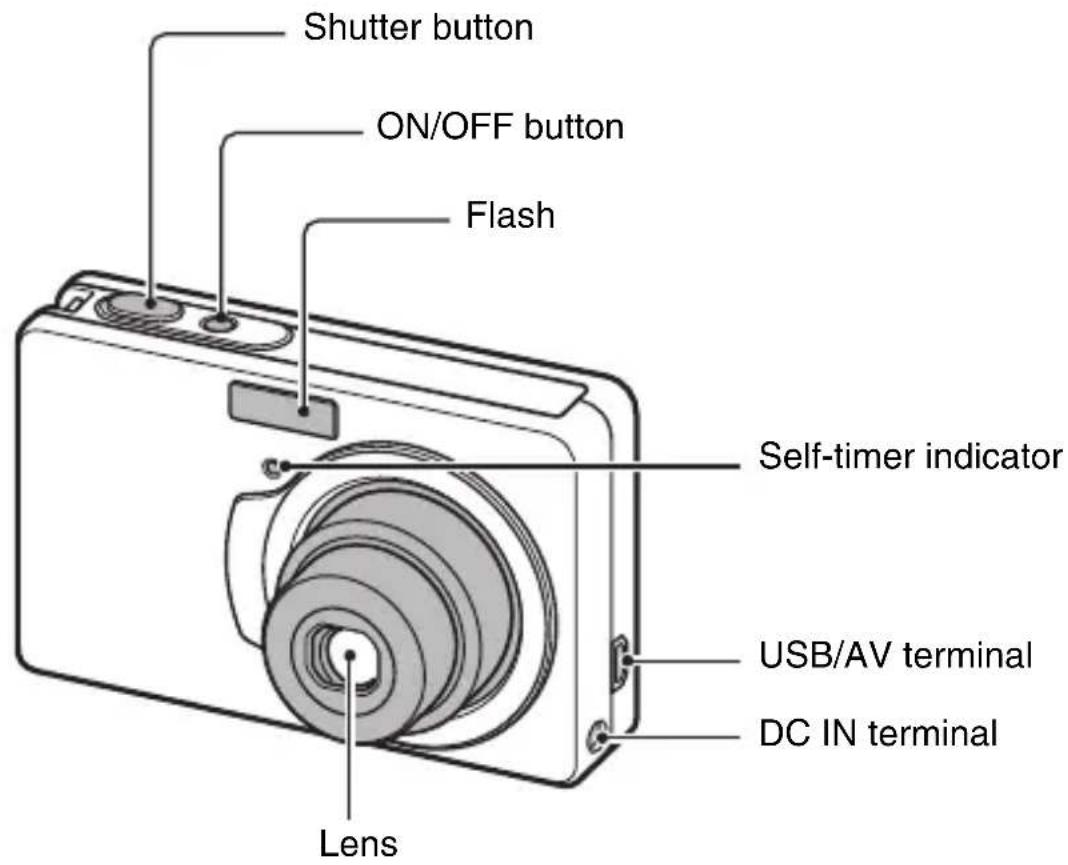
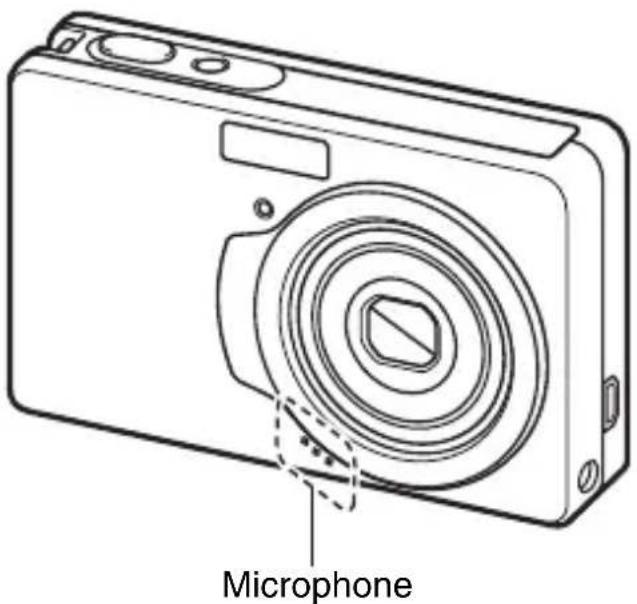
Front
Rear
![Illumination sensor • Detects the ambient brightness and automatically adjusts the brightness of the monitor accordingly. Monitor Zoom switch Strap holder Battery/card compartment cover Playback button [▶] [▲] button [▶] button SET button MENU SCENE SCENE button [▼] button MENU button [◀] button](/content/2026/05/954550/images/1569a5de9ad4b76b4509c8a0dd007f6b3c897ebf3f61f98244bede6bef48a13e.jpg)
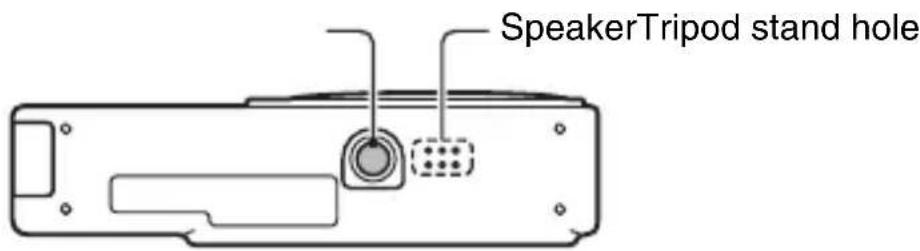
Bottom
CHARGING THE BATTERY PACK
Please charge the supplied battery pack before using it.
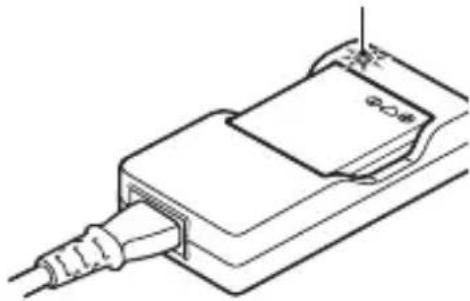
1
Insert the battery pack in the battery charger.
- Insert it in the direction indicated by the [△] mark on the battery pack.
2
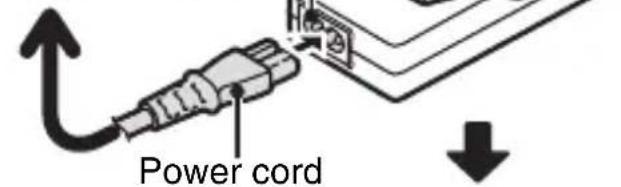
Connect the supplied power cord to the socket on the battery pack charger.
- Insert the connector straight and securely.
3
Plug the power plug into a power outlet (AC 100 V to 240 V).
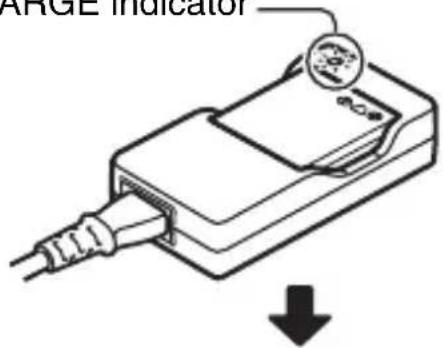
- Recharging begins. - During recharge, the CHARGE indicator is lit red.
4
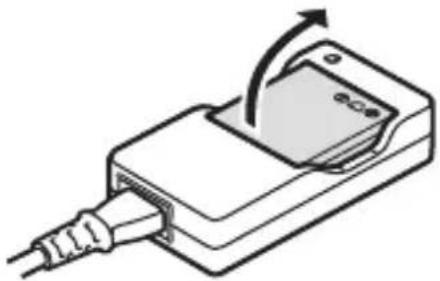
When the CHARGE indicator turns off, unplug the power cord from the power outlet, and remove the battery pack from the charger.
CHARGE indicator
[△] mark Battery pack
Socket
To power outlet
CHARGE indicator
natural_image
Diagram of a device with an attached plug and cable, showing a curved arrow indicating rotation (no text or symbols present)HINT
- The recharge time is approx. 90 minutes.
RECHARGING THE BATTERY PACK
Be sure to fully charge the supplied or separately sold battery pack before using it in your camera. For charging the battery pack, use the supplied charger.
Charge the battery pack if it is being used for the first time, and recharge it whenever the remaining charge is low (see “CHECKING THE REMAINING BATTERY CHARGE” on page 113).
- During recharging, the charger and battery pack will be warm. This is normal and does not indicate a malfunction.
If there is interference to your TV or radio during recharging...
- Move the battery pack and charger further away from the TV or radio.
Ambient temperature during recharging
- It is recommended that the ambient temperature during recharging be between about 10°C and 35°C (50°F and 95°F). Due to the characteristics of the battery pack, at temperatures below 0°C (32°F), it may not be possible to sufficiently recharge it.
- When the battery pack temperature is high, it may take longer to recharge it.
Recharge a battery pack in the following cases
- A battery pack which has not been used for a long time
- Newly purchased battery pack
CHARGING THE BATTERY PACK
About the CHARGE indicator
The CHARGE indicator shows the status of the battery pack and the charger.
Please refer to the following table if the indicator flashes abnormally.
CHARGE indicator
natural_image
Line drawing of a device with a cable inserted into a housing (no text or symbols)| CHARGE indicator | |
| Not lit Not connected properlyTo recharge the battery pack, the power cord of the charger must be connected to a power outlet, and the plug at the other end inserted in the charger's power socket (page 15).The battery pack is not installed, or it is not installed correctly (page 15).Recharging finished | |
| Lit red Recharging | |
| Red flashing | Problem with the battery pack or battery pack chargerImmediately remove the battery pack from the charger.Do not use an abnormal battery pack. (The usable life of the battery pack has probably expired.) |
About the internal backup battery
- This camera's internal battery serves to maintain the date and time settings, as well as the shooting settings. The backup battery will be fully charged when the battery pack is kept in the camera continuously for about 2 days. In the fully charged state, the backup battery will maintain the camera settings for about 7 days.
When not using the camera for a long time, remove the battery pack
- A small amount of power is still used even if the digital camera is turned off, and it is therefore recommended that the battery pack be removed from the camera if it is not going to be used for a long time. Note that when the battery pack is removed for a long period, the time and date settings may be cleared. Before using your camera again, be sure to confirm that the camera settings are correct.
INSTALL THE BATTERY PACK AND CARD
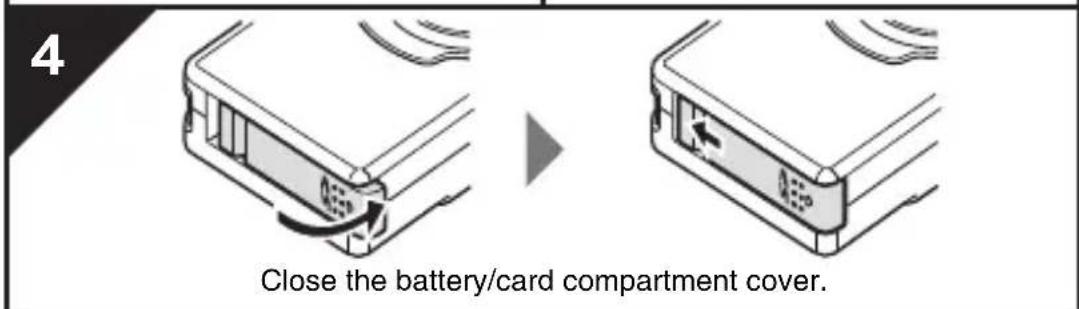
1 Insert the battery pack and card.
- The card can be used after it has been formatted with the camera (page 108).
- Make sure that the battery pack and card orientation are correct.
![2 [△]mark Insert the battery pack. Insert all the way until it clicks. 3 Contact end](/content/2026/05/954550/images/d5103306591a9be90d150660640960fac3f21e7cf702021ebfcc98d773aefb32.jpg)
INSTALL THE BATTERY PACK AND CARD
CAUTION
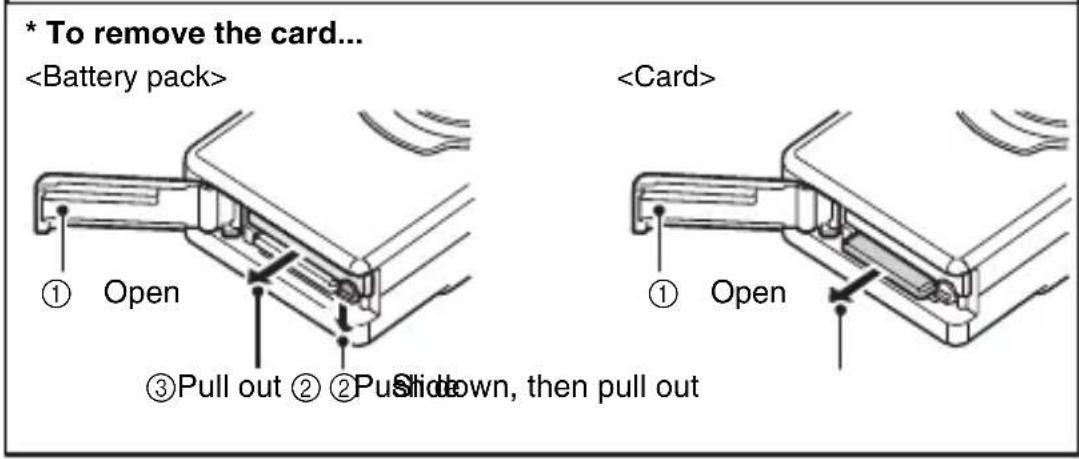
Be careful when removing the card.
- Do not attempt to forcibly remove the card.
- Never remove the card when the camera is connected to a computer or printer, or when the self-timer indicator is flashing quickly. In doing so, you risk losing the data stored in the card.
Keep your finger on the card until it is completely inserted or released.
- If you remove your finger too soon, the card may spring out and become lost or hit someone in the eye.
HINT
Shooting without a card installed
- When a card is installed, images are recorded to and played back from the card. When no card is installed, images are recorded to and played back from the camera's internal memory. When the camera is turned on with no card installed, the internal memory icon 📋 is shown on the monitor to let you know that the images you capture will be saved to the camera's internal memory.
TURNING THE CAMERA ON AND OFF
Turning on the camera
In the shooting mode
1 Press the ON/OFF button.
• The camera turns on.
• The camera turns on in the shooting mode that was active before it was last turned off.
In the playback mode
1 Press the playback button [▶] for at least one second.
• The Playback Screen appears on the monitor (pages 36 and 46).
![ON/OFF button Monitor Playback button [▶]](/content/2026/05/954550/images/bedde7d4a56f256521c3c6e7b56fa83ea77da848fc5a0efaa994c1a33bac5f95.jpg)
Turning off the camera
1 Press the ON/OFF button.
• The camera turns off.
- When the playback button [▶] or ON/OFF button is pressed, the camera turns off.
TURNING THE CAMERA ON AND OFF
About the auto power off function
In order to preserve battery pack power when, for example, the camera has accidentally been left on, the camera is furnished with an “auto power off” function by which the camera automatically turns off after a certain period of inactivity (about 1 minute during shooting or about 3 minutes during playback [factory default settings]).
- If the auto power save function has operated to turn the camera off, press the ON/OFF button to turn it back on.
- You can change the setting for the time elapsed before the camera automatically turns off (page 104).
- When the camera is connected to a computer or printer using the dedicated USB interface cable, the auto power save function is disabled, and the camera turns off after about 12 hours.
HINT
If the Ⓛ? icon appears...
- When a picture is taken, the date and time it was captured is recorded with it. When the date and time cannot be recorded with the image because the date and time have not yet been set (page 22), the 🔊? icon appears. To have the date and time recorded with images, please make this setting before capturing images.
DATE AND TIME SETTING
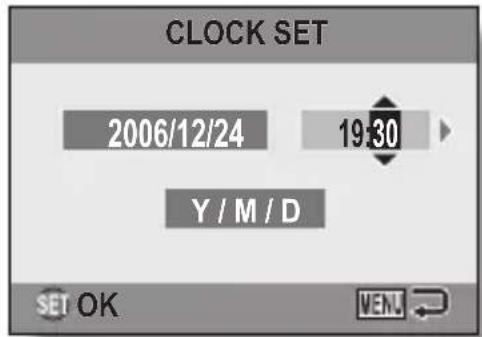
The camera will record the date and time an image is captured so that you can display them during playback. Therefore, before capturing images, make sure the correct date and time are set.
Example: To set the clock to 7:30 p.m. on December 24, 2006
1 Press the ON/OFF button to turn the camera on, and press the MENU button.
• The Recording Menu appears (page 62).
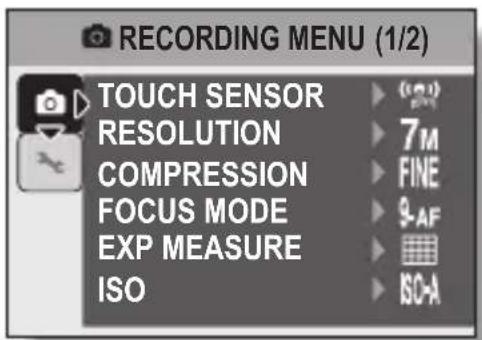
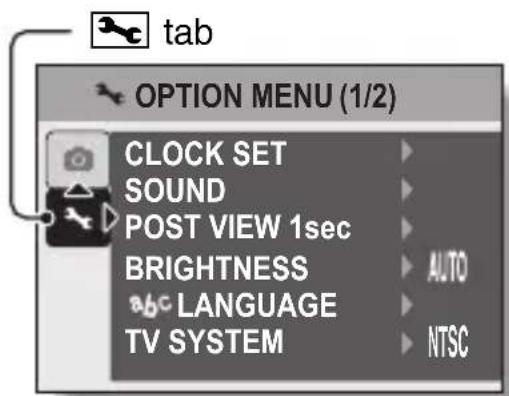
2 Press the [▼] button to select the □ tab, and press the [▶] button.
• The Option Menu appears.
3 Press the [▲] or [▼] button to select "CLOCK SET", and press the SET button or the [▶] button.
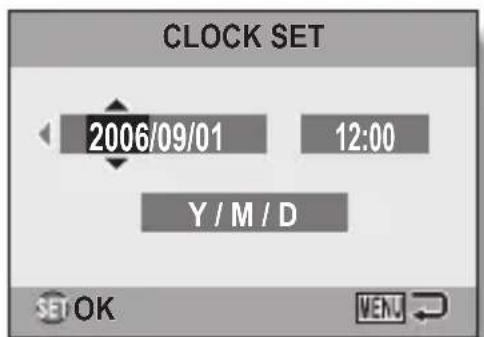
• The Clock Set Screen appears.
• The current date and time settings are shown.
- Follow the procedures below to enable or disable the date display during playback, to set the display format for the date, and to set the date and time.
• To return to the Option Menu, press the MENU button.
DATE AND TIME SETTING
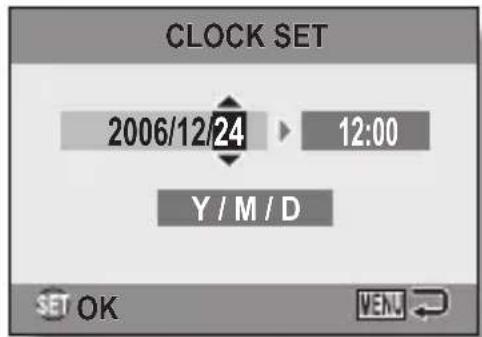
4 Set the date and time.
① Press the [▲] or [▼] button to change the year indication.
- Repeat these steps to select the month indication and day indication, and set the date to December 24, 2006.
② Press the [▶] button to select the time indication.
③ Press the [▲] or [▼] button to change the time setting.
④ Press the [▶] button to select the Y/M/D indication.
⑤ Press the [▲] or [▼] button to change the displayed date order.
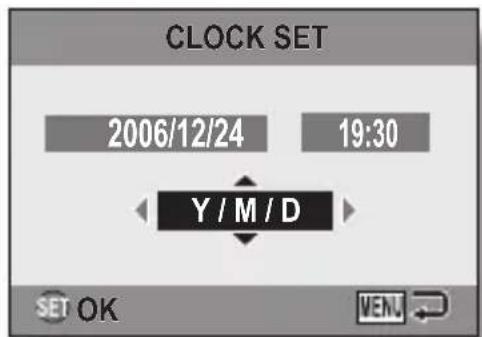
- Press the [▼] button to change the displayed date order as follows:
- Press the [▲] button to change it in the reverse order.

flowchart
graph LR
    A["→ Y / M / D → M / D / Y → D / M / Y → DISP OFF"] --> B[" "]
5 Press the SET button.
- The date and time setting is completed, and you are returned to the Option Menu.
- The Option Menu is canceled when the MENU button is pressed.
HINT
- Under normal conditions, while the battery pack is being replaced, an internal battery will maintain the date and time settings. However, there is a small chance the settings may be lost. (The backup will last for about 7 days.) It is recommended to check that the date and time settings are still correct after replacing the battery pack and before shooting or recording of any type (follow steps 1 to 3).
To correct the date and time settings
- In step 4, select the indication that you want to change, and follow the procedure to change the indication.
BEFORE TAKING PICTURES
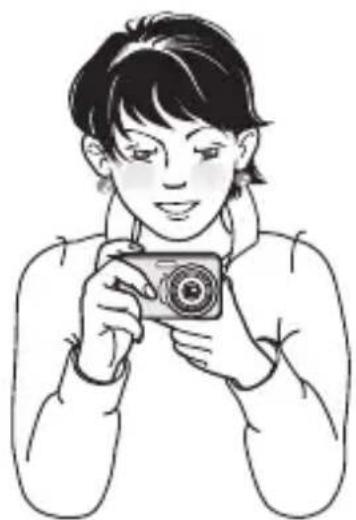
How to hold the camera
Hold the camera securely, keeping your elbows close to your body and making sure the camera is stable.
Correct hold Incorrect hold
natural_image
Line drawing of a person holding a digital camera (no text or symbols)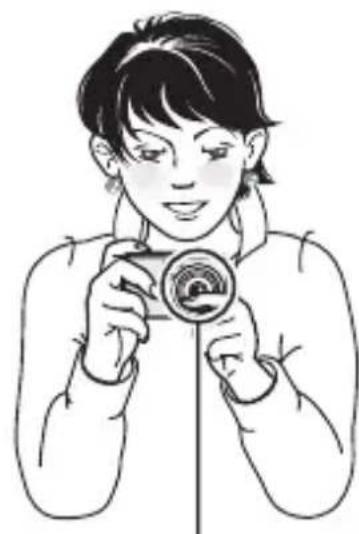
natural_image
Illustration of a person holding a camera lens (no text or symbols)A finger is blocking the lens or flash.
Make sure that the lens and flash are not blocked by your fingers or the handstrap.
HINT
- Images captured in the still image shooting mode can be rotated when they are played back (page 81).
- When the optical zoom is used or when the autofocus is operating, the image may appear to waver, but this is not a malfunction.
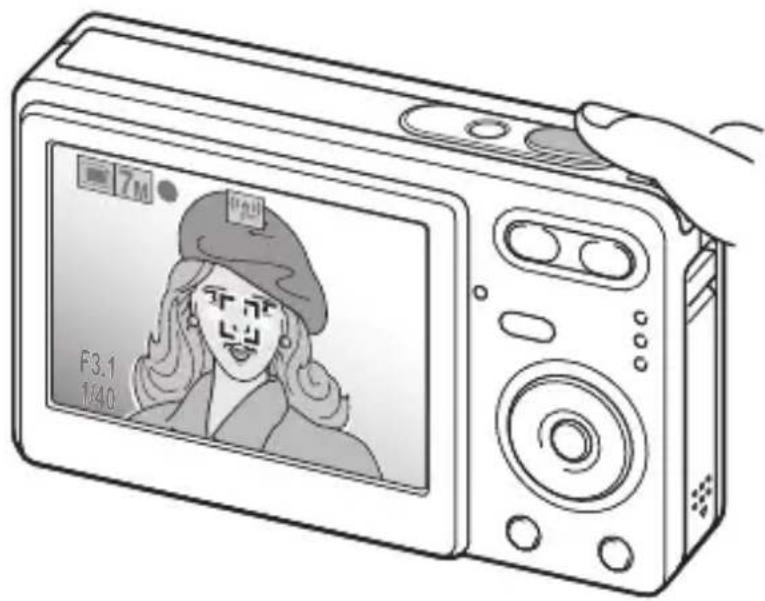
About the touch sensor (touch focus)
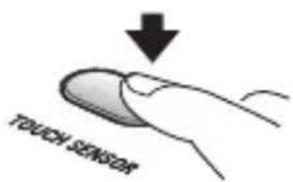
With the touch sensor, the image is focused simply by a light finger-touch on the shutter button (focus lock). With the subject in focus, just gently press the shutter button to take the picture for a perfectly focused image.
At the same time, the touch sensor is temporarily deactivated whenever the Recording Menu (page 62) is displayed, thereby facilitating operation of these screens.
Furthermore, you can also deactivate the touch sensor so that the autofocus operates only when you press the shutter button halfway (page 65).
natural_image
Line drawing of a digital camera with a face and screen (no text or symbols on the device body)BEFORE TAKING PICTURES
Using the autofocus
The autofocus will work in almost all situations; however, there are certain conditions that may cause the autofocus function to not work properly. If the autofocus function is not working properly, set the focus range to capture images (page 59).
■Conditions that may cause incorrect focus
The following examples are some of the situations where the autofocus function may not work.
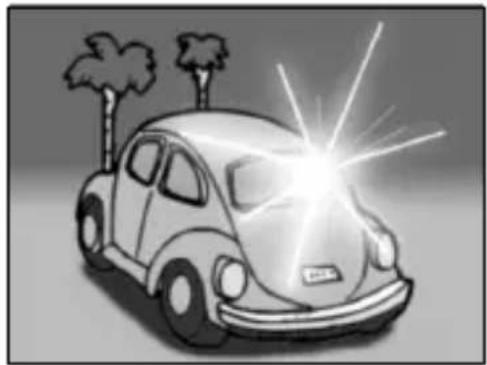
- Subjects with low contrast, very bright subjects at the center of the image or dark subjects or locations
Use the focus-lock function to lock the focus on an object with contrast at the same distance as the desired subject.
natural_image
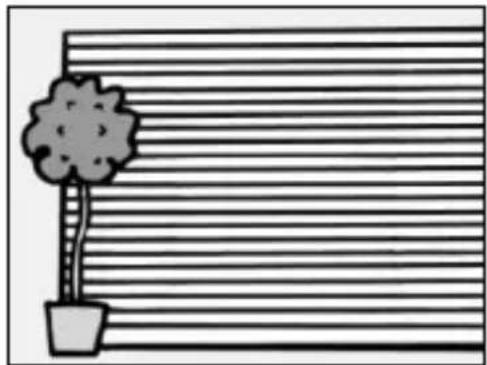
Illustration of a cartoon-style car with smoke and explosion effects (no text or symbols)- Subjects without vertical lines
Use the focus-lock function to lock the focus while framing the subject vertically, then re-orient the camera to compose a horizontally framed image.
natural_image
Simple line drawing of a potted tree with horizontal striped background (no text or symbols)The following examples are some of the situations where the autofocus function may work, but not as desired.
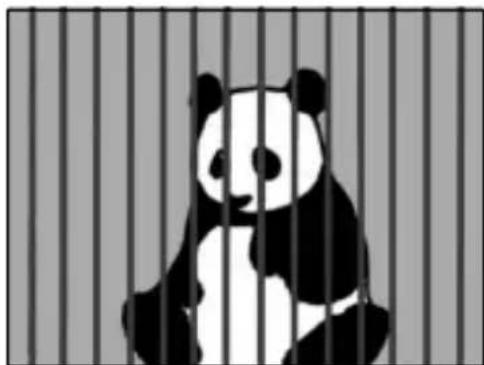
- When both near and far objects are present
Use the focus-lock function to lock the focus on an object at the same distance as the desired subject, then reposition the camera to compose the picture.
natural_image
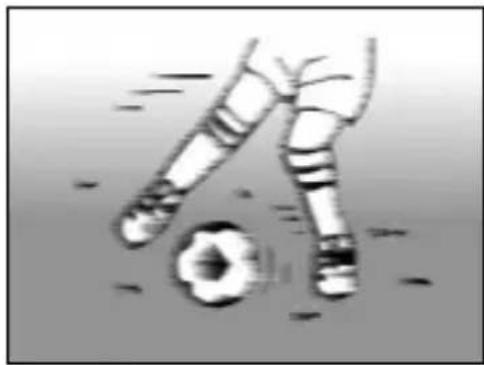
Illustration of a panda sitting in a cage with vertical bars (no text or symbols)- Fast-moving subjects
Use the focus-lock function to lock the focus on an object at the same distance as the desired subject, then reposition the camera to compose the picture.
natural_image
Illustration of a soccer player kicking a ball (no text or symbols)BEFORE TAKING PICTURES
Switching between the shooting mode and playback mode
1 Press the ON/OFF button to turn the camera on.
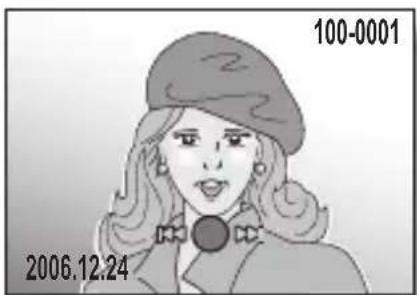
2 Press the playback button [▶].
• Each time the playback button is pressed, the camera switches between the shooting mode and the playback mode.
![ON/OFF button Playback button [▶] 7M 6](/content/2026/05/954550/images/1e6ef7967ac8f791971e7ce36d8df1ab616fd57a7162c4384978c3fb4ac55c38.jpg)
natural_image
Illustration of a woman wearing a beret and a necklace, with date and number annotations (no readable text content)HINT
To turn the camera on in the playback mode
- Press the playback button [▶] for at least 1 second, and the camera will turn on in the playback mode.
How to switch the shooting mode
Your camera can capture single still photos (single-shot mode), record video clips (video clip recording mode), and also capture a series of still photos (sequential shots mode).
1 Press the ON/OFF button to turn the camera on.
2 Press the [▶] button.
• The screen to set the shooting mode and the self-timer appears.
3 Press the [▶] button to select the shooting mode.
4 Press the SET button.
- The selected shooting mode is set.
- An icon in the upper left area of the monitor indicates the active shooting mode setting.
![ON/OFF button [▶] button SET button 7M 6](/content/2026/05/954550/images/4e67d418d57fafdefc40e265adb0ce9770ab8fd564c84a7c67e6d873db59769f.jpg)
:Single-shot mode
Sequential shots mode
:Video clip recording mode
BEFORE TAKING PICTURES
Switching the display mode
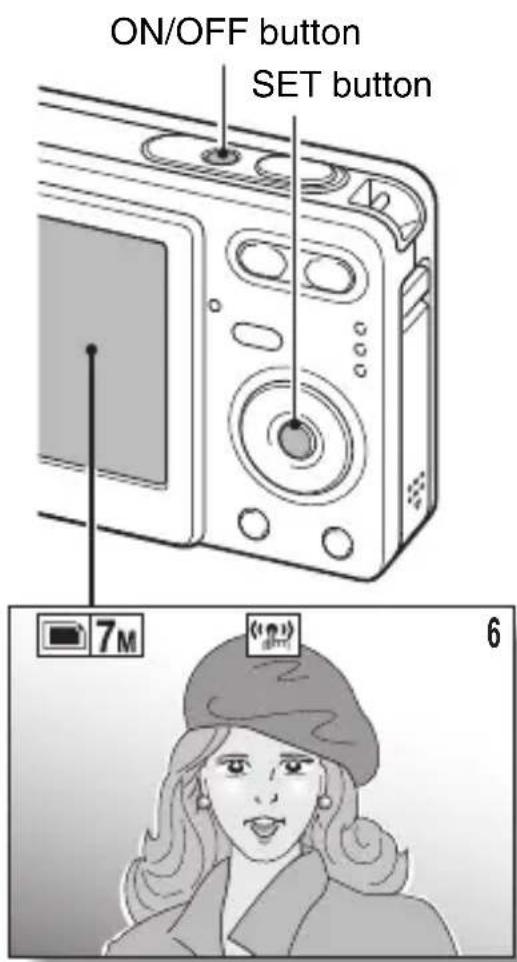
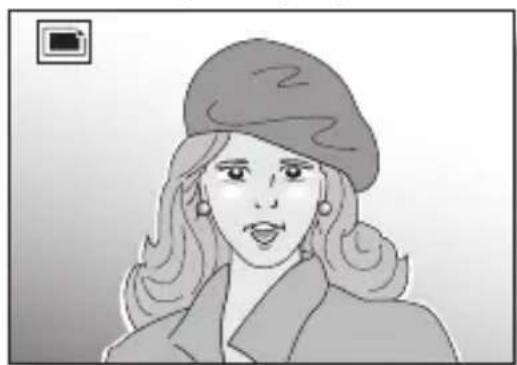
In the shooting mode, you can select the either the “settings display mode” which allows you to confirm the shooting settings on the monitor while you shoot, or the “normal display mode” in which the setting indications are turned off, providing a full view of the subject.
1 Press the ON/OFF button to turn the camera on.
2 Press the SET button.
• Each time the SET button is pressed, the camera switches between the settings display mode and the normal display mode.
natural_image
Illustration of a woman wearing a beret and coat, with no visible text or symbols31 English
Adjust the monitor brightness
The brightness of the monitor is adjustable. Adjust the brightness to the optimum readability in the ambient light.
1 Press the ON/OFF button to turn the camera on.
2 Press the MENU button for at least 1 second.
• The monitor brightness menu appears.
3 Press the [▲] and [▼] buttons to adjust the brightness.
- When set to AUTO, the illumination sensor (page 14) detects the ambient brightness and automatically adjusts the brightness of the monitor accordingly.
4 Press the MENU button.
• The monitor brightness is set, and the monitor brightness menu is canceled.
![ON/OFF button MENU button [▲] and [▼] buttons Monitor brightness menu BRIGHTNESS AUTO +2 +1 ±0 -1 -2](/content/2026/05/954550/images/942572f30c27eb2ffaa06a52108ed51252cebfe304555fa53dcda7fb156b9099.jpg)
HINT
- You can also adjust the monitor brightness by selecting "BRIGHTNESS" from the Option Menu (page 98).
BEFORE TAKING PICTURES
Hints for taking pictures
Muting the camera sounds
- The operation sounds that are generated, for example, when the shutter button, MENU button or SET button is pressed, can be muted (page 99).
Where is the image data saved?
- All the image and sound data is recorded in the camera's internal memory or on the card installed in the camera.
- When a card is installed in the camera, the data is recorded on the card. If no card is installed, the data is recorded in the camera's internal memory.
Taking pictures in backlight conditions...
- When taking pictures with the light coming from behind the subject, due to the characteristics of the CCD, light lines or ghost patterns (flare phenomenon) may appear in the captured image. In this situation, it is recommended that you avoid taking pictures with the subject lit from behind.
Switching the guidance display ON/OFF
- Press the [◀] button. Each time the [◀] button is pressed, the guidance display switches between ON and OFF.
![7M 26 26 [◀] Touch shutter button to focus 7M](/content/2026/05/954550/images/2dc18d0a011fb03c280feee4cbe8f227004036e0b28afbad80d11eaf1694b241.jpg)
CAPTURING AND PLAYING BACK STILL IMAGES
There are two modes for capturing still images. In the normal still image mode, one image is captured each time the shutter button is pressed. In the sequential shots mode, when you press the shutter button, several successive images are captured. For more information about taking sequential shots, please see page 44.
Shooting single shots
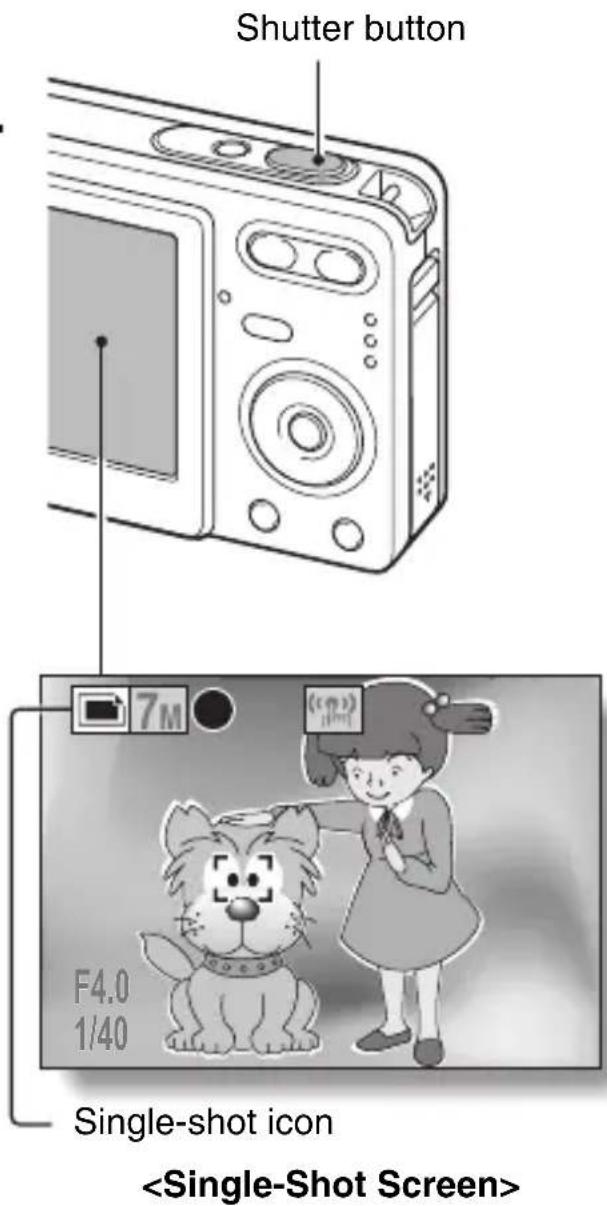
1 Set the camera to the single-shot mode (page 30).
2 Rest your finger on the shutter button.
- If the touch sensor (page 65) has been set to ON, when the shutter button is touched, the autofocus operates and the image is focused (focus lock).

- Engage the autofocus by pressing the shutter button halfway.
CAPTURING AND PLAYING BACK STILL IMAGES
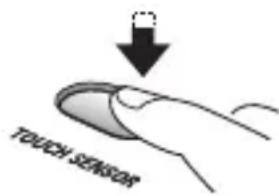
3 Gently press the shutter button.
- Press the shutter button gently, taking care not to move the camera.
- The image that was captured appears on the monitor as long as the shutter button is kept pressed (post view).
4 Release your finger from the shutter button.
- The captured image is recorded.
HINT
When the focus mode (page 70) is set to the 9-point focus mode 9-AF...
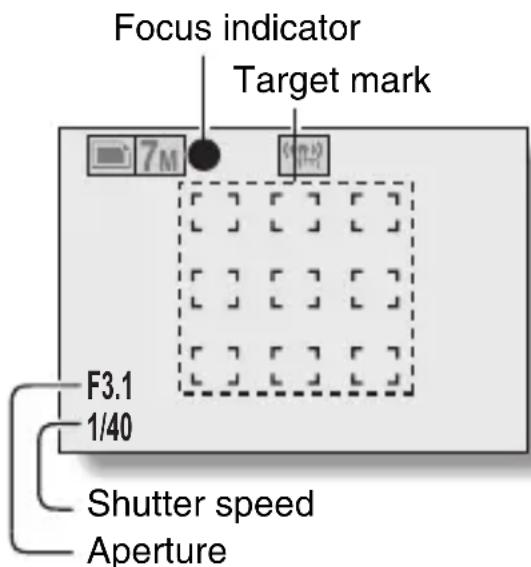
- A target mark [] on the monitor shows the area the camera is focusing on.
- The camera automatically determines the correct focus by measuring from 9 different focus points within the shooting area. If the target mark is at a position that is different from the point you wish to focus on, you can refocus, for example, by changing the shooting angle.
- The large target mark appears when the camera focuses on a wide area in the center of the screen.
About the focus indicator
- A green focus indicator appears when the subject is successfully focused, or a red focus indicator when the camera was not able to focus the subject.
The shutter speed and aperture are displayed
- The shutter speed and aperture settings are also displayed on the monitor. You can use them as a reference when shooting.
If the motion alert icon appears...
- During still image shooting, if the
shutter speed is slow and the possibility that the image may be blurred due to camera shake becomes high, the motion alert icon may appear on the monitor. In this case, use a tripod to stabilize the camera when shooting, or set the flash operation mode to automatic (page 55). - When shooting with the fireworks 📄 scene function, the motion alert icon always appears, but this is normal.
Motion alert icon
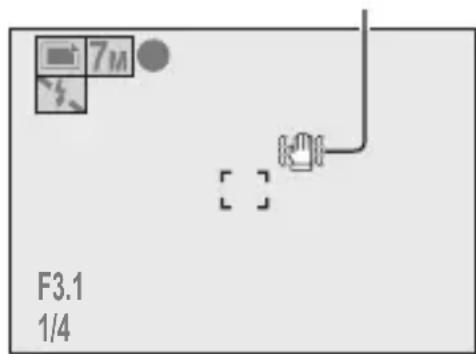
Viewing still images
The steps for viewing both single shots and sequential shots are the same.
5
Press the playback button [▶].
- If the playback button [▶] was pressed to turn the camera on, however, press the playback button [▶] for at least 1 second.
• The image most recently captured appears on the monitor.
6
View other images.
- Press the [◀] or [▶] button to display the previous or next image.
To display the previous image:
Press [◀].
To display the next image: Press [▶].
- To return to Shooting Screen, press the playback button [▶].
- When the playback button [▶] or ON/OFF button is pressed, the camera turns off.
![Playback button [▶] 100-0001 2006.12.24](/content/2026/05/954550/images/78f607b252c89e52db91299389bdf76cb41f4d998ac719ac9ecba31be813555e.jpg)
When you are finished viewing images...
- Press the ON/OFF button to turn the camera off.
HINT
For still images with voice memo (page 51)...
- When the shutter button is pressed, the voice memo is played back.
CAPTURING AND PLAYING BACK STILL IMAGES
9-image display playback
1 Press the playback button [▶].
2 Press [W] ([☐]) on the zoom switch.
• The 9-image display appears.
3 Select the image to play back.
- Press the arrow buttons to move the orange frame to the desired image, and press the SET button. Instead of pressing the SET button, you can press [T] ([○]) on the zoom switch to show the image full screen.
![Zoom switch [W]/[T] SET button Arrow buttons Video clip Still image Orange frame Audio recording Folder number Image number](/content/2026/05/954550/images/1b77aa5c00ea7599ac45987bcb3874bdf006216ed5730585135c87fbda8ffd67.jpg)
37 English
Quick scroll playback
A convenient way to quick-search when there are many images.
1 Access the 9-image display screen (page 37).
2 Press [W] ([☐]) on the zoom switch.
• The Quick Scroll Playback Screen appears.
- Press the [◀] or [▶] button to display the previous or following image.
- You can press the [▲] or [▼] button to move back or forward 32 files at a time.
![SANYO Xacti VPC-E7EX - Press [W] ([☐]) on the zoom switch. - 1](/content/2026/05/954550/images/a652ef29ebe91e2f444fca44191264243e5275073580b526c7fd23d5a6faac67.jpg)
natural_image
Film strip with floral pattern and date label (2006.12.24), no readable text or symbols in the main image area3 Display the desired image, and press the SET button.
- The selected image is shown full-screen.
CAPTURING AND PLAYING BACK STILL IMAGES
Folder playback
A convenient way to search through multiple folders, or to search for an image that was recorded using Screen Capture (page 23 in the SANYO Software Pack INSTRUCTION MANUAL).
1 Access the Quick Scroll Playback Screen (page 38).
2 Press [W] ([☐]) on the zoom switch.
- The Folder Display Screen appears.
3 Select the desired folder, and press the SET button.
- The first image in the selected folder is displayed.
- At this time, if you press [W] ([☐]) on the zoom switch, the images in the selected folder are shown in the 9-image display. If [W] ([☐]) on the zoom switch is then pressed again, you are returned to the Quick Scroll Playback Screen.
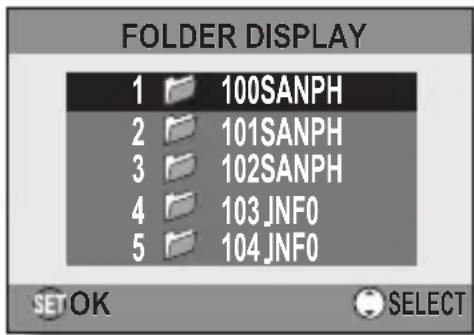
HINT
About images that were recorded using Screen Capture (SANYO Software Pack INSTRUCTION MANUAL page 23)
- Images that were recorded using Screen Capture are saved in folder [***_INFO]. ("***" indicates a 3-digit folder number.)
Magnifying (zooming in) the image
1 Display the image that you want to magnify.
2 Press [T] ([○]) on the zoom switch.
• Magnification is enabled.
- The image is magnified, and the central portion of image is displayed.
- Press the arrow buttons to view different parts of the magnified image.
To magnify:
Magnification increases with each press of [T] ([○]) on the zoom switch.
To return to normal size:
Magnification decreases with each press of [W] ([☐]) on the zoom switch.
- Press the SET button to return to the normal (100%) view.
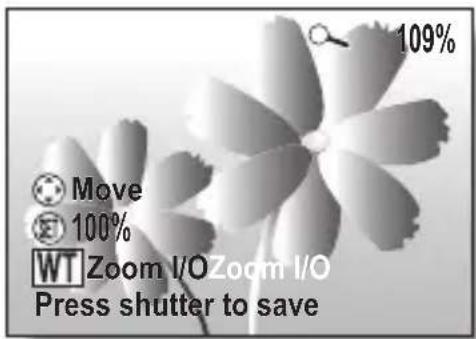
HINT
The magnified portion of the image can be saved as a separate image.
- Press the shutter button. The magnified portion is saved as a new still image.
CAPTURING AND PLAYING BACK STILL IMAGES
Zoom jump playback
You can magnify a portion of a still image to check the accuracy of the focus.
1 Display a still image to view using zoom jump playback.
2 Press the SET button.
• The image is magnified.
- If the magnified view appears to be in focus, then the overall image will be in focus.
3 Press the arrow buttons to move to the part you wish to magnify, and press [T] ([○]) on the zoom switch.
• The displayed area is further magnified.
To magnify further: Magnification increases with each press of [T] ([○]) on the zoom switch.
To go back: Magnification decreases with each press of [W] ([☐]) on the zoom switch.
- Press the SET button again to return to the normal size (100%) screen.
![Zoom switch [W]/[T] SET button Arrow buttons 960% Move 100% WT Zoom I/O Press shutter to save](/content/2026/05/954550/images/51e641a77de9c8c758d82a3930de386bf5c90374fc4ba65c6df1b83ed7993177.jpg)
Erasing files
You can erase files that are stored on the card if you no longer need them. You can erase the files one at a time, or all at once.
1 To erase data from the card, perform the delete procedure with the card installed in the camera. To erase data from the camera's internal memory, remove the card before performing the delete procedure.
2 Set the camera to the playback mode, and press the [▲] button.
• The Delete Screen appears.
ALL FILES:
Erases all the data.
1 FILE:
Erases one file at a time.
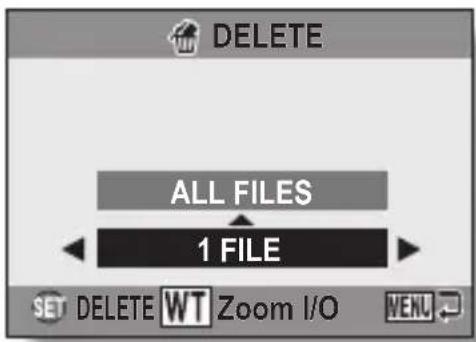
3 Delete the files.
① Use the [◀] and [▶] buttons to view the images and check if it is OK to delete all the files.
② Press the [▲] or [▼] button to select "ALL FILES".
③ Press the SET button.
- The Delete Confirmation Screen appears. To erase the files, select "YES", and press the SET button. When the file delete is completed, "No image" is shown.
CAPTURING AND PLAYING BACK STILL IMAGES
① Use the [◀] and [▶] buttons to display the file you wish to delete.
② Press the [▲] or [▼] button to select "1 FILE".
- There is no confirmation screen when deleting single files. Before pressing the SET button in step ③, please make sure that the displayed image is one you wish to delete.
③ Press the SET button.
- The currently displayed file is deleted.
- To delete other files, repeat steps ① to ③.
CAUTION
About protected images
- Files that are protected from accidental erase cannot be erased. To erase protected files, set the protect setting for the file to off (page 79), and then follow the file delete procedure.
SHOOTING SEQUENTIAL SHOTS
When the shutter button is pressed, still images are captured in succession.
1 Set the camera to the sequential shots mode (page 30).
- If the resolution is set to 10M , the setting changes automatically to 7M .
2 Press the shutter button to start shooting.
- Shooting sequential shots begins.
| Resolution Max. no. of shots | |
| 7M Approx. 6 shots | |
| 4M Approx. 3 shots | |
| 2M Approx. 7 shots | |
| 0.3M Approx. 37 shots |
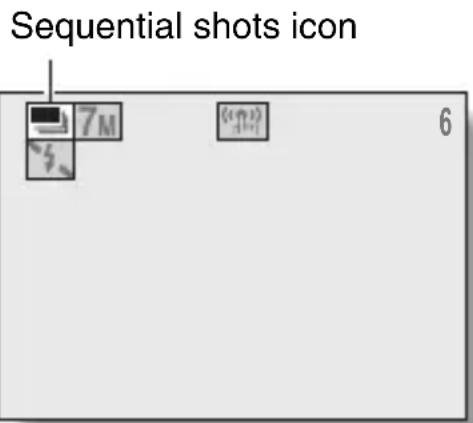
* The quantities indicate the number of shots when the compression rate is set to FINE.
* The maximum number of sequential shots will differ depending on the subject.
- Note that if the shutter button is released during shooting, shooting stops immediately.
HINT
About the focus when shooting sequential shots
- When sequential shots are captured, the autofocus operates when the focus lock is activated, fixing the focus.
- Shooting sequential shots at a resolution of 10M is not possible. If the resolution is set to 10M , it automatically changes to 7M .
Can the self-timer and/or flash be used?
- The self-timer and flash do not operate when shooting sequential shots.
- The following scene functions cannot be set.

Recording a video clip
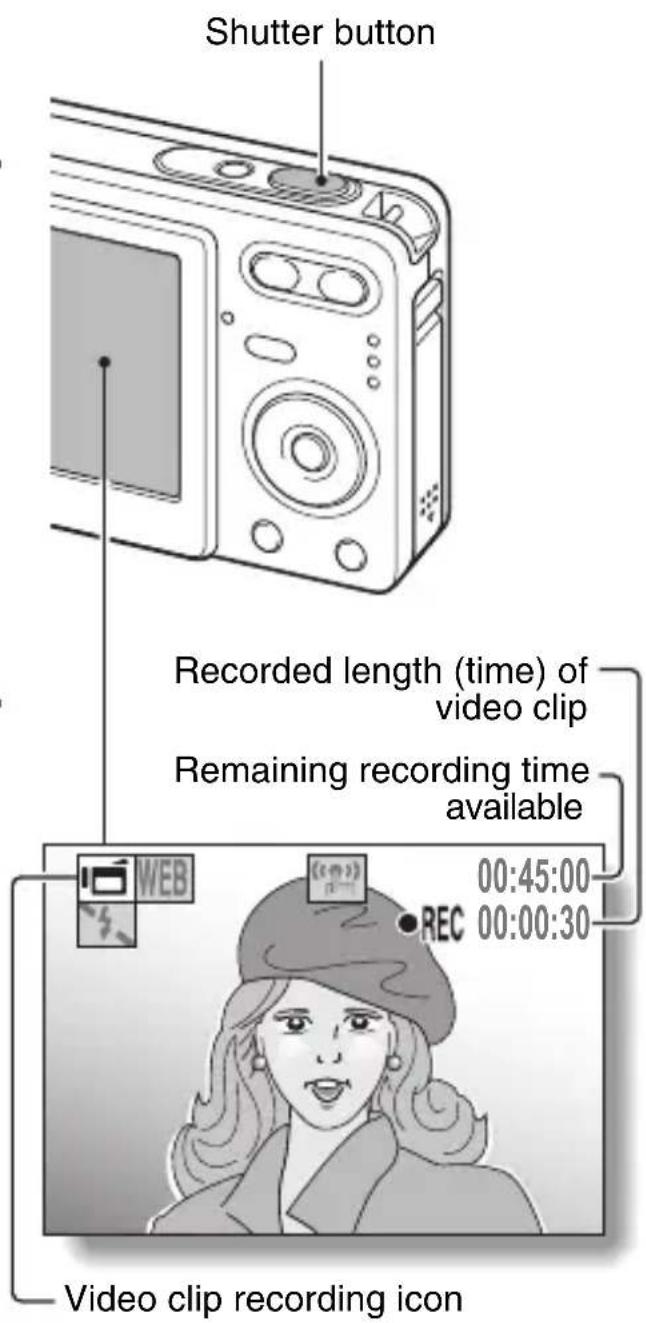
1 Set the camera to the video clip recording mode (page 30).
2 Press the shutter button.
• Video clip recording begins. During recording, the length of the video clip and the remaining recording time available are shown on the monitor.
- It is not necessary to continue pressing the shutter button while shooting.
3 End the recording.
- Press the shutter button again to stop recording and save the video clip.
Playing back the video clip
4 Press the playback button [▶].
- If the playback button [▶] was pressed to turn the camera on, however, press the playback button [▶] for at least 1 second.
• The video clip just recorded appears on the monitor.
• Video clips are indicated by a video clip pattern along the top and bottom of the screen.
5 Press the SET button.
• Video clip playback begins.
• To stop playback, press the [▼] button.
Playback button [▶]
![[▼] button SET button 101-0008 2006.12.24 Video clip pattern](/content/2026/05/954550/images/27ade81149faaf27170be64f3df6a805eb02244097f778b18de3cd561d85493c.jpg)
Outline of playback operation
| To do this... Do this | ||
| Stop playback During | playback, press the [▼] button | |
| Pause | During playback, press the SET button.During accelerated or slow playback, press the [▲] button. | |
| To extract a still image | While playback is paused, press the shutter button. | |
| To play back one image at a time (single-frame step) | During forward playback | While playback is paused, press the [▶] button. |
| During reverse playback | While playback is paused, press the [◀] button. | |
| Slow playback | During forward playback | While playback is paused, press and hold the [▶] button. |
| During reverse playback | While playback is paused, press and hold the [◀] button. | |
| To accelerate playback | Forward playback | During forward playback, press the [▶] button.* The playback speed changes each time the [▶] button is pressed, as follows:Normal playback → 2x → 5x → 10x → 15xPress the [◀] button to resume normal playback speed. |
| Reverse playback | During forward playback, press the [◀] button.* The playback speed changes each time the [◀] button is pressed, as follows:15x ← 10x ← 5xPress the [▶] button to resume normal playback speed. | |
| Return to normal playback speed | Press the SET button. | |
| Adjusting the volume | Louder: During playback, press [T] on the zoom switch.Softer: During playback, press [W] on the zoom switch. | |
When you are finished viewing video clips...
- Press the ON/OFF button to turn the camera off.
CAUTION
If no audio is heard...
The audio is not played back when the video clip is played back in the frame-by-frame, slow playback, fast playback or reverse playback mode.
CAUTION
The data for a video clip is very large.
- Therefore, be aware that if the video clip is uploaded to a computer to be played back, the computer may not be able to play back the video fast enough, making it appear jerky. (The video will always be displayed properly on the monitor.)
If video clip recording stops even when there is card memory remaining...
- Depending on the card you are using, recording may stop even if there is remaining memory in the card.
- For video clip recording, it is recommended that a high-speed memory card be used.
USING THE SCENE FUNCTION
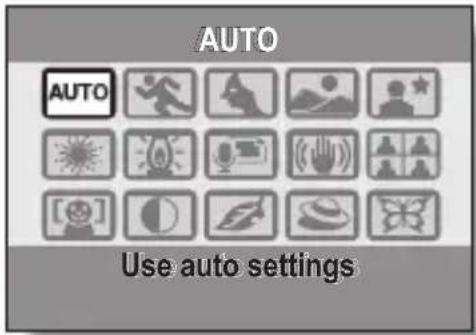
You can select from a variety of preset settings (aperture, shutter speed, etc.) for specific shooting conditions.
1
Set the camera to the shooting mode (page 29), and press the SCENE button.
- The screen to select the settings suitable for the scene (shooting conditions) appears.
2
Use the arrow buttons to select the desired setting.
| Scene setting Features | Shooting mode setting | |||
 Auto Auto | The camera makes the optimum settings. | ○ | ○ | ○ |
 Sports Sports | Capture a split-second image of a fast-moving subject. | ○ | ○ | ○ |
 Portrait Portrait | Enhance the three-dimensional feel of the subject by blurring the background. | ○ | ○ | ○ |
 Landscape Landscape | For beautiful shots of distant scenery. | ○ | × | ○ |
 Night view Night view | Photograph the subject while keeping the background night scenery. | ○ | × | ○ |
 Fireworks Fireworks | For capturing fireworks at night. | ○ | × | ○ |
 Lamp Lamp | Photograph in low-light conditions | ○ | × | ○ |
| Still image with audio | Shoot a still image and add a voice memo. | ○ | × | × |
| Blur reduction | Minimize the effects of camera shake. | ○ | ○ | × |
| Best shot | Four successive still images are captured as the exposure changes. | ○ | × | × |
| Face chaser | The subject's face is kept in focus and the exposure adjusted as the image is captured. | ○ | ○* | ○* |
| Monochrome | Create black-and-white photos. | ○ | ○ | ○ |
| Sepia | Create sepia-tone photos. ○ | ○ | ○ | |
| Contrast | Accentuates the light and dark areas in the image. | ○ | ○ | ○ |
| Vivid | Accentuates the colors in the image. | ○ | ○ | ○ |
○: Available ×: Not available
*: Disabled during recording
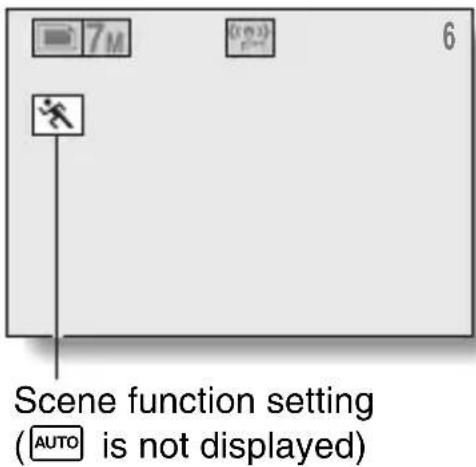
3 Press the SET button.
• This completes the scene select setting.
- The display returns to the Shooting Screen.
- The scene function setting is shown on the monitor.
USING THE SCENE FUNCTION
Capture a still image with a voice memo
With the still-image-plus-audio 📄 scene function, you can add an audio track (about 10 seconds maximum) to a captured still image. This audio track is called a “voice memo”.
1 On the screen to select the scene function settings (page 49), select 📄, and press the SET button.
2 Press the shutter button to take the picture, then speak into the microphone.
- During recording, be careful not to obstruct the microphone with your fingers, for example.
- Audio recording begins. During recording, the length of the audio track and the remaining recording time available are shown on the monitor.
- The maximum recording time for a voice memo is about 10 seconds.
- To end the recording before 10 seconds has elapsed, press the shutter button.
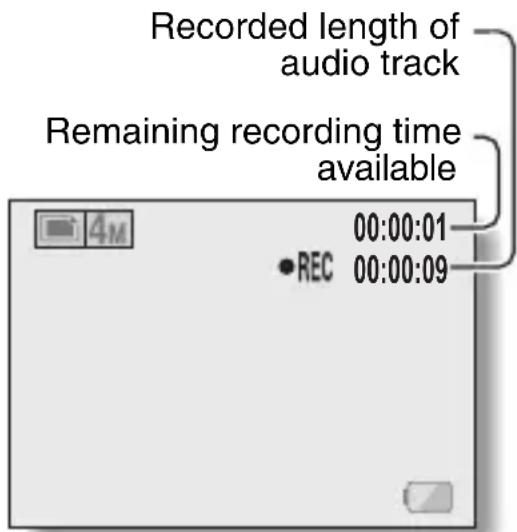
How to use the best shot feature
1 Set the camera to the single-shot mode; on the screen to select the scene function settings, select the best shot icon 🏠 (page 49); and press the SET button.
- If the resolution is set to 10M , the setting changes automatically to 7M and the images are captured.
2 Press the shutter button.
- While the settings change, four still images are shot in sequence.
• After the images are captured, the four still images are displayed on the monitor.
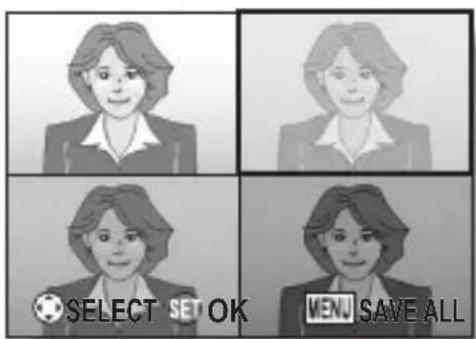
3 Use the arrow buttons to move the orange frame to the image you wish to save.
- For a full-size view of the selected image, press the SET button.
- With the full-size view active, you can use the [◀] and [▶] buttons to view the previous or next image.
- With all four images showing on the monitor, press the MENU button.
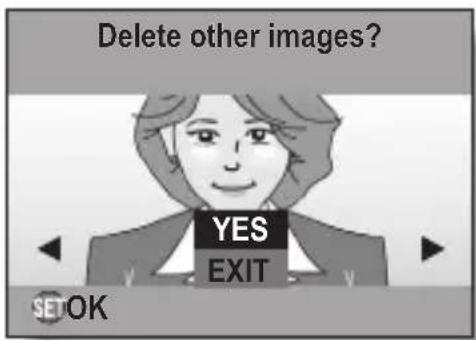
4 With the full-size view of the image you wish to save, select "YES", and press the SET button.
- The image currently displayed is saved, and the other images are deleted.
USING THE SCENE FUNCTION
How to use the face chaser feature
To attain the best possible face shots, the camera automatically focuses on the face and adjusts the exposure.
1 On the screen to select the scene function settings (page 49), select the face chaser icon [icon], and press the SET button.
2 Aim the camera lens at the subject.
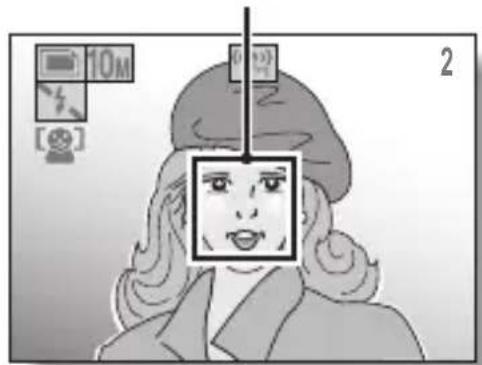
- The camera searches for the subject's face. When it detects the face, an orange frame appears.
- Do not touch the shutter button while the camera is searching. The camera cannot search when the autofocus is activated.
Orange frame
natural_image
Illustration of a person's face with a magnified inset showing camera and time adjustment icons (no text or symbols)3 The focus locks on the subject (page 34).
- The camera focuses on the subject and the exposure is adjusted.
- When the face is in focus, the orange frame changes to green.
4 Press the shutter button.
• The image is captured.
HINT
- When the focus mode is set to AF seeker AF, the scene function setting automatically changes to auto AUTO.
53 English
USING THE ZOOM
Your camera has two zoom functions: optical zoom and digital zoom.
1 Set the camera to the shooting mode (page 29), and point the camera lens at the subject.
2 Press the zoom switch to compose the desired image.
[T]: Zoom in on the subject. [W]: Zoom out.
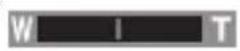
- When the zoom switch is pressed, the zoom bar appears on the monitor.
- When the optical zoom factor is at maximum, zooming stops temporarily. When [T] on the zoom switch is pressed again, the mode changes to the digital zoom mode and zooming continues.
3 Take the picture.
![Zoom switch [W]/[T] Monitor](/content/2026/05/954550/images/17be3290512143682960119e8941fc3eae9e469626b80da1d0de9d34d221903e.jpg)
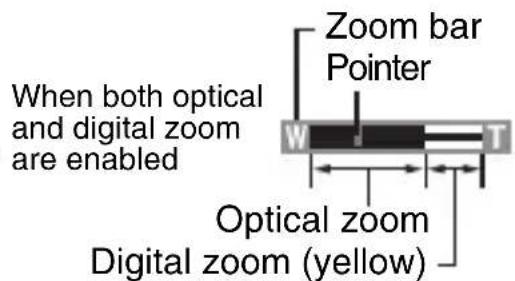
When optical zoom only is enabled
When digital zoom only is enabled

HINT
Can't access the digital zoom?
- The digital zoom cannot be used when the resolution is set to 10M, the face chaser [icon] scene function is active, or the focus mode is set to AF seeker AF.
Can't access the optical zoom?
- When the focus range is set to pan PF or during video clip recording, the optical zoom cannot be used.
FLASH SETTING
The flash is used not only for taking pictures where there is insufficient light, but also when the subject is in shade or in backlight conditions. Your camera's flash has four modes of operation (auto mode, forced flash mode, flash off mode and red-eye reduction mode). Select the flash mode that is appropriate for the surrounding conditions. The flash can be enabled only when taking single-shot still images.
1
Set the camera to the single-shot mode (page 30), and press the [▲] (⚡) button.
• The flash menu appears.
A: The camera will detect the subject brightness and use the flash only when required. In a backlight situation, if only the center of the image is very dark, the flash will operate to compensate (auto).
The flash will operate with every image captured regardless of the conditions. Use this setting under backlight conditions, when the subject is in shade, under fluorescent lighting conditions, etc. (forced flash).
: The flash will not operate even in dark situations. Use this setting when capturing an image in a location where flash photography is prohibited, or when shooting a night landscape scene (flash off).
The digital camera will detect the subject brightness and use the flash only when required. At this time the flash will operate in a manner that reduces the red reflection (“red-eye”) in the subject’s eyes (red-eye reduction).
![[▲] ( ⚡ ) button FLASH AUTO Flash menu](/content/2026/05/954550/images/137a97c80e8c5c64a7f871a561212c3de87e26ff1fe80d7d243c8d77401b9265.jpg)
2 Press the [▲] or [▼] button to select the desired flash mode, and press the SET button.
3 Press the shutter button.
- The picture is snapped and the flash operates according to the selected mode.
HINT
When auto is selected...
- The ⚠A icon indicating the flash setting is not shown on the Shooting Screen.
- When the subject is in focus, if the camera determines that the flash is necessary, a ⏻A or ⏻icon appearing on the monitor indicates that the flash will operate.
When auto or red-eye reduction is selected...
SELF-TIMER
Self-timer photography is available in the single-shot mode.
1 Set the camera to the single-shot mode (page 30), and press the [▶] (×) button.
• The self-timer menu appears.
_2 : The image is captured about 2 seconds after the shutter button is pressed.
10: The image is captured about 10 seconds after the shutter button is pressed.
2 Use the [▲] and [▼] buttons to select the desired self-timer setting, and press the SET button.
• The self-timer is set, and you are returned to the Shooting Screen.
![[▶] ( ⓤ ) button PHOTOGRAPH 1 IMAGE](/content/2026/05/954550/images/274648db16352fb1386df2671c206358ba27bcf8dcef24a6046eabd7e6d1fcc2.jpg)
Self-timer menu
HINT
- The countdown time until shutter release is shown graphically on the monitor.
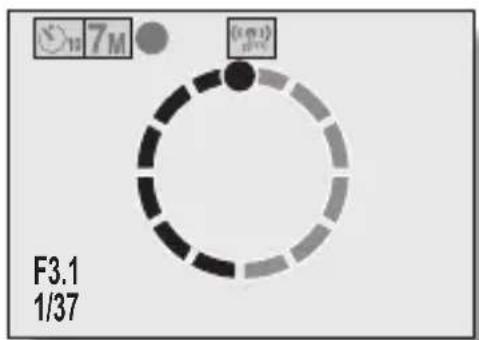
pie
| Category | Value | |---|---| | On | 7M | | (on) | 0.5m | | F3.1 1/37 | 1 |To pause or cancel the self-timer function...
- If the shutter button is pressed again before the shutter is released, the self-timer countdown temporarily stops. Press the shutter button one more time to restart the self-timer.
- To cancel self-timer photography, set the self-timer setting to off
- After the self-timer picture is snapped, the self-timer is automatically reset to off.
When 10 is selected...
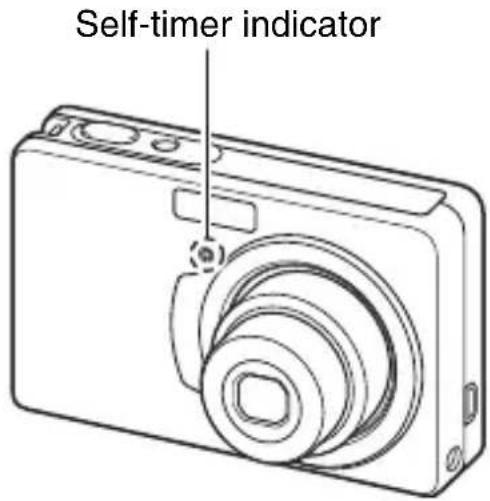
- When the shutter button is pressed, the self-timer indicator flashes for approximately 10 seconds, after which shooting begins.
- About 3 seconds before shooting, the self-timer indicator flashes faster.
FOCUS RANGE
1
Set the camera to the shooting mode (page 29), and press the [▼] (💡) button.
• The focus range menu appears.
PF: The focus operates within the ranges shown below (pan).
- At maximum aperture setting: 2.2 m (7.22 ft.) to
- At minimum aperture setting: 1.3 m (4.27 ft.) to
- Wide end:
At maximum aperture setting: 40 cm (15.75 in.) to ∞
At minimum aperture setting: 30 cm (11.81 in.) to ∞ - Tele end:
At maximum aperture setting: 1.7 m (5.58 ft.) to ∞
At minimum aperture setting: 1.2 m (3.94 ft.) to ∞

The camera automatically focuses on the subject within a range of 10 cm (3.94 in.) (Wide end) or 60 cm (23.62 in.) (Tele end) to infinity (auto).

You can focus on a subject within a range of 5 cm (1.97 in.) (Wide end) or 60 cm (23.62 in.) (Tele end) to 80 cm (31.50 in.) (macro).

The focus can be manually set to any distance from 5 cm (1.97 in.) to 8 m (26.25 ft), as well as to infinity (manual).
![[▼] ( 🔊 ) button 7m PF MF FOCUS AUTO Focus range menu](/content/2026/05/954550/images/b5c4162d274f9548d4687c7ea6faa9fa5930045183a8f648ce12d3e9957cad16.jpg)
2 Press the [▲] or [▼] button to select the desired focus range, and press the SET button.
- The specified focus range is set, and the camera returns to the Shooting Screen.
HINT
- In the single-shot mode and sequential shots mode, when the focus range is set to macro 🎋, the zoom is automatically set to one step from the wide end. When the focus range is set to pan PF, the zoom is automatically set to the Wide end.
FOCUS RANGE
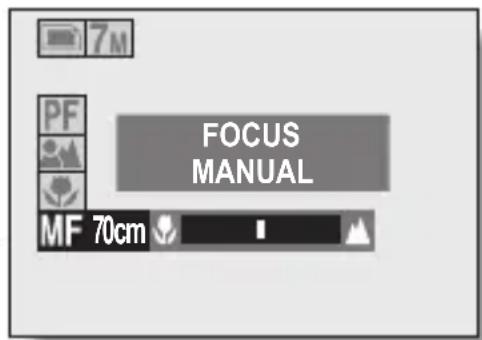
How to use the manual focus
1 Select manual MF from the focus range menu, and press the SET button.
- The focus distance adjustment bar appears.
2 Press the [◀] or [▶] button to adjust the focus distance, and press the SET button.
- The focus distance is set, and you are returned to the Shooting Screen.
HINT
About the focus range
- The focus distance indication shows the distance between the lens surface and the subject.
- In some cases there may be a slight variance between the distance (numerical figure) you set in the manual focus mode and the actual distance. Use the monitor to confirm the focus and compose the photo.
About zoom movement when using the manual focus
- If the focus distance is set to 50 cm (19.69 in.) or less, the zoom changes to the largest setting that is suitable for that focus distance.
- When the focus distance is set to 50 cm (19.69 in.) or less, the zoom will function only within the range at which the image is focused.
ACCESSING THE RECORDING MENU
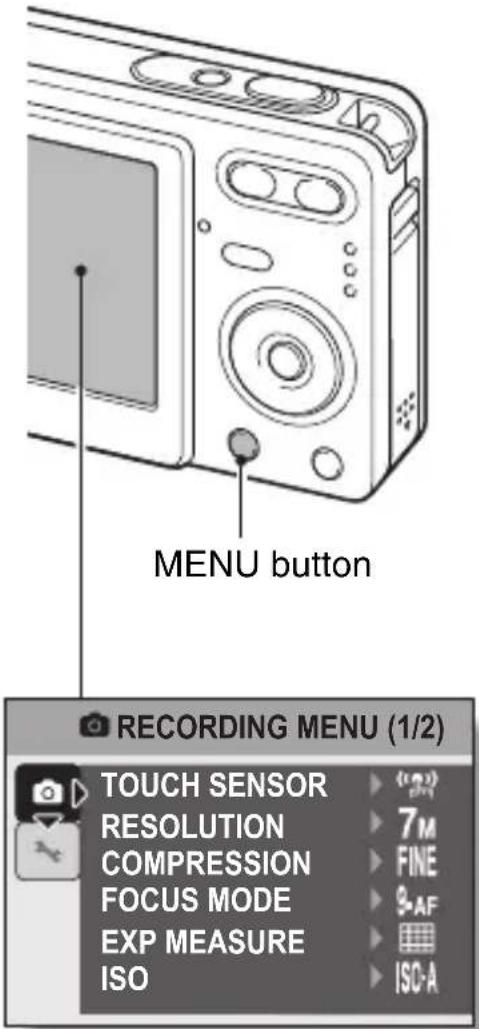
Detailed shooting settings are accessed from the Recording Menu.
1 Set the camera to a shooting mode (page 29).
2 Press the MENU button.
• The Recording Menu corresponding to the shooting mode set in step 1 appears.
• The Recording Menu can be canceled by pressing the MENU button.
ACCESSING THE RECORDING MENU
Overview of the Recording Menu
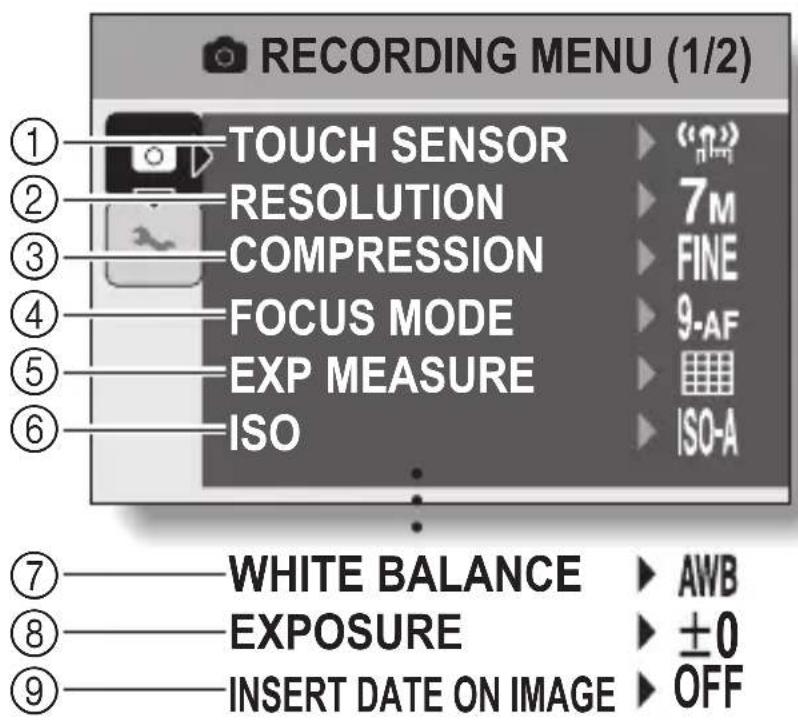
• ⑦ through ⑨ are displayed when you press the [▲] or [▼] button to scroll.
① Touch sensor menu (page 65)
[1] : Set the shutter button touch sensor to ON.
: Set the shutter button touch sensor to OFF.
② Resolution menu/video size menu (page 66)
10M: Shoot at 3,680 × 2,760 pixels (single-shot mode only)
7M: Shoot at 3,072 × 2,304 pixels
4M: Shoot at 2,288 × 1,712 pixels
2M: Shoot at 1,600 × 1,200 pixels
0.3M: Shoot at 640 × 480 pixels
- Important note
- Warning
- ■FOR AMERICAN USERS
- WARNING:
- Declaration of Conformity
- i English
- ■FOR CANADIAN USERS
- ■ FOR EU USERS
- Note:
- ■Symbols used in this manual
- GETTING UP AND RUNNING
- Install the battery pack
- Use the supplied charger to charge the battery pack.
- Open the battery/card compartment cover, and insert the battery pack.
- Shooting
- Press the [▶] button.
- Press the [◀] or [▶] button to select the shooting mode.
- Press the SET button.
- Press the shutter button.
- Playback
- ■Still image playback
- Press the playback button [▶].
- ■Video clip playback
- Press the SET button.
- When you are finished taking pictures...
- v English
- CONTENTS
- SETUP
- ■ BASIC OPERATION
- English
- ■ PLAYBACK
- OPTION
- ■ OTHER DEVICES AND CONNECTIONS
- ■ APPENDICES
- CHECKING THE INCLUDED ACCESSORIES
- English
- Attaching the handstrap
- Media cards that can be used with this camera
- What "card" means in this manual
- GETTING THE MOST OUT OF YOUR CAMERA
- You'll never miss a photo opportunity, thanks to the quick focus: Touch focus (see page 65)
- ■Abundant scene functions
- ■Speedy mode-switching
- English
- SYSTEM MAP
- PARTS NAMES
- Rear
- Bottom
- CHARGING THE BATTERY PACK
- 1
- 2
- 3
- 4
- HINT
- RECHARGING THE BATTERY PACK
- If there is interference to your TV or radio during recharging...
- Ambient temperature during recharging
- Recharge a battery pack in the following cases
- About the CHARGE indicator
- About the internal backup battery
- When not using the camera for a long time, remove the battery pack
- INSTALL THE BATTERY PACK AND CARD
- Insert the battery pack and card.
- CAUTION
- Be careful when removing the card.
- Keep your finger on the card until it is completely inserted or released.
- Shooting without a card installed
- TURNING THE CAMERA ON AND OFF
- Turning on the camera
- In the shooting mode
- Press the ON/OFF button.
- In the playback mode
- Press the playback button [▶] for at least one second.
- Turning off the camera
- About the auto power off function
- If the Ⓛ? icon appears...
- DATE AND TIME SETTING
- Press the ON/OFF button to turn the camera on, and press the MENU button.
- Press the [▼] button to select the □ tab, and press the [▶] button.
- Press the [▲] or [▼] button to select "CLOCK SET", and press the SET button or the [▶] button.
- Set the date and time.
- Press the SET button.
- To correct the date and time settings
- BEFORE TAKING PICTURES
- How to hold the camera
- About the touch sensor (touch focus)
- Using the autofocus
- ■Conditions that may cause incorrect focus
- - When both near and far objects are present
- - Fast-moving subjects
- Switching between the shooting mode and playback mode
- To turn the camera on in the playback mode
- How to switch the shooting mode
- Press the ON/OFF button to turn the camera on.
- Press the [▶] button.
- Press the [▶] button to select the shooting mode.
- Press the SET button.
- Switching the display mode
- English
- Adjust the monitor brightness
- Press the MENU button for at least 1 second.
- Press the [▲] and [▼] buttons to adjust the brightness.
- Press the MENU button.
- Hints for taking pictures
- Muting the camera sounds
- Where is the image data saved?
- Taking pictures in backlight conditions...
- Switching the guidance display ON/OFF
- CAPTURING AND PLAYING BACK STILL IMAGES
- Shooting single shots
- Set the camera to the single-shot mode (page 30).
- Rest your finger on the shutter button.
- Gently press the shutter button.
- Release your finger from the shutter button.
- When the focus mode (page 70) is set to the 9-point focus mode 9-AF...
- About the focus indicator
- The shutter speed and aperture are displayed
- If the motion alert icon appears...
- Viewing still images
- 5
- Press the playback button [▶].
- 6
- View other images.
- When you are finished viewing images...
- 9-image display playback
- English
- Quick scroll playback
- Access the 9-image display screen (page 37).
- Press [W] ([☐]) on the zoom switch.
- Display the desired image, and press the SET button.
- Folder playback
- Access the Quick Scroll Playback Screen (page 38).
- Select the desired folder, and press the SET button.
- About images that were recorded using Screen Capture (SANYO Software Pack INSTRUCTION MANUAL page 23)
- Magnifying (zooming in) the image
- Display the image that you want to magnify.
- Press [T] ([○]) on the zoom switch.
- To magnify:
- Zoom jump playback
- Erasing files
- About protected images
- SHOOTING SEQUENTIAL SHOTS
- Set the camera to the sequential shots mode (page 30).
- Press the shutter button to start shooting.
- About the focus when shooting sequential shots
- Can the self-timer and/or flash be used?
- Recording a video clip
- Playing back the video clip
- Press the playback button [▶].
- When you are finished viewing video clips...
- USING THE SCENE FUNCTION
- Capture a still image with a voice memo
- How to use the best shot feature
- How to use the face chaser feature
- English
- USING THE ZOOM
- FLASH SETTING
- When auto is selected...
- When auto or red-eye reduction is selected...
- SELF-TIMER
- Set the camera to the single-shot mode (page 30), and press the [▶] (×) button.
- Use the [▲] and [▼] buttons to select the desired self-timer setting, and press the SET button.
- To pause or cancel the self-timer function...
- When 10 is selected...
- FOCUS RANGE
- Press the [▲] or [▼] button to select the desired focus range, and press the SET button.
- How to use the manual focus
- Select manual MF from the focus range menu, and press the SET button.
- Press the [◀] or [▶] button to adjust the focus distance, and press the SET button.
- About the focus range
- About zoom movement when using the manual focus
- ACCESSING THE RECORDING MENU
- Set the camera to a shooting mode (page 29).
- Press the MENU button.
- Overview of the Recording Menu
- TOUCH SENSOR (TOUCH FOCUS) SETTING
- Display the Recording Menu (page 62).
- Select "TOUCH SENSOR" and press the SET button.
- Select the desired icon, and press the SET button.
- RESOLUTION/VIDEO SIZE SETTING
- In the single-shot or sequential shots mode select "RESOLUTION", or in the video clip recording mode select "CLIP SIZE", and press the SET button.
- Record and play back an audio file
- ■Record an audio file
- English
- Display the desired audio data.
- Play back the recording.
- COMPRESSION RATE SETTING
- Select the compression rate menu, and press the SET button.
- Select the desired compression rate from the compression menu, and press the SET button.
- FOCUS AREA SETTING
- 9-point range finder focus:
- Spot focus:
- AF seeker:
- Select "FOCUS MODE" and press the SET button.
- When spot focus is selected...
- When AF seeker is selected...
- LIGHT-MEASURING MODE SETTING
- Multi-section light-measuring:
- Center-weighted light-measuring:
- Spot light-measuring:
- ISO SENSITIVITY
- Select "ISO" and press the SET button.
- Does the image appear to flicker when recording a video clip?
- English
- WHITE BALANCE
- Select "WHITE BALANCE" and press the SET button.
- Select the desired icon, and press the MENU button.
- To cancel the white balance setting
- EXPOSURE CORRECTION
- DATE IMPRINT
- DISPLAYING THE PLAYBACK MENU
- Press the MENU button.
- PLAYBACK MENU (1/2)
- Overview of the Playback Menu
- IMAGE PROTECT
- ROTATE IMAGE
- CHANGING IMAGE SIZE (RESIZE)
- CONTRAST CORRECTION
- If the modified image is satisfactory, press the SET button.
- SAVE AS NEW:
- OVERWRITE FILE:
- Select the desired method to save the modified image, and press the SET button.
- RED-EYE CORRECTION
- COPY DATA
- COPY SINGLE:
- COPY ALL:
- EXIT:
- Select the desired type of copy.
- Press the SET button.
- PRINT SETTINGS
- Display the screen to set the print settings
- Display the Playback Menu (page 77).
- Select "PRINT INSTRUCTIONS" and press the SET button.
- EACH IMAGE:
- ALL IMAGES:
- ALL CLEAR:
- About the DPOF format
- About the finished prints
- Specifying date imprinting and number of prints
- Display the screen to set the print settings (page 89).
- Select EACH IMAGE or ALL IMAGES.
- Specify the number of prints and whether the date is imprinted.
- Clearing all the print settings
- SLIDESHOW PLAYBACK
- Select "SLIDESHOW" and press the SET button.
- Select "START", and press the SET button.
- DISPLAYING IMAGE PROPERTIES (INFORMATION SCREEN)
- Display the desired image.
- Press and hold the MENU button for at least 1 second.
- DISPLAYING THE OPTION MENU
- Display the Recording Menu or Playback Menu.
- Press the [▲] or [▼] button to select the option tab 📄.
- To exit the Option Menu
- Overview of the Option Menu
- SOUNDS
- Display the Option Menu (page 96).
- Select "SOUND" and press the SET button.
- OPERATION VOL:
- TURN ON/OFF:
- SHUTTER:
- KEY SW:
- AUDIO GUIDE:
- PLAY VOLUME:
- Select the desired item, and press the SET button.
- Press the [▲] or [▼] button to change the setting.
- POST-VIEW SETTING
- Select "POST VIEW" and press the SET button.
- Select the desired setting, and press the SET button.
- SCREEN LANGUAGE
- TV SYSTEM SETTING
- AUTO POWER OFF FUNCTION
- Select "AUTO POWER OFF" and press the SET button.
- RECORDING:
- PLAYBACK:
- Select the desired option, and press the SET button.
- Press the [▲] or [▼] button to select the standby time.
- FILE No. RESET FUNCTION
- What about the internal memory?
- Select "FILE NO. RESET" and press the SET button.
- Select "OFF", and press the SET button.
- INITIALIZING THE CARD MEMORY AND INTERNAL MEMORY
- FORMAT:
- FULL FORMAT:
- Select the desired format option, and press the SET button.
- Select "YES".
- Press the SET button.
- Caution during reformatting
- Reformatting erases the data
- Caution regarding disposing/transferring the card (recovering data from a reformatted card)
- To cancel reformatting
- English
- RESETTING THE CAMERA SETTINGS
- Select "RESET SETTINGS" and press the SET button.
- Select "YES", and press the SET button.
- CHECKING THE REMAINING INTERNAL MEMORY AND CARD MEMORY
- Set the camera to the audio recording mode (page 67).
- CHECKING THE REMAINING BATTERY CHARGE
- CONNECTING TO A TV
- Insert and pull out the cable carefully
- English
- DIRECT PRINTING
- Print preparations
- Turn the printer on, use the supplied USB interface cable to connect the camera to the printer.
- Select "PictBridge", and press the SET button.
- Caution when connecting a printer
- To select one image and print it (print selected image)
- Complete the printing setup (page 116).
- Press the [◀] or [▶] button.
- To cancel printing
- To print all the images (all images)
- Select PRINT ALL IMAGES, and press the SET button.
- Specify the number of prints or date-imprinted prints.
- To print the images that are set to print (print reserved images)
- English
- To change the printer settings and print images (change printer settings)
- Select the printer settings tab 📄, and press the SET button.
- MEDIA TYPE:
- PAPER SIZE:
- LAYOUT:
- QUALITY:
- Adjust the printer settings.
- COMMONLY ASKED QUESTIONS
- TROUBLESHOOTING
- SPECIFICATIONS
- Camera connectors
- Battery life
- Possible Number of Images/Video Recording Time/Audio Recording Time
- Supplied battery pack charger
- Supplied Li-ion battery pack
- Others
- Basic photography
- If images are blurred even when the autofocus is used
- ■How the autofocus works
- ■Reasons for unfocused images
- ■Preventing blurred images
- Photographing a moving subject
- ■ Preventing blurred images (How to use the manual focus [page 61])
- ■How to photograph a moving subject
- Shooting with the scene function
- Shooting portraits (portrait mode 📁)
- Points:
- NOTE
- Photographing moving subjects (sports mode 📁)
- Night photography (night view mode 📁\*)
- Photographing scenery (landscape mode 📄)
Brand : SANYO
Model : Xacti VPC-E7EX
Category : Camera