
SC-1 - Guitar PEAVEY - Free user manual and instructions
Find the device manual for free SC-1 PEAVEY in PDF.


| Product Type | Electric Guitar |
| Brand | Peavey |
| Model | SC-1 |
| Body Material | Solid Wood (typically Basswood or Poplar) |
| Neck Material | Maple |
| Fretboard Material | Rosewood or Maple |
| Number of Frets | 22 |
| Scale Length | 25.5 inches |
| Pickups | Single-coil (2 or 3 depending on variant) |
| Controls | Volume, Tone, 5-way selector switch |
| Bridge | Fixed bridge (hardtail) |
| Hardware Finish | Chrome |
| Overall Length | 38 inches (approx.) |
| Body Width | 12.5 inches (approx.) |
| Body Depth | 1.75 inches (approx.) |
| Weight | 8 lbs (approx.) |
| Power Supply | Passive (no battery required) |
| String Gauge (Factory) | .009-.042 |
| Maintenance: Cleaning | Wipe with a soft dry cloth after use |
| Maintenance: String Replacement | Change strings regularly when they lose brightness |
| Safety Warning | Avoid exposure to extreme temperatures and humidity |
| Spare Parts Availability | Common parts available online (strings, knobs, pickups) |
| Country of Origin | USA (original models) or China (later models) |
| Warranty | Varies by seller; typically 1 year limited |
Frequently Asked Questions - SC-1 PEAVEY
User questions about SC-1 PEAVEY
0 question about this device. Answer the ones you know or ask your own.
Ask a new question about this device
Download the instructions for your Guitar in PDF format for free! Find your manual SC-1 - PEAVEY and take your electronic device back in hand. On this page are published all the documents necessary for the use of your device. SC-1 by PEAVEY.
USER MANUAL SC-1 PEAVEY
Electric Guitar
Owner's Manual

Congratulations
So, you are the owner of a new Peavey Electric Guitar. Congratulations! Your purchase proves your taste in musical instruments is superb. Peavey offers a wide variety of guitars for beginners to professionals, each with unique qualities and features. While our professional luthiers have carefully inspected your guitar, every model requires some initial set up, and periodic maintenance is required for peak performance.
To ensure proper care of your quality instrument, visit www.peavey.com/accessories for Peavey-recommended accessories, parts and cleaning supplies.

natural_image
Black electric guitar headstock with visible fretboard and tuning pegs (no text or symbols)
natural_image
Yellow electric guitar with visible grille and fretboard (no text or symbols)Cleaning & Care
When properly cared for, your Peavey guitar will offer you years of pleasure. Playing your guitar means that you will need to perform regular, general maintenance, such as cleaning and proper storage, to keep it looking and sounding great.
Every time you play your guitar, body oils and perspiration are transferred to the body, back of the neck, headstock, fingerboards, strings, tuners, pickups and bridge. After you finish performing, but before you put your guitar away, take a moment to remove these contaminants.

Cleaning - Wood
To clean and care for the major wood parts of your guitar (body, headstock or the back of the neck), Peavey recommends that you use a clean, soft, lint-free, dry cotton or Peavey micro-fiber cloth and specially formulated HP's Axe Wax available at www.peavey.com/accessories. Use of an inappropriate rag or polish may result in scratching the finish of your instrument.
WARNING: Peavey recommends that you do not use abrasives or solvents on your instrument.

natural_image
Exterior view of an electric guitar with a black-and-yellow body, alongside a microfiber and AXE WAY guitar box (no visible text or symbols on main objects)Cleaning - Fingerboard
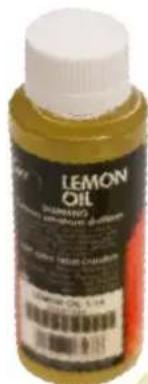
Properly caring for your fingerboard requires special attention. Over time, a fingerboard may lose its natural oils and shrink or exhibit a worn or faded appearance. Peavey recommends that you periodically apply a small amount of Lemon Oil (available at www.peavey.com/accessories) to your fingerboard (after removing strings) using a clean, soft, lint-free, dry cotton cloth, taking care to remove excess oil immediately. A little goes a long way! How do you know when it is time to reapply? You can watch for a change in the appearance of your wood, or set a routine calendar date. However, do not allow too much time to pass as permanent damage may occur. If you allow the wood on the fingerboard to dry out and shrink, the frets will “stand out” and feel rough to the touch.

natural_image
Guitar fretboard showing fret positions and fret numbers (no text or symbols beyond standard notation)Cleaning - Metal

To clean and lubricate the major metal parts of your guitar (strings, pickups, bridge, tuners), Peavey recommends that you use a different clean, soft, lint-free, dry cotton cloth and specially formulated guitar string cleaner available at www.peavey.com/accessories.
Forming a cloth fold and running it up and down the length of each string can quickly clean strings. Failure to routinely clean and lubricate the metal parts of your instrument, including strings, may result in rusting.
WARNING: Peavey recommends that you do not use abra sives or solvents on your instrument
Storage & Travel
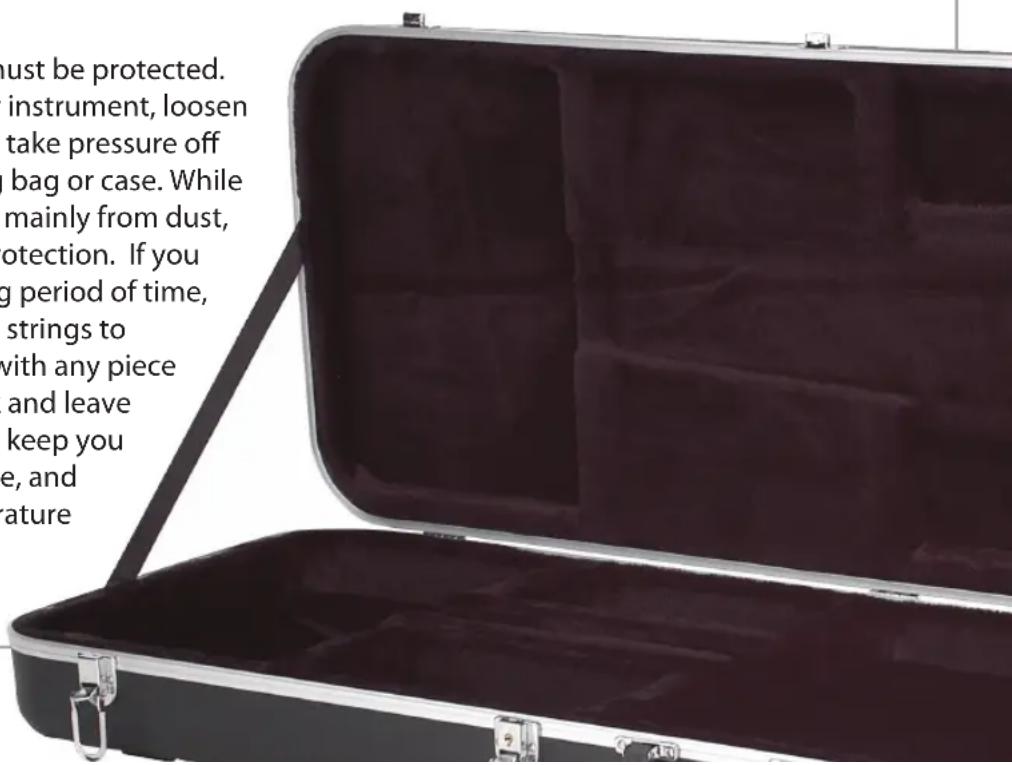
Your guitar is a piece of art that must be protected. When you are traveling with your instrument, loosen the tuning knobs a turn or two to take pressure off the neck, and protect it with a gig bag or case. While a gig bag offers some protection, mainly from dust, a hardshell case offers the best protection. If you plan to store your guitar for a long period of time, remember to slightly loosen your strings to relieve pressure on the neck. As with any piece of art, don't throw it in your trunk and leave it in -10° or 110° weather! Always keep you guitar stored at room temperature, and avoid extreme changes in temperature or humidity.
Accessories

natural_image
Black gaiton with white logo on back, no visible text or symbols on bodyAdd-on products like stands, hangers and straps that are made of plastic, rubber or man-made materials may chemically or physically react with and damage the finish of your Peavey guitar. Peavey offers a full line of accessories at www.peavey.com/accessories).
Every player needs a strap for peak performance, however, straps and strap buttons are designed for "ordinary" use. If you anticipate "above ordinary" use, Peavey recommends that you use Super Strap Locks to secure your strap to your guitar (See Peavey accessories www.peavey.com/accessories).
REMEMBER: Peavey Care Kits offer the best value for your money. Visit www.peavey.com/accessories, locate the order form in the back of this manual, or call 866-443-2333 to place your order.

Strings
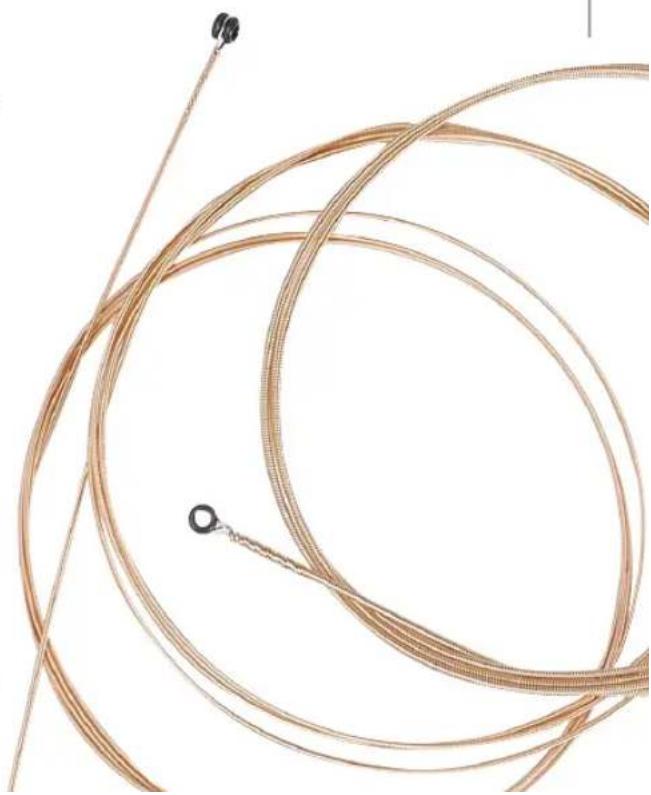
Old strings produce dull, buzzing or dead notes, while a new set of strings ring clear and true. If you play often, you will need to change your strings often. A good rule of thumb is that if you play daily, you should change strings every two or three weeks. Replace your strings as you notice them becoming dirty or discolored, before you experience a disappointing loss of performance.
See page 12 for detailed instructions on changing strings.
natural_image
Close-up of a coiled, copper wire with two small circular connectors (no text or symbols visible)Changing Your Strings
Unless you are reconditioning your fretboard (see care and cleaning), strings should be changed one at a time to maintain proper neck tension. New strings should be free of defects (twists, kinks, bends) that can cause sound irregularities or breakage. All strings must be stretched upon installation. After your first tuning, carefully pull each string away from the fretboard, stretching it gently (too much force will break thinner strings). Then, retune your guitar.
Peavey recommends that you replace strings in the same gauges to maintain proper neck and/or tremolo tension. If you wish to change strings with different gauges, Peavey recommends that you enlist the services of a qualified technician to make the required truss rod and/or tremolo adjustments on your instrument.
Some Peavey guitars feature ACM ^® (page 13) or double-locking tremolos (page 15).
Standard Tuning
(6th string is the heavey topmost string)
Open note E A D G B E
String 6 5 4 3 2 1
Mnemonic memory aid for string tuning (Beginning with the 6th string):
Eddie Ate Dynamite. Good Bye Eddie.
Quick Tips
To change intonation, adjust saddles.
To align tremolo in relation to the body, adjust spring tension.
To change string action (height), adjust tremolo studs.
-ACM® Bridge - Changing Your Strings
Changing strings on a Peavey guitar featuring an ACM Bridge is a simple task that will bring new life to your instrument.
Tools Needed:
Wire cutters
Electronic tuner or pitch pipe (optional)
Note: Peavey recommends changing one string at a time to maintain proper tension on the neck and bridge. Replace strings with the same gauges or you will need to make truss rod, spring tension, and intonation adjustments as described in this manual.
First, detune the 6th string (the thickest, top string) using the machine head tuner—two or three turns should remove the tension on the string. Remove the string from the tuning peg; at the other end of the string, push the string back through the string saddle until the ball end of the string comes out the hole in the back of the guitar. (You may wish to cut off the portion of the string previously wound around the tuning peg to make this task easier.)
ACM® Bridge - Changing Your Strings
Insert a new string through the hole in the back of the guitar and pull through until the ball end of the string rests tightly against the underside of the bridge.
Thread the other string end across the string saddle, across the nut and into the small hole in the corresponding machine head tuning post. Allow two inches of slack for turning around the machine head post. Each winding should be beneath the one before it to prevent slippage. Keep a light pressure on the string with the fingers of your other hand while tightening using the tuners. (An inexpensive, optional peg winder makes winding much easier.) Cut off the excess string using wire cutters. Tune to pitch. Because new strings are prone to stretch when first installed, you should gently stretch the string by pulling it away from the neck and retune again.
Repeat this procedure for the remaining strings, 5-1, remembering to tune each to pitch before proceeding to the next string. Retune each string until strings hold their relative pitch to one another.
Double Locking Tremolo - Changing Your Strings
The Peavey double-locking tremolo system allows for pushing and pulling because the tremolo does not rest on the instrument body. Instead, it uses powerful springs, which are attached in the back of the body, to balance the tension created by the strings so that the tremolo "floats" within the enlarged cavity. While it is one the most reliable and popular tremolo systems in the world, to novice players, or even to the uninitiated seasoned player, changing strings the first time or two may seem like a overwhelming task. Follow these simple steps and you'll soon be able to change strings as easily as playing your favorite licks.
Tools Needed:
3 mm Allen wrench
Wire cutters
Electronic tuner or pitch pipe
Note: Peavey recommends changing one string at a time to maintain proper tension on the neck and tremolo. Replace strings with the same gauges or you will need to make truss rod, spring tension and intonation adjustments as described in this manual.
Double Locking Tremolo - Changing Your Strings
First, detune the 6th string (the thickest, top string) using the machine head tuner—two or three turns should remove the tension on the string. Then, using a 3mm Allen wrench, unlock the corresponding string clamp located at the nut. Then, back on the bridge, reset each Fine Tuner to its middle range. Now, you are ready to remove the 6th string.
Using a 3mm Allen wrench, unclamp the 6th string at the saddle by loosening the saddle lock screws at the rear of the tremolo. Remove string by sliding it out of the nut and unwrapping from the tuning machine head. Note: Broken string pieces can be removed easily with tweezers or a magnetic screwdriver.
Using wire cutters, remove the ball end and extra wrapping of the replacement string. (New strings should be free of twists, kinks and bends that can cause sound irregularities or breakage.) Insert the freshly cut end of the string into the saddle; tighten the saddle lock screws at the rear of the tremolo until snug (View 1). TIP: For easier access to the tremolo screws, and to protect the finish of your guitar, tilt the rear of the tremolo upward using an attached tremolo arm (whammy bar). Do not overtighten the screws or you may permanently damage the saddles or strip the Allen sockets.

natural_image
Close-up of a hand using a tool to adjust or install a metallic component with visible pins (no text or symbols)View 1: Use allen wrench to secure string
Double Locking Tremolo - Changing Your Strings-
Thread the other string end under the nut and into the small hole in the corresponding machine head tuning post. Allow two inches of slack for turning around the machine head post (View 2).
For the thicker strings (E, A, D), wrap the string end clockwise around post, then run under string at post entry, and pull string tightly over itself, creating a knot. Strings G, B and E should be wound and secured in the same manner (counterclockwise on a three-a-side headstock, as in View 2). To avoid slippage, wind strings tightly from top to bottom on each post, completing 2-3 wraps around each post. Keep a light pressure on the string with the fingers of your other hand while tightening the tuners. (An inexpensive, optional peg winder makes winding much easier.) Tune strings to correct pitch, checking post wraps for smooth winding. String ends can then be bent down and trimmed near the knot.

natural_image
Close-up of hands using a HRP SCRIGA instrument to adjust the electric motor (no visible text or symbols)View 2: Insert string in machine head.
Because new strings are prone to stretch when first installed, you should gently stretch the string by pulling it away from the neck and retune again.
Tune-O-Matic™/Stop Tailpiece - Changing Your Strings
To replace strings, thread the new strings through the string holes located on the back of the tailpiece and bring them up and over the saddle. The intonation can be adjusted by moving the saddle forward or backward using a Phillips head screwdriver on the adjustment screw at the rear of the bridge. Raise or lower the two height adjustment spinners on either side of the bridge to adjust string height.
The height adjustment of the bar tailpiece can be raised or lowered by using the two height adjustment studs on either side of the tailpiece.

natural_image
Close-up of a red electric guitar body with visible wood grain and metallic strings (no text or symbols)Tuning Machine Adjustments
Over time, tuners can become loose. Get in the habit of checking the tension with every string change. If you notice a change in the tension of a tuner, use a small flathead or Phillips screwdriver to tighten it (turn clockwise) or loosen it (turn counterclockwise) accordingly. Warning: While the screw should be snug, do not overtighten, as you may strip the screw.

natural_image
Red electric guitar headstock with visible fretboard and tuning pegs (no text or symbols)String Action
String action refers to the distance between the strings and the frets on a stringed instrument. Peavey technicians carefully set optimal string action on every guitar before it leaves our factory; however, changes in temperature and moisture (humidity), changing string gauges, making neck adjustments or tuning can alter string action enough to require a height adjustment to restore your guitar to factory specifications. Undesirable low action causes buzzing, while abnormally high action makes your guitar difficult to play.

Pickup Adjustments
Factory settings place pickups at the same volume level; however many players change the height of one or more neck or bridge pickups to create their own output levels. Should you choose to alter the height of a pickup, remember that it is magnetic. To keep your factory warranty intact, Peavey suggests you take your guitar to an Authorized Peavey Service Center to have the pickup adjustments made.

natural_image
Close-up of a bright magenta electric guitar with visible fretboard and keyway (no text or symbols)Intonation
A properly intoned guitar will sound in tune no matter where you play along the fretboard. Intonation is determined by the length of each string as controlled by the location of each string's saddle. To check intonation, complete all adjustments to the truss rod and string action, and tune your guitar. Then, compare the fretted sound of the 12th fret to the open harmonic of the 12th fret. (Harmonics are created by lightly placing a finger against a string—in this case, at the 12th fret—and striking normally with your picking hand. You've done it correctly if you hear a clear, loud, bell-like tone.) If the notes are the same, no adjustment is required. If they do not match, you will need to fine-tune each offending string using the adjustment screws to move the saddle location. If the fretted 12th note is flat, adjust the saddle toward the neck. If sharp, move it away from the neck. Note that on some guitars, you will need to loosen strings before making saddle adjustments. Repeat the process until the fretted sound of the 12th fret matches the open harmonic of the 12th fret.


natural_image
Close-up of a red electric guitar head with visible fretboard and tuning pegs (no text or symbols)Neck and Truss Rod-
Every Peavey steel-string guitar features an adjustable truss rod inside the neck. Truss rods allow for adjustments in the neck to accommodate changes in string tension caused by humidity, changing string gauges or tuning. As the backbone of your instrument, the truss rod should always be adjusted first during instrument setup. (Peavey recommends that you enlist the services of a qualified technician to make the required truss rod and/or tremolo adjustments on your instrument. Improper adjustment may damage your neck and void your Peavey warranty.) To gain access to the truss rod, look for a 4 mm or 8 mm allen wrench adjustment screw either at the end of the neck near the body or at the opposite end near the headstock. Note that some guitars may require neck removal to gain access to the neck pocket truss rod. The goal of truss rod adjustment is to create the correct amount of bow in your guitar's neck to facilitate optimal playability.
To check the neck's bow, hold the guitar in normal playing position and follow this procedure for both E strings (string 1 and string 6). Fret and hold the string at the first fret, while fretting and holding the same string with your picking-hand
- Neck and Truss Rod
thumb (where the neck and body meet, typically around the 16th fret). Then, stretch your picking hand index finger as far as you can to fret the middle area of the neck, somewhere around fret 7-8-9. The distance your string travels to meet the fret is the bow. Peavey recommends a .3 mm to .5 mm (.010" to .020") bow, easily measured and set with a steel rule. Too much bow leads to buzzing in the middle of the neck because the strings are too far away from the frets, while too little bow (backbow) causes excessive buzzing on open notes and notes near the nut.
To make adjustments for neck bow or relief (backbow), adjust the truss rod in 1/4 turn increments, and then recheck. If your neck is backbowed, loosen the truss rod by turning it counterclockwise. If it has too much bow, tighten the truss rod by turning clockwise. Remember, a little truss rod adjustment makes a big change in how your guitar plays. Improper adjustment may damage your neck and void your Peavey warranty.
Volume and Tone Control
This control determines the master output level of your instrument. Rotating the knob clockwise increases volume. Turning the knob counterclockwise decreases the volume. Some guitars feature multiple volume controls, one assigned to each pickup. When the three-way pickup selector switch is set to the middle position and one of the volume controls is set to OFF, the instrument will be off.
The tone control determines the presence of high frequencies in your outgoing signal. All frequencies are present when the knob is fully clockwise, and the highs diminish as the knob is turned counterclockwise.
WARNING: To prevent voiding your factory warranty, Peavey suggests all adjustments be made at an Authorized Peavey Service Center.

Pickups & Pickup Selector Switch
Single-coil pickups and dual-coil pickups (humbuckers) convert your guitar's string vibrations into an electronic signal that is processed by your amplifier.
Selector switches are used to quickly change between pickups or combinations of pickups. Typically switches are 3-way slotted, 5-way slotted or 3-way toggled. Series selections, typically found on humbucker models, combine two coils of full output. Parallel selections combine two coils to simulate a single coil while acting as a hum-canceling humbucker. Some guitars feature a push-pull volume control in place of a switch that allows for single pickup selections.

Balance Control & Push-Pull or Push-Push Coil Tap
To create a specific tone, some instruments feature a balance control that determines the mix of pickup signals being sent to the amplifier. In the center (detented) position, both pickups send the same volume. Turning the knob counterclockwise selects more bridge pickup signal, while turning it clockwise sends more neck pickup signal.
When engaged, this switch, usually located on a Volume Control or Tone Control, allows one coil from a dual pickup to be turned off, effectively cutting the output in half. Note that as the humbucker is now functioning as a single coil, it will exhibit more hum or noise.

natural_image
Close-up of a black electric guitar headstock with visible fretboard and grille (no text or symbols)-Accessories
Peavey offers a wide range of accessory products to support and enhance your purchase. Please visit the Peavey web site, www.peavey.com for specific details and suggested list prices.
Item Number Description
00081340 10' Black Instrument Cable
00082930 15' Black Instrument Cable
00081360 20' Black Instrument Cable
00351210 25' Black Instrument Cable
00493970 10' Silent Instrument Cable
00493980 15' Silent Instrument Cable
00493990 20' Silent Instrument Cable
00478950 Hardshell Guitar Case
00722780 Nylon Guitar Bag
00479950 Electric Guitar Bag
00444820 Electric Lite Case
Item Number Description
00577920 Balanced 8s Nickel Wound Elements™ Electric Guitar Strings
00579450 Balanced 9s Nickel Wound Elements Electric Guitar Strings
00579460 Balanced Plus 9s Nickel Wound Elements Electric Guitar Strings
00579470 Balanced 10s Nickel Wound Elements Electric Guitar Strings
00577930 Balanced 11s Nickel Wound Elements Electric Guitar Strings
00577940 Balanced 12s Nickel Wound Element Electric Guitar Strings
03009010 PT-100 CHROMATIC TUNER/Recorder
Accessories
Item Number Description
00479470 Thin Dreamers™ Red 351, 12-piece guitar pick set
00479480 Thin/Medium Dreamers Orange 351, 12-piece guitar pick set
00479490 Medium Dreamers Yellow 351, 12-piece guitar pick set
00479500 Medium/Heavy Dreamers Green 351, 12-piece guitar pick set
Item Number Description
00479510 Heavy Dreamers Blue 351, 12-piece guitar pick set
00479520 Extra Heavy Dreamers Purple 351, 12-piece guitar pick set
00089200 Peavey Black Padded Strap
00592510 Electric Guitar Accessory Pack
Warranty
Your Peavey Warranty covers defects in material and workmanship in Peavey products purchased and serviced in the U.S.A. and Canada.
What This Warranty Does Not Cover
The Warranty does not cover: (1) damage caused by accident, misuse, abuse, improper installation or operation, rental, product modification or neglect; (2) damage occurring during shipment; (3) damage caused by repair or service performed by persons not authorized by Peavey; (4) products on which the serial number has been altered, defaced or removed; (5) products not purchased from an Authorized Peavey Dealer.
Who This Warranty Protects
This Warranty protects only the original purchaser of the product.
How Long This Warranty Lasts
The Warranty begins on the date of purchase by the original retail purchaser. The duration of the Warranty for guitars is 2 years (+3 years). [ denotes additional warranty period applicable if optional Warranty Registration Card is completed and returned to Peavey by original retail purchaser within 90 days of purchase.]
What Peavey Will Do
We will repair or replace (at Peavey's discretion) products covered by warranty at no charge for labor or materials. If the product or component must be shipped to Peavey for warranty service, the consumer must pay initial shipping charges. If the repairs are covered by warranty, Peavey will pay the return shipping charges.
How To Get Warranty Service
(1) Take the defective item and your sales receipt or other proof of date of purchase to your Authorized Peavey Dealer or Authorized
Warranty
Peavey Service Center.
OR
(2) Ship the defective item, prepaid, to Peavey Electronics Corporation, International Service Center, 412 Highway 11 & 80 East, Meridian, MS 39301. Include a detailed description of the problem, together with a copy of your sales receipt or other proof of date of purchase as evidence of warranty coverage. Also provide a complete return address.
Limitation of Implied Warranties
ANY IMPLIED WARRANTIES, INCLUDING WARRANTIES OF MERCHANTABILITY AND FITNESS FOR A PARTICULAR PURPOSE, ARE LIMITED IN DURATION TO THE LENGTH OF THIS WARRANTY.
Some states do not allow limitations on how long an implied warranty lasts, so the above limitation may not apply to you.
Exclusions of Damages
PEAVEY'S LIABILITY FOR ANY DEFECTIVE PRODUCT IS LIMITED TO THE REPAIR OR REPLACEMENT OF THE PRODUCT, AT PEAVEY'S OPTION. IF WE ELECT TO REPLACE THE PRODUCT, THE REPLACEMENT MAY BE A RECONDITIONED UNIT. PEAVEY SHALL NOT BE LIABLE FOR DAMAGES BASED ON INCONVENIENCE, LOSS OF USE, LOST PROFITS, LOST SAVINGS, DAMAGE TO ANY OTHER EQUIPMENT OR OTHER ITEMS AT THE SITE OF USE, OR ANY OTHER DAMAGES WHETHER INCIDENTAL, CONSEQUENTIAL OR OTHERWISE, EVEN IF PEAVEY HAS BEEN ADVISED OF THE POSSIBILITY OF SUCH DAMAGES.
Some states do not allow the exclusion or limitation of incidental or consequential damages, so the above limitation may not apply to you.
This Warranty gives you specific legal rights, and you may also have other rights which vary from state to state.
If you have any questions about this warranty or services received or if you need assistance in locating an Authorized Service Center, please contact the Peavey International Service Center at 877-732-8391(toll-free) or customerservice@peavey.com. Features and specifications subject to change without notice.

natural_image
Abstract black geometric logo design with stylized arrow-like shapes (no text or symbols)Features and specifications subject to change without notice.
Peavey Electronics Corporation • 5022 Hartley Peavey Dr • Meridian, MS 39305
(601) 483-5365 • FAX (601) 486-1278 • www.peavey.com
© 2006
Printed in the U.S.A 80307338




- Electric Guitar
- Congratulations
- Cleaning & Care
- Cleaning - Wood
- Cleaning - Fingerboard
- Cleaning - Metal
- Storage & Travel
- Accessories
- Strings
- Changing Your Strings
- Standard Tuning
- Quick Tips
- -ACM® Bridge - Changing Your Strings
- ACM® Bridge - Changing Your Strings
- Double Locking Tremolo - Changing Your Strings
- Double Locking Tremolo - Changing Your Strings-
- Tune-O-Matic™/Stop Tailpiece - Changing Your Strings
- Tuning Machine Adjustments
- String Action
- Pickup Adjustments
- Intonation
- Neck and Truss Rod-
- - Neck and Truss Rod
- Volume and Tone Control
- Pickups & Pickup Selector Switch
- Balance Control & Push-Pull or Push-Push Coil Tap
- -Accessories
- Warranty
- What This Warranty Does Not Cover
- Who This Warranty Protects
- How Long This Warranty Lasts
- What Peavey Will Do
- How To Get Warranty Service
Brand : PEAVEY
Model : SC-1
Category : Guitar