Saflok SAM - Electronic lock Dormakaba - Free user manual and instructions
Find the device manual for free Saflok SAM Dormakaba in PDF.


| Product Type | Electronic Lock |
| Brand | Dormakaba |
| Model | Saflok SAM |
| Dimensions (L x W x H) | 4.5 x 2.5 x 1.5 inches |
| Weight | 1.2 lbs |
| Power Source | 4 x AA batteries (6V DC) |
| Battery Life | Approximately 18 months under normal use |
| Low Battery Warning | Audible beeps and visual indicator |
| Keypad Type | Membrane keypad with backlight |
| User Capacity | Up to 100 unique users |
| Access Methods | RFID card, PIN code, mechanical override key |
| Wireless Communication | Saflok proprietary RF (for audit trail) |
| Audit Trail | Records last 1000 events |
| Security Features | Anti-tamper alarm, encryption, blocking after multiple wrong PINs |
| Operating Temperature | 32°F to 122°F (0°C to 50°C) |
| Compatible Door Thickness | 1.75 to 2.25 inches (44-57 mm) |
| Mounting Type | Mortise or cylindrical (adapter kit) |
| Finish | Polished brass, satin chrome, or dark bronze |
| Spare Parts & Reparability | Keypads, electronic boards, card readers available from Dormakaba distributors |
| Maintenance | Clean with a soft, damp cloth; do not use abrasive cleaners |
| Warranty | 2-year limited warranty |
Frequently Asked Questions - Saflok SAM Dormakaba
User questions about Saflok SAM Dormakaba
0 question about this device. Answer the ones you know or ask your own.
Ask a new question about this device
Download the instructions for your Electronic lock in PDF format for free! Find your manual Saflok SAM - Dormakaba and take your electronic device back in hand. On this page are published all the documents necessary for the use of your device. Saflok SAM by Dormakaba.
USER MANUAL Saflok SAM Dormakaba
Security Access Manager system
Operations Manual
Säflok®
Multihousing Division

Computerized Security Systems
© 2003 SAFLOK, All rights reserved
1020 West 17th Street Costa Mesa, CA 92627
SAFLOK reserves the right to modify the characteristics of all products in this publication.
Table of Contents
Table of Contents ii
Introduction 1
Welcome to SAM™! 1
SAM System Requirements 1
SAM System Components 1
Part 1: Getting Started \_\_\_\_ 3
Section 1: Installing the SAM System 4
Running the Software 8
Logging on to SAM 8
Section 2: Registering System Users 11
Assigning the System Administrator 11
Removing the Default System Administrator 12
Adding System Users 13
Creating Authorization Groups 15
Section 3: The Site Design Process 19
Entering Zone Information 19
Entering Suite Lock Information 21
Entering Unit Lock Information 23
Entering Common Access Area Information 26
Confirming Property Settings 27
Part 2: Programming Locks 32
Section 4: The Preprogramming Process \_\_\_\_ 33
Construction Keys 33
The Programming Key 35
The Utility Device 38
Section 5: The Lock Programming Process 41
Creating Common Access Configure Keys 41
Programming Common Access Locks 43
Programming Suite Locks 43
Programming Unit Locks 46
Part 3: Creating Keys 49
Section 6: Staff Keys 50
Creating Master Keys 50
Creating Zone Keys 53
Adding New Staff to the SAM System 56
When Staff Members Leave 58
Preventing Access 59
Section 7: Resident Keys 63
Adding Residents to the SAM System 63
Creating Resident Keys 64
When Residents Move Out 67
Preventing Access 67
Section 8: Vendor Keys 70
Adding Vendors to the SAM System 70
Creating Vendor Keys 72
Replacing Lost Vendor Keys 74
Section 9: Replacing Lost Resident Keys 75
Reading Resident Keys 75
The Inhibit Resident Key 76
Creating a Replacement Resident Key 77
Reprogramming Locks 79
Section 10: Replacing Lost Staff Keys 80
Creating an Inhibit Master Key 80
Creating an Inhibit Zone Key 81
Reprogramming Locks 83
Creating a Replacement Master Key 84
Creating a Replacement Zone Key 86
Part 4: Querying and Reporting 88
Section 11: The Query Key 89
Creating the Query Key 89
Querying the Lock 90
Reviewing the Audit Trail 91
Section 12: Querying Several Locks 95
Programming the Utility Device 95
Querying the Lock 95
Uploading the Audit Trail 96
Section 13: SAM System Reports 100
Common SAM System Report Functions 100
Unit Key History Report 102
User Key History Report 104
Keys Made Report 105
Lock Interrogation Report 107
Limited Use Key Audits Report 107
Transactions Report 108
Part 5: Maintenance \_\_\_\_ 110
Section 14: Work Orders 111
Viewing Work Orders 111
Creating New Work Orders 111
Editing Existing Work Orders 114
Distributing Work Orders 116
Section 15: Lock Maintenance 119
Clock Maintenance 119
Lock Environmental Considerations 119
Low Battery Indication 119
The Maintenance Key 119
Gathering Lock Information 121
Opening a Lock With a Dead Battery 124
Replacing Lock Batteries 124
Resetting the Date/Time 124
Section 16: Backing up 126
Backing up Data Files 126
Saving the Backup File off Your Computer 127
Introduction
Welcome to SAM™!
SAFLOK's Security Access Manager (SAM™) is a sophisticated yet easy-to-use electronic locking system designed to maximize security for apartment homes, timeshares, student housing, assisted-living facilities, military family housing and similar dwellings.
The SAM System includes a Microsoft Windows-based, password-protected software program that runs on any personal computer (PC), an electronic key-coding device, a utility device that performs a variety of functions, and a quantity of electronic keys.
SAM eliminates the need for mechanical key cutting equipment, costly lock replacement and the risks associated with unauthorized mechanical keys. In addition, SAM allows you to easily authorize, control and document multiple levels of access to ensure the highest level of security for your property.
SAM System Requirements
The SAM System is intended for use on a PC. The system requirements are as follows:
• Windows 98, 2000, ME, XP or NT
• 32 MB RAM memory
- 5 MB of hard disk space
- CD-ROM drive
• PC Anywhere (recommended)
SAM System Components
The SAM System includes the following components:
- SAM software CD
• Electronic key encoder (Fig. A)
• SAM System utility device (Fig. B) - Electronic keys – preprogrammed (construction keys) and not programmed (Fig. C)
• Power source for the key encoder (Fig. D)
• RS 232 serial cable female to female (Fig. E)
• External power supply (EPS), backup power for locks
If any of these components are missing, contact your SAM sales agent immediately.
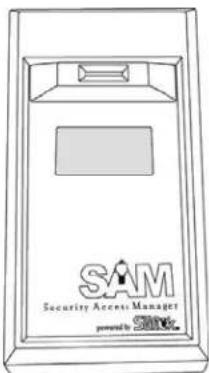
Fig. A - Electronic Key Encoder
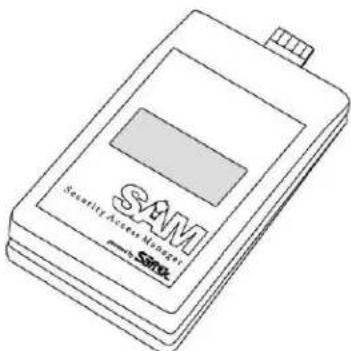
Fig. B - SAM System Utility Device
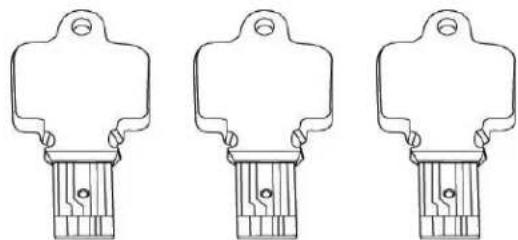
natural_image
Three identical line drawings of a mechanical component with flanges and base (no text or symbols)Fig. C - Electronic Keys

natural_image
Pure electrical circuit lines without any symbolsFig. D - Power Source for the Key Encoder

natural_image
Technical line drawing of two connected electrical connectors (no text or symbols)Fig. E - RS 232 Serial Cable
Female to Female
Part 1
Getting Started
Section 1: Installing the SAM System
Note: Before beginning the SAM System installation process, it is recommended that you confirm that all components are present. (Refer to pages 1-2 for a full component list.)
The first SAM System component to install is the key encoder, which connects to your PC using the RS 232 serial cable. Once the key encoder is connected to your PC, attach the power source to the key encoder and plug it into an electric socket in the wall or onto a power strip. The key encoder will flash the message, "WAIT FOR PC SIGNAL."
The second component to install is the SAM System software. To install the software program, simply insert the CD into your CD-ROM drive. The Setup program should launch automatically and the Welcome screen will be displayed (Fig. 1.1).

Fig. 1.1 - Welcome Screen
Note: If the Setup program does not auto-start, go to the Start menu and click Run. Click Browse to find the setup.exe file located on the CD-ROM and double-click it. Back at the Run dialog box, click OK.
At the Welcome screen, click Next to continue the installation process. This will display the Select Components screen (Fig. 1.2).

Fig. 1.2 - Select Components Screen
At the Select Components screen, the box next to the words "Install SAM Application files" will already be checked. You must check the box next to the words "Install SAM Database files." If you do not check this box, the database information provided from the manufacturer will not install correctly.
Note: It is extremely important that both boxes on the Select Components screen are checked before continuing with the installation process.
When you have checked the box next to "Install SAM Database files," click Next to continue the installation process. This will display the Select Destination Directory screen (Fig. 1.3).
The SAM System software will automatically install into the default folder location: C:\Program Files\SAM.
Note: You may choose to install the program into a different folder location; however, for service purposes, it is recommended that you keep the location standard for the SAM System. This allows our technical service associates to better assist you should problems arise.

Fig. 1.3 - Select Destination Directory Screen
When you have selected the destination directory for the SAM program files, click Next to continue the installation process. This will display the Select Database Directory screen (Fig. 1.4).
The SAM System database will automatically install into the default folder location: C:\Program Files\SAM\Data.
Note: You may choose to install the database into a different folder location; however, for service purposes, it is recommended that you keep the location standard for the SAM System. This allows our technical service associates to better assist you should problems arise.
When you have selected the destination directory for the SAM database files, click Next to continue the installation process. This will display the Backup Replaced Files screen (Fig. 1.5).

Fig. 1.4 - Select Database Directory Screen

Fig. 1.5 - Backup Replaced Files Screen
Click Next at the Backup Replaced Files screen. This will display the Select Replaced Directory screen (Fig. 1.6).

Fig. 1.6 - Select Replaced Directory Screen
Note: Although this is likely an entirely new installation of the SAM System, with no files to replace, it is prudent to accept these defaults.
Click Next at the Select Replaced Directory screen. This will display the Ready to Install screen (Fig. 1.7). Click Next to begin installation.

Fig. 1.7 - Ready to Install Screen
Installation progress will be displayed in the Installing screen (Fig. 1.8).
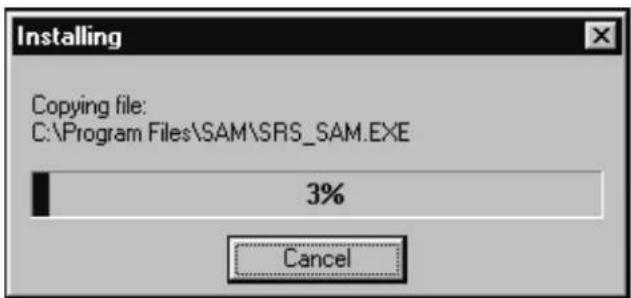
Fig. 1.8 - Installing Screen
When installation is complete, the Installation Completed screen (Fig. 1.9) will be displayed. Click Finish at the Installation Completed screen. The installation process is now complete.

Fig. 1.9 - Installation Completed Screen
Running the Software
The installation process will have created a shortcut to SAM in the Start menu. To start the program, go to your computer's Start menu and select:
Programs → SAM
This will display the Initialization screen (Fig. 1.10), or main SAM System menu. Like most Windows-based programs, pull-down menus appear in the upper left area of the screen, and only those features that are active and accessible will be highlighted. Until you fully log on to the SAM System, only the File menu will be active. All other features of the system will be inaccessible.

Fig. 1.10 - Initialization Screen/Main SAM System Menu
Logging on to SAM
To start the log-on process, click File and select Log On from the pull-down menu (Fig. 1.11). The User Logon screen will then appear (Fig. 1.12).
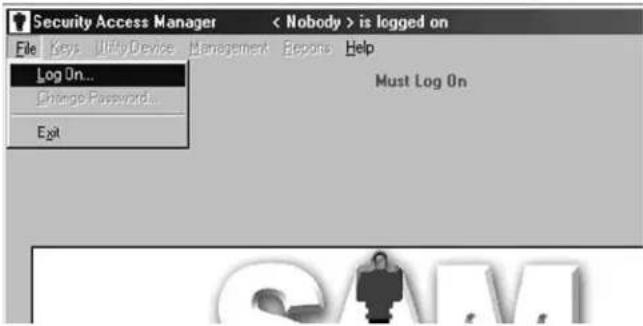
Fig. 1.11 - File Pull-Down Menu

Fig. 1.12 - User Logon Screen
When the SAM System is started for the first time, both the User ID and Password are the same: "ADMIN." Type "ADMIN" in the User ID field and the Password field and click OK (or press the
Once you are logged on to the SAM System, all drop-down menus will be active (Fig. 1.13), allowing you full access to all the program's features. The name of the person who is currently logged on to the SAM System is displayed at the top of the screen.

Fig. 1.13 - Main SAM System Menu With Active Menus
Note: SAM will automatically log off the current user if the system remains idle for more than five minutes. The user will then have to log back on to the system using his or her user ID and password.
Once you have full access to all the program's features, you can configure the SAM System specifically for your property. Although this takes some time, once it is configured, the information contained in the system will require only minor changes in the future.
Configuring the SAM System entails the following:
- Adding new SAM System users, in other words, employees who will have access to and be using the SAM System. SAM allows you to assign varying levels of access to the system's many features.
- Setting up zones that represent individual buildings or other areas within your property.
- Inputting unit numbers either individually or by group.
- Setting up any common access locks, such as for the pool gate or laundry doors.
- Setting up any suite doors that provide access to up to 10 unit doors.
The next section of this manual discusses the process of adding system users and assigning access, or authorization, levels. The other steps listed above are discussed in Section 3: "The Site Design Process."
Section 2: Registering System Users
The first step in configuring the SAM System is registering the people who will be using the system, or "system users," and assigning their respective levels of authority or access. To register system users, go to the Management pull-down menu and select:
Maintenance → Staff
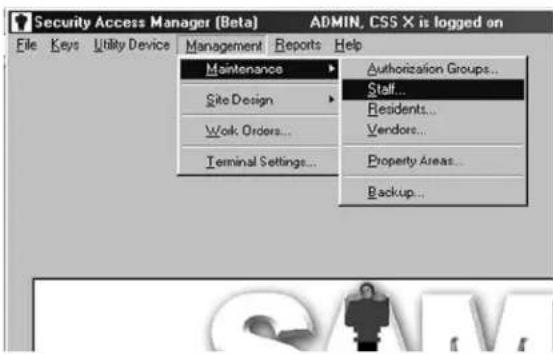
This will display the Staff List dialog box (Fig. 2.1).

Fig. 2.1 - Staff List Dialog Box
Assigning the System Administrator
Within the Staff List dialog box, you will see one person already registered: "ADMIN, CSS" (Fig. 2.1). This is the default setting that comes from the factory.
Assuming that you will be the "system administrator," your first step is to register yourself in the SAM System and assign yourself the authority of the system administrator. To register yourself in the SAM System, click Add (Fig. 2.1) to display the Staff Form – ADD Mode dialog box (Fig. 2.2).

Fig. 2.2 - Staff Form - ADD Mode Dialog Box
At the Staff Form – ADD Mode dialog box, simply click in each field and start typing. At the top of the box, enter your last name, first name and middle name or initial (optional) in the appropriate fields. In the Position field, enter the word "Admin" or "Manager" or some other appropriate descriptor.
The next area of the Staff Form – ADD Mode dialog box is for entering the System Authorization Information. At this time, you will create a User Name and Password for yourself.
Note: A user name can be from one to 15 characters and a password can be from three to 10 characters. This information will become the user ID and password that you will use each time you log on to the SAM System, so make it something you can easily remember and/or be sure to write it down and secure it for future reference.
Once you have created your user name and password, go to the area beneath these fields to the box labeled Administrator (Fig. 2.2). The system administrator is the person who will be setting up and maintaining the SAM System. Assuming that is you, click on the Administrator box so a check mark appears in it. This will give you full authority to operate all aspects of the SAM System. Click Save to return to the Staff List dialog box (Fig. 2.1).
Note: If someone else will ultimately be the system administrator, you can register him/her using these instructions. You may still want to register yourself with full system administrator authority if you will be performing a number of administrative functions.
Removing the Default System Administrator
Now that you have registered yourself (and/or someone else) as the system administrator, it is highly recommended that you remove the default system administrator ("ADMIN, CSS") from the SAM System.
First you must log off the system and then log back on using your new user name and password. To delete the default system administrator, go back to the Management pull-down menu and select:
Maintenance → Staff

This will once again display the Staff List dialog box (Fig. 2.3), now showing at least one additional person listed.
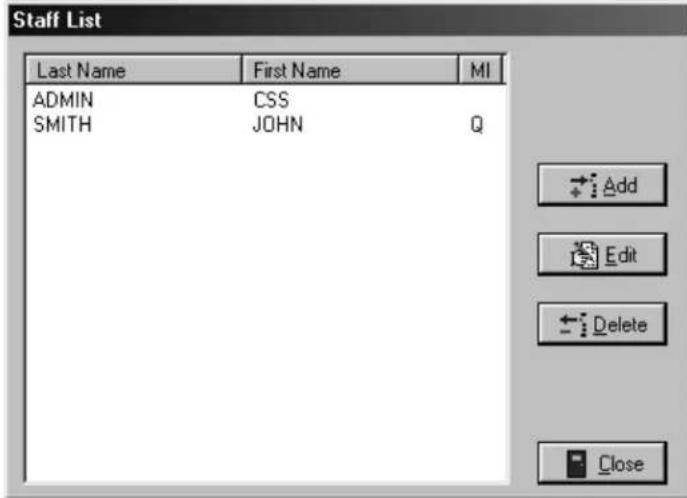
Fig. 2.3 - Staff List Dialog Box
Within the Staff List dialog box, click on ADMIN, CSS to highlight it, and then click Delete.
A Delete Confirmation dialog box will appear, asking, "Do you wish to delete ADMIN, CSS?" Click Yes to confirm the deletion. This will return you to the Staff List dialog box.
Back at the Staff List dialog box, you can click Close to return to the main SAM System menu, or stay in the Staff List dialog box to register SAM system users as discussed below.
Adding System Users
“System users” are loosely defined as the people who will be using the SAM System. However, it is recommended that you register all staff members, whether they will be directly using the SAM System or not. This will make performing such functions as creating staff keys or assigning work orders an easier process. You can register system users now or at any time in the future.
To register system users – and if you are not already at the Staff List dialog box – go back to the Management pull-down menu and select:
Maintenance → Staff
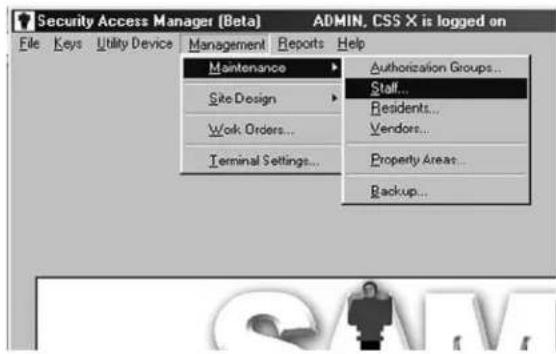
This will once again display the Staff List dialog box (Fig. 2.4).
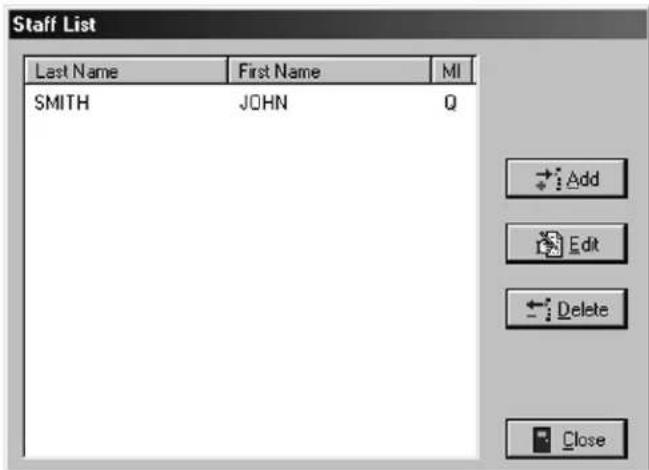
Fig. 2.4 - Staff List Dialog Box
Within the Staff List dialog box, click Add to display the Staff Form – ADD Mode dialog box (Fig. 2.5), and follow the step-by-step instructions listed below.

Fig. 2.5 - Staff Form - ADD Mode Dialog Box
- Enter the person's name. At the top of the form are fields for inputting each person's last, first and middle name/initial (optional).
- Enter information about his/her position. In the Position field, type in a word or two that identifies this person's position or responsibility at your site, such as "Manager" or "Maintenance."
- Enter the System Authorization Information. Create a user name and password for this person.
Note: A user name cannot be more than 15 characters and a password cannot be more than 10 characters. Keep in mind that this information will become the user ID and password that each user will type in when logging on to the SAM System; be sure it is something they can easily remember. For this reason, it is recommended that you employ an easily identifiable system for assigning user names, such as the person's first initial and last name. For example, John Smith's user name would be "jsmith."
As the system administrator, you will have access to user name and password information in the future. This will be useful in cases where you need to add or remove users from the system or change passwords.
- Assign the authority level. It is highly recommended that you not give administrator privileges to any other users of the SAM System. In other words, leave the Administrator box unchecked.
Below the Administrator box is a larger box that is currently empty, but may eventually contain the names of "authorization groups" that you can set up. An authorization group is essentially a label that represents access to a specific (and limited) list of SAM System functions, such as assigning work orders or creating new keys, rather than allowing access to the entire system.
Once you have set up authorization groups in the SAM System, you can go back in and edit the authority level of certain staff members by selecting one of the authorization groups that will then appear in the System Authorization Information box (Fig. 2.5). Creating authorization groups is discussed below.
- Click Save to return to the Staff List dialog box (Fig. 2.4). Click Add to add the next user and follow the process once again. When you have registered all staff members in the SAM System, click Close to return to the main SAM System menu.
Creating Authorization Groups
Assigning a staff member to a specific authorization group allows that person access to a limited list of SAM System functions, rather than allowing access to the entire system.
Considering the amount of time you will have spent in setting up the information the SAM System, it is recommended that you be very careful in determining how much access to give to other users of the system.
To create authorization groups, go to the Management pull-down menu and select:
Maintenance → Authorization Groups

This will display the Authorization Groups dialog box (Fig. 2.6).

Fig. 2.6 - Authorization Groups Dialog Box
At this point, there will be no authorization groups listed in the box. To create new authorization groups, click Add. This will display the Authorization Group – ADD Mode dialog box (Fig. 2.7).

Fig. 2.7 - Authorization Group - ADD Mode Dialog Box (System Authorizations)
The first step in creating a new authorization group is to type in a name for it in the Name field at the top of the dialog box. It is recommended that the name be something that is easily identifiable, such as “Maintenance” or “Work Order Access.” We’ve added a unit access authorization group to follow as an example (Fig. 2.7).
Below the Name field are two tabs – System Authorizations and Key Authorizations – each with a list of options from which to choose.
System Authorizations
System Authorizations options are listed below with short definitions of each. To select options, simply click in the small box next to the option so a check mark appears in it.
Read Key – Allows the user to use the key encoder to read a key.
Rename Unit – Allows the user to go into the site design section and change the names of units.
Change Active State of Unit – Allows the user to go into the site design section and edit the active state of a unit.
Add Unit – Allows the user to go into the site design section and add additional units to the system.
Move Unit From Zone – Allows the user to go into the site design section and change a unit's zone assignment.
Move Unit From Suite – Allows the user to go into the site design section and change a unit's suite assignment.
Change Switch Mode of Unit – Allows the user to go into the site design section and change a unit's switch mode.
Rename Common Access Lock – Allows the user to go into the site design section and change the names of common access locks.
Change Active State of Common Access – Allows the user to go into the site design section and edit the active state of a common access lock.
Change Start/Stop Time of Common Access – Allows the user to edit the start and stop times of a common access lock.
Rename Zone – Allows the user to go into the site design section and rename a zone.
Change Active State of Zone – Allows the user to go into the site design section and edit the active state of a zone.
Edit Vendor Company – Allows the user to go into the maintenance section and edit information about a vendor company.
Delete Vendor Company – Allows the user to go into the maintenance section and delete a vendor company from the SAM System.
Add Vendor Company – Allows the user to go into the maintenance section and add a vendor company to the SAM System.
Edit Vendor Employee – Allows the user to go into the maintenance section and edit information about a vendor employee.
Delete Vendor Employee – Allows the user to go into the maintenance section and delete a vendor employee from the SAM System.
Add Vendor Employee – Allows the user to go into the maintenance section and add a vendor employee to the SAM System.
Edit Resident – Allows the user to go into the maintenance section and edit information about a resident.
Delete Resident – Allows the user to go into the maintenance section and delete a resident from the SAM System.
Add Resident – Allows the user to go into the maintenance section and add a resident to the SAM System.
Edit Staff – Allows the user to go into the maintenance section and edit information about a staff member.
Delete Staff – Allows the user to go into the maintenance section and delete a staff member from the SAM System.
Add Staff – Allows the user to go into the maintenance section and add a staff member to the SAM System.
Edit Property Settings – Allows the user to go into the site design section and edit information regarding default settings and more.
Edit Work Order – Allows the user to go into the work order section and edit a work order.
Delete Work Order – Allows the user to go into the work order section and delete a work order.
Add Work Order – Allows the user to go into the work order section and add a work order.
Rename Suite – Allows the user to go into the site design section and change the names of suites.
Change Active State of Suite – Allows the user to go into the site design section and edit the active state of a suite lock.
Add Suite – Allows the user to go into the site design section and add additional suites to the system.
Move Suite From Zone – Allows the user to go into the site design section and change a suite's zone assignment in the SAM System.
Change Switch Mode of Suite – Allows the user to go into the site design section and change a suite's switch mode.
Edit Area – Allows the user to go into the property areas section and edit information about a common access area in the SAM System.
Delete Area – Allows the user to go into the property areas section to delete a common access area from the SAM System.
Add Area – Allows the user to go into the property areas section and add additional common access areas to the SAM System.
Key Authorizations
Under the Key Authorizations tab (Fig. 2.8), nearly every key that can be created is listed along with the following three options:
- Make New Key
• Make Duplicate Key - Erase Key

Fig. 2.8 - Authorization Group - ADD Mode Dialog Box (Key Authorizations)
To select any or all of these options, click on the name of the specific key and then click in the small box next to the option so a check mark appears in it.
Note: If one of these three options appears dark, that option is not available for that particular key.
Once you have set up your system users, your next task is to register information pertaining to your property, such as its common access areas, zones, suites and units, into the SAM System.
Section 3: The Site Design Process
The “site design process” refers to entering information about your property into the SAM System. This information generally includes the actual units and their designations (1A, Apartment 211, Building A, Unit 101, etc.), any common access areas such as a pool or laundry room, any zones or suites and more.
It is important to be careful and thorough when entering information about your property into the SAM System; the way the locks are configured and the keys programmed are both dependent upon accurate site design information. Although it may take considerable time to perform the site design process, once completed, changes to this information will not likely be required in the future.
Entering Zone Information
The site design process begins by entering information about any zones your property may have. If your property is like many, it is divided up into a number of zones that represent separate buildings or groups of buildings. A zone key is the key that will be given to employees to allow them to gain access only to those units (and any common access areas) within the zone or zones for which they are responsible.
If your property is only a single building, you may set up each floor as a different zone, or you can choose not to set up zones at all. In this case, go to the next subsection: "Entering Suite Lock Information" (page 21).
Setting Up Zones
To set up zone information in the SAM System, go to the Management pull-down menu and select:
Site Design → Zones

This will display the Zone Configuration dialog box (Fig. 3.1). In this dialog box, you will immediately see a series of numbered rows starting with 1: ZONE 01 and going up to 50: ZONE 50.

Fig. 3.1 - Zone Configuration Dialog Box
To begin entering zone information for your property, click on 1: ZONE 01 and then click Edit. This will display the Zone Edit dialog box (Fig. 3.2).

Fig. 3.2 - Zone Edit Dialog Box
In the Name field, highlight over 1: ZONE 01 and type in an appropriate name for your first zone, such as "Building A" or "Floor 01." Make sure that the Active box is checked, and then click OK.
Note: If you are using numbers, be sure to use only two-digit numbers by including a "0" in front of any single-digit numbers. For example, use "Building 01" (not "Building 1"), "Building 02" (not "Building 2"), "Building 10," etc. This will ensure that the zones are listed in the proper order later in the site design process.
Saving Zone Information
Back at the Zone Configuration dialog box, the changes you just made to 1: ZONE 01 will appear in boldface type (Fig. 3.3). Continue entering zone information for your property by clicking on 2: ZONE 02 and then clicking Edit. This will again display the Zone Edit dialog box (Fig. 3.2).
In the Name field, highlight over 2: ZONE 02, type in an appropriate name for that next zone, confirm that the Active box is checked, and click OK.
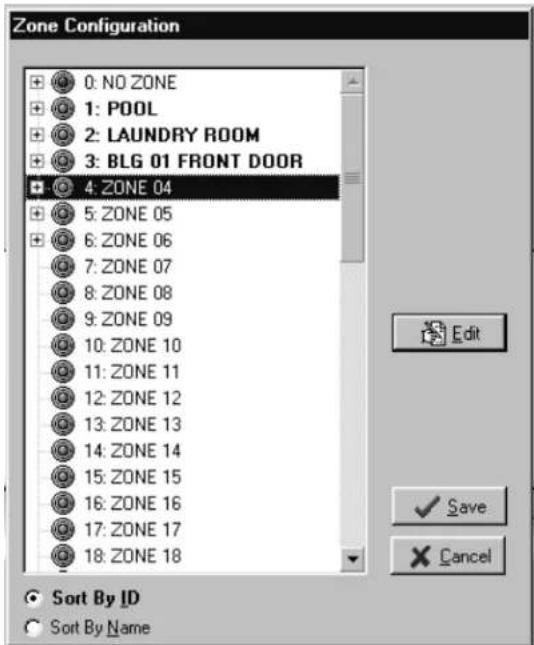
Fig. 3.3 - Zone Configuration Dialog Box (showing changes)
Back at the Zone Configuration dialog box, these changes made to 2: ZONE 02 will also appear in boldface type (Fig. 3.3). Continue renaming zones in the same manner. All changes made will appear in bold in the Zone Configuration dialog box until you save them in the SAM System.
When you have finished designating the appropriate number of zones for your property, click Save to store the information in the SAM System. To confirm that all zone information has been saved, go back into the Zone Configuration dialog box. The names of the zones you just registered should no longer appear in boldface type.
Entering Suite Lock Information
The next step in the site design process is to input information about any suites your property may have. Suites are smaller groupings of units, where up to 10 units are accessed through a common door as well as their own individual doors. When you eventually make unit keys, the keys for any units within suites will be programmed to open both the suite door as well as their own individual unit doors – not all the unit doors within the suite.
Suites are more common in college dormitories than in apartment complexes or similar dwellings. If your property does not have suites, go on to the next subsection: "Entering Unit Lock Information" (page 23).
Setting up Suites
To set up suite information for your property, go to the Management pull-down menu and select:
Site Design → Suite Locks

This will display the Suite Configuration dialog box (Fig. 3.4).

Fig. 3.4 - Suite Configuration Dialog Box
Unlike in the Zone Configuration dialog box, no suites are pre-listed. To begin entering suite information into the SAM System, click Add. This will display the Suite Add dialog box (Fig. 3.5).
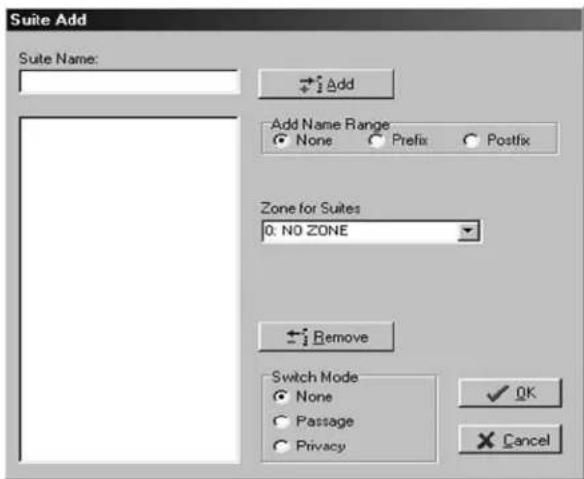
Fig. 3.5 - Suite Add Dialog Box
In the top field labeled Suite Name, type in the designation for your first suite, for example, "Suite 01," "Suite A," "West Wing, Suite 101" or whatever is appropriate for your property, then click Add. The suite you just named will appear in the list box below the Suite Name field.
Adding a Range of Suites
You can continue adding additional suites in this manner, or you may add a range of suite numbers to the system, as long as they are all in the same zone.
To add a range of suite numbers from the same zone into the system, type the word "SUITE" (or another appropriate name such as "Building A, Suite") in the Suite Name box, then go to the Add Name Range area.
To add numeric information BEFORE the information entered into the Suite Name box, click the open circle in front of Prefix; to add the numeric information AFTER the information entered into the Suite Name box, click the open circle in front of Postfix. Enter the range of suite numbers, such as 01 to 20, and click Add. The range of suites you just designated will appear in the list box below the Suite Name field.
Note: If you are using numbers, be sure to use only two-digit numbers by including a "0" in front of any single-digit numbers. For example, use "Suite 01" (not "Suite 1"), "Suite 02" (not "Suite 2"), "Suite 10," etc. This will ensure that the suites are listed in the proper order later in the site design process.
If the information in the Suite Name box does not appear as you had intended, you can delete the entries individually by clicking on a single entry and clicking Remove. To delete all the entries at one time, click on the first entry, holding down the
Indicating the Zone for Suites
Once you have created the appropriate list of suites, go to the Zone for Suites drop-down box to indicate in which zone this suite (or range of suites) is located. Because you have already set up all the zones for your property, the appropriate zone (such as "Building A") should already be in the drop-down box. Click on the zone name. It will then appear in the field directly under Zone for Suites.
Selecting the Switch Mode
The next step is to indicate the switch mode for this suite (or range of suites). In most cases, the locks you received as part of the SAM System have a switch with a large knob on the backside. Depending on the locks ordered, the switch will either have a label marked "PRIVACY" with an arrow pointing in a counter-clockwise direction or a label marked "OPEN" in one position and "LOCK" in the other position.
Back at the Suite Add dialog box (Fig. 3.5), down toward the bottom of the screen, there is a Switch Mode section that has three options:
- None
- Passage
- Privacy
If your locks have a switch labeled "OPEN" and "LOCK":
You can select one of two options for the switch mode: Passage or None. By selecting Passage, any time the switch is turned to the OPEN position, the lock will remain open (i.e., in an unlocked condition) when the suite door lock is eventually programmed. As long as the switch remains in the OPEN position, the lock will remain in the open position and all keys will be ignored.
In addition, any time the switch is turned to the LOCK position, the lock will remain closed (i.e., in a locked condition). As long as the switch remains in the LOCK position, the lock motor will be engaged. All keys programmed for that lock will be able to unlock it, but the lock motor will reengage within five seconds.
By selecting None, the switch on the lock will have no function whatsoever.
If your locks have a switch labeled "PRIVACY":
You can select one of two options for the switch Mode: Privacy or None. By selecting Privacy, any time the switch is turned to the PRIVACY position, only the resident or master key will be able to unlock the door when the suite door lock is eventually programmed. Other keys, such as limited use keys or zone keys, will be ignored.
By selecting None, the switch on the lock will have no function whatsoever.
Note: You will be given a number of switch labels to change door switches as needed. If the locks had originally been configured with PRIVACY switches, they can be relabeled and reconfigured to become OPEN and LOCK switches and vice versa.
Saving Suite Information
When you are satisfied that all information for this suite or range of suites is accurate, click OK. Back at the Suite Configuration dialog box, the suite or range of suites you just added will appear in boldface type. Continue adding individual suites or ranges of suites in the same manner as described above. All suites added will appear in bold in the Suite Configuration dialog box until you save them in the SAM System.
When you have finished creating and designating the appropriate number of suites for your property, click Save to store the information in the SAM System. To confirm that all suite information has been saved, go back into the Suite Configuration dialog box. The names of the suites you just registered should no longer appear in boldface type.
Entering Unit Lock Information
The next step is to input information for all your property's units, or apartments, into the SAM System. To do this, go to the Management pull-down menu and select:
Site Design → Unit Locks

This will display the Unit Configuration dialog box (Fig. 3.6).

Fig. 3.6 - Unit Configuration Dialog Box
Like the Suite Configuration dialog box, the Unit Configuration dialog box will be empty. To add units, click Add. This will display the Unit Add dialog box (Fig. 3.7).
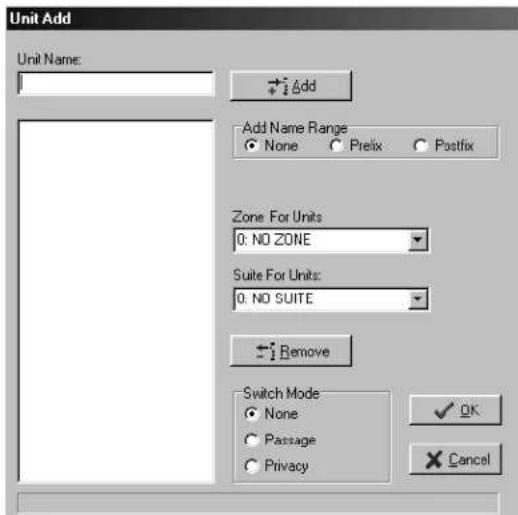
Fig. 3.7 - Unit Add Dialog Box
In the top field labeled Unit Name, type in the designation for the first unit – such as “Unit 101,” “Building A, Unit 101” or whatever is appropriate for your property – and click Add. The unit you just named will appear in the list box below the Unit Name field. You can continue adding additional units in this manner, or you can add a range of units to the system, as long as they are all in the same zone and/or suite.
Adding a Range of Units
To add a range of units from the same zone into the system, type the word "Unit" (or another appropriate name such as "Building A Unit") in the Unit Name box, then go to the Add Name Range area.
To add the numeric information BEFORE the information entered into the Unit Name box, click the open circle in front of Prefix; to add the numeric information AFTER the information entered into the Unit Name box, click the open circle in front of Postfix. Now enter the range of unit numbers, such as 101 to 999, and click Add.
Note: If you are using numbers, be sure to use only two- or three-digit numbers by including a "0" in front of any single- or double-digit numbers. For example, use "01" or "001" (not "1"), "02" or "002" (not "2"), or "10" or "010" (if three digits are being used). This will ensure that the units are listed in the proper order later in the site design process.
The units you just named will appear in the list box below the Unit Name field. If the information in the box is not listed as you had intended, you can delete the entries individually by clicking on an entry and clicking Remove. To delete all the entries at one time, click on the first entry, hold down the
Indicating the Zone and/or Suite for Units
Once you have created the appropriate list of units, go to the Zone for Units drop-down box to indicate in which zone this unit (or range of units) is located. Because you have already set up all the zones for your property, the appropriate zone (such as "Building A") should already be in the drop-down box. Click on the zone name. It will then appear in the field directly under Zone for Units.
If the units are part of a suite, go to the Suite for Units drop-down box to indicate which suite these units are in. Because you have already set up all the suites for your property, the appropriate suite (such as "Building 1, Suite A") should already be in the drop-down box. Click the suite for these units. It will then appear in the field under Suite for Units.
Selecting the Switch Mode
The next step is to indicate the switch mode for this unit (or range of units). Generally speaking, the locks you received as part of the SAM System will each have a switch with a large knob on the backside. Depending on the locks ordered, the switch will either have a label marked "PRIVACY" with an arrow pointing in a counter-clockwise direction or a label marked "OPEN" in one position and "LOCK" in the other position.
Back at the Unit Add dialog box (Fig. 3.7), down toward the bottom of the screen, there is a Switch Mode section with three options:
- None
- Passage
- Privacy
If your locks have a switch labeled "OPEN" and "LOCK":
You can select one of two options for the switch mode: Passage or None. By selecting Passage, any time the switch is turned to the OPEN position, the lock will remain open (i.e., in an unlocked condition) when the unit door lock is eventually programmed. As long as the switch remains in the OPEN position, the lock motor will not activate and all keys will be ignored.
In addition, any time the switch is turned to the LOCK position, the lock will remain closed (i.e., in a locked condition). As long as the switch remains in the LOCK position, the lock motor will be engaged. All keys programmed for that lock will be able to unlock it, but the lock motor will reengage within five seconds.
By selecting None, the switch on the lock will have no function whatsoever.
If your locks have a switch labeled "PRIVACY":
You can select one of two options for the switch mode: Privacy or None. By selecting Privacy, any time the switch is turned to the PRIVACY position, only the resident or master key will be able to unlock the door when the unit door lock is eventually programmed. Other keys, such as limited use keys or zone keys, will be ignored.
By selecting None, the switch on the lock will have no function whatsoever.
Note: You will be given a number of switch labels to change door switches as needed. If the locks had originally been configured with PRIVACY switches, they can be relabeled and reconfigured to become OPEN and LOCK switches and vice versa.
Saving Unit Information
When you are satisfied that all information for this unit or range of units is accurate, click OK. Back at the Unit Configuration dialog box, the unit or range of units you just added will appear in boldface type. Continue adding individual units or range of units in the same manner as described above. All units added will appear in bold in the Unit Configuration dialog box until you save them in the SAM System.
When you have finished creating and designating the appropriate number of units for your property, click Save to store the information in the SAM System. To confirm that all unit information has been saved, go back to the Unit Configuration dialog box. The unit names you just registered should no longer appear in boldface type.
Entering Common Access Area Information
Common access areas are areas having locking systems that need to allow access to a number of people (tenants, maintenance staff, etc.). Common access areas on your property may include community pools, garages, laundry rooms and more. In addition, if you have buildings with doors that provide access to all the units within, the locks on those doors would be considered common access locks.
To designate the appropriate common access areas for your property, go to the Management pull-down menu and select:
Site Design → Common Access Locks

This will display the Common Access Lock Configuration dialog box (Fig. 3.8).
![Common Access Lock Configuration 1: [COMMON ACCESS LOCK 01] 2: [COMMON ACCESS LOCK 02] 3: [COMMON ACCESS LOCK 03] 4: [COMMON ACCESS LOCK 04] 5: [COMMON ACCESS LOCK 05] 6: [COMMON ACCESS LOCK 06] 7: [COMMON ACCESS LOCK 07] 8: [COMMON ACCESS LOCK 08] 9: [COMMON ACCESS LOCK 09] 10: [COMMON ACCESS LOCK 10] 11: [COMMON ACCESS LOCK 11] 12: [COMMON ACCESS LOCK 12] 13: [COMMON ACCESS LOCK 13] 14: [COMMON ACCESS LOCK 14] 15: [COMMON ACCESS LOCK 15] 16: [COMMON ACCESS LOCK 16] 17: [COMMON ACCESS LOCK 17] 18: [COMMON ACCESS LOCK 18] 19: [COMMON ACCESS LOCK 19] Edit ✓ Save × Cancel Sort By ID Sort By Name](/content/2026/05/953934/images/435345862817154beaf94565ea655104e0d666b3ad4e942d4f0ef346b8775638.jpg)
Fig. 3.8 - Common Access Lock Configuration Dialog Box
You will immediately see a number of rows with the designation "COMMON ACCESS LOCK" with a number beside it starting with COMMON ACCESS LOCK 01 and going up to COMMON ACCESS LOCK 64. Each of these entries can be assigned a specific descriptive name to represent the various common access areas on your property.
To begin entering common access information, click on COMMON ACCESS LOCK 01 and then click Edit. This will display the Common Access Lock Edit dialog box (Fig. 3.9).
![Common Access Lock Configuration 1: [COMMON ACCESS LOCK 01] 2: [COMMON ACCESS LOCK 02] 3: [COMMON ACCESS LOCK 03] Common Access Lock Edit Name: COMMON ACCESS LOCK 01 ✓ Active Start Time: 12:00 AM Stop Time: 12:00 AM ✓ OK ✗ Cancel 18. [COMMON ACCESS LOCK 18] ✓ Cancel Sort By ID Sort By Name](/content/2026/05/953934/images/47d2d618e48d03f81e8b2b5ce6133021b4cb383147c3c56fe51d79dc8289d8ac.jpg)
Fig. 3.9 - Common Access Lock Edit Dialog Box
In the Name field, highlight over COMMON ACCESS LOCK 01 and type in an appropriate name for this area, such as "Building A Front Door," "Building A Pool" or "Laundry Room," and click OK.
Note: If you are using numbers, be sure to use only two-digit numbers. For example, use "Building 01 Pool" (not "Building 1 Pool"), "Building 02 Laundry Room" (not "Building 2 Laundry Room"). This will ensure that the common access area names are listed in the proper order later in the site design process.
By default, the Active field will be checked and the Start Time and Stop Time will be listed as 12:00 AM. This will allow the common access area to be accessible at any time of day to anyone with an appropriate key. To limit the number of hours an area is accessible, simply change the Start Time and Stop Time. For example, to limit entry to the pool between midnight and 6:00 AM, enter 6:00 AM for the Start Time and 12:00 AM for the Stop Time. During the inactive times, the lock will ignore all keys except the master key.
When you are satisfied with the information, click OK. Back at the Common Access Lock Configuration dialog box, the common access area information you just entered will appear in bold. Continue designating common access areas in the same manner.
When you have finished entering all the common access areas for your property, click Save to store the information in the SAM System. To confirm that all common access area information has been saved, go back into the Common Access Lock Configuration dialog box. The names of the common access areas you just registered should no longer appear in boldface type.
Confirming Property Settings
The next step in the site design process is to confirm or reconfigure your property settings within the SAM System. These settings include the default common access options for unit and zone keys that you just set up, the automatic daylight-saving time adjuster, and the name and identification numbers for your property. To begin this step, go to the Management pull-down menu and select:
Site Design → Property Settings
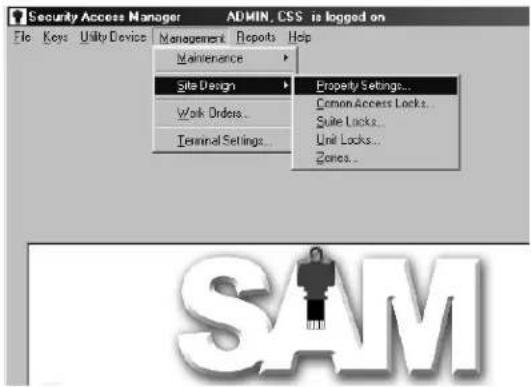
This will display the Property Settings dialog box (Fig. 3.10).
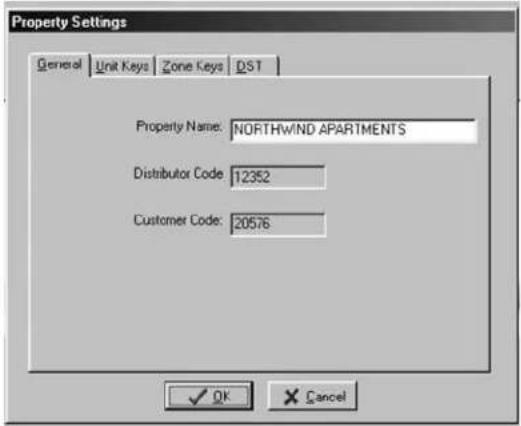
Fig. 3.10 - Property Settings Dialog Box
Within the Property Settings box are four tabs representing four different screen options:
- General
- Unit Keys
- Zone Keys
• DST
Click on the General tab. The name of your property should already be listed in the Name field. The Distributor Code and the Customer Code fields will also have been filled in by the factory. This information helps to distinguish one property from another so that keys made for your property will not open locks at any other property and vice versa.
Confirm that your property's Name is correct. You can also confirm that the Distributor Code and the Customer Code are correct by matching them to your invoice, but this is not absolutely necessary.
Unit Keys
To continue on to the next section, simply click on the Unit Keys tab (Fig. 3.11). You will immediately see the common access area options, which you just set up, listed in alphanumeric order. By default, all common access area options should already be checked.
![Property Settings General Unit Keys Zone Keys DST Default common access lock information for resident/unit keys [COMMON ACCESS LOCK 01] [COMMON ACCESS LOCK 02] [COMMON ACCESS LOCK 03] [COMMON ACCESS LOCK 04] [COMMON ACCESS LOCK 05] [COMMON ACCESS LOCK 06] [COMMON ACCESS LOCK 07] [COMMON ACCESS LOCK 08] [COMMON ACCESS LOCK 09] [COMMON ACCESS LOCK 10] [COMMON ACCESS LOCK 11] [COMMON ACCESS LOCK 12] [COMMON ACCESS LOCK 13] Mark All Clear All OK Cancel](/content/2026/05/953934/images/f5e4494fe6ebedd09fc1135d76ea7073670f83cb6b7d95be5ce3cd4dcfe04440.jpg)
Fig. 3.11 - Unit Keys Dialog Box
You can accept the default settings as they are or check/uncheck different options. For example, you may have set up storage rooms in each zone as common access areas, but you will only allow tenants to have access to the storage rooms in their own buildings. In this case, you will want to uncheck the storage rooms for now, and recheck them later when you make unit keys for each particular building or zone.
When you are satisfied with the default or corrected common access options for Unit Keys, click OK to save the settings. This will take you back to the main SAM System menu.
Zone Keys
To confirm the common access options for zone keys, go back to the Management pull-down menu and select:
Site Design → Property Settings

Click on the Zone Keys tab (Fig. 3.12). Just as with the Unit Keys tab, you will immediately see the common access options that have already been set up in the SAM System.
![Property Settings General | Unit Keys | Zone Keys | DST | Default common access lock information for zone keys ✓ [COMMON ACCESS LOCK 01] ✓ [COMMON ACCESS LOCK 02] ✓ [COMMON ACCESS LOCK 03] □ [COMMON ACCESS LOCK 04] ✓ [COMMON ACCESS LOCK 05] ✓ [COMMON ACCESS LOCK 06] ✓ [COMMON ACCESS LOCK 07] ✓ [COMMON ACCESS LOCK 08] ✓ [COMMON ACCESS LOCK 09] ✓ [COMMON ACCESS LOCK 10] ✓ [COMMON ACCESS LOCK 11] ✓ [COMMON ACCESS LOCK 12] ✓ [COMMON ACCESS LOCK 13] Mark All Clear All ✓ OK ✗ Cancel](/content/2026/05/953934/images/0044bb7f9bc42d2200b8d412d900014b2b1a57a1d1c433bf76ec505bf4e369e5.jpg)
Fig. 3.12 - Zone Keys Dialog Box
Once again, you can accept the default settings or check/uncheck different options. When you are satisfied with the default or corrected common access options for Zone Keys, click OK to save the settings.
DST
For most of the U.S., daylight-saving time (DST) runs from the first weekend in April to the last weekend in October. Although the SAM System assigns access time to each key produced, with the default being 24 hours per day, some keys, such as limited access keys, have specific expiration times, either by default or by configuration. If the region in which you live does NOT change the clocks for DST, you will need to configure SAM to take that into account so that expiration times are assigned accurately.
To confirm that the SAM System will account for DST properly for your region of the country, go back to the Management pull-down menu and select:
Site Design → Property Settings

Click on the DST tab (Fig. 3.13).

Fig. 3.13 - DST Dialog Box
The default setting is for U.S. STANDARD. With this setting, you will not be able to change the time settings under DST Start and DST Finish. To change the time settings (if your area does not change the clocks), choose NONE, LOCAL STANDARD or NON-STANDARD in the box under DST Type. When you have chosen a setting, click OK.
Go back to the DST dialog box. If you had previously chosen NONE, all the time setting information will have disappeared. If you had chosen LOCAL STANDARD or NON-STANDARD, you will now be able to access the time and date information to change the settings. Enter the new time and date information and click OK to save the settings.
Now that the site design process is complete, your next step is to program all the new locks on your property.
Part 2
Programming Locks
Section 4: The Preprogramming Process
Your SAM System vendor should have installed the locks on your property by now. The locks must be carefully programmed so that the right keys open them. For instance, if a unit lock is programmed as a common access area lock, many keys will provide access, and the security that the SAM System is meant to provide will be compromised.
Before going forward with programming locks, there are several steps that need to be completed, such as creating programming keys and initializing the utility device.
Until all of your locks are programmed, you and your staff – along with any vendors, such as construction workers and painters – will need an alternate method for gaining access into common access areas, suites and units. During this time, you will use construction keys.
Construction Keys
Construction keys can ONLY be used on locks that have not yet been programmed – whether unit locks, suite or zone locks or common access locks. As soon as a lock is programmed, a construction key will no longer open it.
While construction on your property is still in progress, construction keys can be used as master keys for you and your staff to gain access into areas where locks have already been installed. These keys can also be given to any vendors who need access to certain areas in order to complete their work on your property.
Your SAM System came with a certain number of preprogrammed construction keys. If you do not have a sufficient number of construction keys, you may opt to create more.
Note: It is strongly recommended that you limit the number of construction keys for your property.
If you do not wish to create additional construction keys, go to the next subsection: "The Programming Key" (page 35).
Creating Additional Construction Keys
To create additional construction keys, go to the Keys pull-down menu and select:
Create → Construction Key

This will display the Create Construction Key dialog box (Fig. 4.1).

Fig. 4.1 - Create Construction Key Dialog Box
By default, the construction key will be assigned to whomever is logged on to the SAM System. That person's name will appear in the box under the words, "The Key Is Assigned To." To accept this default, simply click OK.
Encoding the Construction Key
If a key is not currently in the key encoder, you will be prompted to place a key in the key encoder now. Within a few seconds, the key will be encoded. The key encoder will flash the message "KEY CODED CORRECTLY" and your computer will display the message: "The write operation was successful!" Click OK on the computer message to return to the main SAM System menu.
Note: It is recommended that you label each key as it is created to avoid confusion later.
Assigning Construction Keys
If you wish to assign a construction key to a staff member other than yourself, click the button to the right of the box. (This button has a hand pointing to the right.) This will display the Select User Type dialog box (Fig. 4.2).
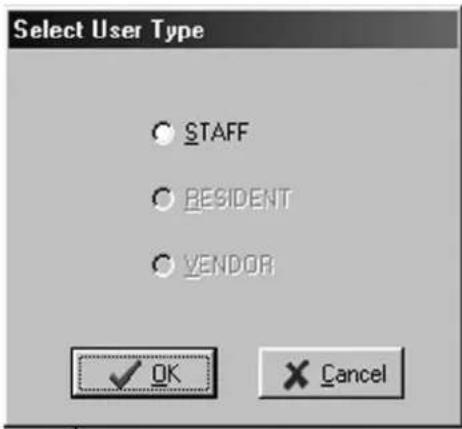
Fig. 4.2 - Select User Type Dialog Box
Note: Construction keys can be given to either staff or vendors, but can only be assigned to staff.
Click the open circle next to Staff and click OK. This will take you to the Staff List dialog box (Fig. 4.3). Any staff members you previously entered into the system ("Adding System Users," Section 2) will be listed in this box. Simply click on the name of the person to receive this key and click Select.

Fig. 4.3 - Staff List Dialog Box
Note: If the staff member you wish to assign the key to is not in the staff list, go to "Adding New Staff to the SAM System" (page 56) for instructions on adding that person to the list.
Back at the Create Construction Key dialog box, the name of the person you selected will appear in the box under the words, "The Key Is Assigned To." Click OK.
Encode the construction key as directed in "Encoding the Construction Key" (page 34). Continue creating construction keys in this manner until you have enough keys to give to both staff and vendors. Again, it is recommended that you limit the number of construction keys to only those individuals who absolutely need one and that each key is carefully labeled.
The Programming Key
The lock programming process can be a lengthy process without assistance. It requires two special keys: the configure key and the programming key. Both keys get inserted into the lock to tell it what kind of lock it is. The configure key will be discussed in the next section. The programming key is discussed below.
The programming key is a preprogrammed electronic key that is inserted into a lock to tell it that it is about to be configured. Each staff member involved in programming locks will need one. For that reason, it is recommended that you consider the number of people who will be helping with this process and that you create enough programming keys so that each person has one.
Creating Programming Keys
To create programming keys, go to the Keys pull-down menu and select:
Create → Programming Key

This will display the Create Programming Key dialog box (Fig. 4.4).

Fig. 4.4 - Create Programming Key Dialog Box
Because this will be the first programming key you are creating, it is important to select the New Key option by clicking on the open circle next to New Key.
Note: Whenever the New Key option is selected, a Warning dialog box (Fig. 4.5) will appear, indicating that creating a new key will cancel any other keys of the same type. If this is indeed the very first key of this type you are creating, click Yes to proceed. Otherwise, click No to return to the Create Programming Key dialog box and select the Duplicate Key option.

Fig. 4.5 - New Key Warning Dialog Box
The default setting for programming keys assigns each key to whomever is logged on to the SAM System. That person's name will appear in the box under the words, "The Key Is Assigned To." To accept this default setting, simply click OK.
Encoding the Programming Key
If a key is not currently in the key encoder, you will be prompted to insert a key into the key encoder now. Within a few seconds, the key will be encoded. The key encoder will flash the message "KEY CODED CORRECTLY" and your computer will display the message: "The write operation was successful!" Click OK on the computer message to return to the main SAM System menu.
Note: It is recommended that you label each key as it is created to avoid confusion later. Make sure that this key is labeled as a programming key that is assigned to the system administrator.
Creating Additional Programming Keys
To create additional programming keys to give to staff members who will be assisting in the lock programming process, go to the Keys pull-down menu and select:
Create → Programming Key
![Security Access Manager [Beta] File Keys Utility Device Management Reports Help Create Read... Resident Key... Zone Key... Master Key... Inhibit Resident Key... Inhibit Zone Key... Inhibit Master Key... Programming Key... Configure Unit Key... Configure Common Access Key... Configure Suite Key... Construction Key Limited Use Key Query Key Maintenance Key ADMIN, CSS X is logged on](/content/2026/05/953934/images/8d9bba9b864537606d06061b41be88207d957b783ff9b1fcdfca3eb852509bca.jpg)
This will once again display the Create Programming Key dialog box (Fig. 4.6).

Fig. 4.6 - Create Programming Key Dialog Box
Because this will now be a duplicate programming key, is important to accept (i.e., do not change) the default setting of Duplicate Key.
Once again, the name of the person currently logged on to the SAM System will appear in the box under the words, "The Key Is Assigned To." To change the key assignment, click the button to the right of the box. (This button has a hand pointing to the right.) This will display the Select User Type dialog box (Fig. 4.7).

Fig. 4.7 - Select User Type Dialog Box
Click the open circle next to Staff and click OK. This will take you to the Staff List dialog box (Fig. 4.8).

Fig. 4.8 - Staff List Dialog Box
Any staff members you previously entered into the system ("Adding System Users," Section 2) will be listed in this box. Simply click on the name of the person to receive this key and click Select.
Note: If the staff member you wish to assign the key to is not in the staff list, go to "Adding New Staff to the SAM System" (page 56) for instructions on adding that person to the list.
Back at the Create Programming Key dialog box, the name of the person you selected will appear in the box under the words, "The Key Is Assigned To." When you are satisfied with the settings for this key, click OK.
Encode the programming key as directed in “Encoding the Programming Key” (page 36). Continue creating programming keys in this manner until you have enough keys to give to the appropriate number of staff members. Be sure to label them appropriately. It is recommended that you limit the number of programming keys to only those individuals who absolutely need one.
The Utility Device
The utility device performs a number of functions. For the lock programming process, the utility device assigns an ID number and programs the correct date and time into the lock. In the future, if you "query" the lock to analyze its activity (to determine which keys have been inserted and when, for instance), all activity will be listed in correct, chronological order.
Setting the Correct Date/Time
In order for the utility device to program the lock with the correct date and time, the utility device itself must be programmed with the correct date and time. To set the correct date and time in the utility device, you must first verify that your computer is registering the correct date and time.
Note: Most PCs display the current time in the lower right-hand corner of the screen. By double-clicking on this time display, the familiar Windows Date/Time Properties screen will appear. Confirm that the time and date settings are correct and click OK.
Once you have verified your PC's date and time settings, insert the utility device into the key encoder. Go to the Utility Device pull-down menu and select:
Set Date/Time in Utility Device
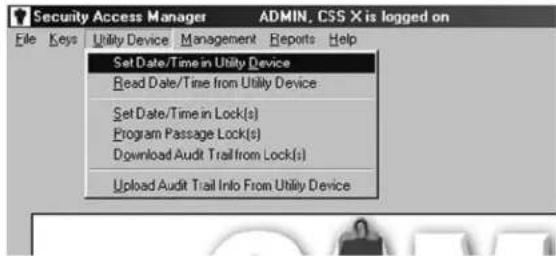
Note: If you have not already put the utility device into the key encoder, or if it is not positioned correctly, you will be prompted to insert the utility device with messages on screen as well as on the key encoder.
The set date/time process will take a few moments. When it is completed, a message will be displayed (Fig. 4.9) indicating the date and time in the utility device. The utility device itself will also display the correct time. The time that has been set is now synchronized with your PC.

Fig. 4.9 - Utility Device Function Confirmation Screen
Read Date/Time From Utility Device
If ever you need to check the accuracy of the clock in the utility device, insert it into the key encoder and go to the Utility Device pull-down menu and select:
Read Date/Time in Utility Device
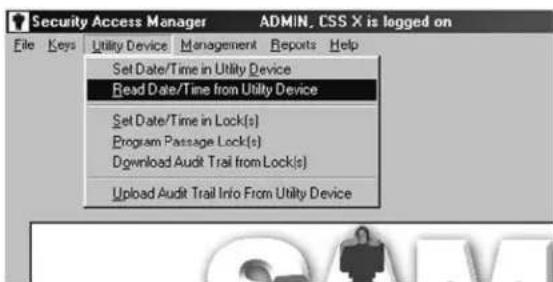
A message (Fig. 4.9) will be displayed indicating the date and time in the utility device, and the utility device itself will display the correct time.
Initializing the Utility Device
Initializing the utility device simply means telling it what it is about to do. For the lock programming process, the utility device will be setting the correct date and time in each lock as it is programmed. Therefore, to initialize the utility device for the lock programming process, go to the Utility Device pull-down menu and select:
Set Date/Time in Lock(s)
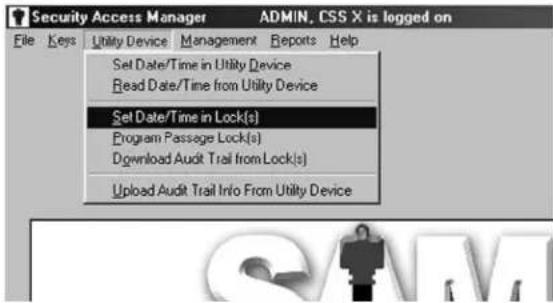
Note: If the utility device is not still in the key encoder, or if it is not positioned correctly, you will be prompted to insert the utility device with messages on screen as well as on the key encoder.
The set date/time in locks process will take a few moments. When it is completed, a message will be displayed indicating that "The write operation was successful!" The utility device will once again display the correct date and time.
Once you have created an appropriate number of programming keys (one for each staff member who will assist in the lock programming process) and you've initialized the utility device, you're almost ready to program locks.
The last step will be to create configure keys – one for each individual lock. Configure keys will be discussed in the next section in conjunction with the lock programming process.
Section 5: The Lock Programming Process
Along with a programming key and the initialized utility device, you will need a configure key to program a specific lock.
A configure key is inserted into a lock right after the programming key is inserted (and removed). Essentially, the programming key tells the lock it is about to be programmed, and the configure key programs the lock by telling it what type of lock it is and what keys should be allowed to open it. For instance, to program the lock for a pool, you will first insert your programming key and then a configure common access key specifically programmed for that pool's lock.
Because only specific configure keys program specific locks, it is very important that you carefully label configure keys as you create them.
Creating Common Access Configure Keys
Because there are a limited number of common access areas on your property (compared to possibly hundreds of units), it is recommended that you begin the lock programming process with the common access area locks on your property.
To create configure common access keys, go to the Keys pull-down menu and select:
Create → Configure Common Access Key

This will display the Create Configure Common Access Key dialog box (Fig. 5.1).
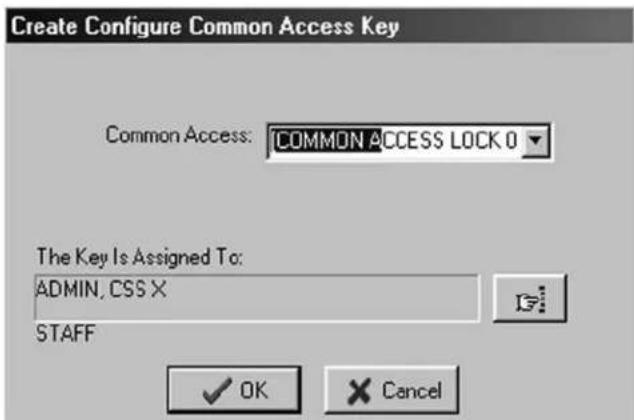
Fig. 5.1 - Create Configure Common Access Key Dialog Box
Within the Create Configure Common Access Key dialog box will be a drop-down box that contains the names of all the common access areas you designated during the site design process. Click on the name of the common access area you wish to program first. It will then appear in the field next to Common Access.
Assigning Configure Common Access Keys
The default setting for configure keys automatically assigns each key to whomever is logged on to the SAM System. That person's name will appear in the box under the words, "The Key Is Assigned To." To accept this default setting, simply click OK.
If someone other than yourself will be programming this particular lock, it is recommended that you assign the configure common access key to that person. To do this, click the button to the right of the box (Fig. 5.1). (This button has a hand pointing to the right.) This will display the Select User Type dialog box (Fig. 5.2).

Fig. 5.2 - Select User Type Dialog Box
Click the open circle next to Staff and click OK. This will take you to the Staff List dialog box (Fig. 5.3). Any staff members you previously entered into the system ("Adding System Users," Section 2) will be listed in this box. Simply click on the name of the person you wish to assign this key to and click Select.

Fig. 5.3 - Staff List Dialog Box
Note: If the staff member you wish to assign the key to is not in the staff list, go to "Adding New Staff to the SAM System" (page 56) for instructions on adding that person to the list.
Back at the Create Configure Common Access Key dialog box, the name of the person you selected will appear in the box under the words, "The Key Is Assigned To." Click OK.
Encoding the Configure Common Access Key
If a key is not currently in the key encoder, you will be prompted to insert a key into the key encoder now. Within a few seconds, the key will be encoded. The key encoder will flash the message "KEY CODED CORRECTLY" and your computer will display the message: "The write operation was successful!" Click OK on the computer message to return to the main SAM System menu.
Continue creating configure common access keys in this manner – one for each specific common access area lock. Be sure to label these keys carefully so you know which key will program which lock.
Programming Common Access Locks
Once you have created the necessary configure common access keys (one per common access lock), you can take them, your programming key and your utility device – assuming all the locks have already been installed – to each common access lock on your property to complete the programming process.
Note: Although it is possible to program uninstalled locks, it is strongly recommended that you wait until the locks have been physically installed to decrease the possibility of installing preprogrammed locks on the wrong doors.
Once you are in front of the first common access lock, follow this step-by-step process:
- Insert the programming key. The light above the keyhole will flash red. You now have 20 seconds to complete Step 2.
- Remove the programming key and insert the configure key for that lock. Be sure to insert the correct configure key for that lock. The light above the keyhole will now flash green.
- Insert the utility device to set the time and date in the lock.
- When the utility device beeps and declares "OPERATION COMPLETED." remove the utility device from the lock.
The lock has now been programmed. Construction keys will no longer provide access to this area.
Go to the next common access lock. Be sure you have the correct configure common access key for that specific lock. Once again, follow the step-by-step process outlined above.
Go to the next common access lock and continue the process until you have programmed all the common access locks on your property.
Programming Suite Locks
Programming suite locks is much the same as programming common access locks. If you do not have any suites on your property, go to the next subsection: "Programming Unit Locks" (page 46).
The first step in programming suite locks is to create a configure suite key for each of the suite locks on your property. To create configure suite keys, go to the Keys pull-down menu and select:
Create → Configure Suite Key

This will display the Create Configure Suite Key dialog box (Fig. 5.4).

Fig. 5.4 - Create Configure Suite Key Dialog Box
Within this dialog box will be a drop-down box that contains the designations for all the suites you set up during the site design process. Click on the suite you wish to program first. Its designation ("Suite 01," for example) will then appear in the Suite field.
Assigning Configure Suite Keys
The default setting for configure keys automatically assigns each key to whomever is logged on to the SAM System. That person's name will appear in the box under the words, "The Key Is Assigned To." To accept this default setting, simply click OK.
If someone other than yourself will be programming this particular suite lock, it is recommended that you assign the configure suite key to that person. To do this, click the button to the right of the box. (This button has a hand pointing to the right.) This will display the Select User Type dialog box (Fig. 5.5).
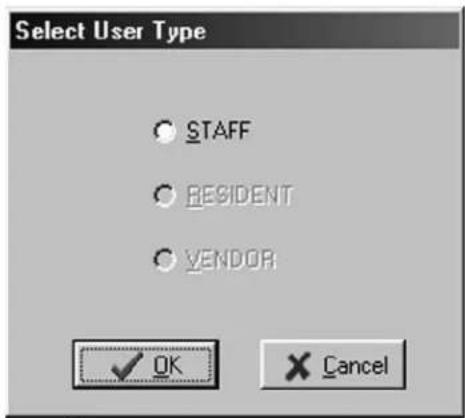
Fig. 5.5 - Select User Type Dialog Box
Click the open circle next to Staff and click OK. This will take you to the Staff List dialog box (Fig. 5.6). Any staff members you previously entered into the system ("Adding System Users," Section 2) will be listed in this box. Simply click on the name of the person you wish to assign this key to and click Select.

Fig. 5.6 - Staff List Dialog Box
Note: If the staff member you wish to assign the key to is not in the staff list, go to "Adding New Staff to the SAM System" (page 56) for instructions on adding that person to the list.
Back at the Create Suite Key dialog box, the name of the person you selected will appear in the box under the words, "The Key Is Assigned To." Click OK.
Encoding the Configure Suite Key
If a key is not currently in the key encoder, you will be prompted to insert a key into the key encoder now. Within a few seconds, the key will be encoded. The key encoder will flash the message "KEY CODED CORRECTLY" and your computer will display the message: "The write operation was successful!" Click OK on the computer message to return to the main SAM System menu.
Note: It is recommended that you label each key as it is created to avoid confusion later.
Continue creating configure suite keys in this manner – one for each suite lock on your property. Be sure to label these keys so you know which key will program each specific lock.
Programming a Suite Lock
Once you have created the necessary configure suite keys (one per suite lock on your property), you can take them, your programming key and your utility device to each suite lock to complete the programming process.
Let's say we are going to start with the lock for Suite 01. Go directly to the Suite 01 door and follow this step-by-step process:
- Insert the programming key. The light above the keyhole will flash red. You now have 20 seconds to complete Step 2
- Remove the programming key and insert the configure key for Suite 01. Be sure to insert the correct key. The light above the keyhole will now flash green.
- Insert the utility device to set the time and date in the lock.
- When the utility device beeps and declares "OPERATION COMPLETED," remove the utility device from the lock.
The lock has now been programmed. Construction keys will no longer provide access to this area.
Go to the next suite lock (Suite 02, for instance). Be sure you have the correct configure suite key for that lock. Once again, follow the step-by-step process. Continue the process until you have programmed all the suite locks on your property.
Programming Unit Locks
Because you probably have a great number of units on your property, it is recommended that you create batches of configure unit keys, or that you carefully label them and group them based on who will be doing the actual lock programming.
To create configure unit keys, go to the Keys pull-down menu and select:
Create → Configure Unit Key

This will display the Create Configure Unit Key dialog box (Fig. 5.7).

Fig. 5.7 - Create Configure Unit Key Dialog Box
Within this dialog box will be a drop-down box that contains the names of all the units you designated during the site design process. Click on the unit you wish to program first. Its designation (for example, "Unit 101") will then appear in the Unit field.
Assigning Configure Unit Keys
The default setting for configure keys automatically assigns each key to whomever is logged on to the SAM System. That person's name will appear in the box under the words, "The Key Is Assigned To." To accept this default setting, simply click OK.
If you wish to assign a configure unit key to a staff member other than yourself, click the button to the right of the box. (This button has a hand pointing to the right.) This will display the Select User Type dialog box (Fig. 5.8).

Fig. 5.8 - Select User Type Dialog Box
Click the open circle next to Staff and click OK. This will take you to the Staff List dialog box (Fig. 5.9). Any staff members you previously entered into the system ("Adding System Users," Section 2) will be listed in this box. Simply click on the name of the person you wish to assign this key to and click Select.

Fig. 5.9 - Staff List Dialog Box
Note: If the staff member you wish to assign the key to is not in the staff list, go to "Adding New Staff to the SAM System" (page 56) for instructions on adding that person to the list.
Back at the Create Configure Unit Key dialog box, the name of the person you selected will appear in the box under the words, "The Key Is Assigned To." Click OK.
Encoding the Configure Unit Key
If a key is not currently in the key encoder, you will be prompted to insert a key into the key encoder now. Within a few seconds, the key will be encoded. The key encoder will flash the message "KEY CODED CORRECTLY" and your computer will display the message: "The write operation was successful!" Click OK on the message to return to the main SAM System menu.
Note: It is recommended that you label each key as it is created to avoid confusion later.
Continue creating configure unit keys in this manner – one for each unit lock on your property. Be sure to label these keys so you know which key will program each specific lock.
Programming a Unit Lock
Once you have created the necessary configure unit keys (one per unit lock on your property), you can take them, your programming key and your utility device to each unit lock to complete the programming process.
Once you are in front of the first unit lock, follow this step-by-step process:
- Insert the programming key. The light above the keyhole will flash red. You now have 20 seconds to complete Step 2.
- Remove the programming key and insert the configure key for that lock. Be sure to insert the correct key. The light above the keyhole will now flash green.
- Insert the utility device to set the time and date in the lock.
- When the utility device beeps and declares "OPERATION COMPLETED," remove the utility device from the lock.
The lock has now been programmed. Construction keys will no longer provide access to this area.
Go to the next unit lock and follow the step-by-step process. Be sure you have the correct configure unit key for that lock. Continue the process until you have programmed all the unit locks on your property.
Once all of the locks have been programmed, your construction keys will no longer provide access. It is now time to create keys for you and your staff.
Part 3
Creating Keys
Section 6: Staff Keys
If you have programmed all of the locks on your property, the construction keys that came with your SAM System will no longer provide access. You must now create master keys. Master keys are programmed to open any lock on your property, including unit, suite and common access area locks.
Note: Electronic construction keys can be reused to create new keys.
Master keys are strictly for you and your staff. They are not to be given to residents or even vendors who need access to a number of areas on your property.
Creating keys involves the SAM System software, the key encoder and the electronic keys. Master keys are discussed below. Subsequent sections in this manual discuss keys for residents and vendors.
Creating Master Keys
Note: Not all properties have the option to make master keys. The option to create a master key is not available on the software installed at those properties.
To create master keys for yourself and your staff, go to the Keys pull-down menu and select:
Create → Master Key

This will display the Create Master Key dialog box (Fig. 6.1).
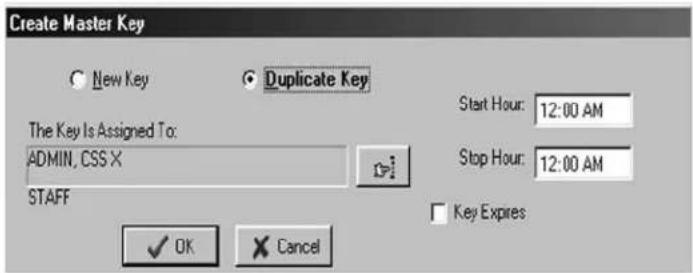
Fig. 6.1 - Create Master Key Dialog Box
Master Key Options
Because this will be the first master key you are creating, it is important to select the New Key option by clicking on the open circle next to New Key.
Note: Whenever the New Key option is selected, a Warning dialog box (Fig. 6.2) will appear, indicating that creating a new key will cancel any other keys of the same type. If this is indeed the very first key of this type you are creating, click
Yes to proceed. Otherwise, click No to return to the Create Master Key dialog box and select the Duplicate Key option.
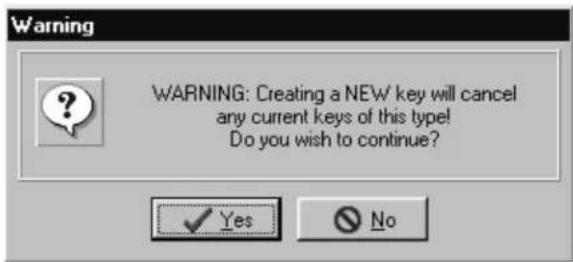
Fig. 6.2 - New Key Warning Dialog Box
The SAM System designates every new key created as Key ID 1. Each subsequent key created as a duplicate key will be designated Key ID 2, Key ID 3, etc. – up to Key ID 64. Carefully assigning key IDs will increase the level of security the SAM System provides – allowing you to know exactly who has which keys and helping you make sure that any lost or stolen keys no longer provide access.
Your next task is to determine the hours of operation for this key. The default settings for master keys assign each key for a full 24 hours each day with no expiration date. If you wish to limit the number of hours per day that this key will provide access, or enter an expiration date, you can do so now. Otherwise, leave these settings as they are.
Like all keys in the SAM System, master keys will be assigned by default to whomever is logged on to the SAM System. That person's name will appear in the box under the words, "The Key Is Assigned To." To accept this default setting, simply click OK.
Note: Key ID 1 should belong to the system administrator. Creating additional master keys for other staff members is discussed below.
Encoding the Master Key
If a key is not currently in the key encoder, you will be prompted to insert a key into the key encoder now. Within a few seconds, the key will be encoded. The key encoder will flash the message "KEY CODED CORRECTLY" and your computer will display the message:
The write operation was successful! The key ID for this key is 1.
Click OK on the computer message to return to the main SAM System menu.
Note: It is recommended that you label each key as it is created to avoid confusion later.
Creating Additional Master Keys
To create additional master keys to give to other staff members, go back to the Keys pull-down menu and select:
Create → Master Key

This will once again display the Create Master Key dialog box (Fig. 6.1).
Because this will not be the first master key you are creating, it is important to accept (i.e., do not change) the default setting of Duplicate Key.
If you wish to limit the number of hours per day that this key will provide access, you can do so now. To assign an expiration date – during the time a new hire is on probation, for example – click the open circle next to Key Expires. A Date field will appear beneath these words. Simply enter an appropriate date in the Date field (Fig. 6.3).

Fig. 6.3 - Create Master Key Box With Date Field
By default, the name of the person currently logged on to the SAM System appears in the box under the words, "The Key Is Assigned To." To change the key assignment to another staff member, click the button to the right of the box. (This button has a hand pointing to the right.) This will display the Select User Type dialog box (Fig. 6.4).

Fig. 6.4 - Select User Type Dialog Box
Note: Master keys can only be assigned to staff members.
Click the open circle next to Staff and click OK. This will take you to the Staff List dialog box (Fig. 6.5). Any staff members you previously entered into the system ("Adding System Users," Section 2) will be listed in this box. Simply click on the name of the person to receive this key and click Select.
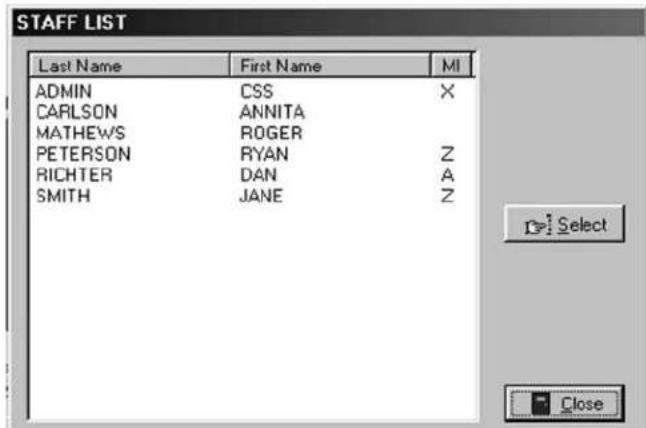
Fig. 6.5 - Staff List Dialog Box
Note: If the staff member you wish to assign the key to is not in the staff list, go to "Adding New Staff to the SAM System" (page 56) for instructions on adding that person to the list.
Back at the Create Master Key dialog box, the name of the person you selected will appear in the box under the words, "The Key Is Assigned To."
When you are satisfied with the settings for this key, click OK.
Encoding Additional Master Keys
If a key is not currently in the key encoder, you will be prompted to insert a key into the key encoder now. Within a few seconds, the key will be encoded. The key encoder will flash the message "KEY CODED CORRECTLY" and your computer will display the message:
The write operation was successful! The key ID for this key is 2.
Click OK on the computer message to return to the main SAM System menu.
Continue creating master keys in this manner until you have enough keys to give to the appropriate number of staff members. Be sure to assign them as duplicate keys (to create a new key ID for each staff member) and to carefully label them as master keys for each specific staff member.
Creating Zone Keys
Assuming your property has zones, you may decide that zone managers should only have keys for the specific zone they are responsible for – instead of a master key that will give them access to all other zones (including residential units within those zones).
Zone keys will open any lock within a specific zone, including common access area locks, which you designated during the site design process, unit locks and suite locks. In other words, they are essentially a master key for a specific zone.
If your property does not have zones, you chose not to set up zones in the site design process, or you do not wish to create zone keys, go to the next subsection: "Adding New Staff to the SAM System" (page 56).
To create zone keys, go to the Keys pull-down menu and select:
Create → Zone Key

This will display the Create Zone Key dialog box (Fig. 6.6).

Fig. 6.6 - Create Zone Key Dialog Box
Zone Key Options
Since this will be the first zone key you are creating, it is important to select the New Key option by clicking on the open circle next to New Key.
Note: Whenever the New Key option is selected, a Warning dialog box (Fig. 6.7) will appear indicating that creating a new key will cancel any other keys of the same type. If this is indeed the very first key of this type you are creating, click Yes to proceed. Otherwise, click No to return to the Create Zone Key dialog box and select the Duplicate Key option.
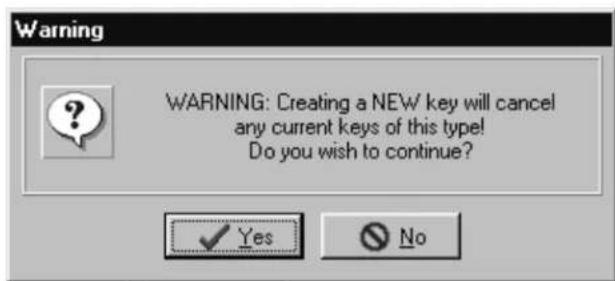
Fig. 6.7 - New Key Warning Dialog Box
Your next task is to go to the Zone drop-down box (Fig. 6.6) and confirm that you are creating a key for the appropriate zone. If you set up zones correctly in the site design process, all zones within your property will appear in the drop-down box. In fact, the first zone should already be selected and appearing in the box.
Now confirm the default settings for the common access areas for this zone. These default settings were set up in the site design process (Section 3) and will not likely require any changes.
Like master keys, zone keys will be assigned by default to whomever is logged on to the SAM System. That person's name will appear in the box under the words, "The Key Is Assigned To." The assignment is for a full 24 hours each day with no expiration date. To accept these default settings, simply click OK.
If a key is not currently in the key encoder, you will be prompted to insert a key into the key encoder now. Within a few seconds, the key will be encoded. The key encoder will flash the message "KEY CODED CORRECTLY" and your computer will display the message:
The write operation was successful!
The key ID for this key is 1.
Click OK on the computer message to return to the main SAM System menu.
Creating Additional Zone Keys
To create additional zone keys for other staff members, go to the Keys pull-down menu and select:
Create → Zone Key

This will once again display the Create Zone Key dialog box (Fig. 6.6).
Because this will now be a duplicate zone key, it is important to accept (i.e., do not change) the default setting of Duplicate Key.
By default, the name of the person currently logged on to the SAM System will appear in the box under the words, "The Key Is Assigned To." To change the key assignment, click the button to the right of the box. (This button has a hand pointing to the right.) This will display the Select User Type dialog box (Fig. 6.8).

Fig. 6.8 - Select User Type Dialog Box
Like master keys, zone keys can only be assigned to staff members. Click the open circle next to Staff and click OK. This will take you to the Staff List dialog box (Fig. 6.9). Click on the name of the person who will be assigned this key and click Select.

Fig. 6.9 - Staff List Dialog Box
Back at the Create Zone Key dialog box, the name you selected will appear in the box under the words, "The Key Is Assigned To."
Once again, the default settings assign each key for a full 24 hours each day with no expiration date. If you wish to limit the number of hours per day that this key will provide access, you can do so now. If you wish to assign an expiration date (during the time a new hire is on probation, for example), click the open circle next to Key Expires. A Date field will appear beneath these words. Simply enter an appropriate date in the Date field (Fig 6.10).
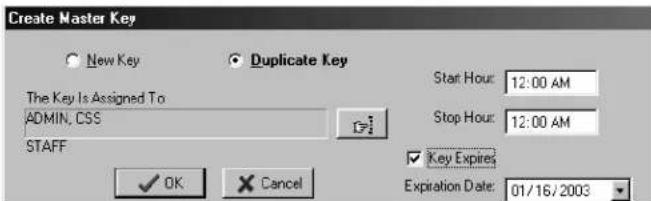
Fig. 6.10 - Create Zone Key Dialog Box
Encoding Additional Zone Keys
When you are satisfied with the settings for this zone key, click OK. If a key is not currently in the key encoder, you will be prompted to insert a key into the key encoder now. Within a few seconds, the key will be encoded. The key encoder will flash the message "KEY CODED CORRECTLY" and your computer will display the message:
The write operation was successful!
The key ID for this key is 2.
Click OK on the computer message to return to the main SAM System menu.
Continue creating zone keys in this manner until you have enough keys to give to the appropriate number of staff members. Be sure to assign them as duplicate keys to create a new key ID for each staff member. Be sure to also choose the appropriate zone for each person.
Adding New Staff to the SAM System
You can register additional system users now or any time in the future, such as when a new staff member joins your team. Only the system administrator has the authorization to add or remove system users from the system.
To register additional system users, go to the Management pull-down menu and select:
Maintenance → Staff

This will display the Staff List dialog box (Fig. 6.11).

Fig. 6.11 - Staff List Dialog Box
Within the Staff List dialog box, click Add to display the Staff Form – ADD Mode dialog box (Fig. 6.12).

Fig. 6.12 - Staff Form - ADD Mode Dialog Box
Follow the step-by-step instructions listed below:
-
Enter the person's name. At the top of the form are fields for inputting each person's last, first and middle name/initial (optional).
-
Enter information about his/her position. In the Position field, type in a word or two that identifies this person's position or responsibility at your site, such as "Manager" or "Maintenance."
- Enter the System Authorization Information. Create a user name and password for this person.
Note: A user name cannot be more than 15 characters and a password cannot be more than 10 characters. Keep in mind that this information will become the user ID and password that each user will type in when logging on to the SAM System; be sure it is something they can easily remember. For this reason, it is recommended that you employ an easily identifiable system for assigning user names, such as the person's first initial and last name. For example, John Smith's user name would be "jsmith."
As the system administrator, you will have access to user name and password information in the future. This will be useful in cases where you need to add or remove users from the system or change passwords.
- Assign the authority level. It is highly recommended that you not give administrator privileges to any other users of the SAM System. In other words, leave the Administrator box unchecked.
Below the Administrator box is a larger box that contains the names of authorization groups that you have set up. An authorization group is essentially a label that represents access to a specific (and limited) list of SAM System functions – such as assigning work orders or creating new keys – rather than allowing access to the entire system.
Once you have set up authorization groups in the SAM System, you can go back and edit the authority level of certain staff members by selecting one of the authorization groups that will then appear in the System Authorization Information box. See "Creating Authorization Groups" (page 15).
- Click Save to return to the Staff List dialog box. Click Add to add the next user and follow the process once again. When you have registered all staff members in the SAM System, click Close to return to the main SAM System menu.
When Staff Members Leave
When staff members leave your employment, it is highly recommended that you delete them from the SAM System and change any existing passwords for current staff. This will prevent previous employees from accessing the information contained in the system or possibly creating new keys.
Deleting Staff Members from the SAM System
To delete staff members from the SAM System, go to the Management pull-down menu and select:
Maintenance → Staff

This will display the Staff List dialog box (Fig. 6.13).
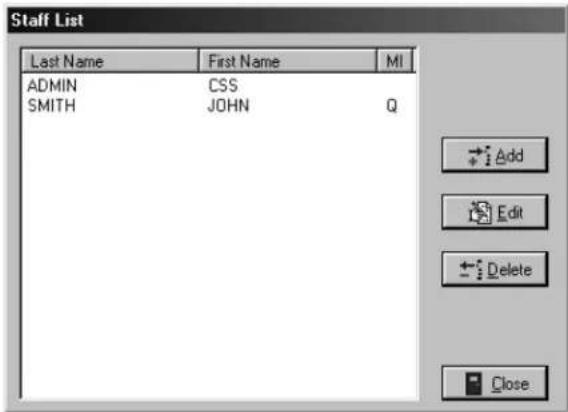
Fig. 6.13 - Staff List Dialog Box
Within the Staff List dialog box, click on the person's name you wish to delete, and click Delete.
A Delete Confirmation box will appear, asking if you are sure about deleting that person. Click Yes to confirm deletion and then click Close at the Staff List dialog box to return to the main SAM System menu.
Preventing Access
Merely deleting staff members from the SAM System is not enough to ensure the security of your property. It is also very important that you collect whatever keys they might have in their possession. If former staff members do not relinquish their keys, they can continue to gain access to common access areas, or worse, to your residents' units.
To ensure the security of your property whether or not you have collected any keys in former staff members' possession, you can reprogram the locks that these staff members previously had access to. To reprogram these locks, you need an inhibit key.
The Inhibit Key
An inhibit key is programmed to tell a lock to ignore keys with specific key IDs. As long as you assigned key IDs carefully in the key creation process, the inhibiting process will be easy.
Assuming you gave your staff members either master keys or zone keys, you will create either an inhibit master key or an inhibit zone key.
Creating an Inhibit Master Key
To create an inhibit master key, go to the Keys pull-down menu and select:
Create → Inhibit Master Key

This will display the Create Inhibit Master Key dialog box (Fig. 6.14).

Fig. 6.14 - Create Inhibit Master Key Dialog Box
Inhibit Master Key Options
In the Select IDs to Inhibit box is a listing of all the master key IDs created, along with the name of the staff member each key is assigned to. Simply click in the box to the left of the staff member(s) whose key(s) you wish to inhibit and click OK.
Once again, the name of the person currently logged on to the SAM System will appear in the box under the words, "The Key Is Assigned To." You can accept this default or change the key assignment. To change the assignment, click the button to the right of the box. (This button has a hand pointing to the right.) This will display the Select User Type dialog box.
Like master keys, inhibit master keys can only be assigned to staff members. Click the open circle next to Staff and click OK. This will take you to the Staff List dialog box. Click on the name of the person who will be assigned this key and click Select.
Back at the Create Inhibit Master Key dialog box, the name of the person you selected will appear in the box under the words, "The Key Is Assigned To." When you are satisfied with the settings for this inhibit master key, click OK.
Encoding the Inhibit Key
If a key is not currently in the key encoder, you will be prompted to insert a key into the key encoder now. Within a few seconds, the key will be encoded. The key encoder will flash the message "KEY CODED CORRECTLY" and your computer will display the message: "The write operation was successful!" Click OK on the computer message to return to the main SAM System menu.
Reprogramming Locks
Now that you have created an inhibit master key for a specific staff member (or members) who will no longer be allowed access to your property, it is necessary to go to each and every unit, suite and common access lock on your property and insert the inhibit master key. This will reprogram the locks to no longer provide access to any of the key IDs selected.
Note: Depending upon the size of your property, you may wish to create several inhibit master keys and enlist the support of other staff members to help you reprogram these locks.
Creating an Inhibit Zone Key
If you had previously assigned a zone key to someone who is no longer a member of your staff, you will need to create an inhibit zone key to reprogram all of the locks within that zone to no longer provide access to that person's key.
To create an inhibit zone key, go to the Keys pull-down menu and select:
Create → Inhibit Zone Key

This will display the Create Inhibit Zone Key dialog box (Fig. 6.15).

Fig. 6.15 - Create Inhibit Zone Key Dialog Box
Inhibit Zone Key Options
Your first task is to go to the Zone drop-down box and confirm that you are creating an inhibit key for the appropriate zone. If you set up zones correctly in the site design process, all zones within your property will appear in the drop-down box. Select the appropriate zone.
In the Select IDs to Inhibit box, there will be a listing of all the zone key IDs created for that particular zone, along with the name of the staff member each key is assigned to. Simply click in the box to the left of the staff member(s) whose key(s) you wish to inhibit.
Once again, the name of the person currently logged on to the SAM System will appear in the box under the words, "The Key Is Assigned To." To change the key assignment, click the button to the right of the box. (This button has a hand pointing to the right.) This will display the Select User Type dialog box.
Like zone keys, inhibit zone keys can only be assigned to staff members. Click the open circle next to Staff and click OK. This will take you to the Staff List dialog box. Click on the name of the person who will be assigned this key and click Select.
Back at the Create Inhibit Zone Key dialog box, the name of the person you selected will appear in the box under the words, "The Key Is Assigned To."
Encoding the Inhibit Key
If a key is not currently in the key encoder, you will be prompted to insert a key into the key encoder now. Within a few seconds, the key will be encoded. The key encoder will flash the message "KEY CODED CORRECTLY" and your
computer will display the message: "The write operation was successful!" Click OK on the computer message to return to the main SAM System menu.
Reprogramming Locks
Now that you have created an inhibit zone key for a specific staff member (or members) who will no longer be allowed access to your property, it is necessary to go to each and every unit, suite and common access lock in that particular zone (as well as common access locks outside that zone) and insert the inhibit zone key. This will reprogram the locks to no longer provide access to any of the key IDs selected.
Note: Depending upon the size of your property, you may wish to create several inhibit zone keys and enlist the support of other staff members to help you reprogram these locks.
Section 7: Resident Keys
By now, you should have created master keys for you and your staff to provide access to any lock on your property. At this point you can create resident keys. These keys will only open specific unit locks, as well as any associated suite and common access locks.
Note: It is recommended that you wait until residents move into a unit before creating keys for that unit. In this way, you can register each resident in the SAM System and assign him or her a specific resident key ID.
Adding Residents to the SAM System
To register residents in the SAM System, go to the Management pull-down menu and select:
Maintenance → Residents

This will display the Unit/Resident List dialog box (Fig. 7.1).

Fig. 7.1 - Unit/Resident List Dialog Box
If you set up units correctly during the site design process, all units within your property will appear in the Unit/Resident List.
To register a new resident, click on the unit the resident is moving into, then click Add. The system will now display the Resident Form – ADD Mode dialog box (Fig. 7.2).
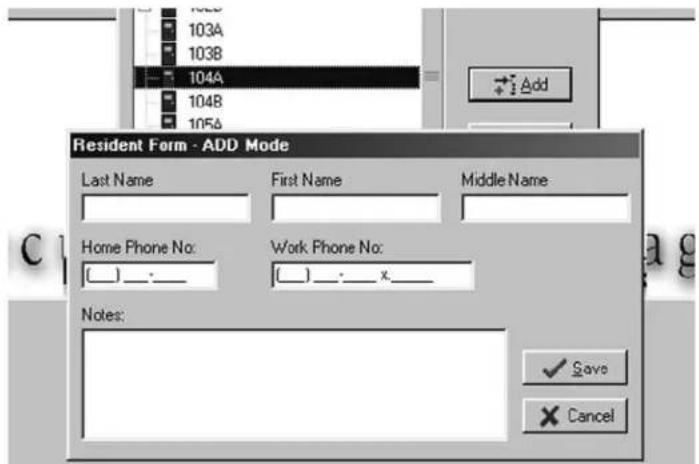
Fig. 7.2 - Resident Form - ADD Mode Dialog Box
Enter as much information as you can about the resident, including his or her name, work phone and home phone numbers. There is also space to record some notes about the resident.
When you have entered as much information as you can about that resident, click Save. This will return you to the Unit/Resident List dialog box (Fig. 7.1).
If more than one resident will be moving into the same unit, click on that specific unit once again at the Unit/Resident List dialog box and enter information about the next person moving in. Continue registering additional residents moving into that same unit – or into a different unit – following the same process. Click Close at the Unit/Resident List dialog box to return to the main SAM System menu.
Creating Resident Keys
Once you have entered residents into the system, creating keys for them is a simple process. To create resident keys, go to the Keys pull-down menu and select:
Create → Resident Key

This will display the Create Resident/Unit Key dialog box (Fig. 7.3).
![Create Resident / Unit Key New Key Duplicate Key Unit: 101A Key will work in selected Common Access Lock [COMMON ACCESS LOCK 01] [COMMON ACCESS LOCK 02] [COMMON ACCESS LOCK 03] [COMMON ACCESS LOCK 04] [COMMON ACCESS LOCK 05] [COMMON ACCESS LOCK 06] [COMMON ACCESS LOCK 07] [COMMON ACCESS LOCK 08] Key Expires The Key Is Assigned To: ADMIN, CSS X STAFF OK Cancel](/content/2026/05/953934/images/825c0dd3439c6d26b7189d71f64fed0103e64502e8ebf5f7c7fe6cbcada70635.jpg)
Fig. 7.3 - Create Resident/Unit Key Dialog Box
Resident/Unit Key Options
In the Create Resident/Unit Key dialog box, your first task is to select either the New Key option or the Duplicate Key option. As with master keys, you must choose the New Key option each time you create the first key for a specific unit and the Duplicate Key option for subsequent keys created for the same unit.
Note: Whenever the New Key option is selected, a Warning dialog box (Fig. 7.4) will appear, indicating that creating a new key will cancel any other keys of the same type. If this is indeed the very first key of this type you are creating, click Yes to proceed. Otherwise, click No to return to the Create Resident/Unit Key dialog box and select the Duplicate Key option.

Fig. 7.4 - New Key Warning Dialog Box
The next step is to go to the Unit drop-down box and select the appropriate unit. Once again, if you set up units correctly in the site design process, all units within your property will appear in the drop-down box.
Your next step is to confirm the default settings for the common access areas for this unit. These default settings were also set up in the site design process and are not likely to require any changes. If the unit was correctly configured, the key created will automatically open any zone or suite doors, as well as the unit itself.
Like all keys in the SAM System, resident keys will be assigned by default to whoever is logged on to the SAM System. That person's name will appear in the box under the words, "The Key Is Assigned To." If there are no tenants to assign this key to, you can click OK to accept these default settings.
Assigning Resident Keys
To assign this resident key to an actual resident, click the button to the right of the box. (This button has a hand pointing to the right.) This will display the Select User Type dialog box (Fig. 7.5).
Note: Resident keys can be assigned to either staff members or residents.

Fig. 7.5 - Select User Type Dialog Box
Click the open circle next to Resident and click OK. This will take you to the Resident List dialog box (Fig. 7.6). Any residents you registered into the system for that particular unit will be listed in this box. Simply click on the name of the person to receive this key and click Select.

Fig. 7.6 - Resident List Dialog Box
Note: If the resident you wish to assign the key to is not in the resident list, go to "Adding Residents to the SAM System" (page 63) for instructions on adding that person to the list.
Back at the Create Resident Key dialog box, the name of the person you selected will appear in the box under the words, "The Key Is Assigned To." When you are satisfied with the settings for this key, click OK.
Encoding the Resident Key
If a key is not currently in the key encoder, you will be prompted to insert a key into the key encoder now. Within a few seconds, the key will be encoded. The key encoder will flash the message "KEY CODED CORRECTLY" and your computer will display the message:
The write operation was successful!
The key ID for this key is 1.
Click OK on the computer message to return to the main SAM System menu.
Continue creating resident keys in this manner until you have enough keys to give to the appropriate number of residents. Be sure to assign additional keys created for the same unit as duplicate keys (to create a new key ID for each resident) and to carefully label them for each specific resident.
When Residents Move Out
When residents move out of your property, it is highly recommended that you delete them from the SAM System.
To delete residents, be sure you are in the Unit/Resident List dialog box (Fig. 7.1). To access this dialog box, go to the Management pull-down menu and select:
Maintenance → Residents

Within the Unit/Resident List dialog box, click on the person's name you wish to delete, then click Delete.
A Delete Confirmation box will appear asking if you are sure about deleting that person. Click Yes to confirm deletion, and then click Close at the Unit/Resident List dialog box to return to the main SAM System menu.
Repeat the process until all residents vacating a unit are removed from the SAM System.
If you have new residents to register, follow the process described in "Adding Residents to the SAM System" (page 63).
Preventing Access
Merely deleting residents from the SAM System is not enough to ensure the security of your property. It is also very important that you collect whatever keys former residents might have in their possession. If former residents do not relinquish their keys, they can continue to gain access to common access areas, or worse, to their former units.
To ensure the security of your property AND the security of the new residents of that unit, it is important to make sure that any keys in a former resident's possession will no longer provide access.
To prevent access, you must reprogram the locks that the residents previously had access to. To reprogram these locks, you need an inhibit resident key.
The Inhibit Resident Key
An inhibit resident key is programmed to tell a lock to ignore keys with specific key IDs. As long as you assigned key IDs carefully in the resident key creation process, the inhibiting process will be easy.
Creating an Inhibit Resident Key
To create an inhibit resident key, go to the Keys pull-down menu and select:
Create → Inhibit Resident Key
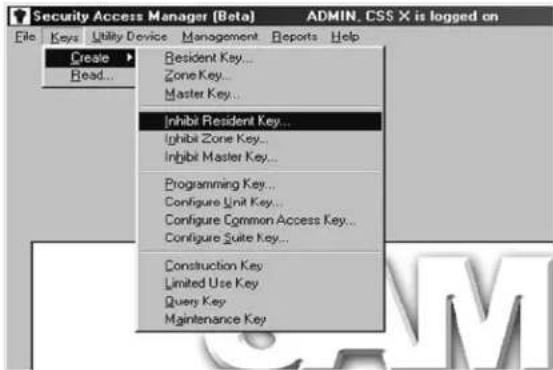
This will display the Create Inhibit Resident Key dialog box (Fig. 7.7).

Fig. 7.7 - Create Inhibit Resident Key Dialog Box
Inhibit Resident Key Options
Your first task is to go to the Unit drop-down box and confirm that you are creating an inhibit resident key for the appropriate unit. If you set up units correctly in the site design process, all units within your property will appear in the drop-down box. Select the appropriate unit in the drop-down box.
In the Select IDs to Inhibit box is a listing of all the resident key IDs created for that particular unit, along with the names of the residents each key is assigned to. Simply click in the box to the left of the resident(s) whose key(s) you wish to inhibit.
Inhibit resident keys will be assigned by default to whomever is logged on to the SAM System. That person's name will appear in the box under the words, "The Key Is Assigned To." To change the key assignment, click the button to the right of the box. (This button has a hand pointing to the right.) This will display the Select User Type dialog box.
Inhibit resident keys can be assigned to staff members or to residents. To assign the key to a staff member, click the open circle next to Staff and click OK. This will take you to the Staff List dialog box. Click on the name of the person who will be assigned this key and click Select.
Back at the Create Inhibit Resident Key dialog box, the name of the person you selected will appear in the box under the words, "The Key Is Assigned To." When you are satisfied with the settings for this inhibit resident key, click OK.
Encoding the Inhibit Key
If a key is not currently in the key encoder, you will be prompted to insert a key into the key encoder now. Within a few seconds, the key will be encoded. The key encoder will flash the message "KEY CODED CORRECTLY" and your computer will display the message: "The write operation was successful!" Click OK on the computer message to return to the main SAM System menu.
Reprogramming Locks
Now that you have created an inhibit resident key for a specific resident(s) who has moved away from your property, it is necessary to go to that resident's unit, suite and all common access locks on your property and insert the inhibit resident key. This will reprogram the locks to no longer provide access to any of the key IDs selected.
Section 8: Vendor Keys
Vendors are those product and service companies that help keep your property running smoothly. A vendor might provide pool-cleaning services, sending one or more employees to your property on a regular basis. A vendor might also provide a one-time service, such as a plumber replacing a broken pipe in a resident's shower.
Rather than provide a master key to a vendor – giving him or her access to more areas than necessary – you can create a vendor key, also known as a limited use key. Limited use keys provide access for a specific vendor to a designated area (or areas) for a finite period of time, up to 24 hours.
Before creating limited use keys, it is highly recommended that you register the specific vendor, as well as that vendor's employee(s), in the SAM System. This will allow you to assign limited use keys appropriately and to track these keys if necessary later.
Adding Vendors to the SAM System
To register vendors, go to the Management pull-down menu and select:
Maintenance → Vendors
![Security Access Manager [Beta] ADMIN, CSS X is logged on File Keys Utility Device Management Reports Help Maintenance Site Design Work Orders... Terminal Settings... Authorization Groups... Staff... Residents... Vendors... Property Areas... Backup...](/content/2026/05/953934/images/2bbf4516b6644755bcece5b5f1e9f89b5213038e6599049b0b54c94f39197189.jpg)
This will display the Vendor Company List dialog box (Fig. 8.1).
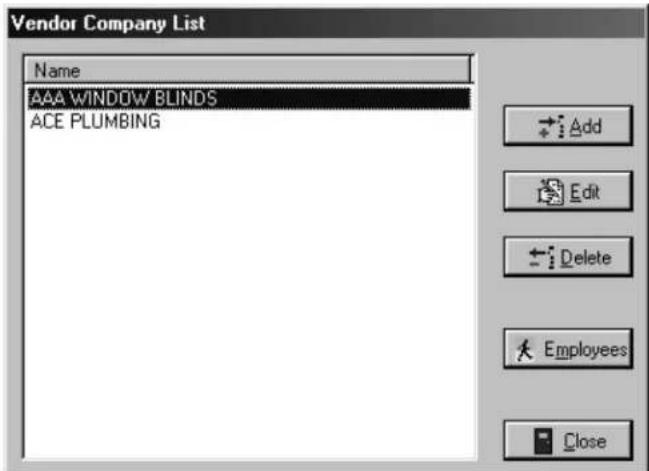
Fig. 8.1 - Vendor Company List Dialog Box
Within the Vendor Company List dialog box, click Add. The system will now display the Vendor Company Form – ADD Mode dialog box (Fig. 8.2).

Fig. 8.2 - Vendor Company Form - ADD Mode Dialog Box
Input as much information as possible about the vendor company in the fields provided including:
• The vendor company's name
- The vendor type, such as "Plumber," "Painter," etc.
- Address and phone number information
Click Save to return to the Vendor Company List dialog box. If you would like to add another vendor to the system right away, click New and follow the process once again.
Registering Vendor Employees
To register employees of a specific vendor company, be sure you are in the Vendor Company List dialog box (Fig. 8.1). Click on the vendor for which you will be registering employees and click Employees. This will display the Vendor Employee List dialog box (Fig. 8.3).

Fig. 8.3 - Vendor Employee List Dialog Box
To register a new vendor employee, click Add. This will display the Vendor Employee Form – ADD Mode dialog box (Fig. 8.4).
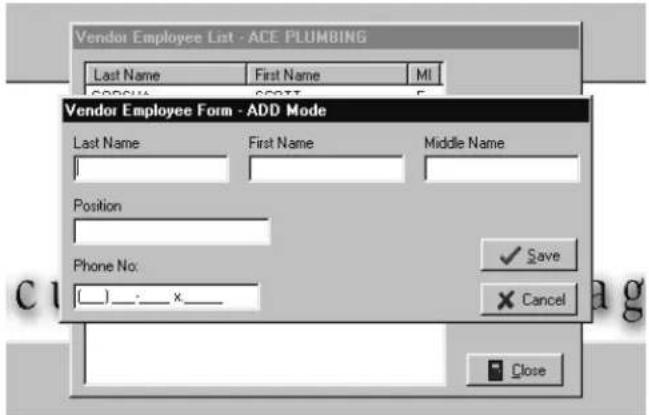
Fig. 8.4 - Vendor Employee Form - ADD Mode Dialog Box
Enter as much information as you can about the employee, including his or her name, position and the phone number that he or she uses most often. When you have entered as much information as possible, click Save. This will return you once again to the Vendor Employee List dialog box (Fig. 8.3).
Continue registering additional vendor employees by following the same process, or click Close at the Vendor Employee List dialog box and again at the Vendor Company List dialog box.
Creating Vendor Keys
Because vendors only need access for a limited time, the SAM System incorporates limited use keys. These keys can be programmed to provide access to a single location – such as a specific common access area or one specific unit – or up to 10 units per key.
To create a limited use key, go to the Keys pull-down menu and select:
Create → Limited Use Key

This will display the Create Limited Use Key dialog box (Fig. 8.5).

Fig. 8.5 - Create Limited Use Key Dialog Box
In the Create Limited Use Key dialog box, the first option you see is the number of hours this key will function. "0" indicates that the key will work for only one lock and will open this lock only once. You can assign the number of hours for this key (up to 24 hours); however, all limited use keys expire automatically at midnight on the day they are created. Therefore, if the vendor needs to return the next day, a new key will need to be created the next day.
The next step is to select the locks that this key will open. You can choose a single unit or any combination of units up to a total of 10, as well as common access areas.
Note: For the common access areas, you can click Mark All to easily select all common access locks. If you intend to select eight out of 10 of these locks, for example, you can Mark All, then click the two unwanted areas to unselect them.
Limited use keys will be assigned by default to whoever is logged on to the SAM System. That person's name will appear in the box under the words, "The Key Is Assigned To." Because this key is to be given to a vendor, you want to make sure this key is assigned to this person in the system.
To change the key assignment, click the button to the right of the box. (This button has a hand pointing to the right.) This will display the Select User Type dialog box (Fig. 8.6).

Fig. 8.6 - Select User Type Dialog Box
Click the open circle next to Vendor and click OK. This will take you to the Vendor Company List dialog box (Fig. 8.1). Any vendor companies you previously entered into the system will be listed in this box. Click on the name of the vendor, and then click Employees. Click on the name of the vendor employee, and then click Select.
This will take you back to the Create Limited Use Key dialog box (Fig. 8.5). The name of the vendor employee you selected will now appear in the box under the words, "The Key Is Assigned To." If you are satisfied with all the information selected, click OK.
If a key is not currently in the key encoder, you will be prompted to insert a key into the key encoder now. Within a few seconds, the key will be encoded. The key encoder will flash the message "KEY CODED CORRECTLY" and your computer will display the message: "The write operation was successful!" Click OK on the computer message to return to the main SAM System menu.
If you have more than one vendor or vendor employee needing access, repeat the process for creating a limited use key. Be sure to assign each key to a specific vendor employee to be able to track the key if necessary.
Replacing Lost Vendor Keys
Because limited use keys expire at midnight on the day they are created, it is not necessary to replace lost or stolen vendor keys.
Section 9: Replacing Lost Resident Keys
One of the tasks you will perform most often with the SAM System is replacing keys lost by either staff or residents. When keys are lost, replacement keys will need to be created and locks must be reprogrammed to ensure the security of your property.
Replacing lost resident keys is discussed below. Replacing lost staff keys is discussed in Section 10 (page 80).
When there is only one resident in a unit, replacing that person's key is a fairly simple process. However, when several people reside in a unit, a key assigned specifically to one of the residents may end up being used by another. When replacing a lost key in the case of multiple residents, it is vital that you determine which key is actually lost.
Reading Resident Keys
The best way to determine exactly which key is lost is to have all the other residents of that unit bring their keys to the office so that you can read each key using the key encoder. This will provide information as to each key's ID and to whom it is assigned.
To read a resident key, put the key into the key encoder. Go to the Keys pull-down menu and select:
Read

This will display the Key Read dialog box (Fig. 9.1).
![Key Read Key Type: Resident / Unit Key Assigned To: ADMIN, CSS X STAFF Status: Current Expiration Date: Never Unit: 101A Made By: ADMIN, CSS X KeyID: 6 Allowed In Common Access Locks: [COMMON ACCESS LOCK 02] [COMMON ACCESS LOCK 03] [COMMON ACCESS LOCK 05] [COMMON ACCESS LOCK 06] [COMMON ACCESS LOCK 07] [COMMON ACCESS LOCK 08] [COMMON ACCESS LOCK 09] [COMMON ACCESS LOCK 10] Erase Close](/content/2026/05/953934/images/364bd84332d1de0c589e9785fb5cf572cd30f2eef4f6602c9991a3e069abb453.jpg)
Fig. 9.1 - Key Read Dialog Box
Note: If there is not a key in the key encoder, you will be prompted to insert a key with messages both on screen and on the key encoder.
The Key Read dialog box displays such information as the type of key (such as master key, programming key, resident/unit key, etc.) and to whom the key is assigned. Additional information is provided based on the key type. For instance, a master key read would provide expiration information. A resident/unit key read would display the specific unit, suite and common access area locks that key opens.
Once you have determined which resident/unit keys are accounted for, you will know exactly which key ID is missing. However, before creating a replacement key, it is essential that you first create an inhibit resident key.
The Inhibit Resident Key
An inhibit resident key is programmed to tell a lock to ignore keys with specific key IDs. In the process of making an inhibit resident key, the SAM System will be programmed with the knowledge that a specific resident key is no longer a valid key ID.
When you create the replacement key, it will then be programmed with the knowledge of the invalid key ID. As the replacement key is used, it will automatically program each lock to ignore the invalid key ID. This is why it is so important to determine which key is actually lost. If you are not certain exactly which key ID is lost, you might invalidate the wrong key ID.
Creating an Inhibit Resident Key
To create an inhibit resident key, go to the Keys pull-down menu and select:
Create → Inhibit Resident Key

This will display the Create Inhibit Resident Key dialog box (Fig. 9.2).

Fig. 9.2 - Create Inhibit Resident Key Dialog Box
Inhibit Resident Key Options
Your first task is to select the appropriate unit in the drop-down box. Once you have selected the unit in question, the Select IDs to Inhibit box lists all resident key IDs created for that particular unit, along with the names of the residents each key is assigned to. Simply click in the box to the left of the resident whose key was lost and click OK.
Note: If more than one resident key is lost, you can select more than one key ID to inhibit.
Inhibit resident keys will be assigned by default to whomever is logged on to the SAM System. That person's name will appear in the box under the words, "The Key Is Assigned To." To change the key assignment to the person who lost the original key, click the button to the right of the box. (This button has a hand pointing to the right.) This will display the Select User Type dialog box (Fig. 9.3).

Fig. 9.3 - Select User Type Dialog Box
Inhibit resident keys can only be assigned to staff members or to residents. To choose a staff member to assign this key to, click the open circle next to Staff and click OK. This will take you to the Staff List dialog box. To choose a resident to assign this key to, click the open circle next to Resident and click OK. This will take you to the Resident List dialog box. Click on the name of the person who will be assigned this key and click Select.
Note: You can assign and give this key to the resident to inhibit locks. However, once a replacement resident key is created, that new resident key will automatically reprogram all locks it is used in to ignore the invalid key ID.
Back at the Create Inhibit Resident Key dialog box, the name of the person you selected will appear in the box under the words, "The Key Is Assigned To." When you are satisfied with the settings for this inhibit resident key, click OK.
Encoding the Inhibit Key
If a key is not currently in the key encoder, you will be prompted to insert a key into the key encoder now. Within a few seconds, the key will be encoded. The key encoder will flash the message "KEY CODED CORRECTLY" and your computer will display the message: "The write operation was successful!" Click OK on the computer message to return to the main SAM System menu.
Now that you have created the inhibit resident key and thus updated the SAM System as to which resident key IDs are no longer valid, you can immediately create a replacement resident key.
Creating a Replacement Resident Key
To create the replacement resident key, go to the Keys pull-down menu and select:
Create → Resident Key

This will display the Create Resident/Unit Key dialog box (Fig. 9.4).
![Create Resident / Unit Key New Key Duplicate Key Unit: 1014 Key will work in selected Common Access Lock [COMMON ACCESS LOCK 01] [COMMON ACCESS LOCK 02] [COMMON ACCESS LOCK 03] [COMMON ACCESS LOCK 04] [COMMON ACCESS LOCK 05] [COMMON ACCESS LOCK 06] [COMMON ACCESS LOCK 07] [COMMON ACCESS LOCK 08] Key Expires The Key Is Assigned To ADMIN, CSS X STAFF OK Cancel](/content/2026/05/953934/images/eac09e3148e83b1ac2a5392c6b9c797f7e57ddb399cbf5192b09b54607f5b78c.jpg)
Fig. 9.4 - Create Resident/Unit Key Dialog Box
Resident/Unit Key Options
In the Create Resident/Unit Key dialog box, it is extremely important to accept the default Duplicate Key option. Selecting the New Key option will invalidate ALL other resident keys for this unit.
The next step is to go to the Unit drop-down box and select the unit in question so that it appears at the top of the drop-down box. To assign this resident key to the specific resident whose key is being replaced, click the button to the right of the box. (The box has a hand pointing to the right.) This will display the Select User Type dialog box (Fig. 9.5).
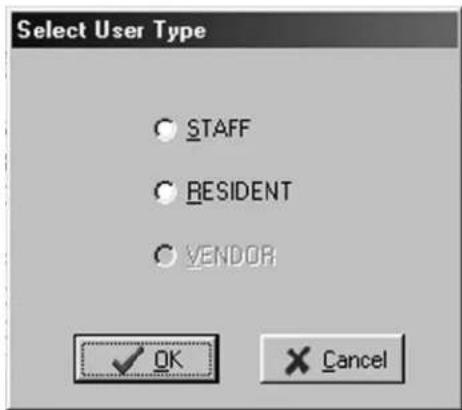
Fig. 9.5 - Select User Type Dialog Box
Click the open circle next to Resident and click OK. This will take you to the Resident List dialog box (Fig. 9.6). Simply click on the name of the person who will receive this replacement key and click Select.

Fig. 9.6 - Resident List Dialog Box
Back at the Create Resident Key dialog box, the name of the person you selected will appear in the box under the words, "The Key Is Assigned To." When you are satisfied with the settings for this key, click OK.
Encoding the Replacement Resident Key
If a key is not currently in the key encoder, you will be prompted to insert a key into the key encoder now. Within a few seconds, the key will be encoded. The key encoder will flash the message "KEY CODED CORRECTLY" and your computer will display the message:
The write operation was successful!
The key ID for this key is [?].
Note: The SAM System will assign the next available key ID to this replacement key; it will not reassign the same ID as before.
Click OK on the computer message to return to the main SAM System menu.
Reprogramming Locks
To ensure the security of your property, all locks that a lost key once opened must be reprogrammed to ignore that key from now on. For resident keys, you have two options for reprogramming locks.
One option is to insert the inhibit resident key into that resident's unit lock, suite lock (if applicable) and all common access locks on your property. This will reprogram the locks to no longer provide access to any of the key IDs selected.
The other option is to simply allow the resident to reprogram the locks. Every time the resident inserts the replacement key into a lock previously opened by the lost key, it will automatically invalidate the lost key, rendering it useless.
Section 10: Replacing Lost Staff Keys
If a staff member loses a key, the security risk is far more serious than when a resident loses a key; after all, staff members' keys are usually either master keys or zone keys, which provide access to more than just a single unit.
To ensure the security of your property, and especially its residents, you must carefully reprogram all the locks that the lost key previously opened. To reprogram these locks, you'll need either an inhibit master key or an inhibit zone key.
Creating an Inhibit Master Key
To create an inhibit master key, go to the Keys pull-down menu and select:
Create → Inhibit Master Key
![Security Access Manager [Beta] File Keys Utility Device Management Reports Help Create Head... Resident Key... Zone Key... Master Key... Inhibit Resident Key... Inhibit Zone Key... Inhibit Master Key... Programming Key... Configure Unit Key... Configure Common Access Key... Configure Suite Key... Construction Key Limited Use Key Query Key Maintenance Key ADMIN, CSS X is logged on](/content/2026/05/953934/images/c5ca6094cb3bc67dcc94b2bb1374ef7f086efe4602bba9235d613ab16a00cd8c.jpg)
This will display the Create Inhibit Master Key dialog box (Fig. 10.1).

Fig. 10.1 - Create Inhibit Master Key Dialog Box
Inhibit Master Key Options
The Select IDs to Inhibit box lists all of the master key IDs created, along with the name of the staff member each key is assigned to. Simply click in the box to the left of the staff member whose key was lost and click OK.
Note: If more than one master key is lost, you can select more than one key ID to inhibit.
As with all keys, the name of the person currently logged on to the SAM System will appear in the box under the words, "The Key Is Assigned To." To change the key assignment to the person who lost the original key, click the button to the
right of the box. (This button has a hand pointing to the right.) This will display the Select User Type dialog box (Fig. 10.2).

Fig. 10.2 - Select User Type Dialog Box
Click the open circle next to Staff and click OK. This will take you to the Staff List dialog box (Fig. 10.3). Click on the name of the person who will be assigned this key and click Select.

Fig. 10.3 - Staff List Dialog Box
Back at the Create Inhibit Master Key dialog box, the name of the person you selected will appear in the box under the words, "The Key Is Assigned To." When you are satisfied with the settings for this inhibit master key, click OK.
Encoding the Inhibit Master Key
If a key is not currently in the key encoder, you will be prompted to insert a key into the key encoder now. Within a few seconds, the key will be encoded. The key encoder will flash the message "KEY CODED CORRECTLY" and your computer will display the message: "The write operation was successful!" Click OK on the computer message to return to the main SAM System menu.
Creating an Inhibit Zone Key
If the lost key was a zone key, you will need to create an inhibit zone key to reprogram all of the locks within that zone.
To create an inhibit zone key, go to the Keys pull-down menu and select:
Create → Inhibit Zone Key

This will display the Create Inhibit Zone Key dialog box (Fig. 10.4).
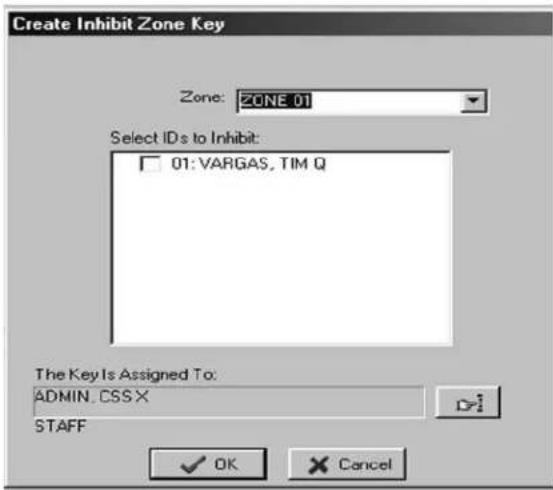
Fig. 10.4 - Create Inhibit Zone Key Dialog Box
Inhibit Zone Key Options
Your first task is to go to the Zone drop-down box and select the appropriate zone for this key. Once you have selected the correct zone, the Select IDs to Inhibit box will list all of the zone key IDs created for that particular zone, along with the name of the staff member each key is assigned to. Simply click in the box to the left of the name of the staff member who lost the key.
Note: If more than one zone key is lost, you can select more than one key ID to inhibit.
Once again, the name of the person currently logged on to the SAM System will appear in the box under the words, "The Key Is Assigned To." To change the key assignment, click the button to the right of the box. (This button has a hand pointing to the right.) This will display the Select User Type dialog box (Fig. 10.5).

Fig. 10.5 - Select User Type Dialog Box
Like inhibit master keys, inhibit zone keys can only be assigned to staff members. Click the open circle next to Staff and click OK. This will take you to the Staff List dialog box (Fig. 10.6). Click on the name of the person who will be assigned this key and click Select.

Fig. 10.6 - Staff List Dialog Box
Back at the Create Inhibit Zone Key dialog box, the name of the person you selected will appear in the box under the words, "The Key Is Assigned To." When you are satisfied with the settings for this inhibit zone key, click OK.
Encoding the Inhibit Key
If a key is not currently in the key encoder, you will be prompted to insert a key into the key encoder now. Within a few seconds, the key will be encoded. The key encoder will flash the message "KEY CODED CORRECTLY" and your computer will display the message: "The write operation was successful!" Click OK on the computer message to return to the main SAM System menu.
Reprogramming Locks
Now that you have created either an inhibit master key or an inhibit zone key, it is necessary to go to each and every unit, suite and common access lock on your property (or in that particular zone) and insert the inhibit key. This will reprogram the locks to no longer provide access to the lost key ID.
Note: Depending upon the size of your property, you may wish to create several inhibit master or inhibit zone keys and enlist the support of other staff members to help you reprogram these locks.
Creating a Replacement Master Key
To create a replacement master key, go to the Keys pull-down menu and select:
Create → Master Key

This will display the Create Master Key dialog box (Fig. 10.7).

Fig. 10.7 - Create Master Key Dialog Box
Master Key Options
Because this will be a replacement master key, it is extremely important to select the Duplicate Key option by clicking on the open circle next to Duplicate Key. Selecting the New Key option will invalidate ALL other master keys.
Your next task is to determine the hours of operation for this key. The default settings for master keys assign each key for a full 24 hours each day with no expiration date. If you wish to limit the number of hours per day that this key will provide access, or enter an expiration date, you can do so now. Otherwise, leave these settings as they are.
Like all keys in the SAM System, master keys will be assigned by default to whomever is logged on to the SAM System. That person's name will appear in the box under the words, "The Key Is Assigned To." To change the key assignment to the staff member who lost the original key, click the button to the right of the box. (This button has a hand pointing to the right.) This will display the Select User Type dialog box (Fig. 10.8).

Fig. 10.8 - Select User Type Dialog Box
Click the open circle next to Staff and click OK. This will take you to the Staff List dialog box (Fig. 10.9). Simply click on the name of the person who lost the original key and click Select.

Fig. 10.9 - Staff List Dialog Box
Back at the Create Master Key dialog box, the name of the person you selected will appear in the box under the words, "The Key Is Assigned To." When you are satisfied with the settings for this key, click OK.
Encoding the Master Key
If a key is not currently in the key encoder, you will be prompted to insert a key into the key encoder now. Within a few seconds, the key will be encoded. The key encoder will flash the message "KEY CODED CORRECTLY" and your computer will display the message:
The write operation was successful!
The key ID for this key is [?].
Note: The SAM System will assign the next available key ID to this replacement key; it will not reassign the same ID as before.
Click OK on the computer message to return to the main SAM System menu.
Creating a Replacement Zone Key
To create a replacement zone key, go to the Keys pull-down menu and select:
Create → Zone Key

This will display the Create Zone Key dialog box (Fig. 10.10).
![Create Zone Key New Key Duplicate Key Zone: ZONE 01 Key will work in selected Common Access Lock [COMMON ACCESS LOCK 01] [COMMON ACCESS LOCK 02] [COMMON ACCESS LOCK 03] [COMMON ACCESS LOCK 04] [COMMON ACCESS LOCK 05] [COMMON ACCESS LOCK 06] [COMMON ACCESS LOCK 07] [COMMON ACCESS LOCK 08] Start Hour: 12:00 AM Stop Hour: 12:00 AM Key Expires The Key Is Assigned To ADMIN. CSS X STAFF OK Cancel](/content/2026/05/953934/images/20797e99fbbc79b3abd2ee1449140a5b3c36d53cedfd06987dac458883bef6cd.jpg)
Fig. 10.10 - Create Zone Key Dialog Box
Zone Key Options
Because this will be a replacement zone key, it is extremely important to select the Duplicate Key option by clicking on the open circle next to Duplicate Key. Selecting the New Key option will invalidate ALL other zone keys.
The next step is to go to the Zone drop-down box and select the zone in question so it appears at the top of the drop-down box.
Like master keys, zone keys will be assigned by default to whoever is logged on to the SAM System. That person's name will appear in the box under the words, "The Key Is Assigned To." To change the key assignment to the staff member who lost the original key, click the button to the right of the box. (This button has a hand pointing to the right.) This will display the Select User Type dialog box (Fig. 10.11).

Fig. 10.11 - Select User Type Dialog Box
Click the open circle next to Staff and click OK. This will take you to the Staff List dialog box (Fig. 10.12). Simply click on the name of the person who lost the original key and click Select.
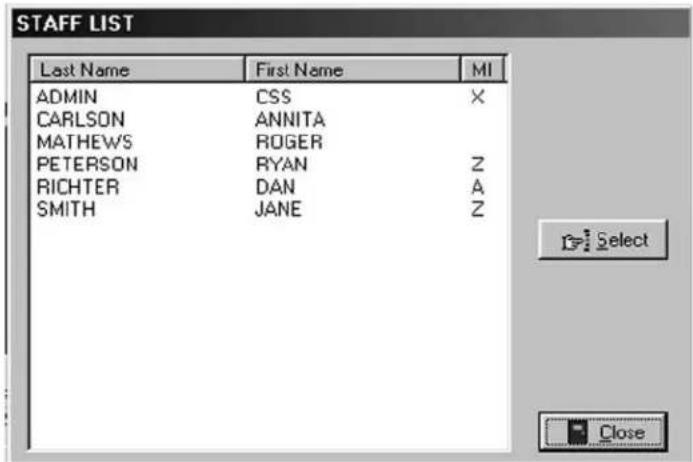
Fig. 10.12 - Staff List Dialog Box
Back at the Create Zone Key dialog box, the name of the person you selected will appear in the box under the words, "The Key Is Assigned To." When you are satisfied with the settings for this key, click OK.
Encoding the Zone Key
If a key is not currently in the key encoder, you will be prompted to insert a key into the key encoder now. Within a few seconds, the key will be encoded. The key encoder will flash the message "KEY CODED CORRECTLY" and your computer will display the message:
The write operation was successful! The key ID for this key is [?].
Note: The SAM System will assign the next available key ID to this replacement key; it will not reassign the same ID as before.
Click OK on the computer message to return to the main SAM System menu.
Note: If you have not done so already, be sure to take either the inhibit master key or the inhibit zone key to each and every unit, suite and common access lock on your property (or in that particular zone) and insert the key. This will reprogram the locks to ignore the invalid key ID.
Part 4
Querying and Reporting
Section 11: The Query Key
Querying a lock refers to downloading information saved in the lock and uploading that information to the SAM System. This information, also known as the “audit trail,” shows which keys have been used to gain access, along with the time and date that each key was used.
A query key can hold information for one unit lock at a time. If you need to retrieve information from more than one unit lock, you can either use multiple query keys or the utility device, which can retrieve the audit trails of up to three common access or unit locks at one time. Querying a single unit lock using the query key is discussed below. Querying multiple locks using the utility device is discussed in Section 12: "Querying Several Locks" (page 95).
Creating the Query Key
To create a query key to query a single unit lock, go to the Keys pull-down menu and select:
Create → Query Key
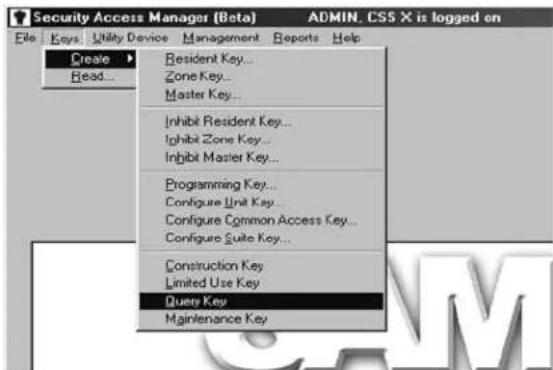
This will display the Create Query Key dialog box (Fig. 11.1).

Fig. 11.1 - Create Query Key Dialog Box
By default, the query key will be assigned to whomever is logged on to the SAM System. That person's name will appear in the box under the words, "The Key Is Assigned To." To accept this default, simply click OK.
If you wish to assign the query key to a staff member other than yourself, click the button to the right of the box. (This button has a hand pointing to the right.) This will display the Select User Type dialog box (Fig. 11.2).

Fig. 11.2 - Select User Type Dialog Box
Query keys can only be assigned to staff. Click the open circle next to Staff and click OK. This will take you to the Staff List dialog box (Fig. 11.3). Any staff members you previously entered into the system ("Adding System Users," Section 2) will be listed in this box. Simply click on the name of the person to receive this key and click Select.

Fig. 11.3 - Staff List Dialog Box
Note: If the staff member you wish to assign the key to is not in the staff list, go to "Adding New Staff to the SAM System" (page 56) for instructions on adding that person to the list.
Back at the Create Query Key dialog box, the name of the person you selected will appear in the box under the words, "The Key Is Assigned To." Click OK.
Encoding the Query Key
If a key is not currently in the key encoder, you will be prompted to insert a key into the key encoder now. Within a few seconds, the key will be encoded. The key encoder will flash the message "KEY CODED CORRECTLY" and your computer will display the message: "The write operation was successful!" Click OK on the computer message to return to the main SAM System menu.
Querying the Lock
When your query key is encoded, take it directly to the lock in question and insert it into the lock. The lock will beep once and then flash. The download process will take several moments. The lock will beep again when the download is complete. At that point, remove the query key and bring it back to the SAM System.
Reviewing the Audit Trail
In order to review the audit trail, you'll need to read the query key. To read the query key, insert the query key into the key encoder, go to the Keys pull-down menu and select:
Read

This will display the Key Read dialog box (Fig. 11.4).
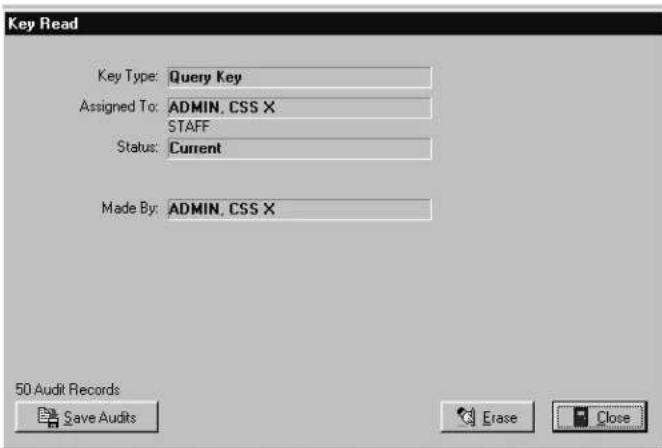
Fig. 11.4 - Key Read Dialog Box
Note: If there is not a key in the key encoder, you will be prompted to insert a key with messages both on screen and on the key encoder.
The Key Read dialog box displays such information as the type of key (such as master key, programming key, resident/unit key, etc.) and the name of the person the key is assigned to. Since this is a query key, there will be a Save Audits button in the lower left-hand side of the dialog box.
Viewing the Audit Trail
To view the audit trail, click the Save Audits button in the lower left-hand side of the dialog box. This will display a Confirmation Requested dialog box (Fig. 11.5).

Fig. 11.5 - Confirmation Requested Dialog Box
The Confirmation Requested dialog box will report the number of audit records held in the query key and ask if you want to save these audit records for later viewing.
To save these audit records for later viewing, click Yes.
Creating a Report
A Success dialog box will be displayed to let you know that the audits were successfully saved (Fig. 11.6). Click OK to return to the main SAM System menu.
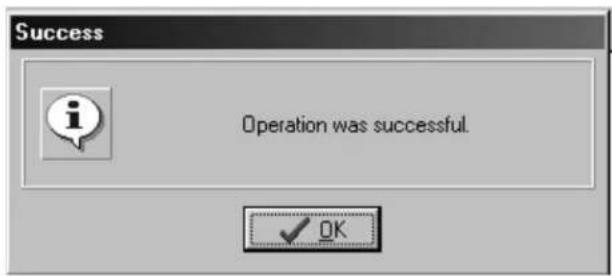
Fig. 11.6 - Success Dialog Box
Go to the Reports pull-down menu and select:
Lock Interrogations

This will display the SAM Lock Interrogation Report dialog box (Fig. 11.7).
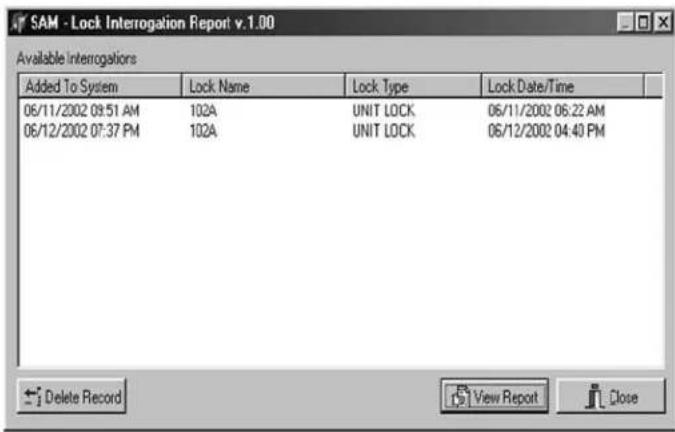
Fig. 11.7 - SAM Lock Interrogation Report Dialog Box
Reports will be listed in chronological order, according to when the reports were created, with the most recently created report appearing at the bottom of the list. Also displayed are: the names of the locks queried (such as "Pool" or "Unit 101"); the lock type; and the time/date of the queries. If you performed several lock interrogations on the same day, you can find the desired report using one of these other criteria.
Viewing a Report
To view a report, click on the desired report and click View Report. This will display the Output Options dialog box (Fig. 11.8).

Fig. 11.8 - Output Options Dialog Box
At the top of the Output Options dialog box, your default printer will be listed. Beneath that will be a Report Destination box, along with three options:
- Printer: The report can be printed out as a hard copy.
- Preview: The report can be viewed on screen.
• File: The report can be saved to your hard drive or to disk.
To view the report on screen, confirm that the Preview option is selected and click OK. (Printing and saving reports are discussed in Section 13: "SAM System Reports.")
Within a few moments, the lock interrogation report (Fig. 11.9) will open up in a new window that can be maximized or minimized (like any Windows-based window).

Fig. 11.9 - Lock Interrogation Report
The lock interrogation report displays the name of the lock you queried (such as "Pool" or "Unit 101"), the type of lock and the time the report was generated. In addition, the report will display the date and time the lock was queried, how it was queried (via query key or utility device), and the number of transactions (the number of times any activity took place, such as a key being inserted or the lock being programmed).
The lock interrogation report then displays a list of all transactions with details as to what happened. For instance, if a key was inserted, the report shows the type of key, whose key it was and the actual time the key was inserted. Reviewing this report can provide valuable information about any suspicious activity related to that lock.
If there are several pages to the report, the lock interrogation report provides tools for going from one page to another using either the buttons at the top of the box or via the Page menu. There are also options for zooming in or zooming out of the report using either the Zoom box or the Zoom menu.
The File menu provides options for saving the report, opening another report or printing the report to your default printer. These options are discussed in more detail in Section 13: "SAM System Reports."
To exit the lock interrogation report, go to the File menu and click Exit. This will return you to the SAM Lock Interrogation Report dialog box (Fig. 11.7). Click Close to return to the main SAM System menu.
Section 12: Querying Several Locks
As discussed in the previous section, querying a lock refers to downloading information saved in the lock and uploading that information into the SAM System. This information, or audit trail, shows which keys have been used to gain access, along with the time and date that each key was used.
While a query key can hold information for only one unit lock at a time, the utility device can retrieve the audit trails of up to three common access or unit locks at one time.
Programming the Utility Device
To program the utility device to download audit trails using the key encoder, go to the Utility Device pull-down menu and select:
Download Audit Trail from Lock(s)

Note: If you have not already put the utility device into the key encoder, or if it is not positioned correctly, you will be prompted to insert the utility device with messages on screen as well as on the key encoder.
The programming process will take a few moments. When it is completed, a Key/Utility Write screen (Fig. 12.1) will be displayed indicating, "The write operation was successful!" The key encoder will display the message "UTD WRITES SUCCESS."

Fig. 12.1 - Key/Utility Write Screen
Querying the Lock
When your utility device is programmed to download information from one or more locks, take it directly to the locks in question and insert it into the locks one at a time. The download process will take several moments, during which time the utility device will display the message “<<” and beep every few seconds.
When the utility device is finished retrieving the audit trail from the first lock, the lock will beep twice and the utility device will display the message "Operation Completed."
You can now remove the utility device and insert it into the next lock in question. Once you have queried all the locks in question, bring the utility device back to the SAM System.
Uploading the Audit Trail
To upload the audit trail from the utility device, go to the Utility Device pull-down menu and select:
Upload Audit Trail Info From Utility Device

Note: If you have not already put the utility device into the key encoder, or if it is not positioned correctly, you will be prompted to insert the utility device with messages on screen as well as on the key encoder.
Viewing the Audit Trail
Once the audit trail has been successfully uploaded from the utility device, the Confirmation Requested dialog box will be displayed (Fig. 12.2).

Fig. 12.2 - Confirmation Requested Dialog Box
At the Confirmation Requested dialog box, click Yes to save these audit records for later viewing.
Creating a Report
A Success dialog box will be displayed to let you know that the audits were successfully saved (Fig. 12.3). Click OK to return to the main SAM System menu.

Fig. 12.3 - Success Dialog Box
Go to the Reports pull-down menu and select:
Lock Interrogations

This will display the SAM Lock Interrogation Report dialog box (Fig. 12.4).

Fig. 12.4 - SAM Lock Interrogation Report Dialog Box
Reports will be listed in chronological order, according to when the reports were created, with the most recently created report appearing at the bottom of the list.
Also displayed are: the lock name you queried (such as "Pool" or "Unit 101"), the lock type and the time/date the lock was queried. Because you can perform several lock interrogations at once using the utility device, each lock interrogated will have a separate report.
Viewing a Report
To view a report, simply click on the desired report and click View Report. This will display the Output Options dialog box (Fig. 12.5).
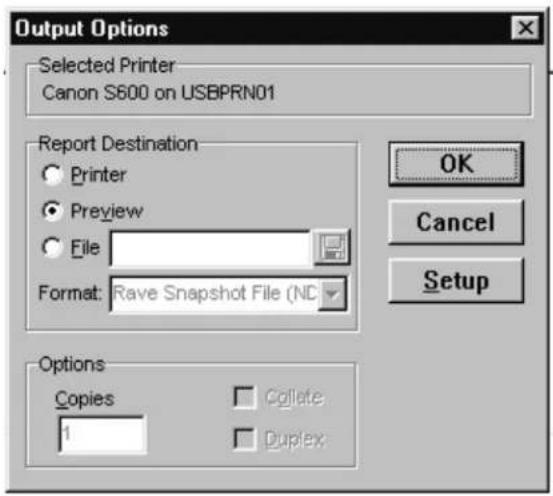
Fig. 12.5 - Output Options Dialog Box
At the top of the Output Options dialog box, your default printer will be listed. Beneath that will be a Report Destination box, along with three options:
- Printer: The report can be printed out as a hard copy.
- Preview: The report can be viewed on screen.
- File: The report can be saved to your hard drive or to disk.
To simply view the report on screen, confirm that the Preview option is selected and click OK. (Printing and saving reports will be discussed in Section 13.) Within a few moments, the lock interrogation report (Fig. 12.6) will open up in a new window that can be maximized or minimized (like any Windows-based window).

Fig. 12.6 - Lock Interrogation Report
The lock interrogation report displays the name of the lock you queried (such as "Pool" or "Unit 101"), the type of lock and the time the report was generated. In addition, the report will display the date and time the lock was queried, how it was queried (query key or utility device), and the number of transactions (the number of times any activity took place with the lock, such as a key being inserted or the lock being programmed).
The lock interrogation report then displays a list of all transactions with details as to what happened. For instance, if a key was inserted, the report shows the type of key, whose key it was and the actual time the key was inserted. Reviewing this report can provide valuable information about any suspicious activity related to that lock.
If there are several pages to the report, the lock interrogation report provides tools for going from one page to another using either the buttons at the top of the box or the Page menu. There are also options for zooming in or zooming out of the report using either the Zoom box or the Zoom menu.
The File menu provides options for saving the report, opening another report or printing the report to your default printer. These options will be discussed in more detail in Section 13: "SAM System Reports."
To exit the lock interrogation report, go to the File menu and click Exit. This will return you to the SAM Lock Interrogation Report dialog box (Fig. 12.4). Click Close to return to the main SAM System menu.
Section 13: SAM System Reports
The SAM System provides a high degree of security by allowing you to reprogram (rather than completely change out) locks as well as electronically program keys and locks. In addition, SAM provides a number of reports to help you monitor activities around your property. The reports, along with the page number on which they are discussed, are as follows:
• Unit key history report (page 102)
- User key history report (page 104)
- Keys made report (page 105)
- Lock interrogation report (page 107)
(See also: Section 11, "The Query Key," or Section 12, "Querying Several Locks")
- Limited use key audits report (page 107)
• Transactions report (page 108)
Common SAM System Report Functions
Because SAM System reports have many similar functions, rather than describe each function repeatedly when discussing each report, the most common report functions are discussed below.
Selecting a Date Range
Almost all SAM System reports allow you to select a range of dates for the report desired. The default settings provide a time range of just one day. There are several options for changing the date range:
- Click on the large down arrow (▼) next to Beginning Date or Ending Date to display the date range calendar (Fig. 13.1).
The double arrow buttons (◀◀ ▶▶) will change the date range from year to year, while the single arrow buttons (◀▶) will change the date range from month to month.
There are also four buttons near the bottom of the calendar that allow you to quickly clear the date, choose the current date and accept or cancel the settings.

Fig. 13.1 - Sample Date Range Calendar
- Click on a specific day in the date range calendar. This will automatically enter the desired numbers into the Beginning Date field.
- Once you have opened up a date range calendar, small up/down arrows appear right next to the date. These buttons allow you to quickly change the month field; clicking the up arrow moves the date up a month, while clicking the down arrow moves the date back a month.
- Highlight over the individual number field (month/day/year) you wish to change and type in the desired number(s).
Previewing Reports
Once you have selected the date range – along with any other necessary settings – for a desired report, your next step will be to click the View Report button, usually located at the bottom of a report dialog box (Fig. 13.1). This will display the Output Options dialog box (Fig. 13.2).

Fig. 13.2 - Output Options Dialog Box
At the top of the Output Options dialog box, your default printer will be listed. Below that will be a Report Destination box along with three options:
- Printer: The report can be printed out as a hard copy.
- Preview: The report can be viewed on screen before printing.
- File: The report can be saved to your hard drive or to disk.
Note: Although you have the option to print or to save the report to file, it is highly recommended that you first preview the report on screen. You will once again have the option to print or save from the preview screen.
To view the report on screen, confirm that the Preview option is selected and click OK. Within a few moments, the Report Preview screen (Fig. 13.3) will open up in a new window that can be maximized or minimized (like any Windows-based window).
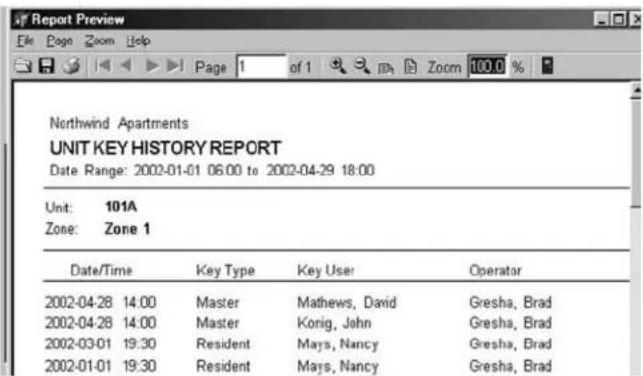
Fig. 13.3 - Sample Report Preview Screen
If there are several pages to the report, the preview screen provides tools for going from one page to another using either the buttons at the top of the box or the Page pull-down menu. There are also options for zooming in or zooming out of the report using either the Zoom box or the Zoom pull-down menu.
The File menu provides options for saving the report, opening another report or for printing the report to your default printer. To exit the preview screen, go to the File menu and click Exit. This will return you to the report dialog box that you started with. Click Close to return to the main SAM System menu.
Unit Key History Report
The unit key history report provides data on any keys created during a specified date range that would open a specific unit lock. This would include any resident keys, master keys and zone keys. To view this information, go to the Reports pull-down menu and select:
Unit Key History

This will display the Unit Key History Report dialog box (Fig. 13.4).
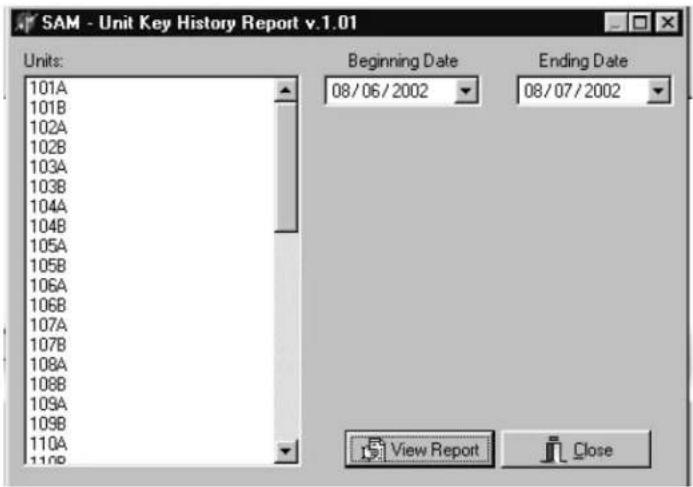
Fig. 13.4 - Unit Key History Report Dialog Box
In the Unit Key History Report dialog box, you can view the key history of any of the units on your property for any range of time.
To choose a unit, simply find it in the Unit list box and click on it. (You may have to scroll down to see all of the units listed.)
Once you have chosen a unit, select the date range. For instructions on choosing a date range, see "Selecting a Date Range" (page 100).
When you are satisfied with the settings (i.e., you have chosen the right date range for the desired unit), click the View Report button. This will display the Output Options dialog box (Fig. 13.2).
Previewing the Unit Key History Report
To view the unit key history report on screen, confirm that the Preview option is selected and click OK. Within a few moments, the Unit Key History Report Preview screen (Fig. 13.5) will be displayed.

Fig. 13.5 - Unit Key History Report Preview Screen
The unit key history report lists the date range requested, the specific unit number and its zone (if any). In addition, the report displays the following information:
- Date/Time: When the key was created for the unit.
• Key Type: Whether resident key, master key or zone key, vendor key, programming key, etc.
• Key User: The person to whom the key was assigned. - Operator: The person who made the key (or the person who was logged on to the system when the key was made).
- Status: Whether the key is: current; expired (a specific expiration date had been assigned and is now past); old (a newer key has invalidated it); canceled (the key was intentionally inhibited by creating an inhibit key); or returned (the key was erased after being read).
User Key History Report
The user key history report provides data on any keys created during a specified date range for a specific individual. This would include any resident keys, master or zone keys, as well as programming keys, construction keys, etc. To view this information, go to the Reports pull-down menu and select:
User Key History

This will display the User Key History Report dialog box (Fig. 13.6).
![SAM - User Key History Report v.1.01 User Types: [ALL] Users: Name Type ADMIN, CSS STAFF DOE, JANE RESIDENT DOE, JANE STAFF DOE, JOHN RESIDENT DOE, JOHN STAFF EK, MATT RESIDENT EK, PAM RESIDENT GORSHA, BRAD STAFF GORSHA, SCOTT VENDOR HASSELBECK, MARK VENDOR JONES, DAVEY RESIDENT JONES, KIM RESIDENT Beginning Date Ending Date 08/06/2002 08/07/2002 View Report Close](/content/2026/05/953934/images/cb5d8a7f19612a3050e36fe9adde450904d654d46d38fc40f415c0171bf61421.jpg)
Fig. 13.6 - User Key History Report Dialog Box
In the User Key History Report dialog box, you can choose to view the key history of any single individual that has ever been assigned a key.
To narrow the list of users, you can go to the User Types drop-down box and choose from All users, Resident, Staff or Vendor.
Once you have chosen a user category, simply find the individual user in the Users box and click on it. (You may have to scroll down to see all of the users listed.)
The last step is to select a date range. For instructions on choosing a date range, see "Selecting a Date Range" (page 100).
When you are satisfied with the settings (i.e., you have chosen the right date range for the specific user), click the View Report button. This will display the Output Options dialog box.
Previewing the User Key History Report
To view the user key history report on screen, confirm that the Preview option is selected and click OK. Within a few moments, the User Key History Report Preview screen (Fig. 13.7) will be displayed.
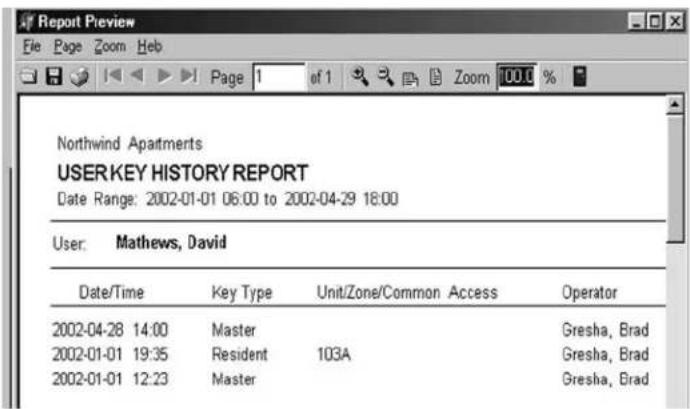
Fig. 13.7 - User Key History Report Preview Screen
The user key history report lists the date range requested along with the specific user. In addition, the report displays the following information:
- Date/Time: When the key was created for the unit.
• Key Type: Whether resident key, master or zone key, vendor key, programming key, etc. - Unit/Zone/Common Access: What specific locks the key will open. (Because master keys open all locks, none will be specifically listed.)
- Operator: The person who made the key (or the person who was logged on to the system when the key was made).
- Status: Whether the key is: current; expired (a specific expiration date had been assigned and is now past); old (a newer key has invalidated it); canceled (the key was intentionally inhibited by creating an inhibit key); or returned (the key was erased after being read).
Keys Made Report
The keys made report provides data on any keys created during a specified date range based on user, key type and/or status. To view this information, go to the Reports pull-down menu and select:
Keys Made

This will display the Keys Made Report dialog box (Fig. 13.8).
![SAM - Keys Made Report v.1.01 User Types: [ALL] Users: Name Type [ALL] ADMIN, CSS STAFF DOE, JANE RESIDENT DOE, JANE STAFF DOE, JOHN RESIDENT DOE, JOHN STAFF EK, MATT RESIDENT EK, PAM RESIDENT GORSHA, BRAD STAFF GORSHA, SCOTT VENDOR HASSELBECK, MARK VENDOR JONES, DAVEY RESIDENT JONES, KIM RESIDENT Key Types: [ALL] Status [ALL] Beginning Date Ending Date 08/06/2002 08/07/2002 View Report Close](/content/2026/05/953934/images/b2c5303850fb86c0022b69da00098147a09db17bd0b23759fbf03e369bacc92f.jpg)
Fig. 13.8 - Keys Made Report Dialog Box
In the Keys Made Report dialog box, you can choose from many combinations of criteria based on user type, key type, key status and date range.
Note: The keys made report allows you to choose all or any group of users (staff, resident or vendor), as opposed to the user key history report, which only reports on one individual user at a time.
The last step is to select a date range. For instructions on choosing a date range, see "Selecting a Date Range" (page 100).
Once you have chosen the specific criteria and are satisfied with the settings for this report, click the View Report button. This will display the Output Options dialog box.
Previewing the Keys Made Report
To view the keys made report on screen, confirm that the Preview option is selected and click OK. Within a few moments, the Keys Made Report Preview screen (Fig. 13.9) will be displayed.

Fig. 13.9 - Keys Made Report Preview Screen
The keys made report lists the date range requested along with the following information:
- Date/Time: When the key was created.
• Key Type: Whether resident key, master or zone key, vendor key, programming key, etc.
• Key User: The person to whom the key was assigned.
- Unit/Zone: What specific locks the key will open. (Because master keys open all locks, none will be specifically listed.)
- Operator: The person who made the key (or the person who was logged on to the system when the key was made).
- Status: Whether the key is: current; expired (a specific expiration date had been assigned and is now past); old (a newer key has invalidated it); canceled (the key was intentionally inhibited by creating an inhibit key); or returned (the key was erased after being read).
Lock Interrogation Report
Querying a lock refers to downloading information saved in the lock and uploading that information into the SAM System. This information, or audit trail, shows how the lock was programmed, what keys have been inserted into it – whether successfully or unsuccessfully – and more.
Once the audit trail has been successfully uploaded to the SAM System, lock interrogation reports can be created. For more information on creating and viewing lock interrogation reports, go to Section 11, "The Query Key," or Section 12, "Querying Several Locks."
Limited Use Key Audits Report
The limited use key audits report provides information on any or all limited use or vendor keys created. To view the limited use key audits report, go to the Reports pull-down menu and select:
Limited Use Audits
![Security Access Manager [Beta] ADMIN, CSS X is logged on File Tools Utility Device Management Reports Help Unit Key History... User Any History... Key Made... Look Intangements... Limited Use Goals... Transactions...](/content/2026/05/953934/images/a58986d8c2e900de911441b8ab351a79cc8f2908305e4143e7f4d35ebdc34395.jpg)
This will display the SAM Limited Use Key Report dialog box (Fig. 13.10).

Fig. 13.10 - SAM Limited Use Key Report Dialog Box
Limited use key audits reports will be listed in chronological order according to when the limited use keys were created, with the most recently created key appearing at the bottom of the list.
Also displayed is the person the key was assigned to and his or her user type (staff or vendor) along with a listing of the locks to which the key provided access.
Viewing a Limited Use Key Audits Report
To view the limited use key audits report for any of the keys listed, simply click on the desired report and click View Report. This will display the Output Options dialog box.
Confirm that the Preview option is selected and click OK. Within a few moments, the Limited Use Key Report Preview screen (Fig. 13.11) will be displayed.
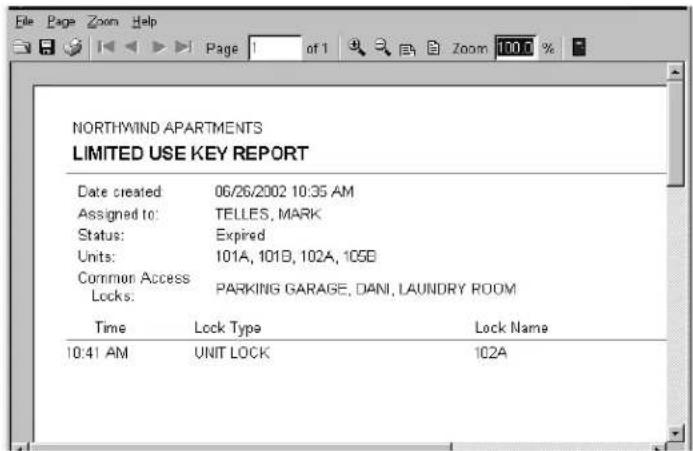
Fig. 13.11 - Limited Use Key Report Preview Screen
The limited use key report displays the same information as listed above, with the addition of any audit data from previous lock interrogations performed on any of the locks this key might have opened.
Transactions Report
The term "transactions" refers to any action taken with the SAM System, both keying transactions (such as when new keys are made) and non-keying transactions (such as when a new resident or staff member is added to the system).
To view a transaction history report, go to the Reports pull-down menu and select:
Transactions
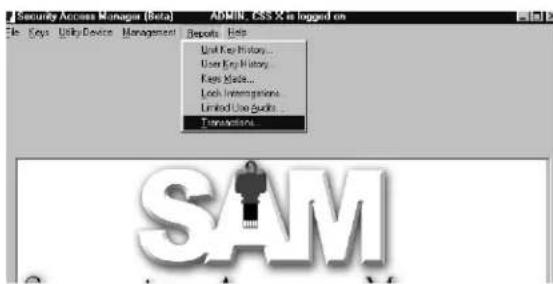
This will display the SAM Transaction History Report dialog box (Fig. 13.12).
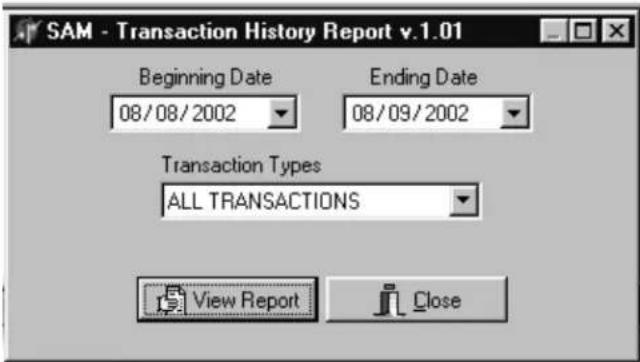
Fig. 13.12 - SAM Transaction History Report Dialog Box
For the transaction history report, you can choose to view All Transactions within a given date range, all Keying Transactions, or all Non-Keying Transactions for a specific date range. For instructions on choosing a date range, see "Selecting a Date Range" (page 100).
Once you have chosen the specific criteria and are satisfied with the settings for this report, click the View Report button. This will display the Output Options dialog box.
Previewing the Transaction History Report
To view the report on screen, confirm that the Preview option is selected and click OK. Within a few moments, the Transaction History Report Preview screen (Fig. 13.13) will be displayed.

Fig. 13.13 - Transaction History Report Preview Screen
The transaction history report displays the following information:
• Date/Time of the transaction.
- Log ID – an identifying number for the transaction.
- A short Description of the transaction, such as "Make Key" or "Add Resident."
- Any Additional Data that is available about the transaction, such as the unit number a key is made for or the name of the resident that was added.
Part 5
Maintenance
Section 14: Work Orders
Not only does the SAM System provide enhanced security for your property, it also enhances the level of service you can provide to your residents, specifically through the use of computer-generated work orders for property maintenance.
The SAM System allows you to create new work orders, assign them to specific staff members or vendors, and track and edit them as they are processed.
Viewing Work Orders
To view existing work orders, go to the Management pull-down menu and select:
Work Orders

This will display the Work Order List dialog box (Fig. 14.1).
![Work Order List Work Order Type Unit Property Pending Open Closed Show Users [ALL USERS] [ALL UNITS] Work Order Unit/Property Status Assigned To 20020430-1 U-101A OPEN S-VARGAS, TIM Q 20020430-2 U-101B OPEN V-HASSELBECK, MARK 20020430-3 U-102A PENDING S-ADMIN, CSS X Refresh Add Edit Delete Report Close](/content/2026/05/953934/images/555f13284384a48316840821c7dd7bdbab30dd9b8b95b428b39665305548354e.jpg)
Fig. 14.1 - Work Order List Dialog Box
The Work Order List dialog box provides a number of viewing options for existing work orders. For instance, under Work Order Type, you can choose the Unit option to view all work orders for all units or just for a single unit. Alternatively, you can choose the Property option, which will list any work orders for common access areas around your property.
Next, you can choose to review only pending, open or closed work orders – or any combination of the three. You can also choose to review work orders based on the staff member they were assigned to by selecting a specific user.
Note: Whenever you make changes to the viewing options, it is important to click the Refresh button at the top right corner of the dialog box to update the screen.
Creating New Work Orders
To create a new work order, click Add to display the Work Order - ADD Mode dialog box (Fig. 14.2).

Fig. 14.2 - Work Order - ADD Mode Dialog Box
The SAM System automatically assigns a work order number for later identification. In addition, the Date/Time Requested fields will be automatically filled in with the current date and time.
The first step in creating a new work order is to select the Work Order Type by clicking the small circle next to either Unit or Property. If the work order is for a unit, you will then select the unit number using the drop-down box below Unit.
Recording Who Requested the Service
Service requests can be made by either a staff member or a resident. By default, the name of the person currently logged on to the SAM System will appear in the box under the words, "Requested By." To change this information, click the button to the right of the box. (This button has a hand pointing to the right.) This will display the Select User Type dialog box (Fig. 14.3).

Fig. 14.3 - Select User Type Dialog Box
If a resident requested the service, click the open circle next to Resident and click OK. This will take you to the Resident List dialog box (Fig. 14.4). Any residents you registered into the system for that particular unit will be listed in this box. Click on the name of the person who reported the problem and click Select.
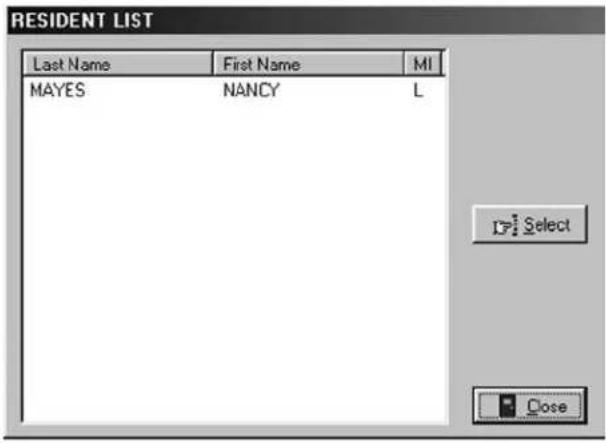
Fig. 14.4 - Resident List Dialog Box
Note: If the resident who requested the service is not in the resident list, go to "Adding Residents to the SAM System" (page 63) for instructions on adding that person to the list.
If a staff member requested the service, click the open circle next to Staff and click OK. This will take you to the Staff List dialog box. Click on the name of the staff member who reported the problem and click Select.
Note: If the staff member who requested the service is not in the staff list, go to "Adding New Staff to the SAM System" (page 56) for instructions on adding that person to the list.
Back at the Work Order List dialog box, the name of the person you selected will appear in the box under the words, "Requested By."
Assigning the Work Order
Work orders can be assigned to either a staff member or a vendor. By default, the name of the person currently logged on to the SAM System will appear in the box under the words, "Assigned To." To assign the work order to someone else, click the button to the right of the box. (This button has a hand pointing to the right.) This will display the Select User Type dialog box (Fig. 14.5).

Fig. 14.5 - Select User Type Dialog Box
If the work order is being assigned to a staff member, click the open circle next to Staff and click OK. This will take you to the Staff List dialog box. Click on the name of the staff member who will be assigned the work order and click Select.
If the work order is being assigned to a vendor, click the open circle next to Vendor and click OK. This will take you to the Vendor Company List dialog box. Any vendors you previously registered into the system will be listed in this box. Click on the name of the vendor you wish to assign this work order to and click Select.
If you would like to assign this work order to a specific vendor employee, click on the name of the vendor and then click Employees. This will display the Vendor Employee List dialog box (Fig. 14.6).

Fig. 14.6 - Vendor Employee List Dialog Box
Note: If the vendor company or vendor employee you wish to assign the work order to is not in the vendor company list, go to "Adding Vendors to the SAM System" (page 70) for instructions on adding that vendor (or vendor employee) to the list.
Back at the Work Order – ADD Mode dialog box (Fig. 14.2), the name of the person or vendor company you selected will appear in the box under the words, "Assigned To." If known, type that person's phone number into the Phone No. field.
If you wish to assign a date to this work order other than the current date/time, you can do so in this dialog box. For detailed instructions on changing the date, go to "Selecting a Date Range" (page 100).
The next task is to select the Priority for this work order – Low, Normal or High – with Normal being the default. And because this is a new work order, you can accept the default Status of the work order as Pending.
The Work Order – ADD Mode dialog box has additional fields for recording a full description of the service problem as well as any additional information, such as whether or not permission to enter has been granted, if there is a pet on the premises, etc.
When you are satisfied with all the settings for this work order, click OK.
Editing Existing Work Orders
To keep accurate records, it may be necessary to make changes to existing work orders. For instance, if a work order is being reassigned to a different staff member or to a vendor, or when a work order's status goes from open to closed, that information should be recorded.
To edit an existing work order, go to the Management pull-down menu and select:
Work Orders
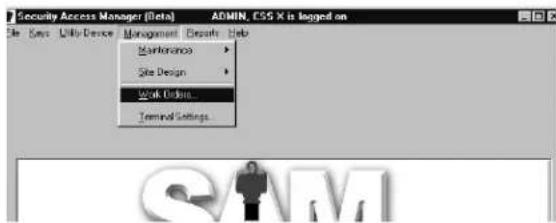
This will once again display the Work Order List dialog box (Fig. 14.1).
Click on the work order you wish to update and then click Edit. This will display the Work Order – EDIT Mode dialog box (Fig. 14.7).
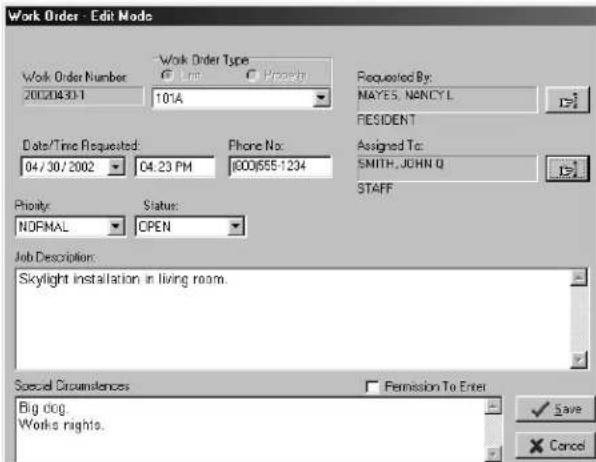
Fig. 14.7 - Work Order - EDIT Mode Dialog Box
Editing Who Requested the Service
Service requests can be made by either a staff member or a resident. To change this information, click the button to the right of the box. (This button has a hand pointing to the right.) This will display the Select User Type dialog box.
To change this information to a resident, click the open circle next to Resident and click OK. This will take you to the Resident List dialog box. Any residents you registered into the system for that particular unit will be listed in this box. Click on the name of the person who reported the problem and click Select.
Note: If the resident who reported the problem is not in the resident list, go to "Adding Residents to the SAM System" (page 63) for instructions on adding that person to the list.
To change this information to a staff member, click the open circle next to Staff and click OK. This will take you to the Staff List dialog box. Click on the name of the staff member who requested the service and click Select.
Note: If the staff member who requested the service is not in the staff list, go to "Adding New Staff to the SAM System" (page 56) for instructions on adding that person to the list.
Back at the Work Order List dialog box, the name of the person you selected will appear in the box under the words, "Requested By."
Reassigning the Work Order
Work orders can be reassigned to either a staff member or a vendor. To change the work order assignment, click the button to the right of the box under the words, "Assigned To." (This button has a hand pointing to the right.) This will display the Select User Type dialog box.
If the work order is being reassigned to a staff member, click the open circle next to Staff and click OK. This will take you to the Staff List dialog box. Click on the name of the staff member who reported the problem and click Select.
If the work order is being reassigned to a vendor, click the open circle next to Vendor and click OK. This will take you to the Vendor Company List dialog box. Any vendors you previously registered into the system will be listed in this box. Click on the name of the vendor you wish to assign this work order to and click Select.
If you would like to assign this work order to a specific vendor employee, click on the name of the vendor company and then click Employees. This will display the Vendor Employee List dialog box.
Note: If the vendor you wish to assign the work order to is not in the vendor company list, go to "Adding Vendors to the SAM System" (page 70) for instructions on adding that vendor to the list.
Back at the Work Order – EDIT Mode dialog box (Fig. 14.7), the name of the person or vendor company you selected will appear in the box under the words, "Assigned To." If known, type that person's phone number into the Phone No. field.
If you wish to assign this work order a new date/time, you can do so in this dialog box. For detailed instructions on changing the date, go to "Selecting a Date Range" (page 100).
Other changes that can be made in the Work Order – EDIT Mode dialog box are: changing the Priority (Low, Normal or High), its Status (Pending, Open or Closed) and adding more information to the Job Description and Special Circumstances fields.
When you are satisfied with all the changes to this work order, click Save.
Distributing Work Orders
Although you have created and assigned a work order using the SAM System, it does not necessarily mean the person the work order is assigned to actually is aware of it. Somehow, that person needs to be informed that the work order exists and action needs to be taken.
There are essentially two ways to do this: 1) Print the work order out and hand it to the staff member it is assigned to (call/fax it to the vendor); 2) Provide access to the SAM System work orders functions for responsible staff members to retrieve and edit work orders themselves.
Printing Work Orders
To print an existing work order, go to the Management pull-down menu and select:
Work Orders

This will once again display the Work Order List dialog box (Fig. 14.1).
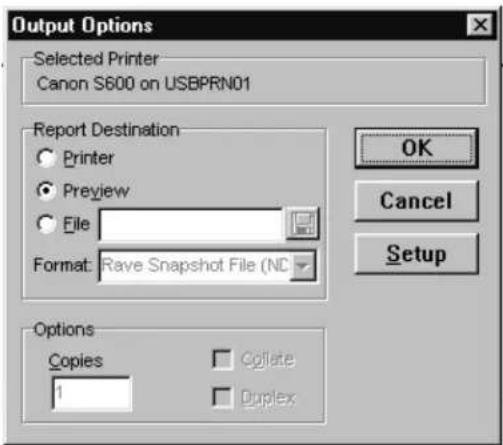
Fig. 14.8 - Output Options Dialog Box
Click on the work order you wish to print and then click Report. This will display the Output Options dialog box (Fig. 14.8).
At the top of the Output Options dialog box, your default printer will be listed. Below that will be a Report Destination box along with three options:
- Printer: The report can be printed out as a hard copy.
- Preview: The report can be viewed on screen before printing.
- File: The report can be saved to your hard drive or to disk.
Note: Although you have the option to print or to save the report to file, it is highly recommended that you first preview the report on screen. You will once again have the option to print or save from the preview screen. Also, unless you specifically delete a work order, it will remain in the SAM System indefinitely.
Previewing the Work Order Report
To preview the work order report on screen, confirm that the Preview option is selected and click OK. Within a few moments, the Report Preview Screen (Fig. 14.9) will open up in a new window that can be maximized or minimized (like any Windows-based window).

Fig. 14.9 - Work Order Report Preview Screen
If there are several pages to the work order report, the preview screen provides tools for going from one page to another using either the buttons at the top of the box or the Page pull-down menu. There are also options for zooming in or zooming out of the report using either the Zoom box or the Zoom pull-down menu.
To print the work order report, go to the File pull-down menu and select Print. This will open up the printing dialog box for your default printer. Simply select the various options and click OK to commence printing.
To exit the preview screen, go to the File menu and click Exit. This will return you to the Work Order List dialog box. Click Close to return to the main SAM System menu.
Section 15: Lock Maintenance
SAM System locks are built for endurance and efficiency, especially in terms of the batteries that power them. Although it is impossible to predict exactly how long a lock's battery pack will last, a SAM System lock is designed to open (and close) over 100,000 times on one set of batteries; in other words, based on average use, you can expect to get several years of lock operation per battery pack.
Clock Maintenance
Every lock in the SAM System has its own clock built into the unit. This internal clock is set with the proper time and date by the SAM utility device when the lock is first installed on the door and programmed for that specific unit number. To keep the internal audit trail accurate, the time and date should be updated once per year. This is accomplished simply by taking the SAM utility device, setting its time and date using the SAM System, and inserting the utility device into each unit lock.
Lock Environmental Considerations
The SAM lock is protected from normal environmental conditions. However, direct exposure to water can cause the lock to not operate properly. For example, avoid inserting a key that is wet or mounting a lock where it is exposed to direct driving rain. If a unit should become wet and malfunction, normal operation will return when the water is removed and the unit is allowed to dry off.
The SAM utility device should never be exposed to wet conditions.
Low Battery Indication
Every time an access key, such as a resident key, zone key, master key or vendor key (limited use key), is used in a lock, the lock will do a self-check on its battery condition. A low battery indication will occur when the battery voltage drops below 4.6 volts.
The low battery indication is identified by the red light flashing six times and the beeper sounding six times. This is followed by the lock motor turning on to unlock (and subsequently relock) the door in the usual fashion.
After the lock first senses a low battery voltage condition and initiates the low battery indication, you can expect the lock to open (and close) at least 100 more times before the battery pack is depleted to the point that it will no longer operate the lock properly. Nonetheless, it is highly recommended that the lock batteries be changed sooner rather than later.
Rather than waiting for a low battery indication, it is recommended that you perform periodic preventive lock maintenance. Just as checking the batteries in your property's smoke alarm systems is done twice per year, it is recommended that you perform regular preventive lock maintenance at least once per year. Preventive lock maintenance is performed by inserting a maintenance key into each lock on your property and analyzing the resulting maintenance key report.
The Maintenance Key
The maintenance key gathers such information as battery voltage, the total number of openings each lock has experienced, its current date/time and more. After gathering this information, the maintenance key is read using the SAM System key encoder and the PC running the SAM System software. A maintenance key report is produced.
Note: The maintenance key can be inserted into no more than 60 locks. If you have more than 60 locks to check, it is recommended that you create enough maintenance keys to check all locks at once. A separate maintenance key report is produced for each maintenance key used.
Creating Maintenance Keys
To create a maintenance key, go to the Keys pull-down menu and select:
Create → Maintenance Key
![Security Access Manager [Beta] ADMIN. CSS X is logged on File Keys Utility Device Management Reports Help Create Head... Resident Key... Zone Key... Master Key... Inhibit Resident Key... Inhibit Zone Key... Inhibit Master Key... Programming Key... Configure Unit Key... Configure Common Access Key... Configure Suite Key... Construction Key Limited Use Key Query Key Maintenance Key](/content/2026/05/953934/images/bd8b395e0e20fbe98c258985c9c514b8df2cd439297052341a6e9e304efec4ef.jpg)
This will display the Create Maintenance Key dialog box (Fig. 15.1).

Fig. 15.1 - Create Maintenance Key Dialog Box
By default, the maintenance key will be assigned to whomever is logged on to the SAM System. That person's name will appear in the box under the words, "The Key Is Assigned To." To accept this default, simply click OK.
If you wish to assign the maintenance key to a staff member other than yourself, click the button to the right of the box. (This button has a hand pointing to the right.) This will display the Select User Type dialog box (Fig. 15.2).
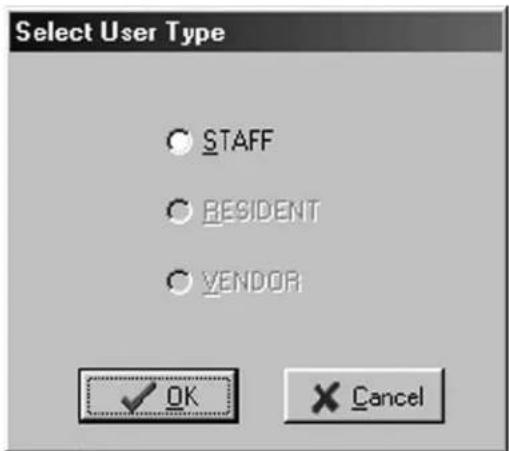
Fig. 15.2 - Select User Type Dialog Box
Maintenance keys can only be assigned to staff. Click the open circle next to Staff and click OK. This will take you to the Staff List dialog box (Fig. 15.3). Any staff members you previously entered into the system ("Adding System Users," Section 2) will be listed in this box. Simply click on the name of the person to receive this key and click Select.

Fig. 15.3 - Staff List Dialog Box
Note: If the staff member you wish to assign the key to is not in the staff list, go to "Adding New Staff to the SAM System" (page 56) for instructions on adding that person to the list.
Back at the Create Maintenance Key dialog box, the name of the person you selected will appear in the box under the words, "The Key Is Assigned To." Click OK.
Encoding the Maintenance Key
If a key is not currently in the key encoder, you will be prompted to insert a key into the key encoder now. Within a few seconds, the key will be encoded. The key encoder will flash the message "KEY CODED CORRECTLY" and your computer will display the message: "The write operation was successful!" Click OK on the computer message to return to the main SAM System menu.
As noted above, a single maintenance key can hold information from up to 60 locks. Continue creating maintenance keys in this manner until you have enough keys to check all the locks on your property.
Gathering Lock Information
Once you have encoded the appropriate number of maintenance keys, take the first key directly to the first lock on your property and insert the key into the lock. The lock will flash green once to indicate that the key has gathered the information needed. Remove the key and insert the same maintenance key into the very next lock.
Note: It is highly recommended that you use the same key for as many locks as possible (up to 60 locks) in as short a period of time as possible. Doing so will allow you to more accurately analyze the time/date settings on each lock.
When a maintenance key has reached 60 records, the lock it is inserted into will flash red three times and beep three times. At this point, begin using the next available maintenance key in that same lock.
When you have inserted a maintenance key into all the locks on your property, bring the keys back to the SAM System.
Reading the Maintenance Key(s)
In order to review the information gathered by each maintenance key, you'll need to read each maintenance key one at a time using the key encoder.
To read a maintenance key, insert it into the key encoder, go to the Keys pull-down menu and select:
Read
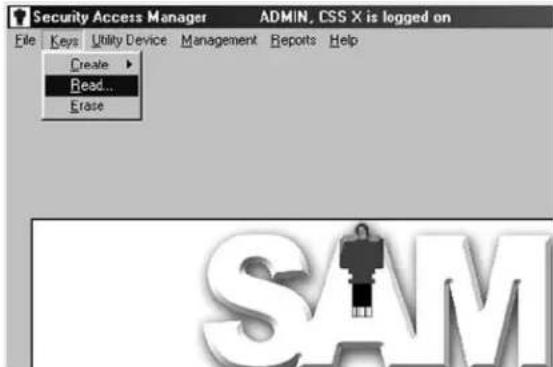
This will display the Key Read dialog box (Fig. 15.4).
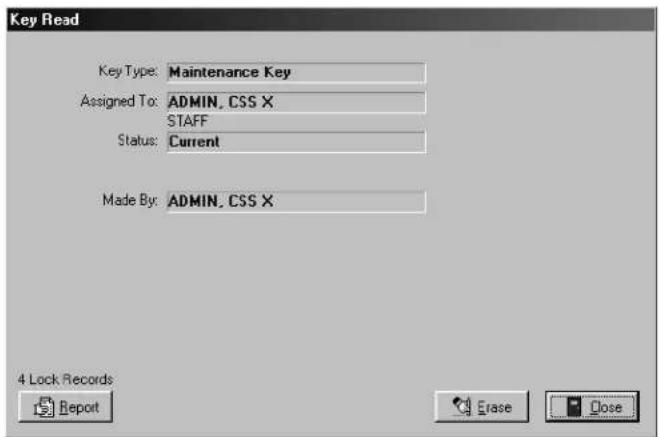
Fig. 15.4 - Key Read Dialog Box
Note: If there is not a key in the key encoder, you will be prompted to insert a key with messages both on screen and on the key encoder.
The Key Read dialog box displays such information as the type of key and the name of the person the key is assigned to. Because the key encoder is reading a maintenance key, there will also be a Report button in the lower left-hand side of the dialog box, with the number of lock records contained on the key shown above the button.
Viewing the Maintenance Key Report
To view the maintenance key report, click the Report button in the lower left-hand side of the dialog box. This will display the Output Options dialog box (Fig. 15.5).

Fig. 15.5 - Output Options Dialog Box
At the top of the Output Options dialog box, your default printer will be listed. Beneath that will be a Report Destination box, along with three options:
- Printer: The report can be printed out as a hard copy.
- Preview: The report can be viewed on screen.
- File: The report can be saved to your hard drive or to disk.
To view the report on screen, confirm that the Preview option is selected and click OK. Within a few moments, the Maintenance Key Report dialog box (Fig. 15.6) will open up in a new window that can be maximized or minimized (like any Windows-based window).
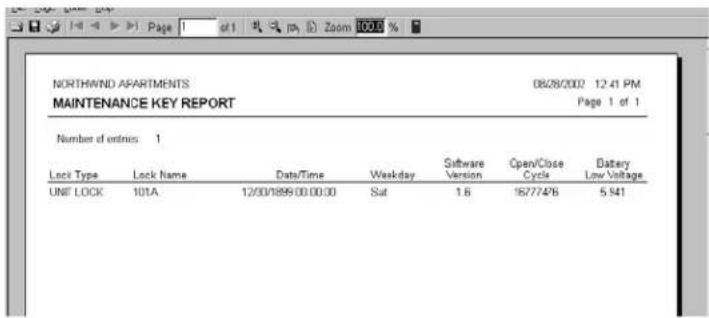
Fig. 15.6 - Maintenance Key Report Dialog Box
Note: For multiple maintenance keys, you will need to generate multiple reports, one for each maintenance key used.
The maintenance key report lists the locks that were checked using that particular maintenance key in the order in which the key was inserted. In addition, the report lists the following information:
- Lock Type: Whether unit lock, suite lock or common lock.
- Lock Name: Such as "Pool" or "Unit 101."
- Date/Time: The date and time setting in the lock itself at the time the maintenance key was inserted. Note: Be sure to take a close look at the date and time settings of each lock. If there is a wide variance in the times from one lock to the next, it is highly recommended that you reset the date and time in the lock(s) using the utility device. Instructions on resetting the date/time in a lock are discussed below.
- Software Version: The version of the SAM System software that the lock was programmed with.
• Day: The day of the week the maintenance key was inserted. - Open/Close Cycle: The number of times the lock has been unlocked using an access key.
- Battery Voltage: The actual voltage of the batteries inside the lock. Note: If a lock's battery voltage is below 4.7, "LOW" will appear next to the voltage number to flag the lock for possible battery change. Changing battery packs is discussed below.
If there are several pages to the report, the maintenance key report provides tools for going from one page to another using either the buttons at the top of the box or the Page menu. There are also options for zooming in or zooming out of the report using either the Zoom box or the Zoom menu.
The File menu provides options for saving the report, opening another report, or for printing the report to your default printer. These options are discussed in more detail in Section 13: "SAM System Reports."
To exit the maintenance key report, go to the File menu and click Exit. This will return you to the main SAM System menu.
Opening a Lock With a Dead Battery
In the unlikely chance the battery becomes too weak to operate the lock properly, you can use the external power supply (EPS) unit to power the lock and gain access. To use the EPS unit follow these simple steps:
- Insert the EPS unit just as you would a key, making sure the label of the unit is facing up.
- Next insert a valid key for that unit into the connector on the EPS unit.
- The lock should now open.
- Replace the locks batteries at this time.
Replacing Lock Batteries
If the maintenance key report indicates any locks with low voltage (below 4.7), it is recommended that the battery pack be replaced immediately. To replace the battery pack, follow these simple steps:
- Remove the two Phillips head screws on the back cover plate. Note: Be sure to note the position of the knob for the passage/privacy switch so when you replace the cover, the switch will be in the same position.
- Remove the back cover plate from the lock.
- Unplug the old battery pack, noting the orientation of the power connector.
- Plug in a new battery pack, noting the orientation of the power connector.
- The lock will reinitiate by beeping once, flashing the red light once and then flashing the green light once.
- Replace the cover plate, noting the orientation of the passage/privacy switch.
Note: A backup power source is used to power the lock's internal clock for over two minutes after the battery pack is removed. If more than two minutes elapse between removing the old battery pack and plugging in the new one, you may have to reset the lock's date and time using the utility device.
Resetting the Date/Time
If a lock's date and time settings are no longer accurate, they should be reset using the utility device. However, you must first set the correct date/time in the utility device using the key encoder.
To set the correct date/time in the utility device, insert the utility device into the key encoder. Go to the Utility Device pull-down menu and select:
Set Date/Time in Utility Device
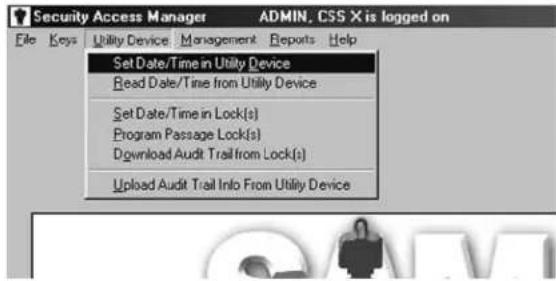
Note: If you have not already put the utility device into the key encoder, or if it is not positioned correctly, you will be prompted to insert the utility device with messages on screen as well as on the key encoder.
The set date/time process will take a few moments. When it is completed, a message will be displayed indicating the date and time in the utility device, and the utility device itself will display the correct time. The time that has been set is now synchronized with your PC.
The next step is to go back to the Utility Device pull-down menu and select:
Set Date/Time in Lock(s)

Note: If the utility device is not still in the key encoder, or if it is not positioned correctly, you will be prompted to insert the utility device with messages on screen as well as on the key encoder.
The set date/time in locks process will take a few moments. When it is completed, a message will be displayed indicating that "The write operation was successful!" The utility device itself will once again display the correct date and time.
Once the utility device has been initialized to set the date/time in a lock, take it to each lock whose internal clock needs to be reset. Insert the utility device into the lock. When the utility device beeps and displays "OPERATION COMPLETED," remove the utility device from the lock.
Section 16: Backing up
As with most computer software programs, regularly backing up the information in the SAM System is highly recommended. After all, you have probably spent a great deal of time inputting the data. Should something unforeseen happen to your computer, a backup file of the data would prevent your having to input that information all over again.
It is recommended that you backup the data in the SAM System at least once each week. Fortunately, the SAM System has an easy-to-use backup function built in.
Backing up Data Files
To backup your SAM System data files, go to the Management pull-down menu and select:
Maintenance → Backup

This will display the SAM Database Backup dialog box (Fig. 16.1).

Fig. 16.1 - SAM Database Backup Dialog Box
The default backup file name and location (i.e., directory) will already be listed in the box next to the words "Self-Extracting Database Backup.exe":
C:\PROGRAM FILES\SAM\BACKUP\SAMDBBackup.EXE
In other words, the backup file will be named "SAMDBBackup.EXE" and will appear in your C:\ directory (normally your hard drive) in the Program Files subdirectory. Within the SAM program folder, a sub-folder named "Backup" will be created with the backup file housed within it.
You have the option of changing the directory if you wish, however, it is recommended that you do not change the default backup location on your hard drive. However, it IS HIGHLY recommended that you save the backup data OFF your computer – onto a floppy disk, a CD, tape, zip disk or even another computer.
Note: SAM System database files will often exceed the maximum available disk space on a 3.5-inch floppy disk. It is therefore recommended that you find some other media to save this file to, such as a CD, tape, zip disk or another computer.
To save the backup file onto your computer's hard drive, click Create Backup File. Within a few moments, the SAM System will display an information screen with the following message:
C:\PROGRAM FILES\SAM\BACKUP\SAMDBBackup.EXE has been successfully created.
Click OK on the information screen and then click Cancel at the SAM Database Backup dialog box to return to the main SAM System menu.
Saving the Backup File off Your Computer
To backup your SAM System data files off your computer, go to the Management pull-down menu and select:
Maintenance → Backup
This will once again display the SAM Database Backup dialog box (Fig. 16.1).
The default backup file name and location will already be listed in the box next to the words "Self-Extracting Database Backup.exe." To change this default information, click the Browse button next to the box. This will display a familiar Windows Save As dialog box (Fig. 16.2).

Fig. 16.2 - Save As Dialog Box
Click the down arrow (▼) to access a different directory (for a CD drive, tape drive or zip disk drive). Choose the appropriate location for saving your backup file and click Save.
Note: While most computers use the C:\ directory as the hard drive, other directories for the CD drive, tape or zip drive will not necessarily be the same for all computers.
When the file has been saved, you will be returned to the SAM Database Backup dialog box. The new location for the backup file (along with the name of the backup file) will now appear in the box next to the words "Self-Extracting Database Backup.exe." Click Create Backup File to proceed.
Within a few moments, the SAM System will display an information screen with the following message:
X:\PROGRAM FILES\SAM\BACKUP\SAMDBBackup.EXE has been successfully created.
Note: "X" indicates the letter of the directory you have chosen for the backup file.
Click OK on the information screen, and then click Cancel at the SAM Database Backup dialog box to return to the main SAM System menu.
- Security Access Manager system
- Table of Contents
- Table of Contents ii
- Introduction 1
- Part 1: Getting Started \_\_\_\_ 3
- Section 1: Installing the SAM System 4
- Section 2: Registering System Users 11
- Section 3: The Site Design Process 19
- Part 2: Programming Locks 32
- Section 4: The Preprogramming Process \_\_\_\_ 33
- Section 5: The Lock Programming Process 41
- Part 3: Creating Keys 49
- Section 6: Staff Keys 50
- Section 7: Resident Keys 63
- Section 8: Vendor Keys 70
- Section 9: Replacing Lost Resident Keys 75
- Section 10: Replacing Lost Staff Keys 80
- Part 4: Querying and Reporting 88
- Section 11: The Query Key 89
- Section 12: Querying Several Locks 95
- Section 13: SAM System Reports 100
- Part 5: Maintenance \_\_\_\_ 110
- Section 14: Work Orders 111
- Section 15: Lock Maintenance 119
- Section 16: Backing up 126
- Introduction
- Welcome to SAM™!
- SAM System Requirements
- SAM System Components
- Part 1
- Getting Started
- Section 1: Installing the SAM System
- Running the Software
- Programs → SAM
- Logging on to SAM
- Section 2: Registering System Users
- Maintenance → Staff
- Assigning the System Administrator
- Removing the Default System Administrator
- Adding System Users
- Creating Authorization Groups
- Maintenance → Authorization Groups
- System Authorizations
- Key Authorizations
- Section 3: The Site Design Process
- Entering Zone Information
- Setting Up Zones
- Site Design → Zones
- Saving Zone Information
- Entering Suite Lock Information
- Setting up Suites
- Site Design → Suite Locks
- Adding a Range of Suites
- Indicating the Zone for Suites
- Selecting the Switch Mode
- If your locks have a switch labeled "OPEN" and "LOCK":
- If your locks have a switch labeled "PRIVACY":
- Saving Suite Information
- Entering Unit Lock Information
- Site Design → Unit Locks
- Adding a Range of Units
- Indicating the Zone and/or Suite for Units
- Saving Unit Information
- Entering Common Access Area Information
- Site Design → Common Access Locks
- Confirming Property Settings
- Site Design → Property Settings
- Unit Keys
- Zone Keys
- DST
- Part 2
- Programming Locks
- Section 4: The Preprogramming Process
- Construction Keys
- Creating Additional Construction Keys
- Create → Construction Key
- Encoding the Construction Key
- Assigning Construction Keys
- The Programming Key
- Creating Programming Keys
- Create → Programming Key
- Encoding the Programming Key
- Creating Additional Programming Keys
- The Utility Device
- Setting the Correct Date/Time
- Set Date/Time in Utility Device
- Read Date/Time From Utility Device
- Read Date/Time in Utility Device
- Initializing the Utility Device
- Set Date/Time in Lock(s)
- Section 5: The Lock Programming Process
- Creating Common Access Configure Keys
- Create → Configure Common Access Key
- Assigning Configure Common Access Keys
- Encoding the Configure Common Access Key
- Programming Common Access Locks
- Programming Suite Locks
- Create → Configure Suite Key
- Assigning Configure Suite Keys
- Encoding the Configure Suite Key
- Programming a Suite Lock
- Programming Unit Locks
- Create → Configure Unit Key
- Assigning Configure Unit Keys
- Encoding the Configure Unit Key
- Programming a Unit Lock
- Part 3
- Creating Keys
- Section 6: Staff Keys
- Creating Master Keys
- Create → Master Key
- Master Key Options
- Encoding the Master Key
- Creating Additional Master Keys
- Encoding Additional Master Keys
- Creating Zone Keys
- Create → Zone Key
- Zone Key Options
- Creating Additional Zone Keys
- Encoding Additional Zone Keys
- Adding New Staff to the SAM System
- When Staff Members Leave
- Deleting Staff Members from the SAM System
- Preventing Access
- The Inhibit Key
- Creating an Inhibit Master Key
- Create → Inhibit Master Key
- Inhibit Master Key Options
- Encoding the Inhibit Key
- Reprogramming Locks
- Creating an Inhibit Zone Key
- Create → Inhibit Zone Key
- Inhibit Zone Key Options
- Section 7: Resident Keys
- Adding Residents to the SAM System
- Maintenance → Residents
- Creating Resident Keys
- Create → Resident Key
- Resident/Unit Key Options
- Assigning Resident Keys
- Encoding the Resident Key
- When Residents Move Out
- The Inhibit Resident Key
- Creating an Inhibit Resident Key
- Create → Inhibit Resident Key
- Inhibit Resident Key Options
- Section 8: Vendor Keys
- Adding Vendors to the SAM System
- Registering Vendor Employees
- Creating Vendor Keys
- Replacing Lost Vendor Keys
- Section 9: Replacing Lost Resident Keys
- Reading Resident Keys
- Read
- Creating a Replacement Resident Key
- Encoding the Replacement Resident Key
- Section 10: Replacing Lost Staff Keys
- Encoding the Inhibit Master Key
- Select
- Creating a Replacement Master Key
- Creating a Replacement Zone Key
- Encoding the Zone Key
- Part 4
- Querying and Reporting
- Section 11: The Query Key
- Creating the Query Key
- Create → Query Key
- Encoding the Query Key
- Querying the Lock
- Reviewing the Audit Trail
- Viewing the Audit Trail
- Creating a Report
- Lock Interrogations
- Viewing a Report
- Section 12: Querying Several Locks
- Programming the Utility Device
- Download Audit Trail from Lock(s)
- Uploading the Audit Trail
- Upload Audit Trail Info From Utility Device
- Section 13: SAM System Reports
- Common SAM System Report Functions
- Selecting a Date Range
- Previewing Reports
- Unit Key History Report
- Unit Key History
- Previewing the Unit Key History Report
- User Key History Report
- User Key History
- Previewing the User Key History Report
- Keys Made Report
- Keys Made
- Previewing the Keys Made Report
- Lock Interrogation Report
- Limited Use Key Audits Report
- Limited Use Audits
- Viewing a Limited Use Key Audits Report
- Transactions Report
- Transactions
- Previewing the Transaction History Report
- Part 5
- Maintenance
- Section 14: Work Orders
- Viewing Work Orders
- Work Orders
- Creating New Work Orders
- Recording Who Requested the Service
- Assigning the Work Order
- Editing Existing Work Orders
- Editing Who Requested the Service
- Reassigning the Work Order
- Distributing Work Orders
- Printing Work Orders
- Previewing the Work Order Report
- Section 15: Lock Maintenance
- Clock Maintenance
- Lock Environmental Considerations
- Low Battery Indication
- The Maintenance Key
- Creating Maintenance Keys
- Create → Maintenance Key
- Encoding the Maintenance Key
- Gathering Lock Information
- Reading the Maintenance Key(s)
- Viewing the Maintenance Key Report
- Opening a Lock With a Dead Battery
- Replacing Lock Batteries
- Resetting the Date/Time
- Section 16: Backing up
- Backing up Data Files
- Maintenance → Backup
- Saving the Backup File off Your Computer
Brand : Dormakaba
Model : Saflok SAM
Category : Electronic lock