
Livenza CKM1641D - Kitchen Appliances DELONGHI - Free user manual and instructions
Find the device manual for free Livenza CKM1641D DELONGHI in PDF.


| Type of product | Electric Kettle |
| Brand | DeLonghi |
| Model | Livenza CKM1641D |
| Capacity | 1.7 liters |
| Power | 2200 W |
| Voltage | 220-240 V, 50/60 Hz |
| Material | Stainless steel |
| Heating element | Concealed (hidden) |
| Base type | 360° cordless swivel base |
| Water level indicator | Yes, external transparent window with markings |
| Filter | Removable limescale filter |
| Lid opening | Soft opening button |
| Auto shut-off | Yes, when water reaches boiling point |
| Boil-dry protection | Yes, automatic shut-off if empty |
| Dimensions (approx.) | 22 x 18 x 25 cm (height includes base) |
| Weight (approx.) | 1.1 kg |
| Color | Stainless steel / Black accents |
| Replacement parts | Limescale filter, lid assembly available |
| Repairability index | 2.5 out of 10 (estimate) |
| Cleaning | Wipe exterior with damp cloth; descale interior with vinegar or citric acid |
Frequently Asked Questions - Livenza CKM1641D DELONGHI
User questions about Livenza CKM1641D DELONGHI
0 question about this device. Answer the ones you know or ask your own.
Ask a new question about this device
Download the instructions for your Kitchen Appliances in PDF format for free! Find your manual Livenza CKM1641D - DELONGHI and take your electronic device back in hand. On this page are published all the documents necessary for the use of your device. Livenza CKM1641D by DELONGHI.
USER MANUAL Livenza CKM1641D DELONGHI

5723510031_00_0718 printed in China
Register Now

www.delonghi.com/register
www.delonghi.com
PRECISION MULTI COOKER
Instructions for use
Keep these instructions
Mode d'emploi
natural_image
Exterior view of a DeLonghi cooking pot with digital display and control knobs (no text or symbols on main body)ELECTRIC CHARACTERISTICS /
CARACTÉRISTIQUES ÉLECTRIQUES /
CARACTERISTICAS ELECTRICAS:
120 V \~ 60 Hz 1350 W


CONTENTS
ELECTRICAL CONNECTION ....4
IMPORTANT SAFEGUARDS ....5
TECHNICAL SPECIFICATION....6
DESCRIPTION OF THE APPLIANCE 6
ASSEMBLY INSTRUCTIONS....6
OPERATION....6
NOTE......6
POT 6
STAND-BY MODE/ACTIVE MODE OF YOUR MULTI COOKER.....6
COOKING GUIDELINES 7
SLOW COOKING....7
OVEN/BAKE 8
BROWN/SAUTÉ....8
STEAM 8
RICE 8
COOKING WITH LOW FUNCTION....8
COOKING WITH MEDIUM FUNCTION....9
COOKING WITH HIGH FUNCTION....10
KEEP WARM FUNCTION ....10
COOKING WITH OVEN/BAKE FUNCTION ....11
COOKING WITH BROWN/SAUTE' FUNCTION....11
COOKING WITH STEAM FUNCTION....12
COOKING WITH RICE FUNCTION....13
CHANGE FUNCTION DURING COOKING PROCESS ALREADY
RUNNING 15
ADJUST TIMER DURING COOKING FUNCTION ALREADY STAR-
TED 15
CLEANING AND MAINTENANCE....16
TROUBLESHOOTING 16
RECIPE 16
ELECTRICAL CONNECTION
Only use a 120 Volt - 60 Hz power supply outlet
NOTICE
This appliance has a polarized plug (one prong is wider than the other).
As a safety feature, this plug will fit into a polarized outlet only one way. If the plug does not fit fully in the outlet, reverse the plug. If it still does not fit, contact a qualified electrician. Do not attempt to defeat this safety feature.
SPECIAL CORD SET INSTRUCTIONS
A short power supply cord is provided to reduce the risk of becoming entangled in or tripping over a longer cord.
Do not use any extension cords.
IMPORTANT SAFEGUARDS
When using an electrical appliance, basic safety precautions should always be followed:
-
READ ALL INSTRUCTIONS
-
THIS PRODUCT IS DESIGNED FOR HOUSEHOLD USE ONLY. DO NOT USE OUTDOORS.
-
Do not touch hot surfaces; use handles or knobs. Extreme caution must be used when handling the pot in hot condition. Always use oven gloves or potholders.
-
To protect against risk of electrical shock, do not immerse the multi cooker housing, cord or plug in water or any other liquid. If housing falls into liquid, unplug the cord from outlet immediately.
DO NOT reach into the liquid.
- To avoid possible accidental injury, close supervision is necessary when any appliance is used by or near children.
- Unplug from outlet when not in use and before cleaning. Allow to cool before putting on or taking off parts.
- Do not operate any appliance with a damaged cord or plug or after the appliance has malfunctioned or has been dropped or damaged in any way or is not operating properly.
Return the appliance to the nearest De'Longhi Customer Service (see Warranty for details) for examination, repair or mechanical or electrical adjustment.
- If the plug heats up, contact a qualified electrician.
- The use of attachments are not recommended by De'Longhi as they may cause fire, electrical shock, or risk of injury.
- Do not use outdoors or anywhere the cord or unit housing might come into contact with water while in use.
- Do not place on or near a hot gas or electric burner, or in a heated oven
- Extreme caution must be used when moving an appliance containing hot oil or other hot liquids.
- Do not use appliance for other than intended use.
- To avoid the possibility of the multi cooker being ac-
cidentally pulled off work area, which could result in damage to the multi cooker or personal injury, do not let cord hang over edge of table or counter top.
- To avoid damage to cord and possible fire or electrocution hazard, do not let cord contact hot surfaces, including a stove.
- Do not use abrasive/aggressive/acid detergent, metal sponges or steel wool to clean the appliance.
- Avoid sudden temperature changes, such as adding refrigerated foods to a heated pot, or pour cold water over hot lid.
- The lid is made of glass and is therefore fragile. Handle with proper care.
- Caution: to reduce the risk of electric shock, cook only in the pot provided, do not use any other metal containers.
- Caution: a heated pot may damage countertops or tables. when removing the hot pot from the multi cooker, do not place it directly on any unprotected surface. Always set the hot pot on a trivet or a rack, or a heatproof surface.
- If the appliance is used on countertop made with solid surface material (e.g. Silestone ^® , Corian ^® , etc.), follow carefully the indications of countertop manufacturer and/or supplier.
- To disconnect, press the On/Off button, and then remove the plug from the wall outlet.
- This appliance is intended for countertop use only.
- WARNING: Spilled food can cause serious burns. Keep appliance and cord away from children. Never drape cord over edge of counter, never use outlet below counter, and never use with an extension cord.
- This product is in compliance with UL and CSA Safety Standards.
SAVE THESE INSTRUCTIONS
WARNING: After having removed the appliance from its packaging, check that all parts are intact.
The lid is made of glass and is therefore fragile. If it is visibly chipped, scored or scratched, it should be replaced.
While using, cleaning or moving the appliance, avoid
slamming or knocking the lid. Do not pour cold liquid onto the glass while the appliance is hot.
WARNING: The accessories for cooking of this appliance are not suitable for food preservation. Avoid leaving for prolonged time acid substances as lemon/orange juice, tomato or vinegar on accessories surface. If left on surfaces for prolonged time these substances may damage and deteriorate the non-stick coating.
TECHNICAL SPECIFICATION
Voltage: 120 V \~ 60Hz
Absorbed power: 1350 W
Overall dimensions: LxPxH 17.7x12.5x11 in (45x32x28 cm)
Weight (including accessories): 13 lb (6kg)
DESCRIPTION OF THE APPLIANCE
A FUNCTION SELECTOR DIAL
B KEEP WARM BUTTON
C TIME/TEMPERATURE DIAL
D START/STOP BUTTON
E RED LIGHT
F KEEP WARM RED LIGHT
G SET TIME/TEMPERATURE BUTTON
H DISPLAY
I POT
L LID
M STEAM RACK
ASSEMBLY INSTRUCTIONS
To use your Multi Cooker:
- Carefully unpack the Multi Cooker.
- Rinse the pot (I), glass lid (L) and steam rack (M) in warm, soapy water. Rinse well and dry thoroughly.
- Wipe all interior and exterior surfaces of the Multi Cooker base with a soft, damp cloth.
- Place pot in the base of the unit.
- Place the lid on top of the pot.
- Plug in power cord. Your Multi Cooker is now ready for use.
OPERATION
Your De'Longhi Multi Cooker cooks food automatically once you set the time and the desired cooking mode. When time expires, the unit automatically switches to the Keep Warm setting (some functions only, check Cooking Guidelines), and the Keep Warm indicator light illuminates.
When cooking time and mode are set, the unit will perform those functions until the cooking time expires or the unit is manually turned off.
NOTE
- The U.S. Department of Agriculture (USDA) recommends that when cooking anything containing meat in a slow cooker mode, the meat should reach 140°F within 2 hours. This ensures that the meat will reach food-safe temperatures in the proper amount of time.
- This is a large-capacity Multi Cooker and it is recommended that you cook with at least 1 qt (1 L) of food in the pot.
- Avoid cooking frozen food. Use fresh room temperature ingredients only.
POT
Your De'Longhi Multi Cooker is provided with removable 6-qt. (5.7 L) aluminum pot with non-stick coating (I).
Dishwasher-safe pot can also be used as a serving dish at the dinner table.
Pouring may be difficult if pot is full or nearly full, so it is recommended that you use a ladle to remove the contents from the pot.
WARNING : The pot provided with your multi cooker is not suitable for stovetop or microwave oven.
Use the pot to cook in the multi cooker only.
STAND-BY MODE/ACTIVE MODE OF YOUR MULTI COOKER
Once appliance is connected to the power supply, the display is illuminated as h00:00m / 000 for 20 seconds. After this time the display backlight is reduced. This is defined as Stand-by mode. Turning Function Selector Dial (A), or press any push buttons, or turning Time/Temperature dial, the display will default to setting of selected function. This is defined as Active mode.
If no operation is taken within 20 seconds, the display backlight is reduced, turning to Stand-by mode.
This condition is valid anytime if no operation is taken within 20 seconds from active mode.
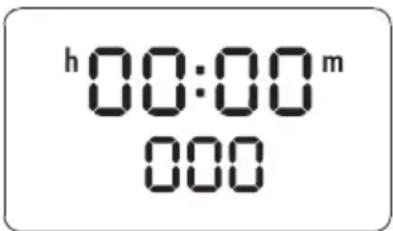
From stand-by mode, if Start/Stop button (D) is pressed one time the control turns into Active mode.
If Start/Stop button is pressed again, the currently selected function is started.
| SLOW COOKER MODE | |||||
| SETTING | DESCRIPTION | RECIPES | FUNCTION TEMPERATURE | TIMER KEEP | WARM |
| LOW | Good for slow cooking recipes or less tender cuts of meats that require longer cooking times to develop full flavor. | Baked egg based puddingsBeef roastBeef rollsBeef short ribsChicken/turkey piecesDressing/stuffingDried beans/lentilsPork roastSoups with less tender cuts of meatStewed chicken | 175°F (80°C) | Default time is h10:00mAdjustable from 15 minutes to 24h, in increments of 15 minutes | Automatically set at end of cooking time, 12h maximum duration |
| MEDIUM | Appropriate for most recipes when there is time for long, slow cooking.It's an ideal setting for food started before going to work in the morning and served for dinner in the evening. | Baked potatoesBeef chuck roastBeef short ribsPork ribsPotato casserolePuddingsRice puddingEgg bakePoached pearsPork chops | 185°F (85°C) | Default time is h08:00m.Adjustable from 15 minutes to 16h, in increments of 15 minutes | Automatically set at end of cooking time, 12h maximum duration |
| HIGH | Try using this setting when a shorter cooking time is desired or for recipes that are typically baked or roasted. | Broth-based soupChicken/turkey piecesRoasted meatsSteamed potatoesWild rice casseroleDumplings | 200°F (93°C) | Default time is h04:00mAdjustable from 15 minutes to 8h, in increments of 15 minutes | Automatically set at end of cooking time, 12h maximum duration |
| KEEP WARM | DO NOT USE THIS FUNCTION TO COOK FOODThis setting is intended to reheat or keep cooked food warm only | All cooked food. Reheating dinner, Soups, etc. Use for keeping foods warm while entertaining. | 150°F (65°C) | Default time is h00:15mAdjustable from 15 minutes to 12h, in increments of 15 minutes | - |
SLOW COOKING
Slow cooking is perfect for foods that require long, slow simmering, such as soups, stocks, stews, and dried beans. Slow cooking is also ideal for specific types of meat such as chuck roasts, short ribs, pork shoulders and lamb shanks.
The Medium and Low settings are usually used for recipes that cook longer.
When starting a dish later in the day, select the High setting to ensure that food is cooked, warm, and ready when you'd like to eat.
| MULTI COOKER MODE | |||||
| SETTING | DESCRIPTION | RECIPES | FUNCTION TEMPERATURE | TIMER KEEP | WARM |
| OVEN/BAKE | Try using this setting for recipes that are typically baked. | Great for cakes and breads. Also ideal for roasting meats, such as beef roast or roasted chicken. | From 300°F to 400°F, in increments of 25°F | Default time is h00:30mAdjustable from 5 minutes to 6h, in increments of 5 minutes | - |
| BROWN/SAUTE' | Use Brown/Saute as you would a sautè pan on the stovetop. Ideal for meat searing or stir frying.It uses high temperatures to cook the outside brown/saute quickly, lock-in in the flavor and juices inside | Ideal for meat searing : Beef short ribs, pot roast, Osso Buco and chicken dishes.Use sauté for creating dishes such as stir-fries, and breakfast foods such as sausage and scrambled eggs. | From 400°F to 450°F, with step 25°F | Default time is h00:01mAdjustable from 1 minute to 1h , in increments of 1 minute | - |
| STEAM | The healthiest methods of cooking a variety of fish and vegetables | Vegetables in general , shrimp , chicken , fish fillets | Default temperature of 212°F (100°C) | Default time is 30 minutesAdjustable from 1 minute to 1h , in increments of 1 minute | - |
| RICE | Add in the pot your desired amount of rice and water. Reference page 15 for rice cooking chart. | Long and Medium grain white rice, Brown and Black rice | Default temperature of 212°F (100°C) | Automatically selected based on rice and water quantity | Automatically set at end of cooking time, 12h default |
OVEN/BAKE
Ideal for recipes that are typically baked. Braised foods, roasts and potatoes.
To reheat foods, use Oven/Bake at 350^ and stir until all ingredients are warmed through. Then switch to Keep Warm until ready to serve.
BROWN/SAUTÉ
Use Brown/Sauté as you would a skillet or sautè pan on the stove-top for a variety of recipes. Prepare a quickly sautèed skillet dish, or brown food right in the pot as the first step in many braised family favorites.
STEAM
Steaming is one of the healthiest methods of cooking. No butter or oil is required and fewer nutrients are lost in the steaming process. One quart of water is used for basic steaming, enough to cook most variety of food.
The steaming rack should be placed in the UP position to raise the food above water.
RICE
The simplest way to cook rice is to place the rice in cooking pot and add appropriate water amount.
Cooking times will vary according to amount of rice and cooking liquid. The electronic control will automatically turn off once the water completely evaporates and rice has been properly cooked.
COOKING WITH LOW FUNCTION
- Place the unit on a clean, dry counter.
- Remove glass lid (L).
- Fill the pot (I) with ingredients.
- Replace lid.
From stand-by mode, turn the Function Selector Dial (A) to select LOW function.
The lower display is switched off, Set Time/Temperature button (G) is disabled.
The upper display defaults to h10:00m flashing, adjust cooking time by turning Time/Temperature dial (C)
Turning clockwise the dial will increase the time by 15 minutes increments, for a maximum set time of h24:00m.
Turning counterclockwise the dial will decrease the time in increments of 15 minutes, till h00:15m.
When adjusting the timer by turning Time/Temperature dial (C), the display will stop flashing.
After 1 second that no selection is made, the display restarts flashing.
Pressing Start/Stop button (D) the selected cooking function is started, upper display will stop flashing, the red light (E) around Start/Stop button will illuminate, cooking time begins.
If Start/Stop button (D) is not pressed within 20 seconds, the control goes into stand-by mode.
h 12:45m
It is possible to stop the function anytime by pressing Start/Stop button (D).
The red light around Start/Stop button (E) will light off, the display will turn to stand-by mode.
Once set time is elapsed, the control stops the function, the red light (E) around Start/Stop button will turn off, the display will show "End" flashing for 5 minutes.
End
While "End" is flashing you can reset the control by pressing Start/Stop button (D).
The control goes into stand-by mode
If no further action is taken after 5 minutes of "End" flashing, the control will automatically switch to Keep Warm function.
Keep Warm red light (F) will illuminate, the red light (E) around Start/Stop button will light on, dots start flashing.
Once Keep Warm function timing is elapsed, the control will turn off and will go into stand-by mode.
COOKING WITH MEDIUM FUNCTION
- Place the unit on a clean, dry counter.
- Remove glass lid (L).
- Fill the pot (l) with ingredients.
- Replace lid.
From stand-by mode, turn the Function Selector Dial (A) to select MEDIUM function.
The lower display is switched off, Set Time/Temperature button (G) is disabled.
The upper display defaults to h08:00m flashing, adjust cooking time by turning Time/Temperature dial (C)
Turning clockwise the dial will increase the time by 15 minutes increments, for a maximum set time of h16:00m.
Turning counterclockwise the dial will decrease the time by 15 minutes increments, till h00:15m.
When adjusting the timer by turning Time/Temperature dial (C), the display will stop flashing.
After 1 second that no selection is made, the display restarts flashing.
Pressing Start/Stop button (D) the selected cooking function is started, upper display will stop flashing, the red light (E) around Start/Stop button will illuminate, cooking time begins.
If Start/Stop button (D) is not pressed within 20 seconds, the control goes into stand-by mode.
h02:15m
It is possible to stop the function anytime by pressing Start/Stop button (D).
The red light around Start/Stop button (E) will light off, the display will turn to stand-by mode.
Once set time is elapsed, the control stops the function, the red light (E) around Start/Stop button will turn off, the display show "End" flashing for 5 minutes.
End
While "End" is flashing you can reset the control by pressing Start/Stop button (D).
The control goes into stand-by mode.
If no any further action is taken after 5 minutes of "End" flashing, the control will automatically switch to Keep Warm function.
Keep Warm red light (F) will illuminate, the red light (E) around Start/Stop button will illuminate, dots start flashing.
Once Keep Warm function timing is elapsed, the control will turn off and will go into stand-by mode.
COOKING WITH HIGH FUNCTION
- Place the unit on a clean, dry counter.
- Remove glass lid (L).
- Fill the pot (I) with ingredients.
- Replace lid.
From stand-by mode, turn the Function Selector Dial (A) to select HIGH function.
The lower display is switched off, Set Time/Temperature button (G) is disabled.
The upper display defaults to h04:00m flashing, adjust cooking time by turning Time/Temperature dial (C).
Turning clockwise the dial will increase the time in increments of 15 minutes, for a maximum set time of h08:00m.
Turning counterclockwise the dial will decrease the time in increments of 15 minutes, till h00:15m.
When adjusting the timer by turning Time/Temperature dial (C), the display will stop flashing.
After 1 second that no selection is made, the display restarts flashing.
Pressing Start/Stop button (D) the selected cooking function is started, the upper display will stop flashing, the red light (E) around Start/Stop button will illuminate, cooking time begins.
If Start/Stop button (D) is not pressed within 20 seconds, the control goes into stand-by mode.
h02:45m
It is possible to stop the function anytime by pressing Start/Stop button (D).
The red light around Start/Stop button (E) will turn off, the display will turn to stand-by mode.
Once set time is elapsed, the control stops the function, the red light (E) around Start/Stop button will turn off, the display show "End" flashing for 5 minutes.

While "End" is flashing you can reset the control by pressing Start/Stop button (D).
The control goes into stand-by mode.
If no further action is taken after 5 minutes of "End" flashing, the control will automatically switch to Keep Warm function.
Keep Warm red light (F) will illuminate, the red light (E) around Start/Stop button will illuminate
Once Keep Warm function timing is elapsed, the control will turn off and will go into stand-by mode.
KEEP WARM FUNCTION
Keep warm automatic selection
Keep Warm function is automatically activated at the end of cooking time of some functions (SEE COOKING GUIDELINES).
Once function timing is elapsed, and "End" message flashes for 5 minutes, the control will turn on automatically to Keep Warm function, the Keep Warm red light (F) and red light (E) around Start/Stop button will be illuminated, and the display will show a time count-up from h00:00m to h12:00m, with 1 minute increment.
h00:12m
If no action is taken, after 12h elapsed the control will turn off and will go into stand-by mode. The Keep Warm red light (F) and red light (E) around Start/Stop button will shut off.
Keep warm manual selection
Keep Warm function can also be manually activated by pressing Keep Warm button (B).
From stand-by mode or active mode (but not during any cooking function already started) function can be activated by pressing Keep Warm button (B).
Keep Warm red light (F) will be illuminated, the display turn in active mode and show h00:15m.
Further pressing of Keep Warm button (B) will disable the function: the control will go into stand-by mode and Keep Warm red light (F) will shut off.
It is also possible to disable the Keep Warm function (if not already started) turning the Function Selector Dial (A): Keep Warm red light
(F) will be turn off and the control will go into active mode, showing default condition for each function for 20 seconds.
After this time the display backlight is reduced to Stand-By mode.
When Keep Warm function is selected you can adjust the Keep Warm time from h00:15m to h12:00m, with step 15 minutes by turning Time/Temperature dial (C).
If Start/Stop button (D) is not pressed within 20 seconds, the control goes into stand-by mode.
Pressing Start/Stop button (D), Keep Warm function starts and the red light (E) around Start/Stop button will illuminate.
h02:45m
Once set time is elapsed, the control will turn off and will go into stand-by mode. The Keep Warm red light (F) and red light (E) around Start/Stop button will turn off.
For both above cases (Manual or Automatic), it is possible to stop the function anytime by pressing Start/Stop button (D). the red light (E) around Start/Stop button and Keep Warm red light (F) will shut off, the display will default to stand-by mode.
COOKING WITH OVEN/BAKE FUNCTION
- Place the unit on a clean, dry counter.
- Remove glass lid (L).
- Fill the pot (I) with ingredients.
- Replace lid.
From stand-by mode, turn the Function Selector Dial (A) to select OVEN/BAKE function.
The upper display will default to h00:30m flashing, than adjust cooking time by turning Time/Temperature dial (C).
Turning clockwise the dial will increase the time by 5 minute increments, for a maximum set time of h06:00m.
Turning counterclockwise the dial will decrease the time by 5 minutes increments, till h00:05m.
When adjusting the timer by turning Time/Temperature dial (C), the display stop flashing.
Pressing Set Time/Temperature button (G), the upper display will stop flashing, and lower display will default to flashing 350°F temperature.
Turning clockwise the dial will increase the temperature, in increments of 25^ F, for a maximum of 400^ F.
Turning counterclockwise the dial will decrease, in increments of 25^ F, to 300^ F.
Pressing Start/Stop button (D) the selected cooking function is started, the red light (E) around Start/Stop button will illuminate.
Now the lower display is switched off, and upper display will alternately show the message "PRE" and "HEAT" cycling.
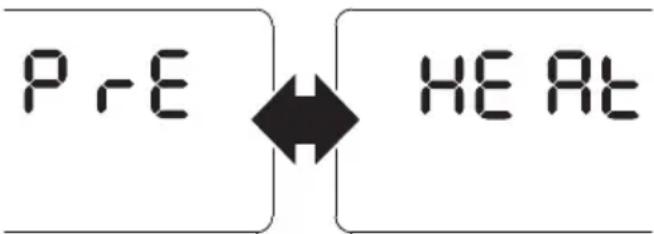
flowchart
graph LR
    A["P rE"] --> B["HE A Rt"]
    B --> C["←"]
Once the pot reaches the target temperature, the upper display will show the time selected, and lower display will show the temperature selected. Now the timer begins countdown.
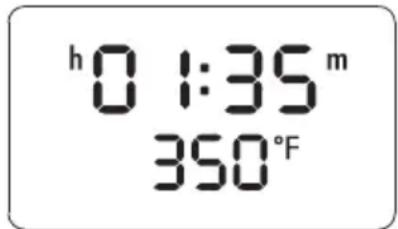
It is possible to change the settings for time and temperature anytime while the cooker is running, by pressing Set Time/Temperature button (G) and turning Time/Temperature dial (C) as previously described.
It is possible to stop the function anytime by pressing Start/Stop button (D). The red light (E) around Start/Stop button will shut off, the display turn to stand-by mode.
Once function timing is elapsed, red light (E) around Start/Stop button will turn off and the display will show "End" flashing for 5 minutes, after that the control will turn off and will go into standby mode.
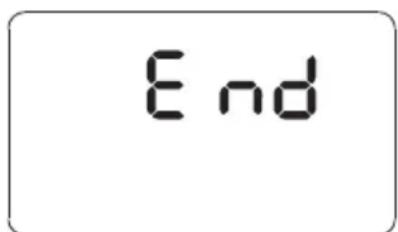
While "End" is flashing you can reset the control by pressing Start/Stop button (D).
COOKING WITH BROWN/SAUTE' FUNCTION
- Place the unit on a clean, dry counter.
- Remove glass lid (L).
- Fill the pot (I) with ingredients.
- Replace lid.
From stand-by mode, turn the Function Selector Dial (A) to select BROWN/SAUTE' function.
The upper display will default to h00:01m flashing, than adjust cooking time by turning Time/Temperature dial (C).
Turning clockwise the dial will increase the time in increments of 1
minute, for a maximum set time of h01:00m.
Turning counterclockwise the dial will decrease the time in increments of 1 minute, till h00:01m.
When adjusting the timer by turning Time/Temperature dial (C), the display will stop flashing.
Pressing Set Time/Temperature button (G), the upper display will stop flashing, and lower display show temperature setting of 400^ F flashing.
Turning clockwise the dial will increase the temperature, in increments of 25^ F, for a maximum temperature of 450^ F.
Turning counterclockwise the dial will decrease in increments of 25^ F, till 400^ F.
When adjusting the temperature by turning Time/Temperature dial (C), the display will stop flashing.
Pressing Start/Stop button (D) the selected cooking function begins, the red light (E) around Start/Stop button will illuminate.
Now the lower display is switched off, and upper display will alternately show the message "PRE" and "HEAT" cycling.

flowchart
graph LR
    A["P r E"] --> B["H E A R t"]
    B --> C["↔"]
Once the pot reaches the target temperature, the upper display will show the time selected, and lower display will show the temperature selected.
Now the timer starts countdown for cooking time.
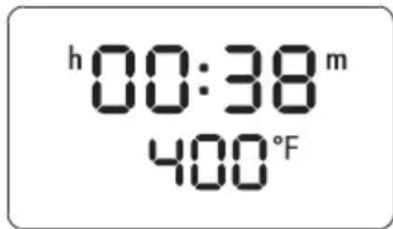
It is possible to change the settings for time and temperature anytime while the function is running, by pressing Set Time/Temperature button (G) and turning Time/Temperature dial (C) as previously described.
It is possible to stop the function anytime by pressing Start/Stop button (D). The red light (E) around Start/Stop button will turn off, the display will default to stand-by mode.
Once function timing is elapsed, red light (E) around Start/Stop button will turn off and the display will show "End" flashing for 5 minutes, after that the control will shut off and will go into standby mode.

When "End" flashes you can reset the control by pressing Start/Stop button (D).
COOKING WITH STEAM FUNCTION
-
Place the unit on a clean, dry counter.
-
Remove glass lid (L).
-
Place the steam rack (M) into the pot (I).
-
Fill the pot with water (about 1Qt maximum).
-
Place the food over the steam rack.
-
Replace lid.
WARNING : Extreme caution should be exercised when using Steam function. Steam generated inside the pot is flowing through steam vent on the lid, and surrounding the lid, that may cause serious burns.
From stand-by mode, turn the Function Selector Dial (A) to select STEAM function.
The lower display is switched off, Set Time/Temperature button (G) is disabled as a default temperature is used for steaming function.
The upper display will default to h00:30m flashing, than adjust cooking time by turning Time/Temperature dial (C).
Turning clockwise the dial will increase the time in 1 minute increments, for a maximum set time of h01:00m.
Turning counterclockwise the dial will decrease the time in 1 minute increments, till h00:01m.
Temperature for this function is automatically defaulted into Steam mode, and not shown.
Pressing Start/Stop button (D) the selected cooking function is started, the red light around Start/Stop button will illuminate, the upper display will alternately show the message PRE and HEAT, cycling.

flowchart
graph LR
    A["P rE"] <--> B["HE A Rt"]
Once the appliance reaches water boiling (about 212^ F / 100^ C) the upper display will show the time selected.
Now the timer begins countdown.
h00:20m
It is possible to stop the function anytime by pressing Start/Stop button (D). The red light (E) around Start/Stop button will shut off, the display will go to stand-by mode.
Once set time is elapsed, red light (E) around Start/Stop button will turn off and the control show "End" flashing for 5 minutes, after that the control will turn off and will go into stand-by mode.
End
When "End" flashes you can reset the control by pressing Start/Stop button (D).
Steam function also incorporates safety control. Once the device detects that the water inside the pot is completely evaporated, the power immediately switches off.
The upper display timer will stop and keeps the time value shown. The triangle Warning symbol is shown fixed on display, and the red light (E) around Start/Stop button flashes.
Lower display will show alternately the message "Fill" and "H2o".
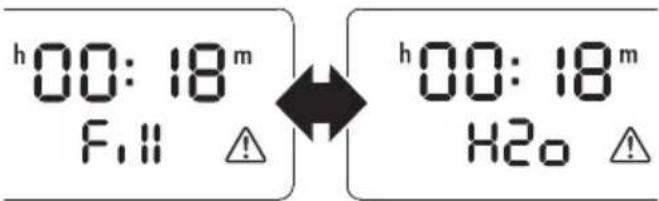
You can refill the pot with water and restart the cooking process by pressing Start/Stop button (D).
Once pressed Start/Stop button (D) the triangle Warning symbol will shut off, the red light (E) around Start/Stop button will illuminate, "Fill" and "H2o" message shutoff, and the countdown restarts.
After Start/Stop button (D) has been pressed :
- if the control detects the pot has been refilled, the control will continue running the function.
- if the control detects that the pot has not been refilled, the control will come back to the warning message, switch off the power.
If Start/Stop button (D) is not pressed during warning mode, after 1 hour the control will turn off into stand-by mode.
Guide for steaming
Steaming is one of the healthiest methods of cooking. No butter or oil is required and fewer nutrients are lost in the steaming process.
One quart (4C) of water is used for basic steaming. Refill the pot during cooking for prolonged time recipes.
RECAP COOKING DIRECTION CHART STILL IN PROGRESS
| FOOD | AMOUNT | PREPARATION COOKING TIME |
| Asparagus 1 pound medium trimmed 4 – 7 minutes | ||
| Broccoli 1 bunch (about 16 to 20 oz.) 2-inch florets 7 – 10 minutes | ||
| Carrots, baby 1 pound whole 10 – 12 minutes | ||
| Cauliflower 1 pound florets 12 – 15 minutes | ||
| Fennels 1 pound quartered | 20 – 25 minutes | |
| Potatoes, new 1 pound quartered/halved | 15 – 20 minutes | |
| Squash, summer/zucchini 1 pound 1⁄2-inch slices | 5 – 8 minutes | |
| Shrimp 1 pound (large) (about 21-25) | peeled & deveined | 4 – 5 minutes |
| Fin Fish (salmon, swordfish, etc.) 1 pound | cut into portion sizes 8 – 12 minutes |
COOKING WITH RICE FUNCTION
- Place the unit on a clean, dry counter.
- Remove glass lid (L).
- Fill the pot (I) with rice and water.
- Replace lid.
WARNING : Extreme caution should be exercised when using Rice function. Steam generated inside the pot is flowing through steam vent on the lid, and surrounding the lid, that may cause serious burns.
From stand-by mode, turn the Function Selector Dial (A) to select RICE function.
The lower display is switched off, Set Time/Temperature button (G) is disabled as a default temperature is used for the Rice function.
The upper display defaults to h00:00m.
Temperature for this function is automatically set to Rice function mode, and not shown.
Pressing Start/Stop button (D) the selected cooking function is started, the red light (E) around Start/Stop button will illuminate, and the display will show a time count-up from h00:00m until the rice has been properly cooked and the water inside the pot is completely evaporated.
h00:20m
It is possible to stop the function anytime by pressing Start/Stop button (D). The red light (E) around Start/Stop button will light off, the display turn to stand-by mode.
Once the appliance detects that the water inside the pot is completely evaporated, the rice has been properly cooked, the control will stop the function, the red light (E) Start/Stop button will shut-off, the display will flash "End".
h00:24 ^m End
While "End" is flashing you can reset the control by pressing Start/Stop button (D).
The control goes into stand-by mode.
If no action is taken after 5 minutes flashing, the control will automatically switch to Keep Warm function.
Keep Warm red light (F) will illuminate, the red light (E) around
Start/Stop button will illuminate, timer will restart from h00:00m.
Once Keep Warm function timing is elapsed, the control will turn off and will go in stand-by mode.
IMPORTANT: Avoid prolonged time in keep warm mode, as rice may overcook as a result. We recommend to not leave rice in cooker for more than 1 hour in keep warm mode.
Guide for Rice Cooking
The easiest way to cook rice is to place the rice in cooking pot and add appropriate water amount.
NOTES :
- Cooking times will vary according to amount of rice, type of rice and cooking liquid.
- For grains and specialty rice, use the chart provided on page 15.
- All rice/grain and water/liquid is measured in a Standard Measuring Cup. Add salt based on your own taste.
• 1 cup of uncooked rice provides 2\~3 servings. - Rinse the standard rice with plenty of running water before cooking. It will remove excess starch for a better final result, with less foam generated during cooking, reducing spill over. It will also reduce the starch film on pot bottom once rice is cooked. Flavored rice and enriched rice shall not be rinsed to avoid flavor spices or added nutrients removal.
• Water quantity may vary slightly based on rice type and brand. - Adjust water quantity based on your own taste if necessary: increase water to get more cooked rice, decrease water to get less cooked rice.
- Brown and Black rice generally needs longer cooking times than white rice.
- Parboiled rice is a process that provides more nutrition than white rice while shortening the time necessary for final preparation, so less water amount shall be used.
- You should not prepare these amounts in smaller or larger quantities than stated in the chart.
- The multi cooker will use less water than the traditional stove top rice preparation. Please consult the recommendations in the table below for some common types of rice.
RECAP COOKING DIRECTION CHART STILL IN PROGRESS
| RICE TYPE | RICE AMOUNT | WATER AMOUNT |
| Long grain white rice | 1 CUP 1 3/4 CUP | |
| 2 CUP 3 CUP | ||
| 3 CUP 4 1/4 CUP | ||
| 4 CUP 6 CUP | ||
| Medium grain white rice | 1 CUP 1 1/2 CUP | |
| 2 CUP 2 1/2 CUP | ||
| 3 CUP 3 1/2 CUP | ||
| Brown rice | 1 CUP 2 1/4 CUP | |
| 2 CUP 3 CUP | ||
| Yellow Spanish rice (Amarillo arroz) | 1 CUP 2 CUP | |
| 2 CUP 3 1/4 CUP | ||
| 3 CUP 4 1/2 CUP | ||
| Arborio | 1 CUP 1 3/4 CUP | |
| 2 CUP 3 CUP | ||
| 3 CUP 4 CUP | ||
| Whole brown rice long grain | 1 CUP 2 1/4 CUP | |
| 2 CUP 3 CUP | ||
| 3 CUP 4 1/2 CUP | ||
| Medium grain white rice enriched | 1 CUP 1 3/4 CUP | |
| 2 CUP 3 CUP | ||
| 3 CUP 4 1/4 CUP |
CHANGE FUNCTION DURING COOKING PROCESS AL-READY RUNNING
During each cooking function already in progress, you can turn the Function Selector Dial (A), changing the cooking function.
This change will vary depending on the function running.
- Changing among LOW/MEDIUM/HIGH functions of Slow Cooker mode:
The display will continue the countdown of time previously selected, if it did not exceed the maximum time of the newly selected function and change the temperature setting to the new function selected. - Changing from LOW / MEDIUM / HIGH functions of Slow Cooker mode to whichever other functions of Multi Cooker mode:
The control immediately stop any cooking function, and display will show "Err" flashing, and Warning symbol.
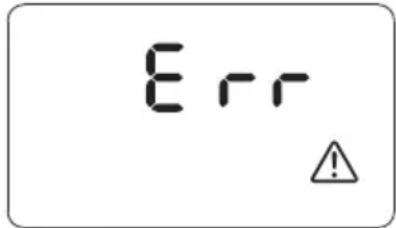
You can reset the error mode by single pressing Start/Stop button (D).
Further pressing of Start/Stop button will start the current new function selected.
If no action is taken, after 20 seconds elapsed the display will stop flashing and will default to stand-by mode.
- Changing among BAKE/ROAST/STEAM/RICE functions of Multi Cooker mode :
The control will immediately stop any cooking function, and display show "Err" flashing, and Warning symbol.
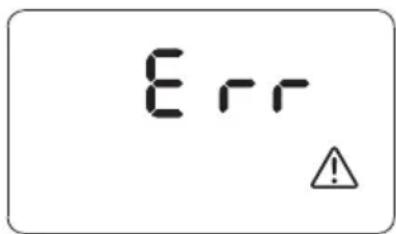
You can reset the error mode by pressing Start/Stop button (D).
Further pressing of the Start/Stop button will start the current function selected.
If no action is taken, after 20 seconds elapsed the display will stop flashing and will default to stand-by mode.
ADJUST TIMER DURING COOKING FUNCTION ALREADY STARTED
During each cooking function already started, you can adjust the timer by pressing Set Time/Temperature button (G) and turning
Time/Temperature dial (C).
As first moving step of Time/Temperature dial (C), the display will start to flash showing actual time.
If no further selection of Time/Temperature dial (C), after 3 seconds the display will stop flashing, confirming the value.
Further selection of Time/Temperature dial (C), the display will show different time value adjustment based on the current running function.
See below examples how the control select the different time values:
For Slow cooker and Keep warm functions
By turning the Time/Temperature dial, the display will show the nearest multiple value of 15 minutes.
01:34 > Turning clockwise the dial > display show 01:45
01:34 > Turning counterclockwise the dial > display show 01:30
03:54 > Turning clockwise the dial > display show 04:00
03:54 > Turning counterclockwise the dial > display show 03:45
02:16 > Turning clockwise the dial > display show 02:30
02:16 > Turning counterclockwise the dial > display show 02:15
If no further moving step of Time/Temperature dial (C), after 3 seconds the display will stop flashing confirming new value.
For Bake functions
By turning the Time/Temperature dial (C), the display will show the nearest multiple value of 5 minutes.
01:34 > Turning clockwise the dial > display show 01:35
01:34 > Turning counterclockwise the dial > display show 01:30
03:52 > Turning clockwise the dial > display show 03:55
03:52 > Turning counterclockwise the dial > display show 03:50
02:16 > Turning clockwise the dial > display show 02:20
02:16 > Turning counterclockwise the dial > display show 02:15
If there is no further moving step of Time/Temperature dial (C), after 3 seconds the display will stop flashing confirming new value.
For Brown sautè, Steam and Functions
Further selection of Time/Temperature dial (C), clockwise or counterclockwise, the display will increase or decrease the time value of 1 minute.
If no further selection of Time/Temperature dial (C), after 3 seconds the display will stop flashing confirming new value.
CLEANING AND MAINTENANCE
Here are a few simple tips to assure your slow cooker gives you years of service.
Pot and lid are dishwasher safe, however De'Longhi recommends hand washing the pot to ensure longer life of the non-stick coating.
- Unplug your Multi Cooker and allow it to cool before cleaning.
- Avoid using abrasive / aggressive products that may damage the pot or the exterior of the appliance.
- Place pot and lid in the dishwasher or wash with warm, soapy water.
- If food sticks to the surface, fill the pot with warm, soapy water and allow to soak before cleaning.
- If scouring is necessary, use a nonabrasive cleanser or liquid detergent with a nylon pad or brush.
- Wipe the inside surfaces of the pot with a soft pad.
TROUBLESHOOTING
Pot detection
The electronic control is able to detect if the pot has been properly fitted in the multi cooker.
This is an important safety feature that ensures your appliance is a properly working.
Once appliance is connected to the power supply, or during any cooking process, if the pot has not properly been added into the appliance (or is removed from the appliance) the control will immediately stop any cooking function, and the display will default to the message below:

Once the pot is properly fitted in the appliance, the warning symbol will immediately go off, and the display will default to:
- stand-by mode if no cooking function was in progress
- the current function if a cooking function was in progress
NOTE: Please note that this error message can be shown if the electronic control detect other kinds of malfunction.
If your pot is already fitted in the appliance and the error is shown on display, verify that the pot is properly and completely fitted in the multi cooker base, adjusting its position by moving.
If the pot was properly fitted, and error message is still on the display, disconnect the appliance from the power supply and contact De'Longhi Customer Service for assistance.
| Multi Cooker will not switch ON or LCD display light has gone out | Check that the power plug is properly inserted into wall outletInsert the power plug into a different outletVerify the circuit breakerIf above solution does not solve the problem, the appliance may have experienced a malfunction.Unplug the appliance from the outlet and contact a De’Longhi customer service for assistance. |
Country-Style Short Ribs Horseradish Cream
Makes 4 servings
Prep: 15 Min
Cook: 3 Hr 10 Min
Total time: 3 Hr 25 Min
Ingredients:
2 lbs short ribs
^3/_4 tsp salt
12 tsp pepper
2 tbsp vegetable oil
1 cup beef broth
2 tbsp Worcestershire sauce
2 Vidalia onions, sliced
1 lb small red potatoes
1 ½ cups sliced carrots
2 garlic cloves, chopped
2 tbsp all-purpose flour
2 tbsp cold water
1 tbsp chopped fresh parsley
^1/_3 cup sour cream
2 tbsp horseradish
1 tbsp Dijon mustard
Directions:
Season the short ribs with 12 tsp salt and 14 tsp pepper. Turn the function dial to Brown/Sauté. Set the timer for 5 minutes and preheat the multi-cooker. Set the temperature to 400^ F. Add the short ribs and oil and cook, turning occasionally, until the ribs are browned, about 5 minutes. Add the broth, Worcestershire, onions, potatoes, carrots, and garlic.
Turn the function dial to High and set the timer for 3 hours. During the last 15 minutes of cooking time, whisk together the flour and water in a small bowl until blended. Add the flour mixture to the short ribs. Cover and cook until the sauce is thickened, and the meat and vegetables are tender. Stir in the parsley.
Meanwhile, to make the horseradish cream, combine the sour cream, horseradish, and mustard in a small bowl. Serve with the short ribs and vegetables.
Pulled Chicken Tacos
Serves 6 (Yield: 6 cups)
Prep: 15 min
Cook: 40 min
Total time: 55 min
Ingredients:
1 3/4 lbs boneless skinless chicken thighs
12 tsp salt
2 tsp olive oil
1 lb tomatillos, husked, rinsed, and cut into wedges
1 onion, sliced
1 (16-oz) jar green salsa
2 jalapeño peppers, finely chopped
2 garlic cloves, chopped
1 (15-oz) can black beans, rinsed and drained
14 cup chopped fresh cilantro
6 (8-inch) tortillas, warmed
Sour cream, chopped fresh cilantro, diced red onion for serving (optional)
Directions:
Sprinkle the chicken with the salt. Turn the function dial to Brown/Sauté. Set the timer for 5 minutes and preheat the multi-cooker. Set the temperature to 350°F. Add the chicken and cook until browned, about 5 minutes. Add the tomatillos, onion, salsa, jalapeños, and garlic. Turn the function dial to oven/bake. Cover and cook until the chicken is fork-tender, about 30 minutes.
Transfer the chicken to a cutting board. With two forks, shred the chicken into small pieces. Stir the chicken and cilantro into the multi-cooker; heat through.
Serve with the warmed tortillas. Top with sour cream, cilantro, and red onion, if using.
Beef Bourguignon
Serves 4 (6 cups)
Prep: 15 min
Cook: 3 hrs 18 min
Total time: 3 hrs 22 min
Ingredients:
6 slices bacon, chopped
1 ½ lbs boneless beef chuck, cut into 3/4-inch pieces
1 onion, chopped
2 garlic cloves, minced
3 tbsp all-purpose flour
1 tbsp tomato paste
1 (14.5-oz) can beef broth
^3/_4 cup dry red wine
1 (10-oz) package cremini mushrooms, halved
2 cups frozen white pearl onions (from a 14.4-oz package)
1 tbsp chopped fresh thyme, or 12 tsp dried thyme
^3/_4 tsp salt
Directions:
Turn the function dial to Brown/Sauté. Set the timer for 5 minutes and preheat the multi-cooker. Set the temperature to 350^ F. Add the bacon and cook until browned, about 5 minutes. Transfer to paper towels to drain; set aside.
Add the beef to the drippings in the multi-cooker and cook, turning occasionally, until browned, about 8 minutes. Add the onion and garlic and cook until softened, about 5 minutes. Stir in the flour and cook 1 minute. Stir in the tomato paste until blended. Add the broth, wine, mushrooms, pearl onions, thyme, salt, and the reserved bacon; bring to a simmer.
Turn the function dial to High on the Slow Cooker function. Set the timer for 3 hours. Cover and cook until the meat and vegetables are fork-tender.
Red Beans and Rice
Serves 8 (10 cups)
Prep: 15 min + soaking time
Cook: 5 hours
Total time: 5 hrs 15 min
Ingredients:
1 lb dried red kidney beans
12 oz andouille sausage, cut into 34 -inch-thick slices
3 ribs celery, chopped
1 onion, chopped
1 green bell pepper, chopped
1 tbsp chili powder
1 tbsp packed brown sugar
1 tsp ground cumin
^3/_4 tsp salt
12 tsp cayenne pepper
4 cups chicken broth
4 cups hot cooked rice
Bring the beans and enough water to cover to a boil in a large saucepan. Boil 2 minutes. Remove from the heat and let stand 1 hour; drain. Alternatively, soak the beans overnight in a large pot of water; drain.
Place the beans, sausage, celery, onion, bell pepper, chili powder, brown sugar, cumin, salt, and cayenne. Add the broth and stir to mix.
Turn the function dial to Medium on the Slow Cooker function. Set the timer for 5 hours. Cover and cook until the beans are fork-tender. Serve with the rice.
Sour Cream Apple Coffee Cake
Prep: 15 min
Cook: 3 hrs
Total time: 3 hrs 15 min
Serves 8
Ingredients:
2 cups all-purpose flour
2 tsp baking powder
2 tsp ground cinnamon
12 tsp baking soda
12 tsp salt
14 tsp ground allspice
^3/4 cup sugar
12 cup sour cream
^1/3 cup canola oil
2 large eggs
1 tsp vanilla extract
^3/_4 cup walnuts, chopped
1 Granny Smith apple, chopped
Directions:
Combine the flour, baking powder, cinnamon, baking soda, salt, and allspice in a large bowl. Whisk together the sugar, sour cream, oil, eggs, and vanilla in a medium bowl. Stir in apple and walnuts. Add the sour cream mixture to flour mixture; stir just until flour mixture is moistened.
Spray a 4 x 8-inch loaf pan with nonstick spray. Scrape the batter into the pan. Spray a sheet of foil with nonstick spray; tightly cover baking dish, coated-side down, with foil.
Pour 2 cups of hot water into the multi-cooker. Place the baking dish in the multi-cooker. Turn the function dial to High on the Slow Cooker setting. Set the timer for 3 hours. Cover and cook until a toothpick inserted in the center comes out clean.
Remove the baking dish from the multi-cooker and cool on a rack 10 minutes. Remove the loaf from the pan. Let cool completely on rack.
- PRECISION MULTI COOKER
- CONTENTS
- ELECTRICAL CONNECTION
- NOTICE
- SPECIAL CORD SET INSTRUCTIONS
- IMPORTANT SAFEGUARDS
- SAVE THESE INSTRUCTIONS
- TECHNICAL SPECIFICATION
- DESCRIPTION OF THE APPLIANCE
- ASSEMBLY INSTRUCTIONS
- OPERATION
- NOTE
- POT
- STAND-BY MODE/ACTIVE MODE OF YOUR MULTI COOKER
- SLOW COOKING
- OVEN/BAKE
- BROWN/SAUTÉ
- STEAM
- RICE
- COOKING WITH LOW FUNCTION
- COOKING WITH MEDIUM FUNCTION
- COOKING WITH HIGH FUNCTION
- KEEP WARM FUNCTION
- Keep warm automatic selection
- Keep warm manual selection
- COOKING WITH OVEN/BAKE FUNCTION
- COOKING WITH BROWN/SAUTE' FUNCTION
- COOKING WITH STEAM FUNCTION
- Guide for steaming
- COOKING WITH RICE FUNCTION
- Guide for Rice Cooking
- NOTES :
- CHANGE FUNCTION DURING COOKING PROCESS AL-READY RUNNING
- ADJUST TIMER DURING COOKING FUNCTION ALREADY STARTED
- For Slow cooker and Keep warm functions
- For Bake functions
- For Brown sautè, Steam and Functions
- CLEANING AND MAINTENANCE
- TROUBLESHOOTING
- Pot detection
- Country-Style Short Ribs Horseradish Cream
- Directions:
- Pulled Chicken Tacos
- Ingredients:
- Beef Bourguignon
- Red Beans and Rice
- Sour Cream Apple Coffee Cake
Brand : DELONGHI
Model : Livenza CKM1641D
Category : Kitchen Appliances