
NVP-1000 - Video projector Naxa - Free user manual and instructions
Find the device manual for free NVP-1000 Naxa in PDF.


| Product Type | 150" Home Theater LCD Projector |
| Brand | Naxa |
| Model | NVP-1000 |
| Dimensions | 203 x 150 x 82 mm |
| Weight | 0.9 kg |
| Power Supply | DC 12V, 3.5A (adapter: AC 100-240V, 50/60Hz) |
| Power Consumption | Operating: 50W; Standby: 0.8W |
| Light Source | LED |
| Projection Size | 30 - 170 inches |
| Display Color | 16.7 million colors |
| Supported Video Resolutions | 1080p, 1080i, 720p, 576i, 480p, 480i |
| Input Ports | HDMI (2), VGA, AV (3.5mm to RCA), USB, Micro SD/TF card |
| USB Support | USB flash drives up to 32GB; file formats: AVI, MOV, MPEG, MP3, JPEG |
| Bluetooth | Yes (for external speakers) |
| Keystone Correction | Yes (trapezoidal adjustment) |
| Focus Adjustment | Yes (manual knob) |
| Zoom | Yes (digital zoom) |
| Remote Control | Included |
| Package Contents | Projector, Remote Control, AC Power Adapter, User Manual |
| Maintenance | Clean with a dry cloth; do not use liquids |
| Safety | Do not look into the light; do not touch lens; disconnect during storms; service only by qualified personnel |
| Spare Parts and Repairability | No user-serviceable parts inside; refer to qualified service personnel |
Frequently Asked Questions - NVP-1000 Naxa
User questions about NVP-1000 Naxa
0 question about this device. Answer the ones you know or ask your own.
Ask a new question about this device
Download the instructions for your Video projector in PDF format for free! Find your manual NVP-1000 - Naxa and take your electronic device back in hand. On this page are published all the documents necessary for the use of your device. NVP-1000 by Naxa.
USER MANUAL NVP-1000 Naxa
150" Home Theater LCD Projector
NVP-1000
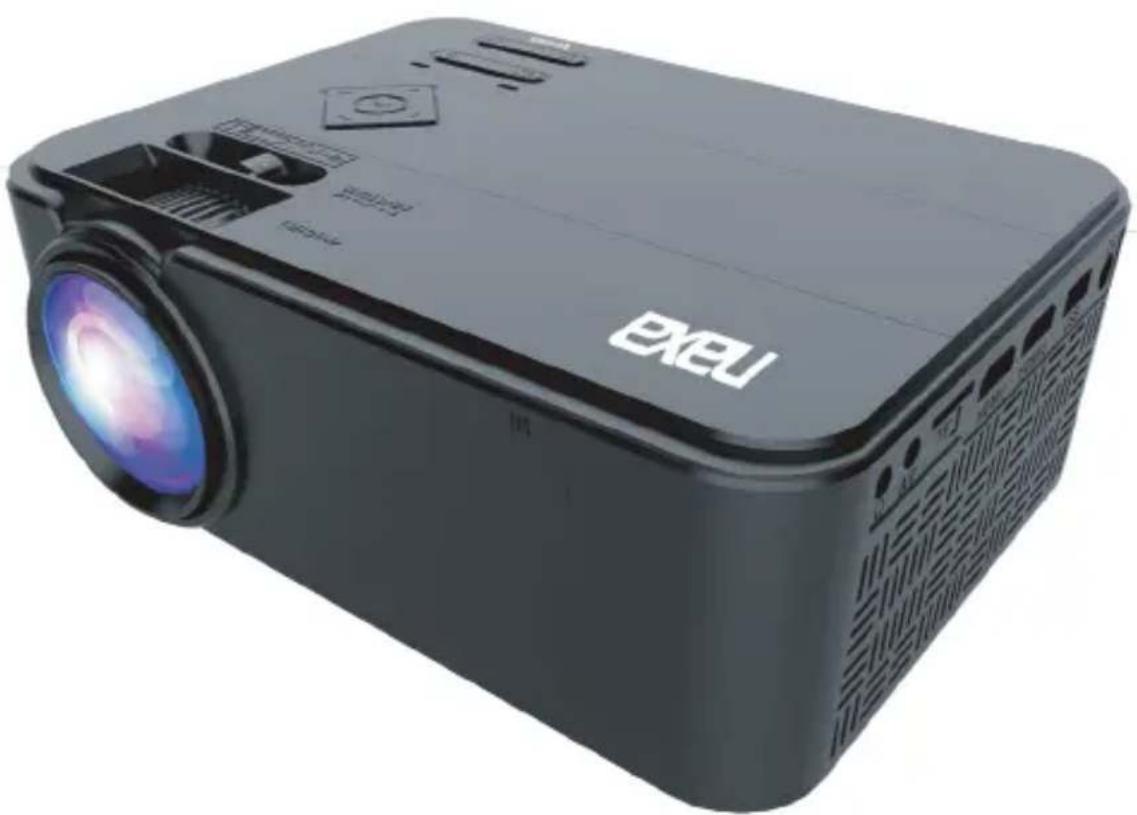
natural_image
Exterior view of a black FXEU projector with visible lens and control panel (no text or symbols on body)User Manual
Please read carefully before using product and keep for future reference
Table of Contents
Introduction....3
Safety Instructions....4
Additional Warnings....5
Package Contents......6
Placing Projector....7
Making Adjustments....8
Remote Overview....9
Projector Overview....10
Main Operation....11
Bluetooth Operation....12
HDMI Operation....14
Audio / Video Input....15
Computer Video (VGA)......16
External Audio....17
Micro SD & USB Inputs....18
Specifications....19
Support....20
Introduction
Congratulations, and thank you for choosing Naxa's 150" Home Theater LCD Projector. This manual will help you operate your new device.
We know you have many choices when it comes to technology; thank you for choosing us here at Naxa Electronics. Established in 2001 in Los Angeles, California, we are dedicated to delivering products that entertain and delight.
We trust that you will be happy with your purchase. Please read this manual carefully and save it for reference. You may also find the latest FAQ, documentation, and other product material at our website. Come visit us on the web at www.naxa.com and see all that we have to offer!
Safety Instructions
- Read these instructions.
- Keep these instructions.
- Heed all warnings.
- Follow all instructions.
- Do not use this apparatus near water.
- Clean only with a dry cloth.
- Do not block any ventilation openings. Install in accordance with the manufacturer's instructions.
- Do not install near any heat sources, such as radiators, heat registers, stoves, or other apparatus (including amplifier) that produce heat.
- Protect the power cord from being walked on or pinched, particularly at plugs, convenience receptacles, and the point where they exit from the apparatus.
- Only use attachments / accessories specified by the manufacturer.
- Unplug this apparatus during lightning storms or when unused for long periods of time.
- Refer all servicing to qualified service personnel. Servicing is required when the apparatus has been damaged in any way, such as power-supply cord or plug is damaged, liquid has been spilled or objects have failed into the apparatus, the apparatus has been exposed to rain or moisture, does not operate normally, or has been dropped.
- Use only with a cart, stand, tripod, bracket, or table specified by the manufacturer or sold with the apparatus. When a cart is used, use caution when moving the cart / apparatus combination to avoid injury from tip-over.
Additional Warnings
- Do not look directly into the projector light.
- Do not touch the projector lens.
- Mains adapter is used as disconnect and it should remain readily operable during intended use. In order to disconnect the apparatus from the mains completely, the mains plug should be disconnected from the mains socket completely.
- CAUTION: Use of controls or adjustments or performance of procedures other than those specified may result in hazardous radiation exposure.
- WARNING: Changes or modified to this unit not expressly approved by the party responsible for compliance could void the user's authority to operate the equipment.
- WARNING: Use of this unit near fluorescent lighting may cause interference regarding use of the remote. If the unit is displaying erratic behavior move away from any fluorescent lighting, as it may be the cause.
- WARNING: Shock hazard - DO NOT OPEN.
- Caution and marking information is located at the rear or bottom of the apparatus.
- WARNING: To reduce the risk of fire or electric shock, do not expose this apparatus to rain, moisture, dripping, or splashing.
- Objects filled with liquids, such as vases, shall not be placed on the apparatus.
Package Contents
natural_image
Exterior view of a black projector with visible lens and control panel (no text or symbols)Projector

Remote control
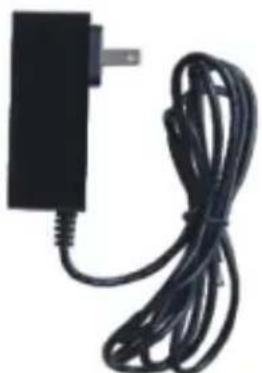
natural_image
Black rectangular power adapter with attached black cable (no text or symbols visible)AC Power Adapter

User manual
Placing Projector
Your projector can be installed in four different configurations (see picture below).
Front Table:
Select this location with the projector placed near the floor in front of the screen. This is the most common way to position the projector for quick setup and portability.

natural_image
Illustration of a group of people seated at a table facing a large screen (no text or symbols visible)FRONT TABLE
Front Ceiling:
Select this location with the projector suspended upside-down from the ceiling in front of the screen.
NOTE: A projector mount is required to install the projector on the ceiling.

natural_image
Illustration of a meeting scene with a speaker at the front and a projection screen above (no text or symbols)FRONT CEILING
Rear Table:
Select this location with the projector placed near the floor behind screen.
NOTE: A special rear projection screen is required.
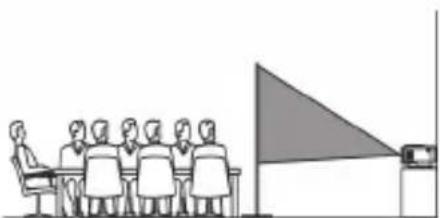
natural_image
Illustration of a meeting scene with a group of people seated at a table facing a large triangular flag (no text or symbols present)REAR TABLE
Rear Ceiling:
Select this location with the projector suspended upside-down from the ceiling behind the screen.
NOTE: A projector mount and a special rear projection screen is required.

natural_image
Illustration of a meeting room with a speaker at the front and a projection screen on the right (no text or symbols)REAR CEILING
Making Adjustments
Follow the pictures below to adjust the focus and trap- ezoidal screen. Adjust the focus by turning the knob while observing the image pixels near the center of the screen. Optimal focus is obtained when the pixels are clearly visible. Depending on the projected screen size, the focus near the screen edges may be less sharp than the screen center.

Keystone image is created when the projector beam is projected to the screen in an angle. Keystone correction will restore the distorted image to a rectangular or square shape.

Control Overview
Power
Press to power ON.
Press and hold to power OFF.
Previous / Next
Press to skip between chapters or tracks.
Stop
Press to stop playback.
Flip
Press to flip display image 180°.
▶|| Play/Pause
Press to play or pause an individual chapter or track.
Arrows/OK
Press to navigate and confirm selections in Settings and other menus.
Menu
Press to access projector Settings.
Go To/Number Keypad
Press to enter specific chapter or track numbers. Use Play button to begin playing.

Mute
Press to mute volume.
◀◀ Back / Fwd ▶▶
Press to search through an individual chapter or track.
VOL+/VOL-
Press to adjust audio level.
Source
Press to select media source (AV, PC, HDMI, MEDIA).
Exit
Press to exit menus.
Zoom
Press to zoom display image in or out.
Projector Overview
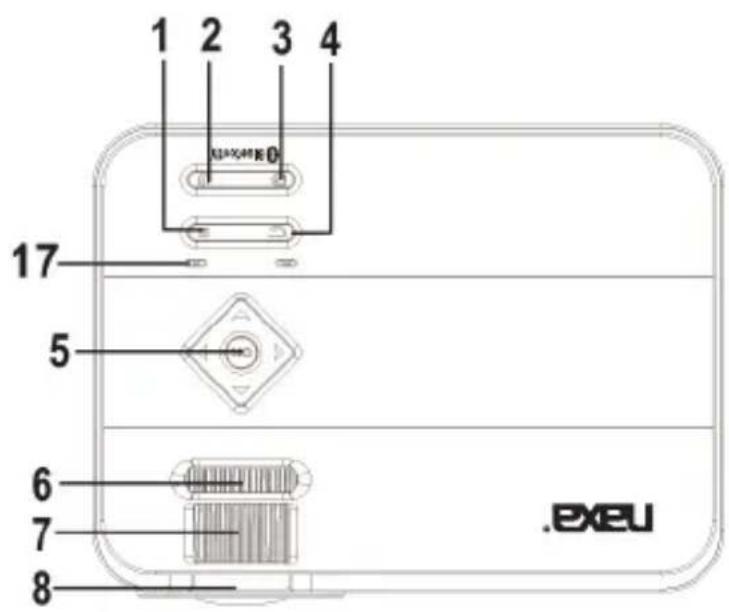
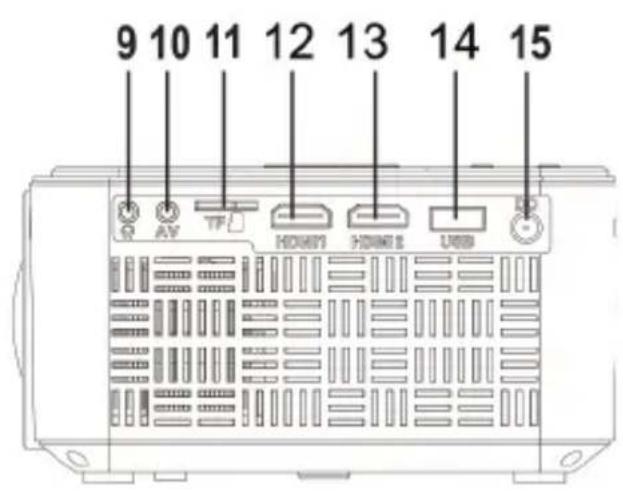


- Menu Button
- Power Button
- Source Button
- Return Button
- Netvigator Button
- Trapezoidal ADJ. Knob
- Focus ADJ. Knob
- Lens
- Earphone Jack
- AV IN Jack
-
TF Card Slot
-
HDMI Port 1
- HDMI Port 2
- USB Port
- DC IN Jack
- VGA Port
- Power On Indicator
- IR Window (rear side)
- IR Window (front side)
- Angel ADJ. Knob
Main Operation
- Press the button to turn on unit, press again to turn off.
S / SOURCE - Press the button to select input source.
M / MENU - Press the button to enter projector menu.
- Press the buttons to select screen item of projector menu.
/ EXIT - Press the button to exit the projector menu.
◀◀/▶▶ - Press the buttons to fast search forward and rewind on USB / TF.
◀◀/▶◀ - Press the buttons to search next or previous file on USB / TF.
VOL+ / VOL - Press the buttons to select correct sound.
- Press the button to play/pause the connect USB / TF card.
FLIP ? Press the button to rotate / mirror projector screen
ZOOM - Press the button to select image scale.
- Press to muting the audio sound of your projector. Press again to resume.
Bluetooth® Operation
Pairing is the term used when two Bluetooth devices are connected wirelessly for the first time. This allows the devices to see each other and sets up a one-to-one communication channel between both devices.
Bluetooth Connection
- Press the Power button to turn on the unit.
- Press the Menu button to enter the menu screen.
- Use the left / right directional arrows to select right side menu.
- Use the up / down directional arrows to select Bluetooth column.
- Press the "OK" button to enter Bluetooth menu.
- Use the lef/right directional arrows to select "ON".
- Turn on your external Bluetooth speaker and select Bluetooth pairing mode.
- A few seconds later, an audio sound will prompt to notify you that the projector and speaker are connected.
- After connecting, the projector will sound through the external Bluetooth speaker.
NOTE: When the BT can't connect to this device automatically, please enter the Bluetooth setup menu and select to resest BT. Then, the BT device will connect to the projector automatically
Disconnecting Bluetooth Device
- Press the Menu button to enter the menu screen.
- Use the left / right directional arrows to select above menu.
- Use the up / down directional arrows to select Bluetooth column.
- Press the "OK" button to enter Bluetooth menu.
- Use the left/right directional arrows to select "OFF" and disconnect Bluetooth.
HDMI Operation
HDMI offers superior sound and picture quality, and is the easiest way to play media from a computer, Blu-Ray player, or other device with an HDMI output.
Requires an HDMI cable (not included) and a device with an HDMI output.
- Using an HDMI cable, connect the HDMI 1 or 2 Input on the projector to the HDMI output on your media player or computer.
- Set the projector's Source to the connected HDMI Input and use the controls on the connected device to select and play media.

flowchart
graph TD
    A["Computer"] -->|Connect to HDMI on laptop or PC.| B["Hardware"]
    C["Hardware"] -->|Connect to HDMI on DVD, Blu-Ray, or other source.| B
    B -->|Data Link| A
Audio / Video Input
Requires a 3.5mm to RCA audio / video cable.
- Connect the 3.5mm to RCA audio video cable to the AV input on the projector.
- Connect the 3.5mm to RCA audio / video cable tot he RCA stereo audio outputs and composite video output on the media player.
- Set the projector's Source to AV and use the control on the connected player to select and play media.
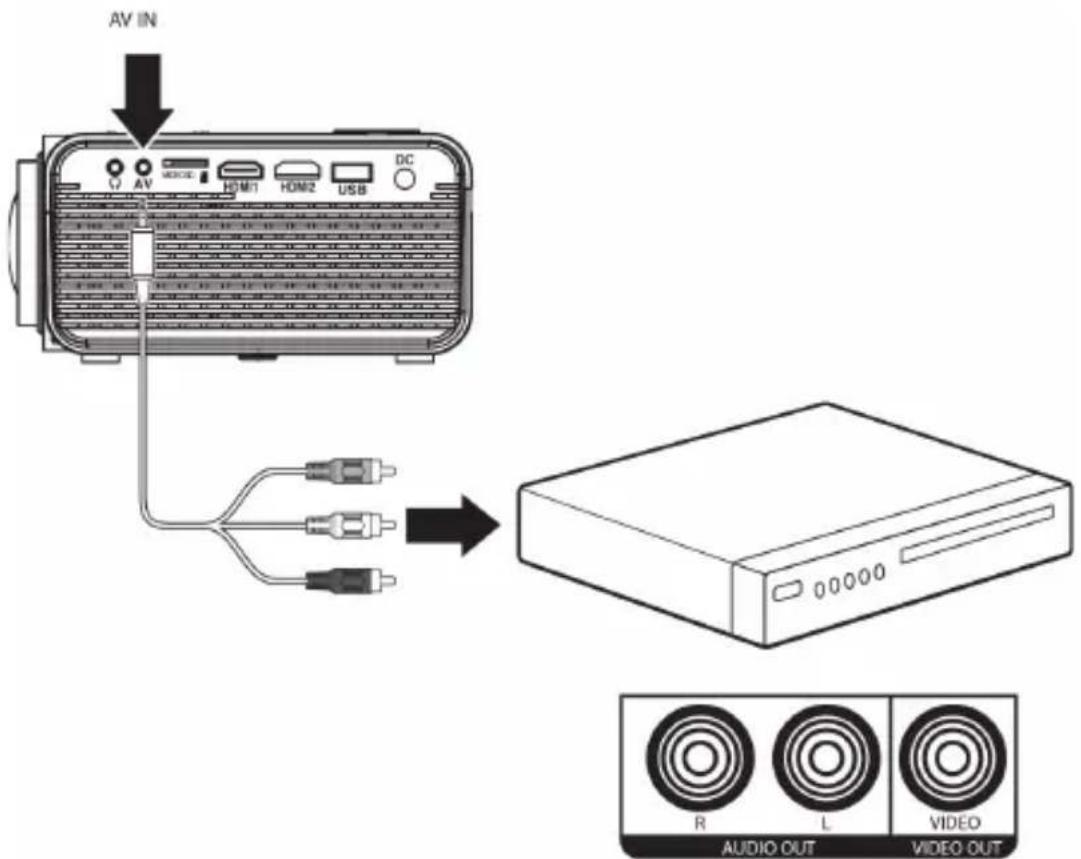
Connect AV cable (included) to media player's AV outputs. Audio Left Channel - White Audio Right Channel - Red Video - Yellow
Computer Video (VGA)
NOTE: VGA connections do not support audio. You will need to use the computer's speakers to hear audio.
Requires a VGA cable (not included) and a desktop PC or laptop with a VGA output.
- Using a VGA cable, connect the VGA Input on the projector to the VGA output on your computer.
- Set the projector's Source to PC and use the controls on the computer to select and play media.

flowchart
graph TD
    A["Laptop with built-in speakers"] -->|PC with connected speakers| B["PC"]
    B --> C["VGA Input"]
    C --> D["air conditioner"]
External Audio
NOTE: Speakers must have their own power supply.
Requires a 3.5mm to RCA audio / video cable.
-
Using a 3.5mm to RCA stereo cable, connect the external powered speakers to the headphone jack on the projector.
-
The projector will automatically detect the connection and send audio signal to the speakers.

flowchart
graph TD
    A["Speaker"] --> B["Audio Left Channel - White"]
    A --> C["Audio Right Channel - Red"]
    A --> D["Video (Yellow) plug will NOT be used."]
    B --> E["Headphone Jack"]
    C --> E
    D --> E
    E --> F["Device with USB port"]
    style A fill:#f9f,stroke:#333
    style B fill:#ccf,stroke:#333
    style C fill:#ccf,stroke:#333
    style D fill:#ccf,stroke:#333
    style E fill:#dfd,stroke:#333
Micro SD & USB Inputs
Supports Micro SD cards and USB flash drives up to 32GB.
Supports AVI, MOV file formats.
- Load a USB drive into the USB port.
- Set the Source to Media Player, then use the arrow buttons to select "C:Drive" or "D:Drive" (C;Drive is the SD card, D:Drive is the USB).
- Use the arrow buttons to select Music / Photo / Movie, then press the "OK" button to begin playing content from the connected storage device.

Specifications
| Light Source Type LED | |
| HDMI Input Supported Video Resolution | 1080p, 1080o, 720p, 576i, 480p, and 480i |
| Power Consumption Operating | 50W; Standby 0.8W |
| Power Input Connect Included Adapter | DC 12V, 3.5A |
| Included Adapter Connect DC Input of Unit | Input: AC 100-240V, 50/60Hz Output: DC12V, 3.5A |
| Display Color 16.7K | |
| Projection Size 30-170 Inch | |
| Signal Port Video / VGA / H | DMI / TF Card |
| USB Port Supports USB device up to 10000 GB Supports mpeg1, Mpeg2, mpeg3, mp3, jpeg | |
| Weight 0.9 KG | |
| Dimension 203 x 150 x 82 mm | |
Support
If you have problems with your device, please consult the instructions in this manual. Please also visit us on the web at www.naxa.com to get up to the minute news, alerts, and documentation for your device. For additional assistance, please contact Naxa Technical Support.
NAXA Technical Support
2320 East 49th St. Vernon, CA 90058
http://www.naxa.com/naxa_support/
MADE IN CHINA


- 150" Home Theater LCD Projector
- User Manual
- Table of Contents
- Introduction
- Safety Instructions
- Additional Warnings
- Package Contents
- Placing Projector
- Front Table:
- Front Ceiling:
- Rear Table:
- Rear Ceiling:
- Making Adjustments
- Control Overview
- Power
- Previous / Next
- Stop
- Flip
- ▶|| Play/Pause
- Arrows/OK
- Menu
- Go To/Number Keypad
- Mute
- ◀◀ Back / Fwd ▶▶
- VOL+/VOL-
- Source
- Exit
- Zoom
- Projector Overview
- Main Operation
- Bluetooth® Operation
- Bluetooth Connection
- Disconnecting Bluetooth Device
- HDMI Operation
- Audio / Video Input
- Computer Video (VGA)
- External Audio
- Micro SD & USB Inputs
- Support
- NAXA Technical Support
Brand : Naxa
Model : NVP-1000
Category : Video projector