EF36IWFSS - Refrigerator Dacor - Free user manual and instructions
Find the device manual for free EF36IWFSS Dacor in PDF.


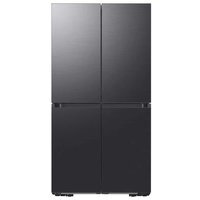
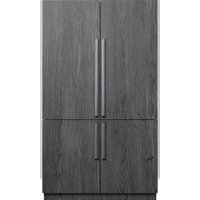
| Product Type | Bottom-Freezer French Door Refrigerator |
| Brand | Dacor |
| Model | EF36IWFSS |
| Width | 36 inches (typical) |
| Depth | Approx. 30 inches (counter-depth) |
| Height | Approx. 70 inches |
| Weight | Approx. 350 lbs |
| Power Supply | 115 V, 60 Hz, 15-20 A, dedicated circuit recommended |
| Refrigerator Capacity | Approx. 14-16 cu ft (estimated) |
| Freezer Capacity | Approx. 5-6 cu ft (estimated) |
| Control Panel | Touch pad with digital display, multiple modes (Max Cool, Sabbath, Vacation, etc.) |
| Ice Maker | Built-in, automatic, located in refrigerator compartment |
| Water Dispenser | Internal dispenser with filter, water and cubed ice |
| Water Filtration | Internal filter, replacement cartridge AFF3, capacity 750 gal |
| Shelving | Spill-proof glass shelves, adjustable, slide-out |
| Crisper Drawers | 2 humidity-controlled crisper drawers with fruit/vegetable settings |
| Deli Drawer | Full-width deli drawer with adjustable temperature control |
| Door Storage | Dairy center, adjustable door buckets |
| Lighting | LED interior lights, auto-dispense light with sensor |
| Care Instructions | Monthly cleaning with mild detergent; stainless steel polish recommended |
| Safety Features | Door alarm, temperature alarm, child lock on dispenser, grounding requirements |
| Warranty | 1 year full, 2-5 years limited on sealed system |
| Spare Parts | Water filter AFF3, handle kits (Epicure, Millennia), light bulbs (40W max) |
| Repairability | Sealed refrigeration system; service by authorized Dacor provider |
| Certifications | NSF/ANSI 42 & 53 for water filter; CSA for electrical |
Frequently Asked Questions - EF36IWFSS Dacor
User questions about EF36IWFSS Dacor
0 question about this device. Answer the ones you know or ask your own.
Ask a new question about this device
Download the instructions for your Refrigerator in PDF format for free! Find your manual EF36IWFSS - Dacor and take your electronic device back in hand. On this page are published all the documents necessary for the use of your device. EF36IWFSS by Dacor.
USER MANUAL EF36IWFSS Dacor
natural_image
Line drawing of a refrigerator with front door, side panels, and side legs (no text or symbols)Handle style varies.
Table of Contents
Refrigerator Safety 1
Important Information 2
Before Use 2
Refrigerator Operation 2-10
Care and Cleaning 11
Before You Call for Service 12-13
Warranty and Service 14
Notes 15-16
Francis 17-34
Warranty Card ....Back Cover

To Our Valued Customer: Our unique combination of features, style and latest in Dacor® products! Our unique combination of features, style and home.
Congratulations on your purchase of the very latest performance make us The Life of the Kitchen™, and a great addition to your new Distinctive Appliance section.
In order to familiarize yourself with the controls, family care and care manual thoroughly, beginning with the Important Safety Instruction. The use and care manual thoroughly, beginning with the All Dacor appliances are designed and manufactured with quality and pride, while working within the framework of our company value. Should you ever experience a problem with your product, please first check the Before You Call for guidance of this manual for guidance. It provides useful suggestions and remedies prior to calling for service.
Service section of the 1998-2000s is to continuously improve our products and services.
Valuable customer input helps us to confirm your Customer Service Team for assistance with any of your product service.
Customer Service Team
Dacor Customer Blvd Suite 1000
600 Anton Blvd.
Costa Mesa, CA 92620
(800) 793-0093
Telephone: (626) 403-3130
Fax: Monday through Friday
Hours of Operation: Monday to 5:00 P.M. Pacific Time
6:00 A.M. 10 5.0
Web Site:
Thank you for choosing Dacor for your home. We are confident that your new Dacor product will deliver a high level of enjoyment for many years to come.
Sincerely,
The Dacon Customer Service Team
Refrigerator Safety
Your safety and the safety of others are very important.
We have provided many important safety messages in this manual and on your appliance. Always read and obey all safety messages.

This is the safety alert symbol.
This symbol alerts you to potential hazards that can kill or hurt you and others.
All safety messages will follow the safety alert symbol and either the word "DANGER" or "WARNING."
These words mean:
DANGER
WARNING
You can be killed or seriously injured if you don't immediately follow instructions.
You can be killed or seriously injured if you don't follow instructions.
All safety messages will tell you what the potential hazard is, tell you how to reduce the chance of injury, and tell you what can happen if the instructions are not followed.
IMPORTANT SAFETY INSTRUCTIONS
WARNING: To reduce the risk of fire, electric shock, or injury when using your refrigerator, follow these basic precautions:
■ Plug into a grounded 3 prong outlet.
■ Do not remove ground prong.
■ Do not use an adapter.
■ Do not use an extension cord.
■ Disconnect power before servicing.
■ Remove doors from your old refrigerator.
■ Replace all parts and panels before operating.
■ Use nonflammable cleaner.
- Keep flammable materials and vapors, such as gasoline, away from refrigerator.
■ Use two or more people to move and install refrigerator.
■ Disconnect power before installing ice maker (on ice maker kit ready models only).
■ Use a sturdy glass when dispensing ice (on some models).
SAVE THESE INSTRUCTIONS
Proper Disposal of Your Refrigerator
WARNING
Suffocation Hazard
Remove doors from your old refrigerator.
Failure to do so can result in death or brain damage.
IMPORTANT: Child entrapment and suffocation are not problems of the past. Junked or abandoned refrigerators are still dangerous, even if they sit out for "just a few days." If you are getting rid of your old refrigerator, please follow the instructions below to help prevent accidents.
Before you throw away your old refrigerator or freezer:
Take off the doors. ■
Leave the shelves in place so children may not easily climb ■ inside.

natural_image
Line drawing of a cabinet with multiple doors and shelves (no text or symbols)Important Information
Installer: Please leave this guide with this appliance.
Consumer: Please read and keep this use and care manual for future reference. This guide provides proper use and maintenance information. Keep this guide and the sales receipt and/or cancelled check together for future reference. Proof of original purchase date is needed for warranty service.
For warranty and service information, see page 14.
If you have any questions (other than warranty questions), call:
Dacor Customer Service
(800) 793-0093 (U.S.A. and Canada)
Monday — Friday 6:00 A.M. to 5:00 P.M. Pacific Time
Web site: www.Dacor.com
Have the complete model and serial number identification of your refrigerator ready. These numbers are found on a label located on the inside wall of the refrigerator compartment. Record these numbers on this page for easy access.
Model Number
Serial Number
Date of Purchase
In our continuing effort to improve the quality and performance of our products, it may be necessary to make changes to the appliance without revising this guide.
IMPORTANT: If you receive a damaged product, immediately contact your dealer or builder. Do not install or use a damaged appliance.
Before Use
Remove the Packaging
Remove tape and glue residue from surfaces before turning on the refrigerator. Rub a small amount of liquid dish soap over the adhesive with your fingers. Wipe with warm water and dry.
Do not use sharp instruments, rubbing alcohol, flammable fluids or abrasive cleaners to remove tape or glue. These products can damage the surface of your refrigerator. Dispose of/recycle all packaging materials.
Clean Before Using
■ After you remove all of the packaging materials, clean the inside of your refrigerator before using it. See the cleaning instructions in the Care and Cleaning section.
Important information to know about glass shelves and covers:
Do not clean glass shelves or covers with warm water when they are cold. Shelves and covers may break if exposed to sudden temperature changes or impact, such as bumping. Tempered glass is designed to shatter into many small, pebble-size pieces. This is normal. Glass shelves and covers are heavy. Use both hands when removing them to avoid dropping.
Refrigerator Operation
WARNING

Electrical Shock Hazard
Plug into a grounded 3 prong outlet.
Do not remove ground prong.
Do not use an adapter.
Do not use an extension cord.
Failure to follow these instructions can result in death, fire, or electrical shock.
WARNING

Explosion Hazard
Keep flammable materials and vapors, such as gasoline, away from refrigerator.
Failure to do so can result in death, explosion, or fire.
Plug the refrigerator into a grounded 3-prong electrical outlet.
A 115 Volt, 60 Hz., AC only 15 or 20 Amp. fused, grounded electrical supply is required. It is recommended that a separate circuit serving only your refrigerator be provided. Use an outlet that cannot be turned off by a switch. Do not use an extension cord.
Refrigerator Operation

Setting the Controls
The control panel is located on the front of the ice and water dispenser.
To access the main control menu, press any of the four touch pads located on either side of the display. Then, touch the pad next to the desired option or user setting to access the various features.
IMPORTANT:
Press only the touch pads next to your selection on the display screen, not the selection itself.
Wait 24 hours for your refrigerator to cool completely before ■ adding food. If you add food before the refrigerator has cooled completely, your food may spoil.
■Adjusting the refrigerator and freezer temperature controls to a colder than recommended setting will not cool the compartments any faster.
■The recommended settings should be correct for normal household refrigerator use. The controls are set correctly when milk or juice is as cold as you like and when ice cream is firm.
■If the temperature is too warm or too cold in the refrigerator or freezer, first check the air vents to be sure they are not blocked before adjusting the controls.
Turning Cooling On or Off
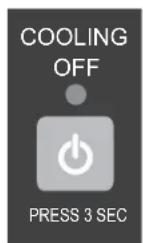
COOLING OFF controls all cooling functions, the control panel and the dispenser. It does not disconnect power to the refrigerator.
■ Press and hold the COOLING OFF touch pad for three seconds. The LED will light up to indicate that cooling is off. Neither compartment will cool.
■ Press the COOLING OFF touch pad again to turn on the cooling. The LED will turn off.
NOTE: At times, the front of the refrigerator cabinet may be warm to the touch. This condition is normal and helps prevent moisture from condensing on the cabinet. This condition will be more noticeable when the refrigerator is first started, during hot weather and after excessive or lengthy door openings.
Temperature Controls
For your convenience, your temperature controls are preset at the factory. When you first install your refrigerator, make sure the controls are still set to the recommended set points.
Press the touch pad next to "FRESH FOOD TEMP" on the main menu to display the current set point of the compartment. Press the touch pad next to "WARMER" or "COLDER" to adjust the set point to the recommended 38°F. Press the touch pad next to "Done" to lock in the setting.
Press the touch pad next to "FREEZER TEMP" on the main menu to display the current set point of the compartment. Press the touch pad next to "WARMER" or "COLDER" to adjust the set point to the recommended 0°F. Press the touch pad next to "Done" to lock in the setting.
To Adjust Set Point Temperatures:
If you need to adjust the temperature in either the refrigerator or freezer compartment, use the settings listed in the chart as a guide. The display will show the set point for approximately 3 seconds.
Press the touch pad next to "WARMER" or "COLDER" to adjust the set point to the desired temperature. Then, press the touch pad next to "Done" to lock in the new set point temperature.
NOTE: Except when first turning on the refrigerator, do not adjust either temperature control more than one setting at a time. Wait 24 hours for the temperature to stabilize between adjustments.
| CONDITION/REASON: ADJUSTMENT: | |
| REFRIGERATOR too warm FRESH | FOOD Control1° lower |
| FREEZER too warm/too little ice | FREEZER Control1° lower |
| REFRIGERATOR too cold FRESH | FOOD Control1° higher |
| FREEZER too cold FREEZER Control | 1° higher |
Refrigerator Operation

flowchart
graph TD
    A["Display touch pads"] --> B["COOLING OFF"]
    A --> C["LOCKED"]
    A --> D["PREM. DISPRESS (NE)"]
    A --> E["DISPENSE WATER"]
    A --> F["AUTO"]
    A --> G["ON"]
Control Panel
Setting the Controls (Continued)
Door Alarm
The Door Alarm feature sounds an audible alarm every few seconds when the either refrigerator door has been left open for three continuous minutes. The alarm will sound until the door is closed or Door Alarm is turned off.
On the main menu, press the touch pad next to "Options."1.
Press the touch pad next to "Door Alarm Is On" to switch 2. between ON and OFF. Press the touch pad next to "Done" to lock in the desired setting and return to the main menu.
Humidity Control
The humidity control feature turns on a heater to help reduce moisture on the door hinge seal. Use in humid environments or when you notice moisture on the door hinge seal. The refrigerator uses more energy when Humidity Control is on.
On the main menu, press the touch pad next to "Options."1.
Press the touch pad next to "Humid Ctrl Is On" to switch 2. between ON and OFF. Press the touch pad next to "Done" to lock in the desired setting and return to the main menu.
Vacation Mode
The vacation mode feature decreases the number of automatic defrost cycles. Once set, vacation mode will remain on until a door is opened or the feature is turned off on the control panel.
NOTE: Door openings are ignored for the first hour after Vacation mode is activated.
On the main menu, press the touch pad next to "Options."1.
In each of the following screens, continue to press the touch 2. pad next to "More Options" until "Vac. Mode is Off" appears on the display.
Press the touch pad next to "Vac. Mode is Off" to switch 3. between ON and OFF. Press the touch pad next to "Done" to lock in the desired setting and return to the main menu.
Max Cool
The Max Cool feature assists with periods of high refrigerator or freezer use, full grocery loads, or temporarily warm room temperatures by lowering the freezer and refrigerator to the minimum temperatures.
On the main menu, press the touch pad next to "Options." 1.
In each of the following screens, continue to press the touch 2. pad next to "More Options" until "Max Cool is Off" appears on the display.
Press the touch pad next to "Max Cool is Off" to switch 3. between ON and OFF. Press the touch pad next to "Done" to lock in the desired setting and return to the main menu.
NOTE: The Max Cool feature will automatically shut off in approximately 2 hours.
Sabbath Mode
The Sabbath mode feature turns off all lights, disables the water and ice dispenser, disables all alarms and tones, disables the automatic defrost feature and disables the control panel. While the refrigerator is operating in Sabbath mode, any touch of the control panel will display the Sabbath mode control which will allow you to turn off the Sabbath mode feature.
Turn Sabbath mode on:
On the main menu, press the touch pad next to "Options."1.
In each of the following screens, continue to press the touch 2. pad next to "More Options" until "Sabbath Is Off" appears on the display.
Press the touch pad next to "Sabbath Is Off" to switch between 3. ON and OFF. Press the touch pad next to "Done" to lock in the desired setting and return to the main menu.
Temp Alarm
The Temp Alarm feature alerts you if the temperature exceeds normal operating temperatures, for an hour or longer, in either or both the refrigerator and freezer compartments. An audible alarm will sound repeatedly and the highest temperature reached in each compartment will be displayed.
NOTE: Touch any pad on the control panel to turn off the audible alarm. Temp Alarm will automatically reset once the warm condition has been corrected for 30 minutes.
On the main menu, press the touch pad next to "Options."1.
In each of the following screens, continue to press the touch 2. pad next to "More Options" until "Temp Alarm Is Off" appears on the display.
Press the touch pad next to "Temp Alarm Is Off" to switch 3. between ON and OFF. Press the touch pad next to "Done" to lock in the desired setting and return to the main menu.
Refrigerator Operation
Replace H2O Filter
See Water Filtration System (page 9).
Language
The language preference allows you to change the control panel display to English, French or Spanish.
On the main menu, press the touch pad next to "User 1. Settings."
Press the touch pad next to "Select Language."2.
Press the touch pad next to either "Mettre En Français" or 3. "Cambiar En Español." Press the touch pad next to "Confirm" to lock in the setting and return to the main menu.
Temperature Display
The temperature display preference allows you to change the control panel display from degrees Fahrenheit to degrees Celsius.
On the main menu, press the touch pad next to "User 1. Settings."
Press the touch pad next to "Fahrenheit Is On" to switch 2. between Fahrenheit and Celsius. Press the touch pad next to "Done" to lock in the desired setting and return to the main menu.
Display Brightness
The Display Brightness preference adjusts the backlight level of the control panel.
On the main menu, press the touch pad next to "User 1. Settings."
In each of the following screens, continue to press the touch 2. pad next to "More Settings" until "Display Brightness" appears on the display.
Press the touch pad next to "Lighter" or "Darker" to adjust the 3. setting between 1 (darkest) and 5 (lightest). Press the touch pad next to "Done" to lock in the desired setting and return to the main menu.
Adjust Light Sensor
The “Adjust LiteSensor” preference allows you to adjust the level at which the Light Sensor will detect darkness and activate the Auto On mode for the dispenser light.
On the main menu, press the touch pad next to "User 1. Settings."
In each of the following screens, continue to press the touch 2. pad next to "More Settings" until "Adjust LiteSensor" appears on the display.
Press the touch pad next to "Lighter" or "Darker" to adjust the 3. setting between 1 (darkest) and 9 (lightest). Press the touch pad next to "Done" to lock in the desired setting.
Alarm Sound
The alarm sound preference allows you to turn off any audible alarms (door open, too warm etc.) when quick and simple remedies are not possible. It will not disable alarm features or visual displays.
On the main menu, press the touch pad next to "User 1. Settings."
In each of the following screens, continue to press the touch 2. pad next to "More Settings" until "Alrm Sound Is On" appears on the display.
Press the touch pad next to "Alrm Sound Is On" to switch 3. between ON and OFF. Press the touch pad next to "Done" to lock in the desired setting and return to the main menu.
Dispenser Lock, Dispenser and Dispenser Light
See the Ice and Water section on page 7.
Refrigerator Compartment
Opening and Closing Doors
There are two refrigerator compartment doors. The doors can be opened and closed either separately or together. There is a vertically-hinged seal on the left refrigerator door.
When the left side door is opened, the hinged seal automatically folds inward so that it is out of the way.
When both doors are closed, the hinged seal automatically ■ forms a seal between the two doors.

Refrigerator Operation
Refrigerator Compartment (Continued)
Shelves
Important information to know about glass shelves and covers:
Do not clean glass shelves or covers with warm water when they are cold. Shelves and covers may break if exposed to sudden temperature changes or impact, such as bumping. Tempered glass is designed to shatter into many small, pebble-size pieces. This is normal. Glass shelves and covers are heavy. Use both hands when removing them to avoid dropping.
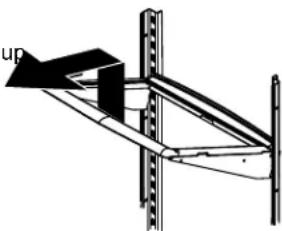
Your refrigerator has spill-proof glass shelves. The spill-proof shelves have a spill retainer edge which allows for easier clean up and are equipped with a slide out feature. To slide out, grasp the front of the shelf and pull forward. Push in the shelf to return to the original position.
To remove a shelf:
Slightly tilt u ■ p the front and lift up the rear of the shelf, then pull the shelf straight out.
natural_image
Technical line drawing of a mechanical assembly with no visible text or symbolsTo lock the shelf into another position:
■ Tilt up the front edge of the shelf.
■Insert the hook into the desired frame openings and let the shelf settle into place.
■ Be sure the shelf is securely locked at the rear.
Door Storage
Dairy Center
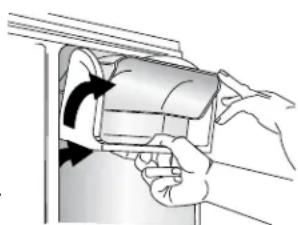
The dairy center provides convenient door storage for spreadable items such as butter and margarine. This compartment can be moved to different locations to accommodate storage needs. To use the dairy center, raise the cover.
To remove:
■Raise the cover, pull upward and tilt out.
To install:
■Slide the dairy center in and down until firmly seated in the door liner.
natural_image
Illustration of hands installing or adjusting a mechanical component (no text or symbols visible)Door Buckets
Door buckets can be moved to meet storage needs.
To remove:
■Slide the bucket up and pull straight out.
To install:
■Slide the bucket in and down until firmly seated in the door liner.

natural_image
Diagram of a mechanical device with a black arrow pointing to a container (no text or symbols present)Crisper Drawers
The crisper drawers provide a higher humidity environment for fresh fruit and vegetable storage.
Controls
The crisper controls regulate the amount of humidity in the crisper drawer. Slide the control toward the FRUIT setting for produce with outer skins. Slide the control toward the VEGETABLES setting for leafy produce.
Vegetables
Fruit
To remove:
Pull the drawer out to full extension. Tilt up the front of the ■ drawer and pull it straight out.
To install:
Insert the drawer into the frame rails and push it back into ■ place.
NOTE: For best results, keep the crisper drawers tightly closed.
Deli Drawer
The deli drawer is a full-width drawer with adjustable temperature control. This drawer can be used for large party trays, deli items, beverages or miscellaneous items. There is a divider to organize the drawer into sections if desired.
There is a temperature control which adjusts the amount of cold air allowed into the deli drawer. The control is located on the right of the drawer, under the lid.
Set the control to cold to provide a normal refrigerator temperature. Set the drawer on the coldest setting when a temperature colder than the main refrigerator compartment is desired. Use the coldest setting when storing meats.
NOTES:
Cold air directed to the ■ deli drawer can decrease refrigerator temperature. The refrigerator control may need to be adjusted.
Do not place leafy vegetables in the ■ deli drawer. Colder temperatures could damage leafy produce.
To remove:
Lift the lid. Pull the drawer out to full extension. Tilt the drawer ■ front up and pull it straight out.
To install:
Push the metal glide rails to the back of the refrigerator. Place ■ the drawer onto the rails and slide the drawer back until it falls into place.
To remove the divider:
Pull the drawer completely out and raise the front of the divider to unhook it from the rear wall of the pantry. Lift it out.
To install the divider:
Hook the back of divider over the rear wall of pantry and lower ■ it into place.
Refrigerator Operation
Freezer Compartment
The freezer compartment is located in the bottom drawer. It is equipped with modular storage bins for storing frozen foods.
NOTE: The ice maker is located in the refrigerator compartment.
See the Ice and Water section below for more information.
Ice and Water
Connect the ice maker to the water supply as instructed in the installation instructions. Proper water flow and a level refrigerator are essential for optimal ice maker performance.
Do not use with water that is microbiologically unsafe or of unknown quality without adequate disinfection before or after the system. Systems certified for cyst reduction may be used on disinfected waters that may contain filterable cysts.
Ice Maker and Ice Storage Bin
The ice maker and storage bin are located in the upper left-hand side of the refrigerator compartment.
Turning the Ice Maker On/Off
The On/Off switch is located on the ice maker.
To turn on the ice maker, press the switch to the ON position.
To manually turn off the ice maker, press the switch to the ■ OFF position.

IMPORTANT:
If you turn the refrigerator on before the water line is ■ connected, turn the ice maker OFF.
Allow 24 hours to produce the first batch of ice. Discard the first three batches of ice produced.
The ice maker should produce approximately 8 to 12 batches ■ of ice in a 24-hour period.
To increase ice production, lower the freezer and refrigerator temperature. See Setting the Controls on page 3. Wait 24 hours between adjustments.
The quality of your ice will be only as good as the quality of ■ the water supplied to your ice maker. Avoid connecting the ice maker to a softened water supply. Water softener chemicals (such as salt) can damage parts of the ice maker and lead to poor quality ice. If a softened water supply cannot be avoided, make sure the water softener is operating properly and is well maintained.
Do not use anything sharp to break up the ice in the bin. This can cause damage to the ice bin and dispenser mechanism.
Do not store anything on top of the ice maker or in the ice storage bin.
NOTE: Your ice maker has an automatic shutoff. The ice maker sensors will automatically stop ice production, but the control will remain in the ON position.
To Remove the Ice Storage Bin:
Hold the base of the storage bin and press the release button 1. on the lower right.
Pull the storage bin out until resistance is felt. Lift up the front 2. of the ice bin and remove.
Press the switch to the OFF position 3.
To Replace the Ice Storage Bin:
IMPORTANT: It may be necessary to turn the auger driver, behind the ice bin, counterclockwise to properly align the ice bin with the auger driver. The ice storage bin must be locked in place for proper ice dispensing.
Press the switch to the ON position1.
Slide the ice bin into the guide rails located on either side of 2. the enclosure.
- Push the ice bin in until resistance is felt. Raise the front slightly and push the ice bin in until an audible "click" is heard.
Continued...
Refrigerator Operation
Water and Ice Dispenser
IMPORTANT:
After connecting the refrigerator to a water source, flush the ■ water system. Press the Water touch pad on the control panel. Use a sturdy container to depress and hold the dispenser lever for 5 seconds, then release it for 5 seconds. Repeat until water begins to flow. Once water begins to flow, continue depressing and releasing the dispenser lever (5 seconds on, 5 seconds off) for an additional 5 minutes. This will flush air from the filter and water dispensing system. Additional flushing may be required in some households. As air is cleared from the system, water may spurt out of the dispenser.
NOTE: After 5 minutes of continuous dispensing, the dispenser will stop dispensing water to avoid flooding. To continue dispensing, remove the container and press the dispensing lever again.
Allow 24 hours for the refrigerator to cool down and chill water. Dispense enough water every week to maintain a fresh supply.
Allow 24 hours to produce the first batch of ice. Discard the ■ first three batches of ice produced.
Dispenser Operation
WARNING

Cut Hazard
Use a sturdy glass when dispensing ice.
Failure to do so can result in cuts.
The dispenser will dispense either water or cubed ice.
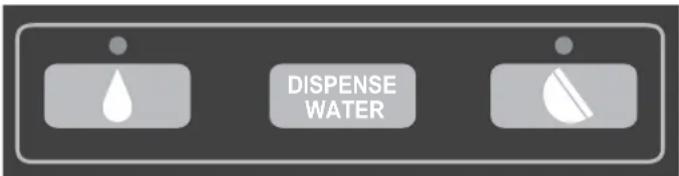
NOTE: The DISPENSE WATER control allows you to fill containers that will not fit within the dispenser area, such as sport bottles.
Select either water or cubed ice by touching the Water or Ice 1. pad on the control panel. The light above the control indicates your selection.
Water Ice
Press a sturdy container against the dispenser lever.2.
IMPORTANT: You do not need to apply a lot of pressure to the lever in order to activate the dispenser. Pressing hard will not make the water or ice dispense faster or in greater quantities.
- Remove the container to stop dispensing.
Dispenser Light
NOTES:
The dispenser lights are LEDs which should not need to be changed.
When you use the dispenser, the lever will automatically turn the light on. If you want the light to be on continuously, you may choose either On or Auto.
AUTO: The light sensor monitors the light level in the room. The dispenser light will illuminate at half-power when the light level is low. To activate the Auto option press the Light touch pad. The Auto indicator light will illuminate.

ON: For continuous light, press the Light touch pad a second time. The On indicator light will illuminate.
OFF: To turn the dispenser light off, press the Light touch pad a third time.
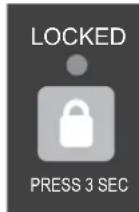
Dispenser Lock
The dispenser can be locked for easy cleaning or to avoid unintentional dispensing by small children and pets.
NOTE: The dispenser lock does not shut off power to the product, to the ice maker, or to the dispenser light. It just deactivates the dispenser lever.
To Lock and Unlock Dispenser:
Press and hold the 1. LOCKED touch pad for three seconds to lock the dispenser. The indicator light will illuminate when Lock is on.
Press and hold the 2. LOCKED touch pad again for three seconds to unlock dispenser. The indicator light will turn off.
Refrigerator Operation
Water Filtration System
The water filter is located in the upper right-hand corner of the refrigerator compartment.
Do not use with water that is microbiologically unsafe or of unknown quality without adequate disinfection before or after the system. Systems certified for cyst reduction may be used on disinfected waters that may contain filterable cysts.
Water Filter Status
The control panel will remind you when it is time to order and replace your water filter by displaying a message when you dispense water. "Order Water Filter" means it is almost time to change the water filter and "Replace Water Filter" means a new water filter should be installed. It is recommended that you replace the water filter when you see the "Replace Water Filter" message OR earlier if the flow of water to your water dispenser or ice maker decreases noticeably
To Reset Water Filter Status
After replacing the water filter, you must reset the water filter status to turn off the message.
On the main menu, press the touch pad next to "Options."1.
In each of the following screens, continue to press the touch 2. pad next to "More Options" until you reach the "Replace Filter screen."
Press the touch pad next to "YES" to reset the water filter 3. status. Press the touch pad next to "NO" if you do not wish to reset the water filter status.
Replacing the Water Filter
IMPORTANT: Air trapped in the system may cause water and the cartridge to eject. Always dispense water for two minutes before removing the filter for any reason. Use caution when removing.
The water filter is located in the upper right hand corner of the fresh food compartment.
Turn the filter counterclockwise until it releases from the filter 1. head.
Remove sealing label from replacement filter and insert the 2. filter end into the filter head.
Turn the filter clockwise until it stops. Snap the filter cover 3. closed.
NOTICE: Flush four (4) gallons of water through the water filter cartridge before use.
IMPORTANT: The condition of the water and the amount used determines the life span of the water filter cartridge. If water use is high, or if water is of poor quality, replacement may need to take place more often.
To order visit www.everythingdacor.com or call Dacor Customer Service at (800) 793-0093. Use replacement cartridge AFF3.
The dispenser feature may be used without a water filter cartridge. If you choose this option, replace the filter with the blue bypass cap.
Accessories
| Description Part Number | |
| Epicure black chrome trim style handle kit AFE36H3LBC | |
| Epicure brass trim style handle kit AFE36H3LBR | |
| Epicure chrome trim style handle kit AFE36H3LCH | |
| Epicure copper trim style handle kit AFE36H3LCP | |
| Millennia style handle kit AFM36H3L |
The above accessories are available from your Dacor dealer or visit www.everythingdacor.com.
Refrigerator Operation
Water Filter Performance Data

System tested and certified by NSF International against NSF/ANSI Std 42 for the reduction of Chlorine Taste and Odor, Particulate Class I and against NSF/ANSI 53 for the reduction of Cysts, Turbidity, Asbestos, Mercury, Lead, Benzene, p-Diclorobenzene, Carbofuran
| Substance Reduction Aesthetic Effects | NSF Reduction Requirements | Average Influent | Influent Challenge Concentration | Maximum Effluent | Average Effluent | Minimum % Reduction | Average % Reduction |
| Chlorine Taste/Odor Particulate Class I* | 50% reduction85% reduction | 1.88 mg/L5,700,000 #/mL | 2.0 mg/L ± 10% At least 10,000 particles/mL | 0.06 mg/L69,000 #/mL** | 0.05 mg/L30,583 #/mL | 96.8498.94 | >97.2699.52 |
| Contaminant Reduction | NSF Reduction Requirements | Average Influent | Influent Challenge Concentration | Maximum Effluent | Average Effluent | Minimum % Reduction | Average % Reduction |
| Lead: @ pH 6.5Lead: @ pH 8.5 | 0.010 mg/L0.010 mg/L | 0.153 mg/L^ 0.150 mg/L^ | 0.15 mg/L ± 10%0.15 mg/L ± 10% | < 0.001mg/L< 0.001mg/L | < 0.001mg/L< 0.001mg/L | >99.29%>99.29% | >99.35%>99.33% |
| Mercury: @ pH 6.5Mercury: @ pH 8.5 | 0.002 mg/L0.002 mg/L | 0.006 mg/L0.006 mg/L | 0.006 mg/L ± 10%0.006 mg/L ± 10% | 0.0005 mg/L0.0015 mg/L | 0.0003 mg/L0.0008 mg/L | 90.9175.93 | 95.7086.22 |
| Toxaphene 0.003 mg/L 0.015 mg/L 0.15 ± 10% < 0.001mg/L < 0.001mg/L 91.67% 92.97% | |||||||
| Atrazine 0.003 mg/L 0.009 mg/L 0.009 mg/L ± 10% < 0.002mg/L < 0.002mg/L 75.31% 76.99% | |||||||
| Asbestos 99% 155 MF/L | 107 to 108 fibers/L | †† | < 1 MF/L | < 1 MF/L | >99.99% | >99.99% | |
| Live Cysts‡Turbidity | >99.95%0.5 NTU | 166,500 #/L10.7 NTU | 50,000/L min.11 ± 1 NTU | < 1 #/L‡0.49 NTU | < 1 #/L‡0.31 NTU | >99.99%95.2 | >99.99>97.09% |
| Lindane | 0.0002 mg/L | 0.0002 mg/L | 0.002 ± 10% | < 0.0001mg/L | 0.000mg/L | 96.50% | >98.72% |
Test Parameters: pH = 7.5 ± 0.5 unless otherwise noted. Flow = 0.78 gpm (1.9 Lpm). Pressure = 60 psig (413.7 kPa). Temp. = 68°F to 71.6°F (20°C to 22°C).
* Class I particle size: >0.5 to <1 um
** Test requirement is at least 100,000 particles/mL of AC Fine Test Dust
† These contaminants are not necessarily in your water supply. Performance may vary based on local water conditions
†† Fibers greater than 10 um in length
‡ Based on the use of Cryptosporidium parvum oocysts
Specifications
Water Supply: City or well
Service Flow Rate: .78 gpm (2.9 L/min) @ 60 psi
Water Pressure: 35 - 120 psi (241 - 827 kPa)
Water Temperature: 33^ - 100^ ( 1^ - 38^ )
It is essential that operational, maintenance and filter replacement requirements be carried out for the product to perform as advertised.
The filter monitor system measures the amount of water that passes through the filter and alerts you to replace the filter. When 90% of the filter's rated life is used, the yellow (Order) light comes on. When 100% of the filter's rated life is used, the red (Replace) light comes on, and it is recommended that you replace the filter. For models without filter status lights, replace the filter every 6 months. Use Dacor replacement cartridge AFF3.
This product is for cold water use only.
Do not use with water that is microbiologically unsafe or of unknown quality without adequate disinfection before or after the system. Systems certified for cyst reduction may be used on disinfected waters that may contain filterable cysts.
This system has been tested according to ANSI/NSF 42 and 53 for reduction of the substances listed above. The concentration of the indicated substances in water entering the system was reduced to a concentration less than or equal to the permissible limit for water leaving the system, as specified in ANSI/NSF 42 and 53.
® NSF is a registered trademark of NSF International.

natural_image
Technical line drawing of a cylindrical mechanical component with flanges (no text or symbols)State of California
Department of Health Services
Water Treatment Device Certificate Number
03 - 1583
Date Issued: September 16, 2003
Date Revised: April 22, 2004
Trademark/Model Designation
UKF8001AXX750
469006-750
67003523-750
Replacement Elements
UKF\$001AXX
46 9006
67003523
Manufacturer: PentaPure Inc
The water treatment device(s) listed on this certificate have met the testing requirements pursuant to Section 116830 of the Health and Safety Code for the following health related contaminants:
Microbiological Contaminants and Turbidity
Cysts
Turbidity
Inorganic/Radiological Contaminants
Asbestos
Lead
Mercury
Organic Contaminants
Atrazine
Lindano
Benzene
Carbofuran
p-dichlorobenzene
10xaphene
Rated Service Capacity: 750 gal.
Rated Service Flow: 0.78 gpm
Conditions of Certification:
Do not use where water is microbiologically unsafe or with water of unknown quality, except that systems certified for cyst reduction may be used on disinfected waters that may contain filterable cysts.
Care and Cleaning
Cleaning
WARNING
Explosion Hazard
Use nonflammable cleaner.
Failure to do so can result in death, explosion, or fire.
Important information to know about glass shelves and covers:
Do not clean glass shelves or covers with warm water when they are cold. Shelves and covers may break if exposed to sudden temperature changes or impact, such as bumping. Tempered glass is designed to shatter into many small, pebble-size pieces. This is normal. Glass shelves and covers are heavy. Use both hands when removing them to avoid dropping.
Both the refrigerator and freezer sections defrost automatically. However, clean both sections about once a month to avoid buildup of odors. Wipe up spills immediately.
IMPORTANT: Because air circulates between both sections, any odors formed in one section will transfer to the other. You must thoroughly clean both sections to eliminate odors. To avoid odor transfer and drying out of food, wrap or cover foods tightly.
To clean your refrigerator:
NOTE: Do not use abrasive or harsh cleaners such as window sprays, scouring cleansers, flammable fluids, cleaning waxes, concentrated detergents, bleaches or cleansers containing petroleum products on plastic parts, interior and door liners or gaskets. Do not use paper towels, scouring pads or other harsh cleaning tools.
Unplug the refrigerator or disconnect power.1.
Hand wash, rinse and dry removable parts and interior 2. surfaces thoroughly. Use a clean sponge or soft cloth and a mild detergent in warm water.
Wash stainless steel and painted metal exteriors with a clean 3. sponge or soft cloth and a mild detergent in warm water.
To keep stainless steel looking like new and to remove minor scuffs or marks, it is suggested that you use the Dacor approved stainless steel cleaner and polish, part number A302. To order the cleaner, see www.everythingdacor.com.
IMPORTANT: This cleaner is for stainless steel parts only! Do not allow the stainless steel cleaner and polish to come into contact with any plastic parts such as the trim pieces, dispenser covers or door gaskets. If unintentional contact does occur, clean plastic parts with a sponge and mild detergent in warm water. Dry thoroughly with a soft cloth.
There is no need for routine condenser cleaning in normal 4. home operating environments. If the environment is particularly greasy or dusty, or there is significant pet traffic in the home, the condenser should be cleaned every 2 to 3 months to ensure maximum efficiency.
If you need to clean the condenser:
Remove the base grille. ■
Use a vacuum cleaner with a soft brush to clean the grille, the open areas behind the grille and the front surface area of the condenser.
Replace the base grille when finished. ■
Plug in the refrigerator or reconnect power.5.
Changing the Light Bulbs
NOTE: Not all appliance bulbs will fit your refrigerator. Be sure to replace the bulb with an appliance bulb of the same size, shape and wattage (no greater than 40 watts).
Unplug the refrigerator or disconnect power.1.
Remove the light shield.2.
Top of the refrigerator compartment:
Squeeze both sides of the light shield while pulling downward to remove.
Beneath ice storage enclosure:
Press along upper edge of light shield and roll light shield forward to remove.

natural_image
Illustration showing two steps of a hand holding a device, with no visible text or symbols.Replace the burned-out bulb(s) with an appliance bulb(s) no 3. greater than 40 watts.
Replace the light shield(s) by inserting the tabs on the shield 4. into the liner holes and snap into place.
NOTE: To avoid damaging the light shield, do not force the shield beyond the locking point.
Plug in the refrigerator or reconnect power.5.
Before You Call for Service
Troubleshooting Guide
Refrigerator will not operate
WARNING
Electrical Shock Hazard
Plug into a grounded 3 prong outlet.
Do not remove ground prong.
Do not use an adapter.
Do not use an extension cord.
Failure to follow these instructions can result in death, fire, or electrical shock.
■ Power cord unplugged? Plug into a grounded 3-prong outlet.
■ Is outlet working? Plug in a lamp to see if the outlet is working.
■ Household fuse blown or circuit breaker tripped? Replace the fuse or reset the circuit breaker. If the problem continues, call an electrician.
■ Are controls on? Make sure the refrigerator controls are on. See page 3.
■ New installation? Allow 24 hours following installation for the refrigerator to cool completely.
NOTE: Adjusting the temperature controls to the coldest setting will not cool either compartment more quickly.
Temperature is too warm
■ New installation? Allow 24 hours following installation for the refrigerator to cool completely.
■ Door(s) opened often or left open? Allows warm air to enter refrigerator. Minimize door openings and keep doors fully closed.
■ Large load of food added? Allow several hours for refrigerator to return to normal temperature.
■ Controls set correctly for the surrounding conditions?
Adjust the controls a setting colder. Check temperature in 24 hours. See page 3.
There is interior moisture buildup
NOTE: Some moisture buildup is normal.
■ Humid room? Contributes to moisture buildup.
■ Door(s) opened often or left open? Allows humid air to enter refrigerator. Minimize door openings and keep doors fully closed.
The motor seems to run too much
Your new refrigerator may run longer than your old one due to its high-efficiency compressor and fans. The unit may run even longer if the room is warm, a large food load is added, doors are opened often or if the doors have been left open.
The refrigerator seems noisy
Refrigerator noise has been reduced over the years. Due to this reduction, you may hear intermittent noises from your new refrigerator that you did not notice from your old model. Below are listed some normal sounds with explanations.
■ Buzzing - heard when the water valve opens to fill the ice maker.
■ Pulsating - fans/compressor adjusting to optimize performance.
■ Hissing/Rattling - flow of refrigerant, movement of water lines, or from items placed on top of the refrigerator.
■ Sizzling/Gurgling - water dripping on the heater during defrost cycle.
■ Popping - contraction/expansion of inside walls, especially during initial cool-down.
■ Water running - may be heard when water melts during the defrost cycle and runs into the drain pan.
■ Creaking/Cracking - occurs as ice is being ejected from the ice maker mold.
The doors will not close completely
■ Door blocked open? Move food packages away from door.
■ Bin or shelf in the way? Push bin or shelf back in the correct position.
The doors are difficult to open
■ Gaskets dirty or sticky? Clean gaskets and contact surfaces with mild soap and warm water. Rinse and dry with soft cloth.
WARNING

Explosion Hazard
Use nonflammable cleaner.
Failure to do so can result in death, explosion, or fire.
Before You Call for Service
The ice maker is not producing ice or not enough ice
Refrigerator connected to a water supply and the supply shutoff valve turned on? Connect refrigerator to water supply and turn water shutoff valve fully open.
■ Kink in the water source line? A kink in the line can reduce water flow. Straighten the water source line.
■ Ice maker turned on? Make sure wire shutoff arm or switch (depending on model) is in the on position.
■ New installation? Wait 24 hours after ice maker installation for ice production to begin. Wait 72 hours for full ice production.
■ Freezer door closed completely? Firmly close the freezer compartment door. If the freezer compartment door will not close all the way, see The doors will not close completely.
■ Large amount of ice recently removed? Allow 24 hours for ice maker to produce more ice.
■ Ice cube jammed in the ice maker ejector arm? Remove ice from the ejector arm with a plastic utensil.
■ Water filter installed on the refrigerator? Remove filter and operate ice maker. If ice volume improves, then the filter may be clogged or incorrectly installed. Replace filter or reinstall it correctly.
■ Reverse osmosis water filtration system connected to your cold water supply? This can decrease water pressure. See the installation instructions.
The ice cubes are hollow or small
NOTE: This is an indication of low water pressure.
■ Water shutoff valve not fully open? Turn the water shut off valve fully open.
■ Kink in the water source line? A kink in the line can reduce water flow. Straighten the water source line.
■ Water filter installed on the refrigerator? Remove filter and operate ice maker. If ice quality improves, then the filter may be clogged or incorrectly installed. Replace filter or reinstall it correctly.
■ Reverse osmosis water filtration system connected to your cold water supply? This can decrease water pressure. See the installation instructions.
■ Questions remain regarding water pressure? Call a licensed, qualified plumber.
Off-taste, odor or gray color in the ice
■ New plumbing connections? New plumbing connections can cause discolored or off-flavored ice.
■ Ice stored too long? Discard ice. Wash ice bin. Allow 24 hours for ice maker to make new ice.
■ Odor transfer from food? Use airtight, moisture proof packaging to store food.
■ Are there minerals (such as sulfur) in the water? A water filter may need to be installed to remove the minerals.
■ Water filter installed on the refrigerator? Gray or dark discoloration in ice indicates that the water filtration system needs additional flushing. Flush the water system before using a new water filter. Replace water filter when indicated. See page 9.
The water dispenser will not operate properly
Refrigerator connected to a water supply and the supply shutoff valve turned on? Connect refrigerator to water supply and turn water shutoff valve fully open.
■ Kink in the water source line? Straighten the water source line.
■ New installation? Flush and fill the water system. See the installation instructions.
Is the water pressure at least 35 psi (241 kPa)? The water pressure to the home determines the flow from the dispenser. See the installation instructions.
■ Water filter installed on the refrigerator? Remove filter and operate dispenser. If water flow increases, the filter may be clogged or incorrectly installed. Replace filter or reinstall it correctly.
■ Refrigerator door closed completely? Close the door firmly. If it does not close completely, see The doors will not close completely.
■ Recently removed the doors? Make sure the water dispenser wire/tube assembly has been properly reconnected. See the installation instructions.
■ Reverse osmosis water filtration system connected to your cold water supply? This can decrease water pressure. See the installation instructions.
Water is leaking from the dispenser system
NOTE: One or two drops of water after dispensing is normal.
■ Glass not being held under the dispenser long enough? Hold the glass under the dispenser 2 to 3 seconds after releasing the dispenser lever.
■ New installation? Flush the water system. See the installation instructions.
■ Recently changed water filter? Flush the water system. See the installation instructions.
■ Water on the floor near the base grille? Make sure the water dispenser tube connections are fully tightened. See the installation instructions.
Water from the dispenser is warm
NOTE: Water from the dispenser is only chilled to 50^ F ( 10^ C).
■ New installation? Allow 24 hours after installation for the water supply to cool completely.
■ Recently dispensed large amount of water? Allow 24 hours for water supply to cool completely.
■ Water not been recently dispensed? The first glass of water may not be cool. Discard the first glass of water.
■ Refrigerator connected to a cold water pipe? Make sure the refrigerator is connected to a cold water pipe. See the installation instructions.
Warranty and Service
Getting Help
Before you request service, please review the Before You Call for Service section of this manual. If you have performed the checks in the Troubleshooting Guide and the problem has not been remedied, please contact the Dacor Customer Service Team. Before requesting service, become familiar with the warranty terms and conditions on this page.
For warranty repairs, call:
Dacor Distinctive Service:
Phone: (877) 337-3226 (U.S.A. and Canada)
Business Hours: 6:00 A.M. - 4:00 P.M. Pacific Time
For a list of Dacor service agents for non-warranty repairs:
Dacor Customer Service:
Phone: (800) 793-0093 (U.S.A. and Canada)
Business Hours: 6:00 A.M. - 5:00 P.M. Pacific Time
Contact us through our web site at:
www.Dacor.com
At Dacor, we believe that our quality of service equals that of our product. Should your experience with our service network or product be different, please contact our customer service team and share your encounter with us. We will do our utmost to resolve the situation for you and deliver on our Dacor promise. If you need anything clarified, just let us know.
Warranty
What is Covered
CERTIFICATE OF WARRANTIES DACOR REFRIGERATORS WITHIN THE FIFTY STATES OF THE U.S.A., THE DISTRICT OF COLUMBIA AND CANADA\*:
FULL ONE YEAR WARRANTY
One (1) year - From the date of original retail purchase, any part that fails in normal home use will be repaired or replaced free of charge. Ice Maker - When purchased with the refrigerator and installed by the dealer the ice maker will be considered part of the refrigerator for warranty purposes.
LIMITED WARRANTY
In the second through fifth years from the date of purchase, when this major appliance is operated and maintained according to instructions attached to or furnished with the product, Dacor will pay for factory specified parts and repair labor costs to correct defects in materials or workmanship in the sealed refrigeration system. These parts are; compressor, evaporator, condenser, dryer and connecting tubing. Service must be provided by a Dacor designated service company.
30 day limited warranty on water filter. For 30 days from the date of purchase, when this filter is operated and maintained according to instructions attached to or furnished with the product, Dacor will pay for replacement parts to correct defects in materials and workmanship.
NOTE: The full warranty and the limited warranties apply when the refrigerator is located in the United States or Canada. Refrigerators located elsewhere are covered by the limited warranties only including parts that fail during the first year.
* Warranty is null and void if non-CSA approved product is transported from the U.S.
LIMITATIONS OF LIABILITY
The warrantor shall not be liable for any incidental or consequential damages, including food or medicine loss. Some states do not allow the exclusion or limitation of consequential damages, so the above limitation or exclusion may not apply to you.
What is Not Covered
Service calls to correct the installation of your major appliance, 1. to instruct you on how to use your major appliance, to replace or repair house fuses, or to correct house wiring or plumbing.
Service calls to repair or replace appliance light bulbs, air 2. filters or water filters. Consumable parts are excluded from warranty coverage.
Repairs when your major appliance is used for other than 3. normal, single-family household use or when it is used in a manner that is contrary to published user or operator instructions and/or installation instructions.
Damage resulting from accident, alteration, misuse, abuse, 4. fire, flood, acts of God, improper installation, installation not in accordance with electrical or plumbing codes or use of consumables or cleaning products not approved by Dacor.
Cosmetic damage, including scratches, dents, chips or other 5. damage to the finish of your major appliance, unless such damage results from defects in materials or workmanship and is reported to Dacor within 30 days from the date of purchase.
Any food or medicine loss due to refrigerator or freezer 6. product failures.
Costs associated with the removal from your home of your 7. major appliance for repairs. This major appliance is designed to be repaired in the home and only in-home service is covered by this warranty.
Repairs to parts or systems resulting from unauthorized 8. modifications made to the appliance.
Expenses for travel and transportation for product service 9. if your major appliance is located in a remote area where service by an authorized Dacor servicer is not available.
The removal and reinstallation of your major appliance if it is 10. installed in an inaccessible location or is not installed in accordance with published installation instructions.
Major appliances with original model/serial numbers that have 11. been removed, altered or cannot be easily determined. This warranty is void if the factory applied serial number has been altered or removed from your major appliance.
The cost of repair or replacement under these excluded circumstances shall be borne by the customer.
fold here
NO POSTAGE
NECESSARY
IF MAILED
IN THE
UNITED STATES
BUSINESS REPLY MAIL
FIRST-CLASS MAIL CITY OF INDUSTRY CAPERMIT NO 1600
POSTAGE WILL BE PAID BY ADDRESSEE
DACOR
ATTN WARRANTY PROCESSING DEPT
PO BOX 90070
CITY OF INDUSTRY CA 91715-9907

IMPORTANT:
Your warranty will not be activated until you activate it online or return this form to Dacor. If you have purchased more than one Dacor product, please return all forms in one envelope or activate the warranty for each product online.
Please rest assured that under no conditions will Dacor sell your name or any of the information on this form for mailing list purposes. We are very grateful that you have chosen Dacor products for your home and do not consider the sale of such information to be a proper way of expressing our gratitude!
Owner's Name:
Street: Last (Please Print or Type) First Middle
City: ____ State: ____ Zip: ____
Purchase Date: Email: Telephone:
Dealer:
City: ____ State: ____ Zip: ____
Your willingness to take a few seconds to fill in the section below will be sincerely appreciated. Thank you.
- How were you first exposed to Dacor products? (Please check one only.)
A. T.V. Cooking Show F Builder
B. Magazine G. Architect/Designer
C. Appliance Dealer Showroom H. Another Dacor Owner
D. Kitchen Dealer Showroom I. Model Home
E. Home Show J. Other
- Where did you buy your Dacor appliances?
A. Appliance Dealer D. Builder
B. Kitchen Dealer E. Other
C. Builder Supplier
- For what purpose was the product purchased?
☐ A. Replacement only ☐ C. New Home
B. Part of a Remodel D. Other
- What is your household income?
☐ A. Under \75,000 ☐ D. \150,000 – \$200,000
B. \75,000 - \100,000 E. \200,000 - \250,000
C. \100,000 - \150,000 F. Over \$250,000
- What other brands of appliances do you have in your kitchen?
A. Cooktop C. Dishwasher
B. Oven D. Refrigerator
- Would you buy or recommend another Dacor product?
□ Yes □ No
Comments:
Thank you very much for your assistance. The information you have provided will be extremely valuable in helping us plan for the future and giving you the support you deserve.

- Table of Contents
- Refrigerator Safety
- Your safety and the safety of others are very important.
- DANGER
- WARNING
- IMPORTANT SAFETY INSTRUCTIONS
- SAVE THESE INSTRUCTIONS
- Proper Disposal of Your Refrigerator
- Important Information
- Before Use
- Remove the Packaging
- Clean Before Using
- Refrigerator Operation
- Electrical Shock Hazard
- Explosion Hazard
- Setting the Controls
- IMPORTANT:
- Turning Cooling On or Off
- Temperature Controls
- To Adjust Set Point Temperatures:
- Setting the Controls (Continued)
- Door Alarm
- Humidity Control
- Vacation Mode
- Max Cool
- Sabbath Mode
- Turn Sabbath mode on:
- Temp Alarm
- Replace H2O Filter
- Language
- Temperature Display
- Display Brightness
- Adjust Light Sensor
- Alarm Sound
- Dispenser Lock, Dispenser and Dispenser Light
- Refrigerator Compartment
- Opening and Closing Doors
- Refrigerator Compartment (Continued)
- Shelves
- Important information to know about glass shelves and covers:
- To remove a shelf:
- To lock the shelf into another position:
- Door Storage
- Dairy Center
- To remove:
- To install:
- Door Buckets
- Crisper Drawers
- Controls
- Vegetables
- Fruit
- Deli Drawer
- NOTES:
- To remove the divider:
- To install the divider:
- Freezer Compartment
- Ice and Water
- Ice Maker and Ice Storage Bin
- Turning the Ice Maker On/Off
- To Remove the Ice Storage Bin:
- To Replace the Ice Storage Bin:
- Water and Ice Dispenser
- Dispenser Operation
- Dispenser Light
- Dispenser Lock
- To Lock and Unlock Dispenser:
- Water Filtration System
- Water Filter Status
- To Reset Water Filter Status
- Replacing the Water Filter
- Water Filter Performance Data
- Specifications
- Care and Cleaning
- Cleaning
- To clean your refrigerator:
- If you need to clean the condenser:
- Changing the Light Bulbs
- Top of the refrigerator compartment:
- Beneath ice storage enclosure:
- Before You Call for Service
- Troubleshooting Guide
- Refrigerator will not operate
- Temperature is too warm
- There is interior moisture buildup
- The motor seems to run too much
- The refrigerator seems noisy
- The doors will not close completely
- The doors are difficult to open
- The ice maker is not producing ice or not enough ice
- The ice cubes are hollow or small
- Off-taste, odor or gray color in the ice
- The water dispenser will not operate properly
- Water is leaking from the dispenser system
- Water from the dispenser is warm
- Warranty and Service
- Getting Help
- Dacor Distinctive Service:
- Dacor Customer Service:
- Warranty
- What is Covered
- CERTIFICATE OF WARRANTIES DACOR REFRIGERATORS WITHIN THE FIFTY STATES OF THE U.S.A., THE DISTRICT OF COLUMBIA AND CANADA\*:
- FULL ONE YEAR WARRANTY
- LIMITED WARRANTY
- LIMITATIONS OF LIABILITY
- What is Not Covered
- BUSINESS REPLY MAIL
Brand : Dacor
Model : EF36IWFSS
Category : Refrigerator