
BD-HP20U - Blu-ray player SHARP - Free user manual and instructions
Find the device manual for free BD-HP20U SHARP in PDF.


| Product Type | Blu-ray Disc Player |
| Model | BD-HP20U |
| Dimensions (W x D x H) | 16.9 x 9.8 x 2.1 inches (430 x 249 x 54 mm) |
| Weight | 6.4 lbs (2.9 kg) |
| Power Supply | AC 120V, 60Hz |
| Power Consumption | 27W (standby 0.5W) |
| Disc Compatibility | BD-ROM, BD-R/RE, DVD, DVD±R/RW, CD, CD-R/RW |
| Video Output | HDMI (1080p upscaling), Component, Composite |
| Audio Output | HDMI, Optical, Coaxial, Analog stereo |
| Audio Formats | Dolby Digital, DTS, Dolby TrueHD, DTS-HD MA (bitstream) |
| Special Features | BD-Live (requires Ethernet), BonusView, 24fps playback |
| Connectivity | Ethernet (10/100), USB 2.0 (front) |
| Remote Control | Included with batteries |
| Region Code | Region A (Blu-ray), Region 1 (DVD) |
| Maintenance | Clean exterior with soft dry cloth; do not use solvents |
| Safety | Do not expose to rain or moisture; use only supplied AC cord |
| Repairability | No user-serviceable parts; refer to qualified service personnel |
| Warranty | 1 year limited (varies by region) |
Frequently Asked Questions - BD-HP20U SHARP
User questions about BD-HP20U SHARP
0 question about this device. Answer the ones you know or ask your own.
Ask a new question about this device
Download the instructions for your Blu-ray player in PDF format for free! Find your manual BD-HP20U - SHARP and take your electronic device back in hand. On this page are published all the documents necessary for the use of your device. BD-HP20U by SHARP.
USER MANUAL BD-HP20U SHARP
AQUOS LINK

BD-Video

RW COMPATIBLE


DOLBY DIGITAL·PLUS
DOLBY TRUEHD

dts Digital Surround

OPERATION MANUAL
ENGLISH
For future reference, record the model and serial number (located on the rear of the product) in the space provided.
Model No.:
Serial No.:
WARNING: TO REDUCE THE RISK OF FIRE OR ELECTRIC SHOCK, DO NOT EXPOSE THIS APPLIANCE TO RAIN OR MOISTURE.

CAUTION
RISK OF ELECTRIC SHOCK DO NOT OPEN

CAUTION:
TO REDUCE THE RISK OF ELECTRIC SHOCK, DO NOT REMOVE COVER. NO USER-SERVICEABLE PARTS INSIDE. REFER SERVICING TO QUALIFIED SERVICE PERSONNEL.
This symbol warns the user of uninsulated voltage within the unit that can cause dangerous electric shocks.

This symbol alerts the user that there are important operating and maintenance instructions in the literature accompanying this unit.
WARNING—FCC Regulations state that any unauthorized changes or modifications to this equipment not expressly approved by the manufacturer could void the user's authority to operate this equipment.
INFORMATION
This equipment has been tested and found to comply with the limits for a Class B digital device, pursuant to Part 15 of the FCC Rules. These limits are designed to provide reasonable protection against harmful interference in a residential installation. This equipment generates, uses and can radiate radio frequency energy and, if not installed and used in accordance with the instructions, may cause harmful interference to radio communications. However, there is no guarantee that interference will not occur in a particular installation. If this equipment does cause harmful interference to radio or television reception, which can be determined by turning the equipment off and on, the user is encouraged to try to correct the interference by one or more of the following measures:
—Reorient or relocate the receiving antenna. —Increase the separation between the equipment and receiver. —Connect the equipment into an outlet on a circuit different from that to which the receiver is connected. —Consult the dealer or an experienced radio/TV technician for help.
CAUTION:
THIS UNIT IS A CLASS 1 LASER PRODUCT.
USE OF CONTROLS OR ADJUSTMENTS OR PERFORMANCE OF PROCEDURES OTHER THAN THOSE SPECIFIED HEREIN MAY RESULT IN HAZARDOUS RADIATION EXPOSURE.
AS THE LASER BEAM USED IN THIS UNIT IS HARMFUL TO THE EYES, DO NOT ATTEMPT TO DISASSEMBLE THE CABINET.
REFER SERVICING TO QUALIFIED PERSONNEL ONLY.
Thank you for your purchase of the Sharp Blu-ray Disc Player. To ensure safety and many years of trouble-free operation of your product, please read the Important Safety Instructions carefully before using this product.
IMPORTANT SAFETY INSTRUCTIONS
Electricity is used to perform many useful functions, but it can also cause personal injuries and property damage if improperly handled. This product has been engineered and manufactured with the highest priority on safety. However, improper use can result in electric shock and/or fire. In order to prevent potential danger, please observe the following instructions when installing, operating and cleaning the product. To ensure your safety and prolong the service life of your Blu-ray Disc Player, please read the following precautions carefully before using the product.
1) Read these instructions. 2) Keep these instructions. 3) Heed all warnings. 4) Follow all instructions. 5) Do not use this apparatus near water. 6) Clean only with dry cloth. 7) Do not block any ventilation openings. Install in accordance with the manufacturer's instructions. 8) Do not install near any heat sources such as radiators, heat registers, stoves, or other apparatus (including amplifiers) that produce heat. 9) Do not defeat the safety purpose of the polarized or grounding-type plug. A polarized plug has two blades with one wider than the other. A grounding type plug has two blades and a third grounding prong. The wide blade or the third prong are provided for your safety. If the provided plug does not fit into your outlet, consult an electrician for replacement of the obsolete outlet.
10) Protect the power cord from being walked on or pinched particularly at plugs, convenience receptacles, and the point where they exit from the apparatus.
11) Only use attachments/accessories specified by the manufacturer.
12) Use only with the cart, stand, tripod, bracket, or table specified by the manufacturer, or sold with the apparatus. When a cart is used, use caution when moving the cart/apparatus combination to avoid injury from tip-over.
13) Unplug this apparatus during lightning storms or when unused for long periods of time.
14) Refer all servicing to qualified service personnel. Servicing is required when the apparatus has been damaged in any way, such as power-supply cord or plug is damaged, liquid has been spilled or objects have fallen into the apparatus, the apparatus has been exposed to rain or moisture, does not operate normally, or has been dropped.

Additional Safety Information
15) Power Sources—This product should be operated only from the type of power source indicated on the marking label. If you are not sure of the type of power supply to your home, consult your product dealer or local power company. For products intended to operate from battery power, or other sources, refer to the operating instructions. 16) Overloading—Do not overload wall outlets, extension cords, or integral convenience receptacles as this can result in a risk of fire or electric shock. 17) Object and Liquid Entry—Never push objects of any kind into this product through openings as they may touch dangerous voltage points or short-out parts that could result in a fire or electric shock. Never spill liquid of any kind on the product. 18) Damage Requiring Service—Unplug this product from the wall outlet and refer servicing to qualified service personnel under the following conditions:
a) When the AC cord or plug is damaged, b) If liquid has been spilled, or objects have fallen into the product, c) If the product has been exposed to rain or water, d) If the product does not operate normally by following the operating instructions. Adjust only those controls that are covered by the operating instructions as an improper adjustment of other controls may result in damage and will often require extensive work by a qualified technician to restore the product to its normal operation, e) If the product has been dropped or damaged in any way, and f) When the product exhibits a distinct change in performance - this indicates a need for service.
19) Replacement Parts—When replacement parts are required, be sure the service technician has used replacement parts specified by the manufacturer or have the same characteristics as the original part. Unauthorized substitutions may result in fire, electric shock, or other hazards.
20) Safety Check—Upon completion of any service or repairs to this product, ask the service technician to perform safety checks to determine that the product is in proper operating condition.
21) Wall or ceiling mounting—When mounting the product on a wall or ceiling, be sure to install the product according to the method recommended by the manufacturer.
22) The mains plug is used as disconnect device and shall always remain readily operable.
IMPORTANT SAFETY INSTRUCTIONS
- Water and Moisture — Do not use this product near water - for example, near a bath tub, wash bowl, kitchen sink, or laundry tub; in a wet basement; or near a swimming pool; and the like.

- Stand — Do not place the product on an unstable cart, stand, tripod or table. Placing the product on an unstable base can cause the product to fall, resulting in serious personal injuries as well as damage to the product. Use only a cart, stand, tripod, bracket or table recommended by the manufacturer or sold with the product. When mounting the product on a wall, be sure to follow the manufacturer's instructions. Use only the mounting hardware recommended by the manufacturer.

- Selecting the location — Select a place with no direct sunlight and good ventilation.
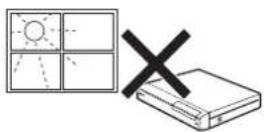
- Ventilation — The vents and other openings in the cabinet are designed for ventilation. Do not cover or block these vents and openings since insufficient ventilation can cause overheating and/or shorten the life of the product. Do not place the product on a bed, sofa, rug or other similar surface, since they can block ventilation openings. This product is not designed for built-in installation; do not place the product in an enclosed place such as a bookcase or rack, unless proper ventilation is provided or the manufacturer's instructions are followed.

- Heat — The product should be situated away from heat sources such as radiators, heat registers, stoves, or other products (including amplifiers) that produce heat.
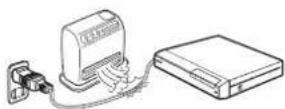
- Lightning — For added protection for this television equipment during a lightning storm, or when it is left unattended and unused for long periods of time, unplug it from the wall outlet and disconnect the antenna. This will prevent damage to the equipment due to lightning and power-line surges.
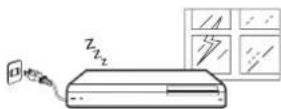
• To prevent fire, never place any type of candle or flames on the top or near the product.

- To prevent fire or shock hazard, do not expose this product to dripping or splashing. No objects filled with liquids, such as vases, should be placed on the product.

IMPORTANT SAFETY INSTRUCTIONS
- To prevent fire or shock hazard, do not place the AC cord under the product or other heavy items.
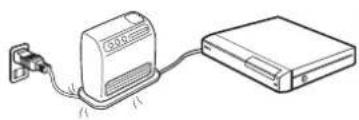
- Turn off the main power and unplug the AC cord from the wall outlet before handling. • To clean the outer cabinet, periodically wipe it with a soft cloth.
- Do not use chemicals for cleaning. It may damage the cabinet finish.


① Introduction
DEAR SHARP CUSTOMER ....1
IMPORTANT SAFETY INSTRUCTIONS ....1
Contents......4
What would you like to do with this Player? 5
About Discs 6 - 7
About Disc Contents 8
Important Information ......9
Getting Started ....10
Major Components 11 - 12
② Connection
Introduction to Connections ......13
Video Connections 14 - 16
Connecting to the HDMI Terminal 14
Change the video output to HDMI video out ..... 14
Connecting to the Component Jacks 15
Connecting to the S-video or Video Jack 16
Audio Connections 17 - 19
Connecting 5.1 ch Speakers through an Amplifi er .. 17
Connecting to the Digital Audio Terminal or Jack .... 18
Connecting the Audio Jacks 19
③ Disc Playback
Before Starting Playback 20 – 23
Loading the Batteries in the Remote Control 20
Connecting the Power Cord 20
Setting the Remote Control Code 21
Operating a SHARP TV Using the Remote Control...21
Turning the Power On 22
Language Setting 22
Turning Off the LCD Backlight and Indications ..... 23
Using AQUOS LINK 23
BD/DVD/CD Playback 24 - 27
Loading a Disc 24
BD/DVD Video Playback 24
BD/DVD Menus 25
BD-R/-RE/DVD-R/-RW Playback 26-27
Audio CD Playback.... 27
Playback Functions .....28 - 30
Fast Forward/Reverse (Search) 28
Skipping to the Next or the Start of the Current Chapter (Track) 28
Slow Playback 28
Pause/Frame Advance Playback 28
Skip Search 28
Replay 28
Repeat Playback of a Title or Chapter (Repeat Playback).... 28
Enlarge the playback image (Zoom function) ...... 28
Partial Repeat Playback (Repeat Playback of a Specified Part) 29
Switching Audio.... 29
Switching Subtitles 29
Switching the Angle 30
Displaying the Angle Mark 30
Settings During Playback 31 - 32
Function Control 31-32
④ Settings
SETTINGS 33 - 46
AUDIO VIDEO SETTINGS 33-35
Basic Operation for AUDIO VIDEO SETTINGS ..... 36
SPEAKER SETTINGS 37
Basic Operation for SPEAKER SETTINGS ..... 37 - 39
QUICK START 40
AUTO POWER OFF 40
AQUOS LINK 40
PLAYBACK 41-42
Basic Operation for PLAYBACK SETTING 43
FRONT DISPLAY/LED 44
VERSION 44
SYSTEM RESET 44
SOFTWARE UPDATE 45 – 46
Appendix
Troubleshooting 47 - 48
On-screen Error Messages ....49
Glossary 50 - 51
Specifications 52
LIMITED WARRANTY 53 - 54
What would you like to do with this Player?
Watching high quality movies on Blu-ray discs
This Player offers full high-definition Blu-ray disc playback.
BD/DVD Video Playback (p. 24)
Enjoying different kinds of discs and contents
Use this Player to enjoy various types of optical discs such as DVDs and CDs that contain various multimedia content.
About Discs (pp. 6-7) BD/DVD Video Playback (p. 24)
Simple connection and operation through HDMI
This Player is equipped with an HDMI terminal. You can connect it to the TV using HDMI and no other cable will be needed to enjoy movies. If your TV is compatible with AQUOS LINK, you can control both the TV and this Player with simple operations.
Introduction to Connections (p. 13) Video Connections (p. 14)
Experiencing surround sound with your speakers
This Player can output 5.1 ch surround sound to the speakers through an amplifier. Enjoy the rich feel of a movie theater.
Introduction to Connections (p. 13) Audio Connections (p. 17)
What to do first:
Refer to "Getting Started" (p. 10) to prepare for watching your discs.
①Introduction (pp. 1-12)
Explains the important operation information.

②Connection (pp. 13-19)
Shows the connecting options provided by this Player.

③Disc Playback (pp. 20-32)
Shows simple playback and useful functions.

④Settings (pp. 33-46)
Gives you more options to suit your circumstances.

⑤Appendix (pp. 47-54)
Provides troubleshooting tips and more information.

A Quick Reference for Selecting Discs
The following is a quick reference to see what discs can/cannot be used with this Player. Each disc has a compatible Recording Format(s) which may present some constraints. For detailed and exact information, read the explanation on pages 6 and 7.
■ Can Play Back
BD Video (with Region code "A" and "ALL" only)
BD-RE Ver.2.1 1L (finalized disc only)
BD-R Ver.1.1 1L (*finalized disc only)
DVD Video (with Region code "1" and "ALL" only)
DVD-RW/DVD-R (*finalized disc only)
DVD+RW/DVD+R (*finalized disc only)
DVD-R DL (*finalized disc only)
Audio CD
CD-RW/CD-R
■ Cannot Play Back
CDG, Video CD, Photo CD, CD-ROM, CD-TEXT, SVCD, SACD, PD, CDV, CVD, DVD-RAM, DVD-Audio, BD-RE Ver. 1.0, BD-RE DL, CD-MP3, CD-WMA

NOTE
* "Finalize" in this manual refers to making sure to have a recording device process on the recorded disc so that it will play in other DVD players as well as this player. Only finalized discs will playback in this player.
Blu-ray Disc
Blu-ray Disc is the ultimate next generation optical media format, offering the following key features:
- Largest capacity (25 GB single layer – 50 GB dual layer) – with over 5 times the amount of content possible with current DVDs, particularly well suited for high definition feature films with extended levels of interactive features
- Pristine picture quality with the capability for full high definition 1920 x 1080p resolution
- Best audio possible with uncompressed surround sound (higher quality than even theatre audio)
- Broadest industry support – ensuring more choice for consumers in the marketplace
- Hardware products will be backward compatible with DVDs, allowing continued enjoyment of existing DVD libraries
- Disc Durability – new breakthroughs in hard coating technologies gives Blu-ray Discs the strongest resistance to scratches and fingerprints.
Types of Discs that Can Be Used with This Player
- The following discs can be played back in this Player. Do not use an 8 cm (3") to 12 cm (5") adapter.
- Use discs that conform to compatible standards as indicated by the presence of official logos on the disc label. Playback of discs not complying with these standards are not guaranteed. In addition, the image quality or sound quality is not guaranteed even if the discs can be played back.
| Disc Type | Recording Format | Contents Disc Size | |
| BD video | Region code A/ALL | — Audio + Video | 12 cm (5") |
| (Movie) | |||
| BD-RE/BD-R (fi nalized disc only) | |||
| DVD Video | Region code | Video/VR mode | Audio + Video (Movie) |
| 12 cm (5")8 cm (3") | |||
| DVD+RW/DVD+R DVD-RW/DVD-R DVD-R DL | Video/VR mode (fi nalized disc only) | Audio + Video (Movie) | |
| 12 cm (5")8 cm (5") | |||
| Audio CD *1 | Audio CD (CD-DA) | Audio | |
| CD-RW/CD-R (fi nalized disc only) | Audio CD (CD-DA) | Audio | |
*1 This Player has been designed on the premise of playing back Audio CDs that comply with CD (Compact Disc) standards. CDs containing a signal for the purpose of protecting copyrights (copy control signal) may not be able to be played back with this Player.
- BD/DVD video players and discs have region codes, which dictate the regions in which a disc can be played. This Player's region code is A for BD and 1 for DVD. (Discs marked ALL will play in any player.)
- BD/DVD Video operations and functions may differ from the explanations in this manual, and some operations may be prohibited due to the disc manufacturer's settings.
- If a menu screen or operating instructions are displayed during playback of a disc, follow the operating procedure displayed.
- The audio component of a DVD video recorded at 96 kHz (Linear PCM) will be output as 48 kHz audio during playback.

NOTE
- Playback of some discs in the tables above may not be possible depending on the disc.
* "Finalize" in this manual refers to making sure that a recording device processes the recorded disc so that it will play on other DVD players and on this player. Accordingly, only finalized discs will play on this player.
- Playback of some discs in the tables above may not be possible depending on the disc. * "Finalize" in this manual refers to making sure that a recording device processes the recorded disc so that it will play on other DVD players and on this player. Accordingly, only finalized discs will play on this player.
Discs that Cannot Be Used with This Player
■ The following discs cannot be played back or will not play back properly on this player. If such a disc is mistakenly played back, speaker damage may occur. Never attempt to play back these discs.
CDG, Video CD, Photo CD, CD-ROM, CD-TEXT, SVCD, SACD, PD, CDV, CVD, DVD-RAM, DVD-Audio, BD-RE Ver. 1.0, BD-RE DL, CD-MP3, CD-WMA
■ Discs with unusual shapes cannot be played.
- Discs with unusual shapes (heart-shaped or hexagonal discs, etc.) cannot be used. The use of such discs will cause malfunction.
■ The following BD video discs cannot be played.
- Discs not displaying "A" or "ALL" for the region code (discs sold outside the authorized marketing area).*2 • Discs produced illegally. • Discs recorded for commercial use. *2 The region code for this product is A.
■ The following DVD video discs cannot be played.
- Discs not displaying "1" or "ALL" for the region code (discs sold outside the authorized marketing area).*3 • Discs produced illegally. • Discs recorded for commercial use. *2 The region code for this product is 1.
■ The following BD-RE/R, DVD-RW/R, DVD+RW/R discs cannot be played.
- Discs on which data has not been recorded cannot be played back.
■ The following Audio CD discs cannot be played.
- Discs containing a signal for the purpose of protecting copyrights (copy control signal) may not be played back with this Player.
- This Player has been designed on the premise of playing back Audio CDs that comply with CD (Compact Disc) standards.
■ The following CD-RW/R discs cannot be played.
- Discs on which data has not been recorded cannot be played back. • Non-finalized discs cannot be played back.
- Discs recorded in a format other than an Audio CD cannot be played back.
- Discs may not be played back depending on their recording status or the status of the disc itself.
- Discs may not be played back depending on their compatibility with this Player.
About Disc Contents
Title, Chapter and Track
- Blu-ray discs and DVDs are divided into "Titles" and "Chapters". If the disc has more than one movie on it, each movie would be a separate "Title". "Chapters", on the other hand, are subdivisions of titles. (See Example 1.)
- Audio CDs are divided into "Tracks". You can think of a "Track" as one tune on an Audio CD. (See Example 2.)
Example 1: Blu-ray disc or DVD![graph TD A["Blu-ray Disc"] --> B["Title 1 T"] C["DVD VLD F-0"] --> B D["Chapter 1 Chapter 2 Chapter 3 Chapter 1 Chapter 2"] --> B E["Blank Chapter 1 Chapter 2"] --> B](/content/2026/05/951558/images/583e709c1b3836d567c2efa14fc752f6d4b382db83116ec3272391d957d492b8.jpg)
Example 2: Audio CD![graph LR A["COMPACT DISC"] --> B["Track 1"] B --> C["Track 2"] C --> D["Track 3"] D --> E["Track 4"] E --> F["Track 5"]](/content/2026/05/951558/images/bf14406fec389ec19134548ae2690cf3fb996334ededb866b1fd2d93ca00ee0d.jpg)
Icons Used on DVD Video Disc Cases
The back of the case of a commercially available DVD usually contains various information about the contents of the disc.

1 Audio tracks and audio formats
DVD discs can contain up to 8 separate tracks with a different language on each. The first in the list is the original track.
This section also details the audio format of each soundtrack—Dolby Digital, DTS, MPEG etc.
Dolby Digital
A sound system developed by Dolby Laboratories Inc. that gives movie theater ambience to audio output when the Player is connected to a Dolby Digital processor or amplifier.
DTS
DTS is a digital sound system developed by DTS, Inc. for use in cinemas. This system uses 6 audio channels and provides accurate sound field positioning and realistic acoustics. (By connecting a DTS Digital Surround decoder, you can also listen to DTS Digital Surround sound.)
Linear PCM
Linear PCM is a signal recording format used for Audio CDs and on some DVD and Blu-ray discs. The sound on Audio CDs is recorded at 44.1 kHz with 16 bits. (Sound is recorded between 48 kHz with 16 bits and 96 kHz with 24 bits on DVD video discs and between 48 kHz with 16 bits and 192 kHz with 24 bits on BD video discs.)
MPEG
MPEG Audio gives movie theater ambience to audio output when the Player is connected to an MPEG Audio 5.1 channel processor or amplifier.
NOTE
- This Player supports 2-channel (L/R) audio and 5.1 ch (Multi-channel) MPEG Audio 1/2 (only when the DIGITAL AUDIO OUT OPTICAL/COAXIAL jack is used for connection). It does not support 7.1 channel MPEG Audio Ver.2.0.
2 Subtitle languages
This indicates the kind of subtitles.
3 Screen aspect ratio
Movies are shot in a variety of screen modes.
4 Camera angle
Recorded onto some BD/DVD discs are scenes which have been simultaneously shot from a number of different angles (the same scene is shot from the front, from the left side, from the right side, etc.).
5 Region code
This indicates the region code (playable region code).
The Icons Used in This Operation Manual
BD VIDEO ...... Indicates the functions that can be performed for BD Video discs. BD-RE ...... Indicates the functions that can be performed for BD-RE discs. BD-R ..... Indicates the functions that can be performed for BD-R discs. DVD VIDEO .... Indicates the functions that can be performed for DVD Video discs. DVD-RW ..... Indicates the functions that can be performed for DVD-RW discs. DVD-R ..... Indicates the functions that can be performed for DVD-R discs. AUDIO CD ...... Indicates the functions that can be performed for Audio CDs.
Important Information
Disc Precautions
Be Careful of Scratches and Dust
- BD, DVD and CD discs are sensitive to dust, fingerprints and especially scratches. A scratched disc may not be able to be played back. Handle discs with care and store them in a safe place.
Proper Disc Storage
| Place the disc in the center of the disc case and store the case and disc upright. |  |
| Avoid storing discs in locations subject to direct sunlight, close to heating appliances or in locations of high humidity. |  |
| Do not drop discs or subject them to strong vibrations or impacts. |  |
| Avoid storing discs in locations where there are large amounts of dust or moisture. |  |
Handling Precautions
- If the surface is soiled, wipe gently with a soft, damp (water only) cloth. When wiping discs, always move the cloth from the center hole toward the outer edge.
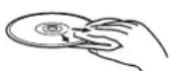


- Do not use record cleaning sprays, benzene, thinner, static electricity prevention liquids or any other solvent.
- Do not touch the surface.
- Do not stick paper or adhesive labels to the disc.
- If the playing surface of a disc is soiled or scratched, the Player may decide that the disc is incompatible and eject the disc tray, or it may fail to play the disc correctly. Wipe any dirt off the playing surface with a soft cloth.
Cleaning the Pick Up Lens
- Never use commercially available cleaning discs. The use of these discs can damage the lens.
- Request the nearest service center approved by Sharp to clean the lens.
Warnings about dew formation
- Condensation may form on pick up lens or disc in the following conditions: — Immediately after a heater has been turned on. — In a steamy or very humid room. — When the Player is suddenly moved from a cold environment to a warm one.
When condensation forms:
It becomes difficult for the Player to read the signals on the disc and prevents the Player from operating properly.
To remove condensation:
Take out the disc and leave the Player with the power off until the condensation disappears. Using the Player when there is condensation may cause malfunction.
Copyright
- Audio-visual material may consist of copyrighted works which must not be recorded without the authority of the owner of the copyright. Refer to relevant laws in your country.
- This product incorporates copyright protection technology that is protected by U.S. patents and other intellectual property rights. Use of this copyright protection technology must be authorized by Macrovision, and is intended for home and other limited viewing uses only unless otherwise authorized by Macrovision. Reverse engineering or disassembly is prohibited.
U.S. Patent Nos. 4,631,603 and 4,907,093
- Manufactured under license from Dolby Laboratories. "Dolby" and the double-D symbol are trademarks of Dolby Laboratories.
- "DTS" and "DTS Digital Out" are trademarks of DTS, Inc. • 6) is a trademark. • DVD is a trademark of DVD Format/Logo Licensing Corporation.
- HDMI, the HDMI logo and High-Definition Multimedia Interface are trademarks or registered trademarks of HDMI Licensing LLC.
- Java and all Java-based trademarks and logos are trademarks or registered trademarks of Sun Microsystems, Inc. in the United States and/or other countries.

Getting Started
Step 1: Unpacking
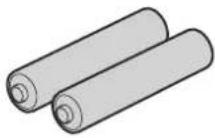
Make sure the following accessories are provided with the product.
| Remote control unit | “AAA” size battery (×2) | AC cord |
 |  |  |
| AV cable | ||
 |
Step 2: Selecting equipment to connect
Connection varies with the equipment used. Refer to Connection (Pages 14-19). Turn off the devices before connecting.
Step 3: Playing back discs
Play back a Blu-ray disc after connecting the Player to your favorite equipment. Refer to Disc Playback. (Pages 20-32)
Step 4: Adjust settings
Adjust settings to enjoy various features and other functions for playing discs. Refer to Settings (Pages 33-46).
Major Components
Main Unit (Front)

1 POWER (p. 22) 2 Remote control sensor (p. 20) 3 Disc tray (p. 24) 4 OPEN/CLOSE (p. 24) 5 DVD/CD mode indicator (p. 22) 6 BD mode indicator (p. 22)
7 ON indicator (p. 22) 8 STANDBY indicator (p. 22) 9 Front panel display (p. 22)
Main Unit (Rear)

1 COMPONENT VIDEO OUT jacks (p. 15) 2 S-VIDEO output jack (p. 16) 3 VIDEO output jack (p. 16) 4 2CH AUDIO output jacks (p. 19) 5 5.1CH AUDIO OUT jacks (p. 17) 6 HDMI OUT terminal (p. 14) 7 DIGITAL AUDIO OUT COAXIAL jack (p. 18)
8 DIGITAL AUDIO OUT OPTICAL terminal (p. 18) 9 Cooling fan
The cooling fan operates while the power to the Player is on.
10 AC IN terminal (p. 20) 11 SERVICE terminal for software (p. 45)
Remote Control Unit
Buttons under the cover
1 POWER (p. 22) 2 PEN/CLOSE (p. 24) 3 TOP MENU, TITLE LIST (pp. 25, 26) 4 DISPLAY (p. 21) 5 Cursor buttons (▲/▼/◄/►), ENTER (pp. 22, 36) 6 EXIT (pp. 22, 36) 7 A (Red), B (Green), C (Blue), D (Yellow) (p. 27) 8 AUDIO (p. 29), SUBTITLE (p. 29), ANGLE (p. 30) 9 (lock) (See below.)
10 REPEAT (pp. 28, 29), OFF (for REPEAT) (pp. 28, 29)
11 REV (p. 28)
12 SKIP (p. 26)
13 REPLAY (p. 28)
14 |SLOW (p. 28)
15 LIGHT (p. 23)
16 TV CONTROL buttons (p. 21)
17 SETUP (pp. 22, 36)
18 POP-UP MENU (p. 25)
19 FUNCTION (p. 31)
20 RETURN (p. 28)
21 ZOOM +/− (p. 28)
22▶ PLAY (p. 24)
23 ▶▶ FWD (p. 28)
24 HAUSE (p. 28)
25 ▶▶ SKIP (p. 26)
26 SKIP SEARCH (p. 28)
27 ■ STOP (p. 24)
28 HDMI (p. 14)
29 COMPONENT RESET (p. 33)
30 Number buttons (p. 32)
31 ENTER (p. 32)
This button has the same function as 5 ENTER.
32 CLEAR (p. 32)
To clear the input number
33 Non-functional buttons
These buttons on the remote control are non-functional.
They have no operation at all.
Keylock function
You can set the keylock to prevent accidental operations.
This function allows TVs compatible with AQUOS LINK to also perform a Key Lock on the player.
Press and hold 🔒 (Lock) for more than 5 seconds.
• Each time you perform this operation, the function is activated or deactivated.
- If you try to operate the Player while the keylock function is set, "Hold" blinks on the front display panel to indicate that the keylock function is set.


- This remote control unit is equipped with two ENTER buttons (5 and 31 listed above). The ENTER button under the cover is useful when using with the Number buttons.
Introduction to Connections
This Player is equipped with the terminals/jacks listed below. Find the corresponding terminal/jack on your video equipment. Using the supplied cable or commercially available cables, connect the video first. Then connect the audio.
Video terminals/jacks on this Player![graph TD A["Higher Quality"] --> B["① HDMI OUT terminal"] B --> C["Page 14"] A --> D["② COMPONENT VIDEO OUT jacks"] D --> E["Page 15"] A --> F["③ S-VIDEO output jack"] F --> G["Page 16"] A --> H["④ VIDEO output jack"] H --> I["Page 16"]](/content/2026/05/951558/images/9cd0a297575bbbd5a8182caec96c9a8472d2483f7701d3a4fac115aa5962fc76.jpg)
Audio terminals/jacks on this Player
Digital audio connection
Analogue audio connection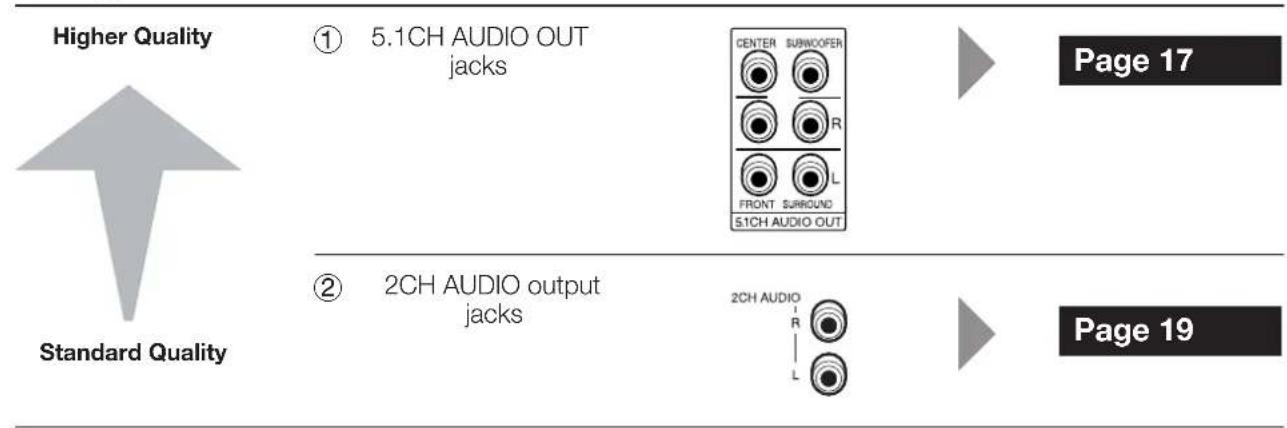
Connecting to the HDMI Terminal
You will enjoy high quality digital picture and sound through the HDMI terminal.
When you use AQUOS LINK, make sure to use a certified HDMI cable.
STEPS
1: Be sure to turn off this Player and the equipment before making any connections. 2: Firmly connect an HDMI cable (commercially available) to the HDMI terminals (① and ②).

- When using an HDMI output, 7.1 ch Digital Output is available.
① To HDMI OUT terminal HDMI cable (commercially available) ② To HDMI input terminal


Projector
TV
AV receiver
Equipment with an HDMI terminal
Caution:
- HDMI output and Component Video output can not be used at the same time.
Change the video output to HDMI video out
When you connect both an HDMI cable and a component cable to this player, switch to the output terminals by remote control.
(The video output is not output both terminals.)

1 Turn on the power. 2 Press HDMI button for 5 seconds, and the change of "Component Video Out" and "HDMI Out" is possible.
- (To switch outputs, it is necessary to keep the button pressed for several seconds.) Also, when the HDMI button is pressed, the current setting conditions will display while flashing (blinking), and then the selected output lamp displays.
The selected title is displayed alternately on the front panel display.
NOTE
- When you connect this player to a SHARP TV with an HDMI cable only and if the TV is on, the video output is changed to HDMI output automatically.
The following setting is unnecessary. - When you connect to the TV with an HDMI cable only, HDMI video output is set to AUTO. If you don't get the normal image, select the desired resolution. - When you are setting HDMI video output besides AUTO, you can only select the resolution that corresponds to the connected TV.
Caution:
- Even when there is no cable connected to the Component video out, switching the output to CP-out (Component video out) is still possible. When CP-out is selected, there will be no signal from the HDMI video out.
After connecting
- Load a disc and start playback. (Pages 24-27)
- If desired, connect audio equipment. (Pages 17-19) • Refer to AQUOS LINK function. (See page 23 and 40)
Connecting to the Component Jacks
You will enjoy accurate color reproduction and high quality images through the component jacks.
STEPS
1: Be sure to turn off this Player and the equipment before making any connections. 2: Firmly connect a component video cable (commercially available) to the component jacks (① and ②).
Caution:
- HDMI output and Component Video output can not be used at the same time.
![graph TD A["This Player"] --> B["Component Video Out"] B --> C["Component Video cable (commercially available)"] C --> D["Component Video input jacks"] D --> E["Component Video OUT jacks"] E --> F["Component Video OUT"] F --> G["Component Video OUT"] G --> H["Component Video OUT"] H --> I["Component…](/content/2026/05/951558/images/a27bfaa2b63838b4cb8654a028df748abf49f695209da5bea9f5acc41aae9209.jpg)


Video equipment with component jacks
After connecting
- Connect audio equipment or the audio terminals of the TV. (Pages 17-19)
Connecting to the S-video or Video Jack
You will enjoy the images through the S-video or video jack.
STEPS
1: Be sure to turn off this Player and the equipment before making any connections. 2: Firmly connect an S-video cable (commercially available) or AV cable (supplied) to the S-video or video jacks (① and ②, or ③ and ④).
This Player![graph TD A["TV"] --> B["Projector"] B --> C["TV"] C --> D["AV receiver"] D --> E["AV INPUT"] E --> F["S-VIDEO AV INPUT"] F --> G["To S-video input jack"] G --> H["S-video cable (commercially available) or to S-VIDEO jack"] H --> I["AV OUT"] I --> J["To VIDEO jack"] J --> K["(Yellow)"] K --> L["Blu-r…](/content/2026/05/951558/images/eb49dc1b3091e8c78883bb78971941ab3cda51154e6892b52cdb9be183a0a8ec.jpg)
Video equipment with an S-video or video jack
After connecting
- Connect audio equipment or the audio terminals of the TV. (Pages 17-19)
Connecting 5.1 ch Speakers through an Amplifier
You can connect up to 5 speakers and a subwoofer to the 5.1CH AUDIO OUT jacks using an amplifier.
STEPS
1: Be sure to turn off this Player and the equipment before making any connections. 2: Firmly connect the audio cables to the 5.1CH AUDIO OUT jacks.
![graph TD A["This Player"] --> B["Center Subwoofer"] A --> C["FRONT"] A --> D["SURROUND"] A --> E["51CH AUDIO IN"] A --> F["To SUBWOOFER jack"] A --> G["To CENTER jack"] A --> H["To FRONT L/R jack"] A --> I["5.1CH AUDIO OUT"] A --> J["To SURROUND L/R jack"] A --> K["Audio cables (commercially availab…](/content/2026/05/951558/images/d306e91eb7244df6606adc0fd7b3d53014b36e46100bded13c252663ca2ed96f.jpg)
NOTE
- You can also connect 2-channel stereo speakers through an amplifier. In this case, set the jacks without any speakers connected to "NONE". (Pages 37-39)
After connecting
- Set the size, distance, and level of each speaker. (Pages 37-39)
- Load a disc and start playback. (Pages 24-27)
Connecting to the Digital Audio Terminal or Jack
You can connect audio equipment to the DIGITAL AUDIO OUT terminal or jack.
STEPS
1: Be sure to turn off this Player and the equipment before making any connections. 2: Firmly connect an optical digital cable (commercially available) to the optical digital audio terminals or a coaxial digital cable (commercially available) to the coaxial digital audio jacks (① and ②, or ③ and ④).
![graph TD A["CD-ROM"] -->|When using COAXIAL/OPTICAL output, 5.1 ch Digital Output is available. 7.1 ch Digital Output is not available.| B["Digital Audio Out"] B --> C["Coaxial digital cable (commercially available)"] B --> D["Optical digital cable (commercially available)"] B --> E["To optical inpu…](/content/2026/05/951558/images/4bc49062dac02e5d3446775ce3e968676d29f474bfe42e02550b90a28eba6cef.jpg)
Audio equipment with a digital audio input terminal or jack
After connecting
- Load a disc and start playback. (Pages 24-27)
Connecting the Audio Jacks
You can connect audio equipment or the TV to the 2CH AUDIO output jacks.
STEPS
1: Be sure to turn off this Player and the equipment before making any connections. 2: Firmly connect the AV cable (supplied) to the audio jacks (① and ②).
![graph TD A["TV"] --> B["Amplifier"] B --> C["L-AUDIO-R AV INPUT"] C --> D["AV cable (supplied)"] D --> E["(White) (Red)"] D --> F["(Red) (White)"] G["This Player"] --> H["2CH AUDIO R S-VIDEO AV OUT"] H --> I["To 2CH AUDIO output jacks"] I --> J["(Red)"] I --> K["(White)"] style A fill:#f9f,stroke:#3…](/content/2026/05/951558/images/807dad3d2626bc443673315a73dfe22b8e63660a5eda663c626795064b83b8f0.jpg)
After connecting
- Load a disc and start playback. (Pages 24-27)
Before Starting Playback
Loading the Batteries in the Remote Control
1 Press down on the tab in the direction of the arrow to remove the battery cover.
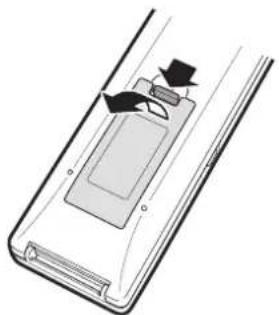
2 Load the two R-03 size batteries ("AAA" size, UM/SUM-4) supplied with the remote control unit. Make sure that the battery poles ⊕ and ⊖ are positioned as indicated.

3 Slide the battery cover in the direction of the arrow until it clicks.


NOTE
- Do not subject the remote control unit to shock, water or excessive humidity.
- The remote control unit may not function if the Player's remote sensor is in direct sunlight or any other strong light.
- Incorrect use of batteries may cause them to leak or burst. Read the battery warnings and use the batteries properly.
- Do not mix old and new batteries, or mix different brands.
- Remove the batteries if you will not use the remote control unit for an extended period of time.
Approximate operating range of remote control
Remote control sensor

Remote control unit
Connecting the Power Cord
Plug the supplied AC cord into the AC IN terminal on the rear of the Player. Then plug into AC outlet.


NOTE
- Place the Player close to the AC outlet, and keep the power plug within reach.
- TO PREVENT RISK OF ELECTRIC SHOCK, DO NOT TOUCH THE UN-INSULATED PARTS OF ANY CABLES WHILE THE AC CORD IS CONNECTED.
- The STANDBY indicator blinks while the Player is preparing for starting up. You cannot turn the Player on until the STANDBY indicator stops blinking.

Setting the Remote Control Code
- 3 types of remote control codes operate this Player: RC-1, RC-2 and RC-3. If you operate this Player by remote control along with another SHARP Blu-ray Disc Player or DVD Player placed next to it simultaneously, switching the remote control code (both the Player and remote control) to one of the signals (RC-1, RC-2 or RC-3) will let you operate only with this Player.
- Make sure to set the Player and remote control to the same remote code. You can not operate the Player if they are not set to the same code.
Setting the Remote Control Code of the Remote
Example: Setting the code to "RC-3".
1 Press and hold 3 first and then POWER on the remote control together for more than 5 seconds. 2 Press POWER to turn off the player.
POWER
Setting the Remote Control Code of the Player
3 Point the remote control at the player, then press and hold the DISPLAY button.
Remote control sensor
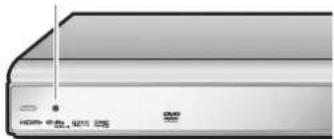
The display on the player changes as shown below, and the player will be set to the same number as the remote control.
Example: Change "RC-1" to "RC-3".
![graph TD A["① RC :1"] -->|Approx. 2 sec. later| B["② RC :1"] B -->|Approx. 3 sec. later| C["③ RC :3"]](/content/2026/05/951558/images/dd2038a08fef34793dd7c2cf079c0a4894c92f26a6fa3441d2e62588b9d72daa.jpg)
If remote control does not work
First, press Power to turn on the player. Press POWER on the remote control and check the front panel display (RC-1, RC-2 or RC-3). Set the remote control code according to the display and press POWER to see if you can turn on/off the Player.
Operating a SHARP TV Using the Remote Control
The Universal Remote Control may operate the basic functions of the SHARP TV.
TV function control
• TV Power: POWER • TV Channel up/down: CH ∧ / ∨ • TV Volume up/down: VOL +/− • TV-AV Selector: INPUT

Turning the Power On
Turning the power on
Press POWER on the remote control or on the Player to turn on the power of the Player.

Entering standby
Press POWER on the remote control or on the Player to enter standby.

- If you press POWER again immediately after entering standby, the Player may not turn on. If this happens, wait for 10 seconds or more and then turn on the power again.

Indicators on the Player ON indicator
| Green on Power on |
STANDBY indicator
| Red blinks Preparing for standby | |
| Red on Standby |
BD and DVD/CD mode indicators
| Off No disc | |
| Blue on Playing back | |
| White on Disc stopped | |
| White blinks Loading a disc |
- When you turn on the POWER, the MENU screen automatically displays for a while. Press EXIT to erase the display.
Language Setting
Changing the on-screen display language
1 Press SETUP to display the SETUP MENU screen.

2 Press ▲/▼/◄/► to select "ON SCREEN LANGUAGE", then press ENTER.

3 Press ▲/▼/◄/► to select the language you want to display on the screen, then press ENTER.

Press SETUP or EXIT to exit.
NOTE
- To select the DVD disc language, such as subtitle language, etc., (See page 25)

Turning Off the LCD Backlight and Indications
If you feel that the indicators on the Player are too bright when watching movies, you can turn them off except for the ON indicator.
Quick operation
Press LIGHT to turn the LCD backlight on or off.
SETUP MENU operation
1 Press SETUP to display the SETUP MENU screen. 2 Press ▲/▼/◄/► to select "SETTINGS", then press ENTER. 3 Press ▲/▼ to select "FRONT DISPLAY/LED", then press ENTER.
![MENU [FRONT DISPLAY / LED] AUDIO VIDEO SETTINGS SPEAKER SETTINGS QUICK START AUTO POWER OFF AQUOS LINK PLAYBACK SETTING FRONT DISPLAY / LED VERSION SOFTWARE UPDATE SYSTEM RESET](/content/2026/05/951558/images/a26c2e0f66b48c4fa1ff7e0abc1e12af3b414a57590bbdc06eec6e6d6a2fd0cd.jpg)
4 Press ◀/▶ to select "ON" or "OFF", then press ENTER.
5 Press SETUP or EXIT to exit.
Using AQUOS LINK
Controlling the Blu-ray disc player using AQUOS LINK
What is AQUOS LINK?
Using the HDMI CEC (Consumer Electronics Control), with AQUOS LINK you can interactively operate this player with your SHARP AQUOS TV.
What you can do with AQUOS LINK
When you connect this player to the LCD TV compatible with AQUOS LINK using an HDMI cable, you can perform the functions listed below. (See page 14 for connecting to the HDMI terminal)
Playback function turns on the LCD TV immediately.
When you start playback on this player, the power of the LCD TV will be turned on and the playback image will appear on the screen.
Automatic input select function
When you start playback of this player, the input selector of the LCD TV will automatically switch to the LCD TV input terminal connected to the player and the playback image will appear on the screen, even if you are watching a TV program.
Automatic power off function
If you turn off the LCD TV when this player is in stop mode, the power of this player will be turned off automatically. (In this case, while playing back a disc, the power does not turn off.)
Automatic power on function
When you switch to the LCD TV input terminal connected to this player, the power of this player will be turned on automatically.
NOTE
- In order to make AQUOS LINK available, set up AQUOS LINK on the LCD TV that is connected to this player. See page 40 regarding the setup of this player. Refer to the Operation Manual of the TV for details regarding setup.
BD/DVD/CD Playback

This section explains playback of commercially available BD Video and DVD Video discs (like movies), CDs, and recorded DVD-RW/R discs.
Loading a Disc
1 Press POWER to turn on the power.
2 Press OPEN/CLOSE to open the disc tray.

3 Load a disc on the disc tray.

- Insert the disc with the label face up. - In case of disc recorded on both sides, face down the side to play back.
4 Press OPEN/CLOSE to close the disc tray.
BD/DVD Video Playback
- Playback may begin automatically, depending on the disc.
2 Press ▶ PLAY.
- Playback begins from the first title. - The menu may be displayed first, depending on the disc. Perform playback operation by following the directions on the screen.
To stop playback
Press ■ STOP.
Resume playback function
- If you press ▶ PLAY next, playback will resume from the point where the Player was previously stopped. To playback from the beginning, cancel resume mode by pressing ■ STOP, then press ▶ PLAY. (This may not work depending on the type of disc. In this case, open the disc tray or enter standby.)

BD/DVD Menus
- This section explains how to play back a BD/DVD video disc with a top menu or disc menu.
- The titles listed in the top menu and a disc guide (for options like subtitles and audio languages) are given in the disc menu.
Start playback by selecting a title from the top menu
1 Press TOP MENU.
- The top menu screen is displayed.

2 Press ▲/▼/◄/► to select the title, then press ENTER.
- The selected title is played back.
NOTE
- The procedure explained on this page is the basic operation procedure. Procedures vary depending on the BD/DVD video disc, so you may need to follow the instructions in the BD/DVD video disc manual or the instructions displayed on the screen.
- A top menu is not displayed for a DVD-RW/R (Video mode) if it has not been finalized.
Top menu
- With some BD/DVD discs, the top menu may be referred to as the "Title Menu". Use TOP MENU on the remote control when the instructions refer to "Title Menu".
- If no top menu is available, the TOP MENU button will have no effect.
Using the disc menu
Example: Select "SUBTITLE LANGUAGE".
1 Press POP-UP MENU.
- The disc menu screen is displayed.
2 Press ▲/▼ to select "SUBTITLE LANGUAGE", then press ENTER.
- The screen for selecting the subtitle language is displayed.

3 Press ▲/▼ to select the subtitle language, then press ENTER.

Press SETUP or EXIT to exit.

BD-R/-RE/DVD-R/-RW Playback
BD-R
BD-RE
DVD-R
DVD-RW
You can play back a disc recorded. (finalized disc only)
Playback from the beginning
1 Load a disc recorded in Video mode.
2 Press ▶ PLAY.
- Playback begins from title 1.
Playback by selecting a title
1 Load a disc recorded in Video mode.
2 Press TOP MENU.
• The TITLE LIST screen is displayed.
- The TITLE LIST screen can also be displayed by pressing ENTER after choosing "DISPLAYS THE TITLE LIST" in SETUP MENU.
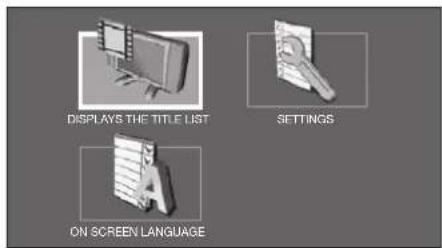
- When more than seven titles are displayed, switch pages by pressing SKIP or SKIP.
![MENU [TITLE LIST (DVD: ORIGINAL)] PROGRAM 1 5/21 FRI 9:30 AM 110 MIN. [FROM OLD] 1 PROGRAM 1 5/21 FRI 110 MIN. 2 PROGRAM 2 8/15 FRI 110 MIN. 3 PROGRAM 3 7/9 MON 56 MIN. 4 PROGRAM 4 W/18 THU 40 MIN. Information of selected title Title Name Recording Date Recording Duration Caption for Color Button a…](/content/2026/05/951558/images/3a649b6778ba1f720cf1e5aee343b4e101cd2bec07927e1beb98614ebbd55453.jpg)
3 Press ▲/▼ to select the title, then press ENTER.
Playback of the selected title will begin.
You can also start playback by pressing ▶ PLAY instead of pressing ENTER.
4 Press ■ STOP to stop playback.
NOTE
- "Finalize" in this manual refers to making sure to have a recording device process on the recorded disc so that it will play in other DVD players as well as this player. Only finalized discs will play back in this player.

Playback by selecting a PLAY LIST
1 Load a disc recorded in Video mode. 2 Press TOP MENU.
• The TITLE LIST screen is displayed.
3 Press C (Blue), then press ENTER.
• The PLAY LIST screen is displayed.
![MENU [TITLE LIST (DVD: PLAYLIST)] PROGRAM 1 5/21 FRI 9:30 AM 110 MIN. 1 PROGRAM 1 5/21 FRI 110 MIN. 2 PROGRAM 2 8/15 FRI 110 MIN. C PLAYLIST D FUNCTIONS](/content/2026/05/951558/images/2b1558760935c44d3b0354cd152317da4a3b0483dd59cec7bac846523223ac6e.jpg)
4 Press ▲/▼ to select the title, then press ENTER.
- Playback of the selected title will begin.
5 Press ■ STOP to stop playback.
Sorting the titles
1 Press B (Green), then press ENTER while the TITLE LIST screen is displayed. 2 Select the type of sorting by pressing ▲/▼, then press ENTER.
![MENU [TITLE LIST (DVD: ORIGINAL)] PROGRAM 1 5/21 FRI 9:30 AM 110 MIN. FROM NEW FROM OLD TITLES 8 SORTING E PLAYLIST D FUNCTIONS](/content/2026/05/951558/images/df8b721bddd388db7ddd4b78831fcc8500cf9542449ccd279a0090847d700069.jpg)
- The displayed titles are rearranged by selected sorting type.
Playing back the title you stopped while being played.
1 Press D (Yellow) while the TITLE LIST screen is displayed.
![MENU [TITLE LIST (DVD: ORIGINAL)] PROGRAM 1 5/21 FRI 9:30 AM 110 MIN. PLAYBACK FROM BEGINNING FROM CONTINUED](/content/2026/05/951558/images/a84f033cd523395da2dd86aafee08db4bdc9b44b431ebe717fb3fed83205706d.jpg)
2 Press ◀/▶ to select the type of Playback, then press ENTER. • Playback of the title will begin.
NOTE
- If a disc recorded in Video mode has been finalized, a menu screen will be created automatically to enable playback with other BD/DVD players. Because of this reason, the menu screen is different before and after finalization.
- "Finalize" in this manual refers to making sure to have a recording device process on the recorded disc so that it will play in other DVD players as well as this player. Only finalized discs will playback in this player.
Audio CD Playback
Playback from the beginning
1 Load an audio CD. 2 Press ▶ PLAY. - Playback begins from the first track. 3 Press ■ STOP to stop playback.


Fast Forward/Reverse (Search)
Fast Forward/Reverse functions when ◀◀ REV or ▶▶ FWD is pressed during playback. Example: When ▶▶ FWD is pressed
- The search speed will cycle as follows each time you press the button.
When playing back a DVD
- You cannot fast forward or fast reverse from one title and continue to another title (except when playing audio CDs).
Skipping to the Next or the Start of the Current Chapter (Track)
Skipping (to the beginning of a chapter or track) functions when SKIP or SKIP is pressed during playback.
Slow Playback
Slow Playback functions when ▶SLOW is pressed during playback.
• This doesn't work for audio CDs. - Press ▶ PLAY to return to normal playback.
Pause/Frame Advance Playback
- Pause functions when || PAUSE is pressed during playback. (If you are playing back an audio CD, the CD will also pause.)
- Frame Advance Playback functions when SKIP is pressed during Pause. • Frame Advance Playback may not function properly with discs other than DVD-RW (VR mode).
- Some BD/DVD Video discs are not compatible with Pause/Frame Advance Playback.
Skip Search
Playback skips 30 seconds ahead when SKIP SEARCH is pressed during playback.
Replay
Playback jumps back 10 seconds when REPLAY is pressed during playback.
Repeat Playback of a Title or Chapter (Repeat Playback)
1. Play back the title or chapter you want to repeat. 2. Press REPEAT. 3. Press ◀/▶ to select the type of Repeat Playback.
- PLAYING BACK TITLE: Repeats the title currently being played back.
- PLAYING BACK CHAP: Repeats the chapter currently being played back.
- SCENE SELECTION: Repeats the specified scene of title or chapter.

- Press 📊 RETURN to cancel without setting the type of Repeat Playback.
- For Audio CD, you can select "PLAYING DISC", "PLAYING TRACK", and "SPECIFY THE PART" as Repeat Playback options.
4. Press ENTER.
Example: Repeat playback of a title (TITLE)

5. Press REPEAT-OFF to return to normal playback.
Enlarge the playback image (Zoom function)
1. Press ZOOM + during playback.
- Three steps can be operated.
- Some discs will not be performed on this player.
2 The area that you want to watch is moved using ▲/▼/◄/►.
3 If you want to return the image, press ZOOM –. Press ZOOM – several times until it will return.
NOTE
• This function is not available for AUDIO CD. - Zoom function will not operate when subtitle is set to ON. - Zoom function will be cancelled when ◀◀ REV or ▶▶ FWD is pressed. - Zoom function will be cancelled when || PAUSE is pressed, depending on the disc.

Partial Repeat Playback (Repeat Playback of a Specified Part)
1 Press REPEAT during playback. 2 Press ◀/▶ to select "SCENE SELECTION", then press ENTER.

3 "SET START POINT" displays, press ENTER at the scene where you want.
- "SET END POINT" displays.
4 Press ENTER at the scene where you want to set the end point.
- You can press ▶▶ FWD to fast forward to the scene where you want to set the end point. When you reach the desired scene, simply press ▶ PLAY and then ENTER to set the end point. To cancel Repeat Playback, press REPEAT-OFF.
NOTE
- Press ▶▶ SKIP, the Repeat Playback is cancelled and the next chapter being played back.
- Press SKIP once, the Repeat Playback is cancelled and the player returns to the start of current chapter (track).
- If you press SKIP again (within about 5 seconds) the player will skip to the beginning of the previous chapter (track).
- For Partial Repeat Playback, set the start and end points within the same title.
- Repeat Playback may be forbidden depending on the disc.
- Partial Repeat Playback may not work in multi-angle scenes.
- If you press DISPLAY, you can confirm the Repeat Playback status.
Switching Audio
You can change the audio output channel using AUDIO.
Each time AUDIO is pressed, the audio channels change as follows:
BD VIDEO DVD VIDEO
The audio track currently being played back will be displayed.
BD-RE BD-R
DVD-RW
DVD-R
When a recorded broadcast with a Secondary Audio Program is played back:
Switches between "L", "R" and "L+R". When a recorded broadcast with stereo or monaural audio is played back:
“Stereo” is displayed. (Audio cannot be switched.)
NOTE
- When you play a program recorded in stereo or monaural, and if you are listening to the BITSTREAM sound via the digital output jack, you cannot select the audio channel. Set "AUDIO OUT" to "PCM" (page 35), or if you want to change the audio channel, listen via the analog output jacks.
Switching Subtitles
If subtitles are provided in multiple languages, you can switch between them.
Press SUBTITLE during playback.
- The display indicates the subtitle number currently being played back, and the subtitles appear. Each time SUBTITLE is pressed, the subtitles change.
- "--" is displayed if a disc has no subtitles.
- You can also select "OFF".

Switching the Angle
If multiple angles are recorded, you can switch between them.
1 Press ANGLE during playback.
- The display indicates the angle number currently being played back. Each time you press ANGLE, the angle switches.
- "—" is displayed if a disc is recorded with only one angle.

To return to the previous angle, press ANGLE to cycle through the angles until you return to the original angle.
Displaying the Angle Mark
You can change settings so that Angle Mark appears in the right bottom part of the screen when multiple angles are recorded. The settings can be changed in "SETTINGS" - "PLAYBACK SETTING" - "ANGLE MARK DISPLAY". (Page 41)
NOTE
- Settings for audio, subtitles and angle can also be changed in the Function Control Screen. (Page 31)
- The operations for subtitles, angle and audio differ according to each disc. You may need to refer to the operation manual of the disc.
- The following operations will not work when playing back an audio CD: Slow Playback, Frame Advance
Display of functions
- The display for subtitles, angle or audio automatically disappears after 5 seconds.
Switching between functions
- You can switch the subtitles, angle and audio at the Function Control screen. (Page 31)
- The operation for each function varies depending on the disc. See the manual for the disc.
Fast Forward/Reverse
- You cannot perform Fast Forward/Fast Reverse between titles. At the end or beginning of the title, Fast Forward/Fast Reverse will be cancelled and normal playback will automatically resume.
- Subtitles are not played back with BD/DVD video discs during Fast Forward and Fast Reverse.
- Depending on the disc and the scene being played back, the Player may not operate at the speed listed in this manual when performing Fast Forward.
Slow Playback
- You cannot perform Slow Playback between titles. At the end of the title, Slow Playback will be cancelled and normal playback will automatically resume.
Repeat Playback
- Repeat Playback may be forbidden depending on the disc.
- Partial Repeat Playback may not work in multi-angle scenes.
- For Partial Repeat Playback, set the start and end points within the same title.
Settings During Playback

Function Control
This allows you to adjust various settings at once, like subtitles, angle settings and the title selection for Direct Playback. You can adjust the video and audio to suit your preferences. The operations are the same for BD and DVD.
Function control screen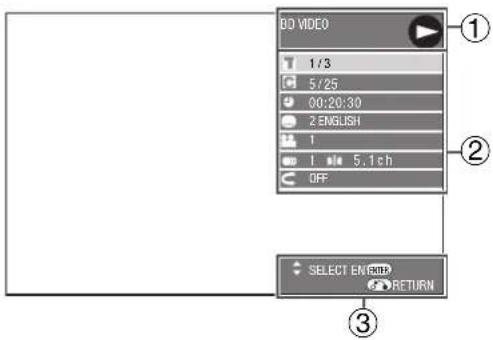
① Playback status display
Shows the operation status and the disc type.
② Setting items
Selects a title or chapter for playback, or performs video/audio settings.
③ Operation guide display
Provides help on remote control button operations.
Function control operation procedure
1 Press FUNCTION during playback.
- The Function Control screen is displayed on the TV.

2 Press ▲/▼ to select the desired setting, then press ENTER.
- For a description of each setting, see "Functions which can be set". (Page 32)
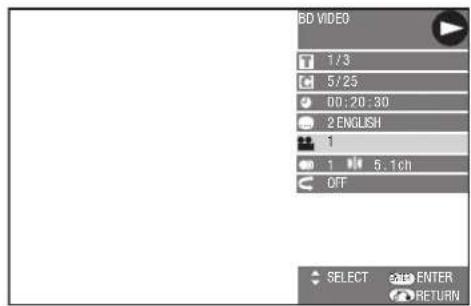
3 Press ▲/▼/◄/► to set, then press ENTER.
- Operations vary depending on the setting. Follow the operation instructions on the screen.
4 Press RETURN or FUNCTION to close the Function Control screen.
NOTE
- If "--" is displayed for an option like title number or subtitles, the disc has no titles or subtitles which can be selected.
- The displayed items vary depending on the disc.
- If you access the Function Control screen during playback of a BD/DVD video, it may be impossible to operate the BD/DVD video playback. In cases like this, close the Function Control screen.

Functions which can be set
Title Number (Direct Title Skip)
• Shows the title number being played back. You can skip to the start of the title. - To skip to the start of a selected title, press the Number buttons to enter the title number when this option is highlighted.
Chapter Number (Direct Chapter Skip)
- Shows the chapter number being played back. You can skip to the start of the chapter.
- To skip to the start of a selected chapter, press the Number buttons to enter the chapter number when this option is highlighted.
Playback Elapsed Time (Direct Time Skip)
- Shows the elapsed time from the beginning of the disc to the present. This lets you skip to a specific time.
- Press ◀/▶ to select the Hour, Minute or Second, then press ▲/▼ or the Number buttons to set the time. Press ENTER to start playback at the set time.
NOTE
- ENTER button under the Cover: Enters the input number.
- CLEAR button under the Cover: Clears the input number.
Subtitle Language
- Shows the currently selected subtitle language. If subtitles are provided in other languages, you can switch to your preferred language.
Angle Number
- Shows the currently selected angle number. If the video is recorded with multiple angles, you can switch the angle.
Audio
• Shows the currently selected type of audio. You can select the desired type of audio.
Repeat
- The current Title (or Chapter) or partial segments can be repeatedly played back. Repeat Playback is also possible with the REPEAT button on the remote control.
NOTE
• These functions may not work with all discs.
AUDIO VIDEO SETTINGS
TV ASPECT RATIO
- If you switch your TV (i.e. because you have bought a new one) and the screen aspect ratio of the connected TV changes, you will have to change the "TV ASPECT RATIO" setting.
- You can set the screen aspect ratio of the connected TV, and adjust the video output.
- Select "TV ASPECT RATIO" from "AUDIO VIDEO SETTINGS".
![MENU [AUDIO VIDEO SETTINGS] AUDIO VIDEO SETTINGS SPEAKER SETTINGS QUICK START AUTO POWER OFF AQUOS LINK PLAYBACK SETTING FRONT DISPLAY/LED VERSION SOFTWARE UPDATE SYSTEM RESET](/content/2026/05/951558/images/c83fa65abcf5177f96e3a0d0a4c394246071bba4c2aae2d46c2fc5d5b5975900.jpg)

![MENU [AUDIO VIDEO SETTINGS - TV ASPECT RATIO] TV ASPECT RATIO COMPONENT VIDEO OUT HDMI VIDEO OUT HDMI AUTO DETECTION AUDIO OUT DYNAMIC RANGE CONTROL 16:9 4:3 WIDE NORMAL](/content/2026/05/951558/images/1a96142658a2786e20121f8f968d4ddf33b9c3d14597fa9a817c53de88758d63.jpg)
WIDE 16:9: Select this when connecting to a TV with a 16:9 screen aspect ratio. NORMAL 4:3: Select this when connecting to a TV with a 4:3 screen aspect ratio.
![MENU [AUDIO VIDEO SETTINGS - TV ASPECT RATIO] TV ASPECT RATIO COMPONENT VIDEO OUT HDMI VIDEO OUT HDMI AUTO DETECTION AUDIO OUT DYNAMIC RANGE CONTROL LETTER BOX PAN SCAN](/content/2026/05/951558/images/7707bf3fef82328b185c21c402c4a3293ecb75d42773a0bf90089bed6a04738b.jpg)

LETTER BOX: If you connect to a TV with a screen aspect ratio of 4:3 and playback a DVD with 16:9 video, the video will be played back with black bands at the top and bottom while maintaining the 16:9 ratio.
PAN SCAN: If you connect to a TV with a screen aspect ratio of 4:3 and playback a DVD with 16:9 video, the video will be played back with the left and right sides of the image cut off to display in 4:3 screen aspect ratio. (This function works if the disc is labelled for 4:3PS.)
WIDE 16:9 NORMAL 4:3
LETTER BOX, PAN SCAN
COMPONENT VIDEO OUT
- This sets the resolution of the component video output.
![MENU [AUDIO VIDEO SETTINGS] AUDIO VIDEO SETTINGS SPEAKER SETTINGS QUICK START AUTO POWER OFF AQUOS LINK PLAYBACK SETTING FRONT DISPLAY / LED VERSION SOFTWARE UPDATE SYSTEM RESET](/content/2026/05/951558/images/058b132c150f40af142dd0f53c4e4d69c65d9eb2eb72281e2b50e972122005b8.jpg)

![MENU [AUDIO VIDEO SETTINGS - COMPONENT VIDEO OUT] TV ASPECT RATIO COMPONENT VIDEO OUT HDMI VIDEO OUT HDMI AUTO DETECTION AUDIO OUT DYNAMIC RANGE CONTROL 1080i 720p 480p 480i](/content/2026/05/951558/images/d4fe6d9ceeb24e264a905f1c5d5d0bb31d944325b13c3ba3998f55ba582abd60.jpg)
- Some TVs are not fully compatible with the Blu-ray disc player, which may cause image distortion. In this case, press “COMPONENT RESET” on the remote control for five seconds. Component video out will be reset to 480i (factory preset value).
Caution: HDMI output and Component output cannot be used at the same time.
HDMI VIDEO OUT
• This sets the resolution of the HDMI video output.
![MENU [AUDIO VIDEO SETTINGS] AUDIO VIDEO SETTINGS SPEAKER SETTINGS QUICK START AUTO POWER OFF AQUOS LINK PLAYBACK SETTING FRONT DISPLAY / LED VERSION SOFTWARE UPDATE SYSTEM RESET](/content/2026/05/951558/images/839e1774b56a5309716b163616da0de03704ba9e7250385ec3e6cc020e86e88a.jpg)

![MENU [AUDIO VIDEO SETTINGS - HDMI VIDEO OUT] TV ASPECT RATIO COMPONENT VIDEO OUT HDMI VIDEO OUT HDMI AUTO DETECTION AUDIO OUT DYNAMIC RANGE CONTROL AUTO 1080p 720p 1080i 480p](/content/2026/05/951558/images/3154025e3331933945242f67e8395849aa502c68f6c64cb38a859cf98c1265b2.jpg)
Caution: HDMI output and Component output cannot be used at the same time.

NOTE
- When the BD player is connected to a 1080p 24Hz compatible TV and the HDMI VIDEO OUT is set to AUTO, 1080p 24Hz will automatically be displayed when compatible discs are played back.
1080i, 720p, 480p, 480i
AUTO, 1080p, 1080i, 720p, 480p
HDMI AUTO DETECTION
- This automatically sets the player's video output to HDMI when it detects this signal.
![MENU [AUDIO VIDEO SETTINGS] AUDIO VIDEO SETTINGS SPEAKER SETTINGS QUICK START AUTO POWER OFF AQUOS LINK PLAYBACK SETTING FRONT DISPLAY / LED VERSION SOFTWARE UPDATE SYSTEM RESET MENU [AUDIO VIDEO SETTINGS - HDMI AUTO DETECTION] TV ASPECT RATIO COMPONENT VIDEO OUT HDMI VIDEO OUT HDMI AUTO DETECTION A…](/content/2026/05/951558/images/4bfb0400e4914e921881f40a7d90bf3f384c33319ed8559d409eac8e85400ff7.jpg)
AUDIO OUT
- You can set AUDIO OUT when connecting to SURROUND sound equipment.
- This sets the audio output connected to SURROUND equipment.
![MENU [AUDIO VIDEO SETTINGS - AUDIO OUT] TV ASPECT RATIO COMPONENT VIDEO OUT HDMI VIDEO OUT HDMI AUTO DETECTION AUDIO OUT DYNAMIC RANGE CONTROL HDMI OUTPUT OPTICAL / COAXIAL DIGITAL OUTPUT 5.1 ch AUDIO OUTPUT 2ch AUDIO OUTPUT](/content/2026/05/951558/images/524e2c36a7f74dad7040cc581f479b8d35f3bfb9e15f58ba126f54d08f4bf395.jpg)
| Selected item Description | |
| HDMI OUTPUT Select this when you connect using HDMI OUT terminal. | |
| OPTICAL/COAXIAL DIGITAL OUTPUT S | select this when you connect using DIGITAL AUDIO OUT terminal (COAXIAL or OPTICAL). |
| 5.1ch AUDIO OUTPUT Select this when you connect using 5.1CH AUDIO OUT jacks. | |
| 2ch AUDIO OUTPUT Select this when you do not use SURROUND sound equipment. | |
- You can set the audio output mode for each output terminal.
This sets the audio output mode for the HDMI OUT terminal when HDMI OUTPUT is selected.
![MENU [AUDIO VIDEO SETTINGS - AUDIO OUT] TV ASPECT RATIO COMPONENT VIDEO OUT HDMI VIDEO OUT HDMI AUTO DETECTION AUDIO OUT DYNAMIC RANGE CONTROL AUTO PCM (SURROUND)](/content/2026/05/951558/images/2f755cb2a8bab11019d86e9072d9696cd52f62e8cad2b060d9c6ea98d5fca7dc.jpg)
| Selected item Description | |
| AUTO • Select this when connecting to | HDMI equipment with a built-in decoder for DOLBY DIGITAL, etc. Setting to AUTO will output in an audio output mode best suited to the connected equipment. |
| PCM (SURROUND) • Select this when | connecting to multi-channel HDMI equipment. Setting to PCM (SURROUND) will output by LINEAR PCM by decoding audio signals recorded in each audio output mode such as DOLBY DIGITAL, DTS, AAC. |
This sets the audio output mode for the DIGITAL AUDIO OUT (COAXIAL jack / OPTICAL terminal) when OPTICAL/COAXIAL DIGITAL OUTPUT or 2ch AUDIO OUTPUT is selected.![MENU [AUDIO VIDEO SETTINGS - AUDIO OUT] TV ASPECT RATIO COMPONENT VIDEO OUT HDMI VIDEO OUT HDMI AUTO DETECTION AUDIO OUT DYNAMIC RANGE CONTROL DOLBY DIGITAL BITSTREAM PCM (STEREO) DTS BITSTREAM PCM (STEREO) AAC BITSTREAM PCM (STEREO) CONFIRM](/content/2026/05/951558/images/59ac77c81528b8de95d22c2b985048de66532e687e77d008bb0ae150c2abce79.jpg)
| Selected item Description | ||
| DOLBY DIGITAL | BITSTREAM • Select this when connecting to SURROUNDEquipment with a built-in decoder for DOLBY DIGITAL, DTS, AAC. | |
| DTS | • Setting to BITSTREAM will output each audio signal by BITSTREAM. | |
| AAC | PCM (STEREO) • Select this when connecting to 2 channel stereo audio equipment.• Setting to PCM (STEREO) will output by converting each audio signal into PCM 2channel audio signal. | |
DYNAMIC RANGE CONTROL
This lets you adjust the range between the loudest and softest sounds (dynamic range) for playback at average volume. Use this when it is hard to hear dialogue.
![MENU [AUDIO VIDEO SETTINGS] AUDIO VIDEO SETTINGS SPEAKER SETTINGS QUICK START AUTO POWER OFF AQUOS LINK PLAYBACK SETTING FRONT DISPLAY / LED VERSION SOFTWARE UPDATE SYSTEM RESET MENU [AUDIO VIDEO SETTINGS - DYNAMIC RANGE CONTROL] TV ASPECT RATIO COMPONENT VIDEO OUT HDMI VIDEO OUT HDMI AUTO DETECTION…](/content/2026/05/951558/images/cb7d9b659898b66efa3ab556c6e079ccdd3fe3fc08bb5cc8854604f6ac588b0b.jpg)
NORMAL*: The audio output range is played as originally recorded. SHIFT: When Dolby Digital audio is played back, the dynamic range is adjusted so that dialogue can be heard easily. (If the audio sounds abnormal, set to "NORMAL".)
* Lower the audio volume before setting. If you do not, the speakers may emit a loud sound or excessive output may be applied to the speakers.

Basic Operation for AUDIO VIDEO SETTINGS
Example: Setting "TV ASPECT RATIO" under "AUDIO VIDEO SETTING"
1 Press SETUP to display the SETUP MENU screen. 2 Press ▲/▼/◄/► to select "SETTINGS", then press ENTER.

3 Press ▲/▼ to select "AUDIO VIDEO SETTINGS", then press ENTER.
![MENU [AUDIO VIDEO SETTINGS] AUDIO VIDEO SETTINGS SPEAKER SETTINGS QUICK START AUTO POWER OFF AQUOS LINK PLAYBACK SETTING FRONT DISPLAY / LED VERSION SOFTWARE UPDATE SYSTEM RESET](/content/2026/05/951558/images/c4c355528b0e9807d1b9af21130d095e0c0e176ff3c00540a449638d635d4f59.jpg)
4 Press ▲/▼ to select "TV ASPECT RATIO", then press ENTER. 5 Press ◀/▶ to select the desired item, then press ENTER.
![MENU [AUDIO VIDEO SETTINGS - TV ASPECT RATIO] TV ASPECT RATIO COMPONENT VIDEO OUT HDMI VIDEO OUT HDMI AUTO DETECTION AUDIO OUT DYNAMIC RANGE CONTROL 16:9 4:3 WIDE NORMAL](/content/2026/05/951558/images/659668fde63a55fdbdaeaa892f3c627c54b9bfc9a99119c42a3e76ff935b7c27.jpg)
6 Press ◀/▶ to select the desired format, then press ENTER.
![MENU [AUDIO VIDEO SETTINGS - TV ASPECT RATIO] TV ASPECT RATIO COMPONENT VIDEO OUT HDMI VIDEO OUT HDMI AUTO DETECTION AUDIO OUT DYNAMIC RANGE CONTROL LETTER BOX PAN SCAN](/content/2026/05/951558/images/8a5194f1a028ec7fd6505e28b19dd00c63fd726431a8952bf3464002420e681f.jpg)
Press SETUP or EXIT to exit.
SPEAKER SETTINGS
About speakers
You can use your speakers with this Player through an amplifier. You can set the speaker size, distance from the viewer, and output level for each speaker.
Using multi channel speakers
Using 2 channel speakers


NOTE
- Refer to the operation manual for the speakers or amplifier for details of speaker setup.
- Speaker setting cannot be performed with the disc in the disc tray. Take out the disc from the player before setup.
Basic Operation for SPEAKER SETTINGS
1 Press SETUP to display the SETUP MENU screen. 2 Press ▲/▼/◄/► to select "SETTINGS", then press ENTER.

3 Press ▲/▼ to select "SPEAKER SETTINGS", then press ENTER.
![MENU [SPEAKER SETTINGS] AUDIO VIDEO SETTINGS SPEAKER SETTINGS QUICK START AUTO POWER OFF AQUOS LINK PLAYBACK SETTING FRONT DISPLAY/LED VERSION SOFTWARE UPDATE SYSTEM RESET](/content/2026/05/951558/images/cc4bc2faee959e9b345d9d1e7663caee20c825cea2be45b0f529cf49f87e273f.jpg)
4 Press ◀/▶ to select the desired item, then press ENTER.
![MENU [SPEAKER SETTINGS] YES 10](/content/2026/05/951558/images/2d39bb51d28f769e740c126d64e2fd9c10e0ccc7930faa4bcf23a27a9299999c.jpg)
5
Press ▲/▼/◄/► to select the speaker, then press ENTER.

6
Press ◀/▶ to select the preferred item, then press ▲/▼ to select the preferred setting, then press ENTER.
![MENU [SPEAKER SETTINGS] 0dB SW 12ft/0dB L 12ft/0dB C 12ft/0dB R LS 6ft/0dB RS 6ft/0dB SIZE DISTANCE LEVEL UWSE 24h 3dB](/content/2026/05/951558/images/20aee87bf21a9dd7b2c67c7787130bdd775de23daeaeb6b87d240b6ee8a8a8b4.jpg)
| Speakers Selectable size | |
| L/R LARGE*, SMALL | |
| C/RS/LS LARGE*, SMALL, NONE | |
| SW YES*, NO | |
| * Factory presetLARGE: The cone diameter is 6.3 inches or larger.SMALL: The cone diameter is smaller than 6.3 inches. | |
| Selectable Distance range | 1ft through 29ft(Settings available in 1ft increments)The factory preset value: 12ft(L/R/C)6ft(RS/LS) |
| Selectable Output Level range | -6dB through +6dB(Settings available in 1dB increments)The factory preset value is 0dB. |
7
Repeat steps 5 and 6 until each speaker's size and level are set.
![MENU [SPEAKER SETTINGS] 0dB SW 12ft/0dB L 12ft/0dB C 12ft/0dB R LS 6ft/0dB LS 6ft/0dB TEST START FINISH](/content/2026/05/951558/images/e43374b904d152990b0b22630f2da6dd629db36676630b070b546f0371b84b9d.jpg)

NOTE
• The speakers L and R, LS and RS move relative to one another. - The speakers L and R are automatically set to "LARGE" when the subwoofer SW is set to "NO", even after speakers L and/or R are set to "SMALL". - The images of speakers set to "NONE" disappear or are greyed out on the screen. - As for a subwoofer, there are no settings for distance, only for level.
Checking the setup sound
8
Press ▲/▼/◄/► to select "TEST START", then press ENTER.
![MENU [SPEAKER SETTINGS] 0dB SW 12ft/0dB L 12ft/0dB C 12ft/0dB R LS 6ft/0dB RS 6ft/0dB TEST START FINISH](/content/2026/05/951558/images/a73b78d88dcff7176aec750b4af40cd0394af6a0154e3ecbfd7e37ba285c28b1.jpg)
• After switching to TEST mode, you can hear the test sound from each speaker in turn. - If you press ▲/▼/◄/► to select the preferred speaker while the test sound is present, you can hear the test sound of the speaker that you selected. - If you press ▲/▼/◄/► to select "TEST TONE STOP" and press ENTER, you can stop the test sound.
Resetting the setup
- When the sound volume of each speaker is uneven, reset the settings separately.
- As for a subwoofer, you can adjust LEVEL only.
9 Press ENTER while the test sound is present from the speaker that you want to reset the setting.
10 Press ◀/▶ to select the "LEVEL", then press ▲/▼ to preferred setting, then press ENTER.
11 Repeat steps 9 and 10 until each speaker is reset.
Completing the settings
12 Press ▲/▼/◄/► to select "FINISH", then press ENTER.
![MENU [SPEAKER SETTINGS] 0dB SW 12f/0dB L 12f/0dB C 12f/0dB R LS 6ft/0dB RS 6ft/0dB TEST START FINISH](/content/2026/05/951558/images/3a0d8052611fca2aba1a335197b59929b521ef0142c4d065ab9553178012b80f.jpg)
Press SETUP or EXIT to exit.
QUICK START
This turns the QUICK START function on and off. When the QUICK START function is on, the startup time of the player is reduced when resuming playback from standby. However, power consumption will increase.
![MENU [QUICK START] AUDIO VIDEO SETTINGS SPEAKER SETTINGS QUICK START AUTO POWER OFF AQUOS LINK PLAYBACK SETTING FRONT DISPLAY / LED VERSION SOFTWARE UPDATE SYSTEM RESET MENU [QUICK START] YES NO](/content/2026/05/951558/images/26d18fbe708af14939e065cb82021ae374d39846a9566ecd533fe3502c8c2733.jpg)
YES, NO
AUTO POWER OFF
This sets the Player so that power is automatically shut off if playback is stopped for about 10 minutes.
![MENU [AUTO POWER OFF] AUDIO VIDEO SETTINGS SPEAKER SETTINGS QUICK START AUTO POWER OFF AQUOS LINK PLAYBACK SETTING FRONT DISPLAY / LED VERSION SOFTWARE UPDATE SYSTEM RESET MENU [AUTO POWER OFF] YES NO](/content/2026/05/951558/images/a9a0e9b395f8ffa0f4c3d59b0c88c430bea6ece9e67babb2f1d1ed2baac6dc46.jpg)
YES, NO
AQUOS LINK
This lets you set the Player to receive the control signal from the AQUOS LINK remote control via the HDMI cable.
![MENU [AQUOS LINK] AUDIO VIDEO SETTINGS SPEAKER SETTINGS QUICK START AUTO POWER OFF AQUOS LINK PLAYBACK SETTING FRONT DISPLAY / LED VERSION SOFTWARE UPDATE SYSTEM RESET MENU [AQUOS LINK] YES NO](/content/2026/05/951558/images/538419b17dc93d73f0fe2574f38b5c5b036b18ed55442ca8210935ebf935248e.jpg)
YES, NO
For details, refer to the operation manual of TV.
PLAYBACK SETTING
PARENTAL CONTROL
- This lets you set the Parental Control depending on the disc content.
- For DVD-video: 8 and OFF: All DVD-video can be played. 1-7: Prohibits play of DVD-video with corresponding ratings recorded on them.
- For BD-ROM: NO LIMIT: All BD-video can be played. 0-99 year(s): Prohibits play of BD-video with corresponding ratings recorded on them.
- Parental Control Level cannot be set if a password has not been set.
![MENU [PLAYBACK SETTING] AUDIO VIDEO SETTINGS SPEAKER SETTINGS QUICK START AUTO POWER OFF AQUOS LINK PLAYBACK SETTING FRONT DISPLAY / LED VERSION SOFTWARE UPDATE SYSTEM RESET MENU [PLAYBACK SETTINGS - PARENTAL CONTROL] PARENTAL CONTROL DISC LANGUAGE ANGLE MARK DISPLAY PIN CODE SETTING LEVEL 3 0 USA](/content/2026/05/951558/images/6bd2b355d3234ff6d7c759e88640519a5b76f2ff69d64b188411685ce5456a19.jpg)
- Refer to "Basic Operation for PLAYBACK SETTING" on page 43 for details.
DISC LANGUAGE (DISC PRIORITY LANGUAGE)
- This lets you select the language for subtitles, audio and menus displayed on the screen.
![MENU [PLAYBACK SETTING] AUDIO VIDEO SETTINGS SPEAKER SETTINGS QUICK START AUTO POWER OFF AQUOS LINK PLAYBACK SETTING FRONT DISPLAY / LED VERSION SOFTWARE UPDATE SYSTEM RESET MENU [PLAYBACK SETTINGS - DISC LANGUAGE] PARENTAL CONTROL DISC LANGUAGE ANGLE MARK DISPLAY PIN CODE SETTING SUBTITLE ENGLISH A…](/content/2026/05/951558/images/82b7ffd0990e96411f0adcad34f7039996a5e0988679841969db22586147d520.jpg)
ANGLE MARK DISPLAY
- This lets you turn the Angle Mark Display on or off when DVD video recorded with multiple angles is played back. (The Angle Mark is displayed in the lower right screen.)
![MENU [PLAYBACK SETTING] AUDIO VIDEO SETTINGS SPEAKER SETTINGS QUICK START AUTO POWER OFF AQUOS LINK PLAYBACK SETTING FRONT DISPLAY / LED VERSION SOFTWARE UPDATE SYSTEM RESET MENU [PLAYBACK SETTINGS - ANGLE MARK DISPLAY] PARENTAL CONTROL DISC LANGUAGE ANGLE MARK DISPLAY PIN CODE SETTING YES NO](/content/2026/05/951558/images/c9fd34ed1673073863a37c449fe11b5afd8a1129b302b940c34ac6ac6df5c339.jpg)
PIN CODE SETTING
- This sets the password for setting or changing the Parental Control Level.
![MENU [PLAYBACK SETTING] AUDIO VIDEO SETTINGS SPEAKER SETTINGS QUICK START AUTO POWER OFF AQUOS LINK PLAYBACK SETTING FRONT DISPLAY / LED VERSION SOFTWARE UPDATE SYSTEM RESET MENU [PLAYBACK SETTINGS - PARENTAL CONTROL]](/content/2026/05/951558/images/12930642b2e916e9231e35a6a7d5a049e793274c78d0dff50d8ce095e306a1dc.jpg)
NOTE
- When you forget the PIN code, you can reset the current PIN code using SYSTEM RESET under SETTINGS. (p.44) You can also set the new PIN code if desired.
For DVD
video:
OFF,
LEVEL 1-8
For BD-
ROM:
NO LIMIT.
LEVEL 0-99
COUNTRY
CODE
* Refer to the Country Code List. (Page 42)
SUBTITLE,
AUDIO.
MENU
* Refer to the Language Code List. (Page 42)
YES, NO
YES, NO
4 digit
number

Country Code List
| USA UK HOLLAND HONG KONG TAIWAN | |||
| CANADA ITALY NORWAY SINGAPORE PHILIPPINE | |||
| JAPAN SPAIN DENMARK THAILAND AUSTRALIA | |||
| GERMANY SWISS FINLAND MALAYSIA RUSSIA | |||
| FRANCE SWEDEN | BELGIUM | INDONESIA | CHINA |
Language Code List
| AA Afar | EU Basque | KK Kazakh | OM Afan (Oromo) | SW Swahili |
| AB Abkhazian | FA Persian | KL Greenlandic | OR Oriya | TA Tamil |
| AF Afrikaans | FI Finnish | KM Cambodian | PA Panjabi | TE Telugu |
| AM Ameharic | FJ Fiji KN Kannada | PL Polish TG Tajik | ||
| AR Arabic | FO Faroese | KO Korean | PS Pashto, Pushto | TH Thai |
| AS Assamese | FR French | KS Kashmiri | PT Portuguese | TI Tigrinya |
| AY Aymara FY Frisian KU Kurdish | QU Quechua | TK Turkmen | ||
| AZ Azerbaijani | GA Irish | KY Kirghiz | RM Rhaeto-Romance | TL Tagalog |
| BA Bashkir | GD Scots Gaelic | LA Latin | RN Kirundi | TN Setswana |
| BE Byelorussian | GL Galician | LN Lingala | RO Romanian | TO Tonga |
| BG Bulgarian | GN Guarani | LO Laothian | RU Russian | TR Turkish |
| BH Bihari | GU Gujarati | LT Lithuanian | RW Kinyarwanda | TS Tsonga |
| BI Bislama | HA Hausa | LV Latvian, Lettish | SA Sanskrit | TT Tatar |
| BN Bengali, Bangla | HI Hindi | MG Malagasy | SD Sindhi | TW Twi |
| BO Tibetan | HR Croatian | MI Maori | SG Sangho | UK Ukrainian |
| BR Breton | HU Hungarian | MK Macedonian | SH Serbo-Croatian | UR Urdu |
| CA Catalan | HY Armenian | ML Malayalam | SI Singhalese | UZ Uzbek |
| CO Corsican | IA Interlingua | MN Mongolian | SK Slovak | VI Vietnamese |
| CS Czech | IE Interlingue | MO Moldavian | SL Slovenian | VO Volapük |
| CY Welsh | IK Inupiak | MR Marathi | SM Samoan | WO Wolof |
| DA Danish | IN Indonesian | MS Malay | SN Shona | XH Xhosa |
| DE German | IS Icelandic | MT Maltese | SO Somali | YO Yoruba |
| DZ Bhutani | IT Italian | MY Burmese | SQ Albanian | ZH Chinese |
| EL Greek IW Hebrew NA Nauru | SR Serbian | ZU Zulu | ||
| EN English JA Japanese NE Nepali | SS Siswat | |||
| EO Esperanto JI Yiddish NL Dutch | ST Sesotho | |||
| ES Spanish | JW Javanese | NO Norwegian | SU Sundanese | |
| ET Estonian | KA Georgian | OC Occitan | SV Swedish | |
Basic Operation for PLAYBACK SETTING
Example: Setting "PARENTAL CONTROL" under "PLAYBACK SETTING".
1. Press SETUP to display the SETUP MENU screen.
2. Press ▲/▼/◄/► to select "SETTINGS", then press ENTER.

3. Press ▲/▼ to select "PLAYBACK SETTING", then press ENTER.
![MENU [PLAYBACK SETTING] AUDIO VIDEO SETTINGS SPEAKER SETTINGS QUICK START AUTO POWER OFF AQUOS LINK PLAYBACK SETTING FRONT DISPLAY / LED VERSION SOFTWARE UPDATE SYSTEM RESET](/content/2026/05/951558/images/9b8a9982bcd9ef39638d4f9ef169aeee831fc8e6757f6a9af7f10d053301f06e.jpg)
When setting the password for the first time:
- Press ◀/▶ to select "YES" to enter the password setting menu, then press ENTER.
- Enter the 4-digit number.
- Press ENTER to move to the next setting screen.
4. Press ▲/▼ to select "PARENTAL CONTROL", then press ENTER.
5. Enter your password.
- You cannot move to the next setting screen until you input the correct password.
![MENU [PLAYBACK SETTINGS - PARENTAL CONTROL]](/content/2026/05/951558/images/458891c99d063a13f6f02337057574096023471cd262f9f191ea5f277f93cc0a.jpg)
6. Press ◀/▶ to select the parental control level for DVD video, then press ENTER. Press ◀/▶ to select the parental control level for BD-ROM, then press ENTER. Press ◀/▶ to select the country code, then press ENTER.
![MENU [PLAYBACK SETTINGS - PARENTAL CONTROL] PARENTAL CONTROL DISC LANGUAGE ANGLE MARK DISPLAY PIN CODE SETTING LEVEL 3 0 USA](/content/2026/05/951558/images/e71f9029f932f4b74f6a269a241f9128262c41e4a70e3e511fd360bcab0a1c5b.jpg)
Press SETUP or EXIT to exit.
FRONT DISPLAY/LED
If you feel that the indicators on the Player are too bright when watching movies, you can turn them off except for the ON indicator.
![MENU [FRONT DISPLAY/LED] AUDIO VIDEO SETTINGS SPEAKER SETTINGS QUICK START AUTO POWER OFF AQUOS LINK PLAYBACK SETTING FRONT DISPLAY/LED VERSION SOFTWARE UPDATE SYSTEM RESET ON OFF](/content/2026/05/951558/images/38a00f33158ceb2766d89c960d53f7b229b1f8fc6df44aacc85c782fca0b1172.jpg)
ON, OFF
VERSION
When you select "VERSION", the system software version is displayed.
SYSTEM RESET
You can reset all settings except the password to the factory presets.
![MENU [SYSTEM RESET] AUDIO VIDEO SETTINGS SPEAKER SETTINGS QUICK START AUTO POWER OFF AQUOS LINK PLAYBACK SETTING FRONT DISPLAY / LED VERSION SOFTWARE UPDATE SYSTEM RESET MENU [SYSTEM RESET] RESET NOT RESET](/content/2026/05/951558/images/499a7d2f243f8b47abb7a69e06500abaef3f16c8a8243bb41db87a07deffcec2.jpg)
RESET, NOT RESET
Common operation
Example: Setting "FRONT DISPLAY/LED"
1 Press SETUP to display the SETUP MENU screen. 2 Press ▲/▼/◄/► to select "SETTINGS", then press ENTER.

3 Press ▲/▼ to select "FRONT DISPLAY/LED", then press ENTER.
![MENU [FRONT DISPLAY / LED] AUDIO VIDEO SETTINGS SPEAKER SETTINGS QUICK START AUTO POWER OFF AQUOS LINK PLAYBACK SETTING FRONT DISPLAY / LED VERSION SOFTWARE UPDATE SYSTEM RESET](/content/2026/05/951558/images/10fa4c610e1f8f6700695401248a19da08b482a958bb2e569ee7906e179fbe0e.jpg)
4 Press ◀/▶ to select the desired item, then press ENTER.
![MENU [FRONT DISPLAY/LED] ON OFF](/content/2026/05/951558/images/df312e99699957d49de0f723757955618a01730cb76d4ede0d0edf7980a57d8e.jpg)
Press SETUP or EXIT to exit.

SOFTWARE UPDATE
This function allows software updates by inserting a USB memory device with the update file into the SERVICE terminal on this player. Regarding how to obtain the software update file, please call 1-800-BE-SHARP.
CAUTION
- Do not remove the USB memory device or unplug the AC cord while the software is being updated.
1 Insert the USB memory device with the update file into the SERVICE terminal on rear of this player. 2 Press SETUP to display the SETUP MENU screen. 3 Press ▲/▼/◄/► to select "SETTINGS", then press ENTER. 4 Press ▲/▼ to select "SOFTWARE UPDATE", then ENTER.
- If you already set the password, go to step 6.
![MENU [SOFTWARE UPDATE] AUDIO VIDEO SETTINGS SPEAKER SETTINGS QUICK START AUTO POWER OFF AQUOS LINK PLAYBACK SETTING FRONT DISPLAY / LED VERSION SOFTWARE UPDATE SYSTEM RESET](/content/2026/05/951558/images/9e5a290726d666dc4c4f40a0da823b6655b73dd138ee9988b0b1c74fc61288e0.jpg)
Enter the 4-digit number using 0-9.5

6 Press ENTER to start checking data in the USB memory device.

7 During the data checking, "Checking" blinks.

- The current version of this unit software and the version of the update file on the USB memory device are displayed. To update this player software with update file, select "YES", and press ENTER.

- If the USB memory device is not properly installed or the correct update file cannot be found on the USB memory device, an error message is displayed. Check the file on the USB memory device, and then reinsert the USB memory device correctly.
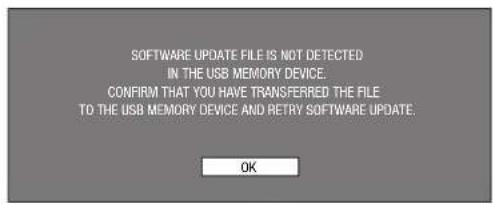


8
Press ENTER to start updating.
- The screen becomes dark for a while until the update screen can be displayed. Please wait for the update screen to appear. Do not unplug the AC cord.

9
When the software is successfully updated, a screen is displayed indicating that the update process is completed.
After this screen is displayed, the unit automatically turns off and then turns on again.
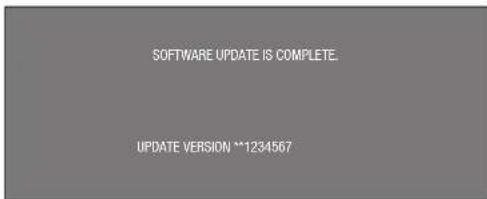
If the update has failed, check the file in the USB device and try Software Update again.
10
The message "SYSTEM SOFTWARE WAS SUCCESSFULLY UPDATED" is displayed, and then press ENTER.
11
Remove the USB memory device.
The following problems do not always suggest a defect or malfunction of this Player. Refer to the problems and lists of possible solutions below before calling for service.
The Player power cannot be turned on.
- Is the power cord firmly plugged into the AC outlet?
- When the power cord is plugged into an AC outlet, press and hold POWER on the Player until "RESEE" appears on the front panel display. Then, after the STANDBY indicator is lit, turn on the power. (Page 48)
- Press POWER after the STANDBY indicator turns on.
The disc is automatically ejected after closing the disc tray.
- Make sure that the disc is loaded properly (aligned in disc tray and label-side up). • Take out the disc and clean it.
- Make sure that region code on the disc matches that of this Player. • Make sure that the disc is playable.
- Make sure that the cables are connected correctly.
- Make sure that the connected TV or the AV receiver is set to the correct input. • Take out the disc and clean it.
- Make sure that the region code on the disc matches that of this Player. • There is no picture from the HDMI output.
- Are the settings performed correctly? Please check the settings.
- There is no picture from the Component output.
- Are the settings performed correctly? Please check the settings.
The Player cannot play a disc.
• Take out the disc and clean it. - Make sure that the disc is loaded properly (aligned in disc tray and label-side up). - Make sure that the region code on the disc matches that of this Player. - Allow any condensation in or near the Player to dry. - Check that the disc is recorded in the compatible TV system (PAL or NTSC). - The Player cannot play back video which was not recorded normally. - Proper playback may be impossible due to the state of the disc recording, a scratched, warped or dirty disc, the state of the pick-up, or compatibility issues between this Player and the disc being used. - When the recorded time of a disc is unusually short, playback may not be possible.
The settings have been erased.
- If the Player is unplugged (or there is a power failure) for more than about 1 hour while its power is on, the settings will be lost. Make sure that you turn off the Player before unplugging the power cord.
- When there is a power interruption or the power cord is unplugged from the power outlet with the power on, all settings return to the factory preset values.
The Player power is turned off.
- Is “AUTO POWER OFF” set to “YES”? When “AUTO POWER OFF” is set to “YES”, the power will be automatically turned off after 10 continuous minutes of inactivity (no playback).
Screen freezes and operation buttons do not work.
- Press ■ STOP, then restart playback.
- Turn off the power and turn on the power again.
- If the power is not turned off, perform a reset. (Page 48)
- Is the disc damaged or dirty? Check the condition of the disc. See page 10 for details about disc cleaning.
The remote control does not work.
- Set the remote control and the Player to the same remote control code. (Page 21)
- Use the remote control within its operating range.
- Replace the batteries.
No sound, or sound is distorted.
- If the volume of the TV or amplifier is set to minimum, turn the volume up.
- There is no sound during still mode, slow motion playback, fast forward and fast reverse.
- DVD audio recorded in DTS is only output from the DIGITAL AUDIO OUT terminal or jack. Connect a DTS compatible digital amplifier or decoder to the DIGITAL AUDIO OUT OPTICAL terminal or COAXIAL jack on this Player.
- Check that the audio cable is connected correctly.
- Check that the cable plugs are clean. • Take out the disc and clean it.
- Audio may not be output depending on the audio recording status, such as when audio other than an audio signal or non-standard audio is recorded for the audio content of the disc.
The playback screen will be disturbed if DVD video is recorded to a VCR, or played back through a VCR.
- This Player complies with analogue copy protection. Some discs contain a copy prohibiting signal. If you try to play back such discs through a VCR, or record to a VCR and play back the signal, the copy protection will prevent normal playback.
The TV operates incorrectly.
- Some TVs with wireless remote control capability may operate incorrectly when using the remote control of this Player. Use such TVs away from this Player.
There is just audio with no video.
- Is the connection cable for video output connected properly?
Widescreen video appears vertically stretched, or black bands appear at the top and bottom of the screen.
- Is "TV ASPECT RATIO" set to match the connected TV? (Page 33)
- If you are using a widescreen TV, is the "TV ASPECT RATIO" set to "WIDE"? (Page 33)

Square noise (mosaic) appears on the screen.
- Blocks in images may be visible in scenes with rapid movement due to the characteristics of digital image compression technology.
Video stops.
- Has the Player been subjected to shock or impact? Are you using it in an unstable location? The Player will stop if it senses shock or vibration.
Left and right channels of audio are reversed, or sound comes out of only one side.
- Are left and right audio cables connected to the opposite terminal, or is one side disconnected?
Disc does not play back automatically.
- Have you set a disc that has an automatic playback function?
The Player heats up during use.
- When using this Player, the console cabinet may heat up depending on the usage environment. This is not a malfunction.
The Player makes a snapping sound when starting playback or loading a disc.
- The player may sometimes make a snapping sound when starting playback if it has not been operated in a while. These sounds are not malfunctions of the player but are normal operating conditions.
Cannot operate the Player.
- Are you operating the Player within the specified operating temperature range? (Page 52)
STANDBY indicator will remain lit.
- When the AC cord is removed from the outlet, the STANDBY indicator will remain lit for a short period. This is normal and is not a malfunction.

NOTE
Reset
- If this Player receives strong interference from a source such as excessive static electricity, strong external noise, malfunction of power supply, or voltage caused by lightning during use or a wrong operation is sent to the Player, errors like the Player not accepting an operation may occur. Press and hold POWER on the Player until “R” appears on the front panel display when the Player does not operate properly even after the power has been turned off. Then, after the STANDBY indicator is lit, turn on the power.
- When a reset is performed while the power is on, the Player will turn off. Turn the power on again. At this point, it may take a few moments for the system processing to finish before the Player is ready for use. During the system processing, the BD and DVD/CD mode indicators on the front panel display of the Player will blink. Once the system processing has finished, the indicators will finish blinking and then light up normally. You can operate the Player when the BD and DVD/CD mode indicators are lit.
- Since all settings including the language setting stored in memory are also reset when a reset has been performed, they must be set again.
- When the problem persists even after performing a reset, unplug the AC cord and plug it in again. If this does not solve the problem, contact the nearest service center approved by SHARP.
On-screen Error Messages
Messages Relating to BD and DVD
The following messages appear on the TV screen in case the disc you tried to playback is not appropriate or the operation is not correct.
| Error message Possible Error Suggested Solution | ||
| CANNOT PLAY. • The disc cannot be played back with this Player. | • Check the disc, and load it correctly. | |
| INCOMPATIBLE DISC. • If you load a disc which cannot be played with this Player (i.e. a scratched disc), or if you load a disc upside down, this message will appear, and the disc tray will automatically pop out. | ||
| • Occurs if the loaded disc cannot be played because it is a non-standard disc or scratched, etc. | ||
| CANNOT OPERATE. • Occurs if an operation is incorrect. | —— | |
BD-J application
The BD-ROM format supports Java for interactive functions. "BD-J" offers content providers almost unlimited functionality when creating interactive BD-ROM titles.
BD-R (pages 6, 26)
A BD-R (Blu-ray Disc Recordable) is a recordable, write-once Blu-ray Disc. Since contents can be recorded and cannot be overwritten, a BD-R can be used to archive data or for storing and distributing video material.
BD-RE (pages 6, 26)
A BD-RE (Blu-ray Disc Rewritable) is a recordable and rewritable Blu-ray Disc.
BD-ROM
BD-ROMs (Blu-ray Disc Read-Only Memory) are commercially produced discs. Other than conventional movie and video contents, these discs have enhanced features such as interactive content, menu operations using pop-up menus, selection of subtitle display, and slide shows. Although a BD-ROM may contain any form of data, most BD-ROM discs will contain movies in High Definition format for playback on Blu-ray Disc players.
Blu-ray Disc (BD) (page 6)
A disc format developed for recording/playing high-definition (HD) video (for HDTV, etc.), and for storing large amounts of data. A single layer Blu-ray Disc holds up to 25 GB, and a dual-layer Blu-ray Disc holds up to 50 GB of data.
Chapter number (page 32)
Sections of a movie or a music feature that are smaller than titles. A title is composed of several chapters. Some discs may only be comprised of a single chapter.
Copy guard
This function prevents copying. You cannot copy discs marked by the copyright holder with a signal which prevents copying.
Disc menu (page 25)
This lets you select things like the subtitle language or audio format using a menu stored on the DVD video disc.
Dolby Digital
A sound system developed by Dolby Laboratories Inc. that gives movie theatre ambience to audio output when the product is connected to a Dolby Digital processor or amplifier.
Dolby Digital Plus
A sound system developed as an extension to Dolby Digital, this audio coding technology supports 5.1 multi-channel surround sound.
Dolby TrueHD
Dolby TrueHD is a lossless coding technology that supports up to 8 channels of multi-channel surround sound for the next generation optical discs. The reproduced sound is true to the original source bit-for-bit.
DTS
This is a digital sound system developed by DTS, Inc. for use in cinemas. This system uses 6 audio channels and provides accurate sound field positioning and realistic acoustics. (By connecting a DTS Digital Surround decoder, you can also listen to DTS Digital Surround sound.)
DVD video (pages 6, 7, 24)
A disc format that contains up to eight hours of moving pictures on a disc the same diameter as a CD. A single-layer single sided DVD holds up to 4.7 GB; a double layer single-sided DVD, 8.5 GB; a single layer double-sided DVD, 9.4 GB; double-layer double-sided DVD, 17 GB. The MPEG 2 format was adopted for efficient video data compression. It is a variable rate technology that encodes the data to according to the status of the video for reproducing high-quality images. Audio information is recorded in a multi-channel format such as Dolby Digital, allowing for a realistic audio presence.
DVD+/-R (pages 6, 26)
A DVD+/-R is a recordable, write-once DVD. Since contents can be recorded and cannot be overwritten, a DVD+/-R can be used to archive data or for storing and distributing video material. The DVD+/-R has two different modes: VR mode and Video mode. DVDs created in Video mode have the same format as a DVD video, while discs created in VR (Video Recording) mode allow the contents to be programmed or edited.
DVD+/-RW (pages 6, 26)
A DVD+/-RW is a recordable and rewritable DVD. The re-recordable feature makes editing possible. The DVD+/-RW has two different modes: VR mode and Video mode. DVDs created in Video mode have the same format as a DVD video, while discs created in VR (Video Recording) mode allow the contents to be programmed or edited.
HDMI
HDMI (High-Definition Multimedia Interface) is an interface that supports both video and audio on a single digital connection. The HDMI connection carries standard to high definition video signals and multi-channel audio signals to AV components such as HDMI equipped TVs, in digital form without degradation.
Interlace format
Interlace format shows every other line of an image as a single "field" and is the standard method for displaying images on television. The even numbered field shows the even numbered lines of an image, and the odd numbered field shows the odd numbered lines of an image.
Letter Box (LB 4:3) (page 33)
A screen size with black bars on the top and bottom of the image to allow viewing of wide-screen (16:9) material on a connected 4:3 TV.
Linear PCM Sound
Linear PCM is a signal recording format used for Audio CDs and on some DVD and Blu-ray discs. The sound on Audio CDs is recorded at 44.1 kHz with 16 bits. (Sound is recorded between 48 kHz with 16 bits and 96 kHz with 24 bits on DVD video discs and between 48 kHz with 16 bits and 192 kHz with 24 bits on BD video discs.)
MPEG-2
MPEG-2 (Moving Picture Experts Group phase 2) is one of the video data compression schemes, which is adopted for DVD videos and digital broadcasts worldwide. Some Blu-ray Discs also use high bitrate MPEG-2.
Multi Angle (pages 30, 31)
This is a feature of DVD and BD video discs. In some discs, the same scene is shot from different angles, and these are stored in a single disc so you can enjoy playback from each angle. (This function can be enjoyed if the disc is recorded with multiple angles.)
Multi Audio
This is a feature of DVD and BD video discs. This function makes it possible to record different audio tracks for the same video, so you can enhance your enjoyment by switching the audio. (You can enjoy this function with discs recorded with multiple audio tracks.)
Pan Scan (PS 4:3) (page 33)
A screen size that cuts off the sides of the image to allow viewing of wide-screen (16:9) material on a connected 4:3 TV.
Parental control (page 41)
In some digital broadcasts and BD/DVD video discs, a control level for disc viewing is set depending on the age of the viewer. With this Player, you can set the control level for viewing such broadcasts and discs.
Pop-up menu (page 25)
An enhanced menu operation available on BD video discs. The pop-up menu appears when POP-UP MENU is pressed during playback, and can be operated while playback is in progress.
Progressive format
Compared to the Interlace format that alternately shows every other line of an image (field) to create one frame, the Progressive format shows the entire image at once as a single frame. This means that while the Interlace format can show 30 frames/60 fields in one second, the Progressive format can show 60 frames in one second. The overall picture quality increases and still images, text, and horizontal lines appear sharper.
Region code (page 6)
Code identifying a geographic region of compatibility for a BD/DVD.
Remote control code (page 21)
This is the type of the remote control signal for operating the Player. There are three types of remote control signals: "Remote Control No. 1" (RC-1), "Remote Control No. 2" (RC-2) and "Remote Control No. 3" (RC-3).
Resume playback (page 24)
If you stop playback while it is in progress, the Player stores the stop position in memory, and this function lets you playback from that point.
Skip (page 28)
This returns to the start of the chapter (or track) being played, or skips to the next chapter (or track).
Subtitles (pages 29, 31, 32)
These are the lines of text appearing at the bottom of the screen which translate or transcribe the dialogue. They are recorded on many DVD and BD video discs.
Time number
This indicates the play time which has elapsed from the start of a disc or a title. It can be used to find a specific scene quickly. (It may not work with some discs.)
Title number (pages 31, 32)
These numbers are recorded on DVD and Blu-ray discs. When a disc contains two or more movies, these movies are numbered as title 1, title 2, etc.
Top menu (page 25)
In a BD/DVD video, this is the menu for selecting things like the chapter to be played back and the subtitle language. In some DVD videos, the top menu may be called the "Title Menu".
Track number
These numbers are assigned to the tracks which are recorded on audio CDs. They enable specific tracks to be located quickly.
Specifications
General
| Power supply AC 120V, 60Hz | |
| Power consumption (Normal) 25 W | |
| Power consumption (Standby) 0.5 W (When “FRONT DISPLAY/LED” is set to “ON”) | |
| Dimensions Approx. 16 | 59/64 × 211/16 × 133/16 inch (W x H x D) |
| Weight Approx. 4.0 kg | |
| Operating temperature 5°C to 35°C | |
| Storage temperature -20°C to 55°C | |
| Operating humidity 10 % to 80 % (no condensation) | |
| TV systems NTSC system, 525 lines, 60 fi elds | |
Playback
| discs BD-ROM, BD-RE (Ver. 2.1 1L), BD-R (Ver. 1.1 1L), DVD Video, DVD-R DL, DVD-RW/R, DVD+RW/R, Audio CD (CD-DA), CD-RW/R (CD-DA) |
Input/Output
| HDMI HDMI 19-pin standard connector | |
| Component video output Output level: | Y: 1 Vp-p (75 ohms) PB/CB , PA/CR : 0.7 Vp-p (75 ohms)Jacks: RCA jack |
| S-Video output | Y-Output level: 1 Vp-p (75 ohms)C-Output level: 0.3 Vp-p (75 ohms)Jack: 4 pin mini DIN |
| Video output | Output level: 1 Vp-p (75 ohms)Jack: RCA-pin jack |
| 5.1 ch Audio output | Output level: 2 V rms (Output impedance: 1K ohms)Jacks: RCA jack |
| Digital audio optical output | Terminal: Square Optical terminal |
| Digital audio coaxial output | Jack: RCA jack |
| Audio output | Output level: 2 V rms (Output impedance: 1K ohms)Jacks: RCA jack |
Specifications are subject to change without notice.
CONSUMER LIMITED WARRANTY
(Valid for warranty service in the U.S. and PUERTO RICO only)
CONSUMER LIMITED WARRANTY
SHARP ELECTRONICS CORPORATION warrants to the first consumer purchaser that this Sharp brand product (the "Product"), when shipped in its original container, will be free from defective workmanship and materials, and agrees that it will, at its option, either repair the defect or replace the defective Product or part thereof with a new or remanufactured equivalent at no charge to the purchaser for parts or labor for the period(s) set forth below.
This warranty does not apply to any appearance items of the Product or if the serial number or model number affixed to the Product has been removed, defaced, changed, altered or tampered with. This warranty does not cover installation or signal reception problems. This limited warranty will not apply if the Product has been or is being used in a commercial setting or application; this warranty is meant solely for the non-commercial, household use of the Product by consumers in their home or residence.
In order to enforce the rights under this limited warranty, the purchaser should follow the steps set forth below and provide proof of purchase to the servicer.
To the extent permitted by applicable state law, the warranties set forth are in lieu of, and exclusive of, all other warranties, express or implied. Specifically ALL OTHER WARRANTIES OTHER THAN THOSE SET FORTH ABOVE ARE EXCLUDED, ALL EXPRESS AND IMPLIED WARRANTIES INCLUDING THE WARRANTIES OF MERCHANTABILITY, FITNESS FOR USE, AND FITNESS FOR A PARTICULAR PURPOSE ARE SPECIFICALLY EXCLUDED. IF, UNDER APPLICABLE STATE LAW, IMPLIED WARRANTIES MAY NOT VALIDLY BE DISCLAIMED OR EXCLUDED, THE DURATION OF SUCH IMPLIED WARRANTIES IS LIMITED TO THE PERIOD(S) FROM THE DATE OF PURCHASE SET FORTH BELOW. THIS WARRANTY GIVES YOU SPECIFIC LEGAL RIGHTS. YOU MAY ALSO HAVE OTHER RIGHTS WHICH VARY FROM STATE TO STATE.
The warranties given herein shall be the sole and exclusive warranties granted by Sharp and shall be the sole and exclusive remedy available to the purchaser and only for the time periods set forth herein. No other representations or promises made by anyone are permitted. Correction of defects, in the manner and for the period of time described herein, shall constitute complete fulfillment of all liabilities and responsibilities of Sharp to the purchaser with respect to the Product, and shall constitute full satisfaction of all claims, whether based on contract, negligence, strict liability or otherwise. Sharp does not warrant nor shall Sharp be liable, or in any way responsible, for Products which have been subject to abuse (including, but not limited to, improper voltage), accident, misuse, negligence, lack of reasonable care, alteration, modification, tampering, improper operation or maintenance or any damages or defects in the Product which were caused by repairs or attempted repairs performed by anyone other than a Sharp authorized servicer. Nor shall Sharp be liable or in any way responsible for any incidental or consequential economic or property damage. Some states do not allow limits on warranties or on remedies for breach in certain transactions; in such states, the limits herein may not apply.
THIS LIMITED WARRANTY IS VALID ONLY IN THE FIFTY (50) UNITED STATES, THE DISTRICT OF COLUMBIA. AND PUERTO RICO
Model Specific Section
Your Product Model Number & Description:
BD-HP20U BLU-RAY DISC PLAYER
(Be sure to have this information available when you need service for your Product.)
Warranty Period for this Product: One (1) year parts and labor from the date of purchase.
Additional Item(s) Excluded from
Warranty Coverage (if any): Non-rechargeable batteries.
Where to Obtain Service:
From a Sharp Authorized Servicer located in the United States. To find the location of the nearest Sharp Authorized Servicer, call Sharp toll free at 1-800-BE-SHARP.
What to do to Obtain Service:
Please transport the Product in its original packaging and ensure that the Product is covered to avoid scratches and damage. Sharp shall not be responsible for lost, stolen or misdirected mail or for damage to the product incurred during shipping.
TO OBTAIN PRODUCT INFORMATION, CALL 1-800-BE-SHARP OR VISIT www.sharpusa.com
LIMITED WARRANTY
Consumer Electronics Products
Congratulations on your purchase!
Sharp Electronics of Canada Ltd. (hereinafter called "Sharp") gives the following express warranty to the first consumer purchaser for this Sharp brand product, when shipped in its original container and sold or distributed in Canada by Sharp or by an Authorized Sharp Dealer:
Sharp warrants that this product is free, under normal use and maintenance, from any defects in material and workmanship. If any such defects should be found in this product within the applicable warranty period, Sharp shall, at its option, repair or replace the product as specified herein.
This warranty shall not apply to:
(a) Any defects caused or repairs required as a result of abusive operation, negligence, accident, improper installation or inappropriate use as outlined in the owner's manual. (b) Any Sharp product tampered with, modified, adjusted or repaired by any party other than Sharp, Sharp's Authorized Service Centres or Sharp's Authorized Servicing Dealers. (c) Damage caused or repairs required as a result of the use with items not specified or approved by Sharp, including but not limited to head cleaning tapes and chemical cleaning agents. (d) Any replacement of accessories, glassware, consumable or peripheral items required through normal use of the product including but not limited to earphones, remote controls, AC adapters, batteries, temperature probe, stylus, trays, filters, belts, ribbons, cables and paper. (e) Any cosmetic damage to the surface or exterior that has been defaced or caused by normal wear and tear. (f) Any damage caused by external or environmental conditions, including but not limited to transmission line/power line voltage or liquid spillage. (g) Any product received without appropriate model, serial number and CSA/cUL markings. (h) Any products used for rental or commercial purposes. (i) Any installation, setup and/or programming charges.
Should this Sharp product fail to operate during the warranty period, warranty service may be obtained upon delivery of the Sharp product together with proof of purchase and a copy of this LIMITED WARRANTY statement to an Authorized Sharp Service Centre or an Authorized Sharp Servicing Dealer. In home warranty service may be provided at Sharp's discretion on any Sharp television with the screen size of 27" or larger and on any Sharp Over-the-Range Microwave Oven.
This warranty constitutes the entire express warranty granted by Sharp and no other dealer, service centre or their agent or employee is authorized to extend, enlarge or transfer this warranty on behalf of Sharp. To the extent the law permits, Sharp disclaims any and all liability for direct or indirect damages or losses or for any incidental, special or consequential damages or loss of profits resulting from a defect in material or workmanship relating to the product, including damages for the loss of time or use of this Sharp product or the loss of information. The purchaser will be responsible for any removal, reinstallation, transportation and insurance costs incurred. Correction of defects, in the manner and period of time described herein, constitute complete fulfillment of all obligations and responsibilities of Sharp to the purchaser with respect to the product and shall constitute full satisfaction of all claims, whether based on contract, negligence, strict liability or otherwise.
WARRANTY PERIODS:
| Audio Product |
| Camcorder |
| DVD Product |
| Projector |
| LCD TV |
| Microwave Oven |
| Air Purifier |
| Portable Air Conditioner |
Parts & Labour (exceptions noted)
1 year
1 year
1 year
1 year (lamp 90 days)
1 year
1 year (magnetron component-4 additional years)
1 year
1 year
To obtain the name and address of the nearest Authorized Sharp Service Centre or Dealer, please contact: SHARP ELECTRONICS OF CANADA LTD. 335 Britannia Road East, Mississauga, Ontario L4Z 1W9
For more information on this Warranty, Sharp Extended Warranty Offers, Sharp Canada Products, Accessory Sales, Dealer or Service Locations, please call (905) 568-7140 Visit our Web site: www.sharp.ca

Revision 12/16/05
SHARP®
SHARP ELECTRONICS CORPORATION
Sharp Plaza, Mahwah, New Jersey 07430-2135
SHARP CORPORATION


- OPERATION MANUAL
- ENGLISH
- WARNING: TO REDUCE THE RISK OF FIRE OR ELECTRIC SHOCK, DO NOT EXPOSE THIS APPLIANCE TO RAIN OR MOISTURE
- CAUTION
- WARNING—FCC REGULATIONS STATE THAT ANY UNAUTHORIZED CHANGES OR MODIFICATIONS TO THIS EQUIPMENT NOT EXPRESSLY APPROVED BY THE MANUFACTURER COULD VOID THE USER'S AUTHORITY TO OPERATE THIS EQUIPMENT
- INFORMATION
- IMPORTANT SAFETY INSTRUCTIONS
- ADDITIONAL SAFETY INFORMATION
- ① INTRODUCTION
- ② CONNECTION
- ③ DISC PLAYBACK
- ④ SETTINGS
- APPENDIX
- WHAT WOULD YOU LIKE TO DO WITH THIS PLAYER
- WATCHING HIGH QUALITY MOVIES ON BLU-RAY DISCS
- ENJOYING DIFFERENT KINDS OF DISCS AND CONTENTS
- SIMPLE CONNECTION AND OPERATION THROUGH HDMI
- EXPERIENCING SURROUND SOUND WITH YOUR SPEAKERS
- WHAT TO DO FIRST
- ①INTRODUCTION (PP. 1-12)
- ②CONNECTION (PP. 13-19)
- ③DISC PLAYBACK (PP. 20-32)
- ④SETTINGS (PP. 33-46)
- ⑤APPENDIX (PP. 47-54)
- A QUICK REFERENCE FOR SELECTING DISCS
- CAN PLAY BACK
- CANNOT PLAY BACK
- NOTE
- BLU-RAY DISC
- TYPES OF DISCS THAT CAN BE USED WITH THIS PLAYER
- DISCS THAT CANNOT BE USED WITH THIS PLAYER
- ABOUT DISC CONTENTS
- TITLE, CHAPTER AND TRACK
- ICONS USED ON DVD VIDEO DISC CASES
- AUDIO TRACKS AND AUDIO FORMATS
- DOLBY DIGITAL
- DTS
- LINEAR PCM
- MPEG
- SUBTITLE LANGUAGES
- SCREEN ASPECT RATIO
- CAMERA ANGLE
- REGION CODE
- THE ICONS USED IN THIS OPERATION MANUAL
- IMPORTANT INFORMATION
- DISC PRECAUTIONS
- BE CAREFUL OF SCRATCHES AND DUST
- HANDLING PRECAUTIONS
- CLEANING THE PICK UP LENS
- WARNINGS ABOUT DEW FORMATION
- WHEN CONDENSATION FORMS
- TO REMOVE CONDENSATION
- COPYRIGHT
- U.S. PATENT NOS. 4,631,603 AND
- GETTING STARTED
- STEP 1: UNPACKING
- STEP 2: SELECTING EQUIPMENT TO CONNECT
- STEP 3: PLAYING BACK DISCS
- STEP 4: ADJUST SETTINGS
- MAJOR COMPONENTS
- MAIN UNIT (FRONT)
- MAIN UNIT (REAR)
- KEYLOCK FUNCTION
- INTRODUCTION TO CONNECTIONS
- CONNECTING TO THE HDMI TERMINAL
- STEPS
- EQUIPMENT WITH AN HDMI TERMINAL
- CHANGE THE VIDEO OUTPUT TO HDMI VIDEO OUT
- AFTER CONNECTING
- CONNECTING TO THE COMPONENT JACKS
- VIDEO EQUIPMENT WITH COMPONENT JACKS
- CONNECTING TO THE S-VIDEO OR VIDEO JACK
- CONNECTING 5.1 CH SPEAKERS THROUGH AN AMPLIFIER
- CONNECTING TO THE DIGITAL AUDIO TERMINAL OR JACK
- CONNECTING THE AUDIO JACKS
- BEFORE STARTING PLAYBACK
- LOADING THE BATTERIES IN THE REMOTE CONTROL
- APPROXIMATE OPERATING RANGE OF REMOTE CONTROL
- CONNECTING THE POWER CORD
- SETTING THE REMOTE CONTROL CODE
- SETTING THE REMOTE CONTROL CODE OF THE REMOTE
- SETTING THE REMOTE CONTROL CODE OF THE PLAYER
- IF REMOTE CONTROL DOES NOT WORK
- OPERATING A SHARP TV USING THE REMOTE CONTROL
- TV FUNCTION CONTROL
- TURNING THE POWER ON
- ENTERING STANDBY
- LANGUAGE SETTING
- CHANGING THE ON-SCREEN DISPLAY LANGUAGE
- TURNING OFF THE LCD BACKLIGHT AND INDICATIONS
- QUICK OPERATION
- SETUP MENU OPERATION
- USING AQUOS LINK
- CONTROLLING THE BLU-RAY DISC PLAYER USING AQUOS LINK
- BD/DVD/CD PLAYBACK
- LOADING A DISC
- BD/DVD VIDEO PLAYBACK
- TO STOP PLAYBACK
- RESUME PLAYBACK FUNCTION
- BD/DVD MENUS
- START PLAYBACK BY SELECTING A TITLE FROM THE TOP MENU
- PRESS TOP MENU
- PRESS ▲/▼/◄/► TO SELECT THE TITLE, THEN PRESS ENTER
- TOP MENU
- USING THE DISC MENU
- PRESS POP-UP MENU
- PRESS ▲/▼ TO SELECT "SUBTITLE LANGUAGE", THEN PRESS ENTER
- PRESS ▲/▼ TO SELECT THE SUBTITLE LANGUAGE, THEN PRESS ENTER
- BD-R/-RE/DVD-R/-RW PLAYBACK
- PLAYBACK FROM THE BEGINNING
- PLAYBACK BY SELECTING A TITLE
- PLAYBACK BY SELECTING A PLAY LIST
- SORTING THE TITLES
- PLAYING BACK THE TITLE YOU STOPPED WHILE BEING PLAYED
- AUDIO CD PLAYBACK
- FAST FORWARD/REVERSE (SEARCH)
- WHEN PLAYING BACK A DVD
- SKIPPING TO THE NEXT OR THE START OF THE CURRENT CHAPTER (TRACK)
- SLOW PLAYBACK
- PAUSE/FRAME ADVANCE PLAYBACK
- SKIP SEARCH
- REPLAY
- REPEAT PLAYBACK OF A TITLE OR CHAPTER (REPEAT PLAYBACK)
- ENLARGE THE PLAYBACK IMAGE (ZOOM FUNCTION)
- PARTIAL REPEAT PLAYBACK (REPEAT PLAYBACK OF A SPECIFIED PART)
- SWITCHING AUDIO
- SWITCHING SUBTITLES
- SWITCHING THE ANGLE
- PRESS ANGLE DURING PLAYBACK
- DISPLAYING THE ANGLE MARK
- DISPLAY OF FUNCTIONS
- SWITCHING BETWEEN FUNCTIONS
- FAST FORWARD/REVERSE
- REPEAT PLAYBACK
- SETTINGS DURING PLAYBACK
- FUNCTION CONTROL
- FUNCTION CONTROL OPERATION PROCEDURE
- FUNCTIONS WHICH CAN BE SET
- TITLE NUMBER (DIRECT TITLE SKIP)
- CHAPTER NUMBER (DIRECT CHAPTER SKIP)
- PLAYBACK ELAPSED TIME (DIRECT TIME SKIP)
- SUBTITLE LANGUAGE
- ANGLE NUMBER
- AUDIO
- REPEAT
- AUDIO VIDEO SETTINGS
- TV ASPECT RATIO
- COMPONENT VIDEO OUT
- HDMI VIDEO OUT
- HDMI AUTO DETECTION
- AUDIO OUT
- DYNAMIC RANGE CONTROL
- BASIC OPERATION FOR AUDIO VIDEO SETTINGS
- SPEAKER SETTINGS
- ABOUT SPEAKERS
- BASIC OPERATION FOR SPEAKER SETTINGS
- CHECKING THE SETUP SOUND
- RESETTING THE SETUP
- COMPLETING THE SETTINGS
- QUICK START
- AUTO POWER OFF
- AQUOS LINK
- PLAYBACK SETTING
- PARENTAL CONTROL
- DISC LANGUAGE (DISC PRIORITY LANGUAGE)
- ANGLE MARK DISPLAY
- PIN CODE SETTING
- BASIC OPERATION FOR PLAYBACK SETTING
- FRONT DISPLAY/LED
- VERSION
- SYSTEM RESET
- COMMON OPERATION
- SOFTWARE UPDATE
- PRESS ENTER TO START UPDATING
- THE PLAYER POWER CANNOT BE TURNED ON
- THE DISC IS AUTOMATICALLY EJECTED AFTER CLOSING THE DISC TRAY
- THE PLAYER CANNOT PLAY A DISC
- THE SETTINGS HAVE BEEN ERASED
- THE PLAYER POWER IS TURNED OFF
- SCREEN FREEZES AND OPERATION BUTTONS DO NOT WORK
- THE REMOTE CONTROL DOES NOT WORK
- NO SOUND, OR SOUND IS DISTORTED
- THE PLAYBACK SCREEN WILL BE DISTURBED IF DVD VIDEO IS RECORDED TO A VCR, OR PLAYED BACK THROUGH A VCR
- THE TV OPERATES INCORRECTLY
- THERE IS JUST AUDIO WITH NO VIDEO
- WIDESCREEN VIDEO APPEARS VERTICALLY STRETCHED, OR BLACK BANDS APPEAR AT THE TOP AND BOTTOM OF THE SCREEN
- SQUARE NOISE (MOSAIC) APPEARS ON THE SCREEN
- VIDEO STOPS
- LEFT AND RIGHT CHANNELS OF AUDIO ARE REVERSED, OR SOUND COMES OUT OF ONLY ONE SIDE
- DISC DOES NOT PLAY BACK AUTOMATICALLY
- THE PLAYER HEATS UP DURING USE
- THE PLAYER MAKES A SNAPPING SOUND WHEN STARTING PLAYBACK OR LOADING A DISC
- CANNOT OPERATE THE PLAYER
- STANDBY INDICATOR WILL REMAIN LIT
- RESET
- ON-SCREEN ERROR MESSAGES
- MESSAGES RELATING TO BD AND DVD
- BD-J APPLICATION
- BD-R (PAGES 6, 26)
- BD-RE (PAGES 6, 26)
- BD-ROM
- BLU-RAY DISC (BD) (PAGE 6)
- CHAPTER NUMBER (PAGE 32)
- COPY GUARD
- DISC MENU (PAGE 25)
- DOLBY DIGITAL PLUS
- DOLBY TRUEHD
- DVD VIDEO (PAGES 6, 7, 24)
- DVD+/-R (PAGES 6, 26)
- DVD+/-RW (PAGES 6, 26)
- HDMI
- INTERLACE FORMAT
- LETTER BOX (LB 4:3) (PAGE 33)
- LINEAR PCM SOUND
- MULTI ANGLE (PAGES 30, 31)
- MULTI AUDIO
- PAN SCAN (PS 4:3) (PAGE 33)
- PARENTAL CONTROL (PAGE 41)
- POP-UP MENU (PAGE 25)
- PROGRESSIVE FORMAT
- REGION CODE (PAGE 6)
- REMOTE CONTROL CODE (PAGE 21)
- RESUME PLAYBACK (PAGE 24)
- SKIP (PAGE 28)
- SUBTITLES (PAGES 29, 31, 32)
- TIME NUMBER
- TITLE NUMBER (PAGES 31, 32)
- TOP MENU (PAGE 25)
- TRACK NUMBER
- SPECIFICATIONS
- CONSUMER LIMITED WARRANTY
- MODEL SPECIFIC SECTION
- ADDITIONAL ITEM(S) EXCLUDED FROM
- LIMITED WARRANTY
- CONSUMER ELECTRONICS PRODUCTS
- CONGRATULATIONS ON YOUR PURCHASE
- SHARP®
- SHARP ELECTRONICS CORPORATION
Brand : SHARP
Model : BD-HP20U
Category : Blu-ray player