
CDR 895 D - Camcorder COBRA - Free user manual and instructions
Find the device manual for free CDR 895 D COBRA in PDF.


Pick your language and provide your email: we'll send you a specifically translated version.
| Product Type | Dash Cam / Camcorder |
| Brand | Cobra |
| Model | CDR 895 D |
| Power Input | 10-24V DC via car power adapter |
| Power Connector | Micro USB (for data/power) |
| Recording Resolution | HD (likely 1080p) |
| Recording Mode | Continuous loop recording |
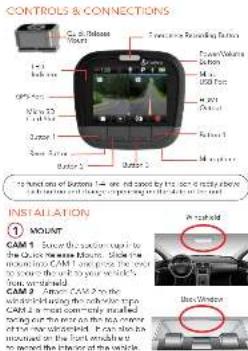
| G-Sensor | Built-in impact detection for emergency recording |
| Number of Cameras | Dual (front and rear, CAM1 & CAM2) |
| Storage | microSD card (up to 128GB, Class 10 or higher) |
| Display | Small built-in screen (not specified size, likely 2-3 inches) |
| Mounting | Suction cup or adhesive mount to windshield |
| Computer Connection | USB for file transfer (mass storage device) |
| Software Support | DriveHD software for viewing and managing clips |
| Dimensions (approx.) | 60 x 60 x 30 mm |
| Weight (approx.) | 60 g |
| Operating Temperature | 0°C to 40°C (estimated) |
| Cleaning | Wipe with soft dry cloth; avoid liquids |
| Safety | Do not install in a way that obstructs driver's view |
| Spare Parts Availability | Contact Cobra support for replacement mounts, cables, etc. |
| General Information | Visit www.cobra.com for manual updates and support |
Frequently Asked Questions - CDR 895 D COBRA
How do I install the Cobra CDR 895 D dash cam?
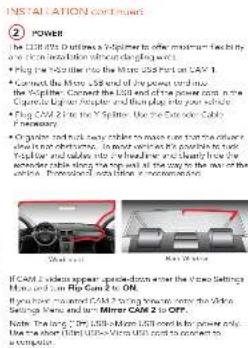
Mount the camera on the windshield using the provided suction cup or adhesive pad. Connect the power cable to the car's 12V outlet and plug the Micro USB end into the camera. Route the cable neatly. If using a rear camera, connect it to the main unit.
What type of memory card does the CDR 895 D support?
It supports microSD cards up to 128GB, Class 10 or higher. Insert the card into the slot until it clicks.
How do I format the memory card?
You can format the card via the camera's menu or on a computer. For best performance, format the card inside the camera using the 'Format' option in settings.
How does the G-Sensor work?
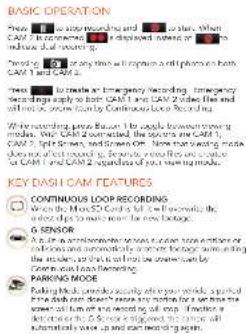
The built-in G-Sensor detects sudden impacts or acceleration. When triggered, it automatically locks the current recording so it won't be overwritten by loop recording.
How do I view recorded videos?
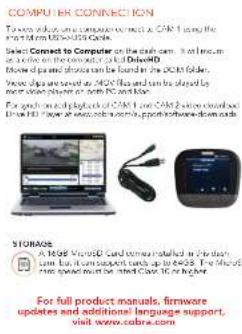
Connect the camera to a computer via USB and select 'Connected to Computer' on the dash screen. The videos will appear as a removable drive. You can also remove the microSD card and use a card reader.
Can I install a rear camera separately?
Yes, the CDR 895 D supports dual cameras. Connect the rear camera (CAM2) to the main unit using the provided cable.
How do I enable loop recording?
Loop recording is enabled by default. The camera will overwrite the oldest footage when the card is full. Locked emergency clips are protected.
What is the emergency recording feature?
Press the emergency button (▪) to manually lock the current clip. Additionally, the G-Sensor automatically triggers emergency recording during a collision.
How do I update the firmware?
Visit www.cobra.com and download the latest firmware for the CDR 895 D. Copy the file to a formatted microSD card, insert it into the camera, and follow the update instructions in the manual.
Why is the camera not powering on?
Check the power cable connection to both the camera and the car adapter. Ensure the car's ignition is on (if wired to the fuse box). Try a different USB cable or adapter.
User questions about CDR 895 D COBRA
0 question about this device. Answer the ones you know or ask your own.
Ask a new question about this device
No questions yet. Be the first to ask one.
Download the instructions for your Camcorder in PDF format for free! Find your manual CDR 895 D - COBRA and take your electronic device back in hand. On this page are published all the documents necessary for the use of your device. CDR 895 D by COBRA.
USER MANUAL CDR 895 D COBRA
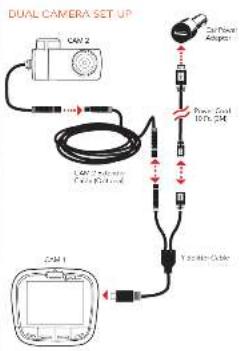
flowchart
graph TD
    A["Cam 1"] --> B["Camera"]
    C["Cam 2"] --> D["Cable"]
    D --> E["Power Supply 10V/24V"]
    E --> F["Sensor Cable"]
    F --> G["Car Power Adapter"]
    style A fill:#f9f,stroke:#333
    style C fill:#f9f,stroke:#333
    style D fill:#f9f,stroke:#333
    style E fill:#ccf,stroke:#333
    style F fill:#ccf,stroke:#333
    style G fill:#cff,stroke:#333
Manual assistant
Powered by Anthropic
Waiting for your message
Product information
Brand : COBRA
Model : CDR 895 D
Category : Camcorder