
MBP86SN - Humidifier MOTOROLA - Free user manual and instructions
Find the device manual for free MBP86SN MOTOROLA in PDF.


| Product Type | Smart Humidifier |
| Model | MBP86SN |
| Water Tank Capacity | 5.5 L (1.45 gallons) |
| Mist Output | Cool mist: ≥350 ml/h, Warm mist: ≥400 ml/h, Total: 135-515 ml/h |
| Mist Levels | 4 levels (Auto, 1, 2, 3) |
| Warm Mist | Yes, takes about 25 minutes to warm up |
| Timer | 1 to 12 hours |
| Humidity Control | Adjustable from 30% to 75% RH in 5% increments |
| Night Light | Yes, can be turned on/off |
| Air Refreshing Function | Yes, available |
| Baby Mode | Yes, controlled via app |
| Wi-Fi Connectivity | 2.4 GHz 802.11b/g/n |
| App Compatibility | Hubble Connect for Smart Nursery (iOS 8.0+, Android 4.4.2+) |
| Noise Level | ≤35 dB(A) |
| Power Input | 220-240 V, 50-60 Hz, 129 W |
| Power Output | 220-240 V, 50-60 Hz, 112 W |
| Warm Mist Power | 80 W |
| Humidification Power | 30 W |
| Operating Temperature | -10 to 50 °C |
| Filters | Pre-filter, water filter, dust filter (replaceable) |
| Filter Replacement Alert | Yes, via app |
| Low Water Alert | Yes, on display and app |
| Safety Certifications | ETL, FCC, IC, UL 998, CSA C22.2 No. 104-11 |
| Dimensions (approx.) | Not specified in manual; typical for 5.5L humidifier: ~25 x 20 x 40 cm |
Frequently Asked Questions - MBP86SN MOTOROLA
User questions about MBP86SN MOTOROLA
0 question about this device. Answer the ones you know or ask your own.
Ask a new question about this device
Download the instructions for your Humidifier in PDF format for free! Find your manual MBP86SN - MOTOROLA and take your electronic device back in hand. On this page are published all the documents necessary for the use of your device. MBP86SN by MOTOROLA.
USER MANUAL MBP86SN MOTOROLA
natural_image
Red circular logo with a white stylized letter M (no text or symbols)motorola
natural_image
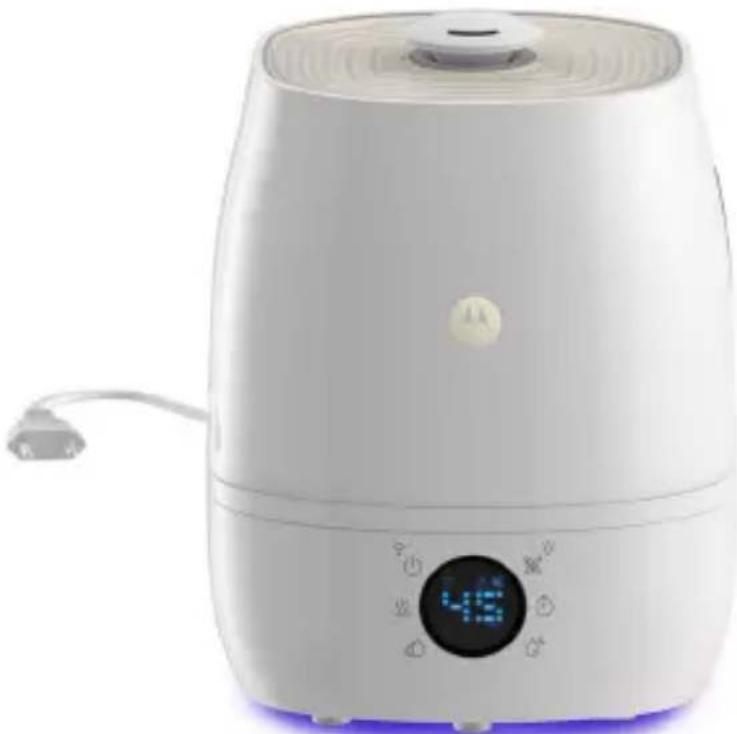
White air fryer with digital display and purple base (no visible text or symbols)USER'S GUIDE
Smart Humidifier
Model: MBP86SN
The features described in this guide are subject to modifications without prior notice.
Welcome...
to your new Motorola Humidifier!
Thank you for purchasing your new Motorola Smart Humidifier.
The Humidifier is designed to let you manage and maintain it while at work, on the road and on vacation via "Hubble Connect for Smart Nursery" App. Featuring evaporative cool mist technology, the Humidifier is capable of humidifying your room for up to 30 hours.
Please keep your original dated sales receipt for your records. For warranty service of your Motorola product, you will need to provide a copy of your dated sales receipt to confirm warranty status.
Registration is not required for warranty coverage.
For product related questions, please call:
US and Canada 1-888-331-3383
E-mail: support@motorolastore.com
On the Web: www.motorolastore.com/support
This User's Guide has all the information you need to make the most out of your product.
Please read the Safety Instructions on page 7 before you install the unit.
Inside the Box
- 1 x Humidifier (filters pre-installed)
• 1 x Quick Start Guide
Overview of the Humidifier

- Mist Outlet
You need to plug in the Mist Outlet before use.
-
Air Refreshing Function / Night Light Button
-
Timer Button
-
Humidity Button
-
Power On-Off Button / Wi-Fi (Pair Key)
-
Warm Mist Button
-
Mist Level Button
-
LED Display
Operation of the Touch Control Buttons
 | Wi-Fi (Pair Key) | Press and hold the Power On-Off / Wi-Fi (Pair Key) button for 3 seconds to enter Wi-Fi pairing/setting mode. |
 | On/Off Button Tap | to turn the unit On or Off. When the unit is turned on, the display lights up to indicate the current mist level and RH value. Both the water tank and night light lamp will also light up. |
 | Warm Mist Tap to | turn warm mist On or Off. It takes about 25 minutes for the mist to warm up. |
 | Mist Level Tap to | cycle through the speed options (1, 2, 3 or Auto). The selected speed is shown on the LED display. |
 | Night Light Press | and hold the Air Refreshing function / Night Light button for 2 seconds to turn night light On or Off. |
 | Air Refreshing Tap | to activate air refreshing function. |
 | Timer Tap to cycle | through the timer settings (from 1 hour to 12 hours). The timer icon and the selected timer will appear on the LED display for around 3 seconds. To exit timer mode, press and hold the timer key for 2 seconds. |
 | Humidity To main | tain the room's humidity at a specific level, tap to cycle through and select the specific RH humidity (30%, 35%, 40%, 45%, 50%, 55%, 60%, 65%, 70%, 75%). The Humidifier will then control the mist level by turning it on/off automatically according to the ambient relative humidity in comparison with the setting. To cancel the mode, press and hold the key for 2 seconds. |
LED Display Icons

| Wi-Fi is on | ||
 | Warm mist is on | |
 | Mist Level (Auto, 1, 2 or 3) | |
 | Air refreshing mode is on | |
 [D6] [D6] | Timer is on | |
 | Baby mode is on | |
| Room humidity | ||
 | Low water level alert | |
 |  | Wi-Fi registration, the 2 x 11 segment digital LED pattern will swap between and until registration completes successfully.The Wi-Fi icon and the 2 x 11 segment digital LED pattern and will blink in the frequency of 1 second on / 1 second off. |
Table of contents
- Safety Instructions ...... 7
- System Requirements....8
- Getting Started 9
3.1 Fill up the Water Tank and Install Pre-Filter 9
3.2 Connect Humidifier to Power Supply.... 12
- Connecting Devices ....13
4.1 User Account and Humidifier Setup on Android™ Devices...... 13
4.1.1 Download Hubble Connect for Smart Nursery App .... 13
4.1.2 Run Hubble Connect for Smart Nursery App on Android™ device 14
4.1.3 Add Humidifier to your Smart Nursery account .....15
4.2 User Account and Humidifier Setup on iOS Devices......18
4.2.1 Download Hubble Connect for Smart Nursery App .... 18
4.2.2 Run Hubble Connect for Smart Nursery App on iOS ® device 18
4.2.3 Add Humidifier to your Smart Nursery account .....19
- Overview of Hubble App....22
- Recommendations for Use and Care ....23
- Change Filters ....24
7.1 Change Pre-Filter 24
7.2 Change Water Filter 24
7.3 Change Dust Filter 25
- Troubleshooting....26
- Disposal of the Device (Environment) 30
- General Information....31
- Technical Specifications ....37
1. Safety Instructions
READ AND SAVE THESE INSTRUCTIONS.
WARNING
This product is compliant with all relevant electromagnetic field standards and is, when handled as described in the User's Guide, safe to use. Therefore, always read the instructions in this User's Guide carefully before using the device, and save it for later use.
- The humidifier is intended for indoor use only. Do not operate the humidifier outdoors.
- Always ensure that there is water in the water tank before operating the humidifier.
- Use only clean, cool water to fill the water tank.
- Place the humidifier on a smooth, level, waterproof surface that is elevated off the ground.
- Keep out of reach of children. Do not install near walls, furniture or electrical appliances.
- The appliance should only be used by children if under adult supervision.
- Always handle the humidifier with dry hands to avoid electric shock.
- Do not operate the humidifier with a damaged cord or plug.
- Unplug the humidifier when not in use.
- Do not cover the mist outlet on the humidifier or insert objects into the mist outlet.
- Do not leave the humidifier in a closed room as the air could become saturated and leave condensation on walls or furniture.
- Leave room door partially open when the humidifier is being operated.
- This product is not a toy. Do not allow children to play with it.
- Keep this User's Guide for future reference.
Important guidelines for installing Humidifier
- Use of other 2.4 GHz products, such as other wireless networks, Bluetooth® systems or microwave ovens may cause interference with this product. Keep the humidifier away from these types of products, or turn them off if they appear to be causing interference.
- Always ensure that you have a good Wi-Fi® connection available.
- Place the humidifier on a smooth, level surface, such as a table.
2. System Requirements
Smartphones/Tablets: Android ™ and iOS ® only.
System Requirement: iOS 8.0, Android™ 4.4.2 or higher
For more information please visit: https://hubbleconnected.com/requirements
3. Getting Started
3.1 Fill up the Water Tank and Install Pre-Filter
Important:
Do not operate the humidifier without water in the water tank.
Make sure that the humidifier is unplugged from the electrical outlet before removing the water tank.
ALWAYS use fresh cool water for the water tank.
- Lift up the handle on top of the water tank and remove the water tank from the humidifier base.

natural_image
Line drawing of a kitchen appliance with three views: top view, front view, and side view (no text or symbols)- Put the handle back into place, then turn the water tank upside down, and remove the pre-filter with cap by twisting it counter clockwise.

natural_image
Simple line drawing of a cylindrical device with a knob and internal components, no text or symbols present.- Fill the water tank with clean, cool water.

natural_image
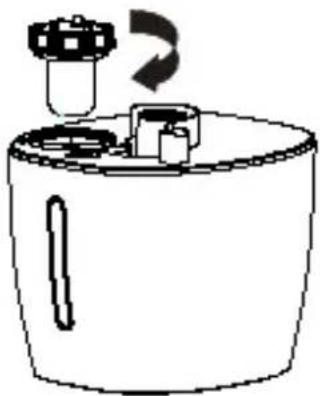
Simple line drawing of a water dispenser with a faucet above it (no text or symbols)- Replace the pre-filter with cap by inserting and turning it clockwise until tight.
natural_image
Simple line drawing of a cylindrical container with a small inset showing internal components and a curved arrow indicating rotation (no text or symbols)- Replace the water tank on the humidifier base. Ensure that the water tank is firmly seated and replace the mist lid back on top of the humidifier.

natural_image
Line drawing of a device with an open lid and internal components, no text or symbols present3.2 Connect Humidifier to Power Supply
- Connect the Humidifier to the electrical outlet.

natural_image
Line drawing of a portable electric heater connected to a wall socket (no text or symbols)- The LED display will light up momentarily and then go blank.
4. Connecting Devices
How Does It Work?

flowchart
graph TD
    A["MBP86SN"] --> B["Wi-Fi Router"]
    B --> C["Smart Nursery Server"]
    C --> D["Access your Humidifier locally"]
    C --> E["Access your Humidifier from any compatible device remotely"]
When a user tries to access the Humidifier, our Smart Nursery server authenticates the user's identity and permits access.
Note
You can only setup via a compatible smartphone or tablet and not via a PC.
4.1 User Account and Humidifier Setup on Android™ Devices
What you need
- Humidifier
• Device with Android™ system 4.4.2 or higher
4.1.1 Download Hubble Connect for Smart Nursery App
- Go to Google Play™ Store to search for Hubble Connect for Smart Nursery.
- Download Hubble Connect for Smart Nursery App and install it on your Android™ device

4.1.2 Run Hubble Connect for Smart Nursery App on Android™ device
- Ensure that your Android™ Device is connected to the Wi-Fi router or mobile network.
- Run Hubble Connect for Smart Nursery App, tap SIGNUP and follow the in-app instructions to create your Smart Nursery Account. By signing up, you agree to our Terms & Conditions. (Pictures A1 & A2)
Note
If you already have a Smart Nursery App account, please tap LOGIN by entering your account information and go to the next steps.

A1

A2
4.1.3 Add Humidifier to your Smart Nursery account
- Switch on your Humidifier, then press and hold the Wi-Fi / Power On-Off key for 3 seconds to enter Wi-Fi pairing/ setting mode.
- Tap on Smart Humidifier or press Add Device then tap on Smart Humidifier to enter Humidifier setup mode. (Picture A3)

A3
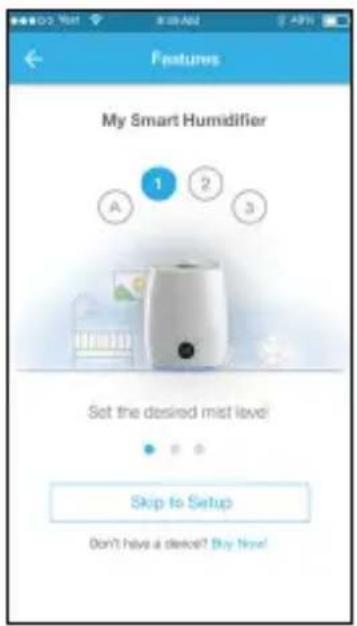
- Tap on Skip to Setup, then tap Next to search for Humidifier. (Pictures A4 & A5)
A4
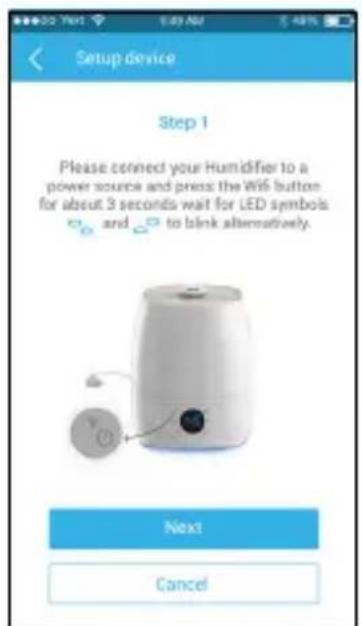
A5
- The device SSID can be found on your Android™ Device. Tap the SSID to confirm. (Picture A6)

A6
- Humidifier is detected. Tap Next to proceed to the next step. (Picture A7)
- You need a Wi-Fi® network to connect to your Humidifier. Tap Search to start network searching. (Picture A8)
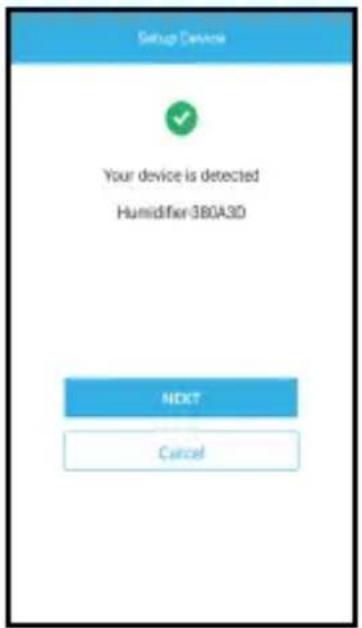
A7

A8
- Select a Wi-Fi® network from the network list, enter Wi-Fi® password and then tap Submit. (Picture A9)

A9
- It will take a few minutes for Humidifier to connect to the Wi-Fi® network. Tap Get Started when Humidifier is successfully connected to Hubble Connect for Smart Nursery App. (Pictures A10 & A11)

A10

A11
Note
If you fail to complete the setup process, press and hold the Wi-Fi key
until the backlight blinks to enter registration mode and repeat the above steps again.
4.2 User Account and Humidifier Setup on iOS Devices
What you need
- Humidifier
• Device with iOS ® 8.0 or higher
4.2.1 Download Hubble Connect for Smart Nursery App
- Go to App Store to search for Hubble Connect for Smart Nursery.
- Download Hubble Connect for Smart Nursery App and install it on your iOS® device


Available on the App Store
4.2.2 Run Hubble Connect for Smart Nursery App on iOS device
- Ensure that your iOS device is connected to the Wi-Fi router or mobile network.
- Run Hubble Connect for Smart Nursery App, tap SIGNUP and follow the in-app instructions to create your Smart Nursery Account. By signing up, you agree to our Terms & Conditions. (i1 & i2)
Note
If you already have a Smart Nursery App account, please tap LOGIN by entering your account information and go to the next steps.
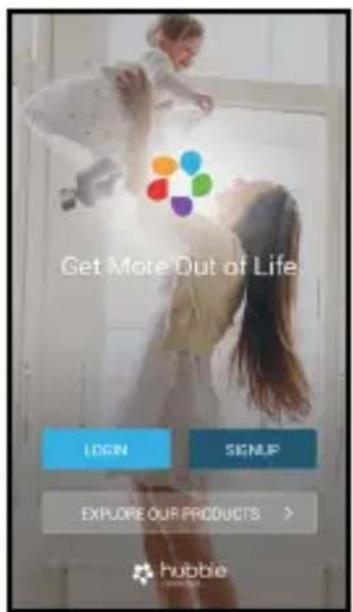
i1
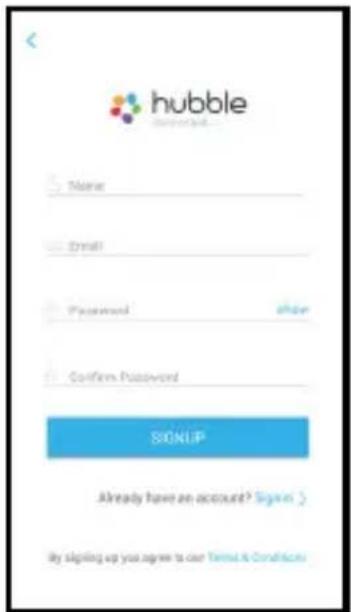
i2
4.2.3 Add Humidifier to your Smart Nursery account
- Switch on your Humidifier, then press and hold the Wi-Fi / Power On-Off key for 3 seconds to enter Wi-Fi pairing/ setting mode.
- Tap on Smart Humidifier to enter Humidifier setup mode. (Picture i3)
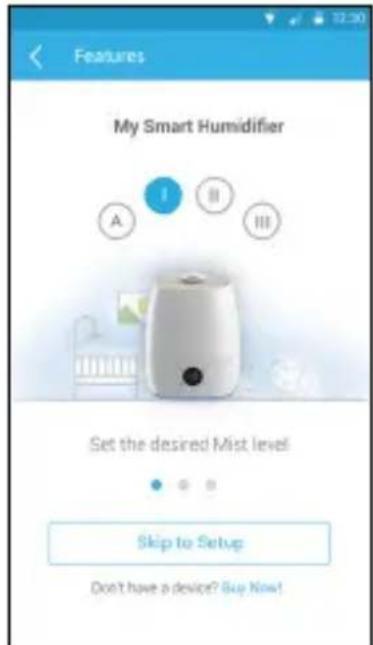
- Skim over the main features of your Humidifier, then tap Skip To Setup. (Picture i4)

i3
i4
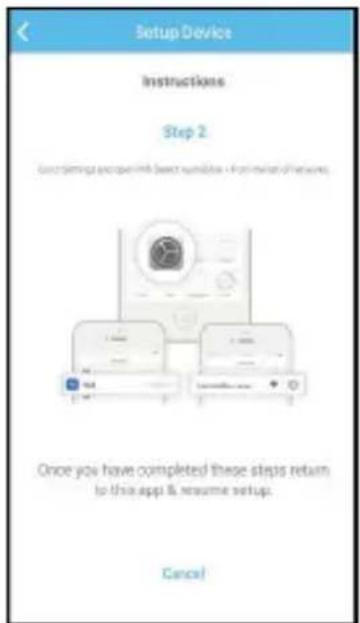
- The following setup instructions will appear on the screen. (Picture i5)

i5
i6
• Follow the on-screen instructions.
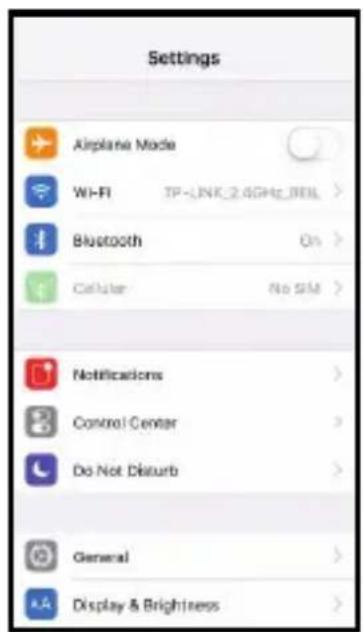
- Go to Settings > Wi-Fi menu on your iOS device. (Pictures i6, i7)
- Select the SSID of your Humidifier from the list of networks. (Pictures i8, i9)
i7

i8

i9
- Return to the Smart Nursery App to resume setup.
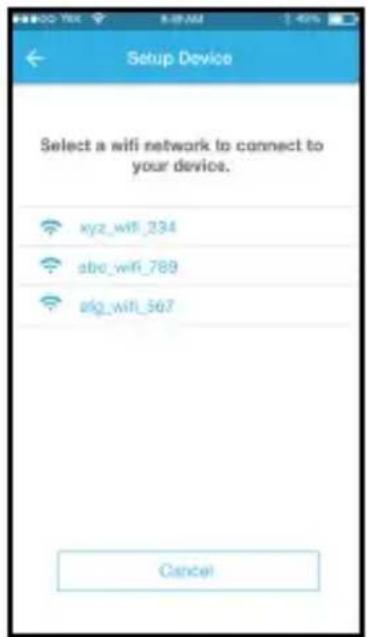
- Select your Wi-Fi® network and tap Search. (Picture i11)
- Enter your Wi-Fi® password and tap OK. (Picture i12)

i10
i11

i12
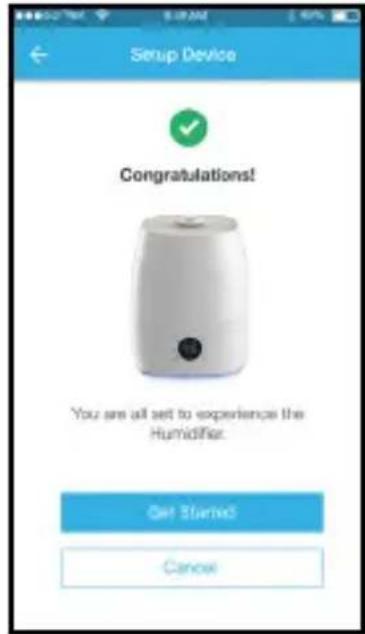
- It will take a few minutes for Humidifier to connect to the Wi-Fi® network before showing the connection status (Pictures i13, i14)

i13 i14
Note
If you fail to complete the setup process, press and hold the Wi-Fi key until the backlight blinks to enter registration mode and repeat the above steps again.
5. Overview of Hubble App
 | Warm Mist • Tap to | switch warm mist On/Off. It takes about 25 minutes for the mist to warm up. |
 A123 A123 | Mist Control • Tap | to select mist speed (1 - 3 or Auto). The selected mist speed is shown on the LED display. |
 | Room Humidity Level | • To maintain the room's humidity at a specific level, tap to select the specific RH humidity (30%, 35%, 40%, 45%, 50%, 55%, 60%, 65%, 70%, 75%). |
 | Select Timer (in hours) | • Tap to switch timer On/Off, then select the operation hours from 1 hour to 12 hours. |
 | Air Refreshing • Tap | to activate the function. |
 | Night Light • Tap | to turn on night light.• Tap to turn off night light. |
 | Baby Mode • This | mode can only be controlled via the Smart Nursery App. When activated, the baby icon will light up on the LED display. |
 | Water and Dust Filter Replacement Alert | • Message appears when the pre-filter, water filter and dust filter have to be replaced. |
 | Low Water Level Alert | • Message appears when the water inside the water tank is low. |
6. Recommendations for Use and Care
- Empty the water tank, wipe all surfaces dry, and refill the water in the humidifier daily to reduce any growth of microorganisms; follow the instructions in “Fill up the Water Tank and Install Pre-Filter” on page 9 when changing water in the Humidifier. Be sure you unplug the humidifier from the electrical outlet first, and also to prevent the risk of electric shock.
- Use water with low mineral content, such as bottled water labelled with "distilled" to prevent the build-up of scale and the dispersal of minerals into the air. Even though distilled water still contains some minerals, it has lower mineral content than most tap water.
- Higher humidity levels may encourage the growth of biological organisms in the home. Hygrometers, available at local hardware stores, may be used to measure humidity levels. If water condenses on windows, walls, or pictures, relocate the humidifier, lower its humidistat setting, or reduce its use.
- Do not let the area around the humidifier to become damp or wet. If dampness occurs, turn the output volume of the humidifier down. If the humidifier output volume cannot be turned down, use the humidifier intermittently. Do not let absorbent materials, such as carpeting, drapes, or tablecloths, to become damp.
- Clean the humidifier, as directed, at the end of the humidifying season or when the product will not be in frequent use. Before storage, make sure all the parts are dry. Dispose of all used demineralization cartridges, cassettes, or filters. Store the humidifier in a dry place. After storage, clean the humidifier again and remove any dust on the outside.
- Stop using your humidifier and contact your physician if you have respiratory symptoms which you believe are associated with periods of use of your humidifier, even if you are following maintenance directions. There may be bacteria growth if water remains in the water tank for more than 24 hours. As such, clean the humidifier daily.
- Every effort has been made to ensure high standards of reliability of your humidifier. However, if something does go wrong, please do not try to repair it yourself - contact Customer Service for assistance.
7. Change Filters
You will be notified by the Smart Nursery App when it is time to change filters.
7.1 Change Pre-Filter

natural_image
Diagram showing three mechanical components with rotating arrows, no text or symbols present- Turn the water tank upside down, then remove the old filter by twisting it counter clockwise.
- Remove the filter cap by twisting it counter clockwise.
- Fit the filter cap over the new filter and twist clockwise to tighten.
- Insert the new filter to the water tank by twisting it clockwise.
7.2 Change Water Filter
natural_image
Diagram of a device inside a container with an outlet, showing internal components and wiring (no text or labels)
natural_image
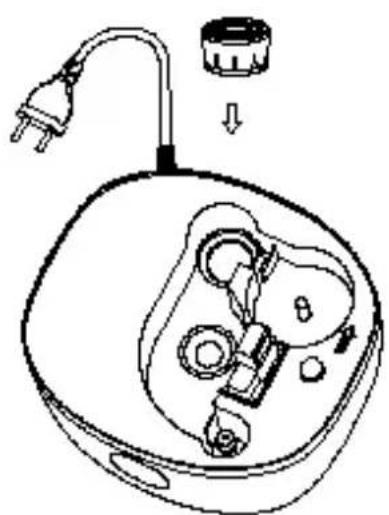
Line drawing of an open electrical device with a power outlet and internal components (no text or symbols)- Remove the old water filter.
- Insert the new water filter.
7.3 Change Dust Filter
The dust filter is located inside the air inlet at the bottom of the Humidifier.
Open the air inlet cover and replace the filter.


Dust Filter Air inlet cover
- Troubleshooting
| Problem Category | Problem Description / Error | Solution |
| Account I am | unable to login even after registration. | Please check your user name and password. |
| Account I receive an error message saying: "E-mail ID is not registered". | Please ensure that you have registered with us. Tap SIGN UP to create an account. | |
| Account What do I do if I forget my password? | Click on the "Forgot Password" link on https://app.hubbleconnected.com/#lostpassword OR on your AndroidTM or iOS application. An e-mail will be sent to your registered e-mail address. | |
| Account I am | unable to receive a new password although I have used the "Forgot password" option. | 1. The e-mail might have been sent to your Junk Mail Folder. Please check your Junk Mail Folder.2. There might be a delay in getting your e-mail. Please wait a few minutes and refresh your e-mail account. |
| Connectivity Issues | I get a message: We are having problems accessing your Device. This could be due to the lack of an internet connection. Please wait and try again later. | 1. Please try again in a few minutes. This could be because of any issue with your internet connection.2. If the problem remains, please restart your Device to check if this fixes the problem.3. Please restart your Wireless Router. |
| Connectivity Issues | I am not able to access my Device. | Please check if the Device is within Wi-Fi range. If the LED on your Device is flashing slowly, please try to move the Device closer to the router for better Wi-Fi connectivity and try again. |
| Setting Up While | I am adding a new Device to my account, I am not able to find any Device to add. | If you are trying to add a Device which has previously been added into your account or another account, you will first have to reset the Device. This can be done by tapping the Wi-Fi key twice. |
| Setting Up During setup on devices for AndroidTM and iOS, I am not able to find my Device during the last step and setup fails. | Please reset the Device to setup mode and try again. Press and hold the Wi-Fi key for 3 seconds to enter setup mode. Wait for a minute for the Device to restart. When the Device LED is flashing, this indicates that it is in setup mode. Now restart the setup from your smartphone again. | |
| General Which | platforms are supported for accessing my Device? | Minimum requirement: AndroidTM 4.4.2 iPhone /iPad iOS version 8.0 |
| General How | do I download the App for AndroidTM and iOS devices? | AndroidTM :- Open the Google Play on your AndroidTM device.- Select Search- Type in "Hubble Connect for Smart Nursery"- The results will show the Hubble App- Select to install itiOS Device:- Open the App Store SM - Select Search- Type in "Hubble Connect for Smart Nursery"- The results will show the Hubble App- Select to install it |
| Functions Why | where is little or no mist? | 1. May be the water level is too low, please refill water in the reservoir.2. Place the device on a flat and level surface.3. Change to a higher mist level (there are 4 selectable levels). |
| Functions Why | do I hear some vibrating noise? | 1. May be the water level is too low, please refill water in the reservoir.2. Place the device on a flat and level surface. |
| Functions Why | do I have a smelly mists? | It might be due to few causes: Mildew and Mold, Bacteria Growth, Mineral Deposits. Please clean the Device properly and replace with fresh water. |
| Functions Why can I no longer adjust the mist level on the humidifier? | The 'set humidity' menu on the Smart Nursery App may be left open. To close the 'set humidity' menu on the App, move the slider to the left until the select humidity level display closes. | |
| Power indication light off, does not work | No power supply Connect power supply, switch on. | |
| Power indication light on, unit doesn't work | Too much water in the water tank | Remove some water from the water tank, close the cover of the water tank tightly. |
| Mist fog coming out from around nozzle | There are apertures between the nozzle and water tank | Dip the nozzle in water for a while and then fix it to the socket on water tank. |
9. Disposal of the Device (Environment)
At the end of the product life cycle, you should not dispose of this product with normal household waste. Take this product to a collection point for the recycling of electrical and electronic equipment. The symbol on the product, user's guide and/or box indicates this.

Some of the product materials can be re-used if you
take them to a recycling point. By reusing some parts or raw materials from used products you make an important contribution to the protection of the environment.
Please contact your local authorities in case you need more information on the collection points in your area.
Dispose of the battery pack in an environmentally-friendly manner according to your local regulations.
10. General Information
If your product is not working properly....
- Read this User's Guide.
- Visit our website: www.motorolastore.com
- Contact Customer Service at
US and Canada 1-888-331-3383
E-mail: support@motorolastore.com
Consumer Products and Accessories Limited Warranty ("Warranty")
Thank you for purchasing this Motorola branded product manufactured under license by Binatone Electronics International Ltd ("BINATONE").
What Does this Warranty Cover?
Subject to the exclusions contained below, BINATONE warrants that this Motorola branded product ("Product") or certified accessory ("Accessory") sold for use with this product is manufactured to be free from defects in materials and workmanship under normal consumer usage for the period outlined below. This Warranty is your exclusive warranty and is not transferable.
THIS WARRANTY GIVES YOU SPECIFIC LEGAL RIGHTS, AND YOU MAY HAVE OTHER RIGHTS THAT VARY BY STATE, PROVINCE OR COUNTRY. FOR CONSUMERS WHO ARE COVERED BY CONSUMER PROTECTION LAWS OR REGULATIONS IN THEIR COUNTRY OF PURCHASE OR, IF DIFFERENT, THEIR COUNTRY OF RESIDENCE, THE BENEFITS CONFERRED BY THIS LIMITED WARRANTY ARE IN ADDITION TO ALL RIGHTS AND REMEDIES CONVEYED BY SUCH CONSUMER PROTECTION LAWS AND REGULATIONS. FOR A FULL UNDERSTANDING OF YOUR RIGHTS YOU SHOULD CONSULT THE LAWS OF YOUR COUNTRY, PROVINCE OR STATE.
Who is covered?
This Warranty extends only to the first consumer purchaser, and is not transferable.
What will BINATONE do?
BINATONE or its authorized distributor at its option and within a commercially reasonable time, will at no charge repair or replace any Products or Accessories that does not conform to this Warranty. We
may use functionally equivalent reconditioned/ refurbished/ pre-owned or new Products, Accessories or parts.
What Other Limitations Are There?
ANY IMPLIED WARRANTIES, INCLUDING WITHOUT LIMITATION THE IMPLIED WARRANTIES OF MERCHANTABILITY AND FITNESS FOR A PARTICULAR PURPOSE, SHALL BE LIMITED TO THE DURATION OF THIS LIMITED WARRANTY, OTHERWISE THE REPAIR OR REPLACEMENT PROVIDED UNDER THIS EXPRESS LIMITED WARRANTY IS THE EXCLUSIVE REMEDY OF THE CONSUMER, AND IS PROVIDED IN LIEU OF ALL OTHER WARRANTIES, EXPRESS OR IMPLIED. IN NO EVENT SHALL MOTOROLA OR BINATONE BE LIABLE, WHETHER IN CONTRACT OR TORT (INCLUDING NEGLIGENCE) FOR DAMAGES IN EXCESS OF THE PURCHASE PRICE OF THE PRODUCT OR ACCESSORY, OR FOR ANY INDIRECT, INCIDENTAL, SPECIAL OR CONSEQUENTIAL DAMAGES OF ANY KIND, OR LOSS OF REVENUE OR PROFITS, LOSS OF BUSINESS, LOSS OF INFORMATION OR OTHER FINANCIAL LOSS ARISING OUT OF OR IN CONNECTION WITH THE ABILITY OR INABILITY TO USE THE PRODUCTS OR ACCESSORIES TO THE FULL EXTENT THESE DAMAGES MAY BE DISCLAIMED BY LAW.
Some jurisdictions do not allow the limitation or exclusion of incidental or consequential damages, or limitation on the length of an implied warranty, so the above limitations or exclusions may not apply to you. This Warranty gives you specific legal rights, and you may also have other rights that vary from one jurisdiction to another.
| Products Covered Length of Coverage | |
| Consumer Products One (1) year | from the date of the Products, original purchase by the first consumer purchaser of the product. |
| Consumer Accessories Ninety (90) days from the date of the Accessories, original purchase by the first consumer purchaser of the product. | |
| Consumer Products and Accessories that are Repaired or Replaced | The balance of the original warranty or for Ninety (90) days from the date returned to the consumer, whichever is longer. |
Exclusions
Normal Wear and Tear. Periodic maintenance, repair and replacement of parts due to normal wear and tear are excluded from coverage.
Batteries. Only batteries whose fully charged capacity falls below 80% of their rated capacity and batteries that leak are covered by this Warranty.
Abuse & Misuse. Defects or damage that result from: (a) improper operation, storage, misuse or abuse, accident or neglect, such as physical damage (cracks, scratches, etc.) to the surface of the product resulting from misuse; (b) contact with liquid, water, rain, extreme humidity or heavy perspiration, sand, dirt or the like, extreme heat, or food; (c) use of the Products or Accessories for commercial purposes or subjecting the Product or Accessory to abnormal usage or conditions; or (d) other acts which are not the fault of MOTOROLA or BINATONE, are excluded from coverage.
Use of Non-Motorola branded Products and Accessories. Defects or damage that result from the use of Non-Motorola branded or certified Products or Accessories or other peripheral equipment are excluded from coverage.
Unauthorized Service or Modification. Defects or damages resulting from service, testing, adjustment, installation, maintenance, alteration, or modification in any way by someone other than MOTOROLA, BINATONE or its authorized service centers, are excluded from coverage.
Altered Products. Products or Accessories with (a) serial numbers or date tags that have been removed, altered or obliterated; (b) broken seals or that show evidence of tampering; (c) mismatched board serial numbers; or (d) nonconforming or non-Motorola branded housings, or parts, are excluded from coverage.
Communication Services. Defects, damages, or the failure of Products or Accessories due to any communication service or signal you may subscribe to or use with the Products or Accessories is excluded from coverage.
How to Obtain Warranty Service or Other Information?
To obtain service or information, please call:
US and Canada 1-888-331-3383
E-mail: support@motorolastore.com
You will receive instructions on how to ship the Products or Accessories at your expense and risk, to a BINATONE Authorized Repair Center.
To obtain service, you must include: (a) the Product or Accessory; (b) the original proof of purchase (receipt) which includes the date, place and seller of the Product; (c) if a warranty card was included in your box, a completed warranty card showing the serial number of the Product; (d) a written description of the problem; and, most importantly; (e) your address and telephone number.
These terms and conditions constitute the complete warranty agreement between you and BINATONE regarding the Products or Accessories purchased by you, and supersede any prior agreement or representations, including representations made in any literature publications or promotional materials issued by BINATONE or representations made by any agent employee or staff of BINATONE, that may have been made in connection with the said purchase.
Responsible Party in the USA
| Legal Company Name: | Binatone North America |
| Address: | 11550 North Meridian Street, Suite 525Carmel, IN 46032 |
| Phone, Fax: | 317-313-0581 |
| E-mail address: | Mert.Ulusoy@binatoneglobal.com |
| Contact Person: | Mert Ulusoy |
FCC and IC regulations
FCC Part I5
NOTE: This equipment has been tested and found to comply with the limits for a Class B digital device, pursuant to Part 15 of the Federal Communications Commission (FCC) rules. These limits are designed to provide reasonable protection against harmful interference in a residential installation. This equipment generates, uses and can radiate radio frequency energy and, if not installed and used in accordance with the instructions, may cause harmful interference to radio communications. However, there is no guarantee that interference will not occur in a particular installation. If this equipment does cause harmful interference to radio or television reception, which can be determined by turning the equipment off and on, the user is encouraged to try to correct the interference by one or more of the following measures:
- Reorient or relocate the receiving antenna.
- Increase the separation between the equipment and receiver.
- Connect the equipment into an outlet on a circuit different from that to which the receiver is connected.
- Consult the dealer or an experienced radio/TV technician for help. Changes or modifications to this equipment not expressly approved by the party responsible for compliance could void the user's authority to operate the equipment.
This device complies with Part 15 of the FCC rules. Operation is subject to the following two conditions: (1) this device may not cause harmful interference, and (2) this device must accept any interference received, including interference that may cause
undesired operation.
Caution: To maintain compliance with the FCC's RF exposure guideline, place the base unit at least 20 cm from nearby persons. To ensure safety of users, the FCC has established criteria for the amount of radio frequency energy that can be safely absorbed by a user or bystander according to the intended usage of the product. This product has been tested and found to comply with the FCC criteria.
This Class B digital apparatus complies with Canadian ICES-003. CAN ICES-3(B)/NMB-3(B)
This equipment has been certified to comply with ETL US/Canada safety standard in accordance with UL 998 and Canadian National Standard, CSA C22.2 No. 104-11, (Bi-National Standard, same as UL 998).
WARNING
Changes or modifications, to this equipment not expressively approved by the party responsible for compliance could void the user's authority to operate the equipment.
The socket-outlet shall be installed near the equipment and shall be easily accessible.
Industry Canada
This device complies with Industry Canada licence-exempt RSS standard(s): Operation is subject to the following Two conditions:(1) this device may not cause interference, and (2) this device must accept any interference, including interference that may cause undesired operation of the device.
The term "IC:" before the certification/registration number only signifies that the Industry Canada technical specifications were met. This product meets the applicable Industry Canada technical specifications.
11. Technical Specifications
Wi-Fi 2.412 - 2.472 GHz (802.11b/g/n)
RF Power 10dBm max
Power Input 220 - 240V, 50 - 60Hz, 129W
Power Output 220 - 240V, 50 - 60Hz, 112W
Warm Mist Power 80W
Humidification Power 30W
Water Tank Capacity 5.5L (1.45 Gallons)
Operating Temperature -10 to 50 °C
Mist Rate 135-515ml/h
Cool Mist ≥350ml/H
Warm Mist ≥400ml/H
Noise Level ≤35dB(A)

motorola
Manufactured, distributed or sold by Binatone Electronics International LTD., official licensee for this product. MOTOROLA and the Stylized M logo are trademarks or registered trademarks of Motorola Trademark Holdings, LLC. and are used under license. Apple logo is a trademark of Apple Inc., registered in the U.S. and other countries. App Store is a service mark of Apple Inc. Google Play and Android are trademarks of Google Inc. Wi-Fi is a trademark of the Wi-Fi Alliance. All other trademarks are the property of their respective owners. © 2017 Motorola Mobility LLC. All rights reserved.

US_EN Version 4.0
Printed in China
- USER'S GUIDE
- Welcome...
- to your new Motorola Humidifier!
- Inside the Box
- Overview of the Humidifier
- Operation of the Touch Control Buttons
- LED Display Icons
- Table of contents
- Safety Instructions
- READ AND SAVE THESE INSTRUCTIONS.
- WARNING
- Important guidelines for installing Humidifier
- System Requirements
- Getting Started
- Fill up the Water Tank and Install Pre-Filter
- Important:
- Connect Humidifier to Power Supply
- Connecting Devices
- Note
- User Account and Humidifier Setup on Android™ Devices
- What you need
- Download Hubble Connect for Smart Nursery App
- Run Hubble Connect for Smart Nursery App on Android™ device
- Add Humidifier to your Smart Nursery account
- User Account and Humidifier Setup on iOS Devices
- Download Hubble Connect for Smart Nursery App
- Run Hubble Connect for Smart Nursery App on iOS device
- Add Humidifier to your Smart Nursery account
- Overview of Hubble App
- Recommendations for Use and Care
- Change Filters
- Change Pre-Filter
- Change Water Filter
- Change Dust Filter
- Disposal of the Device (Environment)
- General Information
- Consumer Products and Accessories Limited Warranty ("Warranty")
- What Does this Warranty Cover?
- Who is covered?
- What will BINATONE do?
- What Other Limitations Are There?
- Exclusions
- How to Obtain Warranty Service or Other Information?
- Responsible Party in the USA
- FCC and IC regulations
- FCC Part I5
- Industry Canada
- Technical Specifications
- motorola
Brand : MOTOROLA
Model : MBP86SN
Category : Humidifier