CLK-305 - Alarm Clock Steren - Free user manual and instructions
Find the device manual for free CLK-305 Steren in PDF.


| Product Type | Alarm Clock Radio |
| Brand | Steren |
| Model | CLK-305 |
| Dimensions | Approx. 15 x 10 x 8 cm (5.9 x 3.9 x 3.1 in) |
| Weight | Approx. 300 g (0.66 lbs) |
| Power Supply | AC 120V/60Hz or 4 x AA batteries (not included) |
| Display | LED digital display with dimmer |
| Alarm | Dual alarm with snooze function |
| Radio | AM/FM tuner with analog dial |
| Speaker | Built-in dynamic speaker (3W) |
| Clock Format | 12/24 hour selectable |
| Sleep Timer | Yes, up to 90 minutes |
| Controls | Rotary knobs for volume/tuning, buttons for alarm set |
| Accessories Included | AC power cord, user manual |
| Battery Backup | Retains time/alarm settings during power outage |
| Care Instructions | Clean with dry soft cloth; avoid liquids and solvents |
| Safety | Do not expose to water, high temperatures, or direct sunlight; unplug during storms |
| Spare Parts | Contact Steren customer service for replacement AC adapter or batteries |
| Repairability | Not user-serviceable; refer to qualified technician |
| General Info | Use only recommended batteries; ensure proper voltage |
Frequently Asked Questions - CLK-305 Steren
User questions about CLK-305 Steren
0 question about this device. Answer the ones you know or ask your own.
Ask a new question about this device
Download the instructions for your Alarm Clock in PDF format for free! Find your manual CLK-305 - Steren and take your electronic device back in hand. On this page are published all the documents necessary for the use of your device. CLK-305 by Steren.
USER MANUAL CLK-305 Steren
ESPECIFICACIONES
ALARM AND THERMOMETER
Instruction manual
0817mV0.0
IMPORTANT
Before to use the product, please read carefully this manual to avoid any malfunction. The info in this manual is shown as reference. Due to updates can exist differences.
Consult our website www.steren.com to obtain the current version of this manual.
CAUTIONS
• This product is not a toy; Keep out of reach of children.
• Always use a soft and dry cloth to clean the device.
- This product is not intended for use by persons with different abilities, unless they are supervised or instructed by a person responsible for its safety.
- Any unauthorized repair may cause malfunction and void the warranty.
- Do not expose the device to extreme temperatures.
PARTS
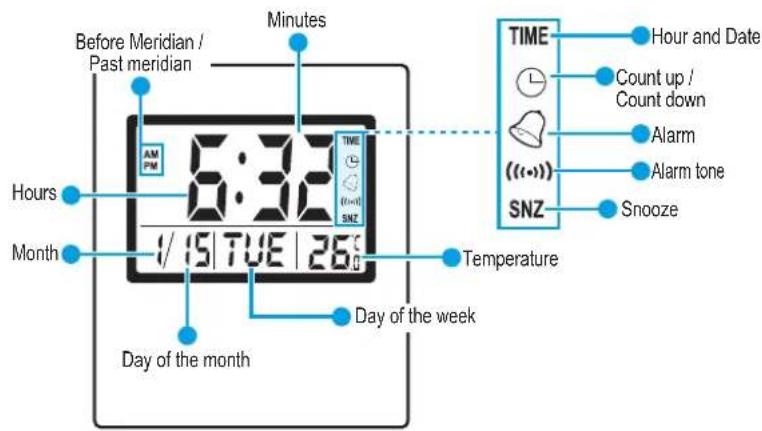
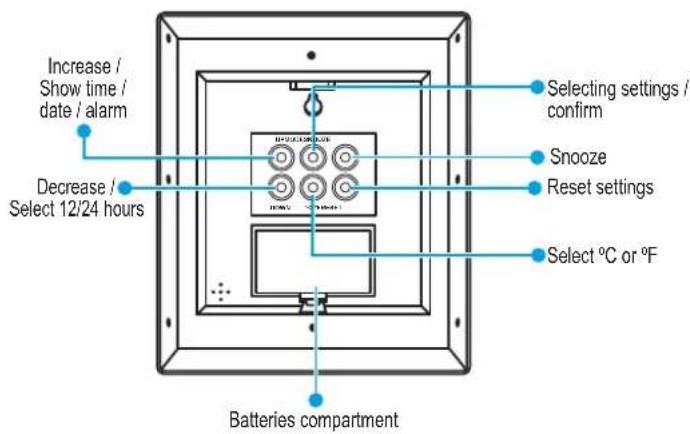
CONFIGURATION
Before to use, insert 2 AA batteries into the battery compartment. Remove the cover for insertion, and then close the compartment properly. Be sure to place the polarities correctly.
To start to configure clock, press and hold the MODE button until the digits begin flashing.
Press MODE to change the settings selection and to save the changes made.
Press UP or DOWN to adjust the digits of the selection.
The adjustment sequence is as following:
Hours
Minutes
Year
Month
Day of the month
- Alarm (hours and minutes): Activate with the SNOOZE button, the ((-)) icon will be activated in the screen.
■ Snooze Select between (1-60 min).
Activate with the SNOOZE button, the SNZ icon will be displayed on the screen. If you have activated the snooze mode, you must press the SNOOZE button when the alarm sounds again (the SNZ icon will flash). To deactivate it, press any other button except RESET.
- Alarm date (Year, Month, Day).
Count down (Press MODE to set the time that you want to the count run, then press the SNOOZE. At the end of the count down, a tone will sound).
Count up (Press the SNOOZE button to start count).
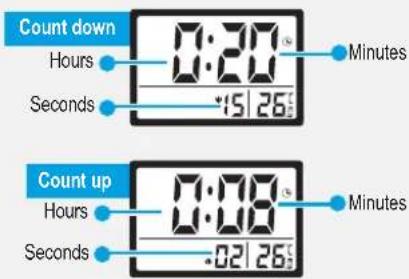
Perform one function at time
To change the temperature mode, just press the °C / °F button.
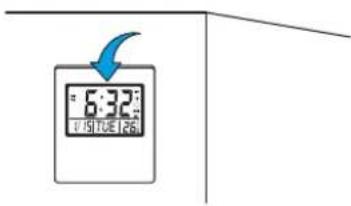
PLACING WATCH
To place the clock select the option that best fits to your needs:
OPTION A (on a surface)
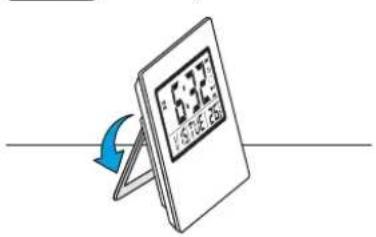
OPTION B (on a wall)
SPECIFICATIONS
Specifications may vary without previous notice
Input: 3 V --- (2 x AA)
Brand : Steren
Model : CLK-305
Category : Alarm Clock