CDC-3.4 - CD Player Integra - Free user manual and instructions
Find the device manual for free CDC-3.4 Integra in PDF.


| Product Type | Compact Disc Changer |
| Brand | Integra |
| Model | CDC-3.4 |
| Disc Capacity | 6 discs |
| Supported Discs | CD, CD-R, CD-RW, CD Extra, MP3 |
| Frequency Response | 5 Hz – 20 kHz |
| Signal-to-Noise Ratio | 98 dB |
| Dynamic Range | 96 dB |
| Total Harmonic Distortion | 0.005% (at 1 kHz) |
| Audio Output (Analog) | 2.0 V rms / 470 Ω |
| Audio Output (Digital Coaxial) | 0.5 V p-p / 75 Ω |
| Audio Output (Digital Optical) | -22.5 dBm |
| D/A Converter | Multi-bit with 128x oversampling, VLSC |
| Playback Modes | All Discs Repeat, Single Disc Repeat, Random, 40-Track Memory, MP3 Folder Repeat |
| Next Selection Function | Yes (cue next track/folder/disc) |
| MP3 Compatibility | ISO 9660 Level 1/2, Romeo, Joliet; up to 499 files, 99 folders |
| Remote Control | RI-compatible (RC-553C), infrared, 5 m range |
| Power Supply | AC 120 V, 60 Hz |
| Power Consumption | 10 W (Standby: 4 W) |
| Dimensions (W × H × D) | 435 × 131 × 436 mm (17-1/8" × 5-3/16" × 17-3/16") |
| Weight | 6.8 kg (15.0 lbs) |
| Operating Temperature | 5°C – 35°C (41°F – 95°F) |
| Laser Class | Class 1 (semiconductor laser) |
Frequently Asked Questions - CDC-3.4 Integra
User questions about CDC-3.4 Integra
0 question about this device. Answer the ones you know or ask your own.
Ask a new question about this device
Download the instructions for your CD Player in PDF format for free! Find your manual CDC-3.4 - Integra and take your electronic device back in hand. On this page are published all the documents necessary for the use of your device. CDC-3.4 by Integra.
USER MANUAL CDC-3.4 Integra
Compact Disc Changer
CDC-3.4
Instruction Manual
WARNING:
TO REDUCE THE RISK OF FIRE OR ELECTRIC SHOCK, DO NOT EXPOSE THIS APPARATUS TO RAIN OR MOISTURE.
CAUTION:
TO REDUCE THE RISK OF ELECTRIC SHOCK, DO NOT REMOVE COVER (OR BACK). NO USER-SERVICEABLE PARTS INSIDE. REFER SERVICING TO QUALIFIED SERVICE PERSONNEL.

WARNING RISK OF ELECTRIC SHOCK DO NOT OPEN
AVIS RISQUE DE CHOC ELECTRIQUE NE PAS OUVRIR


The lightning flash with arrowhead symbol, within an equilateral triangle, is intended to alert the user to the presence of uninsulated “dangerous voltage” within the product’s enclosure that may be of sufficient magnitude to constitute a risk of electric shock to persons.

The exclamation point within an equilateral triangle is intended to alert the user to the presence of important operating and maintenance (servicing) instructions in the literature accompanying the appliance.
Important Safety Instructions
- Read these instructions.
- Keep these instructions.
- Heed all warnings.
- Follow all instructions.
- Do not use this apparatus near water.
-
Clean only with dry cloth.
-
Do not block any ventilation openings. Install in accordance with the manufacturer's instructions.
-
Do not install near any heat sources such as radiators, heat registers, stoves, or other apparatus (including amplifiers) that produce heat.
-
Do not defeat the safety purpose of the polarized or grounding-type plug. A polarized plug has two blades with one wider than the other. A grounding type plug has two blades and a third grounding prong. The wide blade or the third prong are provided for your safety. If the provided plug does not fit into your outlet, consult an electrician for replacement of the obsolete outlet.
-
Protect the power cord from being walked on or pinched particularly at plugs, convenience receptacles, and the point where they exit from the apparatus.
-
Only use attachments/accessories specified by the manufacturer.
-
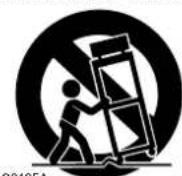
Use only with the cart, stand, tripod, bracket, or table specified by the manufacturer, or sold with the apparatus. When a cart is used, use caution when moving the cart/ apparatus combination to avoid injury from tip-over.
PORTABLE CART WARNING
-
Unplug this apparatus during lightning storms or when unused for long periods of time.
-
Refer all servicing to qualified service personnel. Servicing is required when the apparatus has been damaged in any way, such as power-supply cord or plug is damaged, liquid has been spilled or objects have fallen into the apparatus, the apparatus has been exposed to rain or moisture, does not operate normally, or has been dropped.
-
Damage Requiring Service
Unplug the apparatus from the wall outlet and refer servicing to qualified service personnel under the following conditions:
A. When the power-supply cord or plug is damaged,
B. If liquid has been spilled, or objects have fallen into the apparatus,
C. If the apparatus has been exposed to rain or water,
D. If the apparatus does not operate normally by following the operating instructions. Adjust only those controls that are covered by the operating instructions as an improper adjustment of other controls may result in damage and will often require extensive work by a qualified technician to restore the apparatus to its normal operation,
E. If the apparatus has been dropped or damaged in any way, and
F. When the apparatus exhibits a distinct change in performance this indicates a need for service.
- Object and Liquid Entry
Never push objects of any kind into the apparatus through openings as they may touch dangerous voltage points or short-out parts that could result in a fire or electric shock.
The apparatus shall not be exposed to dripping or splashing and no objects filled with liquids, such as vases shall be placed on the apparatus.
Don't put candles or other burning objects on top of this unit.
- Batteries
Always consider the environmental issues and follow local regulations when disposing of batteries.
- If you install the apparatus in a built-in installation, such as a bookcase or rack, ensure that there is adequate ventilation.
Leave 20 cm (8") of free space at the top and sides and 10 cm (4") at the rear. The rear edge of the shelf or board above the apparatus shall be set 10 cm (4") away from the rear panel or wall, creating a flue-like gap for warm air to escape.
Introduction
Thank you for purchasing an Integra Compact Disc Changer.
Please read this manual thoroughly before making connections and turning on the power.
Following the instructions in this manual will enable you to obtain optimum performance and listening enjoyment from your new Compact Disc Changer.
Please retain this manual for future reference.
CDC-3.4 Features
- 6-disc CD changer
- MP3 playback
- Multi-bit D/A converter
• 128-times oversampling
• VLSC (Vector Linear Shaping Circuitry) - Direct Digital Path
- Change up to 5 discs without stopping playback
- Cue up the next track or disc with the Next Selection function
- Repeat playbacks: All Discs, Entire Disc, Random Tracks, Memory Tracks, Random Memory, Single Folder, Single Track
• 40-track memory playback
• Optical and coaxial digital audio outputs - Analog outputs
• RI compatible remote control
Supplied Accessories
Make sure you have the following accessories:
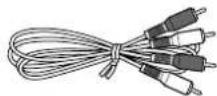
RCA/phono audio connecting cable
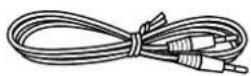
RI cable
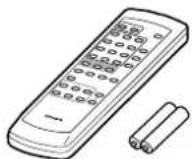
Remote controller (RC-553C) and two (AA/R6) batteries
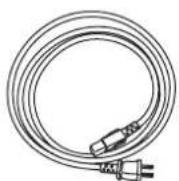
Power cord
* In catalogs and on packaging, the letter added to the end of the product name indicates the color of the CDC-3.4. Specifications and operation are the same regardless of color.
Precautions
1. Recording Copyright
Unless it's for personal use only, recording copy- righted material is illegal without the permission of the copyright holder.
2. AC Fuse
The AC fuse inside the CDC-3.4 is not user-serviceable. If you cannot turn on the CDC-3.4, contact your Integra/Onkyo dealer.
3. Care
Occasionally you should dust the CDC-3.4 all over with a soft cloth. For stubborn stains, use a soft cloth dampened with a weak solution of mild detergent and water. Dry the CDC-3.4 immediately afterwards with a clean cloth. Don't use abrasive cloths, thinners, alcohol, or other chemical solvents, because they may damage the finish or remove the panel lettering.
4. Power
WARNING
BEFORE PLUGGING IN THE UNIT FOR THE FIRST TIME, READ THE FOLLOWING SECTION CAREFULLY.
AC outlet voltages vary from country to country. Make sure that the voltage in your area meets the voltage requirements printed on the CDC-3.4's rear panel (i.e., AC 120 V, 60 Hz).
Setting the [STANDBY/ON] switch to STANDBY does not fully shutdown the CDC-3.4. If you do not intend to use the CDC-3.4 for an extended period, remove the power cord from the AC outlet.
5. Never Touch This Unit with Wet Hands
Never handle this unit or its power cord while your hands are wet or damp. If water or any other liquid gets inside this unit, have it checked by your Integra/Onkyo dealer.
6. Installing This Unit
• Install this unit in a well-ventilated location.
- Ensure that there's adequate ventilation all around this unit, especially if it's installed in an audio rack. If the ventilation is inadequate, the unit may overheat, leading to malfunction.
- Do not expose this unit to direct sunlight or heat sources, because its internal temperature may rise, shortening the life of the optical pickup.
- A v oid damp and dusty places, and places subject to vibrations from loudspeakers. Never put the unit on top of, or directly above a loudspeaker.
• Install this unit horizontally. Never use it on its side or on a sloping surface, because it may cause a malfunction.
- If you install this unit near a TV, radio, or VCR, the sound quality may be affected. If this occurs, move this unit away from the TV, radio, or VCR.
7. Moisture Condensation
Moisture condensation may damage this unit.
Read the following carefully:
When you take a glass containing a cold drink outside on a summer's day, drops of water, called condensation, form on the outside of the glass.
Similarly, moisture may condense on the lens of the optical pickup, one of the most important parts inside this unit.
- Moisture condensation can occur in the following situations:
— The unit is moved from a cold place to a warm place.
— A heater is turned on, or cold air from an air conditioner is hitting the unit.
— In the summer, when this unit is moved from an air conditioned room to a hot and humid place.
— The unit is used in a humid place.
- Do not use this unit when there's the possibility of moisture condensation occurring. Doing so may damage your discs and certain parts inside this unit.
If condensation does occur, remove all discs and leave this unit turned on for two to three hours. By this time, the unit will have warmed up and any condensation will have evaporated. To reduce the risk of condensation, keep this unit connected to a wall outlet.
For U.S. model
The laser is covered by a housing which prevents exposure during operation or maintenance. However, this product is classified as a Laser Product by CDRH (Center for Devices and Radiological Health) which is a department of the Food and Drug Administration.
According to their regulations 21 CFR section 1002.30, all manufactures who sell Laser Products must maintain records of written communications between the manufacturer, dealers and customers concerning radiation safety. If you have any complaints about instructions or explanations affecting the use of this product, please feel free to write to the address on the back page of this manual. When you write us, please include the model number and serial number of your unit.
In compliance with Federal Regulations, the certification, identification and the period of manufacture are indicated on the rear panel.
FCC INFORMATION FOR USER
CAUTION:
The user changes or modifications not expressly approved by the party responsible for compliance could void the user's authority to operate the equipment.
NOTE:
This equipment has been tested and found to comply with the limits for a Class B digital device, pursuant to Part 15 of the FCC Rules.
These limits are designed to provide reasonable protection against harmful interference in a residential installation. This equipment generates, uses and can radiate radio frequency energy and, if not installed and used in accordance with the instructions, may cause harmful interference to radio communications. However, there is no guarantee that interference will not occur in a particular installation.
Precautions—Continued
If this equipment does cause harmful interference to radio or television reception, which can be determined by turning the equipment off and on, the user is encouraged to try to correct the interference by one or more of the following measures:
- Reorient or relocate the receiving antenna.
- Increase the separation between the equipment and receiver.
- Connect the equipment into an outlet on a circuit different from
• that to which the receiver is connected. - Consult the dealer or an experienced radio/TV technician for help.
For Canadian model
NOTE: This Class B digital apparatus complies with Canadian ICES-003.
For models having a power cord with a polarized plug: CAUTION: TO PREVENT ELECTRIC SHOCK, MATCH WIDE BLADE OF PLUG TO WIDE SLOT, FULLY INSERT.
This unit contains a semiconductor laser system and is classified as a "CLASS 1 LASER PRODUCT." So, to use this model properly, read this Instruction Manual carefully. In case of any trouble, please contact the store where you purchased the unit. To prevent exposure to the laser beam, do not try to open the enclosure.
DANGER:
VISIBLE AND INVISIBLE LASER RADIATION WHEN OPEN AND INTERLOCK FAILED OR DEFEATED. DO NOT STARE INTO BEAM.
CAUTION:
THIS PRODUCT UTILIZES A LASER. USE OF CONTROLS OR ADJUSTMENTS OR PERFORMANCE OF PROCEDURES OTHER THAN THOSE SPECIFIED HEREIN MAY RESULT IN HAZARDOUS RADIATION EXPOSURE.
- This unit is a CLASS 1 LASER PRODUCT and employs a laser inside the cabinet.
- To prevent the laser from being exposed, do not remove the cover. Refer servicing to qualified personnel.
Table of Contents
Getting Started
Controls & Connectors ......6
Front Panel 6
Display 7
Rear Panel 8
Remote Controller....9
Before Using the CDC-3.4......10
Installing the Remote Controller's Batteries.....10
Using the Remote Controller ....10
Connections
Connecting the CDC-3.4 ......11
Audio Connections....11
RI Connections....12
Controlling AV Components that are Out of Range ....13
Basic Operation
Turning On the CDC-3.4....14
Turning On the CDC-3.4....14
Basic Playback 14
Loading Discs....14
Starting Playback 15
Selecting Discs....15
Loading Discs During Playback....15
Adjusting the Display Brightness.....15
Basic Operation....16
Selecting MP3s....17
Selecting Tracks by Number......18
Selecting MP3 Folders & Tracks by Number...18
Displaying Information 19
Advanced Operation
Advanced Playback....20
Cuing Up the Next Track, Folder, or Disc.....20
Playing All Discs Repeatedly....21
Playing One Track, Folder,
or Disc Repeatedly ....21
Using Random Playback....21
Using Memory Playback....22
MP3 Preferences ....24
Setting the MP3 Preferences ....24
Initializing the MP3 Preferences....24
Others
Troubleshooting 25
Disc Notes......26
Specifications 27
Controls & Connectors
Front Panel
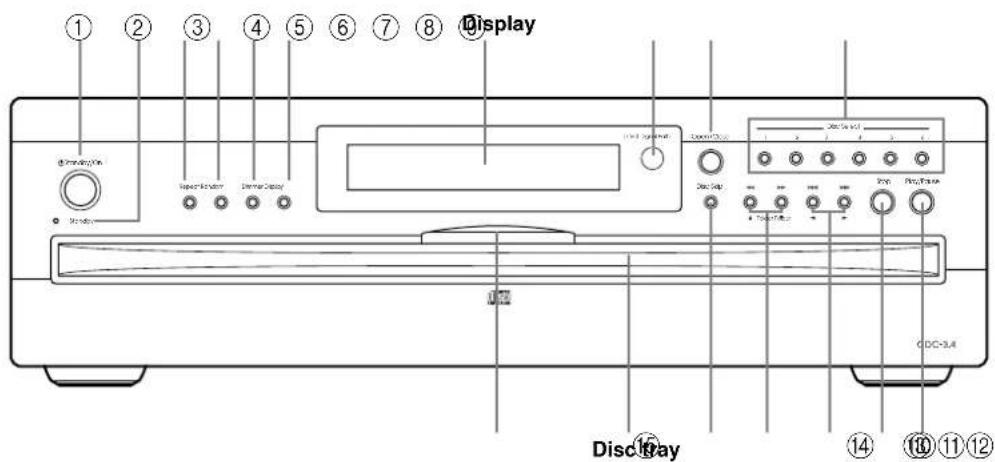
For detailed information, refer to the pages in parenthesis.
① Standby/On button (14)
This button is used to set the CDC-3.4 to On or Standby.
② Standby indicator (14)
This indicator lights up when the CDC-3.4 is in Standby mode.
③ Repeat button (21)
This button is used with the Repeat function.
④ Random button (21)
This button is used with the Random function.
⑤ Dimmer button (15)
This button is used to adjust the display brightness.
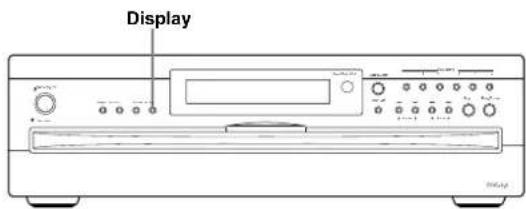
⑥ Display button (19)
This button is used to display elapsed, remaining, and total time information about the current disc or track and various information about MP3 tracks.
⑦ Remote control sensor (10)
This sensor receives control signals from the remote controller.
⑧ Open/Close button (14)
This button is used to open and close the disc tray.
⑨ Disc Select buttons (15)
These buttons are used to select discs. Playback starts automatically when a disc is selected with one of these buttons.
⑩ Play/pause button (15, 16)
This button is used to start and pause playback.
⑪ Stop button (16)
This button is used to stop playback.
⑫ [H][&] Folder [◀]/[▶] buttons (16, 17)
These buttons are used to select the previous and next tracks and to navigate folders on MP3 discs.
⑬ [▼] & Folder [▲]/[▼] buttons (16, 17)
These buttons are used for fast reverse and fast forward and to navigate folders on MP3 discs.
⑭ Disc Skip button (14, 15)
This button is used to turn the disc tray when loading or removing discs and to select discs for play-back.
⑮ Disc tray light
This light illuminates the disc tray. It comes on when the CDC-3.4 is turned on and gets brighter when the disc tray is open.
Controls & Connectors—Continued
Display

For detailed information, refer to the pages in parenthesis.
1 RANDOM indicator (21)
2 MEMORY indicator (22)
3 REPEAT indicator (21)
4 DISC indicator
The number of the current disc appears here.
5 FLDR (FOLDER) indicator
While stopped, the total number of folders on the current MP3 disc are displayed. During playback, the number of the current folder is displayed.
6 NEXT indicator (20)
This indicator appears when using the Next Selection function.
7 TRACK indicator
While stopped, the total number of tracks on the current disc are displayed. During playback, the number of the current track is displayed.
8 NAME indicator
This indicator appears when the current disc is an MP3 disc and a name (disc, folder, track) is being displayed.
9 TOTAL indicator (19)
This indicator appears when the total remain time is displayed.
10 REMAIN indicator (19)
11 Play ▶ Pause indicator
12 MP3 indicator
13 Disc indicators 1–6 (14, 15)
Controls & Connectors—Continued
Rear Panel
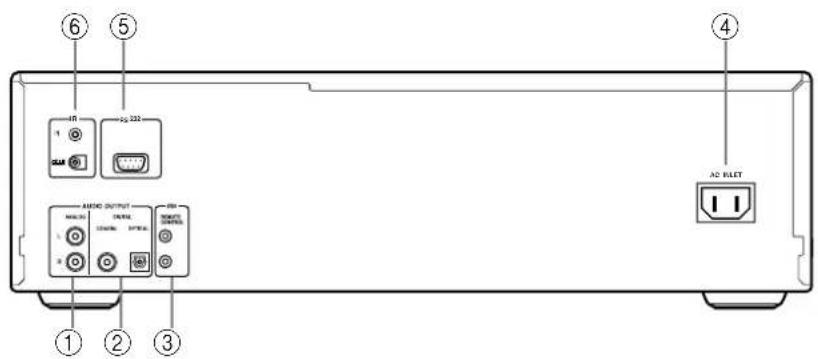
For detailed information, refer to the pages in parenthesis.
① ANALOG AUDIO OUTPUT (11, 12)
These RCA/phono connectors can be connected to the analog audio inputs on a hi-fi amp or AV receiver.
② COAXIAL & OPTICAL DIGITAL AUDIO OUTPUT (11)
These connectors can be used to connect a CD-R, MiniDisc, DAT recorder, digital amp, or other equipment with digital inputs.
③ RI REMOTE CONTROL (11, 12)
These (Remote Interactive) connectors can be connected to the Connectors on your other Integra/Onkyo AV components for interactive control.
To use Rdu must also make analog audio connections (RCA/phono) between the CDC-3.4 and your other Integra/Onkyo equipment.
④ AC INLET (14)
The supplied power cord is connected here. The other end of the power cord should be connected to a suitable wall outlet.
⑤ RS 232
This RS-232 port can be connected to an external controller.
⑥ IR IN/OUT (13)
The IR IN connector can be used to connect a commercially available IR receiver, which can be used to pickup signals from the remote controller when the CDC-3.4 is located in another room, installed in a rack, or is out of range of the remote controller.
The IR OUT connector can be used to connect a commercially available IR emitter, which can be used to pass remote controller signals received by the IR IN along to other AV components.
Controls & Connectors—Continued
Remote Controller
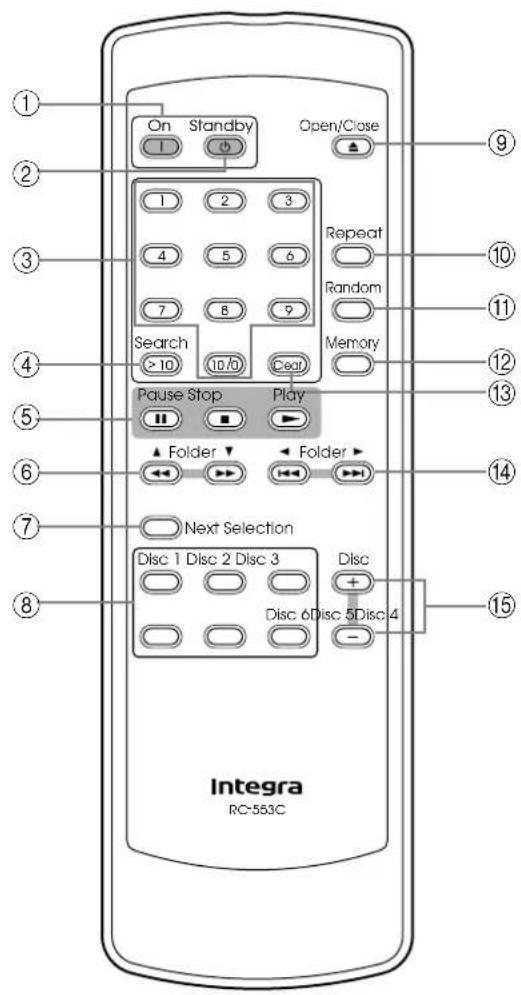
For detailed information, refer to the pages in parenthesis.
① On button (14)
This button is used to turn on the CDC-3.4.
② Standby button (14)
This button is used to set the CDC-3.4 to Standby.
③ Number buttons (18)
These buttons are used to enter track and MP3 folder numbers.
④ Search (>10) button (18)
This button is used to enter track numbers above 10 and to select MP3 folders.
⑤ Operation buttons
Pause [button (16)
This button is used to pause playback.
Stop [■] button (16)
This button is used to stop playback.
Play [▶] button (15)
This button is used to start playback.
⑥ [1/4] & Folder [/][ ] buttons (16, 17)
These buttons are used for fast reverse and fast forward, and to navigate folders on MP3 discs.
⑦ Next Selection button (20)
This button is used with the Next Selection function for cuing up the next track.
⑧ Disc Select buttons (15)
These buttons are used to select discs. Playback starts automatically when a disc is selected with one of these buttons.
⑨ Open/Close [▲] button (14)
This button is used to open and close the disc tray.
⑩ Repeat button (21)
This button is used with the Repeat function.
⑪ Random button (21)
This button is used with the Random function.
⑫ Memory button (22)
This button is used with the Memory function.
⑬ Clear button (23)
This button is used to cancel various functions.
⑭ [H/[] & Folder [/][ ] buttons (16, 17)
These buttons are used to select the previous and next tracks, and to navigate folders on MP3 discs.
⑮ Disc [+] & [-] buttons (15)
These buttons are used to select discs.
Before Using the CDC-3.4
Installing the Remote Controller's Batteries
1 Remove the battery compartment cover, as shown.
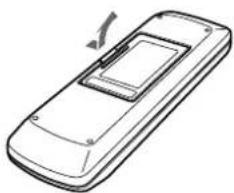
natural_image
Line drawing of a mobile phone casing with an arrow indicating the left side (no text or symbols present)2 Insert the two supplied batteries (AA/R6) in accordance with the polarity diagram inside the battery compartment.
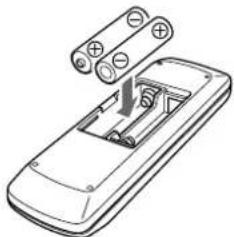
natural_image
Illustration of a remote control device with two batteries inserted into a housing (no text or symbols)3 Replace the battery compartment cover.
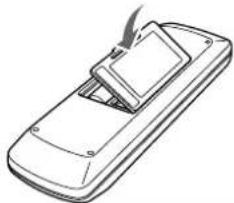
natural_image
Line drawing of a handheld electronic device with a flat top and screen (no text or symbols)Notes:
- The batteries should last for about six months, although this will vary with usage.
- If the remote controller doesn't work reliably, try replacing the batteries.
- Don't mix new and old batteries or different types of batteries.
- If you intend not to use the remote controller for a long time, remove the batteries to prevent damage from leakage or corrosion.
- Flat batteries should be removed as soon as possible to prevent damage from leakage or corrosion.
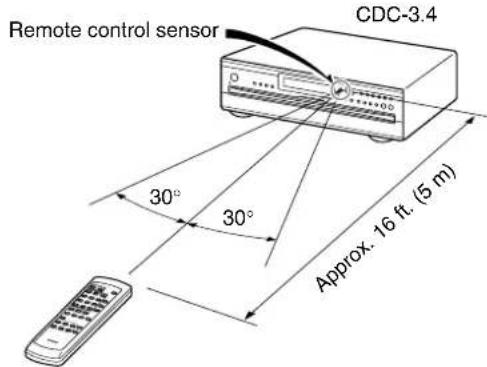
Using the Remote Controller
To use the remote controller, point it at the CDC-3.4's remote control sensor, as shown.
Notes:
- The remote controller may not work reliably if the CDC-3.4 is subjected to bright light, such as direct sunlight or inverter-type fluorescent lights. Keep this in mind when installing the CDC-3.4.
- If another remote controller of the same type is used in the same room, or the CDC-3.4 is installed close to equipment that uses infrared rays, the remote controller may not work reliably.
- Don't put anything, such as a book, on the remote controller, because the buttons may be pressed inadvertently, thereby draining the batteries.
- The remote controller may not work reliably if the CDC-3.4 is installed in a rack behind colored glass doors. Keep this in mind when installing the CDC-3.4.
- The remote controller will not work if there's an obstacle between it and the CDC-3.4's remote control sensor.
Connecting the CDC-3.4
Audio Connections
- Read the manuals supplied with your other audio equipment.
- Don't connect the power cord until you've completed all audio connections.
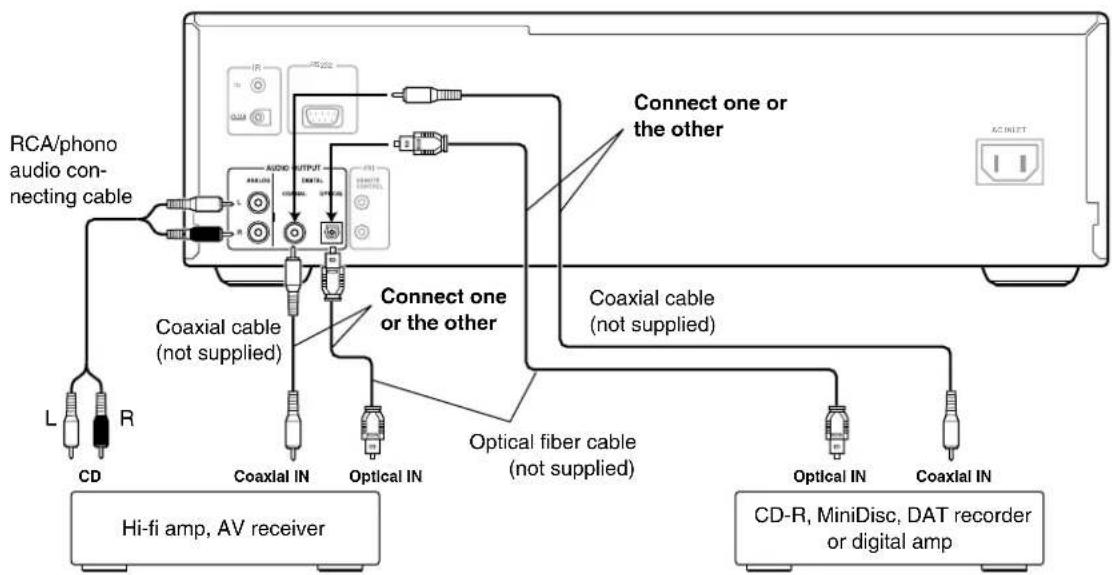
The CDC-3.4 has analog and digital (coaxial and optical) audio outputs. The digital outputs offer the best audio quality, so if your digital recorder or amp has a digital input you should use it.
ANALOG AUDIO OUTPUT
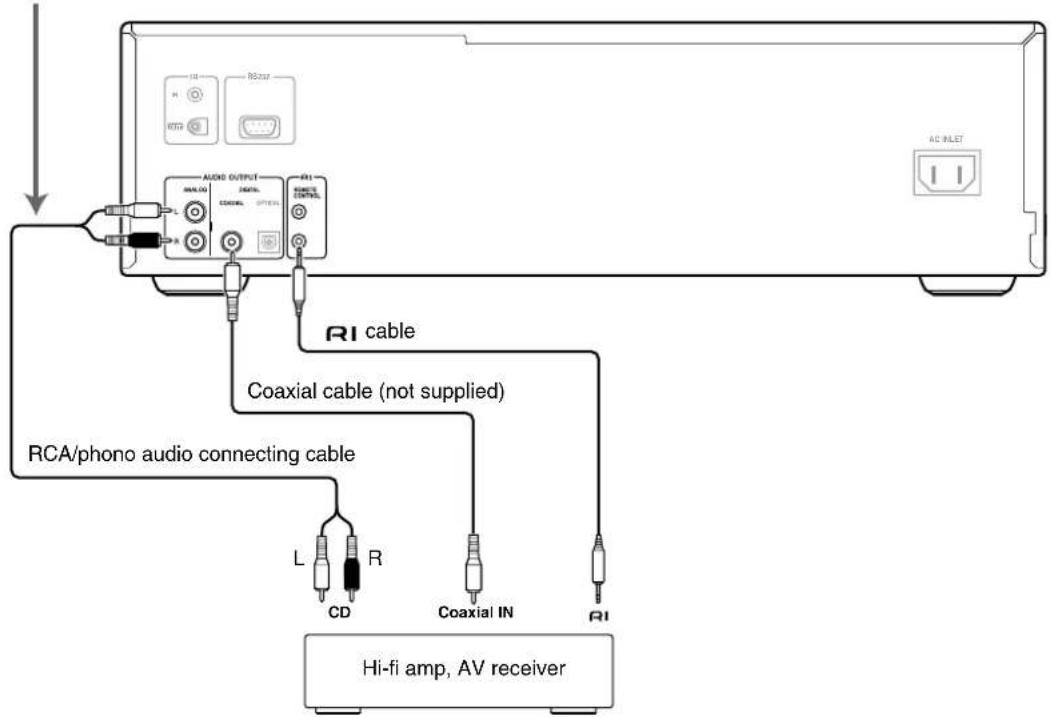
If your hi-fi amp or AV receiver doesn't have a digital input, use the supplied RCA/phono audio connecting cable to connect the CDC-3.4's ANALOG AUDIO OUTPUTs to your amp's analog CD inputs.
Notes:
- RCA/phono audio connecting cables are usually color coded: red and white. Use red plugs to connect right-channel inputs and outputs, and use white plugs to connect left-channel inputs and outputs.
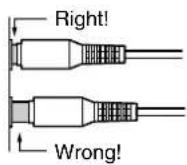
- Push each plug in all the way to make a good connection (loose connections can cause noise or malfunctions).
- To prevent interference, keep audio cables away from power cords and speaker cables.
DIGITAL AUDIO OUTPUT
If your CD-R, MiniDisc, or DAT recorder has a digital input, use a commercially available coaxial or optical fiber digital audio cable to connect the CDC-3.4's COAXIAL or OPTICAL DIGITAL AUDIO OUTPUT to your recorder.
You can also use the digital outputs to connect to an amp that has a digital input, for the best audio quality.
Notes:
- With MP3 tracks, the digital outputs only work if the sampling rate is 32 kHz, 44.1 kHz, or 48 kHz.
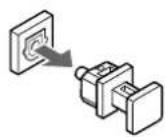
- The OPTICAL DIGITAL AUDIO OUTPUT has a dust cap for keeping out dust and dirt when it's not in use. Remove the cap before connecting an optical fiber cable. Push the plug in all the way to make a good connection. Keep the dust cap in a safe place for future use.
Connecting the CDC-3.4—Continued
RI Connections
With Remote Interactive) you can control the CDC-3.4 together with your other Compatible Integra/Onkyo AV components. With some Integra/Onkyo AV receivers you can use one remote controller to control all your Integra/Onkyo components and use the following special functions:
■ Auto Power On
If your CDC-3.4 is connected to an Rdmpatible Integra/Onkyo AV receiver, when you turn on the CDC-3.4, the AV receiver will turn on and select the CDC-3.4 as the input source.
■ Direct Change
If your CDC-3.4 is connected to an Rdmpatible Integra/Onkyo AV receiver, when you start playback on the CDC-3.4, the AV receiver will select the CDC-3.4 as the input source.
■ Auto Power Off
When you set an Compatible Integra/Onkyo AV receiver to Standby, all other AV components connected via Letter Standby as well.
Dimmer
When you dim the display brightness on an R compatible Integra/Onkyo AV component, the displays on all other AV components connected via Rite dimmed as well.
Touse the functions, you need to connect one of the CDC-3.4's connectors to an connector on another AV component in your system by using the supplied RI cable.
See the manuals supplied with your other Römpatible AV components for more information.
Notes:
- Use only cables for connections.
• To use fdt must make an analog RCA/phono connection between your CDC-3.4 and Integra/Onkyo AV receiver even if they are connected digitally.
- The CDC-3.4 has two connectors. You can connect either one to your Integra/Onkyo AV receiver. The other connector is for connecting additional RI compatible components.
- Connect the CDC-3.4's Insector to only Integra/Onkyo AV components. Connecting to other manufacturer's AV components may cause them to malfunction.
- Some Integra/Onkyo -compatible AV components may not support the special functions described here.
To use you must make an analog audio connection (RCA/phono) between the CDC-3.4 and your other Integra/Onkyo equipment even if they are connected digitally.
Connecting the CDC-3.4—Continued
Controlling AV Components that are Out of Range
You can use the following multi-room kits to control the CDC-3.4 when it's out of range of the remote controller:
- Integra Multi-Room System (IR Remote Controller Extension System)
- Multiroom AV distribution and control systems such as those made by Niles® and Xantech®.
Notes:
- Xantech is a registered trademark of Xantech Corporaion.
- Niles is registered trademark of Niles Audio Corporation.
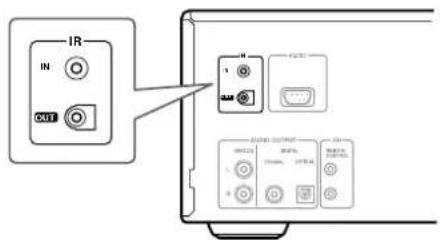
Controlling the CDC-3.4 When It's Out of Range
If the CDC-3.4 is located in another room, installed in a cabinet, or out of range of its remote controller, you can use a commercially available IR receiver to pickup the remote controller signals and feed them to the CDC-3.4, as shown below.
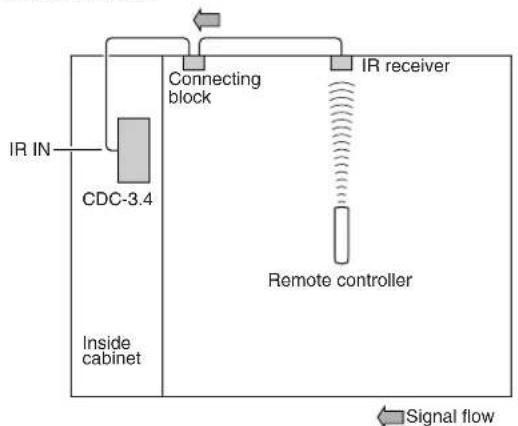
flowchart
graph TD
    A["IR IN"] --> B["CDC-3.4"]
    B --> C["Connecting block"]
    C --> D["IR receiver"]
    D --> E["Remote controller"]
    E --> F["Signal flow"]
    style A fill:#f9f,stroke:#333
    style B fill:#ccc,stroke:#333
    style C fill:#fff,stroke:#333
    style D fill:#fff,stroke:#333
    style E fill:#fff,stroke:#333
    style F fill:#fff,stroke:#333
Connect the IR receiver to the CDC-3.4 as shown below.
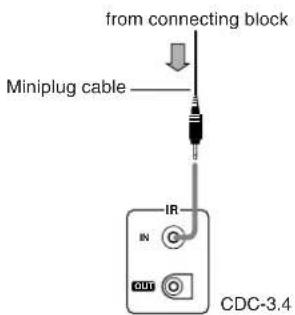
← Signal flow
Controlling Other Out-of-range AV Components
If another AV component is out of range of its remote controller, you can use a commercially available IR emitter to retransmit the remote controller signals received at the CDC-3.4's IR IN, as shown below.
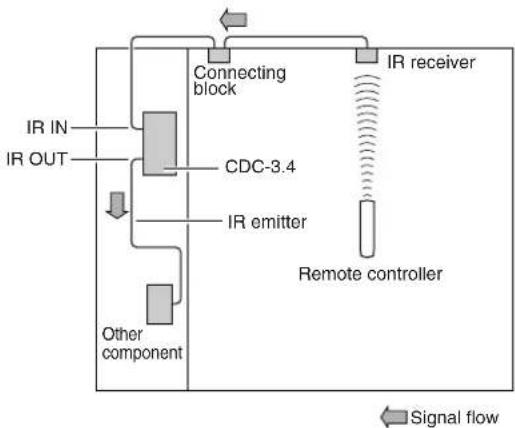
flowchart
graph TD
    A["IR IN"] --> B["CDC-3.4"]
    C["IR OUT"] --> B
    B --> D["IR emitter"]
    D --> E["Remote controller"]
    F["Other component"] --> B
    G["Connecting block"] --> B
    H["IR receiver"] --> I["Signal flow"]
Connect the IR emitter to the CDC-3.4's IR OUT, and place the IR emitter in front of the other AV component's remote control sensor (usually located on its front panel), as shown below. See the instructions supplied with the IR emitter.
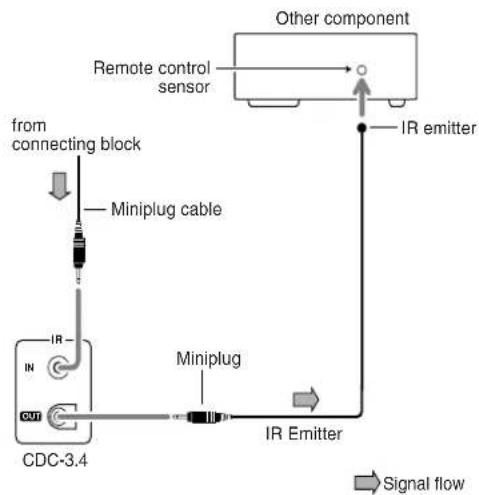
flowchart
graph TD
    A["Remote control sensor"] --> B["Other component"]
    B --> C["IR emitter"]
    D["CDC-3.4"] --> E["Miniplug cable"]
    E --> F["IR"]
    F --> G["Signal flow"]
    H["from connecting block"] --> I["Miniplug cable"]
    I --> J["IR"]
    J --> K["IR Emitter"]
    K --> L["IR Emitter"]
Only remote controller signals received by the CDC-3.4's IR IN are fed through to the IR OUT. Signals picked up by the CDC-3.4's remote control sensor are not output.
Turning On the CDC-3.4
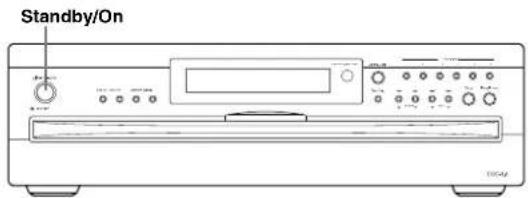
Turning On the CDC-3.4
Before connecting the power cord and turning on the CDC-3.4, connect all your AV components first (see page 11).
Don't forget to turn on your amp, and select the audio input to which the CDC-3.4 is connected.
1
Plug the supplied power cord into the AC INLET. Then plug the other end to a suitable wall outlet.
The standby indicator light up.
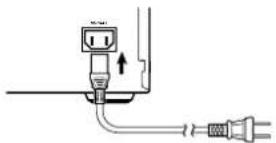
- Do not use a power cord other than the one supplied with the CDC-3.4. The power cord supplied is designed for use with the CDC-3.4 and should not be used with any other device.
- N ever have the power cord disconnected from the CDC-3.4 while the other end is plugged into the wall outlet. Doing so may cause an electric shock. Always connect by plugging into the wall outlet last and disconnect by unplugging from the wall outlet first.
2
Press the [Standby/On] button, or the remote controller's [On] button.
The CDC-3.4 comes on, the display lights up, the disc tray light comes on, and the Standby indicator goes off.
When the CDC-3.4 is turned on, it checks the carousel for discs and selects the first disc that it finds.
To set the CDC-3.4 to Standby, press the [Standby/On] button or the remote controller's [Standby] button.
Note:
- You can turn on the CDC-3.4 and simultaneously open the disc tray or start playback simply by pressing the Open/Close [Button or the Play [] Button respectively. The CDC-3.4 will take a little longer to come on.
Basic Playback
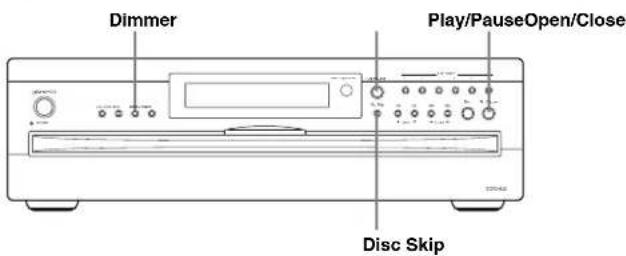
Loading Discs
1
Open/Close
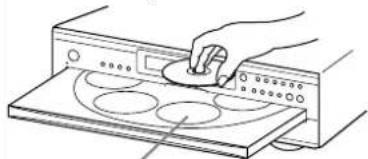
To open the disc tray, press the Open/Close button.
Put a disc, label-side up, into each disc bay.
natural_image
Line drawing of a hand operating a device with circular components on a tray (no text or symbols)Current disc
2
Disc Skip

To access the other disc bays, use the [Disc Skip] button or the remote controller's Disc [+] and [-] buttons.
3
Open/Close
To close the disc tray, press the Open/Close button again.
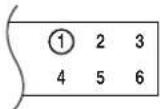
A circle appears around the number of the current disc.
Notes:
- The CDC-3.4 supports 8 cm and 12 cm discs. To avoid damaging your discs or CDC-3.4, be sure to put discs in the centers of the disc bays.
- Only load discs that are supported by the CDC-3.4 (see page 26).
- To avoid personal injury, keep your hands away from the disc tray as it closes.
- A lways use the Open/Close button to open and close the disc tray. Never push the disc tray, and don't touch or obstruct it while it's opening or closing. Don't press down on the disc tray while it's open. Doing so may damage your discs or CDC-3.4.
Basic Playback—Continued
Starting Playback
Play/Pause
To start playback, press the Play/Pause button.

Playback starts from the first track on the current disc, continues with the subsequent discs, and stops when disc #6 has been played.
Empty disc bays are skipped.
Tip: If you press one of the Disc Select buttons, playback of the selected disc will start automatically.
Notes:
- When you close the disc tray, the current disc will be the one in the front-right disc bay. When you open the disc tray, the last disc you selected (i.e., the current disc), will be in the front-right disc bay.
- When the disc tray is closed, all of the disc indicators appear until the CDC-3.4 has checked each bay for the presence of a disc. If a bay is found to have no disc, the corresponding indicator disappears.
Selecting Discs
The section explains how to select discs.
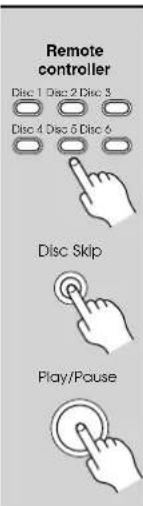
When playback is stopped
Use the Disc Select buttons to select a disc. Playback will start automatically. Or, use the [Disc Skip] button or the remote controller's Disc |+ and [-] buttons to select a disc. In this case you'll need to press the Play [button to start playback.
During playback
Use the Disc Select buttons, [Disc Skip] button, or the remote controller's Disc [+] and [-] buttons to select a disc. The current disc will stop playing, and the newly selected disc will be played. On the display, the number of the current disc has a circle around it.
Loading Discs During Playback
This section explains how to load discs without stopping playback.
1
Open/Close
To open the disc tray, press the Open/Close button.
The disc that's currently playing remains inside the CDC-3.4 and its disc bay is empty and won't come to the front.
2
Disc Skip

Load or remove your discs, and use the [Disc Skip] button or the remote controller's Disc [+] and [-] buttons to access the other disc bays.
3
Open/Close
To close the disc tray, press the Open/Close button again.
Playback of the current disc continues uninterrupted until you stop playback or select another disc.
Tip: If you press one of the Disc Select buttons, the disc tray will close, and playback of the newly selected disc will start automatically.
Note:
- The CDC-3.4 cannot play the next disc while the disc tray is open. Be sure to close the disc tray as soon as you've finish loading discs.
Adjusting the Display Brightness
You can adjust the brightness of the display as follows.
Press the [Dimmer] button repeatedly to cycle through the following options: normal, dim, dimmer, dimmer with disc tray light off.
Basic Playback—Continued
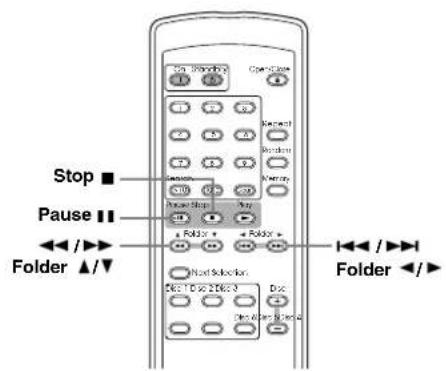
Basic Operation
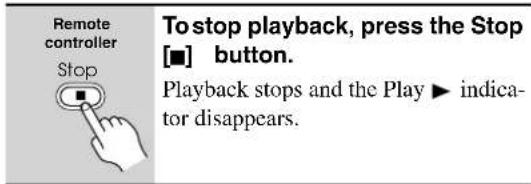
■ Stopping Playback
■ Pausing Playback
![Remote controller Pause To pause playback, press the Pause [button] Playback pauses and the Pause indicator appears on the display. To resume playback, press the Play [button or button] Playback resumes and the Pause indicator disappears.](/content/2026/05/949387/images/01926b93c9b896fac993306d785e48f2c2a7e0d62a0cb6776604a05a9b5c2c0d.jpg)
■ Fast Forward & Fast Reverse
![Remote controller To fast forward during playback, hold down the [ ] button. To fast reverse during playback, hold down the [ ] button. Release the button to cancel fast forward or fast reverse.](/content/2026/05/949387/images/6f0fcd1ed1a3044a26064dfede1207027c20c5c8bbc3c4180d5b639d84a9b30c.jpg)
Notes:
- If you fast forward all the way to the end of a disc, fast forward will be cancelled and the next disc will be played, unless it's last disc, in which case playback will stop.
- If you fast reverse all the way to the beginning of a disc, fast reverse will be cancelled.
- F or MP3 discs, fast reverse only works within the MP3 track that's currently playing.
■ Selecting the Next or Previous Track
| Remote controller | To select the next track, press [▶▶] button. To select the previous track, press [▶▶button. If you press the [▶▶button during playback or while playback is paused, the beginning of the current track is selected. Press it twice to select the beginning of the previous track. If you use the [▶▶] [ ] button to select a track while playback is stopped, you'll need to press the Play [▶] button to start playback. |
Notes:
- F or MP3 discs, you can also select tracks in other folders.
- The [▶▶] [ ] buttons only select tracks on the current disc. So when the last track is being played, the [▶▶] button has no effect, and when the first track is being played, the [▶▶] button will select the beginning of that track.
- During random playback, the [] button can be used to select the next random track (see page 21).
- During memory playback, the [] and [] buttons can be used to select the next or previous track in memory (see page 22).
Basic Playback—Continued
Selecting MP3s
There are two modes for selecting MP3 tracks: Navigation mode and All Folder mode.
■ Selecting MP3 Tracks in Navigation Mode
With Navigation mode you can select MP3 tracks by navigating through the folder hierarchy. This mode can only be used while playback is stopped.
1
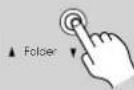
While playback is stopped, press the Folder [▼ button.
The CDC-3.4 enters Navigation mode and “[ROOT]” appears on the display.

2
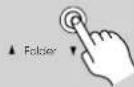
Press the Folder [▼button once more.
The name of the first folder one level down from root appears on the display.

If the disc has no folders, the name of the first track is displayed.
3
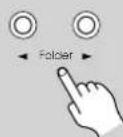
Use the Folder [ ]/ [ ] buttons to select other folders and tracks at the same level.
Folders that do not contain MP3 tracks or folders cannot be selected.
4
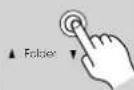
To access tracks or folders inside another folder, select the folder, and then press the Folder [▼button.
Use the Folder | ▶ | ▶ buttons to select the tracks and folders in that folder.

To move up a level, press the Folder |▲ button.
■ Selecting MP3 Tracks in All Folder Mode
With All Folder mode you don't have to navigate the folder hierarchy to find an MP3 track because all folders that contain MP3 tracks appear at the same level. This mode can only be used while playback is stopped.
1
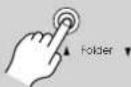
While playback is stopped, press the folder [4] button.
The CDC-3.4 enters All Folder mode and the name of the first folder appears on the display.
![Integra CDC-3.4 - While playback is stopped, press the folder [4] button. - 1](/content/2026/05/949387/images/b219756b3d53969367f8cf13ee89841f07bb283dc0d039181caf18932c84814b.jpg)
2
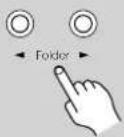
Use the Folder [√][ ] buttons to select a folder.
You can select any of the folders on the disc that contain MP3 tracks.
3
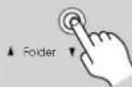
To access the tracks inside the folder, press the Folder [▼] button.
The name of the first track inside the folder appears on the display.
Use the Folder [◀]▶buttons to select the tracks in that folder.
![Integra CDC-3.4 - To access the tracks inside the folder, press the Folder [▼] button. - 1](/content/2026/05/949387/images/f388bf99547276b78e53243ceff0c86d05943b3b01b7973a5b414f622bafdc6b.jpg)
To select another folder, press the Folder [▲] button, and then use the Folder [▼/] buttons.
■ Playing the Selected Track
To play the selected track, press the Play [▶] button. Tip: If you press the Play [▶] button while a folder is selected, playback start with the first track in that folder.
■ Cancelling Navigation or All Folder mode
To cancel Navigation mode or All Folder mode while selecting MP3 tracks, press the Stop [■] button.
natural_image
Pure geometric shape with a small crosshair symbol on the right side (no text or symbols)Basic Playback—Continued
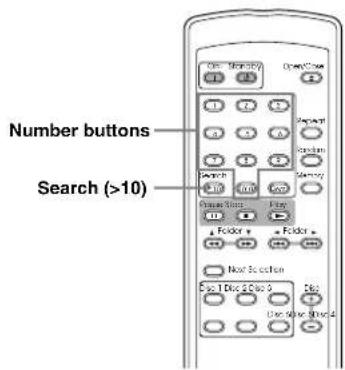
Selecting Tracks by Number
This section explains how to select tracks by number.
| Remote controller Search >10 | Use the remote controller's num- ber buttons to enter the number of the track that you want to play. Playback starts automatically. For track numbers 1 through 10, simply press the corresponding button. For track numbers above 10, press the [Search] (>10) button and then enter the numbers in order from left-to-right. For example, to enter 25, press |Search| (>10), [2], and then [5]. |
| DISC TRACK |
Note:
- F or MP3 discs, tracks in the current folder can be selected.
Selecting MP3 Folders & Tracks by Number
This section explains how to select MP3 folders and tracks by number.
1
Remote controller
Search
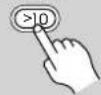
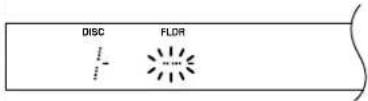
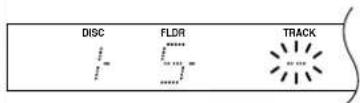
Press the [Search] (>10) button repeatedly until “-” appears below the FLDR indicator on the display.
2
Remote controller
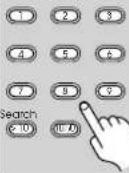
Use the number buttons to enter the folder number.
Enter the numbers in order from left-to-right. For example, to enter folder number 25, press [2] and then [5].
The name of the specified folder appears on the display.
3
Remote controller
Search

Press the [Search] (>10) button again.
Under the TRACK indicator, “-” appears.
4
Remote controller
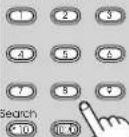
Use the number buttons to enter the track number.
Playback starts automatically.
If the folder contains 100 or more tracks, single- and double-digit track numbers must be preceded with zeros. For example, to enter track number 32, press [0], [3], and then [2].
Tip:
You can select any MP3 track on the entire disc without specifying its folder. Todo this, press the [Search] (>10) button repeatedly until the FLDR indicator disappears and “-” appears below the TRACK indicator. Then use the number buttons to enter the track number. Tracks on the disc are numbered in order of hierarchy. Playback starts automatically.
Basic Playback—Continued
Displaying Information
This section explains how to display various information, including the remaining track time, remaining disc time, disc name, track name, and various ID3 tags for MP3 tracks, including title name, artist name, and so on.
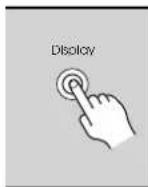
During playback, press the [Display] button repeatedly to cycle through the following options.
■ Audio CD
Elapsed track time: The length of time that the current track has been playing (default display).

Remaining track time: The amount of time remaining for the current track (REMAIN indicator appears).

Remaining disc time: The amount of time remaining for the entire disc (REMAIN and TOTAL indicators appear).

MP3 Disc
Elapsed track time: The length of time that the current track has been playing (default display).

Track name: Name of the current track.

Folder name: Name of the current folder.

Title name: Title of the current track (if ID3 tag present).

Artist name: Name of the artist (if ID3 tag present).

Album name: Name of the album (if ID3 tag present).

Sampling rate and bit rate: Sampling rate and bit rate of the current track.

Notes:
- T o display the disc name, while playback is stopped, press the |Display| button.
- If a track or folder name contains a character that cannot be displayed, it will be displayed as "TRACK n" or "FOLDER n," "n" being the track or folder number. You can set the CDC-3.4 so that it displays underscores in place of any undisplayable characters (see page 24).

natural_image
Pure geometric shape with a small crosshair symbol at the bottom-right corner (no text or symbols)Advanced Playback
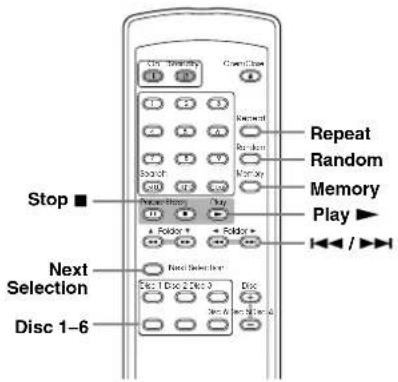
Cuing Up the Next Track, Folder, or Disc
With the Next Selection function you can cue up the track, folder, or disc that you want to play next.
1
Remote controller
During playback, press the [Next Selection] button.
The NEXT indicator flashes on the display and “_” appears below the DISC indicator.
![Integra CDC-3.4 - During playback, press the [Next Selection] button. - 1](/content/2026/05/949387/images/1177c543ccfd0b767a99adcef8e2b5db7dd1ccb0808aa658e1161e077e6a4354.jpg)
2
Remote controller
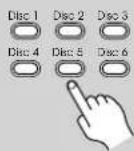
Use the Disc Select buttons to select a disc.
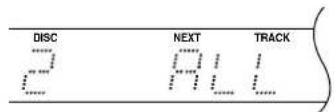
"ALL," which means all tracks on the disc, appears on the display.
To select the entire disc, press the [Next Selection] button to complete this function.
3
Remote controller
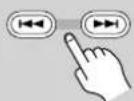
To select a track, use the [ɪ]◀ [▶▶] buttons.
To select an individual track or folder on an MP3 disc, you can use All Folder mode, as explained on page 17 (note that you don't need to stop playback in this case).
You can also select tracks and folders by using the number buttons (as explained on page 18). In this case, the Next Selection function will be set once you've entered the track number.
If you want to play all the MP3 tracks in a folder, simply select that folder.
4
Remote controller
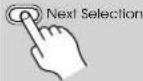
Press the [Next Selection] button again to set the Next Selection function.
The specified disc, folder, or track will be played when, if you specified a disc, the current disc finishes, if you specified a folder, when the current folder finishes, and if you specified a track, when the current track finishes.
■ Cancelling the Next Selection Function
To cancel the Next Selection function, press the [Next Selection] button. The number of the specified track, folder, or disc will flash on the display. Then press the [Clear] button, followed by the [Next Selection] button. The NEXT indicator will disappear.
■ Changing the Specified Track, Folder, or Disc
To change the specified track, folder, or disc, press the [Next Selection] button. The number of the specified track, folder, or disc will flash on the display. Select another track, folder, or disc as explained before, and then press the [Next Selection] button.
Notes:
- If you specify a folder or track on a disc other than the current disc, the name of that folder or track will not be displayed.
- If you set the Next Selection function during memory playback (page 22) or random playback (page 21), when the current track finishes, the next specified track, folder, or disc will be played and the Memory or Random function will be cancelled.
- If after setting the Next Selection function you use the Disc Select buttons, [Disc Skip] button, [▶▶▶] ▶▶▶▶▶▶▶▶▶▶▶▶▶▶▶▶▶▶▶▶▶▶▶▶▶▶▶▶▶▶▶▶▶▶▶▶▶▶▶▶▶▶▶▶▶▶▶▶▶▶▶▶▶▶▶▶▶▶▶▶▶▶▶▶▶▶▶▶▶▶▶▶▶▶▶▶▶▶▶▶▶▶▶▶▶▶▶▶▶▶▶▶▶▶▶▶▶▶▶▶▶>
- The Next Selection function works only once. When playback of the specified track, folder, or disc starts, the Next Selection function is reset.
Advanced Playback—Continued
Playing All Discs Repeatedly
This section explains how to play all loaded discs repeatedly.
1
Remote controller
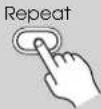
Press the [Repeat] button.
The REPEAT indicator appears.
2
Remote controller Play
Press the Play [▶button.
All loaded discs are played repeatedly. Repeat playback can be used with random and memory playback.
3
Remote controller Repeat
To cancel repeat playback, press the [Repeat] button again.
The REPEAT indicator disappears.
Playing One Track, Folder, or Disc Repeatedly
This section explains how to play one track, folder, or disc repeatedly.
1
Remote controller
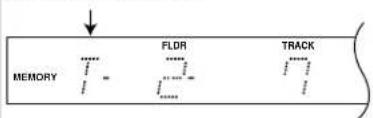
During playback, press the [Memory] button repeatedly to select one of the following options:
T: Current track.
F: Folder containing the current track. (only MP3)
D: Disc containing the current track.
The letter "T," "F," or "D" appears at the left of the display
2
Remote controller Repeat
Press the [Repeat] button.
The track, folder, or disc is played repeatedly.
Note:
- A previously created playlist will be deleted by this procedure.
Using Random Playback
With the Random function you can enjoy a random selection of tracks from all loaded discs.
1
Remote controller
Press the [Random] button.
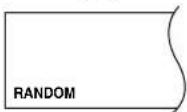
The RANDOM indicator appears and tracks from all loaded discs are played in random order.
Random playback stops when all tracks have been played once.
2
Remote controller
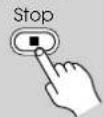
To cancel random playback, press the Stop [■] button or [Random] button.
The RANDOM indicator disappears.
Notes:
- Random playback can be combined with repeat play-back (see the left column). In this case, random play-back continues after all tracks have been played once.
- Random playback can be combined with memory playback (see page 22). Note that if the memory playlist contains a disc or folder, while that disc or folder is being played, only tracks on that disc or in that folder will be played at random. Other tracks will not be played until all the tracks on that disc or in that folder have been played once.
- You cannot use the Disc Select buttons, [Disc Skip] button, the remote controller's Disc [+]/[-] buttons, or number buttons during random playback.
- Y ou can load and unload discs during random playback. If you swap a disc with one that has a different number of tracks, all of the tracks on that disc will be used for random playback. If the disc has the same number of tracks, tracks with the same numbers as those tracks already played, will not be played.
Advanced Playback—Continued
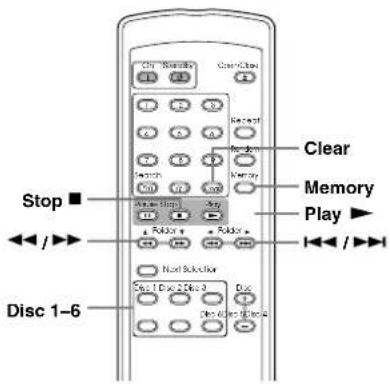
Using Memory Playback
With the Memory function you can create a playlist of up to 40 of your favorite tracks, discs, or folders.
1
Remote controller
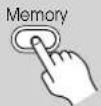
While playback is stopped, press the [Memory] button.
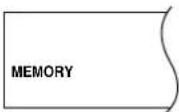
The MEMORY indicator appears.
2
Remote controller
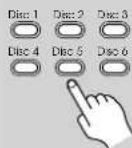
Use the Disc Select buttons to select a disc.
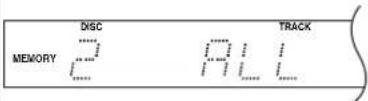
"ALL," which means all tracks on the disc, appears on the display.
To add the entire disc to the playlist, press the |Memory| button.
3
Remote controller
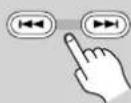
To select a track, use the [1]◀ [▶▶] buttons.
To select an individual track or a folder on an MP3 disc, you can use either Navigation mode or All Folder mode, as explained on page 17 respectively.
You can also select tracks and folders by using the number buttons (as explained on page 18). In this case, the item is added to the playlist once you've entered the track number.
If you want to add all the MP3 tracks in a folder, simply select that folder.
4
Remote controller
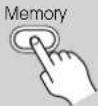
Press the [Memory] button to add the selected track or folder to the playlist.
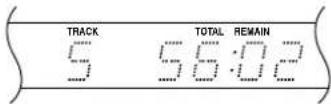
After two seconds, the total playlist time is displayed.
Repeat steps 2 through 4 to add more tracks, discs, or folders to your playlist. If you try to add more than 40 items, the message "FULL" will flash on the display.
5
Remote controller
Press the Play [▶button.
Items in the playlist are played in the order in which they were added.
Notes:
- During memory playback, the total remaining time will be the remaining time of the playlist. However, if the total remaining time exceeds 99 minutes and 59 seconds, the playlist contains items from two or more discs, or contains one or more MP3 tracks, the total remaining time cannot be displayed and “--:--” will be shown instead.
- If you specify a track or disc that does not exist, it will be added to the playlist, but ignored during memory playback.
Advanced Playback—Continued
Checking What's in the Playlist
1
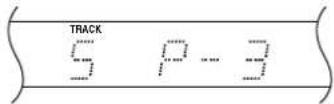
While playback is stopped, press the [Display] button repeatedly until "P-n" appears on the display ("n" being the item number).
On the following display, the playlist contains a total of 16 tracks, the last one being track #8 in folder #12 of disc #1.
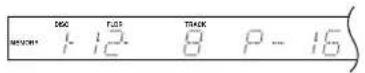
2
Remote controller
Use the [√] buttons to scroll through the playlist.
The disc number, folder number, and track number for each item in the playlist are displayed.
In the following example, item #2 contains track #4 of disc #2.
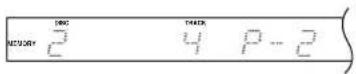
3
Remote controller
When you've finished, press the Stop [■] button.

Deleting the Last Item in the Playlist
Remote controller

To delete the last item in the playlist, while playback is stopped, press the [Clear] button.
The last item in the playlist is deleted.
Canceling Memory Playback
Remote controller
Memory

To cancel memory playback, press the [Memory] button repeatedly to turn the MEMORY indicator off.
The Memory function is turned off and the entire playlist is deleted.
If you are using the Random function with memory playback, you need to turn it off (i.e., press the [Random] button) before you cancel memory playback.
MP3 Preferences
Setting the MP3 Preferences
This section explains how to set various preferences for MP3 discs. Preferences are divided into two groups: Basic and Extra.
You must use the buttons on the CDC-3.4 to set the MP3 preferences, not the remote controller.
- Stop playback. If the Memory function is on, turn it off.
- Press and hold the Stop [■button until "SET-TING" appears on the display (about 4 seconds).
- Press the Stop [■button again. "BASIC ITEMS" appears on the display.
- Use the [◀] buttons to select "BASIC ITEMS" or "EXTRA ITEMS," and then press the STOP [■] button.
- Use the [◀] buttons to select a setting for the first preference, and then press the Stop button.
The preference is set and the next preference appears.
- Repeat steps 5 to set the other preferences. When all the preferences in the group have been set, the previous display reappears. If you want to cancel this procedure at anytime, press the |STANDBY| button. The CDC-3.4 will enter Standby mode.
The Basic and Extra preferences are explained in the following sections. The settings available for each preference are shown in parenthesis, with the default setting on the left.
Basic Items
DISC NAME (DISPLAY/NOT DISPLAY)
This preference determines whether or not the disc name is displayed when an MP3 disc is read.
TRACK NAME (SCROLL/NOT SCROLL)
This preference determines whether or not the track name scrolls across the display when an MP3 track is selected.
FOLDER NAME (SCROLL/NOT SCROLL)
This preference determines whether or not the folder name scrolls across the display when an MP3 folder is selected.
BAD NAME (REPLACE/NOT REPLACE)
This preference determines whether or not track and folder names that contain undisplayable characters are replaced with "TRACK n" or "FOLDER n," "n" being the track or folder number. When set to NOT REPLACE, displayable characters are displayed and underscores are used in place of any undisplayable characters.
For ID3 tags, underscores are used in place of undisplayable characters regardless of this preference.
Note:
Track and folder names are scrolled in Navigation mode (page 17) regardless of the TRACK NAME and FOLDER NAME preferences.
Extra Items
ID3 VER 1 (READ/NOT READ)
This preference determines whether or not version 1.0/1.1 tags are read and displayed. When set to NOT READ, version 1.0/1.1 tags will not be displayed.
ID3 VER 2 (READ/NOT READ)
This preference determines whether or not version 2.3/2.4 tags are read and displayed. When set to NOT READ, version 2.3/2.4 ID3 tags will not be displayed.
CD-EXTRA (AUDIO/MP3)
This preference applies to CD Extra discs and determines whether music in the audio session or MP3 tracks in the data session are played.
JOLIET (USE SVD/ISO9660)
This preference applies to MP3 discs in Joliet format and determines whether the CDC-3.4 reads the SVD data or treats the disc as an ISO 9660 disc. Normally, this preference doesn't need to be changed.
SVD (Supplementary Volume Descriptor) supports long file and folder names and characters other than letters and numbers. Some CD burning software refers to the Joliet format as "Windows format."
Initializing the MP3 Preferences
This section explains how to initialize the MP3 preferences to their default values.
You must use the buttons on the CDC-3.4 for this procedure, not the remote controller.
- Stop playback. If the Memory function is on, turn it off.
- Press and hold the Stop [ ] button until "SET-TING" appears on the display (about 4 seconds).
- Press the [ ][◀] button. "INITIALIZE" appears on the display.
- Press the Stop [ ]button. "CANCEL" appears on the display.
- Use the []# buttons to select "EXE-CUTE." If you want to cancel this procedure, select "CANCEL."
- Press the Stop [button. The MP3 preferences are initialized, "INITIAL- IZED" appears on the display, and then the CDC-3.4 enters Standby mode.
Troubleshooting
If you have any trouble using your CDC-3.4, check the following table for possible causes and remedies. If you still can't resolve the issue yourself, please contact your Integra/Onkyo dealer.
| Trouble Possible | Cause Remedy | |
| No power. | The power cord is not connected properly. | Properly connect the power cord to the CDC-3.4's AC INLET and connect the other end to a suitable wall outlet (page 14). |
| The remote controller does not work. | There are no batteries in the remote controller. Install new batteries (page 10). | |
| The batteries are flat. Replace with new batteries (page 10). | ||
| The batteries are installed incorrectly. | Check the batteries and correct as necessary (page 10). | |
| You're not pointing the remote controller at the CDC-3.4's remote sensor. | Point the remote controller at the CDC-3.4's remote sensor (page 10). | |
| You're too far away from the CDC-3.4. | Use the remote controller closer to the CDC-3.4 (page 10). The remote controller has a range of approximately 5 meters (16 ft.). | |
| A strong light source is interfering with the CDC-3.4's remote sensor. | Make sure that the CDC-3.4 is not subjected to direct sunshine or inverter-type fluorescent lights. Relocate if necessary. | |
| If the CDC-3.4 is installed in a cabinet with colored glass doors, the remote controller may not work reliably when the doors are closed. | Open the doors, or use a cabinet without colored glass. | |
| Cannot play a CD. | The disc is upside down. | Load the disc with the label-side facing up (page 14). |
| The disc is dirty. Remove the disc and clean it (page 27). | ||
| Condensation has formed inside the CDC-3.4. | Remove your discs and leave the CDC-3.4 turned on for several hours until the condensation has evaporated. | |
| The CD-R/RW disc is nonstandard. See “Disc Notes” on page 26. | ||
| There is no sound. | The CDC-3.4 is not connected properly. Check all connections and correct as necessary. | |
| The wrong input source is selected on your amp. | Check your amp's input source setting. Refer to your amp's manual. | |
| CD playback skips. | The CDC-3.4 is subject to vibration. Install the CDC-3.4 somewhere free of vibration. | |
| The disc is dirty. Remove the disc and clean it (page 27). | ||
| The disc is very scratched. Buy a new disc. | ||
| Cannot enter track numbers for memory playback. | No disc is loaded. Load a disc (page 14). | |
| The track number entered doesn't exist on the disc. | Enter the correct track number (page 18). | |
| It takes a long time to locate certain tracks. | The disc is dirty. Remove the disc and clean it (page 27). | |
| The disc is very scratched. Buy a new disc. | ||
| RI does not work. | There's no RCA/phono analog audio connection. | To use Rtu must make an analog audio connection (RCA/phono) between the CDC-3.4 and your Integra/Onkyo AV receiver, even if they are connected digitally. |
| The digital outputs do not work. | The sampling rate of the currently playing MP3 track is not 32 kHz, 44.1 kHz, or 48 kHz. | Select a track with a sampling rate of 32 kHz, 44.1 kHz, or 48 kHz. |
Abnormal Behavior
The CDC-3.4 contains a microcomputer for signal processing and control functions. In very rare situations, severe interference, noise from an external source, or static electricity may cause it to lockup. In the unlikely event that this should happen, unplug the power cord from the wall outlet, wait at least five seconds, and then plug it back in again.
Disc Notes
Supported Discs
The CDC-3.4 supports the following discs.
| Disc Logo Format or file type | ||
| Audio CD |  | PCM |
| CD-R |  | Audio CD, MP3 |
 | MP3 | |
| CD-RW |  | Audio CD, MP3 |
 | MP3 | |
| CD Extra | Audio CD (Session 1), MP3 (Session 2) | |
- Some audio CDs use copy protection that doesn't conform to the official CD standard. Since these are non-standard discs, they may not play properly in the CDC-3.4.
- The CDC-3.4 supports CD-R and CD-RW discs. However, some CD-R and CD-RW discs may not work properly for any of the following reasons: disc burner characteristics, disc characteristics, the disc is damaged or dirty. See the manual supplied with your disc burner for more information. Condensation or dirt on the optical pickup lens can also affect playback.
• The CDC-3.4 supports 8 cm and 12 cm discs.
• The CDC-3.4 does not support disc types not listed. - Don't use discs with an unusual shape, such as those shown below, because you may damage the CDC-3.4.
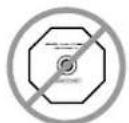
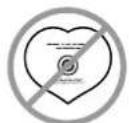
- Don't use discs that have residue from adhesive tape, rental discs with peeling labels, or discs with custom-made labels or stickers. Doing so may damage the CDC-3.4 and you may not be able to remove the disc properly.
Discs Made on Personal Computers
Discs made on personal computers, including those of a compatible format, may not work properly in the CDC-3.4 because of incorrect settings in the disc burning software. Check the manuals supplied with your disc burning software for additional compatibility information.
MP3 Compatibility
- MP3 discs must be ISO 9660 Level 1 or Level 2, Romeo or Joliet compliant. Supported formats: Mode 1, Mode 2 XA Form 1.
• F olders can be up to eight levels deep. - MP3 files must be MPEG-1/MPEG-2 Audio Layer 3 format with a sampling rate of between 8 kHz and 48 kHz and a bit-rate of between 8 kbps and 320 kbps (128 kbps recommended). Incompatible files cannot be played.
- Fixed bit-rate MP3 files are recommended, however, variable bit-rate (VBR) MP3 files between 8 kbps and 320 kbps are supported. (Playing times may display incorrectly.)
- MP3 files must have a “.mp3” or “.MP3” file name extension. MP3 files without the proper extension will not be recognized. To prevent noise and malfunction, do not use these extensions for other types of files.
- The CDC-3.4 supports up to 499 MP3 files and up to 99 folders per disc. Files and folders in excess of this cannot be played. Note that if the file and folder structure is very complicated, the CDC-3.4 may not be able to read or play all of the MP3 files on the disc.
- Disc names may contain up to 32 characters. File and folder names may contain up to 64 characters.
- The maximum time that can be displayed for a single track is 99 minutes and 59 seconds.
- The remaining time cannot be displayed when playing MP3 files.
- MP3 file and folder names (excluding the extension) are shown on the display.
- Multisession discs are supported, however, some multisession discs may take a long time to load and some may not load at all. When burning CDs we recommend that you use a single-session (disc-at-once), and select “Disc Close.”
- Normally, the music in the audio session of a CD Extra disc is played. However, you can set the CDC-3.4 so that it plays any MP3 files in the data session of a CD-R/RW disc instead. If the data session contains no MP3 tracks, the audio session will be played regardless. See “MP3 Preferences” on page 24 for more information.
- The following ID3 tags are supported: versions 1.0/1.1 and 2.3/2.4. Versions 2.2/2.5 and later are not supported. Normally, version 2.3/2.4 tags have priority and will be displayed regardless of the ID3 VER 1 preference on page 24.
- F or ID3 version 2 tags, information in the first 2,048 bytes at the beginning of the file are recognized. We recommend that you include only title, artist name, and album name information in ID3 tags. Compressed, encrypted, and unsynchronized ID3 tags cannot be displayed.
Disc Notes—Continued
Notes:
- With CD-ROM, CD-R, and CD-RW discs that contain many files and folders, and files other than MP3s, it may take a long time to read the disc. We recommend that you include only MP3 files on your discs, use about 20 folders, and limit folder nesting to three levels deep.
- In this manual, MP3 files are referred to as tracks.
Handling Discs
- N ever touch the underside of a disc. Always hold discs by the edge, as shown.
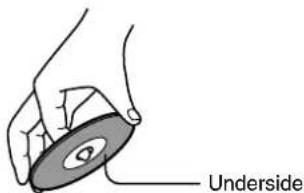
- N ever attach adhesive tape or sticky labels to discs.
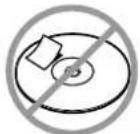
Cleaning Discs
- F or best results, keep your discs clean. Fingerprints and dust can affect the sound quality and should be removed as follows. Using a clean soft cloth, wipe from the center outwards, as shown. Never wipe in a circular direction.
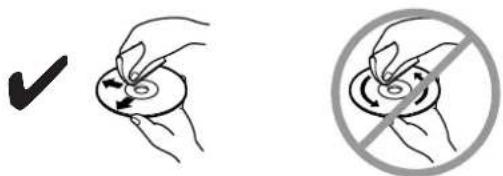
- T o remove stubborn dust or dirt, wipe the disc with a damp soft cloth, and then dry it with a dry cloth.
- N ever use solvent-based cleaning fluids, such as thinner or benzine, commercially available cleaners, or antistatic sprays intended for vinyl records, because they may damage the disc.
Storing Discs
- Don't store discs in places subject to direct sunlight, or near heat sources.
- Don't store discs in places subject to moisture or dust, such as in a bathroom or near a humidifier.
- A lways store discs in their cases and vertically. Stacking, or putting objects on unprotected discs may cause warping, scratches, or other damage.
Specifications
CDC-3.4 (Compact Disc Changer)
Signal readout system.... Optical non-contact Frequency response.... 5 Hz–20 kHz SN ratio ....98 dB
Audio Dynamic range .... 96 dB THD (Total harmonic distortion) ..... 0.005% (at 1 kHz)
Audio output (Digital/Optical)....-22.5 dBm Audio output/Impedance (Digital/Coaxial) ....0.5 V (p-p) / 75 Ω
Audio output/Impedance (Analog) 2.0 V (rms) / 470Ω
Power supply rating....AC 120 V 60 Hz Power consumption.... 10 W
Standby power consumption .... 4 W Dimensions (W×H×D)....17-1/8" × 5-3/16" × 17-3/16" .....(435 × 131 × 436 mm)
Weight 15.0 lbs. (6.8 kg)
Operating conditions Temperature/Humidity 41–95 °F (5–35 °C) / 25–80%
Disc compatibility ....CD, CD-R, CD-RW
RC-553C (Remote Controller)
Transmitter ....Infrared Signal range.... Approx. 16 ft., 5 meters Power supply.....Two (AA/R6) batteries (1.5 V x 2)
Specifications and features are subject to change without notice.
Integra Division of
18 park Way, Upper Saddle River, N.J. 07458, U.S.A.
Tel: 201-785-2600 Fax: 201-785-2650 http://www.integrahometheater.com
Integra Division of
ONKYO CORPORATION
Sales & Product Planning Div.: 2-1, Nisshin-cho, Neyagawa-shi, OSAKA 572-8540, JAPAN
Tel: 072-831-8023 Fax: 072-831-8124
SN 29343571A
(C) Copyright 2003 ONKYO CORPORATION Japan. All rights reserved.
- Compact Disc Changer
- CDC-3.4
- WARNING:
- CAUTION:
- WARNING RISK OF ELECTRIC SHOCK DO NOT OPEN
- AVIS RISQUE DE CHOC ELECTRIQUE NE PAS OUVRIR
- Important Safety Instructions
- Introduction
- CDC-3.4 Features
- Supplied Accessories
- Precautions
- Recording Copyright
- AC Fuse
- Care
- Power
- WARNING
- Never Touch This Unit with Wet Hands
- Installing This Unit
- Moisture Condensation
- Moisture condensation may damage this unit.
- For U.S. model
- FCC INFORMATION FOR USER
- NOTE:
- Precautions—Continued
- For Canadian model
- DANGER:
- Table of Contents
- Getting Started
- Connections
- Basic Operation
- Advanced Operation
- Others
- Controls & Connectors
- Front Panel
- Controls & Connectors—Continued
- Display
- Rear Panel
- Remote Controller
- Before Using the CDC-3.4
- Installing the Remote Controller's Batteries
- Notes:
- Using the Remote Controller
- Connecting the CDC-3.4
- Audio Connections
- ANALOG AUDIO OUTPUT
- DIGITAL AUDIO OUTPUT
- Connecting the CDC-3.4—Continued
- RI Connections
- ■ Auto Power On
- ■ Direct Change
- ■ Auto Power Off
- Dimmer
- Controlling AV Components that are Out of Range
- Controlling the CDC-3.4 When It's Out of Range
- Controlling Other Out-of-range AV Components
- Turning On the CDC-3.4
- 1
- 2
- Basic Playback
- Loading Discs
- 3
- Basic Playback—Continued
- Starting Playback
- To start playback, press the Play/Pause button.
- Selecting Discs
- When playback is stopped
- During playback
- Loading Discs During Playback
- To open the disc tray, press the Open/Close button.
- To close the disc tray, press the Open/Close button again.
- Adjusting the Display Brightness
- ■ Stopping Playback
- ■ Pausing Playback
- ■ Fast Forward & Fast Reverse
- ■ Selecting the Next or Previous Track
- Selecting MP3s
- ■ Selecting MP3 Tracks in Navigation Mode
- While playback is stopped, press the Folder [▼ button.
- Press the Folder [▼button once more.
- Use the Folder [ ]/ [ ] buttons to select other folders and tracks at the same level.
- 4
- To access tracks or folders inside another folder, select the folder, and then press the Folder [▼button.
- ■ Selecting MP3 Tracks in All Folder Mode
- While playback is stopped, press the folder [4] button.
- Use the Folder [√][ ] buttons to select a folder.
- To access the tracks inside the folder, press the Folder [▼] button.
- ■ Playing the Selected Track
- ■ Cancelling Navigation or All Folder mode
- Selecting Tracks by Number
- Selecting MP3 Folders & Tracks by Number
- Tip:
- Displaying Information
- ■ Audio CD
- MP3 Disc
- Advanced Playback
- Cuing Up the Next Track, Folder, or Disc
- During playback, press the [Next Selection] button.
- Use the Disc Select buttons to select a disc.
- To select a track, use the [ɪ]◀ [▶▶] buttons.
- Press the [Next Selection] button again to set the Next Selection function.
- ■ Cancelling the Next Selection Function
- ■ Changing the Specified Track, Folder, or Disc
- Advanced Playback—Continued
- Playing All Discs Repeatedly
- Playing One Track, Folder, or Disc Repeatedly
- Using Random Playback
- Using Memory Playback
- 5
- Checking What's in the Playlist
- Deleting the Last Item in the Playlist
- Canceling Memory Playback
- MP3 Preferences
- Setting the MP3 Preferences
- Basic Items
- DISC NAME (DISPLAY/NOT DISPLAY)
- TRACK NAME (SCROLL/NOT SCROLL)
- FOLDER NAME (SCROLL/NOT SCROLL)
- BAD NAME (REPLACE/NOT REPLACE)
- Extra Items
- ID3 VER 1 (READ/NOT READ)
- ID3 VER 2 (READ/NOT READ)
- CD-EXTRA (AUDIO/MP3)
- JOLIET (USE SVD/ISO9660)
- Initializing the MP3 Preferences
- Troubleshooting
- Abnormal Behavior
- Disc Notes
- Discs Made on Personal Computers
- MP3 Compatibility
- Disc Notes—Continued
- Handling Discs
- Cleaning Discs
- Storing Discs
- Specifications
- CDC-3.4 (Compact Disc Changer)
- RC-553C (Remote Controller)
Brand : Integra
Model : CDC-3.4
Category : CD Player