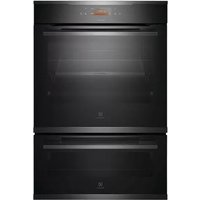
USER MANUAL EVEP626DSD ELECTROLUX
Enjoy peace of mind. Register your appliance today.
Stay updated on better living services, safety notices and shop for accessories.
- Open the camera app on your smartphone and point at the QR code to scan.
Product Registration QR code is located on the front of your appliance or inside the door rim*.

- Tap the notification or link to open the registration form.
- Complete your details and enjoy peace of mind. *Exact location of QR code may vary depending on oven model.
CONGRATULATIONS
Dear customer,
Thank you for purchasing an Electrolux oven.
You've chosen a product that brings with it decades of professional experience and innovation. Ingenious and stylish, it has been designed with you in mind.
So whenever you use it, you can be safe in the knowledge that you'll get great results every time.
Welcome to Electrolux.
The symbols you will see in this booklet have these meanings:

WARNING
This symbol indicates information concerning your personal safety.

CAUTION
This symbol indicates information on how to avoid damaging the cooker or cabinet.

IMPORTANT
This symbol indicates tips and information about use of the cooker.

ENVIRONMENT
This symbol indicates tips and information about economical and ecological use of the cooker.
NOTE: Model codes shown in this manual are the generic code. Your product will also include a two letter suffix which denotes colour and series level.
CONDITIONS OF USE
This appliance is intended to be used in household and similar applications such as:
- Staff kitchen areas in shops, offices and other working environments
• Farmhouses
- By clients in hotels, motels and other residential type environments • Bed and breakfast type environments • Catering and similar non-retail applications
Record model and serial number here:
Model number: ____
Serial number: ____
CONTENTS
Important instructions 3
Before using your appliance 3 Information on disposal for users 3 Important safety instructions ____ 3 General cautions 4 Installation of the appliance 5 Installing the oven accessories ____ 7 Using the appliance 9 Getting to know the oven 10
Technical specifications ____ 11
EVE602, EVE614 12
Before using the appliance 13 Cooking functions 14 Operating sequence 15 Using the appliance ____ 15
EVEP614 17
Cooking functions 18 Operating sequence 19 Using the appliance ____ 19 Before first use 20 Daily use 21 Clock functions 22
Menu 25
Pyrolytic cleaning the oven 27 EVE636, EVEP626 28 EVEP618, EVEP619 29 EVE615, EVEP615, EVEP616 30
Using the appliance 31 Display 32 Condition the oven 33 Daily use 33 Additional functions 34 Cooking functions 36
Menu 39
Pyrolytic cleaning 42
All models 42
EVEP626 43
Assisted cooking recipes 44
Steam assisted cooking 45
EVE602, EVE614 45
EVEP614 45
EVE615, EVE636, EVEP615, EVEP616, EVEP626_46 EVEP618, EVEP619 47 Cooking function – Steam assist 47 Steam cooking operation 48 Steam maintenance 48 Steam service functions 49 Water hardness 50 Steam cooking guide 51
Using the food sensor/probe 52 Cooking guide 55 Dealing with cooking problems 60 Cleaning the appliance 61 Tips and troubleshooting 68 Shortcuts 70 Troubleshooting 71 Notes 73 Warranty 75
IMPORTANT INSTRUCTIONS
Adherence to the directions for use in this manual is extremely important for health and safety. Failure to strictly adhere to the requirements in this manual may result in personal injury, property damage and affect your ability to make a claim under the Electrolux manufacturer's warranty provided with your product. Products must be used, installed and operated in accordance with this manual. You may not be able to claim on the Electrolux manufacturer's warranty in the event that your product fault is due to failure to adhere to this manual.
SOFTWARE LICENSES
The software in this product contains components that are based on free and open source software. Electrolux gratefully acknowledges the contributions of the open software and robotics communities to the development project.
To access the source code of these free and open source software components whose license conditions require publishing, and to see their full copyright information and applicable license terms, please visit: http://electrolux.opensoftwarerepository.com (folder NIU5)
BEFORE USING YOUR APPLIANCE
Before you use the appliance, we recommend that you read through the relevant sections of this manual, which provides the description of your appliance and its functions.
To avoid the risks that are always present when you use an appliance, it is important that the appliance is installed correctly and that you read the safety instructions carefully to avoid misuse and hazards.
We recommend that you keep this instruction booklet for future reference and pass it on to any future owners.
This appliance complies with the requirements of Australian Standards AS/NZS 60335.2.6

IMPORTANT
Check for any damage or marks. If you find the appliance is damaged or marked, you must report it within 7 days if you wish to claim for damage/marks under the manufacturer's warranty. This does not affect your statutory rights.
Preparing the oven
- Please remove all stickers and protective film from doors and control panel, and remove all leaflets and boxes from the floor of the oven before operation.
- Please wipe out the oven interior prior to operation
with warm soapy water and polish dry with a soft clean cloth. Do not close the oven door until the oven is completely dry.
- Do not line the oven with foil. It will damage the enamel.
- For model EVEP618, check the water drawer interior for dust or contaminates. Wipe clean with a damp cloth if necessary.

IMPORTANT
New appliances can have a smell during first use. It is recommended to 'run in' the oven before cooking for the first time. Operate the oven, empty, at a temperature of 180°C for approximately 30 minutes.
Please ensure the room is well ventilated during this process.

ENVIRONMENT
Most of the packing materials are recyclable. Please dispose of those materials through your local recycling depot or by placing them in appropriate collection containers.
If you wish to discard this appliance, please contact your local authorities and ask for the correct method of disposal.
IMPORTANT SAFETY INSTRUCTIONS

WARNING
These warnings have been provided in the interest of safety. You MUST read them carefully before installing or using the appliance.
- An authorised person must install this appliance. (Certificate of Compliance to be retained).
- Before using the appliance, ensure that all packing materials are removed from the appliance.
- In order to avoid any potential hazard, the enclosed installation instructions must be followed.
- Ensure that all specified vents, openings and air spaces are not blocked.
- Where the appliance is built into a cabinet, the cabinet material must be capable of withstanding 70°C. If adjacent to vinyl-wrapped surfaces, use installation kit from vinyl wrap supplier.
IMPORTANT INSTRUCTIONS (CONTINUED)
- Only authorised personnel should carry out servicing. (Certificate of Compliance to be retained)
- Always ensure the appliance is switched off before cleaning or replacing parts.
- For model EVEP618/619, do not open the oven door during steam cooking. Steam can be released. There is a risk of skin burns. There is a risk that steam causes moisture damage to cabinets.
- Allow the oven to cool down for 30 minutes before you drain the water tank in a steam oven. Scalding water may be released.
- In order to avoid fire, the appliance must be kept clean and vents kept unobstructed.
- Do not spray flammable materials in or under the appliance, e.g. aerosols.
- Always use gloves when handling hot items inside the oven.
- Always turn the grill off immediately after use as fat left behind may catch fire.
- Do not cover the grill dish insert with foil, as fat left there may catch fire.
- Always keep the grill dish clean as any fat residue may catch fire.
- Do not leave the grill on unattended.
- To avoid fire, ensure that the grill trays and fittings are always inserted into the appliance in accordance with the instructions.
- To avoid any electric shock, switch the appliance off before removing the oven light glass for globe replacement.
- To avoid an accident, ensure that the oven shelves and fittings are always inserted into the appliance in accordance with the instructions. • This appliance must be earthed.
NOTE: The cooking process must be supervised. A short term cooking process has to be supervised continuously.
Child safety
This appliance is not intended for use by persons (including children) with reduced physical, sensory or mental capabilities, or lack of experience and knowledge, unless they have been given supervision or instruction concerning use of the appliance by a person responsible for their safety.
- Children should be supervised to ensure that they do not play with the appliance.
- During use this appliance becomes hot. Care should be taken to avoid touching hot surfaces, e.g. oven door, heating elements.
- Accessible parts will also become hot when in use. To avoid burns and scalds, children should be kept away.
GENERAL CAUTIONS
Read the following carefully to avoid damage or injury. It is important to use the appliance safely. Check these safety points before using the appliance.
• This appliance must not be used as a space heater. - Do not place thick portions of food under the grill. Foods may curl, catch, and ignite. - Do not use the door as a shelf. - Do not push down on the open oven door. - Do not use harsh abrasive cleaners or sharp metal scrapers to clean the oven door glass since they can scratch the surface, and may result in shattering of the glass. - Do not use steam cleaners, as this may cause moisture build-up. - Always clean the appliance immediately after any food spills. - Only use the Food Sensor/probe recommended for this appliance or the correct replacement parts (selected models only).

WARNING
To maintain safe operation, it is recommended that the product be inspected every five years by an authorized service person.

ENVIRONMENT
To save energy and to help protect the environment, we recommend these hints:
- Use the oven efficiently by cooking many trays of food at the same time. Cook 2 trays of scones, small cakes, or sausage rolls at the same time.
- Select the correct shelf location for food being cooked.
- Do not open the oven door more than necessary.
NOTE: You must read these warnings carefully before installing or using the appliance. If you need assistance, contact your Customer Care Centre. The manufacturer will not accept liability should these instructions or any other safety instructions incorporated in this book be ignored.
INSTALLATION OF THE APPLIANCE

WARNING
The appliance must not be installed behind a decorative door in order to avoid overheating.
To avoid any potential hazard, you must follow our instructions when you install your appliance. Failure to install the appliance correctly could invalidate any warranty or liability claims and lead to prosecution.
Use an authorised person.
As stated in the local municipal building codes and other relevant statutory regulations:
- Wiring connections must be in accordance with AS/NZS 3000 Wiring Rules and any particular conditions of the local authority. Refer to the data plate for rating information. The data plate is positioned behind the bottom of the oven door.
- For appliances with open cooking surfaces, a disconnect functional switch should be provided near the appliance in an accessible position. Refer to AS/NZS 3000 clause 4.7.1.
- Wiring should be protected against mechanical failure. Refer to AS/NZS 3000 clauses 3.3.2.6, 3.9, 3.10.
- A means of disconnection with a contact separation of at least 3 mm must be supplied in the fixed wiring.
- This appliance must be connected with cable of 75°C rating minimum.
- This product has passed the insulation resistance test after manufacture. If the resistance reading is low at installation, it is probably caused by moisture from the atmosphere being absorbed by the elements after the appliance has been produced. (Pass at 0.01 MΩ AS/NZS 3000 Wiring Rules Clause 8.3.6.2).

WARNING
This appliance must be properly earthed.
- Do not lift the appliance by the door handles.
- Prepare the cupboard opening to match your appliance measurements. (See diagrams.)
- Slide the appliance into the cupboard, ensuring that the supply cable (where fitted) does not kink.
- To prevent tipping, use the screws supplied to secure your appliance into the cupboard by fastening through the 4 holes to the front panel.
- Where the appliance is built into a cabinet, the cabinet must be capable of withstanding 70°C. Installation into low temperature tolerant cabinetry (e.g. vinyl coated) may result in deterioration of the low temperature coating by discolouring or bubbling.
- If the appliance is to be installed adjacent to vinyl wrapped surfaces, use an installation kit available from the vinyl-wrap supplier.
• Electrolux Home Products cannot accept responsibility for damage caused by installation into low temperature tolerant cabinets. • After installation, test and ensure that the appliance operates correctly before handing it over to the customer.
NOTE: If a power point is fitted it must be accessible with the appliance installed, as the plug must be accessible after installation.
Cabinet construction for your appliance
For the best integration within a kitchen, install this appliance in a standard 600mm wide cupboard that gives a flush fit (Figure A) with the surrounding cupboard fronts. Non-pyrolytic appliances can also be installed using a proud fit (Figure B).

IMPORTANT
For all Pyrolytic clean models, the "infill panel" MUST not exceed 100mm in length. This ensures a 16mm gap is maintained between the cabinet and side of the appliance to prevent the cupboard overheating.
Figure A - Flush Fit
Figure B – Proud Fit
NOTE: Your appliance must be mounted on a flat horizontal surface for the full width and depth of the product
IMPORTANT INSTRUCTIONS (CONTINUED)
Levelling oven
Place a level in the oven as below making sure the level sits on the front and rear forms. The level needs to be correct to prevent slides from moving in or out with gravity.

Underbench oven
Your underbench oven looks best when the control panel is directly under the benchtop. An upper infill panel may be added if the cooktop placed above the benchtop is too deep. Refer to cooktop installation instructions for required clearance between cooktop and oven.

IMPORTANT!
Note: Dimension 'D'*
A requirement for all EVEPxxxx pyrolytic clean ovens and all Duo ovens – for proper ventilation there MUST be a gap at the bottom rear of the cabinet. This can be a full width opening 20mm deep. Refer to dimension "D" in relevant diagram.
Power point connection for the EVEP618/619 must be accessible with the appliance fully installed. If the supply cord is damaged it must be replaced by the manufacturer, its service agent or similarly qualified persons in order to avoid a hazard.
Cut-out dimensions
| type of fit A (width) B (height) C (depth) |
| Flush fit (mm) 600 600 581 min. |
| Proud fit (mm) 568 590 560 min. |

Double oven Cut-out dimensions
type of fit A (width) B (height) C (depth)
Flush fit (mm) 600 1086 581 min.
Proud fit (mm) 568 1078 560 min.

Pyrolytic underbench Cut-out dimensions
| type of fit A (width) B (height) | C (depth) D* |
| Flush fit (mm) | 600 | 600 | 581 min. | 20 |
| Proud fit (mm) | 565 | 590 | 560 min. | 20 |

Duo oven Cut-out dimensions
| type of fit A (width) B (height) | C (depth) D* |
| Flush fit (mm) | 600 | 893 | 581 min. | 20 |
| Proud fit (mm) | 565 | 885 | 560 min. | 20 |

mounting holes. Fit black screws with plastic spacers provided
INSTALLING THE OVEN ACCESSORIES
Slides (Telescopic runners)
- Obtain the left-hand side rack and left-hand slide – see image to identify.

- The shaded wires indicate the wire on which the slide can be mounted. Fit the slide rear clips to the rear of the wire at an angle as shown below.

- Push the slide front clip over the wire until secured.

Pyro proof slides
- Obtain the left-hand side rack and left-hand slide – see image to identify.

- The shaded wires indicate the wire on which the slide can be mounted. Fit the slide rear clips to the rear of the wire at an angle as shown below.

- Push the slide front clip over the wire until secured.

IMPORTANT INSTRUCTIONS (CONTINUED)
Side racks
- Insert the rear peg into the rear access hole provided, ensuring the peg is fully inserted.
- Then locate the front peg into the front access hole and push in firmly.

NOTE: If you have purchased a two-cavity appliance, you will have additional side racks for the lower oven/grill. These are fitted in a similar manner.
Pyro proof side racks
- Insert the rear peg into the rear access hole provided, ensuring the peg is fully inserted.
- Then locate the front hole and insert the screw.
- Tighten with Allen key.

Shelves
The shelves are designed so that they have maximum extension but cannot be accidentally pulled right out.
To fit a shelf to side racks:
NOTE: To locate the rear edge of the shelves, the detents on the side wires should be towards the oven back wall. See image.
- Rest the rear edge of the shelf on the lower guide rail
of the side rack - see diagram. Ensure the same rail positions on both sides of the oven are being engaged.
- With the front edge raised, begin to slide the shelf in between the guide rails of the side rack.
- Once the detents have passed the front edge of the side rack, the shelf can be pushed fully in.

- When fully inserted the shelf should not interfere with the closed oven door.
To fit a shelf or tray to telescopic slides:
- Push the shelf or tray along the top of the slide until it hits the back post.

- Drop the front of the shelf or tray onto the slide ensuring it sits behind the front post of the slide.

- When fully inserted the shelf/tray should not interfere with the closed oven door.
The appliance is supplied with two types of shelves
- Standard shelf
- Grill shelf – The roasting dish can be suspended under the grill shelf to catch dripping fat. Rest the tray on two side rails of the grill shelf and push all the way in. Once the tray is pushed in fully it should sit inside the side rails.
Trays
The appliance is supplied with Baking tray, Roasting tray and on selected models Cast roasting dish/AirFry Plus tray.
The baking tray and roasting dish can be placed on top of the shelves or can be suspended under the grill shelf.
Grill shelf and Roasting tray

Baking tray

Cast roasting dish
The Cast roasting dish can be inserted between rack wires or can be fitted on telescopic slides.
NOTE: Do not fit cast roasting dish under telescopic slides.

AirFry Plus tray
The AirFry Plus tray can be inserted between rack wires or can be fitted on telescopic slides.

USING THE APPLIANCE

IMPORTANT
Pre-heating
For best cooking results pre-heat the oven.
Pre-heating allows the oven to reach the required temperature quickly and efficiently as well as cook food at the correct temperature for the entire cook time.
- With 'Rapid Heat' function
This function allows the oven to reach preset temperature quicker than any other cooking function.
Turn the function selector to 'Rapid Heat', then set the desired temperature, by rotating the oven temperature selector.
When the heating light goes out, the oven has reached the desired temperature. Select the oven function required and place the food in the oven.
- With other oven functions
Set the desired temperature. Once the oven has reached the desired preset temperature, place your food in the oven, close the door and set the timer if you desire.
- With 'Grill' function
Pre-heat the grill for at least 3 minutes to obtain best results. This will help to seal the natural juices of steak, chops and other meats for a better flavour.

IMPORTANT
Cooling / Vent fan
The built-in appliance is fitted with a cooling fan.
This prevents the kitchen cabinet from overheating and reduces the condensation inside the oven. It will operate whenever the oven is in use and blow warm air across the top of the oven door.
Condensation
Excess condensation may fog the oven door. This may happen when cooking large quantities of food from a cold start. Minimise condensation by:
- Keeping the amount of water used whilst cooking to a minimum.
- Making sure the oven door is firmly closed.
- Baking custard in a baking dish that is slightly smaller than the water container. • Cooking casseroles with the lid on.
NOTE: If using water in cooking, this will turn to steam and may condense outside your appliance. This is not a problem or fault with your oven.
IMPORTANT INSTRUCTIONS (CONTINUED)
GETTING TO KNOW THE OVEN
Get to know your new oven with this 'Simple Test Cake'
Although we strive for a perfect performing oven, it's possible that there will be some variation in colour when baking. Therefore, we suggest to make this simple, easy and delicious Simple Test Cake to help you understand your new oven. All ovens do sometimes have hot or cold spots, therefore it is important to judge with your eye as you may require to rotate during baking.
'Simple Test Cake'
125g butter, softened to room temperature
1 cup caster sugar
1 teaspoon pure vanilla essence
4 large eggs
2 cups self-raising flour
pinch of salt
4 tablespoons (80mL) full-cream milk
Method:
- Butter base and sides of two, 20cm straight-sided round or square cake pans. Then line the base with grease proof or baking paper.
- Preheat oven to moderate '180°C' (170°C fan forced) and ensure oven shelf is in the centre position of oven.
- Cream softened butter and sugar until light in colour.
- Add vanilla essence.
- Then eggs one at a time, beating well after each addition.
- Sift flour and salt into the mixture and beat until well combined.
- Add milk and beat or stir to combine.
- Spoon mixture equally between prepared cake pans.
- Bake in preheated oven, middle shelf for about 25 to 35 minutes or until when tested with a fine cake skewer it comes out clean or the edges of the cakes have come away slightly from the sides of the cake pans.
- Remove from oven to wire cake rack and rest for 5 minutes before removing from cake pans.
- Cool completely.
To Serve:
Sandwich together with your favourite jam or conserve, and dust top with pure icing sugar.
NOTE: if desired substitute butter for either margarine or olive oil spread. Recipe is based on the Australian standard metric 250mL cup and 20mL tablespoon sets.
TECHNICAL SPECIFICATIONS
| model | product dimensions (h x w x d) mm | electrical connection | min. fuse rating | max. power rating | max. current rating |
| EVE602 | 597 x 596 x 568 | 230-240V / 50Hz | 16A | 3.1kW | 12.9A |
| EVE614 | 597 x 596 x 568 | 230-240V / 50Hz | 16A | 3.1kW | 12.9A |
| EVE615 | 597 x 596 x 568 | 230-240V / 50Hz | 16A | 3.1kW | 12.9A |
| EVEP614 | 597 x 596 x 572 | 230-240V / 50Hz | 16A | 3.1kW | 12.9A |
| EVEP615 | 597 x 596 x 572 | 230-240V / 50Hz | 16A | 3.1kW | 12.9A |
| EVEP616 | 597 x 596 x 572 | 230-240V / 50Hz | 16A | 3.1kW | 12.9A |
| EVEP618 | 597 x 596 x 572 | 230-240V / 50Hz | 16A | 3.1kW | 12.9A |
| EVEP619 | 597 x 596 x 572 | 230-240V / 50Hz | 16A | 3.1kW | 12.9A |
| EVEP626 | 890 x 596 x 572 | 230-240V / 50Hz | 25A | 5.3kW | 22.1A |
| EVE636 | 1083 x 596 x 568 | 230-240V / 50Hz | 32A | 6.2kW | 25.8A |
Hard wiring details
- Remove terminal cover plate from rear panel of appliance.
- Fit wires through hole in cover plate and make connections to terminals.
- Engage wires into plastic clip. Secure plastic clip with two long silver screws (supplied in separate bag).
- Replace cover plate onto rear panel.

EVE602 / EVE614 COMPONENTS

1 Timer indicator 4 Cook time 2 Display 5 Timer 3 Clock button

7 Function selector 9 Warm air exhaust 8 Temperature selector 10 Double glazed door (EVE602)
Triple glazed door (EVE614)
EVE602 / EVE614
BEFORE USING THE APPLIANCE
Setting the time
Before the appliance can be used, the time must be set.

After the appliance has been electrically connected, '12:00' will be displayed and the clock icon will flash.
To set the time of day in hours and minutes, touch the + or - symbols. Refer to the diagram above.
5 seconds after the last change, the clock symbol will disappear, confirming the time has been set. Once the time has been entered, the clock advances minute by minute.
NOTE: The clock has a 24-hour display.

IMPORTANT
Oven will not operate until you set the clock.
Cooking guide
- Select the correct shelf location for the food being cooked.
- Make sure dishes will fit into the oven before it is switched on.
- Keep edges of non-Electrolux baking dishes at least 40mm from the side of the oven. This allows free circulation of heat and ensures even cooking.
- Do not open the oven door more than necessary.
- Do not place foods with a lot of liquid into the oven with other foods. This will cause food to steam and not brown.
- After the oven is turned off, it retains heat for some time. Use this heat to finish custards or to dry bread.
- Do not use a lot of cooking oil when roasting. This will prevent splattering oil on the sides of the oven and the oven door.
- When cooking items that require a high heat (e.g. tarts), place the cooking dish on a scone tray in the desired shelf position.
- For sponges and cakes use aluminium, bright finished or non-stick cookware.
Oven shelf location
The oven has 5 positions for shelves (as shown in the diagram below). To give maximum space above and below the shelves, load them in this way:
When cooking with 1 shelf, position at 1 or 2.
When cooking with 2 shelves, position them at 2 and 4.
For more detailed shelf locations, refer to cooking tables for individual cooking functions.

EVE602 / EVE614 (CONTINUED)
COOKING FUNCTIONS
Symbol Function description
Rapid Heat | Heat comes from the element surrounding the fan as well as the smaller element above the food. This allows you to preheat your oven 30% quicker than on standard ‘Bake/Pizza’. ‘Rapid Heat’ is ideal for cooking frozen pre-cooked foods such as savoury pastries, pizzas, mini meals (TV dinners), meat pies and fruit pies. Simply place the food in the oven straight from the freezer and heat. Cook in the upper half of the oven for best results. |
Fan Bake | Heat comes from the element surrounding the fan. This fan circulates the hot air around the oven cavity so that you can put your food in different places in the oven and still cook them at the same time. You can use ‘Fan Bake’ function for multi-shelf cooking, reheating cooked foods, pastries and complete oven meals. It will cook at a lower temperature and be faster than baking. Please note that some variation in browning is normal. |
SteamBake | SteamBake adds humidity at the beginning of the baking process. In bakery products, this allows the dough to rise and helps create a moist interior while obtaining a golden and crispy crust. Before preheating, when the oven is cold, add water to the cavity well. Refer to chapter ‘Steam assisted cooking’ for more details. For best results preheat the empty oven for 10 minutes prior to inserting food. |
Bake/pizza | Heat comes from two elements, one above and one below the food. The bottom element is a clean heat element and is below the floor of the oven. Both elements are controlled by the thermostat and will turn on and off to maintain set temperature. You can use the ‘Bake/pizza’ function for single trays of biscuits, scones, muffins, cakes, slices, casseroles, baked puddings, roasts and delicate egg dishes. |
Pastry | Heat comes from the clean heat element below the food. The element is controlled by the thermostat and will turn on and off to maintain the set temperature. The ‘Pastry’ function can be used to add extra browning to the bases of pizzas, pies, and pastries. Cook in the lower half of the oven when you are using only one shelf. |
Fan Grill | ‘Fan Grill’ offers you the benefits of both ‘Fan Cook’ and traditional ‘Grill’ functions. The grill element turns on and off to maintain set temperature while the fan circulates the heated air.Fan grill with the oven door closed.You can use ‘Fan Grill’ for large cuts of meat, which gives you a result that is similar to ‘rotisserie’ cooked meat. Put your food on the grill shelf in position 2. Place the grill dish under the grill shelf to catch any spills. When using ‘Fan Grill’ it is not necessary to turn food over during the cooking cycle. Set temperature to 180°C. |
Grill | ‘Grill’ function directs radiant heat from the powerful upper element onto the food. You can use the ‘Grill’ function for tender cuts of meat, steak, chops, sausages, fish, cheese toasties and other quick cooking foods.Grill with the oven door closed.Preheat your grill for 3 minutes to get the best results. This will help seal in the natural juices of steak, chops etc for better flavour. Place grill shelf in position 4 with grill dish below to catch any spills. |
Grill Boost | ‘Grill Boost’ directs radiant heat from 2 powerful upper elements onto the food. You can use the ‘Grill Boost’ function for tender cuts of meat, steak, chops, sausages, fish, cheese toasties and other quick cooking foods.Grill with the oven door closed.‘Grill Boost’ allows you to take full advantage of the large grill dish area and will cook faster than normal ‘Grill’. For best results it is recommended to preheat your grill for 3 minutes. This will help seal in the natural juices of steak, chops etc for a better flavour. Place grill shelf in position 4 with grill dish below to catch any spills. |
OPERATING SEQUENCE
Select the cooking function
Turn the function selector in any direction to the desired cooking function. The oven cavity light will come on.
![graph TD A["Grill Boost"] --> B["0"] C["Grill"] --> B D["Fan Grill"] --> B E["Pastry"] --> B F["Rapid Heat"] --> B G["Fan Bake"] --> B H["SteamBake"] --> B I["Bake/Pizza"] --> B](/content/2026/05/948496/images/2004b90ffced051f9f2964e46fc538cc4807b946e1b65d4a131881b6509ed14f.jpg)
Select the temperature
To set the temperature, turn the temperature selector in a clockwise direction to the desired setting. An indicator light in the display will come on.
A thermostat controls the temperature in your oven. When the temperature is reached, the heating source switches itself off and the indicator light goes out. When the oven temperature falls below the desired setting, the heating source switches on and the indicator light comes on again.
Once the food is cooked, turn the temperature selector back in an anti-clockwise direction. Do not force it right round in a clockwise direction as this will result in damage to the thermostat.
NOTE: The desired cooking function must be selected before the oven will operate.

USING THE APPLIANCE
Cooking with the timer
The appliance is equipped with a timer that has the following features:
- Timer - sets a countdown time that will beep when the set time has elapsed.
- Cook time - sets cooking duration. A timer will count down the preset cooking time, beep when the time has elapsed and turn the appliance off.
Selecting the timer
- Touch the ⏻ icon until the timer icon begins flashing.
- Set the countdown time you want by using the + and - symbols. 5 seconds after the last change the timer icon will stop flashing and the countdown will start in minutes. • To stop the beeper, touch any symbol. • Maximum countdown time is 2hrs 30mins.

Setting the cooking duration
- Select the desired oven function and temperature.
- The oven indicator light will glow and the heating source will come on.
- Touch the 📁 icon until the cook time icon begins flashing.
- Set the cooking duration you want by using the + and - symbols. Five seconds after the last change the cook time icon will stop flashing, and the time of day will be displayed. The oven will automatically shut off once the set duration is reached. To check how much time remains, press until the cook time icon is lit. The remaining time will be displayed.
- When the oven shuts off an alarm will beep. To stop the beeper, touch any symbol.
NOTE: Remember to add pre-heating time if necessary.
EVE602 / EVE614 (CONTINUED)

Turn the function and temperature controls to the off position.
Touch any button to stop the timer beeping.
Adjusting the clock
Touch the ⏻ icon until the ⏻ clock icon begins flashing.
Touch the + and - symbols to change the time of day. 5 seconds after the last change, the clock icon will disappear, confirming the time has been adjusted.

To check or cancel settings:
- To cancel 'auto shut off' touch the MODE symbol until the cook time → icon flashes. Touch and hold the - button until the clock no longer reverses (at 0:00 a beep will be heard). This automatically cancels 'auto shut off'. If the temperature and function knobs are still at a setting, the oven will start once the cook time → icon stops flashing. Because 'auto off' is cancelled the oven will continue to heat until it is manually turned off.
On completion of cooking
The heat source will turn off, the timer will beep and the cook time icon will flash.
Even though the heating element turns off the oven will still retain substantial heat. This will continue to cook the food until it is removed or the oven cools down. If you do not plan on being present when the oven turns off, you should take this extra heating time into account.
EVEP614 COMPONENTS

1 Display 2 Light button 3 Timer button
4 Rapid heat button 5 Child lock button 6 OK button

7 Function selector 8 Temperature/timer adjustment
9 Warm air exhaust 10 Quadruple glazed door
EVEP614 (CONTINUED)
COOKING FUNCTIONS
Symbol Function description
Fan Bake | Heat comes from the element surrounding the fan. This fan circulates the hot air around the oven cavity so that you can put your food in different places in the oven and still cook them at the same time. You can use 'Fan Bake' function for multi-shelf cooking, reheating cooked foods, pastries and complete oven meals. It will cook at a lower temperature and be faster than baking. Please note that some variation in browning is normal. |
SteamBake | SteamBake adds humidity at the beginning of the baking process. In bakery products, this allows the dough to rise and helps create a moist interior while obtaining a golden and crispy crust. Before preheating, when the oven is cold, add water to the cavity well. Refer to chapter 'Steam assisted cooking' for more details. For best results preheat the empty oven for 10 minutes prior to inserting food. |
Bake | Heat comes from two elements, one above and one below the food. The bottom element is a clean heat element and is below the floor of the oven. Both elements are controlled by the thermostat and will turn on and off to maintain set temperature. You can use the 'Bake' function for single trays of biscuits, scones, muffins, cakes, slices, casseroles, baked puddings, roasts and delicate egg dishes. |
Pizza | 'Pizza' is a combination of 'Pastry' and 'Fan Cook' and offers you the combined benefits of both functions. Heat comes from the element surrounding the fan as well as the clean heat element below the oven floor. The 'pizza' function is ideal for foods that require cooking and browning of the base. It is great for foods such as pizzas, quiches, meat pies and fruit pies. Simply put the food in the middle of the oven and select the desired temperature. |
Cook from frozen | This function can be used to make convenience food (eg. french fries, potato wedges or spring rolls) crispy. |
Pastry | Heat comes from the clean heat element below the food. The element is controlled by the thermostat and will turn on and off to maintain the set temperature. The 'Pastry' function can be used to add extra browning to the bases of pizzas, pies, and pastries. Cook in the lower half of the oven when you are using only one shelf. |
Fan Grill | 'Fan Grill' offers you the benefits of both 'Bake' and traditional 'Grill' functions. The grill element turns on and off to maintain set temperature while the fan circulates the heated air.Fan grill with the oven door closed.You can use 'Fan Grill' for large cuts of meat, which gives you a result that is similar to 'rotisserie' cooked meat. Put your food on the grill shelf in position 2. When using 'Fan Grill' it is not necessary to turn food over during the cooking cycle. Set temperature to 180°C. |
Grill | 'Grill' function directs radiant heat from the powerful upper element onto the food. You can use the 'Grill' function for tender cuts of meat, steak, chops, sausages, fish, cheese toasties and other quick cooking foods.Grill with the oven door closed.Preheat your grill for 3 minutes to get the best results. This will help seal in the natural juices of steak, chops etc for better flavour. Place the grill shelf in position 4 with grill dish below to catch any spills. |
Grill Boost | 'Grill Boost' directs radiant heat from 2 powerful upper elements onto the food. You can use the 'Maxi Grill' function for tender cuts of meat, steak, chops, sausages, fish, cheese toasties and other quick cooking foods.Grill with the oven door closed.'Grill Boost' allows you to take full advantage of the large grill dish area and will cook faster than normal 'Grill'. For best results it is recommended to preheat your grill for 3 minutes. This will help seal in the natural juices of steak, chops etc for a better flavour. Place the grill shelf in position 4 with grill dish below to catch any spills.. |
OPERATING SEQUENCE
Select the oven function
Turn the oven function selector clockwise to select the desired oven function.
NOTE: each oven function has a default temperature which can then be adjusted as outlined below.
![graph TD A["Menu"] --> B["Grill Boost"] B --> C["Grill"] C --> D["Fan Grill"] D --> E["Pastry"] F["Fan Bake"] --> G["SteamBake"] H["Bake"] --> I["Pizza"] J["Cook From Frozen"] --> K["This knob cannot be turned anticlockwise from off position"] L["0"] --> M["Turn to Off Position"]](/content/2026/05/948496/images/3d131d12e4a744d4fb2446d02017d27ebabc8a5ba20fa8b4144b85e2926056d5.jpg)
Selecting the oven temperature
Rotate the temperature selector (left-or right +) as required to set the desired cooking temperature in °C.
NOTE: the temperature can be adjusted at any time throughout the cooking time.

USING THE APPLIANCE
Control panel
| Control panel sensor fields |
 | Timer |
 | Fast heat up |
 | Light |
 | Child lock |
 | Confirm selection |
| Legend |
 | Press |
 | Turn the knob |
Select a heating function to turn on the oven.
Turn the function selector to the off position to turn the oven off.

When the knob for the heating functions is in the off position, the display goes to standby.

When you cook, the display shows the set temperature, time of day and other available options.
EVEP614 (CONTINUED)

The display with the maximum number of functions set.
Display indicators
| Lock |
| Assisted cooking |
| Cleaning |
| Settings |
| Fast heat up |
| Progress bar for temperature or time |
| Steam cooking indicator |
Timer indicators
| Minute minder |
| Cooking time |
| Time delay |
| Uptimer |
BEFORE FIRST USE

WARNING
Refer to safety chapters.
Initial cleaning
Before the first use, clean the empty oven and set the time:

Remove all accessories and removable shelf supports from the oven.

Clean the oven and accessories with a soft cloth, warm water and a mild detergent.

Place the accessories and the removable supports in the oven.

00:00
CONDITION THE OVEN (TO BURN OFF ANY RESIDUE)

Run in the empty oven before the first use.
- Remove all accessories and removable shelf supports from the oven.
- Set the temperature to 180°C for the function: Fan cooking ☑. Let the oven operate for 30 minutes. ① The oven can emit an odour and smoke during burn off. Make sure that the room is ventilated.
DAILY USE
Start cooking
- Set a heating function.

- Set the temperature.

How to set: Assisted Cooking
Every dish in this submenu has a recommended function and temperature. You can adjust the time and the temperature during cooking.
The degree to which a dish is cooked:
Assisted Cooking – use it to prepare a dish quickly with default settings:
- Enter the menu

- Select Assisted Cooking. Press OK.

- Select the dish. Press OK. Refer to "Menu structure" chapter.

- Insert the dish into the oven. Confirm setting.

CLOCK FUNCTIONS
| Clock function Application |
 | Minute minder. When the timer ends, the signal sounds. |
 | Cooking time. When the timer ends, the signal sounds and the heating function stops. |
 | Time Delay. To postpone the start and / or end of cooking. |
 | Uptimer. Maximum is 23 hours 59 minutes. This function has no effect on the operation of the oven. To turn the Uptimer on and off, select: Menu, Settings. |
How to set: clock functions
How to set: Time of day
- Turn Function Selector to Menu 三.

- Turn Temperature Selector to select Settings and Press OK.


- Press OK again.

- Rotate Temperature Selector until the current time is reached. Press OK.


- Turn Function Selector to Off.

- After 6 seconds has elapsed, the time is set.
How to set: Minute minder
- Press

The display shows:

- Set the Minute minder

- Press OK.

① Timer starts counting down immediately.
How to set: Cooking time
- Choose a heating function and set the temperature.

2 Press repeatedly:

The display shows:

- Set the cooking time.

- Press OK.

Timer starts counting down immediately.
How to set: Time Delay
- Select the heating function.

- Press repeatedly: ⏻

The display shows: the time of day

- Set the start time.

- Press OK.

The display shows:

5 Set the end time.

6 Press OK.

① Timer starts counting down immediately.
How to set: Child lock
- Press and hold lock icon to turn Child Lock ON/OFF.

How to change: Settings Select三
Menu structure
- Select Settings.

- Press OK.

- Select the required setting 01 to 11

- Press OK to confirm selection.

- Adjust the value and press OK.


| Settings |
| 1 Time of Day Change |
| 2 Display Brightness Change |
| 3 Key Tones | 1 - Beep2 - Click3 - Sound off |
| 4 Buzzer Volume 1 - 4 |
| 5 Uptimer On/off |
| 6 Light On/off |
| 7 Fast Heat Up On/off |
| 8 Cleaning Reminder On/off |
| 9 | Demo Mode | Activation code: 2468 |
| 10 | Software Version | Check |
| 11 | Reset All Settings | Yes/No |
EVEP614 (CONTINUED)
| Assisted cooking settings |
| P1 Jacket Potato Wedges |
| P2 Hash Browns |
| P3 Lasagne |
| P4 Potato Gratin |
| P5 Pasta Bake |
| P6 Vegetable Gratin |
| P7 Pizza |
| P8 Pizza frozen |
| P9 Quiche |
| P10 Ciabatta |
| P11 Rolls |
| P12 Baguette |
| P13 Wholegrain Bread |
| P14 White Bread |
| P15 Dark Bread |
| P16 Almond Cake |
| P17 Apple Pie |
| P18 Baked Cheesecake |
| P19 Apple Cake, covered |
| P20 Short crust pastry case |
| P21 Sponge flan case |
| P22 Madeira Cake |
| P23 Sponge Cake |
| P24 Tarts |
| P25 Apple Strudel, froz. |
| P26 Baked Cheesecake |
| P27 Christmas Stollen |
| P28 Sponge Cake |
| P29 Sugar Cake |
| P30 Swiss Roll |
| P31 Swiss Tarte, sweet |
| P32 Yeast Cake |
| P33 Brownies |
| P34 Cakes, small |
| P35 Cream Puffs |
| P36 Eclairs |
| P37 Macaroons |
| P38 Muffins |
| P39 Pastry Strips |
| P40 Puff Pastry |
| P41 Shortbread |
PYROLYTIC CLEANING THE OVEN
Pyrolytic cleaning of the oven cavity
The oven has the Pyrolytic self-cleaning function. It cleans by burning off the spatters and accumulated dirt and grease from the oven liner, at high temperature. This process produces ash which can then be wiped out of the oven cavity.
Pyrolytic cleaning will not remove salt and mineral residue left in the cavity well when water evaporates. It is recommended that the residue is cleaned prior to conducting pyrolytic cleaning cycles. See section 'Cleaning the cavity well'.

WARNING
During the pyrolytic cleaning process the oven becomes extremely hot.
- Please keep small children at a safe distance.
- Never clean non-stick baking trays and tins in the oven during the pyrolytic cycle. High temperatures damage the non-stick coating and poisonous gas is released.
- To prevent damage, do not use acids, sprays or similar cleaning agents.

CAUTION
- During pyrolytic cleaning the air outlet exhaust above the door must be kept clear of any obstruction (eg. bulky tea towels).
- Do not use the oven to clean miscellaneous items (eg. cookware).
Before carrying out the Pyrolytic function
- All accessories must be removed from the oven, including shelves, trays and side racks.
- Clean large deposits, spills or grease from the oven cavity.
- Ensure the cavity well is free of limestone scaling (refer to cleaning the cavity well chapter)
- Choose the Pyrolytic cleaning cycle from the following:
| Cleaning level duration |
| C1 - Quick 1 hour 30 minutes |
| C2 - Normal 2 hours |
| C3 - Intense | 2 hours 30 minutes |
NOTE: Duration includes heat-up time, excluding cool-down time.
Light clean
This is an energy saving cycle that can be used on a regular basis if the oven is lightly soiled. Possibly after every 2nd or 3rd roast.
Medium clean
Use this as the regular cycle about once every 2-3 months.
Heavy clean
When the oven is very dirty it may need a longer cycle to clean it thoroughly. This cycle will clean the dirtiest of ovens.
Pyrolytic Cleaning Operation
The pyrolytic cleaning function can be selected by turning the function selector switch clockwise to the pyrolytic position. Use + or - to select a pyrolytic cleaning time of 1:30 hours or 2:30 hours. The pyrolytic function can be stopped at any time by turning the function selector counterclockwise to the OFF position.
![graph TD A["Menu"] --> B["Grill Boost"] B --> C["Grill"] C --> D["Fan Grill"] D --> E["Pastry"] F["Fan Bake"] --> G["SteamBake"] H["Bake"] --> I["Pizza"] J["Cook From Frozen"] --> K["To Turn Off"] L["0"] --> M["Turn Off"] N["This knob cannot be turned anticlockwise from off position"]](/content/2026/05/948496/images/558eaeb924ea995c18636ff8499530b7860c2ffa71c6216f9afc6485de309c98.jpg)

IMPORTANT
During Pyrolytic cleaning the door will automatically lock and ☐ will appear on the display. During the pyrolytic cleaning cycle there may be some burn off odours. It is advised to keep the room well ventilated during this cycle.
When the pyrolytic cleaning function is on, it is advisable not to use a cooktop if it is fitted above the oven. This could cause overheating and damage to both appliances.
The door will only unlock when the oven has cooled to a safe temperature. Turning the function off will not unlock the door. This will only happen when safe temperature is reached.
NOTE: The cooling fan will operate at an increased speed for Pyrolytic cleaning and will continue to run until the oven has cooled down. This is normal. It is recommended to clean the oven regularly to keep it in its best condition.
After Pyrolytic cleaning
After cool-down, wipe the ash out of the oven with a soft damp cloth and warm water.
To restore the enamel shine to more difficult areas, use a damp cloth with vinegar and detergent.

CAUTION
Do not turn off the mains power supply to the oven during the pyrolytic cycle. This could damage the appliance.
EVE636 / EVEP626 DESCRIPTION

1 On / Off button 2 Menu 3 Favourite button
4 Touch screen display 5 Light button 6 Fast Heat Up button
7 Oven cavity selection

8 Control panel 9 Warm air exhaust 10 Quadruple glazed door
11 Lower (half sized) oven with triple/quadruple glazed door
12 Lower (full sized) oven with triple glazed door
EVEP618 / EVEP619 DESCRIPTION

1 Menu button 2 Touch screen display 3 Light button
4 On / Off button 5 Favourite button 6 Fast Heat Up button

7 Water drawer 8 Control panel
9 Warm air exhaust 10 Quadruple glazed door
EVE615 / EVEP615 / EVEP616 DESCRIPTION


1 On / Off 2 Favourites 3 Fast Heat Up button 4 Menu 5 Touch screen display 6 Light switch 7 Control panel
8 Warm air exhaust 9 Triple / Quadruple glazed door
EVE615 / 636, EVEP615/ 616 / 618 / 619 / 626
USING THE APPLIANCE
| 1 | On / Off | Press and hold to turn the oven on and off |
| 2 | Menu | Lists the oven functions |
| 3 | Favourites | Lists the favourite settings |
| 4 | Touch display Shows the current settings of the oven |
| 5 | Light switch To turn the lamp on and off |
| 6 | Fast Heat Up To deactivate the Fast Heat Up function |
| 7 | Oven selection | To change between selection options (EVE636 & EVEP626 models only) |
 | Press | Touch the surface with your fingertip |
 | Left/Right swipe | Slide fingertip over the surface |
 | Press and hold | Touch the surface for 3 seconds |
 | The models with this icon have the added feature of being able to turn the oven ON and OFF by pressing the oven toggle symbol |
EVE615 / 636, EVEP615/ 616 / 618 / 619 / 626 (CONTINUED)
DISPLAY
How to turn the oven on and off

If you do not use the oven for 2 minutes, the display goes to standby.

When you cook, the display shows the set functions and other available options.

The display with the maximum number of functions set.
A. Time of day B. Start / stop C. Oven temperature D. Heating functions E. Food sensor/probe temperature F. Timer H. Food sensor/probe (selected models only)
Display indicators
| Basic indicators – to navigate on the display |
| OK | To confirm the selection / setting |
| To go one level back in the menu |
| To undo the last action |
| To turn the options on and off |
| Sound alarm function indicators – when the set time of cooking ends, the signal sounds |
| The function is on |
| The function is on.Cooking stops automatically |
| Sound alarm is off |
| Timer indicators |
| To set the function: delayed start |
| To cancel the setting |
CONDITION THE OVEN (TO BURN OFF ANY RESIDUE)

Run in the empty oven before the first use.
- Remove all accessories and removable shelf supports from the oven.
- Set the temperature to 180°C for the function: Fan cooking. Let the oven operate for 30 minutes.
The oven can emit an odour and smoke during burn off. Make sure that the room is ventilated.
DAILY USE

WARNING
Refer to safety chapters
The touch screen display will show prompts or messages. It may be necessary to touch the 'X' or the middle of the message to respond.

or the middle of the message to respond.

How to set Heating Functions
- Turn ON the oven. The display shows the default heating function.
- Press the symbol of the heating function to enter the submenu.
- Select the heating function and press: OK
The display shows: temperature.
- Set: temperature. Press: OK
- Press: SFABD Sensor/probe - you can plug the sensor at any time before or during cooking
STOP – press to turn off the heating function.
- Turn OFF the oven.
Take a shortcut!
![graph LR A["①"] --> B["☐"] B --> C["..."] C --> D["°C"] D --> E["START"]](/content/2026/05/948496/images/27e640b03e7a8a735ca0375aa72b942b1f8c619b8e73e6a54d6edce35fb9fb6f.jpg)
How to set Assisted Cooking
Every dish in this submenu has a recommended function and temperature. You can adjust the time and the temperature.
For some of the dishes you can also cook with:
- Weight Automatic
- Food Sensor/probe
The degree to which a dish is cooked:
- Rare or Less
- Medium
- Well done or More
- Turn on the oven
- Press: .Select: Settings / Connections
- Press: .Enter: Assisted cooking.
- Choose a dish or a food type.
- Press: START
Take a shortcut!
![graph LR A["①"] --> B["≡"] B --> C["×"] C --> D["∅"] D --> E["START"]](/content/2026/05/948496/images/ebffd149fd1544a613f69c00d66af13bc643064d2653951ead1e98a995aa6645.jpg)
How to set Clock functions
How to set the clock
- Turn ON
- Press Menu
- Go to Settings
- Press Setup
- Select: Time of day
- Set the time. Press: OK
How to set cooking time
- Choose a heating function and set the temperature.
- Press ⏻
- Set the time. Press: OK
EVE615 / 636, EVEP615/ 616 / 618 / 619 / 626 (CONTINUED)
Take a shortcut!
![graph LR A["Input Icon"] --> B["Display Icon ..."] B --> C["°C"] C --> D["Refresh Icon"] D --> E["START"]](/content/2026/05/948496/images/ec416d4d3c587da401b9c7bdc2fde8b0bbe3bf825ca468df024cfad335de953f.jpg)
How to choose end option
- Press ⏻
- Press • • •
- Select End action from timer
- Press End action
- Select preferred option
- Press: OK. Repeat the action until the display shows the main screen.
How to delay start of cooking
- Set the heating function and the temperature.
- Press
- Set the cooking time.
- Press • • •
- Press: Delayed start.
- Choose the value.
- Press: OK. Repeat the action until the display shows the main screen.
How to extend cooking time
When 10% of cooking time is left and the food seems not to be ready, you can extend cooking time. You can also change the heating function.
Press +1min to extend the cooking time.
How to change timer settings
- Press ⏻
- Press the timer value.
- Press: OK
You can change the set time during cooking at any time.
ADDITIONAL FUNCTIONS
How to save Favourites
You can save your favourite settings, such as the heating function, the cooking time, the temperature or the cleaning function. You can save 3 favourite settings.
- Turn on the oven.
- Select the preferred setting.
- Press: 三. Select: Favourites.
- Select: Save current settings.
- Press + to add the setting to the list of: Favourites.
Press OK
- Press to reset the setting. ✗ – press to cancel the setting.
Function lock
This function prevents an accidental change of the heating function.
- Turn on the oven.
- Select a heating function.
- ☆, 🖼 press at the same time to turn on the function lock.
To turn off the function lock repeat step 3.
Automatic switch off
For safety reasons the oven turns off after some time, if a heating function works and you do not change any settings.
| (°C) | (h) |
| 30 - 115 12.5 |
| 120 - 195 8.5 |
| 200 - 245 5.5 |
| 250 - maximum 3 |
The Automatic switch-off does not work with the functions: Light, Food sensor/probe, End time, Slow Cooking.
Cooling fan
When the oven operates, the cooling fan turns on automatically to keep the surfaces of the oven cool. If you turn off the oven, the cooling fan can continue to operate until the oven cools down.
How to manage error codes
When the software error occurs, the display shows error message. In this section, you will find the list of the problems that you can handle on your own.
| Code and description | Remedy |
| C2 – the Food sensor/probe is in the oven cavity during Pyrolytic Cleaning. | Take out the Food sensor/probe. |
| C3 – the door is not fully closed during Pyrolytic Cleaning. | Close the door. |
| F111 – Food sensor/probe is not correctly inserted into the socket. | Fully plug Food sensor/probe into the socket. |
| F240, F439 – the touch fields on the display do not work properly. | Clean the surface of the display with micro fibre cloth. Make sure there is no dirt on the touch fields. |
| F908, F113 – the oven system cannot connect with the control panel. | Turn power OFF and ON. |
When one of these error messages continues to appear, please contact the Customer Care Centre using details on the back cover of this user manual.
EVE615 / 636, EVEP615/ 616 / 618 / 619 / 626
COOKING FUNCTIONS - STANDARD (Functions listed may not apply to all models.)
Symbol Function description
Fan cooking | Heat comes from the element surrounding the fan. This fan circulates the hot air around the oven cavity so that you can put your food in different places in the oven and still cook them at the same time. You can use the 'Fan Cooking' function for multi-shelf cooking, reheating cooked foods, pastries and complete oven meals. It will cook at a lower temperature and be faster than baking. Please note that some variation in browning is normal.NOTE: Food sensor/probe function can be introduced into this cooking cycle. |
Traditional bake | Heat comes from two elements, one above and one below the food. The bottom element is a clean heat element and is below the floor of the oven. Both elements are controlled by the thermostat and will turn on and off to maintain set temperature. You can use the 'Traditional Bake' function for single shelf cooking, single trays of biscuits, scones, muffins, cakes, slices, casseroles, baked puddings, roasts and delicate egg dishes. This is a general function that can be used for most cooking.NOTE: Food sensor/probe function can be introduced into this cooking cycle. |
Fan assist bake | Heat comes from two elements, one above and one below the food. The fan circulates the hot air around the oven cavity so that you can put the food in different places in the oven and still cook them at the same time. You should only use a maximum of two shelves with 'Fan Assist Bake'.Do not use the bottom shelf. If the two shelves are used, food on the shelf in the higher position will cook first and should then be removed to allow the food on the lower shelf to finish cooking.NOTE: Food sensor/probe function can be introduced into this cooking cycle. |
Roast | The Roast function is designed for roasting meats, poultry and fish by utilising heat from all elements in combination with the fan to surround the food. This provides even cooking throughout and enhanced browning.NOTE: EVEP618 / EVEP619 gives you the option to introduce steam into this cooking cycle.NOTE: Food sensor/probe function can be introduced into this cooking cycle. |
Pastry | The 'Pastry' function is specially designed for food that require extra browning such as the bases of pastries and pies. Heat comes from the element below the food. If you choose the default setting, the oven will heat up to 230°C in order to brown the food.You should then lower the temperature as required. Cook in the lower half of the oven when you are using only one shelf. |
Pizza | 'Pizza' is a combination of 'Pastry' and 'Fan Assist Bake' and offers you the combined benefits of both functions. Heat switches between the element surrounding the fan and the clean heat element below the oven floor. The 'Pizza' function is ideal for foods that require cooking and browning on the base. It is for foods such as pizzas, quiches, meat pies and fruit pies. Simply place the food in the middle of the oven and set the desired temperature. |
COOKING FUNCTIONS (CONTINUED)
Symbol Function description
Cook from frozen | The ‘Cook from Frozen’ function is ideal for cooking frozen precooked foods such as savoury pastries, pizzas, mini meals (TV dinners), meat pies and fruit pies. Heat comes from the element surrounding the fan as well as a smaller element above the food. Simply place the food in the oven straight from the freezer and heat. Cook in the upper half of the oven for best results. |
Grill boost | ‘Grill Boost’ direct radiant heat from two powerful upper elements onto the food. You can use ‘Grill Boost’ function for tender cuts of meat, steak, chops, sausages, fish, cheese toasties and other quick cooking foods.Grill with the oven door closed.‘Grill Boost’ allows you to take full advantage of the large grill dish area and will cook faster than the ‘Grill’ function. For best results it is recommended to preheat your grill for three minutes. This will help seal in the natural juices of steak, chops etc for a better flavour.Place the grill shelf in position 4 with the grill dish below to catch any spills. ‘Grill Boost’ has 2 temperature settings, ‘LO’ and ‘HI’. |
Grill | The ‘Grill’ directs radiant heat from only one of the powerful upper elements onto the food. The ‘Grill’ function is used instead of ‘Grill Boost’ when only half the amount of heat is needed. ‘Grill’ has 2 temperature settings, ‘LO’ and ‘HI’.Grill with the oven door closed. |
Fan grill | ‘Fan Grill’ offers you the benefits of both traditional bake and traditional grill functions. The grill element turns on and off to maintain set temperature while the fan circulates the heated oven air.Grill with the oven door closed.You can use ‘Fan Grill’ for large cuts of meat, which gives you a result similar to ‘rotisserie’ cooked meat. Place your food on the grill shelf in position 2 with the grill dish below to catch any spills. When using ‘Fan Grill’ it is not necessary to turn the food over during the cooking cycle. Set temperature to 180°C. |
SteamBake | Adding steam to your baking program can lift your baking skills to a whole new level.Shelf guide: position 3. (See diagram on page 41) |
AirFry Plus | Using the dedicated tray with this function delivers great tasting foods that are crisper with juicy centres. Shelf guide: AirFryPlus Tray position 3 and catch tray position 1. (See diagram on page 41) |
EVE615 / 636, EVEP615/ 616 / 618 / 619 / 626 (CONTINUED)
COOKING FUNCTIONS – SPECIAL
(Functions listed may not apply to all models.)
Symbol Function description
Keep warm

The 'Keep Warm' function is a low temperature oven function designed to keep your food at a perfect eating temperature without cooking it further. Heat comes from the smaller elements above the food and is circulated by the fan. Use 'Keep Warm' to keep your food warm while you prepare the rest of the meal or afterwards while you wait for the late arrival.
NOTE: After cooking, the oven retains enough heat to continue to cook food even if the elements are turned off. The 'Keep warm' function recognises this by giving you a warning message. If this happens the function will not start.

The 'Defrost' function uses low temperature air that is circulated by the fan. You can defrost (thaw) your food before you cook it. You can also use 'defrost' to raise your yeast dough and to dry fruit, vegetables and herbs. The 'Defrost' function does not have a suggested temperature but uses the ambient heat in the oven cavity.
Dough proving

The Dough Proving function offers ideal humidity and heat which speeds up and improves the dough proving, prevents surface drying and keeps the dough elastic.
Slow cooking

The Slow Cooking function is great for gentle and slow cooking of lean and tender pieces of meat and fish.
Eco mode

Eco mode function is designed to save energy during cooking. The oven retains moisture in the cavity and runs in energy-saving mode
Main menu
Press: ≡ to open Menu
| Menu item | Application |
| Assisted cooking | Lists automatic programmes. |
| Cleaning | Lists cleaning programmes. |
| Favourites Lists the favourite settings. |
| Options To set the oven configuration. |
| Settings Setup To set the oven configuration |
| Service Shows the software version and configuration |
Submenu for Pyrolytic Cleaning – Applicable to Pyrolytic models only
| Submenu | Application |
| Quick | Duration: 1 hour 30 minutes |
| Normal | Duration: 2 hours |
| Intense Duration: 2 hours 30 minutes |
Submenu for Options
| Submenu | Application |
| Light | Turns the light on and off. |
| Child lock | Prevents accidental activation of the oven. When the option is on, the text "Child Lock" appears on the display when you turn on the oven. To enable the oven use, choose the code letters in the alphabetical order. When the Child Lock is on and the oven is turned off the oven door are locked. |
| Fast heat up Shortens heat up time. It is available only for some of the oven functions. |
| Cleaning Reminder Turns the reminder on and off. |
| Time indication Turns the clock on and off. |
| Digital clock style Changes the format of the displayed time indication. |
EVE615 / 636, EVEP615/ 616 / 618 / 619 / 626 (CONTINUED)
Submenu for Setup
| Submenu | Application |
| Language | Sets the oven language. |
| Display brightness | Sets the display brightness. |
| Key tones | Turns the tone of the touch fields on and off. It is not possible to mute the tone for 1. |
| Buzzer volume Sets the volume of key tones and signals. |
| Time of day Sets the current time and date. |
Submenu for Service
| Submenu | Application |
| Demo mode | Activation / deactivation code: 2468 |
| Software version | Information about software version. |
| Reset all settings Restores factory settings. |
Using the SteamBake function (EVEP618 / EVEP619 model only)
To aid you in baking bread here is a basic recipe to understand and experiment with the bread baking function.
'Test loaf from base ingredients'
500g wheat flour
10g salt
10g butter at room temperature
280 +/- 20g water at 37 °C +/- 2 °C
3g sugar
20g fresh yeast
Method
- Weigh wheat flour, salt and butter in mixing bowl of the food processor.
- Dissolve sugar and yeast in the warm water and add to the flour.
- If using a mixing machine, mix on slow speed for 2 minutes. Then mix on medium for 8 minutes or until dough is smooth.
- Shape round ball of 750g of the dough, put in a bowl, cover with cling film and let it rise for 45 minutes in the oven at 30°C (or in defrost mode).
- Shape a longish loaf, cover with a towel and let it rise for 45 minutes in the oven at 30°C (or in defrost mode).
- Carve the surface of the bread with a serrated knife, depth of the cuts around 5mm.
- Choose 'SteamBake' function, ensure water is in the tank and pre-heat the oven to 180°C for 10 minutes.
- Place the dough in shelf level 2 (second from bottom) and cook for 40-45 minutes.
- Refill the water tank if it becomes empty before the end of the cycle.
- Remove loaf and allow to cool.
- Drain any left over water from the tank once the appliance is cool.
Cooking guide
- Select the correct shelf location for food being cooked.
- Make sure dishes will fit into the oven before it is switched on.
- Keep edges of non Electrolux baking dishes at least 40mm from the side of the oven. This allows free circulation of heat and ensures even cooking.
- Do not open the oven door more than necessary.
- Do not place foods with a lot of liquid into the oven with other foods. This will cause food to steam and not brown.
- After the oven is turned off it retains the heat for some time. Use this heat to finish custards or to dry bread.
- Do not use a lot of cooking oil when roasting. This will prevent splattering oil on the sides of the oven and the oven door.
- When cooking items that require a high heat (e.g. tarts), place the cooking dish on a scone tray in the desired shelf position.
- For sponges and cakes use aluminium, bright finished or non-stick cookware.
Condensation
Excess condensation may fog the oven door. This may happen when you are cooking large quantities of food from a cold start. Minimise condensation by:
- Keeping the amount of water used whilst cooking to a minimum.
- Making sure the oven door is firmly closed.
- Baking custard in a baking dish that is slightly smaller than the water container. • Cooking casseroles with the lid on.
If water is being used in cooking, it will turn to steam and may condense outside your appliance. This is not a problem or fault with the appliance.
Oven shelf location
The oven has 5 positions for shelves (as shown in the diagram below). To give maximum space above and below the shelves, load them in this way:
When cooking with 1 shelf, position at 1 or 2.
When cooking with 2 shelves, position them at 2 and 4.
For more detailed shelf locations, refer to the cooking tables for individual cooking functions.

PYROLYTIC CLEANING
Pyrolytic cleaning of the oven cavity
The oven has the Pyrolytic self-cleaning function, which cleans by burning off spatters and accumulated dirt and grease from the oven liner at high temperature. This process produces ash that can then be wiped out of the oven cavity.

WARNING
During the Pyrolytic cleaning process, the oven becomes extremely hot.
- Please keep small children at a safe distance.
- Never clean non-stick baking trays and tins in the oven during the pyrolytic cycle. High temperatures damage the non-stick coating and release poisonous gas.
- Do not put water into the water tank during the cleaning procedure.
- To prevent damage, do not use acids, sprays, or similar cleaning agents.

CAUTION
During pyrolytic cleaning, the air outlet exhaust above the door must be kept clear of any obstruction (e.g., bulky tea towels).
Do not use your oven to clean miscellaneous items (e.g., cookware).
If you have a steam oven, do not cause the water tank to overflow during the cleaning cycle. This could damage the enamel.
Before carrying out the Pyrolytic function
- All accessories must be removed from the oven, including shelves, trays and side racks.
Pyro proof models (EVEP616/619) are designed for side racks and slides to remain during pyrolytic cycle but shelves and dishes must be removed.
- Clean large deposits, spills or grease from the oven cavity.
- If you have a steam oven ensure the water tank is empty.
- Pyrolytic cleaning can release fumes that are not harmful to humans, including infants or persons with medical conditions, however you are strongly advised to provide good ventilation during and after each pyrolytic cleaning process.
- Unlike humans, some birds and reptiles can be extremely sensitive to the potential fumes emitted during the pyrolytic cleaning process. It is strongly advised to remove any pets (especially birds) from the vicinity of the appliance during and after each pyrolytic cleaning process.
- Small pets can also be highly sensitive to the
localized temperature changes in the vicinity of all pyrolytic ovens when the pyrolytic self cleaning program is in operation.
- Pyrolytic cleaning will not remove salt and mineral residue left in the cavity well when water evaporates. It is recommended that the residue is cleaned prior to conducting pyrolytic cleaning cycles. See section 'Cleaning the cavity well'.
Choose your Pyrolytic cleaning cycle from the following:
Quick Duration: 1 hour 30 minutes
Normal Duration: 2 hours
Intense Duration: 2 hours 30 minutes
NOTE: Duration includes heat-up time, excludes cool-down time.
Light clean
This is an energy saving cycle that can be used on a regular basis if the oven is lightly soiled. Possibly after every 2nd or 3rd roast.
Medium clean
Use this as the regular cycle about once every 2-3 months.
Heavy clean
When the oven is very dirty it may need a longer cycle to clean it thoroughly. This cycle will clean the dirtiest of ovens.
Menu > Cleaning > Pyrolytic cleaning > Select cycle from sub menu.
Selecting the upper or lower oven (EVEP626 only)
This model is equipped with two ovens. Use the oven selector symbol to toggle between the upper and lower ovens.

The oven cavity icon on the control panel will show which oven is currently active. Only one cavity can be cleaned at a time.

IMPORTANT
At the beginning of Pyrolytic cleaning, the door will automatically lock and the lock symbol will appear on the display. During the Pyrolytic cleaning cycle there may be some burn off odours. It is advised to keep the room well ventilated during this cycle.
EVEP626
For this model with two ovens, both doors will lock automatically at the beginning of the pyrolytic cleaning. Cooking is not permitted in either oven during the pyrolytic cleaning function.
The door(s) will only unlock when the oven has cooled to a safe temperature. Turning the function off will not unlock the door(s). This will only happen when safe temperatures are reached.
NOTE: The cooling fan will operate at an increased speed for Pyrolytic cleaning and will continue to run until the oven has cooled down. This is normal. It is recommended to clean the oven regularly to keep it in its best condition.
After Pyrolytic Cleaning
After cool-down wipe the ash out of the oven with a soft damp cloth and warm water. To restore the enamel shine to more difficult areas, use a damp cloth with vinegar and detergent.

CAUTION
Do not turn off the mains power supply to the oven during the Pyrolytic cycle. This could damage the appliance.
ASSISTED COOKING RECIPES
| Food category Type of food Type | | |
| Side / Oven Dishes Side Dishes | Dishes Jacket Potato Wedges | |
| Hash Browns | |
| Oven Dishes Lasagne | |
| Potato Gratin |
| Pasta Bake |
| Vegetable Gratin |
| Savoury Baking Pizza Pizza | | |
| Quiche Quiche Bread Ciabatta | |
|
| Rolls |
| Baguette |
| Wholegrain Bread |
| White Bread |
| Dark Bread |
| Cake in Tin Almond Cake | |
| Apple Pie |
| Baked Cheesecake |
| Apple Cake, covered |
| Short crust pastry case |
| Sponge flan case |
| Madeira Cake |
| Sponge Cake |
| Tarts |
| Desserts / Sweet Baking Cake on Tray Apple Strude, froz. |
|
|
|
|
|
|
|
|
|
|
|
|
|
|
|
|
|
|
|
|
|
STEAM ASSISTED COOKING
All Electrolux range of ovens have the ability to add steam while baking.
Cooking with steam is a great addition to 'hot air' cooking. Steam brings out all the natural flavours and goodness in the food, cooks evenly from surface to centre and retains more nutrients and vitamins. Steam assisted cooking consistently produces juicy, succulent interiors with crisp, golden exteriors.

WARNING
Risk of burns and damage to the appliance
- Do not open the appliance door when the steam function operates, with the exception of preheating.
- Open the appliance door with care after the steam function stops.
- Refer to cleaning the appliance for cleaning after the steam function operates.
EVE602, EVE614
- Open the oven door
- Add 150ml of tap water to the cavity well. Only add water when the oven is cold.

- Set the 'SteamBake' function.
- Preheat the oven for 10 minutes or according to the recipe suggestions.
- Place food in the appliance and close the oven door.

CAUTION
Do not refill the cavity well with water during cooking or when the oven is hot.
- To deactivate the appliance, turn the knob for the oven functions to off position.
- Remove water from the cavity well.

WARNING
Make sure that the appliance is cool before you remove the remaining water from the cavity well.
EVEP614 MODEL ONLY
Steam cooking
Make sure that the oven is cold.
- Add 150ml of tap water to the cavity well. Only add water when the oven is cold.

- Set the steam heating function.

- Set the temperature.

- Preheat the empty oven for 10 minutes to create humidity. Put food in the oven.
① The maximum capacity of the cavity embossment is 250ml. Do not refill the cavity embossment during cooking or when the oven is hot.
When the steam cooking ends
- Turn the knob for the heating functions to the off position to turn off the oven.
- Carefully open the door. Released humidity can cause burns.
- Make sure that the oven is cold. Remove the remaining water from the cavity embossment.
STEAM ASSISTED COOKING (CONTINUED)
EVE615, EVE636, EVEP615, EVEP616, EVEP626
- Open the oven door.
- Add 150ml of tap water to the cavity well. Only add water when the oven is cold.

- Select any of the STEAM ASSIST functions.
- Set the temperature and press START to commence.
- Preheat the oven for 10 minutes or according to the recipe suggestion.
- Place food in the appliance and close the oven door.
EVEP618 / EVEP619
Steam product description
1 SteamRoast 2 AirFry Plus 3 SteamBake 4 Steam Reheat


Water tank Level Indicator
U-Tank empty. Water present. - Tank full. Overfill alarm will sound.
Press 'OK' to continue.
1 Steam outlet. This is where steam is injected into the oven, which is behind the fan cover. 2 Water overflow pipe / drain pipe. If the water tank is over filled, water will be dispensed into the oven from here. This is not a fault with the appliance. It prevents water spilling out of the water drawer which could create a hazard. If this occurs mop up the overflow with a clean cloth and continue with the cooking function.
COOKING FUNCTION – STEAM ASSIST
Steam comes from the outlet pipe and heat comes from the element surrounding the fan. This fan circulates the hot air and steam around the oven cavity so that you can put your food in different places in the oven. This combination of steam and hot air together cooks food with a tender interior and crisp exterior. Browning of meat or fish will be perfect with the best cooking result at the core. The shape will be always be preserved and evenly firm. Vegetables will benefit with a high retention of nutrients.
SteamRoast

The function is suitable for meat, poultry, oven dishes and casseroles. Thanks to the combination of steam and heat, meat gets a tender and juicy texture along with a crusty surface.
SteamBake

Use this function to prepare bread and bread rolls with a very good professional-like result in terms of crispiness, colour and crust gloss.
AirFry Plus

Use this function in combination with dedicated tray to get advanced convection cooking function, delivering improved colour, more moisture retained and crispier precooked food as Potatoes, finger food.
To obtain optimal results, start the function with an empty oven, then when the oven reaches temperature insert the AirFry Plus tray with food and set timer option to "Sound Alarm and stop function", or the function will not cycle properly.
Steam Reheat

Food reheating with steam prevents surface drying.
Heat is distributed in a gentle and even way, which allows to recover taste and aroma of food as just prepared. This function can be used to reheat food directly on a plate. You can regenerate more than one plate at the same time, using different shelf positions.
STEAM ASSISTED COOKING (CONTINUED)
The water drawer cover is in the control panel.

WARNING
Use only cold tap water. Do not use filtered (de-mineralised) or distilled water. Do not use other liquids. Do not put flammable or alcoholic liquids into the water drawer.

WARNING
The steam is not visible inside the oven but it is there. Opening the oven door to place, remove or inspect food will release it. Stand back when opening the door to avoid the risk of burns.

- Press the cover of the water drawer to open it.
- Fill the water drawer with cold water to the maximum level (around 950ml) until the signal sounds or the display shows the message. Do not fill the water drawer over its maximum capacity. If the tank is overfilled, the excess will flow in to the oven. This prevents leakage onto cabinets and is not a fault. Sponge up overflows if they occur.
- Push the water drawer to its initial position.
- Turn on the appliance.
- Select steam heating function from STEAM ASSIST sub menu and set the temperature.
- If necessary, set the function: Duration or: End Time
The steam appears after approximately 2 minutes. When the appliance reaches the set temperature, the signal sounds. When the water drawer is running out of water, the signal sounds and the water drawer needs to be refilled to continue the steam cooking as described above.
The signal sounds at the end of the cooking time.
- Turn off the appliance.
- Empty the water tank after the steam cooking is completed.
STEAM MAINTENANCE
Refer to the cleaning function: Tank emptying.

CAUTION
The appliance is hot. There is a risk of burns.
- After Steam Cooking steam can condensate on the bottom of the cavity. Always dry the bottom of the cavity when the appliance is cool.
Let the appliance dry fully with the door open. To speed up the drying you can close the door and heat up the appliance with function: Fan Cooking at temperature 150° C for approximately 15 minutes.

WARNING
Water in the tank can still be hot. Wait until the appliance is cool before the water tank is drained.
Do not use the drained water to fill the water tank again.
Every dish in this submenu has a proposed function and temperature.
Those parameters can be adjusted manually according to the user's preference.
For some of the dishes you can also choose the way of cooking:
The level to which a dish is cooked:
Note: to obtain a perfect result when you cook something from frozen with your AirFry Plus tray, insert a timer after the oven has reached temperature and the tray is inserted. To verify which timer setting is optimal for the recipe, consult the dedicated table in the paragraphs below.
STEAM SERVICE FUNCTIONS
Menu > Cleaning > Steam maintenance
| Submenu | Application |
| Descaling | Procedure for cleaning the steam generation circuit from residual limestone. |
| Rinsing | Procedure for rinsing and cleaning the steam generation circuit after frequent use of the steam functions. |
| Tank emptying | Procedure for removing the residual water from the water drawer after use of the steam functions. |
Descaling Function
Before you start:
• Turn off the oven and wait until it is cold • Empty the water drawer (use tank empty function)
Duration of the first part: around 100 minutes
- Select Menu/Cleaning/Descaling
- Place the deep pan on the oven base
- Fill the drawer with 250ml of descaling agent
- Fill the remaining part with 700 ml of water, until signal sound or display shows the message
- Launch the function
- After the first part is over, empty the deep pan and put it back on the oven base
Duration of the second part: approx 35min
- Fill the remaining part of the water drawer with water to the maximum level until the signal sounds or the display shows a message.
- When the function ends, remove the deep pan.
① When this function works, the light is off.
When descaling ends:
- Turn off the oven.
- When the oven is cold, dry the cavity with a soft cloth.
- Leave the oven door open and wait until the cavity is dry.
① If the procedure is not completed correctly, the display prompts to repeat the procedure.
Descaling reminder
There are two reminders which prompt you to descale the oven. You cannot disable the descaling reminder.
| Type | Description |
| Soft reminder | Recommends you descale the oven |
| Hard reminder | Obligates you to descale the oven. If you do not descale the oven when the hard reminder is on, the steam functions are disabled. |
Rinsing
Before you start:
• Turn off the oven and wait until it is cold. 1. Place the deep pan on the base of the oven. 2. Fill the water drawer with water to the maximum level until the signal sounds or the display shows a message. 3. Select: Menu / Cleaning / Rinsing.
Duration: approx 30 min. 4. Turn on the function and follow the instructions on the display. 5. When the function ends, remove the deep pan.
① When this function works, the lamp is off.
STEAM ASSISTED COOKING (CONTINUED)
Tank Emptying
Use this function after cooking with a steam heating function to remove the residual water from the water drawer.
Before you start:
• Turn off the oven and wait until it is cold.
- Place the deep pan on the base of the oven.
- Select: Menu / Cleaning / Steam maintenance / Tank emptying.
Duration: 6 minutes
- Turn on the function and follow the instruction on the display.
- When the function ends, remove the deep pan.
① When this function works, the lamp is off.

Always remove tray for normal cooking or enamel damage may occur.
Any residual water on the cavity should be cleaned off with a dry cloth to avoid staining of the enamel. If there is a stain on the cavity, it can be removed by placing paper towel soaked in vinegar solution on the stain. (Equal parts of water/white vinegar solution).
WATER HARDNESS
How to set water hardness:
When the oven is first turned ON, the water hardness level needs to be set. The default value in your controller is 4. To lower or increase your water hardness value, follow below procedure.
- Go to menu.
- Press: Settings
- Press: Set up
- Select water hardness value using the table below as a guide.
Contact your water supplier to check the water hardness level in your area if you are unsure.
The table below shows water hardness range (dH) with the corresponding level of calcium deposit and the water classification. Adjust the water hardness level according to the table.
| Water hardness | Calcium deposit (mmol/l) | Calcium deposit (mg/l) | Water classification |
| Level | dH |
| 1 | 0-7 0-1.3 0-50 soft | | | |
| 2 | 8-14 1.4-2.5 51-100 | | | moderately hard |
| 3 | 15-21 | 2.6-3.8 101-150 hard | | |
| 4 | ≥22 | ≥3.9 | ≥151 | very hard |
When the tap water hardness level is 4, fill the water drawer with still bottled water.
COOKING GUIDE
| Recipe | Function | Shelf position | Temp (C) Preheat | Cooking time (min excluding preheat) | Size/portion Accessory |
| Chicken nuggets | AirFry Plus 3 | 220 Y 15-25 | 600g AirFry Plus Tray | | |
| Croquettes | AirFry Plus 3 | 220 Y 15-25 | 450g AirFry Plus Tray | | |
| Crumbed fish | AirFry Plus 3 | 220 Y 15-25 | 6pcs AirFry Plus Tray | | |
| Chicken schnitzel | AirFry Plus 3 | 230 Y 15-20 | 6pcs AirFry Plus Tray | | |
| French fries | AirFry Plus 3 | 220 Y 25-30 | 1kg AirFry Plus Tray | | |
| Frozen croissant | AirFry Plus 2 | 170 Y 30-40 | 6 | | Grid and baking paper |
| Bread | Reheating 2 | 130 N 20-25 | 700g AirFry Plus Tray | | |
| Focaccia | Reheating 2 | 130 N 20-25 | 3-4 portions Tray | | |
| Casserole Reheating 2 | 130 N 20-30 | 2-3 portions | Round glass pyrex | | |
| Side dishes | Reheating 2 | 130 N 15-20 | 2-3 portions Plate | | |
| Fish | Reheating 2 | 130 N 15-25 | | Fillet or whole | Round glass pyrex |
| Meat | Reheating 2 | 140 Y 20-25 | | Chicken, pork, beef | Round glass pyrex |
| Whole Chicken | Steam Roast | 2 230 N 55-65 | 1.2 kg | Grid/tray | |
| Spare ribs | Steam Roast | 2 130 N | | 10 mins grill at 230°C | 2 racks |
| Whole fish | Steam Roast | 2 180-190 | N 25-30 | | 2 fish, 700g each |
| Potato gratin | Steam Roast | 2 160 N 60-80 | 1 | | Pyrex glass round 21cm |
| Lasagna | Steam Roast | 2 180 N 45-60 | 1 | | Pyrex squared 35 x 24 x 6cm |
| White bread | Steam bake | 2 180 N 50-65 | 750g Tray | | |
| Bread rolls | Steam bake | 2 200 N 30-40 | 9 | Tray | |
| Gluten free bread | Steam bake | 2 200 N 50-65 | 1 | Tin cake mould | |
| Apple pie | Steam bake | 2 160 N 90-110 | | Round tin 21cm | |
| Focaccia | Steam bake | 2 200-210 | N 25-35 | Tray | |
| Biscuits | Steam bake | 2 160-170 | N 20-40 | Tray | |
*count shelf from the bottom up
USING THE FOOD SENSOR/PROBE
The Food Sensor/Probe measures the core temperature of the food. When the food reaches the desired set core temperature, the oven turns off. The Food Sensor/Probe has a core temperature range of 50-99°C.
There are two temperatures to set:
• The oven temperature • The core temperature of the food

WARNING
Only use the Food Sensor/probe supplied or the correct replacement parts.
NOTE: Food must be completely defrosted when inserting the Food Sensor/probe. If the food is too cold, the Food Sensor/probe function will not work.
Put the plug of the Food Sensor/probe into the socket on the top right hand corner of the front frame. Ensure the plug is fully inserted into the socket.


ALL FOOD SENSOR/PROBE MODELS
- Turn on the oven.
- Set a heating function and, if necessary, the oven temperature.
- Insert the Food Sensor/probe.
- Plug the Food Sensor/probe into the socket at the front of the oven. The display shows the current temperature of the Food Sensor/probe.
- Press 🔍 to set the core temperature of the Sensor/probe.

- Press to set the preferred option:
- Sound alarm – when the food reaches the core temperature, the signal sounds.
- Sound alarm and stop cooking – when food reaches the core temperature, the signal sounds and the oven stops.
- Select the option and repeatedly press: OK to go to the main screen.
- Press: When food reaches the set temperature, the signal sounds. You can choose to stop or to continue cooking to make sure the food is well done.
- Remove the Food Sensor/probe plug from the socket and remove the dish from the oven.

WARNING
There is a risk of burns as the Food Sensor/Probe becomes hot. Be careful when you unplug it and remove it from the food.
Take a shortcut!

Meat
For large pieces of meat, insert the tip of the Food Sensor/probe into the centre of the meat, with at least 75% of the sensor/probe inserted into the meat.

Fish
For best results, place the whole fish onto the wire rack and prop it up in the swimming position (i.e. using half a potato or onion). Alternatively the fish can be laid flat. Insert the Food Sensor/probe behind the head with at least 75% of the Sensor/probe inserted into the fish towards the bones in the middle of the fish.

Poultry
Place the whole poultry on the wire rack breast side up. Insert the Food Sensor/probe with at least 75% of the Sensor/probe into the breast of the poultry. Place the Sensor/probe in a direction toward the neck end of the poultry.


CAUTION
To prevent the Food Sensor/probe from being damaged by excessive heat, there must be a gap of a few centimetres between the grill element and the Food Sensor/probe. The meat may expand during the cooking process.

CAUTION
After pre-heating, the front of the oven will be hot. Care should be taken when inserting the food sensor/probe plug.
NOTE: The Food Sensor/probe will only work for the following functions
- Fan cooking • Steam cooking (EVEP618 / EVEP619 only)
- Traditional bake
- Fan assist bake
- Roast
If you have selected a function that is not compatible with the Food Sensor/probe, you will see the message "REMOVE FOOD PROBE".
Core temperatures of different foods
The temperatures in the table are given as a guide and may vary depending on the composition of the food.
| Food Core | Temperature in °C |
| Poultry |
| Chicken 80-85 | |
| Chicken breast 75-80 | |
| Duck 80-85 | |
| Duck breast, rare to medium rare 55-60 | |
| Turkey 80-85 | |
| Turkey breast 80-85 | |
| Goose 80-90 | |
| Pork |
| Shoulder of pork 85-90 | |
| Fillet of pork, rare to medium rare | 62-70 |
| Loin of pork, well done | 72-80 |
| Beef |
| Tenderloin or sirloin, rare | 45-52 |
| Tenderloin or sirloin, medium rare to medium | 55-62 |
| Tenderloin or sirloin, well done | 65-75 |
| Veal * |
| Joint of veal or shoulder, lean | 75-80 |
| Joint of veal, shoulder | 75-80 |
| knuckle of veal | 85-90 |
| Lamb ** |
| Leg of lamb, medium rare | 60-65 |
| Leg or lamb, well done | 70-80 |
| Saddle of lamb, medium rare | 55-60 |
| Fish |
| Whole fish | 65-70 |
| Fish fillet | 60-65 |
| Miscellaneous |
| Meat loaf, all kinds | 80-90 |
* Veal core temperatures are for well done.
** Lamb temperatures are for cuts of Lamb with the bone still in. For boneless, cooking times will be slightly less.
NOTE: The oven temperature needs to be set at least 10° higher than the desired food core temperature.
- The appliance will calculate the approximate end time. The end time is different for different quantities of food, set oven temperatures and function modes.
NOTE: The estimated end time will be displayed after
USING FOOD SENSOR/PROBE (CONTINUED)
approximately 30 minutes.


NOTE: The Food Sensor/probe temperature will not be displayed until the oven is at the desired temperature. Once the oven is at the desired temperature, the Food Sensor/probe temperature will cycle between the desired food core temperature and the actual food core temperature.
NOTE: All meat/fish/poultry should be rested, covered for at least 10 minutes.

CAUTION
Always check if food is cooked throughout before eating.

WARNING
After use, always remove the Food Sensor/probe from the oven cavity.

WARNING
The Food Sensor/probe is hot. There is a risk of burns. Be careful when you remove the tip and plug of the Food Sensor/probe.
To change the desired food core temperature during cooking, press and hold the √ and ∧ at the same time.
To cancel the Food Sensor/probe operation, simply unplug the sensor/probe from the socket.

ENVIRONMENT
To save energy and to help protect the environment, we recommend these hints:
Use the oven efficiently by cooking many trays of food at the same time. For example:
• Cook 2 trays of scones, small cakes or sausage rolls. - Cook a roast dinner at the same time as you cook chips or vegetables.
COOKING GUIDE
Roasting meat (use roasting tray & insert)
- Place the meat in the oven and set the temperature between 180°C and 200°C. (It is recommended to wrap your meats in an oven roasting bag or foil to prevent fats and oils from splattering. This will make it easier to clean the oven.) • Use the grill/oven dish.
- Do not pierce the meat.
- When the meat is cooked, take the roast out of the oven, wrap in aluminium foil and leave to stand for about 10 minutes. This will help retain the juices when the meat is carved. The table below shows temperatures and cooking times for different kinds of meat. These may vary depending on the thickness and bone content of the meat.
Roasting poultry and fish
- Place the poultry or fish in an oven set at a moderate temperature of 180°C - 200°C.
- Place a layer of foil over the fish for about three quarters of the cooking time. The table shows the temperatures and the cooking times for different kinds of fish and poultry. These may vary depending on the thickness and bone content of the meat.
AirFry Plus cooking (applicable models only)
The AirFry Plus feature works best for single shelf baking. AirFry plus is suitable for French Fries, Chicken Wings, Chicken Nuggets and similar products, see settings in the following table.
Important:
• AirFry Plus is designed for single shelf cooking. - Food should be arranged in a single layer on the AirFry Plus tray. - A separate tray should be placed on the bottom shelf position to catch any fat or crumbs dropping from the AirFry Plus tray during cooking. This tray must be removed for normal baking.
- Some experimenting may be required to find the best cooking time.
- Food may need to be removed early and should be checked at the minimum recommended bake time.
- Some frozen dense foods with cook times less than 15 minutes may require additional baking time.
To set the AirFry Plus function:
- Arrange food on the AirFry Plus tray.
- Select the AirFry Plus setting and suggested temperature from the table below.
- For best results, preheat the oven.
- When the oven reaches the set temperature, place the AirFry Plus tray on the suggested oven shelf position.
Note: Set the minute minder for the minimum suggested time and check for desired results when the timer ends.
- When cooking is complete, turn the oven off.
- Clean the AirFry Plus tray after each use. Wash the tray in the sink with warm soapy water and a stainless-steel scourer.
| food Temp | | Shelf position* | Time in minutes |
| Scotch fillet steak, seared first | 220 2 or 3 | | 8-12 (rare/med) |
| Frozen chips 220 2 or 3 15-20 |
| Chicken drumettes/ wingettes with a dry rub | 220 | 3 | 15-20 |
| Fresh barramundi fillet with crumb | 220 | 3 | 15-20 |
| Potatoes cut into wedges | 220 | 3 | 20-25 |
| Frozen goods (Chicken nuggets/ crumbed fish) | 220 | 3 | 15-20 |
| Smashed chats parboiled | 220 | 3 | 15-20 |
*Count shelf position from the bottom up.
COOKING GUIDE (CONTINUED)
Cooking guide
| meat | recommended temperature °C | minutes per kg |
| beef 200 | | rare: 35-40 |
| medium: 45-50 |
| well done 55-60 |
| lamb 200 | | medium: 40 |
| well done 60 |
| veal 180 well done 60 | |
| pork 200 well done 60 | |
| poultry & fish | recommended temperature °C | minutes per kg |
| chicken 200 45-50 |
| duck 200 60-70 |
| turkey 180 | 40-45 (<10kg) |
| 35-40 (>10kg) |
| fish | 180 | 20 |

IMPORTANT
For best cooking results, pre-heat your oven and grill. Pre-heating reaches the required temperature quickly and efficiently, as well as cooks your food at the correct temperature for the entire cook time. When not using steam, for best baking results, preheat the oven for 30 minutes.
Temperature estimations
If a recipe calls for Fahrenheit (°F) or no actual temperatures, use the following table to determine the temperature (°C).
| oven | temp. °C | temp. °F |
| low heat | cool | 80 | 175 |
| very slow | 100-110 | 210-230 |
| slow | 130-140 | 265-285 |
| moderate heat | moderately slow | 150 -16 0 | 300-320 |
| moderate | 170-180 | 340-355 |
| moderately hot | 190-200 | 375-390 |
| high heat | hot | 200-210 | 390-410 |
| very hot | 220-230 | 430-450 |
| extremely hot | 240-250 | 465-480 |
TRADITIONAL BAKING
| food temperature °C | oven shelf position* time in minutes |
| scones | - plain or fruit | 220 | 2 or 3 | 10 |
| biscuits | - rolled | 170 | 2 or 3 | 10-15 |
| - spooned 190 2 or 3 12-15 | | | |
| - shortbread biscuits | 160 | 2 or 3 | 30-35 |
| meringues | - hard - individual | 110 | 2 or 3 | 90 |
| - soft - individual | 180 | 2 or 3 | 15-20 |
| - pavlova - 4 egg whites | 110 | 2 | 75 |
| cakes | - patty cakes | 190 | 2 or 3 | 15-20 |
| - sponge - 4 eggs | 180 | 2 or 3 | 20-30 |
| - shallow butter cake | 180 | 2 or 3 | 30-40 |
| - boiled fruit cake | 180 | 2 or 3 | 60-70 |
| pastry - shortcrust | - cornish pasties | 200 | 2 or 3 | 40-45 |
| - custard tart | 200/180 | 2 or 3 | 10/30-30 |
| pastry - choux | - cream puffs | 210 | 2 or 3 | 25-30 |
| yeast goods | - bread | 210 | 2 or 3 | 25-30 |
| - pizza | 220 2 or 3 18 | | |
*Counting from the bottom position up
FAN COOKING
| food | | temperature °C | oven shelf position* | time in minutes |
| scones | - plain or fruit | 210 | 1 and 4 | 10-15 |
| biscuits | - rolled | 150 | any | 10-15 |
| - spooned | 180 | any | 10-15 |
| - shortbread biscuits | 150 | any | 10-15 |
| meringues | - hard - individual | 100 | any | 90 |
| - soft - individual | 165 | any | 15-20 |
| - pavlova - 4 egg whites | 100 | 1 and 4 | 75 |
| cakes | - patty cakes | 180 | 1 and 4 | 15-20 |
| - sponge - 4 eggs | 170 1 and 4 20-30 | | |
| - shallow butter cake | 170 | any | 30-40 |
| - boiled fruit cake | 170 | 1 | 60-70 |
| pastry - shortcrust | - cornish pasties | 180 | any | 40-45 |
| - custard tart | 190/170 | any | 20-30 |
| pastry - choux | - cream puffs | 200 | any | 25-30 |
| yeast goods | - bread | 210 | 1 | 25-30 |
| - pizza | 220 | 1 | 18 |
COOKING GUIDE (CONTINUED)
STEAM COOKING

IMPORTANT
For best results, preheat the oven for 10 minutes. Refer to the steam-assisted cooking section for details.
SteamBake function
(EVE602, EVE614, EVE615, EVEP614, EVEP615, EVEP616, EVEP626, EVE636)
| food Water on cavity | bottom (ml) | Temperature °C Oven shelf position* | Time in minutes |
| Yeast goods | Bread loaves | 150 | 180-200 | 2 | 35 - 45 |
| Bread rolls | 150 | 190-210 | 2 | 20 - 25 |
| Gluten free bread | 150 | 180-200 | 2 | 40 - 50 |
| Pizza (fresh) | 150 | 210-220 | 2 | 15 - 20 |
| Focaccia | 150 | 200-210 | 2 | 20 - 30 |
| Biscuits | Rolled | 150 | 160-170 | 2 | 10 - 15 |
| Spooned | 150 | 160-170 | 2 | 10 - 15 |
| Scones | Plain or fruit | 150 | 200-210 | 2 | 10 - 15 |
| Cakes | Cupcakes | 150 | 180 | 2 | 20 - 25 |
| Sponge - 4 eggs | 150 | 170 | 2 | 20 - 30 |
| Shallow butter cake | 150 | 170 | 2 | 25 - 30 |
| Pastry - choux | Cream puffs | 150 | 200 | 2 | 20 - 30 |
| Puff pastry | | 150 | 200 | 2 | 15-20 |
| Frozen croissants | | 150 | 170-180 | 2 | 15-25 |
*Counting from the bottom position up
Steam function (EVEP618 / EVEP916 model only)
| food | | temperature °C | oven shelf position* | time in minutes |
| cakes and pastries | - apple cakes in a 20cm cake tin | 140 | 1 | 60-80 |
| - biscuits on a baking tray | 150 | 2 (1 and 3) | 20-40 |
| - sweet buns on a baking tray | 180-200 | 1 | 10-20 |
| flan | - vegetable in a dish | 170-180 | 1 | 20-40 |
| - lasagne in a dish | 170-180 | 1 | 40-50 |
| - potato gratin in a dish | 160-170 | 1 | 50-60 |
| meat | - roast pork | 180-200 | 1 | 90-110/kg |
| - veal | 180 | 1 | 35-45/kg |
| - roast beef | | | |
| • rare | 210 | 1 | 35-40/kg |
| • medium | 200 | 1 | 40-45/kg |
| • well done | 190 | 1 | 50-55/kg |
| - whole chicken | 200 | 1 | 50-55/kg |
| fish and seafood | - snapper 1-1.5kg | 140-150 | 1 | 15-25 |
| - barramundi 4 fillets | 180 | 1 | 10-15 |
| miscellaneous | tray of vegetables 500g | 130 | 1 | 20-25 |
| pizza (fresh) | 210 | 1 | 14-18 |
*Counting from the bottom position up
STEAMBAKE
| food temperature °C | oven shelf position* time in minutes |
| bread | - rolls | 200 | 1 | 20-25 |
| - loaves 180 1 35-45 | | | |
| - focaccia 200-210 1 15-25 | | | |
GRILLING
Grilling hints
As a method of cooking, grilling can be used to:
• Enhance the flavours of vegetables, fish, poultry and meat. • Seal the surface of the food and retain natural juices. • Grill with the door closed.
This table shows how to grill different types of meat:
| food | grilling method |
| beef – tenderloin, rump and sirloin. | brush with oil or melted butter, especially if the meat is very lean |
| lamb – loin chops, shortloin chops, chump chops and forequarter chops. | remove skin or cut at intervals to avoid curling. brush with oil or melted butter |
| sausages | prick sausages to stop skin from bursting |
| poultry | divide into serving pieces. brush with oil |
| fish | brush with oil or melted butter and lemon juice |
| bacon | remove rind, grill flat and make into rolls |

WARNING
Always clean the grill/oven dish after every use. Excessive fat build up may cause a fire.
Guide to better grilling
No definite times can be given for grilling because this depends on your own tastes and the size of the food. These times should only be used as a guide and remember to turn the food over half way through the cooking process.
| food | time in minutes |
| Steak | 15-20 |
| Chops | 20-30 |
| Fish | 8-10 |
| Bacon | 4-5 |
For better grilling results, follow these easy instructions:
- Remove oven/grill dish and grill shelf and preheat grill for about 5 minutes.
- Choose only prime cuts of meat or fish. If the cut is less than 5mm thick it will dry out. If the cut is more than 40mm thick, the outside may burn whilst the inside remains raw.

WARNING
Do not place aluminium foil under food as this prevents fats and oils from draining away, which could result in a fire.
- Baste the food during grilling with butter, olive oil or marinade. Grilled food is better if marinated before cooking.
- Use tongs to turn food as a fork pierces the surface and will let juices escape.
Fan grill
The ‘fan grill’ function will assist the grilling process by circulating the heat evenly around the food. The recommended temperature setting is 180°C for all fan grilling functions.
Use the grill shelf with dish below for all fan grilling. Position the shelf in the lower half of the oven for the best results.
Wipe off any oil or fat which splatters while the oven is still warm.
There is no need to turn meat as both sides are cooked at the same time which means the food is succulent.
DEALING WITH COOKING PROBLEMS
| problem possible causes remedies |
| Uneven cooking | Incorrect shelf position | Select shelf suitable for cooking function. See cooking function tables in cooking guide |
| Oven tray too large Experiment with other trays or dishes |
| Trays not centralised Centre trays |
| Air flow in oven uneven Rotate food during cooking |
| Grill dish affecting thermostat Remove grill dish from oven on bake modes |
| Baked products too brown on top | Oven not preheated Preheat oven |
| Baking tins too large for the recipe Use correct size tins |
| Baking tins not evenly spaced Stagger baking tins at least 3cm between tins and oven walls |
| Products not evenly sized or spaced on traysMake into same size and shape, and spread evenly over trays |
| Baking temperature too highLower the temperature |
| Baked products too brown on bottom | Baking tins too large for the recipe Use correct size tins |
| Baking tins are a dark metal or glassChange to shiny, light tins or lower the temp by 10°C |
| Food too low in the ovenCook one shelf higher |
| Oven door opened too frequently during bakingDon't open the door until at least half the cooking time has passed |
| Baking temperature too highLower the temperature |
| Grill dish affecting thermostat Remove grill dish from oven on bake modes |
| Cakes have a cracked thin crust | Baking temperature too highLower the temperature |
| Food too high in ovenCook one shelf lower |
| Cake batter over mixedMix just long enough to combine ingredients |
| Pan too deepCheck size of pan |
| Baking pans darkChange to shiny pans |
| Baked products are pale, flat and undercooked | Baking temperature too lowRaise the temperature |
| Food too low in ovenCook one shelf higher |
| Baking time too shortIncrease the cooking time |
| Incorrect size tinUse the correct size tin |
| Cakes fallen in the centre | Baking temperature too lowRaise the temperature |
| Baking time too shortIncrease the cooking time |
| Proportions of ingredients incorrectCheck recipe |
| Door opened too early in bakingDo not open door until the last quarter of cooking time |
| Roast meat, potatoes not browning in tan oven | Poor air circulationElevate food onto a rack to allow air circulation |
| Grill dish affecting thermostat Remove grill dish from oven on bake modes |
| Juices running out of meatDo not pierce meat with a fork |
| Grilled meats outside is overcooked and centre is raw | | Grill in a lower position |
| Grilled chops and steaks curling | | Cut into fat every 2cm |
| The steam cooking does not operate | There is no water in the tankFill the water tank |
| Limescale is obstructing the holeCheck the steam outlet opening and remove the lime |
| It takes more than three minutes to empty the water tank or the water tank leaks from the steam outlet | There are lime deposits in the applianceCheck the water tank and refer to the chapter on Cleaning the water tank. |
| Steam and condensation settle on the food and in the appliance | The dish has been left in the oven for too longDo not keep the dishes in the appliance for longer than 15-20 minutes after the cooking ends |
| Food Sensor/probe function will not display when plugged in | | Ensure food is fully defrosted |
CLEANING THE APPLIANCE
STEAM ASSISTED CLEANING
This function assists in the removal of food residue from inside the oven. This method is effective in removing light soiling only. It is not effective in removing stubborn baked-on stains. This function can only be used when the oven is cold.
Procedure for cleaning:
- Remove all shelves, dishes and side racks.
- Make a solution of water (85%), white vinegar (10%), and dishwashing detergent (5%) and spray liberally on to the door, side walls and back wall of the oven cavity.
- Pour 40ml of water into the cavity base well.
- Select Steam Assist from the Cleaning submenu
- Wait until the cleaning procedure is finished.
- Allow to cool to a safe level before wiping the surface with a wet cloth.


WARNING
- Do not use steam cleaners.
- Do not line the bottom of the oven with foil or cookware.
Stainless steel
All grades of stainless steel can stain, discolour or become greasy. You must clean these areas regularly by following the procedures below, if you want your appliance to look its best, perform well and have a long life.
Care must be taken when wiping exposed stainless steel edges, they can be sharp!
A suitable cleaner can be purchased from Electrolux Customer Care Centres.

CAUTION
The oven door and control panel are decorated with a special stainless steel that resists finger marks and should only be cleaned with warm water and a mild detergent.
Do not use stainless steel cleaners, abrasive cleaners, or harsh solvents.
Note: Make sure you follow the polish or brushing lines in the steel.
Glass
- Glass surfaces on doors and control panels are best cleaned immediately after soiling.
- A damp cloth may help remove baked-on food deposits.
- Oven cleaners can be used to remove stubborn marks and stains.

Warning
The door glass on this appliance is made from a tough, durable material that withstands heating and cooling without breaking. However, it must be remembered that it is glass, and it may break. Treat it accordingly! Should you have any questions about the glass in your new appliance, please contact the customer care centre by dialling 1300 363 640.
Do not use harsh abrasive cleaners or sharp metal scrapers to clean the oven door since they can scratch the surface, which may result in shattering of the glass.
Oven
- Always keep the appliance clean. Ensure fats and oils do not accumulate around elements, burners, or fans.
- Always keep oven dishes, bake trays, and grill dish inserts clean, as any fat deposits may catch fire.
- It is recommended to wrap meats in foil or an oven roasting bag to minimise cleaning.
- Any polyunsaturated fats can leave a varnish-like residue which is very difficult to remove.
Grill
- Always keep grill dish clean, as any fat deposits may catch fire.
Food Sensor/probe (selected models only)
- Clean the Food Sensor/probe after each use and let it dry. Use a soft cloth with warm water and a cleaning agent. Only clean the sensor/probe end and not the plug.
Cleaning the cavity well
The cleaning procedure removes limestone residue from the cavity well after cooking with steam.

WARNING
- Mix 150ml of tap water with 100ml of white vinegar and put the mix in the cavity well.
- Let the water+vinegar-mix dissolve the limestone residue at the ambient temperature for 45 minutes.
- Remove the water+vinegar-mix with a soft cloth and clean the cavity with warm water and a soft cloth.
CLEANING THE APPLIANCE (CONTINUED)
CLEANING THE ACCESSORIES
Removing the trays and shelves from the appliance
- Slide the tray and shelves towards you until they reach the front stop.
- Tilt them up at the front to clear the side supports, taking care not to spill the contents.
- Lift them clear.
- Wash the tray and shelves in hot soapy water.
- Reverse the above steps to put the tray and shelves back again.
- Ensure that they are placed between two support wires.
- To remove a shelf from slides:
- Pull shelf towards you until it stops.
- Lift the shelf clear.
Removing the side racks
(Not required for models EVEP616 / EVEP619)
- Grasp the middle wire at the front.
- Pull firmly inwards while pushing back.

Slides (Telescopic runners)
- Do not subject slides to temperatures greater than 300°C.
- Do not place slides in a dishwasher
- Do not use a knife or sharp object to clean slides.
- Do not add oil or any other lubricant to slides.

WARNING
Make sure the appliance is turned off before you remove or replace parts to avoid the possibility of electric shock.
Removing and replacing the oven back light and side light (if fitted)
- Turn oven light glass anti-clockwise to remove it for globe replacement.
- To remove side light, place a spoon under the light glass and lever off. Replace globe and snap glass cover back into position.
- A special high temperature resistant globe should be used. This can be purchased from Electrolux Customer Care Centres.

Releasing the grill element
Rotating latch models - rotate latch 180° and the grill element will drop down freely. After cleaning, raise the grill element and secure by rotating the latch back 180°.

Retaining clips models - The upper grill element is secured with 2 clips which can be removed to help clean the oven cavity ceiling. To disengage the clips, push the edge of the clip towards back of the oven as shown below. After cleaning raise the grill element and secure clips back in position.

CLEANING THE DOUBLE/TRIPLE GLAZED DOOR (NON PYROLYTIC MODELS)

WARNING
Do not lift the door by the handle. Rough handling will cause glass to break.
Removing the oven door
The oven is equipped with a door that can be disassembled in order to clean all the panes of glass.
Remove the door before cleaning.
- Open the door fully to access the hinges, then rotate the 'stirrups' (highlighted in the diagram) on both hinges fully to the open position.

- Slowly close the oven door until it stops against the 'stirrups' (about 45°).

- Grasp the oven door with a hand on each side of the door and remove it from the oven by pulling it towards you.

- Lay the oven door with the outer side facing downwards on something soft and flat (for example, a cloth or towel on a kitchen bench or table) to prevent scratches.
Removing the oven door top trim
- Take hold of the grid embossed sections of the door trim at each end and press inwards to release the clips. Remove the door trim by pulling it towards you.

Removing door glass panels

WARNING
Rough handling, especially around the edges, can cause the glass to break.
- Lift the black bordered glass panel out of the guide.
- Repeat this for the smaller clear glass panel.
CLEANING THE APPLIANCE (CONTINUED)

Cleaning the door glass panels

CAUTION
- Do not use harsh abrasives on the glass panes as the reflective surface plays a role in the function of the oven to keep the door cool.
- Do not place glass in dishwasher. Hand wash only with a soft cloth and warm soapy water. When dry, polish with a soft cloth and ensure the glass is dry before reassembly.
- Be careful not to hit the corners of the glass on the benchtop as the glass may break.
Replacing the door glass panels
- Insert the smaller clear glass panel first from above and at an angle to the profile of the door.

- Repeat for the black bordered glass panel ensuring the painted surface is facing downwards.
Replacing the top door trim
- Take hold of the top door trim at each side and position it to the inside edge of the glass.
- Push the trim down with its top edge over glass panel until the clip snaps in on each side of the trim.

- Push the middle of the trim down to ensure it is straight and firm against the glass panel.

Fitting the oven door
- Take hold of the oven door with a hand on each side and with the door at an angle of 45°, position the recesses at the bottom of the door onto the hinge arms of the oven. Let the door slide down the hinge arms as far as it will go.

- Open the door fully to access the hinges.
- Rotate the 'stirrups' (see the diagram below) until they lock into the hook. The oven door may now be closed.

CLEANING THE QUAD GLAZED DOOR (PYROLYTIC MODELS)

WARNING
Do not lift the door by the handle. Rough handling will cause glass to break.
Removing the oven door
The oven is equipped with a door that can be disassembled in order to clean all the panes of glass.
Remove the door before cleaning.
- Open the door fully to access the hinges, then rotate the 'stirrups' (highlighted in the diagram) on both hinges fully to the open position.

- Slowly close the oven door until it stops against the 'stirrups' (about 30°).

- Hold the oven door with a hand on each side and remove it from the oven by pulling it towards you.

- Lay the oven door with the outer side facing downwards on something soft and flat (for example, a cloth/towel on a kitchen bench/table) to prevent scratches.
Removing the oven door top trim
Hold the embossed sections of the door columns at each end and press inwards to release the clips. Remove the upper door trim by pulling it towards you.

Removing door glass panels

WARNING
Rough handling, especially around the edges, can cause the glass to break.
- Lift the black bordered glass panel out of the guide.
- Repeat this for the smaller clear glass panels.
- When removing panel 3, ensure that the two rubber spacers are removed before cleaning.
CLEANING THE APPLIANCE (CONTINUED)
Do not misplace them!


CAUTION
- Do not use harsh abrasives on the glass panes as the reflective surface plays a role in the function of the oven.
- Do not place glass in dishwasher. Hand wash only with a soft cloth and warm soapy water. When dry, polish with a soft cloth and ensure the glass is dry before reassembly.
- Be careful not to hit the corner of the glass on the benchtop as the glass may break.
Replacing door glass panels
- Assemble the silicone spacers to the upper corners of one of the clear glass panels. Position the panel into the lower position of the door, ensuring the chamfered corner of the panel is placed in the correct location as shown in the image below.

- Insert the remaining smaller clear glass panel into the middle position, ensuring the chamfered corner of the panel is placed in the correct location as shown in the image below.

- Insert the black bordered glass panel into the upper position, ensuring the painted surface is facing the downside as per the image below.

Replacing the top door trim
- Hold the top door trim at each side and position it to the inside edge of the glass with trim vent opening closest to glass.
- Push the trim down with its top edge over the glass panel until the clip snap in on each side of the trim.
- Push the middle of the trim down to ensure it is straight and firm against the glass panel.

Fitting the oven door
- Take hold of the oven door with a hand on each side and with the door at an angle of 30°, position the recesses at the bottom of the door onto the hinge arms of the oven. Let the door slide down the hinge arms as far as it will go.

- Open the door fully to access the hinges.
- Rotate the 'stirrups' (see the diagram below) until they lock into the hook. The oven door may now be closed.

TIPS AND TROUBLESHOOTING
Before the first use, have you to set:
- Language
- Display brightness
- Key tones
- Buzzer volume
- Water hardness
- Time of day
Start using the oven
Quickstart
Turn on the oven and start cooking with the default temperature and time of the function.
- Press and hold: ①
- select the preferred function.
- Press START
Quick OFF
Turn off the oven, any screen or message at any time.
- Press and hold: ① until the oven turns off.
Start cooking
- ① - press to turn on the oven
- □... - select the heating function
- ° C - set the temperature.
- OK - Press to confirm.
- START – Press to start cooking.
Get to know how to cook quickly
Use the automatic programmes to prepare a dish quickly with the default settings:
Assisted cooking
- Press ①.
- Press
- Press Assisted Cooking
- Choose the dish.
IMPORTANT
This appliance is fitted with a cooling fan. This prevents your kitchen cabinet from overheating and reduces the condensation inside the oven. It will operate whenever you are using the oven and blow warm air across the top of the oven door.
NOTE: If the oven is still hot from cooking, the cooling fan will keep running to cool the oven down and will switch off by itself once cool.
CAUTION
Using the oven
• Always cook with the oven door closed. - Stand clear when opening the drop down oven door. Do not allow it to fall open. Always support the door using the door handle until it is fully open. - Do not lean on an open oven door, or place heavy items on it. This could damage the appliance. Take care in the region of the hinges.
IMPORTANT
Condensation and steam
This appliance is supplied with an exclusive system which produces a natural circulation of air and the constant recycling of steam.
This steam makes it possible to cook in a steamy environment ensuring that dishes are soft inside and crusty on the outside. This process also reduces cooking time and energy consumption. During cooking steam may be produced and released when the door is opened. This is absolutely normal.
When food is heated it produces steam in the same way a boiling kettle does. When steam comes into contact with the oven door glass it will condense and produce water droplets. To reduce condensation, ensure that the oven is well heated before placing food in the oven cavity.
Oven pre-heating is necessary before any cooking.
It is recommended that condensation is wiped away after each use of the oven.
The effects of dishes on cooking results
Dishes and tins vary in their thickness, heat conductivity, colour etc. which affects the way they transfer heat to the food inside them.
- Aluminium, earthenware, oven glassware and bright shiny utensils reduce cooking and base browning.
- Enamelled cast iron, anodized aluminium, aluminium with non-stick interior and coloured exterior and dark, heavy utensils increase cooking and base browning.
- To increase base browning simply lower the shelf position. To increase top browning, raise the shelf position.
- Always place dishes centrally on the shelf to ensure even browning.
- Single level cooking gives best results in conventional modes that do not use the oven fan. If cooking on more than one level, use the fan cooking function.
- Do not place trays on the base of the oven. This may damage the enamel.
Faults
If there is a problem with the oven or grill, please check the points listed below before calling for service. It may be possible to avoid a call by fixing the problem yourself - and so continue cooking.
Data plate
When you need information, service or spare parts please be prepared to tell us the:
Model number: ____
Serial number: ____
These are shown on the data plate. The data plate is visible when the oven or grill door is open.
Customer Care Centre
If you need more information, please contact the Customer Care Centre:
Australia: 1300 363 640, 8am – 5pm EST Mon – Fri.
New Zealand: +649 573 2384, 8am – 5pm EST Mon – Fri.
If you have a warranty or spare parts enquiry, you should call the number listed on the back page.
SHORTCUTS
Here you can see all the useful shortcuts. You can also find them in the dedicated chapters in the user manual.
How to set: heating functions
![graph LR A["①"] --> B["☐"] B --> C["..."] C --> D["℃"] D --> E["START"]](/content/2026/05/948496/images/17d3ea3af3131e7bd4492ae51c08d1951fca224fcea1ed4600e12758bf082a89.jpg)
How to set: cooking with a steam heating function
![graph LR A["①"] --> B["COCON"] B --> C["°C"] C --> D["COCON"] D --> E["START"] E --> F["①"] F --> G["COCON"]](/content/2026/05/948496/images/3cc4adb27a37b08c81477cca666a097371fb4fa233f7b51544cc9dc64dfea011.jpg)
How to set: assisted cooking
![graph LR A["Start"] --> B["≡"] B --> C["×"] C --> D["鸡"] D --> E["START"]](/content/2026/05/948496/images/e7cf62f3d089ef49837c6e6b549558cd2ee404fc807be7b37afebd1f3fa17e2a.jpg)
How to set: cooking time
![graph LR A["Input Icon"] --> B["°C"] B --> C["Checkmark"] C --> D["START"]](/content/2026/05/948496/images/54ff6043190530b6f344978f06f201fbd29f707c3ade06fb4584d720d4e4f67b.jpg)
How to delay: start and end of cooking

How to cancel: set timer

How to cancel: set timer
![graph LR A["①"] --> B["☐"] B --> C["..."] C --> D["°C"] D --> E["灯泡"] E --> F["°C"] F --> G["START"]](/content/2026/05/948496/images/bad4e678181f77528b16495b6b4b5a95db18dc47d06f699721ffdbf007c339b4.jpg)
TROUBLESHOOTING
NOTE: We may charge for service even in the warranty period if your problem is due to the causes listed below.
| problem possible cause |
| Oven or grill not working • Time of day is not set. |
|
|
|
|
|
|
| Oven light not working • Light may be turned off at control panel. |
|
|
|
| Oven not heating enough • Foil trays on bottom of oven. |
|
|
|
|
| There is warm air coming from the top of the oven door | • The oven is located under the control panel. When the oven is on, the air passes through this vent. This venting is necessary for proper air circulation in the oven and good baking results. Do not block oven vent. |
| Clock flashing on display • Reset time of day and any cooking functions you were using. |
| Unit smoking when first used • Protective oils being removed. |
| Condensation build up | • Reduce the amount of water used in cooking. (Sometimes condensation is normal). |
| Door cannot be replaced after removal | • Stirrup not engaged properly. |
| Functions and temperature appear on display but oven does not work | • Oven is in ‘Demo’ mode, refer to Additional Functionality. |
| When the door is open the fan stops (underbench only) | • This is a function of the power board to help reduce the blast of air when opening the door. |
| When a non fan mode is selected the fan starts | • Most oven modes have a fast heat up function that uses the fan, fan element and top (boost) elements. Auto fast heat up can be overridden by selecting a temperature of 120°C or less, allowing the function to start, then increasing the temperature to the desired level. |
| The light stays on when the door is closed | • An oven function has been selected. |
| • The light has been turned on at the control panel. |
| The light does not turn *ON* when the door is opened | • Oven light may need replacing. |
| Error message “REMOVE FOOD PROBE” after connecting Food Sensor/probe to appliance | • The cooking function selected is not compatible with the food sensor/probe. Refer Food Sensor/robe instructions page. |
| Food Sensor/probe temperature setting not displayed | • Ensure Food Sensor/probe plug is fully inserted into the socket on the front panel. |
| • Incorrect Food Sensor/probe used. Only use the Food Sensor/probe recommended for this appliance. |
| • Ensure food is fully defrosted |
Troubleshooting continued over page
TROUBLESHOOTING (CONTINUED)
| When using the Food Sensor/probe, centre of the food is undercooked | ·Ensure the Food Sensor/probe is inserted at least 75% into the food. |
| ·Ensure that food has been adequately rested after cooking. |
| Shelf or telescopic runner slides out when door is opened | ·Oven cavity is not level, you can perform a check using a level to verify this (refer to installation section). If not level refer to installer. |
| Door locked (switching off Pyro function quickly) | ·Go back into Pyro mode and switch off Pyro function after few seconds for the lock to open completely. |
| Lime scale residue on base of oven | ·Follow the procedure for cleaning the cavity well. There may be some minor residual marks after cleaning. |
| Oven seal loose | ·The oven seal of non pyrolytic models is only attached at each corner. It may seem like a loose fit, but when the oven is closed it will function correctly. |
| Steam functions (EVEP618/619 models only) |
| Steam and condensation settle on the food and in the cavity of the oven | You left the dish in the oven for too long. Do not leave dishes in the oven for longer than 15-20 minutes after the cooking process ends. |
| The descaling procedure is interrupted before it finishes. | This could have been caused by a power outage. Repeat the procedure. |
| The descaling procedure is interrupted before it finishes. | If the function was stopped by the user, repeat the procedure. |
| There is no water inside the grill / roasting pan after the descaling procedure. | This could be caused by the water drawer not being filled to the maximum level. Check if the descaling agent / water is present in the water drawer body. Repeat the procedure. |
| There is dirty water on the bottom of the cavity after the descaling cycle. | The grill/roasting pan could have been in the wrong position. Remove the residual water and the descaling agent from the bottom of the oven. Put the grill / roasting pan on the first shelf position. |
NOTES
NOTES

Electrolux Warranty
FOR SALES IN AUSTRALIA AND NEW ZEALAND
APPLIANCE: ELECTROLUX BUILT-IN OVENS, COOKTOPS,
FREESTANDING COOKER AND WARMING DRAWER
This document sets out the terms and conditions of the product warranties for Electrolux Appliances. It is an important document. Please keep it with your proof of purchase documents in a safe place for future reference should there be a manufacturing defect in your Appliance. This warranty is in addition to other rights you may have under the Australian Consumer Law.
1. In this warranty:
(a) ‘ACL’ or ‘Australian Consumer Law’ means Schedule 2 to the Competition and Consumer Act 2010; (b) 'Appliance' means any Electrolux product purchased by you and accompanied by this document; (c) 'ASC' means Electrolux's authorised serviced centres; (d) 'Electrolux' is the brand controlled by Electrolux Home Products Pty Ltd of 163 O'Riordan Street, Mascot NSW 2020, ABN 51 004 762 341 in respect of Appliances purchased in Australia and Electrolux (NZ) Limited (collectively "Electrolux") of 3-5 Niall Burgess Road, Mount Wellington, in respect of Appliances purchased in New Zealand; (e) 'Warranty Period' means the period specified in clause 3 of this warranty; (f) 'you' means the purchaser of the Appliance not having purchased the Appliance for re-sale, and 'your' has a corresponding meaning.
- Application: This warranty only applies to new Appliances, purchased and used in Australia or New Zealand and is in addition to (and does not exclude, restrict, or modify in any way) other rights and remedies under a law to which the Appliances or services relate, including any non-excludable statutory guarantees in Australia and New Zealand.
- Warranty Period: Subject to these terms and conditions, this warranty continues in Australia for a period of 24 months and in New Zealand for a period of 24 months, following the date of original purchase of the Appliance.
- Repair or replace warranty: During the Warranty Period, Electrolux or its ASC will, at no extra charge if your Appliance is readily accessible for service, without special equipment and subject to these terms and conditions, repair or replace any parts which it considers to be defective. Electrolux may, in its absolute discretion, choose whether the remedy offered for a valid warranty claim is repair or replacement. Electrolux or its ASC may use refurbished parts to repair your Appliance. You agree that any replaced Appliances or parts become the property of Electrolux.
- Travel and transportation costs: Subject to clause 7, Electrolux will bear the reasonable cost of transportation, travel and delivery of the Appliance to and from Electrolux or its ASC. Travel and transportation will be arranged by Electrolux as part of any valid warranty claim.
- Proof of purchase is required before you can make a claim under this warranty.
- Exclusions: You may not make a claim under this warranty unless the defect claimed is due to faulty or defective parts or workmanship. This warranty does not cover:
(a) light globes, batteries, filters or similar perishable parts; (b) parts and Appliances not supplied by Electrolux; (c) cosmetic damage which does not affect the operation of the Appliance;
(d) damage to the Appliance caused by: (i) negligence or accident; (ii) misuse or abuse, including failure to properly maintain or service; (iii) improper, negligent or faulty servicing or repair works done by anyone other than an Electrolux authorised repairer or ASC; (iv) normal wear and tear; (v) power surges, electrical storm damage or incorrect power supply; (vi) incomplete or improper installation; (vii) incorrect, improper or inappropriate operation; (viii) insect or vermin infestation; (ix) failure to comply with any additional instructions supplied with the Appliance;
In addition, Electrolux is not liable under this warranty if:
(a) the Appliance has been, or Electrolux reasonably believes that the Appliance has been, used for purposes other than those for which the Appliance was intended, including where the Appliance has been used for any non-domestic purpose; (b) the Appliance is modified without authority from Electrolux in writing; (c) the Appliance's serial number or warranty seal has been removed or defaced
- How to claim under this warranty: To enquire about claiming under this warranty, please follow these steps:
(a) carefully check the operating instructions, user manual and the terms of this warranty; (b) have the model and serial number of the Appliance available; (c) have the proof of purchase (e.g. an invoice) available; (d) telephone the numbers shown below.
- Australia: For Appliances and services provided by Electrolux in Australia: Electrolux goods come with guarantees that cannot be excluded under the Australian Consumer Law. You are entitled to a replacement or refund for a major failure and for compensation for any other reasonably foreseeable loss or damage. You are also entitled to have the Appliance repaired or replaced if the Appliance fails to be of acceptable quality and the failure does not amount to a major failure. 'Acceptable quality' and 'major failure' have the same meaning as referred to in the ACL.
- New Zealand: For Appliances and services provided by Electrolux in New Zealand, the Appliances come with a guarantee by Electrolux pursuant to the provisions of the Consumer Guarantees Act, the Sale of Goods Act and the Fair Trading Act. Where the Appliance was purchased in New Zealand for commercial purposes the Consumer Guarantee Act does not apply.
- Confidentiality: You accept that if you make a warranty claim, Electrolux and its agents including ASC may exchange information in relation to you to enable Electrolux to meet its obligations under this warranty.
Important Notice Before calling for service, please ensure that the steps listed in clause 8 above have been followed.
| AUSTRALIA | FOR SERVICEor to find the address of your nearest authorised service centre in AustraliaPLEASE CALL 13 13 49For the cost of a local call | FOR SPARE PARTSor to find the address of your nearest spare parts centre in AustraliaPLEASE CALL 13 13 50For the cost of a local call |
| NEW ZEALAND | FOR SERVICEor to find the address of your nearest authorised service centre in New ZealandPLEASE CALL 0800 10 66 10 | FOR SPARE PARTSor to find the address of your nearest spare parts centre in New ZealandPLEASE CALL 0800 10 66 20 |
Electrolux Home Products Australia
telephone: 13 13 49
email: customercare@electrolux.com.au
web: electrolux.com.au
Electrolux Home Products New Zealand
telephone: 0800 10 66 10
email: customercare@electrolux.co.nz
web: electrolux.co.nz
shop.electrolux.com.au


To add a touch of professional inspiration
to your home,
visit electrolux.com.au
or electrolux.co.nz
electrolux.com.au

or electrolux.co.nz
electrolux.co.nz
ANC A21031901 Rev C
© 2022 Electrolux Home Products Pty Ltd.
ABN 51 004 762 341
E_MAN_Ovens_A4_Jun22