KHBICSPDMTR - Bike computer Kogan - Free user manual and instructions
Find the device manual for free KHBICSPDMTR Kogan in PDF.


| Product Type | Wired/Wireless Bike Computer |
| Brand | Kogan |
| Model | KHBICSPDMTR |
| Dimensions | 50 x 40 x 20 mm (approx) |
| Weight | 30 g (approx) |
| Display | LCD screen with backlight |
| Power Source | CR2032 battery (included) |
| Battery Life | Up to 12 months (typical use) |
| Functions | Speed, Distance, Odometer, Trip Distance, Riding Time, Clock |
| Unit Selection | km/h or mph |
| Auto Start/Stop | Yes |
| Mounting | Handlebar mount with zip ties or rubber strap |
| Sensor | Wireless sensor for wheel magnet (included) |
| Water Resistance | IPX4 (splash proof) |
| Material | ABS plastic |
| Compatibility | Fits most bikes with wheel sizes 20-29 inches |
| Warranty | 1 year |
| Maintenance | Clean with soft dry cloth; replace battery when low |
| Package Contents | Bike computer, sensor, magnet, mounting bracket, zip ties, manual |
Frequently Asked Questions - KHBICSPDMTR Kogan
User questions about KHBICSPDMTR Kogan
0 question about this device. Answer the ones you know or ask your own.
Ask a new question about this device
Download the instructions for your Bike computer in PDF format for free! Find your manual KHBICSPDMTR - Kogan and take your electronic device back in hand. On this page are published all the documents necessary for the use of your device. KHBICSPDMTR by Kogan.
USER MANUAL KHBICSPDMTR Kogan
Wireless Bicycle Computer
KHB|CSPDMTR
Quick Start Guide
Using the wireless bicycle computer, you can measure your speed and distance travelled with a great degree of accuracy.
Product Checklist
The following items are included:
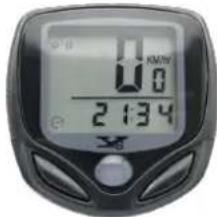
1 x Digital Readout Computer
1 x A23 12V Battery
1 x Magnet
1 x Gauge Stand
6 x Zip Ties
! WARNING:
CHOKING HAZARD - Small parts and batteries. Not for children. Use with adult supervision only
Getting Started
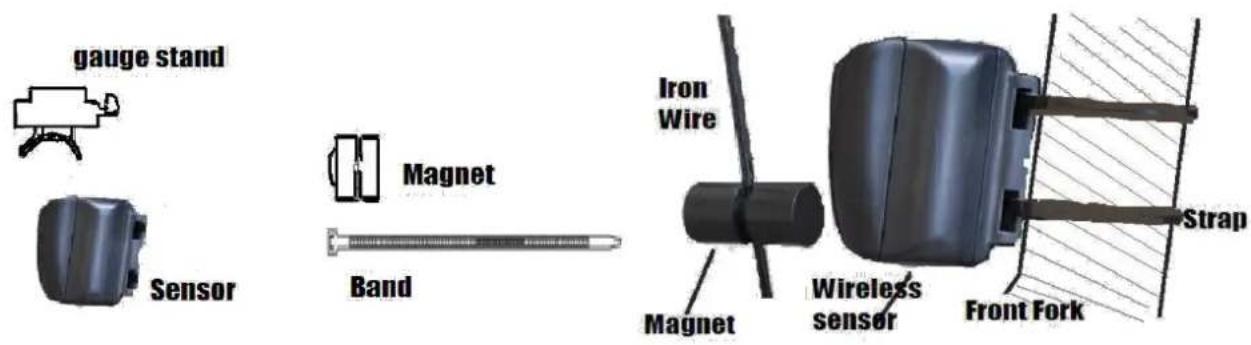
- Remove the battery cover from the wireless sensor and put a 23A 12V battery into the battery compartment, in accordance with the correct polarity.
- Install the sensor onto the front tyre fork of your bicycle by threading the zip ties through the gaps at the back of the sensor. Ensure it is placed so that the sensor is near the magnet. The sensor can also be underlaid with the adhesive backup plate to position it correctly.
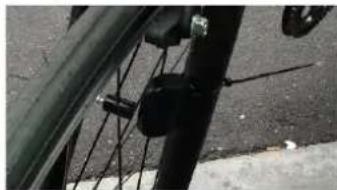
- Unscrew the end of the magnet and wrap it around a spoke on your tyre. Position it to ensure it will pass by the sensor. The magnet must face the sensor, and the two objects should pass each other, with a distance of approximately 1mm between them. Adjust the relative locations of the sensor and magnet if necessary.
-
The gauge stand can be fastened to the handlebars via the zip ties being threaded through the back of the stand (between the gauge and the handlebar barrier). Ensure that when you attach it, the small plastic hook is at the bottom, as the Digital Readout Computer slots in above this.
-
Slot the computer into the top of the gauge stand and press down until it clicks into place. To remove, simply apply slight pressure to the small plastic hook at the bottom of the computer and slide it upwards.
-
Turn the front wheel until the magnet passes the sensor, as shown in the picture to right. Check the screen to confirm that you have a signal. If there is no signal or the computer has not reacted, please check the relative locations of the sensor and magnet, plus confirm that both units have functioning batteries inserted correctly. You now have your speedometer installed and are ready to configure and use it!
natural_image
Close-up of a bicycle wheel and cable cage on asphalt surface (no visible text or symbols)Setting the Wheel Cycle
Once the battery has been installed, the screen will display '2060', with one of the numbers flashing. Select the exact cycle of your bike according to the following list. Push the right key to change the number, then press left key to confirm your selection. Set from right to left; selectable values range from 0mm to 9999mm.
You may make your own measurements using the following method: first, make a mark on the wheel, then push the bicycle to the end of one full cycle. In doing so, you will be able to measure out the distance between two marks and set the wheel cycle accordingly. For example, if the measurement is 1.615m, then input 1615.
Continuing to press the left key will enable the KM / Mile Mode setting.
| T|RE SIZE C|RCT | |RESIZE Perimeter | ||
| 700c x 38mm 2170 | 26" x 2.125" 2133 | ||
| 700c x 35mm 2205 | 26" x 2.0" 2114 | ||
| 700c x 28mm 2149 | 26" x 1.9" 2089 | ||
| 700c x 23mm 2133 | 26" x 1.75" 2035 | ||
| 700c x 20mm 2114 | 26" x 1.6" 2051 | ||
| 650c x 20mm 1945 | 26" x 1.5" 2026 | ||
| 29" x 2.25" 2390 | 26" x 1.0" 1973 | ||
| 29" x 2.0" | 2336 24" x 1.75" | 1907 | |
| 28" x 1.75" 2268 | 20" x 2.0" | 1550 | |
| 28" x 1.5" | 2224 20" x 1.5" | 1500 | |
| 27" x 11/4" 2199 | 20" x 1.25" | 1465 | |
| 27" x 11/8" | 2174 | 18" x 1.5" 1350 | |
| 26" x 2.3" | 2135 16" x 1.75" | 1230 | |
| 26" x 2.25" 2115 | 16" x 1.35" | 1160 |
Selecting KPH or MPH
Press right key to choose KM /hr or Mile/hr mode. Press the left key to enter into the Maintain Reminder mode.
Maintain Reminder Functions
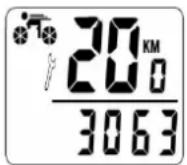
Press right key to choose KM/hr or Mile/hr mode. Press the left key to enter into the Maintain Reminder mode. The default value is: 200(KM/M). Press the right key to select between 200, 400, 600, 800(KM/M). When the numerical value reaches to the setting value, the spanner sign will be flashing. Press the right key for 3 seconds to cancel it.
Setting The Clock
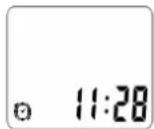
In Clock mode, press the "Left key" for 3 seconds to enter the 12/24hr time settings. Press the left key to alternate between 12/24hr time, press the right key to confirm a selection. When the hour value begins to flash, press the left key to change it, then press the right key to confirm your selection. Press the right key to enter into the Odometer mode.
Setting the ODO (odometer)
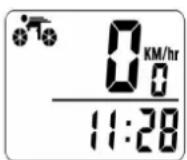
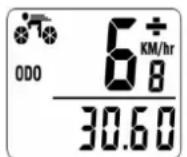
The ODO ranges from 0\~99999 (KM/M). It will be automatically cleared when the value overruns the maximum number. Whilst in the ODO mode, press the left key for 3 seconds to enter the settings. The default number will be 0000.0. Press the right key to change the number, then press left button to confirm the selection. Press the right key to enter into the DST mode.
Trip Distance (DST)
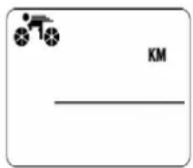
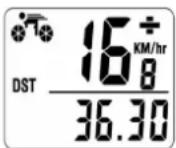
This mode focuses upon recording the distance of a single trip (TM). Distance records range from 0.001\~9999 (KM/Hr). Records will be automatically cleared when the value overruns the maximum number. Whilst in DST mode, press the left key for 3 seconds – the DST value will be altered to read 'O', as well as the value of MXS, AVS, TM. Press the right key to enter into (MXS) mode.
Maximum Speed (MXS)
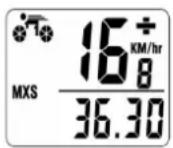
While in MXS Mode, press the left key for 3 seconds, MXS value will revert to "O", as well as the value of DST, AVS, TM. Press the right key to enter into (AVS) mode.
Average Speed (AVS)
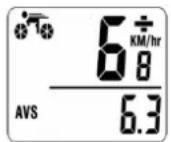
While in AVS mode, press the left key for 3 seconds. AVS values will revert to '0', as well as the value of DST, MXS, TM. Press the right key to enter the (TM) mode.
Elapsed Time (TM)
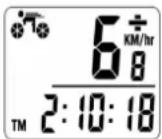
This mode shows the accumulative total time from the last reset time. Records range from 0:00:00 \~ 99:59:59. Records will revert to "O" when the value overruns the max number. Meanwhile DST, MAX and AVS records will be cleared too. While in TM mode, press the left key for 3 seconds. TM records will be cleared, as well as DST, MXS, AVS values. Press the right key to enter into (SCAN) Mode.
(SCAN)
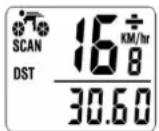
In this mode, the screen will display DST, MXS, AVS, TM in sequence.
AUTO OFF - Energy Saving Mode
After 300 seconds of no signal input, the computer/screen will revert to its 'OFF' state with only the clock visible on the display. You may return the device to normal operation by pressing any key.
Current Speed
This value will always be displayed on-screen. Speed values will range from 0-99.9 KM/h(M/h).
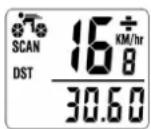
“+” and “—” Comparison
“+” or “-” will display on the screen in the upper right corner. “+” will indicate when the current speed is higher than average speed recorded, whereas “-” will indicate when the current speed is slower than average speed recorded.
Sample Cycling Mode
While in any mode, sampling mode will be initiated when you press the left key. The screen will display the time of the ride (TM). Press the right key to scan the value you have sampled: (DST) - (TM) - (AVS) - (MXS). Press the left key to exit Sampling mode.
Reset all Values
Press the left and right key simultaneously for three seconds to clear and reset all the values.
Using the Two Keys
Press the right key to select the following: ODO, DST, MXS, AVS, TM, SCAN, Clock.
All of the modes, with the exception of Sampling Mode, do not make use of the left key. When you enter into the Sampling Mode, it can show several sampled values via use of the right key. Press the left key again to exit Sampling Mode.
Troubleshooting
| Malfunction Reasons | |
| No measurements registering Incorrect position of the magnet and/or sensor. The magnet must pass within -1mm of the sensor. The sensor must also be within 50cm of the computer. | |
| The speed value won't increase from 'O' Incorrect location the installation of Magnet and Sensor. | |
| The numbers displayed are incorrect Incorrect parameters in setup, eg. the perimeter of the bicycle wheel | |
| Slow Reaction The computer is working in temperatures below zero degrees. | |
| Blank Screen The display has been exposed to extreme sunlight. Attempt to use the computer in shady environments. | |
| Dark display The battery has not been installed properly or, alternatively, the battery has been drained. Please reinstall or replace the battery. | |
| No drawing on screen Remove and replace the battery. | |
Accessories
Warnings / Disclaimers
- Do not expose this device to extreme moisture or sunlight. Doing so will affect normal operation and, in some extreme cases, endanger the user.
• Do not disassemble the product. - Any misuse of the product will void warranty. In the event of product misuse, Kogan will not be responsible for damage or injury if applicable.
- If you believe the computer has malfunctioned or requires repair, please refrain from attempting to repair it yourself. Refer all servicing matters to qualified personnel, or contact the Kogan Customer Support Team.
WARNING – KEEP BATTERIES OUT OF REACH OF CHILDREN

- Swallowing may lead to serious injury in as little as 2 hours or death, due to chemical burns and potential perforation of the oesophagus.
- If you suspect your child has swallowed or inserted a button battery immediately call the 24-hour Poisons Information Centre on 13 11 26 for fast, expert advice.
- Examine devices and make sure the battery compartment is correctly secured, e.g. that the screw or other mechanical fastener is tightened. Do not use if compartment is not secure.
- Dispose of used button batteries immediately and safely. Flat batteries can still be dangerous.
- Tell others about the risk associated with button batteries and how to keep their children safe.
- Wireless Bicycle Computer
- KHB|CSPDMTR
- Quick Start Guide
- Product Checklist
- ! WARNING:
- Getting Started
- Setting the Wheel Cycle
- Selecting KPH or MPH
- Maintain Reminder Functions
- Setting The Clock
- Setting the ODO (odometer)
- Trip Distance (DST)
- Maximum Speed (MXS)
- Average Speed (AVS)
- Elapsed Time (TM)
- (SCAN)
- AUTO OFF - Energy Saving Mode
- Current Speed
- Sample Cycling Mode
- Reset all Values
- Using the Two Keys
- Troubleshooting
- Accessories
- Warnings / Disclaimers
- WARNING – KEEP BATTERIES OUT OF REACH OF CHILDREN
Brand : Kogan
Model : KHBICSPDMTR
Category : Bike computer