
HNIM27ST - Ice Maker Magic Chef - Free user manual and instructions
Find the device manual for free HNIM27ST Magic Chef in PDF.


| Product Type | Countertop Ice Maker |
| Model Number | HNIM27ST |
| Color | Stainless Steel |
| Dimensions (Width) | 9.5 inches |
| Dimensions (Height) | 12.9 inches |
| Dimensions (Depth) | 14.1 inches |
| Net Weight | 17.8 lbs |
| Power Supply | 115V, 60Hz, grounded outlet |
| Ice Cube Size Selection | Small / Large |
| Ice Full Indicator | Yes (automatic shut-off) |
| Water Shortage Indicator | Yes |
| See-Through Window Cover | Yes |
| Water Drain Plug | Yes (front underside) |
| Maximum Water Level Mark | Yes (inside tank) |
| Ventilation Clearance (Rear & Sides) | At least 5 inches |
| Ventilation Clearance (Top) | At least 8 inches |
| Operating Ambient Temperature | 50°F to 100.4°F |
| Cleaning Recommendation | Mild detergent and warm water |
| Warranty (Parts & Labor) | 1 year |
| Compressor Warranty (Parts Only) | 5 years |
| Service Type | Carry-In |
Frequently Asked Questions - HNIM27ST Magic Chef
User questions about HNIM27ST Magic Chef
0 question about this device. Answer the ones you know or ask your own.
Ask a new question about this device
Download the instructions for your Ice Maker in PDF format for free! Find your manual HNIM27ST - Magic Chef and take your electronic device back in hand. On this page are published all the documents necessary for the use of your device. HNIM27ST by Magic Chef.
USER MANUAL HNIM27ST Magic Chef
Countertop Ice Maker
User's Manual
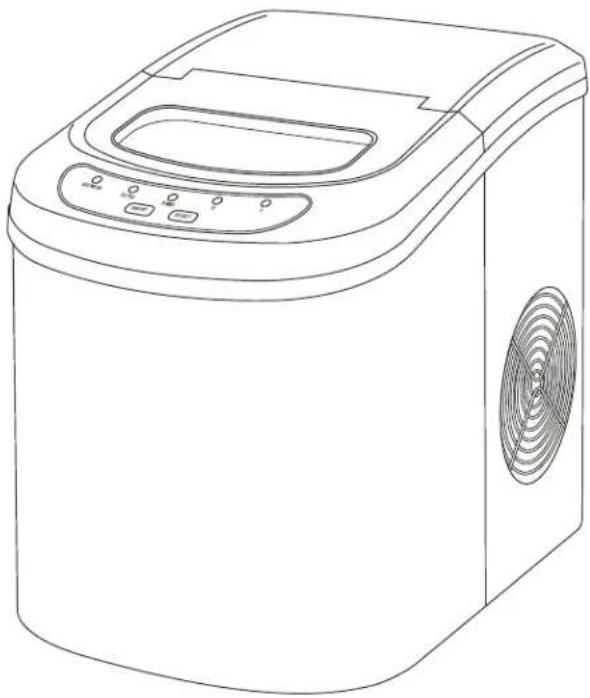
natural_image
Line drawing of a modern kitchen appliance with control panel and ventilation grille (no text or symbols)Model HNIM27SV / HNIM27ST / HMIM27BST
PLEASE READ THIS MANUAL CAREFULLY BEFORE USING YOUR ICE MAKER AND KEEP IT FOR FUTURE REFERENCE.

Product Registration
Thank you for purchasing a Magic Chef® product. The first step to protect your new product is to complete the product registration on our website: www.mcappliance.com/register. The benefits of registering your product include the following:
- Registering your product will allow us to contact you regarding a safety notification or product update.
- Registering your product will allow for more efficient warranty service processing when warranty service is required.
- Registering your product could act as your proof of purchase in the event of insurance loss.
Once again, thank you for purchasing a Magic Chef® product.
TABLE OF CONTENTS
BEFORE PUTTING INTO USE 2
SPECIFICATIONS 2
IMPORTANT SAFETY INSTRUCTIONS
IMPORTANT SAFETY TIPS .... 3
NAME OF THE PARTS .... 4
- Before connecting the appliance to the power supply, let the unit stand upright for 1 hour, which will reduce the possibility of the cooling system malfunctioning due to improper handling.
- Clean your unit thoroughly before putting into use. (See "How to Clean")
- Use the parts diagram on page 4 to insure proper positioning of internal components.
SPECIFICATIONS
| Product Description | Countertop Ice Maker | ||
| Model No. | HNIM27SV / HNIM27ST / HMIM27BST | ||
| Color | Silver / Stainless Steel / Black Stainless Steel | ||
| Unit Dimensions (Inches) | Width | Height | Depth |
| 9.5" | 12.9 "14.1 | " | |
| Net Weight | 17.8(lbs.) | ||
IMPORTANT SAFETY INSTRUCTIONS
IMPORTANT SAFETY TIPS
When using electrical appliances, basic safety precautions should be followed to reduce the risk of fire, electric shock, and injury to persons or property. Read all instructions before using any appliance.
- Do not operate this or any other appliance with a damaged cord.
- Connect to properly polarized outlets only. No other appliance should be plugged into the same outlet. Be sure that the plug is fully inserted into the receptacle.
- Do not run cord over carpeting or other heat insulators. Do not cover the cord. Keep cord away from traffic areas, and do not submerge in water.
- We do not recommend the use of an extension cord, as it may overheat and become a risk of fire. If you must use an extension cord, use No.14 AWG minimum size and rated no less than 1875 watts.
● Unplug the ice maker before cleaning or making repairs.
● Exercise caution and use reasonable supervision when appliance is used near children. - Do not clean your ice maker with flammable fluids. The fumes can create a fire hazard or explosion.
- Do not tip over.
- If the ice maker is brought indoors from outdoors during the wintertime, give it a few hours to adjust to room temperature before plugging it in.
NAME OF THE PARTS
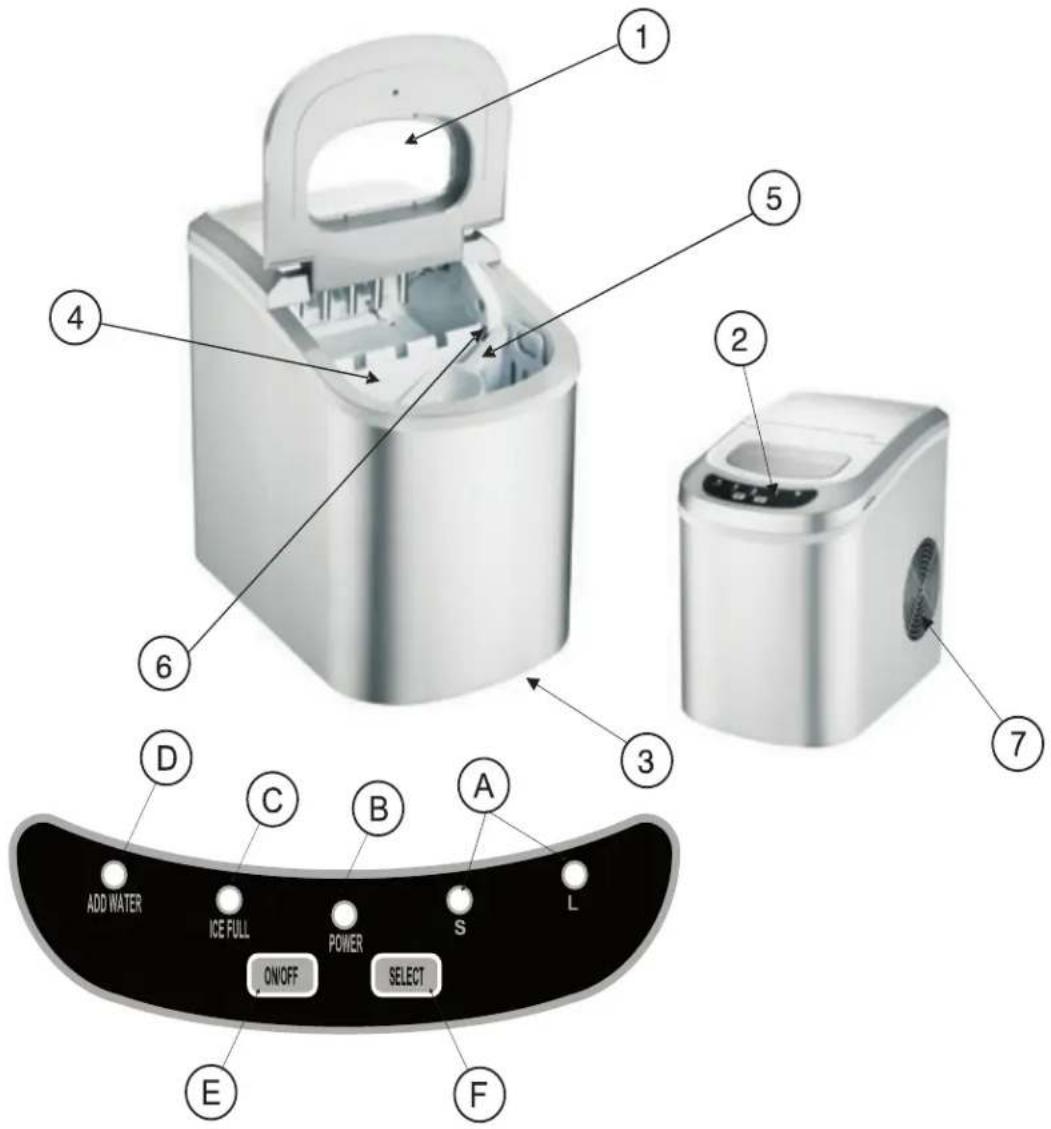
- Cover: See through window to allow interior visibility.
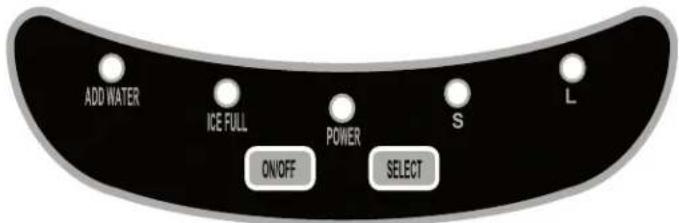
- Control panel: Easy to use, visible functions touch display setting.
A) Selected ice size: small or large.
B) Power indicator.
C) Ice Full indicator.
D) Water shortage indicator.
E) Button to turn on/off the unit.
F) Button to select ice cube size.
-
Water drain cap: At front underside of the unit.
-
Ice basket.
- Ice scoop.
- Ice full sensor.
- Air outlet.
- MAXIMUM WATER LEVEL: —▲ — (Not shown on the below unit image.)
Remove the ice basket, you can see the water level mark.
- Remove all exterior and interior packaging. Check that ice basket and ice scoop is included. If any part or accessory is missing, please contact our customer service.
- Clean the interior with lukewarm water and a soft cloth. Remove the ice basket and wash it in warm water.
- Find a location for your ice maker that is protected from direct sunlight and other sources of heat (i.e.: stove, furnace, radiator). Place the ice maker on a level surface. Maker sure that there is at least 5 inches of space between the back and sides of your ice maker and the wall.
- Allow one hour for the refrigerant fluid to settle before plugging in the unit.
- The appliance must be positioned so that the plug is accessible.
CONNECTING YOUR ICE MAKER

DANGER
* Improper use of the grounded plug can result in the risk of electrical shock. If the power cord is damaged please call our customer service at 888-775-0202.
- This unit should be properly grounded for your safety. The power cord of this appliance is equipped with a three-prong plug which connects with standard three prong wall outlets to minimize the possibility of electric shock.
- Plug your appliance into an exclusive, properly installed, grounded wall outlet. Do not under any circumstances, cut or remove the third (ground) prong from the power cord. Any questions concerning power and/or grounding should be directed toward a certified electrician.
- This appliance requires a standard 115 volt, 60Hz electrical outlet with three-prong ground.
Before using your ice maker, it is strongly recommended to clean it thoroughly.
The ice maker is not designed to be installed in an outside area such as a garage or a porch. Ambient temperatures of below 50°F or above 100.4°F will hinder the performance of the appliance.
HOW TO CLEAN
Remove the ice basket.
- Pull off the drain plug from the front underside to drain out the water.
- Clean the interior with diluted detergent, warm water and a soft cloth.
- The outside of the ice maker should be cleaned regularly with a mild detergent solution and warm water.
- Dry the interior and exterior with a soft cloth.
- Put back the drain plug.
- When the machine is not in use, open water drain cap to drain water completely from water reservoir.
CARE AND MAINTENANCE
The ice maker should be cleaned on a regular basis. (See: "HOW TO CLEAN")
It is necessary to have an adequate ventilation space around the ice maker in order to sustain proper performance, dissipation of heat, maintain efficiency, and low power consumption. Clearance of minimum 5 inches should be maintained at the rear and sides of the unit and 8 inches at the top of the unit.
▶ To attain proper performance, be sure to plug the appliance into a properly grounded 115/60 Hz outlet.
▶ Do not modify the power cord under any circumstances to allow the unit to be plugged into a non-grounded outlet. To avoid heat damage to the power cord, please ensure that it does not come in proximity or in direct contact with the compressor of the ice maker.
▶ Please avoid installing the ice maker in a location where the appliance will come in contact with water or moisture to minimize rusting of metal parts.
The ice maker should not be installed near any heat source or in a location where it will come in direct contact with the sunlight.
USING YOUR ICE MAKER
- Clean your ice maker thoroughly.
- Open the cover, remove the ice basket and pour normal tap water into tank. Keep water level below the level mark.
- Plug in the unit and the power indicator light will blink.
- Press "Power" on the control panel to begin the ice making cycle. The power indicator light will light.
- Select the size of the ice cube by pressing the "Select" button. If ambient temperature is below 60^ F, it is recommended to select small size to avoid ice sticking together.
- While the icemaker is on, check water level periodically. If water pump can't inject water, the ice maker will stop automatically, and the "Water" indicator will be on. Press the "Power" button, fill water up to the level mark and press "Power" again. Allow 3 minutes for the refrigerant to settle before restarting.
- The ice maker automatically stops working when the ice basket is full and the "Ice Full" indicator will be illuminated. Warning: Direct sunlight or sunlight reflection may cause infrared sensor malfunction. If the where there is no sunl inght.
- Change water in the water reservoir every 24 hours to ensure a reasonable hygiene level. If unit is not in use, drain all water in the tank reservoir.
TROUBLESHOOTING
| PROBLEM | POSSIBLE CAUSE | SOLUTION |
| “Add Water” indicator is on. | Stop the ice maker, fill water, and press “power” button again to restart the unit. | |
| “Ice” indicator is on. | Remove ice from ice basket or continuously press “Select” button 5 seconds. The unit could make ice 10 cycles even “ice” indicator is on. | |
| “Water” and “Ice” indicators are both illuminated. | Ice shovel is stuck. | Check if ice is blocking the ice shovel, otherwise, consults a certified technician. |
| Ice cubes stick together. | Ice making cycle is too long. | Stop the ice maker, and restart when the ice blocks melt. Select the small ice size. |
| Water temperature in inner tank is too low. | Change the water in the reservoir. Use water between 45°F-90°F. | |
| Leaving ice in the appliance for an extended period of time may result in the appliance recycling the ice by melting it down and making a new batch. | Transfer ready-made ice to another container and store in a cooler or freezer to avoid recycling. | |
| The ice cubes are melting. | Leaving ice in the appliance for an extended period of time may result in the appliance recycling the ice by melting it down and making a new batch. | After extended period transfer ready-made ice to another container and store in a cooler or freezer to avoid recycling. |
| Ice making cycle is normal but no ice is made. | Ambient temperature or water temperature in inner tank is too high. | Please operate the ice maker below ambient temperature of 90°F and use cold water. |
| Refrigerant liquid leakage. | Consult a qualified technician. | |
| Pipe in the cooling system is blocked. | Consult a qualified technician. |

Warranty
Limited Warranty
MC Appliance Corporation warrants each new "Countertop Ice Maker" to be free from defects in material and workmanship and agrees to remedy any such defect or to furnish a new part(s) (at the company's option) for any part(s) of the unit that has failed during the warranty period. Parts and labor expenses are covered on this unit for a period of one year after the date of purchase. A copy of the dated sales receipt/invoice is required to receive warranty service, replacement or refund.
In addition, MC Appliance Corporation warrants the compressor (parts only) to be free from defects in material and workmanship for a period of five years. The consumer is responsible for all labor and transportation expenses related to the diagnosis and replacement of the compressor after the initial one-year warranty expires. In the event that the unit requires replacement or refund under the terms of this warranty, the consumer is responsible for all transportation expenses to return the unit to our factory prior to receiving a replacement unit or refund. A refund or replacement will be issued at the discretion of MC Appliance Corporation.
This warranty covers appliances in use within the contiguous United States, Alaska, Hawaii, and Puerto Rico. The warranty does not cover the following:
• Damages due to shipping damage or improper installation
• Damages due to misuse or abuse
• Punctures to the evaporator system due to improper defrosting of the unit
• Content losses due to failure of the unit
• Repairs performed by unauthorized service agents
• Service calls that do not involve defects in material and workmanship, such as instruction on proper use of the product or improper installation
• Replacement or resetting of house fuses or circuit breakers
• Failure of this product if used for purposes other than its intended purpose
• Disposal costs of failed units not returned to our factory
• Any delivery or installation costs incurred as the result of a unit that fails to perform as specified
- Expenses for travel and transportation for product service if your appliance is located in a remote area where service by an authorized service technician is not available
- The removal and reinstallation of your appliance if it is installed in an inaccessible location or is not installed in accordance with published installation instructions
• Refunds for non-repairable products are limited to the price paid for the unit per the sales receipt
• This warranty is non-transferable. This warranty applies only to the original purchaser and does not extend to any subsequent owner(s)
LIMITATIONS OF REMEDIES AND EXCLUSIONS
Product repair in accordance with the terms herein, is your sole and exclusive remedy under this limited warranty. Any and all implied warranties including merchantability and fitness for a particular purpose are hereby limited to one year or the shortest period allowed by law. MC Appliance Corporation is not liable for incidental or consequential damages and no representative or person is authorized to assume for us any other liability in connection with the sale of this product. Under no circumstances is the consumer permitted to return this unit to the factory without the prior written consent of MC Appliance Corporation.
Some states prohibit the exclusion or limitation of incidental or consequential damages, or limitations on implied warranties. This warranty gives you specific rights, and you may also have other rights which vary from state to state.
| Model | Parts & Labor | Compressor (Parts Only) | Type of Service |
| HNIM27SV | One Year | Five Years | Carry In |
| HNIM27ST | One Year | Five Years | Carry In |
| HMIM27BST | One Year | Five Years | Carry In |
For Service or Assistance, please call 888-775-0202. Or visit us on the web at www.mcappliance.com to request warranty service or order parts.

CNA International, Inc. d/b/a MC Appliance Corporation. All rights reserved. Magic Chef® is a registered trademark of CNA International, Inc.

natural_image
Line drawing of a modern kitchen appliance with control panel and ventilation grille (no text or symbols)Model HNIM27SV / HNIM27ST / HMIM27BST
LEA ESTE MANUAL ANTES DE UTILIZAR SU MÁQUINA DE HACER HIELO Y GUÁRDELO PARA FUTURA REFERENCIA.

- Countertop Ice Maker
- Product Registration
- TABLE OF CONTENTS
- IMPORTANT SAFETY INSTRUCTIONS
- IMPORTANT SAFETY TIPS
- NAME OF THE PARTS
- CONNECTING YOUR ICE MAKER
- DANGER
- HOW TO CLEAN
- Remove the ice basket.
- CARE AND MAINTENANCE
- USING YOUR ICE MAKER
- TROUBLESHOOTING
- Warranty
- Limited Warranty
- LIMITATIONS OF REMEDIES AND EXCLUSIONS
Brand : Magic Chef
Model : HNIM27ST
Category : Ice Maker