
F 2411 Vi - Freezer MIELE - Free user manual and instructions
Find the device manual for free F 2411 Vi MIELE in PDF.


| Product Type | Freezer |
| Brand | Miele |
| Model | F 2411 Vi |
| Installation Type | Built-in |
| Height | 177.0 cm |
| Width | 55.8 cm |
| Depth | 54.8 cm |
| Weight | 62.0 kg |
| Power Supply | 220-240 V, 50 Hz |
| Energy Efficiency Class | E (EU 2019/2016) |
| Annual Energy Consumption | 220 kWh |
| Climate Class | ST (Sub-tropical) |
| Noise Level | 33 dB(A) re 1 pW |
| Main Functions | NoFrost, SuperFreeze, DynamicCooling |
| Freezer Capacity | 100 L (net) |
| Freezing Capacity | 12 kg/24h |
| Storage Time During Power Failure | 18 h |
| Temperature Range | -18 °C to -24 °C |
| Defrosting | Automatic (NoFrost) |
| Door Hinge | Right, reversible |
| Cleaning | Clean with mild detergent and soft cloth |
| Safety Features | Child lock, Door alarm, Temperature alarm |
| Spare Parts Availability | At least 10 years after discontinuation |
| Reparability Index | 8.5/10 (Miele estimate) |
Frequently Asked Questions - F 2411 Vi MIELE
User questions about F 2411 Vi MIELE
0 question about this device. Answer the ones you know or ask your own.
Ask a new question about this device
Download the instructions for your Freezer in PDF format for free! Find your manual F 2411 Vi - MIELE and take your electronic device back in hand. On this page are published all the documents necessary for the use of your device. F 2411 Vi by MIELE.
USER MANUAL F 2411 Vi MIELE
Operating and installation instructions Freezer

To avoid the risk of accidents or damage to the appliance it is essential to read these instructions before it is installed and used for the first time.
Warning and Safety instructions.... 5
Caring for the environment 15
Installation.... 16
Location.... 16
Climate range 16
Installation notes 17
Adjoining cabinets/units.... 17
Load-bearing capacity of the niche floor 18
Ventilation.... 18
Door hinging.... 18
Side-by-side.... 19
Specifications for the mains water connection 20
Building-in dimensions 21
Dimensions with appliance door open (opening angle 115°)....23
Dimensions of the furniture front.... 24
Installing the appliance.... 25
Before starting 25
Tools required.... 25
Weight of the furniture front 26
Aligning the building-in niche 26
Checking the installation niche 27
Before installation.... 28
Preparing the building-in niche 29
Pushing the refrigeration appliance into the building-in niche 32
Aligning the refrigeration appliance.... 33
Securing the refrigeration appliance in the building-in niche 36
Preparing to install the furniture fronts 38
Securing and aligning the furniture front 41
Securing the covers 45
Securing the plinth ventilation grille and plinth panel.... 47
Mains water connection 48
Information about the mains water connection.... 48
Connecting the refrigeration appliance to the water supply 49
Electrical connection 50
Saving energy 52
Guide to the appliance 54
F 2412 Vi 54
F 2802 Vi, F 2812 Vi, F 2902 Vi, F 2912 Vi .... 55
Main screen.... 56
Settings mode ⚙ 57
Accessories 59
Accessories supplied 59
Optional accessories.... 59
Initial commissioning 60
Before using for the first time.... 60
Choosing the right door assistant (Push2open/Pull2open).... 60
Operating the refrigeration appliance.... 61
Starting up for the first time 62
Switching on and off 63
Switching off for longer periods of time 64
Selecting additional settings.... 65
Switching Keypad lock 📋/☐ on or off 65
Switching Eco mode Ⓞ on or off.... 66
Performing a Self test ☑ 67
Switching on the Door assistant 68
Switching off the Door assistant 70
Setting up Miele@home 70
Switching off the Demo mode 74
Resetting the settings to their default settings 📂.... 75
Switching Sabbath mode 🌐 on or off.... 77
Switching on, switching off or resetting the Water filter display ⚙ 78
The correct temperature.... 80
Setting the temperature....80
Temperature range 81
Using Super freeze 82
Temperature and door alarm.... 83
Adjusting the interior fittings.... 85
Removing or moving the door shelves.... 85
Removing or moving the shelves 85
Removing the shelf above the ice maker 86
Removing the freezer baskets.... 86
Removing the ice cube container 87
Freezing and storing food.... 89
Maximum freezing capacity 89
Freezing fresh food....89
Storing frozen food....89
Home freezing 90
Contents
Placing food in the freezer....91
Storage time for frozen food.... 91
Defrosting frozen goods 92
Cooling drinks quickly 92
Making ice cubes 93
Automatic defrosting 95
Cleaning and care 96
Cleaning agents....96
Before cleaning the refrigeration appliance.... 97
Interior cabinet and accessories 97
Cleaning the door seal
Cleaning the ventilation gaps
Cleaning the water filter (IntensiveClear mesh filter)
After cleaning
Water filter
Problem solving guide
Noises
Service
Contact in the event of a fault
EPREL database
Warranty
Conformity declaration
Copyrights and Licences
This refrigeration appliance complies with current safety requirements. Inappropriate use can, however, lead to personal injury and material damage.
Please read the operating and installation instructions carefully before using the refrigeration appliance for the first time. They contain important information on safety, installation, use and maintenance. This is to protect yourself from injury, and from damaging your refrigeration appliance.
In accordance with standard IEC 60335-1, Miele expressly and strongly advises that you read and follow the instructions in the chapter on installing the appliance as well as the safety instructions and warnings.
Miele cannot be held liable for injury or damage caused by non-compliance with these instructions.
Keep these instructions in a safe place and pass them on to any future owner.
⚠️ Risk of injury and damage due to the refrigeration appliance tipping over.
This refrigeration appliance is very heavy and can tip forwards when the appliance door is open.
Keep the appliance door shut until the refrigeration appliance has been built in and secured in its installation niche in accordance with the operating and installation instructions.
Correct application
This refrigeration appliance is intended for use in the home and in similar environments, for example
– in shops, offices and similar work settings
– by the guests in hotels, motels, bed & breakfasts and other typical home settings.
This refrigeration appliance is not intended for outdoor use.
It must only be used as a domestic appliance to store deep frozen food, freeze fresh food and to make ice.
Any other usage is not supported by the manufacturer and could be dangerous.
This refrigeration appliance is not suitable for storing and keeping cool medicines, blood plasma, laboratory preparations or similar substances or products that are subject to the Medical Device Directive. Incorrect use of the refrigeration appliance for such purposes may cause deterioration of the items stored. The refrigeration appliance is also not suitable for use in areas where there is a risk of explosion.
Miele cannot be held liable for damage caused by improper or incorrect use or operation of the appliance.
The appliance can only be used by people with reduced physical, sensory or mental capabilities, or lack of experience and knowledge, if they are supervised whilst using it, or have been shown how to use it in a safe way and recognise and understand the consequences of incorrect operation.
Safety with children
Children under 8 years of age must be kept away from the refrigeration appliance unless they are constantly supervised. Children 8 years and older may only use the appliance unsupervised if they have been shown how to use it in a safe way and recognise and understand the consequences of incorrect operation. Children must not be allowed to clean or maintain the appliance unsupervised. ▶ Please supervise children in the vicinity of the appliance and do not let them play with it. Risk of death. Please bear in mind that by removing the dividing panel in the large freezer basket, children may be tempted to climb inside. The appliance door hinges can cause injury. Keep children away at all times. Danger of suffocation! Whilst playing, children could become entangled in packaging (such as plastic wrapping) or pull it over their head and suffocate. Keep packaging material away from children.
Technical safety
The coolant circuit has been checked for leaks. The refrigeration appliance complies with statutory safety requirements and the appropriate EU directives.

This refrigeration appliance contains the refrigerant isobutane (R600a), a natural gas which is environmentally friendly but flammable. The refrigerant does not damage the ozone layer and does not contribute to the greenhouse effect.
The use of this refrigerant has, however, led to a slight increase in the noise level of the appliance. In addition to the noise of the compressor, you might be able to hear the refrigerant flowing around the cooling circuit. Unfortunately, this cannot be avoided, but it does not affect the performance of the refrigeration appliance.
When transporting and installing the refrigeration appliance, ensure that no parts of the cooling circuit are damaged. Splashes of refrigerant can damage the eyes.
In the event of damage:
- Avoid naked flames or anything which creates a spark.
- Disconnect the refrigeration appliance from the mains electricity supply.
- Ventilate the room where the refrigeration appliance is located for several minutes.
- Contact the Miele Customer Service Department.
The more coolant there is in a refrigeration appliance, the larger the room it should be installed in. In the event of a leakage, if the appliance is in a small room, there is the danger of a combustible gas/air mixture building up. For every 11 g of coolant at least 1 m³ of room space is required. The amount of coolant in the refrigeration appliance is stated on the data plate inside the appliance.
To avoid the risk of damage to the appliance, make sure that the connection data (fuse rating, frequency and voltage) on the data plate corresponds to the household supply. Check that this is the case before connecting the appliance. Consult a qualified electrician if in any doubt. The electrical safety of this appliance can only be guaranteed when correctly earthed. It is essential that this standard safety requirement is met. If in any doubt please have the electrical installation tested by a qualified electrician. Reliable and safe operation of this appliance can only be assured if it has been connected to the mains electricity supply. The socket must not be concealed behind the refrigeration appliance and must be easily accessible so that the appliance can be quickly disconnected from the electrical supply in case of an emergency. If the electrical connection cable supplied is damaged, it must only be replaced by an original spare part to prevent a hazard for the user. Miele can only guarantee the safety of the appliance when original Miele spare parts are used. Do not connect the appliance to the mains electrical supply by a multi-socket adapter or extension lead. These are a fire hazard and do not guarantee the required safety of the appliance. If moisture gets into electrical components or into the mains connection cable, it could cause a short circuit. Therefore, do not operate this refrigeration appliance in areas which are exposed to moisture (e.g in a garage or utility room). This appliance must not be used in a non-stationary location (e.g. on a ship). Do not use a damaged appliance. It could be dangerous. Check the appliance for visible signs of damage.
For safety reasons, this appliance may only be used after it has been built in. The appliance must be disconnected from the power supply during installation, maintenance and repair work, and during installation work on the mains water connection. It is only completely isolated from the power supply when:
- the mains fuses are switched off, or
- the screw-out fuse is removed (where applicable), or
- the mains cable has been unplugged. Pull on the plug and not the cable when disconnecting it from the power supply.
Unauthorised installation, maintenance and repairs, or a faulty mains water connection can cause considerable danger for the user. Installation, maintenance and repairs, installation work on the mains water connection, and all repairs on the ice/water outlet must only ever be carried out by a Miele-authorised technician.
While the appliance is under warranty, repairs should only be undertaken by a Miele authorised service technician. Otherwise the warranty is invalidated.
Miele can only guarantee the safety of the appliance when genuine original Miele replacement parts are used. Faulty components must only be replaced by Miele spare parts.
This refrigeration appliance is supplied with a special lamp to cope with particular conditions (e.g. temperature, moisture, chemical resistance, abrasion resistance and vibration). This lamp must only be used for the purpose for which it is intended. The lamp is not suitable for room lighting. Replacement lamps may only be fitted by a Miele authorised technician or by the Miele Customer Service Department. This refrigeration appliance contains light sources rated as energy efficiency class F.
Miele cannot be held liable for damage caused by a faulty mains water connection.
The ice-cube maker must only be connected to a cold water supply.
Risk of injury. Ensure that you do not come into contact with moving parts on the dispensing mechanism of the ice cube maker or the heating element on the ice cube maker.
Correct use
The appliance is designed for use within a certain climate range (ambient temperatures), and should not be used outside this range. The climate range for your appliance is stated on the data plate inside the appliance. Installing it in a room with too low an ambient temperature, e.g. a garage, will lead to the appliance switching off for longer periods so that it cannot maintain the required temperature.
Do not cover or block the air vents as this could impair the efficiency of the appliance, increase the electricity consumption and could cause damage to the components.
If storing food which contains a lot of fat or oil in the appliance or the door, make sure that it does not come into contact with plastic components as this could cause stress cracks or break the plastic.
Risk of fire and explosion. Do not store explosive materials in the refrigeration appliance or any products containing propellants (e.g. spray cans). Electrical components can cause flammable mixes of gases to ignite.
Danger of explosion. Do not operate any electrical equipment (e.g. an electric ice-cream maker) inside the refrigeration appliance. Danger of sparking and explosion.
Danger of injury and damage to the appliance. Do not store cans or bottles containing carbonated drinks or liquids which could freeze in the freezer zone. Otherwise they could burst.
Danger of injury and damage to the appliance. When cooling drinks quickly in the freezer zone, make sure bottles are not left in for more than one hour. Otherwise they could burst. Danger of injury. Never handle frozen food or the metal parts of the appliance with wet hands. Your hands may freeze to the frozen food or to the metal. Danger of injury. Do not take ice cubes out with your bare hands and never place ice cubes or ice lollies in your mouth straight from the freezer zone. The very low temperature of the frozen food can cause frost burn to the lips and tongue. Do not refreeze partially or fully defrosted food. Consume defrosted food as soon as possible, as it will lose its nutritional value and spoil if left for too long. Defrosted food may only be re-frozen after it has been cooked. Observe the manufacturer's “use-by” dates and storage instructions given on food to avoid the risk of food poisoning. Storage times will depend on several factors, including the freshness and quality of the food, as well as the temperature at which it is stored.
Accessories and spare parts
Only use genuine original Miele accessories and spare parts with this appliance. Using accessories or spare parts from other manufacturers will invalidate the warranty, and Miele cannot accept liability.
Cleaning and care
Do not use any oils or grease on the door seals, as these will cause the seals to deteriorate and become porous with time. Do not use a steam cleaning appliance to clean or defrost this appliance.
Steam could reach electrical components and cause a short circuit.
Sharp edged or pointed objects will damage the evaporator, causing
irreversible damage to the appliance. Do not use sharp edged or pointed objects to
- remove frost and ice,
- separate frozen food or remove ice trays. Do not place electric heaters or candles in the appliance to defrost it. These can damage the plastic parts. Do not use defrosting sprays or de-icers, as they could contain substances which could damage the plastic parts or which might cause the build-up of gases and pose a danger to health.
Transport
Always transport the appliance in an upright position and in its original transport packaging to avoid damage in transit. Danger of injury and damage to the appliance. The refrigeration appliance is very heavy and must be transported by two people.
Disposal of your old appliance
If your old refrigeration appliance has a door lock, destroy it. This will prevent the risk of children playing accidentally locking themselves in and endangering their lives. Splashes of coolant can damage the eyes. Be careful not to damage any part of the pipework whilst awaiting disposal, e.g. by
- puncturing the coolant channels in the condenser,
- bending any pipework, or
- scratching the surface coating.
Disposal of the packing material
The packaging is designed to protect the appliance from damage during transportation. The packaging materials used are selected from materials which are environmentally friendly for disposal and should be recycled.
Recycling the packaging reduces the use of raw materials in the manufacturing process and also reduces the amount of waste in landfill sites.
Disposing of your old appliance
Electronic and electrical appliances contain many valuable materials. They also contain certain materials, compounds and components which were essential for their correct functioning and safety. These could be hazardous to your health and to the environment if disposed of with general waste or if handled incorrectly. Please do not, therefore, dispose of your old appliance with general waste.

Instead, please make use of officially designated collection and disposal points to dispose of and recycle electrical and electronic appliances in your local community, with your dealer or with Miele. By law, you are solely responsible for deleting any personal data from the appliance prior to disposal.
Take care not to damage your refrigeration appliance's pipework before or during transportation to an authorised collection depot.
This is to ensure that coolant in the cooling circuit and oil in the compressor is contained, and will not leak into the environment.
Please ensure that your old appliance poses no risk to children while being stored prior to disposal. For further information, see “Warning and Safety instructions” in these operating and installation instructions.
Location
This appliance should be installed in a dry, well-ventilated room.
When deciding where to install your refrigeration appliance, please bear in mind that it will use more energy if installed near to a heater, a cooker or other appliance that gives off heat. Direct sunlight should also be avoided. The higher the room temperature, the longer the compressor runs and the higher the energy consumption of the refrigeration appliance is.
When installing the refrigeration appliance, please note the following:
- The socket must be easily accessible in an emergency, not concealed behind the appliance.
- The plug and power cable must not touch the rear of the refrigeration appliance as they could be damaged by vibrations from the appliance.
- Do not plug in other appliances behind the refrigeration appliance.
If installation near a heat source is unavoidable, observe the following minimum distances between the appliance and the heat source:
- At least 3 cm to electric or gas stoves
- At least 30 cm to oil or coal-based stoves
If it is not possible to observe these minimum distances, an isolation plate must be installed between the refrigeration appliance and the heat source.
Climate range
The appliance is designed for use within a certain climate range (ambient temperatures) and should not be used outside this range. The climate range of the appliance is stated on the data plate inside the appliance.
| Climate range Ambient room temperature | |
| SN +10 to +32 °C | |
| N +16 to +32 °C | |
| ST +16 to +38 °C | |
| T +16 to +43 °C |
Operating in a room which is too cold will cause the compressor to switch off for too long, causing the internal temperature in the appliance to rise with the risk of food deteriorating and going off.

Risk of damage due to high humidity
In environments with high humidity, condensation can build up on external refrigeration appliance panels, which can cause corrosion.
Install the refrigeration appliance in a dry and/or air-conditioned room with sufficient ventilation.
After installation, make sure that the appliance door closes properly, the ventilation gaps are not covered and that the refrigeration appliance has been installed in accordance with these operating and installation instructions.
Installation notes

Risk of damage and injury due to refrigeration appliance tipping
This refrigeration appliance is very heavy and can tip forwards when the appliance door(s) is (are) open.
Keep the appliance door(s) shut until the refrigeration appliance has been built in and secured in its housing in accordance with these operating and installation instructions.
Due to its weight and size, the refrigeration appliance must be installed by two people.
Adjoining cabinets/units
The appliance is screwed to the adjoining cabinets/units to the side and above. For this reason, it is essential that all cabinets/units are fixed to the ground or wall.
Load-bearing capacity of the niche floor
To ensure the safe installation of the refrigeration appliance and to guarantee its correct functioning, the floor of the niche where the appliance is to be installed must be smooth and even.
It must be made from strong, rigid material.
Because the refrigeration appliance is extremely heavy when fully loaded, it is essential that the floor it stands on is able to bear its weight. If necessary, seek the advice of an architect or construction expert.
When fully loaded, the weight of the refrigeration appliance is approx.:
F 2411 Vi 261 kg
F 28x1 Vi 368 kg
F 29x1 Vi 426 kg
Ventilation
⚠️ Risk of fire and damage due to insufficient ventilation.
If the refrigeration appliance is not ventilated sufficiently, the compressor will run more frequently and for longer periods.
This will result in increased energy consumption and a higher operating temperature for the compressor. This may, in turn, cause damage to the compressor.
Please ensure that there is adequate ventilation around the refrigeration appliance.
It is essential to observe the required ventilation gaps. The ventilation gaps must not be covered or blocked in any way.
Door hinging
⚠️ Risk of damage and injury when changing the door hinges.
Changing the door hinges single-handedly can cause damage to the appliance and injury.
The refrigeration appliance is supplied with fixed hinges. Under no circumstances should you attempt to change the door hinges yourself.
If you need to change the door hinges to the other side, please contact the Miele Customer Service Department.
Side-by-side
This appliance can be installed side-by-side with another refrigeration appliance. The following overview will show you which side-by-side installation options you have with your refrigeration appliance.
Depending on the installation situation, you will need the side-by-side installation kit for side-by-side installation (see “Accessories – Optional accessories”).
Instructions for installing refrigeration appliances side-by-side can be found in the side-by-side installation kit installation instructions.
... with partition wall
The wall between the side-by-side refrigeration appliances must be at least 16 mm thick.

If the door hinges of the refrigeration appliances are next to each other, you must take into account the thickness of the furniture fronts and door handles so that the appliance doors do not collide and become damaged if they are opened at the same time.
The refrigeration appliances are secured individually in their installation niche using the supplied installation material.
If the partition wall a is narrower than 160 mm, you will need the side panel heater from the side-by-side installation kit to prevent condensation from forming and any resulting damage.
When planning installation niches, please note that the niche into which the refrigeration appliance with the side panel heater is installed must be 4 mm wider (see “Installation – Building-in dimensions”).
If the partition wall a is thicker than 160 mm, you do not need the side-by-side installation kit, nor the side panel heater.
... without partition wall
If the refrigeration appliances are to be installed next to each other without a partition wall between them, they will need to be joined together with the side-by-side installation kit. In addition, you must install the side panel heater to prevent condensation from forming and any resulting damage.
Specifications for the mains water connection
- Connection to the water supply must comply with the applicable regulations in the country where the appliance is being installed. All appliances and systems used to supply water to the refrigeration appliance must also comply with the applicable regulations in the respective country.
- The appliance may only be connected to the mains water supply by suitably qualified persons.
- The quality of the incoming water must conform to the requirements for drinking water in the country where the refrigeration appliance is being used.
- Connect the stainless steel hose of the refrigeration appliance to the fresh water supply and do not connect to a water supply in which the water might stagnate.
- The refrigeration appliance is only suitable for connection to a cold water line.
- The water pressure must be between 200 kPa and 800 kPa (2 and 8 bar).
- A stopcock must be provided between the stainless steel hose and the mains water supply to ensure that the water supply can be cut off if necessary.
- Make sure that the stopcock is still accessible after the refrigeration appliance has been installed.
Building-in dimensions

| A B C | |||
| F 2411 Vi 21 | 34–2164 mm 458 mm | 610 mm + furniture front(19–38 mm) | |
| F 2801 Vi,F 2811 Vi | 2134–2164 mm 762 | mm 610 mm + furniture front(19–38 mm) | |
| F 2901 Vi,F 2911 Vi | 2134–2164 mm 915 | mm 610 mm + furniture front(19–38 mm) |

Side view
Dimensions with appliance door open (opening angle 115°)

| A B* C* D (with a furniture | front of 19 mm) | ||
| F 2411 Vi 525 mm Furniture front(19–38 mm) | Door handle 2 | 37 mm | |
| F 2801 Vi,F 2811 Vi | 829 mm Furniture front(19–38 mm) | Door handle 3 | 63 mm |
| F 2901 Vi,F 2911 Vi | 982 mm Furniture front(19–38 mm) | Door handle 4 | 28 mm |
* The dimensions of the furniture front and the door handle vary depending on the design of the kitchen.
The opening angle of the appliance door must not be limited to 90° because otherwise the freezer baskets and ice cube container cannot be removed.
Dimensions of the furniture front

| A B C | |||
| F 2411 Vi 451 mm 2 | 2029 mm ≥ 102–132 mm | ||
| F 2801 Vi, F 2811 Vi | 756 mm 2029 mm ≥ | 102–132 mm | |
| F 2901 Vi, F 2911 Vi | 908 mm 2029 mm ≥ | 102–132 mm |
Installing the appliance
Before starting ...
It is essential to read these operating and installation instructions carefully before starting to install the refrigeration appliance.
The refrigeration appliance should be installed by a suitably qualified installer in accordance with these operating and installation instructions. Safe operation of the refrigeration appliance is only assured if it has been installed and connected in accordance with these operating and installation instructions.
⚠️ Risk of damage and injury due to the refrigeration appliance tipping over.
This refrigeration appliance is very heavy and can tip forwards when the appliance door is open.
Keep the appliance door shut until the refrigeration appliance has been built in and secured in its niche in accordance with these operating and installation instructions.
Due to its weight and size, the refrigeration appliance must be installed by two people.
Tools required
- Cordless drill
- TX 20 screwdriver
- Hammer drill
- Drill bits in various sizes, depending on materials
- Hammer
- Open spanner
- Ratchet wrench, attachment: socket, 8 mm
- Adhesive tape
- Utility knife
- Pipe wrench
- Spirit level
- Tape measure
- Pencil
Other
- Step ladder
- Sack truck
Weight of the furniture front
Before fitting a furniture front, ensure that the weight of the furniture front does not exceed the maximum permitted weight:
| Refrigeration appli-ance | Max. weight of the furniture front |
| F 1411 Vi 59 kg | |
| F 2801 Vi, F 2811 Vi | 28 kg |
| F 2901 Vi, F 2911 Vi | 34 kg |
⚠️ If the furniture front is too heavy, this can cause damage.
Fitting a furniture front which is heavier than the maximum permitted weight could damage the hinges.
This damage can affect various factors, such as operation of the appliance.
Before fitting a furniture front, ensure that the weight of the furniture front does not exceed the maximum permitted weight.
Aligning the building-in niche
The building-in niche must be carefully aligned using a spirit level before the refrigeration appliance is installed. The niche corners must be at 90° angles to each other, otherwise the furniture front will not sit straight on all 4 corners of the building-in niche.
Checking the installation niche
- Check the installation dimensions (see “Installation – Installation dimensions”). ■ Check the position of the electrical connection. The length of the electrical connection cable is 3 m.
The electrical socket must not be concealed behind the appliance and must be easily accessible in an emergency.
■ Check the position of the fresh water connection. The available length of the stainless steel hose is approx. 2 m.
The stopcock must not be concealed behind the appliance and must be easily accessible in an emergency.
- Check the surroundings for possible collisions (see “Installation – Dimensions with appliance door open”). ■ Only install the refrigeration appliance in stable, solid installation niches, positioned on an even and level floor. ■ Also check the installation niche for the following criteria:
- The side walls of the installation niche must be even.
- The surrounding walls of the installation niche must be at least 16 mm thick.
- The surrounding walls must be securely fixed to the floor or wall.
- Shortened side walls must be at least 100 mm deep.
Before installation
■ Before installation, remove any accessories from the back of the appliance. ■ Check the refrigeration appliance for transport damage.
Do not install a damaged refrigeration appliance.
■ Check that all parts at the back of the appliance are unhindered. ■ To protect the floor during installation, secure an off-cut of flooring or similar material to the floor in front of the installation area.

- Do not remove the installation aids ① from the appliance door. These will be required later for aligning the appliance in the building-in niche.
⚠️ Risk of damage and injury due to the refrigeration appliance tipping over.
As soon as you unscrew the brackets that fix the refrigeration appliance to the pallet, the appliance is no longer secured.
Due to its weight and size, the refrigeration appliance must be installed by two people.

■ Unscrew the fixing brackets ②.
With the help of several people as required, carefully lift the refrigeration appliance from the pallet, starting with the back of the appliance.
⚠️ Risk of damaging the floor from the load.
Moving the refrigeration appliance can cause damage to the floor.
Move the refrigeration appliance carefully on floors that are sensitive to scratching.
As soon as you have set the refrigeration appliance upright, you can move it using the rollers on the bottom.
Preparing the building-in niche
⚠️ Risk of damage and injury due to the refrigeration appliance tipping over.
This refrigeration appliance is very heavy and can tip forwards when the appliance doors are open.
The building-in niche must be secured to the wall behind it and/or above it with several screws. Only this will prevent the refrigeration appliance from tipping over after being installed.
In addition, use the provided anti-tip brackets to secure the building-in niche.
The parts required for installation are supplied with the refrigeration appliance. The plastic bags supplied are marked with letters for easy identification.
■ When performing the individual assembly steps, observe the letters specified and use the matching plastic bag with the required installation equipment.
The anti-tip brackets prevent the refrigeration appliance from tipping.
The anti-tip brackets are also used to fix the building-in niche securely to the surrounding walls.


■ Use 2 anti-tip brackets ③ for each individual refrigeration appliance or 4 anti-tip brackets for each (side-by-side) combination of 2 appliances. ■ Position the anti-tip brackets ③ on the left and right of the building-in niche.
Depending on the subsequent adjustment of the feet, the anti-tip brackets are positioned 2134–2164 mm from the floor of the niche.
Risk of injury and damage due to tipping refrigeration appliance. If the anti-tip brackets are fixed too high up, they cannot be used to secure the refrigeration appliance. The distance between the anti-tip brackets and the refrigeration appliance must not exceed 8 mm.


■ Make sure that the gap between the refrigeration appliance's rear wall and the building-in niche does not exceed 51 mm. ■ Place a wooden wedge behind the anti-tip brackets ③ if necessary. ■ While holding the anti-tip brackets in place, mark the necessary drill holes on the rear wall of the building-in niche.

The accessory pack supplied contains fixing screws for various applications/materials.

Securing to a concrete wall

Securing to a wooden wall

Securing with a wooden wedge
- Secure the building-in niche to the wall behind it and/or above it as required using the anti-tip brackets ③. ■ Connect the refrigeration appliance to the mains water supply (see “Installation – Mains water connection”).
Pushing the refrigeration appliance into the building-in niche
Push the refrigeration appliance into the niche, taking care not to damage the electrical and mains water connections.
If you are installing several refrigeration appliances side by side, now secure the appliances to one another (see the installation instructions for the side-by-side installation kit).
■ To ensure that the refrigeration appliance can then be aligned correctly, the plinth ventilation grille must be removed from the appliance plinth:

- Carefully guide a flat-head screw-driver through the plinth ventilation grille ④ on both sides and use it to push the internal plastic latches outwards to release the plinth ventilation grille. ■ Place the plinth ventilation grille to one side.

■ Affix edge protection ⑤ to the adjacent furniture fronts. - Insert the plug connector at the back of the refrigeration appliance (see “Installation – Electrical connection”). ■ Insert the plug ⑥ into the socket.
The electrical socket must not be concealed behind the appliance and must be easily accessible in an emergency.
Risk of damage due to electrical overload.
If the refrigeration appliance is electrically overloaded, this can cause a short circuit and thus damage your refrigeration appliance.
When you install appliances side by side, each refrigeration appliance must have its own separate electrical socket.
Tip: Secure the power cable to prevent it becoming caught: tie a piece of string to the middle of the cable and as the refrigeration appliance is being pushed into the niche, pull the cable forward underneath the appliance.
■ Carefully push the refrigeration appliance into the niche. If the refrigeration appliance cannot be pushed into the niche (because the floor is uneven, for example), unscrew the rear adjustable feet slightly (see “Installation – Aligning the refrigeration appliance”) and slide the refrigeration appliance into the niche. ■ Remove the edge protection ⑤ from the adjacent furniture fronts.
Aligning the refrigeration appliance
The installation aids ① on the appliance door provide assistance with the alignment of the refrigeration appliance in the building-in niche.
The installation aids are suitable for a furniture front thickness of 19 mm or 38 mm.
■ Align the refrigeration appliance with adjacent furniture fronts as described below.

Furniture front thickness of 19 mm

Furniture front thickness of 38 mm
The adjustable feet at the front and back of the appliance can all be adjusted from the front of the appliance.
Risk of damage due to incorrect feet adjustment.
You may damage the adjustable feet if you use a cordless screwdriver.
Always adjust the front and rear feet by hand.


■ Position the supplied spacers ⑦ on both sides on the markings next to the adjustable feet at the front of the refrigeration appliance.

■ Adjust the rear feet with a ratchet (attachment: socket, 8 mm) or a TX 20 screwdriver ⑧.

■ Adjust the front feet with a ratchet (attachment: socket, 8 mm) or a TX 20 screwdriver ⑨.
Tip: Proceed carefully when adjusting the feet, alternating between the left and right feet.

Place a spirit level across the installation aids ① on the appliance door to check the refrigeration appliance's alignment. ■ Unscrew the adjustable feet ⑧ and ⑨ on both sides at least until the marking on the plinth has reached the specified distance of 32 mm on the spacer ⑦. The standard dimension of 32 mm relates to a niche height of 2134 mm.
It is important to adjust the feet to a height of at least 32 mm so that the ventilation of the refrigeration appliance via the plinth functions correctly.

Risk of damage if the feet are red too much.
The rear adjustable feet can be damaged.
Unscrew the feet only until the marking on the plinth is aligned to a maximum of 62 mm (max. niche height of 2164 mm).
■ Check the alignment of the refrigeration appliance again using the installation aids ① and the spirit level.
Securing the refrigeration appliance in the building-in niche


■ Screw the lugs for the fixing plate ⑩ into the cabinets/units above the appliance.
If it is not possible to secure the refrigeration appliance at the top, it can be attached to the building-in niche with the side fixing plates:

■ Open out the side fixing lugs ⑪.
■ Screw the side fixing lugs ⑪ to the adjacent cabinets/units.
Open the appliance door.

Screw the fixing plate lugs ⑫ at the top and bottom to the cabinets/units adjacent to the appliance.
In a side-by-side combination, only the external panels of the two refrigeration appliances can be secured to the furniture wall.
Preparing to install the furniture fronts
Open the appliance door as far as it will go.

Unscrew the installation aids ① from the appliance door.

Unscrew the angle trims ⑬ from both sides of the appliance door and place the trims and screws to one side – they will be required later.
Close the appliance door.

Measure the gap X between the mounting frame and the upper edge of the adjacent furniture front.

Remove the nuts and washers ⑭ from the threaded bolts ⑮ and place them to one side – they will be required later. Take the mounting frame ⑯ off the appliance door by removing it upwards.

For cassette fronts: always pay attention to the length of the screws when securing the metal strip to the furniture front.

Place the furniture front on a firm surface, with the external side facing downwards (place on a blanket or similar to prevent it from becoming scratched). Mark the distance X - 3 mm on the inner side of the furniture front. Also locate and mark the centre point Y on the furniture front. Position the mounting frame ⑯ according to the markings on the furniture front. Pre-drill the holes.

Screw the mounting frame ⑯ to the furniture front:
Use at least one screw for each retaining point on the mounting frame ⑯.


Secure the mounting frame ⑯ to the top of the furniture front, using 6 to 10 screws depending on the size.
The mounting frame has several different types of holes to take account of a variety of furniture fronts.
When securing the frame, always screw into the strongest part of the furniture front. To do this, select screws which are slightly shorter than the thickness of the furniture front.

■ For cassette fronts: only secure the mounting frame ⑯ to the outer frame with the screws.
■ Screw the appliance handle to the furniture front from the inside if necessary (not for handle-free kitchens).

■ Now insert the angle trims ⑬ on both sides as far as they will go into the provided spaces in the mounting frame ⑯.
Securing and aligning the furniture front

■ Open the appliance door and hang the furniture front on its frame ⑯ onto the threaded bolts ⑮.


■ Press the angle trims ⑬ into the white plastic frame on both sides from the outside and screw them on loosely at first. Spare screws are provided in the plastic bag marked with the letter E.

■ Place the spacers ⑦ on top of the corners of the furniture front on both sides. ■ Close the appliance door and check the distance between the door and adjacent furniture fronts again.

■ Align the depth of the furniture front via the gaps in the angle trims ⑬.

■ Align the height and sides of the furniture front using the threaded bolts ⑮.
■ Close the appliance door and check the distance between the door and adjacent furniture fronts again.

■ Place the washers and nuts ⑭ back in position and tighten the nuts ⑭. The furniture front is now secured.

■ Now tighten the screws in the angle trims ⑬. ■ Open the appliance door. ■ Remove the spacers ⑦ from the furniture front.
Mounting the fixing bracket

The fixing bracket is used to secure the furniture front to the bottom of the appliance door.
Do not mount the fixing bracket until the refrigeration appliance (or side-by-side combination, if applicable) has been installed and the furniture front has been aligned.
Open the appliance door as far as it will go.

Slide the fixing bracket ⑰ sideways onto the screw at the bottom of the appliance door.


Screw the fixing bracket ⑰ securely to the furniture front.
Installation

Tighten the screw at the bottom of the appliance door.

- Click the cover ⑱ onto the fixing bracket.

Fit the cover ⑱ over the fixing bracket ⑰.
Securing the covers
Before the cover ⑲ can be installed in the gap above the refrigeration appliance, it must be assembled as follows:

Insert the two parts of the cover into one another.

Cover viewed from the side

Place the assembled cover ⑲ into the gap above the refrigeration appliance so it clicks into place. While doing so, slide both parts of the cover together as required.
Installing the cover in a side-by-side combination
Insert the pin (from the side-by-side installation kit) halfway into the channel in the cover for the left-hand refrigeration appliance. Place the second cover onto the pin and press the two covers together. Click the two covers together into the gap above the refrigeration appliances.

Fit the plastic covers (⑳) on both sides of the appliance door by clicking them into the gap between the appliance door and the furniture front, starting at the bottom and working up to the top.


Secure both sides of the refrigeration appliance using at least 3 clips (②1) for the covers.

Now attach the covers (②) onto the retaining clips (②) on each side. In the case of side-by-side installation, the covers are only required on the outer side.

Fit the cover (②3) onto the light contact switch.
Securing the plinth ventilation grille and plinth panel

Click the plinth ventilation grille (④) onto the bottom of the appliance plinth.

If necessary, cut the plinth panel to the required length and height (cut along the lower edge of the plinth where it touches the floor).
Secure the plinth panel to the bottom of the plinth ventilation grille.
Mains water connection
Information about the mains water connection
⚠️ Risk of injury and appliance damage if appliance is not connected properly.
Failing to connect the appliance properly can result in personal injury and/or material damage.
The appliance may only be connected to the mains water supply by suitably qualified persons.
⚠️ Disconnect the refrigeration appliance from the power supply before connecting it to the water supply.
Close the stopcock before connecting the refrigeration appliance to the water supply.
⚠️ Risk to health and risk of damage due to contaminated water.
The quality of the incoming water must conform to the requirements for drinking water in the country where the refrigeration appliance is being used.
Connect the refrigeration appliance to the drinking water supply.
This refrigeration appliance meets the requirements of IEC 61770 and EN 61770.
Connection to the water supply must comply with the applicable regulations in the country where the appliance is being installed. All appliances and systems used to supply water to the refrigeration appliance must also comply with the applicable regulations in the respective country.
The water connection pressure needs to be between 200 kPa and 800 kPa (2 bar and 8 bar).
⚠️ Risk of damage due to excessive water pressure.
Excessive water pressure in the pipe can cause damage to the refrigeration appliance.
Install a pressure reducing valve if the water pressure in the system exceeds 800 kPa (8 bar).
Do not install the system if the water pressure exceeds 830 kPa (8.3 bar).
Contact a plumbing specialist if you are unsure of your water pressure.
Use fresh water to ensure that the quality of the ice cubes remains high. Connect the stainless steel hose to the fresh water supply and avoid connection to a water supply in which the water might stagnate.
Only use the stainless steel hose supplied. The stainless steel hose must not be shortened, extended or replaced by a different hose.
The stainless steel hose must only be replaced by an original Miele spare part. The food-grade, stainless steel hose is available to order from the Miele webshop, from the Miele Customer Service Department or from your local Miele dealer.
A stopcock must be provided between the stainless steel hose and the mains water supply to ensure that the water supply can be cut off if necessary.
Make sure that the stopcock is still accessible after the refrigeration appliance has been installed.
The stainless steel hose is 2 m long and is already installed on the refrigeration appliance when it is delivered.
Connecting the refrigeration appliance to the water supply
By this time, the installation niche should already have been prepared so that the refrigeration appliance needs only to be pushed into it.
When doing so, make sure that the stainless steel hose is not kinked or damaged.
Position the refrigeration appliance slightly in front of the installation niche so that the stopcock can still be accessed.

The stainless steel hose for the refrigeration appliance ① is ready for connection at the rear of the appliance.

Connect the stainless steel hose ① to the stopcock. Ensure that the threaded union is properly connected and does not leak. Slowly open the water supply stopcock and check the whole water system for leaks. The appliance can now be installed in the niche (see “Installing the refrigeration appliance” in “Installation”).
Electrical connection
The refrigeration appliance must only be connected using the connection cable supplied (AC 220–240 V 50/60 Hz supply). A longer connection cable is available to order from the Miele Customer Service Department.
The fuse rating must be at least 10 A.
This appliance must be connected to a suitable switched socket. The electrical installation must be in compliance with local and national safety regulations (e.g. VDE 0100 in Germany/BS 7671 in the UK).
The socket must not be concealed behind the refrigeration appliance and must be easily accessible so that the appliance can be quickly disconnected from the electrical supply in case of an emergency.
If the socket is no longer accessible after installation, an additional means of disconnection must be provided for all poles. Suitable means of disconnection include switches with an all-pole contact gap of at least 3 mm. These include circuit breakers, fuses and contactors (EN 60335).
The plug and power cable of the refrigeration appliance must not touch the back of the appliance, as they could be damaged by vibrations from the appliance. This could result in a short circuit.
Do not plug in other appliances behind the refrigeration appliance.
Do not connect the appliance to the mains electricity supply by an extension lead. Extension leads do not guarantee the required safety of the refrigeration appliance (e.g. danger of overheating).
Do not connect the refrigeration appliance to a stand-alone inverter such as those used with an autonomous energy source, e.g. solar power.
When the refrigeration appliance is switched on, power surges could result in a safety switch-off. This could damage the electronic module. The refrigeration appliance must not be used with so-called energy-saving devices either. These reduce the amount of energy supplied to the appliance, causing it to overheat.
Connecting the appliance

■ Insert the plug connector into the socket at the back of the refrigeration appliance.
Make sure that the plug connector has clicked into position correctly.
■ Insert the plug of the refrigeration appliance into the socket.
The refrigeration appliance is now connected to the electricity supply.
Saving energy
| Normal energy consumption | Increased energy consumption | |
| Installation / Maintenance | In a ventilated room. In an enclosed, unventilated room. | |
| Protected from direct sunlight. | In direct sunlight. | |
| Not near to a heat source (radiator, oven). | Near to a heat source (radiator, oven). | |
| Where the ideal ambient room temperature is approx. 20 °C. | Where the ambient room temperature is above 25 °C. | |
| Ventilation gaps uncovered and dusted regularly. | Ventilation gaps covered or dusty. | |
| Temperature setting | Freezer section -18 °C The lower the temperature in the appliance, the higher the energy consumption. | |
| Use Drawers and shelves arranged as they were when the appliance was delivered. | ||
| Only open the door when necessary and for as short a time as possible. Store food in an organised way. | Frequent opening of doors for long periods will cause a loss of coldness. The appliance will try to cool down and the compressor will run for longer periods. | |
| Take an insulated cool bag when shopping, and load food in the appliance as soon as possible.Allow hot food and drinks to cool down before placing them in the appliance. | Hot food or food at room temperature raises the temperature inside the appliance. The appliance will try to cool down and the compressor will run for longer periods. | |
| Store food well packaged. The evaporation or condensation of liquids in the freezer zone will cause a loss of coldness. | ||
| Do not over-fill the appliance to allow air to circulate. | Poor air circulation will cause a loss of coldness. | |
F 2411 Vi
① Display ② On/Off switch ③ Shelves in the appliance door ④ Interior lighting ⑤ Shelves ⑥ Ice cube maker ⑦ Ice cube container ⑧ Freezer baskets ⑨ Automatic door opening (Push2open/Pull2open) ⑩ Water filter
F 2801 Vi, F 2811 Vi, F 2901 Vi, F 2911 Vi
① Display ② On/Off switch ③ Shelves in the appliance door ④ Interior lighting ⑤ Shelves ⑥ Ice cube maker ⑦ Ice cube container ⑧ Freezer baskets ⑨ Automatic door opening (Push2open/Pull2open) ⑩ Water filter
Main screen
① SuperFreeze display (only visible when the SuperFreeze function has been switched on) ② Temperature display (target temperature) ③ Sensor control 🔊 for setting the temperature ④ Display for Miele@home connection status (only visible when Miele@home has been set up) ⑤ Sensor control ⚙ for adjusting various settings in Settings mode
Settings mode ⚙️
In Settings mode, you can select the following appliance functions and alter their settings to some extent:
Symbol Function
Language Set
- Display brightness Adjust (darker to brighter)
Colour scheme Set (dark or bright)
Buzzer tones Adjust the volume or switch off the Buzzer tones completely (e.g. for the door alarm)
Keypad tone Adjust the volume or switch off the Keypad tone completely
°F/°C Temperature unit Set (°Fahrenheit or °Celsius)
Keypad lock Switch on or off (see "Selecting additional settings")
Eco mode Switch on or off (see "Selecting additional settings")
☑ Self test The system restarts and is checked for faults or malfunctions (see "Selecting additional settings")
Door assistant (Push2open or Pull2open) Switch on or off (see "Selecting additional settings")
@ Miele@home Set up, deactivate or query WiFi connection status (see "Selecting additional settings")
■* Demo mode Switch off
* (only visible when Demo mode is switched on, see "Selecting additional settings")
Factory default settings Reset to default settings (see "Selecting additional settings")
☐ Dispenser unit Switching the ice cube maker on and off (see "Making ice cubes")
iii Sabbath mode Switch on or off (see "Selecting additional settings")
Water filter display Switch on or off or reset (see "Selecting additional settings")
Symbols in Settings mode 🔊
</> Scroll in Settings mode or select a setting
-/+ Change a setting (e.g. display brightness)
OK Confirm a setting
Exit the menu level
Accessories supplied
Appliance plug
Water filter (IntensiveClear mesh filter)
The IntensiveClear mesh filter, which is already installed in the refrigeration appliance, filters supply water for making ice cubes.
The IntensiveClear mesh filter does not need to be replaced, just cleaned (see “Water filter (IntensiveClear mesh filter)” in “Cleaning and care”).
Optional accessories
A range of useful Miele accessories and care products are available for your appliance.
Multi-purpose microfibre cloth
The microfibre cloth is suitable for removing fingerprints and light soiling from surfaces such as stainless steel, glass, plastic and chrome without the use of chemicals.
Stainless steel front panel
Stainless steel front panels give your refrigeration appliance a high-quality appearance.
Handles and plinth panels are also available in stainless steel look.
Metal filler panel for cassette fronts

If you wish to install two furniture fronts next to each other instead of one furniture front, they will have to be connected with a metal filler panel.
Side-by-side installation kit
To install two or more refrigeration appliances next to one another, you will need the side-by-side installation kit (see “Installation – Side-by-side”).
Hinge pocket
If the door hinging needs to be changed on your refrigeration appliance, the upper plinth ventilation grille must be converted. A new hinge pocket is required in order to do this.
The door hinging must only be changed by the Miele Customer Service Department.
Accessories are available to order via the Miele Webshop, from Miele directly (see back cover for contact details) or from your Miele dealer.
Before using for the first time
Allow the refrigeration appliance to stand for approx. 1 hour before connecting it to the power supply. This will prevent potential functional problems with the refrigeration appliance.
Packaging material
Remove all packaging material from the inside of the appliance.
Always remove all packaging material, including adhesive tape, before switching on the refrigeration appliance. The adhesive tape is difficult to remove from cold surfaces.
Cleaning
Please refer to the relevant instructions in "Cleaning and care".
Clean the inside of the appliance and the accessories.
Choosing the right door assistant (Push2open/Pull2open)
The door assistant helps you to open the appliance door.
You can choose between the two door assistants Push2open and Pull2open (see "Selecting additional settings – Switching on the Door assistant ☐").
The default door assistant is Push2open.
Select the
Pull2open door assistant if your refrigeration appliance has a furniture front with a handle.
■ Select the
Push2open door assistant if your refrigeration appliance has a handle-free furniture front.
Operating the refrigeration appliance
The touch display can be scratched by pointed or sharp objects, e.g. pens.
Only touch the display with your fingers.
If your fingers are cold, the touch display may not react.

The sensor controls underneath the temperature display can be selected directly by touch; the symbols and text in or above the temperature display can only be displayed.
Settings mode

In Settings mode ⚙, you can select different refrigeration appliance functions and alter their settings to some extent (see “Selecting additional settings”).
■ Touch the ⚙ sensor control to open Settings mode. ■ Use the < and > sensor controls to select the function for which you wish to adjust the settings. ■ Confirm your selection with OK. ■ Adjust the settings using either the < and > sensor controls or the + and - sensor controls. ■ Confirm your selection with OK.
The setting with the coloured background is always the selected setting; it can be confirmed directly with OK.
■ Touch the ↔ sensor control if you wish to switch to the previous menu level or terminate the process.
Every touch of the display is confirmed with an audible keypad tone. You can switch off this keypad tone in Settings mode ⚙️.
Starting up for the first time
Open the appliance door.

Switch the refrigeration appliance on by pressing the on/off switch.
The on/off switch is located below the display.
The refrigeration appliance will start to cool and the interior lighting will come on when the appliance door is opened.
Miele will appear in the refrigeration appliance display.
When you switch the refrigeration appliance on for the first time, you will be asked to make the following settings:
- Set the Language (if you accidentally select the wrong Language, return to Settings mode ⚙ and use the ▶ symbol to change the language)
- Set the Temperature unit: °C (degrees Celsius) or °F (degrees Fahrenheit)
- Set up Miele@home:
- Select Continue if you wish to set up Miele@home now (to do this, follow the instructions under “Selecting additional settings – Miele@home”).
- Select Skip if you would prefer to set up Miele@home later.
- Use the < and > sensor controls to select the right setting and select OK to confirm your selection.
- Touch the ⇔ sensor control if you want to return to the previous menu level.
Set-up successful will appear on the display.
- Confirm the first use with OK.
The main screen will appear on the display (see "Appliance description – Main screen").
You cannot terminate the initial commissioning process. The only way to terminate the process is to switch off the refrigeration appliance, though the process will continue when the appliance is switched back on.
Switching the refrigeration appliance on
Open the appliance door. Switch the refrigeration appliance on by pressing the On/Off switch.
The refrigeration appliance will start to cool and the interior lighting will come on when the appliance door is opened.
Miele will appear on the refrigeration appliance display, followed by the main screen:

The message Freezer temperature too high. Max. temperature ° C will appear on the display when the appliance is switched on for the first time or until the selected temperature has been reached in the freezer zone.
An alarm tone will sound.
Confirm the message with OK.
The message will disappear from the display and the alarm tone will stop.
However, the message may reappear on the display after a brief delay.
As soon as the selected temperature has been reached in the freezer zone, the message will disappear completely from the display and the alarm tone will stop.
To enable the temperature to get sufficiently cold inside the refrigeration appliance, allow the appliance to run for a few hours before placing food in it. Do not place food in the freezer zone until it is cold enough there (at least -18 °C).
Switching off the refrigeration appliance
Switch the refrigeration appliance off by pressing the On/Off switch.
The cooling and interior lighting are switched off.
Please note: the refrigeration appliance is not disconnected from the power supply when it is switched off with the On/Off switch.
Switching off for longer periods of time
If the refrigeration appliance is not going to be used for a longer period of time:
■ Switch the refrigeration appliance off. ■ Switch off at the wall and withdraw the plug from the socket, or disconnect the fuse.
⚠️ Risk of damage due to frozen water inlet pipe.
If the water inlet is blocked while the ice maker is still in use, the water inlet pipe can freeze up.
Turn the ice maker off if the water supply is turned off (e.g. while on holiday).
■ Close the stopcock in the water supply line (approx. 3 hours before switching off the refrigeration appliance to avoid the build-up of mould caused by stagnant water). ■ Empty the ice cube container. ■ Clean the refrigeration appliance. ■ Clean the water filter. ■ Leave the door ajar to air the refrigeration appliance and prevent odours from building up inside it.
If, during a long absence, the refrigeration appliance is switched off but not cleaned and the door(s) left shut, there is a risk of mould forming inside the appliance.
It is essential to clean the refrigeration appliance.
In Settings mode ⚙, you can select different refrigeration appliance settings and alter their settings to some extent, allowing you to adjust the appliance to suit your requirements.
Only the functions in Settings mode ⚙ that require further explanation are described below.
The door alarm and other warnings are automatically disabled when the appliance is in Settings mode ⚙️.
The display is unlocked briefly so you can adjust the setting as required. Closing the appliance door will reactivate the sensor lock.
Switching Keypad lock on or off
Switch Keypad lock on if you wish to protect your refrigeration appliance from unwanted temperature changes or other unintentional adjustments in Settings mode.
In Settings mode, use the < and > sensor controls to select Keypad lock and select OK to confirm your selection. Use the < and > sensor controls to switch the sensor lock On or Off and select OK to confirm your selection. The sensor lock will not be activated until you close the appliance door.
Nothing will appear on the display to indicate that the sensor lock is switched on.
The message "Press OK for 6 seconds to unlock" will appear on the display if you select a sensor control while the sensor lock is switched on.
Follow the instructions on the display.
Switching Eco mode on or off
Eco mode is useful when you go on holiday, for example, if you do not wish to switch off the refrigeration appliance completely or do not need a high degree of cooling. Energy consumption in Eco mode is lower than in normal operation.
The freezer zone is regulated to a temperature of -16 °C.
If the SuperFreeze function is switched on, it will be switched off when Eco mode is selected.
In Settings mode, use the < and > sensor controls to select Eco mode and select OK to confirm your selection. Use the < and > sensor controls to switch the Eco mode On or Off and select OK to confirm your selection.
Only the changed temperature on the display indicates that Eco mode is switched on.
Tip: You can also switch off the Eco mode function by directly adjusting the temperature (see "The correct temperature – Setting the temperature").
Health risk caused by decomposing food.
The usability and quality of food may deteriorate if the temperature remains above -18 °C for an extended period.
Only ever switch on the Eco mode function for a limited period.
When switching to the Eco mode function, check that the food in the freezer zone is already properly frozen.
Do not freeze any new food while the Eco mode function is switched on.
Performing a Self test
Perform a Self test if you are concerned that your refrigeration appliance is not working properly and want to check if it is suffering from any problems.
In Settings mode, use the < and > sensor controls to select Self test and select OK to confirm your selection. Touch the sensor control if you wish to terminate the process.
The Self test starts and the refrigeration appliance is checked for any faults or malfunctions.
- The message System restart will appear on the display if the self test does not discover any faults or malfunctions.
- If the self test does discover any faults or malfunctions, they are indicated as error messages on the display.
An alarm will also sound.
If you find the alarm disruptive, you can switch it off in advance by touching the sensor control. Make a note of the error message(s) displayed. Contact the Miele Customer Service Department and inform them of the error message(s) on the display. Confirm the message with OK.
System restart will appear on the display.
The refrigeration appliance briefly switches off and then back on automatically.
Self test completed will appear on the display.
Confirm the message with OK.
The main screen will appear on the display again.
Switching on the Door assistant
You can choose between the two door assistants: Push2open and Pull2open. The default door assistant is Push2open.
The Push2open door assistant is suitable for furniture fronts without handles. The appliance door opens automatically when you gently press against it.
The Pull2open door assistant is suitable for furniture fronts with handles. The appliance door can be opened easily with little force.

Risk of damage if the appliance is closed prematurely.
When the door assistant is switched on, repeatedly closing the appliance door early can lead to damage or malfunctions.
Refrain from holding onto or closing the appliance door while automatic door opening is still extended. However, if you have closed the appliance door, leave it closed for 5 minutes. Automatic door opening resets itself.
Switching on Push2open
In Settings mode ⚙, use the < and > sensor controls to select Door assistant and select OK to confirm your selection. ■ Use the < and > sensor controls to select Mode and select OK to confirm your selection. ■ Use the < and > sensor controls to select Push2open and select OK to confirm your selection.
■ Touch the ⇔ sensor control to return to the previous menu level.
- Adjusting the intensity
You can also adjust the intensity of the Push2open function. The lower the set intensity, the less force required when you push against the appliance door.
In Settings mode ⚙, use the < and > sensor controls to select Door assistant and select OK to confirm your selection. In Settings mode ⚙, use the < and > sensor controls to select Intensity and select OK to confirm your selection. ■ Use the < and > sensor controls to select the right intensity (Low, Medium, High) and select OK to confirm your selection.
- Adjusting the duration of the Auto-Close function
You can also adjust the duration for how long the appliance door will remain open until it closes automatically.
In Settings mode ⚙, use the < and > sensor controls to select Door assistant and select OK to confirm your selection. In Settings mode ⚙, use the < and > sensor controls to select Auto-Close and select OK to confirm your selection. ■ Use the + and — sensor controls to select the duration (5 to 30 seconds) and touch OK to confirm your selection.
To protect against inadvertent opening: if you do not pull the appliance open, it will close again by itself after a duration defined by you.
Switching on Pull2open
In Settings mode ⚙, use the < and > sensor controls to select Door assistant and select OK to confirm your selection. ■ Use the < and > sensor controls to select Mode and select OK to confirm your selection. ■ Use the < and > sensor controls to select Pull2open and select OK to confirm your selection. ■ Touch the ⇔ sensor control to return to the previous menu level.
- Adjusting the intensity
You can also adjust the intensity of the Pull2open function. The lower the set intensity, the less force required when you pull the appliance door.
In Settings mode ⚙, use the < and > sensor controls to select Door assistant and select OK to confirm your selection. In Settings mode ⚙, use the < and > sensor controls to select Intensity and select OK to confirm your selection. ■ Use the < and > sensor controls to select the right intensity (Low, Medium, High) and select OK to confirm your selection.
Switching off the Door assistant
In Settings mode ⚙, use the < and > sensor controls to select Door assistant and select OK to confirm your selection. ■ Use the < and > sensor controls to select Mode and select OK to confirm your selection. ■ Use the < and > sensor controls to select Off and select OK to confirm your selection. ■ Touch the ⇔ sensor control to return to the previous menu level.
Setting up Miele@home
Your refrigeration appliance is equipped with an integrated WiFi module.
Networking is deactivated at the factory.
To use this feature, you will need:
- A WiFi network
- The Miele@mobile app
- A Miele user account. The user account can be created via the Miele@mobile app.
The Miele@mobile app will guide you as you connect your refrigeration appliance to your home WiFi network.
Once the refrigeration appliance is connected to your WiFi network, you can use the app to carry out the following activities, for example:
- Call up information on the operating status of your refrigeration appliance
- Change the settings on your refrigeration appliance
Connecting your refrigeration appliance to your WiFi network will increase energy consumption, even when the appliance is switched off.
Make sure that the signal of your WiFi network is sufficiently strong in the place where you want to set up your refrigeration appliance.
Availability of the WiFi connection
The WiFi connection shares a frequency range with other appliances (including microwave ovens and remote control toys). This can give rise to sporadic or even complete connection failures. Therefore, the availability of featured functions cannot be guaranteed.
Miele@home availability
The ability to use the Miele@mobile app depends on the availability of the Miele@home service in your country.
The Miele@home service is not available in every country.
For information about availability, please visit www.miele.com.
Miele@mobile App
The Miele@mobile App is available to download free of charge from the Apple App Store® or from the Google Play Store™.


Connecting your refrigeration appliance via the Miele@mobile app
You will also require the following to log in:
- Your WiFi network password
- The password for your refrigeration appliance
Your refrigeration appliance's password is its serial number, which can be found on the data plate.
The data plate can be found in the interior cabinet of the refrigeration appliance.

If your serial number is "78000001", for example, your password will be "78000001".
In Settings mode ⚙, use the < and > sensor controls to select Miele@home and select OK to confirm your selection.
Set up will appear on the display.
■ Confirm your selection with OK. ■ Use the < and > sensor controls to select via the App and select OK to confirm your selection. ■ Open the Miele@mobile app and follow the instructions in the app.
As soon as your refrigeration appliance has been integrated into your WiFi network, the message Connection successful will appear on your refrigeration appliance's display. ■ Confirm the process with OK again. If the WiFi connection is active, ⚙ will appear on the display.
Connecting your refrigeration appliance via WPS
Your router must be equipped with the WPS function for this connection option.
In Settings mode ⚙, use the < and > sensor controls to select Miele@home and select OK to confirm your selection.
Set up will appear on the display.
■ Confirm your selection with OK. ■ Use the < and > sensor controls to select via WPS and select OK to confirm your selection. ■ Now follow the instructions on the display. ■ Confirm the process with OK.
To be able to use the Miele@home functions, you also have to register your refrigeration appliance in the app.
■ As soon as your refrigeration appliance has been integrated into your home network via WPS, the message Connection successful will appear on the display. ■ Confirm the process with OK again. If the WiFi connection is active, ⓤ will appear on the display.
Deactivating Miele@home
In Settings mode ⚙, use the < and > sensor controls to select Miele@home and select OK to confirm your selection. ■ Use the < and > sensor controls to select Deactivate and select OK to confirm your selection.
Deactivation successful will appear on the display.
■ Confirm the message with OK.
Your refrigeration appliance is now disconnected from your WiFi network.
The ⚫ symbol will go out on the display.
Activating Miele@home
If you have already activated Miele@home and then disconnected the connection, you will need to reactivate the connection.
In Settings mode ⚙, use the < and > sensor controls to select Miele@home and select OK to confirm your selection. ■ Use the < and > sensor controls to select Activate and select OK to confirm your selection.
Activation successful will appear on the display.
■ Confirm the message with OK.
If the WiFi connection is active, ⚙ will appear on the display.
Checking the WiFi connection status
In Settings mode ⚙, use the < and > sensor controls to select Miele@home and select OK to confirm your selection. ■ Use the < and > sensor controls to select Connection status and select OK to confirm your selection.
Information about the WiFi connection status will then appear on the display:
- 📋 connected: there is a strong connection
- ✦ connected: there is an average connection
- connected: there is a weak connection
- ✗: disconnected
Setting up Miele@home again
If you have changed your WiFi network, you can set up Miele@home again for your refrigeration appliance.
In Settings mode ⚙, use the < and > sensor controls to select Miele@home and select OK to confirm your selection. ■ Use the < and > sensor controls to select Set up again and select OK to confirm your selection.
Reset configuration? will appear on the display.
■ Use the < and > sensor controls to select Yes or No and select OK to confirm your selection.
Resetting the network configuration
Reset the refrigeration appliance's settings to the default settings when disposing of your refrigeration appliance, selling it or putting a used refrigeration appliance into operation. This will reset the network configuration so that all personal data is deleted from the refrigeration appliance. This will also ensure that a previous owner is no longer able to access the refrigeration appliance.
Reset the settings of the refrigeration appliance as described in the chapter "Resetting the settings to their default settings [icon]".
Switching off the Demo mode
Demo mode allows the refrigeration appliance to be presented in the showroom without the cooling system being switched on. This setting is not needed for domestic use.
If Demo mode has been switched on as a default setting, will show on the display.
In Settings mode ⚙, use the < and > sensor controls to select Demo mode and select OK to confirm your selection.
Press OK for 4 seconds to deactivate will appear on the display.
■ Follow the instructions on the display.
The countdown Demo mode will deactivate in seconds will appear on the display.
Demo mode deactivated. Appliance cooling switched on will appear on the display.
■ Confirm the message with OK.
The main screen will appear on the display again.
Resetting the settings to their default settings 📂
You can reset the refrigeration appliance's settings to their default settings.
Reset the refrigeration appliance's settings to the default settings when disposing of your refrigeration appliance, selling it or putting a used refrigeration appliance into operation. This will reset the network configuration so that all personal data is deleted from the refrigeration appliance. This will also ensure that a previous owner is no longer able to access the refrigeration appliance.
■ In Settings mode ⚙, use the < and > sensor controls to select Factory default settings and select OK to confirm your selection. ■ Use the < and > sensor controls to select Reset and select OK to confirm your selection.
After a brief delay, Settings reset will appear on the display.
■ Confirm the message with OK.
The initial commissioning process restarts (see “Initial commissioning – Starting up for the first time”).
The refrigeration appliance's settings will be reset to the following values:
Function Default setting
Language English
- Display brightness Middle value
(4 of 7 segments)
Colour scheme Dark
Buzzer tones Middle value
(4 of 7 segments)
Keypad tone Middle value
(4 of 7 segments)
°C/°F Temperature unit °Celsius
Keypad lock Switched off
Eco mode Switched off
Door assistant Push2open
@ Miele@home Switched off
Dispenser unit Switched on
Sabbath mode Switched off
Water filter display Switched on
Temperature -18 °C
Switching Sabbath mode on or off
The refrigeration appliance has a Sabbath mode to support the observance of religious customs.
When Sabbath mode is switched on, you cannot make any settings on your refrigeration appliance.
Ensure that the appliance door is properly closed, as visual and audible alarms are switched off in Sabbath mode.
In Settings mode ⚙, use the < and > sensor controls to select Sabbath mode and select OK to confirm your selection. ■ Use the < and > sensor controls to select On or Off and select OK to confirm your selection.
When Sabbath mode is switched on, ü will appear on the display and the display brightness will be reduced (the display does not change when the appliance door is closed).
When Sabbath mode is switched on, the following functions are switched off:
- Door assistant (for furniture fronts without handles, the appliance door will have to be pulled from the bottom or side)
- Lighting
- All acoustic and visual signals
- Temperature display
- The SuperFreeze function (if previously switched on)
- The ice cube maker (if previously switched on)
You can still select:
- The sensor control for Settings mode ⚙ so that Sabbath mode can be switched off.
The Sabbath mode function will switch itself off automatically after approx. 125 hours.
⚠️ Health risk caused by decomposing food.
As any mains outage during Sabbath mode is not indicated, the frozen food may thaw or defrost. This shortens the shelf life of the food. Check the quality of the food.
Check whether the frozen food has started to defrost. If it has, check that the food is safe to use and if it is, then use it as soon as possible or cook it before freezing it again.
Switching on, switching off or resetting the Water filter display
Depending on the quantity of ice cubes produced, the Water filter display will remind you approx. every 6 months that the IntensiveClear mesh filter has to be cleaned. Clean the water filter appears on the display.
See “Water filter (IntensiveClear mesh filter)” in “Cleaning and care” for instructions on how to clean the water filter (IntensiveClear mesh filter).
The first time the mesh filter needs to be cleaned, the display will remind you automatically; the reminder does not need to be switched on separately.
Switching the Water filter display on
If the Water filter display has been switched off, it must be switched on again if required.
In Settings mode, use the < and > sensor controls to select Water filter display and select OK to confirm your selection. Then use the < and > sensor controls to select On and select OK to confirm your selection.
The Water filter display is now switched on.
Switching the Water filter display off
In Settings mode, use the < and > sensor controls to select Water filter display and select OK to confirm your selection. Then use the < and > sensor controls to select Off and select OK to confirm your selection.
The Water filter display has been switched off.
Resetting the Water filter display
After you have cleaned the water filter, you must reset the Water filter display so that it will be displayed automatically again after 6 months.
If you do not reset the display, it appears again and again.
In Settings mode, use the < and > sensor controls to select Water filter display and select OK to confirm your selection. Then use the < and > sensor controls to select Reset and select OK to confirm your selection.
The message "Clean the water filter" will disappear from the display.
The Water filter display is now activated for the next time the water filter requires cleaning.
It is very important to set the correct temperature for storing food in the appliance. Bacteria will cause food which is not stored at the correct temperature to deteriorate rapidly. Temperature influences the growth rate of these bacteria. Reducing the temperature reduces their growth rate.
To freeze fresh food and to store frozen food for long periods, a temperature of -18 °C is required. At this temperature the growth of bacteria is generally halted. As soon as the temperature rises above -10 °C, the bacteria become active in the food again so it cannot be kept as long. For this reason, partially defrosted or defrosted food must not be re-frozen. Food may be re-frozen once it has been cooked, as the high temperatures achieved when cooking destroy most bacteria.
The temperature in the refrigeration appliance will rise:
- The more often the appliance door is opened and the longer it is kept open.
- The more food is stored in it.
- The warmer the food is which is being put into it.
- The higher the ambient temperature surrounding the refrigeration appliance. This refrigeration appliance is designed for use within specific ambient temperatures (climate range). Do not use in ambient temperatures for which it is not designed.
Setting the temperature
Touch the 🔊 sensor control to set the temperature.
The previously set temperature will appear.
Use the + and - sensor controls to set the temperature. Keeping your fingers on the sensor controls changes the temperature continuously. Confirm the temperature setting with OK or wait approx. 8 seconds after the last touch of the sensor control. The temperature will then be automatically adopted.
Tip: The newly set temperature can also be confirmed and adopted by closing the appliance door.
The temperature display always shows the required temperature.
If you have adjusted the temperature, wait for approx. 6 hours if the refrigeration appliance is not very full and for approx. 24 hours if the refrigeration appliance is full before checking the temperature display. It will take this long for the appliance to give an accurate reading.
If, after this time, the temperature is still too high or too low, you will need to adjust it again.
Temperature range
The temperature can be adjusted from -14 °C to -24 °C.
The ambient temperature in the room and the installation location can affect the time it takes for the appliance to reach the lowest temperature.
If the ambient temperature is too high, the appliance may not reach the lowest temperature.
SuperFreeze function
For best results, switch the SuperFreeze function on before putting fresh food into the freezer.
This helps food to freeze quickly and retain its nutrients, vitamins, flavours and appearance.
Exceptions:
- When you place food that is already frozen in the freezer
- When you only freeze up to 2 kg of fresh food daily
Switching on SuperFreeze
SuperFreeze should be turned on 4–6 hours before you place food in the freezer. When you freeze the maximum amount of food the SuperFreeze function should be switched on 24 hours beforehand.
■ Touch the 🔊 sensor control to set the temperature. ■ Touch the ✿ sensor control to switch the SuperFreeze function on.
The ⚙ symbol will be highlighted in colour and the newly set temperature value of -30 °C will appear on the display.
■ Confirm the setting with OK or wait approx. 8 seconds after the last press of the button. The setting will be automatically adopted.
The symbol ✿ will light up on the temperature display.
The refrigeration appliance will now run at maximum power.
Switching off SuperFreeze
Touch the 🔊 sensor control to set the temperature.
The ⚙ symbol will be highlighted in colour and the temperature value of -30 °C will be shown on the display.
Touch the ✿ sensor control to switch the SuperFreeze function off.
The ⚙ symbol will no longer be highlighted in colour and the previous temperature setting will appear again on the display.
Confirm the setting with OK or wait approx. 8 seconds after the last press of the button. The setting will be automatically adopted.
The ⚙ symbol will disappear from the temperature display.
The refrigeration appliance will continue running at normal power.
If you do not turn off the SuperFreeze function, it will turn itself off automatically after approx. 54 hours. The quantity of fresh food placed in the freezer will determine the exact time before the SuperFreeze function turns off. The refrigeration appliance will then run at normal power again.
Tip: To save energy, you should manually switch the SuperFreeze function off once the freezer reaches a constant temperature of -18 °C or colder. Monitor the temperature in the freezer zone.
The appliance has been fitted with a warning system which ensures that the temperature in the freezer cannot rise unnoticed and to avoid energy being wasted if the door is left open.
Temperature alarm
The Freezer temperature too high. Max. temperature °C message will appear on the display if the temperature in the freezer zone becomes too warm. An alarm will also sound.
The temperature display will show the highest temperature that was reached during the time in which the temperature rose.
Audible and visual signals will be activated, for example:
- When the refrigeration appliance is switched on and the temperature in the appliance differs greatly from the set temperature
- If a lot of warm room air enters the freezer when frozen food is being loaded, rearranged or taken out
- When large amounts of food are frozen at once
- When fresh food which is still warm is frozen
- After an extended mains outage
The alarm will be silenced and the message on the display will go out as soon as the reason for the alarm has been resolved.
⚠️ Health risk caused by decomposing food.
If the temperature in the freezer remains above -18 °C for a long time, the frozen food can start to defrost. This will reduce the storage life of the food.
Check whether the frozen food has started to defrost. If it has, check that the food is safe to use and if it is, then use it as soon as possible or cook it before freezing it again.
Switching the temperature alarm off early
Before you switch the temperature alarm off, you must determine the cause and rectify it.
If the alarm disturbs you, it can be turned off early.
■ Touch the OK sensor.
The alarm will stop and the message will disappear from the display.
Door alarm
An alarm will sound if the appliance door has been left open for longer than 2 minutes.
The message Close the door will also appear on the display.
As soon as the appliance door is closed, the alarm tone will stop and the message in the display will go out.
Switching the door alarm off early
If the alarm disturbs you, it can be turned off early.
Touch the OK sensor control.
The alarm will stop and the message will disappear from the display.
After a certain time, the alarm will sound again and the message will reappear on the display until the appliance door has been closed.
Removing or moving the door shelves
Only move or remove the door shelves when they are empty.

Hold the shelf on the frame with both hands and lift it slightly so that it can be lifted with the catches on both sides over the guide. Remove the shelf or place it in the required position with the catches in the guides at the same height again. Make sure that the shelf is straight.
Tip: For the purposes of loading and unloading or cleaning, the baskets in the shelves can be removed from their holders completely.
Removing or moving the shelves

Use both hands to grip the shelf from below and raise it slightly so that it can be lifted with the catches over the guide at the back. Pull the shelf forwards. Remove the shelf or place it in the required position, with the catches in the guide again. Make sure that the shelf is straight.
Removing the shelf above the ice maker

■ Use both hands to grip the front of the shelf from below and press it on both sides until you feel resistance ①.
When pulling out and inserting the shelf, make sure that the side walls are not damaged.
■ Carefully pull the shelf out to the front. ■ To insert it, slide the shelf slowly onto the guide on both sides and then slide it all the way in.
Removing the freezer baskets
■ Open the appliance door as wide as possible.
The opening angle of the appliance door must not be limited to 90° because otherwise the freezer baskets cannot be removed.
■ Pull the freezer basket out as far as it will go.

■ Raise the snap fastening ② on both sides, unclip and carefully lift the basket out. ■ To replace it, pull the telescopic runners ③ out as far as they will go. ■ Place the freezer basket back in again. ■ Slide the basket all the way back in again until it engages in the snap fastening.
Removing the dividing panel (depending on the model)

■ Pull the freezer basket out as far as it will go. ■ To release the holders, use a suitable object to turn the slots in the pegs to a horizontal position (1.). ■ Remove the pegs from the holders (2.). ■ Pull the dividing panel upwards to remove it. ■ To reinsert the dividing panel, place the holders in an upright position and position the dividing panel into the holders so that you hear it click into place. ■ Insert the pegs into the holders and use a suitable object to turn the slots in the pegs into a vertical position. ■ Push the freezer basket all the way back in.
Removing the ice cube container
■ Open the appliance door as far as it will go.
The opening angle of the appliance door must not be limited to 90° because otherwise the upper freezer basket cannot be pulled out as far as it will go.
■ Pull the upper freezer basket out as far as it will go.

■ Tilt the ice cube container ④ forwards and pull it up and out to remove it.
Ice cube production does not stop when the ice cube container has been removed. Ice cubes can fall into the freezer basket underneath. Only remove the ice cube container for the shortest time possible or switch off the ice maker beforehand (see “Switching off the ice maker” in “Making ice cubes”).
Adjusting the interior fittings
■ To replace the ice cube container, pull the upper freezer basket out again as far as it will go. ■ Insert the ice cube container with the rearmost side first, so that it engages. ■ Push the upper freezer basket all the way back in.
Maximum freezing capacity
To ensure that fresh food placed in the freezer freezes through to the core as quickly as possible, the maximum freezing capacity must not be exceeded. The maximum freezing capacity for freezing within a 24-hour period is given on the data plate: “Freezing capacity ....kg/24 hrs”.
The maximum freezing capacity given on the data plate has been calculated according to DIN EN ISO 15502 Standard.
Freezing fresh food
Fresh food should be frozen as quickly as possible. This way the nutritional value of the food, its vitamin content, appearance and taste are not impaired.
Food which takes a long time to freeze will lose more water from its cells, which then shrink. During the defrosting process, only some of this water is re-absorbed by the cells. What this means in practice is that the food loses more moisture. You can see this in the large amount of water that collects around the food when it defrosts.
If food is frozen quickly, the cells have less time to lose moisture, so they shrink less. As there is not so much moisture loss, it is easier for the food to reabsorb it during the defrosting process, and very little water collects around the defrosted food.
Storing frozen food
Never re-freeze partially or fully defrosted food. Defrosted food may only be re-frozen after it has been cooked.
When buying frozen food to store in your freezer, check:
- That the packaging is not damaged
- The use-by date
- The temperature at which the frozen food is being stored in the shop.
The length of time food can be kept is reduced if it has been stored at a temperature warmer than -18 °C.
■ Buy frozen food once you have finished the rest of your shopping and wrap it in newspaper or use a cool bag or cool box to transport it. - Put it into the freezer as soon as possible.
Home freezing
Only freeze fresh food which is in a good condition.
Hints on home freezing
- The following types of food are suitable for freezing: Fresh meat, poultry, game, fish, vegetables, herbs, fresh fruit, dairy products, cakes, leftovers, egg yolks, egg whites and a range of pre-cooked meals.
- The following types of food are not suitable for freezing: Grapes, lettuce, radishes, soured cream, mayonnaise, eggs in their shells, onions, whole raw apples and pears.
- To retain colour, taste, aroma and vitamin C, vegetables should be blanched before they are frozen. To do so place them portion by portion into boiling water for 2–3 minutes. Remove, and plunge into ice-cold water to cool quickly. Drain and pack ready for freezing.
- Lean meat freezes better than fatty meat, and can be stored for considerably longer.
- Separate chops, steaks, cutlets etc. with a sheet of plastic freezer film. This prevents them from freezing together in a block.
- Do not salt or season raw food or blanched vegetables before freezing. Cooked food should only be lightly salted and seasoned. Some herbs intensify the taste of food when frozen.
- Placing hot foods or drinks in the freezer causes food that is already frozen to partially thaw and increases energy consumption. Allow hot foods and drinks to cool down before placing them in the freezer.
Packaging food for freezing
■ Freeze food in portions.
- Suitable packing material
- Plastic freezer bags
- Tubular polythene freezer bags
- Aluminum foil
- Freezer containers
- Unsuitable packing material
- Wrapping paper
- Greaseproof paper
- Cellophane
- Bin bags
- Plastic carrier bags
■ Expel as much air as possible from the packaging. ■ Close the packaging tightly with
- Rubber bands
- Plastic clips
- String
- Freezer tape
Tip: Freezer bags may also be sealed using home heat sealing kits.
Make a note of the contents and the date of freezing on the packaging.
Before placing food in the appliance
When freezing more than 2 kg of fresh food, switch on the SuperFreeze function some time before placing the food in the freezer (see “Super-Freeze”).
This helps create a cold reserve in food which is already stored in the freezer.
Placing food in the freezer
Food to be frozen can be placed anywhere in the freezer zone. Preferably freeze food in the upper freezer basket, as this is the best location for quick and gentle freezing.
Place the food flat in the bottom of the basket so that it freezes through to the core as quickly as possible. Make sure that the packaging and containers are dry to prevent them sticking together when frozen. Slide the freezer baskets in as far as they will go. Please follow the guidelines in the table below regarding recommended weights for the baskets:
| Upper freezer basket | Lower freezer basket | |
| F 2411 Vi 12 kg | 12 kg | |
| F 28x1 Vi 28 kg | 28 kg | |
| F 29x1 Vi 36 kg | 36 kg |
Unfrozen food should not touch frozen food as this will cause the frozen food to begin to thaw.
Storage time for frozen food
The storage life of food is very variable, even at a constant temperature of -18 °C. Decomposition processes also take place in frozen food, albeit at a very reduced speed. For example, fat can become rancid from contact with oxygen in the air. This is why lean meat can be stored approx. twice as long as fatty meat.
The storage times quoted are guide values for the storage life of different food groups in the freezer zone.
| Food group Storage | time(Months) |
| Ice cream 2 to 6 | |
| Bread, baked goods 2 to 6 | |
| Cheese 2 to 4 | |
| Fish, oily 1 to 2 | |
| Fish, lean 1 to 5 | |
| Sausage, ham 1 to 3 | |
| Game, pork 1 to 12 | |
| Poultry, beef 2 to 10 | |
| Vegetables, fruit 6 to 18 | |
| Herbs 6 to 10 |
For standard freezing results, follow the advice on packaging.
By keeping the freezer zone at a constant temperature of -18 °C and taking appropriate hygiene measures you can maximise the storage life of your food and avoid food waste.
Defrosting frozen goods
Never re-freeze partially or fully defrosted food. Defrosted food may only be re-frozen after it has been cooked.
Frozen goods can be defrosted in different ways:
- In a microwave oven
- In an oven using “Fan heat” or the “Defrost” setting
- At room temperature
- In the refrigerator zone (the cold given off by the frozen food helps to keep the other food cold)
- In a steam oven
Flat pieces of partially thawed meat or fish can be placed directly into a hot frying pan.
Meat and poultry (e.g. mince, chicken, fish fillets) should not come into contact with other foods while defrosting. Catch the liquid from defrosting and dispose of it carefully.
Fruit should be defrosted at room temperature in its packaging, or in a covered bowl.
Most vegetables can be cooked while still frozen. Just put straight into boiling water or hot fat. The cooking time is slightly less than that of fresh vegetables due to changes in the cell structure.
Cooling drinks quickly
When cooling drinks quickly in the freezer, make sure bottles are not left in for more than one hour; otherwise they could burst, causing injury and damage.
For the automatic ice cube maker to operate, it must be connected to a mains water supply (see “Mains water connection”).

Risk to health due to contaminated water.
Consuming polluted water can lead to illnesses.
The first 3 batches of ice cubes made after the ice cube maker is started up must not be consumed, as the water will have been used for the initial rinsing of the water supply line.
This applies to the initial commissioning as well as when using the refrigeration appliance again after it has been turned off for a long time.
Switching on the ice maker
Make sure that the ice cube container is correctly located underneath the ice maker. In Settings mode, use the < and > sensor controls to select Dispenser unit and select OK to confirm your selection. Use the < and > sensor controls to select On and select OK to confirm your selection.
Once the freezer zone has cooled down to its set temperature, the ice maker will fill with water.
As soon as the water is frozen, the ice cubes drop out of the ice maker into the ice cube container.
Ice cube production is halted automatically when the ice cube container is full.
The ice maker can make up to approx. 1.3 kg of ice cubes in 24 hours.
The amount of ice cubes made by the appliance depends on the temperature in the freezer zone. The lower the temperature, the more ice cubes are produced.
After you have set up the appliance for the first time, it can take up to 10 hours for the first ice cubes to drop out of the ice maker and collect in the ice cube container.

Risk of damage due to blocking ice maker.
The ice maker could become blocked and, as a result, be damaged.
Do not place any bottles or food into the ice cube container to chill them quickly.
Empty the ice cube container at regular intervals, or if you have not produced any ice for more than a week. This will ensure that you always have fresh ice and the ice cubes will not form a clump.
Ice cube production does not stop when the ice cube container has been removed. Ice cubes can fall into the freezer basket underneath. Only remove the ice cube container for the shortest possible time or switch off the ice maker before removing it.
Switching the ice maker off
The ice maker can be turned off independently of the freezer zone if you do not want to make any ice cubes.
Close the stopcock in the water supply line approx. 3 hours before switching off the refrigeration appliance to avoid the build-up of mould caused by stagnant water. In Settings mode ⚙, use the < and > sensor controls to select Dispenser unit and select OK to confirm your selection. Then use the < and > sensor controls to select Off and select OK to confirm your selection.
The appliance is equipped with a "NoFrost" system. The freezer defrosts automatically.
The moisture generated in the appliance collects on the condenser and is automatically defrosted and dissipated from time to time.
This automatic defrosting system enables the freezer to remain permanently ice-free. Food stored in the freezer will not defrost with this system.
Do not let water get into the electronic unit or the lighting.

Risk of damage due to moisture.
The steam from a steam cleaner can damage plastic and electrical components.
Do not use a steam cleaner to clean the refrigeration appliance.
The data plate located inside the interior cabinet of the refrigeration appliance must not be removed. It contains information which is required in the event of a service call.
Cleaning agents
To avoid damaging the surfaces of your appliance, do not use:
- Cleaning agents containing soda, ammonia, acids or chlorides
- Cleaning agents containing descaling agents
- Abrasive cleaning agents (e.g. scouring powder, scouring liquid or pumice stones)
- Cleaning agents containing solvents
- Stainless steel cleaning agents
- Dishwasher cleaner
- Oven sprays
- Glass cleaning agents
- Hard, abrasive sponges and brushes (e.g. pot scourers)
- Eraser stain remover blocks
- Sharp metal scrapers
Cleaning and conditioning agents used in the interior cabinet of the refrigeration appliance must be food safe.
We recommend using lukewarm water with a little washing-up liquid for cleaning.
Before cleaning the refrigeration appliance
■ Switch the refrigeration appliance off by pressing the On/Off switch. ■ Take any food out of the appliance and store it in a cool place. ■ Take out all other removable parts for cleaning (see “Adjusting the interior fittings”).
Interior cabinet and accessories
Clean the refrigeration appliance regularly, or at least once a month. Remove soiling immediately to prevent it from drying on.
■ Clean the interior cabinet of the refrigeration appliance with a solution of lukewarm water and a little washing-up liquid. Wash all parts by hand. Do not wash in a dishwasher. ■ After cleaning, wipe with clean water and dry with a soft cloth. ■ Leave the door open to air the refrigeration appliance sufficiently for a short while and to prevent odour buildup.
Aluminium frames
The frames for the shelves inside the appliance and the door shelves are partially made from aluminium.
Aluminium is a dynamic material. The reflection and appearance of aluminium changes in different lights and environments and depending on the angle you observe it from. It is also susceptible to scratching.
The aluminium frames may become discoloured or damaged if soiling is left on for too long.
Remove any soiling from the aluminium frame immediately.
Cleaning the door seal
⚠️ Risk of damage as a result of incorrect cleaning.
If you treat the door seal with oils or grease, it can become porous.
Do not use any oils or grease on the door seal.
■ The door seal should be cleaned regularly with clean water and then wiped dry with a cloth.
Cleaning the ventilation gaps
A build-up of dust will increase the energy consumption of the appliance.
The ventilation gaps should be cleaned on a regular basis with a brush or vacuum cleaner (you could use a Miele vacuum cleaner dusting brush, for example).
Cleaning the water filter (IntensiveClear mesh filter)
Depending on the quantity of ice cubes produced, the IntensiveClear mesh filter must be cleaned approx. every 6 months.
Clean the water filter will appear in the display.
Confirm the message with OK.

Turn the cap of the filter cartridge anti-clockwise until it is in the horizontal position 1. and slide it out of the filter opening 2.

Pull the filter out of the back of the filter cartridge 3.).

Rinse the filter under running luke-warm water. Turn the filter over under the running water to clean it on all sides.

Reinsert the filter into the back of the filter cartridge 4.

Slide the filter cartridge as far as it will go into the filter opening 5., making sure the cap is horizontal.

Turn the cap of the filter cartridge clockwise until it is in the vertical position 6.
Risk of damage caused by water rushing out.
If the filter cartridge is not fitted correctly, there is a risk of water leaking out of the refrigeration appliance.
When fitting the filter cartridge, be sure to turn it as far as the marker.
Once the IntensiveClear mesh filter has been cleaned, the water filter display must be reset using Settings mode on the display (see "Resetting the Water filter display" in "Selecting additional settings").
After cleaning
Replace all shelves and accessories in the refrigeration appliance. Switch the refrigeration appliance back on. Switch the SuperFreeze function on for a while so that the freezer zone can cool down quickly. Once the freezer zone has reached the required temperature, place the freezer baskets containing the frozen food back in the freezer zone. Switch the SuperFreeze function off as soon as the temperature in the freezer is a constant -18 °C or colder.
The refrigeration appliance is supplied with a water filter (IntensiveClear mesh filter) that filters mains water for making ice cubes.
The IntensiveClear mesh filter filters suspended particles from the mains water – not bacteria or microbes.
The water filter does not need to be replaced. However, to ensure the highest quality of the ice cubes, it is essential to clean the water filter regularly.
After inserting a new water filter, dispose of all ice cubes produced in the next 24 hours following the change.
Depending on the quantity of ice cubes produced, the IntensiveClear mesh filter must be cleaned approx. every 6 months.
Clean the water filter appears on the display.
- Clean the IntensiveClear mesh filter (see “Cleaning the water filter (IntensiveClear mesh filter)”, in “Cleaning and care”).
Many malfunctions and faults that can occur in daily operation can be easily remedied. Time and money will be saved because a service call will not be needed.
The following guide may help you to find the reason for a malfunction or a fault, and to correct it.
| To prevent unnecessary loss of temperature it is advisable not to open the door while waiting for the appliance to be serviced. |
| Problem Cause and remedy | |
| If you are concerned that your refrigeration appliance is not working properly, you can perform a Self test. Your refrigeration appliance will be checked for any faults or malfunctions. | Any errors identified during the self test are shown on the display.■ Perform a self test (see “Selecting additional settings – Performing a Self test ☑”).■ If necessary, contact the Miele Customer Service Department and inform them of the error message(s) on the display. |
| The refrigeration appliance is not getting cold and the interior lighting does not come on when the appliance door is opened. | The refrigeration appliance has not been switched on.■ Switch the refrigeration appliance on. The temperature appears on the display. |
| The plug is not inserted in the socket correctly.■ Insert the plug into the socket. | |
| The mains fuse has tripped. There could be a fault with the refrigeration appliance, the household electrical wiring or another electrical appliance.■ Contact a qualified electrician or the Miele Customer Service Department. | |
| Problem Cause and remedy | |
| The compressor is switching on more frequently and for longer periods of time. The temperature in the refrigeration appliance is too low. | The ventilation gaps in the housing unit have been covered or become too dusty.■ Do not block the ventilation gaps.■ Dust the ventilation gaps regularly. |
| The appliance door has been opened too frequently, or a large amount of fresh food has been placed inside or frozen at the same time.■ Only open the appliance door when necessary and for as short a time as possible.After a while, the temperature will return to normal by itself. | |
| The appliance door is not properly closed.A thick layer of ice may have formed in the freezer zone.■ Close the appliance door.After a while, the temperature will return to normal by itself.If a thick layer of ice has already formed, this will affect cooling and increase energy consumption.■ Defrost the refrigeration appliance and clean it. | |
| The ambient room temperature is too high. The higher the ambient temperature, the longer the compressor has to run.■ See the information in “Location” in “Installation”. | |
| The refrigeration appliance was not properly installed in the niche.■ See the information in “Installation” and “Installing the refrigeration appliance”. | |
| The compressor is switching on more frequently and for longer periods of time. The temperature in the appliance is too low. | The temperature setting is too low.■ Adjust the temperature. |
| A large amount of food is being frozen at once.■ See “Freezing and storing food”. | |
| The Super freeze function is still switched on.■ To save energy, you can switch the Super freeze function off yourself before this time. | |
| The compressor comes on less and less often and for shorter periods of time. The temperature in the refrigeration appliance rises. | This is not a fault. The temperature setting is too high.■ Correct the temperature setting.■ Check the temperature again after 24 hours. |
| The frozen food begins to defrost.The room temperature is too low for this refrigeration appliance.If the room temperature is too low, the compressor will run less frequently. This may cause the freezer zone to become too warm.■ See the information in “Installation” – “Location”.■ Increase the temperature of the room. | |
| The compressor runs continuously. | This is not a fault. To save energy, the compressor runs at a lower speed, but for longer, when less cooling is required. |
| Food has frozen together. | The food packaging was not dry when placed in the freezer.■ Use a blunt instrument, e.g. a spoon handle or plastic scraper, to prise it apart carefully. |
| An alarm sounds. The appliance door has been open for longer than 2 minutes.■ Close the appliance door. | |
| No alarm sounds despite the appliance door being open. | You have switched off the buzzer.■ Switch the buzzer back on using Settings mode ⚙. |
| The Sabbath mode ⚡ function is switched on: the temperature display is dark and the ⚡ symbol is shown in the display.■ You can switch off Sabbath mode at any time (see “Selecting additional settings – Switching Sabbath mode ⚡ on or off”). | |
| Problem Cause and remedy | |
| The appliance door cannot be opened. | The Pull2open door assistant is switched on but the refrigeration appliance has a handle-free furniture front.■ For handle-free furniture fronts, switch on the Push2open door assistant (see “Selecting additional settings – Switching on the Door assistant ☐”). |
| The appliance door cannot be opened when Sabbath mode is switched on. | The Push2open door assistant is switched on at the same time as Sabbath mode.■ When Sabbath mode is switched on, the door assistant is deactivated.■ Pull the appliance door open from below or from the side. |
Display warnings
| Message Cause and remedy | |
| The warning sounds and the message Freezer temperature too high. Max. temperature °C appears on the display. | The temperature in the refrigeration appliance has risen significantly.This could be due to, for example:- The appliance door being opened too often, or being left open-A large amount of food being frozen at once-An extended mains outage■ If you find the alarm disruptive, you can switch it off in advance by touching the OK sensor.The alarm will stop.■ Rectify the cause of the alarm.The alarm will stop and the error message will disappear from the display.The temperature display will show the highest temperature that was reached during the time in which the temperature in the freezer zone rose.■ Depending on the temperature displayed, you should check whether food in the freezer has started to thaw or has defrosted. If it has, it should be used as soon as possible. Defrosted food may only be re-frozen after it has been cooked.■ In the event of a mains outage, check whether there are any ice cubes in the ice cube container and dispose of these. Otherwise, the ice cubes will freeze together and can damage the ice cube container when they expand. |
| The warning sounds and the message Close the door will appear on the display. | The appliance door is open.■ Close the appliance door.■ If you wish to turn the alarm off early, touch the OK sensor on the display.The alarm will stop. |
| The temperature display is dark and the symbol is shown in the display. | The Sabbath mode function is switched on. The interior lighting is switched off and the refrigeration appliance is cooling down.■ You can switch off Sabbath mode at any time (see “Selecting additional settings – Switching Sabbath mode on or off”). |
| F Please call Miele Service appears on the display and an alarm sounds. | There is a fault.■ Make a note of the error message if necessary.■ Call the Miele Customer Service Department.■ To turn the alarm off, touch the symbol.The error message will not disappear from the display until the error has been rectified. |
| The voltage level is too high/low.■ Observe the connection data under “Installation – Electrical connection”.■ Contact the Miele Customer Service Department if necessary.■ To turn the alarm off, touch the symbol.The error message will not disappear from the display until the error has been rectified. | |
| The symbol lights up in the display. The refrigeration appliance does not get cold, although the appliance controls are working. | The Demo mode is switched on. Demo mode allows the refrigeration appliance to be presented in the showroom without the cooling system being switched on. This setting is not needed for domestic use.■ Switch off Demo mode (see “Selecting additional settings – Switching Demo mode off”). |
Problems with the ice cube maker
| Problem Cause and remedy | |
| The ice maker is not producing any ice cubes. | The refrigeration appliance and the ice maker are not switched on.■ Switch the refrigeration appliance and the ice maker on.■ Check whether the water filter is inserted correctly. |
| The mains water connection has not been installed.■ Make sure that the mains water connection has been installed correctly. | |
| The water supply is not open or has not been vented.■ Open the water supply.■ Check whether the water supply has been vented. | |
| There is a kink in the water hose.■ Check the water hose and replace it if necessary. | |
| The temperature in the freezer zone is too high.■ Select a lower temperature. | |
| The appliance door has been opened too frequently, causing the compressor to turn on more often and the ice maker has iced up.■ Only open the appliance door when necessary and for as short a time as possible. | |
| The water connection pressure is too low.■ Check that the water connection is between 200 kPa and 800 kPa (2 bar and 8 bar).■ Check whether an incorrect valve has been installed, making the pressure too low.Remember that it can take up to 10 hours to produce the first ice cubes. | |
| Problem Cause and remedy | |
| The ice maker is only producing small ice cubes. | Several household appliances connected to the mains water connection are in operation, which has reduced the amount of water being taken in.■ Avoid using the dishwasher, washing machine, etc. at the same time. |
| The water filter is clogged.■ Check whether the water filter needs to be cleaned. | |
| The water connection pressure is too low.■ Check that the water connection is between 200 kPa and 800 kPa (2 bar and 8 bar).■ Check whether an incorrect valve has been installed. | |
| The ice maker is producing only a few or deformed ice cubes. | The water filter is clogged.■ Check whether the water filter needs to be cleaned. |
| The water connection pressure is too low.■ Check that the water connection is between 200 kPa and 800 kPa (2 bar and 8 bar). | |
| The temperature in the freezer zone is too high.■ Select a lower temperature. | |
| The ice cubes taste or smell odd. | The ice cube container is in constant use and needs to be cleaned regularly.■ Check whether the ice cube container is dirty and clean it if necessary. |
| The ice cube container is rarely used. Ice cubes that are stored for a long time can absorb the taste and smell of other items.■ Empty and clean the ice cube container if you are not going to use it for a long time. | |
| Unwrapped food is stored in the freezer zone. Ice can absorb the taste and smell of unwrapped food.■ Only store packaged food in the freezer zone. | |
| The water filter is dirty.■ Check whether the water filter needs to be cleaned. | |
Problem solving guide
| Problem Cause and remedy | |
| Water is flowing out of the refrigeration appli-ance. | The water inlet is faulty.■ Close the stopcock immediately.■ Check whether the water line is damaged.■ Contact the Miele Customer Service Department.■ Check whether the water pressure is too high. |
| If the water pressure is too high, this can cause leaks (see “Mains water connection” in ”Installation”).■ Check whether the water pressure is between 200 kPa and 800 kPa (2 bar and 8 bar).■ Check whether an incorrect valve has been in-stalled. |
The interior lighting is not working.
| Problem Cause and remedy | |
| The interior lighting is not working. | The refrigeration appliance has not been switched on.■ Switch the refrigeration appliance on. |
| The Sabbath mode function is switched on: the temperature display is dark and the i j symbol is shown in the display.■ You can switch off Sabbath mode at any time via the Settings mode ⚙. | |
| There is a fault.⚠️ Risk of electric shock due to exposed, live electrical components.When removing the lighting cover, there is a risk of coming into contact with live electrical components.Do not remove the lighting cover. The LED lighting may only be repaired or replaced by the Miele Customer Service Department. | |
| ⚠️ Risk of injury from LED lighting.This lighting corresponds to risk group RG 2. If the cover is defective, there is a danger of eye injury.If the lighting cover is defective, do not look from a close range directly into the lighting with optical instruments (e.g. magnifying glass or similar). | |
| ■ Call the Miele Customer Service Department. | |
Noises
| Normal noises | What causes them |
| Brrrrr ... A humming noise is made by the motor (compressor). This noise can get louder for brief periods when the motor switches on. | |
| Blubb, blubb ... | A gurgling noise can be heard when coolant is circulating through the pipes. |
| Click ... Clickingsounds are made when the thermostat switches the motor on and off. | |
| Sssrrrrr ... Youcan sometimes just hear the sound of the fan inside the appliance. | |
| Crack ... A cracking sound can be heard when materials expand inside the appliance. | |
| Remember that the noise of the compressor and the coolant circulating in the system is unavoidable. | |
| Noises Cause and remedy | |
| Rattling, vibrating | The refrigeration appliance is uneven. Realign the appliance using a spirit level by raising or lowering the adjustable feet underneath the refrigeration appliance or placing something underneath it. |
| The refrigeration appliance is touching another appliance or piece of furniture. Move it away. | |
| Drawers, baskets or shelves are jiggling or are stuck. Check all removable items and refit them correctly. | |
| Bottles or containers are touching each other. Separate them. | |
Contact in the event of a fault
In the event of any faults which you cannot remedy yourself, please contact your Miele dealer or the Miele Customer Service Department.
You can book a Miele Customer Service Department call-out online at www.miele.com/service.
Contact information for the Miele Customer Service Department can be found at the end of this document.
Please quote the model identifier and serial number of your appliance (Fabr./SN/Nr.) when contacting the Miele Customer Service Department. This information can be found on the data plate.
Please note that telephone calls may be monitored and recorded for training purposes and that a call-out charge will be applied to service visits where the problem could have been resolved as described in this booklet.
The data plate can be found inside the appliance.
Warranty
The appliance warranty is valid for 2 years from date of purchase. In the UK, you must activate your cover by calling 0330 160 6640 or registering online at www.miele.co.uk.
For more information on country-specific warranty terms and conditions, please contact Miele Customer Service.
Miele hereby declares that this freezer complies with Directive 2014/53/EU.
The complete text of the EU declaration of conformity is available from one of the following internet addresses:
- Products, Download from www.miele.co.uk
- For service, information, operating instructions etc: go to www.miele.co.uk/domestic/customer-information-385.htm and enter the name of the product or the serial number
Frequency band of the WiFi module 2.4000 GHz – 2.4835 GHz
Maximum transmitting power of the WiFi module < 100 mW
Miele uses their own and third party software which is not subject to any so-called Open Source Licence for the operation and control of the appliance. This software/these software components are protected by copyright. The copyright powers of Miele and third parties have to be respected.
Furthermore, this appliance contains software components which are distributed under Open Source licence conditions. Please refer to the document “Open Source Information and Licenses” for the Open Source components contained therein, together with the corresponding copyright notices, copies of the licence terms valid at the time, and any further information. The liability and warranty provisions of the Open Source licence terms and conditions as stated therein apply only in relation to the respective rights holders.
In particular, the appliance contains software components licenced by the copyright holders under the GNU General Public License, Version 2, or the GNU Lesser General Public License, Version 2.1. For a period of at least 3 years from the date of purchase or delivery of the appliance respectively, Miele offers to provide you or third parties with a machine-readable copy of the source code of the Open Source components contained in the appliance and licenced under the terms of the GNU General Public License, Version 2, or the GNU Lesser General Public License, Version 2.1, on a data carrier (CD-ROM, DVD or USB stick). Please contact us via e-mail (info@miele.com) or the below postal address and state the product name, the serial number and the date of purchase to obtain this source code.
Miele & Cie. KG
Open Source
GTZ/TIM
Please note the limited warranty in favour of the rights holders under the terms of the GNU General Public License, Version 2, and the GNU Lesser General Public License, Version 2.1:
This program is distributed in the hope that it will be useful, but WITHOUT ANY WARRANTY, without even the implied warranty of MERCHANTABILITY of FITNESS FOR A PARTICULAR PURPOSE. See the GNU General Public License and GNU Lesser General Public License for more details.
United Kingdom
Miele Co. Ltd., Fairacres, Marcham Road, Abingdon, Oxon, OX14 1TW
Tel: 0330 160 6600, Internet: www.miele.co.uk/service, E-mail: info@miele.co.uk
Australia
Miele Australia Pty. Ltd.
ACN 005 635 398
ABN 96 005 635 398
1 Gilbert Park Drive
Knoxfield, VIC 3180
Tel: 1300 464 353
Internet: www.miele.com.au
China
Miele (Shanghai) Trading Ltd.
1-3 Floor, No. 82 Shi Men Yi Road
Jing' an District
200040 Shanghai, PRC
Tel: +86 21 6157 3500
Fax: +86 21 6157 3511
E-mail: info@miele.cn,
Miele (Hong Kong) Limited
41/F - 4101, Manhattan Place
23 Wang Tai Road
Kowloon Bay, Hong Kong
Tel: (852) 2610 1025
Fax: (852) 3579 1404
Email:
customerservices@miele.com.hk
Website: www.miele.hk
India
Miele India Pvt. Ltd.
Ground Floor
Copia Corporate Suites
Plot No. 9, Jasola
New Delhi - 110025
Tel: 011-46 900 000
Fax: 011-46 900 001
E-mail: customercare@miele.in
Internet: www.miele.in
Ireland
Miele Ireland Ltd.
2024 Bianconi Avenue
Citywest Business Campus
Dublin 24
Tel: (01) 461 07 10
Fax: (01) 461 07 97
E-mail: info@miele.ie
Internet: www.miele.ie
Malaysia
Miele Sdn Bhd
Suite 12-2, Level 12
Menara Sapura Kencana
Petroleum
Solaris Dutamas No. 1
Jalan Dutamas 1
50480 Kuala Lumpur, Malaysia
Phone: +603-6209-0288
Fax: +603-6205-3768
New Zealand
Miele New Zealand Limited
IRD 98 463 631
8 College Hill
Freemans Bay, Auckland 1011
New Zealand
Tel: 0800 464 353
Internet: www.miele.co.nz
Singapore
Miele Pte. Ltd.
163 Penang Road
#04-03 Winsland House II
Singapore 238463
Tel: +65 6735 1191
Fax: +65 6735 1161
E-Mail: info@miele.com.sg
Internet: www.miele.sg
South Africa
Miele (Pty) Ltd
63 Peter Place, Bryanston 2194
P.O. Box 69434, Bryanston 2021
Tel: (011) 875 9000
Fax: (011) 875 9035
E-mail: info@miele.co.za
Internet: www.miele.co.za
Taiwan
K.E. & Kingstone Co., Ltd.
6th Fl., No. 120, Sec. 2
Jianguo N. Rd.
Taipei, Taiwan
TEL: +886 2 2502-7256
FAX: +886 2 2502-3077
BHIRAJ TOWER at EmQuartier
43rd Floor Unit 4301-4303
689 Sukhumvit Road
North Klongton Sub-District
Vadhana District
Bangkok 10110, Thailand
United Arab Emirates
Miele Appliances Ltd.
Showroom 1
Eiffel 1 Building
Sheikh Zayed Road, Umm Al She
P.O. Box 114782 - Dubai
Tel. +971 4 3044 999
Fax. +971 4 3418 852
800-MIELE (64353)
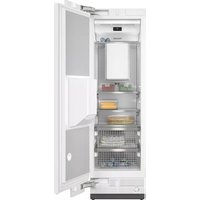


- OPERATING AND INSTALLATION INSTRUCTIONS FREEZER
- WARNING AND SAFETY INSTRUCTIONS
- CARING FOR THE ENVIRONMENT
- INSTALLATION
- LOCATION
- INSTALLATION NOTES
- SPECIFICATIONS FOR THE MAINS WATER CONNECTION
- BUILDING-IN DIMENSIONS
- DIMENSIONS OF THE FURNITURE FRONT
- INSTALLING THE APPLIANCE
- MAINS WATER CONNECTION
- ELECTRICAL CONNECTION
- SAVING ENERGY
- GUIDE TO THE APPLIANCE
- F 2412 VI
- F 2802 VI, F 2812 VI, F 2902 VI, F 2912 VI
- MAIN SCREEN
- SETTINGS MODE ⚙
- ACCESSORIES
- INITIAL COMMISSIONING
- SWITCHING ON AND OFF
- SELECTING ADDITIONAL SETTINGS
- THE CORRECT TEMPERATURE
- USING SUPER FREEZE
- TEMPERATURE AND DOOR ALARM
- ADJUSTING THE INTERIOR FITTINGS
- FREEZING AND STORING FOOD
- CONTENTS
- CORRECT APPLICATION
- SAFETY WITH CHILDREN
- TECHNICAL SAFETY
- CORRECT USE
- ACCESSORIES AND SPARE PARTS
- CLEANING AND CARE
- TRANSPORT
- DISPOSAL OF YOUR OLD APPLIANCE
- DISPOSAL OF THE PACKING MATERIAL
- DISPOSING OF YOUR OLD APPLIANCE
- CLIMATE RANGE
- ADJOINING CABINETS/UNITS
- LOAD-BEARING CAPACITY OF THE NICHE FLOOR
- VENTILATION
- DOOR HINGING
- SIDE-BY-SIDE
- WITH PARTITION WALL
- DIMENSIONS WITH APPLIANCE DOOR OPEN (OPENING ANGLE 115°)
- BEFORE STARTING
- TOOLS REQUIRED
- OTHER
- WEIGHT OF THE FURNITURE FRONT
- CHECKING THE INSTALLATION NICHE
- BEFORE INSTALLATION
- PREPARING THE BUILDING-IN NICHE
- PUSHING THE REFRIGERATION APPLIANCE INTO THE BUILDING-IN NICHE
- ALIGNING THE REFRIGERATION APPLIANCE
- SECURING THE REFRIGERATION APPLIANCE IN THE BUILDING-IN NICHE
- PREPARING TO INSTALL THE FURNITURE FRONTS
- SECURING AND ALIGNING THE FURNITURE FRONT
- MOUNTING THE FIXING BRACKET
- SECURING THE PLINTH VENTILATION GRILLE AND PLINTH PANEL
- INFORMATION ABOUT THE MAINS WATER CONNECTION
- CONNECTING THE REFRIGERATION APPLIANCE TO THE WATER SUPPLY
- CONNECTING THE APPLIANCE
- SETTINGS MODE ⚙️
- SYMBOL FUNCTION
- SYMBOLS IN SETTINGS MODE 🔊
- ACCESSORIES SUPPLIED
- APPLIANCE PLUG
- WATER FILTER (INTENSIVECLEAR MESH FILTER)
- OPTIONAL ACCESSORIES
- MULTI-PURPOSE MICROFIBRE CLOTH
- STAINLESS STEEL FRONT PANEL
- METAL FILLER PANEL FOR CASSETTE FRONTS
- SIDE-BY-SIDE INSTALLATION KIT
- HINGE POCKET
- BEFORE USING FOR THE FIRST TIME
- PACKAGING MATERIAL
- CLEANING
- CHOOSING THE RIGHT DOOR ASSISTANT (PUSH2OPEN/PULL2OPEN)
- OPERATING THE REFRIGERATION APPLIANCE
- SETTINGS MODE
- STARTING UP FOR THE FIRST TIME
- SWITCHING THE REFRIGERATION APPLIANCE ON
- SWITCHING OFF THE REFRIGERATION APPLIANCE
- SWITCHING OFF FOR LONGER PERIODS OF TIME
- SWITCHING KEYPAD LOCK ON OR OFF
- SWITCHING ECO MODE ON OR OFF
- PERFORMING A SELF TEST
- SWITCHING ON THE DOOR ASSISTANT
- SWITCHING ON PUSH2OPEN
- ADJUSTING THE INTENSITY
- ADJUSTING THE DURATION OF THE AUTO-CLOSE FUNCTION
- SWITCHING ON PULL2OPEN
- SWITCHING OFF THE DOOR ASSISTANT
- SETTING UP MIELE@HOME
- AVAILABILITY OF THE WIFI CONNECTION
- MIELE@HOME AVAILABILITY
- MIELE@MOBILE APP
- CONNECTING YOUR REFRIGERATION APPLIANCE VIA THE MIELE@MOBILE APP
- CONNECTING YOUR REFRIGERATION APPLIANCE VIA WPS
- DEACTIVATING MIELE@HOME
- ACTIVATING MIELE@HOME
- CHECKING THE WIFI CONNECTION STATUS
- SETTING UP MIELE@HOME AGAIN
- RESETTING THE NETWORK CONFIGURATION
- SWITCHING OFF THE DEMO MODE
- RESETTING THE SETTINGS TO THEIR DEFAULT SETTINGS 📂
- FUNCTION DEFAULT SETTING
- SWITCHING SABBATH MODE ON OR OFF
- SWITCHING ON, SWITCHING OFF OR RESETTING THE WATER FILTER DISPLAY
- SWITCHING THE WATER FILTER DISPLAY ON
- SWITCHING THE WATER FILTER DISPLAY OFF
- RESETTING THE WATER FILTER DISPLAY
- SETTING THE TEMPERATURE
- TEMPERATURE RANGE
- SUPERFREEZE FUNCTION
- EXCEPTIONS
- SWITCHING ON SUPERFREEZE
- SWITCHING OFF SUPERFREEZE
- TEMPERATURE ALARM
- SWITCHING THE TEMPERATURE ALARM OFF EARLY
- DOOR ALARM
- SWITCHING THE DOOR ALARM OFF EARLY
- REMOVING OR MOVING THE DOOR SHELVES
- REMOVING OR MOVING THE SHELVES
- REMOVING THE SHELF ABOVE THE ICE MAKER
- REMOVING THE FREEZER BASKETS
- REMOVING THE DIVIDING PANEL (DEPENDING ON THE MODEL)
- REMOVING THE ICE CUBE CONTAINER
- MAXIMUM FREEZING CAPACITY
- FREEZING FRESH FOOD
- STORING FROZEN FOOD
- HOME FREEZING
- HINTS ON HOME FREEZING
- PACKAGING FOOD FOR FREEZING
- BEFORE PLACING FOOD IN THE APPLIANCE
- PLACING FOOD IN THE FREEZER
- STORAGE TIME FOR FROZEN FOOD
- DEFROSTING FROZEN GOODS
- COOLING DRINKS QUICKLY
- SWITCHING ON THE ICE MAKER
- SWITCHING THE ICE MAKER OFF
- CLEANING AGENTS
- BEFORE CLEANING THE REFRIGERATION APPLIANCE
- INTERIOR CABINET AND ACCESSORIES
- ALUMINIUM FRAMES
- CLEANING THE DOOR SEAL
- CLEANING THE VENTILATION GAPS
- CLEANING THE WATER FILTER (INTENSIVECLEAR MESH FILTER)
- AFTER CLEANING
- PROBLEM SOLVING GUIDE
- NOISES
- CONTACT IN THE EVENT OF A FAULT
- WARRANTY
- UNITED KINGDOM
- AUSTRALIA
- CHINA
- MIELE (HONG KONG) LIMITED
- INDIA
- IRELAND
- MALAYSIA
- NEW ZEALAND
- SINGAPORE
- SOUTH AFRICA
- TAIWAN
- UNITED ARAB EMIRATES
Brand : MIELE
Model : F 2411 Vi
Category : Freezer