
AMB09US - Mouse TARGUS - Free user manual and instructions
Find the device manual for free AMB09US TARGUS in PDF.


| Product Type | Bluetooth Comfort Laser Mouse |
| Model | AMB09US |
| Brand | Targus |
| Connectivity | Bluetooth |
| Wireless Range | Up to 33 ft (10 m) |
| Tracking Method | Laser |
| Buttons | Left, Right, Scroll Wheel (programmable) |
| Power Source | 2 x AA batteries (included) |
| Battery Life Indicator | 3 LEDs (full, half, low) |
| Power Saving Mode | Automatic after extended inactivity |
| Compatible Operating Systems | Windows 2000, XP, Vista, 7; Mac OS X 10.4 or later |
| Hardware Requirements | Bluetooth-enabled computer |
| Plug and Play | Yes (no additional software for basic use) |
| Scroll Wheel Programming | Downloadable driver from Targus website |
| Pairing Mode | Automatic on power-on (60 seconds discovery) |
| Laser Safety Class | Class 1 (IEC 60825-1) |
| Warranty | 1 year limited |
Frequently Asked Questions - AMB09US TARGUS
User questions about AMB09US TARGUS
0 question about this device. Answer the ones you know or ask your own.
Ask a new question about this device
Download the instructions for your Mouse in PDF format for free! Find your manual AMB09US - TARGUS and take your electronic device back in hand. On this page are published all the documents necessary for the use of your device. AMB09US by TARGUS.
USER MANUAL AMB09US TARGUS
Thank you for your purchase of the Targus Bluetooth Comfort Laser Mouse. This mouse uses Bluetooth technology which provides a seamless connection up to 33 feet (10 m) away. This is a plug and play device so no additional software is required. The advance scroll wheel feature program can be downloaded from the Targus website.
Contents
• Targus Bluetooth Comfort Laser Mouse
- 2 x AA Batteries
- User Guide
System Requirements
Hardware
- Bluetooth-enabled computer
Operating System
- Microsoft Windows® 2000
- Microsoft Windows® XP
- Microsoft Windows Vista®
- Microsoft Windows® 7
• Mac OS® X 10.4 or later
Installing the Batteries
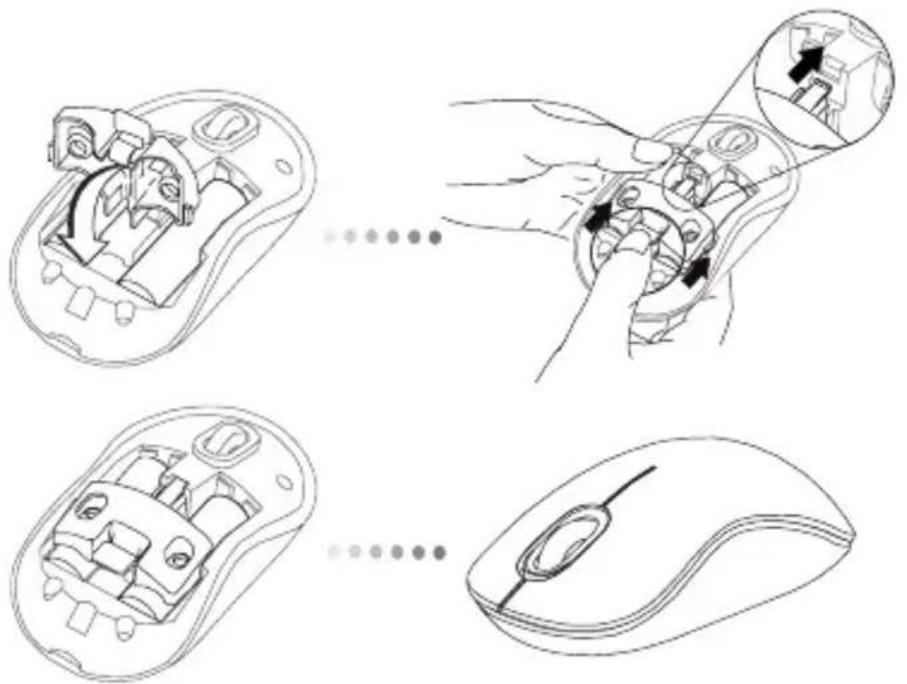
- Remove the battery cover from the top of the mouse by using the notch on the back. Carefully lift the cover up as shown in the diagram.
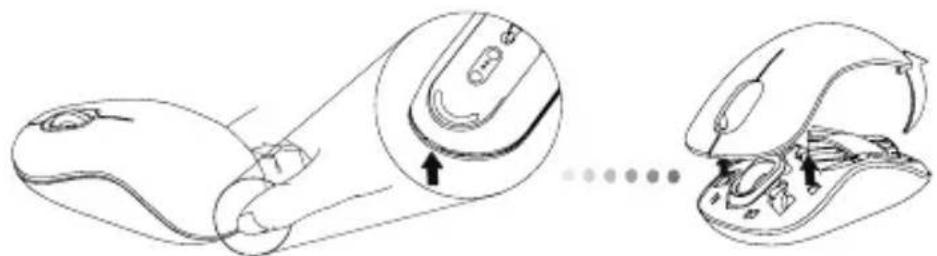
natural_image
Diagram showing a computer mouse being opened into a closed computer mouse, with an inset close-up highlighting the handle (no text or symbols present)- Remove the battery safety clip by squeezing the center of the clip and sliding it back, towards the rear of the mouse. Lift up and rotate the clip out of the way.
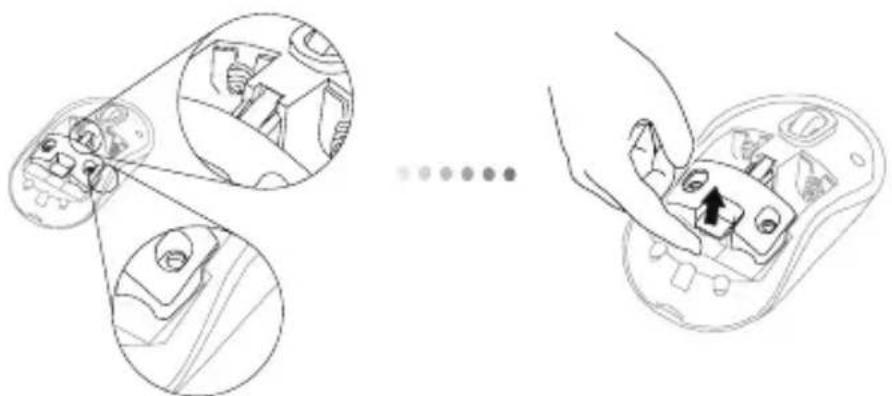
natural_image
Diagram showing a hand holding a device with a close-up of its internal components, alongside a separate close-up view of the device's interior (no text or symbols present)
NOTE: THE BATTERY SAFETY CLIP WILL NEED TO BE IN THE SECURE, LOCKED POSITION BEFORE THE BATTERY COVER CAN BE PUT BACK IN PLACE.
- Slide and lift to remove the battery holder as shown.
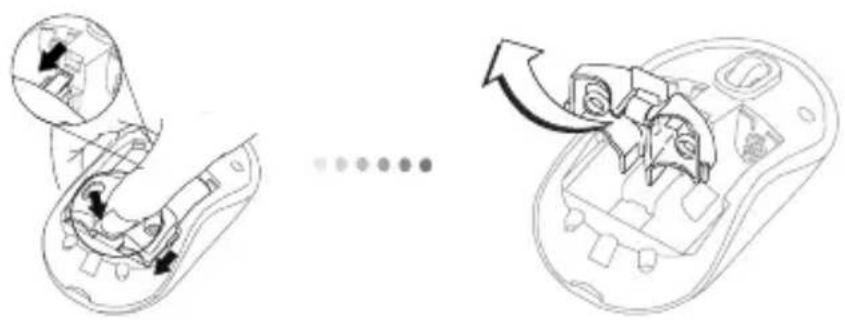
natural_image
Diagram showing a computer mouse with internal components before and after assembly, no text or symbols present- Insert the two AA batteries, making sure that the positive (+) and negative (-) ends of each battery match the polarity indicators inside the battery compartment.
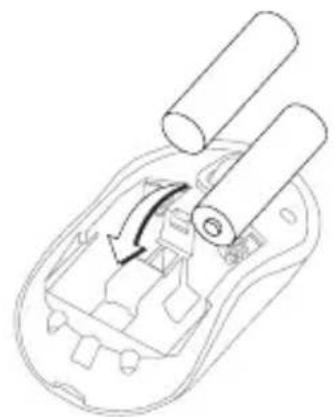
natural_image
Line drawing of a remote control device with two cylindrical components and an arrow indicating rotation (no text or symbols)- Replace the battery safety clip and by sliding it forward until it clicks into place and then replace the battery cover.
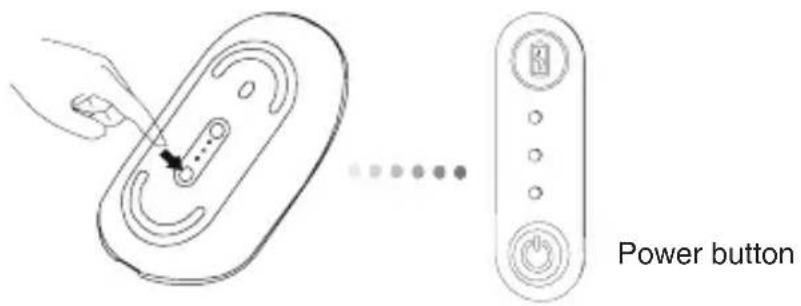
- Turn on the mouse by pressing the power On/Off button on the bottom of the mouse. Hold for 3 seconds and then release.
Power On:
Press and hold the power button for 3 seconds and then release.
The battery life indicator will briefly light up showing the current power level of the batteries.
Power Off:
Press and hold the power button for 3 seconds and then release.
The battery life indicator will briefly light up and then fade out.
Battery Check:
After the mouse is turned on, quickly press and release the power button. The battery life indicator will light up showing the current power level of the batteries.
Initial Mouse Setup
Enable Discovery mode:
The mouse will go into pairing mode automatically after it is powered on. The 1st and 3rd LEDs will flash alternately for 60 seconds; this indicates that the pairing sequence is in operation. Once the connection is established, the 1st and 3rd LED lights will light up steadily for 3 seconds.
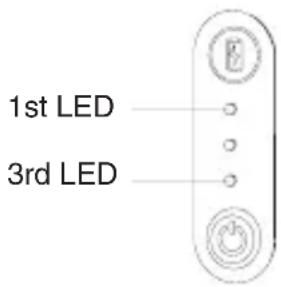
If the connection is not established by the end of 60 seconds, the mouse will go into sleep mode. Click on any mouse button to exit from sleep mode. The pairing sequence will re-start automatically.
Power Saving mode:
After an extended period of time, if the mouse is not used, it will automatically enter power saving mode to conserve power and increase battery life. Click on any mouse button to resume the normal operation. The mouse may take a few seconds to reconnect with your computer.
Battery Life Indicator
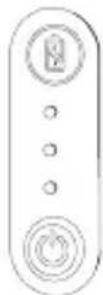
| 3 LEDs lit Full power | |
| 2 LEDs lit Half power | |
| 1 LED lit Low power |

NOTE: WHEN THE FIRST LIGHT IS BLINKING, PLEASE REPLACE THE BATTERIES
Power Management
- To extend the life of your battery, turn off the mouse while travelling or when you're not using it.
Initial Configuration
Before you can begin using your Bluetooth ^® mouse, you will first need to perform some initial setup steps.

NOTE: PLEASE USE THE LATEST BLUETOOTH DEVICE DRIVER. INSTRUCTION SCREENS MIGHT VARY DEPENDING ON THE VERSION OF YOUR BLUETOOTH DEVICE DRIVER.
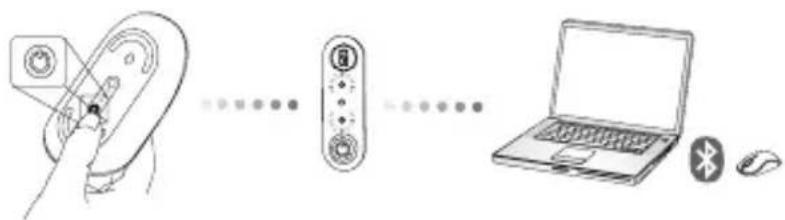
Connecting with Bluetooth Software: WIDCOMM or Microsoft (Windows XP & Windows Vista)
- Go to the Bluetooth Places icon located on your desktop or in the system tray and double click, then click Add a Bluetooth Device.
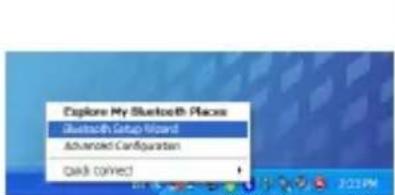
(Windows XP)
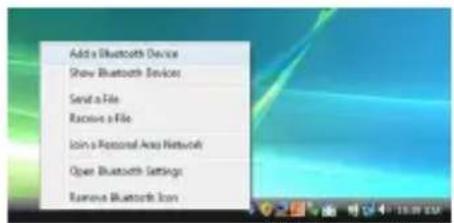
(Windows Vista)
- The Bluetooth Wizard screen will prompt. Please follow the onscreen instructions.
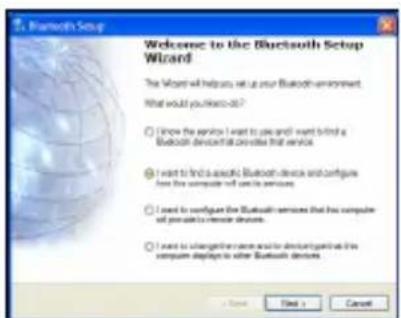
(Windows XP)
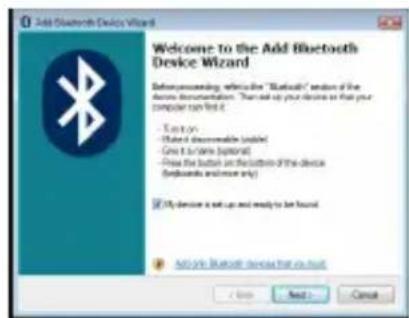
(Windows Vista)
- Power on the mouse and it will automatically go into discovery mode. Click Next to continue pairing and the computer will search for the mouse.
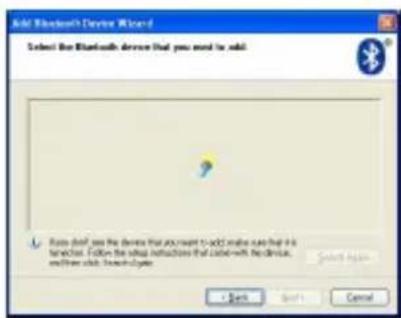
(Windows XP)
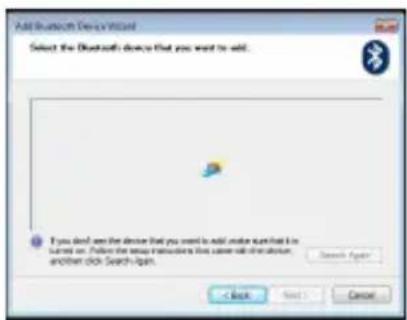
(Windows Vista)
- The confirmation window will appear after the computer finishes detecting the Bluetooth devices. Select the Bluetooth Wireless Mouse and click Next to continue. (There may be one or more different Bluetooth devices detected.) If the mouse is not detected, please make sure the power is on and in discovery mode. Press Search Again to re-pair the device.
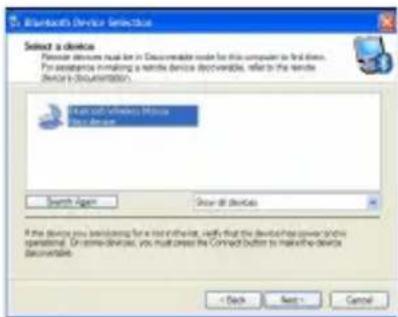
(Windows XP)
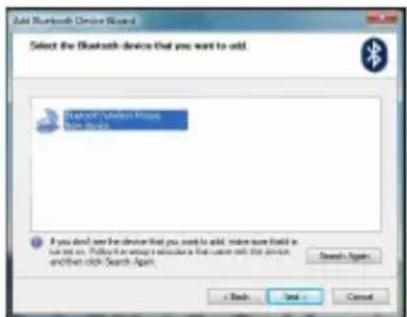
(Windows Vista)
- After selecting the correct device, the computer will finish establishing the connection. Please wait until the setup is completed.
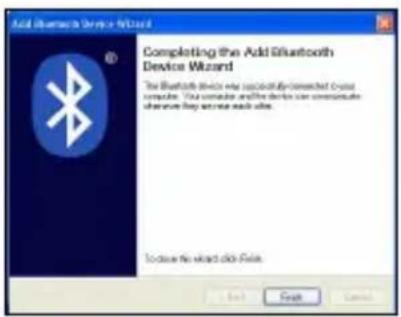
(Windows XP)
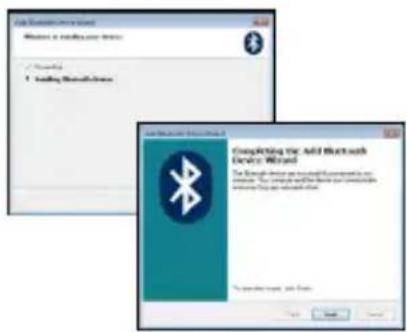
(Windows Vista)
Connecting with Bluetooth Software: TOSHIBA (Windows Vista)
- Double click on the Bluetooth Manager icon in the system tray, and then click Add New Connection.
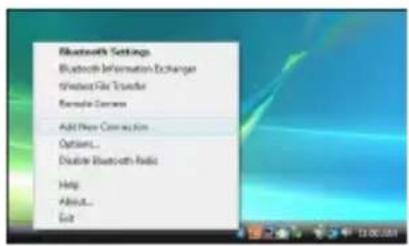
- Power on the mouse and it will automatically go into discovery mode. Click Next to continue pairing and the computer will search for the mouse.
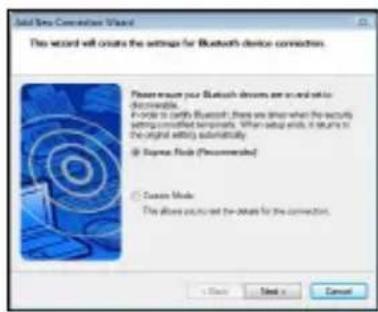
- The computer will now search for the Bluetooth mouse and other Bluetooth devices. Please wait until the search is completed. Choose the device you wish to connect. There may be more than one Bluetooth device detected. Select Bluetooth Wireless Mouse and click Next to continue. If the mouse is not detected, please make sure the mouse is in discovery mode and click Refresh.
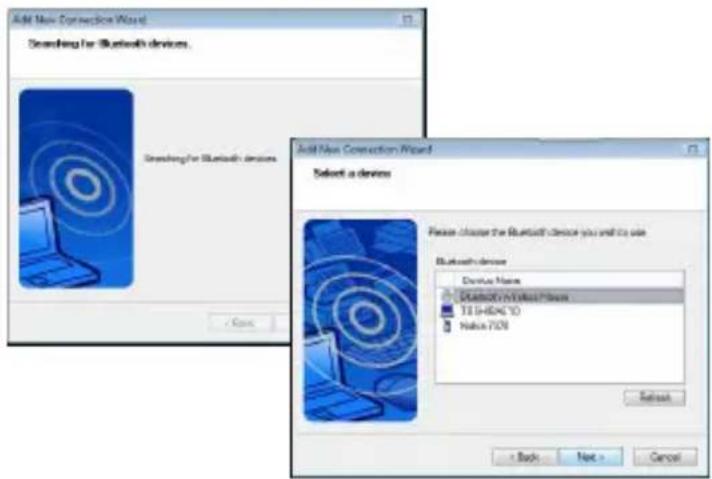
- The computer will begin connecting with the device.
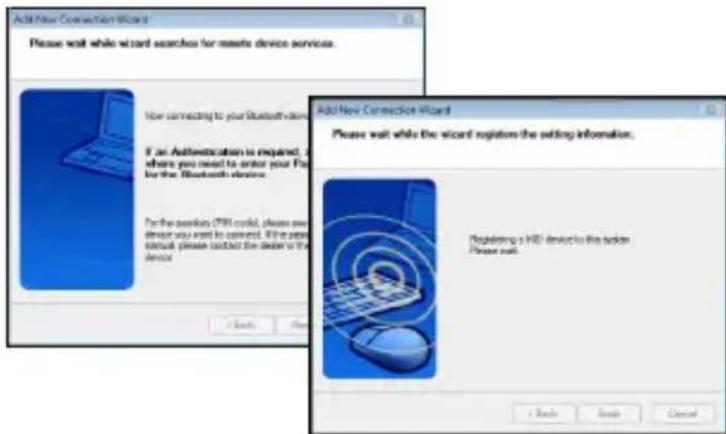
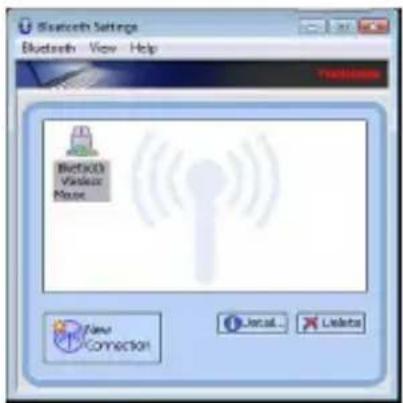
- The connection is established and setup is complete. The device is ready to use. If the connection is not successful, please click Back and search the device again. You can continue to add other Bluetooth devices or close the window.
Bluetooth Software: Mac
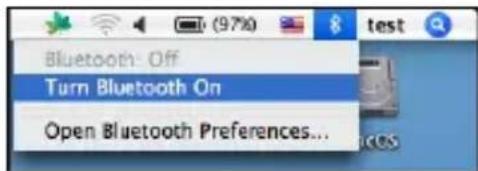
- Go to the Bluetooth icon located on your desktop or in the system bar and click the icon to begin setup. Select "Turn Bluetooth On" to activate the Bluetooth function on your Mac.
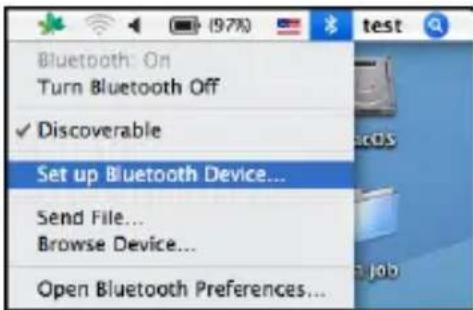
- Scroll down the list and select "Set up Bluetooth Device..."
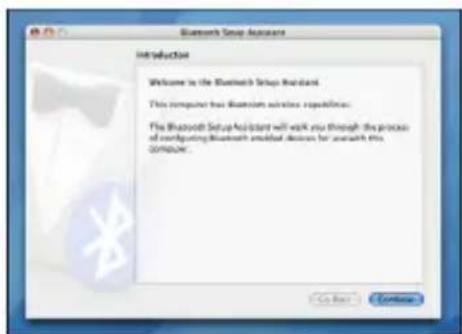
- The Bluetooth Setup Assistant will begin. Please follow the on-screen instructions.
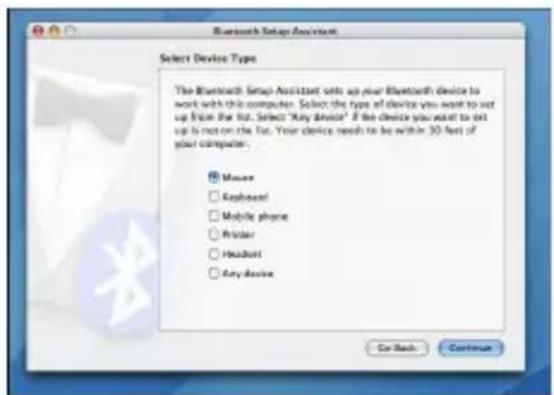
- Select "mouse" and click continue to proceed with setup. Your mouse will need to be in "discovery" mode to connect. Power on the mouse and it will automatically go into discovery mode.
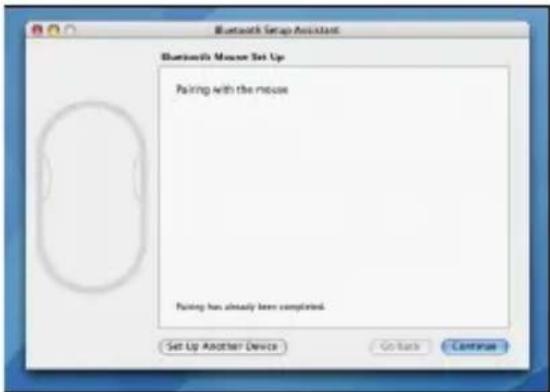
- Your computer will begin to search for the mouse. Once the mouse is found, it will show up in the list. Highlight your mouse and press continue.
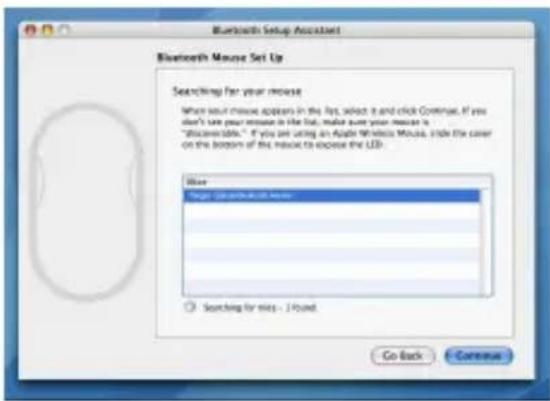
- The Bluetooth mouse will now begin pairing. Click continue to proceed.
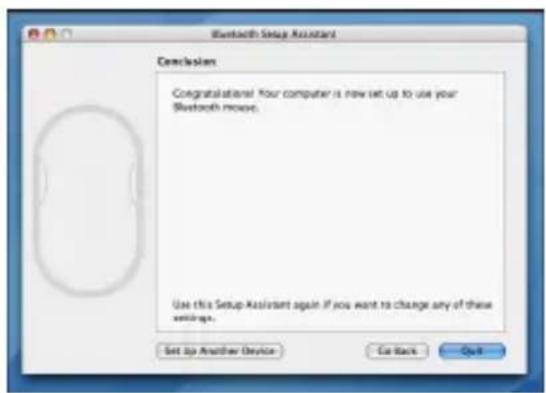
- Congratulations. Your Bluetooth mouse is setup and ready to use. You can choose to setup another device or click Quit to exit setup.
Programming Your Mouse (Windows Only)
To access the advanced scroll wheel features you will need to download and install the software driver. This can be downloaded from the following location:
Visit www.targus.com to download and install the driver.
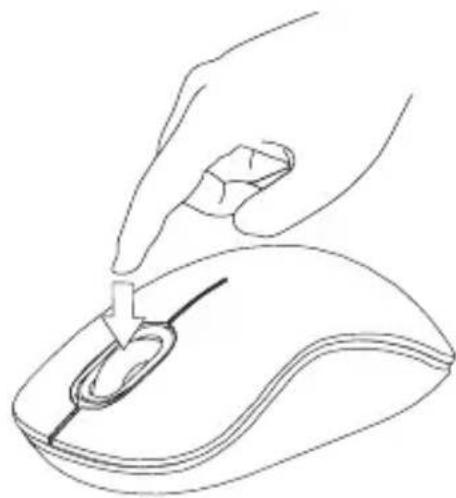
Once installation is complete, open the driver software and select the desired setting for the scroll-wheel button. Close the driver software application and you're ready to go. Activate your selected feature by pressing down on the scroll wheel.
natural_image
Line drawing of a hand holding a computer mouse with a clip, no text or symbols presentTroubleshooting
The mouse is not working.
- Make sure that the polarity of the batteries is correct. The positive (+) and negative (-) ends of each battery must match the positive (+) and negative (-) connections in the battery housing.
- Make sure the batteries are charged. Recharge or replace if necessary.
- Verify that the computer is Bluetooth enabled.
-
Verify that the device drivers are installed:
-
Click Start/ Settings/ Control Panel/ System/ Hardware/ Device Manager
-
Check under "Bluetooth Devices" that a "Soft-Touch Bluetooth" is installed
- Paired devices are always displayed in My Bluetooth Places, even if the mouse is out of range or not powered up.
Technical Support
For technical questions, please visit:
US Internet: www.targus.com/support.asp
Australia Internet: www.targus.com/au
Email: infoaust@targus.com
Telephone: 1800-641-645
New Zealand Telephone: 0800-633-222
Product Registration
Targus recommends that you register your Targus accessory shortly after purchasing it. Go to:
http://www.targus.com/registration.asp
You will need to provide your full name, email address, country of residence and product information.
Warranty
Targus warrants this product to be free from defects in materials and workmanship for one year. If your Targus accessory is found to be defective within that time, we will promptly repair or replace it. This warranty does not cover accidental damage, wear and tear, or consequential or incidental loss. Under no conditions is Targus liable for loss of, or damage to devices; nor loss of, or damage to, programs, records, or data; nor any consequential or incidental damages, even if Targus has been informed of their possibility. This warranty does not affect your statutory rights.
Regulatory Compliance
This device complies with Part 15 of the FCC Rules and Industrial Canada RSS-210.
Operation is subject to the following two conditions: (1) This device may not cause harmful interference, and (2) This device must accept any interference received, including interference that may cause undesired operation.
Compliance with 21 CFR 1040.10 and 1040.11 except for deviations pursuant to Laser Notice No. 50, dated June 24, 2007
This equipment has been tested and found to comply with the limits of a Class B digital device, pursuant to Part 15 of the FCC Rules. These limits are designed to provide reasonable protection against harmful interference in a residential installation. This equipment generates, uses, and can radiate radio frequency energy and if not installed and used in accordance with the instructions, may cause harmful interference to radio communications. However, there is no guarantee that interference will not occur in a particular installation. If this equipment does cause harmful interference to radio or television reception, which can be determined by turning the equipment off and on, the user is encouraged to try to correct the interference by one or more of the following measures:
- Reorient or relocate the receiving antenna;
- Increase the separation between the equipment and receiver;
- Connect the equipment into an outlet on a circuit different from that to which the receiver is connected;
- Consult the dealer or an experienced radio/TV technician for help.
Changes or modifications not authorized by the party responsible for compliance could void the user's authority to operate this product.
Declaration of Conformity
Hereby, Targus, declares that this device is in compliance with the essential requirements and other relevant provisions of Directive 1999/5/EC.
Microsoft, Windows, and Windows Vista are either registered trademarks or trademarks of Microsoft Corporation in the United States and/or other countries. All trademarks and registered trademarks are the property of their respective owners. All rights reserved. Features and specifications are subject to change without notice. © 2009. Targus Group International, Inc. and Targus, Inc., Anaheim, CA 92806 USA

CAUTION
LASER RADIATION. DO NOT STARE INTO THE BEAM OR VIEW DIRECTLY WITH OPTICAL INSTRUMENTS. CLASS I LASER PRODUCT. NEVER POINT A LASER BEAM INTO A PERSON'S EYES OR VIEW A LASER BEAM DIRECTLY, AS PROLONGED EXPOSURE CAN BE HAZARDOUS TO THE EYES. MOMENTARY EXPOSURE FROM A LASER POINTER, SUCH AS AN INADVERTENT SWEEP OF THE LIGHT ACROSS A PERSON'S EYES, MAY CAUSE TEMPORARY FLASH BLINDNESS SIMILAR TO THE EFFECT OF A CAMERA FLASH BULB. ALTHOUGH THIS CONDITION IS TEMPORARY, IT CAN BECOME MORE DANGEROUS IF THE EXPOSED PERSON IS ENGAGED IN A VISION-CRITICAL ACTIVITY SUCH AS DRIVING.

bar
| Category | Value | |---|---| | Category 1 | 0.0 | | Category 2 | 0.0 | | Category 3 | 0.0 | | Category 4 | 0.0 | | Category 5 | 0.0 | | Category 6 | 0.0 | | Category 7 | 0.0 | | Category 8 | 0.0 | | Category 9 | 0.0 | | Category 10 | 0.0 | | Category 11 | 0.0 | | Category 12 | 0.0 | | Category 13 | 0.0 | | Category 14 | 0.0 | | Category 15 | 0.0 | | Category 16 | 0.0 | | Category 17 | 0.0 | | Category 18 | 0.0 | | Category 19 | 0.0 | | Category 20 | 0.0 | | Category 21 | 0.0 | | Category 22 | 0.0 | | Category 23 | 0.0 | | Category 24 | 0.0 | | Category 25 | 0.0 | | Category 26 | 0.0 | | Category 27 | 0.0 | | Category 28 | 0.0 | | Category 29 | 0.0 | | Category 30 | 0.0 | | Category 31 | 0.0 | | Category 32 | 0.0 | | Category 33 | 0.0 | | Category 34 | 0.0 | | Category 35 | 0.0 | | Category 36 | 0.0 | | Category 37 | 0.0 | | Category 38 | 0.0 | | Category 39 | 0.0 | | Category 40 | 0.0 | | Category 41 | 0.0 | | Category 42 | 0.0 | | Category 43 | 0.0 | | Category 44 | 0.0 | | Category 45 | 0.0 | | Category 46 | 0.0 | | Category 47 | 0.0 | | Category 48 | 0.0 | | Category 49 | 0.0 | | Category 50 | 0.0 | | Category 51 | 0.0 | | Category 52 | 0.0 | | Category 53 | 0.0 | | Category 54 | 0.0 | | Category 55 | 0.0 | | Category 56 | 0.0 | | Category 57 | 0.0 | | Category 58 | 0.0 | | Category 59 | 0.0 | | Category 60 | 0.0 | | Category 61 | 0.0 | | Category 62 | 0.0 | | Category 63 | 0.0 | | Category 64 | 0.0 | | Category 65 | 0.0 | | Category 66 | 0.0 | | Category 67 | 0.0 | | Category 68 | 0.0 | | Category 69 | 0.0 | | Category 70 | 0.0 | | Category 71 | 0.0 | | Category 72 | 0.0 | | Category 73 | 0.0 | | Category 74 | 0.0 | | Category 75 | 0.0 | | Category 76 | 0.0 | | Category 77 | 0.0 | | Category 78 | 0.0 | | Category 79 | 0.0 | | Category 80 | 0.0 | | Category 81 | 0.0 | | Category 82 | 0.0 | | Category 83 | 0.0 | | Category 84 | 0.0 | | Category 85 | 0.0 | | Category 86 | 0.0 | | Category 87 | 0.0 | | Category 88 | 0.0 | | Category 89 | 0.0 | | Category 90 | 0.0 | | Category 91 | 0.0 | | Category 92 | 0.0 | | Category 93 | 0.0 | | Category 94 | 0.0 | | Category 95 | 0.0 | | Category 96 | 0.0 | | Category 97 | 0.0 | | Category 98 | 0.0 | | Category 99 | 0.0 | | Total (Total) | -15.5%1 YEAR LIMITED WARRANTY: We pride ourselves on the quality of our products. For complete warranty details and a list of our worldwide offices, please visit www.targus.com. Features and specifications are subject to change without notice. Microsoft, Windows and Windows Vista are registered trademarks or trademarks of Microsoft Corporation in the United States and/or other countries. Mac is a trademark of Apple Inc., registered in the U.S. and other countries. Logitech is a registered trademark of Logitech International in the United States and other countries. The Bluetooth word mark and logos are owned by the Bluetooth SIG, Inc. and any use of such marks by Targus is under license. All trademarks and registered trademarks are the property of their respective owners. ©2009 Targus Group International, Inc.
QD ID : B012764
- Contents
- System Requirements
- Hardware
- Operating System
- Installing the Batteries
- Power On:
- Power Off:
- Battery Check:
- Initial Mouse Setup
- Enable Discovery mode:
- Power Saving mode:
- Battery Life Indicator
- Power Management
- Initial Configuration
- Connecting with Bluetooth Software: WIDCOMM or Microsoft (Windows XP & Windows Vista)
- Connecting with Bluetooth Software: TOSHIBA (Windows Vista)
- Bluetooth Software: Mac
- Programming Your Mouse (Windows Only)
- Troubleshooting
- The mouse is not working.
- Technical Support
- Product Registration
- Warranty
- Regulatory Compliance
- Declaration of Conformity
- CAUTION
Brand : TARGUS
Model : AMB09US
Category : Mouse