
91350 - Baby bed Summer Infant - Free user manual and instructions
Find the device manual for free 91350 Summer Infant in PDF.


User questions about 91350 Summer Infant
0 question about this device. Answer the ones you know or ask your own.
Ask a new question about this device
Download the instructions for your Baby bed in PDF format for free! Find your manual 91350 - Summer Infant and take your electronic device back in hand. On this page are published all the documents necessary for the use of your device. 91350 by Summer Infant.
USER MANUAL 91350 Summer Infant
With the Sleeper fully extended, place between the pillows of the adult bed. The back wall of the unit MUST BE against the headboard of the adult bed (Figure H).
Important Notes:
- When using for co-sleeping, ensure the Sleeper is correctly positioned as recommended in these instructions for use.
- Make sure that adult bedding is securely tucked in at the foot of the bed, so that it does not extend past chest level of the adults in bed.
- Never stack pillows or leave decorative pillows on when using the Sleeper - use only one pillow per adult.
- Discontinue use when infant begins to push up or roll over.

natural_image
Black-and-white photo of a baby crib with straps and a blanket, no visible text or symbols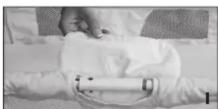
How to fold your By Your Side™ Sleeper
Step I: Uncover center joints (Figure I).
Step 2: Depress release button to disengage lock. Slide locking mechanism in direction of arrow until an audible click is heard (Figure J). Repeat on other side.
Step 3: Fold Sleeper by lifting rounded ends (Figure K).
Step 4: Fold each leg using two hands, firmly press both release buttons (one on each side) simultaneously and pull towards the bottom of the Sleeper (Figure L). Repeat on other leg.
Step 5: Unsnap strap from bottom middle of panel. Pass strap over top of Sleeper, and secure to top middle snap to use in carry mode (Figure M).


Summer Infant stands behind all of its products. If you are not completely satisfied or have any questions, please contact our Consumer Relations Team at 1-800-268-6237 or www.summerinfant.com/contact.
(For Europe call +44 (0)144 250 5000 or customerserviceuk@summerinfant.com)
Summer Infant, Inc.
1275 Park East Drive
Woonsocket, RI 02895 USA
1-800-268-6237
Summer Infant Europe, Ltd.
1st Floor North Wing
Focus 3 | Cleveland Road
Hemel Hempstead, HP2 7BW UK
+44 (0)144 250 5000
©2011 Summer Infant, Inc.
Colors and styles may vary.
Please retain information for
future reference.
MADE IN CHINA.
4/14

91240
Please read the following instructions
and warnings carefully.
Keep this instruction manual for future reference.
Tools required:
Phillips head screwdriver (not included).
For technical support, contact us at 1-800-268-6237
or www.summerinfant.com/contact
For use with children from 0 - 3 Months.
Discontinue use when infant
begins to push up or roll over.
INSTRUCTION MANUAL
ByYour Side™ Sleeper
IMPORTANT – Read the instructions carefully before use and keep them for future reference.
WARNING:
FAILURE TO FOLLOW THESE WARNINGS AND THE INSTRUCTIONS COULD RESULT IN SERIOUS INJURY OR DEATH.
WARNING - Do not leave child unattended.
FALL HAZARD – To help prevent falls, do not use this product when the infant begins to push up on hands and knees or has reached 15 lb, whichever comes first.
SUFFOCATION HAZARD – Infants have suffocated:
- In gaps between an extra pad and side of the sleeper.
- On soft bedding.
NEVER add a mattress, pillow, comforter, or padding.
Use ONLY the pad provided by Summer Infant.
- Do not use this product if the adult mattress is not firm enough to allow the product to lie flat when adults are on the bed.
- To reduce the risk of SIDS, pediatricians recommend healthy infants be placed on their backs to sleep, unless otherwise advised by your physician.
- NEVER use on a water mattress.
- NEVER move, lift or transport sleeper while child is in it.
- NEVER place unit on an elevated surface other than bed.
- NEVER use this product in a motor vehicle.
- NEVER use near stairs.
• NEVER leave child unattended.
• NEVER use product on a stand. - NEVER place the product within 12 inches of the edge of the bed.
- ALWAYS use on flat, stable surfaces.
- ALWAYS keep product away from hazards that may injure your child.
CAUTION:
KEEP SMALL PARTS OUT OF CHILD'S REACH.
See page 4 for contact information to order replacement or additional products.
(CONTINUED NEXT PAGE)
WARNING: (continued)
- DO NOT use if any part is broken, torn or missing.
- DO NOT let other children play unattended near the sleeper.
- This product is only suitable for a child who cannot sit up unaided, roll over and cannot push itself up on its hands and knees. Maximum weight of the child: 15 lb.
- Use ONLY replacement parts supplied or approved by Summer Infant.
- Be aware of the risk of open fire and other source of strong heat, such as electric bar fires, gas fires, etc., in the near vicinity of the sleeper.
- If a sheet is used with the pad, use only the one provided by Summer Infant or one specifically designed to fit the dimension of the sleeper pad.
- Inspect product regularly for signs of damaged and wear.
STRANGULATION HAZARD: Strings can cause strangulation! Do not place items with a string around a child's neck, such as hood strings or pacifier cords. Do not suspend strings over sleeper or attach strings to toys. AVOID CO-SLEEPING HAZARDS:
- NEVER allow infant to sleep in the product while sharing a bed with another toddler or child.
- NEVER allow infant to sleep in the product while sharing a bed with an adult who is under the influence of alcohol or medication. These substances increase the risk of rolling onto the infant and make it harder for the adult to wake up at the baby's distress.
- NEVER allow infant to co-sleep with an obese person.
- NEVER allow infant to sleep in the product while sharing a bed with an adult who has sleep disorders (i.e. sleepwalking, nightmares, fitful sleep).
- NEVER use the product if it DOES NOT LIE LEVEL on the mattress when both parents are on the bed.
- NEVER use the product anywhere else in the bed. Make sure that adult bedding does not cover the product when bedding is fully extended, in order to reduce suffocation risks and overheating.
- NEVER use more than one pillow per adult on each side of the product.
• ALWAYS place the product with the rear wall against the headboard when co-sleeping
⚠ WARNING:
Prevent possible strangulation or entanglement.
Never use sleeper sheet unless it fits securely on sleeper pad.
FEATURES & COMPONENTS:

MAINTENANCE:
Periodically inspect the By Your Side™ Sleeper for missing or damaged parts. Discontinue use if parts are missing or damaged.
TO CLEAN:
Frame and Pad: Wipe clean with a damp cloth. Air dry.
Sheet: Machine wash warm with like colors. Use non-chlorine bleach only if needed.
Tumble dry, low heat.
SET UP:
Step I: Unsnap travel strap, unfold product and locate vibration unit and plastic bag containing plastic feet and screws. Fold Sleeper back into original position.
Step 2: Secure strap to snap on underside of Sleeper (Figure A).
Step 3: Connect detached portion of rear legs by sliding onto attached portion of rear legs while depressing the buttons on attached real legs. Insert fully until legs are locked in place with audible click.
Step 4: Place plastic foot on corner of metal leg. Using a Phillips head screwdriver, install screw tightly into the smaller of the 2 holes (Figure B). Repeat until all 4 feet have been installed on legs.
Note: Please refer to images for correct orientation of feet.
Step 5: Secure each leg by pulling towards ends until they "CLICK" and lock into place (Figure C)
Step 6: Gently push down on the round ends of the Sleeper until frame is parallel with the surface (Figure D).
Step 7: Uncover center joints (Figure E).
Step 8: Gently press the release buttons located on the locking mechanisms on both sides of the Sleeper (Figure F). Keep hands clear from joints. Mechanism will automatically spring towards the locked position. If lock does not engage, manually slide mechanism into the locked position.
Note: Make sure the red portion of the label is covered. Check to see both sides are locked. Only green is visible when properly locked.
Step 9: Cover center joints (Figure G).

- Important Notes:
- How to fold your By Your Side™ Sleeper
- WARNING:
- FAILURE TO FOLLOW THESE WARNINGS AND THE INSTRUCTIONS COULD RESULT IN SERIOUS INJURY OR DEATH.
- SUFFOCATION HAZARD – Infants have suffocated:
- CAUTION:
- KEEP SMALL PARTS OUT OF CHILD'S REACH.
- WARNING: (continued)
- ⚠ WARNING:
- FEATURES & COMPONENTS:
- MAINTENANCE:
- TO CLEAN:
- SET UP:
Brand : Summer Infant
Model : 91350
Category : Baby bed