
DCP501 - Home Theater MOTOROLA - Free user manual and instructions
Find the device manual for free DCP501 MOTOROLA in PDF.


| Product Type | Home Theater System (Digital Convergence Platform) |
| Brand | Motorola |
| Model | DCP501 |
| Category | Home Cinema |
| Dimensions (W x H x D) | 17 x 6.1 x 20 inches (432 x 155 x 508 mm) |
| Weight (without packaging) | 35 lb (15.9 kg) |
| Power Requirements | 120 VAC / 60 Hz |
| Amplifier Output Power (RMS) | 2x100 W (20 Hz – 20 kHz), 5x100 W (1 kHz) |
| Audio Decoders | Dolby Digital, Dolby Pro Logic II, DTS |
| Audio Effects Processor Modes | 6 modes (stadium, concert, theater, etc.) |
| DVD/CD Player | Single-disc tray, supports DVD, audio CD, MP3 CD |
| Tuner | AM/FM with 30 presets |
| Digital Cable Receiver | DCT2000 compatible, analog/digital hybrid |
| Video Inputs (Rear) | Composite + S-Video: VCR1, VCR2, Video1 |
| Video Outputs (Rear) | Composite + S-Video: TV, VCR1, VCR2 |
| Audio Inputs (Rear) | Analog L/R: VCR1, VCR2, Video1, Tape; Digital Coaxial & Optical x1 each |
| Audio Outputs (Rear) | Speaker terminals (front L/R, center, surround L/R); Pre-out for external amp; Subwoofer pre-out |
| Remote Control | Universal (DCP501-R), programmable for TV and VCR |
| Disc Playback Region | Region 1 (North America) |
| Safety Features | Polarized plug, anti-tip, ventilation slots, surge protection, auto shut-off (standby) |
| Cleaning Instructions | Unplug, use damp cloth; no liquid cleaners or aerosols |
| Spare Parts & Repair | Use manufacturer-specified parts; servicing by qualified personnel only |
| General Information | FCC Class B, Industry Canada compliant; Macrovision copy protection |
Frequently Asked Questions - DCP501 MOTOROLA
User questions about DCP501 MOTOROLA
0 question about this device. Answer the ones you know or ask your own.
Ask a new question about this device
Download the instructions for your Home Theater in PDF format for free! Find your manual DCP501 - MOTOROLA and take your electronic device back in hand. On this page are published all the documents necessary for the use of your device. DCP501 by MOTOROLA.
USER MANUAL DCP501 MOTOROLA
natural_image
Black and white photo of a Motorola MP3 audio recording device with CD, dials, and control knobs (no visible text or symbols on main body)
Graphical symbols and supplemental warning marking locations on bottom of terminal.
WARNING
TO PREVENT FIRE OR SHOCK HAZARD, DO NOT EXPOSE THIS APPLIANCE TO RAIN OR MOISTURE.
CAUTION
TO PREVENT ELECTRICAL SHOCK, DO NOT USE THIS (POLARIZED) PLUG WITH AN EXTENSION CORD, RECEPTACLE, OR OTHER OUTLET UNLESS THE BLADES CAN BE FULLY INSERTED TO PREVENT BLADE EXPOSURE.

The lightning flash with arrowhead symbol, within an equilateral triangle, is intended to alert the user to the presence of uninsulated "dangerous voltage" within the product's enclosure that may be of sufficient magnitude to constitute a risk of electric shock to persons.

The exclamation point, within an equilateral triangle, is intended to alert the user to the presence of important operating and maintenance (servicing) instructions in the literature accompanying the appliance.
This installation should be made by a qualified service person and should conform to all local codes.
REPAIRS
If you find the unit in need of repair, contact your cable system operator for repair or replacement.
NOTE TO CATV SYSTEM INSTALLER
This reminder is provided to call the CATV system installer's attention to Article 820-40 of the NEC that provides guidelines for proper grounding and, in particular, specifies that the cable ground shall be connected to the grounding system of the building, as close as possible to the point of cable entry as practical.
EXAMPLE OF ANTENNA GROUNDING

Important Safeguards
1 Read instructions
All the safety and operating instructions should be read before the appliance is operated.
2 Retain instructions
The safety and operating instructions should be retained for future reference.
3 Heed warnings
All warnings on the appliance and in the operating instructions should be adhered to.
4 Follow instructions
All operating and use instructions should be followed.
5 Cleaning
Unplug this product from the wall outlet before cleaning. Do not use liquid cleaners or aerosol cleaners. Use a damp cloth for cleaning.
6 Attachments
Do not use attachments not recommended by the product manufacturer as they may cause hazards.
7 Water and moisture
Do not use this equipment near water; for example, near a bath tub, wash bowl, kitchen sink, or laundry tub, in a wet basement, or near a swimming pool, and the like.
8 Accessories
Do not place this product on an unstable cart, stand, tripod, bracket, or table. The product may fall causing serious injury and serious damage to the appliance. Use only with a cart, stand, tripod, bracket, or table recommended by the manufacturer, or sold with the equipment. Any mounting of the appliance should follow the manufacturer's instructions, and should use a mounting accessory recommended by the manufacturer.
9 Ventilation
Slots and openings in the cabinet are provided for ventilation and to ensure reliable operation of the equipment and to protect it from overheating. The openings should never be blocked by placing the product on a bed, sofa, rug, or similar surface. Equipment should never be placed near or over a radiator or heat register, or in a built-in installation such as a bookcase or rack unless proper ventilation is provided.
10 Power sources
This product should be operated only from the type of power sources indicated on the marking label. If you are not sure of the type of power supplied to your home, consult your local power company. For equipment intended to operate from battery power, or other sources, refer to the operating instructions.
11 Ground or polarization
This equipment may be equipped with a polarized alternating-current line plug (a plug having one blade wider than the other). This plug will fit into the power outlet only one way. This is a safety feature. If you are unable to insert the plug fully into the outlet, try reversing the plug. If the plug should still fail to fit, contact your electrician to replace your obsolete outlet. Do not defeat the safety purpose of the polarized plug.
12 Alternate warnings
This equipment may be equipped with a 3-wire grounding-type plug, a plug having a third (grounding) pin. This pin will only fit into a grounding-type power outlet. This is a safety feature. If you are unable to insert the plug into the outlet, contact your electrician to replace your obsolete outlet. Do not defeat the safety purpose of the grounding-type plug.
13 Power cord protection
Power supply cords should be routed so that they are not likely to be walked on or plinched by Items placed upon or against them, paying particular attention to cords at plugs, convenience receptacles, and the point where they exit from the appliance.
14 Outdoor Antenna Grounding
If an outside antenna or cable system is connected to the equipment, be sure the antenna or cable system is grounded as to provide some protection against voltage surges and built-up static charges. Article 810 of the National Electrical Code, ANSI/NFPA 70, provides information with regard to proper grounding of the mast and supporting structure, grounding of the lead-in wire to an antenna discharge unit, size of grounding conductors, location of antenna-discharge unit, connection to grounding electrodes, and requirements for grounding electrode.
15 Lightning
For added protection for this equipment during a lightning storm, or when it is left unattended and unused for long periods of time, unplug it from the wall outlet and disconnect the antenna or cable system. This will prevent damage to the video product due to lightning and power line surges.
16 Power lines
An outside antenna system should not be located in the vicinity of overhead power lines or where it can fall into such power lines or circuits. When installing an outside antenna system, extreme care should be taken to keep from touching such power lines or circuits, as contact with them may be fatal.
17 Overloading
Do not overload wall outlets and extension cords as this can result in a risk of fire or electrical shock.
Important Safeguards (continued)
18 Object and liquid entry Never push objects of any kind into this equipment through openings as they may touch dangerous voltage points or short-out parts that could result in a fire or electrical shock. Never spill liquid of any kind on the product.
19 Servicing Do not attempt to service this equipment yourself as opening or removing covers may expose you to dangerous voltage or other hazards, refer all servicing to qualified service personnel.
20 Damage requiring service Unplug this equipment from the wall outlet and refer servicing to qualified service personnel under the following conditions:
a When the power supply cord or plug is damaged.
b If the equipment has been exposed to rain or water.
c If liquid has been spilled, or objects have fallen into the equipment.
d If the equipment does not operate normally by following the operating instructions. Adjust only those controls that are covered by the operating Instructions as an improper adjustment of other controls may result in damage and will often require extensive work by a qualified technician to restore the equipment to its normal operation.
e If the equipment has been dropped or cabinet has been damaged.
f When the equipment exhibits a distinct change in performance, indicating a need for service.
21 Replacement parts
When replacement parts are required, be sure the service technician has used replacement parts specified by the manufacturer or have the same characteristics as the original part. Unauthorized substitutions may result in fire, electric shock, or other hazards.
22 Safety check Upon completion of any service or repairs to this video product, ask the service technician to perform safety checks to determine that the product is in proper operational condition.
23 Heat
The product should be situated away from heat sources such as radiators, heat registers, stoves, or other products (including amplifiers) that produce heat.
24 Telephone equipment
Observe the following precautions when installing telephone modem equipment:
a Never install telephone wiring during a lightning storm.
b Never install telephone jacks in a wet location unless the jack is specifically designed for wet locations.
c Never touch uninsulated telephone wires or terminals unless the telephone lines have been disconnected at the network interface.
d Use caution when installing or modifying telephone lines.
25 Battery usage Notwithstanding any information provided by Motorola in this manual regarding the use of batteries, the end user assumes all responsibility and liability to use and dispose of batteries in accordance with all applicable laws, rules and regulations. Motorola will not be liable to anyone for the end user's failure to use and/or dispose of batteries in the proper manner and in accordance with such laws, rules and regulations, or for any defect contained in batteries that may cause injury damage to persons or property.
Regulatory Information
Federal Communications Commission Radio and Television Interface Statement for a Class 'B' Device
This equipment has been tested and found to comply with the limits for a Class B digital device, pursuant to part 15 of the FCC Rules. These limits are designed to provide reasonable protection against harmful interference in the residential installation. This equipment generates, uses and can radiate radio frequency energy and, if not installed and used in accordance with the instructions, may cause harmful interference to radio communications. However, there is no guarantee that interference will not occur in a particular installation.
If the equipment does cause harmful interference to radio or television reception, which can be determined by turning the equipment off and on, the user is encouraged to try to correct the interference by one of the following measures:
■ Re-orient or relocate the receiving antenna.
■ Increase the separation between the equipment and receiver.
- Connect the equipment into an outlet on a circuit different from that to which the receiver is connected.
- Consult the dealer or an experienced radio/TV technician for help.
You may find the following booklet, prepared by the Federal Communication Commission, helpful: How to Identify and Resolve Radio-TV Interference Problems, Stock No. 004-000-0342-4, U.S. Government Printing Office, Washington, DC 20402.
Changes or modification not expressly approved by the party responsible for compliance could void the user's authority to operate the equipment.
Declaration of Conformity
According to 47 CFR, Parts 2 and 15 for Class B Personal Computers and Peripherals; and/or CPU Boards and Power Supplies used with Class B Personal Computers, Motorola, Inc., 6450 Sequence Drive, San Diego, CA 92121, 1-800-225-9446, declares under sole responsibility that the product identifies with 47 CFR Part 2 and 15 of the FCC Rules as a Class B digital device. Each product marketed is identical to the representative unit tested and founded to be compliant with the standards. Records maintained continue to reflect the equipment being produced can be expected to be within the variation accepted, due to quantity production and testing on a statistical basis as required by 47 CFR 2.909. Operation is subject to the following condition: This device must accept any interference received, including interference that may cause undesired operation. The above named party is responsible for ensuring that the equipment complies with the standards of 47 CFR. Paragraphs 15.107 to 15.109.
Canadian Compliance
This product was FCC certified under test conditions that included the use of the supplied cable between system components. To be in compliance with FCC regulation, the user must use this cable and install it properly.
FCC Part 68 Statement
This equipment complies with part 68 of the FCC rules. On the rear panel of this equipment is a label that contains, among other information, the FCC registration number and ringer equivalence number (REN) for the equipment. If requested, this information must be provided to the telephone company.
The REN is used to determine the quantity of devices that may be connected to the telephone line. Excessive RENs on the telephone line may result in the devices not ringing in response to an incoming call. In most, but not all areas, the sum of the RENs should not exceed five (5.0). To be certain of the number of devices that may be connected to the line, as determined by the total RENs, contact the telephone company to determine the maximum REN for the calling area.
This equipment uses the following USOC jack: RJC. An FCC-compliant telephone cord and modular plug is provided with this equipment. This equipment is designed to be connected to the telephone network or premises wiring using a compatible modular jack that is Part 68 compliant. This equipment cannot be used on telephone company-provided coin services. Connection to Party Line Service is subject to state tariffs.
If this equipment causes harm to the telephone network, the telephone company will notify you in advance that the temporary discontinuance of services may be required. If advance notice isn't practical, the telephone company will notify the customer as soon as possible. Also, you will be advised of your right to file a complaint with the FCC if you believe it is necessary.
The telephone company may make changes in its facilities, equipment, operations, or procedures that could affect the operation of the equipment. If this happens, the telephone company will provide advance notice in order to maintain uninterrupted service.
If the trouble is causing harm to the telephone system, the telephone company may request that you remove the equipment from the network until the problem is resolved.
It is recommended that the customer install an AC surge arrestor in the AC outlet to which this device is connected. This is to avoid damaging the equipment by local lightning strikes and other electrical surges.
Industry Canada CS-03 Statement
The Industry Canada label identifies certified equipment. This certification means that the equipment meets certain telecommunications network protective, operational and safety requirements as prescribed in the appropriate Terminal Equipment Technical Requirements document(s). The department does not guarantee that the equipment will operate to the user's satisfaction.
Before installing this equipment, users should ensure that it is permissible to be connected to the facilities of the local telecommunications company. The equipment must also be installed using an acceptable method of connection. The customer should be aware that compliance with the above conditions might not prevent degradation of service in some situations. Only a representative designated by the supplier should coordinate repairs to certified equipment. Repairs or alterations made by the user to this equipment, or equipment malfunctions may give the telecommunication company cause to request the user to disconnect the equipment.
Users should ensure for their own protection that the electrical ground connections of the power utility, telephone lines and internal metallic water pipe system, if present, are connected together. This precaution may be particularly important in rural areas. Users should not attempt to make such connections themselves, but should contact the appropriate electric inspection authority, or electrician, as appropriate.
The Ringer Equivalence Number (REN) of this device is displayed on the product. The REN assigned to each terminal device provides an indication of the maximum number of terminals allowed to be connected to a telephone interface. The termination on an interface may consist of any combination of devices subject only to the requirement that the sum of the Ringer Equivalence Numbers of all devices does not exceed 5. The telephone connection arrangement is a CA11A.
Notes on Copyright


Dolby Digital is manufactured under license from Dolby Laboratories. "Dolby" and the double-D symbol are trademarks of Dolby Laboratories. Copyright © 2002 Dolby Laboratories. All rights reserved.
"DTS" and "DTS Digital" are trademarks of Digital Theater Systems, Inc.
It is forbidden by law to copy, broadcast, show broadcast on cable, play in public, and rent copyrighted material without permission. DVD video discs are copy protected, and any copy made from these discs will be distorted.
This product incorporates copyright protection technology that is protected by certain U.S. patents and other intellectual property rights owned by Macrovision Corporation and other rights owners. Use of this copyright protection technology is authorized by Macrovision Corporation, and is intended for home and other limited viewing uses only unless otherwise authorized by Macrovision Corporation. Reverse engineering or disassembly is prohibited.
Contact Us
For technical support of your DCP Home Theatre System, call Motorola support 1-866-668-2271 or 1-866-MOT-BCS1.
For questions about your cable TV service, call your local cable service provider.
For Motorola consumer cable products, education, and support: http://www.motorola.com/broadband
Copyright © 2002 by Motorola, Inc.
All rights reserved. No part of the contents of this book may be reproduced or transmitted in any form or by any means without written permission of the publisher.
Motorola reserves the right to revise this publication and to make changes in content from time to time without obligation on the part of Motorola to provide notification of such revision or change. Motorola provides this guide without warranty of any kind, either implied or expressed, including, but not limited, to the implied warranties of merchantability and fitness for a particular purpose. Motorola may make improvements or changes in the product(s) described in this manual at any time.
Contents
Introduction ....1
Before Operating This Unit....1
Before You Begin 2
Document Conventions 2
Overview ....3
Features....3
Supplied Accessories 5
Disc Information 5
Types of Discs You Can Use ....5
Handling Discs....6
Cleaning Discs 6
Storing Discs....6
Region Numbers 6
Front Panel 7
DCP501 Display 9
Rear Panel 12
Operating the Remote Control 15
Selecting TV and VCR Setup Codes....19
Verifying a Setup Code Using Blink Back....20
Finding a Setup Code 21
Installing Batteries in Remote Control 22
Installation 23
Before You Begin 24
Installing the DCP501....24
Recording Your Connections....25
Connecting Your TV 26
S-Video....26
Video 27
Connecting to Cable TV 28
Connecting Your Speakers and Subwoofer 29
Speaker Placement....29
Speaker and Subwoofer Connections....30
Connecting Speaker Cords....30
Connecting Your Front Speakers and Active Subwoofer 31
Connecting Your Front Speakers and Passive Subwoofer 32
Connecting Your Surround and Center Speakers ....33
Connecting Your VCR.... 34
Video Connections for Your VCR 34
S-Video 35
Video 36
Audio Connections for Your VCR.... 37
Stereo VCR 37
Mono VCR 38
Connecting Other Audio/Video Sources.... 39
Digital Audio Connections 40
Connecting a Tape Deck or CD Player....41
Connecting the AM and FM Antennas 42
Connecting for Power 43
Connecting to the Front Panel....43
Operation....45
Before You Begin....45
Setting Up Audio 46
Input Setup....46
Subwoofer and Speakers 49
Test Tone Adjust....62
Advanced Audio Setup 67
Using DCP501 Cable TV Functions....74
Using Cable TV Record....74
Using CATV Channel Scan....77
Using the DCP501 Tuner 80
Tuning Radio Stations 80
Presetting Radio Stations....80
Selecting Preset Radio Stations 81
Sound Effects 81
Using the DCP501 Digital Audio/Video Receiver 82
Changing the DCP501 Tone Setting....82
Changing Balance and Fade on the DCP501 83
Using the DCP501 DVD/CD Player 83
Resume Play 84
Fast Motion Playback (Picture Search) 85
Using the DVD Banner Display 85
Selecting a DVD Title 85
Selecting a DVD Chapter 86
Changing the Audio Language on a DVD 86
Changing the Subtitle Language on a DVD 87
Changing the Camera Angle on a DVD 87
Using Bookmarks on a DVD 88
Recalling a Bookmarked Scene on a DVD....88
Clearing a Bookmark on a DVD 88
Program Edit on a DVD 89
Insert Chapter on a DVD....90
Delete Program on a DVD 90
Exiting Program Play on a DVD....90
Using the Repeat Feature....91
Repeat Play 91
A-B Repeat Play 91
Using the CD Banner Display 92
Selecting a CD Track 92
Using IntroScan on a CD 92
Using Bookmarks on a CD....93
Recalling a Bookmarked Selection on a CD....93
Clearing a Bookmark on a CD 93
Program Edit on a CD....94
Program a Playlist with the TV Turned On 94
Insert Track on a CD....95
Delete Program on a CD....95
Program a Playlist with the TV Turned Off 96
Exiting Program Play on a CD 96
Using the Repeat Feature 96
Repeat Play 96
A-B Repeat Play 97
Random Play 97
Playing an MP3 Audio CD on the DCP501 98
On-Screen Display when Playing an MP3 CD....99
Playing your MP3 Files 99
Programming Selections from an MP3 CD....99
Deleting Selections from an MP3 CD 100
Selecting Specific Folder and Files for Playback....100
DVD Setup 101
Resetting Your Password 108
Other On-Screen Text Messages 109
Mute 109
Volume Up/Down 109
DVD/CD Playback Control 109
Source Change 110
Troubleshooting 111
Specifications 117
Digital Cable Receiver 117
A/V Receiver and Amplifier 117
DVD/CD Player....118
Input/Output 118
Front Panel Inputs.... 118
Front Panel Outputs.... 118
Rear Panel Inputs.... 118
Rear Panel Outputs 119
General 119
TV and VCR Setup Codes 121
TV Setup Codes....121
VCR Setup Codes.... 125
Language Codes....129
Abbreviations and Acronyms 131
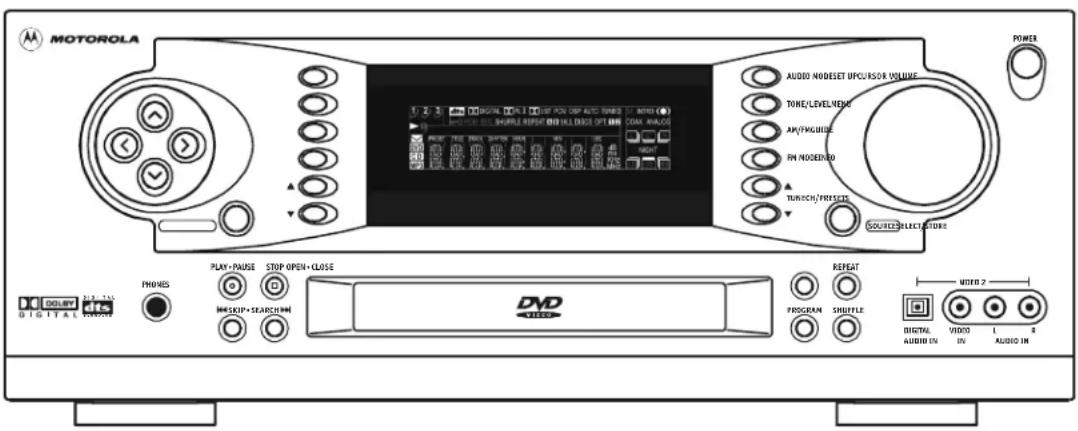
Congratulations on your purchase of Motorola's new state-of-the-art Digital Convergence Platform - DCP500 Series Home Theater System. In the past, you may have connected your VCR or stereo through your TV. Now with the DCP501, you connect your TV, VCR, speakers, and other electronic devices through the DCP501 for easier control of your electronics. The DCP501 provides one platform for all your home entertainment needs. Contained within a convenient space-saving design, the Motorola DCP501 combines digital audio/video tuning and processing with a single-disc DVD/CD player, digital cable receiver, and audio/video receiver. The DCP501 is shown in Figure 1:
Figure 1 DCP501
Before Operating This Unit
Refer to the instruction manuals for your TV, VCR or other consumer electronics.
Before connecting the DCP501 to any of your other consumer electronics, be sure to turn off the power and unplug all equipment from the wall outlets.
Read this manual carefully before operating this unit.
Before You Begin
You program and select options on your DCP501 with cursor buttons on the front of the DCP501 or with your remote control. The following navigational tools enable you to navigate the menus displayed on your television with on-screen display (OSD) or with DCP501 options displayed on the DCP501 front panel display.
| Button | Function |
| SETUP | On the DCP501 front panel or the DCP501 remote control, pressSETUPto display the DCP501 MAIN SETUP menu on your TV or display A U D I O S E T on the DCP501 display. PressSETUpto exit the DCP501 setup menus at any time. |
| SELECT | On the DCP501 front panel, pressSELECTto choose a menu option or save a change to a DCP501 setting. Same asokon the DCP501 remote control. |
| OK On the DCP501 | remote control, pressokto choose a menu option or save a change to a DCP501 setting. Same asSELECTon the DCP501 front panel. |
| Flashing option | Indicates that the option is selected and can be adjusted. |
| Cursor left «and cursor right» | Step through available values for the selected option. |
| Cursor up ∧ and cursor down ∨ | Move up and down through DCP menu settings. |
| ∅ | The invalid symbol is displayed on the TV when you press a button that is invalid or unavailable at the time. This symbol only appears when the DCP is in DVD/CD mode. |
Document Conventions
The following conventions are used in this manual:
| EMPHASIZED TEXT WITH ALL-CAPITAL LETTERS | Emphasized text with all capital letters indicates a button you press on the DCP front panel or the remote control, what is displayed on the TV or DCP501 front panel display, or a connection port on the DCP501.Examples: SETUP, VIDEO2, VCR1, TONE/LEVEL |
Wide Text Text with wider than normal spacing between characters indicates text that is displayed on your television or the DCP501 display.
Examples: AUDIO SET, D DIGITAL, Subtitles On/Off
This section provides information about:
■ Features of the DCP501
■ Accessories included with the DCP501
■ DVD and CD information
It also includes descriptions of the following:
- Front panel
DCP501 display - Rear panel
- Remote control unit
Before you begin to install the DCP501, familiarize yourself with the various controls and displays. Information on installing the DCP501 is provided in the "Installation" section.
NOTE!

When not in use, turn off the DCP501.
Features
The DCP501 includes:
■ DVD/CD player-single-disc tray
■ Audio/Video Receiver (AM-FM tuner/audio amplifier)
■ DCT2000 Digital Cable receiver (analog/digital hybrid)
■ Audio output - 5 x 100 watts per channel
- Tripath Class T- solid state amplifiers
- Dolby 📊 Digital, Dolby 📊 Pro Logic II, Dolby Pro Logic, and DTS 📊 audio decoders
■ Multiple connections for several A/V components
- Toslink and coaxial digital audio inputs
The DCP501 allows you to listen to your favorite digital and analog music in surround sound from selectable multiple audio sources, including:
■ Digital audio on the CD player
- Digital or analog audio on TV channels tuned with the digital cable TV receiver feature*
- Digital audio on the digital audio tuner provided on your cable system*
■ Local analog AM and FM stations with the DCP501 AM/FM tuner
■ External analog audio cassettes
■ External MiniDisc digital audio
■ External digital audio tape (DAT)
■ Video game audio
* Digital Cable TV and interactive services are subscription services offered by most cable service providers.
DCP501 Video/TV features include:
■ Tuning and watching either digital or analog cable TV channels on your cable system
■ Viewing digital programs and movies played on your DCP501 DVD player
■ Viewing analog programs and movies played on your analog VCR or analog video camera
■ Viewing digital movies played on your digital VCR or digital video camera
■ Viewing movies and programs recorded with a personal video recorder (PVR)
■ Viewing and playing video games
After connecting a VCR, video recording capabilities include:
- Using the DCP501 to record DVD movies to video tape (unless the DVD has Macrovision anti-taping control)
- With a second VCR, transferring movies or home video played on one VCR to a second VCR
■ With a personal video recorder (PVR), transferring movies from your PVR to a VCR
Audio and video inputs and outputs provide both S-video and phono connections.
Supplied Accessories
The following items are shipped with your DCP501:
■ DCP501-R Universal Remote Control
■ DCP501 Home Theater System User Guide
■ DCP501 Home Theater System Quick Setup Guide
- Baseband video cable
■ 6 ft. coaxial cable
■ S-video cable
■ AM antenna
FM antenna
■ Warranty/Registration Card
Disc Information
This section includes information on the types of discs you can use with the DCP501 and how to handle, clean and store them.
Types of Discs You Can Use
The DCP501 can play back the following discs:
Type Disc Logo Mark Contents Disc Size Maximum Playback Time
DVD

Audio and Video
12 cm Approx. 4 hours for a single-sided disc or 8 hours for a double-sided disc
8 cm Approx. 80 minutes for a single-sided disc or 160 minutes for a double-sided disc
Audio CD
Audio
12 cm Approx. 75 minutes
8 cm Approx. 20 minutes

The DCP501 cannot play the following disc formats:
DVD-ROM
■ DVD+R/DVD-RAM (The DCP501 can play DVD-R format).
CD-ROM
CD-EXTRA
- Photo CD
Video CD
■ SACD (SuperAudio CD)
Do not use discs that are:
Cracked
- Warped
- Contain adhesive tape or a disc label (as on rental discs)
Handling Discs
When handling your discs:
■ Do not touch the playback side (the blank side) of the disc
■ Do not attach paper or tape to either side of the disc
Cleaning Discs
Your picture and sound quality may deteriorate due to fingerprints or dust on the disc. To clean the disc, wipe the disc with a soft cloth from the center of the disc outwards. Be sure to always keep your discs clean.
Do not use solvents such as record cleaning sprays to clean a disc. Solvents can damage the disc.
Storing Discs
When storing your discs, follow these guidelines:
■ Store discs vertically in their cases.
- Do not stack or place objects on unprotected discs. This can cause warping or scratches.
- Do not store discs in direct sunlight or near a heat source.
- Do not store discs in places subject to moisture or dust.
Region Numbers
The region number of the DCP501 is 1 (North America). This number refers to the coding format of the discs that can be played back. This number only applies to DVDs. If the region number of the DVD disc you are trying to play back is not 1 or ALL, the DCP501 cannot play it back and a warning message appears on the DCP501 display.
Front Panel
The DCP501 contains selection buttons, tuning buttons, a volume control knob, video 2 connection ports, and a single disc CD/DVD tray. For information on operating the DCP501, refer to the "Operation" section. Figure 2 illustrates the front panel of the DCP501:
Figure 2
DCP501 front panel
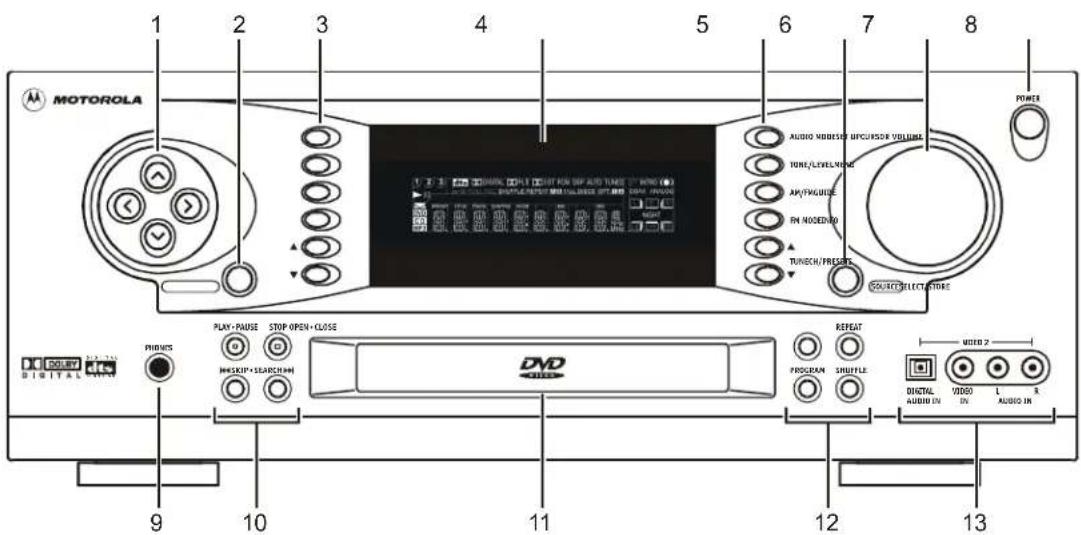
Item Control Description
1 CURSOR Moves cursor up/down/left/right in DCP501 display/on-screen display and CATV application control.
2 SELECT/STORE Selects current DCP501 display/on-screen display item or CATV application controlled item.
3 SET UPress once to view DCP501 A/V configuration menus.
MENU Cable TV source: CATV application controlled.
DVD/CD source: Displays DVD menu.
GUIDE CATV application controlled.
INFO CATV application controlled.
DVD/CD source: Displays DVD/CD control summary.
CH/PRESETS Cable TV source: Advances to next ▲ or previous ▼ channel. CATV application controlled.
Tuner source: Advances to next ▲ or previous ▼ stored preset station #.
4 Display Refer to DCP501 Display in this section for information on the DCP501 display.
| Item | Control | Description |
| 5 | AUDIO | MODE selects surround sound mode (toggle through all available modes). |
| TONE/LEVEL | Press once to enter Bass Level Change mode. | |
| Press twice to enter Treble Level Change mode. | ||
| Press three times to enter Balance Level Change mode. | ||
| Press four times to enter Fader Level Change mode. | ||
| AM/FM | If Tuner not source: Selects Tuner. | |
| Tuner source: Changes radio band (AM→FM, FM→AM). | ||
| FM | MODE press once to force FM station to mono. | |
| Press again to return to normal. | ||
| TUNE ▲▼ | ▲Press to increase ▲ or decrease ▼ radio tuner frequency. | |
| Hold to scan to next ▲ or previous ▼ strongest signal (station). | ||
| 6 | SOURCE | Selects viewing source in the following sequence: |
| CATV→DVD/CD→TUNER→ | ||
| VCR1→VCR2→VIDEO1→ | ||
| VIDEO2→TAPE | ||
| 7 | VOLUME | Increases (clockwise) or decreases (counter-clockwise) pre-amp and speaker level. |
| 8 | POWER | Places DCP501 in standby mode. |
| 9 | PHONES | Jack for headphones connection. |
| 10 | PLAY·PAUSE | In Playback: Pauses playback of DVD/CD. |
| Not in Playback: Begins playback of DVD/CD. | ||
| STOP | Stops playback of DVD/CD. | |
| Press once: place DVD/CD player in resume state. | ||
| Press twice: stop DVD/CD player. | ||
| SKIP·SEARCH | In playback: Press to select previous chapter (track) or press to select next chapter (track). | |
| Hold to rewind and play DVD/CD x2. | ||
| Hold to fast forward and play DVD/CD x2. | ||
| 11 | Loader | Loader for disc. |
| 12 | OPEN·CLOSE | DVD/CD Loader Closed: Opens tray. |
| DVD/CD Loader Open: Closes tray. | ||
| REPEAT | Press once to repeat playback of current chapter/disc. | |
| Press twice to repeat playback of current title/track. | ||
| Press three times to repeat playback of current chapter (DVD only). | ||
| Press again to clear the repeat function. | ||
| PROGRAM | Press Once: program DVD/CD playback list (On screen). | |
| Press Twice: program CD playlist on DCP501 display. | ||
| SHUFFLE | Press Once: shuffle current CD tracks. | |
| Press Again: clear shuffle. | ||
| SHUFFLE does not work with DVDs. | ||
| 13 | VIDEO | Ports for connecting devices such as digital video cameras, mini disc players, and DAT tape players. |
DCP501 Display
For information on the controls and functions shown in the DCP501 display, see the "Operations" section. The icons on your DCP501 display are described in the table below:
Figure 3
DCP501 display

| Item | Indicator/Icon | Description |
| 1 | Not used on the DCP501. | |
| 2 | On indicates DTS Surround is the currently selected audio mode. | |
| 3 | On indicates Dolby Digital Surround is the currently selected audio mode. | |
| 4 | PL II turns on to indicate Dolby Pro Logic II Surround is the currently selected audio mode.P L turns on to indicate Dolby Pro Logic Surround is the currently selected audio mode. | |
| 5 | On indicates Dolby 3 Channel Stereo is the currently selected audio mode. | |
| 6 | Turns on when a DVD/CD or external digital audio input is not Dolby or DTS audio. | |
| 7 | On indicates DSP sound mode is selected. When DSP is selected, the specific sound mode is displayed: STADIUM, CONCERT, THEATER, ARENA, CLUB or CHURCH. | |
| 8 | Turns on when tuner is in use to indicate DCP501 is scanning to next radio station. | |
| 9 | Tuner: On indicates the tuned signal received is strong.Flashing indicates a weak FM signal. | |
| 10 | Tuner: On indicates the tuned FM signal received is transmitting in stereo. | |
| 11 | CD: On indicates the DCP501 is in Preview mode (The CD player plays the first ten seconds of each track.) | |
| 12 | On indicates playback of DVD/CD. | |
| 13 | On indicates DVD/CD has paused playing. | |
| 14 | DVD: On indicates DVD Parental Control Level has been set. | |
| 15 | PGM | DVD/CD: turns on to indicate you are playing the DVD/CD in programmed mode. |
| 16 | REC | On indicates that the record output sources have been overridden for Cable TV Record. |
| 17 | SHUFFLE | CD: On indicates Shuffle mode (CD player is randomly selecting tracks for playback.) |
| 18 | REPEAT | DVD: REPEAT turns on to indicate Disc Repeat, and flashes TITLE or CHAPTER to indicate Title or Chapter Repeat.CD: REPEAT turns on to indicate Disc Repeat, and flashes TRACK to indicate Track Repeat. |
| 19 | AB | DVD/CD: turns on when a sequence for continuous play is being selected.When a DVD or CD is in playback, the A-B button on the remote control can be used to select a sequence for continuous repeated play. The A icon turns on to indicate the start of the sequence has been selected. The B icon turns on to indicate the selected sequence is in playback. See the “Operations” section for more information on this feature. |
| 20 | 1 | Not used on the DCP501. |
| 21 | ALL | Not used on the DCP501. |
| 22 | DISCS | Not used on the DCP501. |
| 23 | OPT. 12 | OPT 1 or OPT 2 turns on to indicate which optical input is in use. |
| 24 | COAX | On indicates coaxial audio input is in use. |
| 25 | ANALOG | On indicates analog audio input is in use. |
Figure 4
DCP501 display

Item Indicator/Icon Description
| 26 |  | On indicates that you have received incoming messages from the cable operator. Use the program guide displayed on the TV to retrieve messages. |
| 27 |  | DVD, CD or MP3 turns on to indicate which item is in use. MP3 indicates a disc containing MP3 audio files is in use. |
| 28 |  | Tuner: displays two-digit preset number, if any, of currently selected radio station.Flashes to indicate when you are pre-setting radio stations. Stops flashing when a preset number is selected. |
| 29 |  | After selecting DVD/CD as the source and pressing DVD/CD button on the remote control, the following is displayed:DVD: Displays the current title of the DVD. |
| 30 | 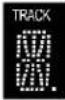 | After selecting DVD/CD as the source and pressing DVD/CD button on the remote control, the following is displayed:CD: Displays the current track (two-digit number). |
| 31 | 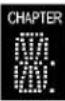 | After selecting DVD/CD as the source and pressing DVD/CD button on the remote control, the following is displayed:DVD: displays the current chapter of the DVD (two-digit number). |
| 32 | 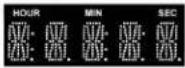 | After selecting DVD/CD as the source and pressing DVD/CD button on the remote control, the following is displayed:DVD: Displays the duration of the current title.CD: Displays the time remaining on the current track.When tuner is selected as the source, displays the radio frequency in use. |
| 33 |  | On indicates volume, bass, treble, and speaker level setting, in decibels. |
| 34 |  | On indicates FM station is in use. |
| 35 |  | On indicates AM station is in use. |
Item
36
Indicator/Icon

Description
L, C, and R indicated left, center and right front speakers, respectively. LS and RS indicate left and right surround speakers, respectively. LFE (Low Frequency Effect) indicates the subwoofer.
These icons turn on as follows:
■ Each icon turns on to indicate a valid input channel. The LFE icon turns on to indicate a LFE component is present.
A box around an icon indicates that the output channel for that speaker has been set.
- The three-dimensional box behind the boxed icon indicates whether the speaker has been set up as LARGE (the three-dimensional box is turned on, as shown in the example above) or SMALL (the three-dimensional box is not turned on).
For more information on speaker settings, see Initial Set-up Operations in the "Operations" section.
37
NIGHT
On indicates Night mode enabled. In Night mode, you can set the DCP501 to dim the display illumination and compresses the audio level to lower volume peaks.
Rear Panel
Figure 5 illustrates the rear panel of the DCP501:
Figure 5
DCP501 rear panel
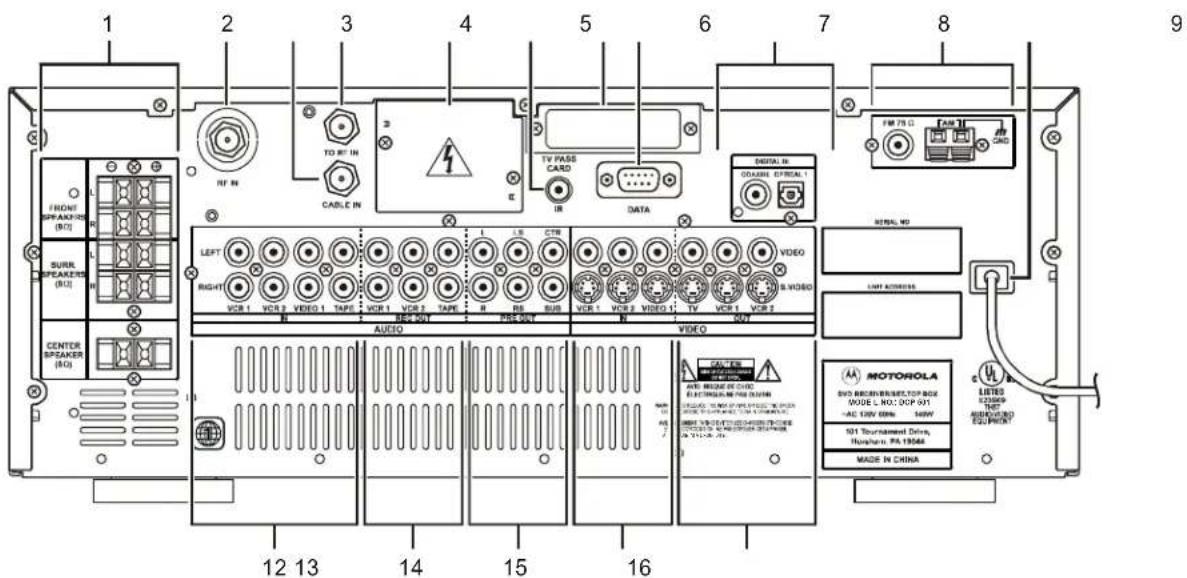
Refer to the "Installation" section for instructions on installing and cabling the DCP501.
The following table describes the rear-panel features:
Item Description
1 Speakers
- FRONT SPEAKERS — connectors used to connect speaker cables to left and right front speakers.
■ SURR SPEAKERS — connectors used to connect speaker cables to left and right surround speakers.
■ CENTER SPEAKER — connectors used to connect speaker cables to center speaker.
2 RF IN — F-type connector used for DCP501 input from the TO RF IN connector.
3 CABLE IN — F-type connector used for the coaxial cable input from the your cable outlet.
4 TO RF IN — F-type connector used to connect the TO RF IN port to the RF IN port.
5 Cover — covers slot used for Telco return.
6 IR — mini-phone jack for connecting an optional IR Blaster.
7 TV PASS CARD — for upgradeable security.
8 DATA — data connector to interface serial data and access the high-speed serial interface for high definition decoding.
9 DIGITAL IN
- COAXIAL — digital audio input from digital audio output device with coaxial cable connector.
- OPTICAL 1 — digital audio input from digital audio output device with optical connector.
10 Antenna
■ FM 75Ω Ω F-connector used for FM antenna.
■ AM — terminal tabs used for connecting AM antenna.
11 Power Outlet — AC power outlet.
12 AUDIO: IN
■ VCR 1 — left and right RCA jacks used for VCR audio output.
■ VCR 2 — left and right RCA jacks used for audio output of VCR or PVR.
■ VIDEO 1 — left and right RCA jacks used for audio output of auxiliary equipment, such as a Laser Disc player.
■ TAPE — left and right RCA jacks used for audio output of alternate audio equipment, such as a stereo or CD jukebox.
13 AUDIO: REC OUT
■ VCR 1 and VCR 2 — left and right RCA jacks for audio input of VCR(s).
■ TAPE—left and right RCA jacks for audio input of tape deck.
14 PRE OUT: Connectors for external amplifiers
- L and R — left and right RCA jacks used for audio output to an external power amplifier for the front speakers.
■ LS and RS — left and right RCA jacks used for audio output to an external power amplifier for surround sound speakers. - CTR — RCA jack used for audio output to an external power amplifier for the center speaker.
■ SUB — RCA jack used for audio output of subwoofer. May require a Y-splitter.
Item Description
15 VIDEO: IN. The RCA jacks in the row labeled VIDEO are used for composite video. The connectors in the row labeled S-VIDEO are used for S-video.
■ VCR 1 and VCR 2 — connectors used for video output of VCR 1 and VCR 2 or PVR.
■ VIDEO 1 — connectors used for video output of external video source, such as a camcorder.
16 VIDEO: OUT. The RCA jacks in the row labeled VIDEO are used for composite video. The connectors in the row labeled S-VIDEO are used for S-video.
■ TV — connectors used for video input of TV.
- VCR 1 and VCR 2 — connectors used for video input of VCR(s). Note that VCR 1 and VCR 2 are both input and output ports.
Operating the Remote Control
The DCP501 uses the DCP501-R Universal Remote Control. Figure 6 illustrates the DCP501-R Universal Remote Control:
Figure 6 Remote control

Descriptions of the remote control functions are shown in the following table.
When you press a button on the remote control, a mode button (CATV, DVD/CD, VCR1, VCR2, Tape, AM/FM, TV, V1 or V2) will turn on to indicate the current mode.
| Button | Item | Description |
| 1 | SETUP | Press Once: DCP501 A/V configuration menus. |
| 2 | DVD/CD | Select DVD/CD as source. (Remote control remains in tuner mode.) |
| 3 | CATV | Select Cable TV as source. |
| 4 | VCR2 | Select VCR 2 as source. Select VCR 2 remote control button codes. |
| 5 | VCR1 | Select VCR 1 as source. Select VCR 1 remote control button codes. |
| 6 | PAGE ▲ | CATV application controlled. |
| 7 | Cursor | keysey DCP501 source: DCP501 display/on-screen display and CATV application control.TV source: Move cursor up/down/left/right.VCR 1 or VCR 2 source: Move cursor up/down/left/right. |
| 8 | HELP | Press once: CATV application controlled. (The CATV button does not turn on.) |
| 9 | GUIDE | CATV application controlled. |
| 10 | LAST | CATV application controlled. |
| 11 | VOL | Raise or lower speaker level. |
| 12 | MUTE | Any DCP501 source: mute speaker and pre-amplifier outputs.TV source: mute speaker output . |
| 13 | A | CATV application controlled. |
| 14 | B | CATV application controlled. |
| 15 | NIGHT | Press once: DIM modeDCP501 display dims and audio plays at maximum dynamic range.Press twice: DIM+SOFT modeDCP501 display dims and audio plays at minimum dynamic range.Press three times: DIM+LOUD modeDCP501 display dims and audio plays at standard dynamic range.Press four times: NORMAL modeDCP501 display is not dimmed and audio plays at maximum dynamic range. |
| 16 | Cable TV source: CATV application controlled.DVD/CD source:Press once (in playback): stop playback (resume possible).Press twice (in playback): stop playback.Press once (not in playback): open DVD/CD tray.Press once (tray open): close DVD/CD tray.VCR 1 or VCR 2 source:Press once (in playback): stop playback.Press once (not in playback): eject VHS cassette. | |
| 17 | TUNE ▼◀ | TABLE TV source: CATV application controlled.DVD/CD source:Press once: rewind and play (rewind 1).Press twice: rewind and play (rewind 2).Press three times: rewind and play (rewind 3).Press four times: rewind and play (rewind 4 for DVD only).Press again: rewind and play (rewind 1).Tuner source:Press to decrease radio tuner frequencyMomentarily hold to scan to previous strongest signal (station). Press again to stop scanning.VCR 1 or VCR 2 source: Rewind and play cassette (in playback) or rewind cassette (not in playback). |
| 18 | FM ● | MODEable TV source: CATV application controlled.Tuner source:Press once: force FM station to monoPress twice: return to normalVCR 1 or VCR 2 source: one touch record, start VCR record. |
| 19 | ◀◀ | In playback: Press to select previous chapter (track) |
| 20 | INPUT/TV/VCR A-B | DVD/CD playback:Press once: Select start of sequence for repeat play.Press twice: Mark end of sequence and begin sequence playback. |
| 21 | SHUFFLE | CD source:Press once: shuffle current CD tracks |
| 22 | PROG | Press Once: program DVD/CD playback list (on-screen display)Press Twice: program CD playlist on DCP501 display |
| 23 | CLEAR | In playback: clear A-B, Shuffle, Repeat, or Program playback modes and resume normal mode.Not in playback: clear A-B, Shuffle, Repeat, or Program playback modes. |
| 24 | POWER | Place DCP501 in standby mode.Turns power off/on on TV, VCR 1, VCR 2, Video 1 and Video 2 units. |
| 25 | AM/FM | If Tuner not source: selects Tuner as sourceTuner source: change radio band (AM→FM, FM→AM) |
| 26 | TV | Select TV remote control button codes. Remote control will be in TV mode.Note that pressing the TV button will not affect the current mode of the DCP501. |
| 27 | TAPE | Select Tape as source. |
| 28 | V1 | Select Video 1 as source. Select Video 1 remote control button codes. |
| 29 | V2 | Select Video 2 as source. Select Video 2 remote control button codes. |
| 30 | LOCK | CATV application controlled. |
| 31 | PAGE ▼ | GATV application controlled. |
| 32 | OK | Any DCP501 source: select current item on DCP501 display/on-screen display or select CATV application controlled item.TV source: Functions as ENTER key.VCR 1 or VCR 2 source: Functions as ENTER key. |
| 33 | EXIT | Cable TV source: exit a menu screen or program guide.TV source: exit menu.VCR 1 or VCR 2 source: exit menu. |
| 34 | INFO | CATV source: CATV Application controlled.DVD/CD source: Display DVD/CD information banners. |
| 35 | MENU | Cable TV source: CATV application controlled.DVD/CD source: DVD menu.TV Source: TV menu.VCR 1 or VCR 2 source: VCR menu. |
| 36 | CH | Cable TV source: CATV application controlled.Tuner source: Go to next + or previous – stored preset station.TV source: Go to next + or previous – channel.VCR 1 or VCR 2 source: Go to next + or previous – channel. |
| 37 | FAVORITE | CATV application controlled. |
| 38 | C | CATV application controlled. |
| 39 | Number | key number entry. |
| 40 | ENTER/MUSIC | CATV application controlled.Any non-DCP501 source: Functions as ENTER key. |
| 41 | DAY ▶ | Gable TV source: CATV application enabled.DVD/CD source: Begin/resume playback (if DVD/CD tray closed). Close tray and begin playback (if DVD/CD tray open).VCR 1 or VCR 2 source: Begin playback. |
| 42 | TUNE ▶ | Gable TV source: CATV application enabled.DVD/CD source:Press once: fast forward and play (fast forward 1).Press twice: fast forward and play (fast forward 2).Press three times: fast forward and play (fast forward 3).Press four times: fast forward and play (fast forward 4 for DVD only).Press again: fast forward and play (fast forward 1).Tuner source:Press to increase radio tuner frequencyMomentarily hold to scan to next strongest signal (station). Press again to stop scanning.VCR 1 or VCR 2 source: Fast forward and play cassette (in playback). Fast forward cassette (not in playback). |
| 43 | ■ | Cable TV source: CATV application controlled.DVD/CD source:Press once: pause playback.Press twice: frame advance (DVD only). |
| 44 | ▶ | In playback: Select next chapter (track). |
| 45 | DISC | SKRpt used on the DCP501. |
| 46 | TONE | Press once: enter Bass Level Change mode.Press twice: enter Treble Level Change mode.Press three times: enter Balance Level Change mode.Press four times: enter Fader Level Change mode. |
| 47 | REPEAT | DVD/CD playback:Press Once: repeat playback of current disc.Press Twice: repeat playback of current title/track.Press Three Times: repeat playback of current chapter (DVD only).Press Again: clear the repeat function. |
| 48 | AUDIO | MODElect surround sound mode (toggle through all available modes). |
| 49 | ANGLE | DVD/CD source: Change DVD camera angle (if supported by disc). |
Selecting TV and VCR Setup Codes
You can set up your remote control for your TV and VCR by consulting the tables in “TV and VCR Setup Codes”. You only need to set up your remote control for your TV, VCR 1 and VCR 2 (if applicable).
To set up your remote control for your TV or VCR(s):
1 Press the mode button for the device you are setting up (either TV, VCR 1 or VCR 2) for six seconds.
The mode buttons will turn on and turn off one at a time. This sequence will repeat two times and then the selected mode button will remain on. This indicates the remote is ready to accept the four-digit setup code.
2 Enter the four-digit setup code for your TV or VCR. The setup code can be found in "TV and VCR Setup Codes".
When the setup code is accepted, the selected mode button will blink three times.
If the setup code is not accepted or more than ten seconds have elapsed between button presses, the selected mode button turns off. The TV or VCR then exits the programming mode and the most recent pre-programmed setup code is restored.
You can only set up your remote control while in TV, VCR 1 or VCR 2 mode.
You can exit the setup mode at any time by pressing any button on the remote other than the number buttons.
Verifying a Setup Code Using Blink Back
You can use the remote control's blink back function to verify a previously entered setup code. The blink back function verifies a setup code by indicating the setup code number through a certain number of blinks on the 1, 2, 3, and 4 buttons on your remote control.
To verify a setup code using blink back:
1 Press the mode button for the device you are verifying (either TV, VCR 1 or VCR 2) for six seconds.
The mode buttons will turn on and turn off one at a time. This sequence will repeat two times and then the selected mode button will remain on. This indicates the remote is ready to accept the blink back code.
2 Press 9 9 0 on your remote control.
The selected mode button will blink three times and turn off.
3 Press 1 on your remote control. The 1 button will blink for a certain number of times.
The number of blinks that occur after pressing the number buttons represent the four-digit setup code for the selected mode. The 1 button represents the first digit in the setup code, the 2 button represents the second digit in the setup code, and so on for all four digits in the setup code.
For example, to verify the TV setup code is 0047, after you press the mode button and 9 9 0, pressing the 1 button will cause it to remain off, pressing the 2 button will cause it to remain off, pressing the 3 button will cause it to blink four times, and pressing the 4 button will cause it to blink seven times.
4 Press 2 on your remote control and count the number of blinks.
5 Press 3 on your remote control and count the number of blinks.
6 Press 4 on your remote control and count the number of blinks.
You can only set up your remote control while in TV, VCR 1 or VCR 2 mode.
After pressing the mode button and 9 9 0 sequence, you can exit the blink back mode at any time by pressing any button on the remote other than the 1 button.
Finding a Setup Code
Setup codes for your TV and VCR are listed by brand in "TV and VCR Setup Codes".
If the setup code for your brand of TV or VCR is not listed, or if your TV or VCR does not respond to the setup codes listed for its brand, you can search for your setup code using your remote control's Step and Set function.
To search for a setup code:
1 Press the mode button for the device (either TV, VCR 1 or VCR 2) for six seconds.
The mode buttons will turn on and turn off one at a time. This sequence will repeat two times and then the selected mode button will remain on. This indicates the remote is ready to use the Step and Set function.
2 Press the Cursor Up ∧ ∧ button to begin Step and Set. The selected mode button will turn off.
If no setup code is currently programmed for the selected mode, the search begins with the most popular setup code for the selected device. If a setup code has been previously programmed, the search begins with the next setup code for that device.
3 Use the following buttons to determine if the setup code properly operates the selected device:
■ Number buttons 0, 1, 2, or 3 (use to test TV setup codes)
- Channel Up (use to test TV setup codes)
■ Play (use to test VCR setup codes)
- Rewind (use to test VCR setup codes)
4 If the setup code successfully operates the device, press OK on the remote control. The setup code is now programmed into your remote control.
If the setup code does not operate the device, repeat steps 2 and 3.
During Step and Set, if there is more than a ten second pause between pressing buttons on the remote control, the remote will exit Step and Set and return to the previously programmed setup code.
You can only set up your remote control while in TV, VCR 1 or VCR 2 mode.
Installing Batteries in Remote Control
Before using the remote control, you must install two AA (1.5 V) alkaline batteries (included) To install batteries in the remote control:
1 Press and slide the battery compartment cover off, as illustrated in Figure 7:
Figure 7
Battery placement in remote control
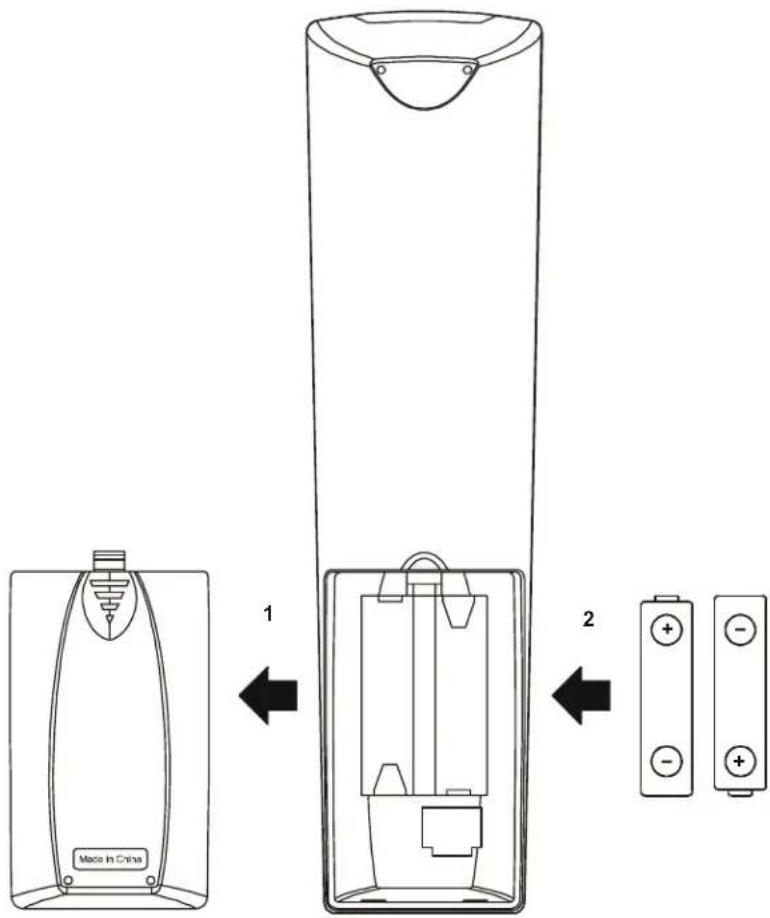
2 Place the batteries in the compartment; be careful to observe the correct polarity.
3 Slide the battery compartment cover back into place.
NOTE!

Use and dispose of batteries in accordance with all applicable laws, rules and regulations. Motorola will not be liable to anyone for the user's failure to use and/or dispose of batteries in the proper manner and in accordance with such laws, rules and regulations, or for any defect contained in batteries that may cause injury damage to persons or property.
In the past, you may have connected your VCR or stereo through your TV. With the DCP501, you connect your TV, VCR, speakers, and other electronic devices through the DCP501 for easier control of your electronics. This section will guide you with these connections.
This section provides instructions for the following:
■ Connecting your TV
■ Connecting to Cable TV
■ Connecting your speakers and subwoofer
■ Connecting your VCR
- Video connections
- Audio connections
■ Connecting other audio-visual sources
■ Digital audio connections
■ Connecting a tape deck or an additional CD player
■ Connecting the FM and AM antennas
■ Connecting for power
■ Connecting to the front panel
- Game console
- Digital camera
- Camcorder (analog or digital)
- MiniDisc player
- DAT player
To complete the installation, you must:
■ Connect the cables
■ Supply power to equipment
Before You Begin
NOTE!

The clear protective film on the DCP501 display must be removed and transferred to the inside back cover of your DCP501 Home Theater System User Guide. The Unit Address and Serial Number found on the protective film is required for activation of your DCP501 cable TV receiver by your cable TV service provider.
Before you begin, review the installation instructions, gather the required items, and complete the tasks listed below:
- Place the DCP501 on a dry, smooth, flat surface and remove any obstructions that could interfere with the free flow of air over, under, or around it. Do not place anything on top of the unit.
- Disconnect power connections to all components before making any connections.
Do not disconnect the cable connection between the RF In and To RF In ports. Removal of this cable could disrupt operation of the DCP501.
WARNING!

To avoid damaging the DCP501, do not use the cable connection between the RF In and To RF ports as a handle.
Installing the DCP501
Before making any connections to the DCP501, refer to the diagrams later in this section for more detailed information
To install the DCP501:
1 Connect your TV to the DCP501.
2 Connect your DCP501 for Cable TV.
3 Connect your speakers and optional subwoofer.
4 Connect your VCR to the DCP501.
5 Connect your AM and FM antennas (supplied with DCP501).
6 Plug your DCP501 into a wall outlet.
CAUTION!

Do not plug the DCP501's power cord into a wall outlet until you have completed all connections between the DCP501 and other components.
Recording Your Connections
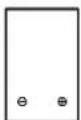
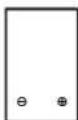
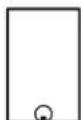
Use the diagram in Figure 8 to record your cable connections from the rear panel. You can use this diagram later to reconnect your system if you move the equipment or add new equipment.
Figure 8
Recording your connections
VCR

TV
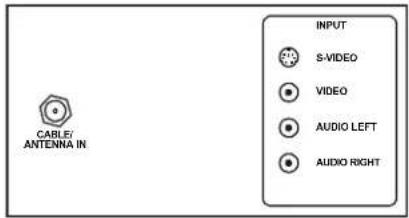

Left Right
Front speakers
Left

Right
Surround speakers

Center speaker
Subwoofer
Connecting Your TV
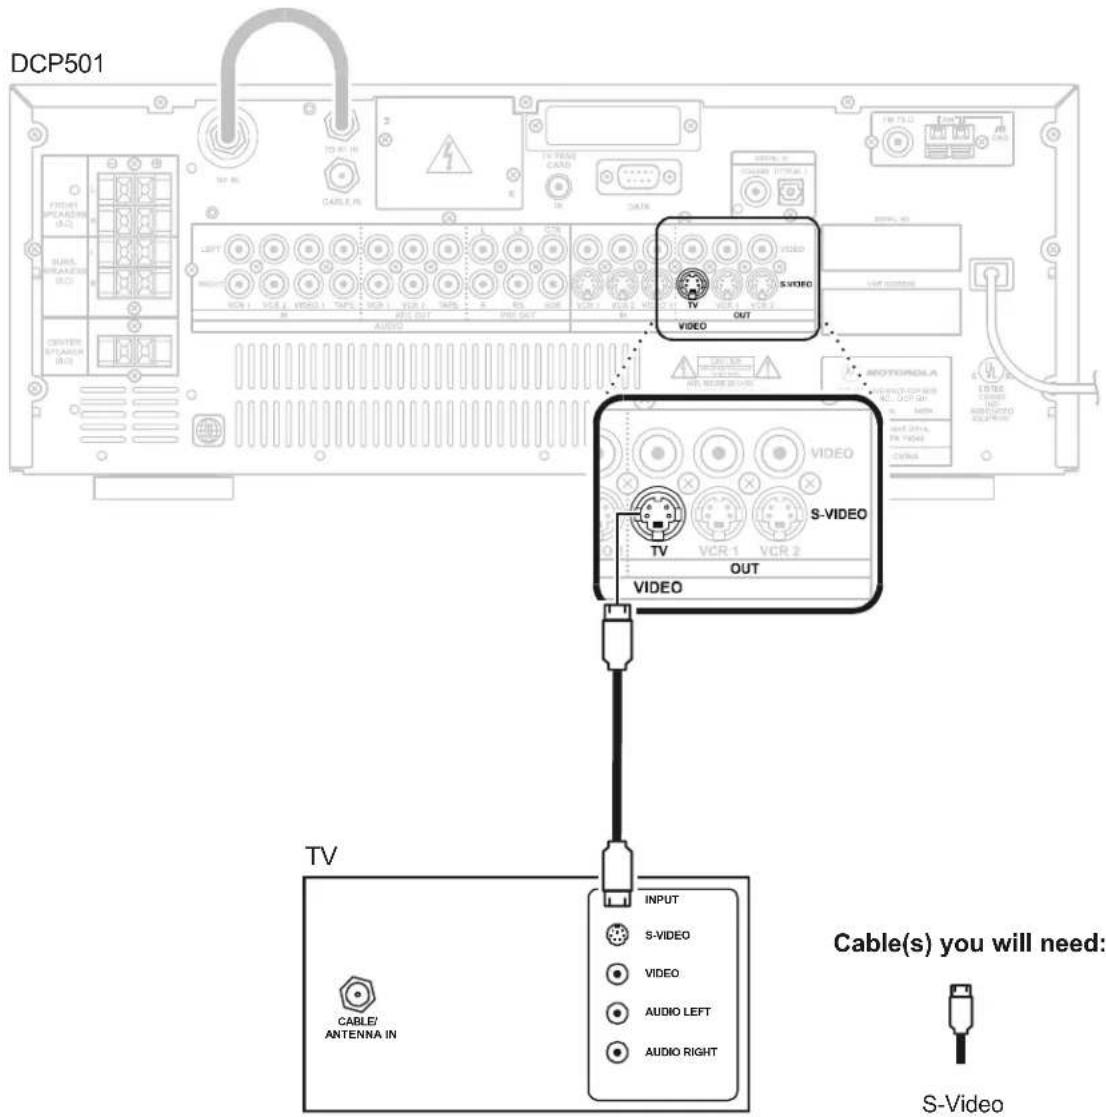
Before connecting your TV to the DCP501, you must determine which type of video connection to use. The DCP501 features two types of video outputs: S-video and video (also referred to as composite video). S-video is the highest quality video available on the DCP501. If your TV does not offer S-video, use the VIDEO connections. To determine whether your TV features S-video or composite video, check the manual supplied with your TV to determine the best connection available.
S-Video
To connect the DCP501 to a TV with S-video capability:
Figure 9
S-video connections to your TV
Video
To connect your DCP501 to a TV that is not S-video capable:
Figure 10
Composite video connections to your TV
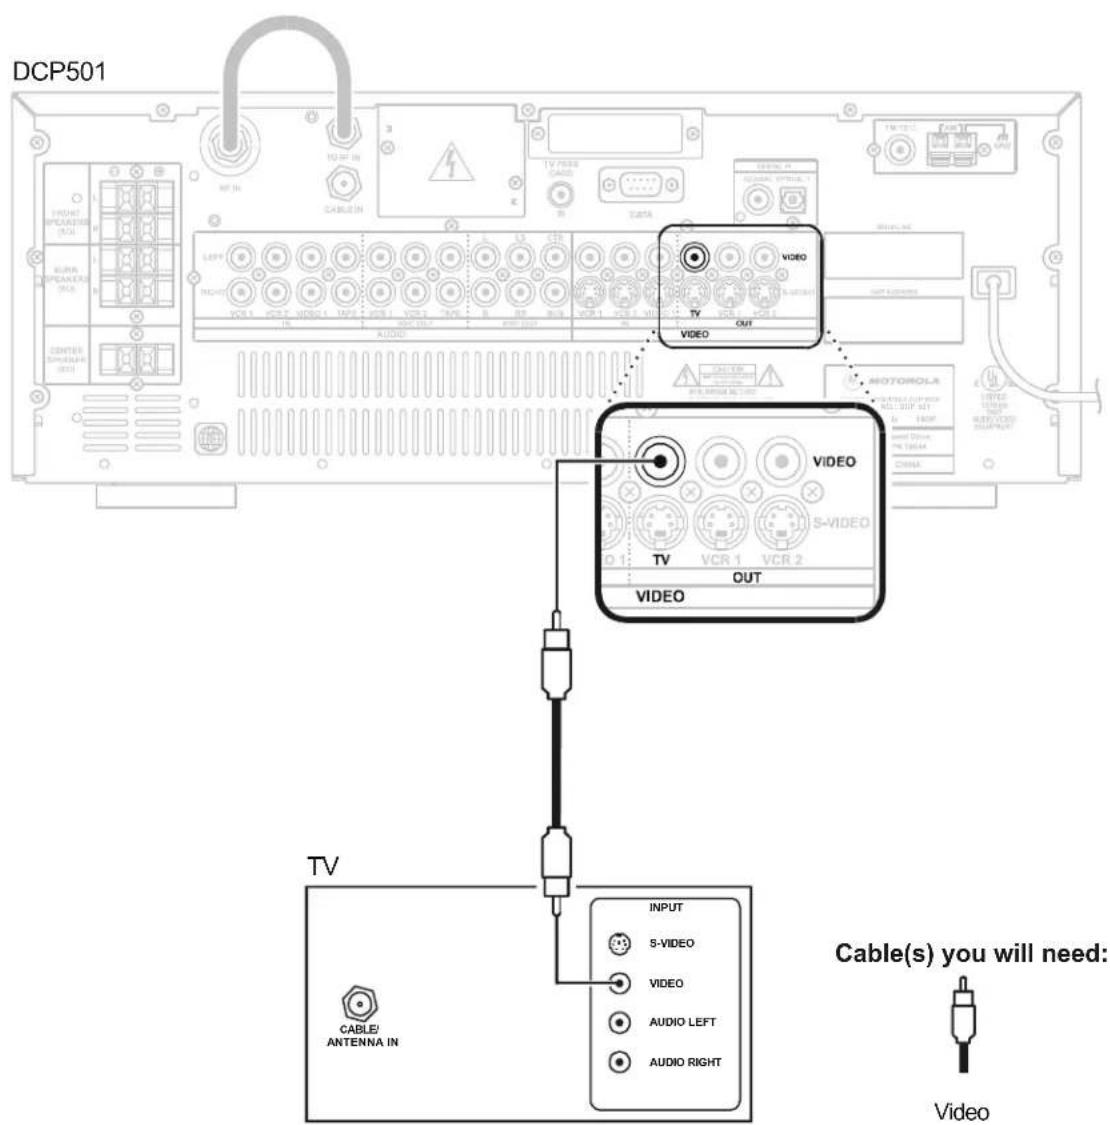
When connecting the video path, never connect composite video and S-Video together. Because certain types of electronics equipment will not support both video inputs simultaneously, use only one connection path.
Connecting to Cable TV
The DCP501 operates only with TVs with composite video or S-video capabilities. The DCP501 contains no RF output, so it will not function properly with older models of TVs with only RF input.
Do not disconnect the cable connection between the RF In and To RF In ports. Removal of this cable could disrupt operation of the DCP501.
IMPORTANT! The digital cable feature of your Motorola DCP501 can be activated only in certain cable systems throughout North America. Contact your local cable TV provider to determine whether the digital cable feature of your Motorola DCP501 can be activated. In cable systems where the digital cable feature cannot be activated, you may connect an external cable receiver provided by your local cable provider. For best results, connect an external cable receiver through the audio and video inputs on the back of your DCP501.
WARNING!

To avoid damaging the DCP501, do not use the cable connection between the RF In and To RF ports as a handle.
Connect your DCP501 for cable TV as shown in Figure 11:
Figure 11
Connecting to cable TV

Cable(s) you will need:

RF (75 ohm) coaxial
Connecting Your Speakers and Subwoofer
This section includes information on connecting your speakers and optional subwoofer. An example of how to place your speakers for optimal performance is also included.
Speaker Placement
An example of how to place your speakers and optional subwoofer for optimal audio performance is shown in Figure 12:
Figure 12
Example of speaker placement

flowchart
graph TD
    A["Left surround speaker"] --> B["Right surround speaker"]
    C["Left front speaker"] --> D["Right front speaker"]
    E["SubwooferCenter"] --> F["Left front speaker"]
    G["TV"] --> H["Speaker"]
    style A fill:#f9f,stroke:#333
    style C fill:#f9f,stroke:#333
    style E fill:#f9f,stroke:#333
    style G fill:#f9f,stroke:#333
For ideal listening, the front and center speakers should be at the same height. Position the front speakers on both sides of the TV at equal distances from the TV. Position the center speaker on top or below the TV set. Do not place the center speaker farther away from the listening position then the front speakers.
Position the rear speakers beside or slightly behind your viewing position. If the rear speakers are placed on the floor, they should be angled up towards the ceiling.
The subwoofer should be placed in a corner or, if that is not possible, against a wall.
The DCP501 should be placed on a dry, smooth, flat surface. Any obstructions that could interfere with the free flow of air over, under, or around the DCP501 should be removed.
Do not place anything on top of the unit.
Speaker and Subwoofer Connections
This subsection provides instructions for:
■ Connecting your front speakers and optional active subwoofer
■ Connecting your front speakers and optional passive subwoofer
■ Connecting your surround and center speakers
Connecting Speaker Cords
To connect your speaker cords:
1 Twist the stripped ends of the speaker cords about 2/3 inch (10 mm).
2 Be sure to match the speaker cord to the appropriate terminal on the components: + to + and - to -.
3 Press down on the terminal's tab to open the terminal and insert the wire.
4 Snap the tab closed.
Consult the manual supplied with your speakers or subwoofer for further information on making the proper connections.
Connecting Your Front Speakers and Active Subwoofer
Connect your front speakers and active subwoofer (optional) as shown in Figure 13:
Figure 13
Connecting front speakers and active subwoofer

Consult the manual supplied with your speakers or subwoofer for further information on making the proper connections.
Connecting Your Front Speakers and Passive Subwoofer
Connect your front speakers and passive subwoofer (optional) as shown in Figure 14:
Figure 14
Connecting front speakers and passive subwoofer

Consult the manual supplied with your speakers or subwoofer for further information on making the proper connections.
Connecting Your Surround and Center Speakers
Connect your surround and center speakers as shown in Figure 15:
Figure 15
Connecting surround and center speakers

Connecting Your VCR
To connect your VCR to the DCP501, perform the following:
■ Video connections
■ Audio connections
Video Connections for Your VCR
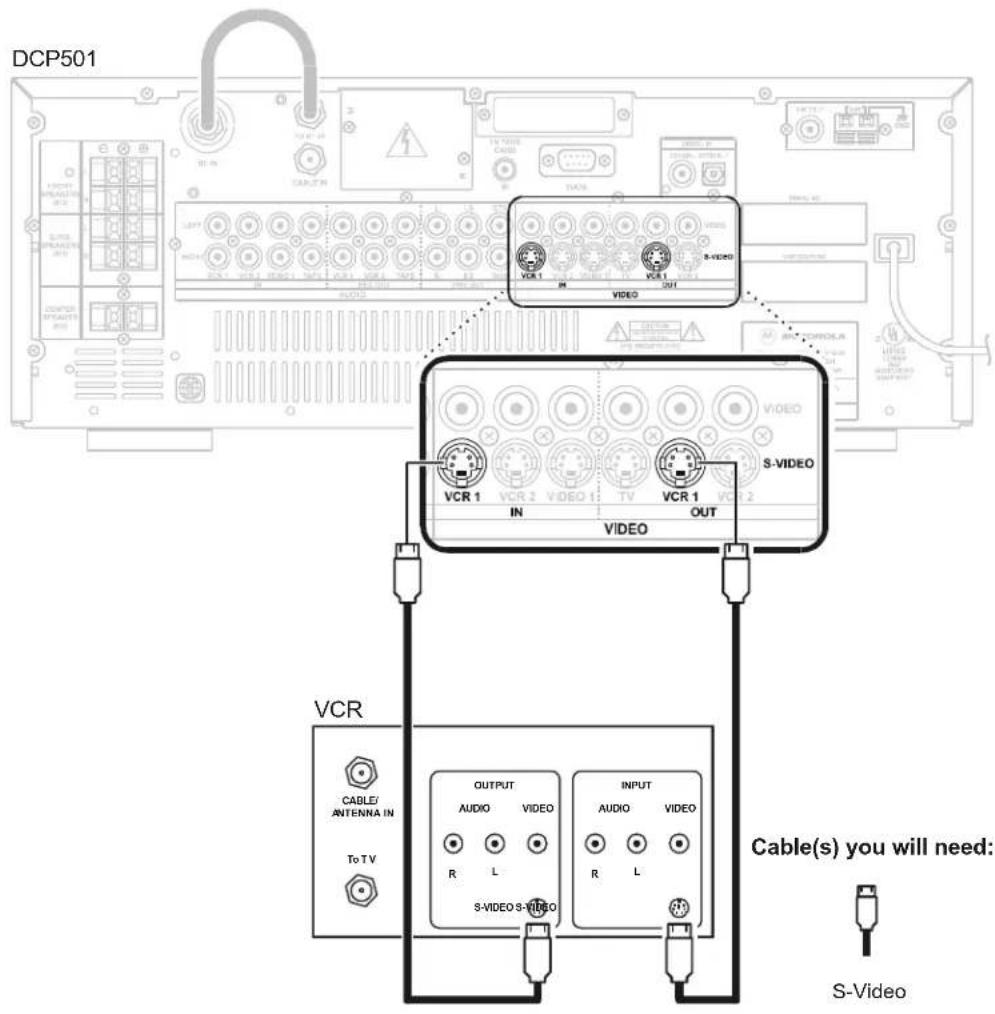
Before connecting your VCR to the DCP501, you must determine which type of video connection to use. The DCP501 features two types of video inputs and outputs: S-video and video (also referred to as composite video). S-video is the highest quality video available on the DCP501. If your VCR does not offer S-video, proceed to the Composite Video instructions that follow the S-video Connections diagram
S-Video
Connect your VCR as shown in Figure 16:
Figure 16
S-video connections to your VCR
Video
Connect your VCR as shown in Figure 17:
Figure 17
Composite video connections to your VCR

When connecting the video path, never connect composite video and S-Video together. Because certain types of electronics equipment will not support both video inputs simultaneously, use only one connection path.
Audio Connections for Your VCR
Before connecting your VCR to the DCP501, determine if your VCR is stereo or monaural (mono). To determine whether your VCR is mono or stereo, check the connectors on the rear panel of your VCR or consult the manual supplied with your VCR.
Stereo VCR
To connect a stereo VCR:
Figure 18
Stereo VCR audio connections

Mono VCR
To connect a mono VCR:
Figure 19
Mono VCR audio connections

Connecting Other Audio/Video Sources
You can connect an alternate audio/video source such as another DVD player by following the diagram in Figure 20.
If you wish to use the digital audio output from a DVD player to the DCP501, you must assign either the Optical1 or Coaxial digital audio input to the corresponding DCP501 video input source by using the INPUT SETUP screens. If the DVD player is connected to the VIDEO2 inputs on the front panel, the DCP501 automatically uses the OPTICAL2 digital audio input over the analog input if it is available. See the “Operations” section for information on using the INPUT SETUP screens. Before connecting the DVD player, check the manual supplied with the DVD player for the manufacturer’s installation guidelines.
Figure 20
Connections for an alternate device

Digital Audio Connections
Digital audio connections can be used with another DVD player, DAT players, and CD players. The DCP501 has three digital inputs: a single coaxial input and two optical inputs. Optical 2 (Digital Audio In) is located on the front panel and is linked to Video 2. Coaxial and Optical 1 are located on the rear panel and can be assigned to any one of the VCR 1, VCR 2, or Video 1 inputs by using the INPUT SETUP screens. See the “Operations” section for information on using the INPUT SETUP screens.
If you are connecting audio equipment that uses Dolby 5.1 or DTS, be sure to connect the digital output of the equipment to either Coaxial or Optical 1. Do not connect the equipment to any other audio input.
When making digital audio connections, it is not necessary to make connections from both the coaxial and optical digital outputs to the same component. When making an optical connection, use a Toslink optical cable.
To connect your DCP501 to a digital audio source:
Figure 21
Digital audio connections

Connecting a Tape Deck or CD Player
To connect an alternate stereo source such as a tape deck or CD player:
Figure 22
Audio connections

Connecting the AM and FM Antennas
Connect your AM and FM antennas as shown in Figure 23:
Figure 23
Antenna connections

To connect the AM antenna:
1 Press down on the AM Antenna terminal's tab to open the terminal.
2 Insert the wire and snap the tab closed.
3 Place the AM antenna as far as possible from the DCP501, TV, speaker cords, and power cords.
After connecting your FM antenna, keep it as horizontal as possible.
If an outside antenna is connected to the DCP501, be sure the antenna is grounded to provide some protection against voltage surges and built-up static charges.
Connecting for Power
After making all your connections, plug the DCP501's power cord into a wall outlet, as shown in Figure 23. Proceed to the “Operations” section for information on setting up and operating the DCP501.
CAUTION!

Do not plug the DCP501's power cord into a wall outlet until you have completed all connections between the DCP501 and other components.

To prevent electrical shock, do not use this (polarized) plug with an extension cord, receptacle, or other outlet unless the blades can be fully inserted to prevent blade exposure.
Connecting to the Front Panel
For easy access, you can connect the following devices to the DCP501 front panel:
Game console
Digital camera
■ Camcorder (analog or digital)
MiniDisc player
DAT player
To connect a device to the front panel:
Figure 24
Front panel connections

This section describes how to operate the DCP501. It includes instructions for:
- Basic audio set-up
- Cable TV
- Sound effects
• Digital Audio/Video Receiver - basic and advanced use
• DVD/CD player - basic and advanced use
Before You Begin
To program and select options on your DCP501, use the cursor buttons on the front of the DCP501 or with your remote control. The following navigational tools enable you to navigate the menus displayed on your TV with on-screen display (OSD) or with DCP501 options displayed on the DCP501 front panel display.
Button Function
SETUP On the DCP501 front panel or the DCP501 remote control, press SETUP to display the DCP501 MAIN SETUP menu on your TV or display A U D I O S E T on the DCP501 display. Press SETUP to exit the DCP501 setup menus at any time.
SELECT On the DCP501 front panel, press SELECT to choose a menu option or save a change to a DCP501 setting. Same as OK on the DCP501 remote control.
OK On the DCP501 remote control, press ok to choose a menu option or save a change to a DCP501 setting. Same as SELECT on the DCP501 front panel.
Flashing option Indicates that the option is selected and can be adjusted.
Cursor left «and cursor right» Step through available values for the selected option.
Cursor up ∧ and Move up and down through DCP501 menu settings.
cursor down v
The invalid symbol is displayed on the TV when you press a button that is invalid or unavailable at the time. This symbol only appears when the DCP501 is in DVD/CD mode.
The following conventions are used in this manual:
EMPHASIZED TEXT WITH ALL-CAPITAL Emphasized text with all capital letters indicates a button you press on the DCP501 front panel or the remote control, what is displayed on the TV or DCP501 front panel display, or a connection port on the DCP501.
LETTERS Examples: SETUP, VIDEO2, VCR1, TONE/LEVEL
Wide Text Text with wider than normal spacing between characters indicates text that is displayed on your TV or the DCP501 display.
Examples: AUDIO SET, D DIGIT&ubtitles On/Off
Some notes about DCP501 operation:
| Lamp test | When you turn on your DCP501, a lamp test is performed on the DCP501 display. This test causes all icons to turn on for 12 second and then MOTOROLA is displayed for 2 seconds. |
| Turning on the DCP501 for the first time | If this is the first time you have turned on your DCP501, SET SPEAKERS scrolls once across the DCP501 display. The same message is displayed when you have returned the DCP501 to the default speaker settings. |
| Setup Timeout | During any setup configuration, if no remote control or front panel button is pressed for 20-seconds, the DCP501 exits the setup mode. |
| Headphones | Connecting headphones to the DCP501 headphone socket mutes the DCP501 speaker outputs. |
| Speakers | Speakers rated at 8 ohms are preferred, but the DCP501 speaker outputs can drive speakers rated from 4 to 16 ohms. |
NOTE

To turn on the DCP501, press the power button on the remote control or the front of the DCP501.
When not in use, turn off the DCP501.
Setting Up Audio
This section includes information about setting up speakers and selecting audio inputs. Once a digital input is assigned to a particular source, the DCP501 always uses the assigned digital audio input instead of the analog audio input if both are present for the same source. You must select various input sources from the INPUT SETUP menu so the DCP501 knows which digital inputs are assigned. The DCP501 display shows the current audio input used by the selected source: OPT1, OPT2, COAX, or ANALOG. For digital audio inputs only, the DCP501 turns on an icon to distinguish the digital input type: PCM, dts, or DIGITAL.
Input Setup
To change the audio inputs on the DCP501:
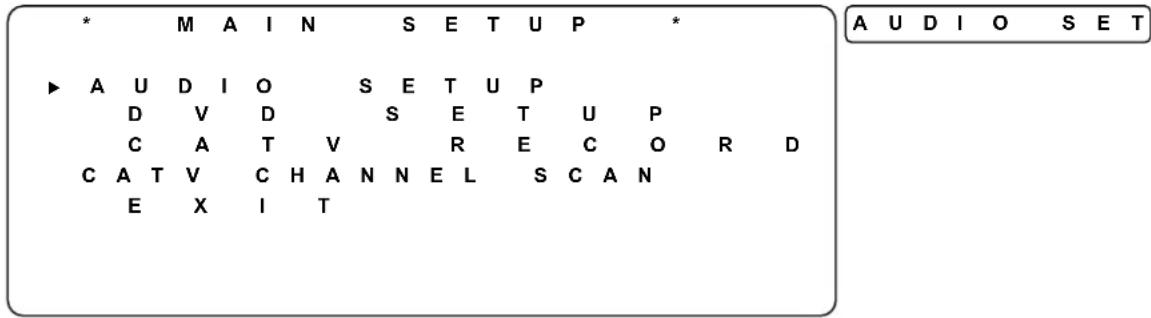
1 Press SETUP to display the MAIN SETUP menu on your TV or AUDIO SET on the DCP501 display.
On-screen Display
DCP501 Display
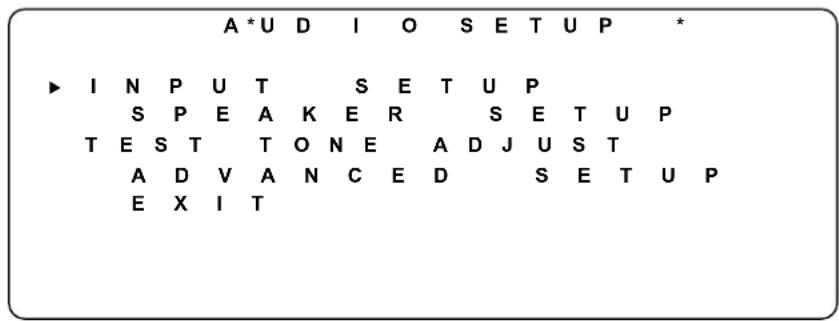
2 Press SELECT or OK to display the AUDIO SETUP menu on your TV, or INPUT SET on the DCP501 display.
On-screen Display
DCP501 Display

3 INPUT SETUP: Press SELECT or OK to display the INPUT SETUP menu on your TV or VID INPUT on the DCP501 display. The DCP501 has three digital audio inputs: a single coaxial input and two optical inputs. OPTICAL2 is always associated with the VIDEO2 input on the front panel. However, OPTICAL1 and the COAXIAL input can be assigned to any one of VCR1, VCR2, or VIDEO1 inputs. The factory settings are:
| VCR1-ANALOG | VCR2-ANALOG | VIDEO1-ANALOG |
On-screen Display
DCP501 Display


4 Press SELECT or OK and the current setting flashes. In this example, VCR1 flashes.
On-screen Display
DCP501 Display
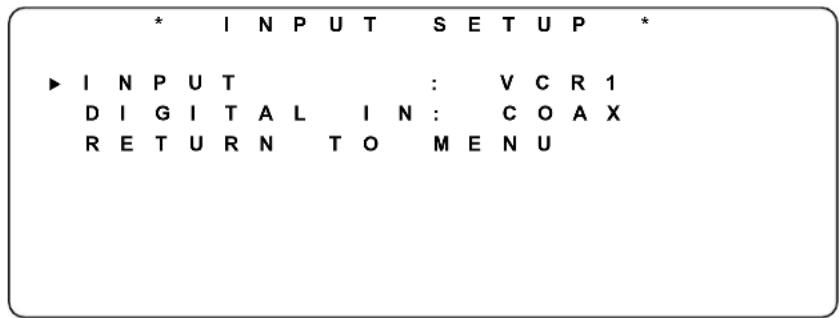

5 Press CURSOR left/right (<> ) to select VCR1, VCR2, or VIDEO1.
6 Press SELECT or OK to accept your selection. Repeat for other video inputs as necessary.
If assigned, the DCP501 always uses a digital audio input. You must select various input sources from the INPUT SETUP menu so the DCP501 knows which digital inputs are assigned. The DCP501 display shows the current audio input used by the selected source: OPT1, COAX, or ANALOG. For digital audio inputs only, the DCP501 turns on an icon to distinguish the digital input type, PCM, dts, or D DIGITAL. To assign a different audio input to the selected video input, press down arrow (v).
On-screen Display
DCP501 Display

7 Press SELECT or OK and the current audio input assigned to the video input flashes: (ANALOG, COAX, or OPTICAL1). In this example, OPTICAL1 flashes.
On-screen Display
DCP501 Display
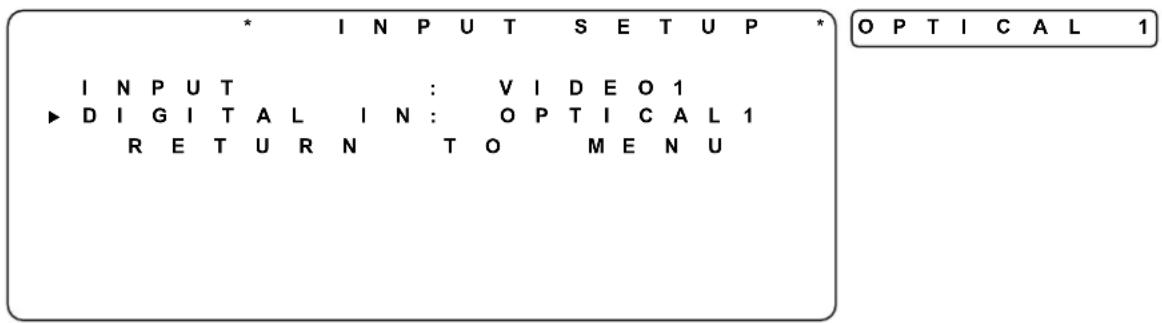
8 Press CURSOR left/right (>>) to select ANALOG, COAX, or OPTICAL 1.
9 Press SELECT or OK to accept your selection. Repeat for other video inputs as necessary. Press SETUP to exit the INPUT SETUP menu.
Subwoofer and Speakers
If you do not have a surround mode selected, you cannot make adjustments to the rear speakers. Similarly, if you have no center speaker in the mode you are in, you cannot make adjustments to the center speaker. So, you must set the DCP501 to an audio mode that uses the center channel and/or the surround channels in order to make adjustments to the center speaker and/or surround speakers.
This option defines whether a subwoofer speaker is connected to the AUDIO-PREOUT-SUB connector. If NO is selected, Speaker Size for all speakers defaults to LARGE. The factory setting is YES. To change the subwoofer settings on the DCP501:
1 Press SETUP or OK to display the MAIN SETUP menu on your TV or AUDIO SET on the DCP501 display.
On-screen Display
DCP501 Display

2 Press SELECT or OK to display the AUDIO SETUP menu on your TV, or INPUT SET on the DCP501 display.
On-screen Display
DCP501 Display

3 Press down arrow (V).
On-screen Display
DCP501 Display
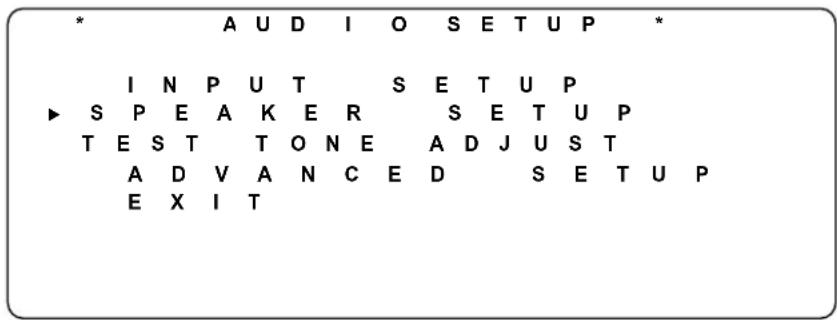
S P K R S E T
4 Press SELECT or OK to display the SPEAKER SETUP menu on your TV.
On-screen Display
DCP501 Display
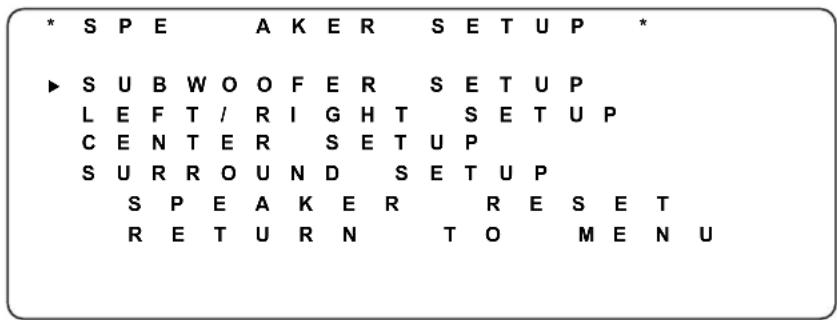
S U B W F R
5 SUBWOOFER SETUP: Press SELECT or OK to display the DCP501 SUBWOOFER SETUP menu or SUB? on the DCP501 display.
On-screen Display
DCP501 Display

S U B ?
6 Press SELECTor OK and the current setting flashes. In this example, Y E S flashes.
7 Press CURSOR left/right (<<) to display YES or NO. If NO is selected, the box around the LFE (low frequency effects) icon on the DCP501 turns off. Selecting NO defaults all speaker sizes to LARGE. Select NO if you are not connecting a subwoofer to the AUDIO-PREOUT-SUB connector on the back of the DCP501.
8 Press SELECT or OK to accept your selection.
9 CROSSOVER FREQUENCY: Press down arrow (v) to select the subwoofer crossover frequency, which is the frequency below which sound is output by your subwoofer. The factory setting is 80 Hz.
On-screen Display
DCP501 Display

10 Press SELECT or OK and the currently selected setting flashes. In this example, 80 Hz flashes.
On-screen Display
DCP501 Display

11 Press CURSOR left/right (<>to raise or lower the crossover frequency to 60 Hz, 80 Hz, 100 Hz, or 120 Hz. If the subwoofer has its own adjustment for crossover frequency, the DCP501 menu setting should be set to the same (or closest) value.
12 Press SELECT or OK to accept your selection.
13 SUBWOOFER LEVEL: Press down arrow ( ) to select the subwoofer level, which is the volume level adjustment to the bass subwoofer. The factory setting is 0 dB (no level adjustment).
On-screen Display
DCP501 Display


14 Press SELECT or OK and the dB icon on the DCP501 front panel display turns on and the currently selected setting flashes. In this example, 0 dB starts flashing.
On-screen Display
DCP501 Display


15 Press CURSOR left/right (<>) to raise or lower the volume level of the subwoofer from -10 dB to +10 dB.
16 Press SELECT or OK to accept your selection.
17 Press down arrow (V).
On-screen Display
DCP501 Display
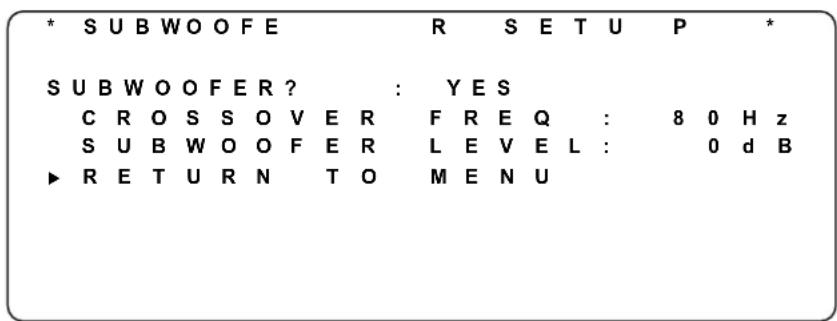

18 Press SELECT or OK, or press left arrow (<).
On-screen Display
DCP501 Display
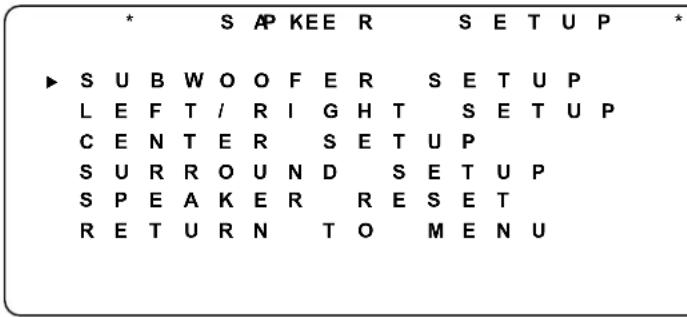
SUBWFR
19 LEFT/RIGHT SETUP: Press down arrow (V).
On-screen Display
DCP501 Display
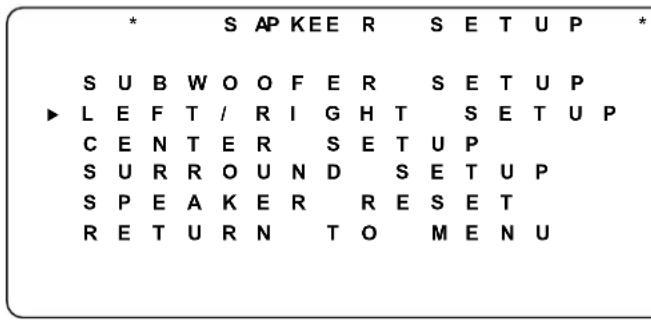
L + R
20 Press SELECT or OK.
On-screen Display
DCP501 Display

SIZE
21 Press SELECT or OK and the currently selected setting flashes. In this example, LARGE flashes. The LARGE and SMALL settings determine which speakers receive low frequency (bass) information. Use the LARGE setting for a speaker that is a traditional full-range speaker capable of reproducing sounds below 100Hz. Use the SMALL setting for smaller, frequency-limited satellite speakers that do not reproduce sounds below 100Hz. When the SMALL setting is used, a subwoofer is required to reproduce low frequency sounds. Note that LARGE and SMALL refer to the speaker's ability to reproduce low frequency sounds and not their physical size. Consult the manufacturer's manual that accompanied your speakers for more information.
On-screen Display
DCP501 Display
| * LEFT / RIGHT SETUP * |
| ▶ LEFT / RIGHT : LARGE DISTANCE : 10ft RETURN TO MENU |
22 Press CURSOR left/right («») to display LARGE or SMALL.
- The speaker icon on DCP501 display changes with the LARGE/SMALL setting.
- The settings for LEFT/RIGHT SETUP are affected by your setting on the SUBWOOFER SETUP menu
23 Press SELECT or OK to accept your selection and LARGE or SMALL stops flashing.
24 Press down arrow (V).
On-screen Display
DCP501 Display

25 Press SELECTor OK and the currently selected setting flashes. In this example, 10 ft flashes.
On-screen Display
DCP501 Display

26 Press CURSOR left/right ( < > ) to adjust the distance between the left/right speakers from a minimum of 3 feet to a maximum of 40 feet.
27 Press SELECT or OK to accept your selection and your selection stops flashing.
28 Press down arrow (V).
On-screen Display
DCP501 Display
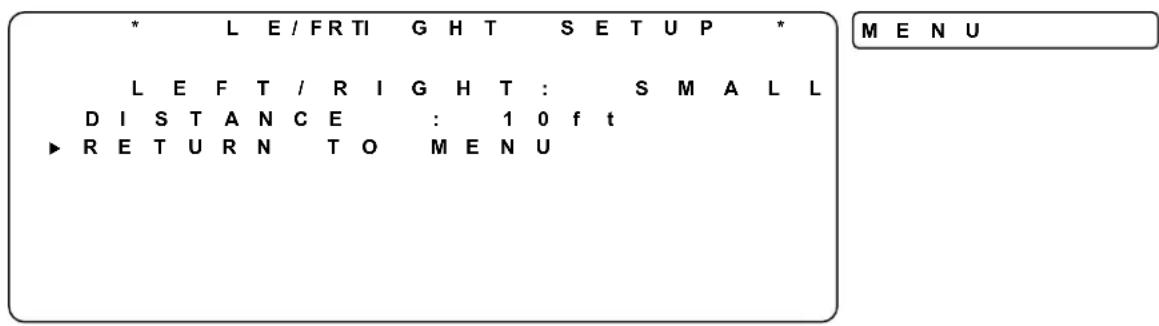
29 Press SELECT or OK.
30 CENTER SETUP: Press down arrow (V).
On-screen Display
DCP501 Display

31 Press SELECT or OK.
On-screen Display
DCP501 Display

32 Press SELECT or OK and the currently select setting flashes. In this example, SMALL flashes.
On-screen Display
DCP501 Display


33 Press CURSOR left/right («») to display LARGE, SMALL, or NONE.
34 Press SELECT or OK to accept your selection and LARGE, SMALL, or NONE stops flashing.
On-screen Display
DCP501 Display


35 Press down arrow (V).
On-screen Display
DCP501 Display

36 Press SELECT or OK and the currently selected setting flashes. In this example, 10 ft flashes.
On-screen Display
DCP501 Display

37 Press CURSOR left/right (<<) to display the desired distance.
The center speaker cannot be closer than the front speaker by more than 5 feet.
The center speaker cannot be further away than the front speaker.
38 Press SELECT or OK to accept your selection and the selected value stops flashing.
39 Press down arrow (v).
On-screen Display
DCP501 Display
| * | CRENSTEU P * |
| CENTER : LARGE | |
| DISTANCE : 10ft | |
| RETURN TO MENU | |
40 Press SELECT or OK.
41 SURROUND SETUP: Press down arrow (V).
On-screen Display
DCP501 Display


42 Press SELECT or OK.
On-screen Display
DCP501 Display


43 Press SELECT or OK and the currently selected setting flashes. In this example, SMALL flashes.
44 Press CURSOR left/right (<>) to display LARGE, SMALL, or NONE.
45 Press SELECT or OK to accept your selection and LARGE, SMALL, or NONE stops flashing.
On-screen Display
DCP501 Display


46 Press down arrow (V).
On-screen Display
DCP501 Display

47 Press SELECT or OK and the currently selected setting flashes. In this example, 10ft flashes.
On-screen Display
DCP501 Display

48 Press CURSOR left/right (<>to adjust the distance from your listening position to the surround sound speakers.
- The surround speaker cannot be further away than the front speaker.
49 Press SELECT or OK to accept your selection and the selected value stops flashing.
50 Press down arrow (V).
On-screen Display
DCP501 Display
| * SU RRO UN D S E T U | M E N U |
| S U R R O U N D : L A R G E | |
| D I S T A N C E : 1 0 f t | |
| ▶ RETURN TO M E N U |
51 Press SELECT or OK.
On-screen Display
DCP501 Display
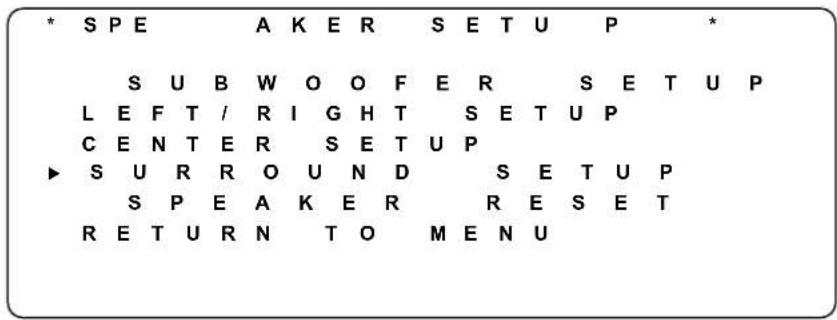

52 SPEAKER RESET: Press down arrow (V). The Speaker Reset option allows you to return all speaker settings to their factory default values.
On-screen Display
DCP501 Display
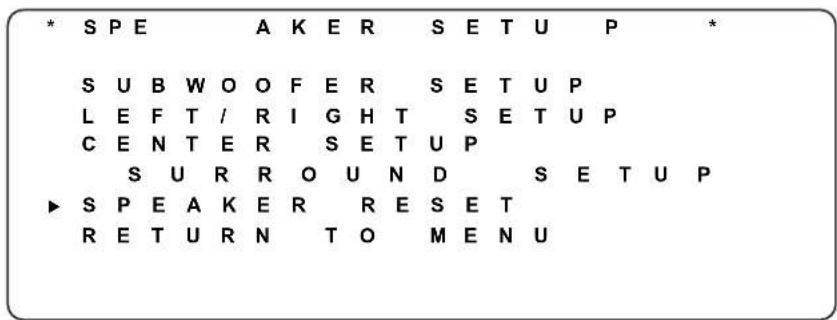

53 Press SELECT or OK.
On-screen Display
DCP501 Display


54 Press SELECT or OK and NO flashes.
On-screen Display
DCP501 Display

55 Press right arrow (>) and YES flashes.
On-screen Display
DCP501 Display
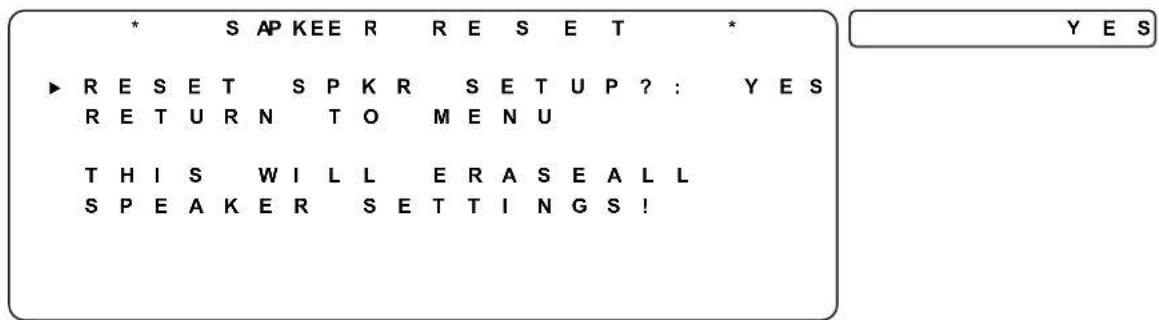
56 Press SELECT or OK and YES stops flashing.
On-screen Display
DCP501 Display

57 Press SETUP to exit the SPEAKER SETUP menu.
Test Tone Adjust
The Test Tone option allows you to hear test tones and adjust the level of these tones on speakers connected to the DCP501 to properly balance the sound system with the listening area.
- For full benefit, Test Tone Adjust should be performed when the DCP501 is in Dolby-Digital or dts mode.
- You can be in any audio mode except stereo to enter the Test Tone Adjust menu. You can only adjust the test tone levels for the speakers that are used in the audio mode you have selected. For example, Dolby 3 Channel Stereo uses left, right, and center speakers. You can adjust the test tones for these three speakers, but not for either of the surround speakers. In any of the full surround modes, you can adjust all five test tone levels - left, right, center, right surround, left surround. You are not allowed to adjust any of the test tones when stereo mode is selected.
- Set the base volume level of each speaker with this option.
- Perform this operation while sitting at the listening position. The factory setting is 0 dB.
As the tone is played through each speaker, the current setting flashes. Use the DCP501 remote control or front panel CURSOR left/right (<>to adjust the volume level of each speaker so that all speaker volumes sound the same.
It is not necessary to press SETUP or OK to record your settings for each speaker.
To use the Test Tone Adjust feature:
1 Press SETUP to display the DCP501 MAIN SETUP menu on your TV or AUDIO SET on the DCP501 display.
On-screen Display
DCP501 Display
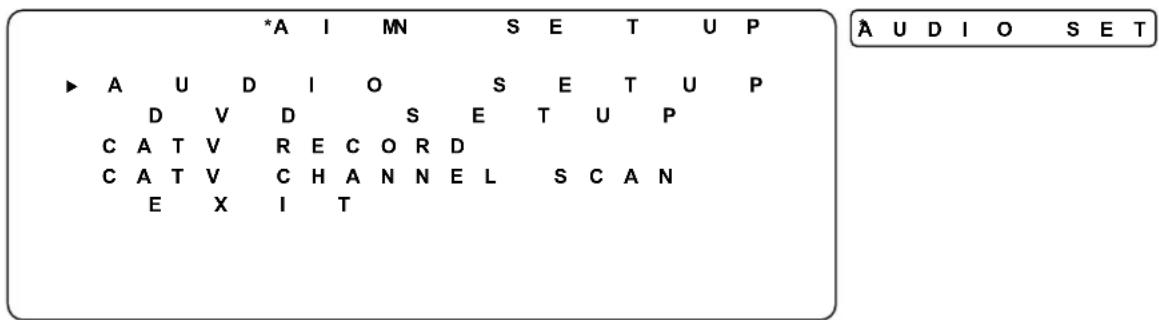
2 Press SELECT or OK to display the AUDIO SETUP menu on your TV, or INPUT SET on the DCP501 display.
On-screen Display
DCP501 Display


3 Press down arrow (v) twice.
On-screen Display
DCP501 Display


4 Press select or OK. The test tone plays on the front-left speaker and the current setting flashes. In the example, 0 dB flashes. The DCP501 begins to cycle through a speaker level test by emitting a tone from each speaker in the following order for 4-seconds:
Speaker Location
LEFT front channel left
CNTR center channel
RIGHT front channel right
R-SUR surround right channel
L-SUR surround left channel
On-screen Display
DCP501 Display
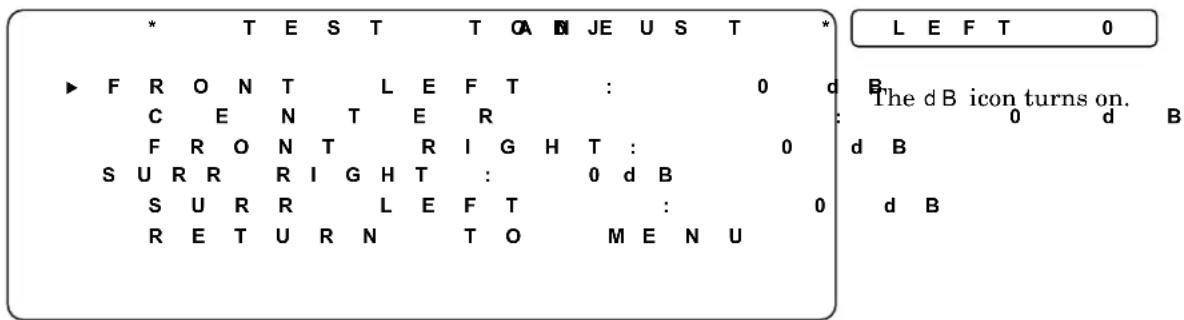
The current setting for the FRONT LEFT speaker flashes for 4-seconds and the test tone plays. In this example 0 dB flashes.
On-screen Display
DCP501 Display
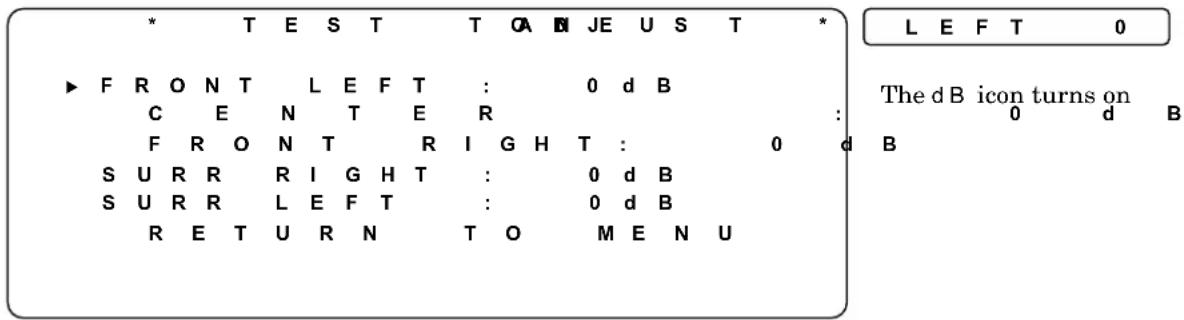
5 Press CURSOR left/right (<>) to adjust the volume level for the front-left speaker. In the example in step 6, the level was changed to +3 dB.
6 After 4 seconds, the test tone plays on the center speaker and the CENTER speaker is selected. Make volume level adjustments for the center speaker. In this example, 0 dB flashes.
On-screen Display
DCP501 Display
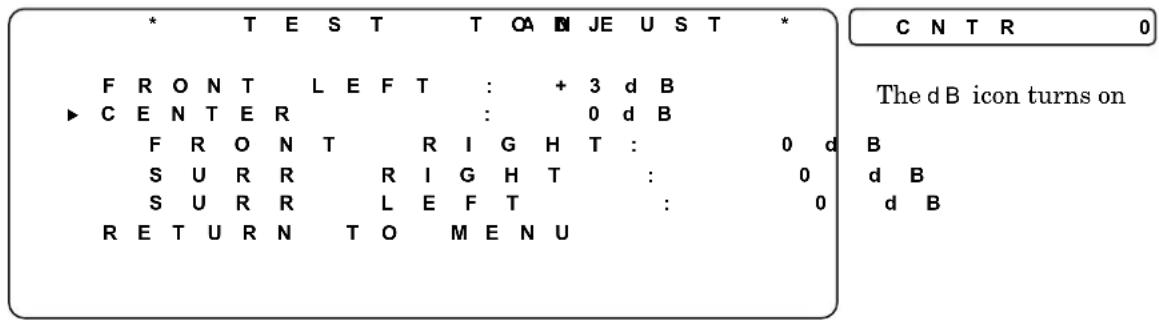
7 Press your remote control CURSOR left/right (<<) to adjust the volume level for the center speaker. In this example, -2 dB flashes.
On-screen Display
DCP501 Display
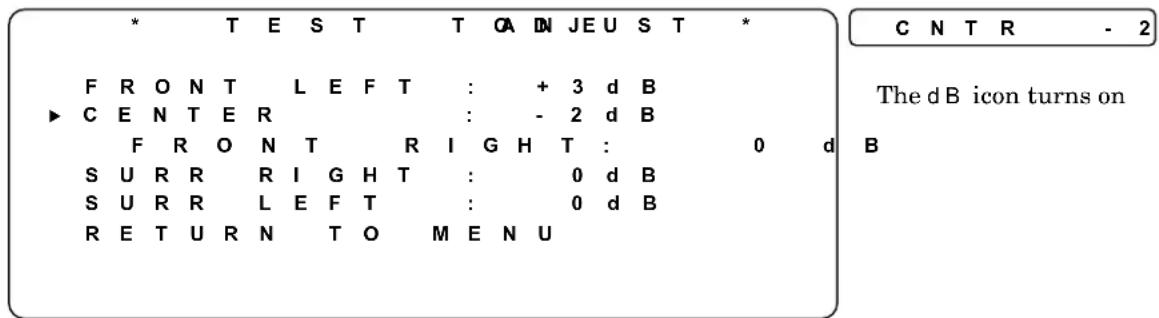
8 After 4 seconds the output adjust continues and the FRONT RIGHT speaker is selected as shown below:
On-screen Display
DCP501 Display

9 Continue the same procedure to set test tone levels for other speakers. In step 10, the value was changed to +4 dB.
10 After setting the level for all speakers, press down arrow (V).
On-screen Display
DCP501 Display
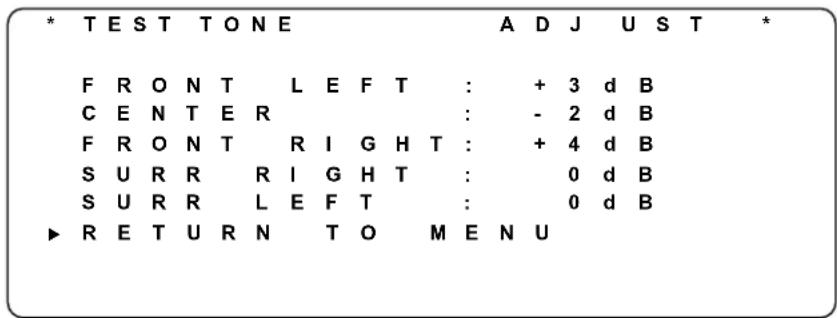
MENU
11 Press SELECT or OK.
On-screen Display
DCP501 Display

TEST TONE
12 Press SETUP to exit TEST TONE ADJUST.
Advanced Audio Setup
This section describes additional audio settings including:
Feature
Description
Default volume level
Use to adjust the volume level at which the DCP501 plays when it is turned on.
Night mode
Allows you to enable/disable audio level compression and switch the DCP501 front panel lighting to a dimmer level.
To set the VOLUME DEFAULT and NIGHT MODE:
1 VOLUME DEFAULT: This feature defines the volume level for the DCP501 when it is turned on. The factory setting is 50 dB and the range is 0 to 70 dB. In the steps below, you turn the feature on or off and if on, set the level. To set Volume Default:
Press SETUP to display the DCP501 MAIN SETUP menu on your TV or AUDIO SET on the DCP501 display.
On-screen Display
DCP501 Display

2 Press SELECT or OK to display the AUDIO SETUP menu on your TV, or INPUT SET on the DCP501 display.
On-screen Display
DCP501 Display

3 Press down arrow (v) three times.
On-screen Display
DCP501 Display


4 Press SELECT or OK.
On-screen Display
DCP501 Display


5 Press SELECT or OK and OFF flashes.
On-screen Display
DCP501 Display


6 Press right arrow (>) and ON flashes.
On-screen Display
DCP501 Display

7 Press SELECT or OK and ON stops flashing.
On-screen Display
DCP501 Display

8 Press down arrow (V).
On-screen Display
DCP501 Display

9 Press SELECT or OK and the current setting flashes. In this example, 50 dB flashes.
On-screen Display
DCP501 Display

10 Press cursor left/right (<>) to select the default volume level (<>) to adjust the default listening level for the DCP501.
11 Press select or ok and the value you selected stops flashing. In this example, 30 dB stops flashing.
On-screen Display
DCP501 Display

12 NIGHT MODE: Press down arrow (V).
Enables/disables audio level compression and switches the DCP501 front lighting to a dimmer level. The factory setting is OFF. Use Night Mode:
- To reduce the light level emitted from the DCP501 display to minimize a visual distraction associated with TV viewing.
- To decrease the loudness of action scenes, such as explosions, and increase the loudness of quieter scenes, such as leaves blowing, and create an overall quieter sound.
- Remote Control only: PressNIGHT once for DIM mode, again for DIM + SOFT, again for DIM + LOUD and once more to clear.
On-screen Display
DCP501 Display

N I G H T
13 Press SELECT or OK and OFF flashes.
On-screen Display
DCP501 Display

OFF
14 Press right arrow (>) and ON flashes. With Night Mode enabled, DCP501 display is dimmer and the NIGHT icon on the DCP501 display turns on.
On-screen Display
DCP501 Display
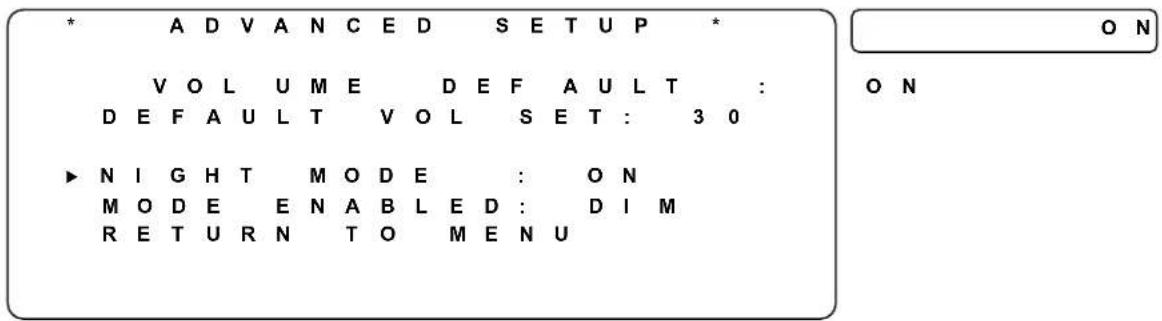
15 Press SELECT or OK and ON stops flashing.
On-screen Display
DCP501 Display

16 Press down arrow (•).
17 Press SELECT or OK and D | M flashes.
On-screen Display
DCP501 Display
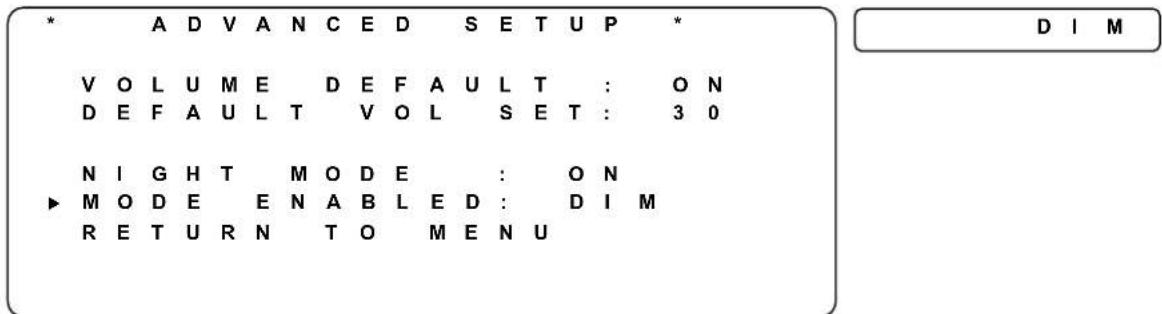
18 Press right arrow (>) and DIM+SOFT flashes. Night Mode enabled with DCP501 display dimmer and light sound compression. The NIGHT icon on the DCP501 display turns on.
On-screen Display
DCP501 Display


ON
19 Press right arrow (>) and DIM+LOUD flashes. This means Night Mode is enabled with the DCP501 display dimmer and heavy sound compression. The NIGHT icon on the DCP501 display turns on.
On-screen Display
DCP501 Display


Summary of Night Mode Operation
Press once: DIM mode
DCP501 display dims and audio plays at maximum dynamic range.
Press twice: DIM+SOFT mode
DCP501 display dims and audio plays at minimum dynamic range.
Press three times: DIM+LOUD mode
DCP501 display dims and audio plays at standard dynamic range.
Press four times: NORMAL mode
DCP501 display is not dimmed and audio plays at maximum dynamic range.
Using DCP501 Cable TV Functions
The DCP501 has an advanced CATV set-top terminal that allows you to view cable channels.
The DCP501 must be authorized for cable TV operation by your cable TV operator before it will tune channels. To use your DCP501 to view cable channels:
1 Press SOURCE to display CATV on your TV. CATV and the last channel tuned are displayed on the DCP501 display.
2 Press MENU to display the TV program guide on your TV.
3 Press GUIDE to display the television program guide on your TV.
4 Change channels by pressing CHANNEL/PRESET▲▼ or making your selection with the program guide on your TV.
If you receive an electronic message from the cable operator, the message icon ☒ turns on. You must use the TV program guide to retrieve an electronic message.
Additional DCP501 cable TV functions include CATV Record and CATV Channel Scan.
Using Cable TV Record
The DCP501 does not have record capability, but it allows you to watch one source like a DVD while recording a cable TV channel on a VCR or PVR. This is known as the CATV RECORD feature. The current listening/viewing source is always selected on the DCP501 front panel or with the DCP501 remote control. The factory setting for the CATV RECORD feature is OFF. The REC icon turns on the DCP501 display to notify you that the record output source has been manually set. To record Cable TV while listening/viewing one of the other sources:
1 Press SETUP to display the MAIN SETUP menu on your TV or AUDIO SET on the DCP501 display.
On-screen Display
DCP501 Display


2 Press down arrow (V) twice.
On-screen Display
DCP501 Display
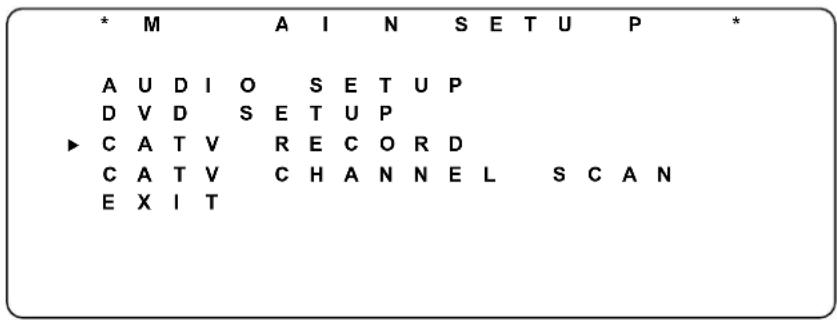

3 Press SELECT or OK.
On-screen Display
DCP501 Display
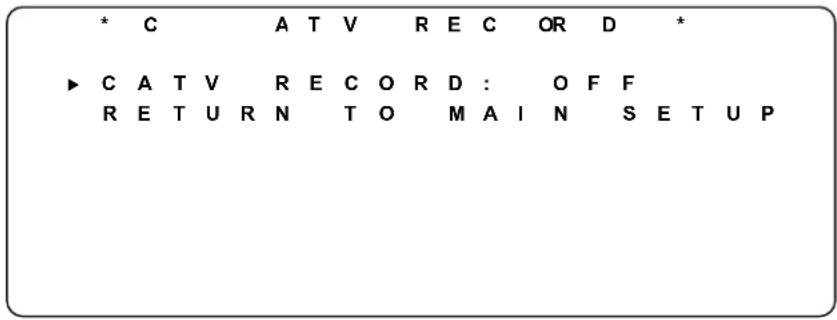

4 Press SELECT or OK and OFF flashes.
On-screen Display
DCP501 Display


5 Press right arrow (>) and ON flashes and the REC icon on the DCP501 display turns on. The current Cable TV channel is directed to VCR1, VCR2, and TAPE outputs regardless of the selected listening/viewing source. The TAPE outputs will only carry the audio from the Cable TV channel.
On-screen Display
DCP501 Display


6 Press SELECT or OK and ON stops flashing.
On-screen Display
DCP501 Display


7 Press down arrow (v).
On-screen Display
DCP501 Display


8 Press SETUP to exit the CATV RECORD menu.
Using CATV Channel Scan
Use this option only if you are NOT a digital cable TV subscriber. This feature enables the set-top terminal in the DCP501 to locate any clear analog cable channels on the cable system. To perform an analog channel scan:
1 Press setup to display the MAIN SETUP menu on your TV or AUDIO SET on the DCP501 display.
On-screen Display
DCP501 Display

2 Press down arrow (v) three times.
On-screen Display
DCP501 Display

3 Press select or OK.
On-screen Display
DCP501 Display
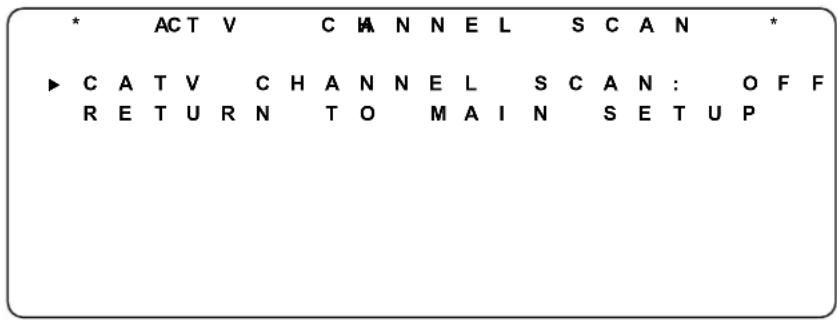
SCAN?
4 Press select or OK and OFF flashes.
On-screen Display
DCP501 Display

5 Press right arrow (>) and ON flashes.
On-screen Display
DCP501 Display


6 Press SELECT or OK. ON stops flashing and an analog CATV channel scan begins. When finished the DCP501 will tune to the first analog cable channel number. The DCP501 also displays the corresponding channel numbers as it scans for clear analog video. The display may take some time to appear on the DCP501 front panel after a channel scan is initiated. Note: Configuring the DCP501 in this manner disables third-party applications. This means that if you previously subscribed to digital channels, some third-party application will no longer be available. This includes your program guide.
On-screen Display
DCP501 Display

SCAN?
7 Press down arrow ( ) three times.
On-screen Display
DCP501 Display

MAIN MENU
8 Press SETUP to exit the CATV CHANNEL SCAN menu.
Using the DCP501 Tuner
This section describes:
■ How to tune radio stations
■ How to Program the DCP501 to tune to your favorite stations with the preset option
Tuning Radio Stations
To tune the radio on the DCP501:
1 Press SOURCE to tuner or press AM/FM. The DCP501 displays:
The last radio station tuned
■ The radio band- AM or FM (also shown on your TV)
The preset number assigned to that station if one has been assigned
2 Press AM/FM to select the radio band.
3 Press tune ▲▼ on the front of the DCP501 or (◀▶) on the remote control to change the frequency. The frequency changes in 200kHz steps in FM and 10kHz steps in AM. Press and hold tune on either the DCP501 front panel or the DCP501 remote control and DCP501 display AUTO icon turns on and the DCP501 scans to the next radio station.
If the tuned signal received is strong, the TUNED icon turns on. For a stereo FM station, the ST icon also turns on. If the signal is weak, ST (stereo) flashes. Press FM MODE to improve the sound, which causes the receiver to operate in monaural (mono) mode, and the ST icon turns off. Press FM MODE again to return to stereo operation.
Note: The red S T (stereo) icon, which corresponds to AM/FM broadcasts, is different from the S T (stereo) icon that corresponds to audio playback from all other sources.
Presetting Radio Stations
You can enter up to 30 preset stations to quickly access your favorite radio station. The 30 stations can be assigned to any combination of AM and FM stations that you would like. To preset radio stations with the DCP501 tuner:
1 Tune to the desired radio station.
2 Press SELECT or OK. The P R E S T icon flashes at the same time as the station number below it, for example 105.3.
3 Press CHANNEL/PRESET▲▼ to select the desired preset number to store the station on or directly enter the preset number using the numeric buttons on your DCP501 remote control.
4 Press SELECT or OK to accept your changes. The PRESET icon and the preset number stop flashing.
A new preset can be stored over an old one by following the same procedure.
Selecting Preset Radio Stations
To select preset radio stations with the DCP501:
1 Press SOURCE to tuner or press AM/FM. DCP501 display shows:
■ the last radio station tuned
■ the band (AM or FM)
■ the preset number assigned to that station (if any)
2 Press CHANNEL/PRESET▲▼ on the front of the DCP501, or channel up/down on the remote control to retrieve the desired preset number or directly enter the preset number using the numeric buttons on your DCP501 remote control. Each preset station number is displayed with its radio band and frequency.
Sound Effects
The DCP501 has many sound effects that can be selected and stored. When the SOURCE is CATV, cable TV providers may be using analog or Dolby Digital audio. The DCP501 allows you to select and store a favorite sound effect for each. On any other SOURCE, the DCP501 stores one analog sound effect for each SOURCE and one Dolby Digital sound effect that is used on all non-CATV SOURCES. Stored sound effects will be automatically selected by the DCP501 when returning to that SOURCE. Some sound effects can only be used on analog (or PCM) audio, and some only on Dolby Digital audio. The dts sound effect can only be used on dts audio. The following sound effects can be used on analog (or PCM) audio.
■ Dolby Pro Logic II (movie, music)
- Dolby Pro Logic
Dolby 3-Stereo
Stereo
■ Six DSP sound effects (Stadium, Concert, Theater, Arena, Club, Church)
The following sound effects can be used on Dolby Digital audio:
- Dolby Digital
- Dolby D+3Stereo
- Dolby D+Stereo
■ Dolby D+PL II (movie, music, & emulation)
Dolby Pro Logic II (Dolby D+PL II) is a special case. Dolby D+PL II can only be used on Dolby Digital audio if the signal is a Dolby Digital 2.0 signal. Sound effects selected on a Dolby Digital 2.0 signal are stored separately from other selected Dolby Digital audio sound effects, and will be automatically selected by the DCP501 when returning to that signal.
To operate the DCP501 audio mode:
1 Press audio MODE and the currently selected surround sound mode is displayed on the TV and the DCP501 display.
2 Press audio MODE repeatedly to cycle through all available surround sound and DSP modes.
When DOLBY DIGITAL is selected, the is displayed.
When DOLBY Pro Logic II Surround is selected, the is displayed.
When DOLBY Pro Logic Surround is selected, the DQPL icon is displayed.
When DOLBY 3 Channel Stereo is selected, the ☐3ST icon is displayed.
When DTS Surround is selected, the dts icon is displayed.
If a DSP sound mode is selected, the DSP icon turns on and the sound mode is displayed:
STADIUM, CONCERT, THEATER, ARENA, CLUB, CHURCH, or STEREO.
Using the DCP501 Digital Audio/Video Receiver
This section describes:
■ How to change the tone setting
■ How to change balance and fade on the DCP501
Changing the DCP501 Tone Setting
Use this feature to define the bass and treble response. The factory setting is 0 dB. The range is from -10 dB to +10 dB. To set the tone:
1 Press tone/level to display BASS.
2 Press select or ok and the current setting flashes.
3 Press cursor left/right ( < > ) to set the speaker bass response and press select.
4 Press tone/level twice to display TREBLE. Press select and the current setting flashes.
5 Press cursor left/right (<>) to set the speaker treble response and then press SELECT or OK.
Below are examples of what is displayed on your TV when you adjust the bass and treble response on your DCP501.
On-screen Display
DCP501 Display
| B | A | S | S | : | - | 5 | d | B |
Changing Balance and Fade on the DCP501
You can define the balance between left and right speakers, and between front and rear speakers with the balance and fade settings. Balance and fade settings should only be used to perform minor adjustments to the sound playback once the Speaker Test Tone Adjust has been conducted. This must be performed while sitting at the listening position. Balance/fade adjustments can reduce the maximum volume of the DCP501.
Balance and fade on the DCP501 are adjusted by attenuating the opposite set of channels. For example, if you want the balance all the way to the right, the DCP501 and the on-screen display show BALANCE: L-20. Balance all the way to the left reads BALANCE: R-20. The factory setting is 0 dB. The range for balance/fade is adjustable by up to 20 dB. To change the balance/fade settings on the DCP501:
1 Press TONE/LEVEL three times to display BALANCE.
2 Press SELECT and the current setting flashes.
3 Press CURSOR left/right ( ≤slant ) to set the balance between the left and right speakers and press SELECT.
4 Press TONE/LEVEL four times to display F A D E R on your TV or F A D E on the DCP501 display.
5 Press SELECT and the current setting flashes.
6 Press CURSOR left/right (<<) to set the balance between the front and rear speakers and press SELECT.
Below are examples of what is displayed on your TV when you adjust the balance/fade response on your DCP501.
On-screen Display
DCP501 Display
| B | A | L | A | N | C | E : | L | - | 1 | 0 |
| F | A | D | E | R : | F - 1 4 | |||||
| B | A | L | L | - | 1 | 0 | |
| F | A | D | E | F | - | 1 | 4 |
Using the DCP501 DVD/CD Player
This section describes your DCP501 DVD/CD player.
1 Press SOURCE to change to DVD/CD mode (Note: READING is displayed on the DCP501 front panel). If no disc is present, the message NO DISC is displayed.
2 Press the OPEN●CLOSE on the front panel to open the loader and insert a disc.
3 Press OPEN● ●CLOSE again to close the loader.
4 To begin playback, press PLAY●PAUSE on the front panel, or the play button (▶) on your DCP501 remote control and the play icon ▶ is displayed.
5 To pause playback, press PLAY●PAUSE on the front panel or II on your DCP501 remote control and the pause icon II is displayed on the DCP501 front panel and PAUSE flashes on your TV for a few seconds. Press PLAY●PAUSE or right arrow play button(▶) to resume playback.
6 Press STOP on the front panel to end playback, or press ▲ twice on your DCP501 remote control.
With a DVD or CD inserted, the following are displayed on the DCP501 display:
Media Type Icon displayed
With a DVD: DVD icon
TITLE icon with total number of titles on DVD
CHAPTER icon with total number of chapters on DVD
HOUR MIN SEC icons with DVD playing time
The DVD navigation menu may be displayed on the TV/monitor if the current Source is DVD/CD.
If the DVD player was in resume mode, the DVD starts playing at the point where it was stopped and the navigation menu is not displayed.
- Some DVDs require you to press STOP (▲) before you can press MENU to display the navigation menu. Other DVDs immediately start a movie without showing the navigation menu.
During DVD playback, pressing MENU stops DVD playback and brings up the DVD navigation menu. A DVD navigation menu allows you to view the special features recorded on the DVD, such as scene select, play the movie from the menu, language selection, and other special features.
With an Audio CD: C D icon
TRACK icon with total number of tracks
HOUR MIN SEC icons with CD playing time
With a CD-R/CD-RW containing mp3 audio files: MP 3 icon TRACK
TRACK icon with total number of tracks
HOUR MIN SEC icons with CD playing time
Resume Play
To use the resume play feature:
1 Press SOURCE to change to DVD/CD mode. If no disc is present, the message NO DISC is displayed.
2 Press the OPEN●CLOSE on the front panel to open the loader and insert a disc.
3 Press OPEN● ●CLOSE again to close the loader.
4 To begin playback, press PLAY●PAUSE on the front panel, or right arrow play button (▶) on your DCP501 remote control and the play icon ▶ is displayed.
5 Press STOP on the DCP501 front panel or ▲ on the DCP501 remote control and RESUME displays on your TV. The DCP501 stays in this mode until you turn the DCP501 off or want to resume playback mode as described in the next step. Resume Play mode stops a DVD or CD and allows you to continue playback later from where you left off unless you turn off the DCP501.
6 Press PLAY● ●PAUSE on the DCP501 front panel or right arrow (▶) on the remote control to resume playback.
7 Press stop on the DCP501 front panel or ▲ on DCP501 remote control twice to end playback.
Changing to any non-DVD/CD source during DVD or CD playback has the same effect as pressing STOP once, which enters Resume Play mode.
Fast Motion Playback (Picture Search)
To scan through the disc when you're playing it, use the Picture Scan feature.
1 Press the (◀ or ▶) buttons when you're playing a disc.
2 Press the (◀ or ▶) buttons again to increase or decrease speed.
3 Press PLAY● ●PAUSE on the front panel or the play button▶ on the remote control any time to resume normal playback.
You do not hear the sound on a disc when you're using the picture scan feature.
Playback features aren't available during the opening credits of a movie.
Using the DVD Banner Display
The on-screen Banner Display contains many DVD playback features. Each feature is represented with an icon. To view the DVD Banner Display, press INFO while a disc is playing.
Press (< > A V) to move through the different features in the Banner Display. When an icon is highlighted, press SELECT or OK to select it.
You can only access the Banner Display when you're playing a disc. In addition, the Banner Display features are only available if the disc was created with that particular feature. For example, if you select the Subtitle icon, you cannot change the subtitle language unless the disc was created with multiple subtitle languages.
Title
Chapter
Audio
Subtitle
Angle
Bookmarks
Disc
Type

Press CLEAR or INFO to remove the Banner Display from your TV screen.
To view the Banner Display, you must turn on your TV and tune it to its Video Input Channel.
Selecting a DVD Title
Some discs contain more than one title. For example, there might be four movies on one disc and each movie could be considered a title. To select a DVD title:
1 While a disc is playing, press INFO to view the Banner Display on your TV.
2 Press CURSOR left/right (>>) to highlight the Title icon.
3 Press SELECT or OK and “- -” is displayed under the Title icon.
4 Press the number buttons on your remote control or
CURSOR left/right and up/down (<>) (∧ ∨) to enter the Title number.
When you enter a one-digit Title number, you may have to press SELECT or OK after pressing the number (1\~9) on the remote. Otherwise, press 0 first and the number of the track that you want to view. Some discs only have one title.
Selecting a DVD Chapter
Because DVD discs use digital technology, a title can be divided into individual chapters, which are similar to tracks on a CD. You can skip a specific chapter by using the Chapter feature on the Banner Display. To select a DVD chapter:
1 While a disc is playing, press INFO to view the Banner Display on your TV.
2 Press CURSOR left/right (<<>>to highlight the Chapter icon.
3 Press SELECT or OK and “- -” is displayed.
Press the number buttons on your remote control or CURSOR up/down (A V) to enter the Title number. When you enter a one-digit Chapter number, you may have to press SELECT or OK after pressing the number (1\~9) on the remote. Otherwise, press 0 first and the number of the chapter that you want to view.
The Chapter feature does not work if the disc isn't formatted with separate chapters.
Changing the Audio Language on a DVD
If the disc was created with different language tracks, you can use the Banner Display to temporarily change the DVD player's Audio setting. To change the DVD audio language:
1 While a disc is playing, press INFO to view the Banner Display on your TV.
2 Press CURSOR left/right (<>to highlight the Audio icon.
3 Press SELECT or OK and the Audio menu is displayed.

4 Press SELECT or OK again to display the next available audio language. When the audio language you want to use is displayed, press SELECT or OK.
5 Press CLEAR or INFO to remove the Banner Display from your TV screen.
The language feature only works if the disc was created with multiple audio tracks.
When you choose an audio language from the Banner Display, you only temporarily override the audio language setting in the DVD Player's main menu in the Language Preferences menu within the Setup menu.
Changing the Subtitle Language on a DVD
You can change the Subtitle language while you're watching a disc, but only if the disc was created with subtitles. To change the DVD subtitle language:
1 While a disc is playing, press INFO to view the Banner Display on your TV.
2 Press CURSOR left/right (<<>> to highlight the Subtitle icon.
3 Press SELECT or OK and the Subtitle menu is displayed.

4 Press CURSOR right ( >> ) to change subtitle language.
5 Press SELECT or OK to enable subtitles (checkmark shown when enabled).
6 Press CLEAR or INFO to remove the Banner Display from your TV screen.
The subtitle feature only works if the disc was created with subtitles.
Changing the Camera Angle on a DVD
Some discs contain multiple angles of a particular scene or sequence. If the disc only has one angle, this feature does not apply. To change the DVD camera angle:
1 While a disc is playing, press INFO to view the Banner Display on your TV.

2 Press CURSOR left/right to highlight the Camera Angle icon.
3 Press SELECT or OK and the Angle menu is displayed.
4 Press SELECT or OK or ANGLE to change the viewing angle.
5 Press CLEAR or INFO to remove the Banner Display from your TV screen.
Using Bookmarks on a DVD
The bookmark feature lets you mark a point on the disc that you can go to quickly. You can store up to 9 bookmarks. To use the bookmark feature:
1 While a disc is playing, press INFO to view the Banner Display on your TV.
2 Press CURSOR left/right (<<>>to highlight the Bookmark icon
3 Press SELECT or OK and the Bookmark menu is displayed.

4 When you reach the scene you want to mark, press SELECT or OK.
5 Press CLEAR or INFO to remove the Banner Display from your TV screen.
Recalling a Bookmarked Scene on a DVD
To recall a bookmark:
1 While a disc is playing, press INFO to view the Banner Display on your TV.
2 Press CURSOR up (^) to select the Go To row of the Bookmark menu.
3 Press CURSOR left/right (<>>to select the bookmarked scene you want to view.
4 Press SELECT or OK to select the bookmark.
5 Press CLEAR or INFO to remove the Banner Display from your TV screen.
Clearing a Bookmark on a DVD
The bookmarks are cleared each time a disc is removed from the player or when the power is turned off. If all 9 bookmarks are in use, you can still mark new scenes, but the previous bookmarks will be erased.
Program Edit on a DVD
You cannot enter Program Edit mode while a disc is playing. To create a Playlist:
1 Press PROG to display the PROGRAM EDIT screen on your TV. If there is no programmed Chapter on the Playlist, the screen below is displayed when you press INFO.

2 Select specific Title/Chapter by pressing CURSOR up/down (∧ ∨) or enter the number (0\~9) on your remote control.
3 Click Add to list your entry on the Playlist.
4 You can add to up to 32 entries by repeating step 2.
5 When you complete program edit, select Play on PROGRAM EDIT screen to begin your programmed playback.
Insert Chapter on a DVD
To insert a Chapter on a Playlist:
1 Press PROG to insert an entry into the Playlist. If there are already programmed Chapters on the Playlist, the screen below is displayed when you press PROG.

2 To insert Chapter, press CURSOR up/down (∧ ∨) to select the location where you want to insert a Chapter.
3 Press CURSOR left/right («») to highlight insert.
4 Click Insert on the PROGRAM EDIT screen to add the entry into your Playlist.
5 Press SELECT or OK.
Delete Program on a DVD
To delete an entry from the Playlist:
1 Press CURSOR up/down (∧ ∨) to select the entry.
2 Press CURSOR left/right and up/down (< > ∧ ∨) to highlight Delete.
3 Press SELECT or OK to delete the selected entry.
Exiting Program Play on a DVD
You exit Program Play when you:
■ Open the disc tray
- PressSTOP on the DCP501 front panel or press ▲ twice on the DCP501 front panel
■ Turn off the DCP501
Using the Repeat Feature
There are four Repeat options:
- Disc- repeat the disc that is playing.
■ Title- repeat the title that is playing.
■ Chapter- repeat the chapter that is playing. - A-B- set the beginning (point A) and the end (point B) to make this part of the movie play repeatedly.
Repeat Play
To use Repeat Play:
1 While a disc is playing, press REPEAT to display Repeat Disc.
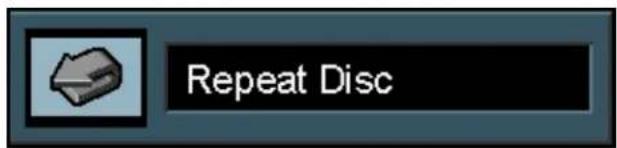
2 Repeat options change when you press REPEAT in the following order:
- Repeat Disc
- Repeat Title
■ Repeat Chapter - Repeat Off
3 Press CLEAR or INFO to remove the Repeat options from your TV screen.
A-B Repeat Play
To use A-B Repeat Play:
1 While a disc is playing, press A-B to display the Repeat A-B.

2 Press A-B when you want to choose a scene as the beginning point.
3 Press A-B again to choose a scene as the end point. This completes the A-B setting.
4 Press A-B to play A-B selection.
5 Press A-B on the remote again to cancel repeat A-B mode.
6 Press CLEAR or INFO to remove Repeat A-B from your TV screen.
Using the CD Banner Display
When playing audio CDs, your CD player has many of the same features as your DVD player, including track skip, repeat play, and programmed playback. The on-screen Banner Display lets you choose various playback features.
The on-screen Banner Display contains many CD playback features. Each feature is illustrated with an icon. To view the CD Banner Display, press INFO while a disc is playing. Press left/right and up/down (< > ∧ ∨) to move through the different features in the Banner Display. When an icon is highlighted, press SELECT or OK to select it.
Track Introscan Bookmarks Elapsed Time Disc Type

TIME
INDICATOR
Press CLEAR or INFO to remove the Banner Display from your TV screen.
Selecting a CD Track
To select a track on a CD:
1 While a disc is playing, press INFO to view the Banner Display on your TV.
2 Press CURSOR left/right (<>) to highlight the Track icon.
3 Press SELECT or OK and “- -” is displayed under the Track icon.
4 Press the number button(s) on your remote control or CURSOR up/down ( ) to enter the Track number.
When you enter a one-digit Track number, you may have to press SELECT or OK after pressing the number (1\~9) on the remote. Otherwise, press 0 first and the number of the track that you want to listen to.
Using IntroScan on a CD
IntroScan plays the first 10-seconds of each track on the CD. To use IntroScan:
1 While a disc is playing, press INFO to view the Banner Display on your TV.
2 Press CURSOR left/right (<>) to highlight the IntroScan icon.
3 Press SELECT or OK to begin IntroScan.
After IntroScan previews each track on the CD, playback stops.
Press PLAY any time to play the current track in its entirety.
Using Bookmarks on a CD
The bookmark feature lets you mark a point on the disc that you can go to quickly. You can store up to 9 bookmarks. To use the bookmark feature:
1 While a disc is playing, press INFO to view the Banner Display on your TV.
2 Press CURSOR left/right ( < > ) to highlight the Bookmark icon
3 Press SELECT or OK and the Bookmark menu is displayed.

4 When you reach a point during playback that you want to mark, press SELECT or OK.
5 Press CLEAR or INFO to remove the Banner Display from your TV screen.
Recalling a Bookmarked Selection on a CD
To recall a bookmark:
1 While a disc is playing, press INFO to view the Banner Display on your TV.
2 Press CURSOR up (^) to select the Go To row of the Bookmark Menu.
3 Press CURSOR left/right (<>) to select the bookmark you want to activate.
4 Press SELECT or OK to select the bookmark.
5 Press CLEAR or INFO to remove the Banner Display from your TV screen.
Clearing a Bookmark on a CD
The bookmarks are cleared each time a disc is removed from the player or when the power is turned off. If all 9 bookmarks are in use, you can still mark new selections, but the previous bookmarks will be erased.
Program Edit on a CD
There are two ways to program a Playlist for a CD. If you press PROG once, you can program a CD Playlist using the on-screen display (OSD) on your TV. If you press PROG twice within 1 second of each other, you do not need the TV turned on, and can program a CD Playlist using your DCP501 display. You cannot enter Program Edit mode while a disc is playing: the disc must be stopped.
Program a Playlist with the TV Turned On
1 Press PROG to display the PROGRAM EDIT screen on your TV.
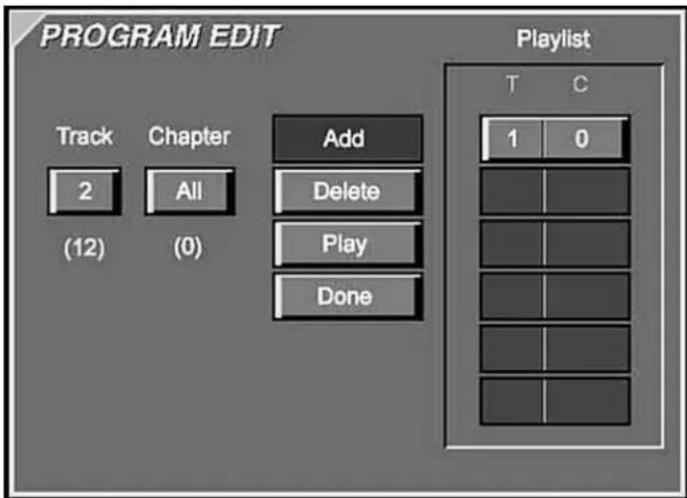
2 Select specific Track/Chapter by pressing CURSOR up/down (∧ ∨) or enter the number (0\~9) on your remote control. The Chapter icon is not an available feature on a CD and is always set to ALL.
3 Click Add to list your entry on the Playlist.
You can add to up to 32 entries by repeating step 2.
4 When you complete program edit, select Play on PROGRAM EDIT screen to begin your programmed playback.
Insert Track on a CD
To insert a Track on a Playlist:
1 Press PROG to insert an entry into the Playlist. If there are already programmed Tracks on the Playlist, the screen below is displayed when you press PROG.
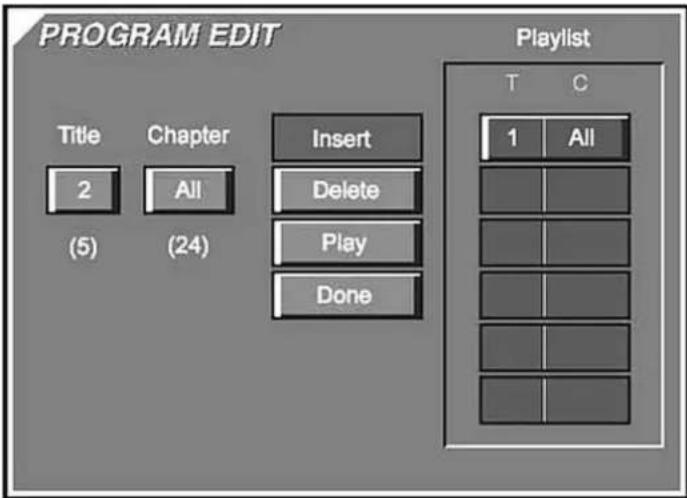
2 To insert Track, press CURSOR up/down (∧ ∨) to select the location where you want to insert a Track.
3 Press CURSOR left/right (<>) to highlight A D D.
4 Click Insert on the PROGRAM EDIT screen.
5 Press SELECT or OK.
Delete Program on a CD
To delete an entry from the Playlist:
1 Press CURSOR up/down (A V) to select the entry.
2 Press CURSOR left/right and up/down (< > ∧ ∨) to highlight Delete.
3 Press SELECT or OK to delete the selected entry.
Program a Playlist with the TV Turned Off
1 With an audio CD inserted and stopped, press PROG twice within 1 second of each other. The Track icon and track number flashes and the program item number, P R : 1, is displayed.
2 Press CURSOR left/right (<>) to select a track number.
3 Press SELECT or OK to store the selected track number in the playlist. The program item number will advance to 2 and the track number will be reset to 1.
4 Press CURSOR left/right (<>) to select a track number.
5 Press SELECT or OK to enter up to 20 track numbers in this manner until finished entering the Playlist.
6 Press PLAY to begin playback of the play list.
Exiting Program Play on a CD
You exit Program Play when you:
- Open the disc tray
- Press STOP on the DCP501 front panel or press ▲ twice on the DCP501 remote control.
- Turn off the DCP501
■ PresCLEAR on the remote control
Using the Repeat Feature
There are three Repeat options for a CD:
- Disc- repeat the disc that is playing.
- Track- repeat the title that is playing.
- A-B- set the beginning (point A) and the end (point B) to make this part of the part of the CD play repeatedly.
Repeat Play
To use Repeat Play:
1 While a disc is playing, press REPEAT to display Repeat Disc.

2 Repeat options change when you press REPEAT in the following order:
- Repeat Disc
- Repeat Track
- Repeat Off
3 Press CLEAR or INFO to remove the Repeat options from your TV screen.
A-B Repeat Play
To use A-B Repeat Play:
1 While a disc is playing, press A-B to display the Repeat A-B.
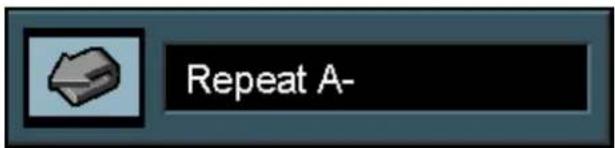
2 Press A-B when you want to choose a point in the music as the beginning point.
3 Press A-B again to choose a point as the end point.
4 Press A-B on the remote again to cancel repeat A-B mode.
5 Press CLEAR or INFO to remove Repeat A-B from your TV screen.
Random Play
To use Random Play on a CD:
1 While a disc is playing, press SHUFFLE to display Random Play.
2 Each time you press SHUFFLE, Random Play turns on and off.
3 Press CLEAR or INFO to remove Random Play from your TV screen.
If you want to cancel Random Play while a disc is playing, press SHUFFLE again and Standard Play is displayed on your TV.
Playing an MP3 Audio CD on the DCP501
Your DCP501 allows you to play MP3 audio CDs created on a PC. To start, stop, pause, and skip a selection on a CD containing MP3 audio files, use the same buttons on the DCP501 front panel or remote control as you would with any DVD or audio CD. When creating an MP3 CD on a PC, the transfer bit rate setting for compression should be set to 128Kbps. The DCP501 is compatible with 32, 44.1, and 48kHz sampling frequencies. The DCP501 can read an MP3 CD created under a PC file structure within the following guidelines:
- Readable characters are alphabetic characters A-Z, numbers 0-9, and the underscore (_).
■ The MP3 extension is attached to all filenames. - Never add the MP3 extension to any files other than MP3 files on a CD played on the DCP501. If the MP3 extension is added to any files other than MP3 files, the DCP501 produces loud noises and may damage your speakers.
■ Make sure an MP3 file can be played on a PC prior to copying the file(s) to a CD.
■ Make sure you close the MP3 copy session on your PC when creating an MP3 CD. An MP3 CD does not play on the DCP501 if the session was not closed. - Filenames and folder names may not be properly displayed with some PC MP3 software.
- Do not store files or folders other than MP3 on the media to be played back on the DCP501.
In some instances, MP3 playback does not occur when audio CD (CD-DA) and MP3 audio are stored on the same CD. - It is not possible to playback more than the maximum allowable folder and files allowed by the media. The maximum is a total of 223 files and folders.
- When exceeding more than eight characters, MP3 folder and file names are displayed in an abbreviated format by the DCP501.
On-Screen Display when Playing an MP3 CD
When you insert an MP3 CD in the DCP501, a screen listing the CD contents is displayed similar to the example shown below. The first MP3 file on the CD starts playing and is listed at the top of the screen.
| Play Indicator | Name of File Playing | Elapsed time | Disc type |

Playlist
Scroll Elevator
Programmed
Playlist
Playing your MP3 Files
1 Press CURSOR up/down (∧ ∨) to select an MP3 file on the left-hand side of the screen.
2 Press SELECT or OK to begin playback of the selected file.
Programming Selections from an MP3 CD
To program the DCP501 to play selections from an MP3 CD:
1 If an MP3 CD is playing, press STOP on the DCP501 front panel or ▲ on DCP501 remote control to end playback.
2 Press PROGRAM to enter Program Mode. The P G M icon turns on.
3 Press CURSOR up/down (∧ ∨) to select an MP3 file on the left-hand side of the screen.
4 Press SELECT or OK and the selected file is copied to the right-hand side of the screen as shown in the example below.

5 Repeat steps 2 and 3 to add selections to your Programmed Playlist. You can have up to 1025 selections in your Programmed Playlist.
6 To listen to your selections, press PLAY●PAUSE on the front panel, or the play button (▶) on your DCP501 remote control and the play icon ▶ is displayed.
Deleting Selections from an MP3 CD
To remove selections from your MP3 Programmed Playlist:
1 Press CURSOR up/down (A V) to select an MP3 file from your Programmed Playlist.
2 Press CLEAR on the remote control and the selected file is deleted from the Programmed Playlist on the right-hand side of the screen.
3 Continue selecting the files you want to delete.
4 To listen to your revised Programmed Playlist, press PLAY●PAUSE on the front panel, or the play button (▶) on your DCP501 remote control and the play icon ▶ is displayed.
To remove all files from a MP3 Programmed Playlist, press CURSOR up/down (A V) to select All Clear. Then, press SELECT or OK and all files are removed from the Programmed Playlist.
Selecting Specific Folder and Files for Playback
To playback a specific file on folder on your MP3 CD:
1 Press CURSOR up/down (A V) to select a folder and then press SELECT or OK. The files in the selected folder are listed under the folder.
2 Press CURSOR up/down (A V) to select a file and then press SELECT or OK. Playback starts from the file or folder you selected. Files in the next folder are played back when there are no files are in the selected folder.
3 Press PLAY●PAUSE on the front panel, or right arrow play button (▶) on your DCP501 remote control and playback begins from your selection.
DVD Setup
The following DVD options are performed only through the on-screen display on your TV.
Audio
Subtitles
- Menus
Rating
- Password
TV Aspect
- Subtitles On/Off
During DVD setup, the message DVD SETUP is displayed on the DCP501 display. To set programmable DVD options on your DCP501:
1 Press SETUP to display MAIN MENU on your TV.
On-screen Display
DCP501 Display
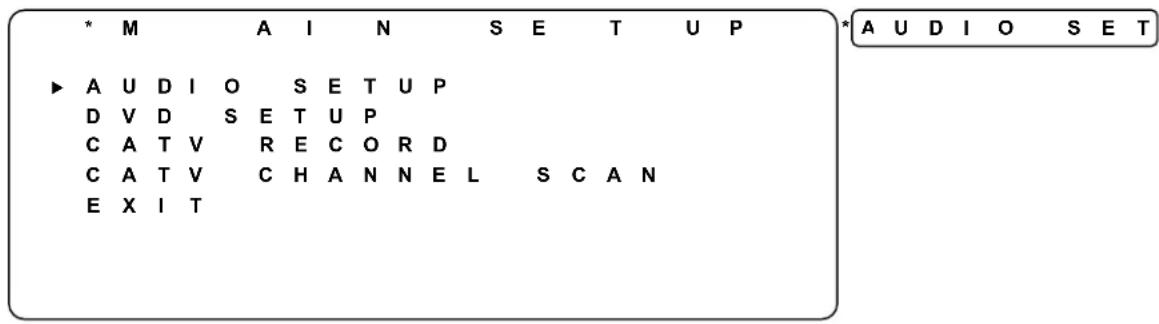
2 Press down arrow (V).
On-screen Display
DCP501 Display

3 Press SELECT on the front of the DCP501 or OK on your remote control to display the DVD SETUP menu.

4 AUDIO: Press SELECT to set Audio. Use this option to set the DVD audio language. The factory setting is English.
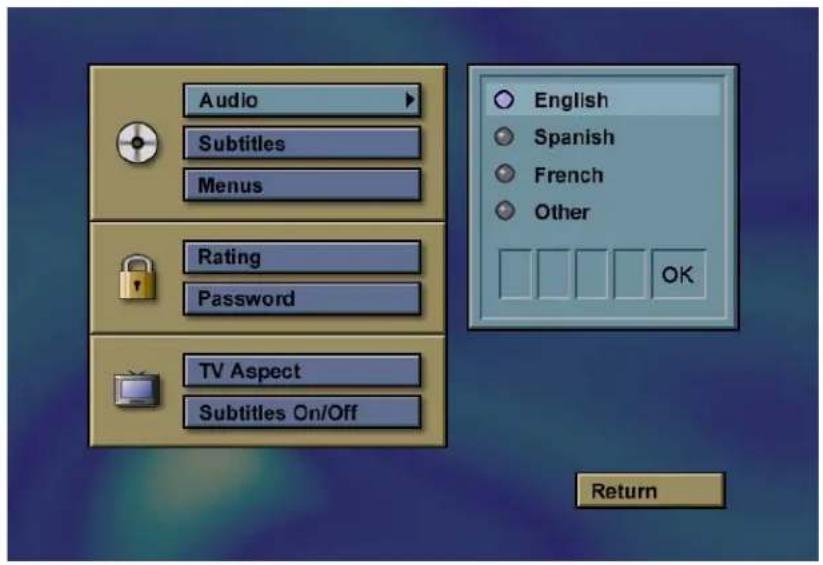
5 Press CURSOR up/down (A V) to highlight English, French, Spanish, or Other, and press SELECT.
If you select Other, you are prompted to enter a 4-digit language code. After entering this code, press SELECT.
6 Press down arrow (V V) to highlight the Sub titles option on the DVD SETUP menu.
7 SUBTITLES: Press SELECT to set Subtitles. Use this option to set the language for DVD subtitles. The factory setting is English.

8 Press CURSOR up/down (A V) to highlight English, French, Spanish, or Other, and press SELECT.
If you select Other, you are prompted to enter a 4-digit language code. After entering this code, press SELECT.
9 Press down arrow (V V) to highlight the Men us option on the DVD SETUP menu.
10 MENUS: Press SELECT to set Menus. Use this option to set the language for DVD menus. The factory setting is English.
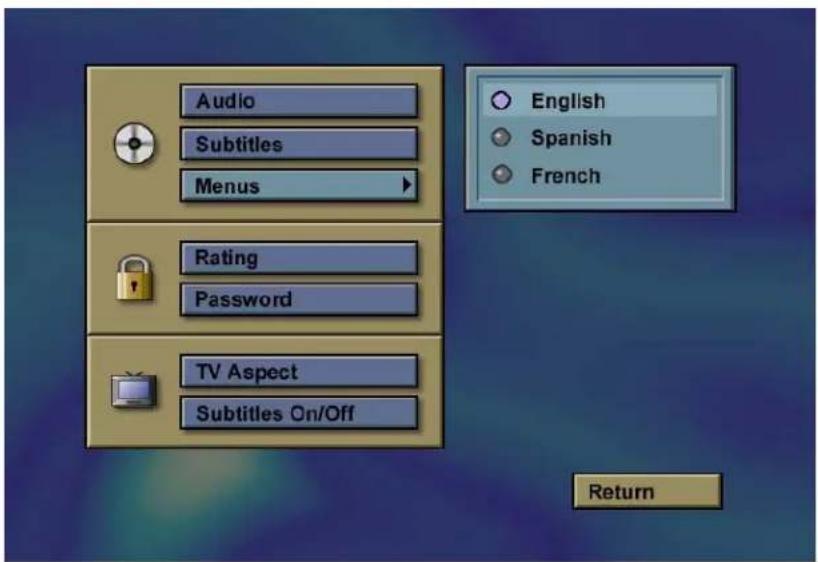
11 Press CURSOR up/down (A V) to highlight English, French, Spanish, or Other and press SELECT.
If you select Other, you are prompted to enter a 4-digit language code. After entering this code, press SELECT.
12 Press down arrow (W) to highlight the Rating option on the DVD SETUP menu.
13 RATING: Press SELECT to set the Rating. DVD Rating (also called Parental Control) allows parents to stop the playback of certain DVDs they deem unsuitable for their children. Most DVDs are encoded with a rating level and if the rating level of the disc is higher than the preset level, playback is prohibited unless a password is entered. The DCP501 cannot prevent the playback of DVD titles that do not have a rating level encoded onto the disc, regardless of the desired rating level setting on the DCP501.

DVDs use a rating system consisting of eight rating levels. The MPAA rating system is shown in the list below. The factory setting is 8 which allows all DVDs to be played.
MPAA Rating "G- General": Level 1
MPAA Rating "PG- Parental Guidance": Level 3
MPAA Rating "PG13- Parental Guidance and 13 years old": Level 4
MPAA Rating "R- Restricted": Level 6
MPAA Rating "NC17- from 17 years old": Level 7
14 Press CURSOR up/down ( ) to highlight the desired rating level and press SELECT or CURSOR left (<).
If a DVD with a rating higher than the one set is inserted for playback, the lock icon on the DCP501 display turns on and your TV screen displays a password entry screen.
15 Press CURSOR up/down (A V) or the number buttons on your DCP501 remote control to enter the desired password, using CURSOR left/right (<>) to move between digits. When all four digits have been entered, press SELECT to enter the password. The lock icon is removed and the DVD navigation menu is re-displayed.
16 Press down arrow (W) to highlight the Password option on the DVD SETUP menu.
17 PASSWORD: Press SELECT to set the Password. After setting a Rating, you may enter a password to override the Parental Control Level set in the case of a DVD with a higher rating is inserted in the DCP501 for playback. To set a password, a four-digit number must be entered.

18 Highlight Set Password and press SELECT to display the password entry screen.

19 Press CURSOR up/down (A V) or the number buttons on the DCP501 remote control to enter the desired password, using CURSOR left/right (<>>to move between digits. When all four digits have been entered, press right CURSOR right (>) to highlight OK and then press SELECT to store the password.
- To change a password, follow the same steps, highlighting Change Password and press SELECT. You are required to first enter the old password before changing to a new one.
- To clear the password feature, thereby removing the Rating Level, follow the same steps, highlighting Clear Password and press SELECT. You will first be required to enter the current password before clearing.
20 Press down arrow (W) to highlight the TV Aspect option on the DVD SETUP menu.
21 TV ASPECT: Press SELECT to set TV Aspect. This option changes the TV aspect to widescreen (16:9) or conventional (4:3). The factory setting for aspect ratio is 4X3 Letterbox.
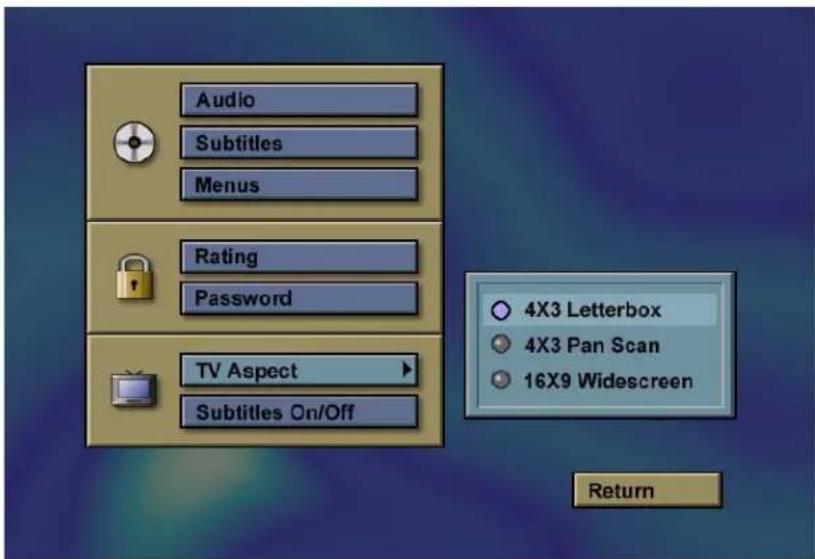
22 Press CURSOR up/down ( V) to highlight one of the following:
4X3 Letterbox to watch a 'letterbox' movie on a conventional TV 4x3 Pan Scan to watch a 'letterbox' movie full screen on a conventional TV 16X9 Widescreen if you have a widescreen TV
23 Press SELECT.
24 Press down arrow (W) to highlight the Subtitles On/Off option on the DVD SETUP menu.
25 SUBTITLES On/Off: Press SELECT to set Subtitles On/Off. The factory setting is On.
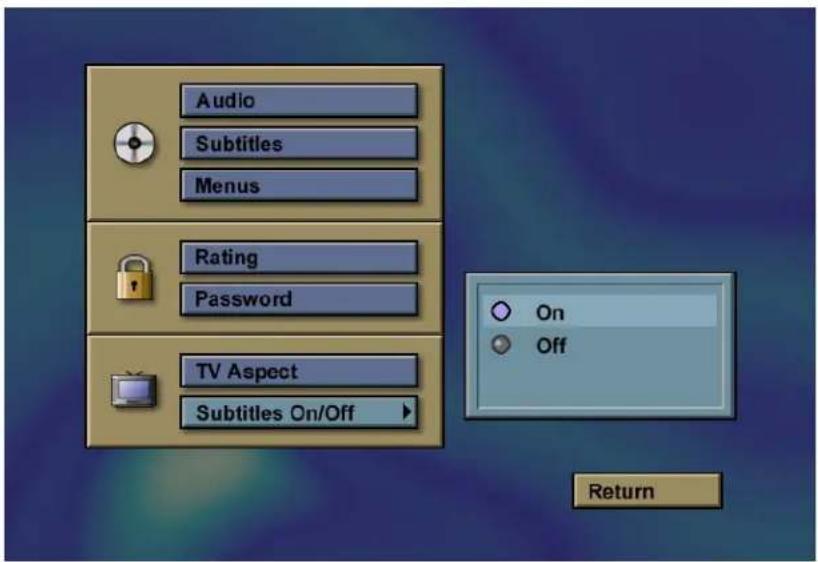
26 Press CURSOR up/down (A V) to highlight Off or On and press SELECT.
27 Press down arrow (V).
28 Press SELECT.
29 Press down arrow (v) three times.
On-screen Display
DCP501 Display


30 Press SELECT to return DCP501 to normal operation. If you enter the DVD Setup menu while watching a DVD, the DVD player automatically stops in resume mode, which means you can return to the same part of the movie. After finishing your changes in the DVD Setup, exit the menus. Press PLAY●PAUSE on the front panel or the play button (▶) on the DCP501 remote control to continue playing your DVD from where you left off. Do not press STOP on the front panel or ▲ on the DCP501 remote control or the DVD player will stop playback completely.
Resetting Your Password
If you forget your DVD parental control password, you can reset the password. The DCP501 should not be in any DCP501 setup mode when performing this operation including:
■ Main Setup
DVD Setup
- Banner Display
Program Edit
To reset your DVD parental control password:
On the DCP501 front panel only, press SETUP + CURSOR ( ) at the same time to clear the old password. The DCP501 display clears indicating that your action was successful. Switch off the DCP501 and switch it back on using the POWER button. You can then return to the DVD Setup password entry screen to enter a new password.
Steps for resetting your password operate only if a password was previously entered.
Other On-Screen Text Messages
The following text is displayed on your TV when you press the corresponding button on the DCP501 front panel or your DCP501 remote control:
Mute
On-screen Display
DCP501 Display
M U T E
M U T E
Volume Up/Down
On-screen Display
DCP501 Display
V O L U M E : 4 4
V O L U M E 4 4
DVD/CD Playback Control
On-screen Display
A Y
A U S E
P L
P
S T O P
N E X T
REV
P
R.S A R C H 1
R. S B A R C H 2
R. S A R C H 3
R. S B A R C H 4
This section provides information to assist you in quickly detecting and resolving problems that might occur when using the DCP501.
If you need assistance, call Motorola's Customer Support Center at 1-866-668-2271 or 1-866-MOT-BCS1. If you have questions about or are having difficulties regarding your digital cable services, contact your local cable service provider.
| Problem | Possible Solution | |
| POWER | The DCP501 doesn’t switch on. | ➢ Check the power outlet for AC power.➢ Verify that the DCP501’s power cord is firmly connected to an AC power outlet.➢ If the DCP501 is excessively hot, thermal circuit breakers may have been tripped. Allow the unit to cool down and then switch the unit on. |
| REMOTE CONTROL | Remote control operation is not possible. | ➢ Check for an obstruction between the remote control and the DCP501. Aim the remote control directly at the DCP501, not at the TV or VCR.➢ Be sure to firmly and deliberately press and release the buttons on the remote control unit one at a time. The LED associated with a remote control button should turn on when you press the associated button.➢ Check the batteries in the remote control unit and replace with new batteries if necessary.➢ Verify that the remote control unit is in the appropriate operational mode (CATV, VCR, DVD, Tape, etc) for the functions you are attempting to use.➢ The remote control unit may be too far away from the DCP501.➢ The angle between the remote control unit and the front panel of the DCP501 may be too large. |
| AUDIO | There is no sound or very little sound from the speakers. | ➢ Check to make sure that each speaker has been properly connected to the speaker output jacks on the rear panel of the DCP501.➢ Check that the speakers are working by utilizing the Test Tone function as described in the “Operation” section.➢ Verify that the DCP501 has not been placed in MUTE mode.➢ Check that the volume control on the DCP501 has been adjusted to an appropriate listening volume.➢ Verify that the DCP501 is set to the correct source (CATV, VCR, DVD, Tape, etc).➢ If the front panel displays O V E R L O A D , one of two things has happened:1 If the DCP501 detects the speakers have a short circuit, it shuts down the amplifiers. Switch the DCP501 off, remove the short circuit, and turn the DCP501 back on. The DCP501 should now work as normal. If O V E R L O A D is still displayed, a short circuit condition remains.2 If the maximum amplifier output power is exceeded, the DCP501 shuts down the amplifiers. Turn down the volume a little and switch the DCP501 off and then switch the DCP501 back on and the DCP501 should now work as normal. If O V E R L O A D is still displayed, turn the volume down some more. |
| There is no sound or very little sound from the center speaker. | ➢ Check that the center speaker has been properly connected to the DCP501.➢ Check that the speaker is working by utilizing the Test Tone function as described in the “Operation” section.➢ The DCP501 may be set to Stereo mode. Select one of the surround sound audio modes (Dolby Digital, Dolby Pro Logic II, dts) and listen for output.➢ Verify that the CENTER selection in the SPEAKER SETUP menu is not set to NONE as defined in the “Operation” section.➢ Adjust the volume control of the DCP501 to an appropriate level. | |
| There is no sound or very little sound from the surround speakers. | ➢ Check that the surround speakers are properly connected to the DCP501.➢ Check that the speakers are working by utilizing the Test Tone function as described in the “Operation” section.➢ The DCP501 may be set to Stereo mode. Select one of the surround sound audio modes (Dolby Digital, Dolby Pro Logic II, dts) and listen for output.➢ Verify that the SURROUND selection in the SPEAKER SETUP menu is not set to NONE as defined in the “Operation” section.➢ Adjust the volume control of the DCP501 to an appropriate level. | |
| There is no sound or very little sound from a powered subwoofer. | ➢ Verify that the subwoofer is properly connected as defined in the “Installation” section.➢ Verify that the SUBWOOFER? setting in the SPEAKER SETUP menu is configured as defined in the “Operation” section.➢ Verify that the subwoofer is properly connected to an AC outlet and powered on as applicable.➢ Verify that the volume/gain control on the subwoofer is adjusted accordingly as applicable. | |
| VIDEO | There is no picture on the TV. | ➢ Check that the TV is powered on.➢ Verify that the DCP501 is properly connected to the TV as defined in the “Installation” section.➢ Verify that the TV is set to the appropriate input source (Input1, Input2, etc.).➢ Verify that the DCP501 is set to the appropriate output mode (DVD, CATV, Video1, etc.).➢ Replace the video cables. |
| The picture is not in color. | ➢ Verify that the picture source is not presented in black and white.➢ Replace the S-Video cable. | |
| The picture appears discolored or improperly tinted. | ➢ Check that speakers or other electrical devices that are near the TV are properly shielded. | |
| CATV | There is no picture when in CATV mode. | ➢ Verify that the coaxial cable is properly connected to the DCP501 as defined in the “Installation” section.➢ Verify that the DCP501 is properly connected to the TV as defined in the “Installation” section.➢ Verify that the DCP501 is authorized for cable TV service as applicable. If not authorized, call you local cable TV provider or perform a channel scan as described in the “Operation” section.➢ The RF signal may not be adequate for the DCP501. Call the cable TV provider for assistance. |
| The picture is “blocky” and appears to be “skipping”. | ➢ The RF signal may not be adequate for the DCP501. Call the cable TV provider for assistance.➢ The cable TV provider may be experiencing technical difficulties. Call the cable TV provider for assistance. | |
| Some channels look better than others. | ➢ The DCP501 is capable of receiving both analog and digital channels. Digital channels provide improved clarity and quality when compared to analog channels. Call the cable TV provider for more information. | |
| The DCP501 does not have a TV program guide that displays on the TV. | ➢ Verify that the DCP501 is authorized for digital cable TV service.➢ The DCP501 may not have an IPG loaded onto the device. Call the cable TV provider for assistance. | |
| The IPG does not have any information. | ➢ Under certain conditions, the DCP501 may take several hours to acquire the applicable program data. Call the cable TV provider for more information.➢ Unplug the DCP501 from the AC outlet, wait five seconds, and plug the DCP501 back into the AC outlet. It may take several hours for the DCP501 to acquire the applicable guide data.➢ Call the cable TV provider for assistance. | |
| DVD/CD PLAYER | The disc does not play. | ➢ Verify that a disc has been inserted into the DVD tray.➢ The disc may be upside down in the tray. Ensure that the disc is inserted with the playback side facing down.➢ The player does not support playback of all disc formats (CD-ROM, etc.). Verify that the disc format is supported by the DCP501.➢ Severe scratches, abrasions, or smudges on the playback side of the disc may prevent proper operation. Check the disc for damage and clean the playback side with a soft cloth.➢ The region code on the DVD does not match the DCP501 player. |
| The disc does not play from the beginning. | ➢ REPEAT, PROGRAM, or SHUFFLE playback has been selected. Press the STOP/EJECT button until the STOP message is displayed on the screen.➢ Resume Play has been selected. The player will continue playback from the previous position on the disc if the STOP/EJECT button has only been pressed once or if the DCP501 was changed to another mode (CATV, VCR1, etc.) while the DVD player was in operation. Press the STOP/EJECT button until the STOP message appears on the screen. | |
| Messages, menus, and subtitles appear in the wrong language. | ➢ Use the DVD SETUP menu from the MAIN SETUP menu to select the desired languages for menus, messages, and subtitles.➢ Some DVDs provide the ability to select the language(s) to use for playback, menus, subtitles, and messages. Press the MENU button while the DVD is playing (some DVDs need to be stopped before their main menu can be accessed) and select the desired language(s).➢ Some DVDs do not offer multilingual tracks and cannot be listened to in other languages beside the recorded track. | |
| The DVD picture does not fill the TV screen. | ➢ Many DVDs are recorded in several different aspect ratios to allow for a customized viewing experience. Use the DVD SETUP menu from the MAIN SETUP menu to select the TV Aspect (Letterbox, Pan & Scan, or Widescreen) that provides the best viewing experience. | |
| AM-FM TUNER | Radio stations cannot be tuned. | ➢ Verify that the AM and FM antennas are properly connected, as defined in the “Installation” section.➢ Adjust antenna location.➢ Verify that the DCP501 is within reception range of the desired station.➢ Indoor antennas may not be adequate to receive AM/FM broadcasts in certain geographical locations. An external antenna may be required. |
| Preset radio stations cannot be recalled. | ➢ No station presets have been entered➢ Station presets have been cleared. | |
| Tuned station is noisy and full of static. | ➢ Switch the FM receiver into Mono mode, as defined in the “Operation” section.➢ The AM receiver may be experiencing interference from electrical appliances (e.g. clothes washer). Turn off the appliance while listening to AM broadcasts. | |
| RECORDING | The VCR does not operate or record properly. | ➢ Check to make sure that the VCR is properly connected to an AC power outlet and powered on.➢ Verify that the VCR outputs of the DCP501 are properly connected to the inputs of the VCR, and that the outputs of the VCR are properly connected to the VCR inputs of the DCP501, as defined in the “Installation” section.➢ The VCR may not record DVDs since the content may be copy-protected.➢ Make sure that the video cassette is not damaged or of poor quality.➢ Make sure that the plastic erase protection tab on the video cassette has not been broken off.➢ Verify that the remote control unit has been programmed to operate the correct model of VCR that is being used. |
Digital Cable Receiver
| Clear analog video | Yes |
| 64 and 256-QAM demodulator | Yes |
| Agile OOB tuner | Yes |
| Return Path | Both RF and integrated Telco Return capabilities |
| Standard definition MPEG2 | Yes |
| NTSC video decoder with adaptive digital comb filter | Yes |
| Graphics | Enhanced Resolution Bitmapped Graphics (2/4/8 Bit) |
A/V Receiver and Amplifier
| RMS Output Power | 2x100 Watts, 20 Hz to 20 kHz5x100 Watts, 1 kHz |
| Dolby® Digital Decoder | 6 channels |
| DTS® Decoder | 6 channels |
| Dolby® Prologic II Processing | Yes |
| Audio effects processor | 6 modes |
| Amplified speaker outputs | Yes |
| Headphone output | Yes |
| Analog volume control, all speakers | Yes |
| Balance control, right/left | Yes |
| Balance control, front/rear | Yes |
| Tone control, front left/right | Yes |
| SPDIF input with Auto Detect | Yes |
| BTSC decoder | Yes |
| AM/FM Tuning | Yes |
| Audio Frequency Response | 20 Hz to 20 kHz, +/- 1 dB |
| Harmonic Distortion | < 0.1% THD, 2x100Watts< 0.9% THD, 5x100Watts |
| Audio Signal-to-Noise Ratio | 95 dB, A-weighted |
| Video Signal-to-Noise Ratio | >57 dB (Digital), >49dB (Analog) |
| Video Frequency Response | ±1 dB from 100 kHz to 4.2 MHz |
DVD/CD Player
| DVD/CD Player | Yes |
| playable Disc(s) | 1 |
| Dolby® Digital Decoder, 6 channels | Yes |
| DTS Decoder | Yes |
| CD play programming | Yes |
| Plays MP3-encoded discs | Yes |
| Audio Dynamic Range | 95 dB, A-weighted |
| Audio Signal-to-Noise Ratio | 95 dB, A-weighted |
| Audio Frequency Response | 96 kHz PCM |
| Video Horizontal Resolution | At least 4.2 MHz |
Input/Output
Front Panel Inputs
| Keypad | Yes |
| IR receiver | Yes |
| Video 2 | |
| Video in—composite video baseband Yes | |
| Left/right audio baseband Yes | |
| SPDIF optical (GAME) Yes | |
Front Panel Outputs
| Headphone jack | Yes |
| LED display | Yes |
| Vacuum Fluorescent Display (VFD) | Yes |
Rear Panel Inputs
| RF | |
| Cable TV input #1 | Yes |
| FM tuner input | Yes |
| AM tuner input | Yes |
Video
| Composite & S-video - VCR1, VCR2, Video1 | Yes—auto detection between composite and S-video | |
| Audio | ||
| Left/right baseband - VCR1, VCR2, Video1, Tape | Yes | |
| SPDIF | optical | Yes |
| SPDIF | coaxial | Yes |
Rear Panel Outputs
| Video | |
| RF modulator (remod) - TV | - |
| Composite & S-video - VCR1, VCR2, TV | Yes |
| Audio | |
| Front left/right speakers A (main) | Yes |
| Center speaker | Yes |
| Rear left/right speakers | Yes |
| Subwoofer output for powered subwoofer | Yes |
| Left/right baseband - VCR1, VCR2, Tape | Yes |
| Front Left/right baseband - TV or Ext amp | Yes |
| Center baseband - TV or Ext amp | Yes |
| Rear left/right baseband - TV or Ext amp | Yes |
General
| Security Features | |
| Embedded security | DigiCipher® Conditional Access |
| Anti-copy Protection(Digital Cable Receiver and DVD) | Macrovision Anti-copy Protection |
| Renewable Security | Motorola TVPass Card |
| Interactive Applications | Supports DCT2000 applications such as electronic program guide and other interactive services as made available by the local cable service provider. |
| Unit Operation | |
| Infrared (IR) Universal Remote Control | Yes |
| Graphic User Interface Menus | Yes |
| Data | |
| HSI for HD | Yes |
| Serial RS232 | Yes |
| Other | |
| Power Requirements | 120 VAC / 60 Hz |
| Weight (without packaging) | 35 pounds (DCP501 without packaging) |
| Dimensions (without packaging) | 17 (W) x 6.1 (H) x 20 (D) inches (DCP501) |
Note: Features, specifications and accessories are subject to change without notice.
You can set up your remote control for your TV and VCR by consulting the tables below. Note that you only need to set up your remote control for your TV, VCR 1 and VCR 2 (if applicable).
For instructions on programming, verifying and finding setup codes for your remote control, see Remote Control in the "Overview" section.
TV Setup Codes
| Manufacturer TV Setup | Code | |
| AOC | 0019, 0030 | |
| Admiral | 0093, 0463 | |
| Aiko | 0092 | |
| Akai | 0030 | |
| Alaron | 0179 | |
| America Action 0180 | ||
| Anam 0180 | ||
| Audiovox 0092, 0180, 0451, 0623 | ||
| Baysonic 0180 | ||
| Belcor 0019 | ||
| Bell & Howell 0016, 0154 | ||
| Bradford 0180 | ||
| Brockwood 0019 | ||
| Broksonic 0236, 0463 | ||
| CXC 0180 | ||
| Candle 0030, 0056 | ||
| Carnivale 0030 | ||
| Carver | 0054 | |
| Celebrity | 0000 | |
| Cineral | 0092, 0451 | |
| Citizen | 0030, 0056, 0060, 0092 | |
| Concerto 0056 | ||
| Contec 0180 | ||
| Craig | 0180 | |
| Crosley | 0054 | |
| Crown 0180 | ||
| Curtis Mathes 0016, 0030, | 0047, 0051, 0054, 0056, 0060, 0093, 0145, 0154, 0166, 0451, 0466, 0747, 1147, 1347 | |
| Daewoo 0019, 0092, 0451, 0623, 0624 | ||
| Daytron 0019 | ||
| Denon 0145 | ||
| Dumont 0017, 0019 | ||
| Electroband 0000 | ||
| Emerson 0019, 0154, 0178, 0179, 0180, 0236, 0463, 0623, 0624 | ||
| Envision 0030 | ||
| Fisher 0154 | ||
| Fujitsu 0179 | ||
| Funai 0171, 0179, 0180 | ||
| Futuretech 0180 | ||
| GE 0021, 0047, 0051, 0093, 0178, 0451, 0747, 1147, 1347 | ||
| Gibraltar 0017, 0019, 0030 | ||
| GoldStar 0019, 0030, 0056, 0178 | ||
| Gradiente 0053, 0056 | ||
| Grunpy 0179, 0180 | ||
| Hallmark 0178 | ||
| Harley Davidson | 0179 | |
| Harman/Kardon | 0054 | |
| Harvard 0180 | ||
| Hitachi | 0016, 0056, 0145 | |
| Infinity | 0054 | |
| Inteq 0017 | ||
| JBL | 0054 | |
| JCB | 0000 | |
| JVC | 0053 | |
| KEC | 0180 | |
| KTV | 0030, 0180 | |
| Kenwood | 0019, 0030 | |
| Konka | 0628, 0632, 0638, 0707 | |
| LG | 0056 | |
| LXI | 0047, 0054, 0154, 0156, 0178, 0747 | |
| Logik | 0016 | |
| Luxman 0056 | ||
| MGA | 0019, 0030, 0150, 0178 | |
| MTC | 0019, 0030, 0056, 0060 | |
| Magnavox | 0030, 0054, 0179, 1254 | |
| Majestic | 0016 | |
| Marantz | 0030, 0054 | |
| Matsushita | 0250 | |
| Megatron | 0145, 0178 | |
| Memorex | 0016, 0056, 0150, 0154, 0178, 0179, 0250, 0463 | |
| Midland | 0017, 0047, 0051, 0747 | |
| Minutz | 0021 | |
| Mitsubishi | 0019, 0093, 0150, 0178 | |
| Motorola | 0093 | |
| Multitech | 0180 | |
| NAD | 0156, 0166, 0178 | |
| NEC | 0019, 0030, 0056 | |
| NTC | 0092 | |
| Nikko | 0030, 0092, 0178 | |
| Onwa | 0180 | |
| Optimus | 0154, 0166, 0250 | |
| Optonica | 0093 | |
| Orion | 0179, 0236, 0463 | |
| Panasonic | 0051, 0250 | |
| Penney | 0019, 0021, 0030, 0047, 0051, 0056, 0060, 0156, 0178, 0747, 1347 | |
| Philco | 0019, 0030, 0054, 0145, 0463 | |
| Philips | 0054 | |
| Pilot | 0019, 0030 | |
| Pioneer | 0166, 0679 | |
| Portland | 0019, 0092 | |
| Prism | 0051 | |
| Proscan | 0047, 0747 | |
| Proton | 0178, 0466 | |
| Pulsar | 0017, 0019 | |
| Quasar | 0051, 0250 | |
| RCA | 0019, 0047, 0051, 0090, 0093, 0679, 0747, 1047, 1147, 1247, 1347, 1447 | |
| Radio Shack | 0019, 0030, 0047, 0056, 0154, 0178, 0180, 0747 | |
| Realistic | 0019, 0030, 0056, 0154, 0178, 0180 | |
| Runco | 0017, 0030 | |
| SSS | 0019, 0180 | |
| Sampo | 0030 | |
| Samsung | 0019, 0030, 0056, 0060, 0178 | |
| Sansei | 0451 | |
| Sansui | 0463 | |
| Sanyo | 0154 | |
| Scimitsu | 0019 | |
| Scotch | 0178 | |
| Scott | 0019, 0178, 0179, 0180, 0236 | |
| Sears | 0047, 0054, 0056, 0154, 0156, 0171, 0178, 0179, 0747 | |
| Semivox | 0180 | |
| Semp | 0156 | |
| Sharp | 0093, 0688 | |
| Shogun | 0019 | |
| Signature | 0016 | |
| Sony | 0000 | |
| Soundesign | 0178, 0179, 0180 | |
| Squareview | 0171 | |
| Starlite | 0180 | |
| Supreme | 0000 | |
| Sylvania | 0030, 0054 | |
| Symphonic | 0171 | |
| TMK | 0056, 0178 | |
| TNCi | 0017 | |
| Tandy | 0093 | |
| Technics | 0051, 0250 | |
| Technol Ace | 0179 | |
| Techwood | 0051, 0056 | |
| Teknika | 0016, 0019, 0054, 0056, 0060, 0092, 0150, 0179, 0180 | |
| Telefunken | 0056 | |
| Toshiba | 0060, 0154, 0156, 1256 | |
| Vector Research | 0030 | |
| Victor | 0053 | |
| Vidikron | 0054 | |
| Vidtech | 0019, 0178 | |
| Wards | 0016, 0019, 0021, 0030, 0054, 0056, 0178, 0179 | |
| White Westinghouse 0463, | 0623, 0624 | |
| Yamaha 0019, 0030 | ||
| Zenith 0016, 0017, | 0092, 0463, 0624 | |
VCR Setup Codes
| Manufacturer VCR Setup Code | |
| Admiral 0048, 0209 | |
| Adventura 0000 | |
| Aiko 0278 | |
| Aiwa 0000, 0037 | |
| Akai 0041 | |
| America Action 0278 | |
| American High 0035 | |
| Asha 0240 | |
| Audiovox | 0037 |
| Beaumark | 0240 |
| Bell & Howell 0104 | |
| Broksonic | 0002, 0121, 0184, 0209, 0479 |
| CCE | 0072, 0278 |
| Calix | 0037 |
| Canon | 0035 |
| Carver | 0081 |
| Cineral | 0278 |
| Citizen | 0037, 0278 |
| Colt | 0072 |
| Craig | 0037, 0047, 0072, 0240, 0271 |
| Curtis Mathes | 0035, 0041, 0060, 0162, 0760 |
| Cybernex 0240 | |
| Daewoo 0045, 0278 | |
| Denon | 0042 |
| Dynatech 0000 | |
| Electrohome | 0037 |
| Electrophonic | 0037 |
| Emerex | 0032 |
| Emerson | 0000, 0002, 0037, 0043, 0121, 0184, 0209, 0278, 0479 |
| Fisher 0047, 0104 | |
| Fuji 0033, 0035 | |
| Funai 0000 | |
| GE 0035, 0048, 0060, 0240, 0760 | |
| Garrard 0000 | |
| Go Video 0432, 0526 | |
| GoldStar 0037, 0038 | |
| Gradiente 0000 | |
| HI-Q | 0047 |
| Harley Davidson 0000 | |
| Harman/Kardon 0038, 0081 | |
| Harwood 0072 | |
| Headquarter 0046 | |
| Hitachi 0000, 0041, 0042 | |
| Hughes Network Systems 0042 | |
| JVC 0041, 0067 | |
| Jensen | 0041 |
| KEC | 0037, 0278 |
| KLH | 0072 |
| Kenwood | 0038, 0041, 0067 |
| Kodak | 0035, 0037 |
| LXI | 0037 |
| Lloyd's | 0000 |
| Logik | 0072 |
| MEI 0035 | |
| MGA | 0043, 0240 |
| MGN Technology | 0240 |
| MTC | 0000, 0240 |
| Magnasonic | 0278 |
| Magnavox | 0000, 0035, 0039, 0081, 0149 |
| Magnin | 0240 |
| Marantz | 0035, 0081 |
| Marta | 0037 |
| Matsushita | 0035, 0162, 0454 |
| Memorex | 0000, 0035, 0037, 0039, 0046, 0047, 0048, 0104, 0162, 0209, 0240, 0454, 0479, 1037, 1162, 1262 |
| Minolta | 0042 |
| Manufacturer | VCR Setup Code |
| Mitsubishi | 0043, 0048, 0067 |
| Motorola | 0035, 0048 |
| Multitech | 0000, 0072 |
| NEC | 0038, 0041, 0067, 0104 |
| Nikko | 0037 |
| Noblex | 0240 |
| Olympus | 0035 |
| Optimus | 0037, 0048, 0104, 0162, 0432, 0454, 1048, 1062, 1162, 1262 |
| Orion | 0002, 0184, 0209, 0479 |
| Panasonic | 0035, 0162, 0225, 0454, 0616, 1062, 1162, 1262, 1362 |
| Penney | 0035, 0037, 0038, 0042, 0240 |
| Pentax | |
| Philco | 0035, 0209, 0479 |
| Philips | 0035, 0081, 0618, 1081, 1181 |
| Pilot | |
| Pioneer | |
| Polk Audio | 0081 |
| Profitronic | |
| Proscan | 0060, 0760 |
| Protec | 0072 |
| Pulsar | |
| Quarter | |
| Quartz | |
| Quasar | |
| RCA | |
| Radio Shack | |
| Radix | |
| Randex | 0037 |
| Realistic | |
| ReplayTV | |
| Runco | 0039 |
| STS | 0042 |
| Samsung | |
| Sanky | |
| Sansui | |
| Sanyo | 0046, 0047, 0104, 0240 |
| Scott | 0043, 0045, 0121, 0184 |
| Sears | 0000, 0035, 0037, 0042, 0046, 0047, 0104 |
| Semp | 0045 |
| Sharp | 0048 |
| Shintom | 0072 |
| Shogun | 0240 |
| Singer | 0072 |
| Sony | 0000, 0032, 0033, 0035, 0636, 1032 |
| Sylvania | 0000, 0035, 0043, 0081 |
| Symphonic | 0000 |
| TMK | 0240 |
| Tatung | 0041 |
| Teac | 0000, 0041 |
| Technics | 0035, 0162 |
| Teknika | 0000, 0035, 0037 |
| Thomas | 0000 |
| Tivo | 0618, 0636 |
| Toshiba | 0043, 0045 |
| Totevision | 0037, 0240 |
| Unitech | 0240 |
| Vector | 0045 |
| Vector Research | 0038 |
| Video Concepts | 0045 |
| Videosonic | 0240 |
| Wards | 0000, 0035, 0042, 0047, 0048, 0060, 0072, 0081, 0149, 0240, 0760 |
| White Westinghouse | 0072, 0209, 0278 |
| XR-1000 | 0000, 0035, 0072 |
| Yamaha | 0038 |
| Zenith | 0000, 0033, 0039, 0209, 0479 |
The DVD menu language codes are included in the table below. For information on setting up your DVD language, see DVD Setup in the “Operations” section.
Don't forget to press ENTER on the remote after you enter the code.
| Language | Code | Language | Code | Language | Code |
| Abkhazian 6566 Hungarian 7285 Afar 6565 Icelandic 7383 Samoan 8377 Afrikaans 6570 Indonesian 7378 Sangho 8371 Albanian 8381 Interlingua 7365 Sanskrit 8365 Ameharic 6577 Interlingue 7369 Scots Gaelic Arabic 6582 Iunpiak 7375 Serbian 8382 Armenian 7289 Irish 7165 Assamese 6583 Italian 7384 Aymara 6588 Japanese 7465 Azerbaijani 6590 Javanese 7487 Bashkir 6665 Kannada 7578 Basque 6985 Kashmiri 7583 Bengali; Bangla 6678 Kazakh 7575 Siswati Bhutani 6890 Kinyarwanda 8287 Bihari 6672 Kirghiz 7589 Bislama 6673 Kirundi 8278 Somali Breton 6682 Korean 7579 Spanish Bulgarian 6671 Kurdish 7585 Burmese 7789 Laothian 7679 Swahili Byelorussian 6669 Latin 7665 Cambodian 7577 Latvian, Lettish 7686 Tagalog Catalan 6765 Lingala 7678 Tajik Chinese 9072 Lithuanian 7684 Corsican 6779 Macedonian 7775 Tatar Croatian 7282 Malagsy 7771 Czech 6783 Malay 7783 Danish 6865 Malayalam 7776 Dutch 7876 Maltese 7784 English 6978 Maori 7773 Tonga Esperanto 6979 Marathi 7782 Estonian 6984 Moldavian 7779 Turkish 8482 | Russian 8285 Samoan 8377 Sangho 8371 Sanskrit 8365 Ameharic 6577 Interlingue 7369 Scots Gaelic Arabic 6582 Iunpiak 7375 Serbian 8382 Armenian 7289 Irish 7165 Assamese 6583 Italian 7384 Aymara 6588 Japanese 7465 Azerbaijani 6590 Javanese 7487 Bashkir 6665 Kannada 7578 Basque 6985 Kashmiri 7583 Singhalese 8373 Bengali; Bangla 6678 Kazakh 7575 Siswati Bhutani 6890 Kinyarwanda 8287 Bihari 6672 Kirghiz 7589 Bislama 6673 Kirundi 8278 Somali Breton 6682 Korean 7579 Spanish Bulgarian 6671 Kurdish 7585 Burmase 7789 Laothian 7679 Swahili Byelorussian 6669 Latin 7665 Cambodian 7577 Latvian, Lettish 7686 Tagalog Catalan 6765 Lingala 7678 Tajik Chinese 9072 Lithuanian 7684 Corsican 6779 Macedonian 7775 Tatar Croatian 6782 Malagsy 7771 Czech 6783 Malay 7783 Danish 6865 Malayalam 7776 Dutch 7876 Maltese 7784 English 6978 Maori 7773 Tonga Esperanto 6979 Marathi 7782 Estonian 6984 Moldavian 7779 Turkish 8482 | Spanish 7579 Spanish 7585 Sudanese 8387 Swedish 8476 Tagalog 8471 Tamil 8484 Telugu Thai Tibetan Tibetana Tigrinya 8479 Tsonga 8482 | |||
| Faroese 7079 Mongolian 7778 Turkmen 8475 | |||||
| Fiji 7074 Naru 7865 | Twi 8487 | ||||
| Finnish 7073 Nepali | 7869 Ukrainian 8575 | ||||
| French | 7082 | Norwegian | 7879 Urdu | ||
| Frisian 7089 Occitan | 7967 Uzbek | 8590 | |||
| Galician | 7176 | Oriya | 7982 | Vietnamese | 8673 |
| Georgian | 7565 | Oromo (Afan) | 7977 | Volapuk | 8679 |
| German | 6869 | Panjabi | 8065 | Welsh | 6789 |
| Greek | 6976 Pashto, Pushto | 8083 Wolof 8779 | |||
| Greenlandic | 7576 | Persian | 7065 | Xhosa | 8872 |
| Guarani | 7178 | Polish | 8076 | Yiddish | 7473 |
| Gujarati | 7185 | Portuguese | 8084 | Yoruba | 8979 |
| Hausa | 7265 Quechua 8185 Zulu | 9085 | |||
| Hebrew | 7387 | Rhaero-Romance | 8277 | ||
| Hindi | 7273 | Romanian | 8279 | ||
Abbreviations and Acronyms
| A/V | Audio/Video |
| AM | Amplitude Modulation |
| CATV | Cable TV |
| CD | Compact Disc |
| CSR | Customer Service Representative |
| DAT | Digital Audio Tape |
| DCP | Digital Convergence Platform |
| DCT 2000 | Digital Consumer Terminal 2000 |
| DTS | Digital Theater Systems. Sound system created by Digital Theater Systems, Inc. to rival Dolby Digital 5.1 |
| DVD | Digital Versatile Disk |
| EMM | entitlement management message(s) |
| EPG | Electronic Program Guide |
| FM | Frequency Modulation |
| HRC | harmonically related carriers |
| IPG | interactive program guide |
| IPPV | Impulse Pay-Per-View |
| IR | Infra-Red |
| IR Blaster | Infrared Blaster |
| IRC | incrementally related carriers |
| kH | Kilo Hertz, thousand of cycles. For the DCP, refers to the frequency of sounds that you can hear and transmission frequencies of AM radio stations. |
| LD | Laser Disk |
| LFE | Low Frequency Effect |
| MHz | Mega Hertz |
| mp3 | See MPEG-1 |
| MPAA | Motion Picture Association of America |
| MPAA | Motion Picture Advisory Association |
| MPEG-1 | Moving Pictures Expert Group standard 1, designed for coding progressive video at a transmission rate of 1.5Mbps, designed for Video-CD and CD-i. MPEG-1 Audio Layer 3 (mp3) evolved from this. |
| MPEG-2 | Moving Pictures Expert Group standard 2, designed for coding interlaced images at rates greater than 4Mbps. Used for digital and high definition television broadcast. |
| NTSC | National Television Standards Committee |
| NVOD | Near Video on Demand |
| NVRAM | Non-volatile random-access memory |
| OSD | On Screen Display |
| OSD | on-screen display |
| PCR | program clock reference |
| PID | packet identifier |
| PPV | Pay-Per-View |
| QAM | quadrature amplitude modulation |
| QPSK | quadrature phase shift keying |
| RCU | Remote Control Unit |
| RSA | Return for Service Authorization |
| SPDIF | Sony and Philips Digital Interconnect Format |
| TCP/IP | Transmission Control Protocol/Internet Protocol |
| TELCO | Telephone Company: a TELCO modem is the V Series telephone network modem |
| TRC | Technical Response Center |
| TV | Television |
| TvPC | TV PassCard |
| VCR | Video Cassette Recorder |
| VFD | Vacuum Fluorescent Display |
| VOD | Video on Demand |
NOTE!

The clear protective film on the DCP display must be removed and placed in the space below. The Unit Address and Serial Number found on the protective film is required for activation of your DCP cable TV receiver by your cable TV service provider.
- WARNING
- CAUTION
- REPAIRS
- NOTE TO CATV SYSTEM INSTALLER
- Important Safeguards
- Important Safeguards (continued)
- Regulatory Information
- Declaration of Conformity
- Canadian Compliance
- FCC Part 68 Statement
- Industry Canada CS-03 Statement
- Notes on Copyright
- Contact Us
- Contents
- Introduction ....1
- Overview ....3
- Installation 23
- Connecting Your VCR.... 34
- Video Connections for Your VCR 34
- Audio Connections for Your VCR.... 37
- Connecting Other Audio/Video Sources.... 39
- Digital Audio Connections 40
- Connecting a Tape Deck or CD Player....41
- Connecting the AM and FM Antennas 42
- Connecting for Power 43
- Connecting to the Front Panel....43
- Operation....45
- Before You Begin....45
- Setting Up Audio 46
- Using DCP501 Cable TV Functions....74
- Using the DCP501 Tuner 80
- Sound Effects 81
- Using the DCP501 Digital Audio/Video Receiver 82
- Using the DCP501 DVD/CD Player 83
- Using the DVD Banner Display 85
- Troubleshooting 111
- Specifications 117
- TV and VCR Setup Codes 121
- Language Codes....129
- Abbreviations and Acronyms 131
- Before Operating This Unit
- Before You Begin
- Document Conventions
- NOTE!
- Features
- Supplied Accessories
- Disc Information
- Types of Discs You Can Use
- Handling Discs
- Cleaning Discs
- Storing Discs
- Region Numbers
- Front Panel
- Item Control Description
- DCP501 Display
- Item Indicator/Icon Description
- Item
- Indicator/Icon
- Description
- Rear Panel
- Item Description
- Speakers
- DIGITAL IN
- Antenna
- AUDIO: IN
- AUDIO: REC OUT
- PRE OUT: Connectors for external amplifiers
- Operating the Remote Control
- Selecting TV and VCR Setup Codes
- Verifying a Setup Code Using Blink Back
- Finding a Setup Code
- Installing Batteries in Remote Control
- WARNING!
- Installing the DCP501
- CAUTION!
- Recording Your Connections
- Connecting Your TV
- S-Video
- Video
- Connecting to Cable TV
- Connecting Your Speakers and Subwoofer
- Speaker Placement
- Speaker and Subwoofer Connections
- Connecting Speaker Cords
- Connecting Your Front Speakers and Active Subwoofer
- Connecting Your Front Speakers and Passive Subwoofer
- Connecting Your Surround and Center Speakers
- Connecting Your VCR
- Video Connections for Your VCR
- Audio Connections for Your VCR
- Stereo VCR
- Mono VCR
- Connecting Other Audio/Video Sources
- Digital Audio Connections
- Connecting a Tape Deck or CD Player
- Connecting the AM and FM Antennas
- Connecting for Power
- Connecting to the Front Panel
- NOTE
- Setting Up Audio
- Input Setup
- On-screen Display
- Subwoofer and Speakers
- Press down arrow (V).
- Press SELECT or OK to display the SPEAKER SETUP menu on your TV.
- SUBWOOFER SETUP: Press SELECT or OK to display the DCP501 SUBWOOFER SETUP menu or SUB? on the DCP501 display.
- Press SELECTor OK and the current setting flashes. In this example, Y E S flashes.
- Press SELECT or OK.
- Press SELECT or OK and the currently select setting flashes. In this example, SMALL flashes.
- Press CURSOR left/right («») to display LARGE, SMALL, or NONE.
- Press SELECT or OK to accept your selection and LARGE, SMALL, or NONE stops flashing.
- Press SELECT or OK.
- SPEAKER RESET: Press down arrow (V). The Speaker Reset option allows you to return all speaker settings to their factory default values.
- Press SELECT or OK.
- Test Tone Adjust
- Advanced Audio Setup
- Feature
- Default volume level
- Night mode
- Press down arrow (v) three times.
- Press SELECT or OK.
- Press SELECT or OK and OFF flashes.
- NIGHT MODE: Press down arrow (V).
- Press SELECT or OK and OFF flashes.
- Summary of Night Mode Operation
- Using DCP501 Cable TV Functions
- Using Cable TV Record
- Press down arrow (V) twice.
- Press SELECT or OK.
- Press SELECT or OK and OFF flashes.
- Using CATV Channel Scan
- Press right arrow (>) and ON flashes.
- Using the DCP501 Tuner
- Tuning Radio Stations
- Presetting Radio Stations
- Selecting Preset Radio Stations
- Sound Effects
- Using the DCP501 Digital Audio/Video Receiver
- Changing the DCP501 Tone Setting
- Changing Balance and Fade on the DCP501
- Using the DCP501 DVD/CD Player
- Media Type Icon displayed
- Resume Play
- Fast Motion Playback (Picture Search)
- Using the DVD Banner Display
- Selecting a DVD Title
- Selecting a DVD Chapter
- Changing the Audio Language on a DVD
- Changing the Subtitle Language on a DVD
- Changing the Camera Angle on a DVD
- Using Bookmarks on a DVD
- Recalling a Bookmarked Scene on a DVD
- Clearing a Bookmark on a DVD
- Program Edit on a DVD
- Insert Chapter on a DVD
- Delete Program on a DVD
- Exiting Program Play on a DVD
- Using the Repeat Feature
- Repeat Play
- A-B Repeat Play
- Using the CD Banner Display
- Selecting a CD Track
- Using IntroScan on a CD
- Using Bookmarks on a CD
- Recalling a Bookmarked Selection on a CD
- Clearing a Bookmark on a CD
- Program Edit on a CD
- Program a Playlist with the TV Turned On
- Insert Track on a CD
- Delete Program on a CD
- Program a Playlist with the TV Turned Off
- Exiting Program Play on a CD
- Random Play
- Playing an MP3 Audio CD on the DCP501
- On-Screen Display when Playing an MP3 CD
- Playing your MP3 Files
- Programming Selections from an MP3 CD
- Deleting Selections from an MP3 CD
- Selecting Specific Folder and Files for Playback
- DVD Setup
- Resetting Your Password
- Other On-Screen Text Messages
- Input/Output
Brand : MOTOROLA
Model : DCP501
Category : Home Theater