
Regal (2011) - Car Buick - Free user manual and instructions
Find the device manual for free Regal (2011) Buick in PDF.


| Product Type | Car |
| Brand | Buick |
| Model | Regal (2011) |
| Category | Vehicle |
| Manual Language | English |
| Manual Pages | 368 |
| Manual Format | |
| Remote Keyless Entry Range | Up to 20 m (65 ft) |
| Power Door Locks | Yes, with lock/unlock buttons on instrument panel |
| Power Windows | Express up/down on front windows, express down on rear |
| Heated Front Seats | Three settings, controlled via climate panel |
| Automatic Dimming Rearview Mirror | Yes |
| Cruise Control | Yes, with RES/+ and SET/- thumbwheel |
| Traction Control System (TCS) | Yes, automatic activation; can be turned off via button |
| StabiliTrak System | Yes, stability control; can be turned off with TCS |
| Tire Pressure Monitor System (TPMS) | Yes, with warning light |
| Engine Oil Life System | Calculates remaining life; resettable via DIC |
| Ultrasonic Parking Assist | Rear sensors, operates below 8 km/h (5 mph) |
| Sunroof | Power tilt/slide with anti-pinch feature |
| OnStar Capability | Yes, with automatic crash response, navigation, and hands-free calling |
| Steering Wheel Controls | Audio, phone, and cruise control |
| Bluetooth Connectivity | Yes, for hands-free calling and audio streaming |
| Airbags | Frontal, seat-mounted side impact, roof-rail; passenger sensing system |
| Child Restraint System (LATCH) | Lower anchors and tethers for rear seats |
| Fuel Type | Unleaded gasoline; E85 compatible (if FlexFuel badge) |
| Transmission | Automatic (6-speed) or manual; with manual shift mode |
Frequently Asked Questions - Regal (2011) Buick
User questions about Regal (2011) Buick
0 question about this device. Answer the ones you know or ask your own.
Ask a new question about this device
Download the instructions for your Car in PDF format for free! Find your manual Regal (2011) - Buick and take your electronic device back in hand. On this page are published all the documents necessary for the use of your device. Regal (2011) by Buick.
USER MANUAL Regal (2011) Buick
VehicleSecurity......2-9
ExteriorMirrors......2-10
InteriorMirrors......2-11
Windows....2-12
Roof....2-15
SeatsandRestraints......3-1
HeadRestraints......3-2
FrontSeats......3-4
RearSeats......3-9
SafetyBelts....3-11
AirbagSystem......3-27
ChildRestraints......3-40
Storage....4-1
StorageCompartments......4-1
AdditionalStorageFeatures...4-3
InstrumentsandControls....5-1
Controls....5-2
WarningLights,Gauges,and
Indicators......5-7
InformationDisplays......5-22
VehicleMessages......5-25
VehiclePersonalization......5-31
Lighting....6-1
ExteriorLighting......6-1
InteriorLighting......6-4
LightingFeatures......6-6
InfotainmentSystem......7-1
Introduction......7-1
Radio....7-7
AudioPlayers......7-14
Phone....7-20
ClimateControls......8-1
ClimateControlSystems.....8-1
AirVents....8-4
Maintenance....8-4
2011BuickRegalOwnerManual
DrivingandOperating......9-1
DrivingInformation......9-2
StartingandOperating......9-16
EngineExhaust......9-24
AutomaticTransmission.....9-25
ManualTransmission......9-29
Brakes....9-30
RideControlSystems......9-34
CruiseControl....9-39
ObjectDetectionSystems....9-42
Fuel....9-44
Towing....9-50
ConversionsandAdd-Ons...9-50
VehicleCare....10-1
GeneralInformation......10-2
VehicleChecks......10-4
HeadlampAiming......10-30
BulbReplacement......10-31
ElectricalSystem......10-35
WheelsandTires......10-42
JumpStarting......10-70
Towing....10-74
AppearanceCare......10-77
ServiceandMaintenance...11-1
GeneralInformation......11-1
ScheduledMaintenance.....11-2
RecommendedFluids, Lubricants,andParts......11-6
MaintenanceRecords......11-9
TechnicalData......12-1
VehicleIdentification......12-1
VehicleData....12-2
CustomerInformation.....13-1
CustomerInformation......13-1
ReportingSafetyDefects....13-12
VehicleDataRecordingand
Privacy....13-14
Index......i-1

Thenames, logos, emblems, slogans, vehiclemodelnames, and vehiclebodydesignsappearing in this manual including, but not limitedto, GM, the GM logo, BUICK, the BUICK Emblem, and REGAL are trademarks and/or service marksof General Motors LLC, its subsidiaries, affiliates, or licensors.
Thismanualdescribesfeaturesthat mayormaynotbeonyourspecific vehicleeitherbecausetheyare optionsthatyoudidnotpurchaseor duetochangessubsequenttothe printingofthisownermanual. Pleaserefertothepurchase documentationrelatingtoyour specificvehicletoconfirmeeachof thefeaturesfoundonyourvehicle.
LithoinU.S.A.
PartNo.20977758CThirdPrinting
ForvehiclesfirstsoldinCanada, substitutethename "General MotorsofCanadaLimited" for Buick MotorDivisionwhereveritappears in this manual.
Keepthismanualinthevehiclefor quickreference.
CanadianVehicleOwners
AFrenchlanguagecopyofthis manualcanbeobtainedfromyour dealerorfrom:
Danger,Warnings, and Cautions
Warning messages found on vehicle labels and this manual describe hazards and what to avoid or reduce them.
Dangerindicatesahazardwitha highlevelofriskwhichwillresultin seriousinjuryordeath.
ivIntroduction
Warningor Caution indicates a hazard that could result in injury or death.

WARNING
These mean there is something that could hurt you or other people.
Notice: This mean there is something that could result in property or vehicle damage. This would not be recovered by the vehicle's warranty.

Acirclewithaslashthroughitisa safetysymbolwhichmeans"Do Not,""Donotdothis,"or"Donotlet thishappen."
Symbols
Thevehiclehascomponentsand labelsthatusesymbolsinsteadof text.Symbolsareshownalongwith thetextdescribingtheoperationor informationrelatingtoaspecific component,control,message, gauge,orindicator.
(i): This symbol is shown when you need to see your own manual for additional instructions or information.
☐: This symbol is shown when you need to see a service manual for additional instructions or information.
VehicleSymbolChart
Herearesomeadditionalsymbols that may be found on the vehicle and what they mean. Form more information on the symbol, refer to the Index.
AirbagReadinessLight
AirConditioning
(ABS):AntilockBrakeSystem(ABS)
AudioSteeringWheelControls orOnStar®
(●):BrakeSystemWarningLight
- + :ChargingSystem
:CruiseControl
EngineCoolantTemperature
-ExteriorLamps
D:FogLamps
:FuelGauge
Fuses
ED:HeadlampHigh/Low-Beam Changer
LATCHSystemChild Restraints
:MalfunctionIndicatorLamp
:OilPressure
①:Power
SafetyBeltReminders
(1):TirePressureMonitor
: TractionControl
:WindshieldWasherFluid
InBrief
InstrumentPanel
InstrumentPanel......1-2
InitialDriveInformation
InitialDriveInformation......1-4
RemoteKeylessEntry(RKE)
System......1-4
DoorLocks......1-5
TrunkRelease....1-5
Windows....1-5
SeatAdjustment......1-5
HeatedSeats......1-7
HeadRestraintAdjustment....1-7
SafetyBelts....1-7
SensingSystemforPassenger
Airbag....1-8
MirrorAdjustment......1-8
SteeringWheelAdjustment...1-9
InteriorLighting......1-9
ExteriorLighting......1-10
WindshieldWiper/Washer....1-10
ClimateControls......1-11
Transmission....1-12
VehicleFeatures
Radio(s)....1-12
SatelliteRadio....1-13
PortableAudioDevices.....1-13
Bluetooth ^® ......1-14
SteeringWheelControls.....1-14
CruiseControl....1-15
NavigationSystem......1-15
DriverInformation
Center(DIC)....1-15
VehiclePersonalization.....1-16
UltrasonicParkingAssist....1-16
PowerOutlets......1-16
Sunroof....1-16
PerformanceandMaintenance
TractionControl
System(TCS)....1-17
StabiliTrak® System......1-18
TirePressureMonitor......1-18
EngineOilLifeSystem.....1-18
FuelE85(85%Ethanol).....1-19
DrivingforBetterFuel
Economy....1-19
RoadsideAssistance
Program....1-19
OnStar ^® 1-20
InstrumentPanel
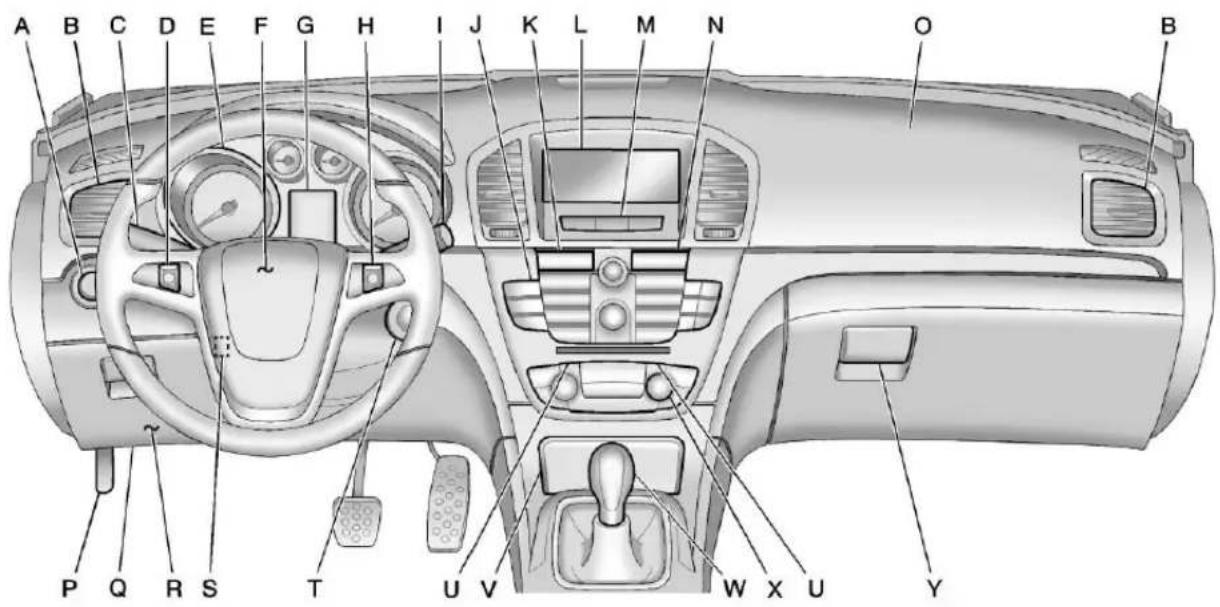
A. Exterior Lamp Controlson page6-1. Fog Lampsonpage6-4. Instrument Panel Illumination Controlonpage6-4.
B. AirVentsonpage8-4. C. TurnandLane-ChangeLever. See TurnandLane-Change Signalsonpage6-3. DriverInformationCenter Buttons.SeeDriverInformation Center(DIC)onpage5-22.
D. CruiseControlonpage9-39. E. InstrumentClusteronpage5-8.
F.Hornonpage5-2. DriverAirbag.SeeWhereAre theAirbags?onpage3-29.
G.DriverInformationCenter Display.SeeDriverInformation Center(DIC)onpage5-22.
H. Steering Wheel Controlson page5-2.
I. WindshieldWiper/Washeron page5-3.
J. Infotainmentpage 7-1.
K. TractionControlSystem(TCS)
onpage9-34/StabiliTrak®
Systemonpage9-36(If Equipped).
InteractiveDriveControl Systemonpage9-38 (IfEquipped).
L.InfoDisplay.SeeOperationon page7-4.
M.PowerDoorLocksonpage2-5.
HazardWarningFlasherson
page6-3.
N. Ultrasonic Parking Assiston page9-42.
O. Front Passenger Airbag. See Where Are the Airbags? on page 3-29.
P.HoodRelease.SeeHoodon page10-5.
Q. DataLinkConnector(Outof View). SeeMalfunctionIndicator Lamponpage5-13.
R. InstrumentPanelFuseBlockon page 10-40.
InstrumentPanelStorageon page 4-1.
S. Steering Wheel Adjustment page5-2.
T. Ignition Position on page 9-17.
U.HeatedFrontSeatson page3-8.
V.StorageCompartment.
W.ShiftLever.SeeAutomatic Transmissiononpage9-25or ManualTransmissionon page9-29.
X.DualAutomaticClimateControl Systemonpage8-1.
Y.GloveBoxonpage4-1.
InitialDrive Information
Thissectionprovidesabrief overviewaboutsomeofthe importantfeaturesthatmayormay notbeonyourspecificvehicle.
Formoredetailedinformation, refer toeachofthefeatureswhichcanbe foundlaterinthisownermanual.
RemoteKeylessEntry (RKE)System
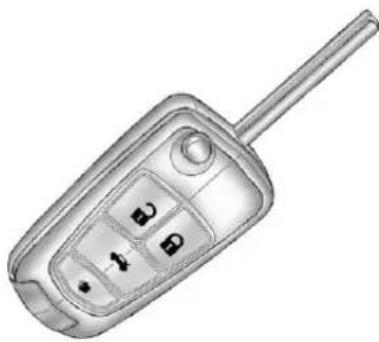
TheRKEtransmitterwillworkupto 20m(65ft)awayfromthevehicle.
natural_image
Illustration of a flip phone with four buttons and a handle (no text or symbols)Pressthekeyreleasebuttonto extendthekeyblade.Thekeycan beusedfortheignitionandall locks.
Press 🔒 tounlockthedriverdooror alldoors.
Press 🔒 tolockalldoors.
Lockandunlockfeedbackcanbe personalized.See Vehicle Personalizationonpage5-31.
Pressandhold 📄 toopenthe trunk.
Pressandrelease ▶tolocatethe vehicle.
Pressandhold ➕foratleast twosecondstosoundthepanic alarm.
Press ➕ againstocancelthepanic alarm.
SeeKeysonpage2-2andRemote KeylessEntry(RKE)System Operationonpage2-3.
DoorLocks
Tolockorunlockthedoor, usethe RemoteKeylessEntry(RKE) transmitterorthekeyfromoutside thevehicle, andthedoorlockknob orswitchfrominsidethevehicle.
Tounlockorlockthefueldoor, use theRKEtransmitterorthedoorlock switchfrominside.
Frominsidethevehicle, pull the doorhandleoncetounlockitanda secondtimetoopenit.
SeeDoorLocksonpage2-4for additionalinformation.
PowerDoorLocks
The powerdoorlockswitch is located on the center of the instrument panel.
:Presstounlockthedoors.
:Presstolockthedoors.
See Vehicle Personalization on page5-31 formoreinformation.
TrunkRelease
Toopenthetrunk, press 📄 on the RemoteKeylessEntry(RKE) transmitterorpressthetouchpad underthevehicleemblem.
See Trunkonpage2-7 for additional information.
Windows
natural_image
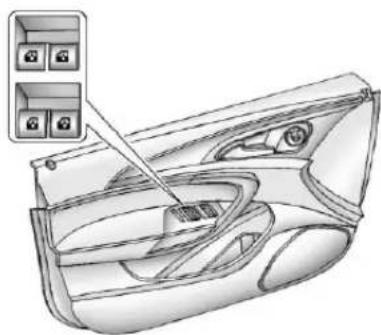
Technical line drawing of a car interior with a zoomed-in panel showing camera icons (no text or labels)The power window switches are located on the driver door. Each passenger door has as switch that control only that window.
Presstheswitchtolowerthe window.Pullthefrontoftheswitch uptoraiseit.
SeePowerWindowsonpage2-12 foradditionalinformation.
SeatAdjustment
ManualSeats
natural_image
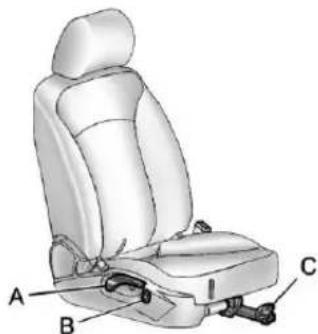
Illustration of a car seat with labeled parts A, B, and C (no text or symbols beyond labels)A. SeatbackReclineLever
B.HeightAdjustmentSwitch
C.SeatPositionHandle
1-6InBrief
Toadjusttheseatposition:
- Pullthehandle(C)underthe frontoftheseatcushion.
2.Slidetheseattothedesired positionandreleasethehandle. - Trytomovetheseatback and forthobesureitislocked in place.
Pressandholdthetoporbottomof theswitch(B)toraiseorlowerthe seat.Releasetheswitchwhenthe desiredheightisreached.
Toraiseorreclinetheseatback, use thelever(A)ontheoutboardside of theseat.SeeRecliningSeatbacks onpage3-6.
PowerSeats
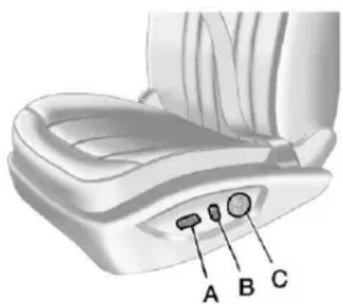
natural_image
Anatomical illustration of a car seat with labeled points A, B, and C (no text or symbols beyond labels)A. PowerSeatAdjustmentControl
B. Reclining Seatbacks
C. Lumbar Adjustment
Toadjustapowerseat, ifequipped:
- Movetheseatforwardor rearwardbyslidingthe control(A)forwardorrearward.
- Raiseorlowerthefrontorrear partoftheseatcushionby movingthefrontorrearofthe control(A)upordown.
- Raiseorlowertheentireseatby movingthecontrol(A)up ordown.
SeePowerSeatAdjustmenton page3-5formoreinformation.
Toraiseorreclinetheseatback, tilt thetopofthecontrol(B)forwardor rearward. See Reclining Seatbacks on page 3-6.
Pressthefrontorrearofthe control(C)toincreaseordecrease lumbarsupport.SeeLumbar Adjustmentonpage3-5.
HeatedSeats HeatedFrontSeats
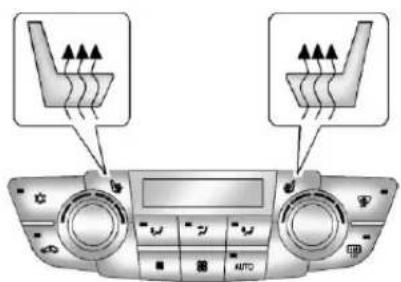
The buttons are on the climate control panel. To operate, the ignition must be on.
Press 📊or 🐦toheatthedriveror passengerseatcushionand seatback.Indicatorlightsonthe climatecontroldisplayshowthe temperaturesetting.
FormoreinformationseeHeated FrontSeatsonpage3-8.
HeadRestraint Adjustment
Donotdriveuntiltheheadrestraints foralloccupantsareinstalled and adjusted properly.
Toachieveacomfortableseating position, changetheseatback reclineangleaslittleasnecessary whilekeepingtheseatandthehead restraintheightintheproper position.
FormoreinformationseeHead Restraintsonpage3-2andSeat Adjustmentonpage3-4.
SafetyBelts
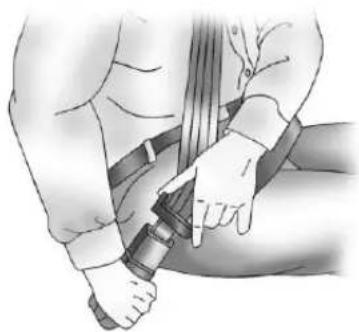
natural_image
Illustration of a person wearing a belt and adjusting a seatbelt (no text or symbols present)Refertothefollowingsectionsfor importantinformationonhowtouse safetybeltsproperly.
• SafetyBeltsonpage3-11.
• HowtoWearSafetyBelts Properlyonpage3-14.
• Lap-ShoulderBeltonpage3-18.
• LowerAnchorsandTethersfor Children(LATCHSystem)on page3-49.
SensingSystemfor PassengerAirbag
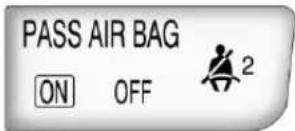
Thepassengersensingsystem turnsofftherightfrontpassenger frontalairbagandtheseat-mounted sideimpactairbagundercertain conditions. Thedriverairbagsand roof-railairbagsarenotaffectedby thepassengersensingsystem.See PassengerAirbagStatusIndicator onpage5-12formoreinformation.
Thepassengerairbagstatus indicatorwillbevisibleonthe instrumentpanelwhenthevehicle isstarted.
MirrorAdjustment ExteriorMirrors
natural_image
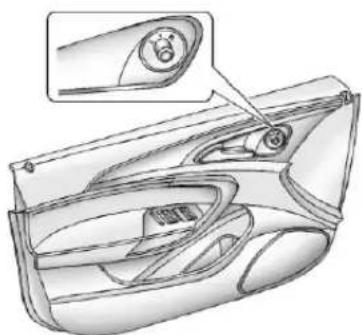
Technical line drawing of a car interior with a magnified inset showing a small component (no text or symbols)Controlsfortheoutsidepower mirrorsarelocatedonthe driverdoor.
-
Turnthecontrolknobtothe L(left)orR(right)selectingthe driverorpassengermirror.
-
Push the control knob to the left, right, up, down to adjust the mirror.
SeePowerMirrorsonpage2-11.
InteriorMirror
Thevehiclehasanautomatic dimminginsiderearviewmirror. Automaticdimmingreducesthe glarefromtheheadlampsofthe vehiclebehindyou. Thedimming featureandtheindicatorlightcome oneachtimetheignitionisturnedto start.
SeeAutomaticDimmingRearview Mirroronpage2-11.
SteeringWheel Adjustment
natural_image
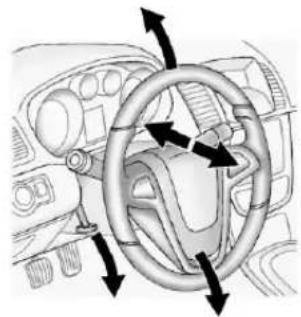
Interior view of a car dashboard with steering wheel and directional arrows indicating motion (no text or symbols)Toadjustthesteeringwheel:
- Pulltheleverdown.
- Movethesteeringwheelup, down, forward, and backward.
- Pulltheleveruptolockthe steeringwheelinplace.
Donotadjustthesteeringwheel whiledriving.
InteriorLighting
DomeLamps
Theinteriorlampscontrolledin theoverheadconsolecontrolsboth thefrontandrearinteriorlamps.
Turnsthelampsoff.
Turnsthelampsonwhenany doorisopened.
※:Keepsthelampsonall thetime.
ReadingLamps
Therearefrontandrearreading lamps.
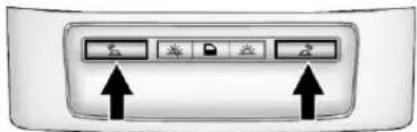
Thefrontreadinglampsarelocated intheoverheadconsole.
natural_image
Front view of a computer control panel with icons and arrows pointing to function buttons (no text or symbols)
:Presstoturneachlampon
Therearreadinglampsarelocated intheheadliner.
Formoreinformationaboutinterior lamps,see:
• DomeLampsonpage6-5.
- ReadingLampsonpage6-5.
• InstrumentPanelIllumination Controlonpage6-4.
ExteriorLighting
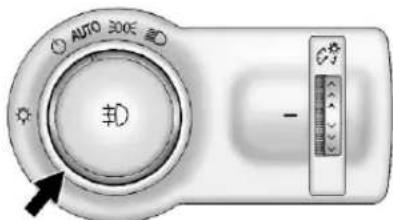
The exterior lamp control is located on the instrument panel on the outboard side of the steering wheel.
:Turnsofftheexteriorlamps. TheknobreturnstotheAUTO positionafteritisreleased.Turnto offagaintoreactivatethe AUTOmode.
InCanada, the headlamp will automatically reactivate on the vehicle is shifted out of Park.
AUTO: Automatically turnsthe exteriorlampson and off, depending on outsidelighting.
ThecurrentstatusoftheAUTO systemisdisplayedintheDriver InformationCenter(DIC)display. SeeDriverInformationCenter(DIC) onpage5-22.
300:Turnsontheparkinglamps, instrumentpanellights,andother exteriorlighting.
D:Turnsontheheadlamps, parkinglamps, instrumentpanel lights, and other exterior lighting.
Formoreinformation,see:
- ExteriorLampControlson page6-1.
• DaytimeRunningLamps(DRL) onpage6-2. - FogLampsonpage6-4.
WindshieldWiper/Washer
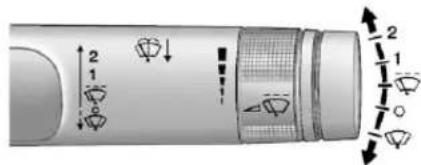
Thewindshieldwiperleverisonthe sideofthesteeringcolumn.
2:Useforfastwipes.
1:Useforslowwipes.
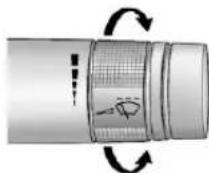
:Turnthebandupformore frequentwipesordownforless frequentwipes.
○:Usetoturnthewindshield wipersoff.
:Forasinglewipe,brieflymove thewiperleverdown.Forseveral wipes,holdthewiperleverdown.
WindshieldWasher
Pullthewindshieldwiperleverto spraywindshieldwasherfluidand activatethewipers.
See Windshield Wiper/Washeron page5-3.
ClimateControls
Theheating, cooling, and ventilation for the vehicle can be controlled with thesesystems.
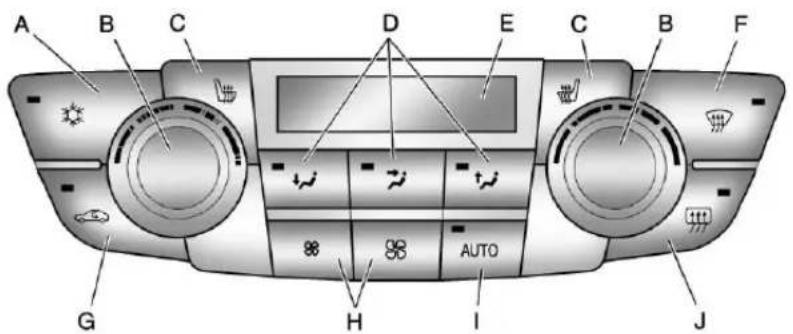
A. AirConditioning
B.DriverandPassenger TemperatureControls
C.HeatedSeats
D. AirDeliveryModes
E. ClimateDisplay
F.Defrost
G.Recirculation
H.FanControls
I. AUTO(AutomaticMode)
J.RearDefogger
See Dual Automatic Climate Control System on page 8-1.
1-12InBrief
Transmission
AutomaticTransmission
natural_image
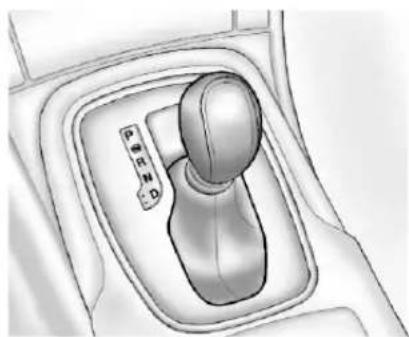
Diagram of a car gear shift lever with no text or symbolsP:Park
R:Reverse
N:Neutral
D:Drive
ManualMode
Movetheselectorleverfrom D(Drive)totheleft.Presstheshift leverforward(+)toupshiftor rearward(-)todownshift.
Theselectorlevercanonlybe movedoutofP(Park)whenthe ignitionisonandthebrakepedal isapplied.ToengageP(Park)or R(Reverse),pushtherelease button.
See Automatic Transmission on page 9-25.
VehicleFeatures
Radio(s)
:Presstoturnthesystem onandoff.Turntoincreaseor decreasethevolume.
RADIO/BAND: Presstochoose betweenFM, AM, or XM™, ifequipped.
←→:Turntoselectradio stations.
◀◀◀:Presstoseektheprevious stationortrack.
▶▶▶:Presstoseekthenext stationortrack.
Buttons1to6:Presstosaveand selectfavoritestations.
INFO: Presstoshowavailable informationaboutthecurrentstation ortrack, ortodisplaythetimewhen theignitionisoff.
Formoreinformationaboutthese andotherradiofeatures,see Operationonpage7-4.
StoringaFavoriteStation
Stationsfromallbandscanbe storedinthefavoritelistsinany order.Uptosixstationscanbe storedineachfavoritepageandthe numberofavailablefavoritepages canbeset.
Tostorethestationtoapositionin thelist,pressthecorresponding numericbutton1to6untilabeepis heard. Thestoredstationwillbegin playback.
Formoreinformation,see"Storinga StationasaFavorite"inAM-FM Radioonpage7-7.
SettingtheClock
AdjustingtheTime
- PresstheCONFIGbutton and selectTimeandDateSettings.
- SelectSetTime.
- Turnthe ←→knobtoadjust thehighlightednumber.
-
Pressthe knobtoselect thenextnumber.
-
Tosavethetimeandreturnto theTimeSettingsmenu, press theBACKbuttonatanytimeor pressthe ←→ buttonafter adjustingtheminutes.
Settingthe12/24HourFormat
- PresstheCONFIGbutton and selectTimeandDateSettings.
- Highlight12/24HourFormat.
- Pressthe ←→ buttontoselect the12houror24hourdisplay format.
Fordetailedinstructionsonsetting theclock, see Clockonpage5-5.
SatelliteRadio
VehicleswithanXM™ Satellite RadiotunerandavvalidXMSatellite RadiosubscriptioncanreceiveXM programming.
XMSatelliteRadioService
XMisasatelliteradioservicebased inthe48contiguousUnitedStates and10Canadianprovinces.XM
SatelliteRadiohasawidevariety of programming and commercial-free music, coasttocoast, and in digital-qualitysound. Afees is required to receive the XM service.
Formoreinformationreferto:
• www.xmradio.comorcall 1-800-929-2100(U.S.).
• www.xmradio.caorcall 1-877-438-9677(Canada).
Formoreinformation, see Satellite Radioonpage7-10.
PortableAudioDevices
Some vehicles have a 3.5mm (1/8in) auxiliary input and USB port located in the center console. External devices such as Pods ^® , laptop computers, MP3 players, CD changers, and USB storage devices may be connected, depending on the audiosystem.
Formoreinformation,seeAuxiliary Devicesonpage7-17.
1-14InBrief
Bluetooth®
The Bluetooth system allows users with a Bluetooth-enabled cellphone to make and receive hands-free calls using the vehicle audio system, microphone, and controls.
TheBluetooth-enabledcellphone mustbepairedwiththein-vehicle Bluetoothsystembeforeitcanbe usedinthevehicle.Notallphones willsupportallfunctions.
SeeBluetooth(Overview)on page7-20orBluetooth (InfotainmentControls) on page7-21orBluetooth(Voice Recognition)onpage7-23.
SteeringWheelControls
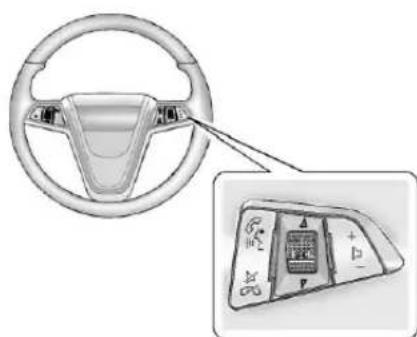
natural_image
Diagram of a car steering wheel and its internal control panel (no text or symbols)Forvehicleswithaudiosteering wheelcontrols, someaudiocontrols can be adjusted at theesteering wheel.
I: Press to interact with the availableBluetooth,OnStar, ornavigationsystem.
☑/☐: Press to silence the vehiclespeakersonly.Pressagain toturnthesoundon.Forvehicles withOnStarorBluetoothsystems, presstorejectanincomingcall, ortoendacurrentcall.
△ SRC ∇ : Turn △ or ∇ to select a radiobandoraudiosource.
Turn or toselectthenextor previousfavoriteradiostation, CD, orMP3track.
PressSRCtochangebetween radioandCDorDVD.
+ ▷ -: Press + to increase or - to decrease the volume.
Formoreinformation,seeSteering WheelControlsonpage5-2.
CruiseControl
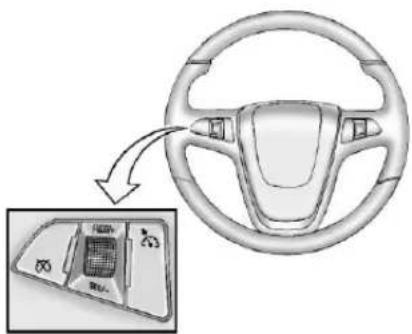
Thecruisecontrolbuttonsare locatedonthesteeringwheel.
:Presstoturnthecruise control systemon and off. An indicator light will turn on or off in the instrument panel cluster.
:Presstodisengagecruise controlwithouterasingtheset speedfrommemory.
RES/+:Movethethumbwheelup tomakethevehicleresumetoa previouslysetspeedorto acceleratetoahigherspeed.
SET/−:Movethethumbwheeldown tosetaspeedortomakethe vehicledecelerate.
See Cruise Control on page 9-39.
NavigationSystem
If the vehicle has an navigation system, there is a separate Navigation System Manual that includes information on the radio, audioplayers, and navigation system.
Thenavigationsystemprovides detailedmapsofmostmajor freewaysandroads. Aftera destinationhasbeenset, the systemprovidesturn-by-turn instructionsforreachingthe destination. In addition, the system can help locate a variety of point sof interest (POIs), such as banks, airports, restaurants, and more.
Seethenavigationsystemmanual formoreinformation.
DriverInformation Center(DIC)
The DIC display is located in the center of the instrument panel cluster. It shows the status of many vehicle systems. The controls for the DIC are located on the return signallever.
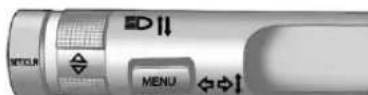
SET/CLR: Presstosetorclearthe menuitemwhenitisdisplayed.
△▽:Usethethumbwheelto scrollthroughtheitemsin eachmenu.
1-16InBrief
MENU: PresstogettotheTrip/FuelMenuandtheVehicle InformationMenu.
Formoreinformation,seeDriver InformationCenter(DIC)on page5-22.
VehiclePersonalization
Somevehiclefeaturescanbe programmedbyusingtheaudio systemcontrols. Thesefeatures include:
• ClimateandAirQuality
• ComfortandConvenience
• Collision/DetectionSystems
- Language
- Lighting
• PowerDoorLocks
- RemoteLock/Unlock
See Vehicle Personalization on page5-31.
UltrasonicParkingAssist
UltrasonicRearParkingAssist (URPA)usessensorsontherear bumpertodetectobjectswhile parkingthevehicle.Itoperatesat speedslessthan8km/h(5mph). URPAusesaudiobeepstoprovide distanceandsysteminformation.
Keepthesensorsonthevehicle's rearbumpercleantoensureproper operation.
Thesystemcanbedisabledby pressingtheparkassistbutton locatednexttotheradio.
See Ultrasonic Parking Assiston page 9-42 form more information.
PowerOutlets
Theaccessorypoweroutletcanbe usedtopluginelectricalequipment, suchasacellphone,anMP3 player,etc.
This outlet is located under the armrestinsidethecenterconsole storage.
The vehicle may have a 110v power outlet located on therear of the center floor console.
Opentheprotectivecovertousethe outlets.
SeePowerOutletsonpage5-5.
Sunroof
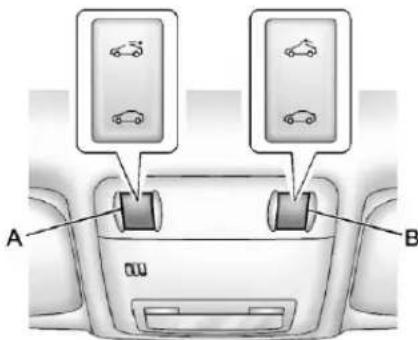
Onvehicleswithasunroof,the switchislocatedontheoverhead console.
Thesunroofonlyoperateswhenthe ignitionisinON/RUNorACC/ACCESSORYorinRetained AccessoryPower(RAP).See RetainedAccessoryPower(RAP) onpage9-21formoreinformation.
Toopenorclosethesunroof, press theopenorclosesunroofswitch(A) tothefirstdetentposition. The safetyfunctionwillstayenabledas longastheswitchisoperated.
To automatically open or close the sunroof with the safety function enabled, firmly press the open or closes unroof switch (A) to the second detention position and release. Tostophemovement, press the switch oncemore.
Toautomaticallytiltorclosethe sunroofwiththesafetyfunction enabled, pressthetiltopenorclose sunroofswitch(B).
Ifanobjectisinthepathofthe sunroofwhileitisclosing,the anti-pinchfeaturewilldetectthe objectandstopthesunrooffrom closingatthepointofthe obstruction.Thesunroofwillthen returntothefull-openorvent position.
Thesunroofglasspanelcannot be openedorclosedifthevehiclehas anelectricalfailure.
See Sunroofonpage2-15formore information.
Performance and Maintenance
TractionControl System(TCS)
The vehicle may have a traction control system that limits wheel spin. The system turn on automatically every time the vehicle is started.
- Toturnofftractioncontrol, press andreleasetheTCS/StabiliTrak button, locatedontheinstrument panel. 📋illuminatesandthe appropriateDICmessageis displayed.SeeRideControl SystemMessagesonpage5-29.
- PressandreleasetheTCS/StabiliTrakbuttonagaintoturnontractioncontrol.
Formoreinformation,see Traction ControlSystem(TCS)on page9-34.
StabiliTrak® System
TheStabiliTraksystemassistswith directionalcontrolofthevehiclein difficultdrivingconditions. The systemturnsonautomaticallyevery timethevehicleisstarted.
- Toturnoffbothtractioncontrol andStabiliTrak,pressandhold theTCS/StabiliTrakbutton, locatedontheinstrumentpanel, until ⏻and ^5 illuminateinthe instrumentclusterandthe appropriateDICmessageis displayed.SeeRideControl SystemMessagesonpage5-29.
- PressandreleasetheTCS/StabiliTrakbuttontoturnonboth systems.
Formoreinformation,see StabiliTrak® Systemonpage9-36.
TirePressureMonitor
ThisvehiclemayhaveaTire PressureMonitorSystem(TPMS).

The TPMS warninglightalertsyou toasignificantlossinpressureof oneofthevehicle'stires.Ifthe warninglightcomeson,stopas soonaspossibleandinflatethe tirestotherecommendedpressure shownontheTireandLoading Informationlabel.SeeVehicleLoad Limitsonpage9-12.Thewarning lightwillremainonuntilthetire pressureiscorrected.
During cooler conditions, the low tire pressure warning light may appear when the vehicle is first started and then turn off. This maybe nearly
indicatorthatthetirepressuresare gettinglowandthetiresneedtobe inflatedtotheproperpressure.
The TPMS does not replacen normal monthly tire maintenance. It is the driver's responsibility to maintain correct tire pressures.
See TirePressureMonitorSystem onpage 10-51.
EngineOilLifeSystem
Theengineoillifesystemcalculates engineoillifebasedonvehicleuse anddisplaystheCHANGEENGINE OILSOONmessagewhenitistime tochangetheengineoilandfilter. Theoillifesystemshouldbereset to 100% onlyfollowinganoil change.
ResettingtheOilLifeSystem
- TurntheignitiontoON/RUNwith theengineoff.
- PresstheDICmenubuttonon theturnsignallevertoenterthe VehicleInformationMenu.Use
thethumbwheeltscrollthrough themenuitemsuntilyoureach REMAININGOILLIFE.
- PresstheSET/CLRbutton to resettheoillifeat100%.
- TurntheignitiontoLOCK/OFF.
SeeEngineOilLifeSystemon page10-13.
FuelE85(85%Ethanol)
VehiclesthathaveaFlexFuelbadge andayellowfuelcapcanuseeither unleadedgasolineorethanolfuel containingupto85%ethanol(E85). SeeFuelE85(85%Ethanol)on page9-47. Forallothervehicles, useonlytheunleadedgasoline describedunderRecommended Fuelonpage9-44.
DrivingforBetterFuel Economy
Drivinghabitscanaffectfuel mileage. Herearesomedrivingtips togetthebestfueleconomy possible.
- Avoidfaststartsandaccelerate smoothly.
- Brakegraduallyandavoid abruptstops.
- Avoididlingtheengineforlong periodsoftime.
- When road and weather conditions are appropriate, use cruise control.
• Alwaysfollowpostedspeed limitsordrivemoreslowlywhen conditionsrequire. -
Keepvehicletiresproperly inflated.
• Combineseveraltripsintoa singletrip. -
Replacethevehicle'stireswith thesameTPCSpecnumber moldedintothetire'ssidewall nearthesize.
- Followrecommended scheduled maintenance.
Roadside Assistance Program
U.S.:1-800-252-1112
TTYUsers:1-888-889-2438
Canada:1-800-268-6800
AstheownerofanewBuick, you are automaticallyenrolledinthe RoadsideAssistanceprogram.
SeeRoadsideAssistanceProgram onpage13-5formoreinformation.
RoadsideAssistanceandOnStar
If you have an active On Star subscription, press the button and the current GPS location will be sent to an On Star Advisor who will assess your problem, contact
1-20InBrief
Roadside Assistance, and relay you exact location to get the help you need.
OnlineOwnerCenter
TheOnlineOwnerCenterisa complimentaryservicethatincludes onlineservicereminders,vehicle maintenancetips,onlineowner manual,specialprivileges, andmore.
Signuptodayat: www.buickownercenter.com (U.S.)orwww.gm.ca(Canada).
OnStar®
ForvehicleswithanactiveOnStar subscription, OnStarusesseveral innovativetechnologiesandlive
Advisorstoprovideawiderangeof safety,security,navigation, diagnostics,andcallingservices.
AutomaticCrashResponse
Inacrash, built-insensors automatically alert an OnStar Advisor who is immediately connected to the vehicle to see if you need help.
HowOnStarServiceWorks
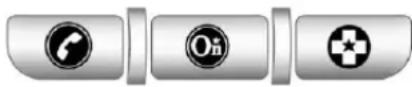
:Pushthisbluebuttonto connecttoaspeciallytrained OnStarAdvisortoverifyyour accountinformationandtoanswer questions.
:Pushthisredemergency buttontogetpriorityhelpfrom speciallytrainedOnStarEmergency Advisors.
:Pushthisbuttonforhands-free, voice-activatedcallingandtogive voicecommandsforHands-Free CallingandTurn-by-Turn Navigation.
AutomaticCrashResponse, EmergencyServices,CrisisAssist, StolenVehicleAssistance,Vehicle Diagnostics,RemoteDoorUnlock, RoadsideAssistance,Turn-by-Turn Navigation,andHands-FreeCalling areavailableonmostvehicles.Not allOnStarservicesareavailableon allvehicles.Formoreinformation, seetheOnStarOwner'sGuide; visitwww.onstar.com(U.S.)or www.onstar.ca(Canada);contact OnStarat1-888-4-ONSTAR (1-888-466-7827)orTTY 1-877-248-2080;orpushthe buttontospeakwithanOnStar Advisor24hoursaday,sevendays aweek.
ForafulldescriptionofOnStar servicesandsystemlimitations,see theOnStarOwner'sGuideinthe glovebox.
OnStarserviceissubjecttothe OnStarTermsandConditions includedintheOnStarGlove BoxKit.
OnStarservicerequireswireless communicationnetworksandthe GlobalPositioningSystem(GPS) satellitenetwork.NotallOnStar servicesareavailableeverywhere oronallvehiclesatalltimes.
OnStarservicecannotworkunless thevehicleisinaplacewhere OnStarhasanagreementwitha wirelessserviceproviderforservice inthatarea,andthewireless serviceproviderhascoverage, networkcapacity,reception,and technologycompatiblewithOnStar service.Serviceinvolvinglocation informationaboutthevehiclecannot workunlessGPSsignalsare available,unobstructed,and compatiblewiththeOnStar hardware.Thevehiclemusthavea workingelectricalsystemand adequatebatterypowerforthe OnStarequipmenttooperate. OnStarservicemaynotworkifthe OnStarequipmentisnotproperly installedoryouhavenotmaintained itevenifthevehicleisingood workingorderandincompliance
withallgovernmentregulations. Ifyoutrytoadd,connect,ormodify anyequipmentorsoftwareinthe vehicle,OnStarservicemaynot work.Otherproblemsbeyond OnStar'scontrolmayprevent servicetoyou,suchashills,tall buildings,tunnels,weather, electricalsystemdesignand architectureofthevehicle,damage toimportantpartsofthevehicleina crash,orwirelessphonenetwork congestionorjamming.
SeeRadioFrequencyStatementon page 13-15forinformation regardingPart15oftheFederal CommunicationsCommission(FCC) rulesandIndustryCanada StandardsRSS-210/220/310.
OnStarSteeringWheel Controls
ThisvehiclemayhaveaTalk/Mute buttonthatcanbeusedtointeract withOnStarHands-Freecalling. SeeSteeringWheelControlson page5-2formoreinformation.
Onsomevehicles,theTalkbutton canbeusedtodialnumbersinto voicemailsystems,ortodialphone extensions.SeetheOnStarOwner's Guideformoreinformation.
YourResponsibility
Increasethevolumeoftheradioif theOnStarAdvisorcannotbe heard.
IfthelightnexttotheOnStar buttonisred,thesystemmaynot befunctioningproperly.Push andrequestvehiclediagnostic check.Ifthelightappearsclear (nolightappears),yourOnStar subscriptionhasexpiredandall serviceshavebeendeactivated. Push toconfirmthattheOnStar equipmentisactive.
1-22InBrief
NOTES
Keys, Doors and Windows
KeysandLocks
Keys......2-2
RemoteKeylessEntry(RKE)
System......2-3
RemoteKeylessEntry(RKE)
SystemOperation......2-3
DoorLocks......2-4
PowerDoorLocks......2-5
SafetyLocks......2-6
Doors
Trunk......2-7
VehicleSecurity
VehicleSecurity......2-9
Anti-theftAlarmSystem......2-9
Immobilizer......2-9
ImmobilizerOperation......2-9
ExteriorMirrors
ConvexMirrors......2-10
PowerMirrors......2-11
FoldingMirrors......2-11
HeatedMirrors......2-11
InteriorMirrors
AutomaticDimmingRearview
Mirror....2-11
Windows
Windows......2-12
PowerWindows......2-12
SunVisors....2-14
Roof
Sunroof....2-15
KeysandLocks
Keys

WARNING
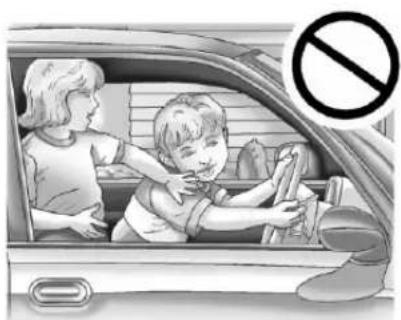
Leavingchildreninavehiclewith theignitionkeyisdangerousfor manyreasons. Childrenorothers couldbebadlyinjuredoreven killed. Theycouldoperatethe powerwindowsorothercontrols orevenmakethevehiclemove. Thewindowswillfunctionwiththe keysintheignitionandchildren couldbeseriouslyinjuredorkilled ifcaughtinthepathofaclosing window. Donotleavethekeysin avehiclewithchildren.
natural_image
Illustration of a child cleaning a car window with an adult nearby, no text or symbols presentThekeythatispartoftheRemote KeylessEntry(RKE)transmittercan beusedfortheignitionandall locks.
natural_image
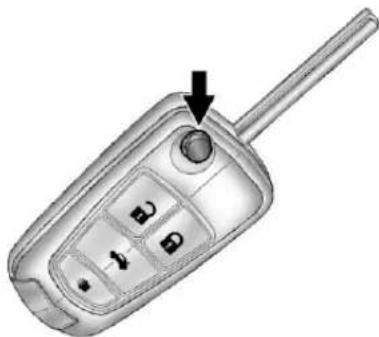
Illustration of a flip phone with a handle and keypad (no text or symbols visible)PressthebuttonontheRKE transmittertoextendthekey.Press thebuttonandthekeybladeto retractthekey.
Seeyourdealerifanewkeyis needed.
Notice: If the keys get locked in the vehicle, it may have to be damaged to get them out. Always carry as spare key.
If you are locked out of the vehicle, see Roadside Assistance Program on page 13-5.
RemoteKeylessEntry (RKE)System
SeeRadioFrequencyStatementon page 13-15forinformation regardingPart15oftheFederal CommunicationsCommission(FCC) rulesandIndustryCanada StandardsRSS-210/220/310.
If thereisadecreaseintheRKE operatingrange:
- Checkthedistance. The transmitter may be too far from the vehicle.
- Checkthelocation. Other vehiclesorobjectsmaybe blockingthesignal.
- Checkthetransmitter's battery. See "BatteryReplacement" later in this section.
- Ifthetransmitterisstillnot workingcorrectly,seeyour dealeroraqualifiedtechnician forservice.
RemoteKeylessEntry (RKE)SystemOperation
TheRKEtransmitterwillworkupto 20m(65ft)awayfromthevehicle.
There are other conditions which can affect the performance of the transmitter. See Remote Keyless Entry(RKE) System on page 2-3.
natural_image
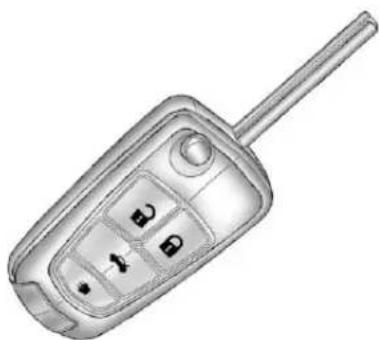
Illustration of a flip phone with four key buttons and a handle (no text or symbols)The following buttons are on the transmitter:
(Lock): Presstolockalldoors. Theturnsignalindicatorsmayflash and/orthehornmaysoundto
indicateLocking;see"Remote LockFeedback"underVehicle Personalizationonpage5-31.
Thefueldoorwillbelockedwhen thedoorsarelocked.
Ifanydoorisopenwhen is pressed, alldoorslock. These settingscanbemodified. See "UnlockedDoorAntiLockOut" under Vehicle Personalization on page5-31.
Pressing 🔒 may also arm the theft-deterrent system. See Anti-theft Alarm System on page 2-9.
(Unlock): Presstounlockthe driverdoororalldoors; see "RemoteDoorUnlock" under VehiclePersonalizationon page5-31. Theturnsignal indicatorsflashtoindicateunlocking hasoccurred. Formoreinformation see "RemoteUnlockLight Feedback" under Vehicle Personalizationonpage5-31.
Pressing mayalsodisarmthe theft-deterrentsystem.See Anti-theftAlarmSystemon page2-9.
(RemoteTrunkRelease): Pressandhold 📄toopenthe trunk.
(VehicleLocator/Panic Alarm):Pressandreleaseone timetolocatethevehicle.The exteriorlampsflashandthehorn chirps.Pressandhold ▶foratleast twosecondstosoundthepanic alarm.Thehornsoundsandthe turnsignalsflashuntil ▶ispressed again,orthekeyisplacedinthe ignitionandturnedtoON/RUN.
ProgrammingTransmittersto theVehicle
OnlyRKEtransmittersprogrammed tothisvehiclewillwork.lfa transmitterislostorstolen,a replacementcanbepurchased and programmedthroughyourdealer. Whenthereplacementtransmitteris programmedtothisvehicle,all remainingtransmittersmustalsobe reprogrammed.Anylostorstolen transmitterswillnolongerwork oncethenewtransmitteris programmed.Seeyourdealerto havenewtransmittersprogrammed.
BatteryReplacement
ReplacethebatteryiftheREPLACE BATTERYINREMOTEKEY messagedisplaysintheDIC.See "ReplaceBatteryinRemoteKey" underKeyandLockMessageson page5-29.
The battery is not rechargeable. Seeyour deal to replace the battery.
DoorLocks
WARNING
Unlockeddoorscan be dangerous.
- Passengers,especially children,caneasilyopenthe doorsandfalloutofamoving vehicle.Thechanceofbeing thrownoutofthevehicleina crashisincreasedifthe doorsarenotlocked.So,all passengersshouldwear safetybeltsproperlyandthe doorsshouldbelocked wheneverthevehicleis driven.
- Youngchildrenwhogetinto unlockedvehiclesmaybe unabletogetout.Achildcan beovercomebyextremeheat andcansufferpermanent injuriesorevendeathfrom heatstroke.Alwayslockthe vehiclewheneverleavingit.
(Continued)
WARNING(Continued)
- Outsiderscaneasilyenter throughan unlockeddoor whenslowingorstoppingthe vehicle. Lockthedoorsto helppreventthisfrom happening.
Tolockandunlockthedoor,usethe RemoteKeylessEntry(RKE) transmitterorthekeyfromthe outside,andthedoorlockknobor switchfromtheinside.
Tounlockorlockthefueldoor, use theRKEtransmitterorthedoorlock switchfromtheinside.
Frominsidethevehiclewiththe doorslocked,pullonceonthedoor handletounlockit,andasecond timetoopenit.
Manuallylockingthedriverdoor alsoautomaticallylocksallother doors.
Formoreinformationsee:
- RemoteKeylessEntry(RKE) SystemOperationonpage2-3.
• PowerDoorLocksonpage2-5.
• VehiclePersonalizationon page5-31.
PowerDoorLocks
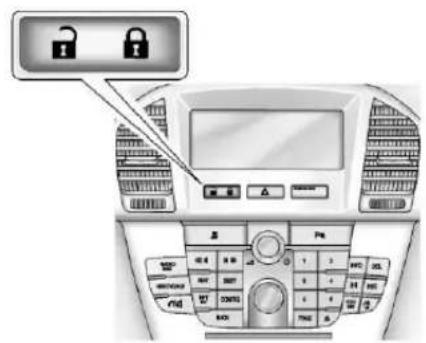
(Unlock):Presstounlockall doors.
(Lock):Presstolockalldoors.
See "PowerDoorLocks" in Vehicle Personalization on page 5-31.
SafetyLocks
The vehicle may have powers safety locks or manuals safety locks. Power safety lock will lock therear windows and not allow therear doorstobe opened from the inside. Manuals safety locks donot allow the reardoorstobe opened from the inside.
PowerSafetyLocks
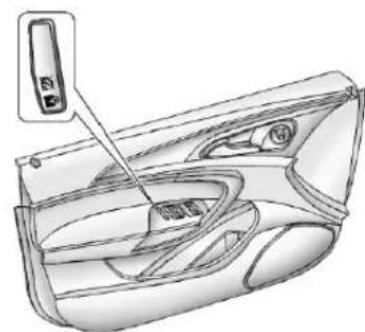
natural_image
Technical line drawing of a car interior showing dashboard and steering wheel (no text or symbols)Press to activate the safety locks on thereardoors. The LED will illuminate.
This switchalsodisablesthepower windowcontrolsonthereardoors
Press 📄againtodeactivatethe safetylocksonthereardoors. The LEDwillturnoff.
IftheLEDflashes, thefeature may notbeworkingproperly. See "Rear WindowLockout" under Power Windowsonpage2-12.
ManualSafetyLocks
natural_image
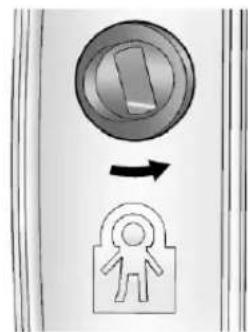
Simple diagram showing a lock icon with an arrow and a padlock symbol (no text or labels)Openthereardoorstoaccessthe safetylocksontheinsideedgeof eachdoor.Tomanuallysetthe locks,insertakeyintotheslotand turnittothehorizontalposition.the doorcanonlybeopenedfromthe outsidewiththedoorunlocked.To returnthedoortonormaloperation, turntheslottotheverticalposition.
Doors
Trunk

WARNING
Exhaustgasescanenterthe vehicleifitisdrivenwiththe liftgate,trunk/hatchopen,orwith anyobjectsthatpassthroughthe sealbetweenthebodyandthe trunk/hatchorliftgate.Engine exhaustcontainsCarbon Monoxide(CO)whichcannotbe seenorsmelled.Itcancause unconsciousnessandevendeath.
If the vehicle must be driven with the lift gate, or trunk/hatch open:
- Closeallofthewindows.
• Fullyopentheairoutletson orundertheinstrument panel.
(Continued)
WARNING(Continued)
- AdjusttheClimateControl systemtoasettingthat bringsinonlyoutsideairand setthefanspeedtothe highestsetting.SeeClimate ControlSystemintheIndex.
- If the vehicle has a power liftgate, disable the power liftgate function.
Formoreinformationabout carbonmonoxide,seeEngine Exhaustonpage9-24.
TrunkRelease
natural_image
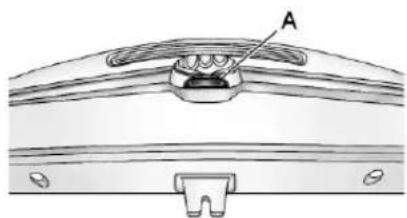
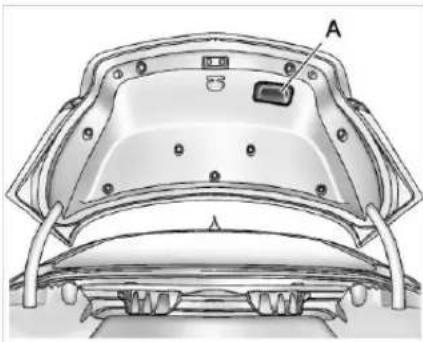
Technical diagram of a mechanical component with labeled section A (no text or symbols present)Toopenthetrunk, pressthe touchpad(A) underthevehicle emblem.
natural_image
Technical line drawing of a vehicle chassis frame with labeled components (no text or symbols present)Toclosethetrunk, usethepull cup(A)asanaid.
RemoteTrunkRelease
Toopenthetrunk, press 📄 onthe RemoteKeylessEntry(RKE) transmitter.
Emergency Trunk Release Handle
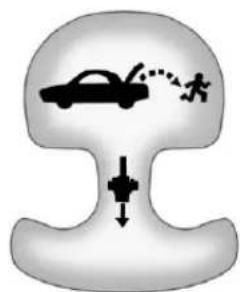
Notice: Donotusethe emergencytrunkreleasehandle asatie-downoranchorpoint whensecuringitemsinthetrunk asitcoulddamagethehandle. Theemergencytrunkrelease handleisonlyintendedtoaida persontrappedinalatchedtrunk, enablingthemtoopenthetrunk fromtheinside.
natural_image
Diagram showing a car being injected with a human silhouette, no text or symbols presentThereisanemergencytrunk releasehandlelocatedinsidethe trunkonthetrunklatch.Onsome vehicles,thereleasehandlecanbe accessedbyfoldingtherearseat centerseatback.SeeRearSeatson page3-9.Pullthereleasehandleto openthetrunkfromtheinside.
VehicleSecurity
This vehicle has the theft-deterrent features; however, they donot make it impossible to steal.
Anti-theftAlarmSystem
This vehicle has an anti-theftalarm system.
ArmingtheSystem
Toarmthesystem, closeallofthe windowsanddoorsandtheneither:
- Press☑ontheRKEtransmitter.
- Lockthevehicleusingthekeyin thedriverdoor.
Thealarmarmsafterabout 30seconds.
Thesecuritylight, located in the center of the instrument panel, will flash slowly.
Press 📄againandthesystemarms immediately.
DisarmingtheSystem
Todisarmthesystempress on theRKEtransmitter.
TurningofftheSystemAlarm
Ifthereisanattempttoopenthe doors,trunk,orhoodwithoutfirst pressing onthetransmitteror unlockingthedriverdoorwiththe key,thesystemalarmwillbe activated.Theexteriorlampswill flashandthehornwillsoundfor about30seconds.
Toturnoffthesystemalarmpress or on the RKE transmitter.
Immobilizer
SeeRadioFrequencyStatementon page13-15forinformation regardingPart15oftheFederal CommunicationsCommission(FCC) rulesandIndustryCanada StandardsRSS-210/220/310.
ImmobilizerOperation
This vehicle has a passive theft-deterrent system.
Thesystemdoesnothavetobe manuallyarmedordisarmed.
The vehicle is automatically immobilized when the key is removed from the ignition.
Thesystemisautomatically disarmedwhenthevehicleis startedwiththecorrectkey. Thekey usesatransponderthatmatchesan immobilizercontrolunitinthe vehicleandautomaticallydisarms thesystem.Onlyanauthorizedkey startsthevehicle. Thevehiclemay notstartifthekeyisdamaged.

Thesecuritylight, located in the instrument panel cluster, comes on if there is a problem with armingor disarming the theft-deterrent system.
Whentryingtostartthevehicle, the securitylightcomesonbrieflywhen theignitionisturnedon.
If theenginedoesnotstartandthe securitylightstayson,thereisa problemwiththesystem.Turnthe ignitionoffandtryagain.
Iftheenginestilldoesnotstart, and thekeyappearstobeundamaged orthelightcontinuestostayon, try anotherignitionkey. Iftheengine doesnotstartwiththeotherkey, the vehicleneedsservice. Ifthevehicle doesstart, thefirstkeymaybe damaged. Seeyourdealerwhocan servicethetheft-deterrentsystem and haveanewkeymade.
Donotleavethekeyordevice thatdisarmsordeactivatesthe theft-deterrentsysteminthevehicle.
ExteriorMirrors
ConvexMirrors

WARNING
Aconvexmirrorcanmakethings, likeothervehicles, lookfarther awaythantheyreallyare. If you cuttoosharplyintotherightlane, youcouldhitavehicleonthe right. Checktheinsidemirroror glanceoveryourshoulderbefore changinglanes.
Thepassengersidemirrorisconvex shaped. Aconvexmirror'ssurface is curvesomorecanbeseenfrom thedriverseat.
PowerMirrors
natural_image
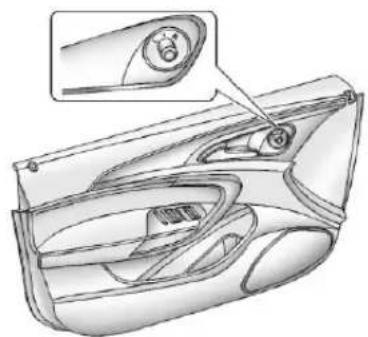
Technical line drawing of a car interior showing dashboard and steering wheel (no text or symbols)Controlsfortheoutsidepower mirrorsarelocatedonthe driverdoor.
-
Turnthecontrolknobtothe L(left)orR(right)selectingthe driverorpassengermirror.
-
Push the control knob to the left, right, up, down to adjust the mirror.
FoldingMirrors
ManualFoldawayMirrors
Thevehiclehasmanualfolding mirrors. Thesemirrorscanbefolded inwardtopreventdamagewhen goingthroughanautomaticcar wash. Tofold, pullthemirrortoward thevehicle. Pushthemirroroutward toreturnittotheoriginalposition.
HeatedMirrors
Thevehiclehasheatedmirrors:
(RearWindowDefogger): Presstoheatthemirrors.
See "RearWindowDefogger" under DualAutomaticClimateControl Systemonpage8-1formore information.
InteriorMirrors
AutomaticDimming RearviewMirror
The vehicle has an automatic dimming inside rear view mirror. Automatic dimming reduces the glare from the headlamp of the vehicle behind you.
VehicleswithOnStar® havethree controlbuttonslocatedatthe bottomofthemirror.Seeyour dealerformoreinformationabout OnStarandhowtosubscribetoit.SeetheOnStarOwner'sGuidefor moreinformationabouttheservices OnStarprovides.
CleaningtheMirror
Donotsprayglasscleanerdirectly onthemirror.Useasofttowel dampenedwithwater.
Windows

WARNING
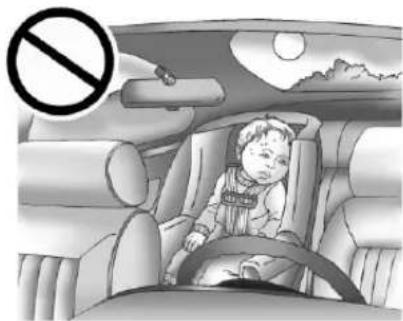
Leavingchildren, helplessadults, orpetsinavehiclewiththe windowsclosedisdangerous. Theycanbeovercomebythe extremeheatandsuffer permanentinjuriesorevendeath fromheatstroke.Neverleavea child,ahelplessadult,orapet aloneinavehicle,especiallywith thewindowsclosedinwarmor hotweather.
natural_image
Interior view of a car with a child seated in the seat, no visible text or symbolsThe vehicle aerodynamics are designed to improve fueleconomy performance. This may result in pulsingsound when either rear window is down and the front windows are up. Toreducethe sound, openeither a front window or the sunroof (ifequipped).
PowerWindows
natural_image
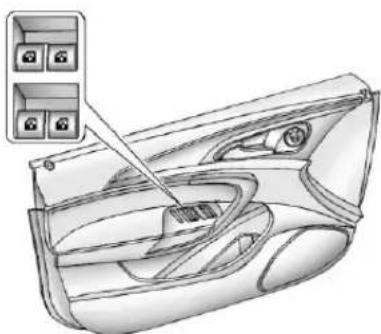
Technical line drawing of a car interior with handlebars and dashboard (no text or symbols)Thepowerwindowswitcheslocated onthedriverdoorcontrolallfour windows. Thepassengerdoors haveawindowswitchthatcontrols thatwindow.Pushtheswitchdown toopenthewindow.Pullthefrontof theswitchuptocloseit.
Theswitchesworkwhentheignition isinON/RUN,ACC/ACCESSORY, orinRetainedAccessoryPower (RAP).SeeRetainedAccessory Power(RAP)onpage9-21.
ExpressWindowOperation
Windowswithanexpress-upor downfeatureallowthefront windowstobeloweredorraised withoutholdingtheswitch. Rear windowsonlyhaveexpressdown. Pullawindowswitchuporpushit downalltheway,releaseit,andthe windowgoesupordown automatically.Stopthewindowby pushingorpullingtheswitch.
RearWindowLockoutwith PowerSafetyLocks
natural_image
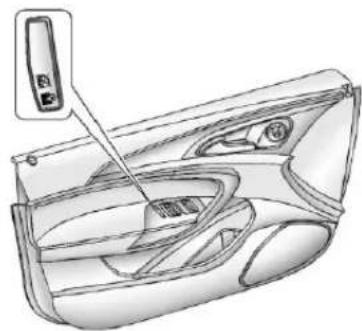
Technical line drawing of a car interior with a door handle and control panel (no text or symbols)Forvehicleswithpowersafety locks,therearwindowlockout buttonisonthedriverdoor.Press 📄todisabletherearwindow controlsandturnonthereardoor powersafetylocks. Thelightonthe buttoncomesonindicatingthe featureisinuse.Therearwindows canstillberaisedorloweredusing thedriverwindowswitcheswhen thelockoutfeatureisactive.To
restorepowertotherearwindows, pressthebuttonagain. Thelighton thebuttongoesout. Ifthelight flashes, thefeaturemaynotbe workingproperly.
RearWindowLockoutwithout PowerSafetyLocks
natural_image
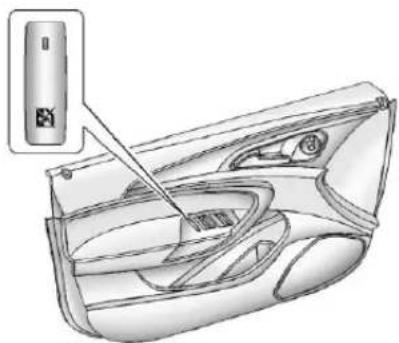
Technical line drawing of a car interior showing dashboard and steering wheel (no text or symbols)Forvehicleswithoutpowersafety locks, therearwindowlockout switchisonthedriverdoor. This featurepreventstherearpassenger windowsfromoperating, except fromthedriverposition.
2-14Keys, DoorsandWindows
Press to activate therear window lockoutswitch.ALED comeson when activated.
Press 📄antodeactivatethe lockoutswitch.
If the LED flashes, the feature may not be working properly.
ProgrammingthePower Windows
Ifthebatteryonthevehiclehas beenrecharged,disconnected,oris notworking,youwillneedto reprogrameachfrontpowerwindow fortheexpress-upfeaturetowork. Beforereprogramming,replaceor rechargethevehicle'sbattery.
Toprogrameachfrontwindow, followthesesteps:
-
With the ignition in ACC/ACCESSORY or ON/RUN, or when Retained Accessory Power (RAP) is active.
-
Pressandholdthepower windowswitchuntilthewindow isfullyopen.
-
Pullthepowerwindowswitchup untilthewindowisfullyclosed.
-
Continue holding the switchup for approximately two seconds after the window is completely closed.
Thewindowisnowreprogrammed. Repeattheprocessfortheother windows.
SunVisors
natural_image
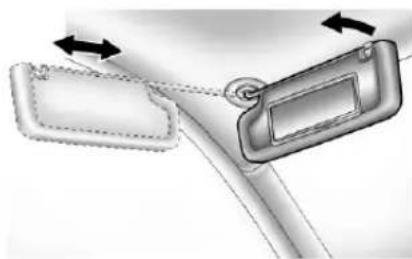
Diagram showing a car door handle with two directional arrows indicating movement or force (no text or symbols present)Pullthesunvisordowntoblock glare.Detachthesunvisorfromthe centermounttopivottotheside window,ortoextendalongtherod, ifavailable.
Roof
Sunroof
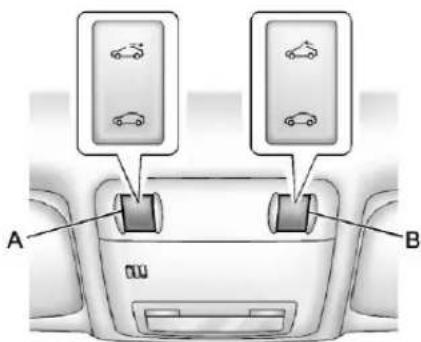
Onvehicleswithasunroof, the switchesareontheoverhead console.
Thesunroofonlyoperateswhen theignitionisinON/RUNorACC/ACCESSORYorinRetained AccessoryPower(RAP).See RetainedAccessoryPower(RAP) onpage9-21formoreinformation.
Toopenorclosethesunroof, press theopenorclosesunroofswitch(A) tothefirstdetentposition.
Toexpressopenorclosethe sunroofwiththesafetyfunction enabled, presstheopenorclose sunroofswitch(A)tothesecond detentpositionandrelease. Tostop themovement, presstheswitch again.
Toautomaticallytiltorclosethe sunroof, pressthetiltopenorclose sunroofswitch(B).
Ifanobjectisinthepathofthe sunroofwhileitisclosing,the anti-pinchfeaturewilldetectthe objectandstopthesunroof.
Thesunroofglasspanelcannotbe openedorclosedifthevehiclehas anelectricalfailure.
natural_image
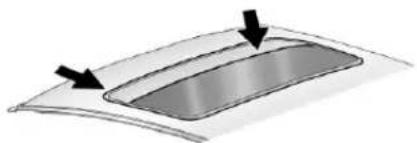
Diagram of a curved panel with two arrows indicating direction (no text or symbols)Dirtanddebrismaycollectonthe sunroofsealorinthetrack. This could cause an issue with sunroof operation, noise, or plugging within the water drainagesystem. Periodically open the sunroof and remove any obstacles or loose debris. Wipethesunroofsealand roofsealing area using a clean cloth, mild soap, and water. Donot remove grease from the sunroof.
2-16Keys, DoorsandWindows
Sunshade
Thesunshadeismanuallyoperated. Closeoropenthesunshadeby sliding.Whenthesunroofis opened,thesunshadeis alwaysopen.
SafetyFunction
If the sunroof has any resistance during automatic closing, it will immediately stop and reverse.
Tooverridethesafetyfunction, pressandholdtheclosesunroof switch. Thesunroofcloseswithout thesafetyfunction. Tostopthe movement, releasetheswitch.
InitializingtheSunroof
If the sunroof cannot be fully closed, or the express open or close feature does not function, the sunroof may need to be initialized. This can happen if the battery has been disconnected or the sunroof has been serviced.
Toinitializethesunroof:
-
Presstheclosesunroofswitch tothefirstdetentposition.Hold theswitchinthispositionfor 10secondsafterthesunroofhas fullyclosed.
-
Presstheopensunroofswitchto thefirstdetentposition. Release theswitchwhenthesunroofis fullyopened.
-
Presstheopensunroofswitch to thefirstdetentpositionandhold for10seconds. Thesunroofwill automaticallyclose. Theswitch canbereleasedwhenthe sunroofstops.
Seatsand Restraints
HeadRestraints
HeadRestraints....3-2
FrontSeats
SeatAdjustment......3-4
PowerSeatAdjustment......3-5
LumbarAdjustment......3-5
RecliningSeatbacks......3-6
HeatedFrontSeats......3-8
RearSeats
RearSeats......3-9
RearSeat
Pass-ThroughDoor......3-10
SafetyBelts
SafetyBelts....3-11
HowtoWearSafetyBelts Properly....3-14
Lap-ShoulderBelt......3-18
SafetyBeltUseDuring Pregnancy....3-25
SafetyBeltExtender......3-25
SafetySystemCheck......3-26
SafetyBeltCare....3-26
ReplacingSafetyBeltSystem PartsafteraCrash......3-26
AirbagSystem
AirbagSystem......3-27
WhereAretheAirbags?.....3-29
WhenShouldanAirbag Inflate?......3-30
WhatMakesanAirbag Inflate?......3-32
HowDoesanAirbag Restrain?......3-32
WhatWillYouSeeafteran AirbagInflates?......3-32
PassengerSensing
System......3-34
ServicingtheAirbag-Equipped Vehicle....3-38
AddingEquipmenttothe Airbag-EquippedVehicle...3-38
AirbagSystemCheck......3-39
ReplacingAirbagSystem PartsafteraCrash......3-40
ChildRestraints
OlderChildren......3-40
InfantsandYoung Children....3-43
ChildRestraintSystems.....3-45 WheretoPuttheRestraint...3-48
LowerAnchorsandTethers forChildren(LATCH System)....3-49
ReplacingLATCHSystem PartsAfteraCrash......3-57
SecuringChildRestraints (RearSeat)....3-57
SecuringChildRestraints (FrontPassengerSeat)....3-59
3-2 Seats and Restraints
HeadRestraints
The vehicle's frontseat have adjustable head restraints in the outboard seating positions.
The vehicle's rearseatshave adjustable headrestraints in the outboard seating positions.
WARNING
Withheadrestraintsthatarenot installedandadjustedproperly, thereisagreaterchancethat occupantswillsufferaneck/spinalinjuryinacrash.Donot driveuntiltheheadrestraintsfor allooccupantsareinstalledand adjustedproperly.
natural_image
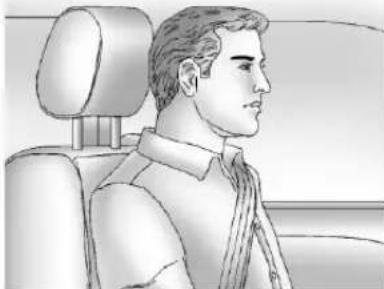
Side profile illustration of a person seated in a car seat, wearing a beret and collared shirt (no text or symbols)Adjusttheheadrestraintsothatthe topoftherestraintisatthesame heightasthetopoftheoccupant's head. Thispositionreducesthe chanceofaneckinjuryinacrash.
FrontSeat
natural_image
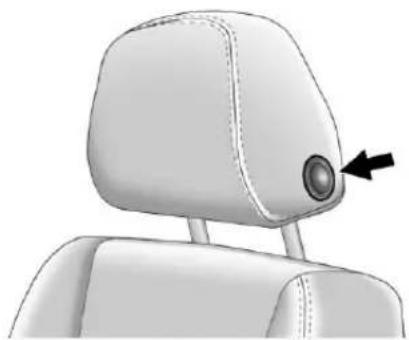
Side profile of a car head with a circular sensor or connector, showing no text or symbols.Toraiseorlowertheheadrestraint, pressthereleasebuttonlocatedon thesideoftheheadrestraintand pulluporpushtheheadrestraint downandreleasethebutton.
Pullandpushontheheadrestraint afterthebuttonisreleasedtomake surethatitislockedinplace.
Thefrontheadrestraintsarenot designedtoberemoved.
RearSeat
natural_image
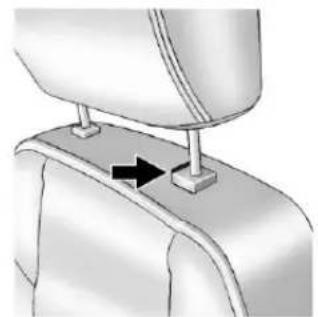
Mechanical assembly diagram showing a bracket with a bolt and arrow indicating direction (no text or symbols)Pulltheheadrestraintuptoraiseit. Tolowertheheadrestraint, press thereleasebutton, located on the headrestraintpostonthetopofthe seatback, while you push the head restraintdown.
Pushdownontheheadrestraint afterthebuttonisreleasedtomake surethatitislockedinplace.
If you are installing a child restraint in therearse at, see "Securinga Child Restraint Designed for the LATCH System" under Lower Anchors and Tethers for Children (LATCH System) on page 3-49.
3-4 Seats and Restraints
FrontSeats
SeatAdjustment
SeatPosition
natural_image
3D rendering of a car seat with seatbelt and side-mounted buttons (no text or symbols)WARNING
Youcanlosecontrolofthe vehicleifyoutrytoadjusta manualdriverseatwhilethe vehicleismoving. Thesudden movementcouldstartleand confuseyou,ormakeyoupusha pedalwhenyoudonotwantto. Adjustthedriverseatonlywhen thevehicleisnotmoving.
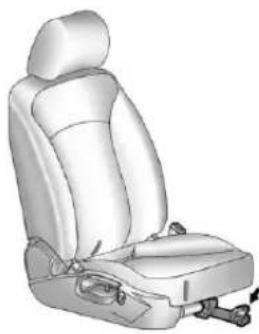
Toadjusttheseatposition:
- Pull the handle under the front of these at cushion.
2.Slidetheseattothedesired positionandreleasethehandle. - Trytomovetheseatback and forthobesureitislocked in place.
HeightAdjustment
natural_image
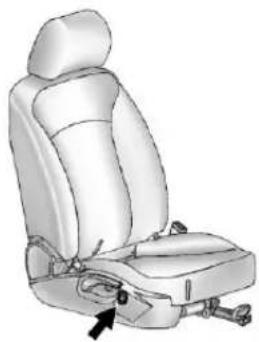
Illustration of a car seat with a black arrow pointing to the lower side of the seat (no text or symbols present)Pressandholdthetoporbottomof theswitchtoraiseorlowertheseat. Releasetheswitchwhenthe desiredheightisreached.
PowerSeatAdjustment
natural_image
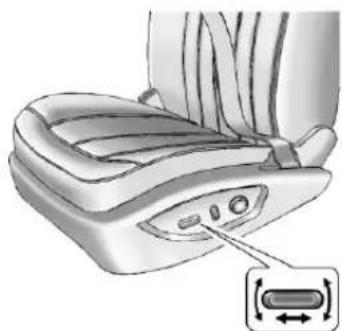
Illustration of a mechanical device with a close-up inset showing a button and arrow (no text or symbols)Toadjustapowerseat:
- Movetheseatforwardor rearwardbyslidingthecontrol forwardorrearward.
- Raiseorlowerthefrontpartof theseatcushionbymovingthe frontofthecontrolupordown.
- Raiseorlowertheentireseatby movingtheentirecontrolup ordown.
LumbarAdjustment
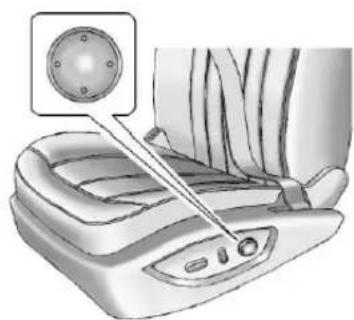
natural_image
Illustration of a car seatbelt with a circular component inserted, showing no text or symbolsToadjustthelumbarsupport:
- Pressandholdthefrontorrear ofthecontroltoincreaseor decreaselumbarsupport.
- Pressandholdthetoporbottom ofthecontroltoraiseorlower lumbarsupport.
Releasethecontrolwhenthe desiredlevelofsupportisreached.
3-6 Seats and Restraints
RecliningSeatbacks

WARNING
Sittinginareclinedpositionwhen thevehicleisinmotioncanbe dangerous.Evenwhenbuckled up,thesafetybeltscannotdo theirjobwhenreclinedlikethis.
Theshoulderbeltcannotdoits jobbecauseitwillnotbeagainst yourbody.Instead,itwillbein frontofyou.Inacrash,youcould gointoit,receivingneckorother injuries.
(Continued)
WARNING(Continued)
Thelapbeltcannotdoitsjob either.Inacrash,thebeltcould goupoveryourabdomen.The beltforceswouldbethere,notat yourpelvicbones.Thiscould causeseriousinternalinjuries.
Forproperprotectionwhenthe vehicleisinmotion,havethe seatbackupright.Thensitwell backintheseatandwearthe safetybeltproperly.
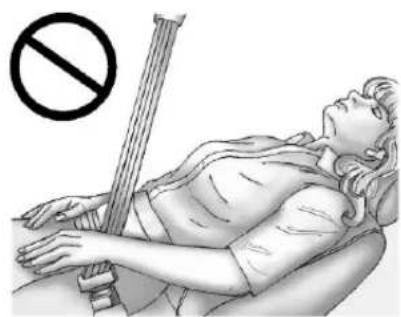
natural_image
Illustration of a person lying on their back with a string and a no-smoking symbol above (no text or labels)Donothaveaseatbackreclinedif thevehicleismoving.
ManualRecliningSeatbacks

WARNING
Ifeitherseatbackisnotlocked, it couldmoveforwardinasudden stoporcrash. That could cause injury to the person sitting there. Always push and pull on the seatbackstobesure they are locked.
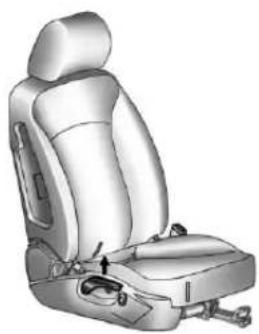
natural_image
3D rendering of a car seat assembly with mounting bracket and side panel (no text or symbols)Toreclinetheseatback:
-
Liftthelever.
-
Movetheseatbacktothe desiredposition, and then releasethelevertolockthe seatbackinplace.
-
Pushandpullontheseatbackto makesureitislocked.
Toreturntheseatbacktotheupright position:
-
Lift the lever fully without applying pressure to the seatback, and these seat back will return to the upright position.
-
Pushandpullontheseatbackto makesureitislocked.
PowerRecliningSeatbacks
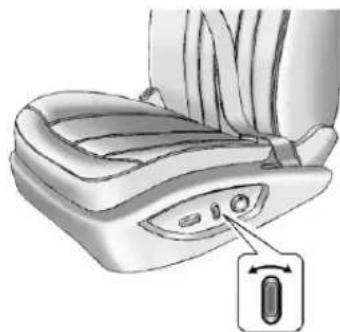
natural_image
Illustration of a medical device with a button and arrow pointing to a component (no text or symbols present)Toadjustapowerseatback, ifequipped:
- Tiltthetopofthecontrol rearwardtorecline.
- Tiltthetopofthecontrolforward toraise.
3-8 Seats and Restraints
HeatedFrontSeats

WARNING
If you cannot feel temperature change or paint to the skin, the seat theater may cause burns even at low temperatures. To reduce risk of burns, people with such conditions should use care when using these seat theater, especially for long periods of time. Don't place anything on these that insulates against heat, such as a blanket, cushion, cover, or similar item. This may cause these seat at the to overheat. An overheated seat theater may cause a burn or may damage these seat.
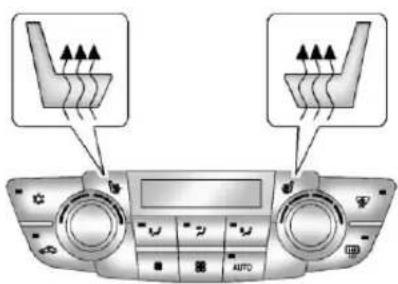
The buttons are on the climate control panel. To operate, the ignition must be on.
Press #or#toheatthedriveror passengerseatcushionand seatback.Indicatorlightsonthe climatecontroldisplayshowthe currentsetting.
Pressthebuttononceforthe highestsetting.Witheachpressof thebutton,theheatedseatwill changetothenextlowersetting, andthentotheoffsetting.The lightsindicatethreeforthehighest settingandoneforthelowest.
RearSeats
FoldingtheSeatback
Eithersideoftheseatbackcanbe foldedownformorecargospace. Foldaseatbackonlywhenthe vehicleisnotmoving.
Notice: Folding arearseat with the safety belts still fastened may caused damage to theseator the safety belts. Always sunbuckle the safety belts and return them to their normal stowed position before folding arearseat.
Tofoldtheseatbackdown:
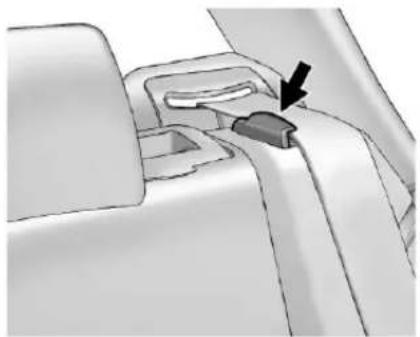
natural_image
Mechanical component diagram showing a highlighted part with an arrow (no text or symbols present)- Besurethesafetybeltisinthe retainerclip.
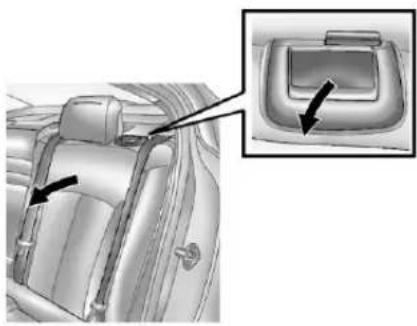
natural_image
Interior view of a car seatbelt with a close-up inset showing the side panel (no text or symbols visible)- Pullontheleveronthetopof theseatbacktounlockit.
Atabneartheseatbacklever raiseswhentheseatbackis unlocked.
3.Foldtheseatbackdown.
RepeatSteps1through3forthe otherseatback,ifdesired.
3-10 Seats and Restraints
RaisingtheSeatback

WARNING
Ifeitherseatbackisnotlocked, it couldmoveforwardinasudden stoporcrash. That could cause injury to the person sitting there. Always push and pull on the seat backstobesure they are locked.

WARNING
Asafetybeltthatisimproperly routed, not properly attached, ortwisted will not provide the protection needed in acrash. The person wearing the belt could be seriously injured. After raising the reseatback, always check to besure that the safety belts are properly routed and attached, and are not twisted.
Toraiseaseatback:
- Lifttheseatbackupandpush itrearwardtolockitinplace. Makesurethesafetybeltisin theretainerclipandisnot twistedorcaughtinthe seatback.
Atabneartheseatbacklever retractswhentheseatbackis lockedinplace.
-
Pushandpullthetopofthe seatbacktobesureitislocked intoposition.
-
RepeatSteps1 and 2 for the other seatback, if necessary.
Whentheseatisnotinuse, it shouldbekeptintheupright, locked position.
RearSeat Pass-ThroughDoor
natural_image
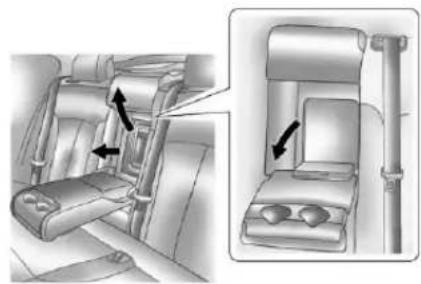
Technical illustration of a car seat assembly showing two side views with arrows indicating movement (no text or symbols present)The vehicle may have a door in the rearseat that provides access to the trunk.
Lowertherearseatarmrestto accessthepass-throughdoor.Pull thereleasehandletoopenthedor. Toclose,pushandlatchthedoor.
The vehicle may have a lock knob on the pass-throughdoor. Turn the lock knob from the trunk side of the door to lock or unlock the door.
SafetyBelts
Thissectionofthemanual describeshowtousesafetybelts properly.Italsodescribessome thingsnottodowithsafetybelts.
WARNING
Donotletanyoneridewherea safetybeltcannotbeworn properly.Inacrash,ifyouoryour passenger(s)arenotwearing safetybelts,theinjuriescanbe muchworse.Youcanhitthings insidethevehicleharderorbe ejectedfromthevehicle.You andyourpassenger(s)canbe seriouslyinjuredorkilled.Inthe samecrash,youmightnotbe, ifyouarebuckledup.Always fastenyoursafetybelt,andcheck thatyourpassenger(s)are restrainedproperlytoo.
WARNING
Itisextremelydangeroustoride inacargoarea,insideoroutside ofavehicle.Inacollision,people ridingintheseareasaremore likelytobeseriouslyinjuredor killed.Donotallowpeopletoride inanyareaofyourvehiclethatis notequippedwithseatsand safetybelts.Besureeveryonein thevehicleisinaseatandusing asafetybeltproperly.
This vehicle has indicators as a remindertobucklethesafetybelts. See SafetyBeltReminderson page 5-11 for additional information.
InmoststatesandinallCanadian provinces,thelawrequireswearing safetybelts.Hereiswhy:
Youneverknowifyouwillbeina crash. If youdohaveacrash, you donotknowifitwillbea seriousone.
Afewcrashesaremild, and some crashescanbesoseriousthateven buckledup, apersonwouldnot survive. But most crashes are in between. In many of them, people whobuckleupcansurvive and sometimes walk away. Without safety beltsthey could have been badly hurtorkilled.
Aftermorethan40yearsofsafety beltsinvehicles, thefactsareclear. Inmostcrashesbucklingupdoes matter...alot!
3-12 Seats and Restraints
WhySafetyBeltsWork
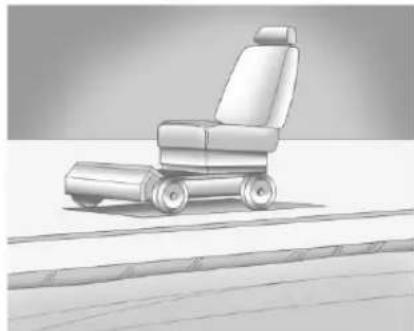
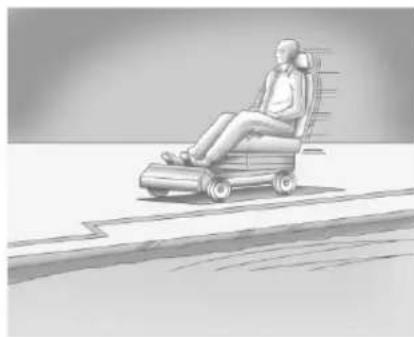
Whenyourideinoronanything, yougoasfastasitgoes.
natural_image
Illustration of a small electric scooter on a paved surface (no text or symbols)Takethesimplestvehicle. Suppose itisjustaseatonwheels.
natural_image
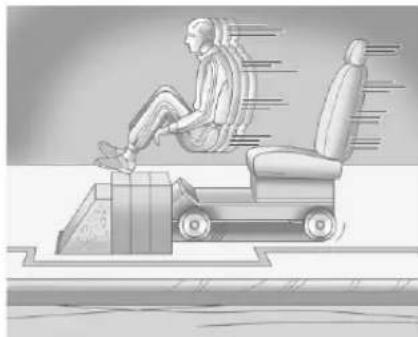
Illustration of a person riding a motor in a curved path (no text or symbols)Putsomeoneonit.Getituptospeed.Thenstopthe
natural_image
Illustration of a person sitting on a vehicle with motion lines indicating speed, no text or symbols presentvehicle.Theriderdoesnotstop.
natural_image
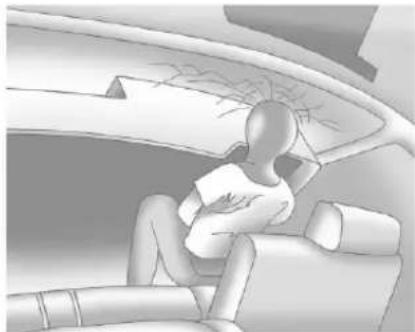
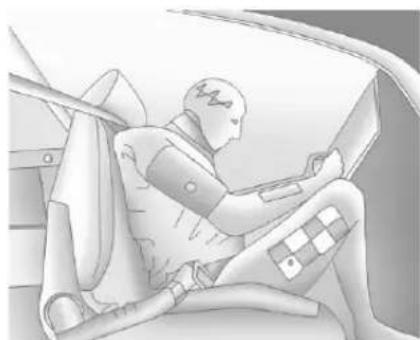
Interior view of a car with a person sitting on the back, no visible text or symbolsThepersonkeepsgoinguntil stoppedbysomething.Inareal vehicle,itcouldbethewindshield...
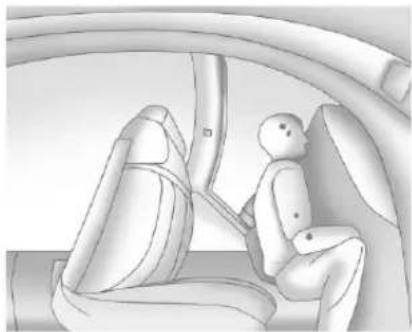
natural_image
Interior view of a car showing two seated passenger seats and a driver's seat, no text or symbols visibleortheinstrumentpanel...
natural_image
Illustration of a person seated in a car, wearing a helmet and holding a device (no text or symbols visible)orthesafetybelts!
Withsafetybelts, youslowdown asthevehicledoes. Yougetmore timetostop. Youstopovermore distance, and your strongest bones taketheforces. That is why safety belts makes such goodsense.
QuestionsandAnswersAbout SafetyBelts
Q: Willlbetrappedinthevehicle afteracrashiflamwearinga safetybelt?
A: You could be—whether you are wearing as safety belt not. But your chance of being conscious during and after an accident, so you can unbuckle and get out, is much greater if you are belted. And you can unbuckle as safety belt, even if you are upsidedown.
3-14 Seats and Restraints
Q: If my vehicle has air bags, why should have to wear safety belts?
A: Airbagsaresupplemental systemsonly; sotheyworkwith safetybelts—notinsteadof them. Whetherornotanairbag isprovided, allooccupantsstill havetobuckleuptogetthe mostprotection. Thatistruenot onlyinfrontalcollisions, but especiallyinsideandother collisions.
Q: Iflamagooddriver, and I neverdrivefarfromhome, whyshouldlwearsafety belts?
A: You may bean excellent driver, but if you are in acrash—even on that is not your fault—you and your passenger(s) can be hurt. Being a good driver does not protect you from things beyond your control, such as baddrivers.
Mostaccidentsoccurwithin 40km(25mi)ofhome.Andthe greatestnumberofserious injuriesanddeathsoccurat speedsoflessthan65km/h (40mph).
Safetybeltsareforeveryone.
HowtoWearSafetyBelts Properly
Thissectionisonlyforpeopleof adultsize.
Beawarethattherearespecial thingstoknowaboutsafetybelts andchildren.Andtherearedifferent rulesforsmallerchildrenand infants.Ifachildwillberidinginthe vehicle,seeOlderChildrenon page3-40orInfantsandYoung Childrenonpage3-43.Followthose rulesforeveryone'sprotection.
Itisveryimportantforallooccupants tobuckleup.Statisticsshowthat unbeltedpeoplearehurtmoreoften incrashesthanthosewhoare wearingsafetybelts.
Occupantswhoarenotbuckledup canbethrownoutofthevehicleina crash. And they can strike others in the vehicle who are wearing safety belts.
First, before you or your passenger(s) wear safety belt, there is important information you should know.
natural_image
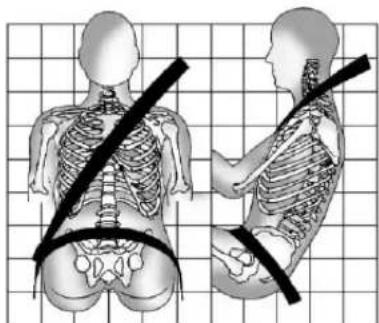
Illustration of human torso and neck anatomy with a black band indicating muscle or spinal cord placement (no text or labels)Situpstraightandalwayskeepyour feetonthefloorinfrontofyou.The lappartofthebeltshouldbeworn lowandsnugonthehips,just touchingthethighs.Inacrash,this appliesforcetothestrongpelvic
bonesandyouwouldbelesslikely toslideunderthelapbelt. Ifyouslid underit, thebeltwouldapplyforce onyourabdomen. This could cause seriousorevenfatalinjuries. The shoulderbeltshouldgooverthe shoulderandacrossthechest. These part of the body are best abletotakebeltrestrainingforces.
Theshoulderbeltlocksifthereisa suddenstoporcrash.
Q: Whatiswrongwiththis?
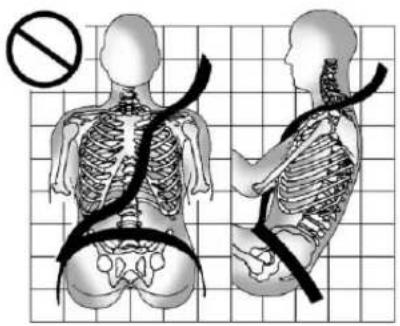
A: Theshoulderbeltistooloose. It will not give as much protection this way.

WARNING
Youcanbeseriouslyhurtifthe shoulderbeltistooloose.Ina crash,youwouldmoveforward toomuch,whichcouldincrease injury.Theshoulderbeltshouldfit snuglyagainstyourbody.
Q: Whatiswrongwiththis?
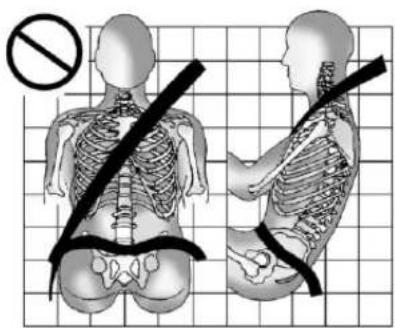
A: Thelapbeltistooloose. It will not given nearly a much protection this way.

WARNING
Youcanbeseriouslyhurtifthe lapbeltistooloose.Inacrash, youcouldslideunderthelap beltandapplyforceonyour abdomen.Thiscouldcause seriousorevenfatalinjuries.The lapbeltshouldbewornlowand snugonthehips,justtouching thethighs.
3-16SeatsandRestraints
Q:Whatiswrongwiththis?
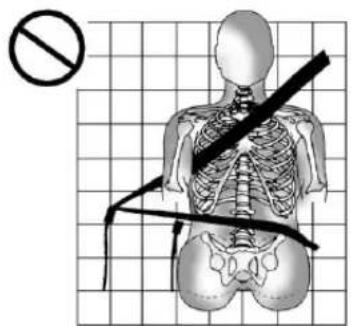
A: Thebeltisbuckledinthewrong buckle.

WARNING
Youcanbeseriouslyinjuredifthe beltisbuckledinthewrongplace likethis.Inacrash,thebeltwould goupoveryourabdomen.The beltforceswouldbethere,noton (Continued)
WARNING(Continued)
thepelvicbones. This could cause serious internal injuries. Always buckle the belt into the bucklenearest you.
Q: Whatiswrongwiththis?
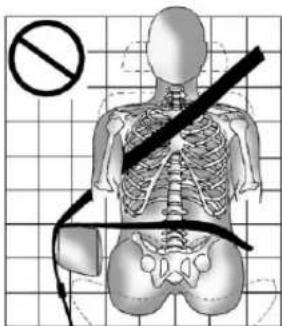
A: Thebeltisoveranarmrest.

WARNING
Youcanbeseriouslyinjuredifthe beltgoesoveranarmrestlike this.Thebeltwouldbemuchtoo high.Inacrash,youcanslide underthebelt.Thebeltforce wouldthenbeappliedonthe abdomen,notonthepelvic bones,andthatcouldcause seriousorfatalinjuries.Besure thebeltgoesunderthearmrests.
Q: Whatiswrongwiththis?
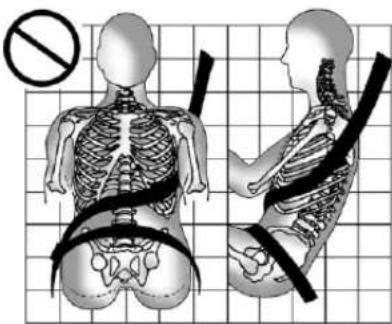
natural_image
Side-by-side anatomical illustrations of human torso and pelvis with a no-smoking symbol, shown on grid background (no text or labels)A: Theshoulderbeltiswornunder thearm. It shouldbewornover theshoulderatalltimes.
WARNING
Youcanbeseriouslyinjuredif youweartheshoulderbeltunder yourarm.Inacrash,yourbody wouldmovetoofarforward, whichwouldincreasethechance ofheadandneckinjury.Also,the (Continued)
WARNING(Continued)
beltwouldapplytoomuchforce totheribs,whicharenotas strongassshoulderbones.You couldalsoseverelyinjureinternal organslikeyourliverorspleen. Theshoulderbeltshouldgoover theshoulderandacrossthe chest.
Q: Whatiswrongwiththis?
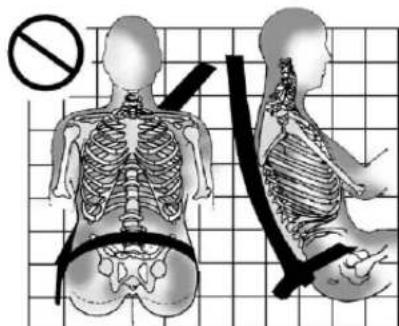
A: Thebeltisbehindthebody.
WARNING
Youcanbeseriouslyinjured by notwearingthelap-shoulderbelt properly. Inacrash, you would not berestrained by the shoulder belt. Your body could movetoo far forward increasing the chance of head and neck injury. You might also slide under the lap belt. The belt force would then be applied right on the abdomen. That could cause serious or fatal injuries. Theshoulder belt should go over the shoulder and across the chest.
3-18 Seats and Restraints
Q:Whatiswrongwiththis?
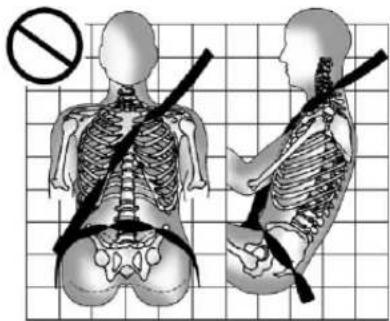
natural_image
Side-by-side anatomical illustrations of human torso and pelvis with a no-smoking symbol, no text or labels presentA: Thebeltistwistedacross thebody.

WARNING
Youcanbeseriouslyinjuredbya twistedbelt.Inacrash,youwould nothavethefullwidthofthebelt tospreadimpactforces.Ifabelt istwisted,makeitstraightsoit canworkproperly,oraskyour dealertofixit.
Lap-ShoulderBelt
Allseatingpositionsinthevehicle havealap-shoulderbelt.
The following instructionsexplain howtowearalap-shoulderbelt properly.
- Adjusttheseat, if theseatis adjustable, so you cansit up straight. Toseehow, see "Seats" in the Index.
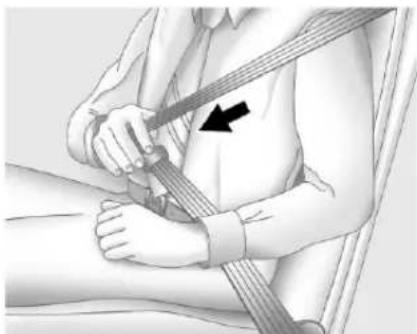
natural_image
Medical illustration of a person's seatbelt being adjusted, showing bandage and arrow (no text or symbols)- Pickupthelatchplateandpull thebeltacrossyou.Donotletit gettwisted.
Thelap-shoulderbeltmaylockif youpullthebeltacrossyouvery quickly. If this happens, let the beltgobackslightlytounlockit. Then pullthebeltacrossyou moreslowly.
Iftheshoulderportionofa passengerbeltispulledoutall theway,thechildrestraint lockingfeaturemaybeenaged. Ifthishappens,letthebeltgo backallthewayandstartagain.
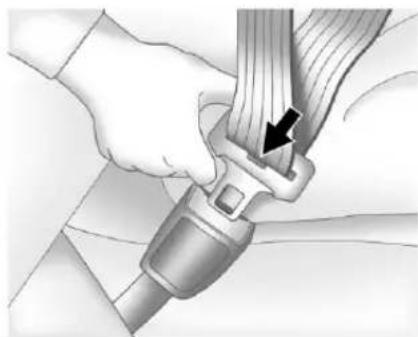
natural_image
Close-up of hands adjusting a car seatbelt buckle (no text or symbols visible)- Pushthelatchplate into the buckle until it clicks.
Pulluponthelatchplateto makesureitissecure.Ifthebelt isnotlongenough,see Safety BeltExtenderonpage3-25.
Positionthereleasebuttonon thebucklesothatthesafetybelt couldbequicklyunbuckledif necessary.
Ifequippedwithashoulderbelt heightadjuster,moveittothe heightthatisrightforyou.See "ShoulderBeltHeightAdjuster" laterinthissectionfor instructionsonuseand importantsafetyinformation.
natural_image
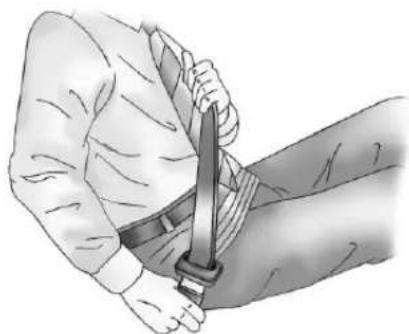
Illustration of a person's arm wearing a belt and adjusting a sword (no text or symbols present)- Tomakethelapparttight, pull upontheshoulderbelt.
It may be necessary to pull stitching on the safety belt through the latch platetofully tight enthelapbeltonsmaller occupants.
natural_image
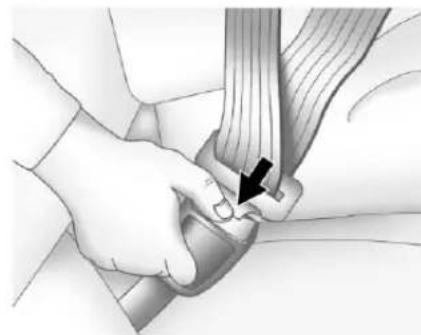
Medical illustration showing a hand holding a medical device with a black arrow pointing to a cable or grip (no text or symbols present)Tounlatchthebelt, pushthebutton onthebuckle. Thebelt should returntoitsstowedposition.
Beforeadoorisclosed,besurethe safetybeltisoutoftheway.Ifa doorisslammedagainstasafety belt,damagecanoccurtoboththe safetybeltandthevehicle.
ShoulderBeltHeightAdjuster
The vehicle has a shoulder belt height adjuster forth the driver and right front passenger seating positions.
Adjusttheheightsotheshoulder portionofthebeltisontheshoulder andnotfallingoffofit. Thebelt shouldbecloseto, but not contacting, theneck. Improper shoulderbeltheightadjustment couldreducetheeffectiveness of thesafetybeltinacrash. SeeHow to WearSafetyBeltsProperlyon page3-14.
natural_image
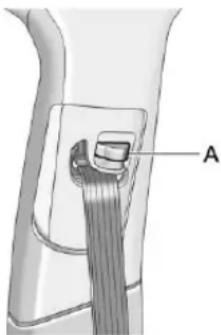
Anatomical illustration of a knee joint with labeled area A (no text or symbols present)Pressthereleasebutton(A)and movetheheightadjustertothe desiredposition.Theadjustercan bemovedupbypushingtheslide/ trimup.Aftertheadjusterissetto thedesiredposition,trytomoveit downwithoutpushingtherelease buttonomakesureithaslocked intoposition.
SafetyBeltPretensioners
This vehicle hassafety belt pretensioners for front outboard occupants. Although the safety belt pretensioners cannot be seen, they are part of the safety belt assembly. They can help to height the safety belts during the early stages of a moderate to severe frontal, near frontal, or rear crash if the threshold conditions for pretensioner activation are met.
And, if the vehicle hasside impact air bags, safety beltpretensioners can help tightent the safety belts in a side crashorarollover event.
Pretensionersworkonlyonce.Ifthe pretensionersactivateinacrash, theywillneedtobereplaced,and probablyothernewpartsforthe vehicle'ssafetybeltsystem.See ReplacingSafetyBeltSystemParts afteraCrashonpage3-26.
RearSafetyBeltComfort Guides
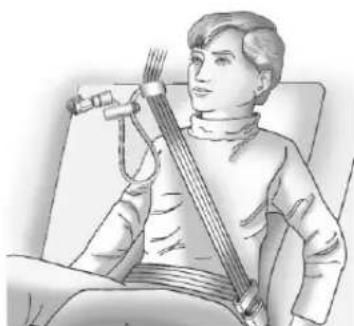
Rearsafetybeltcomfortguidesmay provideaddedsafetybeltcomfort forolderchildrenwhohave outgrownboosterseatsandfor someadults.Wheninstalledona shoulderbelt,thecomfortguide positionstheshoulderbeltaway fromtheneckandhead.
This vehicle may comewitheither an adjustable comfort guide or comfort guidessewn into the side of therearoutboard seatback.
AdjustableSafetyBeltComfort Guide
natural_image
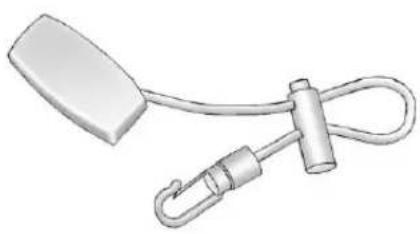
Illustration of a mechanical clamp with a handle and clip (no text or symbols)Onvehicleswiththeadjustable comfortguide,oneguideis provided.Additionaladjustable comfortguidesareavailablethrough yourdealer.
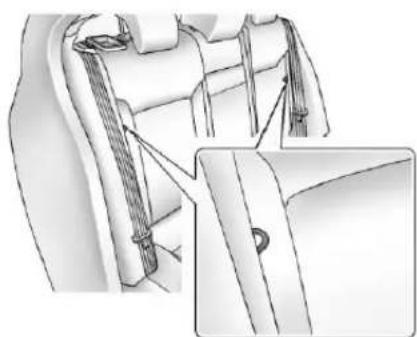
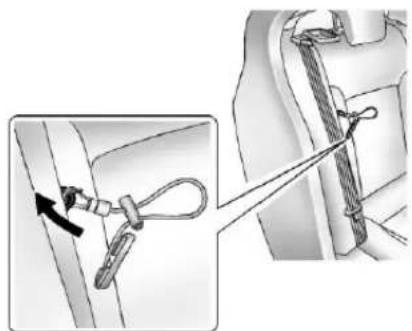
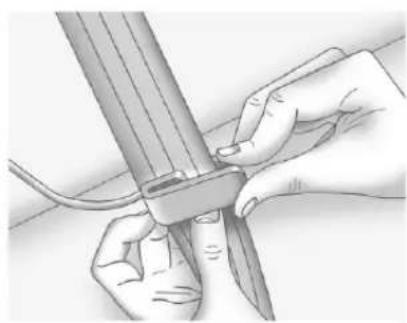
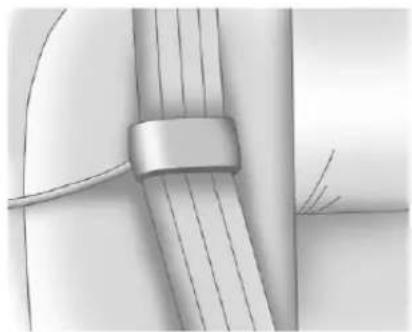
Toinstalltheadjustablesafetybelt comfortguidetotheseatback and thesafetybelt:
natural_image
Technical illustration of a mechanical assembly with a close-up detail (no text or symbols)- Locatetheanchorageloop between therearoutboard seatback and seatbolster, nearthetop.
3-22SeatsandRestraints
natural_image
Technical illustration of a cable clamp securing a cable, showing rope routing and angle adjustment (no text or symbols)- Attachtheadjustablecomfort guidetotheanchorloopby threadingthehookthrough theloop.
natural_image
Illustration of hands holding a pen or tool with a curved cable (no text or symbols visible)- Placetheguide over the belt, and insert the two edges of the belt into the slot of the guide.
natural_image
Close-up of a mechanical cable or wire assembly with no visible text or symbols- Besurethatthebeltisnot twistedanditiesflat. The elasticcordmustbeunderthe beltandtheguideontop.
-
Theelasticcordonthecomfort guideisadjustable.Youcan makeitlongerorshorterby squeezingbothendsofthe plasticadjusterandpullingon theelasticcordortheguide.
-
Adjust the guides to the shoulder portion of the belt is on the shoulder and not falling off of it. The belt should be closeted, but not contacting, then each. Improper comfort guide adjustment could reduce the effectiveness of the safety belt in a crash.
WARNING
Asafetybeltthatisnotproperly wornmaynotprovidethe protectionneededinacrash. The personwearingthebeltcouldbe seriouslyinjured. Theshoulder beltshouldgoovertheshoulder andacrossthechest. Theseparts ofthebodyarebestabletotake beltrestrainingforces.
natural_image
Illustration of a person seated in a chair holding a long, multi-barmed string (no text or symbols visible)- Buckle, position, and release the safety belt as described previously in this section. Make sure that the shoulder belt crossestheshoulder.
Toremoveandstorethecomfort guide, squeezethebeltedges togethersothatthesafetybelt canberemovedfromtheguide. Un-hooktheguidefromtheloop ontheseat.Storetheguideina convenientplaceliketheglovebox forthenexttimeitisneeded.
Sewn-inSafetyBeltComfort Guide
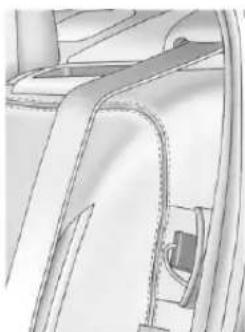
natural_image
Technical line drawing of a mechanical component with no visible text or symbolsOnvehicleswiththesewn-in comfortguide,thereisoneguidefor eachoutboardpassengerpositionin therearseat.
3-24SeatsandRestraints
Toinstallacomfortguidetothe safetybelt:
- Removetheguidefromits storagepocketonthesideof theseat.
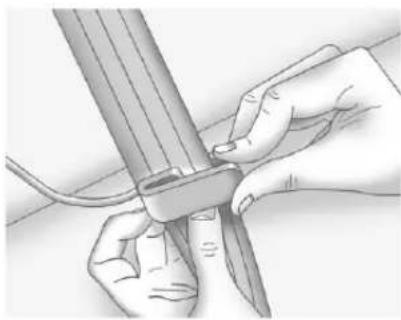
natural_image
Illustration of hands holding a tool with a ruler, no text or symbols present- Placetheguideoverthebelt, andinsertthetwoedgesofthe beltintotheslotsoftheguide.
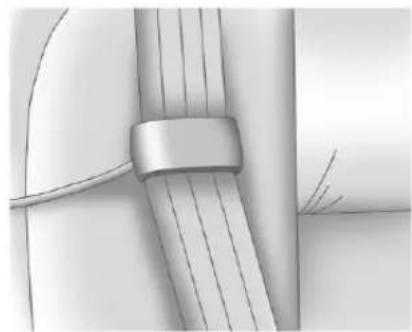
natural_image
Close-up of a metallic cable with a strap, wrapped around a cylindrical object (no text or symbols visible)- Besurethatthebeltisnot twistedanditiesflat. The elasticcordmustbeunderthe beltandtheguideontop.
WARNING
Asafetybeltthatisnotproperly wornmaynotprovidethe protectionneededinacrash. The personwearingthebeltcouldbe seriouslyinjured. Theshoulder beltshouldgoovertheshoulder (Continued)
WARNING(Continued)
andacrossthechest. These parts ofthebodyarebestabletotake beltrestrainingforces.
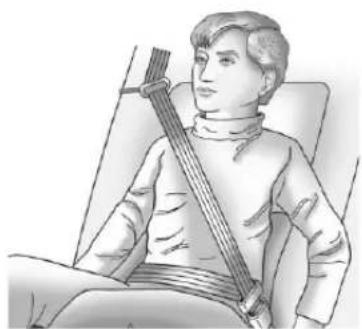
natural_image
Illustration of a person sitting in a chair holding a long stringed object (no text or symbols visible)- Buckle, position, and release the safety belt as described previously in this section. Make sure the shoulder portion of the belt is on the shoulder and not falling off of it. The belt should be closeto, but not contacting, theneck.
Toremoveandstorethecomfort guide, squeeze thebeltedges togethersothatthesafetybeltcan beremovedfromtheguide. Store theguideinitsstoragepocketon thesideoftheseatback.
SafetyBeltUseDuring Pregnancy
Safetybeltsworkforeveryone, includingpregnantwomen.Likeall occupants,theyaremorelikelyto beseriouslyinjurediftheydonot wearsafetybelts.
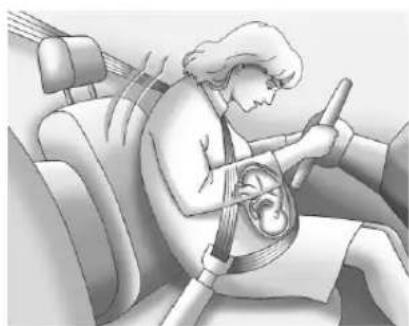
natural_image
Illustration of a person wearing a seatbelt inside a car, with no visible text or symbolsApregnantwomanshouldweara lap-shoulderbelt, and the lap portions should bewornaslowas possible, belowtherounding, throughout the pregnancy.
The best way to protect the fetus is to protect them other. When as safety belt is worn properly, it is more likely that the fetus will not be hurt in a crash. For pregnant women, as for anyone, the key to makings safety belt is effective is wearing them properly.
SafetyBeltExtender
If the vehicle's safety belt will fasten around you, you should use it.
Butifasafetybeltisnotlong enough,yourdealerwillorderyou anextender.Whenyougointo orderit,taketheheaviestcoatyou willwear,sotheextenderwillbe longenoughforyou.Tohelpavoid personalinjury,donotletsomeone elseuseit,anduseitonlyforthe seatismadetofit.Theextender hasbeendesignedforadults.Never useitforsecuringchildseats.To wearit,attachittotheregularsafety belt.Formoreinformation,seethe instructionsheetthatcomeswith theextender.
SafetySystemCheck
Nowandthen, check that the safety belt reminder light, safety belts, buckles, latch plates, retractors, and anchorages are working properly. Look for any other loose or damaged safety belts system parts that might keep safety belts system from doing its job. See your dealer to have it repaired. Tornor frayed safety belts may not protect you in acrash. They can ripapart under impact forces. Ifabeltistor nor frayed, get anewoneright away.
Makesurethesafetybeltreminder lightisworking.SeeSafetyBelt Remindersonpage5-11formore information.
Keepsafetybeltscleananddry. See SafetyBeltCareonpage3-26.
SafetyBeltCare
Keepbeltscleananddry.

WARNING
Donotbleachordyesafetybelts. Itmayseverelyweakenthem. In acrash, they might not be able to provide adequate protection. Cleansafetybeltsonly with mild soap and lukewarmwater.
ReplacingSafetyBelt SystemPartsaftera Crash

WARNING
Acrashcandamagethesafety beltsysteminthevehicle. Adamaged safety beltsystem may not properly protect the person using it, resulting in serious injury overvendeathina crash. To help makes sure the safety belts systems are working properly after a crash, havethem inspected and any necessary replacements made as soon as possible.
Afteraminorcrash, replacement of safetybeltsmaynotbenecessary. Butthesafetybeltasembliesthat were used during any crash may have been stressed or damaged. Se your deal to havethesafety belt assemblies inspected or replaced.
Newpartsandrepairsmaybe necessaryevenifthesafetybelt systemwasnotbeingusedatthe timeofthecrash.
Havethesafetybeltpretensioners checkedifthevehiclehasbeenina crash,oriftheairbagreadinesslight staysonafteryoustartthevehicle orwhileyouaredriving.SeeAirbag ReadinessLightonpage5-11.
AirbagSystem
The vehicle hasthe following airbags:
• Afrontalairbagforthedriver.
- Afrontalairbagfortherightfront passenger.
- Aseat-mountedsideimpact airbagforthedriver.
- Aseat-mountedsideimpact airbagfortherightfront passenger.
• Aroof-railairbagforthedriver and the passenger seated directly behind the driver.
- Aroof-railairbagfortheright frontpassengerandthe passengerseateddirectly behindtherightfrontpassenger.
The vehicle may have the following airbags:
- Aseat-mountedsideimpact airbagfortherearseat passengerseateddirectly behindthedriver.
- Aseat-mountedsideimpact airbagfortherearseat passengerseateddirectly behindtherightfrontpassenger.
Alloftheairbagsinthevehiclewill havethewordAIRBAGembossed inthetrimoronanattachedlabel nearthedeploymentopening.
Forfrontalairbags, theword AIRBAG will appear on the middle part of the steering wheel for the driver and the instrument panel for the right front passenger.
Withseat-mountedsideimpact airbags, thewordAIRBAGwill appearonthesideoftheseatback closesttothedoor.
Withroof-railairbags, theword AIRBAG will appear along the headlinerortrim.
3-28SeatsandRestraints
Airbagsaredesignedtosupplement theprotectionprovidedbysafety belts.Eventhoughttoday'sairbags arealsodesignedtohelpreduce theriskofinjuryfromtheforceofan inflatingbag,allairbagsmustinflate veryquicklytodotheirjob.
Herearethemostimportantthings toknowabouttheairbagsystem:

WARNING
Youcanbeseverelyinjuredor killedinacrashifyouarenot wearingasafetybelt—evenwith airbags.Airbagsaredesignedto workwithsafetybelts,notreplace them.Also,airbagsarenot designedtoinflateineverycrash. Insomecrashessafetybeltsare theonlyrestraint.SeeWhen ShouldanAirbagInflate?on page3-30.
(Continued)
WARNING(Continued)
Wearingasafetybeltduringa crashhelpsreduceyourchance ofhittingthingsinsidethevehicle orbeingejectedfromit.Airbags are“supplementalrestraints”to thesafetybelts.Everyoneinthe vehicleshouldwearasafetybelt properly—whetherornotthereis anairbagforthatperson.

WARNING
Airbagsinflatewithgreatforce, fasterthantheblinkofaneye. Anyonewhoisupagainst,or verycloseto,anyairbagwhenit inflatescanbeseriouslyinjured orkilled.Donotsitunnecessarily closetoanyairbag,asyouwould beifsittingontheedgeofthe seatorleaningforward.Safety beltshelpkeepyouinposition (Continued)
WARNING(Continued)
beforeandduringacrash. Alwayswearasafetybelt,even withairbags. Thedrivershouldsit asfarbackaspossiblewhilestill maintainingcontrolofthevehicle.
Occupantsshouldnotleanonor sleepagainstthedoororside windowsinseatingpositionswith seat-mountedsideimpactairbags and/orroof-railairbags.

WARNING
Childrenwhoareupagainst, orverycloseto,anyairbag whenitinflatescanbeseriously injuredorkilled.Airbagsplus lap-shoulderbeltsofferprotection foradultsandolderchildren,but notforyoungchildrenandinfants.
(Continued)
WARNING(Continued)
Neitherthevehicle'ssafetybelt systemnoritsairbagsystemis designedforthem.Young childrenandinfantsneedthe protectionthatachildrestraint systemcanprovide.Always securechildrenproperlyinthe vehicle.Toreadhow,seeOlder Childrenonpage3-40orInfants andYoungChildrenon page3-43.

Thereisanairbagreadinesslight ontheinstrumentpanelcluster, whichshowstheairbagsymbol. The systemcheckstheairbagelectrical
systemformalfunctions. Thelight tells you if there is an electrical problem. See Airbag Readiness Lightonpage 5-11 form more information.
WhereAretheAirbags?
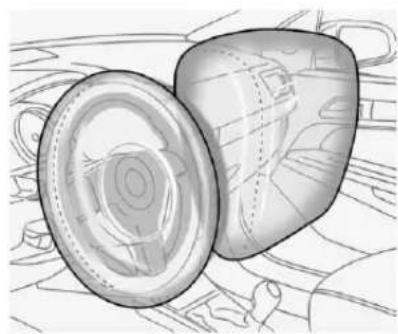
natural_image
Illustration of a cylindrical container with a lid, placed on a textured surface (no text or symbols)Thedriverfrontalairbagisinthe middleofthesteeringwheel.
Therightfrontpassengerfrontal airbagisintheinstrumentpanel on thepassengerside.
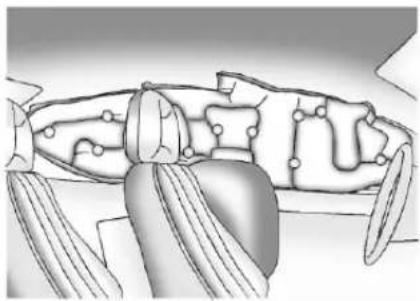
natural_image
Illustration of an insect anatomical structure with visible antennae and appendages (no text or labels)DriverSideShown, Passenger SideSimilar
Theseat-mountedsideimpact airbagsforthedriverandrightfront passengerareinthesideofthe seatbacksclosesttothedoor.
Theroof-railairbagsforthedriver, rightfrontpassenger,andsecond rowoutboardpassengersareinthe ceilingabovethesidewindows.
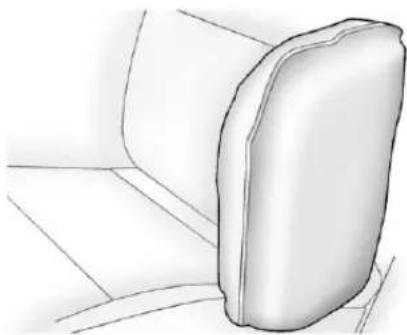
natural_image
Simple line drawing of a rectangular object with a curved base, no text or symbols presentRearSeatDriverSideShown, PassengerSideSimilar
If the vehicle has second row seat-mounted side impact air bags, they are in the sides of therear seat back closest to the door.

WARNING
If something is between an occupant and an airbag, the airbag might not inflate properly or might force the object into that person causing severe injury (Continued)
WARNING(Continued)
orevendeath. Thepathofan inflatingairbagmustbekept clear. Donotputanything betweenanoccupantandan airbag, anddonotattachorput anythingonthesteeringwheel huboronornearanyother airbagcovering.
Donotuseseataccessoriesthat blocktheinflationpathofa seat-mountedsideimpactairbag.
Neversecureanythingtotheroof ofvehiclewithroof-railairbags byroutingaropeortie-down throughanydoororwindow opening. If youdo, the pathofan inflatingroof-railairbagwillbe blocked.
WhenShouldanAirbag Inflate?
Frontalairbagsaredesignedto inflateinmoderatetoseverefrontal ornearfrontalcrashestohelp reducethepotentialforsevere injuriesmainlytothedriver'sorright frontpassenger'sheadandchest. However,theyareonlydesignedto inflateiftheimpactexceedsa predetermineddeployment threshold.Deploymentthresholds areusedtopredicthowseverea crashislikelytobeintimeforthe airbagstoinflateandhelprestrain theoccupants.
Whether the frontal air bags will or should deploy is not based on how fast your vehicle is traveling. It depends largely on what you hit, the direction of the impact, and how quickly your vehicles slows down.
Frontalairbagsmayinflateat differentcrashspeeds. For example:
- If the vehicle hits stationary object, the air bags could inflate at different crash speed than if the vehicle hits moving object.
- Ifthevehiclehitsanobjectthat deforms,theairbagscould inflateatadifferentcrashspeed thanifthevehiclehitsanobject thatdoesnotdeform.
- Ifthevehiclehitsanarrowobject (likeapole), theairbags could inflate at different crash speed than if the vehicle hits a wide object (likeawall).
- Ifthevehiclegoesintoanobject atanangle, theairbags could inflate at different crash speed than if the vehiclegoes straight into the object.
Thresholdscanalsovarywith specificvehicledesign.
Frontalairbagsarenotintendedto inflateduringvehiclerollovers, rear impacts, orinmanysideimpacts.
Inaddition, the vehicle has dual-stage frontal airbags. Dual-stage airbags adjust the restraint according to crash severity. The vehicle has electronic frontal sensors, which help the sensing system distinguish between a moderate frontal impact and more severe frontal impact. Form moderate frontal impacts, dual-stage airbags inflate at level less than full deployment. Form more severe frontal impacts, full deployment occurs.
The vehicle has seat-mounted side impact and roof-rail airbags. See Airbag System on page 3-27. Seat-mounted side impact and roof-rail air bags are intended to inflate in moderate to severe crashes. In addition, the seroof-rail air bags are intended to inflate during a rollover or inasevere frontal impact. Seat-mounted side impact and roof-rail air bags will
inflateifthecrashseverityisabove thesystem'sdesignedthreshold level. Thethresholdlevelcanvary withspecificvehicledesign.
Roof-railairbagsarenotintendedto inflateinrearimpacts. Bothroof-rail airbagswilldeploywheneitherside ofthevehicleisstruckorifthe sensingsystempredictsthatthe vehicleisabouttorollover, orina severefrontalimpact.
Inanyparticularcrash, noonecan saywhetheranairbagshouldhave inflatedsimplybecauseofthe damagetoavehicleorbecause ofwhattherepaircostswere. Forfrontalairbags, inflationis determinedbywhatthevehiclehits, theangleoftheimpact,andhow quicklythevehicleslowsdown. Forseat-mountedsideimpactand roof-railairbags, deploymentis determinedbythelocationand severityofthesideimpact.
Inarolloverevent, roof-railairbag deployment is determined by the direction of the roll.
WhatMakesanAirbag Inflate?
Inadeploymentevent,thesensing systemsendsanelectricalsignal triggeringareleaseofgasfromthe inflator.Gasfromtheinflatorfills the airbagcausingthebagtobreakout ofthecoveranddeploy.Theinflator, theairbag,andrelatedhardwareare allpartoftheairbagmodule.
Frontalairbagmodulesarelocated insidethesteeringwheel and instrumentpanel. For vehicles with seat-mounted side impact airbags, there are airbag modules in the side of the front seat back to the door. For vehicles with roof-rail airbags, there are airbag modules in the ceiling of the vehicle, near the sidewindow sthathave occupant seating positions.
HowDoesanAirbag Restrain?
Inmoderatetoseverefrontalor nearfrontalcollisions, evenbelted occupantscancontactthesteering wheelortheinstrumentpanel. In moderatetoseveresidecollisions, evenbeltedoccupantscancontact theinsideofthevehicle.
Airbagssupplementtheprotection providedbysafetybelts. Frontal airbagsdistributetheforceofthe impactmoreevenlyoverthe occupant'supperbody, stopping theoccupantmoregradually. Seat-mountedsideimpactand roof-railairbagsdistributetheforce oftheimpactmoreevenlyoverthe occupant'supperbody.
Butairbagswouldnothelpin manytypesofcollisions,primarily becausetheoccupant'smotionis nottowardthoseairbags.SeeWhen ShouldanAirbagInflate?on page3-30formoreinformation.
Airbagsshouldneverberegarded asanythingmorethanasupplement tosafetybelts.
WhatWillYouSeeafter anAirbagInflates?
Afterthefrontalairbagsand seat-mountedsideimpactairbags inflate,theyquicklydeflate,so quicklythatsomepeoplemaynot evenrealizeanairbaginflated. Roof-railairbagsmaystillbeatleast partiallyinflatedforsometimeafter theydeploy.Somecomponentsof theairbagmodulemaybehotfor severalminutes.Forlocationofthe airbagmodules,seeWhatMakes anAirbagInflate?onpage3-32.
Thepartsoftheairbagthatcome intocontactwithyoumaybewarm, butnottoohottotouch.Theremay besomesmokeanddustcoming fromtheventsinthedeflated airbags.Airbaginflationdoesnot preventthedriverfromseeingoutof
thewindshieldorbeingabletosteer thevehicle, nordoesitprevent peoplefromleavingthevehicle.

WARNING
Whenanairbaginflates, there maybedustintheair. This dust could cause breathing problems for people with a history of asthma or other breathing trouble. To avoid this, everyone in the vehicles should get out as soon as it is safetodoso. If you have breathing problems but cannot get out of the vehicle after an air bag inflates, then get fresh hair by opening a window or a door. If you experience breathing problems following an air bag deployment, you should seek medical attention.
The vehicle has a safe feature that may automatically unlock the doors, turn on the interior lamps, turn on the hazard warning flashers, and shut
offthefuelsystemaftertheairbags inflate. Youcanlockthedoors, turn offtheinteriorlamps, and turnoff thehazardwarningflashers by usingthecontrols forthose features.

WARNING
Acrashsevereenoughtoinflate theairbagsmayhavealso damagedimportantfunctionsin thevehicle,suchasthefuel system,brakeandsteering systems,etc.Evenifthevehicle appearstobedrivableaftera moderatecrash,theremaybe concealeddamagethatcould makeitdifficulttosafelyoperate thevehicle.
Usecautionifyoushouldattempt torestarttheengineafteracrash hasoccurred.
Inmanycrashessevereenoughto inflatetheairbag, windshieldsare brokenbyvehicledeformation.
Additionalwindshieldbreakagemay alsooccurfromtherightfront passengerairbag.
- Airbagsaredesignedtoinflate onlyonce. Afteranairbag inflates, youwillneedsome newpartsfortheairbagsystem. Ifyoudonotgetthem, the airbagsystemwillnotbethere tohelpprotectyouinanother crash. A newsystemwillinclude airbagmodulesandpossibly otherparts. Theservicemanual foryourvehiclecoverstheneed toreplaceotherparts.
- Thevehiclehasacrashsensing anddiagnosticmodulewhich recordsinformationaftera crash.SeeVehicleData RecordingandPrivacyon page 13-14andEventData Recordersonpage 13-14.
3-34SeatsandRestraints
- Letonlyqualifiedtechnicians workontheairbagsystems. Improperservicecanmeanthat anairbagsystemwillnotwork properly.Seeyourdealerfor service.
PassengerSensing System
The vehicle has a passenger sensing system for the right front passenger position. The passenger airbag status indicator will be visible on the instrument panel when the vehicle is started.
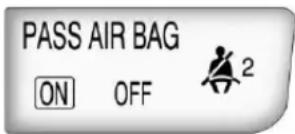
ThewordsONandOFFwillbe visibleduringthesystemcheck. Whenthesystemcheckis complete,eitherthewordON
orthewordOFFwillbevisible.See PassengerAirbagStatusIndicator onpage5-12.
Thepassengersensingsystem turnsofftherightfrontpassenger frontalairbagandseat-mounted sideimpactairbagundercertain conditions. Thedriverairbagsand thereof-railairbagsarenotaffected bythepassengersensingsystem.
The passengersensingsystem workswithsensorsthatarepartof therightfrontpassengerseat. The sensorsaredesignedtodetectthe presenceofaproperlyseated occupantanddetermineiftheright frontpassengerfrontalairbagand seat-mountedsideimpactairbag shouldbeenabled(mayinflate) ornot.
According to accident statistics, children are safer when properly secured in a rearseatin the correct child restraint for their weight and size.
Werecommendthatchildrenbe securedinarearseat,including:an infantorachildridingina rear-facingchildrestraint;achild ridinginaforward-facingchildseat; anolderchildridinginabooster seat;andchildren,whoarelarge enough,usingsafetybelts.
Alabelonthesunvisorsays, "Neverputarear-facingchildseatin thefront." Thisisbecausetheriskto therear-facingchildissogreat, iftheairbagdeploys.

WARNING
Achildinarear-facingchild restraintcanbeseriouslyinjured orkillediftherightfront passengerairbaginflates. This is because the back of the rear-facing childrestraint would be very closetotheinflating airbag. Achildinaforward-facing childrestraint can beseriously injured or killed iftherightfront
(Continued)
WARNING(Continued)
passengerairbaginflatesandthe passengerseatisinaforward position.
Evenifthepassengersensing systemhasturnedofftheright frontpassengerfrontalairbagand seat-mountedsideimpactairbag (ifequipped),nosystemis fail-safe.Noonecanguarantee thatanairbagwillnotdeploy undersomeunusual circumstance,eventoughthe airbag(s)areoff.
Securerear-facingchildrestraints inarearseat, evenifthe airbag(s)areoff. Ifyousecurea forward-facingchildrestraintin therightfrontseat, alwaysmove thefrontpassengerseatasfar backasitwillgo. Itisbetterto securethechildrestraintina rearseat.
Thepassengersensingsystemis designedtoturnofftherightfront passengerfrontalairbagand seat-mountedsideimpactairbagif:
• Therightfrontpassengerseatis unoccupied.
- Thesystemdeterminesthatan infantispresentinarear-facing infantseat.
- Thesystemdeterminesthata smallchilddispresentinachild restraint.
- Thesystemdeterminesthata smallchilddispresentina boosterseat.
- Arightfrontpassengertakes his/herweightoffoftheseatfor aperiodoftime.
- Therightfrontpassengerseatis occupied byasmallerperson, suchasachildwhohas outgrownchildrestraints.
- Thereisacriticalproblemwith theairbagsystemorthe passengersensingsystem.
Whenthepassengersensing systemhasturnedofftheright frontpassengerfrontalairbagand seat-mountedsideimpactairbag, theoffindicatorwilllightandstaylit asareminderthattheairbagsare off.SeePassengerAirbagStatus Indicatoronpage5-12.
Thepassengersensingsystemis designedtoturnon(mayinflate)the rightfrontpassengerfrontalairbag andseat-mountedsideimpact airbaganytimethesystemsenses thatapersonofadultsizeissitting properlyintherightfrontpassenger seat. Whenthepassengersensing systemhasallowedtheairbagsto beenabled, theonindicatorwilllight andstaylitasareminderthatthe airbagsareactive.
Forsomechildrenwhohave outgrownchildrestraintsandfor verysmalladults,thepassenger sensingsystemmayormaynotturn offtherightfrontpassengerfrontal airbagandseat-mountedside impactairbag,dependinguponthe person'sseatingpostureandbody build.Everyoneinthevehicle whohasoutgrownchildrestraints shouldwearasafetybelt properly—whetherornotthere isanairbagforthatperson.

WARNING
If the airbag readiness light ever comes on and stay on, it means that something may be wrong with the air bags system. To help avoid injury to your self for others, have the vehicles serviced right away. See Airbag Readiness Lighton page 5-11 form more information, including important safety information.
IftheOnIndicatorisLitfora ChildRestraint
Ifachildrestrainhasbeeninstalled andtheonindicatorislit:
-
Turnthevehicleoff.
-
Removethechildrestraint from the vehicle.
-
Remove any additional items from these seats such as blankets, cushions, seat covers, seat heaters, or seat massagers.
-
Reinstall the child restraint following the directions provided by the child restraint manufacturer and referto Securing Child Restraints (Rear Seat) on page 3-57 or Securing Child Restraints (Front Passenger Seat) on page 3-59.
-
If, afterreinstalling the child restraint and restarting the vehicle, the on indicator is still lit, turn the vehicle off. Then slightly reclin the vehicle seat back and adjust these at cushion, if adjustable, to make sure that the vehicle seat back is not pushing the child restraint into these at cushion.
Alsomakesurethechild restraintisnottrappedunderthe vehicleheadrestraint.Ifthis happens,adjustthehead restraint.SeeHeadRestraints onpage3-2.
6.Restartthevehicle.
Iftheonindicatorisstilllit, securethechildinthechild restraintinarearseatpositionin thevehicle,andcheckwithyour dealer.
IftheOffIndicatorisLitforan Adult-SizeOccupant
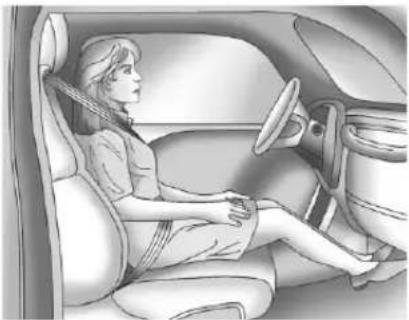
natural_image
Illustration of a woman seated in a car, wearing a seatbelt and driving a vehicle (no text or symbols visible)Ifapersonofadult-sizeissittingin therightfrontpassengerseat,but theoffindicatorislit,itcouldbe becausethatpersonisnotsitting properlyintheseat.Ifthishappens, usethefollowingstepstoallowthe
systemtodetectthatpersonand enabletherightfrontpassenger frontalairbagandseat-mounted sideimpactairbag:
- Turnthevehicleoff.
- Remove any additional material from these seat, such as blankets, cushions, seat covers, seat heaters, or seat massagers.
- Placetheseatbackinthefully uprightposition.
- Havethepersonsituprightin theseat, centeredontheseat cushion, with legscomfortably extended.
- Restart the vehicle and have the person remain in this position for two to three minutes after the indicator is lit.
AdditionalFactorsAffecting SystemOperation
Safetybeltshelpkeepthe passengerinpositionontheseat duringvehiclemaneuversand braking,whichhelpsthepassenger sensingsystemmaintainthe passengerairbagstatus.See "SafetyBelts" and "ChildRestraints" intheIndexforadditional informationabouttheimportanceof properrestraintuse.
Athicklayerofadditionalmaterial, suchasablanketorcushion, oraftermarketequipmentsuch asseatcovers,seatheaters,and seatmassagerscanaffecthowwell thepassengersensingsystem operates.Werecommendthatyou notuseseatcoversorother aftermarketequipmentexceptwhen approvedbyGMforyourspecific vehicle.SeeAddingEquipmentto theAirbag-EquippedVehicleon page3-38formoreinformation aboutmodificationsthatcanaffect howthesystemoperates.

WARNING
Stowingofarticlesunderthe passengerseatorbetweenthe passengerseatcushionand seatbackmayinterferewiththe properoperationofthepassenger sensingsystem.
Servicingthe Airbag-EquippedVehicle
Airbagsaffecthowthevehicle shouldbeserviced.Thereareparts oftheairbagsysteminseveral placesaroundthevehicle.Your dealerandtheservicemanualhave informationaboutservicingthe vehicleandtheairbagsystem.To purchaseaservicemanual,see ServicePublicationsOrdering Informationonpage 13-11.

WARNING
Forupto10secondsafterthe ignitionisturnedoffandthe batteryisdisconnected,anairbag canstillinflateduringimproper service.Youcanbeinjuredifyou areclosetoanairbagwhenit inflates.Avoidyellowconnectors. Theyareprobablypartofthe airbagsystem.Besuretofollow (Continued)
WARNING(Continued)
properserviceprocedures, and makesurethepersonperforming workforyouisqualifiedtodoso.
AddingEquipmenttothe Airbag-EquippedVehicle
Q: Isthereanythinglmightadd toorchangeaboutthevehicle thatcouldkeeptheairbags fromworkingproperly?
A: Yes. If you add things that changethe vehicle's frame, bumpersystem, height, front end, or sidesheet metal, they may keep the air bags system from working properly. Changing ormoving any part of these seats, safety belts, the air bags sensing and diagnostic module, steering wheel, instrument panel, roof-rail airbag modules, ceiling headliner or pillargarnish trim, front
sensors, sideimpactsensors, orairbagwiringcanaffectthe operationoftheairbagsystem. Inaddition,thevehiclehasa passengersensingsystemfor therightfrontpassenger position,whichincludessensors thatarepartofthepassenger seat.Thepassengersensing systemmaynotoperateproperly iftheoriginalseattrimis replacedwithnon-GMcovers, upholstery,ortrim,orwithGM covers,upholstery,ortrim designedforadifferentvehicle. Anyobject,suchasan aftermarketseatheaterora comfort-enhancingpador device,installedunderorontop oftheseatfabric,couldalso interferewiththeoperationof thepassengersensingsystem. Thiscouldeitherpreventproper deploymentofthepassenger airbag(s)orpreventthe passengersensingsystemfrom properlyturningoffthe
passengerairbag(s).See PassengerSensingSystemon page3-34. If you have questions, call Customer Assistance. The phonenumbers and addresses for Customer Assistance are in StepTwooftheCustomer SatisfactionProcedurein this manual. See Customer SatisfactionProcedure on page 13-1.
Q: Because I have adisability, Ihavetogetmy vehicle modified. How can I find out whether this will affect my air bagsystem?
A: If you have questions, call Customer Assistance. The phonenumbers and addresses for Customer Assistance are in Step Two of the Customer Satisfaction Procedure in this manual. See Customer Satisfaction Procedure on page 13-1.
Inaddition, your dealer and the servicemanual have information about the location of the airbag sensors, sensing and diagnostic module, and airbag wiring.
AirbagSystemCheck
Theairbagsystemdoesnotneed regularly scheduled maintenance or replacement. Makesuretheairbag readinesslightisworking. See AirbagReadinessLighton page5-11 formoreinformation.
Notice:Ifanairbagcoveringis damaged, opened, or broken, the airbag may not work properly. Do not open or break the airbag coverings. If there are any opened or broken airbag covers, havethe airbag covering and/or airbag modulere placed. For the location of the airbag modules, see What Makes an Airbag Inflate? on page 3-32. See your dealer for service.
ReplacingAirbagSystem PartsafteraCrash

WARNING
Acrashcandamagetheairbag systemsinthevehicle. Adamagedairbagsystemmay notworkproperlyandmaynot protectyouandyour passenger(s)inacrash,resulting inseriousinjuryorevendeath.To helpmakesuretheairbag systemsareworkingproperly afteracrash,havethem inspectedandanynecessary replacementsmadeassoonas possible.
Ifanairbaginflates, you will need to replace airbagsystemparts. See your dealerforservice.
If the airbagreadinesslightstayson after the vehicle is started or comes on when you are driving, the airbag system may not work properly. Have the vehicles serviced right away. See Airbag Readiness Lighton page 5-11 form more information.
ChildRestraints OlderChildren
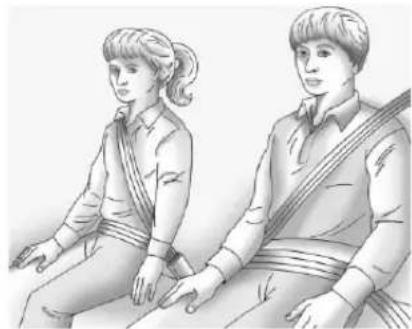
natural_image
Illustration of two people seated, one wearing a tassel and the other in a shirt (no text or symbols)Olderchildrenwhohaveoutgrown boosterseatsshouldwearthe vehiclesafetybelts.
Themanufacturer'sinstructionsthat comewiththeboosterseatstatethe weightandheightlimitationsforthat booster.Useaboosterseatwitha lap-shoulderbeltuntilthechild passesthefittestbelow:
- Sitallthewaybackontheseat. Dothekneesbendattheseat edge?Ifyes,continue.Ifno, returntotheboosterseat.
-
Bucklethelap-shoulderbelt. Doestheshoulderbeltreston theshoulder?Ifyes,continue. Ifno,tryusingtherearsafety beltcomfortguide.See“Rear SafetyBeltComfortGuides” underLap-ShoulderBelton page3-18formoreinformation. Iftheshoulderbeltstilldoesnot restontheshoulder,thenreturn totheboosterseat.
-
Doesthelapbeltfitlowand snugonthehips,touchingthe thighs?Ifyes,continue.Ifno, returntotheboosterseat.
- Canpropersafetybeltfitbe maintainedforthelengthof thetrip?Ifyes,continue.Ifno, returntotheboosterseat.
Q: Whatistheproperway to wearsafetybelts?
A: Anolderchildshouldwearalap-shoulderbeltandgettheadditionalrestraintashoulderbeltcanprovide. Theshoulderbeltshouldnotcrossthefaceorneck. Thelapbeltshouldfitsnuglybelowthehips, justtouchingthetopofthethighs.Thisappliesbeltforcetothechild'spelvicbonesinacrash.Itshouldneverbewornovertheabdomen,whichcouldcausesevereorevenfatalinternalinjuriesinacrash.
Alsosee"RearSafetyBeltComfort Guides" under Lap-ShoulderBelton page3-18.
According to accident statistics, children and infants are safer when properly restrained in a child restraintsystemor infant restraint system secured in a rearseating position.
Inacrash, children who are not buckled up can strike other people who are buckled up, or can be thrown out of the vehicle. Older children need to use safety belts properly.
3-42SeatsandRestraints

WARNING
Neverdothis.
Neverallowtwochildrentowear thesamesafetybelt. Thesafety belt cannot properly spread the impact forces. Inacrash, the two children can be crushed together and seriously injured. As safety belt must be used by only one person at time.
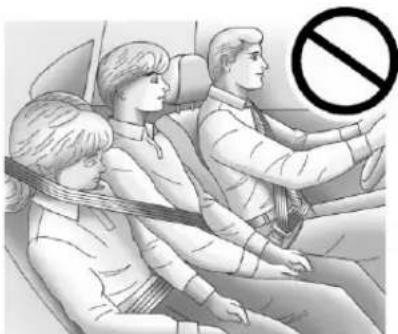
natural_image
Illustration of three people seated in a car, one wearing a seatbelt, with a no-smoking symbol overlay (no text or symbols present)
WARNING
Neverdothis.
Neverallowachildtowearthe safetybeltwiththeshoulderbelt behindtheirback.Achildcanbe seriouslyinjuredbynotwearing thelap-shoulderbeltproperly.Ina crash,thechildwouldnotbe restrainedbytheshoulderbelt. Thechildcouldmovetoofar forwardincreasingthechance of headandneckinjury.Thechild mightalsoslideunderthelap belt.Thebeltforcewouldthenbe appliedrightontheabdomen. Thatcouldcauseseriosorfatal injuries.Theshoulderbeltshould goovertheshoulderandacross thechest.
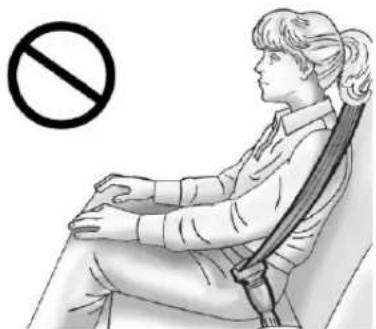
natural_image
Illustration of a person sitting in a chair with a diagonal band, no text or symbols presentInfantsandYoung Children
Everyoneinavehicleneeds protection! Thisincludesinfants andallotherchildren. Neitherthe distancetravelednortheageand sizeofthetravelerchangesthe need,foreveryone,tousesafety restraints. Infact,thelawinevery stateintheUnitedStatesandin everyCanadianprovincesays childrenuptosomeagemustbe restrainedwhileinavehicle.

WARNING
Childrencanbeseriouslyinjured orstrangledifashoulderbeltis wrappedaroundtheirneckand thesafetybeltcontinuesto tighten.Neverleavechildren unattendedinvehicleandnever allowchildrentoplaywiththe safetybelts.
Airbagspluslap-shoulderbeltsoffer protectionforadultsandolder children,butnotforyoungchildren andinfants.Neitherthevehicle's safetybeltsystemnoritsairbag systemisdesignedforthem.Every timeinfantsandyoungchildrenride invehicles,theyshouldhavethe protectionprovidedbyappropriate childrestraints.
Childrenwhoarenotrestrained properlycanstrikeotherpeople, orcanbethrownoutofthevehicle.

WARNING
Neverdothis.
Neverholdaninfantorachild whileridinginavehicle.Dueto crashforces,aninfantorachild willbecomesoheavyitisnot possibletoholditduringacrash.
(Continued)
WARNING(Continued)
Forexample, inacrashatonly 40km/h(25mph), a5.5kg(12lb) infantwillsuddenlybecomea 110kg(240lb)forceonaperson's arms. Aninfantshouldbe securedinanappropriate restraint.
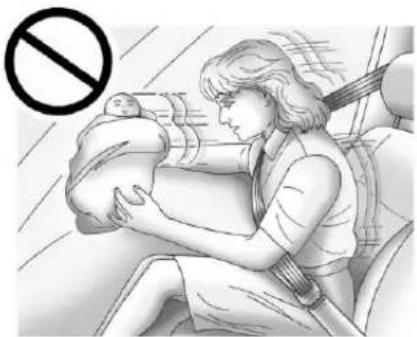
natural_image
Illustration of a woman breastfeeding a baby while seated in a car, with a no-smoking symbol overlay (no text or symbols on the diagram itself)
WARNING
Neverdothis.
Childrenwhoareupagainst, orverycloseto,anyairbagwhen itinflatescanbeseriouslyinjured orkilled.Neverputarear-facing childrestraintintherightfront seat.Securearear-facingchild restraintinarearseat.Itisalso bettertosecureaforward-facing childrestraintinarearseat.Ifyou mustsecureaforward-facing childrestraintintherightfront seat,alwaysmovethefront passengerseatasfarbackasit willgo.
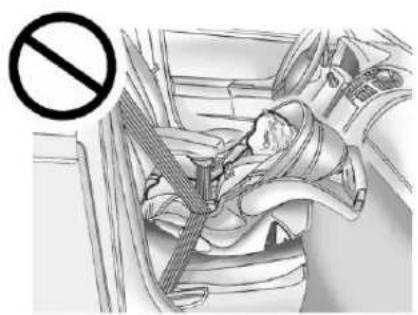
Q: Whatarethedifferenttypes of add-onchildrestraints?
A: Add-onchildrestraints, which are purchased by the vehicle owner, are available in four basic types. Selection of a particular restraint should take into consideration not only the child's weight, height, and age but also whether or not the restraint will be compatible with the motor vehicle in which it will be used. Formost basic types of child restraints, there are many different models available. When purchasing a child restraint, be sure its designed to be used in amotor vehicle. Ifitis, the restraint will have alabels saying that it meets federal motor vehicles safety standards.
Therestraintmanufacturer's instructionsthatcomewiththe restraintstatetheweightand heightlimitationsforaparticular childrestraint. Inaddition, there aremanykindsofrestraints availableforchildrenwith specialneeds.
WARNING
Toreducetheriskofneck and head injury during acrash, infants need completes support. This is because an infant's neck is not fully developed and its head weighssomuch compared with therestofits body. In acrash, an infant in a rear-facing child restraint settles into the restraint, so the crash forces can be distributed across the strongest part of an infant's body, the back and shoulders. Infant should always be secured in rear-facing child restraints.
WARNING
Ayoungchild'shipbonesarestill sosmallthatthevehicle'sregular safetybeltmaynotremainlowon thehipbones,asitshould. Instead,itmaysettleuparound thechild'sabdomen.Inacrash, thebeltwouldapplyforceona bodyareathatisunprotectedby anybonystructure.Thisalone couldcauseseriousorfatal injuries.Toreducetheriskof seriousorfatalinjuriesduringa crash,youngchildrenshould alwaysbesecuredinappropriate childrestraints.
ChildRestraintSystems
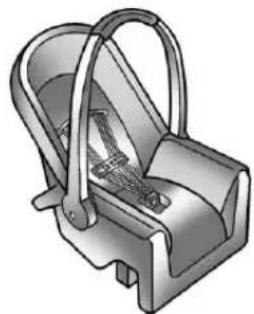
natural_image
3D illustration of a handbag with handle and internal components (no text or symbols)(A)Rear-FacingInfantSeat
Arear-facinginfantseat(A) providesrestraintwiththeseating surfaceagainstthebackofthe infant.
Theharnesssystemholdstheinfant inplaceand,inacrash,actsto keeptheinfantpositionedinthe restraint.
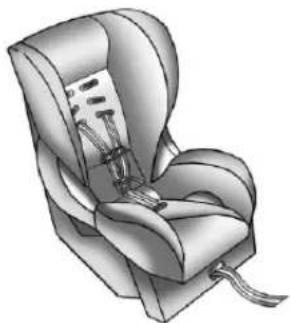
natural_image
Illustration of a car seat with straps and straps (no text or symbols)(B)Forward-FacingChildSeat
Aforward-facingchildseat(B) provides restraint for the child's body with the harness.
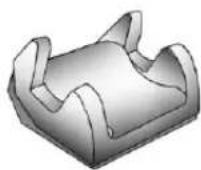
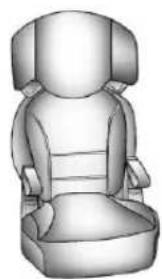
natural_image
3D rendered illustration of a car seat with no text or symbols(C)BoosterSeats
Aboosterseat(C)isachildrestraint designedtoimprovethefitofthe vehicle'ssafetybeltsystem. Aboosterseatcanalsohelpachild toseeoutthewindow.
SecuringanAdd-OnChild RestraintintheVehicle

WARNING
Achildcanbeseriouslyinjuredor killedinacrashifthechild restraintisnotproperlysecuredin thevehicle.Securethechild restraintproperlyinthevehicle usingthevehiclesafetybeltor LATCHsystem,followingthe instructionsthatcamewiththat childrestraintandtheinstructions inthismanual.
Tohelpreducethechanceofinjury, thechildrestraintmustbesecured inthevehicle. Childrestraint systemsmustbesecuredinvehicle seatsbylapbeltsorthelapbelt portionofalap-shoulderbelt,orby theLATCHsystem.SeeLower AnchorsandTethersforChildren (LATCHSystem)onpage3-49for moreinformation. Childrencanbe
endangeredinacrashifthechild restraintisnotproperlysecured in thevehicle.
Whensecuringanadd-onchild restraint, refertotheinstructions that comewiththerestraint which maybeontherestraintitselforina booklet, or both, and to this manual. The childrestraint instructions are important, so if they are not available, obtain are replacement copy from the manufacturer.
Keepinmindthatanunsecured childrestraintcanmovearoundina collisionorsuddenstopandinjure peopleinthevehicle.Besureto properlysecureanychildrestraintin thevehicle—evenwhennochildis init.
Insomeareas, Certified Child Passenger Safety Technicians (CPSTs) are available to inspect and demonstrate how to correctly use and install child restraints. In the U.S., referto the National Highway Traffic Safety Administration (NHTSA) website to locate the nearest child's safety seat inspection station. For CPST availability in Canada, check with Transport Canada or the Provincial Ministry of Transportation office.
SecuringtheChildwithinthe ChildRestraint

WARNING
Achildcanbeseriouslyinjuredor killedinacrashifthechildisnot properlysecuredinthechild restraint. Securethechild properlyfollowingtheinstructions thatcamewiththatchildrestraint.
WheretoPutthe Restraint
According to accident statistics, children and infants are safer when properly restrained in a child restraintsystemor infant restraint system secured in a rearseating position.
Werecommendthatchildrenand childrestraintsbesecuredinarear seat,including:aninfantorachild ridinginarear-facingchildrestraint; achildridinginaforward-facing childseat;anolderchildridingina boosterseat;andchildren,whoare largeenough,usingsafetybelts.
Alabelonyoursunvisorsays, "Neverputarear-facingchildseatin thefront." Thisisbecausetheriskto therear-facingchildissogreatifthe airbagdeploys.
WARNING
Achildinarear-facingchild restraintcanbeseriouslyinjured orkillediftherightfront passengerairbaginflates. This is because the back of the rear-facing child restraint would be very closetotheinflating airbag. Achildinaforward-facing child restraint can beseriously injured or killed iftherightfront passengerairbaginflates and the passenger seat is in a forward position.
Evenifthepassengersensing systemhasturnedofftheright frontpassengerfrontalairbag,no systemisfail-safe.Noonecan guaranteeethatanairbagwillnot deployundersomeunusual circumstance,eventhoughitis turnedoff.
(Continued)
WARNING(Continued)
Securerear-facingchildrestraints inarearseat, eveniftheairbag isoff. Ifyousecurea forward-facingchildrestraintin therightfrontseat, alwaysmove thefrontpassengerseatasfar backasitwillgo. Itisbetterto securethechildrestraintina rearseat.
See Passenger Sensing System on page 3-34 for additional information.
Whensecuringachildrestraintina rearseatingposition,studythe instructionsthatcamewithyour childrestrainttomakesureitis compatiblewiththisvehicle.
Childrestraintsandboosterseats varyconsiderablyinsize, andsome mayfitin certainseatingpositions betterthanothers. Alwaysmake surethechildrestraintisproperly secured.
Dependingonwhereyouplacethe childrestraintandthesizeofthe childrestraint,youmaynotbeable toaccessadjacentsafetybelt assembliesorLATCHanchorsfor additionalpassengersorchild restraints.Adjacentseating positionsshouldnotbeusedifthe childrestraintpreventsaccesstoor interfereswiththeroutingofthe safetybelt.
Whereverachildrestraintis installed, besuretosecurethechild restraintproperly.
Keepinmindthatanunsecured childrestraintcanmovearoundina collisionorsuddenstopandinjure peopleinthevehicle.Besureto properlysecureanychildrestraintin yourvehicle—evenwhennochild isinit.
LowerAnchorsand TethersforChildren (LATCHSystem)
The LATCH system holds a child restraint during driving or in acrash. This system is designed to make installation of child restraint easier. The LATCH system uses anchors in the vehicle and attachment on the child restraint that are made for use with the LATCH system.
MakesurethataLATCH-compatible childrestraintisproperlyinstalled usingtheanchors,orusethe vehicle'ssafetybeltstosecurethe restraint,followingtheinstructions thatcamewiththatrestraint,and alsotheinstructionsinthismanual.
Wheninstallingachildrestraintwith atoptether,youmustalsouse eithertheloweranchorsorthe safetybeltstoproperlysecurethe childrestraint.Achildrestraintmust neverbeinstalledusingonlythetop tetherandanchor.
InordertousetheLATCHsystemin thevehicle,youneedachild restraintthathasLATCH attachments.Thechildrestraint manufacturerwillprovideyouwith instructionsonhowtousethechild restraintanditsattachments.The followingexplainshowtoattacha childrestraintwiththese attachmentsinthevehicle.
Notallvehicleseatingpositionson or childrestraintshaveloweranchors and attachments sortoptether anchorsandattachments.
LowerAnchors
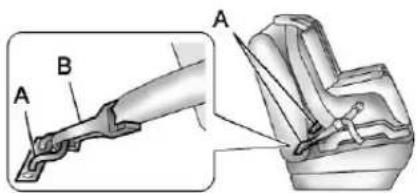
Loweranchors(A)aremetalbars builtintothevehicle.Therearetwo loweranchorsforeachLATCH seatingpositionthatwill accommodateachildrestraintwith lowerattachments(B).
TopTetherAnchor
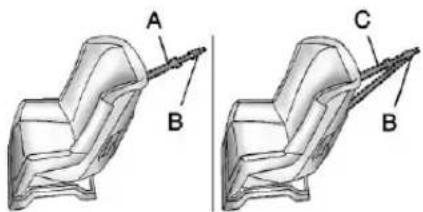
Atoptether(A,C)anchorsthetop ofthechildrestrainttothevehicle. Atoptetheranchorisbuiltintothe vehicle. Thetoptether attachment(B)onthechildrestraint connectstothetoptetheranchorin thevehicleinordertoreducethe forwardmovementandrotationof thechildrestraintduringdrivingorin acrash.
Thechildrestraintmayhavea singletether(A)oradualtether(C). Eitherwillhaveasingle attachment(B)tosecurethetop tethertotheanchor.
Somechildrestraintsthathavea toptetheraredesignedforusewith orwithoutthetoptetherbeing attached.Othersrequirethetop tetheralwaystobeattached.In Canada,thelawrequiresthat forward-facingchildrestraintshave atoptether,andthatthetetherbe attached.Besuretoreadandfollow theinstructionsforthechild restraint.
LowerAnchorandTopTether AnchorLocations
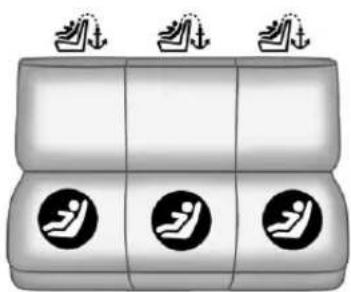
natural_image
Diagram of a car seat with three seats and three seatbelt icons, no text or symbols presentRearSeat
(TopTetherAnchor): Seating positions with toptetheranchors.
⑦(LowerAnchor): Seating positions with twoloweranchors.

Toassistyouinlocatingthelower anchors, eachrearanchorposition hasalabel, nearthecrease between theseatback and theseat cushion.

Toassistyouinlocatingthetop tetheranchors, thetoptetheranchor symbolislocatedonthecover.
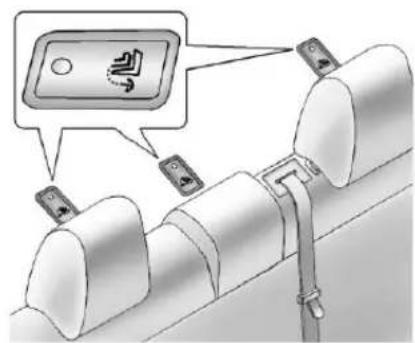
Thetoptetheranchorsarelocated underthecovers,behindtherear seat,onthefillerpanel.Besureto useananchorlocatedonthesame sideofthevehicleastheseating positionwherethechildrestraintwill beplaced.
Donotsecureachildrestraintina positionwithoutatoptetheranchor ifanationalorlocallawrequires thatthetoptetherbeattached,orif theinstructionsthatcomewiththe childrestraintsaythatthetoptether mustbeattached.
3-52SeatsandRestraints
According to accident statistics, children and infants are safer when properly restrained in a child restraintsystemor infant restraint system secured in a rearseating position. See Where to Put the Restrainton page 3-48 for additional information.
SecuringaChildRestraint DesignedfortheLATCH System

WARNING
IfaLATCH-typechildrestraintis notattachedtoanchors, thechild restraintwillnotbeabletoprotect thechildcorrectly. Inacrash, the childcouldbeseriouslyinjuredor killed. InstallaLATCH-typechild restraintproperlyusingthe anchors, orusethevehiclesafety beltstosecuretherestraint, followingtheinstructionsthat camewiththechildrestraintand theinstructionsinthismanual.

WARNING
Donotattachmorethanonechild restrainttoasingleanchor. Attachingmorethanonechild restrainttoasingleanchorcould causetheanchororattachment tocomelooseorevenbreak duringacrash.Achildorothers couldbeinjured.Toreducethe riskofseriousorfatalinjuries duringacrash,attachonlyone childrestraintperanchor.

WARNING
Childrencanbeseriouslyinjured orstrangledifashoulderbeltis wrappedaroundtheirneckand thesafetybeltcontinuesto tighten.Buckleanyunusedsafety beltsbehindthechildrestraintso childrencannotreachthem.Pull theshoulderbeltallthewayout
(Continued)
WARNING(Continued)
oftheretractortosetthelock, ifthevehiclehasone,afterthe childrestrainthasbeeninstalled.
Notice: DonotlettheLATCH attachmentsrubagainstthe vehicle'ssafetybelts. This may damage these parts. If necessary, move buckledsafetybeltsto avoid rubbing the LATCH attachments.
Donotfoldtheemptyrearseat withasafetybeltbuckled. This coulddamagethesafetybeltor theseat. Unbuckleandreturnthe safetybelttoitsstowedposition, beforefoldingtheseat.
If you need to secure more than one child restraint in there are seat, see Where to Put the Restrainton page 3-48.
Youcannotsecurethreechild restraintsusingtheLATCHanchors intherearseatatthesametime, butyoucaninstalltwoofthem. Ifyouwanttodothis,installone LATCHchildrestraintinthe passenger-sideposition,and installtheotheroneeitherinthe driver-sidepositionorinthecenter position.Ifyouneedtoinstallchild restraintsinboththecenterand driver-sideposition,theoneinthe centerseatingpositionwillneedto besecuredusingthevehiclesafety beltsinsteadoftheLATCHanchors.
Refertothefollowingillustrationto learnwhichanchorstouse.
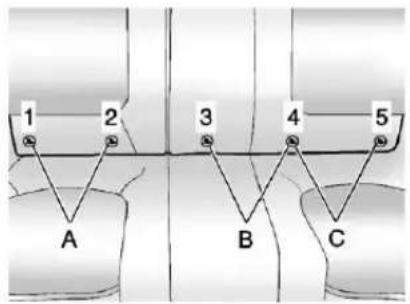
A.PassengerSideRear SeatingPositionandLower Anchors1and2
B. CenterRearSeatingPosition and LowerAnchors3and4
C.DriverSideRear SeatingPositionandLower Anchors4and5
TherearefivelowerLATCHanchors intherearseat.
- Useanchors1and2when installingachildrestraintusing LATCHinseatingpositionA.
- Useanchors3and4when installingachildrestraintusing LATCHinseatingpositionB.
- Useanchors4and5when installingachildrestraintusing LATCHinseatingpositionC.
Installingchildrestraintsusing LATCHinseatingpositionsBandC atthesametimeisprohibited.
Makesuretoattachthechild restraintattheproperanchor location.
This system is designed to make installation of child restraint easier. When using lower anchors, donot use the vehicle's safety belts. Instead use the vehicle's anchors and child restraint attachment to secure therestrants. Some restraints also use another vehicle anchort secure at optether.
- Attachandtightenthelower attachmentstothelower anchors. If the child restraint does nothavelower attachmentsorthedesired seating positiondoes nothave lower anchors, secure the child restraint with the toptether and the safety belts. Referto the child restraint manufacturer instructions and the instructions in this manual.
1.1. Find the lower anchors for the desired seating position.
1.2. Put the child restraint on theseat.
If the head restraint interferes with the proper installation of the child restraint, the head restraint may be removed. See "Head Restraint Removal and Reinstallation" at the end of this section.
1.3. Attachandtightenthelower attachmentsonthechild restrainttothelower anchors.
- If the child restraint manufacturer recommend that the toptether be attached, attach and tighten the toptethertothetoptether anchor, if equipped. Referto the child restraint instructions and the following steps:
2.1. Findthetoptetheranchor.
Openthecovertoexpose theanchor.
2.2. Route, attach, and tighten the toptether according to the child restraint instructions and the following instructions:
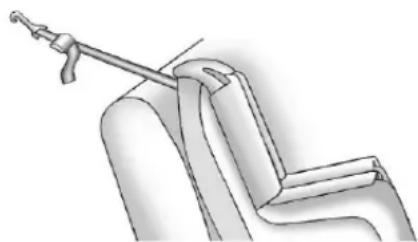
natural_image
Diagram of a mechanical clamp or bracket assembly (no text or symbols visible)- If the position you are using does not have ahead rest or head restraint, or the head rest or head restraint has been removed, and you are using a single tether, routethetether over the seat back.
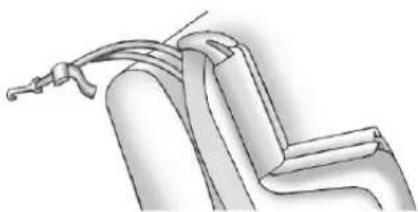
natural_image
Technical line drawing of a mechanical component or assembly (no text or symbols visible)- If the position you are using does not have ahead rest or head restraint, or the head restor head restraint has been removed, and you are using adualtether, routethetether over the seat back.
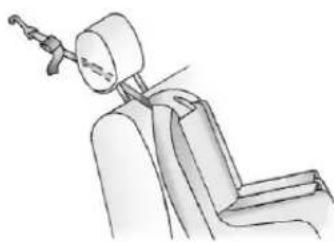
natural_image
Line drawing of a seated human arm with a headpin and wrist strap (no text or symbols)- If the position you are using has an adjustable headrest or headrestraint and you are using a single tether, routethetether under the headrestor headrestraint and in between the headrestor headrestraint posts. See Head Restraints on page 3-2.
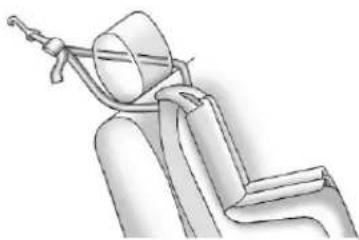
natural_image
Line drawing of a seated car seat with a helmet and arm (no text or symbols)- If the position you are using has an adjustable headrest or headrestraint and you are using adualtether routethetether around the headrestorheadrestraint.
- Beforeplacingachildinthe childrestraint, makesureitis securelyheldinplace. To check, graspthechildrestraintatthe LATCHpathandattemptto moveitsidetosideandback andforth. Thereshouldbeno morethan2.5cm(1in)of movement, forproper installation.
HeadRestraintRemovaland Reinstallation
Therearoutboardheadrestraints canberemovediftheyinterferewith theproperinstallationofthechild restraint.
Toremovetheheadrestraint:
- Partiallyfoldtheseatback forward.SeeRearSeatson page3-9foradditional information.
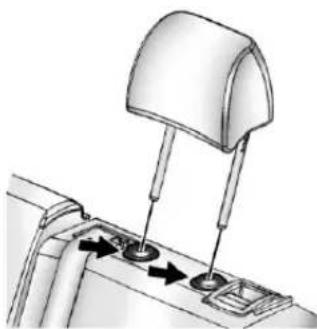
natural_image
Mechanical component diagram showing a lever mechanism with two arrows indicating movement or force (no text or symbols present)- Pressbothbuttonsonthehead restraintpostsatthesametime, andpulluponthehead restraint.
- Storetheheadrestraintinthe trunkofthevehicle.
- Whenthechildrestraintis removed, reinstallthehead restraintbeforetheseating positionisused.
WARNING
Withheadrestraintsthatarenot installedandadjustedproperly, thereisagreaterchancethat occupantswillsufferaneck/spinalinjuryinacrash.Donot driveuntiltheheadrestraintsfor allooccupantsareinstalledand adjustedproperly.
Toreinstalltheheadrestraint:
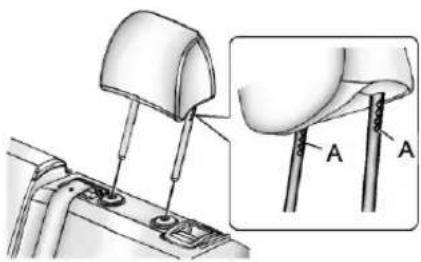
- Insert the head restraint posts into the holes in the top of the seatback. Thenotches (A) on the post must facetedriver side of the vehicle.
-
Pushtheheadrestraintdown. If necessary, press the height adjustment release button to further lower the head restraint. See Head Restraintson page 3-2.
-
Trytomovetheheadrestraint to make sure that it is locked in place.
ReplacingLATCHSystem PartsAfteraCrash
WARNING
AcrashcandamagetheLATCH systeminthevehicle.Adamaged LATCHsystemmaynotproperly securethechildrestraint, resultinginseriousinjuryoreven deathinacrash.Tohelpmake suretheLATCHsystemis workingproperlyafteracrash, seeyourdealertohavethe systeminspectedandany necessaryreplacementsmadeas soonaspossible.
IfthevehiclehastheLATCHsystem anditwasbeingusedduringa crash,newLATCHsystemparts maybeneeded.
Newpartsandrepairsmaybe necessaryeveniftheLATCH systemwasnotbeingusedatthe timeofthecrash.
SecuringChildRestraints (RearSeat)
Whensecuringachildrestraintin arearseatingposition,studythe instructionsthatcamewiththe childrestrainttomakesureitis compatiblewiththisvehicle.
If the child restraint has the LATCH system, see Lower Anchors and Tethers for Children (LATCH System) on page 3-49 for how and where to install the child restraint using LATCH. If a child restraint is secured in the vehicle using a safety belt and it uses to optether, see Lower Anchors and Tethers for Children (LATCH System) on page 3-49 for optether anchor locations.
3-58SeatsandRestraints
Donotsecureachildseatina positionwithoutatoptetheranchor ifanationalorlocallawrequires thatthetoptetherbeanchored, orif theinstructionsthatcomewiththe childrestraintsaythatthetopstrap mustbeanchored.
If the child restraint does not have the LATCH system, you will be using the safety belt to secure the child restraint in this position. Be sure to follow the instruction that camewith the child restraint. Secure the child in the child restraint when and asthe instruction say.
If more than one child restraint need to be installed in therear seat, besuretoread Where to Put the Restrainton page 3-48.
- Putthechildrestraint on theseat.
If the head restraint interferes with the proper installation of the child restraint, the head restraint may be removed. See "Head RestraintRemovaland Reinstallation" under Lower
AnchorsandTethersfor Children(LATCHSystem)on page3-49.
- Pickup the latch plate, and run the lap and shoulder portions of the vehicle's safety belt through or around therestraint. The child restraint instructions will show you how.
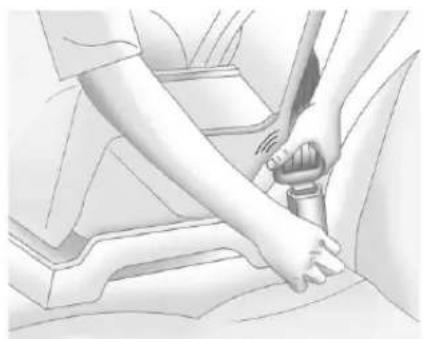
natural_image
Illustration of a person's hand using a belt switch to lift a car seat (no text or symbols visible)- Pushthelatchplate into the buckle until it clicks.
Positionthereleasebuttonon thebucklesothatthesafetybelt couldbequicklyunbuckledif necessary.
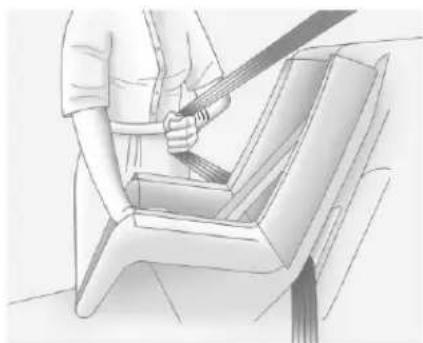
natural_image
Illustration of a person using a seatbelt to lift a seatbelt (no text or symbols present)- Pulltheshoulderbeltalltheway outoftheretractortosetthe lock. Whentheretractorlockis set, thebeltcanbetightenedbut notpulledoutoftheretractor.
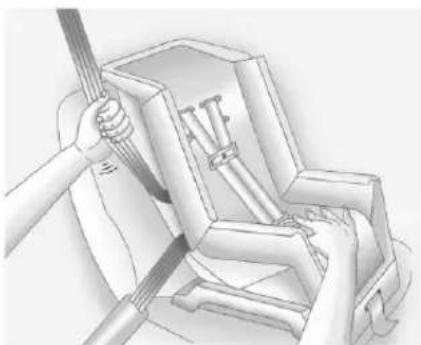
natural_image
Illustration of a hand using a tool to lift or install a mechanical component (no text or symbols visible)- Totightenthebelt, pushdown onthechildrestraint, pullthe shoulderportionofthebelt to tightenthelapportionofthebelt, andfeedtheshoulderbeltback intotheretractor. Wheninstalling aforward-facingchildrestraint, it maybehelpfultouseyourknee topushdownonthechild restraintasyoutightenthebelt.
Trytopullthebeltoutofthe retractortomakesurethe retractorislocked. If the retractorisnotlocked, repeat Steps4 and 5.
-
If the child restraint has a top tether, follow the child restraint manufacturer's instructions regarding the use of the top tether. See Lower Anchors and Tethers for Children (LATCH System) on page 3-49 form more information.
-
Beforeplacingachildinthe childrestraint, makesureitis securelyheldinplace. To check, graspthechildrestraintatthe safetybeltpathandattempt tomoveitside-to-side and back-and-forth. Whenthechild restraintisproperlyinstalled, thereshouldbenomorethan 2.5cm(1in)ofmovement.
Toremovethechildrestraint, unbucklethevehiclesafetybeltand letitreturntothestowedposition. Ifthetoptetherisattachedtoatop tetheranchor, disconnect it. Ifthe headrestraint was removed, reinstallitbeforetheseating position is used. See "Head RestraintRemovaland Reinstallation" under Lower
AnchorsandTethersforChildren (LATCHSystem)onpage3-49for additionalinformationoninstalling theheadrestraintproperly.
SecuringChildRestraints (FrontPassengerSeat)
Thisvehiclehasairbags.Arear seatisasaferplacetosecurea forward-facingchildrestraint.See WheretoPuttheRestrainton page3-48.
Inaddition, the vehicle has a passengersensingsystem which is designed to turn off the right front passenger frontal airbag and seat-mounted side impact airbag under certain conditions. See Passenger Sensing System on page 3-34 and Passenger Airbag Status Indicator on page 5-12 for more information, including important safety information.
Alabelonthesunvisorsays, "Neverputarear-facingchildseatin thefront." Thisisbecausetheriskto therear-facingchildissogreatifthe airbagdeploys.

WARNING
Achildinarear-facingchild restraintcanbeseriouslyinjured orkillediftherightfront passengerairbaginflates. This is because the back of the rear-facing child restraint would be very closetotheinflating airbag. Achildinaforward-facing child restraint can beseriously injured or killed iftherightfront passengerairbaginflates and the passenger seatisinaforward position.
Evenifthepassengersensing systemhasturnedofftheright frontpassengerfrontalairbag, no systemisfail-safe. Noonecan guaranteeethatanairbagwillnot (Continued)
WARNING(Continued)
deployundersomeunusual circumstance, event thoughitis turned off.
Securerear-facingchild restraintsinarearseat,evenif theairbagisoff.Ifyousecurea forward-facingchildrestraintin therightfrontseat,alwaysmove thefrontpassengerseatasfar backasitwillgo.Itisbetterto securethechildrestraintina rearseat.
See Passenger Sensing System on page 3-34 for additional information.
If the child restraint has the LATCH system, see Lower Anchors and Tethers for Children (LATCH System) on page 3-49 for how and where to install the child restraint using LATCH. If a child restraint is secured using as safety belt and it uses at option tether, see Lower
AnchorsandTethersforChildren (LATCHSystem) on page 3-49 for toptetheranchorlocations.
Donotsecureachildseatina positionwithoutatoptetheranchor ifanationalorlocallawrequires thatthetoptetherbeanchored,orif theinstructionsthatcomewiththe childrestraintsaythatthetopstrap mustbeanchored.
InCanada, the law requires that forward-facing child restraint have adopted, and that the tether be attached.
Youwillbeusingthelap-shoulder belttosecurethechildrestraintin thisposition.Followtheinstructions thatcamewiththechildrestraint.
- Movetheseatasfarbackasit willgobeforesecuringthe forward-facingchildrestraint.
Whenthepassengersensing systemhasturnedofftheright frontpassengerfrontalairbag andseat-mountedsideairbag, theoffindicatoronthe
passengerairbagstatus indicatorshouldlightandstaylit whenyoustartthevehicle.See PassengerAirbagStatus Indicatoronpage5-12.
- Putthechildrestraint on theseat.
- Pickup the latch plate, and run the lap and shoulder portions of the vehicle's safety belt through or around therestraint. The child restraint instructions will show you how.
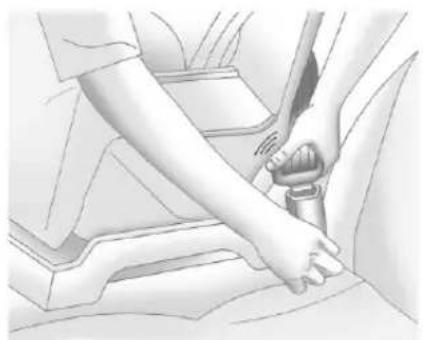
natural_image
Illustration of a person's seatbelt being adjusted for a car (no text or symbols visible)- Pushthelatchplate into the buckle until it clicks.
Positionthereleasebuttonon thebucklesothatthesafetybelt couldbequicklyunbuckledif necessary.
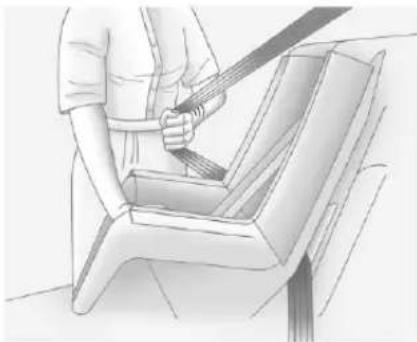
natural_image
Illustration of a person using a seatbelt to lift a car seat (no text or symbols)- Pulltheshoulderbeltalltheway outoftheretractortosetthe lock. Whentheretractorlockis set, thebeltcanbetightenedbut notpulledoutoftheretractor.
3-62SeatsandRestraints
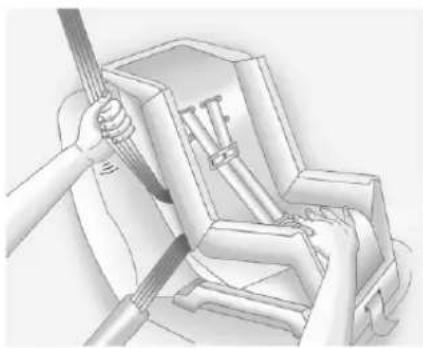
natural_image
Illustration of a hand using a tool to interact with mechanical components (no text or symbols visible)- Totightenthebelt, pushdown onthechildrestraint, pullthe shoulderportionofthebelt to tightenthalapportionofthebelt, andfeedtheshoulderbeltback intotheretractor. Wheninstalling aforward-facingchildrestraint, it maybehelpfultouseyourknee topushdownonthechild restraintasyoutightenthebelt.
Trytopullthebeltoutofthe retractortomakesurethe retractorislocked.Ifthe retractorisnotlocked,repeat Steps5and6.
- Beforeplacingachildinthe childrestraint, makesureitis securelyheldinplace. To check, graspthechildrestraintatthe safetybeltpathandattempt tomoveitside-to-side and back-and-forth. Whenthechild restraintisproperlyinstalled, thereshouldbenomorethan 2.5cm(1in)ofmovement.
If the airbags are off, the off indicator in the passenger airbag status indicator will come on and stay on when the vehicle is started.
Ifachildrestrainhasbeeninstalled andtheonindicatorislit,see"Ifthe OnIndicatorIsLitforaChild Restraint"underPassenger SensingSystemonpage3-34for moreinformation.
Toremovethechildrestraint, unbucklethevehiclesafetybeltand letitreturntothestowedposition.
Storage
StorageCompartments
InstrumentPanelStorage.....4-1
GloveBox......4-1
Cupholders......4-2
RearStorage......4-2
CenterConsoleStorage.....4-2
AdditionalStorageFeatures
CargoNet......4-3
ConvenienceNet......4-3
Storage Compartments
InstrumentPanelStorage
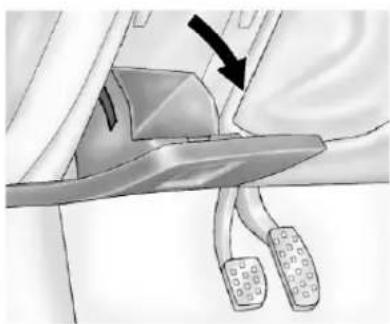
natural_image
Diagram of a car's seat and dashboard mechanism, showing hand placement and foot positioning (no text or symbols)Thereisastoragecompartment locatedonthedriversideofthe instrumentpanel.
GloveBox
Liftupthehandletoopentheglove box.Itcontainsapenholderanda coinholder.
4-2Storage
Cupholders
Twocupholdersareinthecenter console.Slidethedooropento accessthem.
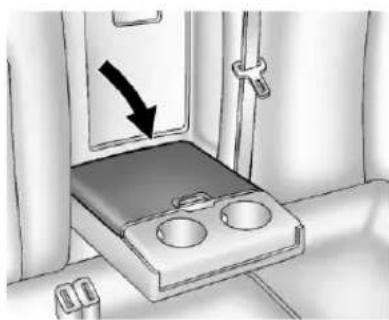
natural_image
Interior view of a vehicle cabin with a double-decker seat and an arrow pointing to the door (no text or symbols visible)Cupholdersmaybelocatedinthe secondrowseatarmrest.To access,pullthearmrestdown.
RearStorage
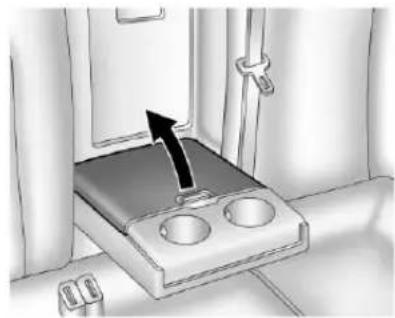
natural_image
Interior view of a vehicle cabin with a tray and vent, showing no text or symbolsPulldownthearmrest.Pushthe buttontoliftthecover.Closethe coverbeforefoldingthearmrestup.
CenterConsoleStorage
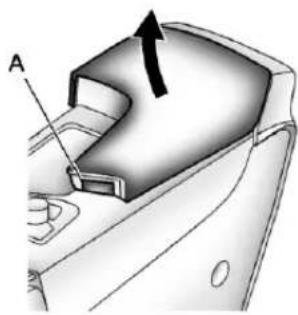
natural_image
Diagram of a car interior showing a handle and seat with an arrow indicating direction (no text or symbols present)Pushthebutton(A)toaccessthe storageoraccessorypoweroutlet underthearmrest.
SeePowerOutletsonpage5-5for moreinformation.
Some vehicles might also have input jacks for auxiliary devices. See Auxiliary Devices on page 7-17 for more information.
AdditionalStorage Features
CargoNet
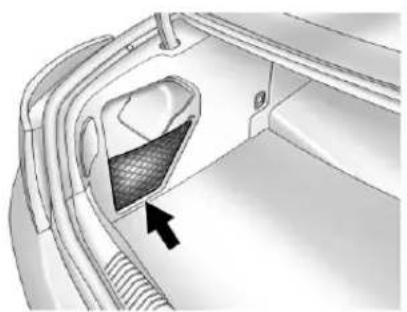
natural_image
Technical diagram of a car interior showing a mesh vent and duct (no text or symbols)Thereisacargonetforstoring itemsonthesideofthetrunk.
ConvenienceNet
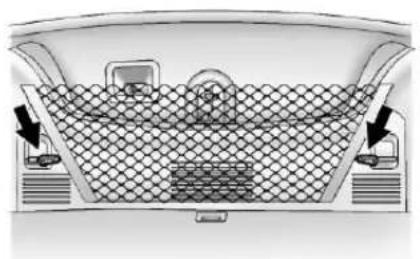
natural_image
Top-down view of a car's front bumper with mesh grille and side-mounted buttons (no text or symbols)Forvehicleswithaconveniencenet, itislocatedinthetrunkandusedto storesmallloads. Thenetshould notbeusedtostoreheavyloads. Attachtheloopsoneachsideofthe nettothehookslocatedonthe sidesofthetrunk.
4-4Storage
NOTES
Instruments and Controls
Controls
SteeringWheelAdjustment...5-2
SteeringWheelControls.....5-2
Horn....5-2
WindshieldWiper/Washer.....5-3
Compass....5-4
Clock....5-5
PowerOutlets....5-5
WarningLights, Gauges, and Indicators
WarningLights, Gauges, and Indicators....5-7
InstrumentCluster......5-8
Speedometer....5-9
Odometer....5-9
TripOdometer....5-9
Tachometer....5-9
FuelGauge....5-9
EngineCoolantTemperature Gauge....5-10
SafetyBeltReminders.....5-11
AirbagReadinessLight.....5-11
PassengerAirbagStatus Indicator....5-12
ChargingSystemLight.....5-13
Malfunction IndicatorLamp......5-13
BrakeSystemWarning Light....5-16
ElectricParkingBrake Light....5-16
AntilockBrakeSystem(ABS) WarningLight......5-17
UltrasonicParkingSensor Light....5-17
TractionOffLight......5-18
StabiliTrak® OFFLight......5-18
TractionControlSystem (TCS)/StabiliTrak® Light....5-18
TirePressureLight......5-19
EngineOilPressureLight....5-20
LowFuelWarningLight.....5-20
SecurityLight....5-21
High-BeamOnLight......5-21
FrontFogLampLight......5-21
LampsOnReminder......5-21
CruiseControlLight......5-22
DoorAjarLight....5-22
InformationDisplays
DriverInformation Center(DIC)......5-22
VehicleMessages
VehicleMessages......5-25
BatteryVoltageandCharging Messages....5-26
BrakeSystemMessages....5-26
CompassMessages......5-26
DoorAjarMessages......5-27
EngineCoolingSystem Messages....5-27
EngineOilMessages......5-28
EnginePowerMessages....5-28
FuelSystemMessages.....5-28
KeyandLockMessages.....5-29
ObjectDetectionSystem Messages......5-29
RideControlSystem Messages......5-29
Anti-theftAlarmSystem Messages....5-29
TireMessages......5-30
TransmissionMessages.....5-30
WindowMessages......5-31
VehiclePersonalization
VehiclePersonalization.....5-31
Controls
SteeringWheel Adjustment
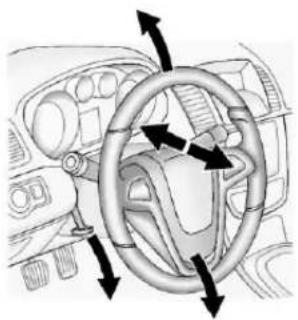
natural_image
Interior view of a car dashboard with steering wheel and directional arrows indicating rotation (no text or symbols)Toadjustthesteeringwheel:
- Pulltheleverdown.
- Movethesteeringwheelup, down, forward, and backward.
- Pulltheleveruptolockthe steeringwheelinplace.
Donotadjustthesteeringwheel whiledriving.
SteeringWheelControls
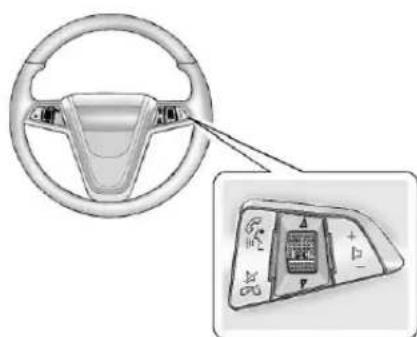
natural_image
Diagram of a car steering wheel and its internal electrical panel (no text or symbols)Forvehicleswithaudiosteering wheelcontrols, someaudiocontrols can be adjusted at theesteering wheel.
I (Push to Talk): For vehicleswithaBluetooth, OnStar, ornavigationsystem, pressto interactwiththosesystems. See Bluetooth(Overview)onpage7-20 orBluetooth(InfotainmentControls) onpage7-21orBluetooth(Voice Recognition)onpage7-23,the
OnStarOwner'sGuide, or the separatenavigationmanual for moreinformation.
/ (Mute/End Call): Press to silencethevehiclespeakersonly. Pressagaintoturnthesound on.ForvehicleswithOnStaror Bluetoothsystems,presstoreject anincomingcall,orenda currentcall.
△ SRC ▽ (Rotary Control): Turn toselectanaudiosource.
Press or toselectthenextor previousfavoriteradiostation, CD, orMP3track.
+ ▷-(Volume):Press+to increase the volume. Press-to decrease the volume.
Horn
Pressnearthehornsymbolsor pressonthesteeringwheelpadto soundthehorn.
Windshield Wiper/Washer
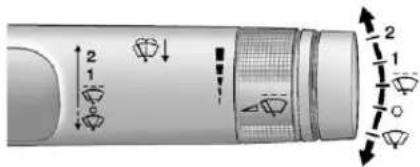
Thewindshieldwiperleveris onthesideofthesteering column. With the ignition in ACC/ACCESSORY or ON/RUN, move the windshieldwiperlevertoselect the wiperspeed.
2: Useforfastwipes.
1: Useforslowwipes.
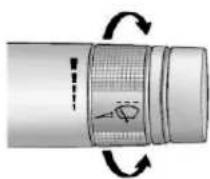
& (Adjustable Interval Wipes): Turnthebandupformorefrequent wipesordownforlessfrequent wipes.
9 (Off): Usetoturnthewindshield wipersoff.
3 (Mist): Forasinglewipe, brieflymovethewiperleverdown. Forseveralwipes, holdthewiper leverdown.
Cleariceandsnowfromthewiper bladesbeforeusingthem.Ifthey arefrozentothewindshield, carefullyloosenorthawthem.
Damagedwiperbladesshould bereplaced.SeeWiper Blade Replacement on page 10-30.
Heavysnoworicecanoverloadthe wipers.Acircuitbreakerstopsthem untilthemotorcools.
Wipe Parking
If the ignition is turned to LOCK/OFF while the wipers are on 1,2, or &, they will immediately stop.
Ifthewindshieldwiperlever isthenmovedtoOFFbeforethe driverdoorisopened,orwithin 10minutes,thewiperswillrestart andmovetothebaseofthe windshield.
If the ignition is turned to LOCK/OFF during a windshield wash, the wipers will stop when they reach the base of the wind shield.
5-4 InstrumentsandControls
WindshieldWasher
Pullthewindshieldwiperlever towardyoutspraywindshield washerfluidandactivatethewipers.
Thewiperswillcontinueuntilthe leverisreleasedorthemaximum washtimeisreached.
Whenthewindshieldwiperleveris released, additional wipes may occur depending on how long the windshieldwasher had been activated. See Washer Fluidon page 10-24 for information on filling the windshieldwasher fluid reservoir.

WARNING
Infreezingweather, donotuse the washer until the windshield is warmed. Otherwisethewasher fluid can form mice on the windshield, blocking your vision.
Compass
Thereisacompassdisplayinthe DriverInformationCenter(DIC). Thecompassreceivesitsheading andotherinformationfromthe GlobalPositioningSystem(GPS) antenna,StabiliTrak,andvehicle speedinformation.
AvoidcoveringtheGPSantennafor longperiodsoftimewithobjects thatmayinterferewiththeantenna's abilitytoreceiveasatellitesignal. SeeBackglassAntennaon page 7-13andSatelliteRadio Antennaonpage 7-14forthe locationofthevehicle'santennas.
Thecompasssystemisdesignedto operateforacertainnumberof milesordegreesofturnbefore needingasignalfromtheGPS satellites. Whenthecompass displayshowsCAL, drivethe vehicleforashortdistanceinan openareawhereitcanreceive aGPSsignal. Thecompass systemwillautomaticallydetermine whentheGPSsignalisrestored andprovideaheadingagain. SeeCompassMessageson page5-26formoreinformation onthemessagesthatmaybe displayedforthecompass.
Clock
Theinfotainmentsystemcontrols areusedtoaccessthetimeand datesettingsthroughthemenu system.SeeOperationonpage7-4 forinformationabouthowtousethe menusystem.
SettingtheTimeandDate
- PresstheCONFIGbutton and selectTimeandDateSettings.
- SelectSetTimeorSetDate.
- Turnthe ←→ knobtoadjust thehighlightedvalue.
- Pressthe knobtoselect thenextvalue.
- Tosavethetimeandreturnto the TimeSettingsmenu, press theBACKbuttonatanytimeor pressthe ←→knobafter adjustingtheminutes.
Settingthe12/24HourFormat
- PresstheCONFIGbutton and selectTimeandDateSettings.
- Highlight12/24HRFormat.
- Press the knobtoselect the12houror24hourdisplay format.
SettingtheMonthandDay Format
- PresstheCONFIGbutton and selectTimeandDateSettings.
- HighlightMonth&Dayformat.
3.Pressthe ←→knobtoselect DD/MM/YYYY(day/month/year), MM/DD/YYYY(month/day/year), orYYYY/MM/DD(year/month/day)displayformat.
PowerOutlets
Theaccessorypoweroutletcanbe usedtopluginelectricalequipment, suchasacellphoneorMP3player.
This outlet is located under the armrest inside the center console storage.
The outlet is powered when the ignition is in ON/RUN or ACC/ACCESSORY, or until the driver door is opened within 10 minutes of turning off the vehicle. See Retained Accessory Power (RAP) on page 9-21.
Opentheprotectivecovertousethe accessorypoweroutlet.
Certain electrical accessories may not be compatible with the accessory power outlets and could overload vehicle or adapter fuses. If there is a problem, see your dealer.
When adding electrical equipment, besuretofollowtheinstallation instructionsincludedwiththe equipment.SeeAdd-On Electrical Equipmentonpage9-50.
Notice: Hangingheavy equipment from the power outlet can caused damage not covered by the vehicle warranty. The power outlets are designed for accessory power plug only, such as cell phone charge cords.
PowerOutlet110VoltAlternating Current
The vehicle may have a power outlet that can be used to plug in electricalequipment with a maximum limit of 150 watts.
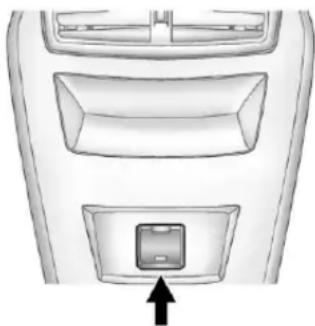
natural_image
Top-down view of a car interior showing dashboard and vent slots with an arrow pointing to the lower panel (no text or symbols)The power outlet is located on the rear of the center console.
Anindicatorlightontheoutlet comesonwheninuse. Thelight comesonwhentheignitionisin ON/RUNandequipmentrequiring lessthan150wattsispluggedinto theoutlet, andnosystemfaultis detected.
Theindicatorlightontheoutletwill notturnoniftheplugisnotfully seated.
If you try to connect equipment using more than 150 watts or a system fault is detected, the equipment may operate for short period and turn itself off. A protection circuit should the powers supply and the indicator light turn soff. To reset the circuit, unplug the item and plug it back in turn the Remote Accessory Power (RAP) off and then back on. See Retained Accessory Power (RAP) on page 9-21. Prolonged usage of the
poweroutletatthemaximumloadof 150wattsmaycausetheoutletto overheatandautomaticallyshut down. The powerrestartswhen equipmentthatoperateswithinthe limitispluggedintotheoutletanda systemfaultisnotdetected.
The power outlet is not designed for the following equipment, and may not work properly if any of the following is plugged in:
• Equipmentwithhigh initialpeakwattagesuchas: compressor-drivenrefrigerators andelectricpowertools.
- Otherequipmentrequiring anextremelystable powersupplysuchas: microcomputer-controlled electricblankets,touchsensor lamps,etc.
WarningLights, Gauges,and Indicators
Warninglightsandgaugescan signalthatsomethingiswrong beforeitbecomesseriouslyenough tocauseanexpensiverepairor replacement.Payingattentiontothe warninglightsandgaugescould preventinjury.
Warninglightscomeonwhenthere couldbeaproblemwithvehicle function. Somewarninglightscome onbrieflywhentheengineisstarted toindicatetheyareworking.
Gaugescanindicatewhenthere couldbeaproblemwithvehicle function.Oftengaugesandwarning lightsworktogethertoindicatea problemwiththevehicle.
Whenoneofthewarninglights comesonandstaysonwhile driving,orwhenoneofthegauges showstheremaybeaproblem, checkthesectionthatexplainswhat todo.Followthismanual'sadvice. Waitingtodorepairscanbecostly andevendangerous.
InstrumentCluster
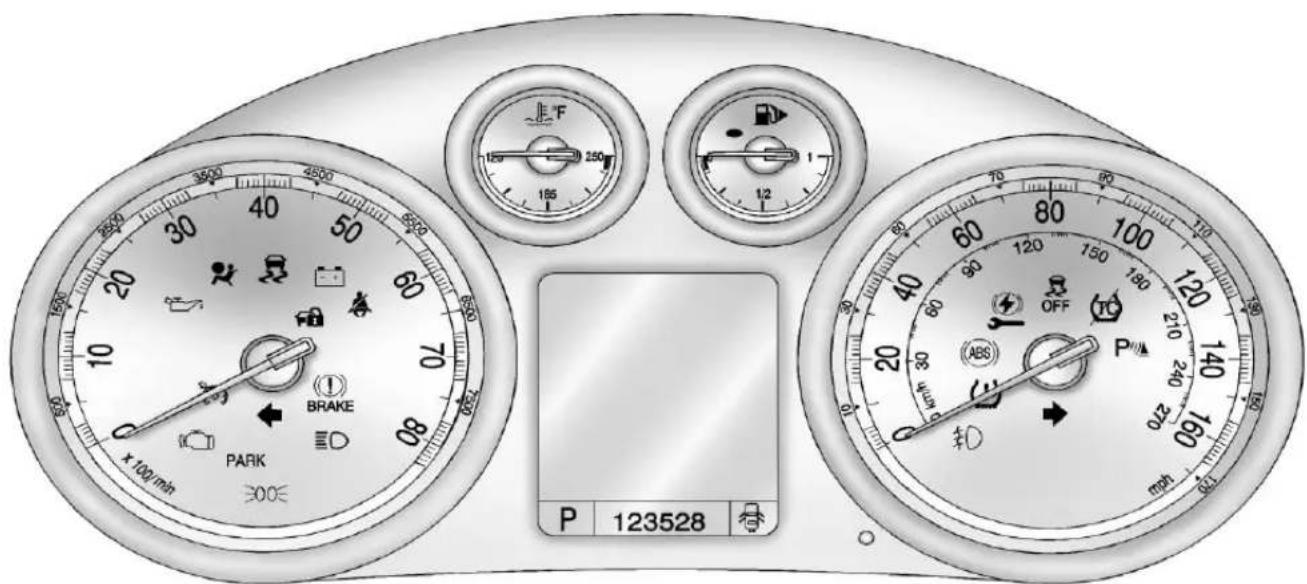
EnglishAutomaticTransmissionShown,ManualandMetricSimilar
Speedometer
Thespeedometershowsthe vehicle'sspeedineitherkilometers perhour(km/h)ormilesper hour(mph).
Odometer
Theodometershowshowfarthe vehiclehasbeendriven,ineither kilometersormiles.
This vehicle has atamper-resistant odometer. Thedigital odometer will read 999,999 if it is turned back.
Ifthevehicleneedsanewodometer installed, it must besetto the mileagetotaloftheoldodometer. If that is not possible, then it must besetatzeroandalabelmust be put onthedriverdoortoshow the oldmileagereadingwhen thenew odometer was installed.
TripOdometer
Thetripodometercanshowhowfar thevehiclehasbeendrivensince thetripodometerwaslastreset.
Thetripodometerisaccessed and resetthroughtheDriverInformation Center(DIC). SeeDriver InformationCenter(DIC) on page5-22 formoreinformation.
Tachometer
Thetachometerdisplaythe enginespeedinrevolutionsper minute(rpm).
Notice: If the engine is operated with the tachometer in the shaded warning area, the vehicle could be damaged, and the damages would not be covered by the vehicle warranty. Donot operate the engine with the tachometer in the shaded warning area.
FuelGauge
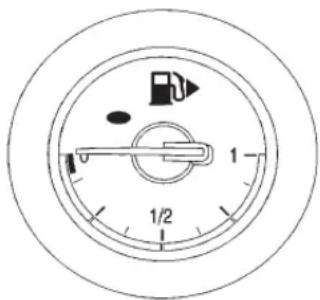
Whentheignitionison, thefuel gaugeshowsabouthowmuchfuel isleftinthetank.
Anarrowonthefuelgauge indicatesthesideofthevehicle thefueldoorison.
TheFUELLEVELLOWmessage appearsintheDriverInformation Center(DIC)andasinglechime sounds.SeeDriverInformation Center(DIC)onpage5-22for moreinformation.
Herearefourthingsthatsome ownersaskabout.Noneofthese showaproblemwiththefuelgauge:
- Attheservicestation, the fuel pumpshutsoffbeforethegauge readsfull.
- Ittakesalittlemoreorless fueltofillupthanthegauge indicated. Forexample, the gaugemayhaveindicatedthe tankwashalffull,butitactually tookalittlemoreorlessthan halfthetank'scapacitytofill thetank.
- Thegaugemovesalittlewhile turningacornerorspeedingup.
- Thegaugetakesafewseconds tostabilizeaftertheignitionis turnedon, and willgobackto emptywhentheignitionis turnedoff.
EngineCoolant
TemperatureGauge
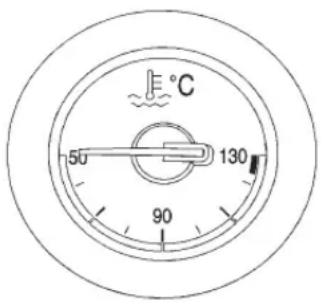
Metric
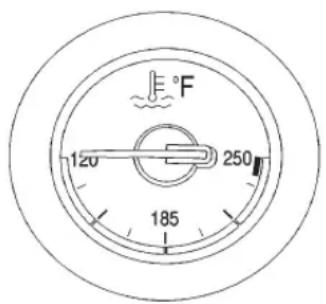
English
Thisgaugeshowstheengine coolanttemperature.
Iftheindicatorneedlemovestothe hotsideofthegaugetowardthe shadedarea,theengineistoohot.
If the vehicle has been operated under normal driving conditions, pull offtheroad, stop the vehicle, and turnoff the engine as soon as possible.
SafetyBeltReminders DriverSafetyBeltReminder Light
Thereisadriversafetybelt reminderlightontheinstrument panelcluster.
Whentheengineisstartedthislight beginstoflashandachimecomes onforseveralsecondstoremind thedrivertofastentheirsafetybelt. Thelightalsostaysonifthedriver remainsunbuckled.
This cyclerepeats if the driver is unbuckled while the vehicle is moving.
If the drivers safety belt is already buckled, neither the light nor the chime comes on.
PassengerSafetyBelt ReminderLight
Thereisapassengersafetybelt reminderlightlocatedonthecenter console.
Whentheengineisstartedthislight beginstoflashandachimecomes onforseveralsecondstoremind thepassengertofastentheirsafety belt. Thelightalsostaysonifthe passengerremainsunbuckled.
This cyclerepeatsifthepassenger is unbuckledwhilethevehicleis moving.
If the passengers safety belt is buckled, neither the chimen or the light comes on.
Thefrontpassengersafetybelt warninglightandchimemayturnon ifanobjectisputontheseatsuch asabriefcase,handbag,grocery bag,laptop,orotherelectronic device.Toturnoffthewarninglight and/orchime,removetheobject fromtheseatorbucklethe safetybelt.
AirbagReadinessLight
Thislightshowsifthereisan electricalproblem.Thesystem checkincludestheairbagsensor, thepretensioners,theairbag modules,thewiring,andthecrash sensinganddiagnosticmodule. Formoreinformationontheairbag system,seeAirbagSystemon page3-27.

The airbagreadinesslightcomeson andstaysonforseveralseconds whenthevehicleisstarted. Then the lightgoesout.
WARNING
If the airbagreadinesslightstays on after the vehicle is started or comes on while driving, it means the air bagsystem might not be working properly. The airbags in the vehicle might not inflate a crash, or they could even inflate without a crash. To help avoid injury, have the vehicles serviced right away.
PassengerAirbagStatus Indicator
Thevehiclehasapassenger sensingsystem.SeePassenger SensingSystemonpage3-34 forimportantsafetyinformation. Theinstrumentpanelhasa passengerairbagstatusindicator.
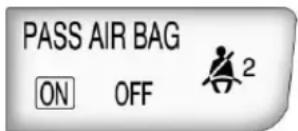
Whenthevehicleisstarted, the passengerairbagstatusindicator willlightthewordsONandOFFfor severalsecondsasasystemcheck.
Then,afterseveralmoreseconds, thestatusindicatorwilllighteither thewordONorOFFtoletyou knowthestatusoftherightfront passengerfrontalairbagand seat-mountedsideimpactairbag.
IfthewordONislitonthe passengerairbagstatusindicator, it meansthattherightfrontpassenger frontalairbagandseat-mounted sideimpactairbagareenabled (mayinflate).
IfthewordOFFislitontheairbag statusindicator, itmeansthatthe passengersensingsystemhas turnedofftherightfrontpassenger frontalairbagandseat-mounted sideimpactairbag.
If, afterseveralseconds, both statusindicatorlightsremainon, oriftherearenolightsatall, there maybeaproblemwiththelights orthepassengersensingsystem. Seeyourdealerforservice.

WARNING
If the airbagreadiness light ever comes on and stay on, it means that something may be wrong with the air bags system. To help avoid injury to your self for others, have the vehicles serviced right away. See Airbag Readiness Lighton page 5-11 form more information, including important safety information.
ChargingSystemLight
Thechargingsystemlightcomeson brieflywhentheignitionisturned on,buttheengineisnotrunning,as achecktoshowthelightisworking. Thelightturnsoffwhentheengine isstarted.Ifitdoesnot,havethe vehicleservicedbyyourdealer.
Ifthelightstayson,orcomeson whiledriving,therecouldbea problemwiththeelectricalcharging system.Haveitcheckedbyyour dealer.Drivingwhilethislightison coulddrainthebattery.
Ifashortdistancemustbedriven withthelighton,besuretoturnoff allaccessories,suchastheradio andairconditioner.
Malfunction IndicatorLamp
AcomputersystemcalledOBDII (On-BoardDiagnostics-Second Generation) monitorsoperation of the fuel, ignition, and emission control systems. It makes sure that emissions are at acceptable levels for the life of the vehicle, helping to produce a cleaner environment.
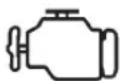
Thislightcomesonwhenthe ignitionison,buttheengineisnot running,asachecktoshowitis working.Ifitdoesnot,havethe vehicleservicedbyyourdealer.
Ifthemalfunctionindicatorlamp comesonandstayson,whilethe engineisrunning,thisindicatesthat thereisanOBDIIproblemand serviceisrequired.
5-14 InstrumentsandControls
Malfunctionsoftenareindicatedby thesystembeforeanyproblemis apparent.Heedingthelightcan preventmoreseriousdamagetothe vehicle.Thissystemassiststhe servicetechnicianincorrectly diagnosinganymalfunction.
Notice: If the vehicle is continually driven with this light on, the emission control might not work as well, the vehicle fuel economy might not be as good, and the engine might not run as smoothly. This could lead to costly repair that might not be covered by the vehicle warranty.
Notice: Modificationsmadetothe engine, transmission, exhaust, intake, orfuelsystemofthe vehicleorthereplacement of the original tires with other than those of the same Tire PerformanceCriteria(TPC) can affect the vehicle's semission controls and can cause this light to come on.
Modificationstothesesystems could lead to costly repairs not covered by the vehicle warranty. This could also result in a failure to pass are required. Emission Inspection/Maintenance test. See Accessories and Modifications on page 10-3.
Thislightcomesonduringa malfunctioninoneoftwoways:
LightFlashing: Amisfirecondition has been detected. Amisfire increases vehicle emissions and could damage the emission control system on the vehicle. Diagnosis and servicemight berequired.
The following can prevent more serious damage to the vehicle:
- Reducevehiclespeed.
- Avoidhardaccelerations.
- Avoidsteepuphillgrades.
Ifthelightcontinuestoflash,when itissafetodoso,stopthevehicle. Findasafeplacetopark.Turnthe vehicleoff,waitatleast10seconds, andrestarttheengine.Ifthelightis stillflashing,followtheprevious stepsandseeyourdealerfor serviceassoonaspossible.
LightOnSteady: Anemission controlsystemmalfunctionhas beendetectedonthevehicle. Diagnosisandservicemightbe required.
The following maycorrectan emissionsystemmalfunction:
- Checkthatthefuelcapisfully installed.SeeFillingtheTankon page9-48.Thediagnostic systemcandetermineifthe fuelcaphasbeenleftoffor improperlyinstalled.Alooseor missingfuelcapallowsfuelto evaporateintotheatmosphere. Afewdrivingtripswiththecap properlyinstalledshouldturnthe lightoff.
- Checkthattheelectricalsystem isnotwet. Thesystemcouldbe wetifthevehiclewasdriven throughadeeppuddleofwater. Theconditionisusually correctedwhentheelectrical systemdriesout.Afewdriving tripsshouldturnthelightoff.
- Checkthatgoodqualityfuelis used. Poorfuelqualitycauses theenginenottorunas efficientlyasdesignedandmay cause:stallingafterstart-up, stallingwhenthevehicleis changedintogear,misfiring, hesitationonacceleration, orstumblingonacceleration. Theseconditionsmightgoaway oncetheengineiswarmedup.
Ifoneormoreofthese conditionsoccurs,changethe fuelbrandused.Itwillrequireat leastonefulltankoftheproper fueltoturnthelightoff.
SeeRecommendedFuelon page9-44.
If none of the above havemade the light turnoff, have your dealer check the vehicle. The dealer has the propertestequipment and diagnostictoolstofixany mechanicalorelectrical problems that might have developed.
EmissionsInspection and MaintenancePrograms
Somestate/provincialandlocal governmentsmayhaveprograms toinspecttheon-vehicleemission controlequipment. Forthe inspection, theemissionsystem testequipmentisconnected tothevehicle'sDataLink Connector(DLC).
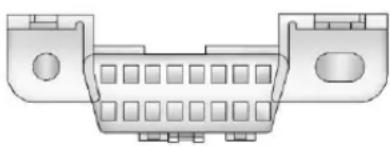
natural_image
Technical line drawing of a connector housing (no text or symbols)The DLC is under the instrument panel near the steering wheel. See your dealer if assistance is needed.
The vehicle may not pass inspection if:
- Themalfunctionindicatorlampis onwiththeengine running, orif the light does not come on when the ignition is turned to ON/RUN while the engine is off.
- The critical emission control system shavenot been completely diagnosed by the system. This can happen if the battery has recently been replaced if the battery has run down. The diagnostics system evaluates critical emission control systems during normal driving. This can take several day so fronted driving. If this has been done and the vehicle still does not pass the inspection, your dealer can prepare the vehicle for inspection.
BrakeSystemWarning Light
The vehicle brakesystem consists of two hydraulics circuits. If one circuit is not working, there are remaining circuit can still work to stop the vehicle. Fornormal braking performance, both circuits need to be working.
If the warning light comes on, there is a brake problem. Havethe brake system inspected right away.

BRAKE

EnglishMetric
The Brake System Warning Light should come on briefly as the engine is started. If it does not come on, havethe vehicles serviced by your dealer.
WARNING
Thebrakesystemmightnotbe workingproperlyifthebrake systemwarninglightison. Drivingwiththebrakesystem warninglightoncanleadtoa crash.Ifthelightisstillonafter thevehiclehasbeenpulledoff theroadandcarefullystopped, havethevehicletowedfor service.
Ifthelightcomesonwhiledriving, achimesounds.Pullofftheroad andstop.Thepedalmightbeharder topushorgoclosertothefloor. Itmightalsotakelongertostop. Ifthelightisstillon,havethe vehicletowedforservice.See Towingthe Vehicleonpage 10-74.
ElectricParkingBrake Light
PARK

EnglishMetric
Theparkingbrakestatuslight comesonwhenthebrakeis applied. Ifthelightcontinues flashingaftertheparkingbrake isreleased, orwhiledriving, thereisaproblemwiththeElectric ParkingBrakesystem.ASERVICE PARKINGBRAKEmessage mayalsodisplayontheDriver InformationCenter(DIC). See Brake SystemMessagesonpage5-26for moreinformation.
Ifthelightdoesnotcomeon, orremainsflashing,seeyourdealer.
Thebrakewarninglightshould comeonbrieflywhentheignitionis placedinON/RUN.Ifitdoesnot comeon,havethevehicleserviced byyourdealer.
If this light comes on, there is a problem with asystem on the vehicle that is causing the parking brakes system to work at a reduced level. The vehicle can still be driven, but should be takento adealeras soon as possible. See Parking Brake on page 9-31 form more information.
AntilockBrakeSystem (ABS)WarningLight

TheAntilockBrakeSystem(ABS) lightcomesonbrieflywhenthe engineisstarted.
Ifthelightdoesnotcomeon,haveit fixedsoitwillbereadytowarnif thereisaproblem.
IftheABSlightstayson,turnthe ignitionoff.Ifthelightcomeson whiledriving,stopassoonasitis safelypossibleandturntheignition off.Achimemayalsosoundwhen theightcomesonsteady.Then starttheengineagaintoresetthe system.IftheABSlightstayson, orcomesonagainwhiledriving,the vehicleneedsservice.Iftheregular brakesystemwarninglightisnot on,thevehiclestillhasbrakes,but
notantilockbrakes.Iftheregular brakesystemwarninglightisalso on,thevehicledoesnothave antilockbrakesandthereisa problemwiththeregularbrakes. SeeBrakeSystemWarningLighton page5-16.
SeeDriverInformationCenter(DIC) onpage5-22forallbrakerelated DICmessages.
UltrasonicParking SensorLight

Thislightcomesontoindicate that there is a malfunction in the system. Se your dealer for service.
See Ultrasonic Parking Assiston page 9-42 and Driver Information Center (DIC) on page 5-22 form more information.
TractionOffLight

Thislightcomesonbrieflywhile startingtheengine.
Ifitdoesnot,havethevehicle servicedbyyourdealer.Ifthe systemisworkingnormally,the indicatorlightthengoesoff.
Thetractionofflightcomesonwhen theTractionControlSystem(TCS) hasbeenturnedofforifthereisa problemwiththeTCS.
Ifthelightcomesonandstayson whilethesystemisturnedon,the vehicleneedsservice.
Amessagealsoappearsinthe DriverInformationCenter(DIC). SeeRideControlSystemMessages onpage5-29formoreinformation.
See TractionControlSystem(TCS) onpage9-34 and StabiliTrak Systemonpage9-36 formore information.
StabiliTrak® OFFLight
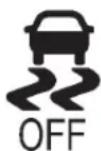
Thislightcomesonwhenthe StabiliTraKsystemisturnedoff. IftheTractionControlSystem(TCS) isoff, wheelspinisnotlimited. IfStabiliTrakisoff, thesystemdoes notassistincontrollingthevehicle. TurnontheTCSandtheStabiliTrak systemandthewarninglight turnsoff.
See TractionControlSystem(TCS) onpage9-34 and StabiliTrak Systemonpage9-36 formore information.
TractionControlSystem (TCS)/StabiliTrak® Light
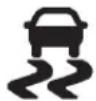
The TractionControlSystem(TCS)/StabiliTrakLightcomesonbriefly whentheengineisstarted.
Ifthelightdoesnotcomeon, have the vehicleservicedbythe dealer. Ifthesystemisworkingnormally, the indicatorlightturnsoff.
IfthelightisonwhilecertainDIC messagesdisplay,thisindicates thattheTCSandStabiliTrak systemsarenotworkingorare disabled.
Ifthelightisonandnotflashing,the TCSandpotentiallytheStabiliTrak systemhavebeendisabled.Check theDICmessagestodetermine whichfeature(s)isnolonger functioningandwhetheritis becauseofthedriverturningoffthe feature(s),orbecausethesystemis networkingproperlyandthevehicle requiresservice.
IftheTCSisdisabled, wheelspinis notlimited. IftheStabiliTraksystem isdisabled, thesystemdoesnotaid inmaintainingdirectionalcontrol of thevehicle.
Iftheindicator/warninglightison andflashing,theTCSorthe StabiliTraksystemisactively working.ChecktheDICmessages fordetailstodeterminewhich systemisworking.IftheLOW TRACTIONmessageappears,the systemislimitingwheelspin.Ifa messageappearsintheDIC,the systemisaidinginmaintaining directionalcontrolofthevehicle.
See StabiliTrak ^® Systemon page9-36 and TractionControl System(TCS) on page9-34 for more information.
See RideControlSystemMessages on page 5-29 form more information on them messages associated with this light.
TirePressureLight
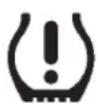
ForvehicleswiththeTirePressure MonitorSystem(TPMS), thislight comesonbrieflywhentheengine isstarted. Itprovidesinformation abouttirepressuresandtheTPMS.
WhentheLightIsOnSteady
This indicates that one or more of the tires are significantly underinflated.
Atirepressuremessagecan accompanythelight. See Tire Messagesonpage5-30formore information. Stopassoonas possible, andinflatethetirestothe pressurevalueshownontheTire andLoadingInformationlabel. See TirePressureonpage10-49 formoreinformation.
WhentheLightFlashesFirstand ThenIsOnSteady
This indicates that theremaybe a problem with the TPMS. Thelight flashes for about a minute and stay on steady for the remainder of the ignition cycle. This sequence repeats with every ignition cycle. See Tire Pressure Monitor Operation on page 10-52 for more information.
EngineOilPressureLight

WARNING
Donotkeepdrivingiftheoil pressureislow.Theenginecan becomesohotthatitcatchesfire. Someonecouldbeburned.Check theoilassoonaspossibleand havethevehicleserviced.
Notice:Lackofproperengineoil maintenancecandamagethe engine.Therepairswouldnotbe coveredbythevehiclewarranty. Alwaysfollowthemaintenance scheduleforchangingengineoil.
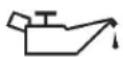
Theoilpressurelightshouldcome onbrieflyastheengineisstarted. Ifitdoesnotcomeonhavethe vehicleservicedbyyourdealer.
Ifthelightcomesonandstayson, it meansthatoilisnotflowingthrough theengineproperly. Thevehicle couldbelowonoilandmighthave someothersystemproblem.See yourdealer.
LowFuelWarningLight
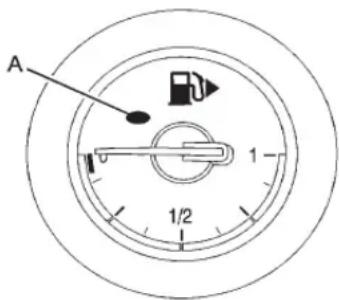
Thislightcomesonfora fewsecondswhentheignitionis turnedonasachecktoindicate itisworking.lfitdoesnotcomeon, haveitfixed.
Thelowfuelwarninglight(A)comes onandachimesoundsperiodically whenthevehicleislowonfuel. The lightturnsoffwhenfuelisaddedto thefueltank.
SeeDriverInformationCenter(DIC) onpage5-22formoreinformation.
SecurityLight

Theimmobilizerlightshouldcome onbrieflyastheengineisstarted. Ifitdoesnotcomeon,havethe vehicleservicedbyyourdealer. Ifthesystemisworkingnormally, theindicatorlightturnsoff.
Thislightcomesonwhenthe ignitionisturnedfromLOCK/OFF toON/RUNandstaysonifthe vehicleisimmobilized.This happenswhenanincorrectkeyor anunprogrammedkeyisusedto startthevehicle.
If the light stay on and the engine does not start, there could be a problem with the theft-deterrent system. See Vehicle Security on page 2-9 form more information.
High-BeamOnLight

Thehigh-beamonlightcomeson whenthehigh-beamheadlampsare inuse.
SeeHeadlampHigh/Low-Beam Changeronpage6-2formore information.
FrontFogLampLight

Forvehicleswithfoglamps,this lightcomesonwhenthefoglamps areinuse.
Thelightgoesoutwhenthefog lampsareturnedoff.SeeFog Lampsonpage6-4formore information.
LampsOnReminder
Forvehicleswiththelampson reminderlight, it comes on when the lights are in use.
CruiseControlLight
Thecruisecontrolllightiswhite whenever thecruisecontrolisset, and turnsgreenwhenthecruise controlisactive.
Thelightturnsoffwhenthecruise controlisturnedoff.SeeCruise Controlonpage9-39formore information.
DoorAjarLight
Thislightcomeswhenadooris openornotsecurelylatched.
InformationDisplays
DriverInformation Center(DIC)
TheDriverInformationCenter(DIC) displaysinformationaboutthe vehicle. Italsodisplayswarning messagesifasystemproblemis detected. See VehicleMessageson page5-25formoreinformation. AllmessagesappearintheDIC displaylocatedinthecenterofthe instrumentpanelcluster.
Onsomemodels, the DIC may have some warning lights or indicators shown in the top portion of the display. See Warning Lights, Gauges, and Indicators on page 5-7 form more information.
The vehicle may also have features that can be customized through the control sontheradio. See Vehicle Personalization on page 5-31 for more information.
DICOperationandDisplays
The DIChasdifferentdisplays whichcanbeaccessedbyusing the DICbuttonslocatedontheturn signalleverlocatedontheleftside ofthesteeringwheel.The DIC displaystrip,fuel,andvehicle systeminformation,andwarning messagesifasystemproblemis detected.
ThebottomoftheDICdisplay showsthepositionoftheshiftlever andtheodometer.Itmayalsoshow thedirectionthevehicleisdriving.
IncoldweathertheDICdisplay maychangeslowly. Thisisnormal andwillmovemorequicklyasthe vehicle'sinteriortemperaturerises.
DICButtons
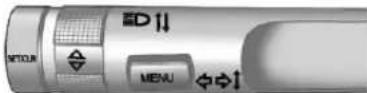
MENU: PresstogettotheTrip/FuelMenuandtheVehicle InformationMenu.
△▽(Thumbwheel):Usetoscroll throughtheitemsineachmenu. Asmallmarkerwillmoveacrossthe bottomofthepageasyouscroll throughtheitems.Thisshows whereeachpageisinthemenu.
SET/CLR(Set/Clear):Presstoset orclearthemenuitemwhenitis displayed.
Trip/FuelMenultems
PressMENUontheturnsignal leveruntilTrip/FuelInformation Menuisdisplayed. Use △▽to scrollthroughthefollowingmenu items:
- Trip1
- Trip2
- FuelRange
- FuelEconomy
• AverageVehicleSpeed - Timer
• DigitalSpeedometer - Turn-by-Turn
Trip1andTrip2
Thisdisplayshowsthecurrent distancetraveled,ineither kilometers(km)ormiles(mi),since thelastresetforthetripodometer. Thetripodometercanberesetto zerobypressingSET/CLRwhilethe tripodometerdisplayisshowing.
FuelRange
Thisdisplayshowstheapproximate distancethevehiclecanbedriven withoutrefueling. Thefuelrange estimateisbasedonanaverageof thevehicle'sfueleconomyover recentdrivinghistoryandthe amountoffuelremaininginthefuel tank.Fuelrangecannotbereset.
FuelEconomy
Thisdisplayshowsboththe averagefueleconomyandthe instantaneousfueleconomy. Theyareshowninlitersper 100kilometers(L/100km)ormiles pergallon(mpg).
Averagefueleconomyis calculatedbasedonthenumberof L/100km(mpg)recordedsincethe lasttimethismenuitemwasreset. Theaveragefueleconomycanbe resetbypassingSET/CLRwhile theFuelEconomydisplayis showing.
The instantaneous fueleconomy reflect only the current fuel economy and changes frequently as driving conditions change. Unlike average economy, this display cannot be reset.
AverageVehicleSpeed
Thisdisplayshowstheaverage speedofthevehicleinkilometers perhour(km/h)ormilesper hour(mph).Thisaverageis calculatedbasedonthevarious vehiclespeedsrecordedsincethe lastresetofthisvalue. Theaverage speedcanberesetbypassing SET/CLRwhiletheAverageVehicle Speeddisplayisshowing.
Timer
Thisdisplaycanbeusedasatimer. Tostartthetimer, pressSET/CLR whileTimerisdisplayed. The displaywillshowtheamountoftime thathaspassedsincethetimerwas lastreset, notincludingtimethe
ignitionisoff. Timewillcontinueto becountedaslongastheignitionison, evenifanotherdisplayisbeing shownontheDIC. Thetimerwill recordupto99hours, 59minutes, and 59seconds(99:59:59)after whichthedisplaywillreturntozero. Tostopthetimer, pressSET/CLR brieflywhileTimerisdisplayed. Toresetthetimertozero, pressand holdSET/CLR.
DigitalSpeedometer
Thespeedometershowshowfast thevehicleismovingineither kilometersperhour(km/h)ormiles perhour(mph). Thespeedometer cannotbereset.
Turn-by-Turn
Thisdisplayisusedforthe NavigationSystemTurn-by-Turn guidance.SeetheNavigation manual,ifthevehiclehas navigation,formoreinformation.
VehicleInformationMenu Items
PressMENUontheturnsignal leveruntilVehicleInformationMenu isdisplayed. Use △▽toscroll throughthefollowingmenuitems:
- Unit
- TirePressure
- RemainingOilLife
Unit
Move △▼toswitchbetween MetricorUSwhentheUnitdisplayisactive.PressSET/CLRtoconfirm thesetting.Thiswillchangethe displaysontheclusterandDICto eithermetricorEnglish(US) measurements.
TirePressure
Thedisplaywillshowavehiclewith theapproximatepressuresofall fourtires.Tirepressureisdisplayed ineitherkilopascal(kPa)orpounds persquareinch(psi).See Tire PressureMonitorSystemon page 10-51 and TirePressure MonitorOperationonpage 10-52 formoreinformation.
RemainingOilLife
Thisdisplayshowsanestimate oftheoil'sremainingusefullife. IfREMAININGOILLIFE99%is displayed,thatmeans99%ofthe currentoilliferemains.
Whentheremainingoillifeislow, theCHANGEENGINEOILSOON messagewillappearonthedisplay. SeeEngineOilMessageson page5-28.Theoilshouldbe changedassoonaspossible.See EngineOilonpage10-9.Inaddition totheEngineOilLifeSystem
monitoringtheoillife,additional maintenanceisrecommendedinthe MaintenanceScheduleinthis manual.SeeScheduled Maintenanceonpage11-2formore information.
Remember,theRemainingOilLife displaymustberesetaftereach oilchange.Itwillnotresetitself. Also,becarefulnottoresetthe RemainingOilLifedisplay accidentallyatanytimeotherthan whentheoilhasjustbeenchanged. Itcannotberesetaccuratelyuntil thenextoilchange.Toresetthe EngineOilLifeSystem,pressSET/ CLRwhiletheRemainingOilLife displayisactive.SeeEngineOil LifeSystempage 10-13.
Compass
The vehicle has a compass display in the DIC. See Compasson page 5-4 form more information.
VehicleMessages
MessagesdisplayedontheDIC indicatethestatusofthevehicleor someactionthatmaybeneeded tocorrectacondition.Multiple messagesmaydisplayoneafter theother.
Themessagesthatdonot requireimmediateactioncanbe acknowledgedandclearedby pressingSET/CLR.Themessages thatrequireimmediateactioncannot becleareduntilthatactionis performed.Allmessagesshouldbe takenseriouslyandclearingthe messagesdoesnotcorrectthe problem.
BatteryVoltage and ChargingMessages
BATTERYSAVERACTIVE
Thismessagedisplayswhenthe vehiclehasdetectedthatthebattery voltageisdroppingbeyonda reasonablepoint.Thebatterysaver systemstartsreducingcertain featuresofthevehiclethatyoumay beabletonotice.Atthepointthat featuresaredisabled,thismessage isdisplayed.Itmeansthatthe vehicleistryingtosavethecharge inthebattery.Turnoffunnecessary accessoriestoallowthebatteryto recharge.
LOWBATTERY
Thismessageisdisplayedwhenthe batteryvoltageislow.SeeBattery onpage10-27formoreinformation.
SERVICEBATTERY CHARGINGSYSTEM
Thismessageisdisplayedwhen thereisafaultinthebattery chargingsystem. Takethevehicle toyourdealerforservice.
BrakeSystemMessages BRAKEFLUIDLOW
Thismessageisdisplayedwhenthe brakefluidlevelislow.SeeBrake Fluidonpage10-26.
PRESSBRAKEPEDALTO RELEASEPARKBRAKE
Thismessageisdisplayedifyou attempttoreleasetheelectric parkingbrakewithoutthebrake pedalapplied.SeeParkingBrake onpage9-31formoreinformation.
Threedasheswillbedisplayedifthe compassneedsservice.Seeyour dealerforservice.
DoorAjarMessages
DRIVERDOOROPEN
Thismessage will display when the driverdoor is open. Closethedoor completely.
HOODOPEN
Thismessagewilldisplaywhenthe hoodisopen.Closethehood completely.
LEFTREARDOOROPEN
Thismessage will display when the driversidereardoorisopen. Close the door completely.
PASSENGERDOOROPEN
Thismessagewilldisplaywhenthe frontpassengerdoorisopen.Close thedoorcompletely.
RIGHTREARDOOROPEN
Thismessagewilldisplaywhenthe passengersidereardoorisopen. Closethedoorcompletely.
TRUNKOPEN
Thismessagewilldisplaywhen thetrunkisopen.Closethetrunk completely.
EngineCoolingSystem Messages
A/COFFDUETOHIGH ENGINETEMP
Thismessagedisplayswhenthe enginecoolantbecomeshotterthan thenormaloperatingtemperature. Toavoidaddedstrainonahot engine,theairconditioning compressorautomaticallyturnsoff. Whenthecoolanttemperature returnstonormal,theair conditioningcompressorturnsback on.Youcancontinuetodrivethe vehicle.
If this message continues to appear, havethesystem repaired by your dealer as soon as possible to avoid damage to the engine.
COOLANTLEVELLOWADD COOLANT
Thismessage will display if the coolant is slow. See Engine Coolant on page 10-18.
ENGINEOVERHEATED—IDLEENGINE
Thismessagedisplayswhenthe enginecoolanttemperatureistoo hot.Stopandallowthevehicleto idleuntilcoolsdown.
ENGINEOVERHEATED— STOPENGINE
Thismessagedisplaysanda continuouschimesoundsifthe enginecoolingsystemreaches unsafetemperaturesforoperation. Stopandturnoffthevehicleas soonasitissafetodosotoavoid severedamage. Thismessage clearswhentheenginehascooled toasafeoperatingtemperature.
HIGHCOOLANT TEMPERATURE
Thismessagedisplaysifthecoolant temperatureishot.SeeEngine Overheatingonpage10-21.
EngineOilMessages CHANGEENGINEOILSOON
Thismessagedisplayswhenthe engineoilneedstobechanged. Whenyouchangetheengineoil,be suretoresettheOilLifeSystem. SeeEngineOilLifeSystemon page10-13andDriverInformation Center(DIC)onpage5-22for informationonhowtoresetthe system.SeeEngineOilon page10-9andScheduled Maintenanceonpage11-2 formoreinformation.
ENGINEOILHOT, IDLE ENGINE
Thismessagedisplayswhenthe engineoiltemperatureistoohot. Stopandallowthevehicletoidle untiltcoolsdown.
ENGINEOILLOW—ADDOIL
Thismessagedisplayswhenthe engineoillevelistoolow.Check theoillevel.SeeEngineOilon page10-9.
OILPRESSURELOW—STOP ENGINE
Thismessagedisplaysiflowoil pressurelevelsoccur. Stopthe vehicleassoonassafelypossible anddonotoperateituntilthecause ofthelowoilpressurehasbeen corrected. Checktheoilassoon aspossibleandhavethevehicle servicedbyyourdealer.
EnginePowerMessages ENGINEPOWERISREDUCED
Thismessagedisplayswhenthe vehicle'senginepowerisreduced. Reducedenginepowercanaffect thevehicle'sabilitytoaccelerate. Ifthismessageison,butthere isnoreductioninperformance, proceedtoyourdestination. Theperformancemaybereduced thenexttimethevehicleisdriven. Thevehiclemaybedrivenata reducedspeedwhilethismessage ison,butmaximumacceleration andspeedmaybereduced. Anytimethismessagestayson,the vehicleshouldbetakentoyour dealerforserviceassoonas possible.
FuelSystemMessages FUELLEVELLOW
Thismessagedisplayswhenthe vehicleislowonfuel.Refuelas soonaspossible.
KeyandLockMessages
REPLACEBATTERYIN REMOTEKEY
Thismessagedisplayswhenthe batteryintheRemoteKeylessEntry (RKE)transmitterneedstobe replaced.
ObjectDetectionSystem Messages
PARKASSISTOFF
Thismessageisdisplayedwhenthe parkassistsystemhasbeenturned off.SeeUltrasonicParkingAssist onpage9-42.
SERVICEPARKASSIST
Thismessageisdisplayedifthere isaproblemwiththeparkassist system. Takethevehicletoyour dealerforservice.
RideControlSystem Messages
SERVICETRACTION CONTROL
Thismessagedisplayswhenthere isaproblemwiththeTraction ControlSystem(TCS).Whenthismessageisdisplayed,thesystem willnotlimitwheelspin.Adjustyour drivingaccordingly.Seeyourdealer forservice.
SERVICESTABILITRAK
Thismessagedisplaysifthereisa problemwiththeStabiliTrak ^® system.Ifthismessageappears,try toresetthesystem.Stop;turnoff theengineforatleast15seconds; thenstarttheengineagain.Ifthis messagestillcomeson,itmeans thereisaproblem.Seeyourdealer forservice.Thevehicleissafeto drive;however,youdonothavethe benefitofStabiliTrak,soreduce yourspeedanddriveaccordingly.
SPORTMODEON
Thismessagedisplayswhenusing theinteractivedrivecontrol.See InteractiveDriveControlSystemon page9-38formoreinformation.
TRACTIONCONTROLOFF
Thismessagedisplayswhenthe TractionControlSystem(TCS)is turnedoff.Adjustyourdriving accordingly.
TRACTIONCONTROLON
Thismessagedisplayswhenthe TractionControlSystem(TCS)is turnedon.
Anti-theftAlarmSystem Messages
THEFTATTEMPTED
Thismessagedisplaysifthevehicle detectsatampercondition.
TireMessages
TIREPRESSURELOWADD AIRTOTIRE
OnvehicleswiththeTirePressure MonitorSystem(TPMS), this messagedisplayswhenthe pressureinoneormoreofthe vehicle'stiresislow.
Thelowtirepressurewarninglight willalsocomeon.SeeTire PressureLightonpage5-19.
Ifatirepressuremessageappears ontheDIC,stopassoonasyou can.Inflatethetiresbyaddingair untilthetirepressureisequalto thevaluesshownontheTireand LoadingInformationlabel.See Tires onpage10-42,VehicleLoadLimits onpage9-12,and TirePressureon page10-49.
Youcanreceivemorethanone tirepressuremessageatatime. Toreadtheothermessagesthat mayhavebeensentatthesame time,presstheSET/CLRbutton.
The DICalsoshowsthetire pressurevalues.SeeDriver Information Center(DIC)on page5-22.
SERVICETIREMONITOR SYSTEM
Thismessagedisplaysifthereisa problemwiththeTirePressure MonitorSystem(TPMS).See Tire PressureMonitorOperationon page 10-52formoreinformation.
TIRELEARNINGACTIVE
Thismessagedisplayswhenthe systemmislearningnewtires.See TirePressureMonitorOperationon page 10-52formoreinformation.
TransmissionMessages
SERVICETRANSMISSION
Thismessagedisplaysifthereis aproblemwiththetransmission. Seeyourdealer.
SHIFTTOPARK
Thismessagedisplayswhenthe transmissionneedstobeshiftedto P(Park). Thismayappearwhen attemptingtoremovethekeyfrom thevehicleifthevehicleisnotin P(Park).
TRANSMISSIONHOT—IDLE ENGINE
Thismessagedisplaysandachime soundsifthetransmissionfluidin thevehiclegetshot.Drivingwiththe transmissionfluidtemperaturehigh cancausedamagetothevehicle. Stopthevehicleandletitidleto allowthetransmissiontocool. Thismessageclearswhenthefluid temperaturereachesasafelevel.
WindowMessages
OPEN, THENCLOSEDRIVER WINDOW
Thismessageisdisplayedwhenthe windowneedstobereprogrammed. Ifthevehicle'sbatteryhasbeen rechargedordisconnected,you willneedtoreprogrameachfront windowfortheexpress-upfeature towork.SeePowerWindowson page2-12formoreinformation.
OPEN,THENCLOSE PASSENGERWINDOW
Thismessageisdisplayedwhenthe windowneedstobereprogrammed. Ifthevehicle'sbatteryhasbeen rechargedordisconnected,you willneedtoreprogrameachfront windowfortheexpress-upfeature towork.SeePowerWindowson page2-12formoreinformation.
Vehicle Personalization
Theaudiosystemcontrolsareused toaccessthepersonalization menusforcustomizingvehicle features.
CONFIG(Configuration):Press toaccesstheConfiguration SettingsMenu.
←→Knob:Pressthecenterof thisknobtoenterthemenusand selectmenuitems.Turntheknobto scrollthroughthemenus.
BACK: Presstoexitormove backwardinamenu.
EnteringthePersonalization Menus
-
PressCONFIGtoaccessthe ConfigurationSettingsmenu.
-
Turnthe ←→ knobtohighlight VehicleSettings.
3.Pressthecenterofthe knobtoselecttheVehicle Settingsmenu.
The followinglistofmenuitemswill beavailable:
• ClimateandAirQuality
• ComfortandConvenience
• Collision/DetectionSystems
- Languages
- Lighting
- PowerDoorLocks
- RemoteLock/Unlock/Start
• ReturntoFactorySettings
Turnthe ←→knobtohighlightthe menu.Presstheknobtoselectit. Eachofthemenusisdetailedinthe followinginformation.
ClimateandAirQuality
SelecttheClimateandAirQuality menuandthefollowingwillbe displayed:
- AutoFanSpeed
- AirConditioningMode
- AutoAreaZoneTemp
- AutoDefog
- AutoRearDefog
AutoFanSpeed
This allows selection of the automatic fanspeedtorunloweror higher than normal.
Pressthe ←→ knobwhenAuto FanSpeedishhighlightedtoopen themenu.Turntheknobtohighlight High,Medium,orLow.Pressthe knobtoconfirmtheselectionand movebacktothelastmenu.
AirConditioningMode
This allows selection of automatic start of the air conditioning upon vehicle start. Selecting On indicates the air conditioning will be on when the vehicle is started. Selecting Off turn the air conditioning off each timethe vehicle is started. Last Setting will resumethelast setting when the vehicle was shutoff.
Pressthe ←→knobwhenAir ConditioningModeishhighlighted. TurntheknobtohighlightOn,Off, orLastSetting.Presstheknobto confirmtheselectionandgobackto thelastmenu.
AutoAreaZoneTemp
This allows selection of the number of zones of temperature control upon vehicle start. Selecting Single Zone automatically reset the passenger temperatures setting the same asthedral's forevery
vehiclestart.Theairconditioning systemwilloperateusingonlythe driver'ssettinguntilthepassenger temperaturesettingischanged. SelectingDualZoneorLastSetting willkeepthepassengertemperature adjustmentseparatefromthe driver'ssettingallthetime.
Pressthe ←→knobwhenAuto AreaZoneTempishhighlighted.Turn theknobtohighlightSingleZone, DualZone,orLastSetting.Press theknobtoconfirmtheselection andgobacktothelastmenu.
AutoDefog
This allow the autodefogtobe turnedonoroffondualzone climate control systems.
Pressthe ←→knobwhenAuto DefogishhighlightedtoselectOnor Off.Turntheknobtoconfirmthe selectionandmovebacktothe lastmenu.
AutoRearDefog
Thisallowstheautoreardefogto beturnedonoroff. Thisfeaturewill automaticallyturnontherear defoggerwhenitiscoldoutside.
Pressthe ←→ knobwhenAuto RearDefogishhighlightedtoselect OnorOff.Turntheknobtoconfirm theselectionandmovebacktothe lastmenu.
ComfortandConvenience
SelecttheComfortand ConveniencemenuandChime Volumewillbedisplayed.
ChimeVolume
Thisallowstheselectionofthe chimevolumelevel.
Pressthe ←→knobwhenChime Volumeishhighlighted.Turntheknob toselectNormalorHigh.Pressthe knobtoconfirmandgobacktothe lastmenu.
Collision/DetectionSystems
SelecttheCollision/Detection SystemsmenuandParkAssistwill bedisplayed.
ParkAssist
ThisallowstheUltrasonicParking Assistfeaturetobeturnedonoroff.
Pressthe ←→knobwhenPark AssistishhighlightedtoselectOnor Off.PressBACKtoreturntothe lastmenu.
Language
SelecttheLanguagemenuandthe followingwillbedisplayed:
- English
- Francais
- Espanol
Turnthe ←→knobtoselectthe language.PressBACKtoreturnto thelastmenu.
Lighting
SelecttheLightingmenuandthe followingwillbedisplayed:
- VehicleLocatorLights
- ExitLighting
VehicleLocatorLights
Thisallowsthevehiclelocatorlights tobeturnedonoroff.
Pressthe ←→knobwhenVehicle LocatorLightsishhighlightedto selectOnorOff.Turntheknob toconfirmandgobacktothe lastmenu.
ExitLighting
This allow these selection of how long the exterior lamps stay on when leaving the vehicle when it is dark outside.
Pressthe ←→knobwhenExit Lightingishhighlighted.Turnthe knobtoselectOff,30Seconds, 1Minute,or2Minutes.Pressthe knobtoconfirmandgobacktothe lastmenu.
5-34 Instruments and Controls
PowerDoorLocks
SelectPowerDoorLocksandthe followingwillbedisplayed:
- UnlockedDoorAntiLockOut
- AutoDoorUnlock
- DelayedDoorLock
UnlockedDoorAntiLockOut
Whenon, thisfeaturewillkeepthe driverdoorfromlockingwhenthe doorisopen.Ifoffisselected,the DelayedDoorLockmenuwillbe availableandthedoorwilllockas programmedthroughthismenu.
Pressthe ←→knobwhenAuto DoorUnlockishhighlightedtoselect OnorOff.Turntheknobtoconfirm andgobacktothelastmenu.
AutoDoorUnlock
This allows selection of which of the doors will automatically unlock when the vehicle is shifted into P(Park).
Pressthe ←→knobwhenAuto DoorUnlockishhighlighted.Turnthe knobtoselectAllDoors,Driver Door,orOff.Presstheknobto confirmandgobacktothe lastmenu.
DelayedDoorLock
Whenon, thisfeaturewilldelay thelockingofthedoorsuntil fiveseconsafterthelastdooris closed. Youwillhearthreechimes tosignaldelayedlockingisinuse. Presseitherthepowerlockbutton orthelockbuttonontheRKE transmittertwicetooverridethe delayedlockingfeatureand immediatelylockallofthedoors.
Pressthe ←→knobwhen DelayedDoorLockishhighlightedto selectOnorOff.PressBACKto returntothelastmenu.
RemoteLock/Unlock/Start
SelectRemoteLock/Unlock/Start and the following will be displayed:
- RemoteUnlockLightFeedback
- RemoteLockFeedback
- RemoteDoorUnlock
RemoteUnlockLightFeedback
Whenon, the exterior lampswill flash when unlocking the vehicle with the RKE transmitter.
Pressthe ←→knobwhen RemoteUnlockLightFeedbackis highlightedtoselectOnorOff.Turn theknobtoconfirmandgobackto thelastmenu.
RemoteLockFeedback
This allows selection of what type of feedback is given when locking the vehicle with the RKE transmitter.
Pressthe ←→knobwhen RemoteLockFeedbackis highlighted.Turntheknobtoselect LightsandHorn,LightsOnly,Horn Only,orOff.Presstheknobto confirmandgobacktothe lastmenu.
RemoteDoorUnlock
This allows selection of which doors will unlock when pressing the unlock button on the RKE transmitter.
Pressthe ←→knobwhen RemoteDoorUnlockishhighlighted. TurntheknobtoselectDriverDoor orAllDoors.WhensettoDriver
Door, the driver door will unlock the first tim the unlock button is pressed and all doors will unlock when the button is pressed a second time. Whensetto All Doors, allof the doors will unlock at the first press of the unlock button. Press the knob to confirm goback to the last menu.
ReturntoFactorySettings
SelectReturntoFactory Settingstoreturnallofthevehicle personalizationtothedefault settings.TurntheknobtoselectYes orNo.Presstheknobtoconfirm andgobacktothelastmenu.
5-36 InstrumentsandControls
NOTES
Lighting
ExteriorLighting
ExteriorLampControls......6-1
ExteriorLampsOff
Reminder......6-2
HeadlampHigh/Low-Beam
Changer......6-2
Flash-to-Pass......6-2
DaytimeRunning
Lamps(DRL)......6-2
AutomaticHeadlamp
System......6-3
HazardWarningFlashers.....6-3
TurnandLane-Change
Signals......6-3
FogLamps....6-4
InteriorLighting
InstrumentPanelIllumination
Control....6-4
DomeLamps....6-5
ReadingLamps......6-5
LightingFeatures
EntryLighting......6-6
ExitLighting......6-6
BatteryPowerProtection.....6-6
ExteriorLighting
ExteriorLampControls
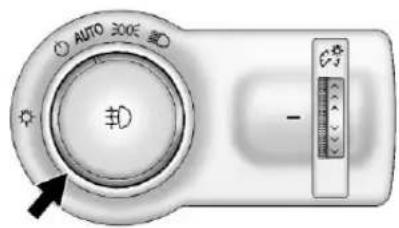
The exterior lamp control is located on the instrument panel on the outboard side of the steering wheel.
Turnthecontroltothefollowing positions:
(Off):Turnsofftheexterior lamps. Theknobreturnstothe
AUTOpositionafteritisreleased.
Turnto ⬇againtoreactivatethe AUTOmode.
InCanada, theheadlampswill automaticallyreactivateoncethe vehicleisshiftedoutofP(Park)and manualtransmissionvehicleswhen theparkingbrakeisreleased.
AUTO(Automatic): Automatically turnstheexteriorlampsonandoff, dependingonoutsidelighting.
ThecurrentstatusoftheAUTO systemisdisplayedintheDriver InformationCenter(DIC)display. SeeDriverInformationCenter(DIC) onpage5-22.
200 (ParkingLamps): Turnsonthe parkinglampstogetherwiththe following:
- SidemarkerLamps
- Taillamps
- LicensePlateLamps
- InstrumentPanelLights
(DHeadlamps): Turnsonthe headlampstogetherwiththe following:
- SidemarkerLamps
- Taillamps
- LicensePlateLamps
- InstrumentPanelLights
- ParkingLamps
ExteriorLampsOff Reminder
Awarningchimesoundsifthedriver doorisopenedwhiletheignitionis offandtheexteriorlampsareon.
HeadlampHigh/ Low-BeamChanger
ID HeadlampHigh/Low-Beam Changer: Pushtheturnsignal/lane changeleverawayfromyouand release, toturnthehighbeamson. Toreturntolowbeams, pushthe leveragainorpullittowardyouand release.

This indicator light turnson in the instrument panel cluster when the high-beam headlamps are on.
Flash-to-Pass
Toflashthehighbeams, pull the turnsignal/lanechangelevertoward you, and release.
DaytimeRunning Lamps(DRL)
DaytimeRunningLamps(DRL)can makeiteasierforotherstoseethe frontofyourvehicleduringtheday. Fullyfunctionaldaytimerunning lampsarerequiredonallvehicles firstsoldinCanada.
The DRL system turns on the low-beam headlamps at a reduced brightness. For vehicles with High Intensity Discharge (HID) headlamps, the dedicated DRL will come on when all of the following conditions are met:
• Theengineisrunning.
• Theexteriorlampbandis inAUTO.
• Thelightsensordeterminesitis daytime.
WhentheDRLareon,the low-beamheadlampswillbeon. Thetaillamps,sidemarkerlamps, instrumentpanellights,andother lampswillnotbeon.
The DRL turnoff when the headlamps are returned to ☐ or the ignition is off.
AutomaticHeadlamp System
Whentheexteriorlampcontrolis settoAUTOanditisdarkenough outside,theheadlampscomeon automatically.
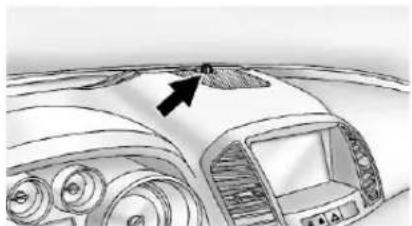
natural_image
Top-down view of a car dashboard with an arrow pointing to the dashboard area (no text or symbols visible)Thereisalightsensorlocatedon topoftheinstrumentpanel.Donot coverthesensor.Otherwisethe headlampswillcomeonwhenthey arenotneeded.
Thesystemmayalsoturnonthe headlampswhendrivingthrougha parkinggarageortunnel.
Whenitisbrightenoughoutside, theheadlampswillturnofformay changetodaytimerunning lamps(DRL).
Theautomaticheadlampsystem turnsoffwhentheexteriorlamp controlisturnedto ☐ortheignition isoff.
HazardWarningFlashers
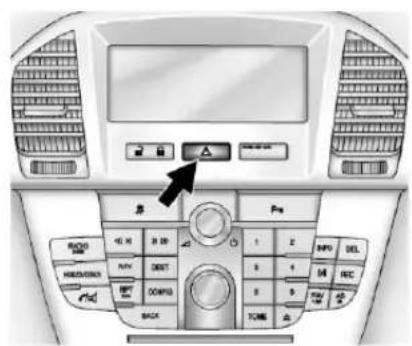
△HazardWarningFlasher: Pressthisbuttonlocatedonthe instrumentpanelabovetheaudio
system,tomakethefrontandrear turnsignallampsflashonandoff. Pressagaintoturntheflashersoff.
Thehazardwarningflashersturnon automaticallyiftheairbagsdeploy.
TurnandLane-Change Signals
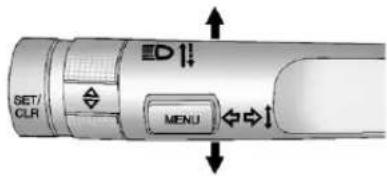
Movetheleverallthewayupor downtosignalaturn.
Anarrowontheinstrumentpanel clusterflashesinthedirectionofthe turnorlanechange.
Raiseorlowertheleveruntilthe arrowstartstoflashtosignalalane change.Holditthereuntilthelane changeiscompleted.Iftheleveris brieflypressedandreleased,the turnsignalflashestreetimes.
6-4Lighting
The turnandlane-changesignal can be turned off manually by moving the leverback to its original position.
lfaftersignalingaturnorlane change,thearrowflashesrapidlyor doesnotcomeon,asignalbulb mightbeburnedout.
Havethebulbsreplaced.Ifthebulb isnotburnedout,checkthefuse. SeeFusesandCircuitBreakerson page10-36.
FogLamps
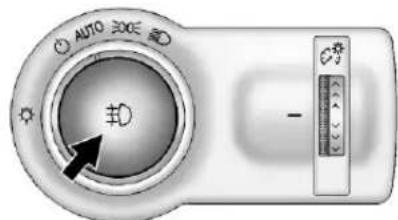
Toturnonthefoglamps, theignition andtheheadlampsorparkinglamps mustbeon.
If the foglamps are turned on while the exterior lamp switch in the AUTO position, the head lamps come on automatically.
^D :Presstoturnonoroff.An indicatorlightontheinstrument panelclustercomesonwhenthe foglampsareon.
Somelocalitieshavelawsthat requiretheheadlampstobeon alongwiththefoglamps.
InteriorLighting
InstrumentPanel
IlluminationControl
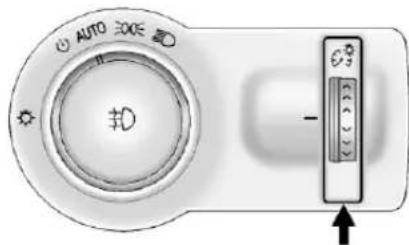
The brightness of the instrument panellighting and steering wheel controlscanbe adjusted.
:Moveandholdthe thumbwheelupordowntobrighten ordimthelights.
DomeLamps
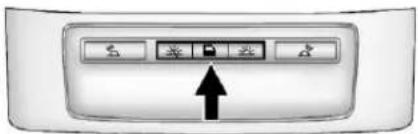
The interior lamps controlled in the overhead console controls both the front and rear interior lamps.
Tooperate:
(Off):Turnsthelampsoff.
(Door):Turnsthelampson whenanydoorisopened.
(On):Keepsthelampsonall thetime.
Theinteriorlampsturnon automaticallyiftheairbagsare deployed.
ReadingLamps
Therearefrontandrearreading lamps.
Thefrontreadinglampsarelocated intheoverheadconsole.
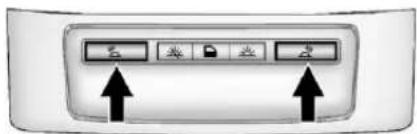
natural_image
Front view of a computer control panel with two arrows pointing to function buttons (no text or symbols visible):Presstoturneachlampon oroff.
Therearreadinglampsarelocated intheheadliner.
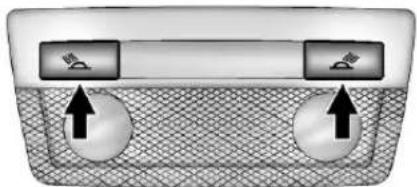
natural_image
Top-down view of a car air conditioner unit with two buttons and airflow indicators (no text or symbols)LightingFeatures
EntryLighting
Theheadlamps, taillamps, license platelamps, back-uplamps, dome lamps, and most of the interior lights turnon briefly when the Remote KeylessEntry(RKE) is pressed. See Remote KeylessEntry(RKE) SystemOperationonpage2-3. Whenthedriverdoorisopened, all controllights, Driver Information Center(DIC)lightsanddoor pocketlightsturnon. After about 30secondsthe exterior lamps turnoff, and thentedome and remaining interior lightswill dim to off. Entry lighting can be disabled manually by changing the ignition outoftheOFF position, or by pressing the RKE button.
Thisfeaturecanbeactivatedor deactivatedintheConfiguration SettingsmenuintheInfoDisplay.
PressCONFIGontheaudiosystem tocallupthemenu.See Vehicle Personalizationonpage5-31.
ExitLighting
Theheadlamps, taillamps, parking lamps, back-uplamps, and license platelamps comeon at night, orin areas with limited lighting, when the key is removed from the ignition. Thedomelamps also come on when the key is removed from the ignition. The exterior lamps and domelamps remain on after the door is closed for a set amount of time, then automatically turn off.
The exterior lampsturnoff immediately by turning the exterior lamps control off.
Theexitlightingfeaturecanbe changed. See Vehicle Personalizationonpage5-31.
BatteryPowerProtection
The battery-saverfeature is designed top to protect the vehicle's battery.
Topreventbatterydischargewhile driving, thefollowingsystemsare reduced automaticallyintwostages and then turnedoff:
• Heatedrearwindowandmirrors
- Heatedseats
- Fan
Inthesecondstage,aDriver InformationCenter(DIC)message isdisplayedconfirmingthe activationofthebatterydischarge protection.SeeBatteryVoltageand ChargingMessagesonpage5-26.
If the exterior lamps or any interior lights are left on and the ignition is turned off, the battery power protection system automatically turnsthe lampoff after about 10 minutes.
Infotainment System
Introduction
Infotainment......7-1
Theft-DeterrentFeature.....7-2
Overview....7-2
Operation....7-4
Radio
AM-FMRadio....7-7
SatelliteRadio....7-10
RadioReception......7-13
BackglassAntenna......7-13
SatelliteRadioAntenna.....7-14
AudioPlayers
CDPlayer....7-14
Auxiliary Devices.....7-17
Phone
Bluetooth(Overview)......7-20
Bluetooth(Infotainment
Controls)....7-21
Bluetooth(Voice
Recognition)....7-23
Introduction
Infotainment
Readthefollowingpagesto becomefamiliarwiththeaudio system'sfeatures.

WARNING
Takingyoureyesofftheroadfor extendedperiodscouldcausea crashresultinginjuryordeath toyouorothers.Donotgive extendedattentionto entertainmenttaskshwiledriving.
This system provides access to many audio and non-audiolistings.
Tominimizetakingyoureyesoffthe roadwhiledriving,dothefollowing whilethevehicleisparked:
- Becomefamiliarwiththe operationandcontrolsofthe audiosystem.
- Setupthetone, speaker adjustments, and presetradio stations.
Formoreinformation,seeDefensive Drivingonpage9-2.
Notice: Contact your dealer before adding any equipment.
Addingaudioorcommunication equipmentcouldinterferewith theoperationoftheengine,radio, orothersystems,andcould damagethem.Followfederal rulescoveringmobileradioand telephoneequipment.
The vehicle has retained Accessory Power (RAP). With RAP, the audiosystem can be played even after the ignition is turned off.
7-2InfotainmentSystem
SeeRetainedAccessoryPower (RAP)onpage9-21formore information.
NavigationView
Forvehicleswithanavigation system,seetheseparateNavigation SystemManual.
Theft-DeterrentFeature
Thetheft-deterrentfeatureworksby learningaportionoftheVehicle IdentificationNumber(VIN)tothe infotainmentsystem.The infotainmentsystemdoesnot operateifitisstolenormovedtoa differentvehicle.
Overview
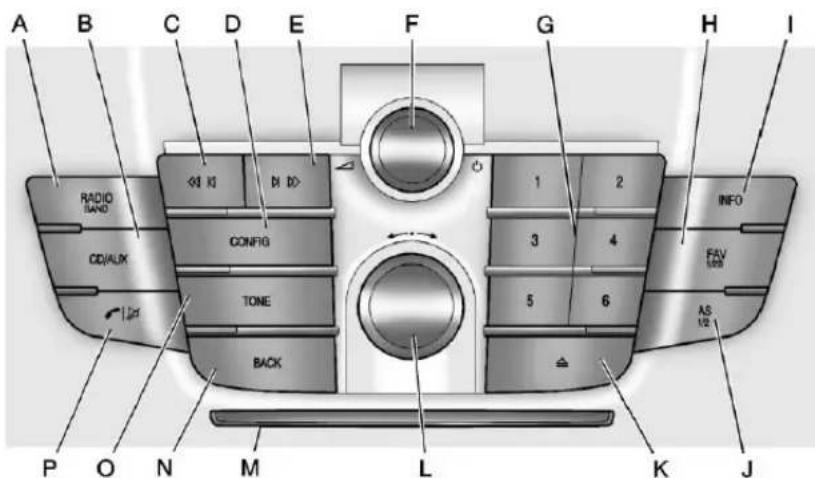
A. RADIO/BAND
• Changesthebandwhile listeningtotheradio.
- Selectstheradiowhen listeningtoadifferent audiosource.
B.CD/AUX
• SelectstheCDplayeror anexternalaudiosource.
C.
• Radio:Seekstheprevious station.
• CD: Select the previous track or re windswithina track.
D.CONFIG
- OpenstheSettingsmenu.
E. ▷▶▶
• Radio:Seeksthenext station.
• CD:Selectsthenexttrack orfastforwardswithina track.
F.
• Turnsthesystemonoroff andadjuststhevolume.
G. Buttons1to6
• Radio:Savesandselects favoritestations.
H.FAV1/2/3
• Radio:Opensthe favoriteslist.
I.INFO
• Radio: Shows available information about the current station.
• CD:Showsavailable informationaboutthe currenttrack.
J.AS1/2
• Radio:Opensthe autostorelist.
K. ≅
- Removesadiscfromthe CDslot.
L.
- Opensmenus, highlights menuitems, orsets numericvalueswhilein amenu.
• Radio: Manually selects radiostations.
• CD:Selectstracks.
M.CDSlot
N.BACK
- Menu: Movesone levelback.
• CharacterInput: Deletes thelastcharacter.
O.TONE
- OpenstheTone Settingsmenu.
P.
- OpensthePhone mainmenu.
- Mutestheaudiosystem.
Operation
Controls
Theinfotainmentsystemisoperated byusingthepushbuttons, multifunctionknobs, menusshown onthedisplay, andsteeringwheel controls, ifequipped.
TurningtheSystemOnorOff
△(Volume/Power):Pressto turnthesystemonandoff.
AutomaticSwitch-Off
If the infotainmentsystem has been turned on after the ignition is turned off, the system will turn off automatically after 10 minutes.
VolumeControl
△(Volume/Power):Turnto adjustthevolume.
/ (Phone/Mute): For vehicles with OnStar ^® , pressandhold / ☑ tomutetheinfotainmentsystem. To cancelmute, pressandhold / ☑ again, orturnthe ☑ knob.
ForvehicleswithoutOnStar ^® ,press / to mute the infotainment system. Tocancelmute, press / again, or turn the △ knob.
MenuSystem
Controls
The ←→knobandtheBACK buttonareusedtonavigatethe menusystem.
←→(Menu/Select):Pressto:
- Enterthemenusystem.
- Selectoractivatethehighlighted menuoption.
- Confirmasetvalue.
• Turnasystemsettingonoroff.
Turnto:
• Highlightamenuoption.
- Selectavalue.
BACK:Pressto:
- Exitamenu.
- Returnfromasubmenuscreen tothepreviousmenuscreen.
- Deletethelastcharacterina sequence.
SelectingaMenuOption
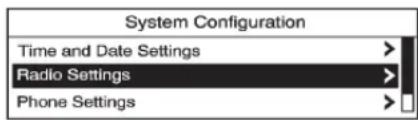
- Turnthe←→knobtomove thehighlightedbar.
- Pressthe knobtoselect thehighlightedoption.
Submenus
Anarrowontheright-handedgeof themenuindicatesthatithasa submenuwithotheroptions.
ActivatingaSetting
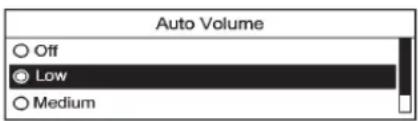
- Turnthe←→knobtohighlight thesetting.
- Pressthe knobto activatethesetting.
SettingaValue
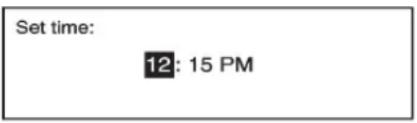
- Turnthe←→knobtochange thecurrentvalueofthesetting.
- Pressthe knobtoconfirm the setting.
TurningaFunctionOnorOff
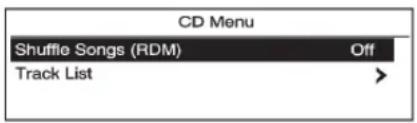
- Turnthe←→knobtohighlight thefunction.
- Pressthe ←→knobtoturnthe functiononoroff.
EnteringaCharacterSequence
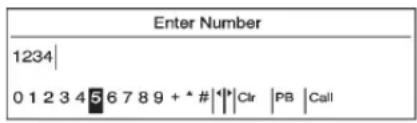
- Turnthe←→knobtohighlight thecharacter.
- Pressthe knobtoselect thecharacter.
PresstheBACKbuttontodeletethe lastcharacterinthesequenceor pressandholdtodeletetheentire charactersequence.
AudioSettings
The audiosettingscanbesetfor eachradiobandandeachaudio playersource.
Toquicklyresetanaudiosetting valueto0:
- PresstheTONEbutton.
- Selecttheaudiosetting.
7-6InfotainmentSystem
- Pressandholdthe←→knob untilthevaluechangesto0.
PresstheBACKbuttontogoback totheToneSettingsmenu.
AdjustingtheTreble, Midrange, and Bass
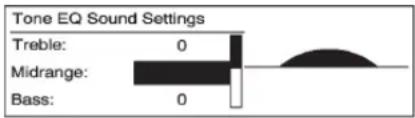
-
PresstheTONEbutton.
-
SelectTreble, Midrange, orBass.
-
Selectthevalue.
PresstheBACKbuttontogoback totheToneSettingsmenu.
AdjustingtheFaderandBalance
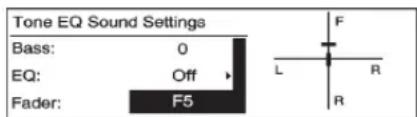
-
PresstheTONEbutton.
-
SelectFaderorBalance.
-
Selectthevalue.
PresstheBACKbuttontogoback totheToneSettingsmenu.
AdjustingtheEQ(Equalizer)
Forvehiclesthathaveanequalizer:
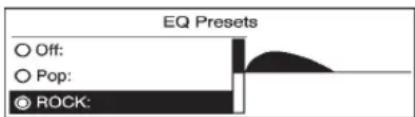
-
PresstheTONEbutton.
-
SelectEQ.
-
Selectthesetting.
PresstheBACKbuttontogoback totheToneSettingsmenu.
SystemSettings
AutoVolume
Theautovolumefeature automaticallyadjuststheradio volumetocompensateforroadand windnoiseasthevehiclespeedsup orslowsdown,sothatthevolume levelisconsistent.
The level of volume compensation can be selected, or the autovolume feature can be turned off.
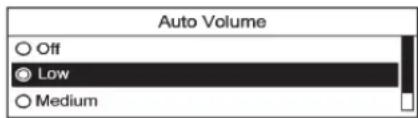
- PresstheCONFIGbutton.
- SelectRadioSettings.
- SelectAutoVolume.
-
Selectthesetting.
-
PresstheBACKbuttontogo backtotheSystem Configurationmenu.
MaximumStartupVolume
Themaximumvolumeplayedwhen theradioisfirstturnedoncan beset.
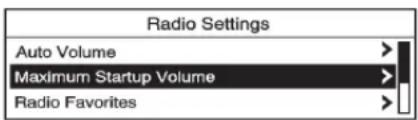
- PresstheCONFIGbutton.
- SelectRadioSettings.
- SelectMaximumStartup Volume.
- Selectthesetting.
- PresstheBACKbuttontogo backtotheSystem Configurationmenu.
ConfiguringtheNumberof FavoritesPages
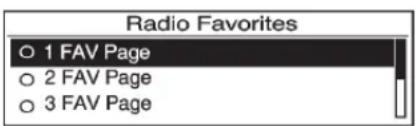
Toconfigurethenumberofavailable favoritespages:
- PresstheCONFIGbutton.
- SelectRadioSettings.
- SelectRadioFavorites.
- Selectthenumberofavailable favoritespages.
- PresstheBACKbuttontogo backtotheSystem Configurationmenu.
Radio
AM-FMRadio
ControlButtons
Thebuttonsusedtocontrolthe radioare:
RADIO/BAND: Presstoturnthe radioonandchoosebetweenAM, FM, and XM™, ifequipped.
←→(Menu/Select):Turnto searchforstationsandpressto navigatetheavailablemenus.
INFO: Presstodisplayadditional informationthatmaybeavailablefor thecurrentsong.
◀◀ ◀/▶ ▷▶ : Press to search for stations.
Buttons1to6:Presstoselect presetstations.
FAV1/2/3: Presstoopenthe favoriteslistandselectfavorites pages.
AS1/2: Presstoopenthe autostorelistandselectautostore pages.
RDS(RadioSubsystem)
TheradiomayhaveRDS.TheRDS featureisavailableforuseonlyon FMstationsthatbroadcastRDS information. Thisfeatureonlyworks whentheinformationfromtheradio stationisavailable.Inrarecases,a radiostationcouldbroadcast incorrectinformationthatcausesthe radiofeaturestoworkimproperly. Ifthishappens,contacttheradio station.
Whiletheradioistunedtoan FM-RDSstation,thestationname orcalllettersdisplay.
RadioMenus
Radiomenus are available for AM and FM.
Pushthe ←→knobtoopenthe mainradiomenuforthatband.
SelectingaBand
PresstheRADIO/BANDbuttonto chooseAM,FM,orXM™, ifequipped. Thelaststationthat wasplayingstartsplayingagain.
SelectingaStation
SeekTuning
Iftheradiostationisnotknown:
Brieflypress ◀◀◀or▶▶▶to automaticallysearchforthenext availablestation. Ifastationisnot found,theradioswitchestoamore sensitivesearchlevel. Ifastation stillisnotfound,thefrequencythat waslastactivebeginstoplay.
Iftheradiostationisknown:
Pressandhold ◀◀◀or▶▶until thestationonthedisplayis reached,thenreleasethebutton.
ManualTuning
Turnthe ←→knobtoselectthe frequencyonthedisplay.
FavoritesList
-
Pressthe knob.
-
SelectFavoritesList.
-
Selectthestation.
StationLists
-
Pressthe ←→ knob.
-
SelectAMorFMStationList. All receivablestationsinthecurrent receptionareaaredisplayed. Ifa stationlisthasnotbeencreated, anautomaticstationsearch isdone.
-
Selectthestation.
CategoryLists
Moststationsthatbroadcastan RDSprogram-typecodespecifythe typeofprogrammingtransmitted. Somestationschangetheprogram typecodedependingonthe content. ThesystemstorestheRDS stationssortedbyprogramtypein theFMcategorylist.
Tosearchforaprogrammingtype determinedbystation:
- Pressthe ←→ knob.
- SelectFMCategoryList.Alistof allprogrammingtypesavailable displays.
- Select the programming type. Alistofstation that transmit programming of these selected typedefs plays.
- Selectthestation.
The categorylistsareupdated whenthestationlistsare updated.
UpdatingStation&CategoryLists
Ifstationsstoredinthestationlist cannolongerbereceived:
- Pressthe ←→ knob.
- SelectUpdateAMorFMStation List, ifthestationsstored in the stationlistarenolonger received. Astationsearchwill be completed and the first station in the updated list will play.
Tocancelthestationsearch, press the ←→ knob.
StoringaStationasaFavorite
Stationsfromallbandscanbe storedinanyorderinthefavorite pages.
Uptosixstationscanbestoredin eachfavoritepageandthenumber ofavailablefavoritepagescan beset.
StoringStations
Tostorethestationtoapositionin thelist,pressthecorresponding numericbutton1to6untilabeepis heard. Thestoredstationwillbegin playback.
RetrievingStations
PresstheFAV1/2/3buttontoopen afavoritepageortoswitchto anotherfavoritepage.Brieflypress oneofthe1to6buttonstoretrieve thestation.
AutostoreStations
AS1/2(Autostore):Autostore searchesandstoressixFMand sixAMstationswiththestrongest signal.Touseautostore:
- PressRADIO/BANDtoselect FMorAM.
- PressAS1/2 for at least twoseconds. Theradiothen searches for available stations.
- Theradioautomaticallystores thesixstrongeststationsfound asautostorepresets.
PresstheAS1/2buttontoalternate between theautostorestations and favorites.
ASdisplaysontheradiowhenusing autostorepresets.
Autostoredoesnotdelete previouslystoredfavoritestations.
AutostoredoesnotfunctionwithXM radiostations.
SatelliteRadio
VehicleswithanXM™ Satellite RadiotunerandavalidXMSatellite RadiosubscriptioncanreceiveXM programming.
XMSatelliteRadioService
XMisasatelliteradioservicebased inthe48contiguousUnitedStates and10Canadianprovinces.XM SatelliteRadiohasawidevarietyof programmingandcommercial-free music,coasttocoast,andin digital-qualitysound.Aservicefee isrequiredtoreceivetheXM service.IfXMServiceneedstobe reactivated,theradiowilldisplay "NoSubscriptionPleaseRenew"on channelXM1.Formoreinformation, contactXMatwww.xmradio.comor call1-800-929-2100intheU.S.and www.xmradio.caorcall 1-877-438-9677inCanada.
ControlButtons
ThebuttonsusedtocontroltheXM radioare:
RADIO/BAND: Presstoturnthe radioonandchoosebetweenAM, FM, and XM™, ifequipped.
←→(Menu/Select):Turnto searchforchannelsandpressto navigatetheavailablemenus.
INFO: Presstodisplayadditional informationthatmaybeavailable aboutthecurrentsong.
◀◀ ◀/▶ ▶▶ : Press to go to the previousornextchannel.
FAV1/2/3: Presstoopenthe favoriteslistandselectfavorite pages.
Buttons1to6:Presstoselect presetstations.
SelectingtheXMBand
PresstheRADIO/BANDbuttonto choosebetweentheAM,FM,and XMbands. Thelastchannelplayed inthatbandbeginstoplaywhen thatbandisselected.
XMCategories
XMchannelsareorganizedin categories.
RemovingorAddingCategories
Channelsinacategorythathave beenremovedcanstillbeaccessed byusingthe ◀◀◀◀or▶▶▶ buttons,orthe←→knob.
Toaddorremovecategories:
- PresstheCONFIGbutton.
- SelectRadioSettings.
- SelectXMCategories.
- Turnthe ←→ knobtohighlight thecategory.
5.Pressthe ←→knobtoremove oraddthecategory.
SelectinganXMChannel
XMchannelscanbeselectedby stationlistsorcategorylists.
SelectingaChannelby StationList
XMchannelscanbeselectedby using ◀◀◀,▶▶▶,orthe ←→knob.
ToselectanXMchannelusing ◀◀◀◀◀◀◀◀◀◀◀◀◀◀◀◀◀◀◀◀◀◀◀◀◀◀◀◀◀◀◀◀◀◀◀◀◀◀◀◀◀◀◀◀◀◀◀◀◀◀◀◀◀◀◀◀◀◀◀◀◀◀◀◀◀◀◀◀◀◀◀◀◀◀◀◀◀◀◀◀◀◀◀◀◀◀◀◀◀◀◀◀◀◀◀◀◀◀◀◀◀▶,dooneofthefollowing:
- Pressandrelease◀◀◀or▶▶▶ togotothepreviousornext channel.
- Press and hold ◀◀ ▶ or ▷ ▶▶ toscrollthroughthepreviousor nextchannelsuntilthechannel isreached.
ToselectanXMchannelusingthe knob:
- Turnthe knobtohighlight anXMchannel.
- Press the knobtoselect thechannel, orleavethe channelhighlighted.
ToselectanXMchannelusing themenu:
- Pressthe ←→ knob.
- SelectXMStationsList.
- Selectthechannel.
SelectingaChannelbyCategory
- Pressthe ←→ knob.
- SelectXMCategoryList.Alistof allprogrammingtypesavailable displays.
- Select the programming type.
- Selectthechannel.
StoringanXMChannelasa Favorite
Channelsfromallbandscanbe storedinanyorderinthefavorites pages.
Uptosixchannelscanbestoredin eachfavoritespageandthenumber ofavailablefavoritespagescan beset.
StoringaChannelasaFavorite
Tostorethechanneltoapositionin thelist,pressandholdthe corresponding1to6buttonuntilthe channelcanbeheardagain.
RetrievingChannels
PresstheFAVbuttontoopena favoritespageortochangeto anotherfavoritespage.Brieflypress oneofthe1to6buttonstoretrieve thechannel.
XMMessages
XL(ExplicitLanguage
Channels): These channels, or any others, can be blocked by request, by calling 1-800-929-2100 in the U.S. and 1-877-438-9677 in Canada.
XMUpdating:Theencryptioncode inthereceiverisbeingupdated.No actionisrequired.Thisprocess shouldtakenolongerthan 30seconds.
LoadingXM: Theaudiosystemis acquiring and processing audio and textdata. No action is needed. This messages should disappear shortly.
ChannelOffAir: Thischannelis notcurrentlyinservice. Tuneinto anotherchannel.
ChannelUnauth: Thischannelis blockedorcannotbereceivedwith yourXMsubscriptionpackage.
ChannelUnavailable: This previously assigned channel is no longer assigned. Tuneto another station.
NoArtistInfo: Thesystemis workingproperly. Noartist informationisavailableatthistime onthischannel.
NoTitleInfo: Thesystemis workingproperly. Nosongtitle informationisavailableatthistime onthischannel.
NoCATInfo: Thesystemis workingproperly. Nocategory informationisavailableatthistime onthischannel.
NoInformation: Thesystemis workingproperly. Notextor informationalmessagesare availableatthistimeonthis channel.
NoSubscriptionPleaseRenew:
TheXMsubscriptionneedstobe reactivated.ContactXMat www.xmradio.comorcall 1-800-929-2100intheU.S.and www.xmradio.caorcall 1-877-438-9677inCanada.
NoXMSignal: Thesystemis workingproperly. Thevehiclemay beinalocationwheretheXMsignal isbeingblocked. Whenthevehicle ismovedintoanopenarea, the signalshouldreturn.
CATNotFound: Thesystemis workingproperly. There are no channels available for these selected category.
XMRadioID: lftunedtochannel0, thismessagealternateswiththeXM Radioeight-digitradioIDlabel. This labelisneededtoactivatethe service.
Unknown: If this message is received when tuned to channel 0, there could be a receiver fault. Consult with your dealer.
CheckAntenna: If this message does not clear within a short period of time, there are ever could have a fault. Consult with your dealer.
XMNotAvailable: If this message does not clear within a short period of time, there are ever could have a fault. Consult with your dealer.
RadioReception
Frequencyinterferenceandstatic canoccurduringnormalradio receptionifitemssuchascellular phonechargers,vehicle convenienceaccessories,and externalelectronicdevicesare pluggedintotheaccessorypower outlet.Ifthereisinterferenceor static,unplugtheitemfromthe accessorypoweroutlet.
FM
FMsignalsonlyreachabout 16to65km(10to40mi).Although theradiohasabuilt-inelectronic circuitthatautomaticallyworksto reduceinterference,somestatic canoccur,especiallyaroundtall buildingsorhills,causingthesound tofadeinandout.
AM
TherangeformostAMstationsis greaterthanforFM,especiallyat night. Thelongerrangecancause stationfrequenciestointerfere witheachother. Forbetterradio reception, mostAMradiostations boost the power levels during the day, and then reducethese levels during thenight. Staticcan also occur when things like storms and powerlines interferewith radio reception. Whentishappens, try reducing the trebleontheradio.
XM™ SatelliteRadioService
XMsatelliteradioservicegives digitalradioreceptionfromcoastto coastinthe48contiguousUnited States,andinCanada.Justas withFM,tallbuildingsorhillscan interferewithsatelliteradiosignals, causingthesoundtofadeinand out.Inaddition,travelingorstanding underheavyfoliage,bridges, garages,ortunnelsmaycauseloss oftheXMsignalforaperiodoftime.
CellularPhoneUsage
Cellularphoneusagemaycause interferencewiththevehicle'sradio. Thisinterferencemayoccurwhen makingorreceivingphonecalls, chargingthephone'sbattery, or simplyhavingthephoneon. This interferencecancauseanincreased levelofstaticwhilelisteningtothe radio. Ifstaticisreceivedwhile listeningtotheradio, unplugthe cellularphoneandturnitoff.
BackglassAntenna
TheAM-FMantennaisintegrated withtherearwindowdefogger, locatedintherearwindow.Make surethattheinsidesurfaceofthe rearwindowisnotscratchedand thatthelinesontheglassarenot damaged.Iftheinsidesurfaceis damaged,itcouldinterferewith radioreception.Forproperradio reception,theantennaconnector needstobeproperlyattachedtothe postontheglass.
7-14InfotainmentSystem
Ifacellulartelephoneantenna needstobeattachedtotheglass, makesurethatthegridlinesforthe AM-FMantennaarenotdamaged. Thereisenoughspacebetweenthe gridlinestoattachacellular telephoneantennawwithout interferingwithradioreception.
Notice: Usingarazorbladeor sharpobjecttocleartheinside rearwindowcandamagetherear windowantennaand/ortherear windowdefogger. Repairswould notbecoveredbythevehicle warranty. Donotcleartheinside rearwindowwithsharpobjects.
Notice: Donotapplyaftermarket glasstintingwithmetallicfilm. Themetallicfilminsometinting materialswillinterferewithor distorttheincomingradio reception. Anydamagecausedto yourbackglassantennadueto metallictintingmaterialswillnot recoveredbythevehicle warranty.
SatelliteRadioAntenna
ForvehicleswithXMsatelliteradio service, the antennaislocated on theoofofthevehicle. Keep the antennaclearofobstructions for clearradioreception.
AudioPlayers
CDPlayer
TheCDplayercanplayaudioCDs andMP3CDs.
TheCDplayerwillnotplay 8cm(3in)CDs.
CareofCDs
Soundqualitycanbereduceddue todiscquality,recordingmethod, qualityofthemusicrecorded,and dischandling. Handlediscscarefully andstorethemintheiroriginal casesorotherprotectivecases awayfromdirectsunlightanddust. Ifthebottomsurfaceofadiscis damaged,thediscmaynotplay properlyoratall. Donottouchthe bottomsurfaceofadiscwhile handlingit;thiscoulddamagethe surface. Pickupdiscsbygrasping theouteredgesortheedgeofthe holeandtheouteredge.
If the bottomsurfaceofadiscis dirty, take asoftlint-freecloth, ordampenacleansoftclothina mildneutraldetergentsolution mixed with water, and clean it. Wipe the disc from the centertothe outer edge.
CareoftheCDPlayer
Donotaddalabeltoadisc;itcould getcaughtintheCDplayer.Ifa labelisneeded,writeonthetopof therecordeddiscwitha markingpen.
Donotusedisclenscleaners because they could contaminate the lensofthediscopticsanddamage the CDplayer.
Notice:Ifalabelisaddedtoa CD, morethanoneCDisinserted intotheslotatatime, oran attemptismadetoplayscratched ordamaged CDs, the CDplayer could bedamaged. While using the CDplayer, use only CDs in good condition without anylabel, load one CDatatime, and keep the CDplayer and the loadingslot free offoreignmaterials, liquids, and debris.
ControlButtons
ThebuttonsusedtocontroltheCD playerare:
CD/AUX: PresstousetheCD player.
◀◀ ◀/▶ ▷▶ : Press to select tracksortofastrewindorforward withinatrack.
INFO: Presstodisplayadditional informationaboutthecurrenttrack thatmaybeavailable.
←→(Menu/Select):Turnto selecttracks.PresstoentertheCD menuandselectitems.
△(Eject):Presstoejectthedisc.
InsertingaCD
Withtheprintedsidefacingup, insertadiscintotheCDslotuntil isdrawnin.
RemovingaCD
Pressthe▲button.
Thediscispushedoutofthe CDslot.
If the disc is not removed after it is ejected, it is pulled back in after a few seconds.
PlayingaCDorMP3CD
PresstheCD/AUXbuttonifthereis adiscintheplayer;itbegins playing.
Informationaboutthediscand currenttrackisshownonthe displaydependingonthedata stored.
7-16InfotainmentSystem
SelectingaCDTrack
Usingthecontrolbuttons:
- Press the ◀◀ ▶ or ▷ ▷▶ button toselectthepreviousornext track.
- Turnthe←→knob.
UsingtheCDMenu:
- Pressthe ←→ knob.
- SelectTrackslist.
- Selectthetrack.
PlayingTracksinRandomOrder
Pressthe ←→knobandthenset ShuffleSongstoOn.
FastForwardandRewind
Pressandhold ▶▶▶▶▶▶▶▶▶▶▶▶▶▶▶▶▶▶▶▶▶▶▶▶▶▶▶▶▶▶▶▶▶▶▶▶▶▶▶▶▶▶▶▶▶▶▶▶▶▶▶▶▶▶▶▶▶▶▶▶▶▶▶▶▶▶▶▶▶▶▶▶▶▶▶▶▶▶▶▶▶▶▶▶▶▶▶▶▶▶▶▶▶▶▶▶▶▶▶▶▶>
SelectinganMP3Track
Using the control buttons:
- Press the ◀◀ ▶ or ▷ ▷▶ button to select the previous or next track.
- Turnthe←→knob.
UsingtheCDMenu:
- Pressthe ←→ knob.
- SelectPlaylists/Folders.
- Selecttheplaylistorfolder.
- Selectthetrack.
SearchingforMP3Tracks
Thesearchfeaturemaytake some timetodisplaytheinformationafter readingthediscduetotheamount ofinformationstoredonthedisc. FMautomaticallyplayswhilethe discisbeingread.
Trackscanbesearchedby:
- Playlists
- Artists
- Albums
- SongTitles
- Genres
- FolderView
Tosearchfortracks:
- Pressthe ←→ knob.
- SelectSearch.
- Select: Playlists, Artists, Albums, SongTitles, Genres, or FolderView.
- Selectthetrack.
AuxiliaryDevices
Thisvehiclemayhavea3.5mm (1/8in)auxiliaryinputjackanda USBport,locatedinthecenter console.Someportableaudio devicesuchasiPods ^® ,MP3 players,andUSBstoragedevices canbeconnectedtothevehicle usinga3.5mm(1/8in)cableora USBcable.
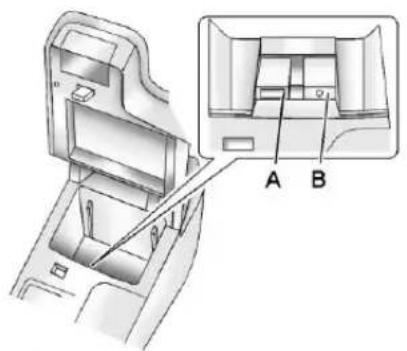
natural_image
Technical diagram of a mechanical component with labeled parts A and B, showing internal structure without any text or symbols.A.USBport
B.3.5mm(1/8in)auxiliary inputjack
Portabledevicesarecontrolledby usingthemenusystemdescribedin Operationonpage7-4.
Usingthe3.5mm(1/8in) AuxiliaryInputJack
Connecta3.5mm(1/8in)cableto the3.5mm(1/8in)auxiliaryinput jacktouseaportableaudioplayer.
Playbackofanaudiodevicethatis connectedtothe3.5mm(1/8in) auxiliaryinputjackcanonlybe controlledusingthecontrolsonthe device.
AdjustingtheVolume
Turnthe △oknobtoadjustthe volumeoftheinfotainmentsystem afterthevolumelevelhasbeenset ontheportableaudiodevice.
USBPort
ForvehicleswithaUSBport, the following devices maybe connected and controlled by the infotainment system:
- iPods
- PlaysForSureDevices(PFD)
- USBDrives
- Zunes®
NotalliPods, PFDs, USBDrives, and Zunesarecompatible with the infotainmentsystem.
ConnectingandControlling aniPod®
NotalliPodscanbecontrolledby theinfotainmentsystem.
ConnectinganiPod
ConnecttheiPodtotheUSBport.
SearchingforaTrack
Trackscanbesearchedforby:
- Playlists
- Artists
7-18InfotainmentSystem
- Albums
- SongTitles
- Podcasts
- Genres
- Audiobooks
- Composers
Tosearchfortracks:
- Pressthe ←→ knob.
- SelectSearch.
- Select: Playlists, Artists, Albums, SongTitles, Podcasts, Genres, Audiobooks, or Composers.
- Selectthetrack.
Shuffle
Pressthe ←→knobandset ShuffleSongs(Random)toOnor Off,thenpresstheBACKbuttonto returnthemainscreen.
On:Playstracksinthecurrent folderinrandomorder.
Off: Playstracksinthecurrent folderinsequentialorder.
Repeat
Pressthe ←→knobandset RepeattoOnorOff, thenpressthe BACKbuttontoreturnthemain screen.
On: Repeatsthecurrenttrack.
Off:Startsplayingfromthe beginningofthecurrenttrackafter thelasttrackfinishes.
ConnectingandControllinga PlaysForSureDevice(PFD) orZune®
ConnectingaPFDorZune
ConnectthePFDorZunetothe USBport.
SearchingforaTrack
Trackscanbesearchedforby:
- Playlists
- Artists
- Albums
-
SongTitles
-
Podcasts
- Genres
Tosearchfortracks:
- Pressthe ←→ knob.
- SelectSearch.
- Select: Playlists, Artists, Albums, SongTitles, Podcasts, orGenres.
- Selectthetrack.
Shuffle
Pressthe ←→knobandset ShuffleSongs(Random)toOn orOff.
On: Playscurrenttracksinrandom order.
Off: Playscurrenttracksin sequentialorder.
Repeat
Pressthe ←→knobandset RepeattoOnorOff.
RepeatOn: Repeatsthecurrent track.
RepeatOff:Startsplayingfromthe beginningofthecurrenttrackafter thelasttrackfinishes.
ConnectingandControllinga USBDrive
Theinfotainmentsystemcanonly playback.mp3and.wmafilesfrom aUSBdrive.
Onlythefirst2,500songsare recognizedonthedevice.
Whenadeviceisnotsupported,the message"Nosupporteddatafound. Youcansafelydisconnectthe device"appears.
ConnectingaUSBDrive
ConnecttheUSBdrivetothe USBport.
SearchingforaTrack
Itisnormalforthesearchfeatureto takesometimetodisplaythe informationafterreadingthedevice duetotheamountofinformation stored.
Filesthatdonothaveanymeta datastoredintheID3tagdisplayas Unknown.
Trackscanbesearchedforby:
- Playlists*
- Artists
- Albums
- SongTitles
- Genres
- FolderView
*Thisonlydisplaysifaplaylistis foundonthedevice.
Tosearchfortracks:
-
Pressthe ←→ knob.
-
SelectSearch.
-
Select: Playlists, Artists, Albums, SongTitles, Genres, or FolderView.
-
Selectthetrack.
Shuffle
Pressthe ←→knobandset ShuffleSongs(Random)toOn orOff.
On: Playscurrenttracksinrandom order.
Off: Playscurrenttracksin sequentialorder.
Repeat
Pressthe ←→knobandset RepeattoOnorOff.
RepeatOn: Repeatsthecurrent track.
RepeatOff:Startsplayingfromthe beginningofthecurrenttrackafter thelasttrackfinishes.
Phone
Bluetooth(Overview)
VehicleswithaBluetoothsystem canuseaBluetooth-capablecell phonewithaHands-FreeProfileto makeandreceivephonecalls. The infotainmentsystemandvoice recognitionareusedtocontrolthe system. Thesystemcanbeused whiletheignitionisinON/RUNor ACC/ACCESSORY. Therangeof theBluetoothsystemcanbeupto 9.1m(30ft). Notallphonessupport allfunctionsandnotallphoneswork withtheBluetoothsystem.See www.gm.com/bluetoothformore informationaboutcompatible phones.
BluetoothControls
Usethebuttonslocatedonthe infotainmentsystemandthe steeringwheeltooperatethe Bluetoothsystem.
SteeringWheelControls
^9 (Push to Talk): Press to answerincomingcalls, confirm systeminformation, and startvoice recognition.
☑/☑ (Mute/End Call): Press to endacall, rejectacall, or cancelan operation.
InfotainmentSystemControls
Forinformationabouthowto navigatethemenusystemusingthe infotainmentcontrols,seeOperation onpage7-4.
☑ (Phone): Press to enter the Phonemainmenu.
VoiceRecognition
Thevoicerecognitionsystemuses commandstocontrolthesystem anddialphonenumbers.
Noise: Thesystemmaynot recognizevoicecommandsifthere istoomuchbackgroundnoise.
WhentoSpeak: Atonesoundsto indicate that the system is ready for avoice command. Wait forthetone and then speak.
HowtoSpeak: Speak clearly in a calmandnatural voice.
AudioSystem
When using the Bluetooth system, sound comesthrough the vehicle's front audiosystems speakers and overridest the audiosystem. Use the / knob during acall to changethe volume level. The adjusted volume level remains in memory for later calls. Thesystem maintains a minimum volume level.
OtherInformation
TheBluetooth ^® wordmarkand logosareownedbyBluetooth ^® SIG, Inc.andanyuseofsuchmarksby GeneralMotorsisunderlicense. Othertrademarksandtradenames arethoseoftheirrespectiveowners.
See Radio Frequency Statement on page 13-15 for Federal Communications Commission (FCC) rules and Industry Canada Standards.
Bluetooth(Infotainment Controls)
Forinformationabouthowto navigatethemenusystemusingthe infotainmentcontrols,seeOperation onpage7-4.
Pairing
ABluetooth-enabledcellphone must be repaired to the Bluetooth system first and then connected to the vehicle before it can be used. Seetheellphonemanufacturer's user guide for Bluetooth functions before repairing the cell phone. If a Bluetooth phone is not connected, calls can be made using OnStar Hands-Free Calling, if available. Referto the OnStar Owner's Guide form more information.
Thepairingprocesscanbestarted byusingthevoicerecognition systemorthecomcontrolsonthe infotainmentsystem.
Pairinginformation:
- Uptofivecellphonescanbe pairedtotheBluetoothsystem.
• Thepairingprocessisdisabled whenthevehicleismoving. - TheBluetoothsystemlinkswith thefirstavailablepairedcell phoneintheorderthephone waspaired.
- Onlyonepairedcellphonecan beconnectedtotheBluetooth systematatime.
- Pairingshouldonlyneedtobe completedonce, unlesschanges tothepairinginformationhave beenmadeorthephoneis deleted.
Tolinktoadifferentpairedphone, see "LinkingtoaDifferentPhone" laterinthissection.
PairingaPhone
- PresstheCONFIGbutton.
- SelectPhoneSettings.
- SelectBluetooth.
- SelectPairDevice (Phone). A four-digit Personal Identification Number (PIN) appear on the display. If the "AddnewGPS device" option is selected, the system will start a search for Bluetooth "Hands-free" profile devices just like if "Addnew Phone" was selected. The additional GPS location feature which would provide the vehicle's GPS location through the Bluetooth Serial Port Profile is not available.
- Start the pairing process on the cell phonethat will be paired to the vehicle. Referenc the cell phonemanufacturer's user guide for information on this process.
7-22InfotainmentSystem
Locatethedevicenamed "GeneralMotors" or "Your Vehicle" inthelistonthecell phone and follow the instructions on the cell phoneto enter the four-digit PIN provided by the system.
- Thesystem prompts for an name for the phone and confirm the name provided. This name is used to indicate which phone is connected.
- Thesystemrespondswith "
hasbeen successfullypaired"afterthe pairingprocessiscomplete. - RepeatSteps1 through 7 topair additional phones.
ListingAllPairedandConnected Phones
- PresstheCONFIGbutton.
- SelectPhoneSettings.
- SelectBluetooth.
- SelectDeviceList.
DeletingaPairedPhone
- PresstheCONFIGbutton.
- SelectPhoneSettings.
- SelectBluetooth.
- SelectDeviceList.
- Select the phonetodelete and followtheon-screen prompts.
LinkingtoaDifferentPhone
Tolinktoadifferentphone, thenew phonemustbeinthevehicleand availabletobeconnectedtothe Bluetoothsystembeforethe processisstarted.
- PresstheCONFIGbutton.
- SelectPhoneSettings.
- SelectBluetooth.
- SelectDeviceList.
- Selectthenewphonetolinkto and followtheon-screen prompts.
lfdeleteisselected, the highlightedphonewillbe deleted.
MakingaCall
- Pressthe/√ buttontwice.
- Enterthecharactersequence. See "EnteringaCharacter Sequence" in Operation on page 7-4 form more information.
- SelectCalltostartdialingthe number.
AcceptingorDecliningaCall
Whenacallisreceived, the infotainmentsystemmutesanda ringtoneisheardinthevehicle.
AcceptingaCall
Turnthe ←→knobtoAnswerand pressthe ←→knob.
DecliningaCall
Turnthe ←→knobtoDeclineand pressthe ←→knob.
CallWaiting
Callwaitingmustbesupported on theBluetoothphoneandenabledby thewirelessservicecarriertowork.
AcceptingaCall
Turnthe ←→knobtoAnswerand pressthe ←→knob.
DecliningaCall
Turnthe ←→knobtoDeclineand pressthe ←→knob.
SwitchingBetweenCalls (CallWaitingCallsOnly)
Toswitchbetweencalls:
1.Pressthe ←→knob.
- SelectSwitchCallfrom themenu.
ConferenceCalling
Conferencecallingandthree-way callingmustbesupportedonthe Bluetoothphoneandenabledbythe wirelessservicecarriertowork.
Tostartaconferencewhileina currentcall:
-
Pressthe ←→ knob.
-
SelectEnterNumber.
3.Enterthecharactersequence thenselectCall.See"Entering aCharacterSequence"in Operation on page 7-4 formore information.
4. After the call has been placed, pressthe ←→knobandselect MergeCalls.
5. To add more caller to the conference call, repeat Steps 1 through 4. Then number of callers who can be added dis limited by your wireless service carrier.
EndingaCall
Pressthe←→knobandselect HangUp.
MutingaCall
ToMuteaCall
Pressthe ←→knobandselect MuteCall.
ToCancelMute
Pressthe ←→knobandselect MuteCall.
DualToneMulti-Frequency (DTMF)Tones
Thein-vehicleBluetoothsystemcan sendnumbersduringacall. This is usedwhencallingamenu-driven phonesystem.
- Pressthe knoband selectEnterNumber.
2.Enterthecharactersequence; see "EnteringaCharacterSequence" in Operation on page 7-4 formoreinformation.
Bluetooth(Voice Recognition)
Pairing
ABluetooth-enabledcellphone must be paired to the Bluetooth system and then connected to the vehicle before it can be used. See the cell phonemanufacturer's user guide for Bluetooth functions before pairing the cell phone. If a Bluetooth phone is not connected, calls can be made using OnStar ^ Hands-Free
7-24InfotainmentSystem
Calling, if available. Referto the OnStarOwner's Guideformore information.
Thepairingprocesscanbestarted byusingthevoicerecognition systemorthecontrolsonthe infotainmentsystem.
Pairinginformation:
- Uptofivecellphonescanbe pairedtotheBluetoothsystem.
- Thepairingprocessisdisabled whenthevehicleismoving.
- TheBluetoothsystemlinkswith thefirstavailablepairedcell phoneintheorderthephone waspaired.
- Onlyonepairedcellphonecan beconnectedtotheBluetooth systematatime.
- Pairingonlyneedstobe completedonce, unless the pairinginformationchangesor thephoneisdeleted.
Tolinktoadifferentpairedphone, see "LinkingtoaDifferentPhone" laterinthissection.
PairingaPhone
-
Press Ⓜ/山
-
Forvehicleswithouta navigationsystem,the systemresponds"Ready," followedbyatone.
-
Forvehicleswitha navigationsystem,the systemrespondswitha tone.Afterthetone,say "HandsFree."Thesystem responds"Ready,"followed byatone.
-
Say "Bluetooth." Thesystem responds "Bluetoothready," followed by atone.
-
Say "Pair." Thesystemresponds withinstructionsandafour-digit PersonalIdentificationNumber (PIN). The PIN will be used in Step4.
-
Start the pairing process on the cell phonethat will be paired to the vehicle. Referenc the cell phonemanufacturer's user guide for information on this process.
Locatethedevicenamed "GeneralMotors" or "Your Vehicle" inthelistonthecell phone and follow the instructions on the cell phoneto enter the four-digit PIN that was provided in Step 3. - Thesystem prompts for an a name for the phone. This nam will be used to indicate which phone is connected. Thesystem confirms then a name.
- Thesystemrespondswith "
hasbeen successfullypaired"afterthe pairingprocessiscomplete. - RepeatSteps1 through 7 for additional phonestobepaired.
ListingAllPairedandConnected Phones
-
Press
-
Forvehicleswithouta navigationsystem,the systemresponds"Ready," followedbyatone.
-
Forvehicleswitha navigationsystem,the systemrespondswitha tone.Afterthetone,say "HandsFree."Thesystem responds"Ready,"followed byatone.
-
Say "Bluetooth." Thesystem responds "Bluetoothready," followed by atone.
- Say "List." Thesystemlistsall pairedBluetoothdevices. The systemwillrespond "is connected" ifaphoneis connectedtothevehicle.
DeletingaPairedPhone
-
Press
-
Forvehicleswithouta navigationsystem,the systemresponds"Ready," followedbyatone.
-
Forvehicleswitha navigationsystem,the systemrespondswitha tone.Afterthetone,say "HandsFree."Thesystem responds"Ready,"followed byatone.
-
Say "Bluetooth." Thesystem responds "Bluetoothready," followed by atone.
- Say "Delete." Thesystemasks which phonetodelete followed byatone.
- Saythenameofthephonetobe deleted. If the phonename is unknown, usethe "List" command foralistofallpaired phones. Thesystemresponds
"Wouldyouliketodelete
- Say "Yes" to delet the phone.
Thesystem responds "OK, deleting
."
LinkingtoaDifferentPhone
-
Press
-
Forvehicleswithouta navigationsystem,the systemresponds"Ready," followedbyatone.
-
Forvehicleswitha navigationsystem, the systemrespondswitha tone. Afterthetone, say "HandsFree." Thesystem responds "Ready," followed byatone.
-
Say "Bluetooth." Thesystem responds "Bluetoothready," followed by atone.
-
Say "Changephone." The system responds "Please wait while search for other phones."
-
Ifanotherphoneisfound, theresponsewillbe "
isnow connected."
• Ifanotherphoneisnot found, theoriginalphone remainsconnected.
StoringNameTags
Thesystemcanstoreupto 30phonenumbersasnametags thataresharedbetweenthe BluetoothandOnStarsystems.
Thesystemusesthefollowing commandstostoreandretrieve phonenumbers:
- Store
- DigitStore
- Directory
UsingtheStoreCommand
Thestorecommandallowsaphone numbertobestoredwithout enteringthedigitsindividually.
-
Press 📞/山
-
Forvehicleswithouta navigationsystem,the systemresponds"Ready," followedbyatone.
-
Forvehicleswitha navigationsystem,the systemrespondswitha tone.Afterthetone,say "HandsFree."Thesystem responds"Ready,"followed byatone.
-
Say "Store." Thesystem responds "Store, number please," followed by atone.
-
Say the complete phonenumber to be stored without pausing.
- Ifthesystemrecognizes thenumber,theresponseis "OK,Storing."
- If the system does not recognize the phone number, theresponse is "Store
." "Pleasesayesorno."If thenumberis correct,say "Yes."If thenumberis not correct,say"No."The system will ask for the number again. - After the system store the phonenumber, it responds "Pleasesaythenametag," followed by atone.
-
Sayanametagforthephone number. Thenametagis recordedandthesystem responds "Abouttostore
. DoesthatsoundOK?" -
Ifthenametagdoesnot soundcorrect, say "No" and repeatStep5.
- Ifthenametagsounds correct, say "Yes" and the nametagisstored. After
thenumberisstored, the systemreturnstothe mainmenu.
UsingtheDigitStoreCommand
Thedigitstorecommandallowsa phonenumbertobestoredby enteringthedigitsindividually.
-
Press
-
Forvehicleswithouta navigationsystem,the systemresponds"Ready," followedbyatone.
-
Forvehicleswitha navigationsystem,the systemrespondswitha tone.Afterthetone,say "HandsFree."Thesystem responds"Ready,"followed byatone.
-
Say "DigitStore." Thesystem respond with "Pleasesay the first digit to store," followed by atone.
-
Saythefirstdigittobestored. Thesystemwillrepeatbackthe digititheardfollowedbyatone. Continueenteringdigitsuntilthe numbertobestorediscomplete.
- Ifanunwantednumberis recognizedbythesystem, say "Clear"atanytimeto clearthelastnumber.
• Tohearallofthenumbers recognizedbythesystem, say "Verify" atanytime.
-
After the completenumber has been entered, say "Store." The system responds "Pleasesay thenametag," followed by atone.
-
Sayanametagforthephone number. Thenametagis recordedandthesystem responds "Abouttostore
. DoesthatsoundOK?"
- Ifthenametagdoesnot soundcorrect, say "No" and repeatStep5.
- Ifthenametagsounds correct, say "Yes" and the nametagisstored. After thenumberisstored, the systemreturnstothe mainmenu.
UsingtheDirectoryCommand
The directorycommandlistsallof thenametagsstoredbythesystem. Tousethedirectorycommand:
-
Press
-
Forvehicleswithouta navigationsystem, the systemresponds"Ready," followedbyatone.
- Forvehicleswitha navigationsystem, the systemrespondswitha tone. Afterthetone, say "HandsFree." Thesystem responds "Ready," followed byatone.
7-28InfotainmentSystem
- Say "Directory." Thesystem responds "Directory" and lists all storenametags. Thesystem return to themainmen when the list is complete.
DeletingNameTags
Thesystemusesthefollowing commandstodeletenametags:
- Delete
- Deleteallnametags
UsingtheDeleteCommand
Thedeletecommandisusedto deletespecificnametags.
Todeletenametags:
-
Press
-
Forvehicleswithouta navigationsystem,the systemresponds"Ready," followedbyatone.
• Forvehicleswitha navigationsystem,the systemrespondswitha tone.Afterthetone,say
"HandsFree." Thesystem responds "Ready," followed byatone.
-
Say "Delete." Thesystem responds "Delete, please say thenametag," followed by atone.
-
Saythenametagtobedeleted. Thesystemresponds"Would youliketodelete,
? Pleasesayyesorno." -
Ifthenametagiscorrect, say "Yes" todeletethe nametag. Thesystem respondswith "OK, deleting
,returningto themainmenu." - Ifthenametagisincorrect, say“No.”Thesystem respondswith“No.OK,let's tryagain,please say the nametag.”
UsingtheDeleteAllNameTags Command
Thedeleteallnametagscommand deletesallstoredphonebookname tagsandroutenametagsfor OnStar,ifstored.
Todeleteallnametags:
-
Press
-
Forvehicleswithouta navigationsystem,the systemresponds"Ready," followedbyatone.
-
Forvehicleswitha navigationsystem,the systemrespondswitha tone.Afterthetone,say "HandsFree."Thesystem responds"Ready,"followed byatone.
-
Say "Deleteallnametags." The system responds "You are about to delete all nametags stored in your phonedirectory and your routed destination directory. Are you sure you want to do this? Pleasesayyesorno."
-
Say"Yes"todeleteall nametags.
- Say“No”tocancelthe functionandreturntothe mainmenu.
MakingaCall
Callscanbemadeusingthe followingcommands:
- Dial
- DigitDial
- Call
- Re-dial
UsingtheDialCommand
- Press

- Forvehicleswithouta navigationsystem,the systemresponds"Ready," followedbyatone.
-
Forvehicleswitha navigationsystem,the systemrespondswitha tone.Afterthetone,say "HandsFree."Thesystem responds"Ready,"followed byatone.
-
Say "Dial." Thesystemresponds "Dialusing
. Numberplease," followed by atone. -
Saytheentirenumberwithout pausing.
- Ifthesystemrecognizes thenumber,itresponds with"OK,Dialing"anddials thenumber.
- If the system does not recognize then number, it confirms then numbers followed by at one. If the number is correct, say "Yes." The system responds "OK, Dialing" and dialsthe number. If then number is not correct, say "No." The system will ask for the number again.
UsingtheDigitDialCommand
-
Press
-
Forvehicleswithouta navigationsystem,the systemresponds"Ready," followedbyatone.
- Forvehicleswitha navigationsystem, the systemrespondswitha tone. Afterthetone, say "HandsFree." Thesystem responds "Ready," followed byatone.
7-30InfotainmentSystem
- Say "DigitDial." Thesystem responds "Digitdialusing
, please say the first digitodial, followed by atone. - Saythedigitstobedialedoneat atime. Thesystemrepeatsback thedigititheardfollowedby atone.
-
Continue entering digits until the numbertobedialediscomplete. After the entire number has been entered, say "Dial." Thesystem responds "OK, Dialing" and dials thenumber.
-
Ifanunwantednumberis recognizedbythesystem, say "Clear"atanytimeto clearthelastnumber.
• Tohearallofthenumbers recognizedbythesystem, say "Verify"atanytime.
UsingtheCallCommand
-
Press
-
Forvehicleswithouta navigationsystem,the systemresponds"Ready," followedbyatone.
-
Forvehicleswitha navigationsystem,the systemrespondswitha tone.Afterthetone,say "HandsFree."Thesystem responds"Ready,"followed byatone.
-
Say "Call." Thesystemresponds "Callusing
. Pleasesaythenametag," followedbyatone. - Saythenametagoftheperson tocall.
- Ifthesystemrecognizes thenametag,itresponds "OK,calling
" anddialsthenumber.
- Ifthesystemdoesnot
recognizethenametag, it
confirmsthenametag
followedbyatone. Ifthe
nametagiscorrect, say
"Yes." Thesystemresponds
with "OK, calling
Onceconnected, thepersoncalled willbeheardthroughtheaudio speakers.
UsingtheRe-dialCommand
-
Press
-
Forvehicleswithouta navigationsystem,the systemresponds"Ready," followedbyatone.
• Forvehicleswitha navigationsystem,the systemrespondswitha tone.Afterthetone,say
"HandsFree." Thesystem responds "Ready," followed byatone.
- Afterthetone, say "Re-dial." The system responds "Re-dialusing
" and dial the last number called from the connected Bluetooth phone.
Onceconnected, thepersoncalled willbeheardthroughtheaudio speakers.
ReceivingaCall
When an incoming call is received, the audiosystemmutes and arding tone is heardin the vehicle.
- Press/112.
- Press/Toignoreacall.
CallWaiting
Callwaitingmustbesupported on theBluetoothphoneandenabledby thewirelessservicecarrier.
- Press ^B / ^w toansweran incomingcallwhenanothercall isactive.Theoriginalcallis placedonhold.
- Press/againtoreturn to theoriginalcall.
• Toignoretheincomingcall, no actionisrequired. - Press/©todisconnectthe currentcallandswitchtothecall onhold.
Three-WayCalling
Three-way calling must be supported on the Bluetooth phone and enabled by the wireless service carrier.
-
Whileonacall, press / . Thesystemrespondswith "Ready," followed by atone.
-
Say "Three-waycall." The system respond with "Three-waycall, please saydialorcall."
- Usethedialorcallcommandto dialthenumberofthethirdparty tobecalled.
- Oncethecallisconnected, press 🔒/√/tolinkallcallers together.
EndingaCall
Press/©toendacall.
MutingaCall
During acall, all sounds from inside the vehicle can be muted so that the person on the other end of the call can not hear them.
ToMuteacall
- Press /_^2 . Thesystem responds "Ready," followed by atone.
- Say "MuteCall." Thesystem responds "Callmuted."
ToCancelMute
- Press 📂/™. Thesystem responds "Ready," followed by atone.
- Afterthetone, say "MuteCall." Thesystemresponds "Resumingcall."
TransferringaCall
Audiocanbetransferredbetween their-vehicleBluetoothsystemand thecellphone.
ToTransferAudiototheCell Phone
During acall with the audio in the vehicle:
- Press _^2 . Thesystem responds "Ready," followed by atone.
- Say "TransferCall." Thesystem responds "Transferringcall" and the audiotransferstothecell phone.
ToTransferAudiototheln-Vehicle BluetoothSystem
Thecellphonemustbepaired and connected with the Bluetooth system before acall can be transferred. The connection process cantakeuptotwominutes after the ignitionisturned to ON/RUN or ACC/ACCESSORY.
Forvehicleswithoutanavigation system, press P/ _2^1 duringacall withtheaudioonthecellphone. Theaudiotransferstothevehicle.
For vehicles with an navigation system, press /^2 during acall with the audio on the cell phone. If the audiodoes not transferto the vehicle, use the audiotransfer feature on the cell phone. Se the cell phonemanufacturer's user guide form more information.
VoicePass-Thru
Voicepass-thruallowsaccesstothe voicerecognitioncommandsonthe cellphone.Seethecellphone manufacturer'suserguidetoseeif thecellphonesupportsthisfeature.
Toaccesscontactsstoredinthecell phone:
-
Press
-
Forvehicleswithouta navigationsystem,the systemresponds"Ready," followedbyatone.
-
Forvehicleswitha navigationsystem,the systemrespondswitha tone.Afterthetone,say "HandsFree."Thesystem responds"Ready,"followed byatone.
-
Say "Bluetooth." Thesystem responds "Bluetoothready," followed by atone.
-
Say "Voice." Thesystem responds "OK, accessing
."
Thecellphone'snormalprompt messageswillgothroughtheir cycleaccordingtothephone's operatinginstructions.
DualToneMulti-Frequency (DTMF)Tones
Thein-vehicleBluetoothsystemcan sendnumbersandthenumbers storedasnametagsduringacall. Usethisfeaturewhencallinga menu-drivenphonesystem. Accountnumberscanalsobe storedforuse.
SendingaNumberDuringaCall
-
Press /_^2 . Thesystem responds "Ready," followed by atone.
-
Say "Dial." Thesystemresponds "Sayanumbertosendtones," followed by atone.
-
Saythenumbertosend.
-
If the system recognizes thenumber, it responds "OK, SendingNumber" and the dialtoesaresent and the call continues.
- Ifthesystemdoesnot recognizesethenumber, it responds "DialNumber, pleasesayyesorno?," followedbyatone.Ifthe numberiscorrect,say "Yes."Thesystemresponds "OK,SendingNumber" and thedialtonesaresentand thecallcontinues.
SendingaStoredNameTag DuringaCall
-
Press Ⓗ/w#. Thesystem responds "Ready," followed by atone.
-
Say "Sendnametag." The system responds "Sayaname tagtosendtones," followed by atone.
-
Saythenametagtosend.
-
If the system recognizes thenumber, it responds "OK, Sending
" and the altoes are sent and the call continues. - Ifthesystemdoesnot recognizablenametag, it responds "Dial
, pleasesayyesorno?," followedbyatone.Ifthe nametagiscorrect,say "Yes."Thesystemresponds with "OK,Sending "andthedialtonesare sentandthecallcontinues.
ClearingtheSystem
Unlessinformationisdeletedoutof their-vehicleBluetoothsystem,it willberetainedindefinitely.This includesallsavednametagsinthe phonebookandphonepairing information.Forinformationonhow todeletethisinformation,seethe previoussectionson"Deletinga PairedPhone"and"Deleting NameTags."
7-34InfotainmentSystem
NOTES
ClimateControls
ClimateControlSystems
DualAutomaticClimateControl
System......8-1
AirVents
AirVents....8-4
Maintenance
PassengerCompartmentAir
Filter....8-4
ClimateControlSystems
DualAutomaticClimateControlSystem
Theheating, cooling, and ventilation for the vehicle can be controlled with this system.
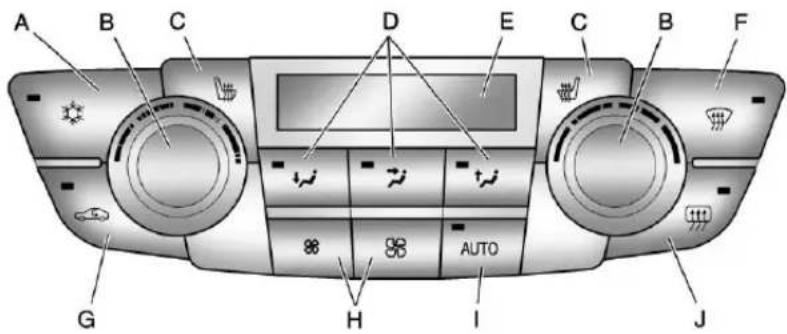
A. AirConditioning
B.DriverandPassenger TemperatureControls
C.HeatedSeats
D. AirDeliveryModes
E. ClimateDisplay
F.Defrost
G.Recirculation
H.FanControls
I. AUTO(AutomaticMode)
J.RearDefogger
8-2ClimateControls
AutomaticOperation
Thesystemautomatically controls the fanspeed, airdelivery, air conditioning, and recirculation in ordertoheatorcoolthevehicleto the desired temperature.
Whentheindicatorlightison, the systemisinfullautomaticoperation. Iftheairdeliverymodeorfan settingismanuallyadjusted, the autoindicatorturnsoffanddisplays willshowtheselectedsettings.
Toplacethesystemin automaticmode:
-
PressAUTO.
-
Set the temperature. Allow the system timetostabilize. Then adjust the temperature as needed for best comfort.
Englishunitscanbechangedto metricunitsthroughtheDriver InformationCenter(DIC).See VehiclePersonalizationon page5-31.
ManualOperation
DriverandPassenger
TemperatureControl:The temperaturecanbeadjusted separatelyforthedriverand passenger.
Turntheknobclockwiseor counterclockwisetoincreaseor decreasethedriverorpassenger temperaturesetting.
FanControl: Presstheleft fanbuttontodecreasethe fanspeed. Presstherightfan buttontoincreasethefanspeed. Theselectedfanspeedisindicated bythenumberofsegmentsshown inthedisplay.
Pressingtheleftfanbuttonlonger turnsthefanoff.
PressAUTOtoreturntoautomatic operation.
AirDeliveryModes:Press

or 🍒tochangethedirectionofthe airflow.Anindicatorlightcomeson intheselectedmodebutton.
Changingthemodecancelsthe automaticoperationandthesystem goesintomanualmode.Press AUTOtoreturntoautomatic operation.
(Floor):Airisdirectedtothe flooroutlets.
(Vent):Airisdirectedtothe instrumentpaneloutlets.
^2 (Upper):Airisdirectedtothe windshieldoutlets.
(Defrost): Presstoclearthe windshieldoffogorfrostmore quickly. Airisdirectedtothe windshield.
(AirConditioning): Pressto turn the automatic air conditioning on or off. If the fan is turned off the outside temperature falls below freezing, the air conditioner will not run.
Press AUTOtoreturntoautomatic operationandtheairconditioner runsasneeded. Whentheindicator lightison, theairconditionerruns automaticallytocooltheairinside thevehicleortodrytheairneeded todefogthewindshieldfaster.
(Recirculation): Presstoturn onrecirculation. Anindicatorlight comeson. Airisrecirculated to quicklycooltheinsideofthevehicle orpreventoutsideairandodors fromentering.
RearWindowDefogger
(RearWindowDefogger): Presstoturntherearwindow defoggeronoroff.
Therearwindowdefogger turnsoffautomaticallyafterabout 10minutes.Ifturnedonagain,it runsforaboutfiveminutesbefore turningoff.Athigherspeeds,the rearwindowdefoggermaystayon continuously.
Forvehicleswithheatedoutside rearviewmirrors,theyturnonwith therearwindowdefoggerandhelp toclearfogorfrostfromthesurface ofthemirror.SeeHeatedMirrorson page2-11.
Notice: Donottrytoclearfrost orothermaterialfromtheinside ofthefrontwindshieldandrear windowwitharazorbladeor anythingelsethatissharp. This maydamagetherearwindow defoggergridandaffectyour radio'sabilitytopickupstations clearly. Therepairswouldn'tbe coveredbyyourwarranty.
Sensors
Thesolarsensorlocatedontopof theinstrumentpanelnearthe windshieldmonitorsthesolarheat.
Theclimatecontrolsystem usesthesensorinformation to adjust the temperature, fanspeed, recirculation, and air delivery mode for best comfort.
If the sensor is covered, the automatic climate control system may not work properly.
AirVents
Usethelouverslocatedontheair ventstochangethedirectionofthe airflow.
Toopenavent, movethe thumbwheelto]. Toclosethevent, movethethumbwheelto ○.
OperationTips
- Keepalloutletsopenwhenever possibleforbestsystem performance.
- Keepthepathsunderallseats clearofobjectstohelpcirculate theairinsidethevehiclemore effectively.
- Useofnon-GMapprovedhood deflectorscanadverselyaffect theperformanceofthesystem.
Maintenance
PassengerCompartment AirFilter
The filterremovesdust, pollen, and other airborne irritants from outside airthatispulled into the vehicle.
Thefiltershouldbereplacedaspart ofroutinescheduledmaintenance. SeeScheduledMaintenanceon page11-2forreplacementintervals. Tofindoutwhattypeoffiltertouse, seeMaintenanceReplacement Partsonpage11-8.
The passenger compartmentair filter can be accessed by removing the entire glovebox.
-
Open the passengers sided door. Removethe end cover located on the side of the instrument panel in the top right corner. Removethescrew affixed to the side of the glove box.
-
Openthegloveboxdoor and removetheattached screws fromaroundtheglovebox.
- Lowertheloosenedglovebox housing.
- Unplugbothwirecablesand removetheglovebox.
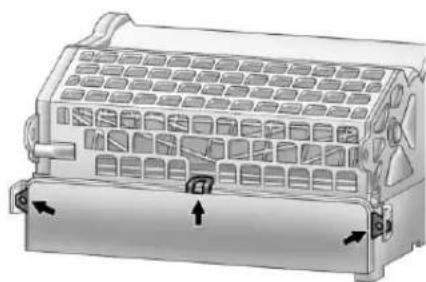
natural_image
Diagram of a vehicle air vent system with directional arrows indicating flow or movement (no text or labels)- Pullthethreetabstorelease andopenthefilterdoor.
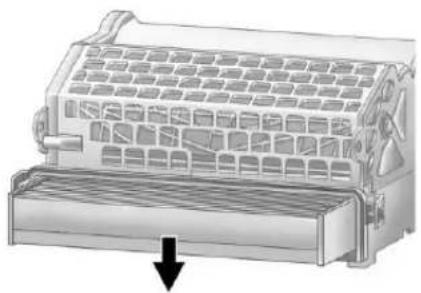
natural_image
Diagram of a mechanical device with a downward arrow indicating a component or process (no text or symbols present)- Removetheoldairfilter.
- Installthenewairfilter.
- Reinstalltheairfilterdoor. Re-installtheglovebox.
Seeyourdealerifadditional assistanceisneeded.
8-6ClimateControls
NOTES
Driving and Operating
DrivingInformation
DefensiveDriving......9-2
DrunkDriving....9-2
ControlofaVehicle......9-3
Braking....9-3
Steering....9-4
Off-RoadRecovery......9-6
LossofControl....9-6
DrivingonWetRoads......9-7
HighwayHypnosis......9-8
HillandMountainRoads.....9-8
WinterDriving....9-9
IftheVehicleIsStuck......9-11
VehicleLoadLimits......9-12
StartingandOperating
NewVehicleBreak-In......9-16
IgnitionPositions......9-17
StartingtheEngine......9-18
EngineHeater......9-20
RetainedAccessory
Power(RAP)......9-21
ShiftingIntoPark(Automatic
Transmission)......9-21
ShiftingoutofPark(Automatic
Transmission)......9-22
Parking......9-23
ParkingoverThings
ThatBurn....9-23
EngineExhaust
EngineExhaust......9-24
RunningtheVehicleWhile
Parked....9-24
AutomaticTransmission
AutomaticTransmission.....9-25
ManualMode......9-28
ManualTransmission
ManualTransmission......9-29
Brakes
AntilockBrake
System(ABS)....9-30
ParkingBrake......9-31
BrakeAssist......9-33
HillStartAssist(HSA)......9-34
RideControlSystems
TractionControl
System(TCS)....9-34
StabiliTrak® System......9-36
InteractiveDriveControl
System......9-38
CruiseControl
CruiseControl....9-39
ObjectDetectionSystems
UltrasonicParkingAssist....9-42
9-2DrivingandOperating
Fuel
Fuel....9-44
RecommendedFuel......9-44
GasolineSpecifications(U.S. andCanadaOnly)....9-45
CaliforniaFuel Requirements......9-45
FuelsinForeignCountries...9-45
FuelAdditives......9-46
FuelE85(85%Ethanol).....9-47
FillingtheTank....9-48
FillingaPortableFuel Container......9-49
Towing
GeneralTowing Information....9-50
ConversionsandAdd-Ons
Add-OnElectrical Equipment....9-50
DrivingInformation
DefensiveDriving
Defensivedrivingmeans"always expecttheunexpected."Thefirst stepindrivingdefensivelyistowear thesafetybelt.See SafetyBeltson page3-11.

WARNING
Assumethatotherroadusers (pedestrians, bicyclists, and other drivers) are going to be careless and make mistakes. Anticipate what they might do and beready. In addition:
- Allowenoughfollowing distancebetweenyouand thedriverinfrontofyou.
- Focusonthetaskofdriving. (Continued)
WARNING(Continued)
Driverdistractioncancause collisionsresultingininjuryor possibledeath. Thesesimple defensivedrivingtechniques couldsaveyourlife.
DrunkDriving

WARNING
Drinkingandthendrivingis verydangerous.Yourreflexes, perceptions,attentiveness,and judgmentcanbeaffectedbyevenasmallamountofalcohol.You canhaveaserious—oreven fatal—collisionifyoudriveafter drinking.
Donotdrinkanddriveorridewith adriverwhohasbeendrinking. Ridehomeinacab;orifyouare withagroup,designateadriver whowillnotdrink.
Death and injury associated with drinking and driving is a global tragedy.
Alcohol affects four things that anyone need st drive a vehicle: judgment, muscular coordination, vision, and attentiveness.
Policerecordsshowthat almost40percentofallmotor vehicle-relateddeathsinvolve alcohol.Inmostcases,these deathsaretheresultofsomeone whowasdrinkinganddriving. Inrecentyears,morethan 17,000annualmotorvehicle-related deathshavebeenassociatedwith theuseofalcohol,withabout 250,000peopleinjured.
Forpersonsunder21,itisagainst thelawineveryU.S.statetodrink alcohol.Therearegoodmedical, psychological,anddevelopmental reasonsfortheselaws.
Theobviouswaytoeliminate the leadinghighwaysafetyproblemis forpeoplenevertodrinkalcohol andthendrive.
Medicalresearchshowsthat alcoholinaperson'ssystem canmakecrashinjuriesworse, especiallyinjuriestothebrain, spinalcord,orheart. Thismeans thatwhenanyonewhohasbeen drinking—driverorpassenger—is inacrash,thatperson'schanceof beingkilledorpermanentlydisabled ishigherthanifthepersonhadnot beendrinking.
ControlofaVehicle
The following three systems helpto control the vehicle while driving—brakes, steering, and accelerator. Attimes, as when driving on snow orice, it is easy to ask more of those control systems than the tires and road can provide. Meaning, you can lose control of the vehicle. See Traction Control System (TCS) on page 9-34.
Adding non-dealer accessories can affect vehicle performance. See Accessories and Modifications on page 10-3.
Braking
SeeBrakeSystemWarningLighton page5-16.
Brakingactioninvolvesperception timeandreactiontime.Deciding topushthebrakepedalis perceptiontime.Actuallydoing itsreactiontime.
Averagereactiontimeisabout three-fourthsofasecond. Butthatis onlyanaverage. It might be less with one driver and as longast two or three seconds more with another. Age, physical condition, alertness, coordination, and eyesightall play apart. Sodo alcohol, drugs, and frustration. Butevenin three-fourth sofa second, a vehicle moving at 100km/h (60mph) travels 20m (66ft). That could be a lot of distance in an emergency, so keeping enough space between the vehicle and others is important.
And, of course, actual stopping distances vary greatly with the surface of the road, whether itis pavement or gravel; the condition of the road, whether itis wet, dry, or icy; tiretread; the condition of the brakes; the weight of the vehicle; and the amount of brake force applied.
Avoidneedlessheavy braking.Somepeopledrivein spurts—heavyacceleration followedbyheavybraking—rather thankeepingpacewithtraffic.This isamistake.Thebrakesmightnot havetimetocoolbetweenhard stops.Thebrakeswillwearout muchfasterwithalotofheavy braking.Keepingpacewiththe trafficandallowingrealisticfollowing distanceseliminatesalotof unnecessarybraking.Thatmeans betterbrakingandlongerbrakelife.
Iftheengineeverstopswhilethe vehicleisbeingdriven,brake normallybutdonotpumpthe brakes.Ifthebrakesarepumped, thepedalcouldgethardertopush down.Iftheenginestops,therewill stillbesomepowerbrakeassistbut itwillbeusedwhenthebrakeis applied.Oncethepowerassistis usedup,itcantakelongertostop andthebrakepedalwillbeharder topush.
Adding non-dealer accessories can affect vehicle performance. See Accessories and Modifications on page 10-3.
Steering
PowerSteering
Ifpowersteeringassistislost because the engine stops or the power steering system is not functioning, the vehicle can be steered but it will take more effort.
SpeedVariableAssistSteering
Some vehicles have aesteering system that variesthe amount of effort required to steer the vehicle in relation to the speed of the vehicle.
The amount of steering effort required less at slowers speeds to make the vehicle more maneuverable and asiertopark. At fasters speeds, the steering effort increases to provide asport-like feeling to the steering. This provides maximum control and stability.
Ifthevehicleseemshardertosteer thannormalwhenparkingordriving slowly,theremaybeaproblemwith thesystem.Youwillstillhavepower steering,butsteeringwillbestiffer thannormalatslowspeeds.See yourdealerforservice.
SteeringTips
Itisimportanttotakecurvesata reasonablespeed.
Tractioninacurvedependsonthe conditionofthetiresandtheroad surface,theangleatwhichthe curveisbanked,andvehiclespeed. Whileinacurve,speedistheone factorthatcanbecontrolled.
If thereisaneedtoreducespeed, doitbeforeenteringthecurve, while thefrontwheelsarestraight.
Trytoadjustthespeedsoyoucan drivethroughthecurve.Maintaina reasonable,steadyspeed.Waitto accelerateuntiloutofthecurve,and thenaccelerategentlyintothe straightaway.
SteeringinEmergencies
Therearetimeswhensteeringcan bemoreeffectivethanbraking. Forexample,youcomeoverahill andfindatruckstoppedinyour lane,oracarsuddenlypullsout fromnowhere,orachilddartsout frombetweenparkedcarsandstops rightinfrontofyou.Theseproblems canbeavoidedbybraking—if you canstopintime.Butsometimesyou cannotstopintimebecausethereis noroom.Thatisthetimefor evasiveaction—steeringaround theproblem.
The vehicle can perform very well in emergencies like these. First apply the brakes. See Braking on page 9-3. It is better to remove as much speed as possible from a collision. Then steer around the problem, to the left or right depending on the space available.
natural_image
Black-and-white illustration of a person driving a car, showing steering wheel and dashboard (no text or symbols)Anemergencylikethisrequires closeattentionandaquickdecision. Ifholdingthesteeringwheelatthe recommended9and3o'clock positions, itcanbeturnedafull 180degreesveryquicklywithout removingeitherhand. Butyouhave toactfast, steerquickly, andjustas quicklystraightentthewheelonce youhaveavoidedtheobject.
The fact that such a emergency situations are always possible, a good reason to practice defensive driving at all times and wears safety belts properly.
Off-RoadRecovery
Thevehicle's rightwheelscandrop offtheedgeofaroadontothe shoulderwhiledriving.
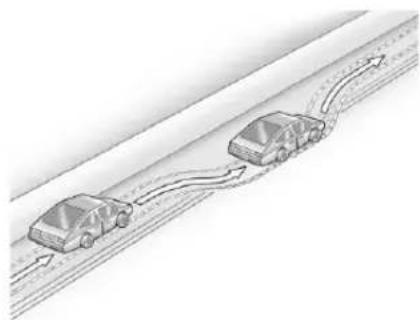
natural_image
Diagram of two cars driving on a road with directional arrows indicating flow (no text or symbols)If the level of the shoulder is only slightly below the pavement, recovery should be fairly easy. Ease off the accelerator and then, if there is nothing in the way, steer
sothatthevehiclestraddlesthe edgeofthepavement. Turnthe steeringwheel8to13cm(3to 5in),aboutone-eighthturn,until therightfronttirecontactsthe pavementedge. Thenturnthe steeringwheeltogostraightdown theroadway.
LossofControl
Letusreviewwhatdrivingexperts sayaboutwhathappenswhenthe threecontrolsystems—brakes, steering,andacceleration—donot haveenoughfrictionwherethetires meettheroadtodowwhatthedriver hasasked.
Inanyemergency, donotgiveup. Keeptryingtosteerandconstantly seekanescaperouteorareaof lessdanger.
Skidding
Inaskid, adrivercanlosecontrol of the vehicle. Defensivedrivers avoid most kids by taking reasonable caresuited to existing conditions, and by not overdriving those conditions. But kids are always possible.
Thethreetypesofskidscorrespond tothevehicle'sthreecontrol systems.Inthebrakingskid,the wheelsarenotrolling.Inthe steeringorcorneringskid,toomuch speedorsteeringinacurvecauses tirestoslipandlosecorneringforce. Andintheaccelerationskid,too muchthrottlecausesthedriving wheelstospin.
Ifthevehiclestartstoslide,ease yourfootofftheacceleratorpedal andquicklysteerthewayyouwant thevehicletogo.Ifyoustart steeringquicklyenough,thevehicle maystraightenout.Alwaysbeready forasecondskidifitoccurs.
Ofcourse, tractionisreducedwhen water, snow, ice, gravel, or other materialisontheroad. Forsafety, slowdown and adjust your driving to these conditions. It is important to slowdown nonslippery surfaces because stopping distance is longer and vehicle control more limited.
Whiledrivingonasurfacewith reducedtraction,trytoavoid suddensteering,acceleration, orbraking,includingreducing vehiclespeedbyshiftingtoalower gear.Anysuddenchangescould causethetirestoslide.Youmight notrealizethesurfaceisslippery untilthevehicleisskidding.Learnto recognizewarningclues—suchas enoughwater,ice,orpackedsnow ontheroadtomakeamirrored surface—andslowdownwhenyou haveanydoubt.
Remember: Antilockbrakeshelp avoidonlythebrakingskid.
DrivingonWetRoads
Rainandwetroadscanreduce vehicletraction and affect your ability to stop and accelerate. Always drives slower in the set types of driving conditions and avoid driving through large puddles and deep-standing or flowing water.

WARNING
Wetbrakescancausecrashes. Theymightnotworkaswellina quickstopandcouldcause pullingtooneside.Youcould losecontrolofthevehicle.
Afterdrivingthroughalarge puddleofwateroracar/vehicle wash, lightlyapplythebrake pedaluntilthebrakeswork normally.
(Continued)
WARNING(Continued)
Flowingorrushingwatercreates strongforces.Drivingthrough flowingwatercouldcausethe vehicletobecarriedaway.Ifthis happens,youandothervehicle occupantscoulddrown.Donot ignorepolicewarningsandbe verycautiousabouttryingtodrive throughflowingwater.
Hydroplaning
Hydroplaningisdangerous.Water canbuildupunderthevehicle's tiressotheyactuallyrideonthe water.Thiscanhappeniftheroad iswetenoughandyouaregoing fastenough.Whenthevehicleis hydroplaning,ithaslittleorno contactwiththeroad.
Thereisnohardandfastruleabout hydroplaning. Thebestadviceisto slowdownwhentheroadiswet.
OtherRainyWeatherTips
Besidesslowingdown,otherwet weatherdrivingtipsinclude:
- Allowextrafollowingdistance.
• Passwithcaution. - Keepwindshieldwiping equipmentingoodshape.
- Keepthewindshieldwasherfluid reservoirfilled.
- Havegoodtireswithproper treaddepth.See Tireson page 10-42.
• Turnoffcruisecontrol.
HighwayHypnosis
Alwaysbealertandpayattentionto yoursurroundingswhiledriving. Ifyoubecometiredorsleepy, find asafeplacetoparkthevehicle andrest.
Otherdrivingtipsinclude:
- Keepthevehiclewellventilated.
- Keepinteriortemperaturecool.
- Keepyoureyesmoving—scan theroadaheadandtothesides.
- Checktherearviewmirrorand vehicleinstrumentsoften.
HillandMountainRoads
Drivingonsteephillsorthrough mountainsisdifferentthandriving onflatorrollingterrain. Tipsfor drivingintheseconditionsinclude:
- Keepthevehicleservicedandin goodshape.
- Checkallfluidlevelsandbrakes, tires,coolingsystem,and transmission.
- Shifttoalowergearwhengoing downsteeporlonghills.

WARNING
If you donot shift down, the brakes could get so hot that they would not work well. You would then have poor braking over no going down a hill. You could crash. Shift downtolet the engine assist the brakes on a steep downhill slope.
WARNING
CoastingdownhillinN(Neutral) orwiththeignitionoffis dangerous. Thebrakeswillhave todoalltheworkofslowing downandtheycouldgetsohot thattheywouldnotworkwell. Youwouldthenhavepoorbraking orevennonegoingdownhill. Youcouldcrash.Alwayshavethe engineerunningandthevehiclein gearwhengoingdownhill.
- Stayinyourownlane.Donot swingwideorcutacrossthe centeroftheroad.Driveat speedsthatletyoustayinyour ownlane.
- Topofhills:Bealert—somethingcouldbeinyourlane (stalledcar,accident).
- Payattentiontospecialroad signs(fallingrocksarea,winding roads,longgrades,passingor no-passingzones)andtake appropriateaction.
WinterDriving
DrivingonSnoworIce
Drivecarefullywhenthereissnow oricebetweenthetiresandthe road,creatinglesstractionorgrip. Weticecanoccuratabout0°C (32°F)whenfreezingrainbeginsto fall,resultinginevenlesstraction. Avoiddrivingonweticeorin freezingrainuntilroadscanbe treatedwithsaltorsand.
Drivewithcaution,whatever the condition.Accelerategently so tractionisnotlost.Acceleratingtoo quicklycausesthewheelstospin andmakesthesurfaceunderthe tiresslick,sothereisevenless traction.
Trynottobreakthefragiletraction. If you accelerate atetoofast, the drive wheels will spin and polish the surface under the tire seven more.
TheAntilockBrake System(ABS) onpage9-30improvesvehicle stabilityduringhardstopson slipperyroads,butapplythebrakes soonerthanwhenondrypavement.
Allowgreaterfollowingdistanceon anyslipperyroadandwatchfor slipperyspots.lcypatchescan occuronotherwiseclearroadsin shadedareas.Thesurfaceofa curveoranoverpasscanremain icywhenthesurroundingroads areclear.Avoidsuddensteering maneuversandbrakingwhile onice.
Turnoffcruise control on slippery surfaces.
BlizzardConditions
Beingstuckinsnowcanbea seriousssituation.Staywiththe vehicleunlesssthereishelpnearby. Ifpossible,usetheRoadside AssistanceProgramonpage13-5. Togethelpandkeepeveryonein thevehiclesafe:
• Turnonthehazardwarning flashers.
- Tiearedclothtoanoutside mirror.

WARNING
Snowcantrapengineexhaust underthevehicle. This may cause exhaust gas to get inside. Engine exhaust contains Carbon Monoxide (CO) which cannot be seen or smelled. It can cause unconsciousness and even death.
(Continued)
WARNING(Continued)
Ifthevehicleisstuckinthesnow:
- Clearawaysnowfromaround thebaseofyourvehicle, especiallyanythatisblocking theexhaustpipe.
- Checkagainfromtimeto timetobesuresnowdoes notcollectthere.
- Openawindowabout5cm (2in)onthesideofthe vehiclethatisawayfromthe windtobringinfreshair.
- Fullyopentheairoutletson orundertheinstrument panel.
- Adjusttheclimatecontrol systemtoasettingthat circulatestheairinside thevehicleandsetthefan speedtothehighestsetting. SeeClimateControlSystem intheIndex.
(Continued)
WARNING(Continued)
Formoreinformationabout carbonmonoxide,seeEngine Exhaustonpage9-24.
Snowcantrapexhaustgases underyourvehicle. This can causedeadlyCO(Carbon Monoxide)gastogetinside.CO couldovercomeyouandkillyou. Youcannotseeitorsmellit,so youmightnotknowitisinyour vehicle.Clearawaysnowfrom aroundthebaseofyourvehicle, especiallyanythatisblockingthe exhaust.
Runtheengineforshortperiods onlyasneededtokeepwarm,but becareful.
Tosavefuel, runtheengineforonly shortperiodsasneededtowarm thevehicleandthenshuttheengine offandclosethewindowmostof thewaytosaveheat.Repeatthis untilhelparrivesbutonlywhenyou feelreallyuncomfortablefromthe cold.Movingabouttokeepwarm alsohelps.
Ifittakessometimeforhelpto arrive,nowandthenwhenyourun theengine,pushtheaccelerator pedalslightlysotheengineruns fasterthantheidlespeed.This keepsthebatterychargedtorestart thevehicleandtosignalforhelp withtheheadlamps.Dothisaslittle aspossibletosavefuel.
IftheVehiclesStuck
Slowlyandcautiouslyspinthe wheelstofreethevehiclewhen stuckinsand,mud,ice,orsnow.
Ifstucktooseverelyforthetraction systemtofreethevehicle,turnthe tractionsystemoffandusethe rockingmethod.

WARNING
If the vehicle's stress pinathigh speed, they can explode, and you or others could be injured. The vehicle can overheat, causing an engine compartment fire or other damage. Spin the wheels as little as possible and avoid going above 55 km/h (35 mph).
Forinformationaboutusingtire chainsonthevehicle,see Tire Chainsonpage 10-62.
RockingtheVehicletoGet itOut
Turnthesteeringwheelleftand righttocleartheareaaroundthe frontwheels.Turnoffanytraction system.Shiftbackandforth betweenR(Reverse)andaforward gear,orwithamanualtransmission, between1(First)or2(Second)and R(Reverse),spinningthewheels aslittleaspossible.Toprevent transmissionwear,waituntilthe wheelsstopspinningbeforeshifting gears.Releasetheaccelerator pedalwhileshifting,andpress lightlyontheacceleratorpedal whenthetransmissionisingear.Slowlyspinningthewheelsinthe forwardandreversedirections causesarockingmotionthatcould freethevehicle.Ifthatdoesnotget thevehicleoutafterafewtries,it mightneedtobetowedout.Ifthe vehicledoesneedtobetowedout, see TowingtheVehicleon page 10-74.
9-12DrivingandOperating
VehicleLoadLimits
Itisveryimportanttoknowhow muchweightthevehiclecan carry. Thisweightiscalledthe vehiclecapacityweightand includestheweightofall occupants, cargoandall nonfactory-installedoptions. Twolabelsonthevehicle showhowmuchweightitmay properlycarry, the Tire and LoadingInformationlabel and the Certificationlabel.
WARNING
Donotloadthevehicleany heavierthantheGross VehicleWeightRating (GVWR), oreitherthe maximumfrontorrearGross AxleWeightRating(GAWR). Thiscancausesystemsto breakandchangethewaythe vehiclehandles. Thiscould causelossofcontrolanda crash. Overloadingcanalso shortenthelifeofthevehicle.
TireandLoadingInformation Label
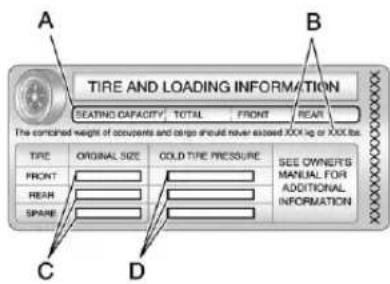
LabelExample
Avehicle-specific Tire and Loading Information label is attached to the vehicle's centerpillar(B-pillar). With the driver door open, you will find the label attached below the door lock post.
The Tire and Loading Information label shows the number of occupant seating positions (A), and the maximum vehicle capacity weight (B) in kilograms and pounds.
The Tire and Loading Information label also shows the tiresize of the original equipment tires (C) and the recommended cold tire inflation pressures (D). Formore information on tires and inflation see Tires on page 10-42 and Tire Pressure on page 10-49.
Thereisalsoimportantloading informationontheCertification label.IttellsyoutheGross VehicleWeightRating(GVWR) andtheGrossAxleWeight Rating(GAWR)forthefrontand rearaxle.See“Certification Label”laterinthissection.
StepsforDeterminingCorrect LoadLimit
- Locatethestatement "Thecombinedweight of occupants and cargoshould never exceed XXXkgor XXXlbs" on your vehicle's placard.
- Determinethecombined weightofthedriverand passengersthatwillberiding inyourvehicle.
- Subtract the combined weight of the driver and passengers from XXXkgor XXXlbs.
- Theresultingfigureequals theavailableamountofcargo andluggageloadcapacity. Forexample, ifthe "XXX" amountequals1400lbsand therewillbefive150lb
passengersinyourvehicle, theamountofavailablecargo andluggageloadcapacityis 650lbs(1400-750(5x150) =650lbs).
-
Determinethecombined weightofluggageandcargo beingloadedonthevehicle. Thatweightmaynotsafely exceedtheavailablecargo andluggageloadcapacity calculatedinStep4.
-
If your vehicle will betowing a trailer, the load from your trailer will be transferred to your vehicle. Consult this manual to determine how this reduces the available cargo and luggage load capacity of your vehicle.
This vehicle is neither designed nor intended to tow a trailer.
9-14DrivingandOperating
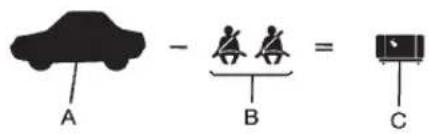
Example1
A. VehicleCapacityWeightfor Example1=453kg (1,000lbs).
B. SubtractOccupantWeight @68kg(150lbs)×2= 136kg(300lbs).
C. Available Occupant and Cargo Weight=317kg (700lbs).
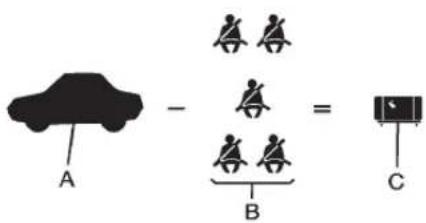
Example2
A. VehicleCapacityWeightfor Example2=453kg (1,000lbs).
B. SubtractOccupantWeight @68kg(150lbs)×5=340kg(750lbs).
C. Available Cargo Weight=113kg(250lbs).
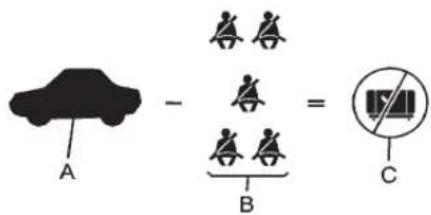
Example3
A. VehicleCapacityWeightfor Example3=453kg (1,000lbs).
B. SubtractOccupantWeight @91kg(200lbs)×5=453kg(1,000lbs).
C. Available Cargo Weight=0kg(0lbs).
Refertothevehicle's Tire and Loading Information label for specific information about the vehicle's capacity weight and seating positions. The combined weight of the driver, passengers, and cargoshould never exceed the vehicle's capacity weight.
CertificationLabel
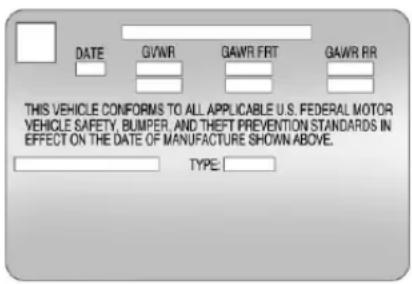
LabelExample
Avehicle-specific Certification labelisattachedtothedriver sidecenterpillar(B-pillar).
Thelabeltellsthegrossweight capacityofthevehicle, called theGrossVehicleWeightRating (GVWR). TheGVWRincludes theweightofthevehicle, all occupants, fuel, and cargo. NeverexceedtheGVWRfor thevehicle, ortheGrossAxle WeightRating(GAWR)foreither thefrontorrearaxle.
And, if there is a heavy load, it should be spread out. See "Steps for Determining Correct Load Limit" earlier in this section.
WARNING
Donotloadthevehicleany heavierthantheGross VehicleWeightRating (GVWR), oreitherthe maximumfrontorrearGross AxleWeightRating(GAWR). Thiscancausesystemsto breakandchangethewaythe vehiclehandles. Thiscould causelossofcontrolanda crash. Overloadingcanalso shortenthelifeofthevehicle.
If you put things inside the vehicle—likesuit cases, tools, packages, or anything else—they will go as fast as the vehicle goes. If you havet to stop or turn quickly, or if there is a crash, they will keep going.

WARNING
Thingsinsidethevehiclecan strikeandinjurepeopleina suddenstoporturn, orina crash.
- Putthingsinthecargo areaofthevehicle.Inthe cargoarea,putthemas farforwardaspossible. Trytospreadtheweight evenly.
(Continued)
WARNING(Continued)
- Neverstackheavier things,likesuitcases, insidethevehiclesothat someofthemareabove thetopsoftheseats.
- Donotleavean unsecuredchildrestraint inthevehicle.
- Securelooseitemsinthe vehicle.
- Donotleaveaseatfolded downunlessneeded.
Starting and Operating
NewVehicleBreak-In
Notice: The vehicle does not need an elaborate break-in. But it will perform better in the long run if you follow these guidelines:
- Donotdriveatanyone constantspeed, fastor slow, for the first 805 km (500 miles). Donotmake full-throttle starts. Avoid downshifting to brake or slow the vehicle.
- Avoidmakinghardstopsfor thefirst322km(200miles)or so.Duringthistimethenew brakeliningsarenotyet brokenin.Hardstopswith newliningscanmean prematurewearandearlier replacement.Followthis breaking-inguidelineevery timeyougetnewbrake linings.
Followingbreak-in, enginespeed and load can be gradually increased.
IgnitionPositions
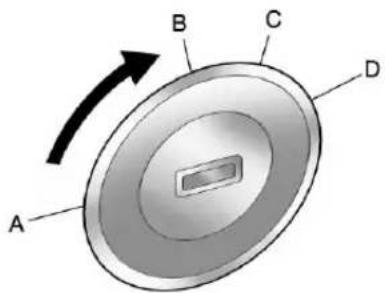
Theignitionswitchhasfourdifferent positions.
Notice: Using a tool to forc the key to turn in the ignition could caused damage to the switchor break the key. Usethe correct key, makes sure it is all the way in, and turn it only with your hand. If the key cannot be turned by hand, see your dealer.
Thekeymustbefullyextendedto startthevehicle.
ToshiftoutofP(Park),turnthe ignitiontoON/RUNandapplythe brakepedal.
A(STOPPINGTHEENGINE/LOCK/OFF):Whenthevehicleis stopped,turntheignitionswitchto LOCK/OFFtoturntheengineoff. RetainedAccessoryPower(RAP) willremainactive.SeeRetained AccessoryPower(RAP)on page9-21formoreinformation.
Thisistheonlypositionfromwhich thekeycanberemoved. Thislocks thesteeringwheel,ignition,and automatictransmission.
Donotturntheengineoffwhenthe vehicleismoving. Thiswillcausea lossofpowerassistinthebrake andsteeringsystemsanddisable theairbags.
Inanemergency, if the vehicle must be shutoff while driving:
-
Brakeusing a firmand steady pressure. Donotpump the brakes repeatedly. This may deplete power assist, requiring increased brake pedal force.
-
Shiftthevehicletoneutral. This can bedonewhilethevehicleis moving. Aftershiftingtoneutral, firmly apply the brakes and steer the vehicle to as a felocation.
-
Cometoacompletestop.Shift toP(Park)withanautomatic transmission,orneutralwitha manualtransmission.Turnthe ignitiontoLOCK/OFF.
-
Settheparkingbrake. See ParkingBrakeonpage9-31.

WARNING
Turningoffthevehiclewhile movingmaycauselossofpower assistinthebrakeandsteering systemsanddisabletheairbags. Whiledriving,onlyshutthe vehicleoffinanemergency.
- If the vehicle must be shutoff while driving, turn the ignition to ACC/ACCESSORY.
Theignitionswitchcanbindinthe LOCK/OFFpositionwiththewheels turnedoffcenter.Ifthishappens, movethesteeringwheelfromright toleftwhileturningthekeytoACC/ACCESSORY.Ifthisdoesnotwork, thenthevehicleneedsservice.
B(ACC/ACCESSORY): This position unlocksthesteeringwheel. Some accessories can be used in this position.
C(ON/RUN): Theignitionswitch stays in this position when the engine is running. This position can be used to operate the electrical accessories, as well as to display some warning and indicator lights.
The battery could bedrained if the key is left in the ON/RUN position with the engine off. The vehicle might not start if the battery is allowed to drain for an extended period of time.
D(START): Thispositionstartsthe engine. Whentheenginestarts, releasethekey. Theignitionswitch willreturntoON/RUNfornormal driving.
StartingtheEngine
Placethetransmissioninthe propergear.
AutomaticTransmission
MovetheshiftlevertoP(Park)or N(Neutral). Theenginewillnotstart inanyotherposition. Torestartthe vehiclewhenitisalreadymoving, useN(Neutral)only.
Notice: Donottrytoshiftto P(Park)ifthevehicleismoving. Ifyoudo,youcoulddamagethe transmission.ShifttoP(Park) onlywhenthevehicleisstopped.
ManualTransmission
Theshiftlevershouldbeinneutral and the parking brake engaged. Hold the clutch pedaldownto the floor and start the engine. The vehicle will not start the clutch pedal is not all the way down.
StartingProcedure
- With your footoff the accelerator pedal, turn the ignition key to START. When the engine starts, let go of the key. The edgespeed will godownasthe engine warms. Donotracethe engine immediately after starting it. Allow the oil to warm up and lubricate all moving parts.
Thevehiclehasa Computer-ControlledCranking System. Thisfeatureassistsin startingtheengineandprotects components. Iftheignitionkeyis turnedtotheSTARTposition, and thenreleasedwhenthe enginebeginscranking,the enginewillcontinuecranking forafewsecondsoruntilthe vehiclestarts. Iftheenginedoes notstartandthekeyisheldin STARTformanyseconds, crankingstopsafter15seconds topreventcrankingmotor damage. Topreventgear damage, thissystemalso preventscrankingiftheengine
isalreadyrunning.Engine crankingcanbestoppedby turningtheignitionswitchto ACC/ACCESSORYor LOCK/OFF.
Notice:Crankingtheenginefor longperiodsoftime,byreturning thekeytotheSTARTposition immediatelyaftercrankinghas ended,canoverheatanddamage thecrankingmotor,anddrainthe battery.Waitatleast15seconds betweeneachtry,toletthe crankingmotorcooldown.
- If theenginedoesnotstartafter 5 to 10 seconds, especially in very cold weather (below - 18°C or 0°F), it could be flooded with to much gasoline. Push the accelerator pedal all the way to the floor and hold the there as you hold the key in START for a maximum of 15 seconds. Wait at least 15 seconds between each try, to allow the cranking motor to cool. When the engine starts, let go of the key and accelerator.
If the vehicle starts briefly but then stops again, repeat the procedure. This clear the extra gasoline from the engine. Donot racethe engine immediately after starting it. Operat the engine and transmission gently until the oil warms up and lubricates all moving parts.
Notice: The engine is designed to work with the electronics in the vehicle. If you add electrical parts or accessories, you could change the way the engine operates. Before adding electrical equipment, check with your dealer. If you donot, the engine might not perform properly. Any resulting damage would not be covered by the vehicle warranty.
OverrunCut-Off
Whenthevehicleisdrivenwitha gearengagedbuttheaccelerator released, thefuelsupplyis automaticallycutofftoimprove fueleconomy.
EngineHeater
Theenginecoolantheater, ifavailable, canhelpincoldweather conditionsatorbelow-18°C(0°F) foreasierstartingandbetterfuel economyduringenginewarm-up. Pluginthecoolantheateratleast fourhoursbeforestartingthe vehicle. Aninternalthermostatin theplug-endofthecordwillprevent enginecoolantheateroperationat temperaturesabove-18°C(0°F).
ToUsetheEngineCoolant Heater
- Turnofftheengine.
- Openthehood and unwrap the electrical cord.
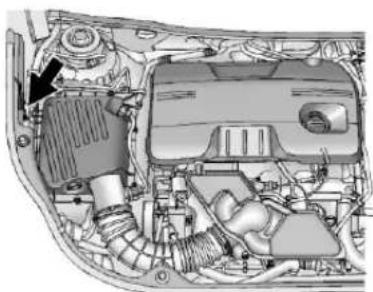
natural_image
Interior view of a car engine bay showing internal components like compressor, fan, and exhaust pipe (no text or labels visible)The electrical cord is located on the passengers side of the engine compartment, between the fender and the air cleaner.
- Plugitintoanormal, grounded 110-voltACoutlet.
WARNING
Pluggingthecordintoan ungroundedoutletcouldcausean electricalshock.Also,thewrong kindofextensioncordcould overheatandcauseafire.You couldbeseriouslyinjured.Plug thecordintoaproperlygrounded three-prong110-voltACoutlet. Ifthecordwillnotreach,usea heavy-dutythree-prongextension cordratedforatleast15amps.
- Before starting the engine, be suretounplugandstorethe cordasitwasbeforetokeepit awayfrommovingengineparts.
Thelengthoftimetheheatershould remainpluggedindependson severalfactors.Askadealerinthe areawhereyouwillbeparkingthe vehicleforthebestadviceonthis.
RetainedAccessory Power(RAP)
These vehicle accessories can be used for up to 10 minutes after the engine is turned off:
- AudioSystem
- PowerWindows
- Sunroof(IfEquipped)
- AuxiliaryPowerOutlet
Powertotheaudiosystemwill continuetooperateforupto 10minutesoruntilthedriverdooris opened.
Powertothepowerwindowsand sunroofwillcontinuetooperatefor upto10minutesoruntilanydooris opened.
Allofthesefeatureswillworkwhen theignitionisinON/RUNorACC/ACCESSORY.
ShiftingIntoPark (AutomaticTransmission)
WARNING
Itcanbedangeroustogetoutof thevehicleiftheshiftleverisnot fullyinP(Park)withtheparking brakefirmlyset. Thevehiclecan roll. If you have left the engine running, the vehicle can move suddenly. You or others could be injured. Tobesure the vehicle will not move, even when you are on fairly level ground, us the steps that follow.
Usethisproceduretoshiftinto P(Park):
- Hold the brake pedaldown and set the parking brake. See Parking Brake on page 9-31 form more information.
- Hold the button on the shift lever and push the levertoward the front of the vehicle into P (Park).
- TurntheignitiontoLOCK/OFF.
- Removethekey.
LeavingtheVehiclewiththe EngineRunning

WARNING
Itcanbedangeroustoleavethe vehiclewiththeengine running. Thevehiclecouldmovesuddenly iftheshiftleverisnotfully in P(Park)withtheparkingbrake firmlyset.And,ifyouleavethe vehiclewiththeengine running, itcouldoverheatandevencatch fire.Youorotherscouldbe injured.Donotleavethevehicle withtheengine running.
If you havetoleavethe vehicle with the engineer running, the vehicle must be in P (Park) and the parking brakeset.
Releasethebuttonandcheckthat theshiftlevercannotbemovedout ofP(Park).
TorqueLock
Torquelockiswhentheweight ofthevehicleputstoomuch forceontheparkingpawlinthe transmission. This happens when parkingonahillandshifting the transmission into P(Park) is not done properly; then it is difficult to shift out of P(Park). Toprevent torque lock, set the parking brake and thenshift into P(Park). To find out how, see "Shifting Into Park" listed previously.
Iftorquelockdoesoccur, the vehiclemayneedtobepushed uphillbyanothervehicletorelieve theparkingpawlpressure,soyou canshiftoutofP(Park).
ShiftingoutofPark (AutomaticTransmission)
This vehicle is equipped with an electronic shift lock release system. Theshift lock release is designed to:
- Preventignitionkeyremoval unlesstheshiftleverisin P(Park)withtheshiftlever buttonfullyreleased.
- Preventmovementoftheshift leveroutofP(Park)unlessthe ignitionisinON/RUNandthe brakepedalisapplied.
Theshiftlockreleaseisalways functionalexceptinthecaseofan unchargedorlowvoltage(lessthan 9volt)battery.
If the vehicle has an uncharged battery or a battery with low voltage, trycharging or jump starting the battery. See Jump Starting on page 10-70
ToshiftoutofP(Park):
- Applythebrakepedal.
- TurntheignitiontoON/RUN.
- Presstheshiftleverbutton.
- Movetheshiftlevertothe desiredposition.
IfstillunabletoshiftoutofP(Park):
- Fullyreleasetheshiftlever button.
- Hold the brake pedaldown and presstheshift lever button again.
- Movetheshiftlevertothe desiredposition.
If you still cannot move the shift lever from P(Park), consult your dealer or professional to owing service.
Parking
If the vehicle has a manual transmission, before getting out of the vehicle, movetheshiftlever into R (Reverse) if parking on downhill slope. On levels surface or an uphills slope, use 1 (First) gear. Firmly apply the parking brake. Turn the wheel toward the curb for a downhill slope, or away from the curb for an uphills slope. Once the shift lever has been placed into gear with the clutch pedal pressed in, turn the ignition key to LOCK/OFF, removethe key, and releasethe clutch.
ParkingoverThings ThatBurn

WARNING
Thingsthatcanburncouldtouch hotexhaustpartsunderthe vehicleandignite.Donotpark overpapers,leaves,drygrass, orotherthingsthatcanburn.
EngineExhaust

WARNING
Engineexhaustcontainscarbon monoxide(CO)whichcannot be seenorsmelled.ExposuretoCO cancauseunconsciousnessand evendeath.
Exhaustmayenterthevehicleif:
- The vehicleidlesinareas with poor ventilation (parking garages, tunnels, deep snow that may block under body airflowortail pipes).
• Theexhaustsmellsor soundsstrangeordifferent.
• Theexhaustsystemleaks duetocorrosionordamage. - Thevehicleexhaustsystem has been modified, damaged or improperly repaired.
(Continued)
WARNING(Continued)
- Thereareholesoropenings inthevehiclebodyfrom damageoraftermarket modificationsthatarenot completelysealed.
Ifunusualfumesaredetectedor ifitissuspectedthatexhaustis comingintothevehicle:
- Driveitonlywiththewindows completelydown.
- Havethevehiclerepaired immediately.
Neverparkthevehiclewiththe engineerunninginanenclosed areasuchasagarageora buildingthathasnofreshair ventilation.
RunningtheVehicle WhileParked
Itisbetternottoparkwiththe enginerunning.Butifyoueverhave to,herearesomethingstoknow.

WARNING
Idlingavehicleinanenclosed areawithpoorventilationis dangerous.Engineexhaustmay enterthevehicle.Engineexhaust containsCarbonMonoxide(CO) whichcannotbeseenorsmelled. Itcancauseunconsciousness andevendeath.Neverrunthe engineinanenclosedareathat hasnofreshairventilation.For moreinformation,seeEngine Exhaustonpage9-24.
WARNING
Itcanbedangeroustogetout ofthevehicleifthaeutomatic transmissionshiftleverisnotfully inP(Park)withtheparkingbrake firmlyset. Thevehiclecanroll. Donotleavethevehiclewhenthe engineisrunningunlessyou haveto. Ifyouhaveleftthe engineerunning, thevehiclecan movesuddenly. Youorothers couldbeinjured. Tobesurethe vehiclewillnotmove, evenwhen itisonfairlylevelground, always settheparkingbrakeandmove theautomatictransmissionshift levertoP(Park),orthemanual transmissionshiftlevertoNeutral.
Followtheproperstepsto besurethevehiclewillnotmove. Ifthevehiclehasanautomatic transmission,seeShiftingIntoPark (AutomaticTransmission)on page9-21.
Automatic Transmission
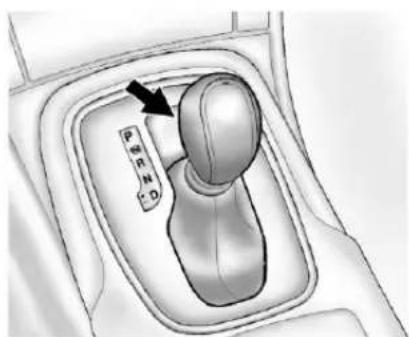
Theautomatictransmissionhasa shiftleverlocatedontheconsole betweentheseats.
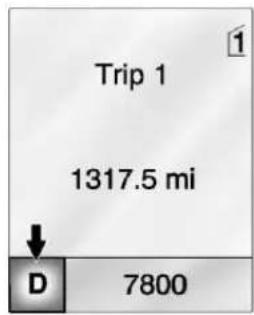
Themodeorselectedgearisshown intheinstrumentcluster.
9-26DrivingandOperating
P(Park): Thispositionlocksthe drivewheels.Itisthebestposition tousewhenstartingtheengine because the vehicle cannot move easily.

WARNING
It is dangerous to get out of the vehicle if the shift lever is not fully in P (Park) with the parking brake firmly set. The vehicle can roll.
Donotleavethevehiclewhenthe engineisrunningunlessyou haveto.Ifyouhaveleftthe engineerunning,thevehiclecan movesuddenly.Youorothers couldbeinjured.Tobesurethe vehiclewillnotmove,evenwhen youareonlevelground,always settheparkingbrakeandmove theshiftlevertoP(Park).See ShiftingIntoPark(Automatic Transmission)onpage9-21.
Makesuretheshiftleverisfullyin P(Park)beforestartingtheengine. Thevehiclehasanautomatic transmissionshiftlockcontrol system. Theregularbrakemustbe fullyappliedfirstandthentheshift leverbuttonpressedbeforeshifting fromP(Park)whentheignitionkey isinON/RUN. Ifyoucannotshiftout ofP(Park),easepressureonthe shiftlever,thenpushtheshiftlever allthewayintoP(Park)asyou maintainbrakeapplication.Then presstheshiftleverbutton and movetheshiftleverintoanother gear.See ShiftingoutofPark (Automatic Transmission)on page9-22.
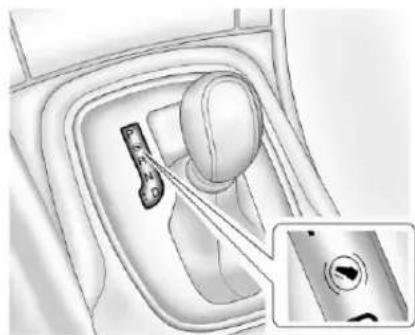
natural_image
Interior view of a car gear shift lever with a close-up inset showing the switch (no text or symbols)Withoutthebrakepedalapplied,the controlindicatorwillbeon.
IftheshiftleverisnotinP(Park) whentheignitionisturnedtoOFF, thecontrolindicatorandPwillflash.
R(Reverse):Usethisgearto backup.
Notice: ShiftingtoR(Reverse) while the vehicle is moving forward could damage the transmission. There pairs would not be recovered by the vehicle warranty. Shift to R(Reverse) only after the vehicle is stopped.
Torockthevehiclebackandfortho getoutofsnow,ice,orsandwithout damagingthetransmission,seelf the VehicleIsStuckonpage9-11.
N(Neutral): In this position, the enginedoes not connect with the wheels. Torestart the engine when the vehicle is already moving, use N(Neutral) only with the brake pedal applied.
The vehicle has an automatic neutral shift feature which allows the transmission to automatically shift to N (Neutral) when the vehicle is stopped with a forward gear engaged and the brake pedal
applied. Thereducedloadonthe engineimprovesvehiclefuel economy.

WARNING
Shifting into a drive gear while the engine is running at high speed is dangerous. Unless your foot is firmly on the brake pedal, the vehicle could move very rapidly. You could lose control and hit people or objects. Donot shift into a drive gear while the engine is running at high speed.
Notice: Shifting out of Park (Park) or N (Neutral) with the engine running at high speed may damage the transmission. The repairs would not be recovered by the vehicle warranty. Besure the engine is not running at high speed when shifting the vehicle.
D(Drive): This position is for normal driving. It provides the best fuel economy. If more power is needed for passing, and the vehicle is:
- Goinglessthan56km/h (35mph), pushtheaccelerator pedalabouthalfwaydown.
- Goingabout56km/h(35mph)or more,pushtheacceleratorall thewaydown.
Notice: If the vehicle seem to accelerate slowly or not shift gears when you go faster, and you continue to drive the vehicle that way, you could damage the transmission. Have the vehicle serviced right away.
ManualMode
DriverShiftControl(DSC)
Notice: If you drivethe vehicle at a high rpm without up shifting while using Driver Shift Control (DSC), you could damage the vehicle. Always up shift when necessary while using DSC.
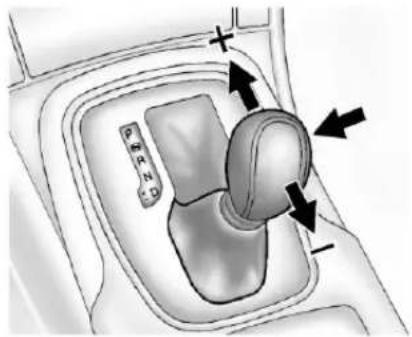
natural_image
Diagram of a car gear shift lever with directional arrows indicating motion (no text or symbols)DSCallowsyoutoshiftan automatictransmissionsimilartoa manualtransmission.Tousethe DSCfeature:
- Movetheshiftlevertotheleft fromD(Drive)intothesidegate markedwith(+)and(-).
- Presstheshiftleverforwardto upshiftorrearwardtodownshift.
While using the DSC feature, the vehicle will have firmer, quicker shifting. You can us this for sport driving or when climbing or
descendinghills, tostayingear longer, ortodownshiftformore powerorenginebraking.
The transmission will only allow youtoshiftintogears appropriate for the vehicles speed and engine revolutions per minute (rpm). The transmission will not automatically shift to then next lower gear if the enginerpmisto high, norto the nexthighergear when the maximum enginerpmis reached.
WhileintheDSCmode,the transmissionwillautomatically downshiftwhenthevehiclecomes toastop.Thiswillallowformore powerduringtake-off.
Whenacceleratingthevehiclefrom astopinsnowyandicyconditions, youmaywanttoshiftintosecond gear.Ahighergearallowsthe vehicletogainmoretractionon slipperysurfaces.
ManualTransmission
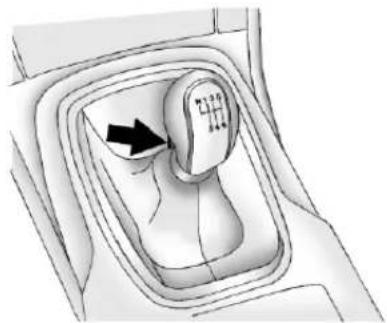
natural_image
Diagram of a car gear shift mechanism showing a knob and clockwise motion arrow (no text or symbols)Thisistheshiftpatternforthe six-speedmanualtransmission.
Tooperatethetransmission:
Notice: Donotrestyourhandon theshiftleverwhiledriving. The pressurecouldcausepremature wearinthetransmission. The repairswouldnotbecoveredby thevehiclewarranty.
Notice: Donotrestyourfooton theclutchpedalwhiledrivingor whilestopped. Thepressurecan causeprematurewearinthe clutch. Therepairswouldnotbe coveredbythevehiclewarranty.
1(First):Presstheclutchpedal fullytothepedalstopandshiftinto 1(First).Thenslowlyletuponthe clutchpedalasyoupressthe acceleratorpedal.
If you cometo a complete stop and it is hard to shift into 1 (First), put the shift lever in Neutral and let up on the clutch. Press the clutch pedal back down. Thenshift into 1 (First).
2(Second): Presstheclutchpedal asyouletupontheaccelerator pedalandshiftinto2(Second). Then, slowlyletupontheclutch pedalasyoupresstheaccelerator pedal.
3(Third),4(Fourth),5(Fifth), and6(Sixth):Shiftinto3(Third), 4(Fourth),5(Fifth),and6(Sixth) thesamewayyoudofor 2(Second).Slowlyletuponthe clutchpedalasyoupressthe acceleratorpedal.Forthebest fueleconomy,use6(Sixth)gear whenevervehiclespeedand drivingconditionsallow.

WARNING
Ifyouskipagearwhenyou downshift,youcouldlosecontrol ofthevehicle.Youcouldinjure yourselforothers.Donotshift downmorethanonegearata timewhenyoudownshift.
Notice: Donotskipgears whileupshifting. This can cause premature wear in the transmission. Therepairswould not be recovered by the vehicle warranty.
Tostop, letupon the accelerator pedaland pressthebrakepedal. Just before the vehicle stops, press the clutch pedaland the brake pedal, and shift to Neutral.
Neutral: Usethispositionwhen youstartoridletheengine. TheshiftleverisinNeutralwhenit iscenteredintheshiftpattern, notin anygear.
R(Reverse):Tobackup,withthe vehicleatacompletestop,press downtheclutchpedal. Thenpullup onthebuttonontheselectorlever, andshiftintoR(Reverse).Letup ontheclutchpedalslowlywhile pressingtheacceleratorpedal.
IfR(Reverse)geardoesnot engage, shift the transmission to Neutral, releasetheclutchpedal and pressitbackdown. Repeat the gearselection.
Notice: ShiftingtoR(Reverse) while the vehicle is moving forward could damage the transmission. There pairs would not be recovered by the vehicle warranty. Shift to R(Reverse) only after the vehicle is stopped.
UseR(Reverse)alongwiththe parkingbraketoparkthevehicle.
Whenoperating, presstheclutch pedaldowncompletely. Donotuse thepedalasafootrest.
Brakes
AntilockBrake System(ABS)
This vehicle has the Antilock Brake System (ABS), an advanced electronic braking system that helps prevent abrakingskid.
Whentheengineisstartedandthe vehiclebeginstodriveaway,ABS checksitself.Amomentarymotoror clickingnoisemightbeheardwhile thistestisgoingon,anditmight evenbenoticedthatthebrake pedalmovesalittle.Thisisnormal.

If there is a problem with ABS, this warning light stays on. See Antilock Brake System (ABS) Warning Light on page 5-17.
Ifdrivingsafelyonawetroadandit becomesnecessarytoslamonthe brakesandcontinuebrakingto avoidasuddenobstacle,a computersensesthatthewheels areslowingdown.Ifoneofthe wheelsisabouttostoprolling,the computerwillseparatelyworkthe brakesateachwheel.
ABScanchangethebrakepressure toeachwheel, asrequired, faster thananydrivercould. Thiscanhelp thedriversteeraroundtheobstacle whilebrakinghard.
Asthebrakesareapplied, the computerkeepsreceivingupdates onwheelspeedandcontrols brakingpressureaccordingly.
Remember:ABSdoesnotchange thetimeneededtogetafootupto thebrakepedaloralwaysdecrease stoppingdistance.Ifyougettoo
closetothevehicleinfrontofyou, therewillnotbeenoughtimeto applythebrakesifthatvehicle suddenlyslowsorstops.Always leaveenoughroomupaheadto stop,evenwithABS.
UsingABS
Donotpumpthebrakes.Justhold thebrakepedaldownfirmlyandlet ABSwork.YoumightheartheABS pumpormotoroperatingandfeel thebrakepedalpulsate,butthisis normal.
BrakinginEmergencies
ABSallowsthedrivertosteerand brakeatthesametime.Inmany emergencies,steeringcanhelp morethaneventheverybest braking.
ParkingBrake
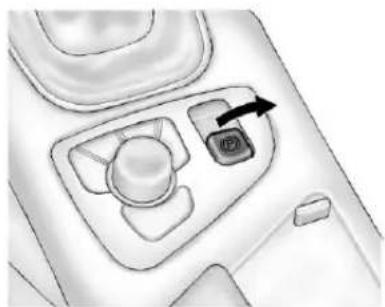
natural_image
Top-down view of a car's air intake console with a black arrow pointing to the mode button (no text or symbols visible)ThevehiclehasanElectricParking Brake(EPB).Theswitchforthe EPBisonthecenterconsole. TheEPBcanalwaysbeactivated, eveniftheignitionisoff.Toprevent drainingthebattery, avoidrepeated cyclesoftheEPBsystemwhenthe engineisnotrunning.
9-32DrivingandOperating
Thesystemhasaparkingbrake statuslightandaparkingbrake warninglight.SeeElectricParking BrakeLightonpage5-16.Thereare alsothreeDriverInformationCenter (DIC)messages.SeeBrakeSystem Messagesonpage5-26formore information.Incaseofinsufficient electricalpower,theEPBcannotbe appliedorreleased.
Beforeleavingthevehicle, check theparkingbrakestatuslightto ensurethattheparkingbrakeis applied.
EPBApply
TheEPBcanbeappliedanytime thevehicleisstopped.TheEPBis appliedbymomentarilyliftingupon theEPBswitch.Oncefullyapplied, theparkingbrakestatuslightwillbe on.Whilethebrakeisbeingapplied, thestatuslightwillflashuntilitis fullyapplied.Ifthelightdoesnot comeon,orremainsflashing,you needtohavethevehicleserviced. Donotdrivethevehicleifthe parkingbrakestatuslightisflashing.
Seeyourdealer.SeeElectric ParkingBrakeLightonpage5-16 formoreinformation.
If the EPB is applied while the vehicle is in motion, achimewill sound, and the DIC message RELEASE PARKBRAKESWITCH will be displayed. The vehicle will decelerate as long astheswitch is held in the up position. Releasing the EPB switch during deceleration will releasethe parking brake. If the switch is held in the up position until the vehicle comestoastop, the EPB will remain applied.
Iftheparkingbrakestatuslight flashescontinuously,thentheEPB isonlypartiallyappliedorreleased, orthereisaproblemwiththeEPB. TheDICmessageSERVICE PARKINGBRAKEwillbedisplayed. Ifthislightflashescontinuously, releasetheEPB,andattemptto applyitagain.Ifthislightcontinues toflash,donotdrivethevehicle. Seeyourdealer.
Iftheparkingbrakewarninglightison, the EPB has detected an error in an othersystem and is operating with reduced functionality. To apply the EPB when this lightison, lift upon the EPB switch and hold it in the up position. Full application of the parking brake by the EPB system may take a longer period to dimethannormal whentislightison. Continueto hold the switch until the parking brake status light remains on. If the parking brakewarninglightison, see your dealer.
FormaximumEPBforcewhen parkingonahill, pulltheEPB switchtwice.
If the EPB fail to apply, there are wheel should be blocked to prevent vehicle movement.
EPBRelease
ToreleasetheEPB, placethe ignitionintheON/RUNposition, applyandholdthebrakepedal, and pushdownmomentarilyontheEPB switch. If you attempt to release the EPB without the brake pedal applied, achimewillsound, and the DIC message PRESSBRAKE PEDAL TORELEASE PARK BRAKE will be displayed. The EPB is released when the parking brake status light is off.
Iftheparkingbrakewarning lightison, the EPBhasdetected anerrorinanothersystemandis operatingwithreducedfunctionality. ToreleasetheEPBwhenthislight ison, pushdownontheEPBswitch andholditinthedownposition. EPBreleasemaytakealonger periodoftimethannormalwhen thislightison. Continuetoholdthe switchuntiltheparkingbrakestatus lightisoff. Ifthelightison, seeyour dealer.
Notice: Driving with the parking brake on can over heat the brake system and cause premature wear ordamagetobrakesystem parts. Makes sure that the parking brake is fully released and the brakewarning light is off before driving.
AutomaticEPBRelease
TheEPBwillautomaticallyreleaseif thevehicleisrunning,placedinto gear,andanattemptismadeto driveaway.Avoidrapidacceleration whentheEPBisapplied,to preserveparkingbrakelininglife.
The EPBcanalsobeused to preventrollbackforvehicleswith a manualtransmissiontakingoffon ahill. Inasituationwherenoroll backisdesired, anappliedEPBwill allowbothfeettobeusedforthe clutchandacceleratorpedalsin preparationforstartingthevehicle movingintheintendeddirection.
Inthissituation, performthenormal clutchand/oraccelerator actions required to begin moving the vehicle. There is noneed top push the switchtoreleasethe EPB.
BrakeAssist
This vehicle has a brake assist feature designed to assist the driver instopping or decreasing vehicle speed in emergency driving conditions. This feature uses the stability system hydraulic brake control module to supplement the power brakesystem under conditions where the driver has quickly and forcefully applied the brake pedalinan attempt to quickly stoporslowdown the vehicle.
Thestabilitysystemhydraulicbrake controlmoduleincreasesbrake pressureateachcornerofthe vehicleuntiltheABSactivates. Minorbrakepedalpulsationor pedalmovementduringthistime isnormalandthedrivershould continuetoapplythebrakepedal asthedrivingsituationdictates. Thebrakeassistfeaturewill automaticallydisengagewhen thebrakepedalisreleasedor brakepedalpressureisquickly decreased.
HillStartAssist(HSA)
Some vehicles have a Hill Start Assist (HSA) feature, which maybe useful when the vehicle is stopped on a grade. This feature is designed to prevent the vehicle from rolling, either forward or rearward, during vehicle drive off. After the driver completely stops and holds the vehicle in a complete stand still on a grade, HSA will be automatically activated. During the transition period between whent hdriver releases the brake pedaland starts to accelerate to drive off on a grade, HSA hold the braking pressure to ensure that there is nor rolling. The brakes will automatically release when the accelerator pedal is applied within the two-second window. It will not activate if the vehicle is in a drive gear and facing downhill or if the vehicle is facing uphill and in R (Reverse).
RideControlSystems
TractionControl System(TCS)
The vehicle may have a Traction Control System (TCS) that limits wheelslip. Thesystem operates if sense that one or both of the front wheels are slipping or beginning to lose traction. Whenthish happens, the system reduces engine power and/or applies brake pressure to the slipping wheel(s).
Thesystemmaybeheardorfelt whileitisworking, butthisis normal.
TCSautomaticallycomeson wheneverthevehicleisstarted. Tolimitwheelslip,especiallyin slipperyroadconditions,thesystem shouldalwaysbelefton.But, TCScanbeturnedoffifneeded.
flashestoindicate that TCS is active. See Traction Control System (TCS)/Stabili Trak® Lighton page 5-18 form more information.
If thereisaproblemdetected with TCS, SERVICETRACTION CONTROL is displayed on the Driver Information Center (DIC). See Ride Control System Messages on page 5-29. Whenthismessage is displayed and comeson and stayson, the vehicle is not drive but the system is not operational. Drivings should be adjusted accordingly.
If ≈ comesonandstayson, reset thesystem.
Toreset:
- Stopthevehicle.
- Turntheengineoffandwaiting 15seconds.
3.Starttheengine.
If stillcomesonandstayson,the vehicleneedsservice.
Notice: Donotrepeatedly brake oraccelerate heavily when TCS is off. The vehicle's driveline could be damaged.
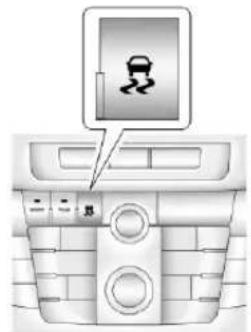
With InteractiveDriveControl System
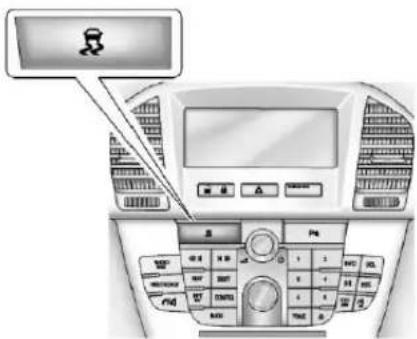
Without InteractiveDriveControl System
TCScanbeturnedoffbypassing andreleasingtheTCS/StabiliTrak button.WhenTCSisturnedoff, comeson, and the appropriate DIC message alsodisplays. See Ride ControlSystemMessageson page5-29. With TCSturnedoff, the systemdoesnotlimitwheelslip. Drivingshouldbeadjusted accordingly. See TractionOffLight onpage5-18formoreinformation.
Pressandreleasethe TCS/StabiliTrakbuttonagain toturnthesystembackon.
Itmaybenecessarytoturnthe systemoffifthevehiclegetsstuck insand,mud,orsnowandrocking thevehicleisrequired.Seelfthe VehicleIsStuckonpage9-11for moreinformation.SeealsoWinter Drivingonpage9-9forinformation onusingTCSwhendrivinginsnowy oricyconditions.
Addingnon-GMaccessoriescan affectthevehicleperformance. SeeAccessoriesandModifications onpage10-3formoreinformation.
StabiliTrak® System
The vehicle may have a vehicle stability enhancement system called StabiliTrak. It is an advanced computer-controlled system that assists with directional control of the vehicle in difficult driving conditions.
StabiliTrakactivateswhenthe computersensesadifference betweentheintendedpathandthe directionthevehicleisactually traveling.StabiliTrakselectively appliesbrakingpressuretothe vehiclebrakestohelpsteerthe vehicleintheintendeddirection.
StabiliTrakcomesonautomatically wheneverthevehicleisstarted. Toassistwithdirectionalcontrol ofthevehicle,thesystemshould alwaysbelefton.
WhenStabiliTrakactivates, flashesontheinstrumentpanel. Anoisemaybeheardorvibration maybefeltinthebrakepedal. Thisisnormal.Continuetosteerthe vehicleintheintendeddirection. See TractionControlSystem(TCS)/StabiliTrak® Lightonpage5-18for moreinformation.
Ifaproblemisdetectedwith StabiliTrak,SERVICE STABILITRAKisdisplayedonthe DriverInformationCenter(DIC). SeeRideControlSystemMessages onpage5-29.Whenthismessage isdisplayedand comesonand stayson,thevehicleissafetodrive butthesystemisnotoperational. Drivingshouldbeadjusted accordingly.
If comesonandstayson,reset thesystem.
Toreset:
-
Stopthevehicle.
-
Turntheengineoffandwaiting 15seconds.
3.Starttheengine.
If 📄stillcomesonandstayson,the vehicleneedsservice.
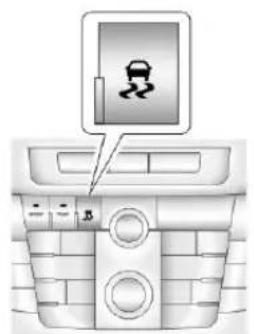
With InteractiveDriveControl System
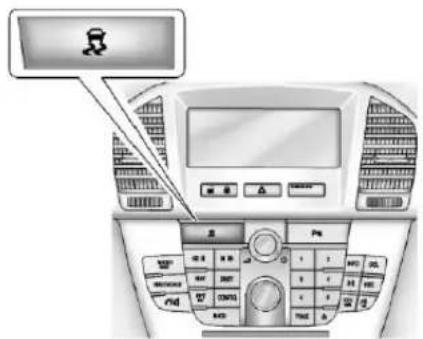
Without InteractiveDriveControl System
- ToturnoffbothStabiliTrakand TCS, press and hold the TCS/StabiliTrakbutton, located on the instrument panel, until ① and ② and ③ illuminate and the appropriate DIC message is displayed. See Ride Control System Messages on page 5-29.
WhenStabiliTrakisturnedoff, thesystemwillnotassistwith directionalcontrolofthevehicle orlimitwheelspin.Driving shouldbeadjustedaccordingly. SeeStabiliTrak® OFFLighton page5-18formoreinformation.
- PressandreleasetheTCS/StabiliTrakbuttonagaintoturn thesystembackon.
Ifcruisecontrolisbeingusedwhen StabiliTrakactivates, cruisecontrol will automatically disengage. Pressthecruisecontrolbutton to reengagewhenroadconditions allow. See Cruise Control on page 9-39 form more information.
InteractiveDriveControl System
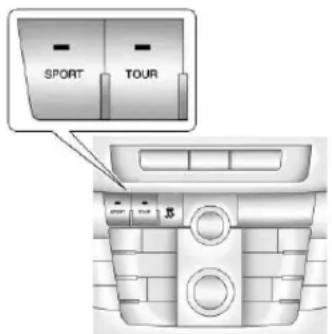
The vehicle may have the Interactive Drive Control System (IDCS). IDCS adapt to the driving style and preference of the driver within one of three driving modes:
Standard: Use for normal city and highway driving. This setting provides precise, comfortable handling. This is a fully automatic mode for city and highway driving.
Tour:Useforlong-distance highwaydriving. Thissetting providesasmooth,softride.Press andreleasetheTOURbuttonand thelightonthebuttoncomeson. Thismodeprovidesacomfortable, smoothride.Pressthebuttonagain andthesystemreturnstothe Standardmode.
Sport: Usewherepersonal preferenceorroadconditions demandmorecontrol. This setting provides responsive, controlled handling. Press and release the SPORT button. The light on the button comes on, and the appropriatemessaged display on the DIC. Pressthe button again. Thesystem return to the Standard mode and the appropriatemessage display on the DIC.
IDCSautomaticallycomesoninthe Standardmodewhenthevehicleis started. WhentheSportandTour modesareturnedoff, thesystem returnstotheStandardmode.
StandardMode
- Theshockabsorbersallowa normalride.
• Thepowertrainreactsnormally totheacceleratorpedal.
• Powersteeringassistance is normal.
TourMode
- Theshockabsorbersallowa softerride.
• The powertrainreactsnormally totheacceleratorpedal.
• Powersteeringassistance is normal.
SportMode
- Theshockabsorbersstiffento providebettercontactwiththe roadsurface.
• Thepowertrainreactsmore quicklytotheacceleratorpedal.
• Powersteeringassistanceis reduced.
DriveModeControl
DriveModeControl(DMC) analyzes the drivingstyle and the activestate of the vehicle and automatically changesthesettings within the selected drivingmode. When there is amorenoticeable change in drivingstyle or conditions, the drivingmode is changed to Sport until the previous driving style returns.
IfStandardmodeisselectedand sportdrivingisdetected,several settingsoftheStandardmode changetosportsettings.lfsport drivingincreases,DMCchangesto Sportmode.
IfTourmodeisselectedandsudden brakingorcorneringisnecessary, DMCchangesthesuspension settingstoSportmodetoincrease vehiclestability.
Whenthedrivingcharacteristicor theactivestateofthevehicle returnstothepreviousstyle,DMC changesthesettingstothe preselecteddrivingmode.
CruiseControl
Withcruisecontrol, the vehicle can maintain as speed of about 40 km/h (25 mph) or more without keeping your foot on the accelerator. Cruise control does not work at speeds below 40 km/h (25 mph).
OnvehicleswiththeTraction ControlSystem(TCS)orthe Stabilitrak® systemmaybeginto limitwheelspinwhileyouareusing cruisecontrol.Ifthishappens,the cruisecontrolwillautomatically disengage.See TractionControl System(TCS)onpage9-34or StabiliTrak® Systemonpage9-36.

WARNING
Cruisecontrolcanbedangerous whereyoucannotdrivesafelyat asteadyspeed.So,donotuse thecruisecontrolonwinding roadsorinheavytraffic.
(Continued)
WARNING(Continued)
Cruisecontrolcanbedangerous onslipperyroads.Onsuchroads, fastchangesintiretraction can causeexcessivewheelslip,and youcouldlosecontrol.Donotuse cruisecontrolonslipperyroads.
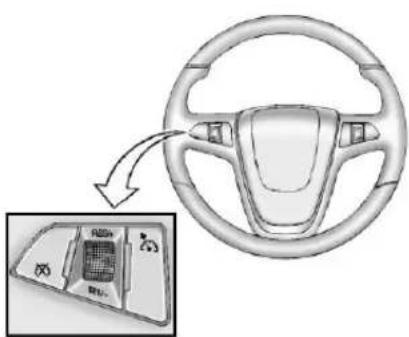
Thecruisecontrolbuttonsare locatedonthesteeringwheel.
On/Off): Presstoturnthe cruisecontrolsystemonandoff. Anindicatorlightwillturnonoroffin theinstrumentpanelcluster.
(Cancel): Presstodisengage cruisecontrolwithouterasingthe setspeedfrommemory.
RES/+(Resume/Accelerate): Movethethumbwheeluptomake thevehicleresumetoapreviously setspeedortoaccelerate.
SET/-(Set/Coast):Movethe thumbwheeldowntosetaspeedor tomakethevehicledecelerate.
SettingCruiseControl
If the cruise button is on when not in use, it could get bumped and go into cruise when not desired. Keep the cruise control switch off when cruise is not being used.
-
Press *ototurncruise controlon.
-
Gettothespeeddesired.
-
Movethethumbwheeldown towardSET/-andreleaseit. Thedesiredsetspeedbriefly appearsintheinstrumentpanel cluster.
- Take your foot off the accelerator pedal.
ResumingaSetSpeed
If the cruise control lissetata desired speed and then the brakes are applied, the cruise control is disengaged without erasing the set speed from memory.
Oncethevehiclespeedreaches about40km/h(25mph)ormore, movethethumbwheeluptoward RES/+briefly. Thevehiclereturnsto theprevioussetspeedandstays there.
IncreasingSpeedWhileUsing CruiseControl
If the cruise control system is already activated:
- Movethethumbwheeluptoward RES/+andholdituntilthe desiredspeedisreached,then releaseit.
- Toincreasevehiclespeedin smallamounts, movethe thumbwheeluptowardRES/+ brieflyandthenreleaseit. Each timethisidone,thevehicle goesabout1.6km/h(1mph) faster.
ReducingSpeedWhileUsing CruiseControl
If the cruise control system is already activated:
- Movethethumbwheeltoward SET/-andholduntilthedesired lowerspeedisreached,then releaseit.
- Toslowdowninsmallamounts, movethethumbwheeltoward SET/-briefly.Eachtimethisis done, the vehiclegoes about 1.6km/h(1mph)slower.
PassingAnotherVehicleWhile UsingCruiseControl
Use the accelerator pedal to increase the vehicles speed. When you take your foot off the pedal, the vehicle will slow down to the previous set cruise controls speed.
UsingCruiseControlonHills
Howwellthecruisecontrolworks onhillsdependsuponthevehicle speed,load,andthesteepness of thehills.Whengingupsteephills, youmighthavetosteponthe acceleratorpedaltomaintain thevehiclespeed.Whenging downhill,youmighthavetobrake orshifttoalowergeartomaintain thevehiclespeed.Whenthebrakes areapplied,thecruisecontrolis disengaged.
EndingCruiseControl
Therearethreewaystoendcruise control:
- Steplightlyonthebrakepedal orclutchtodisengagecruise control.
- Press on thesteeringwheel.
- Press on the steering wheel to turn off the cruise control.
ErasingSpeedMemory
Thecruisecontrolsetspeedis erasedfrommemorybypassing the 🔊buttonoriftheignitionis turnedoff.
ObjectDetection Systems
UltrasonicParkingAssist
ForvehicleswiththeUltrasonic RearParkingAssist(URPA)system, itassiststhedriverwithparking andavoidingobjectswhilein R(Reverse).URPAoperatesat speedslessthan8km/h(5mph), andthesensorsontherearbumper detectobjectsupto1.5m(5ft) behindthevehicle,andatleast 25cm(10in)offtheground.
WARNING
The Ultrasonic Rear Parking Assist (URPA) system does not replaced rivervision. It cannot detect:
- Objectsthatarebelowthe bumper, underthevehicle, ortoocloseorfarfromthe vehicle.
• Children, pedestrians, bicyclists, orpets.
If you donot use proper care before and while backing up, vehicle damage, injury, or death could occur. Even with URPA, always check behind the vehicle before backing up. While backing up, besure to look for objects and check the vehicle's mirrors.
HowtheSystemWorks
URPA comeson automatically whentheshiftleverismovedinto R(Reverse). Asingleton sounds to indicate the system is working.
URPAoperatesonlyatspeedsless than8km/h(5mph).
Anobstacleisindicatedbyaudible beeps. The interval between the beepsbecomesshorterasthe vehiclegetsclosertotheobstacle. Whenthedistance is less than 30cm(12in)thebeepsare continuous.
Tobedetected,objectsmustbeat least25cm(10in)offtheground andbelowtrunklevel. Objectsmust alsobewithin1.5m(5ft)fromthe rearbumper. Thedistanceatwhich objectscanbedetectedmaybe lessduringwarmerorhumid weather.
PARKASSISTOFFdisplaysonthe DriverInformationCenter(DIC)to indicate that URPAisoff. The message disappears after a short period of time.
TurningtheSystemOnandOff
TheURPAsystemcanbeturnedon andoffusingtheparkassistbutton locatednexttotheradio.

Theparkassistbuttonlightsup whenthesystemisonorinstandby andturnsoffwhenithasbeen disabled.
URPAdefaultstotheonsetting eachtimethevehicleisstarted.
WhentheSystemDoesNot SeemtoWorkProperly
SERVICEPARKASSIST: If this message occurs, takethe vehicle to your dealer to repair the system.
PARKASSISTOFF: If the URPA system does not activate duetoa temporary condition, the message displays on the DIC. See Driver Information Center (DIC) on page 5-22 form more information. This can occur under the following conditions:
- Thedriverhasdisabledthe system.
-
The ultrasonicsensors are not clean. Keep the vehicle's rear bumper free of mud, dirt, snow, ice, and slush. For cleaning instructions, see Exterior Care on page 10-77.
-
Anobjectwashangingoutofthe trunkduringthelastdrivecycle. Oncetheobjectisremovedand URPAdetectsnoobjectsof interest,theURPAwillreturnto normaloperation.
• Thevehicle'sbumperis damaged. Takethevehicleto yourdealertorepairthesystem. - Otherconditions,suchas vibrationsfromajackhammeror thecompressionofairbrakeson averylargetruck,areaffecting systemperformance.
If the system is still disabled after checking all conditions listed above and driving forward at least 40 km/h (25 mph), tak the vehicle to your dealer.
Fuel
Useoftherecommendedfuel isanimportantpartoftheproper maintenanceofthisvehicle.Tohelp keeptheenginecleanandmaintain optimumvehicleperformance,we recommendtheuseofgasoline advertisedasTOPTIERDetergent Gasoline.
LookfortheTOPTIERlabelonthe fuelpumptoensuregasolinemeets enhanceddetergencystandards developedbyautocompanies.Alist ofmarketersprovidingTOPTIER DetergentGasolinecanbefoundat www.toptiergas.com.

VehiclesthathaveaFlexFuelbadge and yellowfuelcapcanuse either unleaded gasolineorethanol fuel containing upto 85% ethanol (E85).
SeeFuelE85(85%Ethanol)on page9-47. Forallothervehicles, useonlytheunleadedgasoline describedunderRecommended Fuelonpage9-44.
RecommendedFuel
Ifthevehiclehasa2.4LL4engine (VINCodeC),useregularunleaded gasolinewithapostedoctane ratingof87orhigher.Iftheoctane ratingislessthan87,anaudible knockingnoise,commonlyreferred toassparkknock,mightbeheard whendriving.Ifthisoccurs,use agasolineratedat87octaneor higherassoonaspossible.Ifheavy knockingisheardwhenusing gasolineratedat87octaneor higher,theengineneedsservice.
Ifthevehiclehasthe2.0LL4engine (VINCodeV), usepremium unleaded gasolinewithaposted octaneratingof91orhigher. Youcanalsouseregularunleaded gasolineratedat87octaneor higher, butthevehicle'sacceleration couldbeslightlyreduced, anda slightaudibleknockingnoise, commonlyreferredtoasspark knock, mightbeheard. Iftheoctane islessthan87, aheavyknocking noisemightbeheardwhendriving. Ifthisoccurs, useagasolinerated at87octaneorhigherassoonas possible. Otherwise, youcould damagetheengine. Ifheavy knockingisheardwhenusing gasolineratedat87octaneor higher, theengineneedsservice.
GasolineSpecifications (U.S.andCanadaOnly)
Ataminimum, gasoline shouldmeetASTMspecification D4814intheUnitedStatesor CAN/CGSB-3.5or3.511inCanada. Somegasolinescontainan octane-enhancingadditivecalled methylcyclopentadienylmanganese tricarbonyl(MMT). Were recommend against the use of gasolines containingMMT. See Fuel Additives on page 9-46 for additional information.
CaliforniaFuel Requirements
If the vehicle is certified to meet California Emissions Standards, it is designed to operate on fuel that meet Californias specifications. Seethe underhood emission control label. If this fuel is not available in states adopting California Emissions Standards, the vehicle will operate
satisfactorilyonfuelsmeeting federalspecifications, butemission controlsystemperformancemight beaffected. Themalfunction indicatorlampcouldturnonandthe vehiclemightfailasmog-checktest. SeeMalfunctionIndicatorLampon page5-13. Ifthisoccurs, returnto yourauthorizeddealerfordiagnosis. Ifitisdeterminedthatthecondition iscausedbythetypeoffuelused, repairsmightnotbecoveredbythe vehiclewarranty.
FuelsinForeign Countries
Neveruseleadedgasolineorany otherfuelnotrecommendedinthe previousstextonfuel.Costlyrepairs causedbyuseofimproperfuel wouldnotbecoveredbythevehicle warranty.
Tocheckthefuelavailability, askan autoclub, or contact a major oil company that does business in the country where you will be driving.
FuelAdditives
Toprovidecleanerair,allgasolines intheUnitedStatesarenow requiredtocontainadditivesthat helppreventengineandfuelsystem depositsfromforming,allowingthe emissioncontrolsystemtowork properly.Inmostcases,nothing shouldhavetobeaddedtothefuel. However,somegasolinescontain onlytheminimumamountof additiverequiredtomeetU.S. EnvironmentalProtectionAgency regulations.Tohelpkeepfuel injectorsandintakevalvesclean andavoidproblemsduetodirty injectorsorvalves,lookforgasoline thatisadvertisedasTOPTIER DetergentGasoline.Lookforthe TOPTIERlabelonthefuelpumpto ensuregasolinemeetsenhanced detergencystandardsdeveloped bytheautocompanies.Alistof marketersprovidingTOPTIER DetergentGasolinecanbefound atwww.toptiergas.com.
Forcustomerswhodonotuse TOPTIERDetergentGasoline regularly,onebottleofGMFuel SystemTreatmentPLUS,addedto thefueltankateveryengineoil change,canhelpcleandeposits fromfuelinjectorsandintake valves.GMFuelSystemTreatment PLUSistheonlygasolineadditive recommendedbyGeneralMotors. Itisavailableatyourdealer.
Gasolinescontainingoxygenates, suchasethersandethanol, and reformulatedgasolinesmightbe availableinyourarea. We recommendthatyouusethese gasolines,iftheycomplywiththe specificationsdescribedearlier. However,E85(85%ethanol)and otherfuelscontainingmorethan 10%ethanolmustnotbeusedin vehiclesthatwerenotdesignedfor thosefuels.
Notice: This vehicle was not designed for fuel that contains methanol. Donotuse fuel containing methanol. It can corrode metal parts in the fuel system and is also damage plastic and rubber parts. That damage would not be recovered under the vehicle warranty.
Somegasolinesthatare notreformulatedforlow emissionscancontainan octane-enhancingadditivecalled methylcyclopentadienylmanganese tricarbonyl(MMT);asktheattendant whereyoubuygasolinewhetherthe fuelcontainsMMT.Werecommend againsttheuseofsuchgasolines. FuelscontainingMMTcanreduce sparkpluglifeandaffectemission controlsystemperformance. Themalfunctionindicatorlamp mightturnon.Ifthisoccurs,return toyourdealerforservice.
FuelE85(85%Ethanol)
VehiclesthathaveaFlexFuelbadge andayellowfuelcapcanuseeither unleadedgasolineorethanolfuel containingupto85%ethanol(E85). Forallothervehicles, useonlythe unleadedgasolinedescribedunder RecommendedFuelonpage9-44.
WeencouragetheuseofE85in vehiclesthataredesignedtouseit. TheethanolinE85isa“renewable” fuel, meaningitismadefrom renewablesourcessuchascorn andothercrops.
Manyservicestationswillnothave an85%ethanolfuel(E85)pump available.TheU.S.Departmentof Energyhasanalternativefuels website(www.afdc.energy.gov/afdc/locator/stations/)thatcanhelpyou findE85fuel.Thosestationsthat dohaveE85shouldhavealabel indicatingethanolcontent.Donot usethefueliftheethanolcontentis greaterthan85%.
Ataminimum,E85shouldmeet ASTMSpecificationD5798or CGSBSpecification3.512.Filling thetankwithfuelmixtures that donotmeetASTMorCGSB specificationscanaffectdriveability andcouldcausethemalfunction indicatorlamptocomeon.Asthe outsidetemperatureapproaches freezing,ethanolfueldistributors shouldsupplywintergradeethanol, thesameaswithunleaded gasoline.
The starting characteristics of E85 fuel make it unsuitable for use when the ambient temperatures fall below -18^(0^) .
Intherangeof-18°C(0°F)to0°C (32°F), you may experience an increase in the time it takes for the enginetostart.
Itisbestnottoalternaterepeatedly between gasoline and E85. If you doswitchfuels, it is recommended that you addasmuchfuelas possible—donotaddless than 11L(3gal) when refueling.
Youshoulddrivethevehicle immediatelyafterrefuelingforat least11km(7mi)toallowthe vehicletoadapttothechangein ethanolconcentration.
E85haslessenergyperliter (gallon)thangasoline,soyouwill needtorefillthefueltankmore oftenwhenusingE85thanwhen youareusinggasoline.SeeFilling theTankonpage9-48.
Notice: Someadditives are not compatible with E85 fuel and can harm the vehicle's fuel system. Donot add anything to E85. Damage caused by additives would not be recovered by the vehicle warranty.
Notice: This vehicle was not designed for fuel that contains methanol. Donotuse fuel containing methanol. It can corrodemetal parts in the fuel system and also damage plastic and rubber parts. That damage would not be covered under the vehicle warranty.
FillingtheTank

WARNING
Fuelvaporburnsviolentlyanda fuelfirecancausebadinjuries. Tohelpavoidinjuriestoyouand others,readandfollowallthe instructionsonthefuelpump island.Turnofftheenginewhen refueling.Donotsmokenearfuel orwhenrefuelingthevehicle. Donotusecellularphones.Keep sparks,flames,andsmoking materialsawayfromfuel.Donot leavethefuelpumpunattended whenrefuelingthevehicle.Thisis againstthelawinsomeplaces. Donotre-enterthevehiclewhile pumpingfuel.Keepchildrenaway fromthefuelpump;neverlet childrenpumpfuel.
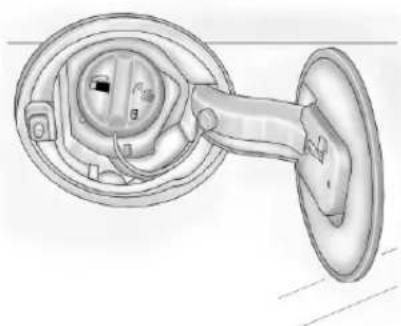
natural_image
Technical line drawing of a mechanical component with no visible text or symbolsThetetheredfuelcapisbehindthe fueldooronthevehicle'spassenger side. Thefueldooris unlocked whenthevehicleis unlocked. Lockingthevehiclelocksthe fueldoor.Turnthefuelcap counterclockwisetoremove.While refueling,hangthetetheredfuelcap fromthediskontheendofthefuel captothematingfeatureonthefuel doorhinge.Reinstallthecapby turningitclockwiseuntilitclicks.

WARNING
Fuelcansprayoutonyouifyou openthefuelcaptooquickly. Ifyouspillfuelandthen somethingignitesit,youcouldbe badlyburned.Thissspraycan happenifthetankisnearlyfull, andismorelikelyinhotweather. Openthefuelcapslowlyandwait foranyhissnoisetostop.Then unscrewthecapalltheway.
Donottopofforoverfillthetank. Waitafewsecondsbeforeremoving thenozzle.Cleanfuelfrompainted surfacesassoonaspossible. See Exterior Care on page 10-77.

WARNING
Ifafirestartswhileyouare refueling, donotremovethe nozzle. Shutofftheflowoffuel byshuttingoffthepumporby notifyingthestationattendant. Leavetheareaimmediately.
Notice: Ifanewfuelcapis needed, besuretogetheright typeofcapfromyourdealer. Thewrongtypeoffuelcapmight notfitproperly, mightcausethe malfunctionindicatorlampto light, and could damage the fuel tankandemissionssystem. See MalfunctionIndicatorLampon page5-13.
FillingaPortableFuel Container

WARNING
Neverfillaportablefuelcontainer whileitisinthevehicle.Static electricitydischargefromthe containercanignitethefuel vapor.Youcanbebadlyburned andthevehicledamagedifthis occurs.Tohelpavoidinjurytoyou andothers:
- Dispensefuelonlyinto approvedcontainers.
- Donotfillacontainerwhileit isinsideavehicle,ina vehicle'strunk,pickupbed, oronanysurfaceotherthan theground.
(Continued)
WARNING(Continued)
- Bringthefillnozzleincontact withtheinsideofthefill openingbeforeoperatingthe nozzle.Contactshouldbe maintaineduntilthefillingis complete.
- Donotsmokewhile pumpingfuel.
- Donotuseacellularphone whilepumpingfuel.
Towing
GeneralTowing Information
The vehicle is neither designed nor intended to tow a trailer.
Conversionsand Add-Ons
Add-On Electrical Equipment
Notice: Donotaddanything electrical to the vehicle unless you check with your dealer first. Some electricalequipment can damage the vehicle and the damage would not be recovered by the vehicle's warranty. Some add-onelectricalequipment can keep other components from working asthey should.
Add-onequipmentcandrainthe vehicle's12-voltbattery, evenifthe vehicleisnotoperating.
Thevehiclehasanairbagsystem. Beforeattemptingtoaddanything electricaltothevehicle,see ServicingtheAirbag-Equipped Vehicleonpage3-38andAdding EquipmenttotheAirbag-Equipped Vehicleonpage3-38.
VehicleCare
GeneralInformation
GeneralInformation......10-2
CaliforniaProposition65
Warning......10-3
CaliforniaPerchlorate
MaterialsRequirements....10-3
Accessoriesand
Modifications......10-3
VehicleChecks
DoingYourOwn
ServiceWork......10-4
Hood....10-5
EngineCompartment
Overview......10-6
EngineOil....10-9
EngineOilLifeSystem.....10-13
AutomaticTransmission
Fluid....10-14
ManualTransmission
Fluid....10-14
HydraulicClutch......10-14
EngineAirCleaner/Filter....10-15
CoolingSystem......10-17
EngineCoolant......10-18
EngineOverheating......10-21
PowerSteeringFluid......10-23
WasherFluid......10-24
Brakes......10-25
BrakeFluid......10-26
Battery....10-27
StarterSwitchCheck......10-28
AutomaticTransmissionShift
LockControlFunction
Check......10-28
IgnitionTransmissionLock
Check......10-29
ParkBrakeandP(Park)
MechanismCheck......10-29
WiperBlade
Replacement......10-30
HeadlampAiming
HeadlampAiming......10-30
BulbReplacement
BulbReplacement......10-31
HalogenBulbs......10-31
Headlamps, FrontTurn
SignalandParking
Lamps....10-31
FogLamps....10-32
Taillamps, TurnSignal,
Stoplamps,andBack-Up
Lamps....10-33
LicensePlateLamp......10-34
ReplacementBulbs.....10-34
ElectricalSystem
ElectricalSystem
Overload......10-35
FusesandCircuit
Breakers......10-36
EngineCompartmentFuse
Block....10-36
InstrumentPanelFuse
Block....10-40
WheelsandTires
Tires....10-42
WinterTires....10-43
TireSidewallLabeling.....10-43
TireDesignations......10-45
TireTerminology and Definitions....10-46
TirePressure....10-49
TirePressureforHigh-Speed Operation....10-50
TirePressureMonitor System....10-51
TirePressureMonitor Operation......10-52
TireInspection......10-55
TireRotation....10-55
When It Is Time for New Tires....10-56
BuyingNewTires......10-57
DifferentSizeTiresand Wheels....10-59
UniformTireQuality Grading....10-59
WheelAlignmentandTire Balance....10-61
WheelReplacement......10-61
TireChains....10-62 IfaTireGoesFlat....10-62
TireChanging....10-63 CompactSpareTire....10-69
JumpStarting
JumpStarting......10-70
Towing
TowingtheVehicle......10-74
Recreational Vehicle Towing....10-74
AppearanceCare
ExteriorCare....10-77
InteriorCare......10-80
FloorMats....10-83
GeneralInformation
Forserviceandpartsneeds, visityourdealer.Youwillreceive genuineGMpartsandGM-trained andsupportedservicepeople.
GenuineGMpartshaveoneof thesemarks:

Genuine

Parts

Accessories
CaliforniaProposition 65Warning
Mostmotorvehicles, including this one, contain and oremit chemicals known to the State of California cause cancer and birth defect or other reproductive harm. Engine exhaust, many parts and systems, many fluids, and some component wear by-products contain and/or emitthes Chemicals.
CaliforniaPerchlorate MaterialsRequirements
Certain types of automotive applications, such as airbag initiators, seat belt pretensioners, and lithium batteries contained in Remote Keyless Entry transmitters, may contain perchloratematerials. Special handling may be necessary. For additional information, see www.dtsc.ca.gov/hazardous waste/perchlorate.
Accessories and Modifications
Adding non-dealer accessories or making modification to the vehicle can affect vehicle performance and safety, including such things as airbags, braking, stability, ride and handling, emission systems, aerodynamics, durability, and electronics systems like antilock brakes, traction control, and stability control. These accessories or modifications could deven cause malfunctionordamagenotcovered by the vehicle warranty.
Damageetovehiclecomponents resultingfrommodificationsorthe installationoruseofnon-GM certifiedparts,includingcontrol moduleorsoftwaremodifications,is notcoveredunderthetermsofthe vehiclewarrantyandmayaffect remainingwarrantycoveragefor affectedparts.
GMAccessoriesaredesignedto complementandfunctionwithother systemsonthevehicle.YourGM dealercanaccessorizethevehicle usinggenuineGMAccessories. WhenyougotoyourGMdealer andaskforGMAccessories,you willknowthatGM-trainedand supportedservicetechnicianswill performtheworkusinggenuineGM Accessories.
Also, see Adding Equipment to the Airbag-Equipped Vehicle on page 3-38.
VehicleChecks
DoingYourOwn ServiceWork

WARNING
Youcanbeinjuredandthe vehiclecouldbedamagedifyou trytodoserviceworkonavehicle withoutknowingenoughaboutit.
- Besureyouhavesufficient knowledge,experience, theproperreplacement parts,andtoolsbefore attemptinganyvehicle maintenancetask.
(Continued)
WARNING(Continued)
- Besuretousetheproper nuts, bolts, and other fasteners. Metric and English fasteners can bee easily confused. If the wrong fasteners are used, partscan later break or falloff. You could be hurt.
If doing some of your own service work, use the proper service manual. It tells you much more about how to servicethe vehicle than this manual can. To order the proper service manual, see Service Publications Ordering Information on page 13-11.
Thisvehiclehasanairbagsystem. Beforeattemptingtodayyourown servicework,seeServicingthe Airbag-EquippedVehicleon page3-38.
Keeparecordwithallpartsreceipts andlistthemileageandthedateof anyserviceworkperformed.See MaintenanceRecordsonpage11-9.
Hood
Toopenthehood:
- Pulluponthehoodrelease handlewiththissymbolonit. Itislocatedinsidethevehicleto theleftofthesteeringcolumn.
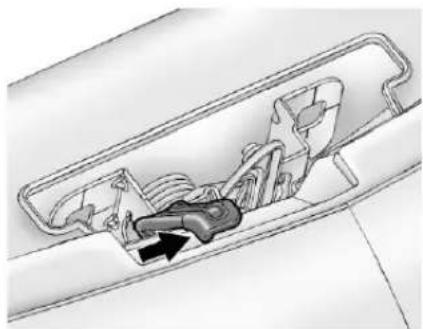
natural_image
Technical line drawing of a mechanical component with internal parts and an arrow indicating direction (no text or symbols)- Gotothefrontofthevehicle and movethesecondaryhood releasehandletotheright.
Toclosethehood:
-
Beforeclosingthehood, besure allthefillercapsareonproperly.
-
Lowerthehood30cm(12in) abovethevehicleandreleaseit soitfullylatches.Checkto makesurethehoodisclosed andrepeattheprocessif necessary.
EngineCompartmentOverview
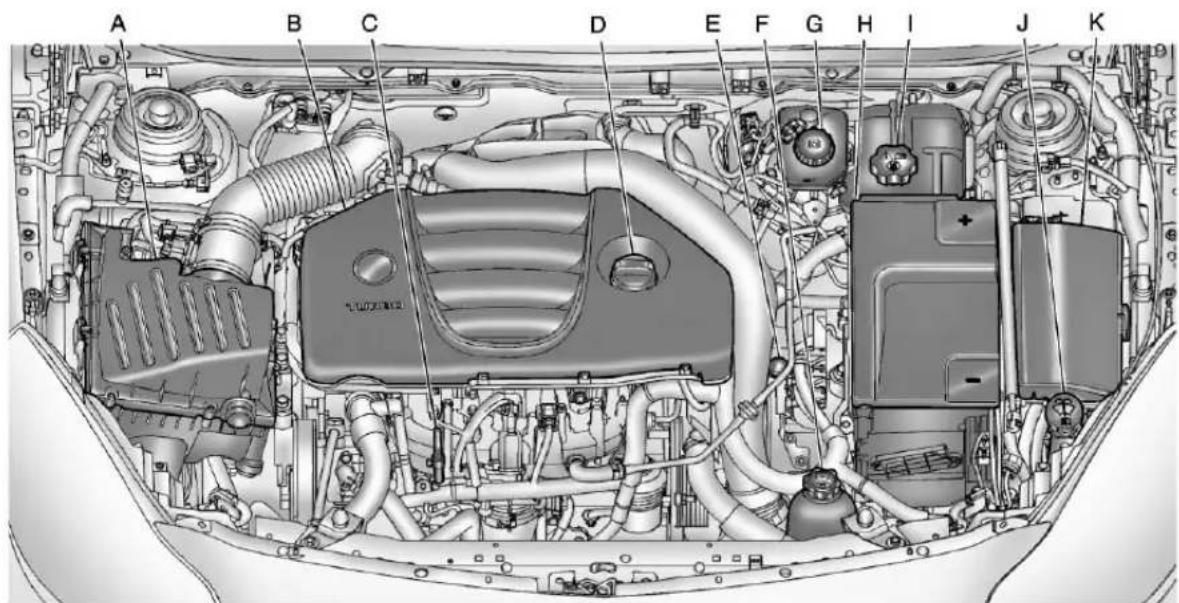
2.0LL4Engine
A. EngineAirCleaner/Filteron page 10-15.
B. EngineCover.
C. EngineOilDipstick.SeeEngine Oilonpage10-9.
D. EngineOilFillCap. SeeEngine Oilonpage10-9.
E. TransmissionFluidCapand Dipstick. See Automatic TransmissionFluidon page 10-14.
F. PowerSteeringFluidReservoir and Cap. See PowerSteering Fluidonpage 10-23.
G.BrakeMasterCylinderand HydraulicClutchReservoir (ifequippedwithmanual transmission).SeeBrakeson page10-25orHydraulicClutch onpage10-14.
H.BatteryCover.SeeBatteryon page10-27.
I. EngineCoolantReservoir and PressureCap. SeeEngine Coolantonpage 10-18.
J. Windshield Washer Fluid
Reservoir. See Washer Fluid on page 10-24.
K.Engine CompartmentFuse Blockonpage 10-36.
10-8VehicleCare
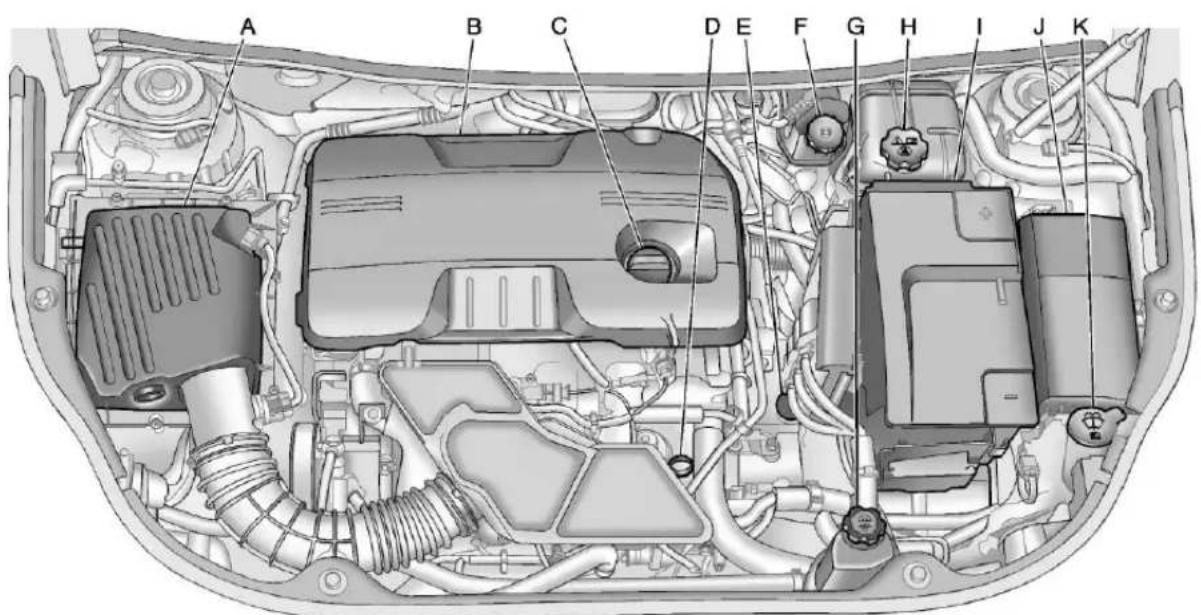
2.4LL4Engine
A. EngineAirCleaner/Filteron page 10-15.
B. EngineCover.
C. EngineOilFillCap. SeeEngine Oilonpage10-9.
D. EngineOilDipstick.SeeEngine Oilonpage10-9.
E. TransmissionFluidCapand Dipstick. See Automatic TransmissionFluidon page 10-14.
F.BrakeMasterCylinder
Reservoir.SeeBrakeson
page10-25.
G. PowerSteeringFluidReservoir and Cap. See PowerSteering Fluidonpage 10-23.
H. EngineCoolantReservoir and PressureCap. SeeEngine Coolantonpage 10-18.
I. BatteryCover. SeeBatteryon page10-27.
J.Engine Compartment Fuse Blockonpage 10-36.
K. Windshield Washer Fluid Reservoir. See Washer Fluid on page 10-24.
EngineOil
Toensureproperengine performanceandlonglife,careful attentionmustbepaidtoengineoil. Followingthesesimple,but importantstepswillhelpprotect yourinvestment:
- Alwaysuseengineoilapproved totheproperspecificationandof theproperviscositygrade.See "SelectingtheRightEngineOil" inthissection.
- Checktheengineoillevel regularlyandmaintainthe properoillevel.See"Checking EngineOil"and"WhentoAdd EngineOil"inthissection.
- Changetheengineoilatthe appropriatetime.SeeEngineOil LifeSystemonpage10-13.
- Always dispose of engine oil properly. See "What to Dow with Used Oil" in this section.
CheckingEngineOil
Itisagoodideatochecktheengine oillevelateachfuelfill.Inorderto getanaccuratereading,theoil mustbewarmandthevehiclemust beonlevelground.Theengineoil dipstickhandleisayellowloop.See EngineCompartmentOverview on page 10-6forthelocationofthe engineoildipstick.
Obtaininganaccurateoillevel readingisessential:
-
If the engine has been running recently, turn off the engine and allow several minutes for the oil to drain back into the oil pan. Checking the oil level too soon after engines hutoff will not provide an accurate oil level reading.
-
Pulloutthedipstickandcleanit withapapertowelorcloth,then pushitbackinalltheway. Removeitagain,keepingthetip down,andcheckthelevel.
WhentoAddEngineOil

If the oil is below the cross-hatched area at the tip of the dipstick, add 1L(1qt) of there recommended oil and then recheck the level. See "Selecting the Right Engine Oil" in this section for an explanation of what kind of oil to use Forengine oil crank case capacity, see Capacities and Specifications on page 12-2.
Notice: Donotaddtoomuchoil. Oil levels above or below the acceptable operating range shown on the dipstick are harmful to the engine. If you find that you have an oil level above the operating range, i.e., the engine hassomuchoil that the oil level gets above the cross-hatched are that show the proper operating range, the engine could be damaged. You should drain out the excess oil limit driving of the vehicle and seek as service professional to remove the excess amount of oil.
SeeEngineCompartmentOverview onpage 10-6forthelocationofthe engineoilfillcap.
Addenoughoiltoputthelevel somewhereintheproperoperating range.Pushthedipstickalltheway backinwhenthrough.
SelectingtheRightEngineOil
Selectingtherightengineoil dependsonboththeperooil specificationandviscositygrade:
Specification(Except2.0LTurbo Engine)
Use and ask forengine oil with the dexos ^™ certification mark. Oils meeting therequirements of the vehicles should havethed dexos certification mark on the container. This certification mark indicates that the oil has been approved to the dexos specification.

This vehicle was filled at the factory with dexos-approved engine oil.
Notice: Use only engine oil that is approved to the dexos specification or an equivalent engine oil of the appropriate viscosity grade. Engine oils approved to the dexos specification will show the dexos symbol on the container. Failure tousetherecommended engine oil equivalent can result in engined damage not covered by the vehicle warranty. If you are unsure whether the oil is approved to the dexos specification, ask your service provider.
UseofSubstituteEngineOilsif dexosisunavailable:Intheevent thatdexos-approvedengineoilis notavailableatanoilchangeorfor maintainingproperoillevel,you mayusesubstituteengineoil displayingtheAPIStarburstsymbol andofSAE5W-30viscositygrade. Useofoilsthatdonotmeetthe dexosspecification,however,may resultinreducedperformanceunder certaincircumstances.
Specification(2.0LTurboEngine)
Use and ask forengine oil with the dexos certification mark. Oils meeting therequirements of the vehicles should havethedexos certification mark on the container. This certification mark indicates that the oil has been approved to the dexos specification.

dexos™
This vehicle was filled at the factory with dexos-approved engine oil.
Notice: Use only engine oil that is approved to the dexos specification or an equivalent engine oil of the appropriate viscosity grade. Engine oils approved to the dexos specification will show the dexos symbol on the container. Failure tousetherecommended engine
oilorequivalentcanresultin enginedamagenotcovered bythevehiclewarranty.Ifyou areunsurewhethertheoil isapprovedtothedexos specification,askyourservice provider.
UseofSubstituteEngineOilsif dexosisunavailablefortop-up only:Engineoilnotmeetingthe dexosspecificationorequivalent shouldnotbeusedforanoil change.Intheeventthat dexos-approvedengineoilisnot availableformaintainingproperoil level,however,youmayuse substituteengineoildisplaying theAPIStarburstsymbolandof SAE5W-30viscositygrade. Extensiveuseofoilsthatdonot meetthedexosspecification, however,mayresultinreduced performanceorenginedamage undercertaincircumstances.
10-12VehicleCare
Maintaining the proper oil level is very important. However, if you use as substitute oil for any reason, we recommend that you perform a complete oil change back to dexos as soon as possible to protect the engine and maintain the engine's peak performance.
ViscosityGrade
SAE5W-30 isthebestviscosity gradeforthevehicle.Donotuse otherviscosityoilssuchas SAE10W-30,10W-40,or20W-50.
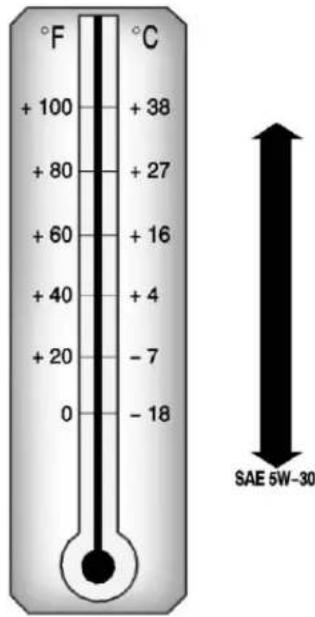
ColdTemperatureOperation:Inan areaofextremecold,wherethe temperaturefallsbelow-29°C
(-20°F), an SAE0W-30 oil should be used. Anoil of this viscosity gradewill provide easier cold starting for the engine at extremely low temperatures. Whenselecting an oil of the appropriate viscosity grade, besure to always select an oil that meet there required specification, dexos. See "Specification" earlier in this section form more information.
EngineOilAdditives/Engine OilFlushes
Donotaddanythingtotheoil. The recommended oil with the dexos specification and displaying the dexos certification mark are all that is needed for good performance and engine protection.
Engineoilsystemflushesarenot recommendedandcouldcause enginedamagenotcoveredbythe vehiclewarranty.
WhattoDowithUsedOil
Usedengineoilcontainscertain elementsthatcanbeunhealthyfor yourskinandcouldevencause cancer.Donotletusedoilstayon yourskinforverylong.Cleanyour skinandnailswithsoapandwater, oragoodhandcleaner.Washor properlydisposeofclothingorrags containingusedengineoil.Seethe manufacturer'swarningsaboutthe useanddisposalofoilproducts.
Usedoilcanbeathreattothe environment. If youchangeyour ownoil, besuretodrainalltheoil from the filter before disposal. Never dispose of oil by putting it in the trash or pouring it on the ground, intosewers, orintostreams or bodies of water. Recycle it by taking it to a placethat collects used oil.
EngineOilLifeSystem
WhentoChangeEngineOil
This vehicle has a computer system that indicates when to change the engine oil and filter. This is based on a combination of factors which include engine revolutions, engine temperature, and miles driven. Based on driving conditions, the mileage at which an oil change is indicated can vary considerably. For the oil ifesystemtowork properly, the system must be set every time the oil is changed.
Whenthesystemhascalculated thatoillifehasbeendiminished, it indicates thatanoilchangeis necessary. ACHANGEENGINE OILSOONmessagecomeson.See EngineOilMessagesonpage5-28. Changetheoilassoonaspossible withinthenext1000km(600mi). It is possible that, if driving under the best conditions, the oil life system might indicate that a noil change is not necessary for up to a year. The engine oil and filter must
bechangedatleastonceayear and,atthistime,thesystemmust bereset. Yourdealerhastrained servicepeoplewhowillperformthis workandresetthesystem.Itisalso importanttochecktheoilregularly overthecourseofanoildrain intervalandkeepitattheproper level.
If the system is ever reset accidentally, the oil must be changed at 5000 km (3,000 mi) sincethelast oil change. Remembertoreset the oil life system whenever the oil is changed.
HowtoResettheEngineOil LifeSystem
Resetthesystemwheneverthe engineoilischangedsothatthe systemcancalculatethenext engineoilchange.Toresetthe system:
-
TurntheignitiontoON/RUNwith theengineoff.
-
PresstheDICmenubuttonon theturnsignallevertoenterthe VehicleInformationMenu. Use thethumbwheeltoscrollthrough themenuitemsuntilyoureach REMAININGOILLIFE.
- PresstheSET/CLRbutton to resettheoillifeat 100%.
- TurntheignitiontoLOCK/OFF.
Thesystemisresetwhenthe CHANGEENGINEOILSOON messageisoffandtheREMAINING OILLIFE100%messageis displayed.
If the CHANGEENGINEOIL message comes back on when the vehicle is started, the engine oil life system has not been reset. Repeat the procedure.
AutomaticTransmission Fluid
HowtoCheckAutomatic TransmissionFluid
Itisnotnecessarytocheckthe transmissionfluidlevel. Atransmissionfluidleakistheonly reasonforfluidloss.Ifaleak occurs,takethevehicletoyour dealerservicedepartmentandhave itrepairedassoonaspossible.
Thereisaspecialprocedurefor checkingandchangingthe transmissionfluid.Becausethis procedureisdifficult,youshould havethisdoneatyourdealer servicedepartment.Contactyour dealerforadditionalinformation. Theprocedurecanbefoundinthe servicemanual.Topurchasea servicemanual,seeService PublicationsOrderingInformation onpage13-11.
Changethefluidandfilteratthe intervalslistedinScheduled Maintenanceonpage11-2,andbe
suretousethefluidlistedin RecommendedFluidsand Lubricantsonpage11-6.
ManualTransmission Fluid
Itisnotnecessarytocheckthe manualtransmissionfluidlevel. Atransmissionfluidleakistheonly reasonforfluidloss.Ifaleak occurs,takethevehicletoyour dealerservicedepartmentand haveitrepairedassoonas possible.SeeRecommendedFluids andLubricantsonpage 11-6forthe properfluidtouse.
HydraulicClutch
Forvehicleswithamanual transmission,itisnotnecessary to regularlycheckbrake/clutchfluid unlessthereisaleaksuspected. Addingfluidwillnotcorrectaleak. Afluidlossinthissystemcould indicateaproblem.Havethe systeminspectedandrepaired.
WhentoCheckandWhat toUse
Thebrake/hydraulicclutchfluid reservoircaphasthissymbolonit. Thecommonhydraulicclutchand brakemastercylinderfluidreservoir isfilledwitheitherDOT3orDOT4 brakefluidasindicatedonthe reservoircap.SeeEngine CompartmentOverviewon page10-6forreservoirlocation.
HowtoCheckandAddFluid
Visuallycheckthebrake/clutchfluid reservoirtomakesurethefluidlevel isattheMIN(minimum)lineonthe sideofthereservoir. Thebrake/hydraulicclutchfluidsystemshould beclosedandsealed.
Donotremovethecaptocheckthe fluidlevelortotop-offthefluidlevel. Removethecaponlywhen necessarytoaddtheproperfluid untilthelevelreachestheMINline.
EngineAirCleaner/Filter
SeeEngineCompartmentOverview onpage10-6forthelocationofthe engineaircleaner/filter.
WhentoInspecttheEngineAir Cleaner/Filter
Inspecttheaircleaner/filteratthe scheduledmaintenanceintervals andreplaceitatthefirstoilchange aftereach80000km(50,000mile) interval.SeeScheduled Maintenanceonpage11-2formore information.Ifyouaredrivingin dusty/dirtyconditions,inspectthe filterateachengineoilchange.
HowtoInspecttheEngineAir Cleaner/Filter
Toinspecttheaircleaner/filter, removethefilterfromthevehicle andlightlyshakethefiltertorelease
loosedustanddirt. If the filter remains covered with dirt, anew filter is required.
Toinspectorreplacetheengineair cleaner/filter:
2.0LL4Engine
- Openthehood. See Hoodon page 10-5.
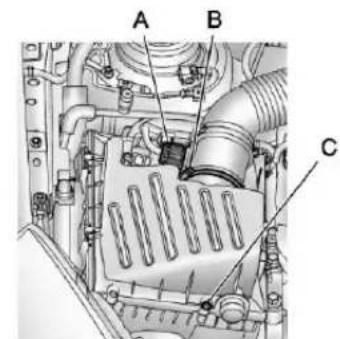
A. Electrical Connector
B.AirDuctClamp
C.Screws(5)
- Disconnect the outletduct by loosening the air duct clamp(B).
10-16VehicleCare
- Disconnect the electrical connector(A).
- Removethescrews(C)ontop of the engine aircleaner/filter housing.
- Lift the filter cover housing away from the engine.
6.Pulloutthefilter. - Inspectorreplace the engine air cleaner/filter.
- ReverseSteps2 through 4 to reinstall the filter coverhousing.
2.4LL4Engine
- Openthehood. See Hoodon page 10-5.
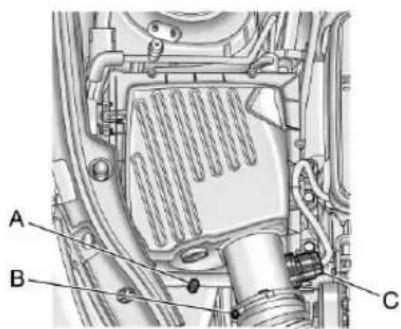
A.Screws(6)
B.AirDuctClamp
C.ElectricalConnector
- Disconnect the outletduct by loosening the air duct clamp (B).
- Disconnect the electrical connector(C).
-
Removethescrews(A)ontopof theengineaircleaner/filter housing.
-
Lift the filter cover housing away from the engine.
6.Pulloutthefilter. - Inspectorreplacetheengineair cleaner/filter.
- ReverseSteps2through4to reinstallthefiltercoverhousing.

WARNING
Operatingtheenginewiththeair cleaner/filteroffcancauseyouor otherstobeburned. Theair cleanernotonlycleanstheair; it helpstostopflamesiftheengine backfires. Usecautionwhen workingontheengineanddonot drivewiththeaircleaner/filteroff.
Notice: If the aircleaner/filter is off, dirtcaneasilygetinto the engine, which could damage it. Always havethe aircleaner/filter in place when you are driving.
CoolingSystem
Thecoolingsystemallows the enginetomaintainthecorrect workingtemperature.
Whenitissafetoliftthehood:
2.0LL4Engine
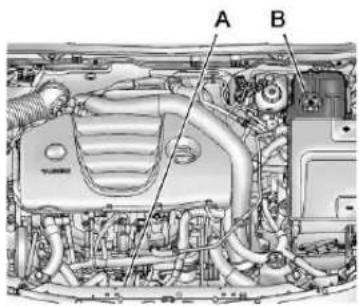
A. ElectricEngineCoolingFans
B.CoolantSurgeTankand PressureCap
2.4LL4Engine
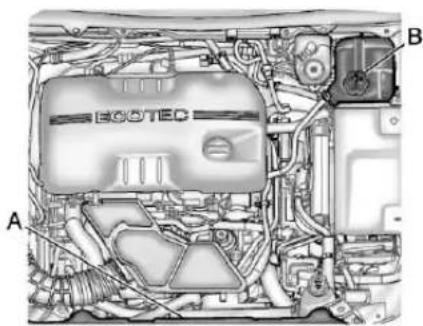
A. ElectricEngineCoolingFans
B. CoolantSurgeTankand PressureCap

WARNING
Anelectricenginecoolingfan underthehoodcanstartupeven whentheengineisnotrunning andcancauseinjury.Keep hands,clothing,andtoolsaway fromanyunderhoodelectricfan.

WARNING
Heaterandradiatorhoses, and otherengineparts, can be very hot. Donottouchthem. If you do, you can be burned.
Donotruntheengineifthereisa leak.Ifyouruntheengine,it couldloseallcoolant.Thatcould causeanenginefire,andyou couldbeburned.Getanyleak fixedbeforeyoudrivethevehicle.
Notice: Using coolantother than DEX-COOL ^® can cause premature engine, heater core, or radiator corrosion. In addition, the engine coolant could require changing sooner, at 50000 km (30,000 mi) or 24 months, whichever occurs first. Any repairs would not be covered by the vehicle warranty. Always use DEX-COOL (silicate-free) coolant in the vehicle.
EngineCoolant
Thecoolingsysteminthevehicleis filledwithDEX-COOL ^® engine coolant. Thiscoolantisdesigned to remaininthevehiclefor5yearsor 240000km(150,000miles), whicheveroccursfirst.
The following explainsthecooling systemandhowtocheckandadd coolantwhenitislow.Ifthereisa problemwithengineoverheating, seeEngineOverheatingon page 10-21.
WhattoUse

WARNING
Addingonlyplainwaterorsome otherliquidtothecoolingsystem canbedangerous. Plainwater andotherliquids, canboilbefore thepropercoolantmixturewill. Thecoolantwarningsystemisset forthepropercoolantmixture. Withplainwaterorthewrong mixture, theenginecouldgettoo hotbutyouwouldnotgetthe overheatwarning. Theengine couldcatchfireandyouor otherscouldbeburned. Usea 50/50mixtureofclean,drinkable waterandDEX-COOLcoolant.
Usea50/50mixtureofclean, drinkablewaterandDEX-COOL coolant. If using this mixture, nothingelseneedstobeaded. This mixture:
• Givesfreezingprotectiondown to -37^(-34^) , outside temperature.
• Givesboilingprotectionupto 129°C(265°F), engine temperature.
- Protectsagainstrustand corrosion.
• Willnotdamagealuminumparts.
• Helpskeep the proper engine temperature.
Notice: If an improper coolant mixture is used, the engine could overheat and be badly damaged. Therepair cost would not be covered by the vehicle warranty. To much water in them mixture can freeze and crack the engine, radiator, heater core, and other parts.
Neverdisposeofenginecoolantby puttingitinthetrash,pourington theground,orintosewers,streams, orbodiesofwater.Havethecoolant changedbyanauthorizedservice center,familiarwithlegal requirementsregardingused coolantdisposal.Thiswillhelp protecttheenvironmentandyour health.
CheckingCoolant
The vehicle must be on a level surface when checking the coolant level.
Checktoseeifcoolantisvisiblein thecoolantsurgetank.Ifthecoolant insidethecoolantsurgetankis boiling,donotdoanythingelseuntil itcoolsdown.Ifcoolantisvisible butthecoolantlevelisnotatthe indicatedmark,adda50/50mixture ofclean,drinkablewaterand DEX-COOLcoolantatthecoolant surgetank,butbesurethecooling systemiscoolbeforethisisdone.
Thecoolantsurgetankislocatedin theenginecompartmentonthe driversideofthevehicle.See EngineCompartmentOverviewon page 10-6formoreinformationon location.
HowtoAddCoolanttothe CoolantSurgeTank
Notice: This vehicle has a specific coolantfill procedure. Failure to follow this procedure could cause the engine to overheat and be severely damaged.
Ifnoproblemisfound, checktosee ifcoolantisvisible in the coolant surgetank. If coolant is visible but the coolant level is not at the indicated level mark, add a 50/50 mixture of clean, drinkable water and DEX-COOL coolant at the coolant surgetank, but besure the cooling system, including the coolant surgetank pressure cap, is cool before you do it.

WARNING
Steamandscaldingliquidsfroma hotcoolingsystemcanblowout andburnyoubadly. They are underpressure, andifyouturn
(Continued)
WARNING(Continued)
thecoolantsurgetankpressure cap—evenalittle—theycan comeoutathighspeed.Never turnthecapwhenthecooling system,includingthecoolant surgetankpressurecap,ishot. Waitforthecoolingsystemand coolantsurgetankpressurecap tocoolifyoueverhavetoturn thepressurecap.

WARNING
Addingonlyplainwaterorsome otherliquidtothecoolingsystem canbedangerous.Plainwater andotherliquids,canboilbefore thepropercoolantmixturewill. Thecoolantwarningsystemisset forthepropercoolantmixture.
(Continued)
WARNING(Continued)
Withplainwaterorthewrong mixture,theenginecouldgettoo hotbutyouwouldnotgetthe overheatwarning.Theengine couldcatchfireandyouor otherscouldbeburned.Usea 50/50mixtureofclean,drinkable waterandDEX-COOLcoolant.
Notice: Incoldweather, water can freeze and crack the engine, radiator, heater core and other parts. Use there recommended coolant and the proper coolant mixture.

WARNING
Youcanbeburnedifyouspill coolantonhotengineparts. Coolantcontainsethyleneglycol anditwillburniftheengineparts arehotenough.Donotspill coolantonahotengine.
2.0LL4EngineShown,2.4LL4 EngineSimilar
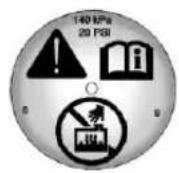
- Removethecoolantsurgetank pressurecapwhenthecooling system, including the coolant surgetank pressurecap and upperradiator hose, is no longerhot.
Turnthepressurecapslowly counterclockwiseabout one-quarterofaturn.Ifyouhear ahiss,waitforthattostop.This willallowanypressurestillleftto beventedoutthe dischargehose.
- Keep turning the pressure cap slowly and remove it.
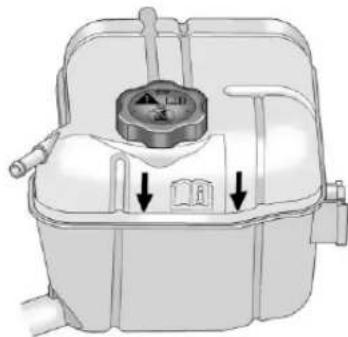
natural_image
Diagram of a mechanical device with a central component and two downward arrows indicating flow or movement (no text or symbols present)-
Fill the coolants surgetank with the proper DEX-COOL coolant mixture to the indicated level mark.
-
With the coolantsurgetank pressure capoff, start the engine and let it run until you can feel the upper radiator hose getting hot. Watch out for the engine cooling fans.
Bythistime, thecoolantlevel insidethecoolantsurgetank maybelower. If the level is lower, add more of the proper DEX-COOL coolant mixture to
thecoolantsurgetankuntilthe levelreachestheindicated levelmark.
- Replacethepressurecap. Be surethepressurecapis hand-tight.
Checkthelevelinthecoolantsurge tankwhenthecoolingsystemhas cooleddown.Ifthecoolantisnot attheproperlevel,repeatSteps1 through3andreinstallthepressure cap.Ifthecoolantstillisnotatthe properlevelwhenthesystemcools downagain,seeyourdealer.
EngineOverheating
The vehicle has several indicators to warn of engine overheating.
Youwillfindanenginecoolant temperaturegaugeonthevehicle's instrumentpanelcluster.See EngineCoolantTemperatureGauge onpage5-10.
Ifitisdecidednottoliftthehood whenthiswarningappears,but insteadgetservicehelprightaway, seeRoadsideAssistanceProgram onpage13-5.
Ifitisdecidedtoliftthehood, make surethevehicleisparkedonalevel surface.
Thenchecktoseeiftheengine coolingfansarerunning. If the engineisoverheating, bothfans shouldberunning. If they are not, donotcontinuetoruntheengine and havethevehicleserviced.
Notice: Enginedamage from running the engine without coolant is not covered by the warranty.
IfSteamIsComingfromthe EngineCompartment
WARNING
Steamfromanoverheatedengine canburnyoubadly,evenifyou justopenthehood.Stayaway fromtheengineifyouseeorhear steamcomingfromit.Justturnit offandgeteveryoneawayfrom thevehicleuntilcoolsdown. Waituntilthereisnosignof steamorcoolantbeforeyouopen thehood.
If you keep driving when the engine is overheated, the liquids init can catch fire. You or others could be badly burned. Stop the engine if to overheats, and get out of the vehicle until the engine is cool.
IfNoSteamIsComingfrom theEngineCompartment
Ifanengineoverheatwarningis displayedbutnosteamcanbeseen orheard,theproblemmaynotbe tooserious.Sometimestheengine cangetalittletoohotwhenthe vehicle:
• Climbsalonghillonahotday.
- Stopsafterhigh-speeddriving.
• Idlesforlongperiodsintraffic.
- Towsatraler.
If the overheat warning is displayed with nosignofsteam:
- Turntheairconditioningoff.
- Turntheheaterontothehighest temperature and tothehighest fanspeed. Openthewindowsas necessary.
- In heavy traffic, let the engine idle in N(Neutral) while stopped. If it is a fast to do so, pulloff the road, shift to P(Park) or N(Neutral), and let the engine idle.
If the temperature overheat gauge isnolonger in the overheat zone or an overheat warning nolonger displays, the vehicle can be driven. Continuetodrivethe vehicles slow for about 10 minutes. Keep as safe vehicledistance from the car in front of you. If the warning does not come back on, continuetodrivenormally.
Ifthewarningcontinues,pullover, stop,andparkthevehicle rightaway.
Ifthereisnosignofsteam,idle theengineforthreeminuteswhile parked.Ifthewarningisstill displayed,turnofftheengineuntil coolsdown.
PowerSteeringFluid
SeeEngineCompartmentOverview onpage10-6forreservoirlocation.
WhentoCheckPowerSteering Fluid
Itisnotnecessarytoregularly checkpowersteeringfluidunlessa leakissuspectedinthesystem, oranunusualnoiseisheard.Afluid lossinthissystemcouldindicatea problem.Havethesysteminspected andrepaired.
HowtoCheckPowerSteering Fluid
Tocheckthepowersteeringfluid:
2.0LL4DipstickShown,2.4LL4 DipstickSimilar
- Turnthekeyoffandletthe enginecompartmentcooldown.
- Wipethecapandthetopofthe reservoirclean.
- Unscrewthecapandwipethe dipstickwithacleanrag.
-
Replacethecapandcompletely tightenit.
-
Removethecapagainandlook atthefluidlevelonthedipstick.
Thefluidlevelshouldbebetween theMIN(Minimum)andMAX (Maximum)markwhentheengine iscold, andattheMAXmarkwhen theengineishot. If thefluidisatthe MINmarkwhentheengineiscold orhot, powersteeringfluid should beadded.
Thefluidlevelshouldbebetween theMINandMAXmarksonthe dipstick.
If the fluid is a separator below the MIN mark on the dipstick, adjust enough fluid to bring the level between the MIN and MAX marks.
WhattoUse
Todeterminewhatkindoffluidto use,seeRecommendedFluidsand Lubricantsonpage11-6.Always usetheproperfluid.
WasherFluid
WhattoUse
When windshieldwasherfluidis needed, besuretoreadthe manufacturer's instructions before use. If operating the vehicle in an areawherethetemperature may fall below freezing, use a fluid that has sufficient protection against freezing.
AddingWasherFluid
Openthecapwiththewasher symbolonit.Addwasherfluiduntil thetankisfull.SeeEngine CompartmentOverviewon page10-6forreservoirlocation.
Notice
- When using concentrated washer fluid, follow the manufacturer's instructions for adding water.
- Donotmixwaterwith ready-to-usewasherfluid. Watercancausethesolution tofreezeanddamagethe washerfluidtankandother partsofthewashersystem. Also,waterdoesnotcleanas wellaswasherfluid.
- Fillthewasherfluidtankonly three-quartersfullwhenitis verycold. This allows for fluidexpansioniffreezing occurs, which could damage the tankifitis completely full.
- Donotuseenginecoolant (antifreeze)inthewindshield washer.ltcandamagethe windshieldwashersystem andpaint.
Brakes
Thisvehiclehasdiscbrakes.Disc brakepadshavebuilt-inwear indicatorsthatmakeahigh-pitched warningsoundwhenthebrakepads arewornandnewpadsareneeded. Thesoundcancomeandgoorbe heardallthetimethevehicleis moving,exceptwhenapplyingthe brakepedalfirmly.

WARNING
Thebrakewearwarningsound meansthatsoonthebrakeswill notworkwell.Thatcouldleadto acrash.Whenthebrakewear warningsoundisheard,havethe vehicleserviced.
Notice:Continuingtodrivewith worn-outbrakepadscouldresult incostlybrakerepair.
Somedrivingconditionsorclimates cancauseabrakesquealwhenthe brakesarefirstappliedorlightly applied. Thisdoesnotmean somethingiswrongwiththebrakes.
Properlytorquedwheelnutsare necessarytohelppreventbrake pulsation. Whentiresarerotated, inspectbrakepadsforwear and evenlytightenwheelnutsinthe propersequencetotorque specificationsin Capacitiesand Specificationsonpage 12-2.
Brakeliningsshouldalwaysbe replacedascompleteaxlesets.
BrakePedalTravel
Seeyourdealerifthebrakepedal doesnotreturntonormalheight, orifthereisarapidincreasein pedaltravel. Thiscouldbeasign thatbrakeservicemightbe required.
BrakeAdjustment
Everytimethebrakesareapplied, withorwithoutthevehiclemoving, thebrakesadjustforwear.
ReplacingBrakeSystemParts
Thebrakingsystemonavehicleis complex. Itsmanypartshavetobe oftopqualityandworkwelltogether ifthevehicleistohavereallygood braking. Thevehiclewasdesigned andtestedwithtop-qualitybrake parts. Whenpartsofthebraking systemarereplaced, besuretoget new, approvedreplacementparts. Ifthisisnotdone, thebrakesmight notworkproperly. Forexample, installingdiscbrakepadsthatare wrongforthevehicle, canchange thebalancebetweenthefrontand rearbrakes—fortheworse. The brakingperformanceexpectedcan changeinmanyotherwaysifthe wrongreplacementbrakepartsare installed.
BrakeFluid
Thebrakemastercylinderand, on manualtransmissionvehicles, the clutchhydraulicsystemusethesamereservoir. SeeEngine CompartmentOverviewon page 10-6forthelocationofthe reservoir. Thereservoirisfilledwith witheitherDOT3orDOT4brake fluidasindicatedonthe reservoircap.
Thereareonlytworeasonswhythe brakefluidlevelinthereservoir mightgodown:
- Thebrakefluidlevelgoesdown becauseofnormalbrakelining wear.Whennewliningsare installed,thefluidlevelgoes backup.
- Afluidleakinthebrake/clutch hydraulicsystemcanalsocause alowfluidlevel.Havethebrake/clutchhydraulicsystemfixed, sincealeakmeansthatsooner orlaterthebrakeswillnot workwell.
Donottopoffthebrake/clutchfluid. Addingfluiddoesnotcorrectaleak. Iffluidisaddedwhenthelingsare worn,therewillbetoomuchfluid whennewbrakeliningsare installed.Addorremovefluid,as necessary,onlywhenworkisdone onthebrake/clutchhydraulic system.

WARNING
Iftoomuchbrakefluidisadded,it canspillontheengineandburn, iftheengineishotenough.You orotherscouldbeburned,and thevehiclecouldbedamaged. Addbrakefluidonlywhenworkis doneonthebrake/clutch hydraulicsystem.
CheckingBrakeFluid
Thebrake/clutchfluidcanbe checkedwithouttakingoffthecap bylookingatthebrake/clutchfluid reservoir.
Thefluidlevelshouldbeabove MIN.Ifitisnot,havethebrake/clutchhydraulicsystemcheckedto seeifthereisaleak.
Afterworkisdoneonthebrake/clutchhydraulicsystem,makesure thelevelisaboveMINbutnotover theMAXmark.
Whenthebrake/clutchfluidfallstoa lowlevel,thebrakewarninglight comeson.SeeBrakeSystem WarningLightonpage5-16.
WhattoAdd
If the vehicle has DOT3 brake fluid, as indicated on the reservoir cap, use only new DOT3 brake fluid from a sealed container. See Recommended Fluids and Lubricantson page 11-6.
If the vehicle has DOT4 brake fluid, as indicated on the reservoir cap, use only new DOT4 brake fluid from a sealed container. It is recommended that the brake/clutch hydraulic system be flushed and refilled with new DOT4 fluid data regular maintenance service every two years. See Scheduled Maintenance on page 11-2 and Recommended Fluids and Lubricantson page 11-6.
Alwayscleanthebrake/clutchfluid reservoircapandtheareaaround thecapbeforeremovingit. This helpskeepdirtfromenteringthe reservoir.

WARNING
Withthewrongkindoffluidinthe brake/clutchhydraulicsystem,the brakesmightnotworkwell.This couldcauseacrash.Alwaysuse theproperbrake/clutchfluid.
Notice
- Usingthewrongfluidcan badlydamagebrake/clutch hydraulicsystemparts. For example, justafewdropsof mineral-basedoil, such as engineoil, inthebrake hydraulicsystemcan damagebrakehydraulic systempartssobadlythat theywillhavetobereplaced. Donotletsomeoneputin thewrongkindoffluid.
- Ifbrakefluidisspilledon thevehicle'spainted surfaces,thepaintfinishcan bedamaged.Becarefulnot tospillbrakefluidonthe vehicle.lfyoudo,washitoff immediately.
Battery
Refertothereplacementnumber shownontheoriginalbatterylabel whenanewbatteryisneeded.See EngineCompartmentOverviewon page 10-6forbatterylocation.

DANGER
Batteryposts, terminals, and related accessories contain lead and lead compounds, chemicals known to the State of California to cause cancer and reproductive harm. Washhands after handling.
VehicleStorage

WARNING
Batterieshaveacidthatcanburn youandgasthatcanexplode. Youcanbebadlyhurtifyouare notcareful.SeeJump Startingon page 10-70fortipsonworking aroundabatterywithout gettinghurt.
InfrequentUsage:Removethe black,negative(−)cablefromthe batterytokeepthebatteryfrom runningdown.
ExtendedStorage:Removethe black,negative(−)cablefromthe batteryoruseabatterytrickle charger.
StarterSwitchCheck

WARNING
Whenyouaredoingthis inspection,thevehiclecould movesuddenly.Ifthevehicle moves,youorotherscouldbe injured.
- Before starting this check, be sure there is enoughroom around the vehicle.
-
Firmly apply both the parking brake and theregular brake. See Parking Brake on page 9-31.
Donotusetheaccelerator pedal, and bereadytoturnoff theengineimmediatelyifit starts. -
For automatic transmission vehicles, try to start the engine in each gear. The vehicle should start only in P (Park) or N (Neutral). If the vehicle starts in any other position, contact your dealer for service.
Formanualtransmission vehicles,puttheshiftleverin Neutral,pushtheclutchpedal downhalfway,andtrytostart theengine.Thevehicleshould startonlywhentheclutchpedal ispusheddownallthewayto thefloor.Ifthevehiclestarts whentheclutchpedalisnot pushedallthewaydown, contactyourdealerforservice.
AutomaticTransmission ShiftLockControl FunctionCheck

WARNING
When you are doing this inspection, the vehicle could moves suddenly. If the vehicle moves, you or others could be injured.
- Before starting this check, be sure there is a tenough room around the vehicle. It should be parked on levels surface.
- Firmlyapplytheparkingbrake. SeeParkingBrakeon page9-31.
Bereadytoapplytheregular brakeimmediatelyifthevehicle beginstomove. - With the engine off, turn the ignition on, but donot start the engine. Without applying the regular brake, try to mov the
shiftleveroutofP(Park)with normaleffort.Iftheshiftlever movesoutofP(Park),contact yourdealerforservice.
IgnitionTransmission LockCheck
Whileparked, and with the parking brakeset, try to turn the ignition to LOCK/OFFineachshift lever position.
- Forautomatictransmission vehicles, theignitionshouldturn toLOCK/OFFonlywhenthe shiftleverisinP(Park). The ignitionkeyshouldcomeout onlyinLOCK/OFF.
- Formanualtransmission vehicles, theignitionkeyshould comeoutonlyinLOCK/OFF.
Contactyourdealerifserviceis required.
ParkBrakeandP(Park) MechanismCheck
WARNING
Whenyouaredoingthischeck, thevehiclecouldbegintomove. Youorotherscouldbeinjured andpropertycouldbedamaged. Makesurethereisroominfront ofthevehicleincaseitbeginsto roll.Bereadytoapplytheregular brakeatonceshouldthevehicle begintomove.
Parkonafairlysteephill, with the vehicle facingdownhill. Keeping yourfootontheregularbrake, set theparkingbrake.
- Tochecktheparkingbrake's holdingability:Withtheengine runningandthetransmissionin N(Neutral),slowlyremovefoot pressurefromtheregularbrake pedal.Dothisuntilthevehicleis heldbytheparkingbrakeonly.
- TochecktheP(Park) mechanism'sholding ability:Withtheengine running,shifttoP(Park). Thenreleasetheparkingbrake followedbytheregularbrake.
Contactyourdealerifserviceis required.
WiperBladeReplacement
Windshieldwiperbladesshouldbe inspectedforwearorcracking.See ScheduledMaintenanceon page11-2formoreinformation.
Itisagoodideatocleanorreplace thewiperbladeassemblya regularbasisorwhenworn. For properwindshieldwiperblade lengthandtype, see Maintenance ReplacementPartsonpage 11-8.
Notice: Allowingthewiperblade armtotouchthewindshieldwhen nowiperbladeisinstalledcould damagethewindshield.Any damagethatoccurswouldnotbe coveredbyyourwarranty.Donot allowthewiperbladearmto touchthewindshield.
Toreplacethewiperblade:
- Pullthewiperassemblyaway fromthewindshield.
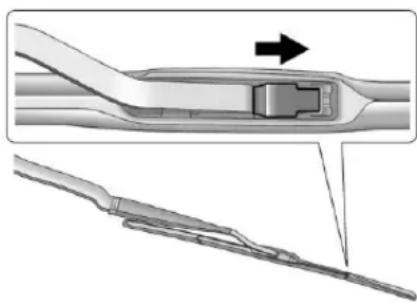
natural_image
Technical illustration of a medical device with an arrow indicating direction (no text or symbols present)- Liftuponthelatchinthemiddle ofthewiperbladewherethe wiperarmattaches.
- With the latch open, pull the wiper bladed downtoward the windshieldfarenoughtorelease it from the J-hooked end of the wiper arm.
- Removethewiperblade.
- ReverseSteps1 through 3 for wiperbladereplacement.
HeadlampAiming
Headlampaimhasbeenpresetat thefactoryandshouldneedno furtheradjustment.
However, if the vehicle is damaged inacrash, the headlamp aimmay be affected. Aim adjustment to the low-beam headlamps may be necessary if on coming drivers flash their high-beam headlamps at you (for vertical aim).
Iftheheadlampsneedtobe re-aimed,itisrecommendedthat thevehiclebetakentoadealerfor service.
BulbReplacement
Forthepropertyofreplacement bulbs,seeReplacementBulbson page 10-34.
Foranybulb-changingprocedure notlistedinthissection,contact yourdealer.
HalogenBulbs

WARNING
Halogenbulbshavepressurized gasinsideandcanburstifyou droporscratchthebulb. Youor otherscouldbeinjured. Besure toreadandfollowtheinstructions onthebulbpackage.
Headlamps, FrontTurn SignalandParking Lamps
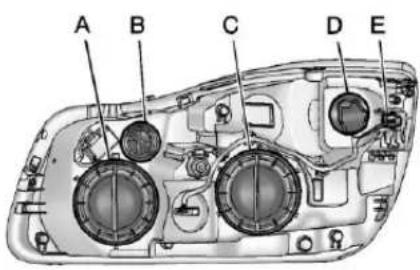
BaseHeadlampAssembly (PassengerSideShown, Driver SideSimilar)
A. High-BeamHeadlamp
B. TurnSignalLamp
C.Low-BeamHeadlamp/Daytime RunningLamp(DRL)
D. ParkingLamp
E.SidemarkerLamp
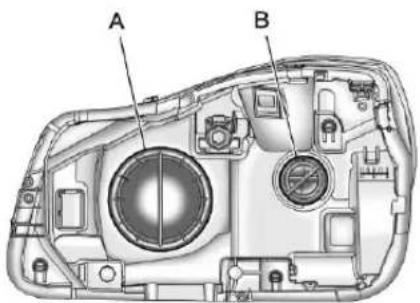
Up-LevelHeadlampAssembly (PassengerSideShown, Driver SideSimilar)
A. High/Low-BeamHeadlamp-To bereplacedatthedealeronly
B. TurnSignalLamp
Low-BeamHeadlamps/Daytime RunningLamps(DRL), High-BeamHeadlamps(Base)
-
Forthedriversidebulb, remove the windshieldwasherbottle fillerneckbyfirmlypullingit straightupandoutofthebottle.
-
Removetheoutsidecapforthe low-beamheadlamp/DRLbulb replacementfromthebackofthe headlampassembly.
- Removetheinsidecapforthe high-beamheadlampbulb replacementfromthebackofthe headlampassembly.
- Disconnect the electrical connector.
- Removethebulbsocketfrom theheadlampassembly.
- Replacethebulbinthebulb socket.
- Install the bulb socket in the head lamp assembly.
- ReverseSteps1 through 4 to reinstall the outside or inside cap on the headlamp assembly.
High/Low-BeamHeadlamps (Up-Level)
The high/low-beam headlampson the up-level headlampsystem are High Intensity Discharge (HID) and should bere placed at the dealer.
FrontTurnSignal/Parking/Side MarkerLamps(Baseand Up-Level)
Toreplacethefrontturnsignal, parkinglamp,orsidemarkerlamp:
- Forthedriversidebulb, remove the windshieldwasherbottle fillerneckbyfirmlypullingit straightupandoutofthebottle.
- Removethebulbsocketfrom theheadlampassemblyby turningitcounterclockwise.
- Removethebulbfromthe socket.
- Replacethebulbinthebulb socket.
-
Install the bulb socket in the headlamp assembly by turning it clockwise.
-
Forthedriverside, reinstall the windshieldwasherbottlefiller neckbyfirmlypushingitstraight intothebottle.Ensurethatthe fillerneckclipengagesintothe underhoodelectricalcenter retainer.
FogLamps
Toreplacethefoglampbulb:
- Locatethebulbassemblyunder thefrontfascia.
- Disconnect the electrical connector from the bulb assembly.
- Removethebulbbyturningit counterclockwiseandpullingit straightoutoftheassembly.
- Installthenewbulbbyturningit clockwiseintotheassembly.
- Reconnecttheelectrical connectortothebulbassembly.
Taillamps, TurnSignal, Stoplamps, and Back-Up Lamps
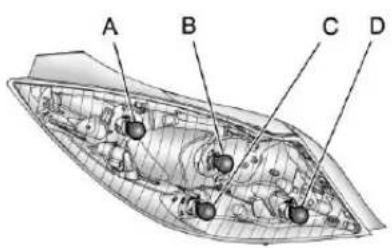
A. Taillamp/SidemarkerLamp
B.Taillamp
C. Stop/TurnSignalLamp
D. Back-up Lamp
Toreplaceanyoneofthesebulbs:
- Openthetrunk.See Trunk Releaseonpage 1-5.
- Removethetaillampassembly accesspanel.
- Removethetwonutsthat securethetaillampassembly.
- Removethetaillampassembly and detach the wiring harness connector.
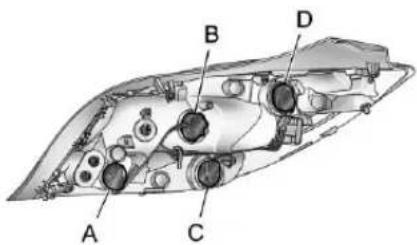
A. Back-up Lamp
B. Taillamp
C.Stop/TurnSignalLamp
D.Taillamp/SidemarkerLamp
- Turnthebulbsocket counterclockwisetoremoveit.
6.Pullthebulbfromthesocket. - Installanewbulb.
- Turnthebulbsocketclockwise toinstallit.
- ReverseSteps2through4to reinstallthetaillampassembly.
LicensePlateLamp
Toreplaceoneofthesebulbs:
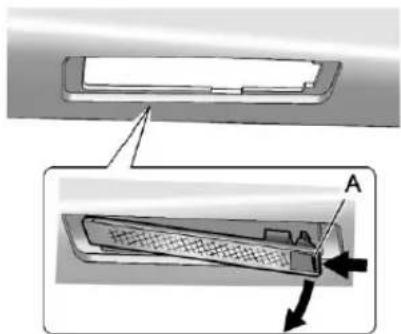
PassengerSideShown,Driver SideSimilar
- Pushthereleasetab(A) toward the lampassembly.
- Pullthelampassemblydownto remove.
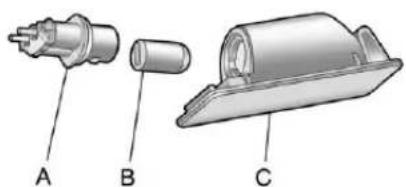
A.BulbSocket
B.Bulb
C.LampAssembly
- Turnthebulbsocket(A) counterclockwisetoremoveit fromthelampassembly(C).
- Pullthebulb(B) straightout of the bulb socket.
-
Pushthereplacementbulb straightintothebulbsocketand turnthebulbsocketclockwiseto installitintothelampassembly.
-
Pushthelampassemblyback intopositionuntilthereleasetab locksintoplace.
ReplacementBulbs
| ExteriorLamp | Bulb Number |
| Back-upLamp3157K | |
| FogLampH10 | |
| FrontTurn SignalLamp | 4157NAK |
| FrontSidemarker Lamp(Base) | 194 |
| High-Beam Headlamp(Base) | H7 |
| LicensePlateLamp194 | |
| Low-Beam Headlamp/Daytime Running Lamp(DRL) | H11 |
| StopLamp/Turn SignalLamp | 3157K |
| Taillamp/SidemarkerLamp | 3157K |
Forreplacementbulbsnotlisted here,contactyourdealer.
ElectricalSystem
ElectricalSystem Overload
The vehicle has fuses and circuit breaker stop protect against electrical system overload.
Whenthecurrentelectricalloadis tooheavy, the circuitbreakeropens and closes, protecting the circuit until the current load return to normal or the problem is fixed. This greatly reduces the chance of circuit overload and fire caused by electrical problems.
Fusesandcircuitbreakersprotect powerdevicesinthevehicle.
Replaceabadfusewithanewone oftheidenticalsizeandrating.
If thereisaproblemontheroad and afuseneedstobereplaced, the sameamperagefusecan be borrowed. Choose some feature of the vehicle that is not needed to use and replace it as soon as possible.
HeadlampWiring
Anelectricaloverloadmaycause thelampstogoonandoff, orin somecasestoremainoff. Havethe headlampwiringcheckedrightaway ifthelampsgoonandoffor remainoff.
WindshieldWipers
Ifthewipermotoroverheatsdueto heavysnoworice, the windshield wiperswillstopuntilthemotorcools and will then restart.
Although the circuit is protected from electrical overload, overload dueto heavysnow oricemay cause wiper linkaged damage. Always clear rice and heavysnow from the windshield before using the windshield wipers.
If the overload is caused by an electrical problem and not snow or ice, besuretogetit fixed.
FusesandCircuit Breakers
The wiring circuits in the vehicle are protected from short circuits by a combination of offuses and circuit breakers. This greatly reduces the chance of damage caused by electrical problems.
Tocheckafuse,lookatthe silver-coloredbandinsidethefuse. Ifthebandisbrokenormelted, replacethefuse.Besuretoreplace abadfusewithanewoneofthe identicalsizeandrating.
Fusesofthesameamperagecan betemporarilyborrowedfrom anotherfuselocation,ifafusegoes out.Replacethefuseassoonas possible.
To identify and check fuses, circuit breakers, and relays, see Engine Compartment Fuse Block on page 10-36 and Instrument Panel Fuse Block on page 10-40.
EngineCompartment FuseBlock
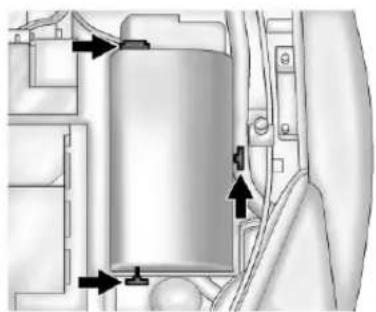
natural_image
Mechanical assembly diagram showing a cylindrical component with mounting holes and directional arrows indicating motion (no text or symbols present)Toremovethefuseblockcover, pressthethreeretainingclipsonthe coverandliftitstraightup.
Notice: Spilling liquidon any electrical component on the vehicle may damage it. Always keep the cover on any electrical component.
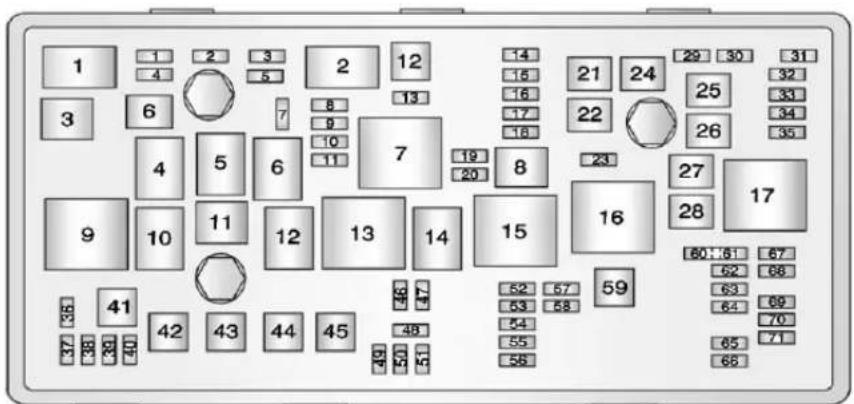
EngineCompartmentFuseBlock
| Fuse Number | Usage |
| 1 | Transmission ControlModule |
| 2 | EngineControl Module |
| Fuse Number | Usage |
| 3NotUsed | |
| 4NotUsed |
| Fuse Number | Usage |
| 5 | Ignition, Transmission ControlModule, EngineControl Module |
| 6WindshieldWiper | |
| 7NotUsed | |
| 8 | FuelInjection, Ignition SystemEven |
| 9 | FuelInjection, IgnitionSystemOdd |
| 10 | EngineControl Module |
| 11OxygenSensor | |
| 12Starter | |
| 13 | FuelSystemControl Module |
| 14 | SecondaryAir Induction |
| 15NotUsed | |
| 16VacuumPump | |
| 17Ignition,Airbag | |
| 18NotUsed | |
| 19NotUsed | |
| 20NotUsed | |
| 21 | RearPower Windows |
| 22 | AntilockBrake SystemValve |
| 23 | VariableEffort Steering |
| 24 | FrontPower Windows |
| 25Power | Outlets |
| 26 | AntilockBrake SystemPump |
| 27 | ElectricParking Brake |
| 28 | HeatedRear Window |
| Fuse Number | Usage |
| 29 | LeftHandSeatLumbar |
| 30 | RightHandSeatLumbar |
| 31NotUsed | |
| 32 | BodyControlModule6 |
| 33HeatedFrontSeats | |
| 34Sunroof | |
| 35InfotainmentSystem | |
| 36NotUsed | |
| 37 | RightHandHigh-BeamHeadlamp |
| 38 | LeftHandHigh-BeamHeadlamp |
| 39NotUsed | |
| 40NotUsed | |
| 41VacuumPump | |
| Fuse Number | Usage |
| 42RadiatorFan1 | |
| 43NotUsed | |
| 44 | HeadlampWasher System(ifequipped) |
| 45RadiatorFan2 | |
| 46 | Terminal87,Main Relay |
| 47OxygenSensor | |
| 48FogLamps | |
| 49 | RightHandLowBeam,HighIntensityDischargeHeadlamp |
| 50 | LeftHandLowBeam,HighIntensityDischargeHeadlamp |
| 51Horn | |
| 52 | MotorIndicatorLamp |
| 53 | Ignition,Inside RearviewMirror |
| 54NotUsed | |
| 55Power | Windows |
| 56WindshieldWasher | |
| 57NotUsed | |
| 58NotUsed | |
| 59 | SecondaryAir Induction |
| 60Heated | Mirrors |
| 61NotUsed | |
| 62 | CanisterVent Solenoid |
| 63NotUsed | |
| 64NotUsed | |
| 65NotUsed | |
| Fuse Number | Usage |
| 66NotUsed | |
| 67 | FuelSystemControl Module |
| 68NotUsed | |
| 69BatterySensor | |
| 70NotUsed | |
| 71NotUsed | |
| Relay Number | Usage |
| K1NotUsed | |
| K2Starter | |
| K3CoolingFan(LHU) | |
| K4FrontWiper(Step2) | |
| K5 | FrontWiper(Step1, Interval) |
| K6SAIVALve | |
| Relay Number | Usage |
| K7Main | Relay |
| K8Not | Used |
| K9 | CoolingFan (LAF/LHU) |
| K10Cooling | Fan(LAF) |
| K11Not | Used |
| K12Cooling | Fan(LHU) |
| K13 | CoolingFan (LAF/LHU) |
| K14 | HighIntensity DischargeLamps |
| K15Ignition | |
| K16 | Secondary AIRPump |
| K17 | Window/Mirror Defog |
InstrumentPanelFuse Block
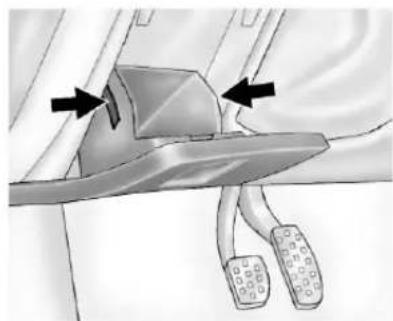
natural_image
Diagram of a mechanical device with arrows indicating motion or force direction (no text or symbols present)Theinstrumentpanelfuseblockis locatedintheinstrumentpanel, on theriversideofthevehicle.
Toaccessthefuses,openthe storagecompartment.Pressinon thesidesofthecompartmentto releaseitfromtheinstrumentpanel. Pullthedoortowardyoutorelease itfromthehinge.
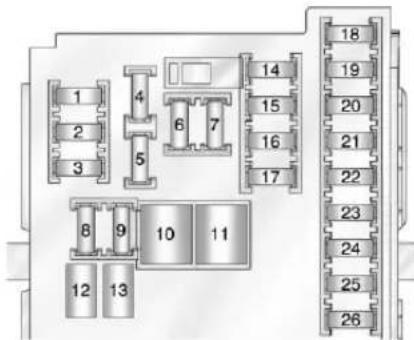
InstrumentPanelFuseBlock
| NumberUsage | |
| 1 | SuspensionControl Module |
| 2 | BodyControl Module7 |
| 3 | BodyControl Module5 |
| 4Radio | |
| 5 | RadioDisplays, ParkAssist, Infotainment, ModuleTunnel Control |
| 6Power | Outlet1 |
| 7Power | Outlet2 |
| 8 | BodyControl Module3 |
| 9 | BodyControl Module4 |
| 10 | BodyControl Module8 |
| 11 | FrontHeater VentilationAir Conditioning/Blower |
| 12 | RightHandPower FrontSeat |
| 13 | LeftHandPower FrontSeat |
| 14 | DiagnosticLink Connector |
| 15Airbag | |
| NumberUsage | |
| 16Trunk | Release |
| 17 | HeaterVentilationAirConditioningController |
| 18 | ServiceFuse,LogisticRelay |
| 19NotUsed | |
| 20 | AutomaticOccupantSensing |
| 21 | InstrumentPanelCluster |
| 22 | DiscreteLogicIgnitionSwitch |
| NumberUsage | |
| 23 | BodyControl Module1 |
| 24 | BodyControl Module2 |
| 25OnStar® | |
| 26Power | Outlet, Trunk |
WheelsandTires
Tires
EverynewGMvehiclehas high-qualitytiresmadebya leadingtiremanufacturer.See thewarrantymanualfor informationregardingthetire warrantyandwheretoget service.Foradditional informationrefertothetire manufacturer.

WARNING
- Poorlymaintained and improperly used tires are dangerous.
• Overloadingthetirescan causeoverheatingasaresult oftoomuchflexing.There couldbeablowoutanda seriouscrash.See Vehicle LoadLimitsonpage9-12.
(Continued)
WARNING(Continued)
- Underinflatedtiresposethe samedangerasoverloaded tires. Theresultingcrash couldcauseseriousinjury. Checkalltiresfrequentlyto maintaintherecommended pressure. Tirepressure shouldbecheckedwhenthe tiresarecold.
• Overinflatedtiresaremore likelytobecut, punctured, orbrokenbyasudden impact—suchaswhen hittingapothole. Keeptiresat therecommended pressure. - Wornoroldtirescancausea crash. If the treadis badly worn, replace them.
- Replaceanytiresthathave beendamagedbyimpacts withpotholes,curbs,etc.
(Continued)
WARNING(Continued)
- Improperlyrepairedtirescan causeacrash. Only the dealeroranauthorized tire servicecenters should repair, replace, dismount, and mount the tires.
- Donotspinthetiresin excessof55km/h(35mph) onslippery surface such as snow, mud, ice, etc. Excessivespinning may causethetirestoexplode.
See TirePressurefor High-SpeedOperationon page 10-50 for inflation pressure adjustment for high-speed driving.
WinterTires
Considerinstallingwintertireson thevehicleiffrequentdrivingon snoworicecoveredroadsis expected. Allseasontiresprovide goodoverallperformanceonmost surfaces, buttheymaynotofferthe tractionorthesamelevelof performanceaswintertiresonsnow oricecoveredroads.
Wintertires, ingeneral, are designed for increased traction on snow and ice covered roads. With wintertires, therem maybe decreased dry road traction, increased road noise, and shortertread life. After changing to wintertires, be alert for changes in vehicle handling and braking.
Seeyourdealerfordetails regardingwintertireavailabilityand propertireselection.Also,see BuyingNewTiresonpage10-57.
Ifusingsnowtires:
- Usetiresofthesamebrandand treadtypeonallfourwheel positions.
- Useonlyradialplytiresofthe samesize,loadrange,and speedratingastheoriginal equipmenttires.
Wintertireswiththesamespeed ratingastheoriginalequipmenttires maynotbeavailableforH,V,W,Y, andZRspeedratedtires. If winter tireswithalowerspeedratingare chosen,neverexceedthetire's maximumspeedcapability.
TireSidewallLabeling
Usefulinformationaboutatireis moldedintoitssidewall. The exampleshowatypical passengervehicletireanda compactsparetiresidewall.
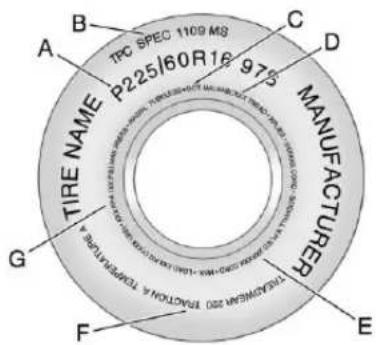
Passenger(P-Metric)TireExample
(A)TireSize: Thetiresizeisa combinationoflettersand numbersusedtodefinea particulartire'swidth,height, aspectratio,constructiontype, andservicedescription.Seethe "TireSize"illustrationalterinthis sectionformoredetail.
(B)TPCSpec(Tire PerformanceCriteria Specification):Original equipmenttiresdesignedto GM'sspecificireperformance criteriahaveaTPCspecification codemoldedontothesidewall. GM'sTPCspecificationsmeetor exceedallfederalsafety guidelines.
(C)DOT(Departmentof Transportation): The DepartmentofTransportation (DOT)codeindicatesthat thetireisincompliancewith theU.S.Departmentof TransportationMotorVehicle SafetyStandards.
(D) TireIdentificationNumber (TIN): The letters and numbers following the DOT (Department of Transportation) code are the TireIdentificationNumber (TIN).
The TINshowsthe manufacturer and plant code, tiresize, and datethetire was manufactured. The TINis molded ontobothsides of the tire, although only onesidemay havethedate of manufacture.
(E)TirePlyMaterial :Thetype ofcordandnumberofpliesin thesidewallandunderthetread.
(F)UniformTireQuality Grading(UTQG): Tire manufacturersarerequired to gradetiresbasedonthree performancefactors:treadwear, traction,andtemperature resistance. Formoreinformation see Uniform Tire Quality Gradingonpage 10-59.
(G)MaximumColdInflation LoadLimit : Maximumload that can be carried and the maximum pressure needed to support that load.
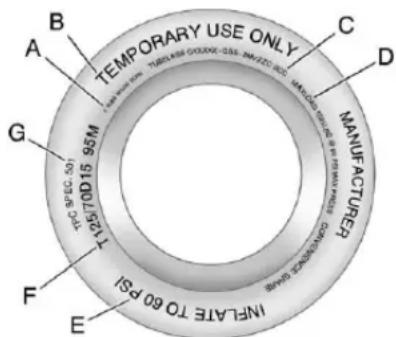
CompactSpareTireExample
(A)TirePlyMaterial: Thetype ofcordandnumberofpliesin thesidewallandunderthetread.
(B)TemporaryUseOnly :The compactsparetireortemporary usetirehasatreadlifeof approximately5000km (3,000mi)andshouldnotbe drivenatspeedsover105km/h (65mph). Thecompactspare tireisforemergencyusewhena regularroadtirehaslostairand goneflat. Ifthevehiclehasa
compactsparetire,see CompactSpareTireon page10-69andIfaTireGoes Flatonpage10-62.
(C) TireIdentificationNumber (TIN): The letters and numbers following the DOT (Department of Transportation) code are the TireIdentificationNumber (TIN). The TIN shows the manufacturer and plant code, tiresize, and datethetire was manufactured. The TIN is molded on both sides of the tire, although only ones idemay havethedate of manufacture.
(D)MaximumColdInflation LoadLimit :Maximumload thatcanbecarriedandthe maximumpressureneededto supportthatload.
(E)TireInflation :The temporaryusetireorcompact sparetireshouldbeinflatedto 420kPa(60psi).Formore
informationontirepressureand inflationsee TirePressureon page10-49.
(F)TireSize :A combination of letters and numbers define a tire's width, height, aspect ratio, construction type, and service description. The letter Tasthe first character in the tiresize mean sthetire is for temporary use only.
(G)TPCSpec(Tire PerformanceCriteria Specification):Original equipmenttiresdesignedto GM'sspecificireperformance criteriahaveaTPCspecification codemoldedontothesidewall. GM'sTPCspecificationsmeetor exceedallfederalsafety guidelines.
TireDesignations
TireSize
The following is an example of typical passenger vehicle tiresize.
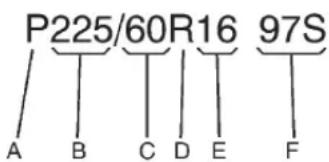
(A)Passenger(P-Metric)
Tire:TheUnitedStatesversion ofametrictiresizingsystem. TheletterPasthefirst characterinthetiresizemeans apassengervehicletire engineeredtostandards setbytheU.S.TireandRim Association.
(B)TireWidth : Thethree-digit numberindicatesthetiresection widthinmillimetersfrom sidewalltosidewall.
(C)AspectRatio:Atwo-digit numberthatindicatesthetire height-to-widthmeasurements. Forexample,ifthetiresize aspectratiois60,asshownin itemCoftheillustration,itwould meanthatthetire'ssidewallis 60percentashighasitiswide.
(D)ConstructionCode :A lettercodeisusedtoindicate thetypeofplyconstructionin thetire.TheletterRmeans radialplyconstruction;the letterDmeansdiagonalorbias plyconstruction;andtheletterB meansbelted-biasply construction.
(E)RimDiameter :Diameter of thewheelin inches.
(F)ServiceDescription :These charactersrepresenttheload indexandspeedratingofthe tire. Theloadindexrepresents theloadcarryingcapacityatire
iscertifiedtocarry. Thespeed ratingisthemaximumspeeda tireiscertifiedtocarryaload.
TireTerminology and Definitions
AirPressure:Theamountof airinsidethetirepressing outwardoneachsquareinch ofthetire.Airpressureis expressedinkPa(kilopascal) orpsi(poundspersquareinch).
AccessoryWeight : The combinedweightofoptional accessories. Some examples of optional accessories are automatic transmission, power steering, power brakes, power windows, power seats, and air conditioning.
AspectRatio :Therelationship ofatire'sheighttoitswidth.
Belt: Arubbercoatedlayerof cordsthatislocatedbetween thepliesandthetread. Cords maybemadefromsteelorother reinforcingmaterials.
Bead: Thetirebead contains steelwireswrapped by steel cordsthathold the tire onto therim.
BiasPlyTire :Apneumatictire inwhichthepliesarelaidat alternateangleslessthan 90degreestothecenterlineof thetread.
ColdTirePressure :The amountofairpressureinatire, measuredinkPa(kilopascal) orpsi(poundspersquareinch) beforeatirehasbuiltupheat fromdriving.See TirePressure onpage 10-49.
CurbWeight : Theweightofa motorvehiclewithstandardand optionalequipmentincludingthe
maximumcapacityoffuel, oil, and coolant, but without passengers and cargo.
DOTMarkings :Acodemolded intothesidewallofatire signifyingthatthetireisin compliancewiththeU.S. DepartmentofTransportation (DOT)MotorVehicleSafety Standards.TheDOTcode includestheTireIdentification Number(TIN),analphanumeric designatorwhichcanalso identifythetiremanufacturer, productionplant,brand,and dateofproduction.
GVWR: Gross Vehicle Weight Rating. See Vehicle Load Limits on page 9-12.
GAWRFRT : GrossAxleWeight Ratingforthefrontaxle. See VehicleLoadLimitson page9-12.
GAWRRR : GrossAxleWeight Ratingfortherearaxle. See VehicleLoadLimitson page9-12.
IntendedOutboardSidewall : Thesideofanasymmetricaltire, thatmustalwaysfaceoutward whenmountedonavehicle.
Kilopascal(kPa) : Thematic unitforairpressure.
LightTruck(LT-Metric)Tire :A tireusedonlightdutytrucksand somemultipurposepassenger vehicles.
LoadIndex : Anassigned numberranging from 1 to 279 that correspond stotheload carrying capacity of atire.
Maximum Inflation Pressure : Themaximum air pressure to which acoldtire can be inflated. Themaximum air pressure is molded onto the sidewall.
MaximumLoadRating :The loadratingforatireatthe maximumpermissibleinflation pressureforthattire.
MaximumLoadedVehicle Weight: Thesumofcurb weight, accessoryweight, vehiclecapacityweight, and productionoptionsweight.
NormalOccupantWeight :The numberofoccupantsavehicle isdesignedtoseatmultipliedby 68kg(150lbs).See Vehicle LoadLimitsonpage9-12.
OccupantDistribution : Designatedseatingpositions.
OutwardFacingSidewall :The sideofanasymmetricaltirethat hasaparticularsidethatfaces outwardwhenmountedona vehicle. Thesideofthetirethat containsawhitewall,bears whitelettering,orbears manufacturer,brand,and/or
modelnamemoldingthatis higherordeeperthanthesame moldingsontheothersidewall ofthetire.
Passenger(P-Metric)Tire :A tireusedonpassengercarsand somelightdutytrucksand multipurposevehicles.
Recommended Inflation Pressure: Vehicle manufacturer's recommended tireinflation pressureasshown onthetireplacard. See Tire Pressureonpage10-49 and VehicleLoadLimitson page9-12.
RadialPlyTire :Apneumatic tireinwhichtheplycordsthat extendtothebeadsarelaidat 90degreestothecenterlineof thetread.
Rim: Ametalsupportforatire anduponwhichthetirebeads areseated.
Sidewall: The portion of atire between the read and the bead.
SpeedRating :An alphanumericcodeassignedto atireindicatingthemaximum speedatwhichatirecan operate.
Traction: Thefrictionbetween thetireandtheroadsurface. Theamountofgripprovided.
Tread: The portion of atire that comes into contact with theroad.
TreadwearIndicators :Narrow bands,sometimescalledwear bars,thatshowacrossthetread ofatirewhenonly1.6mm (1/16in)oftreadremains.See WhenItIs TimeforNew Tires onpage 10-56.
UTQGS(UniformTireQuality GradingStandards) :Atire informationsystemthatprovides consumerswithratingsfora
tire'straction, temperature, andtreadwear. Ratings are determined by tire manufacturers using government testing procedures. Theratings are molded into the sidewallofthetire. See Uniform Tire Quality Grading on page 10-59.
VehicleCapacityWeight : The number of designated seating positions multiplied by 68 kg (150 lbs) plus therated cargo load. See Vehicle Load Limits on page 9-12.
VehicleMaximumLoadonthe Tire:Loadonanindividualtire duetocurbweight,accessory weight,occupantweight,and cargoweight.
VehiclePlacard :Alabel permanentlyattachedtoa vehicleshowingthevehicle capacityweightandtheoriginal equipmenttiresizeand
recommendedinflationpressure. See "TireandLoading InformationLabel" under Vehicle LoadLimitsonpage9-12.
TirePressure
Tiresneedthecorrectamountof airpressuretooperate effectively.
Notice: Neithertire underinflationnor overinflationisgood. Underinflatedtires, ortires thatdonothaveenoughair, canresultin:
- Tireoverloading and overheating which could lead to ablowout.
• Prematureor irregularwear. - Poorhandling.
- Reducedfueleconomy.
Overinflatedtires, ortiresthat havetoomuchair, can resultin:
- Unusualwear.
- Poorhandling.
- Roughride.
- Needlessdamagefrom roadhazards.
The Tire and Loading Information label on the vehicle indicates the originale equipment tires and the correct cold tire inflation pressures. The recommended pressure is the minimum air pressure needed to support the vehicle's maximum loadcarrying capacity.
For additional information regarding how much weight the vehicle can carry, and an example of the Tire and Loading Information label, see Vehicle Load Limit on page 9-12. How the vehicle is loaded affects
vehiclehandlingandride comfort. Neverloadthevehicle withmoreweightthanitwas designedtocarry.
WhentoCheck
Checkthetiresonceamonthor more. Donotforgetthecompact sparetire, if the vehicle has one. The compact spa should be beat 420kPa (60psi). For additional information regarding the compact sparetire, see Compact Spare Tire on page 10-69.
HowtoCheck
Useagoodqualitypocket-type gaugetochecktirepressure. Propertireinflationcannotbe determinedbylookingatthetire. Checkthetireinflationpressure whenthetiresarecold,meaning thevehiclehasnotbeendriven foratleastthreehoursorno morethan1.6km(1mi).
Removethevalvecapfromthe tirevalvestem.Pressthetire gaugefirmlyontothevalveto getapressuremeasurement. Ifthecoldtireinflationpressure matchestherecommended pressureontheTireand LoadingInformationlabel,no furtheradjustmentisnecessary. Iftheinflationpressureislow, addairuntiltherecommended pressureisreached.Ifthe inflationpressureishigh,press onthemetalsteminthecenter ofthetirevalvetoreleaseair.
Re-checkthetirepressurewith thetiregauge.
Return the valvecaps on the valvestemstop prevent leaks and keep out dirt and moisture.
TirePressurefor High-SpeedOperation

WARNING
Drivingathighspeeds,160km/h (100mph)orhigher,putsan additionalstrainontires. Sustainedhigh-speeddriving causesexcessiveheatbuildup andcancausesuddentirefailure. Youcouldhaveacrashandyou orotherscouldbekilled.Some high-speedratedtiresrequire inflationpressureadjustmentfor high-speedoperation.When speedlimitsandroadconditions aresuchthatavehiclecanbe drivenathighspeeds,makesure thetiresareratedforhigh-speed operation,inexcellentcondition, andsettothecorrectcoldtire inflationpressureforthe vehicleload.
VehicleswithP235/50R18sizetires requireinflationpressureadjustment whendrivingthevehicleatspeeds of160km/h(100mph)orhigher. Setthecoldinflationpressureto 270kPa(39psi).
VehicleswithP245/40R19sizetires requireinflationpressureadjustment whendrivingthevehicleatspeeds of 160km/h(100mph)or higher. Setthecoldinflationpressure to 310kPa(45psi).
Returnthetirestothe recommendedcoldtireinflation pressurewhenhigh-speeddriving hasended.SeeVehicleLoadLimits onpage9-12andTirePressureon page10-49.
TirePressureMonitor System
The TirePressureMonitorSystem (TPMS) uses radio and sensor technology to check tire pressure levels. The TPMS sensors monitor the air pressure in your tires and transmit tire pressurereading stoa receiver located in the vehicle.
Eachtire, including the spare (if provided), should be checked monthly when cold and inflated to the inflation pressurerecommended by the vehicle manufacturer on the vehicle placardortire inflation pressure label. (If your vehicle has tires of different sizing thanthesize indicated on the vehicle placardor tire inflation pressure label, you should determinethe propertire inflation pressure forthosetires.)
Asanadded safety feature, your vehicle has been equipped with a tire pressure monitoringsystem (TPMS) that illuminates alowtire
pressuretelltalewhenoneor moreofyourtiresissignificantly under-inflated.
Accordingly, whenthelowtire pressuretelltaleilluminates, you shouldstopandcheckyourtiresas soonaspossible, andinflatethem totheproperpressure. Drivingon asignificantlyunder-inflatedtire causesthetiretooverheatandcan leadtotirefailure. Under-inflation alsoreducesfuelefficiencyandtire treadlife, andmayaffectthe vehicle'shandlingandstopping ability.
PleasenotethattheTPMSis notasubstituteforpropertire maintenance, anditisthedriver's responsibility to maintain incorrect tire pressure, even if under-inflation has not reached the level to trigger illumination of the TPMSlow tire pressure telltale.
Yourvehiclehasalsobeen equippedwithaTPMSmalfunction indicatortoindicatewhenthe systemisnotoperatingproperly.
The TPMSmalfunctionindicatoris combined with the low tire pressure telltale. Whenthesystemdetectsa malfunction, the telltale will flash for approximately one minute and then remain continuously illuminated. This sequence will continue upon subsequent vehicle start-ups as long asthemalfunction exists.
Whenthemalfunctionindicatoris illuminated, thesystemmaynotbe abletodetectorsignallowtire pressureasintended.TPMS malfunctionsmayoccurforvariety ofreasons, includingtheinstallation ofreplacementoralternatetiresor wheelsonthevehiclethatprevent theTPMSfromfunctioningproperly. AlwayschecktheTPMSmalfunction telltaleafterreplacingoneormore tiresorwheelsonyourvehicleto ensurethatthereplacementor alternatetiresandwheelsallowthe TPMStocontinuetofunction properly.
See TirePressureMonitor Operationonpage 10-52 for additional information.
FederalCommunications Commission(FCC)and IndustryCanada
SeeRadioFrequencyStatementon page 13-15forinformation regardingPart15oftheFederal CommunicationsCommission(FCC) rulesandIndustryCanada StandardsRSS-210/220/310.
TirePressureMonitor Operation
This vehicle may have a Tire Pressure Monitor System (TPMS). The TPMS is designed to warn the driver when alow tire pressure condition exists. TPMS sensors are mounted on to each tire and wheel assembly, excluding the spare tire and wheel assembly. The TPMS sensors monitor the air pressure in the tires and transmit the tire pressurereading to are receiver located in the vehicle.

Whenalowtirepressurecondition isdetected,theTPMSilluminates thelowtirepressurewarninglight locatedontheinstrumentcluster. Ifthewarninglightcomeson,stop as soonaspossibleandinflatethe tirestotherecommendedpressure shownontheTireandLoading Informationlabel.SeeVehicleLoad Limitsonpage9-12.
Amessagetocheckthepressurein aspecifictiredisplaysintheDriver InformationCenter(DIC).Thelow tirepressurewarninglightandthe DICwarningmessagecomeonateachignitioncycleuntilthetiresare inflatedtothecorrectinflation pressure.UsingtheDIC,tire pressurelevelscanbeviewed.For additionalinformationanddetails
abouttheDICoperationand displays,seeDriverInformation Center(DIC)onpage5-22.
Thelowtirepressurewarninglight maycomeonincoolweatherwhen thevehicleisfirststarted,andthen turnoffasthevehicleisdriven.This couldbeanearlyindicatorthatthe airpressureisgettinglowand needstobeinflatedtotheproper pressure.
ATireandLoadingInformationlabel showsthesizeoftheoriginal equipmenttiresandthecorrect inflationpressureforthetireswhen theyarecold.SeeVehicleLoad Limitsonpage9-12,foranexample oftheTireandLoadingInformation labelanditslocation.AlsoseeTire Pressureonpage10-49.
The TPMScanwarnabouta lowtirepressurecondition, but itdoesnotreplacenormaltire maintenance. See TireInspection on page 10-55, TireRotationon page 10-55, and Tireson page 10-42.
Notice:Tiresealantmaterialsare notallthesame.Anon-approved tiresealantcoulddamagethe TPMSsensors.TPMSsensor damagecausedbyusingan incorrecttiresealantisnot coveredbythevehiclewarranty. Alwaysuseonlythe GM-approvedtiresealant availablethroughyourdealeror includedinthevehicle.
TPMSMalfunctionLightand Message
The TPMS will not function properly if one or more of the TPMS sensors are missing or inoperable. When the system detects a malfunction, the low-tire pressure warning light flashes for about one minute and then stay on for their remainder of the ignition cycle. ADIC warning message alsodisplays. The malfunction light and DIC warning message come on at each ignition cycle until the problem is corrected.
Someoftheconditionsthatcan causethesetocomeonare:
- Oneoftheroadtireshasbeen replacedwiththesparetire. Thesparetiredoesnothavea TPMSsensor. Themalfunction lightandtheDICmessage shouldgooffaftertheroadtire isreplacedandthesensor matchingprocessisperformed successfully. See "TPMSSensor MatchingProcess" laterinthis section.
-
TheTPMSsensormatching processwasnotdoneor notcompletedsuccessfully afterrotatingthetires.The malfunctionlightandtheDIC messageshouldgooffafter successfullycompleting the sensormatchingprocess.See "TPMSSensorMatching Process"laterinthissection.
-
OneormoreTPMSsensors aremissingordamaged. The malfunctionlightandtheDIC messages should go off when the TPMSsensors are installed and the sensormatching process is performed successfully. See your dealer for service.
- Replacementtiresorwheelsdo notmatchtheoriginalequipment tiresorwheels.Tiresandwheels otherthanthoserecommended couldpreventtheTPMSfrom functioningproperly.SeeBuying NewTiresonpage10-57.
- Operatingelectronicdevicesor beingnearfacilitiesusingradio wavefrequenciessimilartothe TPMScouldcausetheTPMS sensorstomalfunction.
If the TPMS is not functioning properly, it cannot detectorsignala lowtirecondition. Se your dealer for service if the TPMS malfunction light and DIC message come on and stay on.
TPMSSensorMatching Process
EachTPMSsensorhasaunique identificationcode. Theidentification codeneedstobematchedtoanew tire/wheelpositionafterrotatingthe vehicle'stiresorreplacingoneor moreoftheTPMSsensors.Also, theTPMSsensormatchingprocess shouldbeperformedafterreplacing asparetirewitharoadtire containingtheTPMSsensor.The malfunctionlightandtheDIC messageshouldgooffatthenext ignitioncycle. Thesensorsare matchedtothetire/wheelpositions, usingaTPMSrelearntool,inthe followingorder:driversidefronttire, passengersidefronttire,passenger sidereartire,anddriversiderear. Seeyourdealerforserviceorto purchasearelearntool.
Therearetwominutestomatch thefirsttire/wheelposition,and fiveminutesoveralltomatchall fourtire/wheelpositions.Ifittakes longer,thematchingprocessstops andmustberestarted.
TheTPMSsensormatching processis:
- Settheparkingbrake.
- TurntheignitiontoON/RUNwith theengineoff.
- Use the MENU button to select the Vehicle Information Menu in the Driver Information Center (DIC).
- Usethethumbwheeltoscrollto the TirePressureMenuItem screen.
- PresstheSET/CLRbutton to beginthesensormatching process.
Amessagerequesting acceptanceoftheprocess shoulddisplay. -
PresstheSET/CLRbuttonagain to confirm these selection.
Thehornsoundstwicetosignal thereceiverisinrelearnmode andtheTIRELEARNING ACTIVEmessagedisplayson theDICscreen. -
Startwiththedriverside fronttire.
- Placetherelearntoolagainst thetiresidewall, nearthevalve stem. Thenpressthebuttonto activate the TPMS sensor. Ahornchirpconfirmsthatthe sensoridentificationcodehas been matched to thistire and wheelposition.
- Proceed to the passengerside front tire, and repeat the procedure in Step 8.
- Proceed to the passengers side reartire, and repeat the procedure in Step 8.
-
Proceedtothedriversiderear tire, and repeat the procedure in Step 8. The hornsound two timestoindicate the sensor identification code has been matched to the driversiderear tire, and the TPMS sensor matching process is no longer active. The TIRELEARNING ACTIVE message on the DIC displayscreen goes off.
-
TurntheignitiontoLOCK/OFF.
- Set all four tresto the recommended air pressure level as indicated on the Tire and Loading Information label.
TireInspection
Werecommendthatthetires, includingthesparetire,ifthe vehiclehasone,beinspected forsignsofwearordamageat leastonceamonth.
Replacethetireif:
- Theindicatorsatthreeor moreplacesaroundthetire canbeseen.
- Thereiscordorfabric showingthroughthetire's rubber.
-
Thetreadorsidewallis cracked, cut, orsnagged deepenoughtoshowcord orfabric.
-
Thetirehasabump, bulge, orsplit.
- Thetirehasapuncture, cut, orotherdamagethatcannot berepairedwellbecauseof thesizeorlocationofthe damage.
TireRotation
Tiresshouldberotatedevery 12000km(7,500mi).See ScheduledMaintenanceon page11-2.
Tiresarerotatedtoachievea uniformwearforalltires. The firstrotationisthemost important.
Anytimeunusualwearis noticed, rotatethetiresassoon aspossible and check the wheel alignment. Also check for damaged tires or wheels. Also check for damaged tires or wheels. See When It Is Time for
New Tiresonpage10-61 and Wheel Replacement page10-61.
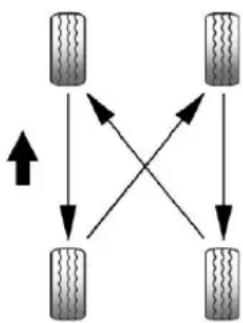
flowchart
graph TD
    A["Left Wheel"] --> B["Right Wheel"]
    A --> C["Left Wheel"]
    A --> D["Right Wheel"]
    B --> C
    B --> D
    C --> D
    style A fill:#f9f,stroke:#333
    style B fill:#ccf,stroke:#333
    style C fill:#cfc,stroke:#333
    style D fill:#fcc,stroke:#333
Usethisrotationpatternwhen rotatingthetires.
Donotincludethecompact sparetireinthetirerotation.
Adjustthefrontandreartiresto therecommendedinflation pressureontheTireand LoadingInformationlabelafter thetireshavebeenrotatedSee
TirePressureonpage9-12and VehicleLoadLimitson page9-12.
Resetthe TirePressureMonitor System.See TirePressure MonitorOperation on page 10-52.
Makecertainthatallwheelnuts areproperlytightened.See "WheelNutTorque" under CapacitiesandSpecificationson page 12-2.

WARNING
Rustordirtonawheel, oronthe partstow whichitisfastened, can makewheelnutsbecomeloose aftertime. Thewheel could come off and cause an accident. When changingawheel, remove any
(Continued)
WARNING(Continued)
rustordirtfromplaceswherethe wheelattachestothevehicle.In anemergency,aclothorapaper towelcanbeused;however,use ascaperorwirebrushlaterto removeallrustordirt.
Lightlycoatthecenterofthe wheelhubwithwheelbearing greaseafterawheelchangeor tirerotationtopreventcorrosion orrustbuild-up.Donotget greaseontheflatwheel mountingsurfaceoronthe wheelnutsorbolts.
WhenItIsTimeforNew Tires
Factors such as maintenance, temperatures, drivingspeeds, vehicleloading, and road conditions affect the wear rate of the tires.
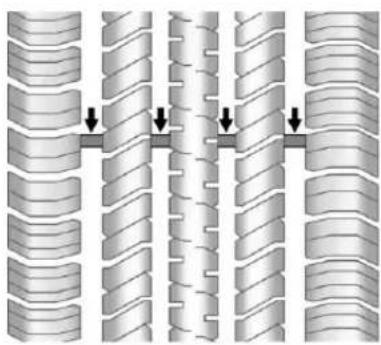
natural_image
Diagram of interlocking cylindrical structures with directional arrows indicating movement or force (no text or symbols)Treadwearindicatorsareonewayto tellwhenitistimefornewtires. Treadwearindicatorsappearwhen thetireshaveonly1.6mm(1/16in) orlessoftreadremaining.See Tire Inspectiononpage 10-55and Tire Rotationonpage 10-55formore information.
Therubberintiresagesovertime. Thisalsoappliesforthesparetire, ifthevehiclehasone, evenifitis neverused. Multipleconditions includingtemperatures, loading conditions, andinflationpressure maintenanceaffecthowfastaging takesplace. Tireswilltypicallyneed tobereplacedduetowearbefore theymayneedtobereplaced duetoage. Consultthetire manufacturerformoreinformation onwhentiresshouldbereplaced.
VehicleStorage
Tiresagewhenstorednormally mountedonaparkedvehicle.Park avehiclethatwillbestoredforat leastamonthinacool,dry,clean areaawayfromdirectsunlightto slowaging.Thisareashouldbe freeofgrease,gasoline,orother substancesthatcandeteriorate rubber.
Parkingforanextendedperiodcan causeflatspotsonthetiresthat mayresultinvibrationswhile driving. Whenstoringavehiclefor atleastamonth,removethetiresor raisethevehicletoreducethe weightfromthetires.
BuyingNewTires
GMhasdevelopedandmatched specificitiesforthevehicle. Theoriginalequipmenttires installedweredesignedto meetGeneralMotorsTire PerformanceCriteria Specification(TPCSpec) systemrating.When replacementtiresareneeded, GMstronglyrecommends buyingtireswiththesameTPC Specrating.
GM's exclusive TPCSpec system considers over a dozen critical specification that impact the overall performance of the vehicle, including brakesystem performance, ride and handling, traction control, and tire pressure monitoring performance. GM's TPCSpec number is molded onto the tire's sidewall near the tiresize. If the tires have an all-season tread design, the TPCSpec number will be followed by MS form mud and snow. See Tire Sidewall Labeling on page 10-43 for additional information.
GMrecommendsreplacingall thetiresatthesametime. Uniformtreaddepthonalltires willhelptomaintainthe performanceofthevehicle.
Brakingandhandling performancemaybeadversely affectedifallthetiresarenot replacedatthesametime.See TireInspectiononpage 10-55 and TireRotationonpage 10-55 forinformationonpropertire rotation.

WARNING
Tirescouldexplodeduring improperservice.Attemptingto mountordismountatirecould causeinjuryordeath.Onlyyour dealerorauthorizedtireservice centershouldmountordismount thetires.

WARNING
Mixingtiresofdifferentsizes, brands,ortypesmaycause lossofcontrolofthevehicle, resultinginacrashorother vehicledamage. Usethe correctsize,brand,andtype oftiresonallwheels.

WARNING
Usingbias-plytiresonthe vehiclemaycausethewheel rimflangestodevelopcracks aftermanymilesofdriving. Atireand/orwheelcouldfail suddenlyandcauseacrash. Useonlyradial-plytireswith thewheelsonthevehicle.
If the vehicle tires must be replaced with atire that does not have a TPCSpec number, make sure they are the same size, load range, speed rating, and construction (radial) as the original tires.
Vehiclesthathaveatire pressuremonitoringsystem couldgiveaninaccurate low-pressurewarningifnon-TPC Specratedtiresareinstalled. See TirePressureMonitor Systemonpage10-51.
The Tire and Loading Information label indicates the originalequipment tires on the vehicle. See Vehicle Load Limits on page 9-12 forthelabel location and more information about the Tire and Loading Information label.
DifferentSizeTiresand Wheels
Ifwheelsortiresareinstalledthat areadifferentsizethantheoriginal equipmentwheelsandtires,vehicle performance,includingitsbraking, rideandhandlingcharacteristics, stability,andresistancetorollover maybeaffected.Ifthevehiclehas electronicsystemssuchasantilock brakes,rolloverairbags,traction control,andelectronicstability control,theperformanceofthese systemscanalsobearaffected.

WARNING
If different-sized wheels are used, theremay not bean acceptable level of performance and safety if tires not recommended for those wheels are selected. This increases the chance of acrash and serious injury. Only use GM specific wheel and tires systems (Continued)
WARNING(Continued)
developedforthevehicle, and havethemproperlyinstalledby aGMcertifiedtechnician.
SeeBuyingNewTireson page 10-57 and Accessories and Modifications on page 10-3 for additional information.
UniformTireQuality Grading
Qualitygradescanbefound whereapplicableonthetire sidewallbetweentreadshoulder andmaximumsectionwidth. For example:
Treadwear200TractionAA TemperatureA
The following information relates to the system developed by the United States National Highway Traffic Safety Administration
(NHTSA), which gradestires bytreadwear, traction, and temperature performance. This applies only to vehicle less sold in the United States. The grades are molded on the sidewall of most passenger cartires. The Uniform Tire Quality Grading (UTQG) system does not apply to deep tread, winter - types now tires, space-saver, or temporary usespareties, tires with nominal rim diameters of 10 to 12 inches (25 to 30 cm), ortosomelimited-production tires.
While the tires available on General Motors passengers cars and light trucks may vary with respect to these grades, they must also conform to federal safety requirements and additional General Motors Tire Performance Criteria (TPC) standards.
All Passenger Car Tires Must Conform to Federal Safety Requirements In Addition To These Grades.
Treadwear
Thetreadweargradeisa comparativeratingbasedon the wear rate of the tire when tested under controlled condition as specified government test course. Forexample, atiregraded 150 would wear one and half (1½) times as well on the government course as atire graded 100. Thereative performance of tires depends upon the actual conditions of their use, however, and may depart significantly from the norm duetovariations in driving habits, service practices and differences in road characteristics and climate.
Traction-AA,A,B,C
Thetractiongrades, from highest to lowest, are AA, A, B, and C. Those grades represent the tire's ability to stop on wet pavement as measured under controlled condition on specified government test surfaces of asphalt and concrete. At remarked C may have poor traction performance. Warning: The traction grade assigned to histire is based on straight-ahead braking traction tests, and does not include acceleration, cornering, hydroplaning, or peak traction characteristics.
Temperature—A,B,C
Thetemperaturegrades areA(thehighest),B,andC, representing the tire's resistance to the generation of heat and its ability to dissipate heat when
testedundercontrolled conditionsonaspecifiedindoor laboratorytestwheel.Sustained hightemperaturecancausethe materialofthetiretodegenerate andreducetirelife,and excessivetemperaturecan leadtosuddentirefailure.The gradeCcorrespondstoalevel ofperformancewhichall passengercartiresmustmeet undertheFederalMotorSafety StandardNo.109.GradesBand Arepresenthigherlevelsof performanceonthelaboratory testwheelthanthemminimum requiredbylaw.Warning:The temperaturegradeforthistireis establishedforatirethatis properlyinflatedandnot overloaded.Excessivespeed, underinflation,orexcessive loading,eitherseparatelyorin combination,cancauseheat buildupandpossibletirefailure.
WheelAlignmentandTire Balance
Thetiresandwheelswerealigned andbalancedatthefactoryto providethelongesttirelifeandbest overallperformance.Adjustmentsto wheelalignmentandtirebalancing willnotbenecessaryonaregular basis.However,checkthe alignmentifthereisunusualtire wearorifthevehicleispullingto onesideortheother.Ifthevehicle vibrateswhendrivingonasmooth road,thetiresandwheelsmight needtoberebalanced.Seeyour dealerforproperdiagnosis.
WheelReplacement
Replaceanywheelthatisbent, cracked,orbadlyrustedor corroded. Ifwheelnutskeepcoming loose,thewheel,wheelbolts,and wheelnutsshouldbereplaced. Ifthewheelleaksair,replaceit.
Somealuminumwheelscanbe repaired. Seeyourdealerifany of theseconditionsexist.
Yourdealerwillknowthekindof wheelthatisneeded.
Eachnewwheelshouldhavethe sameload-carryingcapacity, diameter,width,offset,andbe mountedthesamewayastheoneit replaces.
Replacewheels, wheelbolts, wheel nuts, or Tire Pressure Monitor System (TPMS) sensors with new GM originalequipment parts.

WARNING
Using the wrong replacement wheels, wheel bolts, or wheel nutscan bed dangerous. It could affect the braking and handling of the vehicle. Tirescan lose air, and causel loss of control, causing a crash. Always use the correct wheel, wheel bolts, and wheel nuts for replacement.
Notice: The wrong wheel can also cause problems with bearing life, brake cooling, speedometer orodometrical calibration, headlampaim, bumper height, vehicleground clearance, and tire ortirechain clearance to the body and chassis.
Seelfa Tire Goes Flaton page 10-62 form more information.
UsedReplacementWheels

WARNING
Replacingawheelwithaused oneisdangerous.Howithas beenusedorhowfarithasbeen drivenmaybeunknown.Itcould failsuddenlyandcauseacrash. Whenreplacingwheels,usea newGMoriginalequipment wheel.
TireChains

WARNING
Donotusetirechains. Thereis notenoughclearance. Tirechains usedonavehiclewithoutthe properamountofclearancecan causedamagetothebrakes, suspension, orothervehicle parts. Theareadamagedbythe tirechainscouldcauselossof controlandacrash.
Useanothertypeoftraction deviceonlyifitsmanufacturer recommendsitforthevehicle's tiresizecombinationand roadconditions.Followthat manufacturer'sinstructions.To avoidvehicledamage,drive slowandreadjustorremovethe tractiondeviceifitcontactsthe vehicle.Donotspinthewheels. Iftractiondevicesareused,install themonthefronttires.
IfaTireGoesFlat
Itisunusualforatiretoblowout whiledriving,especiallyifthetires aremaintainedproperly.Ifairgoes outofatire,itismuchmorelikelyto leakoutslowly.Butifthereeverisa blowout,hereareafewtipsabout whattoexpectandwhattodo:
Ifafronttirefails,theflattire createsadragthatpullsthevehicle towardthatside.Takeyourfootoff theacceleratorpedalandgripthe steeringwheelfirmly.Steerto maintainlaneposition,andthen gentlybraketoastop,welloffthe road,ifpossible.
Arearblowout, particularlyona curve, actsmuchlikeaskid and mayrequirethesamecorrectionas usedinaskid. Stoppressing the acceleratorpedalandsteerto straightenthevehicle. It maybe verybumpyandnoisy. Gentlybrake toastop, wellofftheroad, if possible.

WARNING
Drivingonaflattirewillcause permanentdamagetothetire. Re-inflatingatireafterithas beendrivenonwhileseverely underinflatedorflatmaycausea blowoutandaseriouscrash. Neverattempttore-inflateatire thathasbeendrivenonwhile severelyunderinflatedorflat. Haveyourdealeroranaauthorized tireservicecenterrepairor replacetheflattireassoonas possible.

WARNING
Liftingvehicleandgetting underittodomainaintenanceor repairsidangerouswithoutthe appropriatesafetyequipmentand training.Ifajackisprovidedwith thevehicle,itisdesignedonlyfor changingaflattire.Ifitisusedfor anythingelse,youorotherscould bebadlyinjuredorkilledifthe vehicleslipsoffthejack.Ifajack isprovidedwiththevehicle,only useitforchangingaflattire.
Ifatiregoesflat, avoidfurthertire andwheeldamagebydrivingslowly toalevelplace, wellofftheroad, ifpossible. Turnonthehazard warningflashers.SeeHazard WarningFlashersonpage6-3.

WARNING
Changingatirecanbe dangerous. The vehiclecanslip off the jack and rollover or fall causing injury or death. Find a level placeto changethire. To help prevent the vehicle from moving:
- Settheparkingbrakefirmly.
- Putanautomatic transmission in P(Park) or a manual transmission in 1(First) or R(Reverse).
- Turnofftheengineanddo notrestartwhilethevehicle israised.
- Donotallowpassengersto remaininthevehicle.
- Placewheelblocksonboth sidesofthetireatthe oppositecornerofthetire beingchanged.
Whenthevehiclehasaflattire(B), usethefollowingexampleasa guidetoassistintheplacementof thewheelblocks(A).
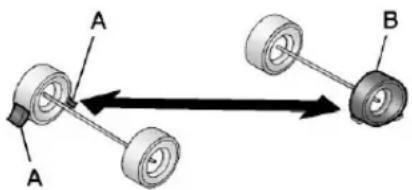
A.WheelBlock
B.FlatTire
The following information explains how to repair or change atire.
TireChanging
RemovingtheSpareTireand Tools
Toaccessthesparetireandtools:
- Openthetrunk.
- Removethesparetirecover.
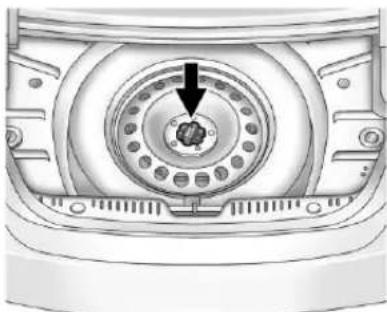
natural_image
Technical illustration of a mechanical component with a central circular dial and an arrow pointing to a specific feature (no text or symbols present)- Turntheretainernut counterclockwiseandremove thesparetire. Placethespare tirenexttothetirebeing changed.
- Thejackandtoolsarestored belowthesparetire. Remove themfromtheircontainerand placethemnearthetirebeing changed.
RemovingtheFlatTireand
InstallingtheSpareTire
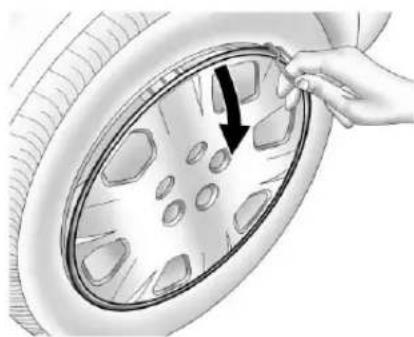
natural_image
Illustration of a hand adjusting a car tire with a black arrow pointing to the wheel rim (no text or symbols present)Takeoffthewheelcoverorcenter cap,ifthevehiclehasone,toreach thewheelbolts.
- Doasafetycheckbefore proceeding. Seelfa Tire Goes Flatonpage 10-62 formore information.
- Turnthewheelwrench counterclockwisetoloosenand removethewheelnutcaps.
Donottrytoremoveplasticcaps from the cover or centercap.
- Pull the cover or center cap away from the wheel. Store the wheel cover in the cargo area until you have the flattire repaired or replaced.
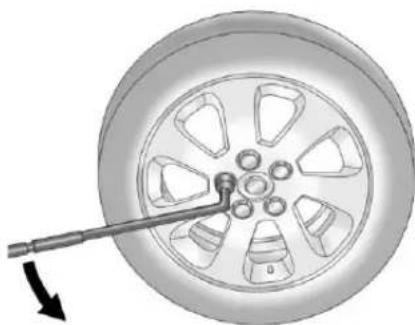
natural_image
Diagram of a car wheel with a tool inserted, showing the wheel rim and hub (no text or symbols)- Turnthewheelwrench counterclockwisetoloosenall thewheelnuts, butdonot removethemyet.
-
Placethejackneartheflattire.
-
Putthecompactsparetire nearyou.
WARNING
Gettingundervehiclewhenitis jackedupisdangerous.Ifthe vehicleslipsoffthejack,you couldbebadlyinjuredorkilled. Nevergetundervehiclewhenit issupportedonlybyajack.
WARNING
Raisingthevehiclewiththejack improperlypositionedcan damagethevehicleandeven makethevehiclefall. To help avoidpersonalinjuryandvehicle damage, besuretofitthejacklift headintotheproperlocation beforeraisingthevehicle.
WARNING
Liftingvehicleandgettingunder ittodomaintenanceorrepairsis dangerouswithoutthe appropriatesafetyequipmentand training.Ifajackisprovidedwith thevehicle,itisdesignedonlyfor changingaflattire.Ifitisusedfor anythingelse,youorotherscould bebadlyinjuredorkilledifthe vehicleslipsoffthejack.Ifajack isprovidedwiththevehicle,only useitforchangingaflattire.
- Attachthejackhandleextension ontothejackbyslidingthehook throughtheendofthejack.
- Placethejackunderthevehicle.
Notice: Makesurethatthejack liftheadisinthecorrectposition oryoumaydamageyourvehicle. Therepairswouldnotbecovered byyourwarranty.
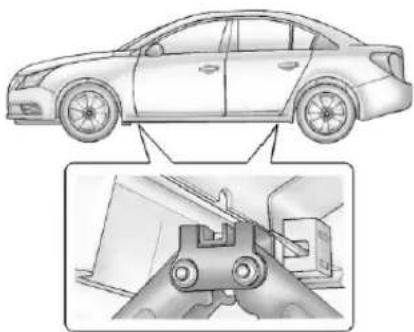
natural_image
Technical illustration of a sedan and its internal components, showing front and side views (no text or symbols)- Position the jack lifthead at the jack location nearest the flattire. Thelocation is indicated by a mark on the bottom edge of the front and reardoor plastic molding. The jack must not be used in any other position.
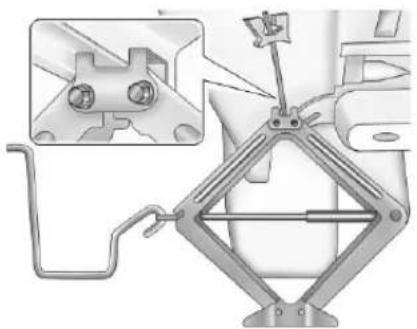
natural_image
Mechanical assembly diagram showing a bracket with mounting holes and a close-up inset of a mechanical component (no text or symbols)Placethejacknotch,asshown.10.Ra
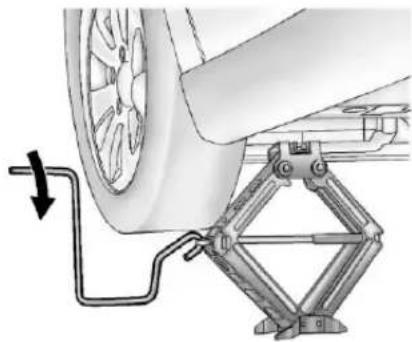
natural_image
Mechanical assembly diagram showing a car wheel connected to a mechanical linkage with a downward arrow (no text or symbols)sethevehiclebyturningthe jackhandleclockwise.Raise thevehiclefarenoughoffthe groundsothereisenough roomfortheroadtiretoclear theground.
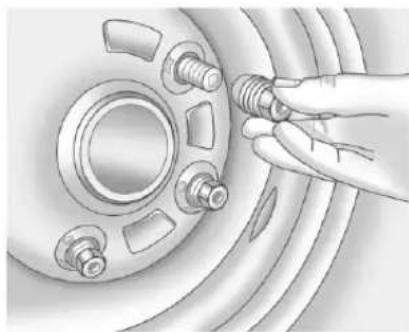
natural_image
Illustration of a hand adjusting a car wheel rim with bolts (no text or symbols)- Removeallofthewheelnuts.
- Removetheflattire.
WARNING
Rustordirtonawheel, oronthe partstow whichitisfastened, can makewheelnutsbecomeloose aftertime. The wheel could come off and cause an accident. When changing a wheel, remove any rustordirt from places where the wheel attachest o the vehicle. In an emergency, aclothorapaper towel can be used; however, use ascaper or wire brush laterto remove all rustordirt.
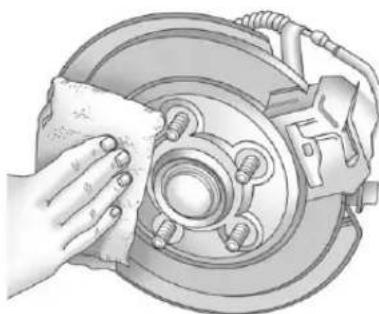
natural_image
Illustration of a hand cleaning a car brake disc with a cloth (no text or symbols)-
Remove any rustordirt from the wheel bolts, mounting surfaces, and spare wheel.
-
Placethecompactsparetire onthewheel-mountingsurface.
WARNING
Neveruseoilorgreaseonbolts ornutsbecausethenutsmight comeloose. Thevehicle'swheel couldfalloff,causingacrash.
- Reinstallthewheelnuts. Tighteneachnutbyhanduntil thewheelisheldagainst thehub.
- Lowerthevehicleby turningthejackhandle counterclockwise.

WARNING
Wheelnutsthatareimproperlyor incorrectlytightenedcancause thewheelstobecomelooseor comeoff. Thewheelnutsshould betightenedwithatorquewrench tothepropertorquespecification afterreplacing.Followthetorque specificationsuppliedbythe aftermarketmanufacturerwhen usingaccessorylockingwheel nuts.SeeCapacitiesand Specificationsonpage12-2for originalequipmentwheelnut torquespecifications.
Notice: Improperlytightened wheelnutscanleadtobrake pulsationandrotordamage. To avoidexpensivebrakerepairs, evenlytightenthewheelnutsin thepropersequenceandtothe propertorquespecification. See CapacitiesandSpecificationson page12-2forthewheelnut torquespecification.
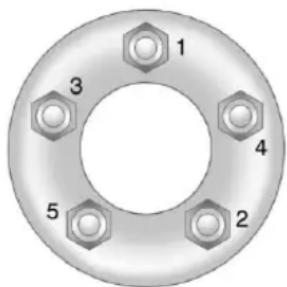
- Tightenthewheelnutsfirmly in acrisscrosssequence, as shown.
- Lowerthejackalltheway and removethejackfromunderthe vehicle.
- Tightenthewheelnutsfirmly withthewheelwrench.
When reinstallingthewheelcover orcentercaponthefull-sizetire, tightenallfiveplasticcapshand snugwiththeaidofthewheel wrenchandtightenthemwith thewheelwrenchanadditional one-quarterofaturn.
Notice: Wheelcoverswillnotfit onthevehicle'scompactspare. Ifyoutrytoputawheelcoveron thecompactspare, thecoveror thesparecouldbedamaged.
StoringaFlatorSpareTire andTools

WARNING
Storingajack, atire, or other equipment in the passenger compartment of the vehicle could cause injury. In sudden stop or collision, loose equipment could strike someone. Store all these in the proper place.
Tostoretheflattire:
- If the flattire is larger than the spare tire, usethelonger mounting bolt from the tool bag.
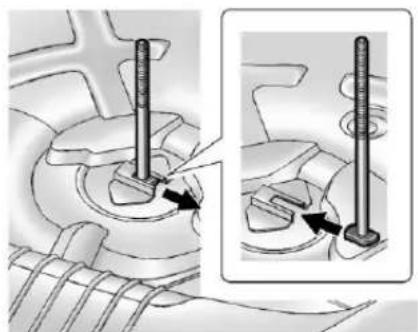
natural_image
Mechanical assembly diagram showing two stages of a bolted joint with arrows indicating motion (no text or labels)2.Slidetheshorterbolttoremove itfromthefloorandinsertthe longerone.
3. Replacethejackandtoolsin theiroriginalstoragelocation.
4. Placethetire, lying flat, facing upinthesparetirewell.
5. Turntheretainernutclockwise tosecurethetire.
6. Placethefloorcoveronthe wheel.
Tostorethecompactsparetire, use theshortermountingbolt.
Thecompactspareisfortemporary useonly.Replacehecompact spare tirewithafull-sizetireas soonasyoucan.
CompactSpareTire
WARNING
Drivingwithmorethanone compactsparetireatatimecould resultinlossofbrakingand handling. Thiscouldleadtoa crashandyouorotherscouldbe injured. Useonlyonecompact sparetireatatime.
If this vehicle has a compact spare tire, it was fully inflated when the vehicle was new; however, it can lose air after time. Check the inflation pressureregularly. It should be 420kPa (60 psi).
Afterinstallingthecompactspare onthevehicle,stopassoonas possibleandmakesurethespare tireiscorrectlyinflated.The compactspareismadetoperform wellatspeedsupto105km/h (65mph)fordistancesupto 5000km(3,000mi),soyoucan finishyourtripandhavethefull-size tirerepairedorreplacedatyour convenience.Ofcourse,itisbestto replacethesparewithafull-sizetire assoonaspossible.Thesparetire willlastlongerandbeingood shapeincaseitisneededagain.
Notice: Whenthecompactspare is installed, donottakethe vehiclethroughanautomatic carwashwithguiderails. The compactsparecangetcaughton therailswhichcandamagethe tire, wheelandotherpartsofthe vehicle.
Donotusethecompactspareon othervehicles.
Donotmixthecompactsparetireor wheelwithotherwheelsortires. Theywillnotfit.Keepthesparetire anditswheeltogether.
Notice:Tirechainswillnotfitthe compactspare.Usingthemcan damagethevehicleandcan damagethechainstoo.Donot usetirechainsonthecompact spare.
JumpStarting
Formoreinformationaboutthe vehiclebattery,seeBatteryon page10-27
If the battery has rundown, try to use an other vehicle and some jumpercablestostart your vehicle. Besuretousethe following step to do its safely.

WARNING
Batteriescanhurtyou. They can be dangerous because:
• Theycontainacidthatcan burnyou.
• Theycontaingasthatcan explodeorignite.
• They contain enough electricity to burn you.
If you donot follow these steps exactly, some or all of these things can hurt you.
Notice: Ignoring the seven steps could result in costly damage to the vehicle that would not be covered by the warranty.
Trying to start the vehicle by pushing or pulling it will not work, and it could damage the vehicle.
Thejumpstartnegative(A)isthe powersteeringlinefittingandbolt onthetopofthepower steeringpump.
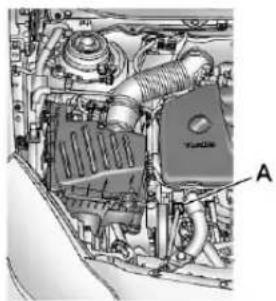
natural_image
Technical diagram of a car engine bay with visible components and no text or symbols2.0LEngineShown,2.4LSimilar
Thejumpstartpositive(B)is locatedunderatrimcoverinthe enginecompartmentonthedriver sideofthevehicle.
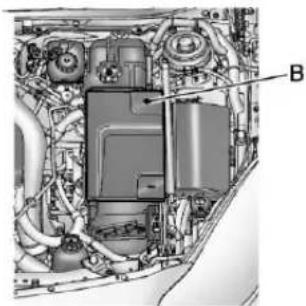
natural_image
Interior view of a vehicle's engine bay with visible components and wiring (no text or labels)2.0LEngineShown,2.4LSimilar
These locations are used instead of adirect connection to the battery.
- Checktheothervehicle.Itmust havea12-voltbatterywitha negativegroundsystem.
Notice: Only use vehicle that has a 12-voltsystem with a negative ground for jump starting. If the other vehicle does not have a 12-voltsystem with a negative ground, both vehicles can be damaged.
-
Positionthetwovehiclessothat theyarenottouching.
-
To avoid the possibility of the vehicles rolling, set the parking brake firmly on both vehicles involved in the jump start procedure. Put an automatic transmission in P (Park) or a manual transmission in Neutral before setting the parking brake.
Notice: Iftheradioorother accessories are left on during the jump starting procedure, they could be damaged. There pairs would not be recovered by the warranty. Always turn off the radio and other accessories when jump starting the vehicle.
- TurntheignitiontoLOCK/OFF andswitchoffalllightsand accessoriesinbothvehicles, exceptthehazardwarning flashersifneeded.

WARNING
Anelectricfancanstartupeven whentheengineisnotrunning andcaninjureyou.Keephands, clothingandtoolsawayfromany underhoodelectricfan.

WARNING
Usingamatchnearabatterycan causebatterygastoexplode. Peoplehavebeenhurtdoingthis, andsomehavebeenblinded. Useaflashlightifyouneedmore light.
Besurethebatteryhasenough water.Youdonotneedtoadd watertothebatteryinstalledin yournewvehicle.Butifabattery hasfillercaps,besuretheright amountoffluidisthere.Ifitislow, (Continued)
WARNING(Continued)
addwatertotakecareofthat first.Ifyoudon't,explosivegas couldbepresent.
Batteryfluidcontainsacidthat canburnyou.Donotgetiton you.Ifyouaccidentallygetitin youreyesoronyourskin,flush theplacewithwaterandget medicalhelpimmediately.

WARNING
Fansorothermovingengine partscaninjureyoubadly.Keep yourhandsawayfrommoving partsoncetheengineisrunning.
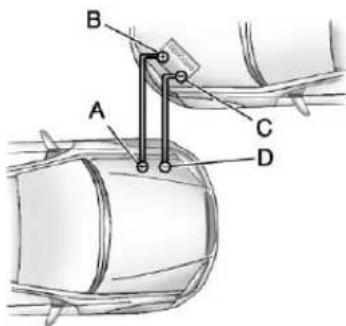
-
Connectoneendofthered positive(+)cabletothejump startpositive(+)post(A). Usea remotepositive(+)terminalifthe vehiclehasone.
-
Donotlettheotherendofthe redpositive(+)cabletouch metal. Connectittothe positive(+)terminalofthegood battery(B). Usearemote positive(+)terminalifthevehicle hasone.
-
Connectoneendoftheblack negative(−)cabletothe negative(−)terminalofthegood battery(C). Usearemote negative(−)terminalifthe vehiclehasone.
Donotlettheotherendtouch anythinguntilthenextstep.The otherendofthenegative(−) cabledoesnotgotothedead battery.Itgoestoaheavy, unpaintedmetalenginepartor toaremotenegative(−)terminal onthevehiclewiththedead battery.
-
Connect the other end of the black negative (−) cable to an unpainted heavymetal engine part (D) away from the dead battery, but not a re engine part that move.
-
Start the engine in the vehicle with the good battery and run the engine at idlespeed for at least four minutes.
- Trytostartthevehiclethathad thedeadbattery.lfitwillnot startafterafewtries, it probablyneedsservice.
Notice: If the jumpercables are connected or removed in the wrong order, electrical shorting may occur and damage the vehicle. There pairs would not be covered by the vehicle warranty. Always connect and remove the jumpercables in the correct order, makingsure that the cables donottouche achother or other metal.
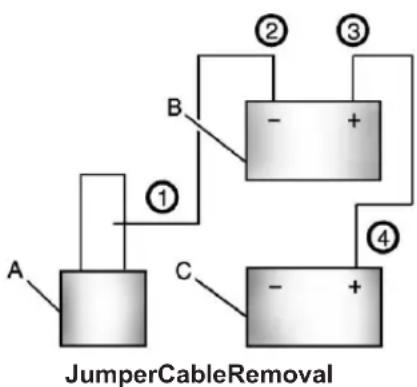
flowchart
graph TD
    A["Block A"] -->|①| B["Block B"]
    B -->|②| C["Block C"]
    C -->|③| D["Block D"]
    D -->|④| E["Block E"]
    style A fill:#f9f,stroke:#333
    style B fill:#ccf,stroke:#333
    style C fill:#cfc,stroke:#333
    style D fill:#fcc,stroke:#333
    style E fill:#cff,stroke:#333
A. Heavy, Unpainted Metal Engine Partor Remote Negative(−) Terminal
B. GoodBatteryorRemote Positive(+)andRemote Negative(-)Terminals
C. DeadBatteryorRemote
Positive(+)Terminal
Todisconnectthejumpercables frombothvehicles:
- Disconnecttheblack negative(-)cablefromthe vehiclethathadthedead battery.
- Disconnect the black negative (-) cable from the vehicle with the good battery.
- Disconnectthered positive(+) cable from the vehicle with the good battery.
- Disconnecttheredpositive(+) cablefromtheothervehicle.
- Return the capsoverthe positive(+) and negative(-) terminal to their original positions.
Towing
TowingtheVehicle
Notice: To avoid damage, the disabled vehicle should be towed with all four wheel soff the ground. Care must be taken with vehicle sthathavelow ground clearance and/or special equipment. Always flat bedona car carrier.
Consultyourdealerora professionaltowingserviceifthe disabledvehiclemustbetowed. SeeRoadsideAssistanceProgram onpage13-5.
Totowthevehiclebehindanother vehicleforrecreationalpurposes, suchasbehindamotorhome,see "RecreationalVehicleTowing"inthis section.
Recreational Vehicle Towing
Recreationalvehicletowingmeans towingthevehiclebehindanother vehicle,suchasbehindamotor home.Thetwomostcommontypes ofrecreationalvehicletowingare knownasdinghytowinganddolly towing.Dinghytowingistowingthe vehiclewithallfourwheelsonthe ground.Dollytowingistowingthe vehiclewithtwowwheelsonthe groundandtwowheelsupona deviceknownasadolly.
Herearesomeimportantthingsto considerbeforerecreationalvehicle towing:
- Whatisthetowingcapacityof thetowingvehicle?Besureto readthetowvehicle manufacturer's recommendations.
- Whatisthedistancethatwillbe traveled?Somevehicleshave restrictionsonhowfarandhow longtheycantow.
- Isthepropertowingequipment goingtobeused? Seeyour dealerortraileringprofessional foradditionaladviceand equipmentrecommendations.
- Isthevehiclereadytobe towed?Justaspreparingthe vehicleforalongtrip,makesure thevehicleispreparedtobe towed.
DinghyTowingfromtheFront (With2.0LEngine and AutomaticTransmission)
Notice: If the vehicle is bestowed with all four wheels on the ground, the drivetrain components could be damaged. There pairs would not be recovered by the vehicle warranty. Donot tow the vehicle with all four wheels on the ground.
Vehicleswiththe2.0Lengineand anautomatictransmissions should not betowed with all four wheels on the ground.
DinghyTowingfromtheFront (AllExcept2.0LEngine and AutomaticTransmission)
Whendinghytowingvehiclewith anautomatictransmission,the vehicleshouldberunatthe beginningofeachdayandateach RVfuelstopforaboutfiveminutes. Thiswillensureproperlubricationof transmissioncomponents.
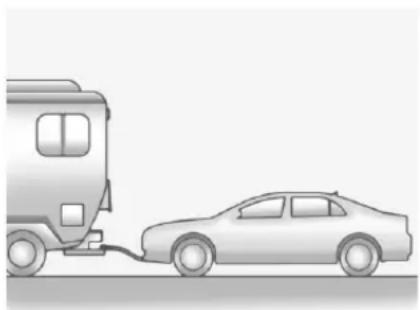
natural_image
Illustration of a bus connected to a car, showing the vehicle being pulled out (no text or symbols present)Usethefollowingprocedure to dinghytowthevehiclefromthefront withallfourwheelsontheground:
- Position the vehicle being towed behind the tow vehicle.
- Shifttheautomatictransmission toP(Park)oramanual transmissioninto1(First)gear andturntheengineoff.
- Settheparkingbrake.
- Following the manufacturer's instructions, attach the vehicle being towed to the tow vehicle.
5.Shifttheautomatictransmission toN(Neutral)oramanual transmissiontoNeutral. - Releasetheparkingbrake.
Whentowingthevehiclefor extendedperiodsoftime,startthe vehicleasoftenaspossibleto preventbatterydrain.Thisshould bedonewhenthetowvehicleis parked.
DinghyTowingfromtheRear
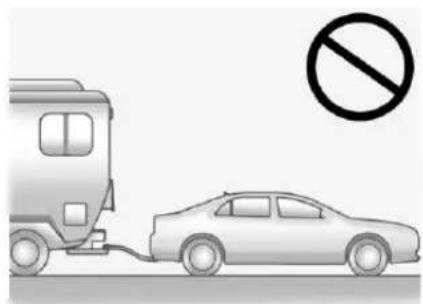
natural_image
Illustration of a bus connected to a car with a no-smoking symbol (no text or labels)The vehicle was not designed to be towed from therear with all four wheels on the ground.
DollyTowingfromtheFront
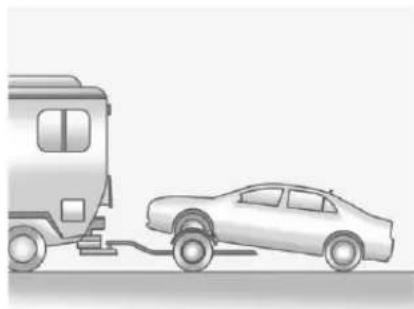
natural_image
Illustration of a car being pulled off from a bus (no text or symbols)Vehicleswithfront-wheeldrivecan bedollytowedfromthefront.
Usethefollowingproceduretodolly towthevehiclefromthefront:
- Attachthedollytothetow vehiclefollowingthedolly manufacturer'sinstructions.
- Drivethefrontwheelsontothe dolly.
- Shift the automatic transmission into P(Park) or a manual transmission into 1 (First) gear.
- Firmlysettheparkingbrake.
- Use an adequate clamping device designed for towing to ensure that the front wheels are locked into the straight-ahead position.
- Secure the vehicle to the Holly following the manufacturer's instructions.
- Releasetheparkingbrakeonly afterthevehiclebeingtowedis firmlyattachedtothetowing vehicle.
8.TurntheignitiontoLOCK/OFF.
DollyTowingfromtheRear
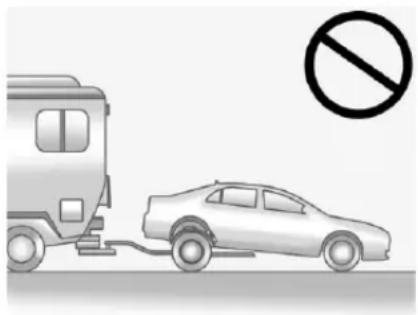
natural_image
Illustration of a car being stopped by a bus, with no visible text or symbolsThe vehicle cannot bedollytowed from therear.
AppearanceCare
ExteriorCare
CleaningExteriorLamps/Lenses
Useonlylukewarmorcoldwater, a softcloth, and acar washing soap to clean exterior lamps and lenses. Follow instructions under "Washing the Vehicle" later in this section.
FinishCare
Occasionalwaxingormildpolishing ofthevehiclebyhandmaybe necessarytoremoveresiduefrom thepaintfinish.Approvedcleaning productscanbeobtainedfromyour dealer.
Ifthevehiclehasabasecoat/clearcoatpaintfinish, theclearcoat givesmoredepthandglosstothe coloredbasecoat. Alwaysuse waxesandpolishesthatare non-abrasiveandmadefora basecoat/clearcoatpaintfinish.
Notice: Machine compounding or aggressive polishing on a basecoat/clearcoat paint finish may damage it. Use only non-abrasivewaxes and polishes that are made for a basecoat/clearcoat paint finish on the vehicle.
Foreignmaterialssuchascalcium chlorideandothersalts, icemelting agents, roadoilandtar, treesap, birddroppings, chemicalsfrom industrialchimneys, etc., can damagethevehicle's finishifthey remainonpaintedsurfaces. Wash thevehicleassoonaspossible. If necessary, usenon-abrasive cleanersthataremarkedsafefor paintedsurfacestoremoveforeign matter.
Exteriorpaintedsurfacesare subjecttoaging,weather,and chemicalfalloutthatcantaketheir tolloveraperiodofyears.Tokeep thepaintfinishlookingnew,keep thevehiclegaragedorcovered wheneverpossible.
Protecting Exterior Bright Metal Parts
Brightmetalpartsshouldbe cleanedregularlytokeeptheir luster.Washwithwateroruse chromepolishonchromeor stainlesssteeltrim,ifnecessary.
Usespecialcarewithaluminum trim.Toavoiddamagingprotective trim,neveruseautoorchrome polish,steam,orcausticsoap tocleanaluminum.Acoatingof wax,rubbedtohighpolish,is recommendedforallbrightmetal parts.
WashingtheVehicle
Topreservethevehicle'sfinish, keepitcleanbywashingitoften.
Donotwashthevehicleindirect sunlightanduseacar washingsoap.
Notice: Donotusecleaning agents that are petroleum based orthatcontain acid or abrasives, astheycandamagethepaint, metal, or plastic on the vehicle.
Approvedcleaningproductscan beobtainedfromyourdealer. Followallmanufacturer directionsregardingcorrect productusage,necessarsafety precautions,andappropriate disposalofanyvehiclecare product.Certaincleanerscontain chemicalsthatcandamagethe emblemsornameplatesonthe vehicle.Checkthecleaning productlabel.lfitstatesthatit shouldnotbeusedonplastic parts,donotuseitonthevehicle ordamagemayoccurandit wouldnotbecoveredbythe warranty.
Rinsethevehiclewell, before washing and after, to remove all cleaning agents completely. If they are allowed today on the surface, they could stain.
Drythefinishwithasoft, clean chamoisoranall-cottontowelto avoidsurfacescratchesandwater spotting.
Highpressurecarwashescould causewatertoenterthevehicle. Avoidusinghighpressurewashes closerthan30cm(12in)tothe surfaceofthevehicle.Useofpower washersexceeding8,274kPa (1,200psi)canresultindamageor removalofpaintanddecals.
Notice: Conveyorsystemson some automatic car washescould damage the vehicle. Theremay not been enough clearance for the undercarriage. Check with the car wash manager before using the automatic car wash.
Weatherstrips
Siliconegreaseonweatherstripswill makethemlastlonger,sealbetter, andnotstickorsqueak.Apply siliconegreasewithacleancloth. Duringverycold,dampweather frequentapplicationmaybe required.SeeRecommendedFluids andLubricantsonpage11-6.
WheelsandTrim—Aluminum orChrome
The vehicle may have either aluminum or chrome-plated wheels.
Keepthewheelscleanusingasoft, cleanclothwithmildsoapand water.Rinsewithcleanwater.After rinsingthoroughly,drywithasoft, cleantowel.Awaxmaythenbe applied.
Notice: Chromewheels and other chrometrimmay bedamaged if the vehicle is not washed after driving on road sthathave been sprayed with magnesium, calcium or sodium chloride. These chlorides are used on roads for condition such as ice and dust. Always wash the chromewith soap and water after exposure.
Notice: Donotusestrongsoaps, chemicals, abrasivepolishes, cleaners, brushes, orcleaners that contain acidonaluminum or chrome-plated wheels, because the surface could be damaged.
Therepairswouldnotbecovered bythevehiclewarranty.Useonly approvedcleanersonaluminum orchrome-platedwheels.
Notice: Neverdrive vehicle that has aluminum or chrome-plated wheel through an automatic car wash that uses silicon carbide tire cleaning brushes, asthis could caused damage. There pairs would not be covered by the vehicle warranty.
WindshieldandWiperBlades
Cleantheoutsideofthewindshield withglasscleaner.
Cleantherubberbladesusinga lint-freeclothorpapertowelsoaked withwindshieldwasherfluidora milddetergent.Washthewindshield thoroughlywhencleaningthe blades.Bugs,roadgrime,sap,and abuildupofvehiclewash/wax treatmentsmaycausewiper streaking.Replacethewiperblades iftheyarewornordamaged.
Wiperscanbedamagedby:
• Extremedustyconditions
- Sandandsalt
- Heatandsun
- Snowandice, without proper removal
Tires
Useastiffbrushwithtirecleanerto cleanthetires.
Notice: Using petroleum-based tiredressing product on the vehicle may damage the paint finish and/or tires. When applying atiredressing, always swipe off any overspray from all painted surfaces on the vehicle.
SheetMetalDamage
If the vehicle is damaged and requires sheet metal repair or replacement, makes sure the body repair shop applies anti-corrosion material to parts repaired or replaced to restore corrosion protection.
Originalmanufacturer replacement partswill providethe corrosion protectionwhile maintaining the vehicle warranty.
FinishDamage
Anystonechips, fractures, or deep scratches in the finish should be repaired right away. Bare metal will corrode quickly and may develop intomajor repair expense.
Minorchipsandscratchescanbe repairedwithtouch-upmaterials availablefromyourdealer. Larger areasoffinishdamagecanbe correctedinyourdealer'sbody and paintshop.
UnderbodyMaintenance
Chemicalsusedforiceandsnow removalanddustcontrolcancollect ontheunderbody. If these are not removed, corrosion and trust can develop on the underbody parts such as fuellines, frame, floorpan, and exhaust system even though they have corrosion protection.
Atleasteveryspring, flush these materials from the underbody with plainwater. Clean any areas where mud and debriscancollect. Dirt packed in close areas of the frame should be loosened before being flushed. Your dealer or an under body car washingsystem can do this.
ChemicalPaintSpotting
Somewatherandatmospheric conditionscancreateachemical fallout.Airbornepollutantscanfall uponandattackpaintedsurfaceson thevehicle.Thisdamagecantake twoforms:blotchy,ring-shaped discolorations,andsmall,irregular darkspotsetchedintothepaint surface.
InteriorCare
The interior will continuetolook its bestifitiscleanedoften. Dustand dirtcanaccumulate on the upholstery and caused damage to the carpet, fabric, leather, and
plasticsurfaces.Stainsshouldbe removedquicklyasextremeheat couldcausethemtosetrapidly.
Lightercoloredinteriorsmay require more frequent cleaning. Newspapers and garments that can transfer color to home furnishings can also transfer color to the interior.
Removedustfromsmallbuttons andknobswithasmallbrushwith softbristles.
Yourdealerhasproductsfor cleaningtheinterior.Whencleaning theinterior,onlyusecleaners specificallydesignedforthe surfacesthatarebeingcleaned. Permanentdamagecanresultfrom usingcleanersonsurfacesfor whichtheywerenotintended.Apply thecleanerdirectlytothecleaning clothtopreventover-spray.Remove anyaccidentalover-sprayfrom othersurfacesimmediately.
Notice: Using abrasive cleaners when cleaning glass surfaces on the vehicle, could scratch the glass and/or caused damage to the rear window defogger. When cleaning the glass on the vehicle, use only as soft cloth and glass cleaner.
Cleanerscancontainsolventsthat canbecomeconcentratedinthe interior.Beforeusingcleaners,read andadheretoallsafetyinstructions onthelabel.Whilecleaningthe interior,maintainadequate ventilationbyopeningthedoorsand windows.
Donotcleantheinteriorusingthe followingcleanersortechniques:
- Neveruseaknifeoranyother sharpobjecttoremoveasoil fromanyinteriorsurface.
-
Neveruseastiffbrush.Itcan causedamage.
-
Neverapplyheavypressureor rubaggressivelywithacleaning cloth.Useofheavypressurecan damagetheinterioranddoes notimprovetheeffectiveness of soilremoval.
- Avoidlaundrydetergentsor dishwashingsoapswith degreasers. Usingtoomuch soapwillleavearesiduethat leavesstreaksandattractsdirt. Forliquidcleaners, about 20dropsper3.78L(1gal)of waterisagoodguide. Useonly mild,neutral-pHsoaps.
- Donotheavilysaturatethe upholsterywhilecleaning.
- Cleanersthatcontainsolvents candamagetheinterior.
Fabric/Carpet
Useavacuumcleanerwithasoft brushattachmenttoremovedust andloosedirt.Acanistervacuum withrotatingbrushesinthenozzle mayonlybeusedonfloorcarpet andcarpetedfloormats.Forsoils, alwaystrytoremovethemfirstwith plainwaterorclubsoda.Before cleaning,gentlyremoveasmuchof thesoilaspossibleusingoneofthe followingtechniques:
- Forliquids:gentlyblotthe remainingsoilwithapaper towel.Allowthesoiltoabsorb intothepapertoweluntilno morecanberemoved.
- Forsoliddrysoils:removeas muchaspossibleandthen vacuum.
Toclean:
- Saturatealint-free, cleanwhite cloth with water or clubs soda.
- Remove excess moisture.
3.Startontheoutsideedgeofthe soilandgentlyrubtowardthe center.Continuecleaning,using acleanareaoftheclotheach timeitbecomessoiled.
-
Continuetogentlyrubthe soiledarea.
-
If the soil is not completely removed, use a mild soap solution and repeat the cleaning process with plain water.
Ifanyofthesoilremains,a commercialfabriccleanerorspot liftermaybenecessary.Testasmall hiddenareaforcolorfastnessbefore usingacommercialupholstery cleanerorspotlifter.Ifthelocally cleanedareagivesanyimpression thataringformationmayresult, cleantheentiresurface.
Apapertowelcanbeusedtoblot excessmoisturefromthefabricor carpetafterthecleaningprocess.
Leather
Leather, and lighter colored leather in particular, will need more frequent cleaning to prevent the buildup of dust, dirt, and colorstransferred from other items so that these do not become permanent stains.
Toremovedust, asoftcloth dampened with water can be used. If a more thorough cleaning is necessary, asoft cloth dampened with a mild soapsolution can be used. Your dealer has a GM approved leather cleaner available that provides superior cleaning performance when used regularly on finished automotive leathers. Allow the athertodrynaturally. Do not use heat, steam, spot lifters or spot removers, or shoepolishon leather. Many commercial leather cleaners and coating that are sold top reserve and protect leather may permanently changethe appearance and feel of the leather and are not recommended. Donot uses silicone or wax-based products, orthose containing organicsolvents
tocleantheinteriorbecausethey canaltertheappearanceby increasingtheglossina non-uniformmanner.
InstrumentPanel, Vinyl, and OtherPlasticSurfaces
Toremovedust, asoftcloth dampenedwithwatercanbeused. Ifamorethoroughcleaningis necessary, acleansoftcloth dampenedwithamildsoapsolution canbeusedtogentlyremovedust anddirt. Neverusespotliftersor removersonplasticsurfaces. Many commercialcleanersandcoatings thataresoldtopreserveand protectsoftplasticsurfaces maypermanentlychangethe appearanceandfeeloftheinterior andarenotrecommended. Donot usesiliconeorwax-basedproducts, orthosecontainingorganicsolvents tocleantheinteriorbecausethey canaltertheappearanceby increasingtheglossina non-uniformmanner.
Some commercial products may increase gloss on the instrument panel. The increase in gloss may cause annoying reflections in the windshield and even make it difficult to seethrough the windshield under certain conditions.
Notice: Airfresheners contain solventsthatmaycaused damage toplasticsandpaintedsurfaces. Followthemanufacturer's instructions when using air fresheners in the vehicle. Ifair freshener comes in contact with paintoraplastic surface, blot immediately with asoftcloth. Damage caused by using air fresheners would not be recovered by the vehicle warranty.
CareofSafetyBelts
Keepbeltscleananddry.

WARNING
Donotbleachordyesafetybelts. Itmayseverelyweakenthem. In acrash, they might not be able to provide adequate protection. Cleansafety belt only with mild soap and lukewarm water.
FloorMats

WARNING
Ifafloormatisthewrongsizeor isnotproperlyinstalled, itcan interferewiththeaccelerator pedaland/orbrakepedal. Interferencewiththepedalscan causeunintendedacceleration and/orincreasedstopping distancewhichcancauseacrash (Continued)
WARNING(Continued)
andinjury. Makesurethefloor matdoesnotinterferewiththe acceleratororbrakepedal.
Usethefollowingguidelinesfor properfloormatusage:
- Theoriginalequipmentfloor matsweredesignedforyour vehicle. If thefloormatsneed replacing, it is recommended that GMcertifiedfloormatsbe purchased. Non-GMfloormats may not fit properly and may interferewith the accelerator or brake pedal. Always check that thefloormatsdonot interfere with the pedals.
- Usethefloormatwiththe correctsideup.Donotturn itover.
10-84VehicleCare
- Donotplaceanythingontopof theriversidefloormat.
• Useonlyasinglefloormaton theriverside. - Donotplaceonefloormaton topofanother.
RemovingandReplacingthe FloorMats
Pullupontherearofthefloormat tounlockeachretainerandremove.
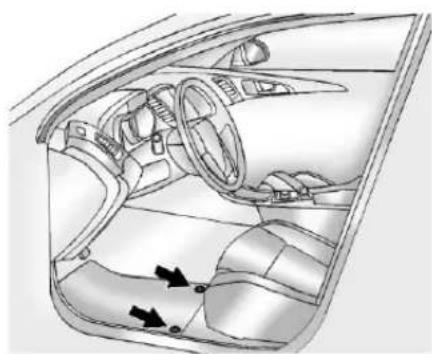
natural_image
Interior view of a car dashboard and steering wheel (no text or symbols visible)Reinstallbyliningupthefloormat retaineropeningsoverthecarpet retainersandsnapintoposition.
Makesurethefloormatisproperly securedinplace.
Verifythefloormatdoesnot interferewiththeaccelerator, clutch, orthebrakepedal.
Service and Maintenance
GeneralInformation
GeneralInformation......11-1
ScheduledMaintenance
ScheduledMaintenance.....11-2
RecommendedFluids, Lubricants,andParts
RecommendedFluidsand
Lubricants....11-6
MaintenanceReplacement
Parts......11-8
MaintenanceRecords
MaintenanceRecords.....11-9
GeneralInformation
Notice: Maintenance intervals, checks, inspections, recommended fluids, and lubricants are necessary to keep this vehicle in good working condition. Damage caused by failure to follows scheduled maintenance might not be covered by the vehicle warranty.
Asthevehicleowner, you are responsible for the scheduled maintenance in this section. We recommend having your dealer perform the services. Proper
vehiclemaintenancehelpsto keepthevehicleingoodworking condition, improvesfueleconomy, and reducesvehicleemissions for betterairquality.
Becauseofallthedifferentways peopleusevehicles,maintenance needsvary.Thevehiclemightneed morefrequentchecksandservices. Pleasereadtheinformationunder ScheduledMaintenance.Tokeep thevehicleingoodcondition,see yourdealer.
11-2ServiceandMaintenance
Themaintenancescheduleisfor vehiclesthat:
- Carrypassengersandcargo withinrecommendedlimitson the TireandLoadingInformation label.See VehicleLoadLimits onpage9-12.
- Aredrivenonreasonableroad surfaceswithinlegaldriving limits.
- Usetherecommendedfuel.See RecommendedFuelon page9-44.

WARNING
Performingmaintenanceworkcan bedangerous. Somejobscan causeseriousinjury. Perform maintenanceworkonlyifyou havetherequiredknow-howand thepropertoolsandequipment. Ifindoubt, seeyourdealerto haveaqualifiedtechniciandothe work. SeeDoingYourOwn ServiceWorkonpage10-4.
Atyourdealer,youcanbecertain thatyouwillreceivethehighest levelofserviceavailable.Your dealerhasspeciallytrainedservice technicians,usesgenuine replacementparts,aswellas, up-to-datetoolsandequipmentto ensurefastandaccurate diagnostics.
The proper replacement parts, fluids, and lubricant stouse are listed in Recommended Fluids and Lubricantson page 11-6 and Maintenance Replacement Partson page 11-8. Were recommend the use of genuine parts from your dealer.
RotationofNewTires
Tomaintainride, handling, and performance of the vehicle, it is important that the first rotation service for new tires be performed. Tiress should be rotated every 12000 km/7,500 mi. See Tire Rotation on page 10-55.
Scheduled Maintenance
WhentheChangeEngineOil SoonMessageDisplays
Changeengineoilandfilter.See EngineOilonpage10-9.An EmissionControlService.
WhentheCHANGEENGINEOIL SOONmessagedisplays,serviceis requiredforthevehicleassoonas possible,withinthenext1000km/600miles. Ifdrivingunderthebest conditions,theengineoillifesystem mightnotindicatetheneedfor vehicleserviceformorethanayear. Theengineoilandfiltermustbe changedatleastonceayearand theoillifesystemmustbereset. Yourdealerhastrainedservice technicianswhowillperformthis workandresetthesystem.Ifthe engineoillifesystemisreset accidentally,servicethevehicle within5000km/3,000milessince thelastservice.Resettheoillife
systemwhenevertheoilischanged. SeeEngineOilLifeSystemon page10-13.
EveryEngineOilChange
- Changeengineoilandfilter. Resetoillifesystem.See EngineOilonpage10-9and EngineOilLifeSystemon page10-13.AnEmission ControlService.
• Enginecoolantlevelcheck.See EngineCoolantonpage10-18.
• Enginecoolingsystem inspection. Visualinspection of hoses, pipes, fittings, and clamps and replacement, if needed.
• Windshieldwasherfluidlevel check. See WasherFluidon page 10-24. - Windshieldwiperblade inspectionforwear,cracking, orcontaminationandwindshield andwiperbladecleaning, ifcontaminated.SeeExterior Careonpage 10-77.Wornor
damagedwiperblade replacement.SeeWiperBlade Replacementonpage10-30.
- Tireinflationpressurescheck. See TirePressureon page 10-49.
• Tirewearinspection.See Tire Inspectiononpage10-55. - Rotatetiresifnecessary.See TireRotationonpage10-55.
- Fluidsvisualleakcheck(or every12months, whichever occursfirst).Aleakinany systemmustberepairedandthe fluidlevelchecked.
• Engineaircleanerfilter inspection.SeeEngineAir Cleaner/Filteronpage10-15. -
Brakesysteminspection(or every 12 months, whichever occursfirst).
• Steeringandsuspension inspection. Visualinspection for damaged, loose, or missing partsorsignsofwear. -
Bodyhingesandlatches,key lockcylinders,foldingseat hardware,andsunroof(if equipped)lubrication.See RecommendedFluidsand Lubricantsonpage 11-6.More frequentlubricationmaybe requiredwhenthevehicleis exposedtoacorrosive environment.Applyingsilicone greaseonweatherstripswitha cleanclothmakesthemlast longer,sealbetter,andnotstick orsqueak.
- Restraintsystemcomponent check.SeeSafetySystem Checkonpage3-26.
- Fuelsysteminspectionfor damageorleaks.
- Exhaustsystemandnearbyheat shieldsinspectionforlooseor damagedcomponents.
AdditionalRequiredServices
Every12000km/7,500Miles
- Rotatetires.Tiresshouldbe rotatedevery12000km/7,500miles.SeeTireRotation onpage 10-55.
AtEachFuelStop
• Engineoillevelcheck.See EngineOilonpage10-9.
• Enginecoolantlevelcheck.See EngineCoolantonpage10-18.
• Windshieldwasherfluidlevel check. See WasherFluidon page 10-24.
OnceaMonth
• Tireinflationcheck. See Tire Pressureonpage10-49.
- Tirewearinspection.SeeTire Inspectiononpage10-55.
- Sunrooftrackandseal inspection,ifequipped.See Sunroofonpage2-15.
OnceaYear
• SeeStarterSwitchCheckon page10-28.
• SeeAutomaticTransmissionShiftLockControlFunctionCheckonpage10-28.
• SeelgnitionTransmissionLock Checkonpage10-29.
• SeeParkBrakeandP(Park) MechanismCheckon page10-29.
- Acceleratorpedalcheckfor damage, higheffort, orbinding. Replace if needed.
• Underbodyflushingservice.
- Hood/Decklid/Liftgate/Liftglass SupportGasStrutService: Visuallyinspectgasstrut, ifequipped, forsignsofwear, cracks, orotherdamage. Check theholdopenability of the gas strut. Contact your dealer if service is required.
OnceEveryTwoYears
- VehiclesusingDOT4brakefluid only:Changebrake/clutch hydraulicfluidataregular maintenanceserviceevery twoyears.
FirstEngineOilChangeAfter Every40000km/25,000Miles
- Passengercompartmentair filterreplacement(orevery 24months,whicheveroccurs first). Morefrequentreplacement maybeneededifyoudrivein areaswithheavytraffic,areas withpoorairquality,orareas withhighdustlevels. Replacementmayalsobe neededifyounoticereducedair flow,windowsfoggingup, orodors.Yourdealercanhelp youdeterminewhenitisthe righttimetoreplacethefilter.
FirstEngineOilChangeAfter Every80000km/50,000Miles
• Engineaircleanerfilter replacement.SeeEngineAir Cleaner/Filteronpage10-15.
• Automatictransmissionfluid change(severeservice)for vehiclesmainlydriveninheavy citytrafficinhotweather, inhilly ormountainousterrain, orused fortaxi, police, ordelivery service. See Automatic TransmissionFluidon page 10-14.
• Evaporativecontrolsystem inspection. Checkallfueland vaporlinesandhosesforproper hook-up, routing, and condition. Checkthatthepurgevalve, ifthevehiclehasone, works properly. Replaceasneeded. An EmissionControlService. The U.S. EnvironmentalProtection
AgencyortheCaliforniaAir ResourcesBoardhas determinedthatthefailureto performthismaintenanceitem willnotnullifytheemission warrantyorlimitrecallliability priortothecompletionofthe vehicle'susefullife.We, however,urgetatall recommendedmaintenance servicesbeperformedatthe indicatedintervalsandthe maintenanceberecorded.
FirstEngineOilChangeAfter Every160000km/100,000Miles
• Automatictransmissionfluid change(normalservice). See AutomaticTransmissionFluidon page 10-14.
- Sparkplugreplacementand sparkplugwiresinspection. AnEmissionControlService.
FirstEngineOilChangeAfter Every240000km/150,000Miles
• Enginecoolingsystemdrain, flush, and refill (orevery five years, whichever occurs first). See Cooling System on page 10-17. An Emission Control Service.
- Enginedrivebeltsinspection forfraying, excessivecracks, orobviousdamage(orevery 10years, whicheveroccurs first).Replace, ifneeded.
RecommendedFluids,Lubricants,andParts
RecommendedFluidsandLubricants
| UsageFluid/Lubricant | |
| EngineOil | Theenginerequiresengineoilapprovedtothedexossspecification.Oils meetingthisspecificationcanbeidentifiedwiththedexoscertification mark.Lookforanduseonlyanengineoilthatdisplaysthedexos certificationmarkoftheproperviscositygrade.SeeEngineOilon page10-9. |
| EngineCoolant | 50/50mixtureofclean,drinkablewateranduseonlyDEX-COOLCoolant.SeeEngineCoolantonpage10-18. |
| HydraulicBrake/ClutchSystem (VehicleswithDOT3brakefluid) | DOT3HydraulicBrakeFluid(GMPartNo.88862806,in Canada88862807). |
| HydraulicBrake/ClutchSystem (VehicleswithDOT4brakefluid) | DOT4HydraulicBrakeFluid(GMPartNo.88958860,in Canada88901244). |
| WindshieldWasherOptikleen | ^ WasherSolvent. |
| HydraulicPowerSteeringSystemDEX | RON ^ -VIAutomaticTransmissionFluid. |
| AutomaticTransmission(2.4LEngine)DE | XRON ^ -VIAutomaticTransmissionFluid. |
| AutomaticTransmission(2.0LEngine) | AutomaticTransmissionFluid(GMPartNo.19256039,in Canada19256040). |
| ManualTransmission | CastrolBOT0402TransmissionFluid(GMPartNo.88862472,in Canada88862473). |
| KeyLockCylinders | Multi-PurposeLubricant,Superlube(GMPartNo.12346241,in Canada10953474). |
| HoodLatchAssembly,Secondary Latch,Pivots,SpringAnchor,and ReleasePawl | LubriplateLubricantAerosol(GMPartNo.12346293,inCanada992723) orlubricantmeetingrequirementsofNLGI#2,CategoryLBorGC-LB. |
| HoodandDoorHinges | Multi-PurposeLubricant,Superlube(GMPartNo.12346241,in Canada10953474). |
| WeatherstripConditioning | WeatherstripLubricant(GMPartNo.3634770,inCanada10953518)or DielectricSiliconeGrease(GMPartNo.12345579,inCanada992887). |
MaintenanceReplacementParts
Replacementpartsidentifiedbelowbyname, partnumber, orspecification can be obtained from your dealer.
| PartGMPartNumberACDelcoPartNumber | ||
| EngineAirCleaner/Filter55560894A3128C | ||
| EngineOilFilter | ||
| 2.0LL4Engine12605566PF457G | ||
| 2.4LL4Engine12605566PF457G | ||
| PassengerCompartmentAirFilterElement13271191CF176 | ||
| SparkPlugs | ||
| 2.0LL4Engine1262054041-108 | ||
| 2.4LL4Engine1262054041-108 | ||
| WiperBlades | ||
| Driver Side – 60.0 cm (23.62 in) | 13227404 | — |
| Passenger Side – 45.0 cm (17.7 in) | 13227405 | — |
MaintenanceRecords
After the scheduled services are performed, record the date, odometer reading, who performed the service, and the type of services performed in the boxes provided. Retain all maintain an uncereceipts.
| Date | Odometer Reading | ServicedByServices | Performed |
11-10ServiceandMaintenance
| Date | Odometer Reading | ServicedByServices | Performed |
11-12ServiceandMaintenance
| Date | Odometer Reading | ServicedByServices | Performed |
TechnicalData
VehicleIdentification
VehicleIdentification
Number(VIN)......12-1
ServicePartsIdentification
Label.....12-1
VehicleData
Capacitiesand
Specifications......12-2
EngineDriveBeltRouting...12-4
VehicleIdentification
VehicleIdentification Number(VIN)


Thislegalidentifierisinthefront corneroftheinstrumentpanel,on theleftsideofthevehicle.Itcanbe seenthroughthewindshieldfrom outside.TheVINalsoappearson theVehicleCertificationandService Partslabelsandcertificatesoftitle andregistration.
Engineldentification
TheeighthcharacterintheVINis theenginecode. Thiscode identifiesthevehicle'sengine, specifications, and replacement parts. See "EngineSpecifications" under Capacities and Specifications on page 12-2 for the vehicle's enginecode.
ServiceParts IdentificationLabel
Thislabel, located either in the glovebox orthetrunk area, has the following information:
• VehicleIdentification Number(VIN).
- Modeldesignation.
- Paintinformation.
• Productionoptionsandspecial equipment.
Donotremovethislabelfromthe vehicle.
VehicleData
CapacitiesandSpecifications
| Application | Capacities | |
| MetricEnglish | ||
| AirConditioningRefrigerantR134a | Fortheairconditioningsystemrefrigerantcharge amount,seetherefrigerantlabellocatedunderthe hood.Seeyourdealerformoreinformation. | |
| EngineCoolingSystem | ||
| 2.0LL4Engine7.8L8.2qt | ||
| 2.4LL4Engine7.1L7.5qt | ||
| EngineOilwithFilter | ||
| 2.0LL4Engine6L6.3qt | ||
| 2.4LL4Engine4.7L5.0qt | ||
| FuelTank | ||
| 2.0L,2.4LL4Engine(withNU5andNT7emissions)73.9L19.5gal | ||
| 2.4LL4Engine(withNU6emissions)70.0L18.5gal | ||
| TransmissionFluid*(DrainandRefill) | ||
| 2.0LL4Engine,6-SpeedAutomatic(Transmission RequiresNoFluidReplacement) | — | — |
| 2.4LL4Engine,6-SpeedAutomatic8.4L8.9qt | ||
| WheelNutTorque150N•m110lbft | ||
| *See Automatic Transmission Fluid on page 10-14 for information on checking fluid level. | ||
| Allcapacitiesareapproximate.Whenadding,besuretofilltotheapproximatelevel,asrecommendedinthis manual.Recheckfluidlevelafterfilling. | ||
EngineSpecifications
| EngineVINCodeTransmissionSparkPlugGap | |||
| 2.0L L4 Engine | V | Automatic | 0.9 mm (0.035 in) |
| 2.4L L4 Engine | C | Automatic | 0.9 mm (0.035 in) |
12-4 TechnicalData
EngineDriveBeltRouting
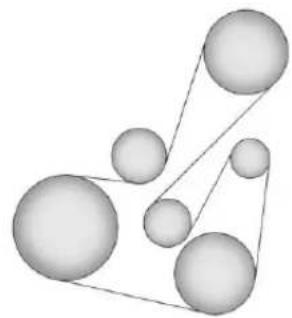
natural_image
Abstract diagram of interconnected spheres with connecting lines (no text or symbols)Customer Information
CustomerInformation
CustomerSatisfaction
Procedure......13-1
CustomerAssistance
Offices....13-3
CustomerAssistanceforText
Telephone(TTY)Users.....13-4
OnlineOwnerCenter......13-4
GMMobilityReimbursement
Program......13-5
Roadside Assistance
Program......13-5
SchedulingService
Appointments......13-7
Courtesy Transportation
Program......13-8
CollisionDamageRepair....13-9
ServicePublications
OrderingInformation.....13-11
ReportingSafetyDefects
Reporting Safety Defect to the United States
Government......13-12
Reporting Safety Defect to the Canadian
Government......13-13
ReportingSafetyDefectsto
GeneralMotors......13-13
VehicleDataRecordingand Privacy
VehicleDataRecordingand
Privacy....13-14
EventDataRecorders.....13-14
OnStar ^ 13-15
NavigationView......13-15
RadioFrequency
Identification(RFID)......13-15
RadioFrequency
Statement......13-15
CustomerInformation
CustomerSatisfaction Procedure
Yoursatisfactionandgoodwillare importanttoyourdealerandto Buick.Normally,anyconcernswith thesalestransactionorthe operationofthevehiclewillbe resolvedbyyourdealer'ssalesor servicedepartments.Sometimes, however,despitethebestintentions ofallconcerned,misunderstandings canoccur.Ifyourconcernhasnot beenresolvedoyoursatisfaction, thefollowingstepsshouldbetaken:
STEPONE: Discuss your concern with a member of dealership management. Normally, concerns can be quickly resolved at that level. If them matter has already been reviewed with the sales, service, or parts manager, contact the owner of your dealership or the general manager.
13-2 Customer Information
STEPTWO: If after contacting a member of dealership management, it appears your concern cannot be resolved by your dealership without further help, in the U.S., call 1-800-521-7300. In Canada, contact General Motors of Canada Customer Communication Centre at 1-800-263-3777 (English) or 1-800-263-7854 (French).
Weencourageyoutocallthe toll-freenumberinordertogiveyour inquirypromptattention.Havethe followinginformationavailableto givetheCustomerAssistance representative:
- VehicleIdentification Number(VIN). This is available from the vehicleregistration or title, or the plate at the top of the instrument panel and visible through the windshield.
• Dealershipnameandlocation.
• Vehicledeliverydate and presentmileage.
When contacting Buick, remember that your concern will likely be resolved at a dealer's facility. That is why wesuggest following Step One first.
STEPTHREE—U.S.Owners: BothGeneralMotorsandyour dealerarecommittedtomaking sureyouarecompletely satisfied withyournewvehicle. However, ifyoucontinuetoremainunsatisfied afterfollowingtheprocedure outlinedinStepsOneandTwo,you canfilewiththeBetterBusiness Bureau(BBB)AutoLine ^® Program toenforceyourrights.
TheBBBAutoLineProgramisan out-of-courtprogramadministered bytheCouncilofBetterBusiness Bureaustosettleautomotive disputesregardingvehiclerepairsor theinterpretationoftheNewVehicle LimitedWarranty.Althoughyoumay berequiredtoresorttothisinformal disputeresolutionprogrampriorto filingacourtaction,useofthe programisfreeofchargeandyour casewillgenerallybeheardwithin
40days. If you donot agree with the decision given in your case, you may reject it and proceed with any other venue for relief available to you.
YoumaycontacttheBBBAutoLine Programusingthetoll-free telephonenumberorwritethemat thefollowingaddress:
BBBAutoLineProgram CouncilofBetterBusiness Bureaus,Inc. 4200WilsonBoulevard Suite800 Arlington,VA22203-1838
Telephone:1-800-955-5100 www.dr.bbb.org/goauto
Thisprogramisavailableinall 50statesandtheDistrictof Columbia. Eligibilityislimitedby vehicleage, mileage, and other factors. General Motorsreserves therighttochangeeligibility limitationsand/ordiscontinueits participationinthisprogram.
STEPTHREE—Canadian
Owners: Intheeventthatyoudo notfeelyourconcernshavebeen addressedafterfollowingthe procedureoutlinedinStepsOne andTwo, General Motors of Canada Limitedwantsyoutobeawareofits participationinano-charge Mediation/Arbitrationprogram. General Motors of Canada Limited hascommittedtobindingarbitration ofownerdisputesinvolving factory-relatedvehicleservice claims. The program provides for thereviewofthefactsinvolved by animpartialthirdpartyarbiter, and may include an informal hearing before thearbiter. The program is designed so that the entire dispute settlement process, from the time you file your complaint to the final decision, should be completed in approximately 70 days. We believe our impartial program offers advantages over courts in most jurisdictions because it is informal, quick, and free of charge.
For further information concerning eligibility in the Canadian Motor Vehicle Arbitration Plan (CAMVAP), call toll-free 1-800-207-0685, or call the General Motors Customer Communication Centre, 1-800-263-3777 (English), 1-800-263-7854 (French), or writeto:
Mediation/ArbitrationProgram c/oCustomerCommunication Centre GeneralMotorsofCanadaLimited MailCode:CA1-163-005 1908ColonelSamDrive Oshawa,OntarioL1H8P7
The inquiry should be accompanied by the Vehicle Identification Number(VIN).
CustomerAssistance Offices
Buickencouragescustomerstocall thetoll-freenumberforassistance. However,ifacustomerwishes to writeore-mailBuick,theletter shouldbeaddressedto:
UnitedStates
BuickCustomerAssistanceCenter P.O.Box33136 Detroit, MI48232-5136 www.Buick.com
1-800-521-7300
1-800-832-8425(ForText Telephonedevices(TTYs))
RoadsideAssistance: 1-800-252-1112
FromPuertoRico: 1-800-496-9992(English) 1-800-496-9993(Spanish)
From U.S. Virgin Islands: 1-800-496-9994
Canada
General Motors of Canada Limited
CustomerCommunicationCentre,
MailCode:CA1-163-005
1908ColonelSamDrive
Oshawa,OntarioL1H8P7
www.gm.ca
1-800-263-3777(English)
Mexico, Central America and Caribbean Islands/Countries (Except Puerto Rico and U.S. Virgin Islands)
General Motors de Mexico, S. de R.L. de C.V.
CustomerAssistanceCenter
C.P.11520,Mexico,D.F.
01-800-466-0818
LongDistance:011-52-53290818
CustomerAssistancefor TextTelephone(TTY) Users
Toassistcustomerswhoaredeaf, hardofhearing,orspeech-impaired andwhouseTextTelephones
(TTYs), Buickhas TTYequipment availableatitsCustomerAssistance
Center.AnyTTYusercan
communicatewithBuickbydialing:
1-800-832-8425.TTYusersin
Canadacandial1-800-263-3830.
OnlineOwnerCenter
BuickOwnerCenter(U.S.) www.buickownercenter.com
Information and services customized for your specific vehicle—all in one convenient place.
• Digitalownermanual, warranty information, and more.
• Storageforonlineservice and maintenancerecords.
• Buickdealerlocatorforservice nationwide.
• Exclusiveprivilegesandoffers.
- Recallnoticesforyourspecific vehicle.
• OnStarandGMCardmember ServicesEarningssummaries.
OtherHelpfulLinks:
Buick—www.buick.com
BuickMerchandise—
www.buickmerchandise.com
HelpCenter— http://www.buick.com/help/faqs.html
• FAQ(FrequentlyAsked Questions)
- ContactUs
MyGMCanadawww.gm.ca
MyGMCanadaisa password-protectedsectionof www.gm.cawhereyoucansave informationonGMvehicles,get personalizedoffers,andusehandy toolsandformswithgreaterease.
Hereareafewofthevaluabletools andservicesyouwillhave accessto:
• MyShowroom: Findandsave informationonvehiclesand currentoffersinyourarea.
- MyDealers: Savedetailssuch asaddressandphonenumber foreachofyourpreferredGM dealers.
• MyDriveway: Accessquicklinks topartsandserviceestimates, checktrade-invalues,
orscheduleaservice appointmentbyaddingthe vehiclesyouowntoyour drivewayprofile.
• MyPreferences: Manage your profile and set tools and forms with greater ease.
Tosignup, visit the My GM.ca section within www.gm.ca.
GMMobility ReimbursementProgram
GM MOBILITY
This program is available to qualified applicants for cost reimbursement of eligible aftermarket adaptive equipment required for the vehicle, such as hand controls or a wheelchair/ scooter lift for the vehicle.
Formoreinformationonthelimited offer,visitwww.gmmobility.comor calltheGMMobilityAssistance Centerat1-800-323-9935.Text Telephone(TTY)users,call 1-800-833-9935.
General Motors of Canada also has a Mobility Program. Call 1-800-GM-DRIVE (463-7483) for details. TTY users call 1-800-263-3830.
Roadside Assistance Program
For U.S.-purchased vehicles, call 1-800-252-1112; (TextTelephone (TTY): 1-888-889-2438).
For Canadian-purchased vehicles, call 1-800-268-6800.
Serviceisavailable24hoursaday, 365daysayear.
CallingforAssistance
WhencallingRoadsideAssistance, havethefollowinginformation ready:
- Yourname,homeaddress,and hometelephonenumber.
• Telephonenumberofyour location. - Locationofthevehicle.
• Model, year, color, and license platenumberofthevehicle. - Odometerreading, Vehicle IdentificationNumber(VIN), and deliverydateofthevehicle.
• Descriptionoftheproblem.
Coverage
Servicesareprovidedupto5years/160000km(100,000miles), whichevercomesfirst.
IntheU.S.,anyonedrivingthe vehicleiscovered.InCanada,a persondrivingthevehiclewithout permissionfromtheownerisnot covered.
Roadside Assistance is not part of the New Vehicle Limited Warranty. Buick and General Motors of Canada Limited reservation right to make any changes disorder continue the Roadside Assistance program at any time without notification.
BuickandGeneral Motors of Canada Limited reservetheright to limitservices or payment to an owner or driver if they decide the claims are made too often, or the sametype of claim is mademany times.
ServicesProvided
• EmergencyFuelDelivery: Deliveryofenoughfuelforthe vehicletogettothenearest servicestation.
- Lock-OutService:Serviceto unlockthevehicleifyouare lockedout.Aremoteunlock maybeavailableifyyouhave OnStar®.Forsecurityreasons, thedrivermustpresent identificationbeforethisservice isgiven.
- EmergencyTowfromaPublic RoadorHighway:Towtothe nearestBuickdealerfor warrantyservice,orifthevehicle wasinacrashandcannotbe driven.Assistanceisalsogiven whenthevehicleisstuckin sand,mud,orsnow.
- FlatTireChange: Serviceto changeaflattirewiththespare tire. Thesparetire, ifequipped, mustbeingoodconditionand properlyinflated. Itistheowner's responsibilityfortherepairor replacementofthetireifitisnot coveredbythewarranty.
- BatteryJumpStart:Serviceto jumpstartadeadbattery.
ServicesNotIncludedin RoadsideAssistance
- Impoundtowingcausedby violationofanylaws.
- Legalfines.
- Mounting, dismounting, or changing of snowtires, chains, or other traction devices.
- Towingorservicesforvehicles drivenonanon-publicroador highway.
ServicesSpecificto Canadian-PurchasedVehicles
- Fueldelivery:Reimbursement is approximately \$5Canadian. Dieselfueldeliverymaybe restricted.Propaneandother fuelsarenotprovidedthrough thisservice.
- Lock-OutService: Vehicle registration is required.
- TripRoutingService: Detailed mapsofNorthAmericaare providedwhenrequestedeither withthemostdirectrouteorthe mostscenicroute.Thereisasix requestlimitperyear.Additional travelinformationisalso available.Allowthreeweeksfor delivery.
- TripInterruptionBenefitsand Assistance:Mustbeover 250kilometersfromwherethe tripwasstartedtoqualify.
General Motors of Canada Limited requires pre-authorization, original detailed receipts, and a copy of therepair orders. Once authorization has been received, the Roadside Assistance advisor will help you make arrangements and explain how to receive payment.
- AlternativeService:If assistancecannotbeprovided rightaway,theRoadside Assistanceadvisormaygive permissiontogetlocal emergencyroadservice.Youwill receivepayment,upto\$100, aftersendingtheoriginalreceipt toRoadsideAssistance. Mechanicalfailuresmaybe covered,howeverancostfor partsandlaborforrepairsnot coveredbythewarrantyarethe ownerresponsibility.
SchedulingService Appointments
Whenthevehiclerequireswarranty service,contactyourdealer and requestanappointment. By schedulingaserviceappointment andadvisingtheserviceconsultant ofyourtransportationneeds,your dealercanhelpminimizeyour inconvenience.
If the vehicle cannot be scheduled into the serviced department immediately, keep driving it until it can be scheduled for service, unless, of course, the problem is safety related. Ifitis, please call your dealership, let them know this, and ask for instructions.
If your dealer requests you to bring the vehicle for service, you are urged todos to easily in the work day as possible to allow for the same-day repair.
Courtesy Transportation Program
Toenhanceyourownership experience,weandourparticipating dealersareproudtoofferCourtesy Transportation,acustomersupport programforvehicleswiththe Bumper-to-Bumper(BaseWarranty CoverageperiodinCanada), extendedpowertrain,and/or hybrid-specificwarrantiesinboth theU.S.andCanada.
SeveralCourtesyTransportation optionsareavailabletoassistin reducinginconveniencewhen warrantyrepairsarerequired.
Courtesy Transportation is not a part of the New Vehicle Limited Warranty. A separate booklet entitled "Warranty and Owner Assistance Information" furnished with each new vehicle provides detailed warranty coverage information.
TransportationOptions
Warranty service can generally be completed while you wait. However, if you are unable to wait, GM helps to minimize inconvenience by providing several transportation options. Depending on the circumstances, your dealer can offer one of the following:
ShuttleService
Shuttleserviceisthepreferred meansofofferingCourtesy Transportation.Dealersmayprovide shuttleservicetogetyoutoyour destinationwithminimalinterruption ofyourdailyschedule.Thisincludes one-wayorround-tripshuttleservice withinreasonabletimeanddistance parametersofyourdealer'sarea.
PublicTransportationorFuel Reimbursement
Ifthevehiclerequiresovernight warrantyrepairs,andpublic transportationisusedinsteadof yourdealer'sshuttleservice,the expensemustbesupportedby
originalreceiptsandcanonlybeup tothemaximumamountallowedby GMforshuttleservice.Inaddition, forU.S.customers,shouldyou arrangetransportationthrough afriendorrelative,limited reimbursementforreasonablefuel expensesmaybeavailable.Claim amountsshouldreflectactual costsandbesupportedbyoriginal receipts.Seeyourdealerfor informationregardingtheallowance amountsforreimbursementoffuel orothertransportationcosts.
CourtesyRentalVehicle
Yourdealermayarrangetoprovide youwithacourtesyrentalvehicleor reimburseyouforarentalvehicle thatyouobtainifthevehicleiskept foranovernightwarrantyrepair. Rentalreimbursementwillbelimited andmustbesupportedbyoriginal receipts. Thisrequiresthatyousign andcompletearentalagreement andmeetstate/provincial,local,and rentalvehicleproviderrequirements. Requirementsvaryandmayinclude minimumagerequirements,
insurancecoverage, creditcard, etc. Youareresponsibleforfuelusage chargesandmayalsobe responsiblefortaxes, levies, usage fees, excessiveemileage, orrental usagebeyondthecompletionofthe repair.
Itmaynotbepossibletoprovide a likevehicleasacourtesyrental.
AdditionalProgram Information
Allprogramoptions,suchasshuttle service,maynotbeavailableat everydealer.Pleasecontactyour dealerforspecificinformation aboutavailability.AllCourtesy Transportationarrangementswillbe administeredbyappropriatedealer personnel.
General Motors reserve theright to unilaterally modify, change, or discontinue Courtesy Transportation at any time and to resolve all question so claim eligibility pursuant to the terms and conditions described herein at its solediscretion.
CollisionDamageRepair
If the vehicle is involved a collision and it is damaged, have the damage repaired by a qualified technician using the proper equipment and quality replacement parts. Poorly performed collision repairs diminish the vehicular resale value, and safety performance can be compromised in subsequent collisions.
CollisionParts
GenuineGMCollisionpartsarenew partsmadewiththesamematerials andconstructionmethodsasthe partswithwhichthevehiclewas originallybuilt.GenuineGM Collisionpartsarethebestchoiceto ensurethatthevehicle'sdesigned appearance,durability,andsafety arepreserved.TheuseofGenuine GMpartscanhelpmaintaintheGM NewVehicleLimitedWarranty.
Recycled originalequipment parts may also be used for repair. These parts are typically removed from
vehiclesthatweretotallossesin priorcrashes.Inmostcases,the partsbeingrecycledarefrom undamagedsectionsofthevehicle. ArecycledoriginalequipmentGM partmaybeanacceptablechoiceto maintainthevehicle'soriginally designedappearanceandsafety performance;however,thehistoryof thesepartsisnotknown.Suchparts arenotcoveredbytheGMNew VehicleLimitedWarranty,andany relatedfailuresarenotcoveredby thatwarranty.
Aftermarketcollisionpartsarealso available. Thesearemadeby companiesotherthanGMandmay nothavebeentestedforthevehicle. Asaresult, thesepartsmayfit poorly, exhibitprematuredurability/corrosionproblems, and may not performproperlyin subsequent collisions. Aftermarketpartsarenot covered by the GMNew Vehicle Limited Warranty, and any vehicle failurerelatedtosuchpartsis not covered by that warranty.
RepairFacility
GMalsorecommendsthatyou chooseacollisionrepairfacilitythat meetsyourneedsbeforeyouever needcollisionrepairs. Yourdealer mayhaveacollisionrepaircenter withGM-trainedtechniciansand state-of-the-artequipment,orbe abletorecommendacollisionrepair centerthathasGM-trained techniciansandcomparable equipment.
InsuringtheVehicle
Protect your investment in the GM vehicle with comprehensive and collision insurance coverage. There are significant differences in the quality of coverage afforded by various insurance policy terms. Many insurance policies provide reduced protection to the GM vehicle by limiting compensation for damagerepairs by using aftermarket collision parts. Some insurance companies will not specify aftermarket collision parts.
When purchasing insurance, we recommend that you ensure that the vehicle will berepaired with GM originalequipment collision parts. If such insurance coverage is not available from your current insurance carrier, considers switching to another insurance carrier.
Ifthevehicleisleased,theleasing companymayrequireyoutohave insurancethatensuresrepairswith GenuineGMOriginalEquipment Manufacturer(OEM)partsor GenuineManufacturerreplacement parts.Readtheleasecarefully,as youmaybechargedattheendof theleaseforpoorqualityrepairs.
IfaCrashOccurs
Iftherehasbeenaninjury,call emergencyservicesforhelp.Donot leavethesceneofacrashuntilall mattershavebeentakencareof. Movethevehicleonlyifitsposition putsyouindanger,oryouare instructedtomoveitbyapolice officer.
Giveonlythenecessaryinformation topoliceandotherpartiesinvolved inthecrash.
Foremergencytowingsee RoadsideAssistanceProgramon page13-5.
Gatherthefollowinginformation:
- Drivename, address, and telephonenumber.
• Driverlicensenumber. - Ownername, address, and telephonenumber.
• Vehiclelicenseplatenumber.
• Vehiclemake, model, and modelyear.
• VehicleIdentification Number(VIN).
• Insurancecompanyandpolicy number. - Generaldescriptionofthe damagetotheothervehicle.
Choose areputablerepairfacility that uses quality replacement parts. See "Collision Parts" earlier in this section.
If the airbag has inflated, see What Will You See after an Airbag Inflates? on page 3-32.
ManagingtheVehicleDamage RepairProcess
Intheeventthatthevehiclerequires damagerepairs, GMrecommends thatyoutakeanactiveroleinits repair. If you have apre-determined repair facility of choice, takethe vehicle there, or have it towed there. Specify to the facility that any required replacement collision parts be originalequipment parts, either new Genuine GM parts or recycled original GM parts. Remember, recycled part will not be covered by the GM vehicle warranty.
Insurancepaysthebillfortherepair, butyoumustlivewiththerepair. Dependingonyourpolicylimits, yourinsurancecompanymay initiallyvaluetherepairusing aftermarketparts.Discussthiswith therepairprofessional,andinsiston GenuineGMparts.Remember, ifthevehicleisleased,youmaybe obligatedtohavethevehicle repairedwithGenuineGMparts, evenifyourinsurancecoverage doesnotpaythefullcost.
Ifanotherparty'sinsurance companyispayingfortherepairs, youarenotobligatedtoaccepta repairvaluationbasedonthat insurancecompany'scollisionpolicy repairlimits,asyouhaveno contractuallimitswiththatcompany. Insuchcases,youcanhavecontrol oftherepairandpartschoicesas longasthecoststayswithin reasonablelimits.
ServicePublications OrderingInformation
ServiceManuals
ServiceManualshavethediagnosis andrepairinformationonthe engines,transmission,axle, suspension,brakes,electrical, steering,body,etc.
ServiceBulletins
ServiceBulletinsgiveadditional technicalserviceinformation neededtoknowledgeablyservice GeneralMotorscarsandtrucks. Eachbulletincontainsinstructions toassistinthediagnosisand serviceofthevehicle.
OwnerInformation
Ownerpublicationsarewritten specificallyforownersandintended toprovidebasicoperational informationaboutthevehicle.The OwnerManualincludethe MaintenanceScheduleforall models.
In-Portfolio: IncludesaPortfolio, OwnerManual, and Warranty Booklet.
RETAILSELLPRICE: \$35.00(U.S.) plushandlingand shippingfees.
WithoutPortfolio:Owner Manualonly.
RETAILSELLPRICE: \$25.00(U.S.) plushandlingand shippingfees.
CurrentandPastModels
TechnicalServiceBulletinsand Manualsareavailableforcurrent andpastmodelGMvehicles.
ORDERTOLLFREE: 1-800-551-4123Monday-Friday 8:00AM-6:00PMEasternTime
ForCreditCardOrdersOnly (VISA-MasterCard-Discover), visit Helm, Inc. at: www.helminc.com.
Orwriteto:
Helm, Incorporated P.O.Box07130 Detroit, MI48207
Pricesaresubjecttochangewithout noticeandwithoutincurring obligation.Allowampletimefor delivery.
All listed prices are quoted in U.S. funds. Make checks payable in U.S. funds.
ReportingSafety Defects
ReportingSafetyDefects totheUnitedStates Government
If you believe that your vehicle has a defect which could cause acrash or could cause injury or death, you should immediately inform the National Highway Traffic Safety Administration (NHTSA) in addition to notifying General Motors.
IfNHTSAreceivessimilar complaints, it may open an investigation, and if it find that as safety defect exists in a group of vehicles, it may order a recall and remedycampaign. However, NHTSA cannot become involved in individual problems between you, your dealer, or General Motors.
TocontactNHTSA,youmay calltheVehicleSafetyHotline toll-freeat1-888-327-4236 (TTY:1-800-424-9153);goto http://www.safercar.gov;or writeto:
Administrator, NHTSA 1200 New Jersey Avenue, S.E. Washington, D.C. 20590
Youcanalsoobtainother informationaboutmotor vehiclesafetyfrom http://www.safercar.gov.
ReportingSafetyDefects totheCanadian Government
If you live in Canada, and you believe that the vehicle has as safety defect, notify Transport Canada immediately, and notify General Motors of Canada Limited. Call them at 1-800-333-0510 or writeto:
TransportCanada RoadSafetyBranch 2780SheffieldRoad Ottawa,OntarioK1B3V9
ReportingSafetyDefects toGeneralMotors
InadditiononotifyingNHTSA(or TransportCanada)inasituationlike this,pleasenotifyGeneralMotors.
Call1-800-521-7300, orwrite:
BuickCustomerAssistanceCenter P.O.Box33136 Detroit, MI48232-5136
InCanada, call 1-800-263-3777 (English) or 1-800-263-7854 (French), or write:
General Motors of Canada Limited Customer Communication Centre, Mail Code: CA1-163-005 1908 Colonel Sam Drive Oshawa, Ontario L1H8P7
VehicleData Recordingand Privacy
ThisGMvehiclehasanumberof sophisticatedcomputersthatrecord informationaboutthevehicle's performanceandhowitisdriven. Forexample,thevehicleuses computermodulestomonitorand controlengineandtransmission performance,tomonitorthe conditionsforairbagdeployment anddeployairbagsinacrash,and, ifsoequipped,topprovideantilock brakingtohelpthedrivercontrolthe vehicle.Thesemodulesmaystore datatohelpyourdealertechnician servicethevehicle.Somemodules mayalsostoredataabouthowyou operatethevehicle,suchasrateof fuelconsumptionoraveragespeed. Thesemodulesmayalsoretainthe owner'spersonalpreferences,such asradiopre-sets,seatpositions, andtemperaturesettings.
EventDataRecorders
ThisvehiclehasanEventData Recorder(EDR). Themainpurpose of an EDRistorecord, incertain crashornearcrash-likesituations, such as an airbag deploymentor hitting a road obstacle, data that will assist in understanding how a vehicle's systems performed. The EDR is designed to record data related to vehicledynamics and safety systems for a short period of time, typically 30 seconds or less. The EDR in this vehicle is designed to record such data as:
• Howvarious systems in the vehicle were operating.
- Whetherornotthedriverand passengersafetybeltswere buckled/fastened.
• Howfar, ifatall, thedriver was pressing the accelerator and/or brake pedal.
• Howfastthevehiclewas traveling.
This data can help provide better understanding of the circumstances in which crashes and injuries occur.
Important:EDRdataisrecorded bythevehicleonlyifanon-trivial crashesituationoccurs;nodatais recordedbytheEDRundernormal drivingconditionsandnopersonal data(e.g.,name,gender,age, andcrashlocation)isrecorded. However,otherparties,suchas lawenforcement,couldcombine theEDRdatawiththetypeof personallyidentifyingdataroutinely acquiredduringacrash investigation.
ToreaddatarecordedbyanEDR, specialequipmentisrequired,and accesstothevehicleortheEDRis needed.Inadditiontothevehicle manufacturer,otherparties,suchas lawenforcement,thathavethe specialequipment,canreadthe informationiftheyhaveaccessto thevehicleortheEDR.
GMwillnotaccessthisdataor shareitwithothersexcept:withthe consentofthevehicleowner, ifthevehicleisleased, withthe consentofthelessee;inresponse toanofficialrequestbypoliceor similargovernmentoffice;aspartof GM'sdefenseoflitigationthrough thediscoveryprocess;or, as requiredbylaw.DatathatGM collectsorreceivesmayalsobe usedforGMresearchneedsormay bemadeavailabletoothersfor researchpurposes,whereaneedis shownandthedataisnottiedtoa specificvehicleorvehicleowner.
OnStar®
If the vehicle is equipped with an active On Starsystem, that system may also record data in crash or near crash - likes situations. The On Star Terms and Conditions provides information on data collection and use and is available in the On Starglovebox kit, at www.onstar.com (U.S.) or
www.onstar.ca(Canada),orby pressingthe 📄 buttonand speakingtoanadvisor.
NavigationSystem
If the vehicle has an navigation system, use of the system may result in the storage of destinations, addresses, telephonenumber, and other trip information. Referto the navigation system operating manual for information on stored data and for deletion instructions.
RadioFrequency Identification(RFID)
RFIDtechnologyisusedinsome vehiclesforfunctionssuchastire pressuremonitoringandignition systemsecurity,aswellasin connectionwithconveniences such askeyfobsforremotedoorlocking/unlockingandstarting,and in-vehicletransmittersforgarage dooropeners.RFIDtechnologyin GMvehiclesdoesnotuseorrecord
personalinformationorlinkwithany otherGMsystemcontaining personalinformation.
RadioFrequency Statement
This vehicle hassystems that operate on radio frequency that comply with Part 15 of the Federal Communications Commission (FCC) rules and with Industry Canada Standards RSS-210/220/310.
Operationissubjecttothefollowing twoconditions:
- Thedevicemaynotcause interference.
- The device must accept any interference received, including interference that may cause undesired operation of the device.
Changesormodificationstoanyof thesesystemsbyotherthanan authorizedservicefacilitycouldvoid authorizationtousethisequipment.
13-16 Customer Information
NOTES
A
Accessoriesand
Modifications......10-3
AccessoryPower......9-21
Add-On Electrical
Equipment....9-50
Adjustments
Lumbar, FrontSeats......3-5
AirCleaner/Filter, Engine.....10-15
AirFilter, Passenger
Compartment......8-4
AirVents....8-4
Airbag
AddingEquipmenttothe
Vehicle....3-38
AirbagSystem
Check....3-39
HowDoesanAirbag
Restrain?......3-32
PassengerSensing
System......3-34
WhatMakesanAirbag
Inflate?......3-32
AirbagSystem(cont.)
WhatWillYouSeeafteran
AirbagInflates?......3-32
WhenShouldanAirbag
Inflate?......3-30
WhereAretheAirbags?.....3-29
Airbags
PassengerStatusIndicator...5-12
ReadinessLight......5-11
ServicingAirbag-Equipped
Vehicles....3-38
SystemCheck....3-27
AlarmSystem
Anti-theft....2-9
AM-FMRadio....7-7
Antenna
SatelliteRadio....7-14
Anti-theft
AlarmSystem......2-9
AlarmSystemMessages.....5-29
AntilockBrake
System(ABS)....9-30
WarningLight......5-17
AppearanceCare
Exterior.....10-77
Interior......10-80
AssistanceProgram,
Roadside....13-5
AudioPlayers......7-14
CD....7-14
AudioSystem
BackglassAntenna......7-13
RadioReception......7-13
Theft-DeterrentFeature......7-2
Automatic
HeadlampSystem......6-3
AutomaticTransmission......9-25
Fluid....10-14
ManualMode....9-28
ShiftLockControl
FunctionCheck......10-28
Auxiliary Devices......7-17
B
Battery....10-27
JumpStarting.....10-70
PowerProtection......6-6
VoltageandCharging
Messages......5-26
BladeReplacement,Wiper...10-30
Bluetooth......7-20,7-21,7-23
BrakeSystemWarningLight...5-16
i-2INDEX
Brakes....10-25
Antilock....9-30
Assist....9-33
Fluid....10-26
Parking....9-31
SystemMessages......5-26
Braking....9-3
Break-In, NewVehicle......9-16
BulbReplacement......10-34
FogLamps......10-32,6-4
HalogenBulbs......10-31
HeadlampAiming......10-30
Headlamps....10-31
Headlamps, FrontTurn
Signal,andParking
Lamps....10-31
LicensePlateLamps......10-34
Taillamps, TurnSignal,
Stoplamps,and
Back-upLamps.....10-33
BuyingNewTires......10-57
C
Calibration....5-4
California
FuelRequirements......9-45
PerchlorateMaterials
Requirements......10-3
Warning......10-3
CanadianVehicleOwners......iii
Capacitiesand
Specifications......12-2
CarbonMonoxide
EngineExhaust......9-24
Trunk......2-7
WinterDriving....9-9
CargoNet......4-3
Cautions, Danger, and
Warnings......iii
CDPlayer....7-14
CenterConsoleStorage......4-2
Chains,Tire....10-62
ChargingSystemLight......5-13
Check
EngineLight....5-13
Ignition
TransmissionLock......10-29
ChildRestraints
InfantsandYoung
Children....3-43
LowerAnchorsand
TethersforChildren......3-49
OlderChildren....3-40
Securing....3-57,3-59
Systems....3-45
CircuitBreakers......10-36
Cleaning
ExteriorCare......10-77
InteriorCare....10-80
ClimateControlSystems
DualAutomatic......8-1
Clock....5-5
Cluster,Instrument......5-8
Clutch,Hydraulic......10-14
CollisionDamageRepair.....13-9
CompactSpareTire......10-69
Compass....5-4
Messages......5-26
ControlofaVehicle......9-3
ConvenienceNet......4-3
ConvexMirrors......2-10
Coolant
Engine....10-18
Engine Temperature
Gauge....5-10
CoolingSystem......10-17
EngineMessages......5-27
CourtesyTransportation
Program......13-8
CruiseControl......9-39
Light....5-22
Cupholders......4-2
CustomerAssistance......13-4
Offices....13-3
TextTelephone(TTY)
Users......13-4
CustomerInformation
ServicePublications
OrderingInformation......13-11
CustomerSatisfaction
Procedure....13-1
D
DamageRepair,Collision.....13-9
Danger,Warnings, and
Cautions......iii
DataRecorders,Event......13-14
DaytimeRunning
Lamps(DRL)....6-2
DefensiveDriving......9-2
Devices,Auxiliary......7-17
DomeLamps....6-5
Door
AjarLight....5-22
AjarMessages......5-27
Locks....2-4
PowerLocks......2-5
RearSeatPass-through.....3-10
DriveBeltRouting,Engine.....12-4
DriverInformation
Center(DIC)......5-22
Driving
Defensive....9-2
Drunk....9-2
ForBetterFuelEconomy .....1-19
HighwayHypnosis......9-8
HillandMountainRoads......9-8
IftheVehicle isStuck......9-11
Driving(cont.)
LossofControl......9-6
Off-RoadRecovery......9-6
VehicleLoadLimits......9-12
WetRoads....9-7
Winter 9-9
DualAutomaticClimate
ControlSystem......8-1
E
E85Fuel....9-47
ElectricParkingBrakeLight...5-16
Electrical Equipment,
Add-On....9-50
ElectricalSystem
EngineCompartment
FuseBlock 10-36
FusesandCircuit
Breakers......10-36
InstrumentPanelFuse
Block....10-40
Overload.....10-35
i-4INDEX
Engine
AirCleaner/Filter......10-15
CheckandServiceEngine SoonLight....5-13
CompartmentOverview......10-6
Coolant....10-18
CoolantTemperature Gauge....5-10
CoolingSystem......10-17
CoolingSystemMessages...5-27
DriveBeltRouting......12-4
Exhaust....9-24
Heater....9-20
Overheating....10-21
PowerMessages......5-28
PressureLight....5-20
RunningWhileParked......9-24
Starting....9-18
EngineOil
LifeSystem......10-13
Messages......5-28
EntryLighting......6-6
EventDataRecorders.....13-14
ExitLighting......6-6
Extender, Safety Belt.....3-25
ExteriorLampControls......6-1
ExteriorLampsOffReminder...6-2
F
Filter,
EngineAirCleaner......10-15
Flash-to-Pass......6-2
Flashers, HazardWarning.....6-3
FlatTire....10-62
Changing....10-63
FloorMats....10-83
Fluid
AutomaticTransmission....10-14
Brakes....10-26
PowerSteering......10-23
Washer....10-24
FogLamps
BulbReplacement.....10-32,6-4
FoldingMirrors......2-11
FrontFogLamp
Light....5-21
FrontSeats
Adjustment....3-4
Heated....3-8
Fuel....9-44
Additives......9-46
E85(85%Ethanol)....9-47
FillingaPortableFuel
Container....9-49
FillingtheTank......9-48
FuelsinForeignCountries....9-45
GasolineSpecifications......9-45
Gauge....5-9
LowFuelWarningLight.....5-20
Recommended......9-44
Requirements, California.....9-45
SystemMessages......5-28
FuelEconomy
Driving....1-19
Fuses
EngineCompartment
FuseBlock......10-36
FusesandCircuit
Breakers.....10-36
InstrumentPanelFuse
Block....10-40
G
Gasoline
Specifications....9-45
Gauges
EngineCoolant
Temperature......5-10
Fuel....5-9
Odometer....5-9
Speedometer....5-9
Tachometer....5-9
TripOdometer....5-9
WarningLightsand
Indicators......5-7
GeneralInformation
ServiceandMaintenance.....11-1
Towing....9-50
VehicleCare....10-2
GloveBox....4-1
GMMobilityReimbursement
Program....13-5
H
HalogenBulbs....10-31
HazardWarningFlashers.....6-3
HeadRestraints.... 3-2
Headlamps
Aiming....10-30
Automatic....6-3
BulbReplacement...... 10-31
DaytimeRunning
Lamps(DRL)......6-2
Flash-to-Pass......6-2
High-BeamOnLight .....5-21
High/LowBeamChanger.....6-2
LampsOnReminder .....5-21
HeatedFrontSeats......3-8
HeatedMirrors....2-11
Heater
Engine....9-20
High-BeamOnLight .....5-21
High-SpeedOperation......10-50
HighwayHypnosis...... 9-8
HillandMountainRoads...... 9-8
HillStartAssist (HSA)......9-34
Hood....10-5
Horn.... 5-2
HowtoWearSafetyBelts
Properly....3-14
HydraulicClutch .....10-14
I
IgnitionPositions......9-17
IgnitionTransmissionLock
Check....10-29
Immobilizer.... 2-9
InfantsandYoungChildren,
Restraints 3-43
Infotainment.... 7-1
InstrumentCluster 5-8
InstrumentPanel
StorageArea......4-1
Interactive
DriveControlSystem......9-38
InteractiveDriveControl
System......9-38
Introduction......iii
i-6INDEX
J
JumpStarting.....10-70
K
KeyandLockMessages......5-29
KeylessEntry
Remote(RKE)System......2-3
Keys....2-2
L
Labeling, TireSidewall.....10-43
Lamps
DaytimeRunning(DRL)......6-2
Dome......6-5
ExteriorControls......6-1
ExteriorLampsOff
Reminder......6-2
Headlamps, FrontTurn
Signal,andParking
Lamps....10-31
LicensePlate....10-34
MalfunctionIndicator......5-13
OnReminder......5-21
Reading......6-5
Lap-ShoulderBelt......3-18
LATCHSystem
ReplacingPartsaftera
Crash....3-57
LATCH, LowerAnchorsand
TethersforChildren......3-49
Light
StabiliTrak ^® OFF......5-18
Lighting
Entry......6-6
Exit......6-6
IlluminationControl......6-4
Lights
AirbagReadiness......5-11
AntilockBrakeSystem
(ABS)Warning......5-17
BrakeSystemWarning......5-16
ChargingSystem......5-13
CruiseControl....5-22
DoorAjar....5-22
ElectricParkingBrake......5-16
EngineOilPressure......5-20
Flash-to-Pass......6-2
FrontFogLamp......5-21
Lights(cont.)
High-BeamOn....5-21
High/LowBeamChanger.....6-2
LowFuelWarning......5-20
SafetyBeltReminders......5-11
Security......5-21
TirePressure....5-19
TractionControlSystem
(TCS)/StabiliTrak® 5-18
TractionOff....5-18
UltrasonicParkingSensor....5-17
Locks
Door....2-4
PowerDoor.....2-5
Safety....2-6
LossofControl....9-6
LowFuelWarningLight......5-20
LowerAnchorsandTethers
forChildren(LATCH
System)....3-49
LumbarAdjustment......3-5
FrontSeats......3-5
M
Maintenance
Records......11-9
MaintenanceSchedule
RecommendedFluidsand
Lubricants....11-6
ScheduledMaintenance.....11-2
MalfunctionIndicatorLamp....5-13
ManualMode....9-28
ManualTransmission......9-29
Fluid....10-14
Messages
Anti-theftAlarmSystem......5-29
BatteryVoltageand
Charging....5-26
BrakeSystem......5-26
Compass....5-26
DoorAjar....5-27
EngineCoolingSystem......5-27
EngineOil....5-28
EnginePower......5-28
FuelSystem......5-28
KeyandLock......5-29
ObjectDetectionSystem.....5-29
RideControlSystem......5-29
Tire....5-30
Messages(cont.)
Transmission......5-30
Vehicle....5-25
Window....5-31
Mirrors
AutomaticDimming
Rearview......2-11
Convex....2-10
Folding....2-11
Heated....2-11
Power......2-11
MonitorSystem, Tire
Pressure....10-51
N
Navigation
VehicleDataRecording
andPrivacy......13-15
Net
Cargo....4-3
Net, Convenience......4-3
NewVehicleBreak-In......9-16
0
ObjectDetectionSystem
Messages......5-29
Odometer....5-9
Trip....5-9
Off-Road
Recovery......9-6
Oil
Engine....10-9
EngineOilLifeSystem.....10-13
Messages......5-28
PressureLight......5-20
OlderChildren, Restraints.....3-40
OnlineOwnerCenter......13-4
OnStar ^® System......1-20
Operation, Infotainment
System......7-4
Ordering
ServicePublications......13-11
Outlets
Power....5-5
Overheating,Engine......10-21
Overview, Infotainment
System......7-2
i-8INDEX
P
Park
Shiftinginto......9-21
Shiftingoutof....9-22
Parking....9-23
Assist,Ultrasonic....9-42
Brake....9-31
BrakeandP(Park)
MechanismCheck......10-29
OverThingsThatBurn......9-23
UltrasonicSensorLight.....5-17
PassengerAirbagStatus
Indicator....5-12
PassengerCompartmentAir
Filter....8-4
PassengerSensingSystem...3-34
PerchlorateMaterials
Requirements, California.....10-3
Personalization
Vehicle....5-31
Phone
Bluetooth......7-20,7-21,7-23
Power
DoorLocks......2-5
Mirrors....2-11
Outlets....5-5
Protection,Battery......6-6
RetainedAccessory(RAP)...9-21
SeatAdjustment......3-5
SteeringFluid......10-23
Windows....2-12
Pregnancy, Using Safety
Belts....3-25
Privacy
RadioFrequency
Identification(RFID)......13-15
Program
Courtesy Transportation.....13-8
Proposition65Warning,
California....10-3
R
RadioFrequency
Identification(RFID)......13-15
Statement......13-15
Radios
AM-FMRadio....7-7
Reception......7-13
Satellite....7-10
ReadingLamps......6-5
RearSeat
Pass-throughDoor......3-10
RearSeats......3-9
RearStorage....4-2
RearviewMirror
AutomaticDimming......2-11
RecliningSeatbacks......3-6
Recommended
Fuel....9-44
RecommendedFluidsand
Lubricants....11-6
Records
Maintenance....11-9
Recreational Vehicle
Towing....10-74
ReimbursementProgram,
GMMobility......13-5
RemoteKeylessEntry(RKE)
System......2-3
ReplacementBulbs.....10-34
ReplacementParts
Airbags....3-40
Maintenance....11-8
ReplacingAirbagSystem.....3-40
ReplacingLATCHSystem
PartsafteraCrash......3-57
ReplacingSafetyBelt
SystemPartsafteraCrash...3-26
ReportingSafetyDefects
Canadian Government.....13-13
GeneralMotors......13-13
U.S.Government......13-12
Restraints
WheretoPut......3-48
RetainedAccessory
Power(RAP)....9-21
RideControlSystems
Messages......5-29
Roads
Driving, Wet....9-7
Roadside Assistance
Program......13-5
Roof
Sunroof....2-15
Rotation, Tires......10-55
Routing,EngineDriveBelt.....12-4
RunningtheVehicleWhile
Parked....9-24
S
SafetyBelts....3-11
Care....3-26
Extender....3-25
HowtoWearSafetyBelts
Properly....3-14
Lap-ShoulderBelt......3-18
Reminders....5-11
ReplacingafteraCrash .....3-26
UseDuringPregnancy......3-25
SafetyDefectsReporting
CanadianGovernment.....13-13
GeneralMotors......13-13
U.S.Government......13-12
SafetyLocks....2-6
SafetySystemCheck......3-26
SatelliteRadio....7-10
ScheduledMaintenance.....11-2
SchedulingAppointments.....13-7
i-10INDEX
Seats
Adjustment, Front......3-4
HeadRestraints......3-2
HeatedFront......3-8
LumbarAdjustment, Front.....3-5
PowerAdjustment, Front.....3-5
Rear....3-9
RecliningSeatbacks......3-6
SecuringChild
Restraints....3-57,3-59
Security
Light....5-21
Vehicle....2-9
Service
Accessoriesand
Modifications......10-3
DoingYourOwnWork......10-4
EngineSoonLight......5-13
MaintenanceRecords......11-9
Maintenance, General
Information......11-1
Service(cont.)
PartsIdentificationLabel.....12-1
PublicationsOrdering
Information......13-11
SchedulingAppointments.....13-7
ServicingtheAirbag......3-38
ShiftLockControlFunction
Check, Automatic
Transmission....10-28
Shifting
IntoPark....9-21
OutofPark......9-22
Signals, Turnand
Lane-Change......6-3
SpareTire
Compact....10-69
Specificationsand
Capacities....12-2
Speedometer....5-9
StabiliTrak
OFFLight....5-18
System......9-36
StartAssist,Hills......9-34
StarterSwitchCheck......10-28
StartingtheEngine......9-18
Steering....9-4
Fluid,Power......10-23
WheelAdjustment......5-2
WheelControls....5-2
StoplampsandBack-upLamps
BulbReplacement......10-33
Storage
Rear....4-2
StorageAreas
CenterConsole......4-2
ConvenienceNet......4-3
GloveBox....4-1
InstrumentPanel......4-1
StuckVehicle....9-11
SunVisors....2-14
Sunroof....2-15
Symbols......iv
System
Infotainment......7-1
InteractiveDriveControl.....9-38
T
Tachometer....5-9
Taillamps
BulbReplacement......10-33
TextTelephone(TTY)Users...13-4
Theft-DeterrentSystems......2-9
Immobilizer......2-9
Time....5-5
Tires
BuyingNewTires......10-57
Chains....10-62
Changing....10-63
CompactSpare......10-69
Designations......10-45
DifferentSize......10-59
IfaTireGoesFlat......10-62
InflationMonitorSystem....10-52
Inspection......10-55
Messages......5-30
Pressure....10-50
PressureLight......5-19
Tires(cont.)
PressureMonitorSystem...10-51
Rotation 10-55
SidewallLabeling......10-43
Terminology and
Definitions......10-46
UniformTireQuality
Grading 10-59
WheelAlignmentandTire
Balance....10-61
WheelReplacement......10-61
WhenItIsTimeforNew
Tires....10-56
Winter 10-43
Towing
GeneralInformation......9-50
Recreational Vehicle......10-74
Vehicle 10-74
Traction
ControlSystem(TCS) .....9-34
ControlSystem(TCS)/
StabiliTrak® Light......5-18
OffLight....5-18
Transmission
Automatic....9-25
Fluid, Automatic .....10-14
Fluid, Manual.....10-14
Messages......5-30
TransportationProgram,
Courtesy....13-8
TripOdometer....5-9
Trunk......2-7
TurnandLane-Change
Signals......6-3
TurnSignal
BulbReplacement......10-33
U
UltrasonicParkingAssist .....9-42
UltrasonicParkingSensor
Light....5-17
UniformTireQuality
Grading 10-59
UsingThisManual......iii
i-12INDEX
V
Vehicle
CanadianOwners......iii
Control....9-3
Identification
Number(VIN)......12-1
LoadLimits....9-12
Messages......5-25
Personalization......5-31
Security......2-9
Towing....10-74
VehicleCare
TirePressure......10-49
VehicleIdentification
ServicePartsIdentification
Label.....12-1
Ventilation,Air......8-4
Visors....2-14
W
Warning
BrakeSystemLight......5-16
WarningLights, Gauges, and
Indicators......5-7
Warnings......iii
CautionsandDanger......iii
HazardFlashers......6-3
WasherFluid......10-24
Wheels
AlignmentandTire
Balance.....10-61
DifferentSize......10-59
Replacement......10-61
WhenItIsTimeforNew
Tires....10-56
WheretoPuttheRestraint....3-48
Windows....2-12
Messages......5-31
Power 2-12
Windshield
Wiper/Washer....5-3
Winter
Driving....9-9
WinterTires....10-43
WiperBladeReplacement....10-30
- 2011BuickRegalOwnerManual
- CanadianVehicleOwners
- Danger,Warnings, and Cautions
- ivIntroduction
- WARNING
- Symbols
- VehicleSymbolChart
- D:FogLamps
- InBrief
- InstrumentPanel
- InitialDriveInformation
- VehicleFeatures
- PerformanceandMaintenance
- InitialDrive Information
- RemoteKeylessEntry (RKE)System
- DoorLocks
- PowerDoorLocks
- TrunkRelease
- SeatAdjustment
- 1-6InBrief
- HeatedSeats HeatedFrontSeats
- HeadRestraint Adjustment
- SafetyBelts
- SensingSystemfor PassengerAirbag
- MirrorAdjustment ExteriorMirrors
- InteriorMirror
- SteeringWheel Adjustment
- InteriorLighting
- DomeLamps
- ReadingLamps
- ExteriorLighting
- WindshieldWiper/Washer
- WindshieldWasher
- ClimateControls
- 1-12InBrief
- Transmission
- AutomaticTransmission
- ManualMode
- Radio(s)
- StoringaFavoriteStation
- SettingtheClock
- AdjustingtheTime
- Settingthe12/24HourFormat
- SatelliteRadio
- XMSatelliteRadioService
- PortableAudioDevices
- 1-14InBrief
- Bluetooth®
- CruiseControl
- NavigationSystem
- DriverInformation Center(DIC)
- 1-16InBrief
- VehiclePersonalization
- UltrasonicParkingAssist
- PowerOutlets
- Performance and Maintenance
- TractionControl System(TCS)
- StabiliTrak® System
- TirePressureMonitor
- EngineOilLifeSystem
- ResettingtheOilLifeSystem
- FuelE85(85%Ethanol)
- DrivingforBetterFuel Economy
- Roadside Assistance Program
- RoadsideAssistanceandOnStar
- 1-20InBrief
- OnlineOwnerCenter
- OnStar®
- AutomaticCrashResponse
- HowOnStarServiceWorks
- OnStarSteeringWheel Controls
- YourResponsibility
- Keys, Doors and Windows
- KeysandLocks
- Doors
- VehicleSecurity
- ExteriorMirrors
- InteriorMirrors
- Windows
- Roof
- Keys
- RemoteKeylessEntry (RKE)SystemOperation
- ProgrammingTransmittersto theVehicle
- BatteryReplacement
- WARNING(Continued)
- SafetyLocks
- Trunk
- RemoteTrunkRelease
- Emergency Trunk Release Handle
- Anti-theftAlarmSystem
- ArmingtheSystem
- DisarmingtheSystem
- TurningofftheSystemAlarm
- Immobilizer
- ImmobilizerOperation
- ConvexMirrors
- PowerMirrors
- FoldingMirrors
- ManualFoldawayMirrors
- HeatedMirrors
- AutomaticDimming RearviewMirror
- CleaningtheMirror
- PowerWindows
- ExpressWindowOperation
- RearWindowLockoutwith PowerSafetyLocks
- RearWindowLockoutwithout PowerSafetyLocks
- 2-14Keys, DoorsandWindows
- ProgrammingthePower Windows
- Sunroof
- 2-16Keys, DoorsandWindows
- Sunshade
- SafetyFunction
- InitializingtheSunroof
- Toinitializethesunroof:
- Seatsand Restraints
- HeadRestraints
- FrontSeats
- RearSeats
- AirbagSystem
- ChildRestraints
- 3-2 Seats and Restraints
- 3-4 Seats and Restraints
- Toadjustapowerseat:
- Toadjustthelumbarsupport:
- 3-6 Seats and Restraints
- RecliningSeatbacks
- ManualRecliningSeatbacks
- PowerRecliningSeatbacks
- 3-8 Seats and Restraints
- HeatedFrontSeats
- FoldingtheSeatback
- 3-10 Seats and Restraints
- RaisingtheSeatback
- Toraiseaseatback:
- RearSeat Pass-ThroughDoor
- 3-12 Seats and Restraints
- WhySafetyBeltsWork
- QuestionsandAnswersAbout SafetyBelts
- 3-14 Seats and Restraints
- HowtoWearSafetyBelts Properly
- 3-16SeatsandRestraints
- 3-18 Seats and Restraints
- Lap-ShoulderBelt
- ShoulderBeltHeightAdjuster
- SafetyBeltPretensioners
- RearSafetyBeltComfort Guides
- 3-22SeatsandRestraints
- 3-24SeatsandRestraints
- SafetyBeltUseDuring Pregnancy
- SafetyBeltExtender
- SafetySystemCheck
- SafetyBeltCare
- ReplacingSafetyBelt SystemPartsaftera Crash
- 3-28SeatsandRestraints
- WhereAretheAirbags?
- WhenShouldanAirbag Inflate?
- WhatMakesanAirbag Inflate?
- HowDoesanAirbag Restrain?
- WhatWillYouSeeafter anAirbagInflates?
- 3-34SeatsandRestraints
- PassengerSensing System
- IftheOnIndicatorisLitfora ChildRestraint
- IftheOffIndicatorisLitforan Adult-SizeOccupant
- AdditionalFactorsAffecting SystemOperation
- Servicingthe Airbag-EquippedVehicle
- AddingEquipmenttothe Airbag-EquippedVehicle
- AirbagSystemCheck
- ReplacingAirbagSystem PartsafteraCrash
- ChildRestraints OlderChildren
- Q: Whatistheproperway to wearsafetybelts?
- 3-42SeatsandRestraints
- InfantsandYoung Children
- Q: Whatarethedifferenttypes of add-onchildrestraints?
- SecuringanAdd-OnChild RestraintintheVehicle
- SecuringtheChildwithinthe ChildRestraint
- WheretoPutthe Restraint
- LowerAnchorsand TethersforChildren (LATCHSystem)
- LowerAnchors
- TopTetherAnchor
- 3-52SeatsandRestraints
- SecuringaChildRestraint DesignedfortheLATCH System
- HeadRestraintRemovaland Reinstallation
- ReplacingLATCHSystem PartsAfteraCrash
- SecuringChildRestraints (RearSeat)
- 3-58SeatsandRestraints
- SecuringChildRestraints (FrontPassengerSeat)
- 3-62SeatsandRestraints
- Storage
- StorageCompartments
- AdditionalStorageFeatures
- Storage Compartments
- InstrumentPanelStorage
- GloveBox
- 4-2Storage
- Cupholders
- RearStorage
- CenterConsoleStorage
- AdditionalStorage Features
- 4-4Storage
- NOTES
- Instruments and Controls
- Controls
- WarningLights, Gauges, and Indicators
- InformationDisplays
- VehicleMessages
- SteeringWheelControls
- Horn
- Windshield Wiper/Washer
- 5-4 InstrumentsandControls
- Compass
- Clock
- SettingtheTimeandDate
- SettingtheMonthandDay Format
- PowerOutlet110VoltAlternating Current
- WarningLights, Gauges,and Indicators
- InstrumentCluster
- Speedometer
- Odometer
- TripOdometer
- Tachometer
- English
- SafetyBeltReminders DriverSafetyBeltReminder Light
- PassengerSafetyBelt ReminderLight
- AirbagReadinessLight
- PassengerAirbagStatus Indicator
- ChargingSystemLight
- Malfunction IndicatorLamp
- 5-14 InstrumentsandControls
- EmissionsInspection and MaintenancePrograms
- BrakeSystemWarning Light
- EnglishMetric
- ElectricParkingBrake Light
- AntilockBrakeSystem (ABS)WarningLight
- UltrasonicParking SensorLight
- TractionOffLight
- StabiliTrak® OFFLight
- TractionControlSystem (TCS)/StabiliTrak® Light
- TirePressureLight
- WhentheLightIsOnSteady
- WhentheLightFlashesFirstand ThenIsOnSteady
- EngineOilPressureLight
- LowFuelWarningLight
- SecurityLight
- High-BeamOnLight
- FrontFogLampLight
- LampsOnReminder
- CruiseControlLight
- DoorAjarLight
- DICOperationandDisplays
- DICButtons
- Trip/FuelMenultems
- Trip1andTrip2
- FuelRange
- FuelEconomy
- AverageVehicleSpeed
- Timer
- DigitalSpeedometer
- Turn-by-Turn
- VehicleInformationMenu Items
- Unit
- TirePressure
- RemainingOilLife
- BatteryVoltage and ChargingMessages
- BATTERYSAVERACTIVE
- LOWBATTERY
- SERVICEBATTERY CHARGINGSYSTEM
- BrakeSystemMessages BRAKEFLUIDLOW
- PRESSBRAKEPEDALTO RELEASEPARKBRAKE
- DoorAjarMessages
- DRIVERDOOROPEN
- HOODOPEN
- LEFTREARDOOROPEN
- PASSENGERDOOROPEN
- RIGHTREARDOOROPEN
- TRUNKOPEN
- EngineCoolingSystem Messages
- A/COFFDUETOHIGH ENGINETEMP
- COOLANTLEVELLOWADD COOLANT
- ENGINEOVERHEATED—IDLEENGINE
- ENGINEOVERHEATED— STOPENGINE
- HIGHCOOLANT TEMPERATURE
- EngineOilMessages CHANGEENGINEOILSOON
- ENGINEOILHOT, IDLE ENGINE
- ENGINEOILLOW—ADDOIL
- OILPRESSURELOW—STOP ENGINE
- EnginePowerMessages ENGINEPOWERISREDUCED
- FuelSystemMessages FUELLEVELLOW
- KeyandLockMessages
- REPLACEBATTERYIN REMOTEKEY
- ObjectDetectionSystem Messages
- PARKASSISTOFF
- SERVICEPARKASSIST
- RideControlSystem Messages
- SERVICETRACTION CONTROL
- SERVICESTABILITRAK
- SPORTMODEON
- TRACTIONCONTROLOFF
- TRACTIONCONTROLON
- Anti-theftAlarmSystem Messages
- THEFTATTEMPTED
- TireMessages
- TIREPRESSURELOWADD AIRTOTIRE
- SERVICETIREMONITOR SYSTEM
- TIRELEARNINGACTIVE
- TransmissionMessages
- SERVICETRANSMISSION
- SHIFTTOPARK
- TRANSMISSIONHOT—IDLE ENGINE
- WindowMessages
- OPEN, THENCLOSEDRIVER WINDOW
- OPEN,THENCLOSE PASSENGERWINDOW
- Vehicle Personalization
- EnteringthePersonalization Menus
- ClimateandAirQuality
- AutoFanSpeed
- AirConditioningMode
- AutoAreaZoneTemp
- AutoDefog
- AutoRearDefog
- ComfortandConvenience
- ChimeVolume
- Collision/DetectionSystems
- ParkAssist
- Language
- Lighting
- VehicleLocatorLights
- ExitLighting
- 5-34 Instruments and Controls
- UnlockedDoorAntiLockOut
- AutoDoorUnlock
- DelayedDoorLock
- RemoteLock/Unlock/Start
- RemoteUnlockLightFeedback
- RemoteLockFeedback
- RemoteDoorUnlock
- ReturntoFactorySettings
- 5-36 InstrumentsandControls
- LightingFeatures
- ExteriorLampControls
- ExteriorLampsOff Reminder
- HeadlampHigh/ Low-BeamChanger
- Flash-to-Pass
- DaytimeRunning Lamps(DRL)
- AutomaticHeadlamp System
- 6-4Lighting
- EntryLighting
- BatteryPowerProtection
- Infotainment System
- Introduction
- Radio
- AudioPlayers
- Phone
- Infotainment
- 7-2InfotainmentSystem
- NavigationView
- Theft-DeterrentFeature
- RADIO/BAND
- B.CD/AUX
- C.
- D.CONFIG
- ▷▶▶
- F.
- Buttons1to6
- H.FAV1/2/3
- I.INFO
- J.AS1/2
- ≅
- L.
- M.CDSlot
- N.BACK
- O.TONE
- P.
- Operation
- TurningtheSystemOnorOff
- AutomaticSwitch-Off
- VolumeControl
- MenuSystem
- BACK:Pressto:
- SelectingaMenuOption
- Submenus
- ActivatingaSetting
- SettingaValue
- TurningaFunctionOnorOff
- EnteringaCharacterSequence
- AudioSettings
- 7-6InfotainmentSystem
- AdjustingtheFaderandBalance
- AdjustingtheEQ(Equalizer)
- SystemSettings
- AutoVolume
- MaximumStartupVolume
- ConfiguringtheNumberof FavoritesPages
- AM-FMRadio
- ControlButtons
- RDS(RadioSubsystem)
- RadioMenus
- SelectingaBand
- SelectingaStation
- SeekTuning
- ManualTuning
- FavoritesList
- StationLists
- CategoryLists
- UpdatingStation&CategoryLists
- StoringaStationasaFavorite
- StoringStations
- RetrievingStations
- AutostoreStations
- SelectingtheXMBand
- XMCategories
- RemovingorAddingCategories
- SelectinganXMChannel
- SelectingaChannelby StationList
- SelectingaChannelbyCategory
- StoringanXMChannelasa Favorite
- StoringaChannelasaFavorite
- RetrievingChannels
- XMMessages
- XL(ExplicitLanguage
- NoSubscriptionPleaseRenew:
- RadioReception
- FM
- AM
- XM™ SatelliteRadioService
- CellularPhoneUsage
- BackglassAntenna
- 7-14InfotainmentSystem
- SatelliteRadioAntenna
- CDPlayer
- CareofCDs
- CareoftheCDPlayer
- InsertingaCD
- RemovingaCD
- PlayingaCDorMP3CD
- 7-16InfotainmentSystem
- SelectingaCDTrack
- PlayingTracksinRandomOrder
- FastForwardandRewind
- SelectinganMP3Track
- SearchingforMP3Tracks
- Trackscanbesearchedby:
- AuxiliaryDevices
- Usingthe3.5mm(1/8in) AuxiliaryInputJack
- AdjustingtheVolume
- USBPort
- ConnectingandControlling aniPod®
- ConnectinganiPod
- SearchingforaTrack
- 7-18InfotainmentSystem
- Shuffle
- Repeat
- ConnectingandControllinga PlaysForSureDevice(PFD) orZune®
- ConnectingaPFDorZune
- ConnectingandControllinga USBDrive
- ConnectingaUSBDrive
- Bluetooth(Overview)
- BluetoothControls
- InfotainmentSystemControls
- VoiceRecognition
- AudioSystem
- OtherInformation
- Bluetooth(Infotainment Controls)
- Pairing
- Pairinginformation:
- PairingaPhone
- 7-22InfotainmentSystem
- ListingAllPairedandConnected Phones
- DeletingaPairedPhone
- LinkingtoaDifferentPhone
- MakingaCall
- AcceptingorDecliningaCall
- AcceptingaCall
- DecliningaCall
- CallWaiting
- SwitchingBetweenCalls (CallWaitingCallsOnly)
- ConferenceCalling
- EndingaCall
- MutingaCall
- ToMuteaCall
- ToCancelMute
- DualToneMulti-Frequency (DTMF)Tones
- Bluetooth(Voice Recognition)
- 7-24InfotainmentSystem
- StoringNameTags
- UsingtheStoreCommand
- UsingtheDigitStoreCommand
- UsingtheDirectoryCommand
- 7-28InfotainmentSystem
- DeletingNameTags
- UsingtheDeleteCommand
- UsingtheDeleteAllNameTags Command
- UsingtheDialCommand
- UsingtheDigitDialCommand
- 7-30InfotainmentSystem
- UsingtheCallCommand
- UsingtheRe-dialCommand
- ReceivingaCall
- Three-WayCalling
- TransferringaCall
- ToTransferAudiototheCell Phone
- ToTransferAudiototheln-Vehicle BluetoothSystem
- VoicePass-Thru
- SendingaNumberDuringaCall
- SendingaStoredNameTag DuringaCall
- ClearingtheSystem
- 7-34InfotainmentSystem
- ClimateControlSystems
- AirVents
- Maintenance
- DualAutomaticClimateControlSystem
- 8-2ClimateControls
- AutomaticOperation
- ManualOperation
- DriverandPassenger
- AirDeliveryModes:Press
- RearWindowDefogger
- Sensors
- OperationTips
- PassengerCompartment AirFilter
- 8-6ClimateControls
- Driving and Operating
- DrivingInformation
- StartingandOperating
- EngineExhaust
- ManualTransmission
- Brakes
- RideControlSystems
- ObjectDetectionSystems
- 9-2DrivingandOperating
- Fuel
- Towing
- ConversionsandAdd-Ons
- DefensiveDriving
- DrunkDriving
- ControlofaVehicle
- Braking
- Steering
- PowerSteering
- SpeedVariableAssistSteering
- SteeringTips
- SteeringinEmergencies
- Off-RoadRecovery
- LossofControl
- Skidding
- DrivingonWetRoads
- Hydroplaning
- OtherRainyWeatherTips
- HighwayHypnosis
- HillandMountainRoads
- WinterDriving
- DrivingonSnoworIce
- BlizzardConditions
- IftheVehiclesStuck
- RockingtheVehicletoGet itOut
- 9-12DrivingandOperating
- VehicleLoadLimits
- LabelExample
- StepsforDeterminingCorrect LoadLimit
- 9-14DrivingandOperating
- Example1
- Example2
- Example3
- Starting and Operating
- NewVehicleBreak-In
- StartingtheEngine
- StartingProcedure
- OverrunCut-Off
- EngineHeater
- ToUsetheEngineCoolant Heater
- RetainedAccessory Power(RAP)
- ShiftingIntoPark (AutomaticTransmission)
- LeavingtheVehiclewiththe EngineRunning
- TorqueLock
- ShiftingoutofPark (AutomaticTransmission)
- Parking
- ParkingoverThings ThatBurn
- RunningtheVehicle WhileParked
- 9-26DrivingandOperating
- DriverShiftControl(DSC)
- AntilockBrake System(ABS)
- UsingABS
- BrakinginEmergencies
- ParkingBrake
- 9-32DrivingandOperating
- EPBApply
- EPBRelease
- AutomaticEPBRelease
- BrakeAssist
- HillStartAssist(HSA)
- InteractiveDriveControl System
- StandardMode
- TourMode
- SportMode
- DriveModeControl
- SettingCruiseControl
- ResumingaSetSpeed
- IncreasingSpeedWhileUsing CruiseControl
- ReducingSpeedWhileUsing CruiseControl
- PassingAnotherVehicleWhile UsingCruiseControl
- UsingCruiseControlonHills
- EndingCruiseControl
- ErasingSpeedMemory
- ObjectDetection Systems
- HowtheSystemWorks
- TurningtheSystemOnandOff
- WhentheSystemDoesNot SeemtoWorkProperly
- RecommendedFuel
- GasolineSpecifications (U.S.andCanadaOnly)
- CaliforniaFuel Requirements
- FuelsinForeign Countries
- FuelAdditives
- FillingtheTank
- FillingaPortableFuel Container
- GeneralTowing Information
- Conversionsand Add-Ons
- Add-On Electrical Equipment
- VehicleCare
- GeneralInformation
- VehicleChecks
- HeadlampAiming
- BulbReplacement
- ElectricalSystem
- WheelsandTires
- JumpStarting
- AppearanceCare
- CaliforniaProposition 65Warning
- CaliforniaPerchlorate MaterialsRequirements
- Accessories and Modifications
- DoingYourOwn ServiceWork
- Hood
- Toclosethehood:
- EngineCompartmentOverview
- 10-8VehicleCare
- EngineOil
- CheckingEngineOil
- WhentoAddEngineOil
- SelectingtheRightEngineOil
- Specification(Except2.0LTurbo Engine)
- Specification(2.0LTurboEngine)
- dexos™
- 10-12VehicleCare
- ViscosityGrade
- EngineOilAdditives/Engine OilFlushes
- WhattoDowithUsedOil
- WhentoChangeEngineOil
- HowtoResettheEngineOil LifeSystem
- AutomaticTransmission Fluid
- HowtoCheckAutomatic TransmissionFluid
- ManualTransmission Fluid
- HydraulicClutch
- WhentoCheckandWhat toUse
- HowtoCheckandAddFluid
- EngineAirCleaner/Filter
- WhentoInspecttheEngineAir Cleaner/Filter
- HowtoInspecttheEngineAir Cleaner/Filter
- 2.0LL4Engine
- 10-16VehicleCare
- 2.4LL4Engine
- CoolingSystem
- EngineCoolant
- WhattoUse
- CheckingCoolant
- HowtoAddCoolanttothe CoolantSurgeTank
- EngineOverheating
- IfSteamIsComingfromthe EngineCompartment
- IfNoSteamIsComingfrom theEngineCompartment
- PowerSteeringFluid
- WhentoCheckPowerSteering Fluid
- HowtoCheckPowerSteering Fluid
- 2.0LL4DipstickShown,2.4LL4 DipstickSimilar
- WasherFluid
- AddingWasherFluid
- Notice
- BrakePedalTravel
- BrakeAdjustment
- ReplacingBrakeSystemParts
- BrakeFluid
- CheckingBrakeFluid
- WhattoAdd
- Battery
- DANGER
- VehicleStorage
- StarterSwitchCheck
- AutomaticTransmission ShiftLockControl FunctionCheck
- IgnitionTransmission LockCheck
- ParkBrakeandP(Park) MechanismCheck
- WiperBladeReplacement
- HalogenBulbs
- Headlamps, FrontTurn SignalandParking Lamps
- BaseHeadlampAssembly (PassengerSideShown, Driver SideSimilar)
- Up-LevelHeadlampAssembly (PassengerSideShown, Driver SideSimilar)
- Low-BeamHeadlamps/Daytime RunningLamps(DRL), High-BeamHeadlamps(Base)
- High/Low-BeamHeadlamps (Up-Level)
- FrontTurnSignal/Parking/Side MarkerLamps(Baseand Up-Level)
- FogLamps
- Taillamps, TurnSignal, Stoplamps, and Back-Up Lamps
- LicensePlateLamp
- ElectricalSystem Overload
- HeadlampWiring
- WindshieldWipers
- FusesandCircuit Breakers
- EngineCompartment FuseBlock
- InstrumentPanelFuse Block
- Tires
- WinterTires
- TireSidewallLabeling
- TireDesignations
- TireSize
- TireTerminology and Definitions
- Overinflatedtires, ortiresthat havetoomuchair, can resultin:
- WhentoCheck
- HowtoCheck
- TirePressurefor High-SpeedOperation
- TirePressureMonitor System
- FederalCommunications Commission(FCC)and IndustryCanada
- TirePressureMonitor Operation
- TPMSMalfunctionLightand Message
- TPMSSensorMatching Process
- TireInspection
- TireRotation
- WhenItIsTimeforNew Tires
- BuyingNewTires
- DifferentSizeTiresand Wheels
- UniformTireQuality Grading
- Treadwear200TractionAA TemperatureA
- Treadwear
- Traction-AA,A,B,C
- Temperature—A,B,C
- WheelAlignmentandTire Balance
- WheelReplacement
- UsedReplacementWheels
- TireChains
- IfaTireGoesFlat
- TireChanging
- RemovingtheSpareTireand Tools
- Tostoretheflattire:
- CompactSpareTire
- 2.0LEngineShown,2.4LSimilar
- TowingtheVehicle
- Recreational Vehicle Towing
- DinghyTowingfromtheFront (With2.0LEngine and AutomaticTransmission)
- DinghyTowingfromtheFront (AllExcept2.0LEngine and AutomaticTransmission)
- ExteriorCare
- CleaningExteriorLamps/Lenses
- FinishCare
- Protecting Exterior Bright Metal Parts
- WashingtheVehicle
- Weatherstrips
- WheelsandTrim—Aluminum orChrome
- WindshieldandWiperBlades
- SheetMetalDamage
- FinishDamage
- UnderbodyMaintenance
- ChemicalPaintSpotting
- InteriorCare
- Fabric/Carpet
- Toclean:
- Leather
- InstrumentPanel, Vinyl, and OtherPlasticSurfaces
- CareofSafetyBelts
- FloorMats
- 10-84VehicleCare
- RemovingandReplacingthe FloorMats
- Service and Maintenance
- 11-2ServiceandMaintenance
- RotationofNewTires
- Scheduled Maintenance
- WhentheChangeEngineOil SoonMessageDisplays
- EveryEngineOilChange
- AdditionalRequiredServices
- Every12000km/7,500Miles
- AtEachFuelStop
- OnceaMonth
- OnceaYear
- OnceEveryTwoYears
- FirstEngineOilChangeAfter Every40000km/25,000Miles
- FirstEngineOilChangeAfter Every80000km/50,000Miles
- FirstEngineOilChangeAfter Every160000km/100,000Miles
- FirstEngineOilChangeAfter Every240000km/150,000Miles
- RecommendedFluids,Lubricants,andParts
- MaintenanceReplacementParts
- MaintenanceRecords
- TechnicalData
- VehicleIdentification
- VehicleData
- VehicleIdentification Number(VIN)
- Engineldentification
- ServiceParts IdentificationLabel
- 12-4 TechnicalData
- Customer Information
- CustomerInformation
- ReportingSafetyDefects
- VehicleDataRecordingand Privacy
- CustomerSatisfaction Procedure
- 13-2 Customer Information
- STEPTHREE—Canadian
- CustomerAssistance Offices
- UnitedStates
- Canada
- Mexico, Central America and Caribbean Islands/Countries (Except Puerto Rico and U.S. Virgin Islands)
- CustomerAssistancefor TextTelephone(TTY) Users
- BuickOwnerCenter(U.S.) www.buickownercenter.com
- OtherHelpfulLinks:
- MyGMCanadawww.gm.ca
- GMMobility ReimbursementProgram
- GM MOBILITY
- CallingforAssistance
- Coverage
- ServicesProvided
- ServicesNotIncludedin RoadsideAssistance
- ServicesSpecificto Canadian-PurchasedVehicles
- SchedulingService Appointments
- Courtesy Transportation Program
- TransportationOptions
- ShuttleService
- PublicTransportationorFuel Reimbursement
- CourtesyRentalVehicle
- AdditionalProgram Information
- CollisionDamageRepair
- CollisionParts
- RepairFacility
- InsuringtheVehicle
- IfaCrashOccurs
- ManagingtheVehicleDamage RepairProcess
- ServicePublications OrderingInformation
- ServiceManuals
- ServiceBulletins
- OwnerInformation
- CurrentandPastModels
- ORDERTOLLFREE: 1-800-551-4123Monday-Friday 8:00AM-6:00PMEasternTime
- ReportingSafety Defects
- ReportingSafetyDefects totheUnitedStates Government
- ReportingSafetyDefects totheCanadian Government
- ReportingSafetyDefects toGeneralMotors
- VehicleData Recordingand Privacy
- EventDataRecorders
- RadioFrequency Identification(RFID)
- RadioFrequency Statement
- 13-16 Customer Information
- A
- B
- i-2INDEX
- C
- D
- E
- i-4INDEX
- F
- G
- H
- I
- i-6INDEX
- J
- K
- L
- M
- N
- 0
- i-8INDEX
- P
- R
- S
- i-10INDEX
- Seats
- SecuringChild
- Security
- Service
- Maintenance, General
- Service(cont.)
- ShiftLockControlFunction
- Shifting
- Signals, Turnand
- SpareTire
- Specificationsand
- StabiliTrak
- StorageAreas
- System
- T
- U
- i-12INDEX
- V
- W
Brand : Buick
Model : Regal (2011)
Category : Car