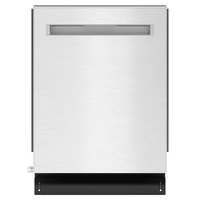
USER MANUAL SDW6726MS SHARP
CUSTOMER ASSISTANCE 2
CONSUMER LIMITED WARRANTY....3
IMPORTANT SAFETY INSTRUCTIONS....4
APPEARANCE OVERVIEW....5
CONTROL PANEL....6
CONVENIENT FEATURES....9

GETTING STARTED....11
DISHWASHER CYCLE OPTIONS ....14
CARE AND CLEANING....16
TROUBLESHOOTING 18
ERROR CODES ......20
REGISTER YOUR PRODUCT
Registering your new product is easy and offers benefits that help you get the most out of your Sharp product including:
√ Convenience: If you ever need warranty support, your product information is already on file.
√ Communication: Stay up to date with important notifications and special offers from SHARP.
√ Support: Quickly access support content including Owner's Manuals, FAQ's, How-to Videos, and much more.
3 EASY WAYS TO REGISTER TODAY!

SCAN
Use the camera or QR code scanning application on your smart phone

ONLINE
Visit our sites to learn more about your product at sharpusa.com and sbl.sharpusa.com

CALL US
US 800-BE-SHARP
800-237-4277
Scan this QR Code on your smart phone Visit http://www.sharpusa.com/register
Contact a Sharp Advisor on the phone
PRODUCT SUPPORT
If you have questions about the setup or operation of your product, please refer to the corresponding section within this manual.
Additionally, visit www.sharpusa.com/support to access exclusive content about your product including:
→ FAQ's and How-To Meos
→ Find or Request Service
→ Purchase an Extended Warranty
→ Downloads including the Installation Guide, Spec Sheet, and Owner's Manual
If at any time you have questions or comments concerning your SHARP product, please contact the SHARP Customer Assistance Center. We are available to assist you through multiple contact methods for your convenience:

EMAIL
Available 24/7
US: sharpusa.com
CHAT ONLINE
Mon-Fri: 7am-7pm CST
Sat-Sun: 9am-7pm CST

CALL US
US 800-BE-SHARP
800-237-4277
See the Contact Us section on our sites U.S. | www.sharpusa.com/support Contact a Sharp Advisor on the phone
SHARP®
CONSUMER LIMITED WARRANTY
SHARP ELECTRONICS CORPORATION ("Sharp") warrants to the first consumer purchaser that this Sharp brand product (the "Product"), when shipped in its original container, will be free from defective workmanship and materials, and agrees that it will, at its option, either repair the defect or replace the defective Product or part thereof with a new or remanufactured equivalent at no charge to the purchaser for parts or labor for the period(s) set forth below.
This warranty does not apply to any cosmetic or appearance items of the Product nor to the additional excluded item(s) set forth below nor to any Product the exterior of which has been damaged or defaced, which has been subjected to misuse, abnormal service, or handling, or which has been altered or modified in design or construction. In order to enforce the rights under this limited warranty, the purchaser should follow the steps set forth below and provide proof of purchase to the servicer.
The limited warranty described herein is in addition to whatever implied warranties may be granted to purchasers by law. ALL IMPLIED WARRANTIES INCLUDING THE WARRANTIES OF MERCHANTABILITY AND FITNESS FOR USE ARE LIMITED TO THE PERIOD(S) FROM THE DATE OF PURCHASE SET FORTH BELOW. Some states do not allow limitations on how long an implied warranty lasts, so the above limitation may not apply to you.
Neither the sales personnel of the seller nor any other person is authorized to make any warranties other than those described herein, or to extend the duration of any warranties beyond the time period described above on behalf of Sharp. The warranties described herein should be the sole and exclusive warranties granted by Sharp and should be the sole and exclusive remedy available to the purchaser. Correction of defects, in the manner and for the period of time described herein, should constitute complete fulfillment of all liabilities and responsibilities of Sharp to the purchaser with respect to the Product, and should constitute full satisfaction of all claims, whether based on contract, negligence, strict liability or otherwise. In no event should Sharp be liable, or in any way responsible, for any damages or defects in the Product which were caused by repairs or attempted repairs performed by anyone other than a Sharp authorized servicer. Nor should Sharp be liable or in any way responsible for any incidental or consequential economic or property damage. Some states do not allow the exclusion of incidental or consequential damages, so the above exclusion may not apply to you.
THIS LIMITED WARRANTY IS VALID ONLY IN THE FIFTY (50) UNITED STATES, THE DISTRICT OF COLUMBIA AND PUERTO RICO.
Your product model number & description
Model # SDW6726MS/SDW6736MS Dishwasher.
(Be sure to have this information available when you need service for your Product.)
Warranty period for this product: One (1) year parts and labor, including in-home service. Five (5) years parts only, racks and electronics controls.
Additional item(s) excluded from warranty coverage:
Commercial, non-residential, or use inconsistent with published installation and product operational instructions.
Service calls to your home to instruct how to use your dishwasher appliance, replace or repair house fuses or to correct house wiring, installation, or maintenance, damage to the product caused by delivery, accident, modifications, fire, floods or acts of God.
What to do to obtain service: In-home service is provided for one (1) year from date of purchase. Service can be arranged by calling 1-800-BE-SHARP. Be sure to have Proof of Purchase, Model, and Serial Number available.
TO OBTAIN SUPPLY, ACCESSORY OR PRODUCT INFORMATION, CALL 1-800-BE-SHARP or visit www.sharpusa.com. SAVE THE PROOF OF PURCHASE AS IT IS NEEDED SHOULD YOUR DISHWASHER EVER REQUIRE WARRANTY SERVICE.
⚠ WARNING For your safety, please follow the information in this manual to minimize the risk of fire, explosion, electric shock, and to help prevent property damage or personal injury.
PROPER INSTALLATION
Please install your dishwasher properly; follow the installation guide.
1 Water supply inlet temperature should be between 120° F and 149° F.
2 Dispose of the discarded appliance and packing material properly.
3 The dishwasher must be properly grounded, or it can result in a risk of electric shock.
4 If there is any damage to the Dishwasher, please contact your Dealer. Do not to attempt to repair or replace any part by yourself.
BASIC PRECAUTION BEFORE USE
The manual does not cover every possible condition and situation that may occur.
1 Read all instructions before using the dishwasher.
2 Use the dishwasher only for intended function as described in this manual.
3 When loading items to be washed:
- Load sharp items and knives so that they are not likely to damage the door seal and tub.
- Load sharp items and knives with the handles up to reduce the risk of injury.
4 Do not wash plastic items unless they are marked dishwasher safe, if not marked, check with manufacturer for recommendation. Items that are not dishwasher safe may melt and create a potential fire hazard.
5 If the dishwasher drains into a food disposer, make sure disposer is completely empty before running dishwasher.
6 Do not tamper with controls.
7 Do not operate your dishwasher unless all enclosure panels are in the proper place.
8 Do not touch the heating element during or immediately after use, especially if the sanitize option has been selected.
9 To reduce the risk of injury, do not allow children to play in or on a dishwasher.
10 Do not let children abuse, sit or stand on door or racks of the dishwasher.
11 Keep young children and infants away from dishwasher when it is in operation.
12 Under certain conditions, hydrogen gas may be produced in a hot water system that has not been used for two weeks or longer. HYDROGEN GAS IS EXPLOSIVE. If the hot water system has not been used for such a period, BEFORE USING DISHWASHER, turn on all hot water faucets and let water run from each for several minutes. This will release any accumulated hydrogen gas. Hydrogen gas is flammable. DO NOT smoke or use an open flame during this time.
13 Do not store or use combustible materials, gasoline or other flammable vapors and liquids in the vicinity of this or any other appliance.
14 Use only detergents or rinse agents recommended for use in a dishwasher and keep them out of the reach of children.
15 Do not use the dishwasher if it has a damaged power line or plug, and do not plug the dishwasher into a damaged outlet. Failure to observe these instructions may result in electric shock.
16 Remove the door to the washing compartment when removing an old dishwasher from service or discarding it.
SAVE THESE INSTRUCTIONS
SPECIFICATION(Model:SDW6726MS)
| Capacity 14 place settings |
| Dimension (W x D x H) | 23 7/8" x 241/2" x 333/4" (606 x 622 x 857 mm) |
| Weight Unpacked 93.3 lb (42.3 kg) |
| Power Supply 120 volts, 60 Hz |
| Rated current 8.4A |
| Rated Power Usage Wash motor 50 W / Heater 840 W |
| Water Feed Pressure 20 ~ 120 psi (138 ~ 828 kPa) |
SPECIFICATION(Model:SDW6736MS)
| Capacity 14 place settings |
| Dimension (W x D x H) | 237/8" x 251/2" x 333/4" (606 x 650 x 857 mm) |
| Weight Unpacked 93.3 lb (42.3 kg) |
| Power Supply 120 volts, 60 Hz |
| Rated current 8.4A |
| Rated Power Usage Wash motor 50 W / Heater 840 W |
| Water Feed Pressure 20 ~ 120 psi (138 ~ 828 kPa) |
![graph LR A["Power"] --> B["Auto"] B --> C["Heavy Duty"] C --> D["Normal"] D --> E["Light"] E --> F["Express Wash"] F --> G["Rinse Only"] G --> H["3"] H --> I["Delay"] I --> J["Cleaned Loss"] J --> K["Wash Zone"] K --> L["Power Wash"] L --> M["Extended Wash"] M --> N["Hi Temp Wash"] N --> O["Heat Dry…](/content/2026/05/944256/images/106544bf5c44b2b03ec83994da83606b8b0fd25c5b626f0766f85a2182ad8369.jpg)
Control Panel is located on the top edge of the door. The door must be opened to make settings and operate the dishwasher.
OPERATIONS & DISPLAYS
1 Power
Turn on/off the power by pressing for 3 seconds.
2 Start/Cancel
- Open the door to select the desired wash cycle; the indicator light will turn ON. Press the START/CANCEL pad and close the door within 4 seconds. The selected program light will begin to blink and the cycle progress indicator in the door panel will turn ON indicating the wash cycle is running. If the door is not closed within 4 seconds of pressing START/CANCEL, the cycle will time out and not start.
- To modify or change a selected running wash cycle, open the door, press the START/CANCEL pad and hold for 3 seconds. The dishwasher will drain the water for 60 seconds and the screen will display "60" after draining has completed. You may select a new cycle at this time.
- If you want to pause the running dishwasher to load more dishes, USE CAUTION and open the door slowly as there is a possibility of injury by hot steam from inside the dishwasher. Check the detergent dispenser to see if it is still closed indicating the main wash cycle has not started; if so, you may add more dishes.
- To achieve the best washing results, it is strongly recommended that all dishes be loaded before washing cycle begins.
3 Display Window
Displays the remaining hours and minutes of the running cycle, delay hours, error codes, etc.
4 Rinse Aid Indicator Light
Illuminates when the dishwasher requires additional rinse aid.
5 Sanitized Indicator Light
If a cycle with the sanitize function is finished, the SANITIZED indicator light turns ON. If the door is opened, it will turn OFF after 30 seconds.
6 Child Lock Indicator Light
You can lock all controls to prevent children from accidentally changing the dishwasher cycle or starting the dishwasher. Press the LIGHT and the EXPRESS WASH pads simultaneously to select or cancel the function. After the function is selected, the corresponding indicator light will turn ON.
WASH CYCLE SELECTIONS
7 Auto
This cycle detects the turbidity degree and loading level of the washing items and automatically selects an optimal wash cycle for best performance.
8 Heavy Duty
This cycle is for hard-to-clean, heavily soiled dishes, pots and pans.
9 Normal
This cycle is for commonly used dishes and silverware with a regular amount of soil with energy and water saving benefits.
10 Light
This cycle is for light to medium soiled china and crystal
11 Express Wash
This cycle is for lightly soiled, pre-rinsed dishes and silverware.
12 Rinse Only
This cycle is for pre-rinsing dishes or glassware. This is only a rinse that keeps food from drying on the dishes and reduces odor buildup in the dishwasher until you are ready to wash a full load. Do not use detergent.
OPTIONS
13 Delay
To delay the start of a selected cycle, press the DELAY pad until the desired delay time shows in the LED display screen. This allows you to automatically start your dishwasher with 1 to 24 hours delay. To cancel the delay start option and begin the cycle before the delay period is over, press the START/CANCEL pad.
14 Wash Zone
Select the rack when you wash the upper or lower rack by pressing Wash Zone. This option is not available to "AUTO" and "RINSE" cycles.
15 Power Wash
Use this option to wash pots, pans, durable serving bowls and other large, heavily soiled or hard-to-clean dishes. To use Power Wash, place the dishes facedown in the lower rack directly above the power wash arm in the back left corner.
16 Extended Wash
For use with heavily soiled and/or dried-on, baked-on soils. This option adds about 30 minutes to the cycle time for Auto, Heavy Duty, Normal and Light. This option must be selected prior to starting the cycle.
17 Hi Temp Wash
When the HI TEMP WASH function is selected, the temperature of the water will be maintained at 140° F (60°C) maximum.
18 Heat Dry
When the HEAT DRY function is selected, the heater will operate during the drying process.
19 Sanitize
To sanitize dishes and glassware, select the Sanitize option. When the SANITIZE function is selected, the temperature of the water will be maintained at 158° F ( 70° C) maximum.
NOTE: It is possible that 158° F ( 70° C) may not be reached, if the temperature of the incoming hot water does not reach the suggested temperature.
STATUS WINDOW
DELAY TIME
If the DELAY option is selected, the number of delay start hours will display in the Status Window.
If the dishwasher is working and the remaining cycle time is more than 1 hour, number of hours and minutes left will be shown alternately in the Status Window. 1 hour is shown as 1H.
CYCLE LIGHT
Flashes once the program has been entered and the START/CANCEL pad is pressed. It also flashes if the door is opened during a wash cycle. Close the dishwasher door to begin or continue a wash cycle.
NOTE
The remaining time may increase or decrease as the Smart Sensor assesses the soil level and adjusts the number of water fills required for the load.
ERROR INDICATION
In certain situations that are critical to the safe function and operation of the dishwasher, the machine will shut down and display an error code. (See Error Codes on page 20.)
If Error Codes are displayed, contact the dealer or servicer. They will be able to provide assistance in troubleshooting the problem or locate an authorized service technician if needed.
CYCLE PROGRESS INDICATOR (Model:SDW6726MS)
The cycle progress lights indicate the progress of the cycle while the dishwasher is running. They are located on the front of the dishwasher panel on the right side of the pocket handle.
| PROCESS INDICATOR | |
| WASHWhen the dishwasher is in a wash or rinse stage of a cycle, the WASH light is illuminated. |  |
| DRYWhen the dishwasher is in a drying stage of a cycle, the WASH and DRY lights are illuminated. |  |
| CLEANAfter the dishwasher has completed all stages of a cycle, all indicator lights are illuminated.If the door is opened when the CLEAN lights are illuminated, all the lights will turn OFF after 30 seconds. |  |
CYCLE PROGRESS INDICATOR (Model:SDW6736MS)
The cycle progress lights indicate the progress of the cycle while the dishwasher is running. They are located on the front of the dishwasher panel on the right side.

| 1.WASH | When the dishwasher is in a wash or rinse stage of a cycle, the WASH light is illuminated. |
| 2.DRY | When the dishwasher is in a drying stage of a cycle, the WASH and DRY lights are illuminated. |
| 3.CLEAN | After the dishwasher has completed all stages of a cycle, all indicator lights are illuminated.If the door is opened when the CLEAN lights are illuminated, all the lights will turn OFF after 30 seconds. |
ADJUSTABLE THIRD RACK
The Third Rack is provided for cutlery or other accessories. You can slide the right shelf over the left shelf when additional space is needed on the Upper Rack.
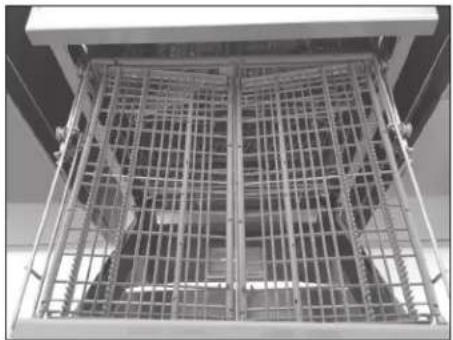

The Upper Rack height can be raised or lowered to accommodate loading taller dishes in either rack. The Upper Rack clearance height H1 goes from 8" to 10". The Lower Rack clearance height H2 is 11" to 13".

To adjust the Upper Rack position, lift the Adjustment Arms on both sides of the rack and pull up or push down the rack.

⚠️ Height should be adjusted without dishes in the racks.
CONVENIENT FEATURES
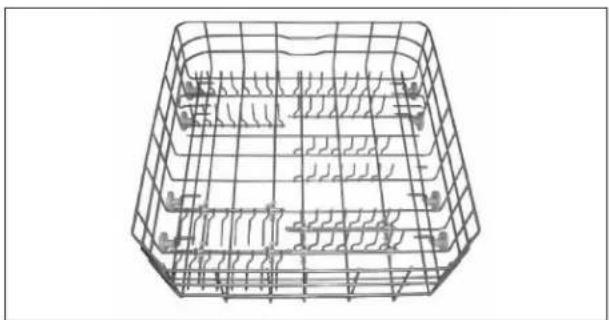
FOLDABLE TINES
The upper and lower racks include flexible tines that can be folded down to create more space for dishes. The tines may be left in the up position for normal use, or folded down for more flexible loading.
TO FOLD TINES DOWN
Grasp the tip of the tine, gently pull the tine out of the tine holder and rotate the tine to the side.
• Upper Rack - Push the tines to the center of the rack.
- Lower Rack - Push the tines to the back of the rack.
TO STAND TINES UPRIGHT
Grasp and pull the tine until it is vertical and/or you feel it click into place. Verify the tines are secure before loading.
• Upper Rack - Push the tines to the right-hand side of the rack.
- Lower Rack - Push the tines to the front of the rack.
SMART WASH SYSTEM
Your dishwasher has Smart Wash System. This system can determine the type of cycle required to clean the dishes in the load with maximum efficiency. When a partial load of lightly soiled dishes is placed in the unit, a wash cycle similar to a short wash will automatically be performed. When a full load of heavily soiled dishes is placed in the unit, a heavy wash cycle will automatically be performed.
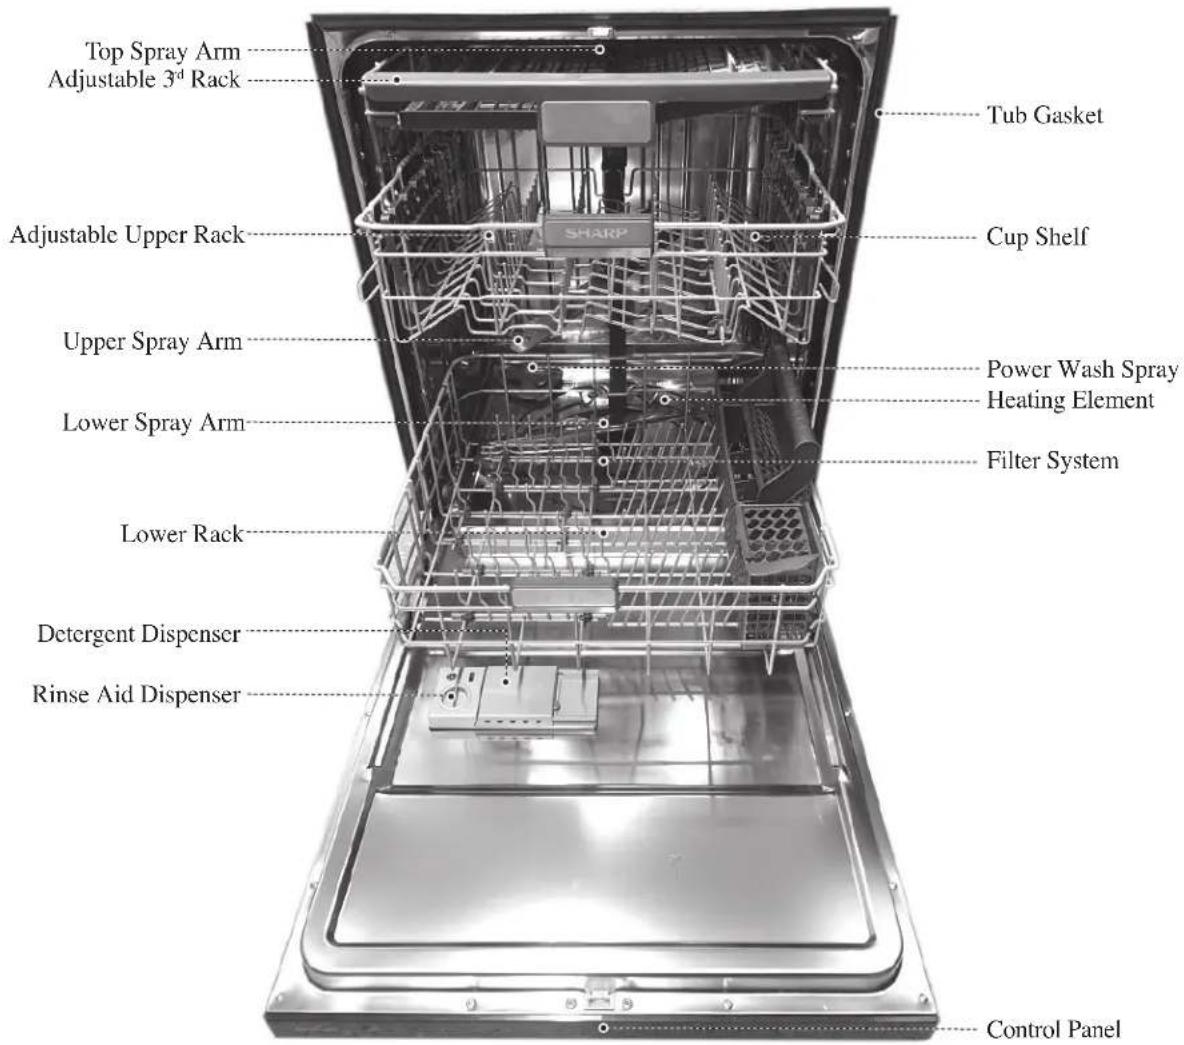
POWER WASH SPRAY
Your dishwasher is equipped with Power Wash spray in addition to the upper spray arm and the lower spray arm. It is located in the back left corner, and effectively washes heavy soiled pots and pans.
FILTER SYSTEM
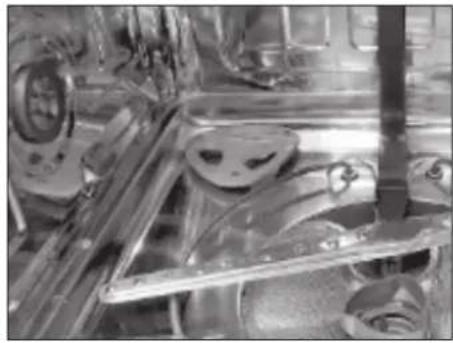
Your dishwasher has a multiple filter system. In this system there are four mesh filters that can separate soiled water and clean water into different chambers. The multiple filter system helps your dishwasher achieve better performance using less water and energy.

HOW YOUR DISHWASHER CLEANS
Your dishwasher cleans by spraying a mixture of hot water and detergent through the spray arms against soiled surfaces.
The dishwasher fills with water, covering the filter area. Water is then pumped through the multiple filter system and spray arms. Separated soil particles go down the drain as the water is pumped out and replaced with clean water.
The number of water fills will vary with the cycle being used.
BASIC OPERATIONS
1 Load dishwasher. (See preparing and loading dishes.)
2 Add detergent. (See fill detergent dispenser.)
3 Add rinse aid if needed. (See fill rinse aid dispenser.)
4 Select desired CYCLE. (See cycle chart.) The indicator light above the pad will turn on when selected.
5 Select desired OPTIONS. The indicator light above the pad will glow when selected.
6 To start, press the START/CANCEL pad.
7 Close the door within 4 seconds to begin the cycle.
Your dishwasher has the top control panel.
Your selections will only be activated when the door is firmly closed.
NOTE
The dishwasher is programmed to remember your last cycle so you do not have to reset each time. To start the dishwasher using the same cycle and options selected on the previous wash, simply press the START/CANCEL pad.
DISH PREPARATION
Scrape away large pieces of food, bones, pits, toothpicks, etc. The continuous filtered wash system will remove the remaining food particles. Burned-on foods should be loosened before loading. Empty liquids from glasses and cups.
Foods such as mustard, mayonnaise, vinegar, lemon juice and tomato-based products may cause discoloration of stainless steel and plastics if allowed to sit for a long period of time. If not operating the dishwasher immediately, it is best to rinse off dishes soiled with these types of foods.
If the dishwasher drains into a food disposer, be sure disposer is completely empty before starting dishwasher.

LOADING THE UPPER RACK
The Upper Rack is designed for cups, glasses, small plates, bowls and plastic items marked dishwasher safe.
For best results, place bowls, cups, glasses and sauce pans with soiled surfaces facing down or toward the center. Tilt slightly for better drainage.

Make sure the loaded dishes do not interfere with the rotation of the upper spray arm that is located at the bottom of the Upper Rack. (Check this by rotating the upper spray arm by hand.)

14 Place Settings
LOADING THE LOWER RACK
The Lower Rack is designed to load plates, soup bowls, saucers and cookware. The elevated Upper Rack space will allow you to load dishes that are a maximum of 13" in height.

Large items should be placed along the edge so they do not interfere with the upper spray arm rotation or prevent the detergent dispenser from opening. Large items should be turned over so that the inside faces downward so they do not interfere with the lower spray arm rotation.

14 Place Settings
LOADING THE THIRD RACK
The Third Rack can be used to load cutlery or other accessories such as spatulas or cooking spoons. Silverware, knives and utensils should be loaded in the third rack separate from each other in the appropriate positions so they do not nest together.
NOTES
- Do not load silver or silver-plated silverware with stainless steel. These metals can be damaged by contact with each other during washing.
- Some foods (such as salt, vinegar, milk products, fruit juices, etc.) can pit or corrode silverware. DO NOT WASH ALUMINUM COOKWARE IN YOUR DISHWASHER.

LOADING THE SILVERWARE BASKET
The silverware basket consists of three separate sections. For optimum loading flexibility, the center section of the basket can be used individually, joined with one or both side sections or removed.
- Lift handle to remove the silverware basket and set the basket on a counter or table top.
- Lift up on each side section to disengage the center section from the keyhole slots in the side sections.
- Either load silverware into the basket sections while they are in the Lower Rack, or while they are sitting on a countertop before replacing into the Lower Rack.

The three separated modules of the silverware basket can be used in both Upper and Lower Racks..
1 Spoons
3 Salad forks
5 Large spoons
2 Knives
4 Forks
6 Large forks


- Do not let any item extend through bottom.
- Be sure nothing protrudes through bottom of the silverware basket or rack that could block the lower spray arm.
• Always load sharp items (knives, skewers, etc.) pointing down.
FOR BEST RESULTS:
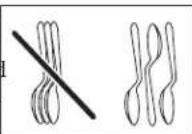
- To avoid injury, load utensils such as knives and skewers with handles pointing up and sharp metal edges pointing down. Items such as forks and spoons may be loaded with handles pointing up or down, using separators to prevent the edges of the silverware from nesting.
- Place small items such as baby bottle caps, jar lids, corncob holders, etc. in the basket sections with hinged covers. Close the covers to hold small items in place.
- Unload or remove the baskets before unloading the racks to avoid water drops from falling on the silverware.
- When handles are up, mix items in each section of the baskets with some pointing up and some down to avoid nesting. Spray cannot reach nested items.
ADDING A DISH
To add or remove items after wash cycle starts:
1 Open door slightly and wait a few seconds until wash action stops before completely opening.
2 Add the item.
3 Press the START/CANCEL pad, then close the door latch firmly within 4 seconds, the cycle will automatically resume. If the door is not closed within 4 seconds after pressing START/CANCEL, the cycle will time out and not start.
CAUTION TO AVOID BURN INJURY: Slightly open door and wait until spray arms and wash action stop. Hot steam may exit the dishwasher or hot water may splash out of it. Failure to USE CAUTION may result in injury.
FILLING THE RINSE AID
Rinse aid greatly improves drying and reduces water spots and filming. Without rinse aid, your dishes and dishwasher interior will have excessive moisture. The Heat Dry option will not perform as well without rinse aid. The Rinse Aid Dispenser, located next to the detergent dispenser, automatically releases a measured amount of rinse aid during the final rinse.
If spotting and poor drying are a problem, increase the amount of rinse aid dispensed by rotating the dial to a higher number. The dial is located under the dispenser cap.
If the rinse aid is low, the rinse aid light is illuminated at the beginning and end of the cycle indicating that it is time to refill.
FILLING THE RINSE AID DISPENSER

Your dishwasher is designed to use a liquid rinse aid. The use of rinse aid greatly improves drying performance after the final rinse. Do not use a solid or bar-type rinse aid. Under normal conditions, the rinse aid will last approximately one month. Try to keep the reservoir full, but do not overfill.
1 Open the door, turn the dispenser cap to the left and lift it out.

2 Add rinse agent up to the maximum indicator level.

3 You can adjust the amount of the rinse aid released during the rinse operation; a higher number indicates a larger amount of rinse aid released.

4 Replace the dispenser cap.

FILLING THE DETERGENT DISPENSER
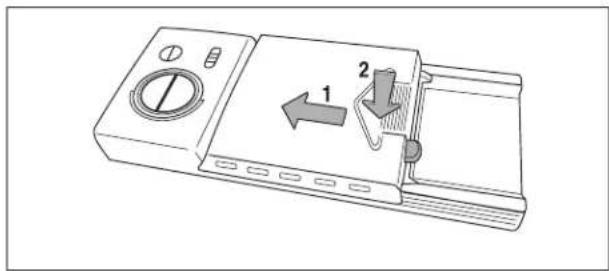
1 Push the dispenser cover latch downward and open it.

2 Add the detergent to the main wash compartment.

3 Close the dispenser cover.
CYCLE CHART
| PROGRAM DESCRIPTION OF CYCLE | DETERGENT - OZ (G) (PRE-WASH/MAIN WASH) | WATER - GAL (L) CYCLE TIME (MIN.) |
| AUTO | Pre-Wash | CU: 0.53/0.53 (15/15) Others: 0/0.70 (0/19.8) | 3.0~5.9(11.4~22.5) | 100~133 |
| Auto 118.4 - 125.6°F (48 - 52°C) |
| Rinse 136.4 - 156.2°F (58 - 69°C) |
| Drying |
| HEAVY DUTY | Pre-Wash | 0 / 0.70 (0/19.8) | 6.9(26.2) | 138 |
| Pre-Wash |
| Wash 131.0°F (55°C) |
| Rinse |
| Rinse |
| Rinse |
| Rinse 148.0-156.2°F (65 ~69°C) |
| Drying |
| NORMAL | Pre-Wash | AHAM、NSF: 0.70 (19.8) CU: 0.53/0.53 (15/15) DOE: 0/0.35 (0/9.9) | 3.0~5.9(11.4~22.5) | 102~120 |
| Auto 104.0-125.6°F (40-52°C) |
| Rinse 136.4-156.2°F (58-69°C) |
| Drying |
| LIGHT | Pre-Wash | 0/0.70 (0/19.8) | 5.0(18.8) | 106 |
| Wash 118.4°F (48°C) |
| Rinse 136.4°F (58°C) |
| Drying |
| EXPRESS WASH | Pre-Wash 104.0°F (40°C) | 0/0.70 (0/19.8) | 4.0(15.1) | 60 |
| Wash 131.0°F (55°C) |
| Rinse 131.0°F (55°C) |
| Rinse 136.4-156.2°F(58-69°C) |
| Drying |
| RINSE ONLY | Rinse Only | 0 | 2.0(7.7) | 20 |
CYCLE TIME WITH OPTIONS
| PROGRAM DESCRIPTION OF CYCLE | CYCLE TIME W/O OPTIONS | WASH ZONE | POWER WASH | HI TEMP WASH | SANITIZE | HEAT DRY | EXTENDED WASH |
| MINUTES |
| AUTO | Pre-Wash | 100~133 | N.A. N.A. | | 147~177 | 154~177 139~172 | | 150 |
| Wash 118 - 126°F (48 - 52°C) |
| Rinse 136°F (58°C) |
| Drying |
| HEAVY DUTY | Pre-Wash | 138 | 172 | 177 | 182 | 185 | 177 | 150 |
| Pre-Wash |
| Wash 131°F (55°C) |
| Rinse |
| Rinse |
| Rinse |
| Rinse 144°F (62°C) |
| Drying |
| NORMAL | Pre-Wash | 102~120 | 136~155 | 139~159 | 145~161 | 153~167 | 147~159 | 150 |
| Auto 108 - 126°F (42 - 52°C) |
| Rinse 136 - 144°F (58 - 62°C) |
| Drying |
| LIGHT | Pre-Wash | 106 | 129 | 132 | 136 | 144 | 130 | 150 |
| Wash 118°F (48°C) |
| Rinse |
| Rinse |
| Rinse 136°F (58°C) |
| Drying |
| EXPRESS WASH | Pre-Wash 104°F (40°C) | 60 | 126 | 126 | N.A. | N.A. | 126 | N.A. |
| Wash 131°F (55°C) |
| Rinse 131°F (55°C) |
| Rinse 136°F (58°C) |
| Drying |
| RINSE | Rinse Only | 20 | N.A. | N.A. | N.A. | N.A. | N.A. | N.A. |
WASH CYCLE SELECTIONS
Cycle times are approximate and will vary with options selected. Hot water is necessary to activate dishwasher detergent and melt fatty food soils. An automatic sensor will check the incoming water temperature, and, if it is not hot enough, the timer will be delayed for automatic water heating in the main wash of all cycles. This happens even when HI-TEMP WASH is selected as an even higher temperature will be guaranteed to handle heavier soil loads.
CARE AND CLEANING
CLEANING THE EXTERIOR DOOR AND PANEL
1 Stainless steel panel - Clean the stainless steel door and handle regularly to remove any debris with a soft cleaning cloth.
Do not use appliance wax, polish, bleach or products containing chlorine to clean the stainless steel door.
2 Control panel - Gently clean the control panel with a lightly dampened cloth.
CLEAN THE STAINLESS STEEL INNER DOOR AND TUB
The tub is made of stainless steel; it will not rust or corrode if the dishwasher is scratched or dented.

Clean any spots on the steel inner door and tub with a damp, nonabrasive cloth.
CLEAN THE CYLINDER FILTER
The Cylinder Filter is designed to collect some big items such as broken glass, bones and pits. The Cylinder Filter needs to be cleaned to maximize wash performance.
Remove the Lower Rack, rotate the Cylinder Filter as shown and lift out the filter. Empty and clean it by holding it under running water and place it back into position.

Clean any spots on the steel inner door and tub with a damp, nonabrasive cloth.
WARNING
BURN HAZARD
Allow heating element to cool before cleaning the interior. Failure to do so can result in burns.


CLEAN THE FINE FILTER
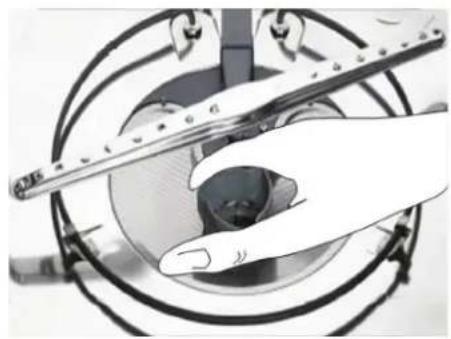
Take out the Cylinder Filter and remove the Fine Filter from the dishwasher tub bottom. To remove the Fine Filter, you must first remove the bottom spray arm as shown below.
Flush the Fine Filter by holding it under running water and place it back into position.


Clean the door gasket with a damp cloth regularly to remove food particles.

INSIDE
The inside of the dishwasher is self-cleaning with normal use. If needed, clean the tub gasket with a damp cloth and use a brush similar to the one shown below to clean the opening in the end of the gasket.

AIR GAP
If there is an air gap installed with your dishwasher, make sure it is clean, so the dishwasher will drain properly.
Air gap is not part of your dishwasher. Before cleaning the air gap, first turn off the dishwasher, then lift off the cover. Remove the plastic cap and clean with a toothpick.
PROTECT AGAINST FREEZING
Your dishwasher should be properly protected from freezing when left in an unheated place. Have a qualified technician perform the steps listed below in this section.
To Disconnect Service:
1 Turn off electrical power to the dishwasher at the supply source by moving fuses or tripping the circuit breaker.
2 Turn off the water supply.
3 Place a pan under the inlet valve. Disconnect water line from inlet valve and drain into pan.
4 Disconnect drain line from pump and drain water into pan.
To Restore Service:
1 Reconnect the water, drain and electrical power supply.
2 Turn on water and electrical power supply.
3 Fill both detergent cups and run dishwasher through a heated wash cycle.
4 Check connections to make sure they do not leak.
BEFORE CALLING FOR SERVICE
| PROBLEM POSSIBLE CAUSE SOLUTION | |
| Dishwasher won't start | Door may not be closed properly Ensure the door is properly closed |
| Power supply or power line is not connected Ensure power supply is correctly connected |
| Delay Start option has been selected Refer to delay start section in this manual to reset |
| Child lock activated (selected models) Refer to child lock section in this manual to deactivate the child lock |
| Dishwasher beeps at the end of the cycle | Indicates the wash cycle is finished, the dishwasher will beep | |
| Rinse aid light is on The rinse aid level is low Add rinse aid | |
| Dishwasher operates too long | The dishwasher is connected to cold water Check the dishwasher, make sure it is connected to the hot water supply |
| The cycle time will vary depending on the soil level of the dishes | When heavy soil is detected, the Auto and Normal cycles will automatically increase the cycle time |
| The sanitize option is selected When Sanitize option is selected, the cycle time will be increased to meet the sanitize temperature requirement |
| Dishes are not clean enough | Water pressure is temporarily low Use dishwasher when the water pressure is normal |
| The inlet water is low Make sure the dishwasher is connected to the hot water supplyTry not to use the dishwasher when hot water is being used elsewhere in the house |
| Dishes are loaded too close together | Load the dishes again as the manual indicates |
| Improper use of detergent | Using fresh detergent, add the correct amount depending on the water hardness and the selected cycle |
| The selected cycle is not suitable for food soil condition | Choose another cycle for longer washing time |
| Spray arms are blocked by items | Make sure the spray arm is rotated fully |
| Dishes are not dry enough | Detergent dispenser is empty | Fill rinse aid dispenser or increase the amount of rinse aid |
| Improper loading of dishes | Load the dishes again as the manual indicates |
| The selected cycle did not include drying | Choose the proper cycle with drying |
| Spots and filming on dishes | Water hardness is too high | For extremely hard water, install a water softener |
| Improper loading of dishes | Load the dishes again as the manual indicates |
| Old or damp powder rinse aid is used | Use fresh rinse aid |
| Rinse aid dispenser empty | Add rinse aid to the dispenser |
| Etching | Use of too much detergent | Use less detergent if you have soft water etching |
| The inlet water temperature exceeds 150°F | Lower the inlet water temperature |
| Detergent left in dispenser cup | Detergent may be too old | Use fresh detergent |
| Spray arm is blocked | Load the dishes, making sure the spray arms are not blocked |
| Detergent dispenser will not close | Improper operation of the detergent cover | Add the detergent and rinse aid as indicated by the manual |
| Water remains in the dishwasher | Previous cycle has not finished or has been interrupted | Select the proper cycle as indicated by the manual |
| Dishwasher does not drain properly | Drain is clogged Check the air gap if it is installed | Make sure the disposer is empty if the dishwasher is connected to the disposer |
| Drain hose is kinked Be sure the drain hose is properly connected to the sink |
| Suds in the tub Improper detergent is used Be sure to use only the automatic dishwasher detergent |
|
|
| Dishwasher leaks Dishwasher is not level Level the dishwasher (see the installation manual) |
| Black or gray marks on dishes | Aluminum utensils have rubbed against dishes Choose a higher cycleMake sure the inlet water temperature is no less than 120°F |
| Stained tub interior | Coffee and tea soil Use a spot cleaner to remove the soil |
| Reddish stain Some tomato-based foods will cause this. Use of the rinse only cycle right after loading this will decrease the staining |
| Noise | Detergent cup opening / drain pump sound This is normal |
| A hard object has entered the wash module.When the object is ground up, the sound should stop | If the noise persists after a complete cycle, call for service |
| Dishwasher won't fill | Water valve is shut off | Make sure water valve is open |
| Door latch may not be properly seated | Make sure the door is closed |
| Bad odor in dishwasher tub | Drain Hose connected to sink drain between sink trap and the wall | Be sure the Drain Hose is connected to the sink between the sink and the sink trap |
When some malfunctions occur, the appliance will display error codes to warn you:
| CODES MEANINGS POSSIBLE CAUSES | |
| E1 | • Longer inlet time | • Faucet is not opened, or water intake is restricted, or water pressure is too low |
| • Improper or Incomplete Draining | • Drain Hose is extended more than 10 ft from Dishwasher• Drain Hose is not properly looped underneath sink, or not installed with Air Gap• Drain Hose is kinked, compressed, or otherwise damaged• Wrong Drain Hose used (use only supplied Sharp Dishwasher Drain Hose) |
| E4 Overflow Some element of dishwasher leaks | |
| E8 Failure of orientation of distributary valve Open circuit or break of distributary valve | |
| E9 | Holding a button for longer than 30 seconds | Water or some other material on the button |
WARNING
- If overflow occurs, turn off the main water supply before calling for service.
- If there is water in the base pan because of an overfill or small leak, the water should be removed before restarting the dishwasher.
INCORRECT CORRECT - METHOD 1

AIR GAP WITH WASTE TEE OR DISPOSER

Waste Tee Installation

Disposer Installation
INCORRECT CORRECT - METHOD 2

HIGH DRAIN LOOP WITH WASTE TEE OR DISPOSER

Waste Tee Installation

Disposer Installation