
Levitt 59436 - Ceiling fan Casablanca - Free user manual and instructions
Find the device manual for free Levitt 59436 Casablanca in PDF.


| Product Type | Ceiling Fan |
| Brand | Casablanca |
| Model | Levitt 59436 |
| Mounting Options | Standard Downrod (included), Low-Profile, Angled Mounting Kit (sold separately for angles >34°) |
| Recommended Ceiling Height | At least 7 ft from floor to blade bottom |
| Blade Clearance | At least 30 in from blade tip to nearest wall or obstruction |
| Fan Weight Support | Compatible with outlet boxes rated for up to 70 lbs |
| Power Supply | 120 V AC, 60 Hz |
| Speed Control | Multi-speed with wall control (included) |
| Light Kit | LED integrated, dimmable |
| Reverse Function | Yes, for updraft/downdraft |
| Remote Control | Wall control included (battery-powered, 2 AAA) |
| Wiring Options | Single switch or dual switch compatible |
| Safety Certifications | UL 507, FCC Part 15 compliant |
| Installation Tools Required | Screwdrivers, pliers, wire strippers, power drill (optional), 9/64" drill bit (optional) |
| Maintenance | Clean with soft brush or cloth; avoid harsh chemicals |
| Spare Parts | Use only Casablanca replacement parts |
| Warranty | Refer to manual or contact Casablanca |
Frequently Asked Questions - Levitt 59436 Casablanca
User questions about Levitt 59436 Casablanca
0 question about this device. Answer the ones you know or ask your own.
Ask a new question about this device
Download the instructions for your Ceiling fan in PDF format for free! Find your manual Levitt 59436 - Casablanca and take your electronic device back in hand. On this page are published all the documents necessary for the use of your device. Levitt 59436 by Casablanca.
USER MANUAL Levitt 59436 Casablanca
What to Expect with Your Installation

Tools Needed
Mounting Options

Ceiling Bracket

Downrod
Wiring

Canopy
Blade

Light Kit

Wall Control

Maintenance & Cleaning

Troubleshooting

M8549-01·08/16/18·©2018 Casablanca Fan Company
What to Expect with Your Installation
www.CasablancaFanCo.com
1.888.227.2178
natural_image
Simple line drawing of a mechanical component with no text or symbols
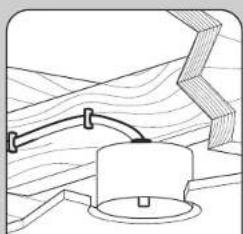
Must be able to
secure the fan to
building structure or
fan-rated outlet box
If you are unfamiliar with wiring, use a qualified electrician.


Know your wiring
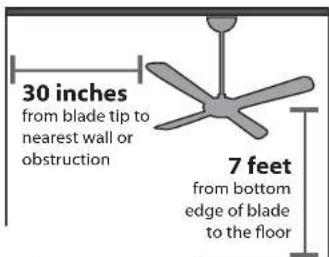

Assess location
Read and Save These Instructions
This product conforms to UL Standard 507
WARNINGS
w.1 - To reduce the risk of fire, electrical shock, or personal injury, mount fan directly from building structure and/or an outlet box marked acceptable for fan support of 70 lbs (31.8 kg) and use the mounting screws provided with the outlet box.
w.2 - To avoid possible electrical shock, before installing or servicing your fan, disconnect the power by turning off the circuit breakers to the outlet box and associated wall switch location. If you cannot lock the circuit breakers in the off position, securely fasten a prominent warning device, such as a tag, to the service panel.
w.3 - To reduce the risk of fire, electrical shock, or motor damage, use only Hunter Solid State Speed Controls.
w.4 - To reduce the risk of personal injury, do not bend the blade brackets when installing the blade brackets, balancing the blades, or cleaning the fan. Do not insert foreign objects in between rotating fan blades.
CAUTIONS
You may need a friend to help you.


Check box to see
fan weight

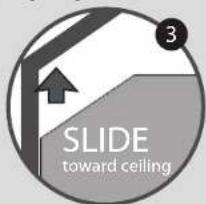
Ceiling angles greater than 34° will require an Angled Mounting Kit. See page 4 for details.

Assess ceiling angle

Standard Downrod

Longer Downrod
for angled ceilings or high ceilings

Select a downrod length
c.1 - All wiring must be in accordance with national and local electrical codes ANSI/NFPA 70. If you are unfamiliar with wiring, use a qualified electrician.
c.2 - Use only Casablanca replacement parts.
This equipment has been tested and found to comply with the limits for a Class B digital device, pursuant to part 15 of the FCC Rules. These limits are designed to provide reasonable protection against harmful interference in a residential installation. This equipment generates, uses and can radiate radio frequency energy and if not installed and used in accordance with the instructions may cause harmful interference to radio communications. However, there is no guarantee that interference will not occur in a particular installation. If this equipment does cause harmful interference to radio or television reception, which can be determined by turning the equipment off and on, the user is encouraged to try to correct the interference by one or more of the following measures:
• Reorient or relocate the receiving antenna.
- Increase the separation between the equipment and receiver.
- Connect the equipment into an outlet on a circuit different from that to
which the receiver is connected.
- Consult the dealer or an experienced radio/TV technician for help.
Caution: modifications not approved by the party responsible for compliance could void user's authority to operate the equipment.
This device complies with Part 15 of the FCC Rules. Operation is subject to the following two conditions: (1) This device may not cause harmful interference, and (2) this device must accept any interference received, including interference that may cause undesired operation.

M8549-01·08/16/18·© 2018 Casablanca Fan Company
Tools Needed
www.CasablancaFanCo.com
1.888.227.2178

natural_image
Simple line drawing of a ladder with a checkmark label (no text or symbols on the ladder itself)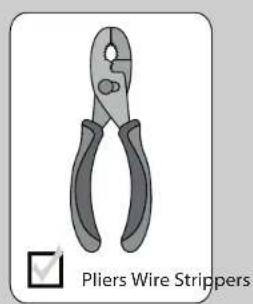
natural_image
Illustration of a pair of pliers with a handle, labeled 'Pliers Wire Strippers' below (no other text or symbols)
natural_image
Illustration of a pair of metal pliers with a checkmark below (no text or symbols on the pliers themselves)


natural_image
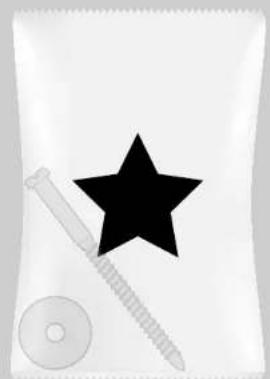
Illustration of a padlock with a black star, screwdriver, and washer (no text or symbols)Do not discard the hardware bags or mix parts from different bags. Make note of the symbol printed on each hardware bag. The symbols can be used to identify the appropriate hardware for each step.
If mounting to a support structure, you will also need these tools.

M8549-01·08/16/18·© 2018 Casablanca Fan Company

CEILING
If you have a flat ceiling:
Hang your fan by a standard downrod (included).

OPTION 1
If you have an angled ceiling:
- You will need a longer downrod (sold separately).
- If your ceiling angle is greater than 34°, you will also need an Angled Mounting Kit (sold separately).

OPTION 2
Use the three steps below to determine if your ceiling angle is greater than 34°




Mounting Options
www.CasablancaFanCo.com
1.888.227.2178

Use Standard Mounting or Low-Profile Mounting to hang the fan from a flat ceiling.

Use Angled Mounting
to hang the fan from a
vaulted or angled ceiling.

M8549-01·08/16/18·© 2018 Casablanca Fan Company
Ceiling Bracket
www.CasablancaFanCo.com
1.888.227.2178
natural_image
Technical illustration of a screw and a washer (no text or symbols)
natural_image
Illustration of a skull and jawbone with magnified views of the jaw (no text or symbols)Make sure all four bumpers are still attached.

If you are unable to do this, call Technical Support at 1-888-277-2178.

natural_image
Technical diagram of a mechanical assembly with screw fasteners and a tool (no text or labels)Use wood screws
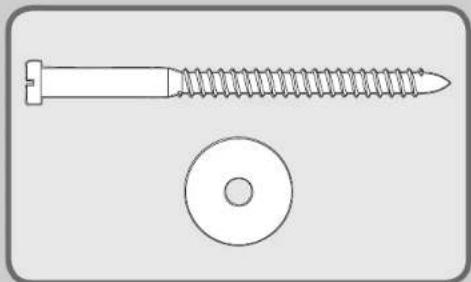
(included) when securing to support structure with approved electrical outlet box. Drill 9/64" pilot holes in support structure to aid in securing ceiling bracket with hardware found in the ★ hardware bag.
Use machine screws
(provided with outlet box) when securing to existing ceiling fan-rated outlet box. Make sure It is securely installed and is acceptable for fan support of 31.8 kg (70 lbs) or less.

natural_image
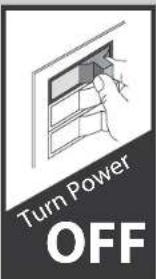
Diagram of a mechanical assembly with a thumbs-up icon (no text or labels)To avoid possible electrical shock, before installing your fan, disconnect the power by turning off the circuit breakers to the outlet box associated with the wall switch location.
Refer to warning w.1 on pg. 2


M8549-01·08/16/18·©2018 Casablanca Fan Company
3 Downrod
www.CasablancaFanCo.com
1.888.227.2178
Option 1Op

Option 2
Longer Downrod for angled ceilings or high ceilings
skip to next page
If you need a different downrod length follow these steps:

flowchart
graph TD
    A["Step 1: 2345"] --> B["Step 2: Slide"]
    B --> C["Step 3: Slide"]
    C --> D["Step 4: Slide"]
    D --> E["Step 5: Slide"]
    E --> F["Step 6: Slide"]
    F --> G["Step 7: Slide"]
    G --> H["Step 8: Slide"]
    H --> I["Step 9: Slide"]
    I --> J["Step 10: Slide"]
    style A fill:#f9f,stroke:#333
    style B fill:#ccf,stroke:#333
    style C fill:#cfc,stroke:#333
    style D fill:#fcc,stroke:#333
    style E fill:#cff,stroke:#333
    style F fill:#ffc,stroke:#333
    style G fill:#cfc,stroke:#333
    style H fill:#fcc,stroke:#333
    style I fill:#cfc,stroke:#333
    style J fill:#fcc,stroke:#333


M8549-01·08/16/18·©2018 Casablanca Fan Company
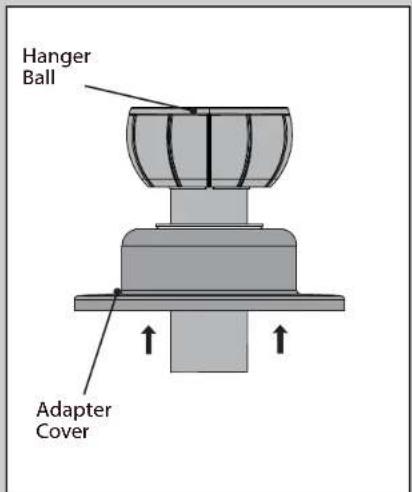
Slide the adapter cover onto the downrod until it rests against the hanger ball.

Remove the pre-installed setscrew so that the downrod can be inserted.

natural_image
Mechanical assembly diagram showing a base with a central component and a curved spring (no text or symbols)Hand tighten the downrod (at least 4-5 full turns) until it stops.

M8549-01·08/16/18·©2018 Casablanca Fan Company
Downrod (continued)
www.CasablancaFanCo.com
1.888.227.2178

The wires can be cut, but leave at least 8" extending from the top of the downrod.

natural_image
Illustration of a hand using pliers to adjust a screw on a workbench, with an inset showing the same tool (no text or symbols present)Tighten the setscrew with pliers. DO NOT HAND TIGHTEN.
natural_image
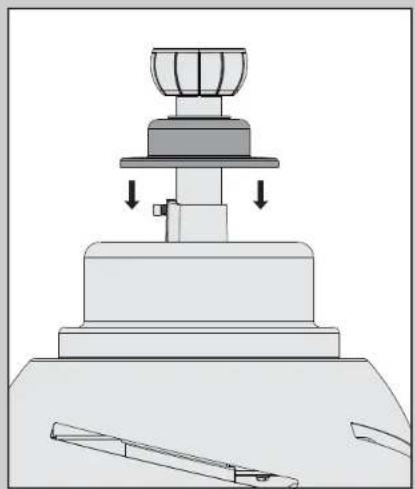
Mechanical assembly diagram showing a base platform with a conical top and two downward arrows indicating motion or force (no text or symbols present)Lower the adapter cover until it rests flush against the motor housing.

If the setscrew is not tightened securely, the fan may fall.

M8549-01·08/16/18·©2018 Casablanca Fan Company
Downrod (continued)
www.CasablancaFanCo.com
1.888.227.2178

natural_image
Diagram of a steaming bowl with three handles, emitting steam from a downward arrow (no text or symbols)Put the wires and downrod through the canopy. Let the canopy sit loosely on top of the fan.

natural_image
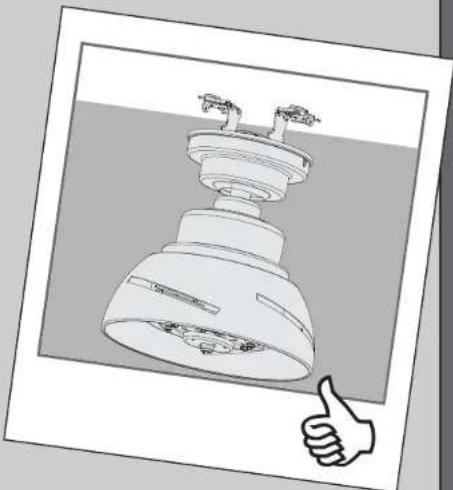
Diagram of a toilet with a pipe outlet and fan base, showing airflow direction (no text or labels)DO NOT PICK THE FAN UP BY THE CANOPY OR WIRES. Place the downrod ball into the slot in the ceiling bracket.
natural_image
Illustration of a ceiling lamp with a hand giving a thumbs-up gesture (no text or symbols)
M8549-01·08/16/18·©2018 Casablanca Fan Company
Wiring: Single Switch
www.CasablancaFanCo.com
1.888.227.2178

Wiring: Dual Switch
www.CasablancaFanCo.com
1.888.227.2178

Have dual switches?
Follow these steps:
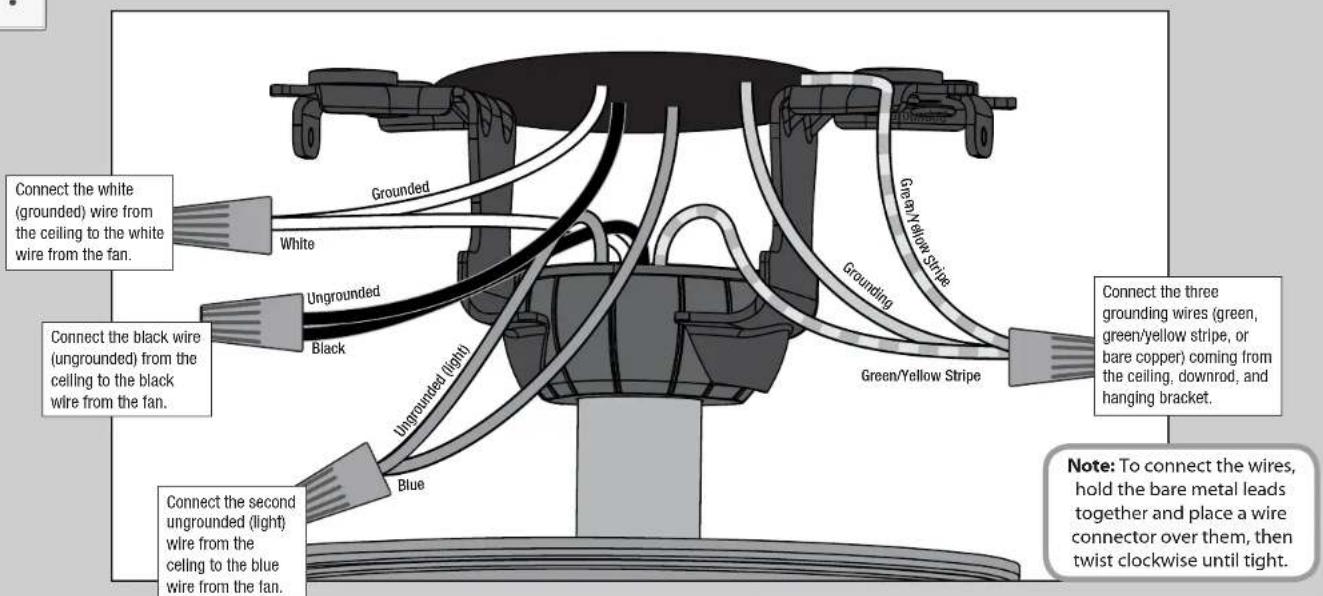
Refer to CAUTION c.1 on pg. 2
Turn the splices upward and push them carefully back through the hanger bracket into the outlet box. Spread the wires apart, with the grounded wires on one side of the outlet box and the ungrounded wires on the other side of the outlet box.

M8549-01·08/16/18·©2018 Casablanca Fan Company
Canopy
www.CasablancaFanCo.com
1.888.227.2178
natural_image
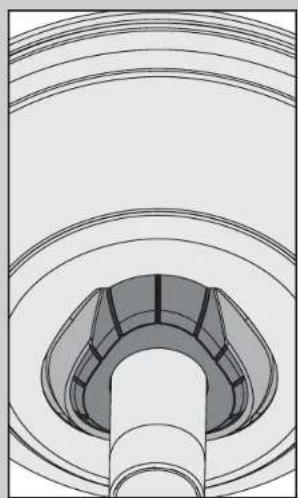
Technical line drawing of a mechanical component with concentric circular layers and a central cylindrical shaft (no text or symbols)Position the canopy so that, when lifted into place, the canopy fits into the hanging bracket as shown.

Lift the canopy into place so that the screw holes are aligned.

natural_image
Technical line drawing of a mechanical assembly with a screw and base mount (no text or symbols)Insert the two canopy screws found in the ● hardware bag.

natural_image
Line drawing of a ceiling lamp with internal components and a thumbs-up gesture (no text or symbols)
M8549-01·08/16/18·©2018 Casablanca Fan Company
Blades
www.CasablancaFanCo.com
1.888.227.2178


natural_image
Illustration of a ceiling fan with internal components and a thumbs-up gesture (no text or symbols)
M8549-01·08/16/18·©2018 Casablanca Fan Company


natural_image
Technical line drawing of a mechanical component with concentric rings and mounting holes, labeled 'CASABLANCA' (no other text or symbols)Feed the two single-pin connectors through the center hole of the upper switch housing, then wrap the keyhole slots around the screws and twist counterclockwise.

natural_image
Technical line drawing of a mechanical component with no visible text or symbolsInsert the third screw, found in the ≡ hardware bag, into place and then tighten all three screws.
Make sure the upper switch housing is securely attached to the mounting plate. Failure to properly secure all 3 assembly screws could result in the switch housing fixture falling.

M8549-01·08/16/18·©2018 Casablanca Fan Company

natural_image
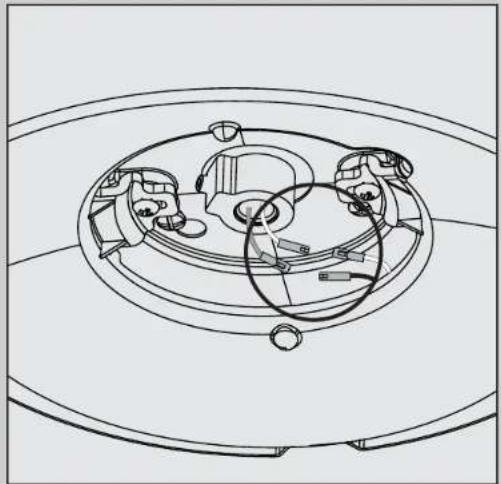
Technical line drawing of a mechanical component with no visible text or symbolsConnect the single-pin connectors from the LED assembly to the connectors from the fan. Connect the white wires together. Connect the blue and black wires together. Tuck the excess wiring above the LED assembly.

natural_image
Technical line drawing of a circular mechanical component with concentric rings and mounting holes (no text or symbols)Raise cap to the LED assembly. Align the notches on the sides of the cap with the screw holes in the LED assembly.

Install the two light kit assembly screws which can be found in the hardware bag.
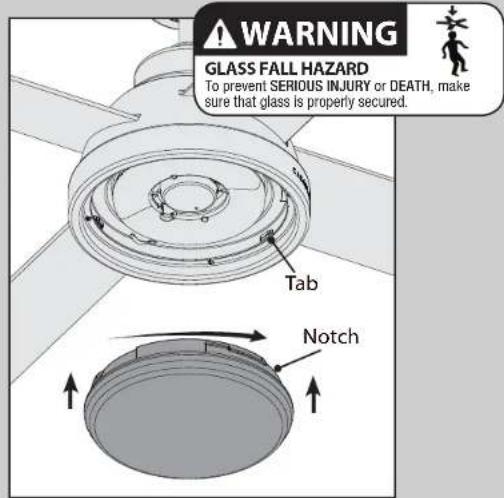
Position the notches in the outer rim of the globe so they line up with the three tabs on the inside rim of the housing. Carefully lift the globe up inside the housing as far as it will go, then rotate the globe clockwise until it is held tightly in place by the tabs. NOTE: Check to ensure proper engagement

See next page for fan operation instructions.


M8549-01·08/16/18·©2018 Casablanca Fan Company

Wall Control For Single Switch
www.CasablancaFanCo.com
1.888.227.2178

If you have a dual switch setup, go to page 18 for dual switch installation instructions.
7
Turning off the power
Ensure the power is OFF at the outlet box and wall switch location before proceeding with installation.

2
Installing the battery
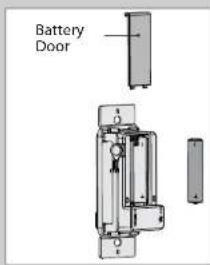
To access the battery compartment, slide the battery door up.
Replace the used battery with two AAA batteries when needed.
This device complies with Part 15 of the FCC Rules. Operation is subject to the following conditions: (1) this device may not cause harmful interference, and (2) this device must accept any interference received, Including Interference that may cause undesired operation.
3
Installing the Wall Plate Bracket Snap the Wall Control into the Wall Plate Bracket.

4
Wiring the Wall Control
- Connect the grounding wire from the wall control to the ground control from the switch box using the provided wire nuts.
- Connect the "LIVE IN" from the switch box to the "\~VAC" from the wall control using the provided wire nuts.
- Connect the "LIVE OUT" from the switch box to the "FAN" out from the wall control using the provided wire nuts.
- Push all wires into the switch box.

natural_image
Technical diagram showing a device with wiring and a separate panel labeled VAC, no readable text or symbols present.
M8549-01·08/16/18·© 2018 Casablanca Fan Company

Wall Control For Single Switch
www.CasablancaFanCo.com
1.888.227.2178
5
Installing the Wall Control
Install the longer screws through the slots in the wall control into the switch box screw holes.

natural_image
Interior view of a mobile phone module with keypad and indicator lights (no visible text or labels)6
Installing the Wall Plate
Push the wall plate onto the Wall Plate Bracket. It should snap into place.

natural_image
Technical illustration of a door panel and its internal component (no text or symbols)7
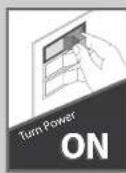
Turn on the power.
IMPORTANT

8
Reference the included remote function card for information on how to use your wall control!

M8549-01·08/16/18·© 2018 Casablanca Fan Company

Wall Control For Dual Switches
www.CasablancaFanCo.com
1.888.227.2178
To install the Casablanca Wall Control into a dual switch location, you will need a wall plate with both a standard switch and rocker switch cut-out (sold separately).
If you are unfamiliar or uncomfortable with wiring, please contact a qualified electrician.

(Sold Separately)
1 Installing the battery
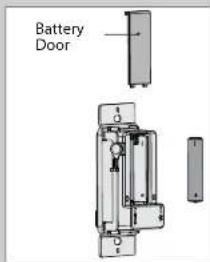
To access the battery compartment, slide the battery door up.
Replace the used battery with two AAA batteries when needed.
2 Verify which switch controls the fan light.
- Turn on power for the fan.
- Push both existing wall switches to the on position.
- Press the Fan and Light button on the Casablanca Wall Control.
- Your fan's light and fan should be on.
- Push each of your existing wall switches into the off position one at a time to determine which switch controls the Light.
- The Light switch will not be replaced when installing the Casablanca Wall Control. You may find it helpful to mark the Light switch with a pencil or some other non-permanent mark.
IMPORTANT
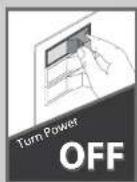
3 Turn off the power
Ensure the power is OFF at the outlet box and wall switch location before proceeding with installation.


M8549 01 · 08/16/18 · © 2018 Casablanca Fan Company

Wall Control For Dual Switches
www.CasablancaFanCo.com
1.888.227.2178
4 Remove the existing wall plate
Remove the existing wall plate.
Save the screws. You will need them for the existing, marked light switch.
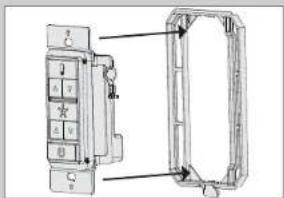
5 Remove the Casablanca Wall Control frame. Remove the frame from the Casablanca Wall Control. You will not need it for the dual switch installation process.
6 Wiring the Casablanca Wall Control
- Connect the grounding wire from the wall control to the ground control from the switch box using the provided wire nuts.
- Connect the "LIVE IN" from the switch box to the "-VAC" from the wall control using the provided wire nuts.
- Connect the "LIVE OUT" from the switch box to the "FAN" out from the wall control using the provided wire nuts.
- Push all wires into the switch box.


natural_image
Technical diagram showing a battery pack and its internal components with wiring (no text or symbols)7 Install the Wall Plate
Install the wall plate that fits your setup (sold separately).
- Use the screws you saved to reinstall into the light switch.
- Use the screws included

natural_image
Pure electrical circuit lines without any symbols8 Installation complete
The existing light switch still controls the light on/off.

9 Turn on the power ▲IMPORTANT
10 Reference the included remote function card for information on how to use your wall control!


M8549-01·08/16/18·©2018 Casablanca Fan Company
Wall Control
www.CasablancaFanCo.com
1.888.227.2178

KEY PRESS KEY PRESS
FUNCTION FUNCTION
LIGHT FUNCTIONS FAN FUNCTIONS
Long
Press
Long
Press
Long
Press


Light On/Off
Light Dimming
Control
Light High
Light Low
Dimming Mode
On/Off

Long
Press
Long
Press


Fan On/Off
Fan Speed
Control
Fan High
Fan Low
Long
Press
Long
Press
Long
Press



Fan Reverse
Fan Updraft
Fan Downdraft
Power On/Off

Long
Press
Long
Press


Pair Function
Reset
(For WiFi enabled fans ONLY)

M8549-01·08/16/18·©2018 Casablanca Fan Company

Be sure to turn off power to the fan before performing any maintenance.

natural_image
Line drawing of a ceiling fan with a hand adjusting the blade (no text or symbols)Cleaning the fan - use soft brushes or cloths to prevent scratching. Cleaning products may damage the finishes.

M8549-01·08/16/18·©2018 Casablanca Fan Company
Troubleshooting
www.CasablancaFanCo.com
1.888.227.2178
Fan doesn't work
- Press a fan speed button (up or down arrow.
- Check the circuit breaker to ensure the power is turned on.
- Check the wall control battery.
• Make sure the blades spin freely. - Turn off power from the circuit breaker, then loosen the canopy and check all the connections according to the wiring diagram on pages 10, 11, and 16.
Excessive wobbling
- Turn the power off, support the fan carefully, and check that the hanger ball is properly seated.
- Use the provided balancing kit and instructions to balance the fan.
Fan keeps spinning after power is turned off
- The blades may take a few minutes to come to a complete stop. The powerful Casablanca motor combined with the unique blade design on this fan allows for great air movement, but this may cause the blades to keep spinning for longer than expected after power is turned off.
Remote does not work
• Make sure the battery is installed correctly.
• Install a new battery.
- If the remote still does not work, you may need to pair your remote. To prevent faulty operation, please disconnect power (at the wall switch, breaker, or fan) from all other ceiling fans within range while pairing. To pair: cycle power to the fan by turning power off and back on at the wall switch (or circuit breaker if necessary). Within three minutes, press and hold both the Fan and Light button for four seconds to pair the remote. If applicable, the fan will turn on and the lights will flash and stay on to indicate successful pairing.
LED lights will not dim
• To enable dimming, you must first set your remote to Dimming Mode. To toggle Dimming Mode on or off, long press the up and down button together.
AUTHORIZED SERVICE CENTERS
For the most updated list of Casablanca Authorized Service Centers, visit www.CasablancaFanCo.com or call toll free 1-888-227-2178.

M8549 01 · 08/16/18 · © 2018 Casablanca Fan Company
Installing Multiple Fans with Independently Operating Remote Controls

natural_image
Three identical line drawings of a double-decker airship with visible blades and mounting base (no text or symbols)To install multiple fans with independently operating remote controls, there is no need to perform any pairing procedures. Each set of receiver/transmitter is already paired. Simply Install each receiver into a fan and use the appropriate transmitter to operate each fan.
If your remote is not working, see the "Remote does not work" section on the previous page.
Installing Multiple Fans Operating on a Single Remote Control

natural_image
Three identical diagrams of a ceiling fan with three blades and a dotted line indicating alignment or alignment (no text or symbols)To have multiple fans operated by a single remote control, you must pair the transmitter to each additional receiver. The receiver that shipped with your fan is already paired to the transmitter.
Note: To prevent faulty operation, you MUST disconnect power (at the wall switch, breaker, or fan) from all other ceiling fans within range while pairing each fan.
For each additional fan, ensure that a compatible receiver is installed. Disconnect power from all other fans while pairing. To pair cycle power to the fan by turning power off and back on at the wall switch (or circuit breaker if necessary). Within three minutes, press and hold both the Fan and Light button for four seconds to pair/unpair the remote. If applicable, the fan will turn on and the lights will flash and stay on to indicate successful pairing.
Installing One Fan Operating on Multiple Remote Controls

natural_image
Diagram of a fan with three blades and dotted connection lines, no text or symbols presentTo have multiple remote controls operate one fan, you must pair each additional transmitter to the receiver in the fan. The transmitter that shipped with your fan is already paired.
Note: To prevent faulty operation, please disconnect power (at the wall switch, breaker, or fan) from all other ceiling fans within range while pairing.
For each additional transmitter, cycle power to the fan by turning power off and back on at the wall switch (or circuit breaker if necessary). Within three minutes, press and hold both the Fan and Light button for four seconds to pair the remote. If applicable, the fan will turn on and the lights will flash and stay on to indicate successful pairing.
"Unpairing" Procedure for Faulty Operation of Remote Controls

natural_image
Two identical fan diagrams with propellers and a dotted line indicating alignment or connection (no text or symbols)If a transmitter is mistakenly operating a fan, you need to "unpair" the transmitter from that fan's receiver. The "unpairing" procedure is the same as the pairing procedure.
Note: To prevent faulty operation, you MUST disconnect power (at the wall switch, breaker, or fan) from all other ceiling fans within range while "unpairing" a fan.
Disconnect power from all other fans while "unpairing." Then, cycle power to the fan you wish to "unpair" by turning power off and back on at the wall switch (or circuit breaker if necessary). Within three minutes, press and hold both the Fan and Light button button for four seconds to "unpair" the remote. If applicable, the fan will turn off and the lights will flash and turn off to indicate successful "unpairing."

M8549-01·08/16/18·©2018 Casablanca Fan Company
- What to Expect with Your Installation
- Read and Save These Instructions
- WARNINGS
- CAUTIONS
- Standard Downrod
- Longer Downrod
- Tools Needed
- If you have a flat ceiling:
- If you have an angled ceiling:
- Mounting Options
- www.CasablancaFanCo.com
- Ceiling Bracket
- Downrod (continued)
- Wiring: Single Switch
- Wiring: Dual Switch
- Canopy
- Blades
- Wall Control For Single Switch
- 7
- 2
- 3
- 4
- 5
- Installing the Wall Control
- 6
- Installing the Wall Plate
- 8
- Wall Control For Dual Switches
- To install the Casablanca Wall Control into a dual switch location, you will need a wall plate with both a standard switch and rocker switch cut-out (sold separately).
- Installing the battery
- Verify which switch controls the fan light.
- IMPORTANT
- Turn off the power
- Wall Control
- KEY PRESS KEY PRESS
- FUNCTION FUNCTION
- LIGHT FUNCTIONS FAN FUNCTIONS
- Troubleshooting
- Fan doesn't work
- Excessive wobbling
- Fan keeps spinning after power is turned off
- Remote does not work
- LED lights will not dim
- AUTHORIZED SERVICE CENTERS
- Note: To prevent faulty operation, you MUST disconnect power (at the wall switch, breaker, or fan) from all other ceiling fans within range while pairing each fan.
- Note: To prevent faulty operation, please disconnect power (at the wall switch, breaker, or fan) from all other ceiling fans within range while pairing.
- Note: To prevent faulty operation, you MUST disconnect power (at the wall switch, breaker, or fan) from all other ceiling fans within range while "unpairing" a fan.
Brand : Casablanca
Model : Levitt 59436
Category : Ceiling fan