
VIMCF-93C - Microwave CRUX - Free user manual and instructions
Find the device manual for free VIMCF-93C CRUX in PDF.


User questions about VIMCF-93C CRUX
0 question about this device. Answer the ones you know or ask your own.
Ask a new question about this device
Download the instructions for your Microwave in PDF format for free! Find your manual VIMCF-93C - CRUX and take your electronic device back in hand. On this page are published all the documents necessary for the use of your device. VIMCF-93C by CRUX.
USER MANUAL VIMCF-93C CRUX
We recommend reading this installation guide first before starting any work. Following these instructions from "Start" to "Finish" will ensure a smooth and hassle free installation. We offer telephone support M-F 9:00 AM - 5:00PM PDT at 1 (855) 822-1348. We are here to help.
PARTS INCLUDED:
(1) CF-93C Interface
(1) CF-93C T-Harness
(1) Instruction
PRECAUTIONS:
- Remove the negative side of the battery to avoid any short circuits during the installation.
- Do not install the interface near any major components or near the HVAC system. This may cause damage or overheating to the vehicle. - Do not disconnect the airbag connection behind the radio panel.
PRELIMINARY:
Please read the entire manual before installing this interface.
SAFETY WARNING:
THIS INTERFACE IS DESIGNED TO ACTIVATE VIDEO IN-MOTION TO ALLOW THE PASSENER ACCESS TO THE ADDRESS INPUT WHILE THE VEHICLE IS IN-MOTION. THIS INTERFACE MAY CAUSE AN ERROR WHEN SERVICED AT THE OEM DEALER. BE AWARE THAT MOST DEALERS WILL ATTEMPT TO VOID THE MANUFACTURERS WARANTY WHEN INSTALLING ANY AFTERMARKET EQUIPMENT. IMPROPER USE OF THIS INTERFACE BY THE DRIVER MAY RESULT IN CITATION. DRIVER MUST KEEP FULL ATTENTION ON THE ROAD AND RESPOSIBILITY ON THE SAFETY OF HIS PASSENGERS.
INSTALLING THE INTERFACE:
- Remove the factory display to gain access to the factory connectors.
- Remove the 52 Pin connector from behind the display.
- Make the T-Harness connections behind the factory display.
if the connectors do not match please contact tech support. - Set dip switch "1" to permanently activate the VIM feature
- Test the Navigation address input while the car is in-motion to verify the VIM is active.
INSTALLATION OVERVIEW

flowchart
graph TD
    A["8.4" DISPLAYS"] --> B["TO FACTORY DISPLAY"]
    B --> C["52-PIN (male plug)"]
    C --> D["8-PIN (male plug)"]
    D --> E["52-PIN (female plug)"]
    E --> F["TO FACTORY HARNESS"]
    G["TO ENABLE VIDEO IN-MOTION"] --> H["1. On = Enable VIM\n2. Not Used\n3. Not Used\n4. Not Used\n5. Not Used\n6. Not Used"]
    H --> I["ON 1 2 3 4 5 6"]
    I --> J["ON 7 8 9 10"]
    J --> K["8-PIN (male plug)"]
SETTING THE DIP SWITCHES
- No video display while driving.
- Make sure the dip swithces are in the proper location.

VIMCF-93C

DODGE
2014 - 2015 Durango
RAM
2013-2015 1500
2013 - 2015 2500
2013 - 2015 3500
JEEP
2014 - 2015 Grand Cherokee
IMPORTANT:
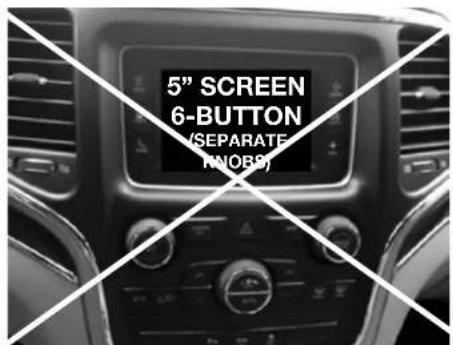
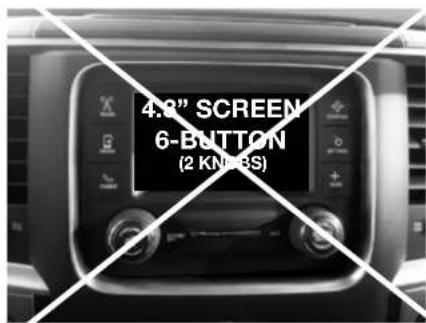
Compatible Nav Radio Type:
U-CONNECT 8.4" SCREEN (1-Piece)
VIDEO IN-MOTION FOR DODGE, JEEP & RAM VEHICLES 2013-UP
COMPATIBLE RADIOS:


Rev. 012015
Brand : CRUX
Model : VIMCF-93C
Category : Microwave