
PELTDV1029 - Portable DVD Player Proscan - Free user manual and instructions
Find the device manual for free PELTDV1029 Proscan in PDF.


| Product Type | Portable DVD Player |
| Brand | Proscan |
| Model | PELTDV1029 |
| Screen Size | 10.1 inches |
| Display Resolution | 1024 x 600 pixels |
| Supported Discs | DVD, DVD±R/RW, CD, CD-R/RW |
| Media Playback | USB, SD/MMC card |
| Video Output | AV out (composite) |
| Audio Output | Headphone jack, built-in speakers |
| Battery Type | Rechargeable lithium-ion |
| Battery Life | Up to 3 hours |
| Power Supply | DC 9V, 2A (AC adapter included) |
| Dimensions (WxDxH) | 10.2 x 7.5 x 1.8 inches |
| Weight | 2.2 lbs (1.0 kg) |
| Region Code | 1 (North America) or multi-region |
| Care & Cleaning | Wipe with dry soft cloth; avoid liquids |
| Safety | Do not disassemble; keep away from moisture |
| Spare Parts & Repairability | Battery, remote control, and AC adapter available |
| General Information | Comes with remote control and car adapter |
Frequently Asked Questions - PELTDV1029 Proscan
User questions about PELTDV1029 Proscan
0 question about this device. Answer the ones you know or ask your own.
Ask a new question about this device
Download the instructions for your Portable DVD Player in PDF format for free! Find your manual PELTDV1029 - Proscan and take your electronic device back in hand. On this page are published all the documents necessary for the use of your device. PELTDV1029 by Proscan.
USER MANUAL PELTDV1029 Proscan
USER'S MANUAL

This product has been manufactured and sold under the responsibility of CURTIS INTERNATIONAL LTD. PROSCAN, and the PROSCAN logo are trademarks used under license by CURTIS INTERNATIONAL LTD.
- further information at www.proscan-brand.com.
All other products, services, companies, trademarks, trade or product names and logos referenced herein are the property of their respective owners.
Table Of Contents
Safety Precaution 01
Package 04
Main Features 04
Overview 05
Charge the Battery 06
Start the device 06
DVD Playback 08
Camera Function 10
Wi-Fi Connection 11
Bluetooth connection 12
Screen Cast Connection 13
Text Input 14
Transfer files between tablet and PC 14
Battery Use 15
Specifications 16
Trouble shooting 16
Reset Your Tablet to Factory Default 18
LIMITED PRODUCT WARRANTY 24
Safety Precaution

The light flash with arrowhead symbol, within an equilateral triangle, is intended to alert the user to the presence of uninsulated "dangerous voltage" within product's enclosure that may be of sufficient magnitude to constitute a risk of electric shock.

The exclamation point within an equilateral triangle is intended to alert the user to the presence of important operation and servicing instructions in the literature accompanying the appliance.
Caution---use of controls or adjustments or performance of procedures other than those specified herein may result in hazardous radiation exposure.
Warning: To reduce the risk of fire or electric shock, do not expose this apparatus to rain or moisture.
1) Please read the instruction manual carefully and follow all the requirements of safe operation to operate the device.
2) Do not use or leave the device in direct sunlight or a hot environment such as a vehicle etc. Overheating can damage the device.
3) There's a rechargeable battery built inside the device. If the device is not used for long, it may occur no charging indication when power up. Under this circumstance, please keep power connected and wait for about 5\~10 minutes. You're advised to charge the battery every 3 months to keep the device in good condition.
4) Do not overcharge the device, do not leave the device on the charger for very long after the battery has been fully charged.
5) Device should be protected from any physical impact or damage and care should be taken not to drop the device.
6) Only use the factory supplied charger. The use of unapproved charger or cable may cause the battery to fail, explode and/or damage the device.
7) Do not disassemble, puncture, crush or expose your device to temperatures above 40^ C / 104^ F.
8) Keep your device away from fire or water.
9) Keep your device from moisture and extreme temperatures.
10) Should your battery swell or expand, please immediately discontinue use of your device. A probable cause is it having been overheated at some point or overcharged. Please contact us for support.
11) Do not install near any heat sources such as radiators, heat registers, stoves, or other apparatus (including amplifiers) that produce heat.
12) Unplug this unit during lightning storms or when unused for long time.
13) About Cleaning: Unplug the system, use only wet cloth to clean. Do not use liquid detergent or aerosol.
14) Refer all servicing to qualified service personnel, servicing is required when the unit has been damaged in any way, such as power supply cord or plug is damaged, liquid has been spilled or objects have fallen into the unit, exposed to moisture, does not operate normally. Don't try to repair the device by yourself because of the danger of high voltage and electric shock.
15) Do not use irregular shaped discs such as heart or star-shaped discs as they may cause the unit to malfunction.
16) This device is not compatible with Blue-ray disc while playing DVD.
17) BD type disc not supported.
18) While playing DVD, in wireless connection, there's a slight audio lag less than 5 seconds. This is normal and design related.
19) It is recommended that volume level of your earphones should be adjusted to an appropriate level to avoid damages to your hearings due to high volume. (earphone not included)
20) Do not cut off the power abruptly during software update, software download, or during this device is in operation, to avoid data loss and system error.
21) Wi-Fi connection could be affected by related wireless equipments and networks in each specific location and situation, please try with patience.
22) Any wireless equipment will influence the flight of an airplane, please consult the airline company if you want to use this device on the airplane.
23) For data safety, please back up important data on a timely manner.
24) The unit can not be physically connected to a TV using a USB Cable to HDMI cable for displaying content.
* As constant improvement, UI display may vary slightly.

This product is not a toy. To use only under adult supervision.
This device complies with Part 15 of the FCC Rules. Operation is subject to the following two conditions: (1) This device may not cause harmful interference, and (2) This device must accept any interference received, including interference that may cause undesired operation.
The device has been evaluated to meet general RF exposure requirement. The device can be used in portable exposure cond.
Warning: Changes or modifications to this unit not expressly approved by the party responsible for compliance could void the user's authority to operate the equipment.
NOTE: This equipment has been tested and found to comply with the limits for a Class B digital device, pursuant to Part 15 of the FCC Rules. These limits are designed to provide reasonable protection against harmful interference in a residential installation. This equipment generates, uses and can radiate radio frequency energy and, if not installed and used in accordance with the instructions, may cause harmful interference to radio communications.
However, there is no guarantee that interference will not occur in a particular installation. If this equipment does cause harmful interference to radio or television reception, which can be determined by turning the equipment off and on, the user is encouraged to try to correct the interference by one or more of the following measures:
Reorient or relocate the receiving antenna.
Increase the separation between the equipment and receiver.
Connect the equipment into an outlet on a circuit different from that to which the receiver is connected.
Consult the dealer or an experienced radio/TV technician for help.
Package
| DVD Player with tablet combo | 1 |
| Car adapter | 1 |
| AC/DC adapter | 1 |
| USB cable (cable length: 100cm) | 1 |
| User manual | 1 |
Main Features
* 10.1" panel of 800X1280 resolution
* Built-in rechargeable Lithium-ion battery
* Built-in two HIFI speakers
* Support playback CD/CD-R/CD-RW/DVD/DVD-R/DVD+R/DVD-RW/VCD/MP3
Note: This unit is NOT compatible with Blu-ray.
* Android™ 11 (Go edition), Quad core MT8168, Arm Cortex-A53 @2.0GHZ,Wi-Fi: 802.11b/g/n
* Built-in internal memory of 32GB
* Support Wireless connection (Tablet mode)
* Touch control functions
* Stand on back plate
* 2MP front camera
Overview
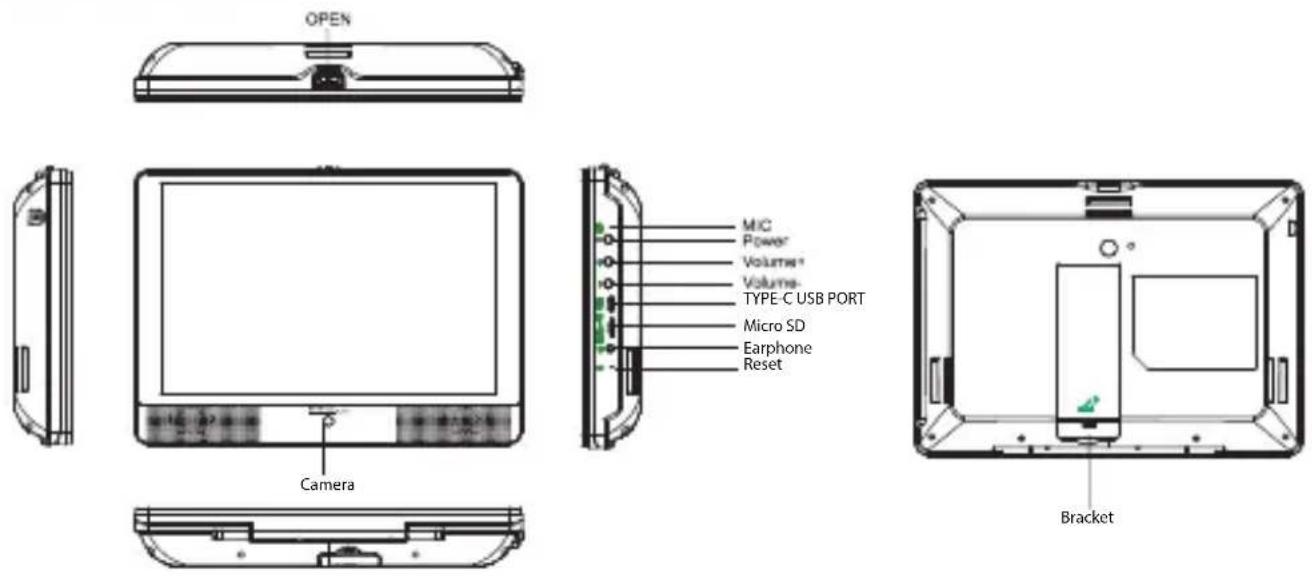
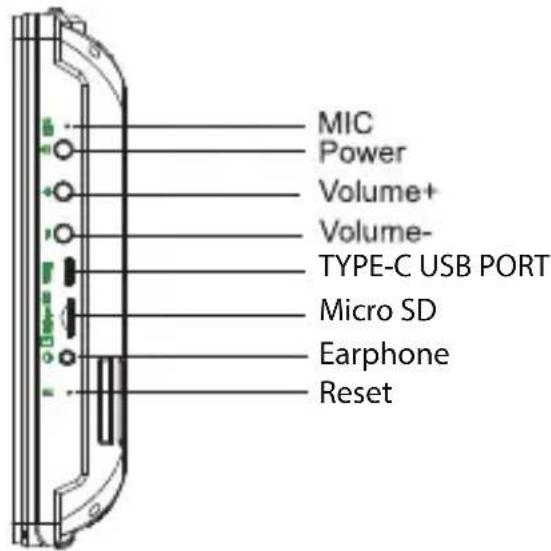
OPEN(▼): Press it to open the unit and put the disc on the loading tray.
MIC: To record if recording function turned on.
Power button ⏻
Long press Ⓧ 2-3 seconds, screen will light up and pictures will show up until the interface page.
Long press Ⓧ 2-3 seconds, it will show Power off, Restart, Screenshot, choose Power off to turn off the unit; choose Restart to restart the unit; choose Screenshot to make a screenshot.
Volume +/-
Press +/- to adjust volume.
TYPE-C USB port: For both power supply input and connecting with PC(For the latter, after connecting the USB cable with PC, select Settings-> Connected Devices->USB ->Use USB for File Transfer.)
Micro SD(Micro SD slot): to insert a micro SD per instruction.
Earphone jack: To connect external earphone.
Reset: To restart the system if abnormal situation happens and the device can't be turned off. Use a thin object(like the end of a paper clip) to press Reset, the device will be reset and the device turns off. Then press Ⓧ2-3 seconds to restart.
Camera: 2 Million pixel, for camera use.
Bracket: Pull it out to put the device on the table.
Basic Operation
1. Charge the battery
Note: Charge the device before using it the first time
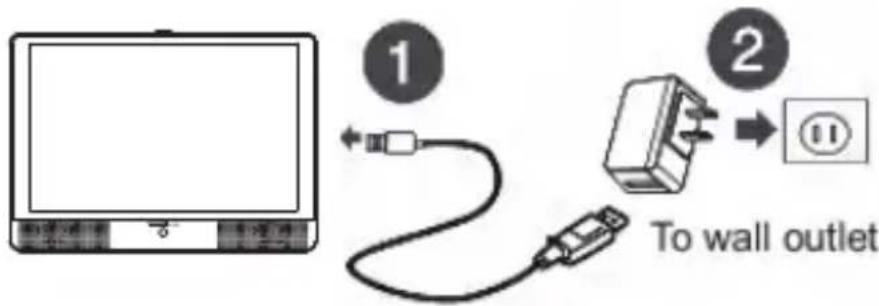
a) Connect the USB cable to the device.
b) Connect the other end of the USB cable to the USB power adapter (wall charger), then plug the adapter into a power outlet. It takes about 5 hours to fully charge the device. The device can be charged while it's using as well.
Caution: Use only the included power adapter to charge the battery.
An incompatible adapter may cause damage.
2. Start the device
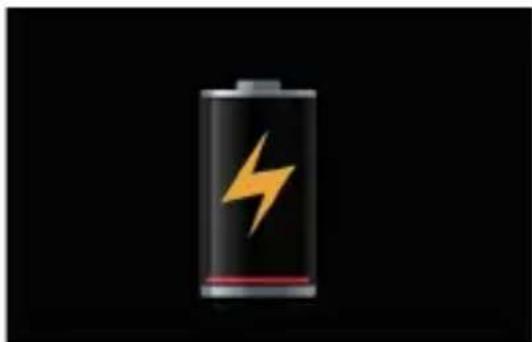
a) After connecting the power adapter, screen will light up and show battery charging icon for about 5 seconds, then screen will turn off, press power button once, the unit will light up again. If screen does not light up, please charge and wait for about 5 minutes. If still no response, please call after sales service for help.
natural_image
Battery icon with a yellow lightning bolt symbol on its surface, set against a black background (no text or numbers)b) Keep pressing power button for 2-3 seconds, screen will light up, the first boot will take about 5-10 minutes, please be patient.
c) After boost, Android user wizard will appear, you are required to do some setup, or you can skip it.
d) Turn on the device, you will see the main page which has a lot of app icons. or swipe up to go to app page where all the pre-installed apps can be found.
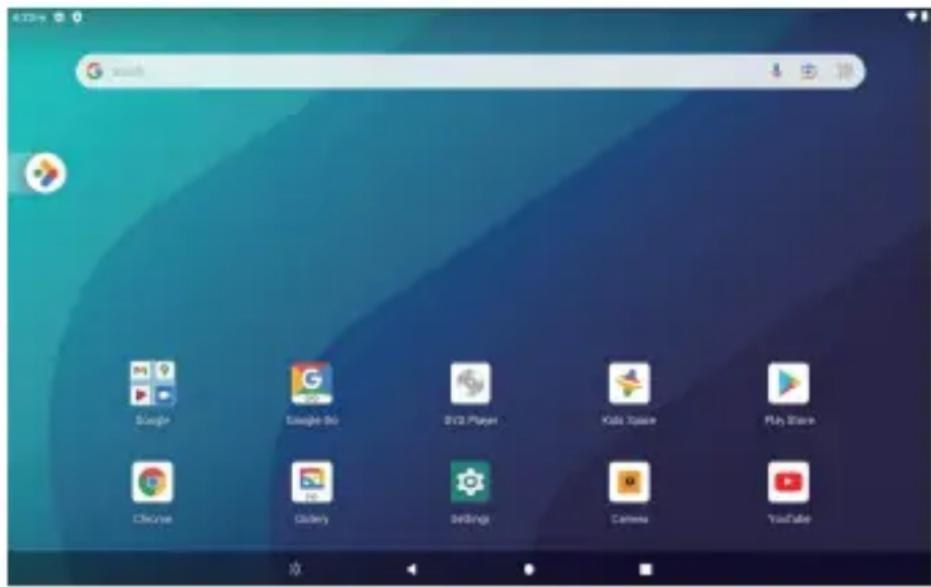
No matter what you're looking for, Google Play has it all. Get your music, movies, TV, books, magazines, apps and games all in one place.
e) Function buttons at the bottom of the interface.

natural_image
Pure graphical toolbar with four basic icons: asterisk, left-pointing triangle, circle, and square (no text or symbols)
: Touch it to enter Walmart App.

: Touch it to back to last step or quit the current app.

: Touch it to go to the main page at once.

: Touch it to show recent app list.
If you want to close recent apps, touch ■ to show recent items, wipe it up to close the corresponding item. If you want to close all recent used items, please slide right, "CLEAR ALL" will show up at the left, then touch it, the system will close all recent items.
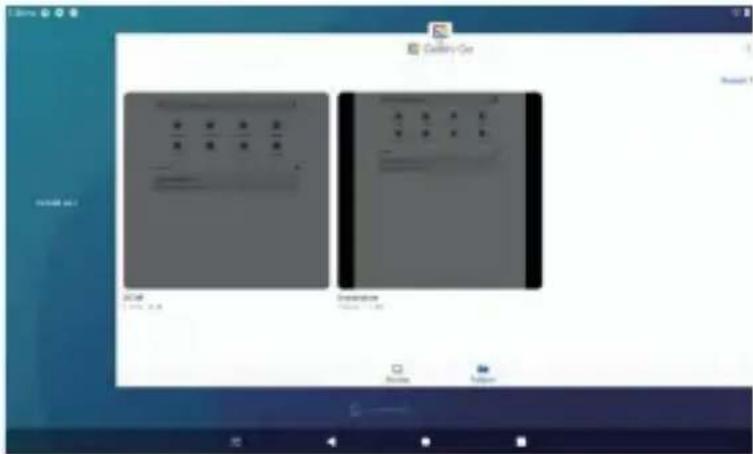
Important Notes:
A lot of apps will take up memory space and slow down the speed, worsen your experience. To clear app trash and junk files frequently will help to keep your device agile and running smoothly.
3. DVD Playback
You can playback movies with this device, but please note, Blu-ray disc is not compatible.
a) Touch DVD icon on the main page or choose it from the app list.
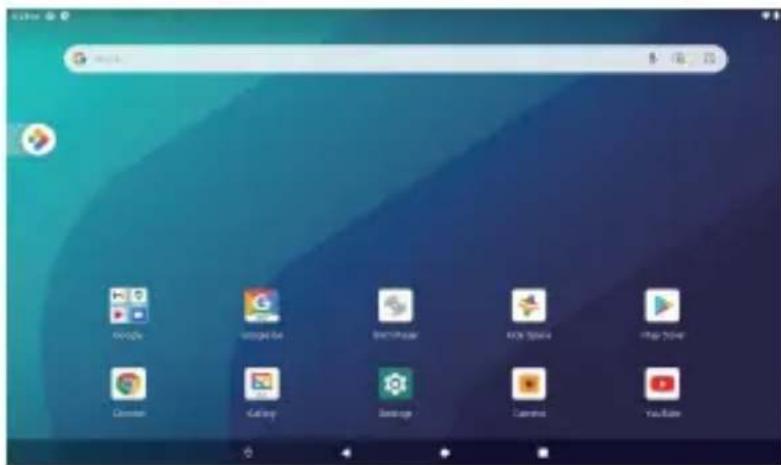
b) Press Open button (▼) on the top of the unit, open the device and load a disc. After close the unit, the disc will start loading and you can choose to play. c) During the playback, you can touch any part of the screen, then function buttons will show at the bottom. Swipe left, more buttons will show.
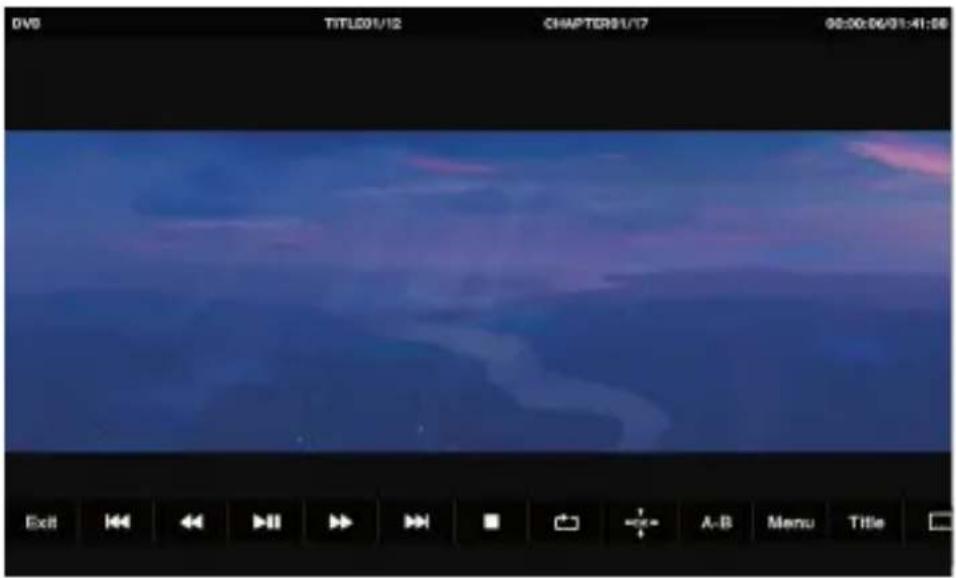
| Exit Exit DVD mode | |
 | Select to go to previous chapter or track during playing. |
 | Select to playback fast backward at 2,4,8,16 or 32 times |
 | Select to Play/Pause |
 | Select to playback fast forward at 2,4,8,16 or 32 times |
 | Select to go to next chapter or track during playing. |
 | Select once to stop playback, then press ▶ to resume playback from the point where you stopped; press ■ twice to stop playback completely. |
 | Select to repeat the current title,chapter,or all. |
 | Select ARROWS to move cursors to different item; select “OK” to confirm. |
| A-B | Select to repeat a specific portion from point A to B , press it again to cancel repeat playing. |
| MENU | Select once to open the DVD menu. This option works only if the DVD has a menu. |
| Title | Select to display the DVD title information. Press TITLE, CHAPTER or Time on the top bar, a figure table will show, press the corresponding number you want to choose. |
 | Select to turn subtitles on and off, or select to choose the subtitle language. This option works only if the DVD has subtitles. |
 | Select to choose the DVD audio languages. This option works only if the DVD has multiple audio languages. |
| [7CSW] | Select to choose the DVD multi angles. This option works only if the DVD has multiple angles. |
4. Camera function
This device has a front camera, located at the bottom of the screen. The camera is 2Million pixels, for basic use only.

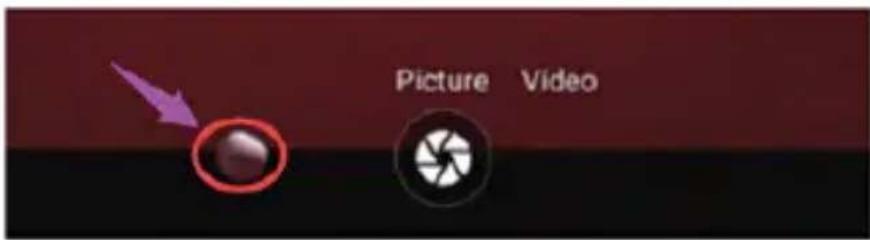
a) Touch Camera on the app page to activate camera function.
b) Select "Picture" to take pictures and select "Video" to take videos.

c) Select ⚙ at the lower left corner to enter the parameter settings.
d) Press ⬤ to take pictures, and press ▶ to record a video, press ▶ to pause, press ▶ to stop and save.
e) Also, you can easily find & manage your photos on your device with the Gallery Go app.
5. Wi-Fi connection

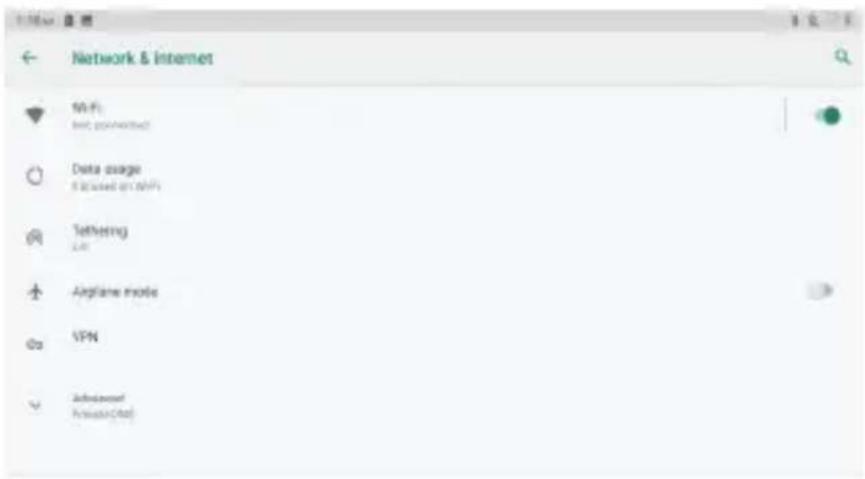
a) Touch Settings icon Settings on the app list page, select Network&internet, slide the switch to the right to activate Wi-Fi connection.
b) Press Wi-Fi to enter the Wi-Fi page, the tablet will scan for available Wi-Fi networks within range.
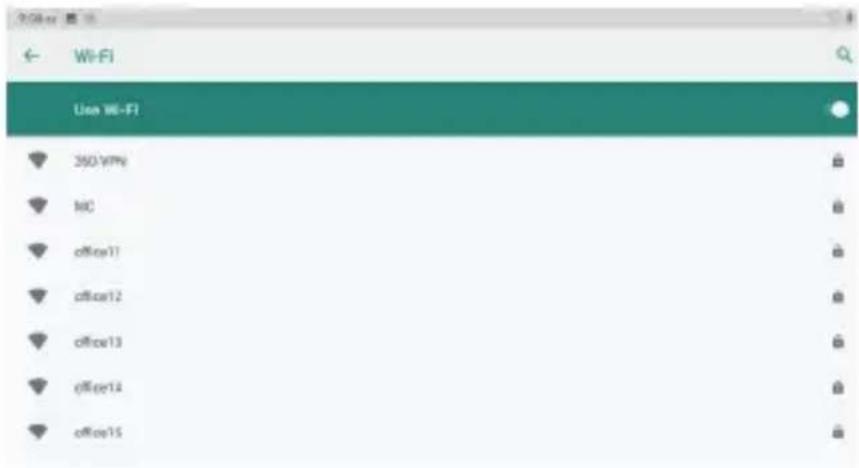
c) Select the Wi-Fi you want to connect, enter the password, once you have successfully entered your information, the tablet will remember your settings.
6. Bluetooth connection
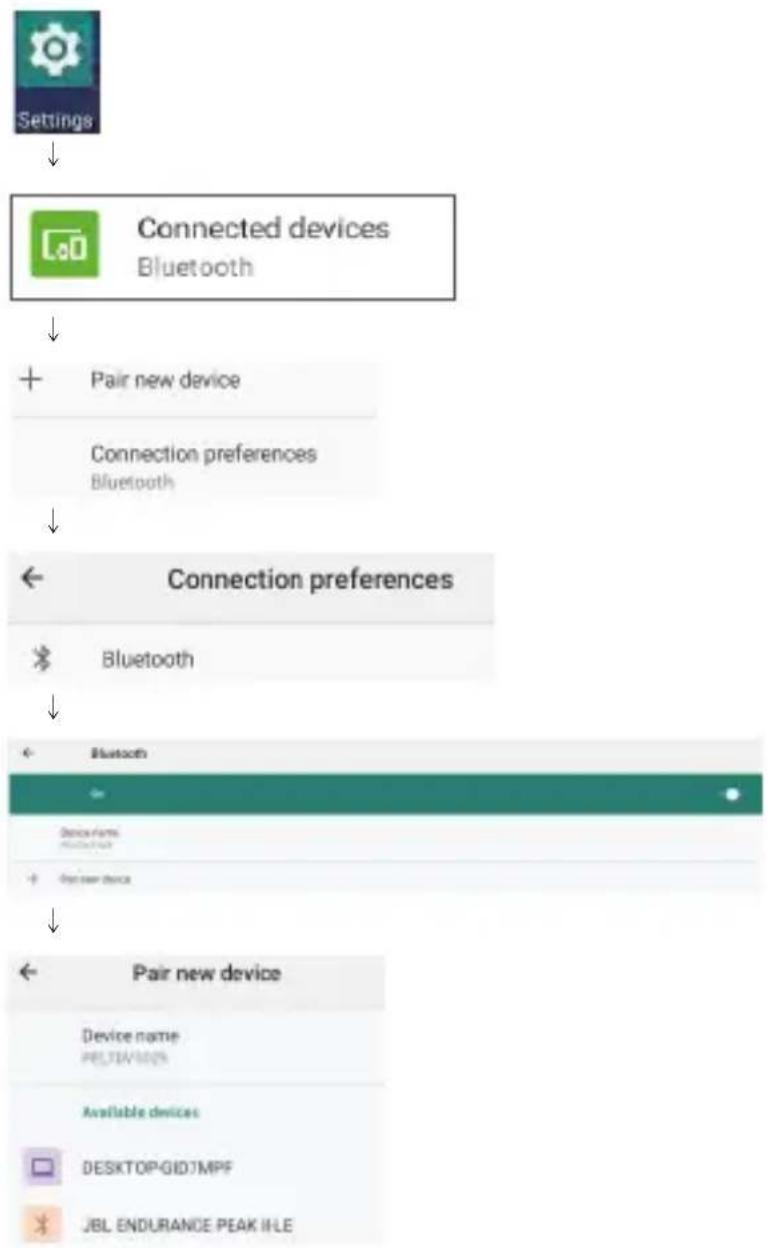
The device can send its audio to an external bluetooth speaker by Bluetooth connection, steps as below:
- Touch "Settings" on the app list page, choose "Connected devices", "Connection preferences", "bluetooth", then set Bluetooth as "ON" and choose "Pair new device", available bluetooth devices will be shown, choose the one you want to connect, once connected, the audio can be heard on the Bluetooth headphone.
flowchart
graph TD
    A["Settings"] --> B["Connected devices\nBluetooth"]
    B --> C["+ Pair new device"]
    B --> D["Connection preferences\nBluetooth"]
    D --> E["Connection preferences"]
    E --> F["Bluetooth"]
    E --> G["+ Pair new device"]
    G --> H["Pair new device"]
    H --> I["Device name\nPELTSV1009"]
    H --> J["Available devices\nDESKTOP-GIDJMPF"]
    H --> K["JBL ENDURANCE PEAK II LE"]
7. Screen cast connection
a) Only to output signal to external device under this feature.
b) Make sure both the unit and the external device to be connected by same Wi-Fi or same hotspot.
c) Then turn on Screen Cast connection from the external device.
d) Screen Cast connection setting unit is as below:
Settings --> Connected devices--> Connection preferences--> Cast --> Tap the icon(☐) on top right corner to Enable wireless display--> You can find the external device name-->Click the external device name--> The external device will show connection info "DECLINE" or "ACCEPT"-->Click "ACCEPT" to connect.
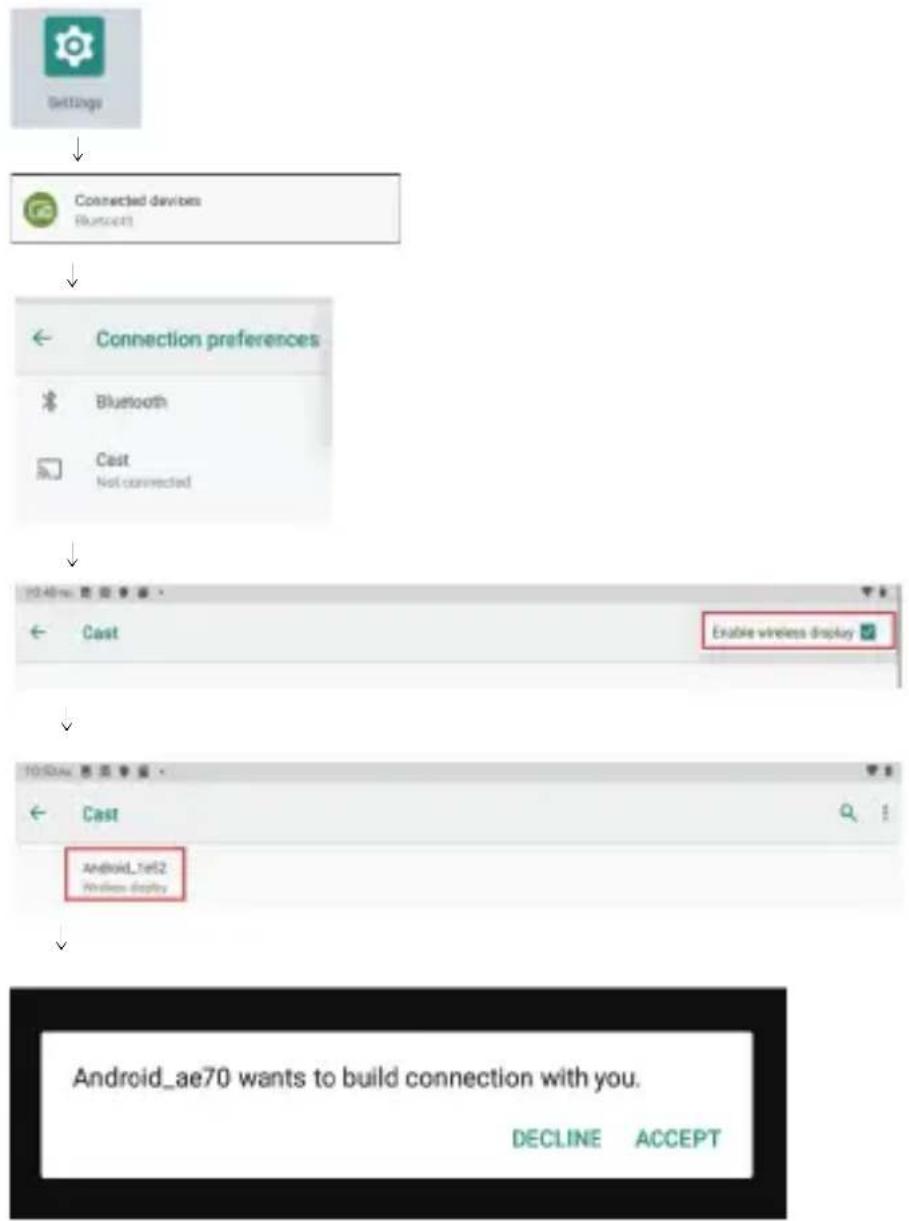
flowchart
graph TD
    A["Settings"] --> B["Connected devices\nBluetooth"]
    B --> C["Connection preferences"]
    C --> D["Bluetooth"]
    C --> E["Cast\nNot connected"]
    D --> F["Enable wireless display"]
    E --> F
    F --> G["Android_1e52\nWireless display"]
    G --> H["Android_ae70 wants to build connection with you."]
    H --> I["DECLINE ACCEPT"]
8. Text Input
When use the tablet, you can use the virtual keyboard to enter text, number, symbols directly by touching screen. After selecting the Android input method, the default keyboard show as below:
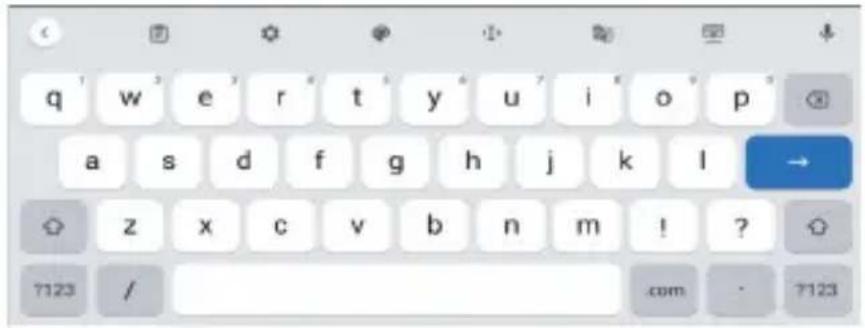
Press ?123 to input numbers and letters and change letters in capital or small type by pressing
9. Transfer files between a tablet and PC
a) Connect the tablet with a PC by the USB cable supplied.
b) Select Settings --> Connected devices --> USB --> Use USB for File Transfer
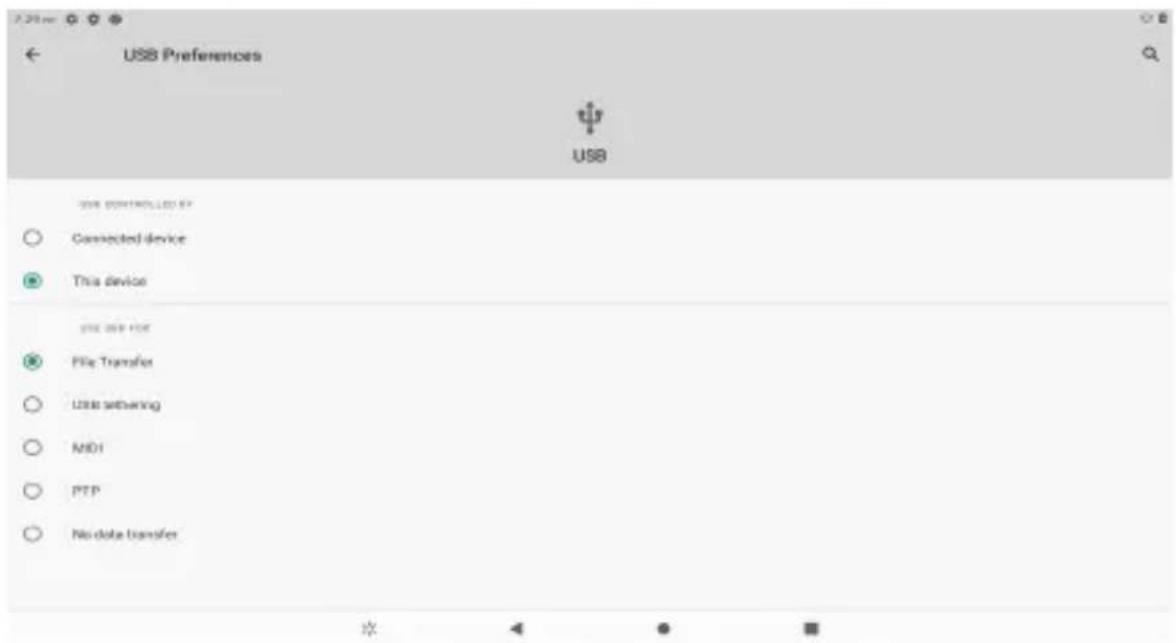
c) You can locate the tablet on your PC as a removable disk.
10. Battery Use
This device utilizes long-life Lithium-ion battery for portable power supply.
The battery has no memory effect and thus can be recharged safely regardless. Whether it's fully or partially discharged. It's enough to recharge no longer than 5 hours each time. Fully recharged battery can last up to 3 hours for dvd play and up to 6 hour for wifi surfing (when system brightness and volume set at medium). When press (power button), there will be charging status shown on the screen while the device is charging in shutdown state.
Note:
*As soon as low power indicated on screen while operating, please recharge the battery immediately to avoid inconvenience of sudden shutdown.
*Please regularly charge battery should the device not use for long to keep battery in good condition.
*Using and Maintaining rechargeable battery
The normal working temperature is: 0°C\~40°C
Always unplug AC/DC adapter from the device when not in use.
It'll get warm and hot when continue to play, it's normal, while avoid long time playing unattended.
*Avoid colliding with other objects, and place away from possible heat source and humidity environment.
Removal Of Waste Battery
natural_image
Technical line drawing of a rectangular device with internal components and mounting holes (no text or symbols)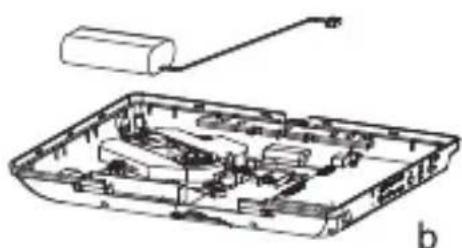
natural_image
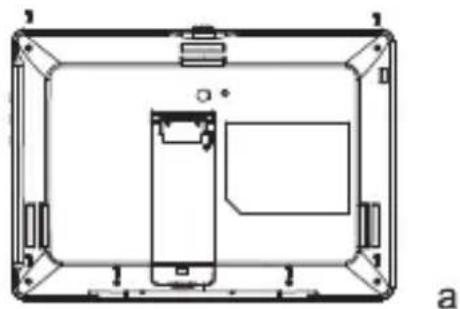
Technical line drawing of a mechanical assembly with no visible text or symbolsBefore to discard EOL unit, please remove the waste battery by below steps:
a. Pull out the screws on the bottom cover by the screwdriver to unpack the unit.
b. Remove the battery socket from the board.
11. Specifications
| Dimensions | 9.9"*7"*1.46" (25.12*17.76*3.72cm) |
| Net Weight | Approx 1.88lb (0.85kg) |
| LCD | 10.1" 800X1280 |
| OS | Android 11(Go edition) |
| Processor | 2.0GHz Quad Core |
| Memory | 2GB DDR RAM, 32GB internal memory |
| Wi-Fi | 802.11b/g/n |
| Disc support | DVD/VCD/CD/MP3(no blue-ray disc) |
| Connections | USB Type-C, Micro-SD(up to 32GB), Earphone jack |
| Battery | 3.7V 5000mAh 18650 Li-ion battery |
| Battery playback | Up to 3h with DVD(default setting and test with earbud on) Up to 6h with wifi(default setting and test with earbud on) |
| Operating temperature | Between 0°C and 40°C |
12. Trouble shooting
| PROBLEM | SOLUTION |
| No sound or distorted sound | Make sure the machine is connected properly.Make sure all cables are securely inserted into the appropriate jacks. |
| Can't advance through a movie | You can't advance through the opening credits and warning information that appears at the beginning of movies because the disc is programmed to prohibit that action. |
| The icon ⏻ appears on screen | The feature or action cannot be completed at this time because:1. The disc's software restricts it.2. The disc's software doesn't support the feature (e.g., angles)3. The feature is not available at the moment.4. You've requested a title or chapter number that is out of range. |
| Picture is distorted | The disc might be damaged. Try another disc;It is normal for some distortion to appear during forward or reverse scan. |
| No forward or reverse scan | Some discs have sections that prohibit rapid scanning or chapter skip;If you try to skip through the warning information and credits at the beginning of a movie, you won't be able to. This part of the movie is often programmed to prohibit skipping through it. |
| Display shows- "No disc" after inserting DVD | 1. Check to see if you may have inserted a blank disc.2. Remove disc and check to ensure that disc is clean and not scratched.3. Check to see if you may have inserted a disc that has not yet been finalized.4. Check to see if you may have inserted the disc correctly;please remove and try to insert disc correctly.5. Try to play the original DVD disc. please note that improperly burned discs cannot be recognized.6. Use a lens cleaning disc or gently wipe the laser pickup lens with dry microfiber cloth. |
| Not reading disc | 1. Do not play Blue-ray disc.2. Play only with proper discs in good condition, clean and no scratch.3. Do not touch the loader pick-up. |
| Wi-Fi cannot be connected | Make sure Wi-Fi is set on;Make sure the Wi-Fi signal is strong enough. |
| "Safe Mode" appears at left bottom side | Keep pressing ⏻, press "Restart" to restart the unit, it will get back to normal. |
| Cannot turn on | Charge the device until battery is full for first time use; For device not used for long, please charge about 5~10 minutes first, charging icon will appear. |
| Chinese characters displayed when turning on | It's caused by mis-operation. Please keep pressing ⏻, until system auto re-start. |

If at any time in the future you should need to dispose of this product please note that waste electrical products should not be disposed of with household waste. Please recycle where facilities exist. Check with your Local Authority or retailer for recycling advice. (Waste Electrical and Electronic equipment Directive)
※ Owing to continuous improvement, no prior notice will be given regarding changes on above feature and spec.
Google, Android, Google Play and other marks are trademarks of Google LLC.
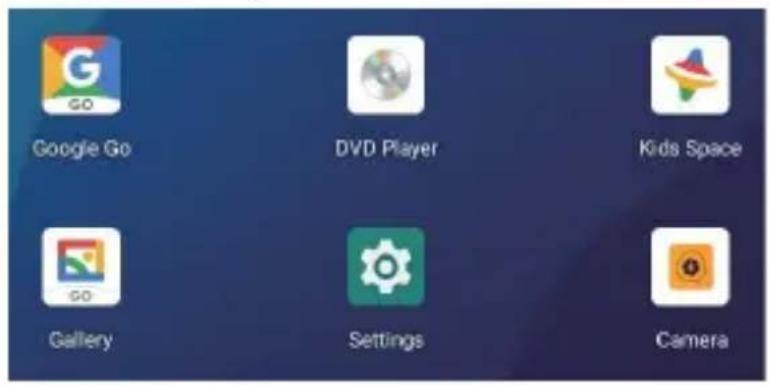
Reset Your Tablet to Factory Default Method #1 Using System Settings Menu:
Enter the Settings from main menu as shown below
Swipe up to choose System
Google Services & preferences
DuraSpeed
System Languages, gestures, time, backup
About tablet PELTDV1029
Choose Advanced
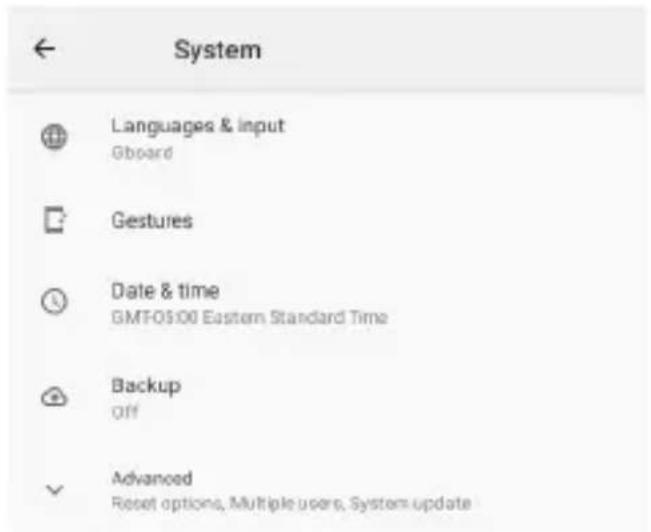
Choose Reset Options (Make sure Multiple users is set as "OWNER", you can set it by the following steps: Settings--System---Advanced---Multiple Users---Owner---Switch to owner)

Backup Off

Reset options Network, apps, or device can be reset

Multiple users Signed in as Owner

System update Updated to Android 11
Then choose Erase all data (factory reset)

Reset options
Reset Wi-Fi, mobile & Bluetooth
Reset app preferences
Erase all data (factory reset)
Choose Erase all data (factory reset)

Erase all data (factory reset)
This will erase all data from your tablet's internal storage, including:
- Your Google Account
● System and app data and settings - Downloaded apps
Music - Photos
- Other user data
Confirm you wish to erase your personal data by tapping the Erase all data button
Erase all data
All of your personal data will be deleted from the tablet.
Reset Your Tablet to Factory Default
Method #2 Using the Android Recovery Method
(Use this method when you have forgotten your PIN &/or Password)
Hold the Power and Volume + buttons simultaneously until the Boot Menu is displayed.
Boot Menu:
![Select Boot Mode: [VOLUME_UP to select, VOLUME_DOWN is OK.] [Recovery Mode] << [Fastboot Mode] [Normal Boot]](/content/2026/05/943936/images/71a53b2daff8d299208e2b866d44a4df82f75b8a96768af4afec916d9d3c98f3.jpg)
Choose Recovery Mode:
The VOLUME+ button allows you to scroll through the menu choices.
Press the VOLUME- button to confirm your selection.
The following screen will be displayed:
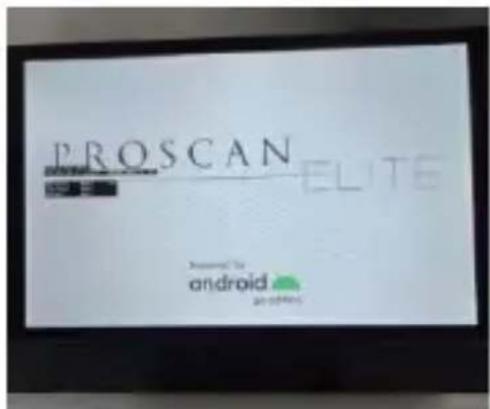
Press both the Power and Volume + buttons simultaneously repeatedly (DO NOT HOLD THEM DOWN).
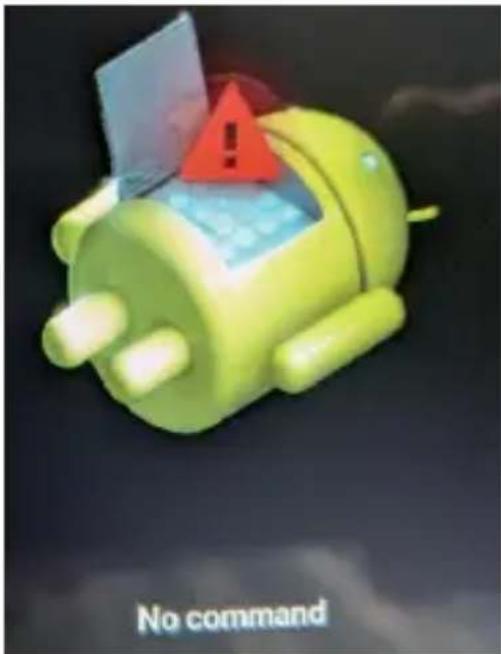
When you see the Android “NO COMMAND” screen, press the Power and Volume + buttons (Simultaneously) once or twice (Note: if the tablet hangs at the “No Command” screen, repeat the complete Method 2 reset procedure).
The tablet will display the Android Recovery menu
(Scroll up & down using the Volume+ and Volume- buttons and confirm your selection using the Power button).
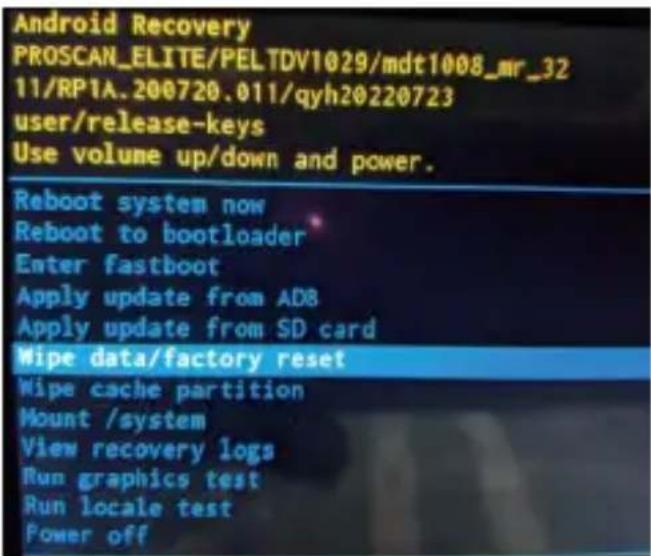
Choose Wipe data/factory reset.
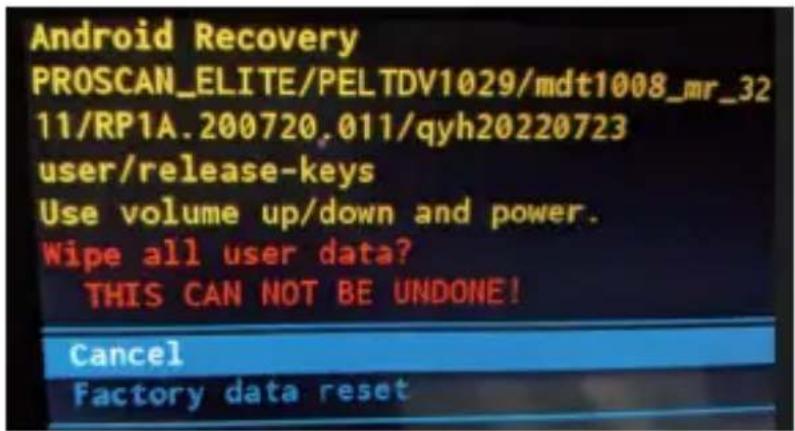
Choose Factory data reset and press the Power button
The User Data and Stored Data will be wiped from the tablet (You will see a confirmation screen)
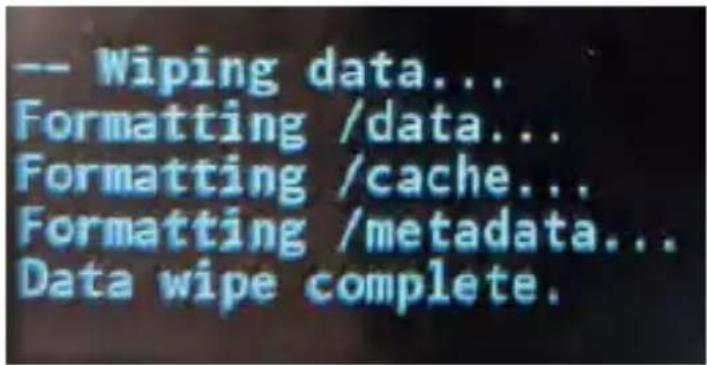
The tablet will return to the Android Recovery Menu.
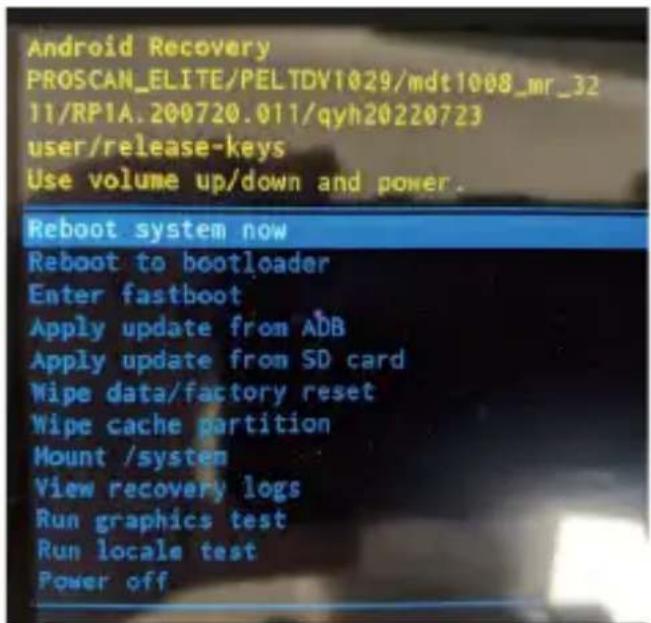
Choose Reboot system now by pressing the Power button.
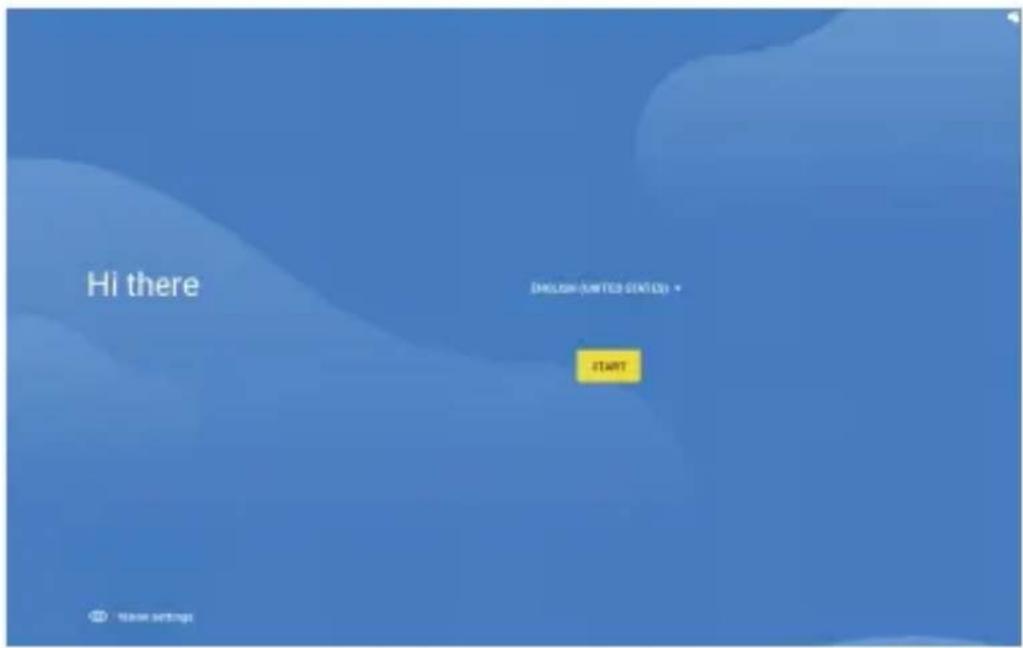
The tablet will reboot to the initial User Setup screen.
You can set up your tablet or Press the Power button to turn the tablet off.
LIMITED PRODUCT WARRANTY
To make a warranty claim, please email support2@curtiscs.com or call 1-800-968-9853.
90 day Warranty
This product is warranted to be free from defects in material and workmanship for a period of ninety (90) days from the date of original purchase. During this period, your exclusive remedy is repair or replacement of this product or component found to be defective, at our option; however, you are responsible for all costs associated with returning the product to us. If the product or component is no longer available, we will replace with a similar one of equal or greater value. Prior to a replacement being sent, the product must be rendered inoperable or returned to us.
This warranty does not cover glass, filters, wear from normal use, use not in conformity with the printed directions., or damage to the product resulting from accident, alteration, abuse, or misuse. This warranty extends only to the original consumer purchaser or gift recipient. Keep the original sales receipt, as proof of purchase is required to make a warranty claim. This warranty is void if the product is used for other than single-family household use or subjected to any voltage and waveform other than as on the specified rating on the label (e.g., 120V\~60Hz).
We exclude all claims for special, incidental, and consequential damages caused by breach of express or implied warranty. All liability is limited to the amount of the purchase price. Every implied warranty, including any statutory warranty or condition of merchantability or fitness for a particular purpose, is disclaimed except to the extent prohibited by law, in which case such warranty or condition is limited to the duration of this written warranty. This warranty gives you specific legal rights. You may have other legal rights that vary depending on where you live. Some states or provinces do not allow limitations on implied warranties or special, incidental, or consequential damages, so the foregoing limitations may not apply to you.
For faster service, locate the model, type, and serial numbers on your appliance.
For service assistance and product information
please call: 1-800-968-9853.
Curtis International Ltd.
7045 BECKETT DRIVE, UNIT 15, MISSISSAUGA, ON, L5S 2A3
www.curtisint.com
Walmart Inc.Bentonville, AR 72716 Walmart.com
ATTACH YOUR PROOF OF PURCHASE HERE, PROOF OF PURCHASE IS REQUIRED TO OBTAIN WARRANTY SERVICE.
Please have the following information available when you contact the Support Team:
• Name, address and telephone number.
• Model number and serial number.
• A clear, detailed description of the problem.
• Proof of purchase including dealer or retailer name, address and date of purchase.
Ver1.3, 1122
- USER'S MANUAL
- Table Of Contents
- Safety Precaution
- Warning: To reduce the risk of fire or electric shock, do not expose this apparatus to rain or moisture.
- Package
- Main Features
- Overview
- Power button ⏻
- Volume +/-
- Basic Operation
- Charge the battery
- Start the device
- Important Notes:
- DVD Playback
- Camera function
- Wi-Fi connection
- Bluetooth connection
- Screen cast connection
- Text Input
- Transfer files between a tablet and PC
- Battery Use
- Note:
- Removal Of Waste Battery
- Specifications
- Trouble shooting
- Reset Your Tablet to Factory Default Method #1 Using System Settings Menu:
- Erase all data (factory reset)
- Erase all data
- Reset Your Tablet to Factory Default
- Method #2 Using the Android Recovery Method
- Boot Menu:
- Press both the Power and Volume + buttons simultaneously repeatedly (DO NOT HOLD THEM DOWN).
- The tablet will display the Android Recovery menu
- Choose Factory data reset and press the Power button
- LIMITED PRODUCT WARRANTY
- day Warranty
Brand : Proscan
Model : PELTDV1029
Category : Portable DVD Player