JP-1019 - Loudspeaker Metra - Free user manual and instructions
Find the device manual for free JP-1019 Metra in PDF.


| Product Type | Rear Soundbar Speaker Adapter Plates |
| Brand | Metra |
| Model | JP-1019 |
| Compatibility | Jeep Wrangler (JL) 2024-Up, Jeep Gladiator (JT) 2024-Up |
| Purpose | Adapt factory 4" speakers to fit 6" to 6.75" aftermarket speakers with tweeter option |
| Speaker Depth | 4" |
| Dome Light Retention | Yes, retains OE dome light |
| Included Components | Replacement grilles (2), mounting plate/template, speaker harness, hardware (10 coarse thread screws, 10 M4 socket head screws, 1 roll 1/4" foam tape) |
| Tools Required | 5/64" drill bit, 3/16" Allen wrench, 10mm socket wrench, T-15 Torx, T-30 Torx, M3 Allen key, Phillips bit, oscillating saw or cutting device |
| Installation Difficulty | Moderate to advanced; requires soundbar removal and cutting |
| Material | Plastic and metal components |
| Manufacturer Support | Tech support available: 386-257-1187 or techsupport@metra-autosound.com |
| Certification | MECP certified technicians recommended |
Frequently Asked Questions - JP-1019 Metra
User questions about JP-1019 Metra
0 question about this device. Answer the ones you know or ask your own.
Ask a new question about this device
Download the instructions for your Loudspeaker in PDF format for free! Find your manual JP-1019 - Metra and take your electronic device back in hand. On this page are published all the documents necessary for the use of your device. JP-1019 by Metra.
USER MANUAL JP-1019 Metra
natural_image
Close-up of a black plastic mechanical component with a circular cutout and mesh pattern (no visible text or symbols)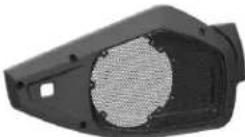
Jeep Wrangler (JL) 2024-Up
Jeep Gladiator (JT) 2024-Up
Rear Soundbar Speaker Adapter Plates
PRODUCT FEATURES
- Designed to adapt the factory
4" with up to a 6"-6.75" speaker
with a tweeter option - Retains the OE dome light
-
Speaker depth: 4"
-
Mounting plate/cutting template
included - Hardware included
- Harness included
TABLE OF CONTENTS
Soundbar Removal....2
Soundbar Disassembly 3-4
Cutting Guide 5
Speaker Installation....6
Dome Light Installation....7
Replacement Grille Installation....8
Mounting Specifications....9
Visit MetraOnline.com for more detailed information about the
product and up-to-date vehicle specific applications
WHAT'S IN THE BOX
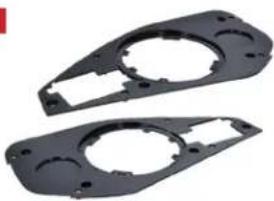
• A) Replacement Grilles • B) Mounting Plate / Template • C) Speaker Harness
Not Shown: (10) Coarse Thread Screws, (10) M4 Socket Head Screws, (1) Roll 1/4" Foam Tape
A
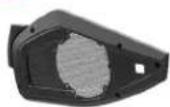
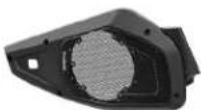
natural_image
Two black plastic mechanical parts with circular cutouts and mounting holes (no text or symbols visible)C
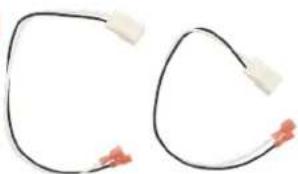
natural_image
Two white electrical connectors with black wires and orange connectors, no text or symbols visibleTOOLS REQUIRED
• 5/64 Drill Bit
• 3/16 Allen Wrench
- 10mm Socket Wrench
• T-15 Torx
• T-30 Torx
• M3 Allen Key
• Phillips Bit
- Oscillating Saw or
other Cutting Device
Attention! Let the vehicle sit with the key out of the ignition for a few minutes before removing the factory radio. When testing the aftermarket equipment, ensure that all factory equipment is connected before cycling the key to ignition.
SOUNDBAR REMOVAL
NOTE: It is highly recommended that the soundbar be removed for install of this speaker adapter kit. (Figure A)
- Remove all panels along the top trim of the interior of the vehicle to gain access to the soundbar mounts.
- Remove the (6) 10mm bolts that are securing the soundbar in place.
- Unplug the harness and remove the soundbar from the vehicle.
Continue to Soundbar Disassembly
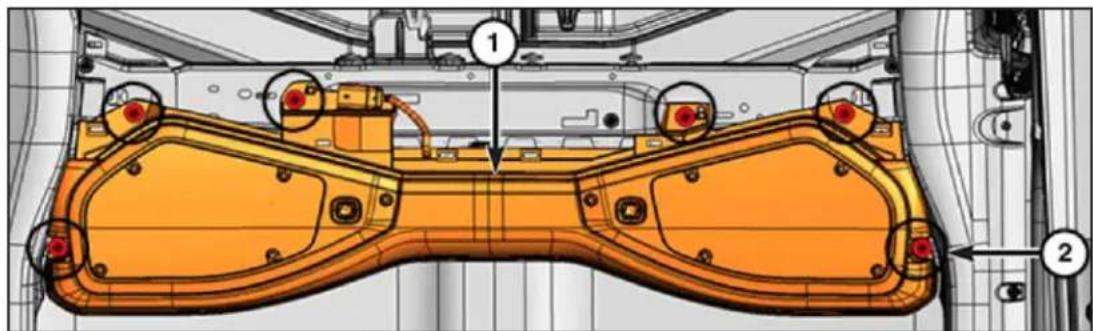
Figure A
SOUNDBAR DISASSEMBLY
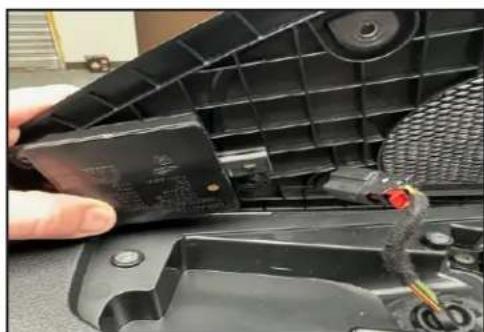
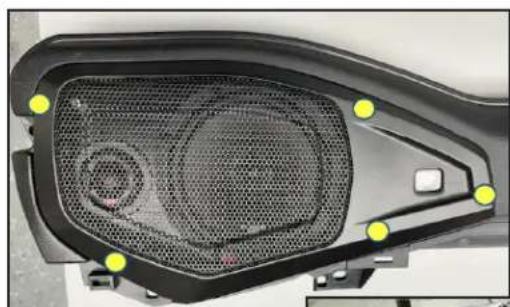
- Remove (5) 3/16" screws holding the factory grille in place. (Figure A)
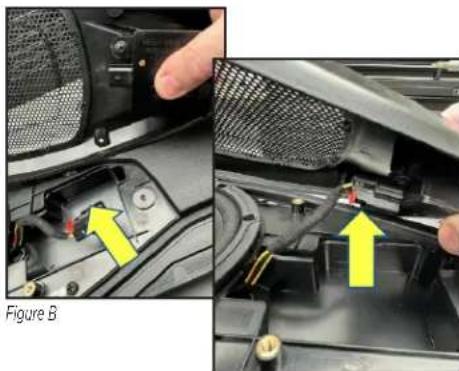
- Disconnect the harness to the attached map light, and remove the factory grille panel. Put grille aside until time for reinstall. (Figure B)
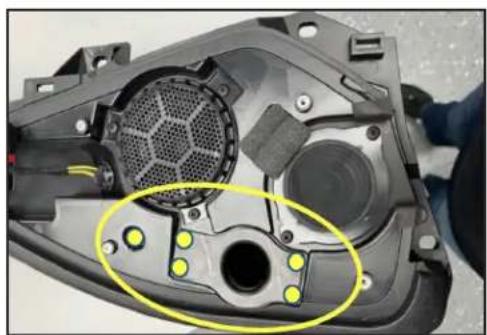
- Remove the (7) T-15 screws from the speakers in the sound bar and remove the speakers. (Figure C)
- Remove the (5) T-30 screws holding the port assembly in place, and remove the port assembly. (Figure D)
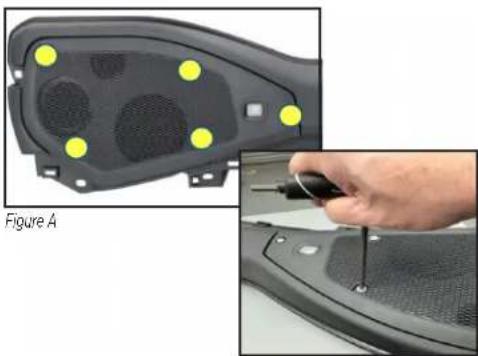
natural_image
Close-up of a car interior panel with yellow circular components and a hand holding a screwdriver (no text or symbols visible)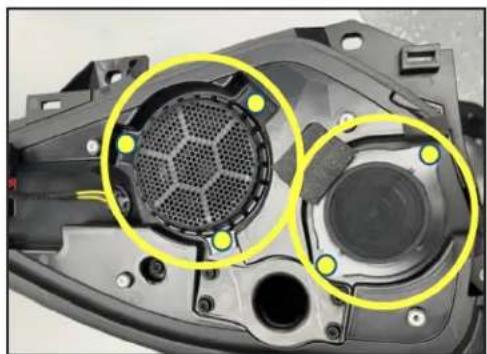
natural_image
Close-up of a mechanical component with two highlighted circular regions (no text or symbols visible)Figure C
natural_image
Close-up of a hand inserting a black plastic component into a device casing (no visible text or symbols)Figure B Figure D
natural_image
Close-up of a mechanical component with highlighted circular features (no text or symbols visible)SOUNDBAR DISASSEMBLY CONT.
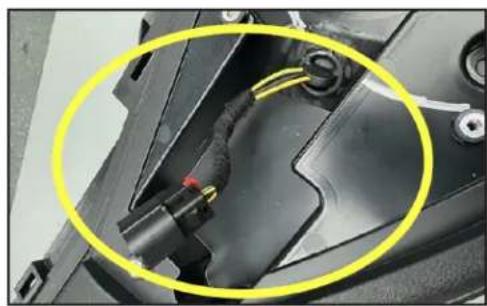
- Push the dome light harness along with the factory speaker harness into the soundbar as to not cut the wiring while cutting the interior structure of the soundbar. (Figure E)
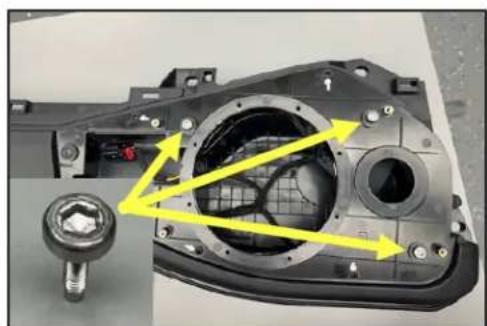
- Place the base plate in place and secure with (3) of the factory 3/16" bolts. (Figure F)
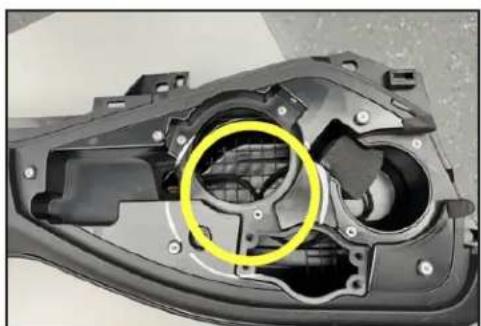
- Trace the area highlighted in Figure G. This is the area that needs to be cut and removed. (Figure G)
- Remove the template and see the area that to needs be cut. (Figure H)
Continue to Cutting Guide
natural_image
Close-up of a mechanical component with yellow circle highlighting a cable or connector (no visible text or symbols)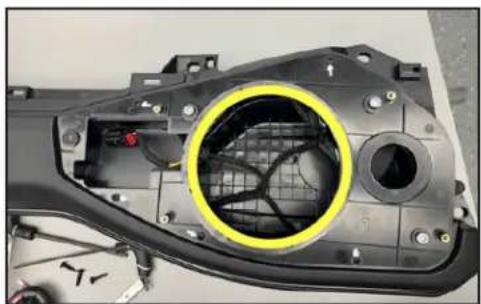
natural_image
Interior view of a car body panel with a highlighted circular component (no text or symbols visible)Figure G Figure E
natural_image
Close-up of a mechanical component with yellow arrows indicating directional flow or movement, no visible text or symbols.Figure F Figure H
natural_image
Close-up of a mechanical component with a highlighted circular area (no text or symbols visible)CUTTING GUIDE
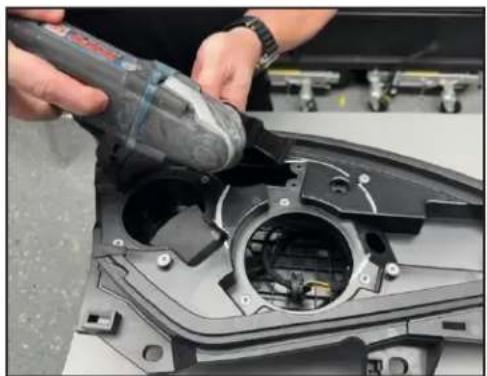
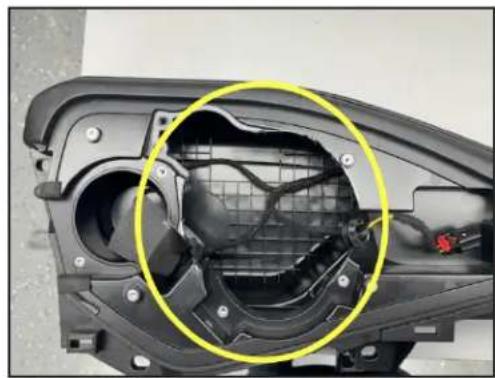
- Cut the traced area carefully. (Figure A) Be sure not to cut through to the back of the soundbar and not to cut through the wiring in the soundbar.
- Figure B shows the section cut and removed.
Continue to Speaker Installation
natural_image
Person using a power tool to clean or inspect internal components of an electronic device (no visible text or symbols)Figure A Figure B
natural_image
Close-up of a car head panel showing internal components and a highlighted circular area (no text or symbols visible)SPEAKER INSTALLATION
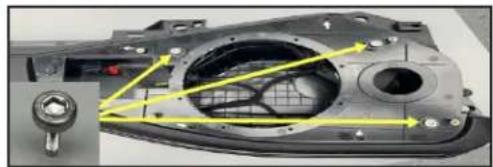
- Reinstall the base plate using (3) factory 3/16" screws. (Figure A)
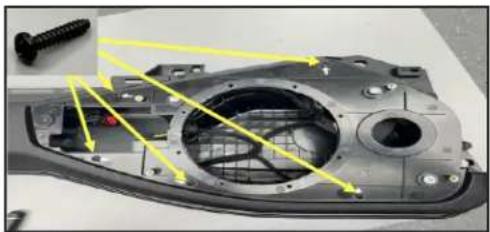
- Using a 5/64" drill bit, pre drill the (5) holes around the base plate. (Figure B)
- Using the (5) 3/4" Pan Head Screws secure the mounting plate to the soundbar. This is what the speaker will mount to. (Figure B)
- Install the speaker into the mounting plate to ensure proper fit.
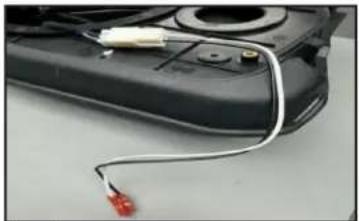
- If the fit is good, install the speaker into the mounting plate and connect with the included speaker harness. (Figure C)
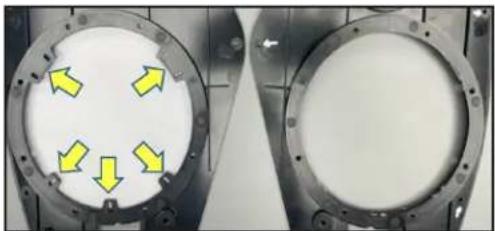
NOTE: Not all tabs are needed for mounting the speaker into the speaker bracket. Remove the tabs as required. (Figure D)
NOTE: There is a center point marked on the template smaller circle that can be used as reference for cutting and installing a tweeter. (Figure E)
Continue to Dome Light Installation
natural_image
Close-up of a mechanical component with yellow arrows indicating assembly or force direction (no text or symbols visible)Figure A
natural_image
Close-up of a mechanical component with yellow arrows pointing to features, no visible text or symbolsFigure B
natural_image
Close-up of a black electronic device with wires and a red connector, no visible text or symbolsFigure C
natural_image
Two circular mechanical components with yellow directional arrows indicating rotation or movement, shown from left and right angles (no text or symbols)Figure D
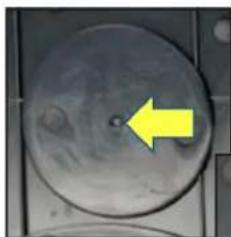
natural_image
Close-up of a circular metallic object with a yellow arrow pointing to a small spot, no visible text or symbols.Figure E
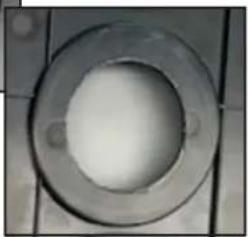
natural_image
Close-up of a circular mechanical component with a central hole, placed on a tiled surface (no text or symbols visible)DOME LIGHT INSTALLATION
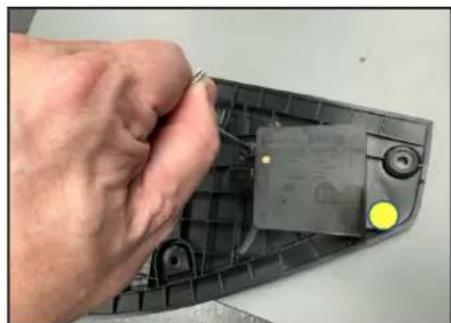
- Take the factory speaker grille that was removed earlier to remove the dome light. (Figure A)
- Remove the (2) T-20 screws that attach the light to the factory speaker grille. (Figure B)
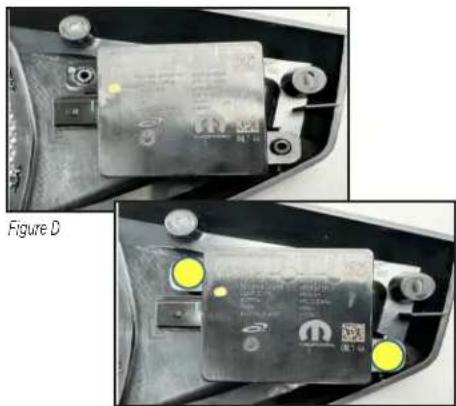
- Install the dome light into the new replacement grille
- Secure using the (2) T-20 screws that held it into the factory grille. (Figure D)
Continue to Replacement Grille Installation
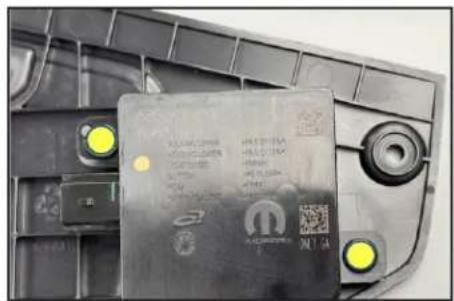
natural_image
Close-up of a battery cover with visible model numbers and mounting points (no readable text or symbols)Figure A
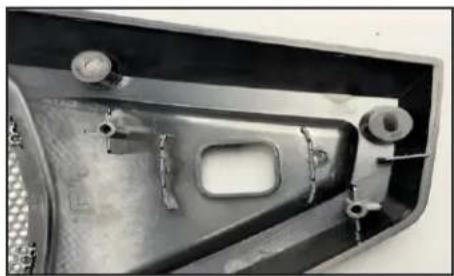
natural_image
Close-up of a metallic mechanical component with mounting holes and internal features (no visible text or symbols)Figure C
natural_image
Close-up of a hand holding a small electronic component with wires, next to a black plastic tray (no visible text or symbols)Figure B
natural_image
Close-up of two automotive battery modules with yellow circular markers, no visible text or symbols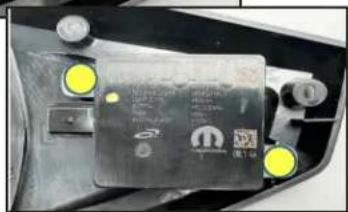
natural_image
Close-up of a car battery pack with yellow circular markers and brand logo (no readable text or symbols)REPLACEMENT GRILLE INSTALLATION
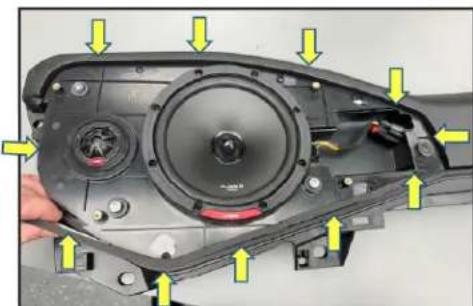
- Install the supplied 1/4" foam tape around the edge of the mounting plate to prevent the possibility of rattling. (Figure A)
- Connect the harness into the dome light attached to the replacement grille. (Figure B)
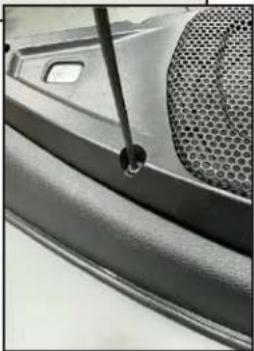
- Secure the replacement grille to the mounting plate using the (5) supplied M3 bolts. (Figure C)
Repeat the previous steps on the opposite side of the soundbar to complete the installation.
natural_image
Close-up of a mechanical device with yellow arrows pointing to component areas (no text or symbols visible)Figure A
natural_image
Close-up of a car front panel with a mesh grille and yellow markers indicating points of interest (no text or symbols present)Figure C
natural_image
Close-up of a car interior showing a hand adjusting the engine compartment with yellow arrows indicating parts of the component (no text or symbols visible)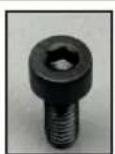
natural_image
Close-up of a car's side panel showing grille and vent (no text or symbols visible)MOUNTING SPECIFICATIONS
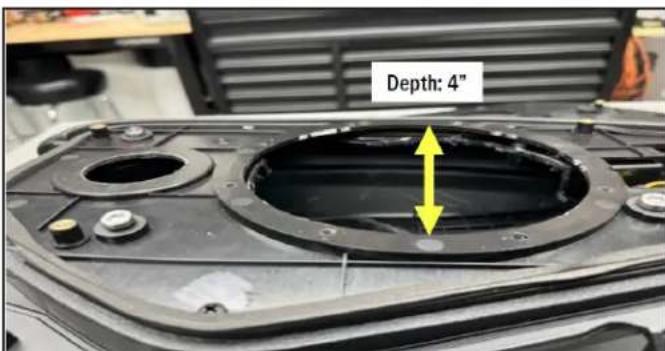
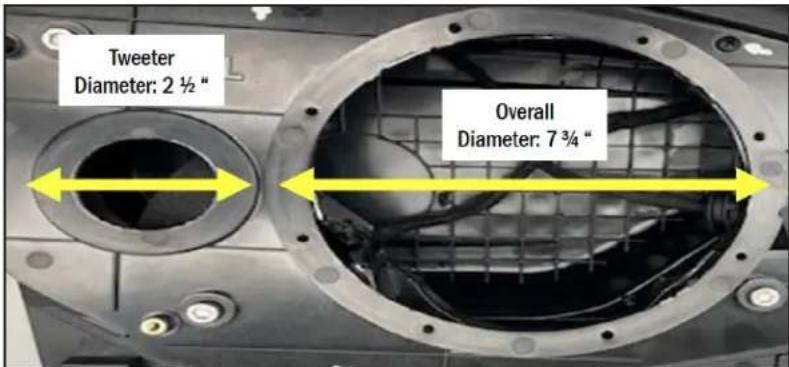
REV. 6/4/24 INSTJP-1019

Scan the QR to check out all our Jeep Accessories and Heise LED Lighting for Jeep at
METRAPOWERSPORTS.COM


Having difficulties? We're here to help.

Contact our Tech Support line at:
386-257-1187

Or via email at:
techsupport@metra-autosound.com
Tech Support Hours (Eastern Standard Time)
Monday - Friday: 9:00 AM - 7:00 PM
Saturday: 10:00 AM - 5:00 PM
Sunday: 10:00 AM - 4:00 PM

Metra recommends MECP certified technicians
- Jeep Wrangler (JL) 2024-Up
- Jeep Gladiator (JT) 2024-Up
- Rear Soundbar Speaker Adapter Plates
- PRODUCT FEATURES
- TABLE OF CONTENTS
- WHAT'S IN THE BOX
- TOOLS REQUIRED
- SOUNDBAR REMOVAL
- SOUNDBAR DISASSEMBLY
- SOUNDBAR DISASSEMBLY CONT.
- CUTTING GUIDE
- SPEAKER INSTALLATION
- DOME LIGHT INSTALLATION
- REPLACEMENT GRILLE INSTALLATION
- MOUNTING SPECIFICATIONS
- Tech Support Hours (Eastern Standard Time)
Brand : Metra
Model : JP-1019
Category : Loudspeaker