
Repeater - Audio software D16 Group - Free user manual and instructions
Find the device manual for free Repeater D16 Group in PDF.


| Product Type | Audio Plugin (Delay Effect) |
| Developer | D16 Group |
| Model | Repeater |
| Category | Audio Software |
| Supported Formats | VST2, VST3, AU, AAX (64-bit) |
| Operating Systems | Windows (7 or later), macOS (10.12 or later) |
| CPU Architecture | Intel x86-64, Apple Silicon (native or Rosetta 2) |
| Manual Format | PDF (40 pages, English) |
| License Type | Commercial license (purchase required) |
| Product Rating | 5.5/10 (user rating) |
| Key Features | Multi-tap delay, modulation, filtering, ping-pong, feedback routing |
| Presets | Factory presets included |
| CPU Usage | Optimized, low latency |
| Installation | Download from developer site, activate with serial number |
| Update Policy | Free updates within major version, paid upgrades for major versions |
| Support | Online forum, email support, knowledge base |
| System Requirements | Min 2 GB RAM, 500 MB free disk space, compatible DAW |
Frequently Asked Questions - Repeater D16 Group
User questions about Repeater D16 Group
0 question about this device. Answer the ones you know or ask your own.
Ask a new question about this device
Download the instructions for your Audio software in PDF format for free! Find your manual Repeater - D16 Group and take your electronic device back in hand. On this page are published all the documents necessary for the use of your device. Repeater by D16 Group.
USER MANUAL Repeater D16 Group
Preliminary information....4
Overview 5
Signal Flow 6
Processing blocks before the feedback loop ....7
Preliminary amplifier and audio clipper 7
Delay line with feedback loop 8
Delay line times 9
Tap 9
Synchronizing the delay line with the hosting application tempo....9
Feedback 11
Analog mode....11
Ping-Pong 11
Processing blocks after the feedback loop 12
Phase inverter....12
Dual filter....12
Stereo mixer 13
Master section....15
Delay line models....15
Stereo link 17
Preset Management 16
Preset storage....16
Browsing presets....17
Sources 18
Filter 18
Groups and tags....18
Results 19
Preset filtering using Groups and Tags 20
Basic Actions 20
Group operator....20
Filter enable / disable 21
Other types of filtering 21
Searching by name 21
Filtering Favorite presets....21
Filtering Pinned presets....22
Info pane....23
Browser's visual adjustments....24
Folding sections....24
Resizing columns....24
Editing presets 25
Preset selection for Edit....25
Preset renaming 25
Preset deletion 26
Tags editing 26
Author editing 28
Description editing 28
Setting presets as Favorites 29
Pinning presets....29
Preset exchange....30
Export 30
Import 31
Importing Patterns 31
Creating custom Tags and Groups structure....31
Adding custom Tags 31
Editing custom Tags....32
Adding custom Groups 32
Editing custom Groups 33
Unassigned Tags 33
Configuration....34
MIDI Learn 34
Linking a parameter to MIDI CC 34
Unlinking a parameter from MIDI CC 35
Loading / Saving a MIDI CC Map....35
Quality settings 35
GUI 36
Size 36
System Scale 36
Theme 36
Default Settings 36
Changing default settings....36
Restoring factory defaults 37
Requirements
Software and hardware requirements:

Windows PC
OS version Windows 7 or newer
CPU 2.0 GHz SSE (Multicore 2.4 GHz recommended)
RAM 8 GB (16 GB Recommended)
Software VST2 / VST3 /AAX compatible host application (32bit or 64bit)

Apple Mac
OS version OS X 10.13 or newer
CPU Intel based 2.0 GHz (2.4 GHz recommended), Apple Silicon
RAM 8 GB (16 GB Recommended)
Software AU / VST2 / VST3 / AAX compatible host application (64bit!)
Hardware requirements / recommendations are based on estimates performed on available computers at D16 Group HQ, and therefore cannot cover all possible configurations available on the market. CPU usage may vary widely depending on the manner in which the product is used. Factors that may contribute to variance in CPU usage include particular patch and its complexity, the global quality setting, project sample rate. In order to form a better understanding of how a plug-in will behave within your current setup, we highly recommend downloading the demo and giving it a try.
Preliminary information
This chapter contains general advice for using the plug-in's interface.
To do a right-click on macOS with single button mice:
Either use your mouse click while holding the CTRL key on your keyboard or use two fingers on your touchpad.
Checking the value of a parameter
Right-click on any parameter to check its value in its context menu:

A parameter's context menu
Note: It's currently not possible to enter a precise value in the input box; it's just to check the value.
Fine-tuning continuous parameters
Tweak a control (knob) while holding the CTRL key (on Windows) or Apple CMD key (on macOS) - this will make the tweaking more precise while moving the mouse pointer up and down.
Double-click to reset a continuous parameter's value
Double-clicking on a parameter restores its value to the initial state, either default (right after loading the plug-in / loading it along a project file) or from the most recently loaded preset.
Overview
Repeater is a stereo delay type effect processor with independent control of processing path for left and right channels. It also emulates the nature and of many various hardware devices of this kind (including the classic effect units).
When the plug-in is loaded to the hosting application its graphic interface appears:

Repeater graphical interface
- Configuration and Preset management section:

Configuration and Preset management section
• And the Signal processing section consisting of the all remaining controls.
Signal Flow
In general, the Repeater processing path may be described as two independent paths; left and right channel. Each path has an independent delay line and additional (identical for each channel) processing blocks, which enrich the overall capabilities. This chapter focuses on the description of the processing path and its components or the individual processing blocks and the parameters that control them.

flowchart
graph LR
    IN_L --> CLIPPER1["IN L"]
    IN_R --> CLIPPER2["IN R"]
    CLIPPER1 --> OUTOUTOUTOUTOUTOUTOUTOUTOUTOUTOUTOUTOUTOUTOUTOUTOUTOUTOUTOUTOUTOUTOUTOUTOUTOUTOUTOUTOUTOUTOUTOUTOUTOUTOUTOUTOUTOUTOUTOUTOUTOUTOUTOUTOUTOUTOUTOUTOUTOUTOUTOUTOUTOUTOUTOUTOUTOUTOUTOUTOUTOUTOUTOUTOUTOUTOUTOUTOUTOUTOUTOUTOUTOUTOUTOUTOUTOUTOUTOUTOUTOUTOUTOUTOUTOUTOUTOUTOUTOUTOUTOUTOUTOUTOUTOUTOUTOUTOUTOUTOUTUT
    CLIPPER1 --> CLIPPER2
    CLIPPER1 --> STRERO_DELAY_LOOP["STEREO DELAY LOOP"]
    CLIPPER2 --> STRERO_DELAY_LOOP
    STRERO_DELAY_LOOP --> OUTL1["IN L"]
    STRERO_DELAY_LOOP --> OUTR1["IN R"]
    STRERO_DELAY_LOOP --> OUTR2["IN R"]
    STRERO_DELAY_LOOP --> OUTR3["IN R"]
    STRERO_DELAY_LOOP --> OUTR4["IN R"]
    STRERO_DELAY_LOOP --> OUTR5["IN R"]
    STRERO_DELAY_LOOP --> OUTR6["IN R"]
    STRERO_DELAY_LOOP --> OUTR7["IN R"]
    STRERO_DELAY_LOOP --> OUTR8["IN R"]
    STRERO_DELAY_LOOP --> OUTR9["IN R"]
    STRERO_DELAY_LOOP --> OUTR10["IN R"]
    STRERO_DELAY_LOOP --> OUTR11["IN R"]
    STRERO_DELAY_LOOP --> OUTR12["IN R"]
    STRERO_DELAY_LOOP --> OUTR13["IN R"]
    STRERO_DELAY_LOOP --> OUTR14["IN R"]
    STRERO_DELAY_LOOP --> OUTR15["IN R"]
    STRERO_DELAY_LOOP --> OUTR16["IN R"]
    STRERO_DELAY_LOOP --> OUTR17["IN R"]
    STRERO_DELAY_LOOP --> OUTR18["IN R"]
    STRERO_DELAY_LOOP --> OUTR19["IN R"]
    STRERO_DELAY_LOOP --> OUTR20["IN R"]
    STRERO_DELAY_LOOP --> OUTR21["IN R"]
    STRERO_DELAY fifteenOutout
    STRERO_DELAY fifteenOutout --> OUTVOLUME["+"]
    STRERO_DELAY fifteenOutout --> OUTWETIN["DRY IN WET IN"] --> OUTWETIN_outout
    STRERO_DELAY fifteenOutout --> OUTWETIN_outout
    STRERO_DELAY fifteenOutout --> OUTWETIN_outout
    STRERO_DELAY fifteenOutout --> OUTWETIN_outout
    STRERO_DELAY fifteenOutout --> OUTWETIN_outout
    STRERO_DELAY fifteenOutout --> OUTWETIN_outout
    STRERO_DELAY fifteenOutout --> OUTWETIN_outout
    STRERO_DELAY fifteenOutout --> OUTWETIN_outout
    IN_R --> CLIPPER1
    IN_R --> CLIPPER2
    IN_R --> CLIPPER1
    IN_R --> CLIPPER2
    IN_R --> CLIPPER1
    IN_R --> CLIPPER2
Schematic diagram of the entire processing path
Each processing block refers to the specific GUI section. The order in which the blocks are described in this chapter reflects the order in which the signal is processed by these blocks.
Processing blocks before the feedback loop
Preliminary amplifier and audio clipper
Before the signal is fed to the feedback delay loop it is processed by the audio clipper block which results in the signal saturation which intensity depends on the gain controlled by the INPUT parameter and the ingoing signal's amplitude.

flowchart
graph TD
    A["INPUT"] --> B["X"]
    C["IN L"] --> B
    D["IN R"] --> E["X"]
    B --> F["COLOR L"]
    E --> G["CLIPPER"]
    F --> H["LEFT CHANNEL FLOW"]
    G --> I["OUT"]
    H --> J["RIGHT CHANNEL FLOW"]
    I --> K["IN"]
    J --> L["OUT"]
    M["COLOR R"] --> N["CLIPPER"]
    O["COLOR"] --> P["IN"]
    Q["COLOR"] --> R["OUT"]
Pre-amplification and clipping blocks of the left and right channel
The parameters that control this section are as follows:
• INPUT – Controls the input signal gain from -12 up to +12 [dB].

Input parameter
• COLOR L, COLOR R – The parameters that control the tone characteristics of the left and right channel audio clipper:

Left and right channel Color parameter
Delay line with feedback loop
The Clipper's output signal is fed to the delay line with feedback loop;

flowchart
graph TD
    A["PING PONG"] --> B["+"]
    C["IN L"] --> B
    D["IN R"] --> E["+"]
    B --> F["FEEDBK L"]
    B --> G["DELAY L"]
    E --> H["+"]
    I["SPREAD"] --> J["+"]
    K["DELAY R"] --> J
    L["FEEDBK R"] --> J
    J --> M["DELAY LINE"]
    M --> N["LEFT CHANNEL FLOW"]
    M --> O["RIGHT CHANNEL FLOW"]
    style A fill:#f9f,stroke:#333
    style C fill:#f9f,stroke:#333
    style D fill:#f9f,stroke:#333
    style I fill:#f9f,stroke:#333
    style K fill:#f9f,stroke:#333
    style L fill:#f9f,stroke:#333
    style M fill:#ccf,stroke:#333
    style N fill:#ccf,stroke:#333
Schematic diagram of Repeater delay line
Its operation is controlled by the following GUI section:
![Digital 42 DELAY MODEL 250.0 TIME [ms] 250.0 0 Max DELAY L - LINK 0 Max DELAY R 0 Max FEEDBACK L LINK - PHASE INVERT 0 Max FEEDBACK R](/content/2026/05/943377/images/53b6e24fd836ab0e73c8fcfa025022d1e573e558c75518e78e4effcb6dea6740.jpg)
Repeater delay line parameter control section

Repeater Delay Line modifiers section
Delay line times
DELAY L and DELAY R control (independently) the line delay times of the left and right channel from 0.1 up to 1000 [ms] (while tempo synchronization is disabled).
![250.0 TIME [ms] 250.0 0 Max DELAY L - UNK 0 Max DELAY R 0 Max FEEDBACK L LINK PHASE INVERT 0 Max FEEDBACK R](/content/2026/05/943377/images/f36ef6ed74a8b5071eb78aa31f4818ba4da9bd9968e641fedfbe114612755a06.jpg)
Delay L and Delay R parameters
Delay times may also be adjusted precisely by dragging the up-down mouse pointer above the digits representing the consecutive delay decimal position on the adjacent display:
![250.0 TIME [ms] 250.0](/content/2026/05/943377/images/bfcd6d754f117692d828fa748da39061a38bbe6274387b9e44d1663c503646f3.jpg)
Display with the current delay time for the left and right channel
Tap
TAP is used to set the delay time "using ears" by clicking TAP rhythmically. The plug-in measures the time between the consecutive clicks, averages it and sets it as a new delay time.

Tap button
This function is available only for the tempo synchronization being disabled
Synchronizing the delay line with the hosting application tempo
SYNC. MODE activates/deactivates the synchronization of the delay times with the hosting application tempo.

Sync. mode parameter
This parameter takes one of the two values:
- DISABLED - Synchronization with the hosting application tempo is deactivated (default value) and the delay times are set in milliseconds.
- ENABLED – Synchronization with the hosting application tempo is active. In this mode the delays are set as note values (tempo-dependent units). It should be mentioned that when this mode is active the display showing the delay values looks slightly different:

Delay in the tempo synchronization mode
DELAY L and DELAY R parameters allow to select one of the following duration values for the delay time: 1/1, 1/2, 1/4, 1/8, 1/16, 1/32, 1/64 - for the left or right channel respectively.
Together with the Note Value we can select one of the three available Modifiers by clicking adequate area on the display (above).
• Full – Delay time equals the duration of the selected Note Value exactly.
• Triplet - Delay time equal to 2/3 of the duration of the selected Note Value.
• Dotted- Delay time equal to 3/2 of the duration of the selected Note Value.
Keep in mind due to internal buffer's limitation maximum delay time can't exceed 10 seconds.
Toggling between SYNC. MODE states:
• From note duration to delay time [ms] when you switch from Enabled to Disabled.
• From delay time [ms] to note duration when you switch from Disabled to Enabled
In this case plug-in tries to estimate the closest note (for a given tempo) value corresponding to the given delay time since it can't be a precise value.
Spread
SPREAD is a left and right channel line delay time modifier. When this function is active a phase offset occurs between both delay lines, which makes an impression that the stereo scene is wider. The function operates with two intensity levels and is controlled with the SPREAD switch:

Spread parameter
It takes the following values:
- OFF – Function inactive.
• A – Function active with the lower intensity/smaller phase offset. - B – Function active with the higher intensity/larger phase offset.
Feedback
Feedback value of the left and right channel delay lines is controlled with FEEDBACK L and FEEDBACK R, respectively.

Feedback L and Feedback R parameters
Analog mode
In this mode, the feedback loop works in analog-like fashion, which results in the sound becoming dimmer with each pass through the loop. Analog toggle button enables / disables this mode:

Analog button
Ping-Pong
By default left and right channel delay line feedback loops are separated and operate independently (PING-PONG is inactive). When the PING-PONG is active the feedback loops of both stereo channels are connected crosswise; the left channel loop connects with the right channel summing node and vice versa:

flowchart
graph TD
    subgraph "PING PONG DISABLED"
        INL["IN L"] --> +1["+"]
        INR["IN R"] --> +2["+"]
        +1 --> DELAYLINE1["DELAY LINE"]
        +2 --> DELAYLINE2["DELAY LINE"]
    end
    subgraph "PING PONG ENABLED"
        INL2["IN L"] --> +3["+"]
        INR2["IN R"] --> +4["+"]
        +3 --> DELAYLINE3["DELAY LINE"]
        +4 --> DELAYLINE4["DELAY LINE"]
    end
    +1 --> DELAYLINE1
    +2 --> DELAYLINE2
    +3 --> DELAYLINE3
    +4 --> DELAYLINE4
    DELAYLINE1 --> DELAYLINE2
    DELAYLINE2 --> DELAYLINE3
    DELAYLINE3 --> DELAYLINE4
    DELAYLINE1 --> DELAYLINE2
    DELAYLINE2 --> DELAYLINE3
    DELAYLINE3 --> DELAYLINE4
Feedback loops - Independent / separated (to the left) and connected in the Ping-Ping mode (to the right)
The effect is switch on/off with the toggle PING-PONG button:

Ping-Pong button
Processing blocks after the feedback loop
This chapter describes the operation and control of the blocks processing the signal outgoing from the feedback loop delay line.
Phase inverter
The signal from the feedback loop is fed to the Phase inverter. This block allows the signal phase be reversed (signal mirror reflection relative to the time axis).

Phase invert buttons
The PHASE INVERT toggle buttons activate the Phase inverter for: left channel - upper button or right channel - lower button.
Dual filter
The signal from the Phase inverter is sent to the Dual filter. This module consists of two passive filters, Low pass and High pass which operate in the cascade. They allow to remove the harmonic content outside the band specified by the cut-off frequencies of these filters:
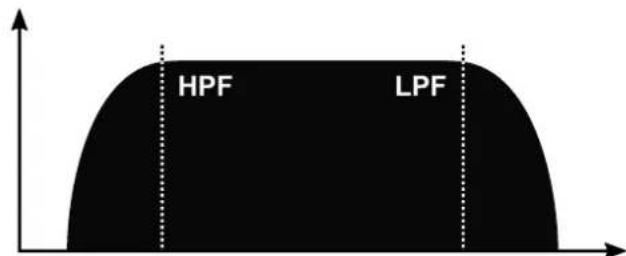
Dual filter frequency response
The Repeater path includes two Dual filters, one for each stereo channel, which are controlled from the following GUI section:
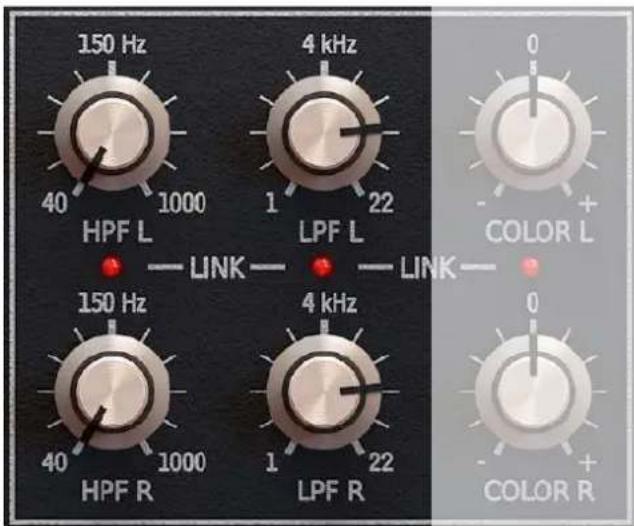
Filter cut-off frequencies for both stereo channels
The parameters available here are as follows:
• HPF L – Left channel High pass filter cut-off frequency. Operating range from 40 up to 1000 [Hz]
• LPF L – Left channel Low pass filter cut-off frequency. Operating range from 1 up to 22 [kHz]
• HPF R – Right channel High pass filter cut-off frequency. Operating range from 40 up to 1000 [Hz]
• LPF R – Right channel Low pass filter cut-off frequency. Operating range from 1 up to 22 [kHz]
Stereo mixer
The Stereo mixer is the subsequent block in the processing path. It has two functions:
Firstly, it provides independent panning of each stereo channel which actually implies that the Repeater may be considered as a delay effect with two independent processing paths rather than an effect with the stereo processing path with the independently controlled parameters of both (left and right) channels.
Secondly, it is able to mix the processed (Wet) signal with the unprocessed (Dry) signal independently for both stereo channels.

flowchart
graph TD
    A["DRY L"] --> B["PANNING"]
    C["WET L"] --> B
    B --> D["+"]
    E["MIX L"] --> F["MIX"]
    G["DRY IN"] --> H["MIX"]
    I["WET IN"] --> J["MIX"]
    K["OUT L"] --> L["OUT L"]
    M["PANNING"] --> N["+"]
    O["PANNING"] --> N
    N --> P["+"]
    Q["DRY IN"] --> R["MIX"]
    S["WET IN"] --> R
    T["OUT L"] --> U["MIX"]
    V["DRY R"] --> W["PANNING"]
    X["DRY L"] --> Y["PANNING"]
    Z["DRY IN"] --> AA["MIX"]
    AB["DRY IN"] --> AC["MIX"]
    AD["DRY IN"] --> AE["MIX"]
    AF["DRY IN"] --> AG["MIX"]
    AH["DRY IN"] --> AI["MIX"]
    AJ["DRY IN"] --> AK["MIX"]
    AL["DRY IN"] --> AM["MIX"]
    AN["DRY IN"] --> AO["MIX"]
    AP["DRY IN"] --> AQ["MIX"]
    AR["DRY IN"] --> AS["MIX"]
    AT["DRY IN"] --> AU["MIX"]
    AV["DRY IN"] --> AW["MIX"]
    AX["DRY IN"] --> AY["MIX"]
    AZ["DRY IN"] --> BA["MIX"]
    BB["DRY IN"] --> BC["MIX"]
    BD["DRY IN"] --> BE["MIX"]
    BF["DRY IN"] --> BG["MIX"]
    BH["DRY IN"] --> BI["MIX"]
    BJ["DRY IN"] --> BK["MIX"]
    BL["DRY IN"] --> BL["MIX"]
    BN["DRY IN"] --> BO["MIX"]
    BP["DRY IN"] --> BP["MIX"]
    BQ["DRY L"] --> B
    RQ["DRY L"] --> B
    AA["DRY L"] --> B
    AB["DRY L"] --> B
    AC["DRY L"] --> B
    AD["DRY L"] --> B
    AE["DRY L"] --> B
    AF["DRY L"] --> B
    AG["DRY L"] --> B
    AH["DRY L"] --> B
    AI["DRY L"] --> B
    AJ["DRY L"] --> B
    AK["DRY L"] --> B
    AL["DRY L"] --> B
    AM["DRY L"] --> B
    AN["DRY L"] --> B
    AO["DRY L"] --> B
    AP["DRY L"] --> B
    AQ["DRY L"] --> B
    AR["DRY L"] --> B
    AS["DRY L"] --> B
    AT["DRY L"] --> B
Signal flow through the Stereo mixer module
The Stereo mixer block is controlled from the following GUI section:

Stereo mixer section
The following parameters are available:
• PAN L, PAN R – Re-panning the signal of the left and right channel, respectively.
• MIX L, MIX R – Mixing together dry and wet signal for the left and right channel, respectively.
The Padlock icon in the upper-right corner is used to lock the MIX L and MIX R parameters, so when preset is loaded these remain unchanged

Parameter lock function
Master section
The Master section is the last Repeater processing path's component:
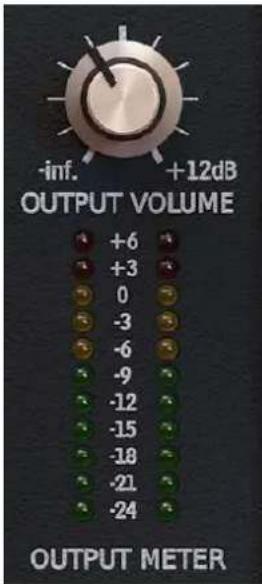
Master section
Its parameter, OUTPUT VOLUME, is used to control the output signal gain from -inf up to +12 [dB], and the VU-meter shown below (OUTPUT METER) indicates the current level of this signal.
Delay line models
The previous chapters focused on specifying and describing the processing modules, which are the components of the Repeater; explaining their roles in this effect and their interconnections.
As already said at the beginning, the basic feature of the Repeater is its ability to emulate the tone characteristics of the whole variety of delay devices by selecting the line Model to be emulated by the plug-in. However, in spite of appearances, it does not mean that the set of available parameters or interface change. It does not mean that the set of available processing blocks and/or their interconnections change either. The Repeater delay line Model affects only its tone characteristics and the lowest level of the processing path (processing blocks' implementation to be precise).
The Model is changed by clicking the DELAY MODEL control:

Delay model parameter
Alternatively you can use Left and Right buttons to sequentially switch between the models.
There are several dozen models to select from:
- Cassette Tape - A model of an early 80's Japanese cassette tape deck. Not too lofi or hifi, I'd call this one "mid-fi"!
- Coopy Cube - An early 70's delay originally made from a garden hose! Great for short delays to add depth, use it at 15ms with the Spread option
- Digital 42 - One of the most famous modern digital delays, this one has a uniquely 'early digital' tone with a touch of graininess and a slight scoop. Sounds great on guitars and vocals.
- Digital 42 x2 - The double option on the digital 42, it halves the sample rate for an extremely unique lofi tone that is great on vocals, guitars, and drums.
Digital Delay - A hi resolution digital delay. Use RePeater's filters and color to customize the tone.
• DM-2 - An early bucket brigade analog delay with a warm and rich tone. Amazing on guitars and synths. - Mellow Delay - A smooth, subdued delay that is based on several vintage analog topologies.
• Memory Guy - Lush analog delay with fat vintage tone. - Mirky Delay - Based on early bucket brigade analog delays, it is dark and thick. Great as a special effect delay or thickener when used with the Spread control.
- New Radio - Delay tone with FM radio style 'scooped' hifi tone. Try it on vocals.
- Old Radio - Delay tone with AM radio style grainy lofi tone
- Pitchy Delays - Delays with slight pitch modulations for extremely spatial and deep effects. Sounds great when both delay lines are set to the same time creating a chorusing mono effect. These can also be used with tight delays with Spread A or B for widening and thickening effects.
• Plexy Echo - Based on an old 70s tape delay unit. It's fat tone sounds great on vocals guitars and even drums.
• Space Delay - Based on the famous magnetic tape delay with warm and gritty tone. A classic on guitars. - Tape Delay Ancient - An extremely old 1940's style tape delay tone.
- Tape Delay Classic - Early 60's style tape delay.
- Tape Delay Modern - Hifi tape delay with warm and lush tone.
- Tape Delay Vintage - 70's style tape tone, slightly grainy but warm.
• Telephone 1 - Lofi telephone tone, great for special effects or used as an insert on vocal or even full mix
• Telephone 2 - Another lofi telephone tone with slightly different frequency and distortion tone - TelRay - The analog delay classic made original from a tuna can. Beautifully lofi with a rich tone that is perfect for guitars.
The individual delay line Models directly affect such plug-in operation aspects as:
- Implementation of the delay line alone - thus affecting its tone characteristics which is connected with the signal degradation, possible detune or saturation.
- Feedback loop attenuation frequency response
- Dual filter calibration
- Feedback loop response
Stereo link
The Repeater processing paths and blocks are identical for left and right channel. Owing to that, the sets of parameters controlling each of them are also identical. The GUI controls are located so that it is easier to see which parameters control the left or right channel path. So the upper row contains the controls for the left channel and the bottom row – for the right channel:
![250.0 DELAY L TIME [ms] - LINK FEEDBACK L LINK - PHASE INVERT 150 Hz 4 kHz 0 HPF L LPF L COLOR L - LINK - LINK 150 Hz 4 kHz 0 HPF R LPF R COLOR R - LINK - LINK C 50% L R 0 100 PAN L MIX L - LINK - 50% L R 0 100 PAN R MIX R](/content/2026/05/943377/images/b15a572d524d65c84e0babb075591376c491d7068b8b7158fe2164d94005207b.jpg)
The upper row controls the left channel parameters and the bottom row - the right channel.
It is possible to link up the up-down parameters in pairs so that the given parameter value is identical for both channels. You can do it with the LINK LEDs located in the middle of the interface:
![250.0 TIME [ms] 250.0 DELAY L Max 0 Max FEEDBACK L LINK - PHASE INVERT 0 Max 0 Max FEEDBACK R 150 Hz 4 kHz 0 HPF L 1000 40 1000 1 22 COLOR L C L R 50% 0 100 PAN L MIX L LINK - 150 Hz 4 kHz 0 HPF R 1000 1 22 LPF R COLOR R C L R 50% 0 100 PAN R MIX R](/content/2026/05/943377/images/29d15e28c60175ecdd698bd68f03284c055a1ed1d82c11d6fdea38ca0beea1ce.jpg)
Link LEDs row to join the controls in pairs (left - right channel)
When the connection is enabled (LED is on) the controls are interconnected and any change of the value of one of these controls automatically changes the value of other control.
Win (Ctrl + Link), Mac (Cmd + Link) - Links / Delinks all stereo control pairs.
Preset Management
Preset storage
Presets, both from Factory content and user ones, are stored as files in proper locations on the disc. Each time a plug-in instance is loaded into a project, these locations are scanned and the presets found there are consolidated into a single linear structure (list) in the Preset Browser.
Browsing presets
The Preset management section (no matter what kind of preset it concerns) enables quick navigation and browsing of the preset structure:

The Preset management section
- PRESET - Displays the name of the currently loaded preset. Clicking the display opens the Preset Browser panel, allowing you to browse factory / user presets.
• Prev / Next - Hovering over right side of the Preset display exposes the Prev / Next buttons: They allow for linear browsing of the presets list (depending on currently set filters - see sections below). - Save ▶ - Saves current parameters as a new preset or allows for overwriting of the existing one (see sections below).
Right-clicking over the Preset display opens a context menu with two or three additional options:
- Init - Restores initial settings of plug-in parameters.
- Reload - Reloads the most recently loaded preset.
- Save - Seedescription above.
The Preset Browser looks as follows:
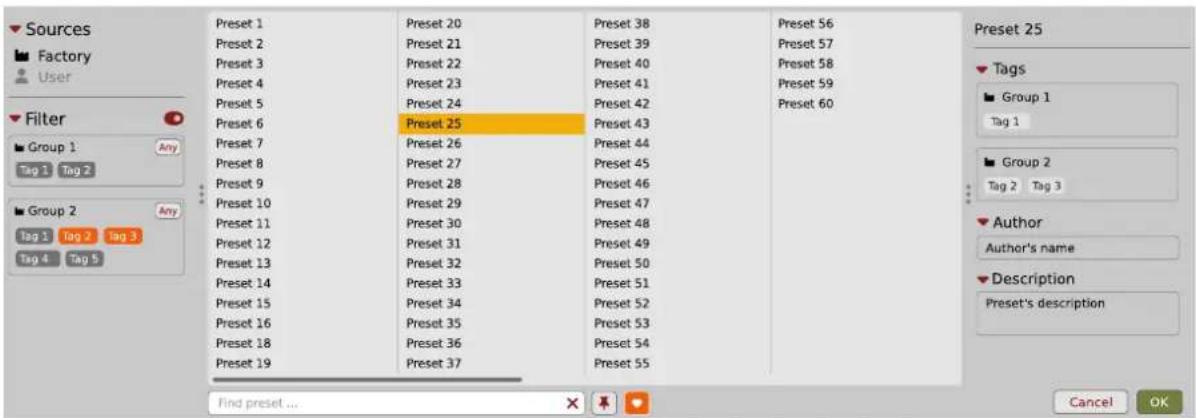
The Preset Browser
There are four main parts:
- Sources - Situated in the left column, filter content Sources for displayed presets.
• Filter - Below Sources, a preset Filter that uses the Tags system.
• Results - List of presets (shown in the middle column) from Sources that meet criteria set in the Filter. - Info pane - The right column shows information about the currently selected preset(s), divided into several subsections.
If available - For some preset types this button can be hidden and accessible from the contextual menu (accessible via right mouse-click on Preset display)
If available
Sources
In this section, you can choose a Source / Source(s) that you want to browse presets from.

Preset Sources
There are two resources to choose from:
- Factory - Delivered together with the plug-in and cannot be modified (read-only).
- User - Created by the user and can be freely modified or shared with other users.
Choosing any of them will cause the results to narrow to the presets from one resource.
Filter
The section below is the Filter, which represents a preset filtering system using Groups and Tags to browse the content.
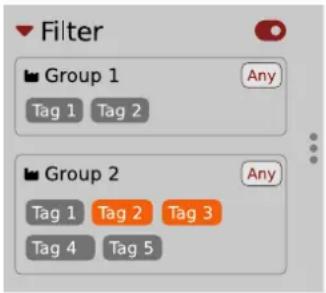
The Filter section
Groups and tags
Each Preset is described by a few common Groups. Within each of them there may be one or more Tags from a particular set.

The Filter group
Presets from the Factory resource were assigned Groups and Tags when they were created.
Groups and Tags describe the content clearly, taking into account the plug-in's purpose.
Editing of the Groups and Tags for Factory content is limited. User presets can be described with the same Groups and Tags as Factory content, or you may define additional Tags within factory Groups and even create your own Groups with your own Tags to describe your own presets.
The only limitation is that a user cannot remove factory Groups or Tags from Factory content.
Results
This is a list of presets from chosen Sources that meet the filtering criteria. The basic function of this section is to browse and load presets. It can also be used for editing, which is described later.
| Preset 1 | Preset 20 | Preset 38 | Preset 56 |
| Preset 2 | Preset 21 | Preset 39 | Preset 57 |
| Preset 3 | Preset 22 | Preset 40 | Preset 58 |
| Preset 4 | Preset 23 | Preset 41 | Preset 59 |
| Preset 5 | Preset 24 | Preset 42 | Preset 60 |
| Preset 6 | Preset 25 | Preset 43 | |
| Preset 7 | Preset 26 | Preset 44 | |
| Preset 8 | Preset 27 | Preset 45 | |
| Preset 9 | Preset 28 | Preset 46 | |
| Preset 10 | Preset 29 | Preset 47 | |
| Preset 11 | Preset 30 | Preset 48 | |
| Preset 12 | Preset 31 | Preset 49 | |
| Preset 13 | Preset 32 | Preset 50 | |
| Preset 14 | Preset 33 | Preset 51 | |
| Preset 15 | Preset 34 | Preset 52 | |
| Preset 16 | Preset 35 | Preset 53 | |
| Preset 18 | Preset 36 | Preset 54 | |
| Preset 19 | Preset 37 | Preset 55 |
The Results list
- Click any name to choose and load the preset.
- Double-click the name to choose, load the preset and close the browser.
Hitting the OK button confirms loading a preset and closes the browser. Using Cancel closes the browser but reverts all parameter changes that loading a new preset might have caused.
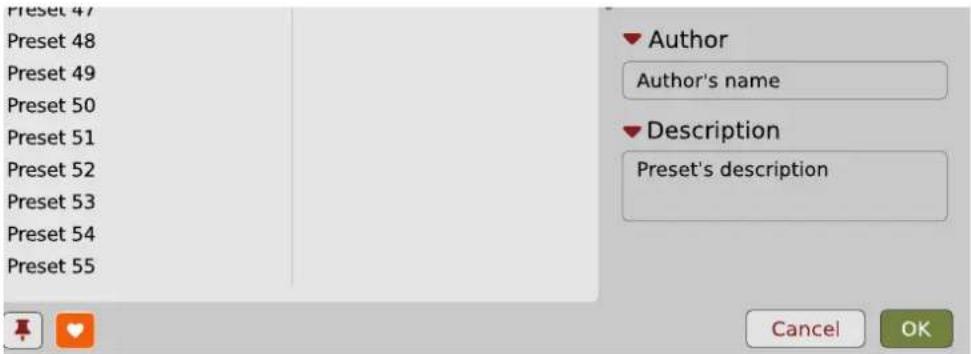
The OK and Cancel buttons in the browser
Using the X icon has the same effect as the OK button:

Close Browser window
Preset filtering using Groups and Tags
The Filter section contains Groups of Tags. Each Group is represented by a rectangle with the Group name + set of Tags inside.
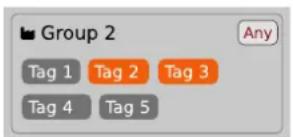
Group 2 with two tags set (Tag 2 and Tag 3)
The filtering process cascades from top to bottom. This means that all presets available in the selected Sources are filtered by selected Tags from the first Group (uppermost one), then the Group below and so on, until filtered by the last active Group (the bottom one).

flowchart
graph LR
    A["SOURCES"] --> B["GROUP 1"]
    B --> C["..."]
    C --> D["GROUP M"]
    D --> E["RESULTS"]
    B --> F["TAG 1"]
    B --> G["TAG 2"]
    B --> H["TAG 3"]
    B --> I["TAG N"]
    D --> J["TAG 1"]
    D --> K["TAG 2"]
    D --> L["TAG 3"]
    D --> M["TAG N"]
Preset Filtering with the use of Groups
The result of the cascade filtering process is listed in the middle column, the Results / presets list section. You can also consider the Results list as an intersection of preset sets, found by filtering through every individual Group.
Basic Actions
Tags work as toggle buttons. Click to activate / deactivate a Tag; a gray background color means that the Tag is inactive, and orange means that the Tag is active.
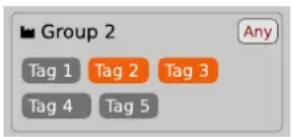
Group 2 with two tags set (Tag 2 and Tag 3)
If at least one Tag in a Group is active, then the Group (filter) also becomes active, otherwise the Group chosen doesn't affect the filtering process at all.
Group operator
When a single Tag is active in a Group, only presets having that Tag set are displayed in the Results.
If two or more Tags in a Group are active, the Results depend on the Operator chosen for the Group:
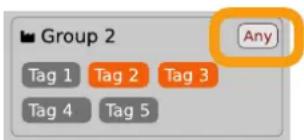
A Group operator
The Operator button works in toggle mode and offers a choice of two alternative Operators for the Group:
- Any ▶ - Means that a preset is shown in the Results when the preset includes at least one of the active Tags from the Group.
• All ▶ - Means that a preset is shown in the Results only when the preset includes all active Tags from the Group.
Filter enable / disable
You can quickly enable / disable the Filter using the toggle switch in the top-most section of the Filter:

An On/Off switch for a Group Filter
Other types of filtering
Searching by name
Alternatively, you can look for a preset by entering its name or just a piece of its name into the Find preset field:

The Find preset input
The Results are refreshed on-the-fly and they work together with the other filters.
Using the X icon clears the entire field:

Clearing the search field
Filtering Favorite presets
You can mark presets as a Favorite by clicking the Heart icon while hovering on preset name ▶. You can unmark presets by clicking the icon again (toggle mode):
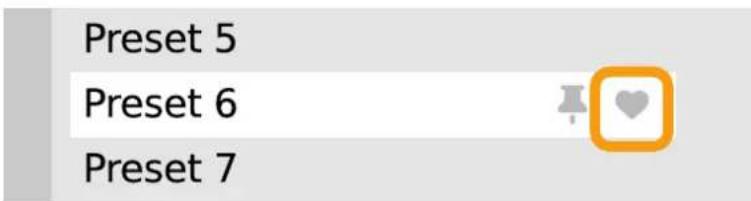
Setting a preset as a Favorite on the list
Logical OR between Tags in the Group
Logical AND between Tags in the Group
It's allowed for every source (factory or user)
The flag is stored globally, meaning that a Favorite preset will be accessible as such from every other instance of the plug-in.
Once you have your Favorite presets flagged, you can quickly filter them using the toggle button with a Heart icon on it:
Find preset ...


Favorite presets filtering
If the button is active, then only Favorite presets will be shown (considering all remaining filters).
Filtering Pinned presets
You can Pin one or more presets using the Pin icon while hovering over a preset name ▶. You can unpin a preset by clicking the icon again (toggle mode):
Preset 6

Pinning a preset on the list
Unlike Favorites, this flag works locally and it's stored with the project file (not global config), so Pins are stored individually for every instance (with total recall, so a plug-in state is recalled if saved in the context of a project).
But, similarly to Favorites, you can easily filter presets using the toggle button with the Pin symbol on it:
Find preset ...


Pinned presets filtering
If the button is active, then only Pinned presets will be shown (considering all remaining filters).
Info pane
The column to the right shows information about the selected preset or presets. It also provides access to some of the preset editing functions.

The Info pane
There's a preset name at the top.

The Preset name in the Info pane
Additionally, if you've selected more than one preset there's information about how many more have been selected:
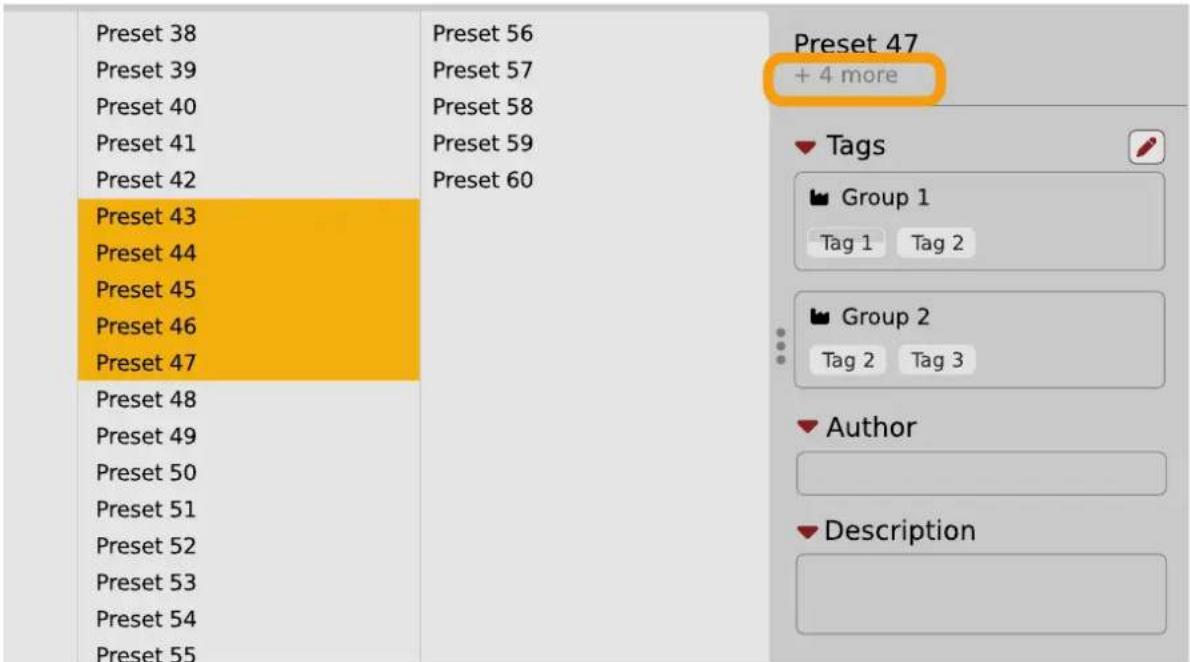
Selecting more than one preset
Below the preset(s) name there are few common sections describing selected presets:
- Tags
• Author - Description
Browser's visual adjustments
Folding sections
If you don't need to see the contents of every section / subsection, you can fold some of them up using the Caret icons:
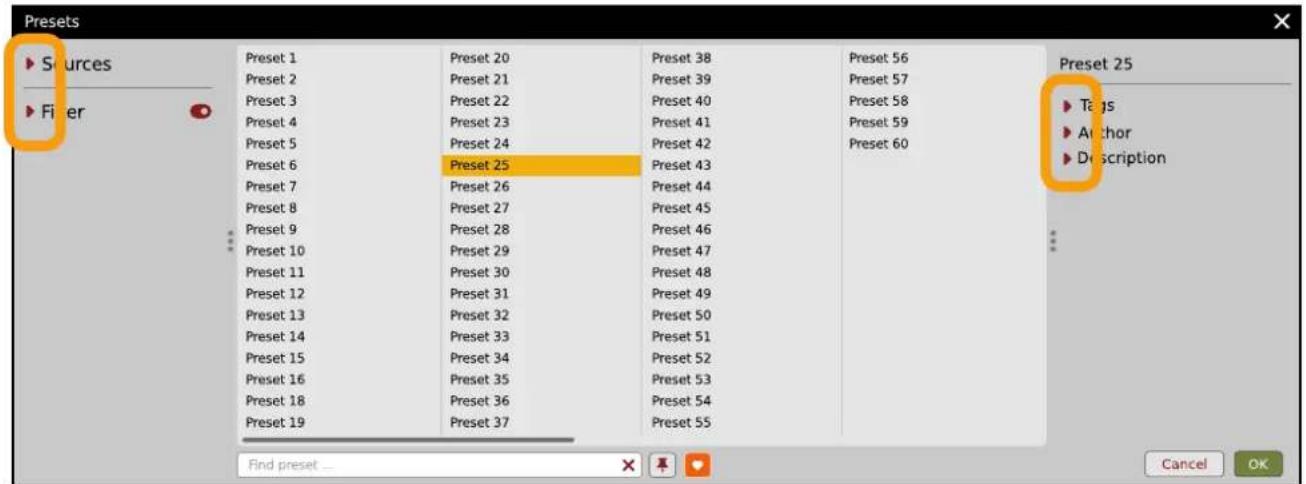
Sections folded up
Resizing columns
You can use the three-dotted handles to change a column's width to your preference.

Resizing Browser columns
Editing presets
You can perform certain actions on presets, such as adjusting Groups and Tags, deletion, renaming the presets as well as their export or import. One should bear in mind, however, that some operations are only allowed on user presets but not on Factory content.
Preset selection for Edit
Some operations can be done on more than one preset, so you're allowed to select more than one preset at once; in the Results section, you can choose a preset or a set of presets in the following ways:
- Click a preset - Selects (and loads) one preset from the list.
- Win ( Ctrl + Click the preset ), Mac ( Cmd + Click the preset ) - Adds another preset to an already chosen preset or a set of presets.
- Shift + Click the preset - Selects a range of presets from the last chosen preset to the preset clicked with the Shift key.
• Right-Click on any Preset in the Results section and choose the Select All option - this selects all presets:

Selecting all presets
Preset renaming
On a selected preset ▶, right-click to open the context menu and select the Rename option:

Preset renaming
Preset deletion
Once you have selected one or more presets, right-click to open the context menu and select the Delete items ▶ option:
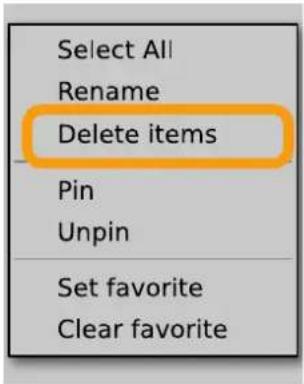
Deleting presets
Alternatively, you can use the Trash bin button in the Info pane to delete selected presets:

The Trash bin button
Tags editing
When you select a preset or presets to change their tags, click the Pencil button next the Tags section in the Info pane to enter Edit mode for the Tags:

Entering the Tag edit mode
With the Edit mode enabled, you will see all possible Groups and Tags available for the preset(s):
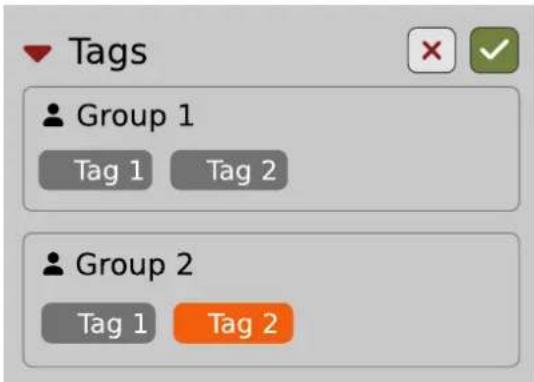
The Tag Edit mode
Tag buttons work in toggle mode, much like filtering. Clicking them either sets or erases a Tag for a chosen preset. If a Tag is set for a preset, it is indicated by an orange background color, whereas if a Tag is not set, it has a gray background color.
If you choose multiple presets with existing tags, Tag buttons will appear orange if a specific Tag appears in all selected presets, and gray if it appears in none.
When a specific Tag is set only for a few of the selected presets, it appears as half-gray and half-orange.

Tags appearing only in part of selection
Changing the Tag status for one or more chosen presets sets or erases this Tag in all these presets. A status change is signaled by an Asterisk to the left of a Tag.

A Tag with a status change
Tag buttons highlighted in half-gray and half-orange color (where Tag values across the highlighted presets aren't all the same) work in a three-state system when switching between states; they turn gray if you erase the Tag for all selected presets, orange if you set the Tag for all selected presets, and return to half-gray and half-orange if the selected items remain unchanged or are returned to their initial state.
Potential changes have to be confirmed using the OK / Cancel buttons at the top part of the Tags section:

Confirmation buttons in the Tags section
Author editing
When you select a preset or presets to change the Author, click the Pencil button next the Author section in the Info pane to enter the Edit mode for the Author field:

Editing Author
Once you've finished editing the field, confirm the operation using the OK / Cancel buttons:

Confirming Author editing
This operation is possible for user content only.
Description editing
When you select a preset or presets to change the Description, click the Pencil button next the Description section in the Info pane to enter the Edit mode for the Description field:

Editing Description
Once you've finished editing the field, confirm the operation using the OK / Cancel buttons:
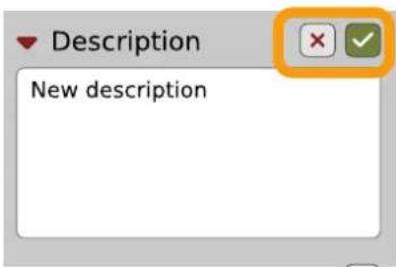
Confirming Description editing
This operation is possible for user content only.
Setting presets as Favorites
As described in the chapters above, you can mark a preset as a Favorite by clicking the Heart icon while hovering over the preset name:
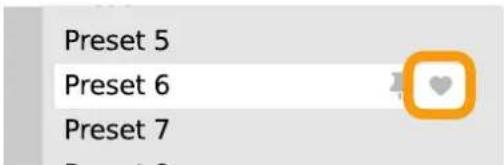
Setting a preset as a Favorite
The flag is stored globally, meaning that a Favorite preset will be accessible as such from every other instance of the plug-in.
It's also possible to perform the operation for a selection of presets. After you select the desired presets in the Results window, right-click on the presets to open a context menu:

Setting Favorite presets from the context menu
And select the Set favorite option.
To clear Favorite flags for the selection of presets, use the Clear favorite option instead.
Pinning presets
You can Pin one or more presets using the Pin icon while hovering over the preset name:

Pinning a preset
Unlike Favorites, this flag works locally and it's stored with the project file (not globally). This means the Pins are stored individually for every instance (with total recall, so a plug-in state is recalled if saved in the context of a project).
It's also possible to perform the operation for a selection of presets. After selecting the desired presets in the Results window, right-click on the presets list to open the context menu:

Pinning presets from selection
And select the Pin option.
To clear the Pin flag for a selection of presets, use the Unpin option instead.
Preset exchange
If you want to make a backup, or exchange a preset with a collaborator, you can export / import selected presets.
Export
Select a preset or presets that you're going to export and drag-and-drop them outside your DAW into a location you'd like to store them:

Exporting presets
The presets will be saved as individual files (one per preset) in the plug-in's native format.
Import
If you'd like to import preset files, you can drag-and-drop preset files from where they're stored, into the preset browser:

Importing presets
They will be automatically imported as user presets.
Importing Patterns
Specifically within the Pattern browser, it's possible to import:
• Native Phoscyon 2 patterns.
- Banks from legacy versions of the plug-in (Phoscyon 1.x) - which will be accessible as alternative Sources, after you drag-and-drop them into the Browser.
• Patterns from Audiorealism ABL 2 or 3 instruments - which will be included in User patterns after import.
Creating custom Tags and Groups structure
Adding custom Tags
Users are allowed to add their own custom Tags to both their own content and factory content. To add a new Tag to an existing filter Group, click over the Group's name to pull down a menu and select the Add Tag option □:

Adding a new Tag
You can do this either in the Info Pane (right column, while the Tag edit mode is enabled) or Filter (left column).
Editing custom Tags
There are a few edit options available for a user to perform on their own Tags, which are available by right-clicking a Tag's name in the Filter section:

The Filter section
You will see a context menu with all the available options:

Editing options for a user Tag
- Rename - Changes the name of a Tag.
• Move to - Moves a Tag to another Group. - Remove - Deletes a Tag.
The menu is accessible only for a user's own Tags.
Adding custom Groups
You can add a custom filter to Groups by clicking the Filter label and selecting the Add Group option from the pull-down menu:

Adding a user Group
From here, you can add Tags to that newly created Group (see above), or move ▶ Tags from other Groups.
You can also add a custom filter to Groups in the Info Pane (right column) or Filter (left column).
Editing custom Groups
There are a few edit options available for a user to perform on their own Groups. Click on a Group's name in the Filter section:

The Filter section
You will see a context menu with the following options:

Edit options for a user Group
• Add Tag - Adds a new tag to the Group (described earlier).
- Rename - Changes the Group's name.
- Remove - Deletes the Group, possible only when all Tags in the Group have also been removed.
- Move up - Moves a Group up in the Filter. Possible unless the Group is already the topmost one.
• Move down - Moves a Group down in the Filter. Possible unless the Group is the last one.
These operations are possible only on user Groups.
Groups in the Filter are ordered with Groups from Factory content first, then user groups below.
You can edit user Groups in either the Info Pane (right column, while Edit mode for Tags is enabled) or Filter (left column).
Unassigned Tags
When you receive content from a collaborator who uses different Tags and Groups, some Tags may show as Unassigned. This happens if the filter structure made by a preset's author is different.
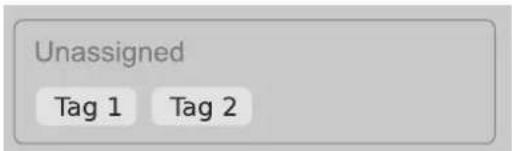
Unassigned Tags
You can move the Tags across your Groups to make them fit your scheme, or re-tag the collaborator content entirely.
Configuration
MIDI Learn
Right-click any plug-in parameter to open the context menu:
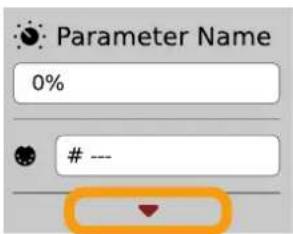
A context menu
Left-clicking outside the menu area closes it automatically.
Clicking the bottom arrow expands the menu and displays all available options:

An expanded context menu
Linking a parameter to MIDI CC
The Learn function enables a quick assignment of physical controllers (from a MIDI controller) to plug-in parameters.
- Click the Learn button to put the plug-in into a pending state before moving any MIDI CC controller.
- Once the CC is recognized, click OK to save the change or click the Cancel button to restore the previous setting.
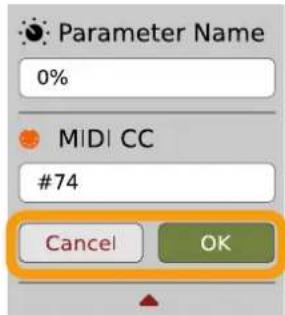
Linking a parameter to MIDI CC
Unlinking a parameter from MIDI CC
You can also delete a MIDI CC code attributed to a parameter from the context menu:
- From the context menu, click the Clear button:

The Clear MIDI CC button
- Then confirm using the OK button.
Loading / Saving a MIDI CC Map
These options are available in the MIDI submenu, accessible under Cog icon in the left-upper corner:

The Load Map and Save Map options
- Save Map - Saves the current MIDI CC map to a file.
- Load Map - Loads a MIDI CC map from a stored file.
Quality settings
The Quality submenu under Cog icon in upper-left corner allows to choose sound quality for Real-time or Offline modes.

Quality settings
The higher the quality, the bigger the impact on the CPU.
GUI
The Size, System Scale and Theme options are accessible from GUI submenu under Cog icon in upper-left corner of the plug-in. With these, you can adjust look of the plug-in, according to the pixel density and resolution of your screen:

The GUI Size and System Scale options
Size
This option lets you choose one of several default skin sizes to best match the plugin to the resolution of your computer monitor.
System Scale
System Scale controls the rescale factor for the whole plug-in. For the best visual results, you should set it to the exact value from your system settings (screen properties).
Theme
The Theme allows you to choose skin color variant according to your preference
Default Settings
You can save your current settings so that the plug-in will default to them for each new instance, or restore the plug-in to load with its factory settings.
Changing default settings
- Click the Cog icon in the left-upper corner of the plugin.
- Go to the Default State submenu and choose the Save current option.
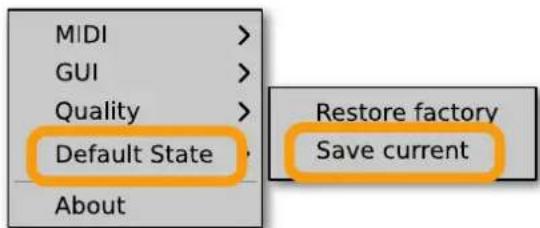
Changing the default state of the plug-in
With this option, the current plug-in state will be saved as the default / initial state for when you insert a new instance of the plug-in.
The plug-in state includes: sound parameters (default preset), views, preset filters, sound quality settings, loaded / created MIDI CC map and GUI settings.
Restoring factory defaults
To return the default state for new instances to factory settings:
- Click the Cog icon in the left-upper corner of the plugin.
- Go to the Default State submenu and choose the Restore factory option.


- Requirements
- Preliminary information
- Checking the value of a parameter
- ---
- Fine-tuning continuous parameters
- Double-click to reset a continuous parameter's value
- Overview
- Signal Flow
- Processing blocks before the feedback loop
- Preliminary amplifier and audio clipper
- Delay line with feedback loop
- Delay line times
- Tap
- Synchronizing the delay line with the hosting application tempo
- Spread
- Feedback
- Analog mode
- Ping-Pong
- Processing blocks after the feedback loop
- Phase inverter
- Dual filter
- Stereo mixer
- Master section
- Delay line models
- Stereo link
- Preset Management
- Preset storage
- Browsing presets
- Sources
- Filter
- Groups and tags
- Results
- Preset filtering using Groups and Tags
- Basic Actions
- Group operator
- Filter enable / disable
- Other types of filtering
- Searching by name
- Filtering Favorite presets
- Filtering Pinned presets
- Preset 6
- Info pane
- Browser's visual adjustments
- Folding sections
- Resizing columns
- Editing presets
- Preset selection for Edit
- Preset renaming
- Preset deletion
- Tags editing
- Author editing
- Description editing
- Setting presets as Favorites
- Pinning presets
- Preset exchange
- Export
- Import
- Importing Patterns
- Creating custom Tags and Groups structure
- Adding custom Tags
- Editing custom Tags
- Adding custom Groups
- Editing custom Groups
- Unassigned Tags
- Configuration
- MIDI Learn
- Linking a parameter to MIDI CC
- Unlinking a parameter from MIDI CC
- Loading / Saving a MIDI CC Map
- Quality settings
- GUI
- Size
- System Scale
- Theme
- Default Settings
- Changing default settings
- Restoring factory defaults
Brand : D16 Group
Model : Repeater
Category : Audio software