
NIM005BSW0 - Ice Maker NewAir - Free user manual and instructions
Find the device manual for free NIM005BSW0 NewAir in PDF.


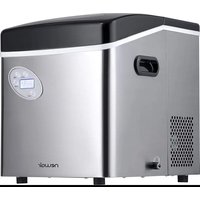
| Product Type | Countertop Craft Whiskey Ice Ball Maker |
| Model Number | NIM005BSW0 |
| Ice Type | Spherical ice balls |
| Rated Voltage / Frequency | 115V~/60Hz |
| Rated Current | 1.6A |
| Refrigerant | R600a / 31g (flammable) |
| Net Weight | 40 lb (18.1 kg) |
| Dimensions (W x D x H) | 10.5" x 17.7" x 18.5" |
| Ice Production per Batch | 2 ice balls |
| Cycle Time | Approximately 2 hours for first batch, then 1-1.5 hours per batch |
| Water Tank Capacity | Fills to MAX line mark (exact capacity not specified) |
| Drain System | Includes condensation drain box and drainpipe |
| Control Panel | Power button, Making Ice indicator, Ice Full indicator, Add Water indicator, Clean indicator, Blue Running indicators |
| Installation Clearance | At least 6 inches from back and sides |
| Operating Temperature | Not specified; avoid extreme temperatures |
| Self-Cleaning Function | Automatic shutdown cleaning process (up to 10 mins) |
| Recommended Cleaning Frequency | Every 9 months or more frequently in hard water/high humidity |
| Cleaning Solution | Water and vinegar or citric acid (10:1 ratio) |
| Water Quality Recommendation | RO filtered or purified water for best clarity |
| Safety Features | Grounded plug, flammable refrigerant warnings, automatic shutoff when full or low water |
| Warranty | 1-year limited manufacturer's warranty |
| Accessories Included | Ice tong, drain pipe, C-type snap rings, drain box, user manual |
Frequently Asked Questions - NIM005BSW0 NewAir
User questions about NIM005BSW0 NewAir
0 question about this device. Answer the ones you know or ask your own.
Ask a new question about this device
Download the instructions for your Ice Maker in PDF format for free! Find your manual NIM005BSW0 - NewAir and take your electronic device back in hand. On this page are published all the documents necessary for the use of your device. NIM005BSW0 by NewAir.
USER MANUAL NIM005BSW0 NewAir
Countertop Craft Whiskey Ice Ball Maker

OWNER'S MANUAL
A Name You Can Trust
Trust should be earned and we will earn yours. Customer happiness is the focus of our business.
From the factory to the warehouse, from the sales floor to your home, the whole Newair family promises to provide you with innovative products, exceptional service, and support when you need it the most.
Count on Newair
As a proud Newair owner, welcome to our family. There are no robots here, real people shipped your product and real people are here to help you.
Contact Us
Please reach out to our customer service team before making a return to your store of purchase. We are happy to help with any questions or concerns!
Mon-Fri from 8-4 PST at:
Call: 1-855-963-9247 | Email: support@newair.com | Online: www.newair.com
A team member will respond to you within 24 hours.
Follow Us

Facebook.com/newairusa Instagram.com/newairusa
YouTube.com/newairusa Twitter.com/newairusa
REGISTER YOUR PRODUCT ONLINE
Register Your Newair Product Online Today!
Take advantage of all the benefits product registration has to offer:

Service and Support
Diagnose troubleshooting and service issues faster and more accurately

Recall Notifications
Stay up to date for safety, system updates and recall notifications

Special Promotions
Opt-in for Newair promotions and offers
Registering your product information online is safe & secure and takes less than 2 minutes to complete:
newair.com/register
Alternatively, we recommend you attach a copy of your sales receipt below and record the following information, located on the manufacturer's nameplate on the rear of the unit. You will need this information if it becomes necessary to contact the manufacturer for service inquiries.
| Date of Purchase: | |
| Serial Number: | |
| Model Number: |
READ AND SAVE THESE INSTRUCTIONS
TABLE OF CONTENTS
Register Your Product Online....2
Table Of Contents 3
Specifications 3
Packing List....4
Safety Information & Warnings 4
Parts List....7
Operating Instructions 8
Unpacking Your Ice Maker 8
Installation 8
Plugging In Your Ice Maker 9
Function Of Control Panel.... 10
Ice Making Operation 11
Cleaning & Maintenance....12
Regular Maintenance....12
Sound During Operation 13
Disposing Your Ice Maker 14
Troubleshooting.... 14
Circuit Diagram 15
Limited Manufacturer's Warranty 16
SPECIFICATIONS
| MODEL No. | NIM005SSW0/NIM005BSW0 |
| ICE TYPE | Spherical Ice |
| RATED VOLTAGE/F REQUENCY | 115V~/60Hz |
| RATED CURRENT | 1.6A |
| REFRIGERANT | R600a / 31g |
| NETWEIGHT | 40 lb. |
| DIMENSION | 10.5” W x 17.7” D x 18.5” H |
PACKING LIST
- Ice Maker x 1 set
- Drain Pipe x 1 piece
- Ice Tong x 1 piece
• C-type Snap Ring x 2 pieces
• User Manual x 1 piece
- Drain Box x 1 piece
SAFETY INFORMATION & WARNINGS
Your safety and the safety of others are very important.
Serious injury or death may occur if you don't follow instructions.
All safety messages will tell you what the potential hazard is, how to reduce the chance of injury, what can happen if the instructions are not followed.
When using electrical appliances, basic safety precautions should be followed to reduce the risk of fire, electric shock, and injury to persons or property. Read all instructions before using this ice maker.

It indicates the precautions to be taken when operating the product, please read the instructions carefully and use the product safely.

It indicates that operation is prohibited, please read the instructions carefully and be sure to follow the prohibitions to avoid injury.
SAFETY INSTRUCTION
To minimize potential hazards, be sure to read the following precautions carefully before installation and use.

This appliance is not intended for use by persons (including children) with reduced physical, sensory or mental capabilities, or lack of experience and knowledge, unless they have been given supervision or instruction concerning use of the appliance by a person responsible for their safety.

Children should be supervised to ensure that they do not play with the appliance.

Do not use extension cords or ungrounded (two prong) adapters.
If the supply cord is damaged, it must be replaced by the manufacturer, its service agent or similar qualified person in order to avoid hazard.
Do not store explosive substances such as aerosol cans with flammable propellant in this appliance.
WARNING: Keep ventilation openings, in the appliance enclosure or in the built-in structure, clear of obstruction.
WARNING: Do not use mechanical devices or other means to accelerate the defrosting process, other than those recommended by the manufacturer.
WARNING: Do not damage the refrigerant circuit.
WARNING: Do not use electrical appliances inside the ice storage compartments of the appliance, unless they are of the type recommended by the manufacturer.
WARNING: Fill with potable water only. No liquid other than potable water shall be used to make ice.
Do not tilt the ice maker more than 45° in any case, otherwise it will cause compressor or refrigeration system failure.
A space of 6" or more must be reserved around the ice maker, otherwise the cooling system will be affected.
Do not place or store objects other than those recommended by the manufacturer in the ice storage basket.
To ensure the safety of the ice maker during operation, it must be placed on a flat countertop for use.
Do not place the ice maker in direct sunlight.
When cleaning the ice storage basket, use a soft damp cloth to wipe it down, and do not use solvent-based cleaner, otherwise, it may cause damage the ice maker or leave harmful.
WARNING
Be sure to disconnect the power supply before performing operations during cleaning and maintenance.
Bags and foam are potentially dangerous and must be kept out of the reach of children.
Must not be used outdoors or in extreme environments (high heat, ultra-low temperatures, etc.)

Do not disassemble or attempt to repair any part of the ice maker without permission, and all inspections should be made under the direction of a technician.

Do not plug and unplug the power supply with wet hands.

Use a power supply separately and do not use the same power trip with other electrical appliances.

Do not use the ice maker next to high heat sources such as ovens and cookers.

Do not modify or add any parts privately.

Do not use flammable liquids to clean ice maker or even the parts to avoid fire.

The ice maker must not be immersed or drenched in water.
- DANGER: Risk of Fire or Explosion. Flammable Refrigerant Used. To Be Repaired Only by Trained Service Personnel. Do Not Puncture Refrigerant Tubing.
- CAUTION: Risk of Fire or Explosion. Flammable Refrigerant Used. Consult Repair Manual/Owner's Guide Before Attempting to Install or Service This Product. All Safety Precautions Must be Followed.
- CAUTION: Risk of Fire or Explosion. Dispose Of Property in Accordance with Federal or Local Regulations. Flammable Refrigerant Used.
- CAUTION: Risk of Fire or Explosion Due To Puncture Of Refrigerant Tubing; Follow Handling Instructions Carefully. Flammable Refrigerant Used.
- The ice maker should be installed in accordance with the safety standard for Refrigeration Systems, ASHRAE15.
- If the ice maker is experiencing a problem that requires servicing or replacing parts, it needs to be done by a licensed professional to minimize the risk of possible fire or explosion due to incorrect parts or improper service.
This appliance is intended to be used in the household and similar applications such as
• Staff kitchen areas in shops, offices and other working environments.
- Farmhouses and by clients in hotels, motels and other residential type of environments.
- Bed and breakfast type of environments.
• Catering and similar non-retail applications.
READ AND KEEP THESE INSTRUCTIONS
PARTS LIST


OPERATING INSTRUCTIONS
UNPACKING YOUR ICE MAKER
- Remove the exterior and interior packaging, and then check all the accessories are included. If any parts are missing, please contact our customer service.
- Remove all the tapes on the unit; take out the accessory parts inside.
- Clean the interior with lukewarm water and a soft cloth.
- Place your ice maker on a level counter table far from direct sunlight and other sources of heat (i.e.: stove, furnace, and radiator). Make sure that there is at least 6 inches between the back and sides of your ice maker with the wall.
- If needed, level the Ice Maker by adjusting the four adjustable feet located at the bottom of the machine.
- Allow four hours for the refrigerant fluid to settle down before plugging your ice maker in.
- The power plug must be accessible directly.
WARNING: fill with potable water only. Only use drinking water.
NOTE: All Ice Makers are fully tested to ensure that all functions are operating normally before shipment. If there are a few residual water droplets or moisture inside the machine, it is considered normal.
INSTALLATION
• Condensation Drain Box Installation:

- Pull up the blue snap ring on the drain outlet that is located on the lower left side at the back of the ice maker.
- Insert one end of the drainpipe firmly into the drain outlet.
- Insert the blue snap ring back into slot on the drain connector.
- Pull up the blue snap ring on Drain Box's drain connector.
- Cut the other end of the drainpipe to a desire length and make sure the cut is straight to avoid leakage. Firmly insert 3/4 inch of drainpipe into the drain connector on the drain box.
- Insert the blue snap ring back into the drain connector.
WARNING: Water drain from this drain outlet is NON-POTABLE. Empty the drain box when full to avoid overflowing and causing damage to your countertop or floor.
NOTE: Steps 3-6 can be bypassed if you decide to lead the drainpipe into your sink or separate drain bucket.
Make sure the drain box or bucket is placed lower than the drain outlet and the drainpipe is not creased.
PLUGGING IN YOUR ICE MAKER
DANGER: Improper use of the grounded plug can result in the risk of electrical shock. If the power cord is damaged, please call customer service.
- This unit should be properly grounded for your safety. The power cord of this appliance is equipped with a grounding plug which mates with standard grounding wall outlets to minimize the possibility of electric shock.
- Plug your appliance into an exclusive, properly installed, grounding wall outlet. Do not under any circumstances damage the grounding means of the plug. Any questions concerning power and/or grounding should be directed toward a certified electrician.
- This appliance requires a standard 110-120Volt, 60Hz electrical outlet.
FUNCTION OF CONTROL PANEL

① Power on/off: Press and hold for three seconds and the four indicators will light up. The ice maker is now in the power-on state. When in power-on state, press and hold for three seconds and the ice maker will shut down.
② Making Ice indicator: Lights up stays on when the machine is making ice.
③ Ice Full indicator: Lights up and stays on when the ice storage basket is full and ice making process will be stopped.
④ Add Water indicator: Flash and accompanied by an alarm indicates the water tank ran out of water. Please add water to the ice maker in time.
⑤ Clean indicators: Flash when the unit is in self-cleaning stage of shutdown process. The indicator will stop flashing and continue shutdown process after the cleaning process is complete.
⑥ Blue Running indicators:
Stays On: The Ice Maker is in Ice Making Process
| Flashes with Making Ice indicator: | The Ice Maker is discharging ice balls. Do not open the door until the Making Ice indicator stop flashing. |
| Flashes with Clean indicator: | In shutdown process. The Ice Maker will turn off after self-cleaning and shutdown process are completely. It may take up to 10 mins. Please do not cut off the power supply at this time. |
⚠ WARNING Before start making ice, please make sure the ice maker is leveled by adjusting four adjustable feet at the bottom of the unit. Operating the ice maker on an uneven surface will affect the size and shape of the ice balls! Let the ice maker upright for at least 4 hours before plugging into power outlet to start making ice.
②
Connect the ice maker's power supply to three-prong socket with a grounding wire.
③

(1) For first time use or when the "Add water indicator" is flashing, open the door and pull out the water tank.
(2) Open the lid on top of the water tank and fill water to the MAX line mark. Close the lid and insert the water tank back into the ice maker.
④
Press the Power on/off and hold for three seconds to start the ice maker.
⑤
Although the ice maker was carefully cleaned before packing and shipping, it is recommended not to use the first four ice balls when using the ice maker for the first time or after a long period of time.
⑥
The ice maker makes 2 ice balls per batch. The ice-making cycle is approximately 2 hours for the first batch.
After the first batch, depending on the water and ambient temperature, the cycle time will reduce down to 1\~1.5 hours/batch.
⑦
The ice maker will stop ice making process and switch to standby when Ice Full or Add Water indicator light up. It will resume ice making process automatically when Ice Full or Add Water condition is eliminated.
⑧
To turn off the ice maker, press and hold the Power on/off for three seconds or until you hear a beep sound. The Ice Maker will run self-cleaning and shutdown processes for up to 10 mins and then turn off automatically.
NOTE: The shape and clarity of the ice ball will reach its designed condition after the first or second batch. It is normal to have cloudy ice balls from the first few batches.
Ice making time and ice ball clarity are also affected by ambient temperature, door opening times and water quality. It is recommended to use water filtered by RO reverse osmosis membrane for the best clarity or purified water for best results.
Warning: Change the water in the water tank every 24 hours to ensure a good hygiene level. If you do not plan on using the ice maker in the next 24 hours, drain out all the water & dry the water tank.
CLEANING & MAINTENANCE
Clean the ice maker before using it for the first time or after a long period of time. It is recommended to have regular cleaning and maintenance according to the local water quality and actual use.
Use solvent-based cleaning agents to clean, otherwise, it may cause damage or harmful substance residues; do not rinse the ice maker with water, please use a damp cloth to wipe the inside and outside.
REGULAR MAINTENANCE
It is recommended to deeply clean your ice maker once every 9 months, or more frequently if you live in an area with hard water or high humidity.
Follow these cleaning instructions to make sure your ice maker is clear of mineral deposits and the longevity of your ice maker is maintained.
For disinfectant, use water and vinegar, or citric acid (10:1 ratio).
Instructions
① Always turn the ice maker off and disconnect the power supply before cleaning.

(1) Remove the screw on the ice storage basket and lift up to remove.
(2) Please align the respective fixing position on both the basket and the door and slide it down to install.

(3) Remove the ice basket to reveal the Door Stop. Push the Door Stop to open the door by 90° for easy cleaning.
| 4 |  | (4) Remove the water box cover to clean the water box. Clean it with a soft, damp cloth and put the cover back when finished. |
| 5 |  | (5) Empty excess water inside the internal water tank through the drain hole located at the bottom front of the ice maker.(6) Keep the Ice Maker in the upright position. Place the water bucket below the drain hole or place the ice maker over a sink drain and unplug the drain plug. |
| 6 |  | (7) Cleaning Water Tank1. Remove the lid2. Pinch the sides of the tank to open the upper cover.3. Simply wipe it with soft, damp cloth. |
| 7 | Fill the water tank with drinking water, connect the power, turn on the ice maker to make ice; toss the first four ice balls and enjoy the subsequent ice balls. | |
If the ice maker has not been cleaned for a long time, or if you feel that there is an odor of the ice ball or ice maker, please also follow the steps above to clean.
SOUND DURING OPERATION
The following sounds during operation are normal,
• A gurgling sound of refrigerant flow may be heard during each cycle.
- The sound of the ice ball dropping into the ice storage basket will be heard after each ice making.
• The sound of cooling fans turning on both sides of the ice maker will be heard.
- If the door is accidentally opened when ice ball is coming out, then you will hear the knocking sound of the ice ball falling to the water box cover, in this case, the door cannot be closed, please take down the ice storage basket, and take out the ice ball that falls on the cover.
• The sound of the compressor during operation may be heard.
- In low temperature environment, due to the fast-freezing speed, the DD transparent device may be frozen, and resulting in 2 to 3 abnormal sounds over a period of time. Don't worry and no operation is needed, as the ice maker will start the protection program and automatically restore the ice making after a period of time.
- The Ice Maker will continue running for 1\~10 minutes after long press the power off to shut down the machine. The sound of the ice maker operation can still be heard at this time, please do not cut off the power.
DISPOSING YOUR ICE MAKER
Dispose of this ice maker's material in accordance with national regulations.
TROUBLESHOOTING
| Problem Possible Causes Solution | ||
| The Ice Maker does not respond when connected to wall outlet | No power on wall outlet | Check wall outlet |
| The power cord is damaged | Requires repair or replacement by a professional technician | |
| Power cord not plugged in securely | Check the power cord connection | |
| The full ice indicator is on, but the ice basket is not full. | Ice Full Sensor is blocked | Requires repair or replacement by a professional technician |
| Ice Full Sensor is damaged | Requires repair or replacement by a professional technician | |
| The Add Water indicator is on, but there is still water in the tank | Water tank is not installed properly | Pull the tank out and push it back in |
| Water shortage sensor damaged | Requires repair or replacement by a professional technician | |
| Water pump malfunction | ||
| The Ice Maker is working but does not make ice | Refrigerant leakage | Requires repair or replacement by a professional technician |
| Refrigeration pipes Clogged | ||
| It may be in system protection mode | Unplug the power cord of the Ice Maker. Wait for four hours before plugging it back in. If the Ice Maker still can’t make ice after power on, please contact Customer Service | |
| Problem | Possible Causes | Solution |
| Water leaking from the bottom of the Ice Maker | Drain plugs are not installed properly. | Check the drain plugs on the back and bottom of the Ice Maker. Make sure they are plug in tightly. |
| Water dripping under the door of Ice Maker | Condensation is caused by high ambient temperature and humidity. It is normal, please use a soft dry cloth to wipe it clean. | |
CIRCUIT DIAGRAM
![graph TD A["DC Water Pumps"] --> B["Display pane"] B --> C["Main PCB"] C --> D["MCU"] D --> E["Infrared sensor"] E --> F["Normally closed, type switch"] F --> G["Stepper motor"] G --> H["Thermistor"] H --> I["Direct Current motor"] I --> J["Water Level Sensor"] C --> K["Compressor"] K --> L["Yellow…](/content/2026/05/943048/images/6f1443a888e6cbbb213bf92f4f7304e065773295e23be8ce7bdb55f0d45877e9.jpg)
LIMITED MANUFACTURER'S WARRANTY
This appliance is covered by a limited manufacturer's warranty. For one year from the original date of purchase, the manufacturer will repair or replace any parts of this appliance that prove to be defective in materials and workmanship, provided the appliance has been used under normal operating conditions as intended by the manufacturer.
Warranty Terms:
During the first year, any components of this appliance found to be defective due to materials or workmanship will be repaired or replaced, at the manufacturer's discretion, at no charge to the original purchaser. The purchaser will be responsible for any removal or transportation costs.
Warranty Exclusions:
The warranty will not apply if damage is caused by any of the following:
- Power failure
- Damage in transit or when moving the appliance.
- Improper power supply such as low voltage, defective household wiring or inadequate fuses
- Accident, alteration, misuse, or abuse of the appliance such as using non-approved accessories, inadequate air circulation in the room or abnormal operating conditions (extreme temperatures)
- Use in commercial or industrial applications.
- Use of force or damage caused by external influences.
• Partially or completely dismantled appliances
• Excess wear and tear by the user
Obtaining Service:
When making a warranty claim, please have the original bill of purchase with the purchase date available. Once confirmed that your appliance is eligible for warranty service, all repairs will be performed by a Newair™ authorized repair facility. The purchaser will be responsible for any removal or transportation costs. Replacement parts and/or units will be new, re-manufactured or refurbished and is subject to the manufacturer's discretion. For technical support and warranty service, please email support@newair.com



- COUNTERTOP CRAFT WHISKEY ICE BALL MAKER
- A NAME YOU CAN TRUST
- COUNT ON NEWAIR
- CONTACT US
- FOLLOW US
- REGISTER YOUR PRODUCT ONLINE
- REGISTER YOUR NEWAIR PRODUCT ONLINE TODAY
- SERVICE AND SUPPORT
- RECALL NOTIFICATIONS
- SPECIAL PROMOTIONS
- REGISTERING YOUR PRODUCT INFORMATION ONLINE IS SAFE & SECURE AND TAKES LESS THAN 2 MINUTES TO COMPLETE
- READ AND SAVE THESE INSTRUCTIONS
- TABLE OF CONTENTS
- SPECIFICATIONS
- PACKING LIST
- SAFETY INFORMATION & WARNINGS
- SERIOUS INJURY OR DEATH MAY OCCUR IF YOU DON'T FOLLOW INSTRUCTIONS
- SAFETY INSTRUCTION
- WARNING
- READ AND KEEP THESE INSTRUCTIONS
- PARTS LIST
- OPERATING INSTRUCTIONS
- UNPACKING YOUR ICE MAKER
- INSTALLATION
- PLUGGING IN YOUR ICE MAKER
- FUNCTION OF CONTROL PANEL
- CLEANING & MAINTENANCE
- REGULAR MAINTENANCE
- INSTRUCTIONS
- SOUND DURING OPERATION
- DISPOSING YOUR ICE MAKER
- LIMITED MANUFACTURER'S WARRANTY
- WARRANTY TERMS
- WARRANTY EXCLUSIONS
- OBTAINING SERVICE
Brand : NewAir
Model : NIM005BSW0
Category : Ice Maker