
WC240 - Water dispenser Healthy Choice - Free user manual and instructions
Find the device manual for free WC240 Healthy Choice in PDF.


| Product Type | Benchtop Water Dispenser |
| Model | WC240 |
| Batch | PR4993 |
| Bottle Model | WB24 |
| Hot Water Temperature | 80°C - 95°C |
| Cold Water Temperature | ≤15°C |
| Water Heating Capacity | 5 L/h |
| Water Cooling Capacity | 1 L/h |
| Filter Lifespan | 1 year or 3000 litres |
| Intended Use | Household and similar applications (offices, shops, farmhouses, hotels, B&Bs) |
| Power Supply | 220-240V ~ 50Hz (typical household) |
| Power Switch | Rear power switch; do not turn on both switches simultaneously |
| Safety Features | Automatic shut-off when water reaches preset temperatures; earthed socket required |
| Cleaning Instructions | Use citric acid solution (30g per 500ml water) every 3-6 months; flush first 2L after cleaning |
| Filter Maintenance | Soak filter for 30 minutes before first use; wash top layer if flow slow after 200-300 litres |
| Installation Requirements | Horizontal, level surface; at least 15cm from rear wall; indoor use only; avoid direct sunlight |
| Warranty | Warranty void if used improperly or not following manual |
Frequently Asked Questions - WC240 Healthy Choice
User questions about WC240 Healthy Choice
0 question about this device. Answer the ones you know or ask your own.
Ask a new question about this device
Download the instructions for your Water dispenser in PDF format for free! Find your manual WC240 - Healthy Choice and take your electronic device back in hand. On this page are published all the documents necessary for the use of your device. WC240 by Healthy Choice.
USER MANUAL WC240 Healthy Choice
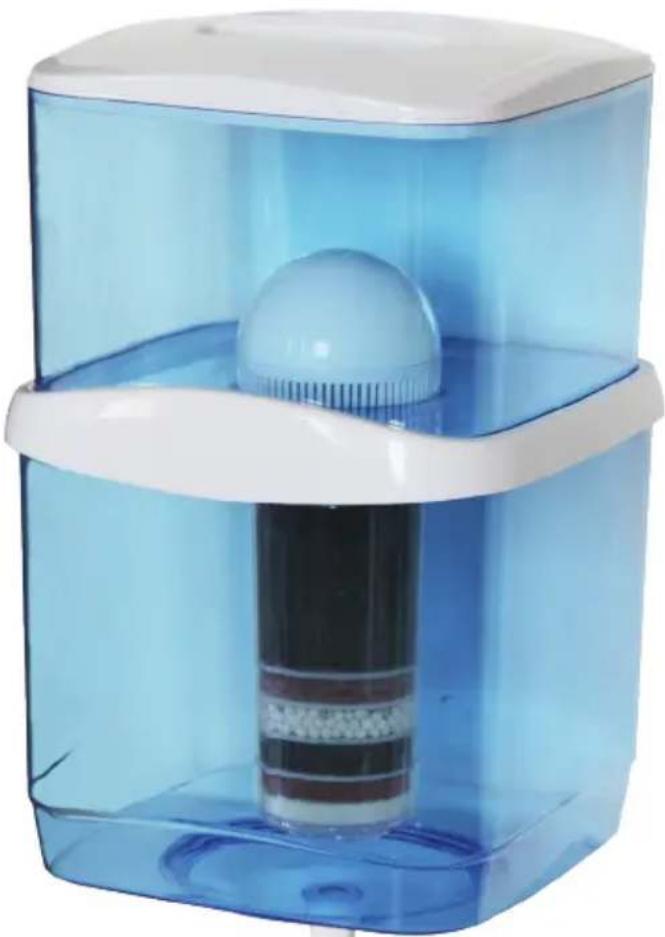
Water Purifier Bottle
natural_image
Transparent blue water dispenser with a white lid and black liquid inside, no visible text or symbolsModel: WB24 | Batch: PR4993
To be used with Healthy Choice WC240 Water Dispenser.
HOUSEHOLD USE ONLY
Carefully read all instructions before use and save for future reference.
Bottle Installation
Wash your hands thoroughly before handling the filter & bottle.
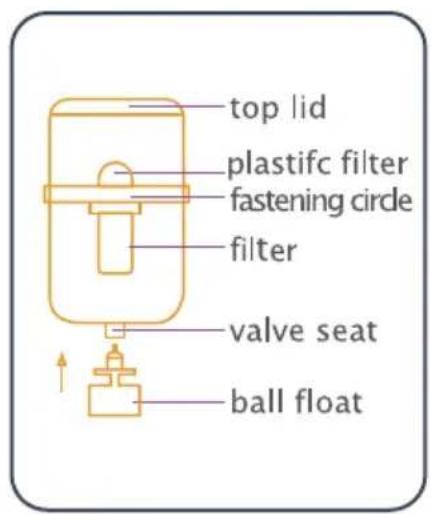
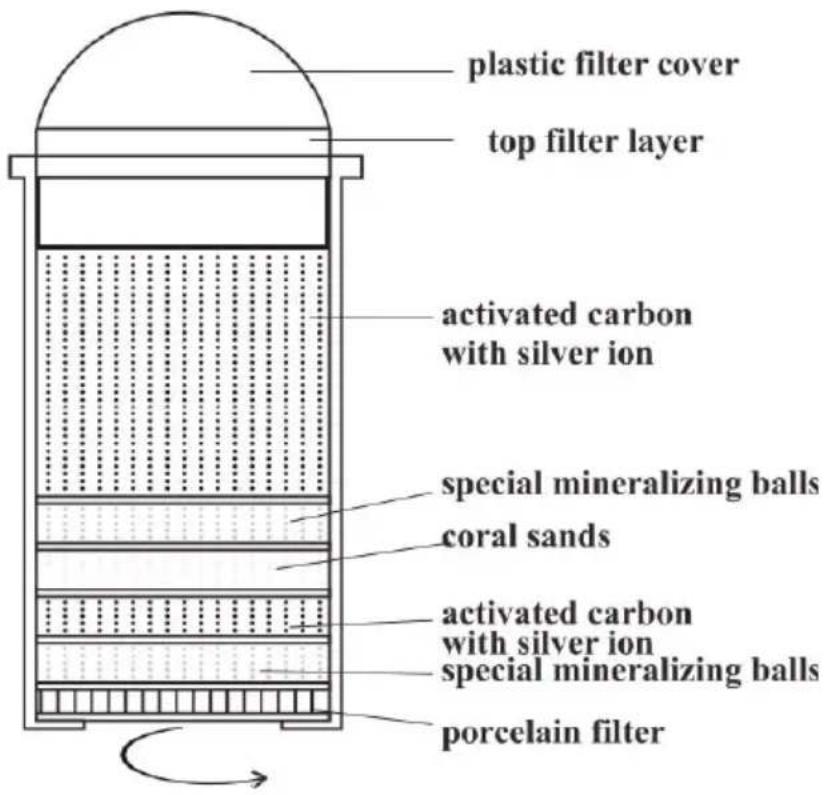
- Remove the filter and soak in water for at least 30 minutes, then rinse thoroughly.
- Wash and rinse the purifier bottle and lid.
- Place the filter and the plastic cover back in the purifier bottle.
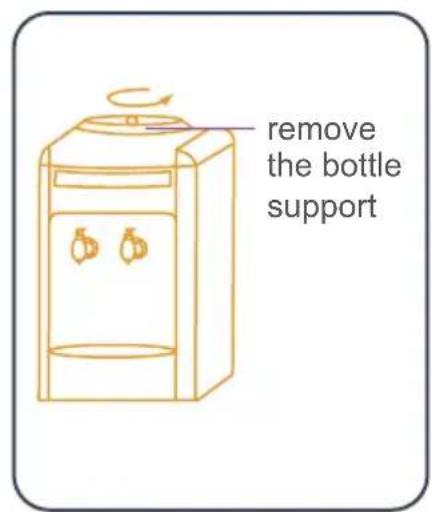
- Remove the bottle support from the water cooler.
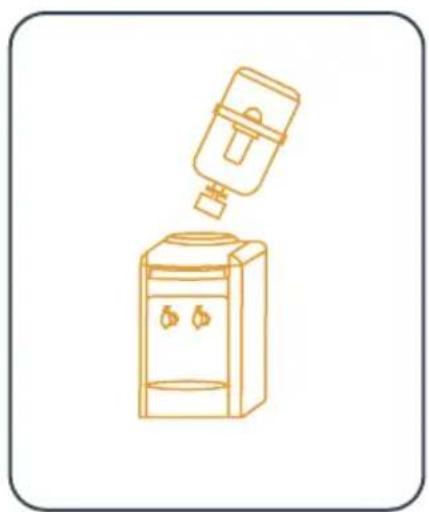
- Place the filter bottle on top of the water cooler.
- Fill the tank with water, then cover with the lid.
Note: Filter bottles generally have a slower flow rate compared to spring water bottles. It will take longer to fill the cooling tank. Allow the cold tank to fill for 30 minutes.
natural_image
Line drawing of a water dispenser with a lid and two outlets, no text or symbols presentFilter Maintenance
- Unscrew the plastic filter cover.
- Remove the top filter layer.
- Wash or replace the filter cloth.
- The filter element itself can be unscrewed counter-clockwise.
Notes
- Black activated carbon powder can float in the water when the filter is first used. Clean the water filter and let this black water flow out before putting the filter onto the dispenser.
• The water purifier must be located out of direct sunlight. - Water being fed through the filter should be clean tap water. Do not put grey water or other dirty water through the filter as this will greatly reduce the lifespan of the filter.
• If you find that the speed of filtration after 200-300 litres is still slow,
please take out the top layer of the filter element and wash it under a fast-flowing tap.
- Please change the filter after one year's use or after 3000 litres of water filtration.
LENOXX
www.lenoxx.com.au

1300 666 848

LenoxxElectronics

LenoxxElectronics
Benchtop Water Dispenser
natural_image
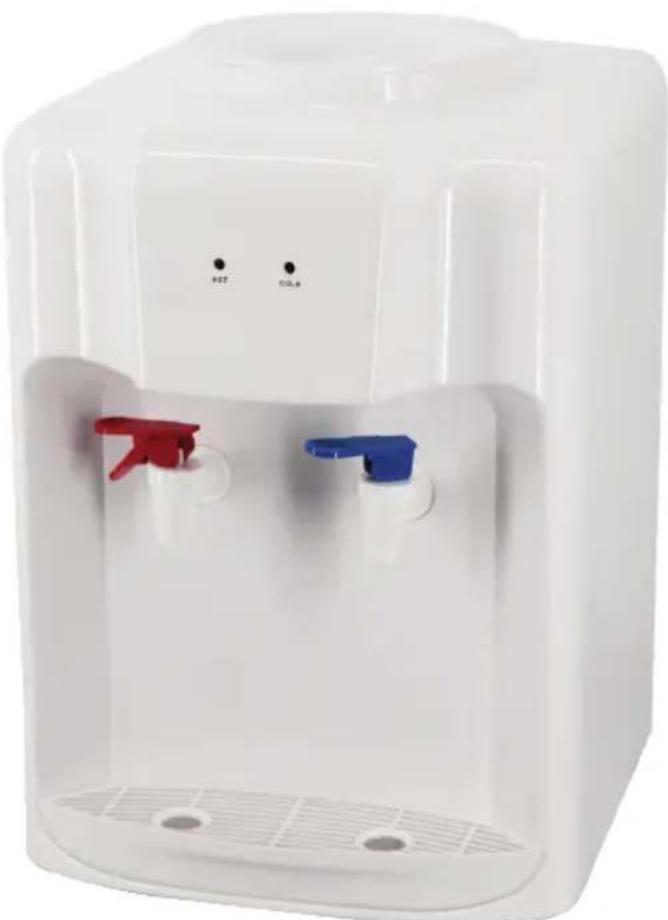
White water dispenser with red and blue push buttons, no visible text or symbols on the device itself.Model: WC240 | Batch: PR4993
Safety Information
- If the appliance is used improperly or if it is not used according to the instructions in the user manual, the warranty will become invalid.
- This appliance is intended to be used in households and similar applications such as staff kitchen areas in offices or shops and other working environments, farmhouses and by clients in hotels, motels and other residential type environments, bed and breakfast type environments.
- This appliance can not be used by persons (including children) with reduced physical, sensory or mental capabilities, or lack of experience and knowledge unless they have been given supervision or instruction concerning the use of the appliance by a person responsible for their safety.
- Children should be supervised to ensure that they do not play with the appliance.
- Check that the voltage indicated on the appliance corresponds to your local mains voltage before you connect the appliance.
- Do not use the appliance if the plug, power cable or appliance itself are damaged.
- If the power cable becomes damaged, you must have it replaced by a professional to avoid a potential hazard.
- Keep the appliance and its power cable out of reach of children.
- Keep the power cable away from hot surfaces.
- Do not plug in the appliance or operate it with wet hands.
- Do not pull on the power cable to unplug the appliance. Remove the plug from a power point by grasping the plug.
- Do not turn the appliance on and off by connecting it to a power point and removing it from a power point. Use the power switch at the rear of the appliance.
- Only connect the appliance to an earthed wall socket, and always make sure that the plug is inserted into the socket properly.
- Never connect this appliance to a timer.
- Place the appliance on a horizontal, level and stable surface at a distance no less than 15cm from a wall at the rear of the appliance. Ensure the ventilation openings at the rear of the appliance are kept uncovered and unobstructed.
• This appliance is for indoor use only. - Keep this appliance away from high temperatures and in a dry and
well-ventilated location. Never install it outdoors, near machinery, plants, areas prone to insects, in the open air, in rain or in direct sunlight. Ensure it is used in an area free of dirt and dust.
- Ensure water has been added into the unit before it is turned ON. If the dispenser is turned ON with an empty water tank, it can become damaged.
- If the appliance will not be used for a long period of time, unplug it and drain all water from its interior.
Product Overview
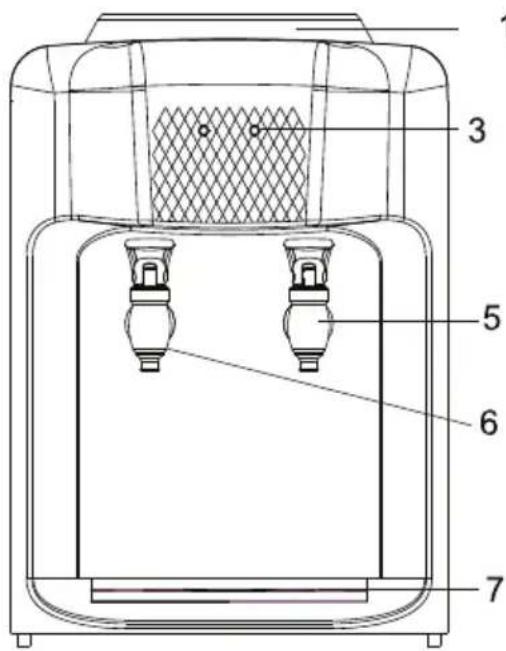
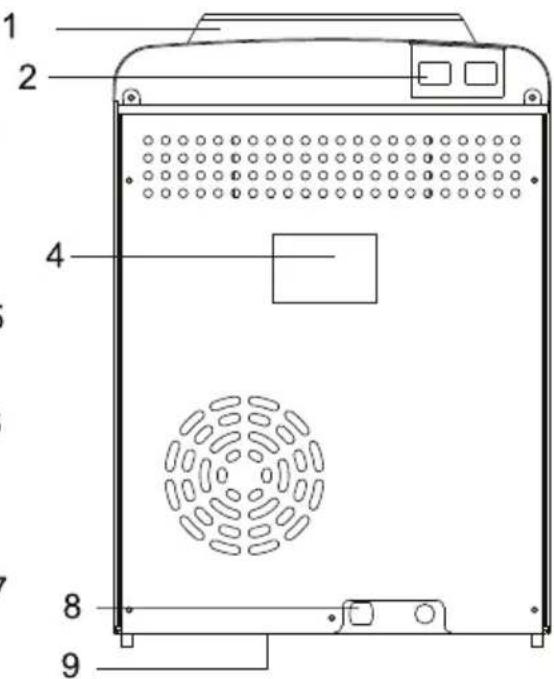
1 Bottle Support
6 Hot Water Tap
2 Power Switch
7 Drip Tray
3 Indicator Lights
8 Power Cord
4 Rating Label
9 Drain Plug
5 Cold Water Tap
Operating Instructions
- Insert the bottle vertically into the bottle support on top of the dispenser and press the water tap until water flows out of the hot water tap (red tap).
- Insert the power plug into the wall socket and turn the power switches to the ON position to start the appliance. DO NOT TURN ON BOTH SWITCHES AT THE SAME TIME. Cooling and heating indicator lights should illuminate. The appliance is designed to provide hot or cold water whenever you need it. It will automatically turn on and off when the water reaches the preset temperatures.
Hot water temperature 80°C - 95°C
Water heating capacity 5L/h
Cold water temperature ≤15^
Water cooling capacity 1L/h
Cleaning & Maintenance
Clean the water tank and pipes with a citric acid solution (30g citric acid per 500ml water) before the initial use and after extended periods of non-use. Dispose of the first 2L of water after cleaning (switch the heating off). Clean and disinfect the system every 3-6 months using the citric acid solution.
The outside of the appliance can be wiped with a soft cloth. Do not immerse in water or any other liquid.
Brand : Healthy Choice
Model : WC240
Category : Water dispenser