
PO19 - Pizza oven Healthy Choice - Free user manual and instructions
Find the device manual for free PO19 Healthy Choice in PDF.


| Product Type | Pizza Oven |
| Brand | Healthy Choice |
| Model | PO19 |
| Dimensions (Approx.) | 40 x 35 x 25 cm |
| Weight (Approx.) | 8 kg |
| Power Supply | 1200 W, 220-240 V, 50/60 Hz |
| Heating Method | Electric convection |
| Temperature Range | Up to 450°C (842°F) |
| Cooking Capacity | Fits up to 12-inch pizza |
| Control Type | Adjustable thermostat with timer |
| Functions | Baking, broiling, reheating |
| Interior Light | Yes |
| Cleaning & Maintenance | Removable crumb tray, non-stick interior; wipe with damp cloth |
| Safety Features | Automatic shut-off, cool-touch handle, overheat protection |
| Spare Parts Availability | Replacement heating elements, thermostat, trays |
| Repairability | Moderate: user-replaceable parts; professional service advised for electronics |
| Manual Format | PDF, 26 pages in English |
| Warranty | 1 year limited |
Frequently Asked Questions - PO19 Healthy Choice
User questions about PO19 Healthy Choice
0 question about this device. Answer the ones you know or ask your own.
Ask a new question about this device
Download the instructions for your Pizza oven in PDF format for free! Find your manual PO19 - Healthy Choice and take your electronic device back in hand. On this page are published all the documents necessary for the use of your device. PO19 by Healthy Choice.
USER MANUAL PO19 Healthy Choice
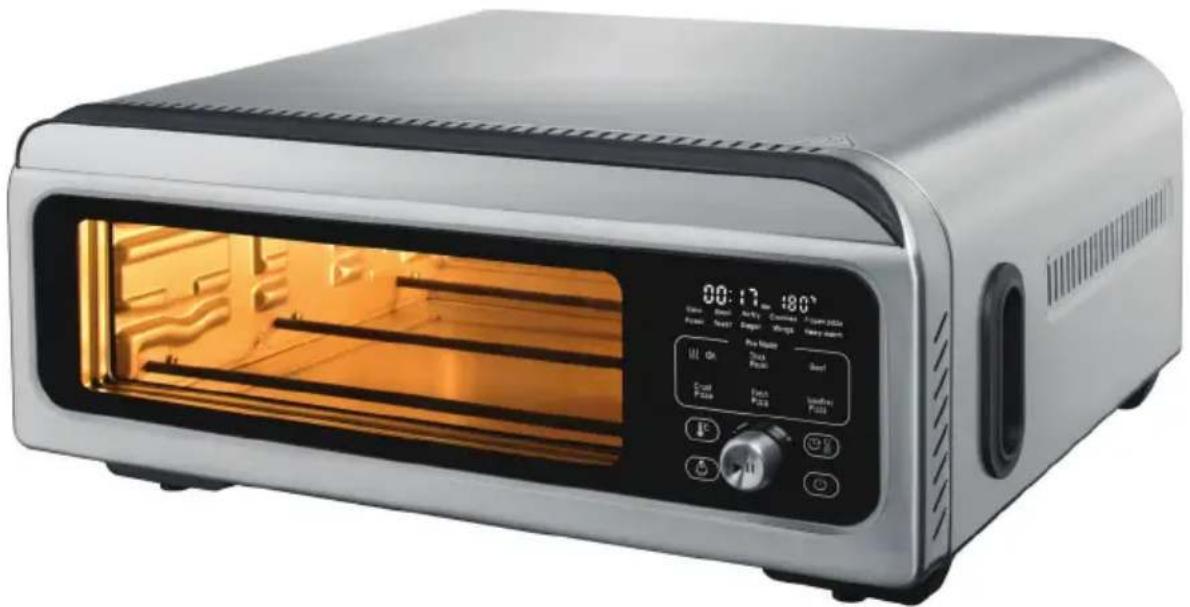
PIZZAMORE Pro 8-in-1 Oven
natural_image
Modern microwave oven with digital display and control buttons (no visible text or symbols on main body)Model: PO19 | Batch: PR5023
The illustrations used in this manual are to illustrate the operation method and product structure of the product. Where there is a small difference between the physical item and the illustrations, please take the physical as the standard.
IMPORTANT SAFEGUARDS
PLEASE READ AND SAVE THIS INSTRUCTION MANUAL FOR FUTURE REFERENCE
When using the appliance, basic safety precautions should be followed, including:
- This appliance can be used by persons with reduced physical, sensory, or mental capabilities or lack of experience and knowledge if they have been given supervision or instruction concerning the use of the appliance in a safe way and understand the hazards involved.
- Take inventory of all contents to ensure you have all the parts needed to operate your oven properly and safely.
- DO NOT use an extension cord. A short power-supply cord is used to reduce the risk of children grabbing the cord or becoming entangled and to reduce the risk of people tripping over a longer cord. Also, the oven is not intended to be operated using an external timer or a separate remote-control system.
- NEVER plug the oven into an outlet below the benchtop. This is to avoid potential hazards such as water splashes reaching the outlet or the cord being pinched or damaged by the benchtop's edge.
- Keep the appliance and its cord out of reach of children. Do not allow the appliance to be used by children. Close supervision is necessary when used near children.
- DO NOT let cord hang over edges of tables or counters or touch hot surfaces, including stoves and other heating ovens.
- NEVER leave the oven unattended while in use.
- DO NOT cover the Crumb Tray or any part of the oven with metal foil. This will cause the oven to overheat or cause a fire.
- In high-temperature professional programs, NEVER place baking paper on top of the accessories. This can cause a fire.
- To protect against electrical shock, DO NOT immerse the cord, plugs, or main unit housing in water or other liquid.
- Do not operate this appliance with a damaged cord or plug or when the appliance malfunctions, or is dropped or damaged in any way. Contact Lenoxx customer service for information on examination or
repair.
-
DO NOT cover the air intake vents or air outlet vents while the unit is operating. Doing so will prevent even cooking and may damage the unit or cause it to overheat.
-
DO NOT insert anything in the ventilation slots and do not obstruct them.
-
DO NOT place any accessories inside the oven while it's operating except for the included accessories.
-
Before placing any accessories into the oven ensure they are clean and dry.
-
Intended for indoor household use only.
-
DO NOT place the oven near the edge of a benchtop. Ensure the surface is level, clean, and dry.
-
DO NOT store any materials, other than supplied accessories inside this oven when not in use.
-
When using this oven, provide adequate space above and on all sides for air circulation.
-
A fire may occur if the oven is covered or touching flammable material, including curtains, draperies, or the like when in operation.
-
DO NOT place anything on top of the oven during operation.
-
Be careful not to scratch the door or chip the edges.
-
DO NOT spray any type of aerosol spray or flavouring inside the oven while cooking.
-
Use caution when inserting and removing anything from the oven, especially when hot.
-
Always use a food thermometer to check that meat is cooked to the recommended temperatures.
-
Keep food away from heating elements. Overloading food may result in personal injury, property damage, or impact safety of the oven.
-
DO NOT place any of the following materials in the oven: paper, cardboard, plastic, roasting bags, and the like.
-
Extreme caution should be exercised when using containers constructed of any materials other than metal or glass.
-
Spilled food can cause serious burns. Extreme caution must be used when the oven contains hot food. Improper use may result in personal injury.
-
Please refer to the cleaning section for regular maintenance of the oven.
-
Cleaning and user maintenance shall not be done by children.
-
Press the RESET button to turn the function off and allow it to cool
completely before cleaning, moving, and storing.
-
Unplug from the power outlet when not in use. To unplug, grasp the plug by the body and pull it from the outlet. Never unplug by grasping and pulling the cord.
-
DO NOT clean with metal scouring pads. Pieces can break off the pad and touch electrical parts, causing a risk of electrical shock.
-
DO NOT use the oven as a source of heat or for drying.
-
This appliance is intended to be used in household and similar applications such as:
-
staff kitchen areas in shops, offices, and other working environments;
- farmhouses;
- by clients in hotels, motels, and other residential-type environments;
• bed and breakfast type environment.
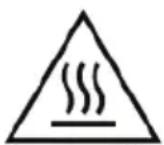
Caution! The temperature of the accessible surface may be high when the appliance is operating. To prevent burns or personal injury, ALWAYS use protective insulated oven mitts.
VERY IMPORTANT: If the housing overheats, it is necessary to cool the oven down before the next time usage. Switch it off then open the door for faster cooling.
- Unpack the unit and remove any packaging materials, promotional labels, and tape. Check inside the oven for any remaining cardboard.
• Take out all accessories from the package and carefully read this manual. Pay close attention to operational instructions, warnings, and important safety measures to prevent injury or property damage.
- Wash the accessories (except the Pizza Stone) in warm, soapy water, then rinse and dry thoroughly. NEVER clean the main unit or the accessories in a dishwasher.
- It's recommended to place all clean & dry accessories inside the oven and run it on the "Air Fry" function at the maximum temperature for 10 minutes without adding food. This helps remove any manufacturing residues and odour traces without affecting the oven's performance. Ensure the area is well-ventilated during this process.
PRODUCT OVERVIEW
natural_image
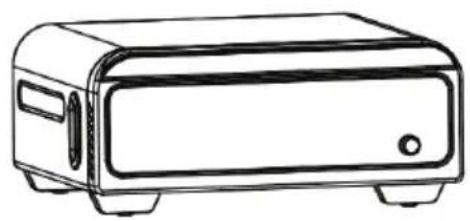
Line drawing of a rectangular kitchen appliance with a lid and side buttons (no text or symbols)Main Unit
natural_image
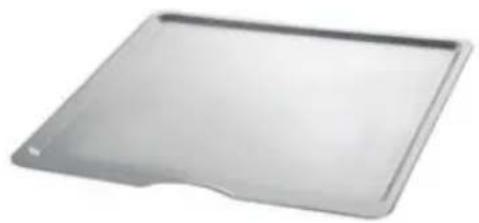
Exterior view of a modern office building (no signage)Crumb Tray
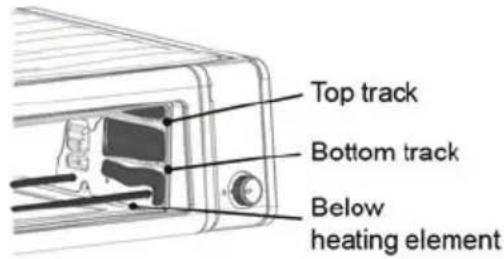
- Place in the "below heating element" position.
- The raised edge must face the front when inserted into the oven.
- Clean it after every use.
natural_image
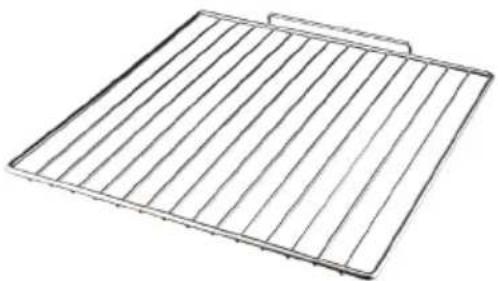
Line drawing of a metal grate or rack with vertical slats (no text or symbols)Oven Rack
- Place in the "bottom rack" position.
• The raised edge must be in the back of the oven. - Clean it after every use.
natural_image
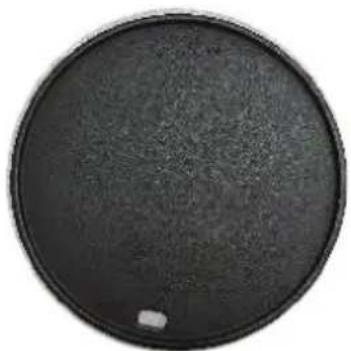
Circular black object with textured surface and small white mark at bottom (no text or symbols)Cast Iron Grill Tray
• Always place it on top of the oven rack.
- Clean it after every use. Wait for the tray to cool down before cleaning. Soak in warm water for 30 minutes, then use a soft brush or a sponge to clean.
natural_image
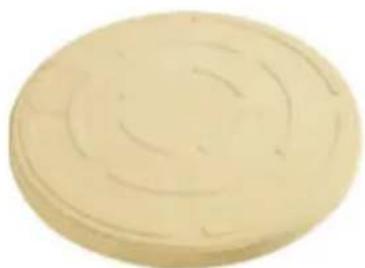
Circular beige object with concentric circular patterns, resembling a button or lid (no text or symbols visible)Pizza Stone
• Always place it on top of the oven rack.
- Do not use when wet.
- Do not clean with water when still hot.
- Can be used to bake pizza, foccacia & bread.
natural_image
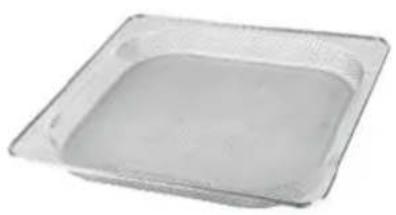
Transparent square container with a shallow interior (no text or symbols visible)Air Fry Basket
- Place it in the "top rack" position.
- Clean it after every use.
natural_image
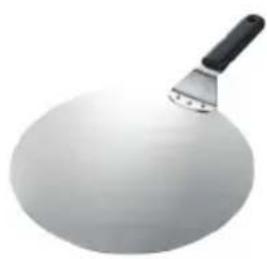
A white oval-shaped object with a black handle, possibly a pan or scraper, placed on top (no text or symbols visible)Pizza Peel
Use to slide pizzas in and out of the oven. Made from heat-resistant material to ensure safe handling of hot pizzas.
natural_image
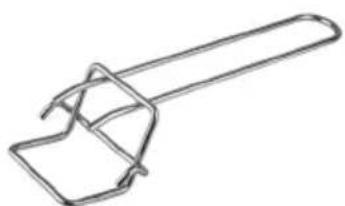
Line drawing of a hand holding a small object (no text or symbols)Fetch Tool
Heat-resistant tool designed for safely handling hot oven accessories. Use when taking accessories in and out of the oven.
SMART DOOR SWITCH
The smart door switch consists of two parts, A and B, with A located in the housing and B in the door. It serves the following functions:
- When the door is opened:
• The interior lamp activates.
• The product enters "Pause" mode.
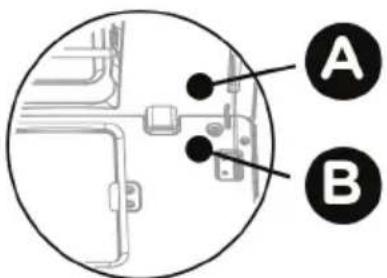
- When the door is closed:
- The product resumes operation or automatically executes functions.
During use, it's crucial to ensure the door is securely closed to the housing without any interference to ensure optimal product performance.
TIME SETTING MEMORY
Time Setting Memory allows for easy repetition of the same cooking process, such as baking the same type of pizza repeatedly.
- When the program ends or is canceled, the CONTROL PANEL retains the initial time setting as memory. Note that any changes made after starting the operation will not be saved.
- Pressing the "RESET" button restores the product to its default time setting and clears the previous usage setting from the CONTROL PANEL.
CONTROL PANEL
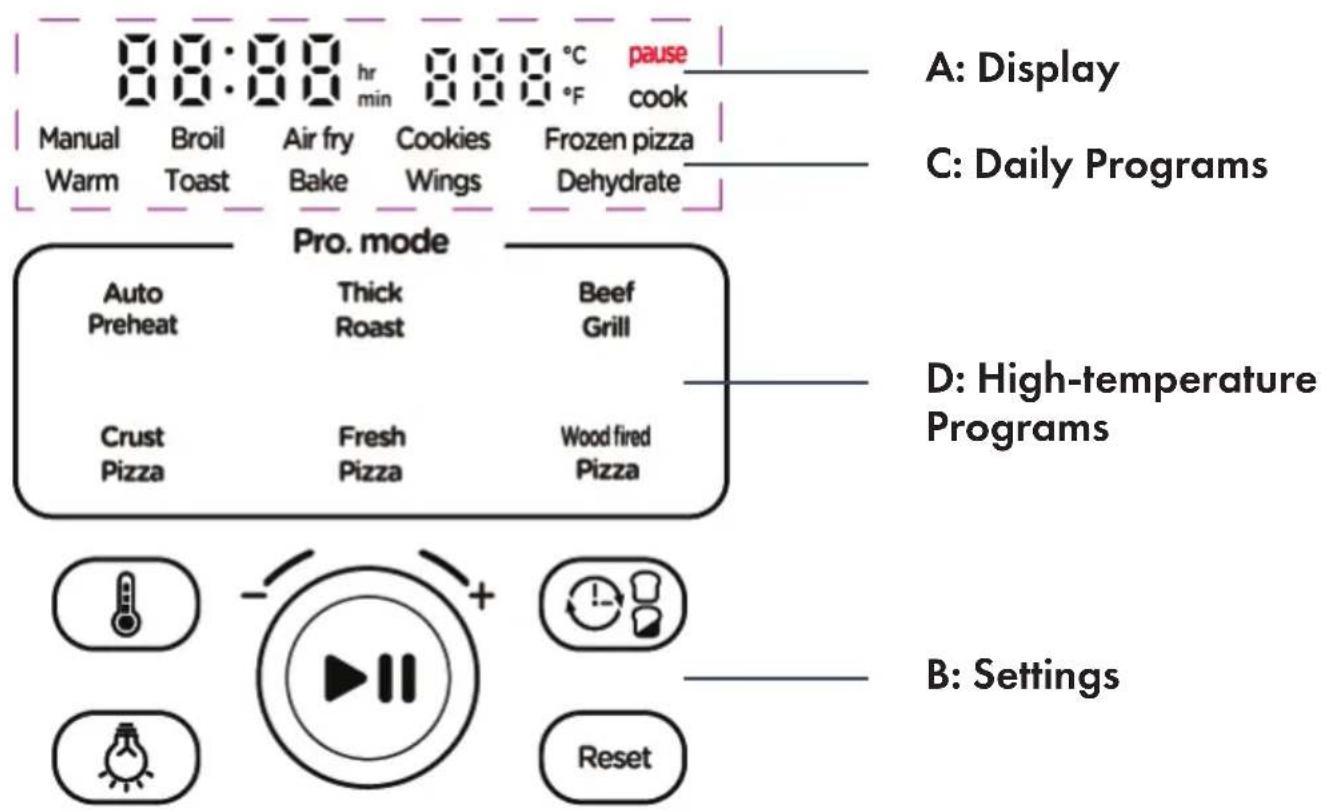
A: DISPLAY
Time Display
Shows time information
Temperature Display
Shows temperature information
Pause
Lit up when the unit is paused
Cook
Lit up when the unit is cooking
Min
Shows the time in minutes
Hr
Shows the time in hours
B: SETTINGS

Dial
The dial allows you to select a cooking function or adjust the time, temperature, number of slices, and darkness level in Toast mode.
The first press-down of the dial = START
The second press-down = PAUSE
During operation (not paused), pressing and holding the dial for 2 seconds cancels the function and resets the unit to the default state.

Light
Press to turn the oven interior light on and off. Note that the light will automatically turn off after 30 seconds of being on.
Reset
Press to cancel the current function and put the unit into standby mode, the display will show "00:00". With another press of the button, the product will reset to the original default program function list.
Time/ Darkness
Press the TIME button to activate the temperature adjustment mode. Use the dial to adjust the temperature. However, when using the Toast mode function, this button will adjust the darkness level instead of the time.
Temp.
Press the TEMP button, then use the dial to adjust the temperature.
C: DAILY PROGRAMS
The following programs come with preset default time and temperature settings as reference information. You can customize these settings based on your specific cooking needs. For more detailed instructions, refer to the "USING DAILY PROGRAMS" section.
| Manual | Set the cooking time and temperature manually. The temperature range can be adjusted from 40°C to 400°C. |
| Broil | For steaks, fish, nachos and finishing casseroles. |
| Air Fry | Activates the fan to fry foods such as chicken wings, nuggets, chips and similar. This mode allows for frying with minimal to no added oil. |
| Cookies | Program for baking cookies. |
| Frozen Pizza | You don't need to defrost the pizza before cooking.If using the cast iron tray, place the pizza directly on the tray.If using the stone tray, preheat the stone for 15 minutes using the "Air Fry" program, then place the pizza on the tray. Then, select and start the "Frozen Pizza" program. |
| Warm | Use to warm up food. |
| Toast | For max 9 slices of bread (10x10cm) at a time. |
| Bake | Use for baking cakes and desserts. |
| Wings | Dedicated program for wings. |
| Dehydrate | Dehydrate fruits, create healthy snacks. |
For other foods, manually adjust the settings as follows. These settings are provided as reference information only and can be changed based on the user preferences or food being cooked.
| Food | Temperature | Function | Time |
| Vegetables | 200°C-230°C | Air Fry | 20-25min |
| Fish | HI | Broil | 10-15min |
| Potatoes | 200°C-230°C | Air Fry | 20-30min |
| ChickenNuggets | 200°C-230°C | Air Fry | 10-15min |
| Chips | 200°C-230°C | Air Fry | 20-30min |
| Mix with a few drops of oil for improved performance.For fresh fries, wash them before cooking, absorb excess water with paper towels, and refrigerate for at least 30 minutes.Avoid overcrowding; cook about 400g at a time in a single layer. After approximately 15 minutes, shake the fries for even baking. | |||
USING DAILY PROGRAMS
Step 1
Place ingredients on the trays and insert them into the product unit (excluding the "Pizza Stone" accessory).
Tips:
- For even baking, preheat the oven to 160°C for 5 minutes without accessories before adding food.
- If using a stone for frozen pizza: preheat the stone using the "Air Fry" program for 15 minutes, then place the pizza on the tray and start the "Frozen Pizza" program.
- For frozen meat/fish: Defrost completely before cooking and ensure the surface is dry.
Step 2
Turn the dial to select functions. The default time and temperature settings will appear on the display.
Step 3
Set the desired time and temperature, then press the dial down to start cooking.
Step 4
During cooking, if you need to adjust the cooking time and temperature:
- Press the TIME/DARKNESS button and turn the dial to make selections.
- The temperature in WARM mode is fixed and cannot be changed.
- Once TOAST mode is started, its temperature cannot be adjusted until the function is cancelled or reset.
- Press the TEMP. button and use the dial to select the desired time.
Step 5
When the cooking time is complete, the unit will beep.
HIGH-TEMPERATURE PROGRAMS
High-temperature programs come with preset default time and fixed temperature settings. Time can be adjusted, but the temperature remains fixed in these preset programs.
IMPORTANT NOTES:
• High-temperature programs operate in two periods:
-
The first period is preheating for accessories. Place only the accessory in the oven for preheating, do not add food.
-
The second period is high-temperature cooking for food. Only proceed with adding food to the preheated oven with an accessory after the "PREHEAT" is finished, indicated by the beeping and "Add in/Open" message on the display. Open the door to add food to the accessory, then close the door to start cooking automatically.
- Due to the extremely high temperatures, place the oven in a well-ventilated area to avoid smoke emissions during cooking.
- NEVER place baking paper on top of accessories in these high-temperature programs, as it can cause a fire.
- It's recommended to monitor and stay close to the oven as your food can quickly become overcooked.
• Exercise caution with the high temperature of accessories.
- When pulling the accessory out from the oven, use oven mitts.
- When turning over food use kitchen tongs.
If there is excessive smoke or the food becomes overcooked:
- Ensure the accessory is cleaned thoroughly, with no food or oil residue from previous usage.
- Use oils with a high smoke point such as canola, avocado, vegetable, or grapeseed oil, instead of olive oil.
FILL In OPEN Add In OPEN
Preheating is finished.
Open the door, pull the accessory out, place food on the accessory then push the accessory back inside the oven. Close the door, and the program will start to cook automatically. Both "Add in (or Fill in)" and "Open" words will disappear.
End
The program is finished
AUTO PREHEAT
This program operates automatically as the first phase of the High-temperature programs, and its Time and Temperature settings cannot be adjusted.
- Please note that during this phase, only the accessories should be inserted into the oven without any food.
- Once the "preheat" process is complete, a beep sound will be heard, and the display will show "Add in" or "Fill in"/"Open."
- The preheat time is influenced by the room and oven interior temperature. Refer to the details provided for each High-Temperature Program.
THICK ROAST
Thick Roast is specifically designed for thicker proteins, up to 6cm in thickness, to achieve a crispy roasted texture in about 10 minutes, ideal for items like thicker pig belly.
- Remove any bones and keep the thickness within 6cm to avoid it being too close to the heating element.
- For optimal flavour, marinate the food before cooking in the oven.
- Use the cast iron tray for cooking after preheating for best results.
BEEF/GRILL
"Beef/ Grill" is tailored for 2cm thick steaks to quickly achieve a juicy grilled texture.
- Around 50 seconds into cooking, you will hear a beep. When this happens, use oven mitts to pull out the oven rack, and quickly flip the food using kitchen tongs. Then, push the oven rack back into the oven and close the door to continue cooking. This flipping process ensures even grilling and should be done swiftly to maintain the high temperature inside the oven.
- It's crucial to use a preheated cast iron tray for optimal cooking results.
CRUST/FRESH/WOODFIRED PIZZA
When preparing pizza:
- If using large-size fresh vegetables, meat, or seafood, switch to the "Crust Pizza" program due to longer cooking times.
- For large-size frozen ingredients, use the "Frozen Pizza" program from the daily programs, as they require more cooking time.
- Both the preheated cast iron tray and preheated stone tray can be used for pizza, offering different flavours.
"CRUST PIZZA" is for frozen crusts (without toppings) purchased from supermarkets (15-20mm thickness). Add your preferred ingredients like cheese and ham on the surface without defrosting the crust.
"FRESH PIZZA" is for homemade dough (10-20mm thickness) with fresh toppings as desired.
"WOODFIRED PIZZA" (Neapolitan Pizza) is for homemade dough (5-10mm thickness) with crushed tomato, mozzarella cheese, and basil only.
PIZZA DOUGH RECIPE
Here's a recipe for dough balls suitable for "FRESH" and "WOOD FIRED PIZZA" in a 10-inch size, in case you can't find pre-made dough:
Ingredients:
- 100g bread flour
- 5g sugar
- 5g salt
- 2g yeast
- 65g milk
-
5g butter
-
Mix all the ingredients thoroughly, then cover the mixture with plastic wrap and let it rest for 1 hour.
- After the mixture has fermented, shape it into a ball. Add more flour if the mixture is too wet to shape.
- Coat the surface of the dough ball with oil, then cover it with plastic wrap.
- Place the dough ball in the refrigerator for at least 6 hours.
- When ready to use, remove the dough ball from the refrigerator and let it come to room temperature for at least 1 hour.
- Prepare your pizza when the oven is almost done preheating. This makes it easier to transfer the pizza from the counter to the oven.
- Sprinkle some flour on the counter and use your hands to stretch the dough ball into a pizza shape, rather than using a rolling pin.
- Add your desired toppings such as cheese, ham, sauce, etc.
- For a thin and crispy crust with bubbly edges, leave around 4-5cm of the crust edge without any sauce or toppings. This will give you a deliciously thin and crispy pizza.
PREHEATING AND COOKING TIME
- The preheating time mentioned in the table is just a guideline and may vary based on the room temperature and the actual temperature inside the oven. If the room is warmer or cooler than usual, the oven program will automatically adjust the preheating time accordingly.
- The default cooking time is also a guideline and can be adjusted (30 seconds - 60 minutes) based on factors like the quantity of food. Feel free to add or reduce cooking time as needed for optimal results.
- The default temperature is preset and cannot be changed directly. If you want to set a custom temperature, switch to "Manual" mode in Daily Programs, and use the preheat and cooking time information provided in the table as a reference.
| Program | Preheat Default temp | °C | Default cooking time (min) | |
| 1st time Next | ||||
| THICK ROAST | 8 min 360 10 | Based on door opened time: <2min no preheat, <3min preheat 3min, >3min preheat 8 min. | ||
| BEEF GRILL | 8 min 4008 min | 30% cooked: 1:3050% cooked: 2:0070% cooked: 2:30100% cooked: 3:00 | ||
| CRUST PIZZA | 15 min 310 | Based on door opened time: <2min no preheat, <3min preheat 3min, >3min preheat 15 min. | 6" - 7" pizza: 5:308" - 10" pizza: 6:0011" - 12" pizza: 6:30 | |
| FRESH PIZZA | 15 min 360 | Based on door opened time: <2min no preheat, <3min preheat 3min, >3min preheat 15 min. | 6" - 7" pizza: 7:308" - 10" pizza: 8:0011" - 12" pizza: 8:30 | |
| WOODFIRED PIZZA | 15 min 400 | Based on door opened time: <2min no preheat, <3min preheat 3min, >3min preheat 15 min. | 6" - 7" pizza: 4:008" - 10" pizza: 4:5011" - 12" pizza: 5:50 | |
Note:
1st time preheat means: oven is working from cool status. Next preheat refers to subsequent uses without letting the unit cool down completely after the initial use.
USING HIGH-TEMPERATURE PROGRAMS
Step 1
Plug in the unit, and the section D buttons will light up. Note that the "PREHEAT" button will not light up at this stage; it's programmed to start automatically.
Step 2
Insert an accessory into the oven. Do not place any food on the accessory yet.
Step 3
Touch the desired program button. The selected program will flash, and its default time will display on the screen. If you need to adjust the cooking time before "Preheat" starts, press the "TIME" button and turn the dial to add or reduce time.
Step 4
After setting the time, press the dial to confirm and start the "Preheat" process. The "PREHEAT" button will automatically light up.
Step 5
Wait for the "PREHEAT" process to finish, indicated by a beep sound. The screen will then show "ADD IN (OR FILL IN)" and "OPEN."
Step 6
Open the door and place the food on the accessory. Close the door to start cooking immediately. The timer will begin counting down.
Note:
If you open the door during "Preheat" or "Cooking," the unit will pause ("Pause" displayed). Close the door to resume cooking.
During cooking, you can adjust the time by pressing the "TIME" button and turning the dial. Confirm by pressing the dial.
Step 7
When the program finishes, you'll hear a beep sound, and "End" will appear on the screen.
Step 8
Remove the accessory with the food, and close the door. The screen will revert to the last setting.
Step 9
Press the "Reset" button to enter standby mode ("00:00"). Press it again to reset the unit to its original default programs.
CLEANING & MAINTENANCE
The unit should be cleaned after every use.
NEVER clean the main unit/accessories in the dishwasher.
- Unplug the unit and let it cool down before cleaning.
- Remove all accessories, including the Crumb Tray.
- Soak the accessories (except the pizza stone) in warm, soapy water for 30 minutes. Use a soft bristle brush for cleaning, avoiding hard tools. Rinse thoroughly with fresh water twice and dry completely.
- Wipe the interior walls of the unit with a soft, damp cloth.
- Clean the main unit and control panel with a slightly damp cloth.
- Use a dry cloth to clean the pizza stone.
TROUBLESHOOTING
Problem Potential cause and solution
The oven is not turning on.
- Check and ensure that you have selected a function and a temperature and set the timer.
- Check and ensure that the power cord is plugged in, the power is turned on, and that the outlet is working (check the appliance at a different outlet).
After preheating, when I close the door, the unit is not working.
- Clean the door and housing, and keep them dry since there is a smart door switch here. (See "SMART DOOR SWITCH")
• The door is too hot, wait for it to cool down
- If the oven still does not work, contact Lenoxx customer service.
When should I add my ingredients?
C: Daily programs
- Preheat the oven to 160°C for 5 minutes before selecting a program.
- Do not preheat accessories, except for the "Frozen Pizza" program.
- Add ingredients to the accessory after preheating, then insert it into the oven before starting the program.
D: High Temperature Programs
- Insert accessories into the oven without food and start the program for preheating.
- After preheating, place the ingredients on the accessories.
- Insert the accessory with ingredients back into the oven and close the door to start high-temperature cooking.
Food is undercooked.
- Avoid overfilling the basket to ensure even frying. Use smaller batches for better results.
- Double-check the temperature settings to ensure they are correct for your food.
- Try using the "BAKE" function. Set the temperature to the maximum, adjust the time to 10 minutes using the "TIME" button, and press the dial to start cooking. Monitor the food closely during cooking.
Smoke is coming from the appliance when I switch it on.
- If you're using the appliance for the first time, it's normal to experience some initial smoke. Ensure good ventilation in the area.
- If you've used the air fryer oven before, unplug it and allow it to cool. Check that all interior surfaces and accessories are clean and free of food residue.
- If the appliance continues to emit smoke after proper cleaning, discontinue use and contact Lenoxx customer service.
- When air-frying greasy foods, oil may drip into the pan, leading to white smoke. This is normal and does not affect the appliance or the cooking outcome.
Steam is coming out from the oven door.
This is normal. The vented door is designed to release steam from high-moisture foods
Food isn't cooked evenly.
Shake the basket halfway through cooking for even results or turn the food over carefully to ensure thorough cooking. Remember, the metal parts are very hot during use.
Home-made chips are fried unevenly.
- Use fresh potatoes suitable for frying, ensuring they are firm and dry before cooking. Rinse and dry the cut sticks thoroughly.
The circuit breaker or safety switch tripped
When using this appliance alongside other kitchen devices on the same circuit, such as kettles or toasters, it may trip the circuit breaker due to high current draw. To prevent this, operate the appliance separately or ensure other devices are not running simultaneously on the same circuit.
Error Code
E1: If you encounter an E1 error indicating poor contact between the NTC (temperature sensor) and the PCB:
- Power off the machine and allow it to cool down.
- After cooling, check if anything is obstructing the sensor. If clear, resume using the machine.
- If the E1 error persists, contact Lenoxx customer service.
For errors E2, E4, and E5 related to PCB issues:
- Turn off the machine and let it cool down.
- If the error code remains, contact Lenoxx customer service.
- Do not attempt DIY repairs.
LENOXX
www.lenoxx.com.au

1300 666 848

LenoxxElectronics LenoxxElectronics
- PIZZAMORE Pro 8-in-1 Oven
- IMPORTANT SAFEGUARDS
- PLEASE READ AND SAVE THIS INSTRUCTION MANUAL FOR FUTURE REFERENCE
- PRODUCT OVERVIEW
- Crumb Tray
- Oven Rack
- Cast Iron Grill Tray
- Pizza Stone
- Air Fry Basket
- Pizza Peel
- Fetch Tool
- SMART DOOR SWITCH
- TIME SETTING MEMORY
- CONTROL PANEL
- A: DISPLAY
- B: SETTINGS
- Dial
- Light
- Reset
- Time/ Darkness
- Temp.
- C: DAILY PROGRAMS
- USING DAILY PROGRAMS
- Step 1
- Step 2
- Step 3
- Step 4
- Step 5
- HIGH-TEMPERATURE PROGRAMS
- IMPORTANT NOTES:
- AUTO PREHEAT
- THICK ROAST
- BEEF/GRILL
- CRUST/FRESH/WOODFIRED PIZZA
- PIZZA DOUGH RECIPE
- Ingredients:
- PREHEATING AND COOKING TIME
- USING HIGH-TEMPERATURE PROGRAMS
- Step 6
- Note:
- Step 7
- Step 8
- Step 9
- CLEANING & MAINTENANCE
- TROUBLESHOOTING
- Problem Potential cause and solution
- LENOXX
Brand : Healthy Choice
Model : PO19
Category : Pizza oven