FWM-N2 - Remote trigger Vello - Free user manual and instructions
Find the device manual for free FWM-N2 Vello in PDF.


| Type | Wireless Remote Trigger |
| Brand | Vello |
| Model | FWM-N2 |
| Compatible With | Cameras with 2.5mm or 3.5mm remote port (check manual) |
| Connection Type | 2.4 GHz Radio Frequency |
| Operating Range | Up to 100 meters (328 feet) |
| Frequency | 2.4 GHz |
| Battery Type (Transmitter) | CR2032 (included) |
| Battery Type (Receiver) | AAA x 1 (included) |
| Standby Time | Approx. 2 years (transmitter), 100 hours (receiver) |
| Operating Temperature | -20°C to 50°C |
| Dimensions (Transmitter) | 48 x 30 x 12 mm |
| Dimensions (Receiver) | 52 x 35 x 18 mm |
| Weight (Transmitter) | 12 g (without battery) |
| Weight (Receiver) | 28 g (without battery) |
| Material | Plastic (ABS) |
| Functions | Half-press, Full-press, Bulb mode, Continuous shooting |
| Indicator LED | Red for transmission, Green for pairing |
| Warranty | 2 years |
| What's in the Box | Transmitter, Receiver, 2x CR2032, 1x AAA, User manual |
| Special Features | Pairing button, Magnetic mounting |
Frequently Asked Questions - FWM-N2 Vello
User questions about FWM-N2 Vello
0 question about this device. Answer the ones you know or ask your own.
Ask a new question about this device
Download the instructions for your Remote trigger in PDF format for free! Find your manual FWM-N2 - Vello and take your electronic device back in hand. On this page are published all the documents necessary for the use of your device. FWM-N2 by Vello.
USER MANUAL FWM-N2 Vello
natural_image
Two black flip-flops with visible control knobs and a partially open case, against a dark background (no text or symbols on the devices themselves)THANK YOU FOR CHOOSING VELLO
The FreeWave Micro Wireless Remote Shutter Release for Nikon is a low-profile shutter trigger that helps you take better pictures away from your camera and avoid camera shake. Setup is a snap by connecting to your Nikon camera's 10-pin remote terminal—there are no cables and no hogging your hot shoe. Select from 16 different wireless channels, and fire the shutter from up to 328 feet away. Using the FreeWave Micro, you can activate autofocus, trigger the shutter, open and close bulb exposures, and start and stop continuous shooting—all without touching your camera.
PRECAUTIONS
- There are no user-serviceable parts inside the devices. Do not attempt to disassemble or perform any unauthorized modification.
- Do not operate in the presence of flammable gas or vapors.
- Do not handle with wet hands or immerse in or expose to water or rain. Failure to observe this precaution can result in fire or electric shock.
- Observe caution when handling batteries. Batteries may leak or explode if improperly handled. Use only the batteries listed in this manual. Make certain to align batteries with correct polarity.
-
Batteries are prone to leakage when fully discharged. To avoid damage to the product, be sure to remove the battery when leaving the product unattended for prolonged periods or when no charge remains.
-
Do not use or leave the devices in conditions of extreme heat, severe cold, or high humidity.
- Dispose of used batteries, packaging, and old devices in accordance with appropriate local environmental regulations.
- Do not attempt to disassemble or repair the equipment—doing so will void the warranty, and Vello will not be responsible for any damage.
- Handle the unit with care.
- Keep out of the reach of children. This device contains small parts which may pose a choking hazard.
- Make sure the item is intact and that there are no missing parts.
- All images are for illustrative purposes only.
- Please read and follow these instructions, and keep this manual in a safe place.
4
OVERVIEW
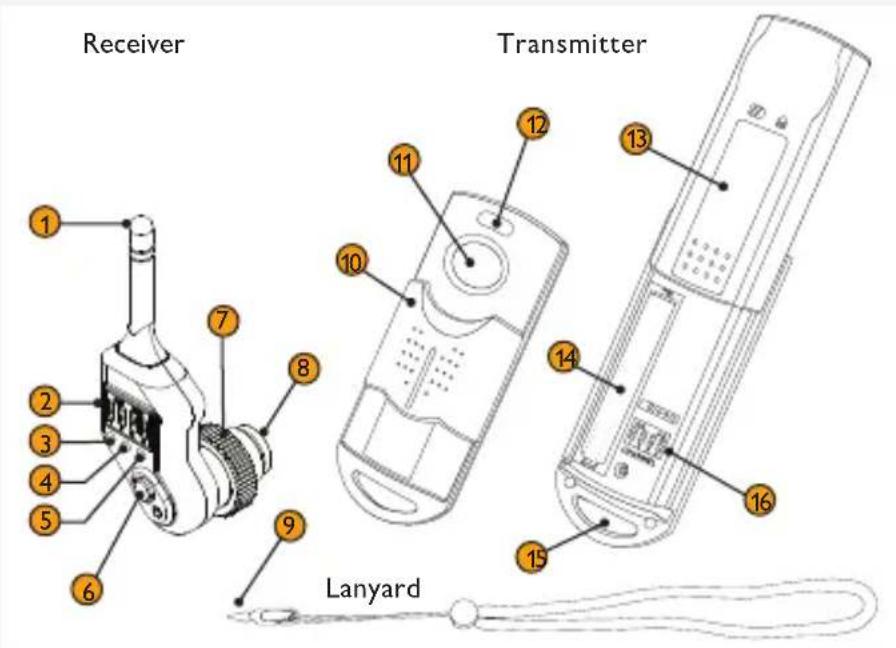
① Antenna
② 16-channel DIP switch
③ Power LED
4 Focus LED
5 Shutter LED
6 Power switch
⑦ Locking wheel
⑧ 10-pin connector
⑨ Channel selection pin
10 Protective sliding cover
11 Shutter release button
12 LED indicator
13 Battery compartment cover
14 Battery compartment
15 Strap hook
16 16-channel DIP switch
INSTRUCTIONS
Connecting the Receiver
The camera must have a 10-pin remote terminal in order to connect the FreeWave Micro Wireless Receiver.
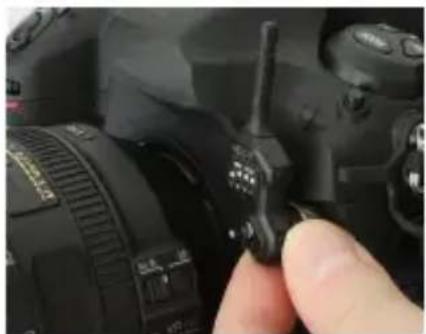
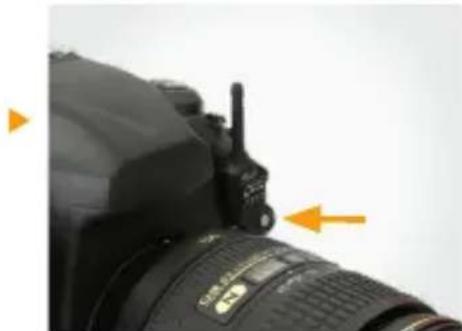
- Turn your camera's power off, and insert the receiver's connector into the camera's 10-pin remote terminal. Make sure the receiver's antenna is pointed up.
- Turn the locking wheel clockwise until the receiver is securely connected to the camera.
natural_image
Close-up of a hand adjusting a camera lens component (no visible text or symbols)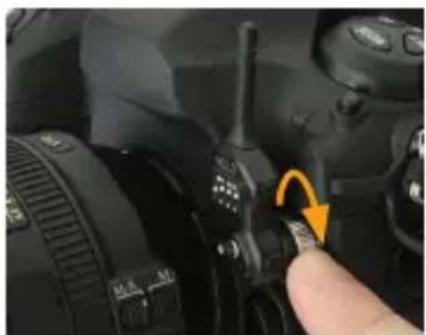
natural_image
Close-up of a camera module with a finger pointing to the lock, showing no visible text or symbols.- Press the receiver's power switch once. You should see the power LED quickly flash red, then blink at a steady rate.
To turn the receiver off, press and hold the power switch until the power LED quickly flashes red and then stops.
Note: The receiver will enter sleep mode after it has been on for two hours without being activated. When the receiver is in sleep mode, press the power switch to resume operation.
natural_image
Close-up of a DSLR camera with visible lens and adjustment arrows (no text or symbols)Installing the Transmitter's Battery
-
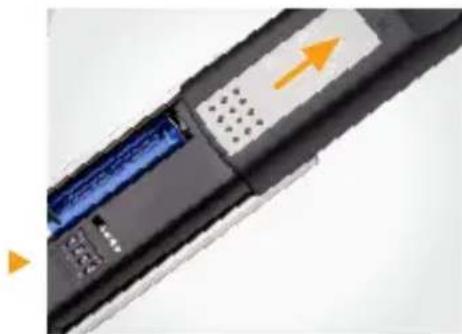
Slide the transmitter's battery compartment cover in the direction of the arrow. You might need to press down on the cover when sliding.
-
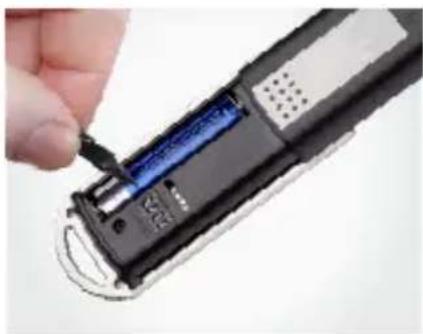
Install the included AAA battery according to the image in the battery chamber. Make sure the polarity is correct.
-
Slide the cover closed until it clicks to lock.
natural_image
Close-up of a black electronic device with a blue screen and orange arrow indicator (no readable text or symbols)Pairing the Transmitter to the Receiver
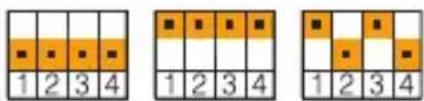
There are 16 radio frequencies (channels), available on the transmitter and receiver. Configure the four DIP switches on both devices in the same positions for correct channel selection.
This allows you to use the FreeWave Micro without interference from other radio-frequency devices nearby. Be sure to maintain a minimum distance of 20 inches (50 cm) between the transmitter and receiver during operation to prevent anti-RF interference.
For example:
Setting the Channel on the Transmitter and Receiver
- Slide open the transmitter's battery compartment cover.
- Using the channel selection pin connected to the lanyard, position each of the four DIP switches up or down, into a channel configuration.
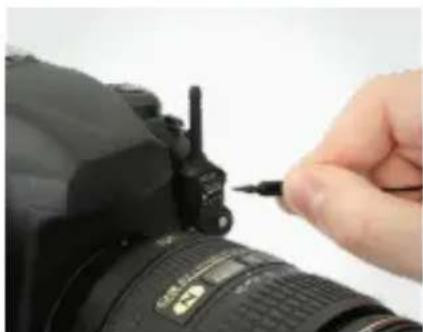
- On the receiver, position the DIP switches into the same configuration as on the transmitter.

natural_image
Close-up of a hand inserting a blue internal component into a black handheld device (no visible text or symbols)
natural_image
Close-up of a hand using a screwdriver to adjust the camera lens (no visible text or symbols)- With the receiver on, press the transmitter's shutter release. You should see the receiver's focus and shutter LEDs light up, as well as the transmitter's LED indicator. If the two are paired correctly, slide the transmitter's cover closed until it locks. If not, repeat steps 2 and 3 until you reach a working channel configuration.
USING THE FREEWAVE MICRO
You can use the FreeWave Micro to activate autofocus, trigger the shutter, and open and close the shutter while in bulb mode.
Autofocus
Press the transmitter's shutter release halfway. A blue LED indicator on the transmitter will light up, and the Focus LED on the receiver will glow blue.
Taking a Shot
A full press of the transmitter's shutter release will take a picture when everything is in focus. The transmitter's LED indicator will change from bright to dim blue, and the receiver's shutter LED will glow red.
Bulb Mode
- Set your camera to manual mode, and change the shutter speed to bulb.
- Press and hold the transmitter's shutter release for three seconds to set the camera to open the shutter and activate bulb lock.
- Press the transmitter's shutter release to end the exposure and close the shutter.
TROUBLESHOOTING
| Problem Solution | |
| The transmitter's LED indicator does not light up, or it blinks at incorrect times. | Ensure the battery's polarity is correct.Insert a fresh battery into the battery chamber. |
| The transmitter's LED indicator blinks, but the receiver's does not. | Check that the receiver's power is on.Ensure that the receiver and transmitter are set to the same channel configuration. |
| LED indicators on the receiver blink, but the camera doesn't operate. | Remove the receiver from the camera, and reconnect. Ensure that it's securely attached. |
SPECIFICATIONS
| Transmitter Receiver | ||
| Frequency | ||
| Channels | ||
| Maximum Range | ||
| Battery | ra | |
| Operating Temperature Range | °F to 122°F (-20°C to 50°C) | |
| Dimensions (H × W × D) | × 0.7 in.(82 × 34 × 17 mm) | 2.3 × 0.9 × 0.9 in.(58 × 23 × 23 mm) |
| Weight | 0.35 oz. (10 g) | |
FCC COMPLIANCE
This device complies with Part 15 of the FCC Rules. Operation is subject to the following two conditions:
- This device may not cause harmful interference.
- This device must accept any interference received, including interference that may cause undesired operation.
ONE-YEAR LIMITED WARRANTY
This VELLO product is warranted to the original purchaser to be free from defects in materials and workmanship under normal consumer use for a period of one (1) year from the original purchase date or thirty (30) days after replacement, whichever occurs later. The warranty provider's responsibility with respect to this limited warranty shall be limited solely to repair or replacement, at the provider's discretion, of any product that fails during normal use of this product in its intended manner and in its intended environment. Inoperability of the product or part(s) shall be determined by the warranty provider. If the product has been discontinued, the warranty provider reserves the right to replace it with a model of equivalent quality and function.
This warranty does not cover damage or defect caused by misuse, neglect, accident, alteration, abuse, improper installation or maintenance. EXCEPT AS PROVIDED HEREIN, THE WARRANTY PROVIDER MAKES NEITHER ANY EXPRESS WARRANTIES NOR ANY IMPLIED WARRANTIES, INCLUDING BUT NOT LIMITED TO ANY IMPLIED WARRANTY OF MERCHANTABILITY OR FITNESS FOR A PARTICULAR PURPOSE. This warranty provides you with specific legal rights, and you may also have additional rights that vary from state to state.
To obtain warranty coverage, contact the Vello Customer Service Department to obtain a return merchandise authorization (“RMA”) number, and return the defective product to Vello along with the RMA number and proof of purchase. Shipment of the defective product is at the purchaser’s own risk and expense.
For more information or to arrange service, visit www.vellogear.com or call Customer Service at 212-594-2353.
Product warranty provided by the Gradus Group.
www.gradusgroup.com
VELLO is a registered trademark of the Gradus Group.
© 2018 Gradus Group LLC. All Rights Reserved.
All other trademarks are the property of their respective owners.

VELLO
www.vellogear.com

VELLO
A Gradus Group Brand
GG2
- THANK YOU FOR CHOOSING VELLO
- PRECAUTIONS
- OVERVIEW
- INSTRUCTIONS
- Connecting the Receiver
- Installing the Transmitter's Battery
- Pairing the Transmitter to the Receiver
- Setting the Channel on the Transmitter and Receiver
- USING THE FREEWAVE MICRO
- Autofocus
- Taking a Shot
- Bulb Mode
- TROUBLESHOOTING
- SPECIFICATIONS
- FCC COMPLIANCE
- ONE-YEAR LIMITED WARRANTY
Brand : Vello
Model : FWM-N2
Category : Remote trigger