
xA (2004) - Car Scion - Free user manual and instructions
Find the device manual for free xA (2004) Scion in PDF.


| Product Type | Scion xA (2004) – Compact Car |
| Overall Length | 3915 mm (154.1 in) |
| Overall Width | 1695 mm (66.7 in) |
| Overall Height | 1530 mm (60.2 in) |
| Wheelbase | 2370 mm (93.3 in) |
| Vehicle Capacity Weight | 375 kg (825 lb) – occupants + cargo |
| Engine Type | 1NZ-FE, 4-cylinder in-line, 1.5 L (1497 cc) |
| Fuel Type | Unleaded gasoline, Octane 87 (RON 91) or higher |
| Fuel Tank Capacity | 45 L (11.9 US gal, 9.9 Imp gal) |
| Transmission Options | 5-speed manual or 4-speed automatic |
| Drivetrain | Front-wheel drive |
| Tire Size (Front/Rear) | P185/60R15 84T |
| Cold Tire Inflation Pressure | 200 kPa (2.0 bar, 29 psi) – all positions |
| Engine Oil Grade | API SL “Energy-Conserving” or ILSAC, SAE 5W-30 |
| Engine Oil Capacity (with filter) | 3.7 L (3.9 US qt, 3.3 Imp qt) |
| Coolant Type | Toyota Super Long Life Coolant (ethylene glycol based) |
| Brake Fluid Type | SAE J1703 or FMVSS No. 116 DOT 3 |
| Power Steering Fluid | Automatic transmission fluid DEXRON®II or III |
| Seat Belt System | 3-point ELR/ALR with pretensioners (front) |
| Airbag System | SRS driver & front passenger, side & curtain shield airbags |
| Battery | 12V, open voltage 12.6–12.8 V (fully charged) |
| Fuse Types | Blade fuses; pull-out tool located in fuse box |
Frequently Asked Questions - xA (2004) Scion
User questions about xA (2004) Scion
0 question about this device. Answer the ones you know or ask your own.
Ask a new question about this device
Download the instructions for your Car in PDF format for free! Find your manual xA (2004) - Scion and take your electronic device back in hand. On this page are published all the documents necessary for the use of your device. xA (2004) by Scion.
USER MANUAL xA (2004) Scion
Welcome to the growing group of value-conscious people who drive Scions. We are proud of the advanced engineering and quality construction of each vehicle we build.
This Owner's Manual explains the operation of your new Scion. Please read it thoroughly and have all the occupants follow the instructions carefully. Doing so will help you enjoy many years of safe and trouble-free motoring. For important information about this manual and your Scion, read the following pages carefully.
When it comes to service, remember that your Scion dealer knows your vehicle best and is interested in your complete satisfaction. He will provide quality maintenance and any other assistance you may require.
If there is not a Scion dealer near you, or you need emergency assistance for any reason, please call the following number:
• U.S. OWNERS:
Scion Customer Assistance Center
Toll-free:1-866-707-2460
Please leave this Owner's Manual in this vehicle at the time of resale. The next owner will need this information also.
All information and specifications in this manual are current at the time of printing. However, because of Sclon's policy of continual product improvement, we reserve the right to make changes at any time without notice.
Please note that this manual applies to all models and explains all equipment, including options. Therefore, you may find some explanations for equipment not installed on your vehicle.
TOYOTA MOTOR CORPORATION
© 2003 TOYOTA MOTOR CORPORATION
All rights reserved. This material may not be reproduced or copied, in whole or in part, without the written permission of Toyota Motor Corporation.
Important information about this manual
Safety and vehicle damage warnings
Throughout this manual, you will see safety and vehicle damage warnings. You must follow these warnings carefully to avoid possible injury or damage.
The types of warnings, what they look like, and how they are used in this manual are explained as follows.

CAUTION
This is a warning against anything which may cause injury to people if the warning is ignored. You are informed about what you must or must not do in order to reduce the risk of injury to yourself and others.
NOTICE
This is a warning against anything which may cause damage to the vehicle or its equipment if the warning is ignored. You are informed about what you must or must not do in order to avoid or reduce the risk of damage to your vehicle and its equipment.
Safety symbol

00060
When you see the safety symbol shown above, it means: "Do not..."; "Do not do this"; or "Do not let this happen".
Important information about your Scion
Occupant restraint systems
Scion encourages you and your family to take the time to read Section 1-3 of this Owner's Manual carefully. In terms of helping you understand how you can receive the maximum benefit of the occupant restraint systems this vehicle provides, Section 1-3 of this Owner's Manual is the most important section for you and your family to read.
Section 1-3 describes the function and operation concerning seats, seat belts, SRS airbags and child restraint systems of this vehicle and some potential hazards you should be aware of. These systems work together along with the overall structure of this vehicle in order to provide occupant restraint in the event of a crash. The effect of each system is enhanced when it is used properly and together with other systems. No single occupant restraint system can, by itself, provide you or your family with the equal level of restraint which these systems can provide when used together. That is why it is important for you and your family to understand the purpose and proper use of each of these systems and how they relate to each other.
The purpose of all occupant restraint systems is to help reduce the possibility of death or serious injury in the event of a collision. None of these systems, either individually or together, can ensure that there is no injury in the event of collision. However, the more you know about these systems and how to use them properly, the greater your chances become of surviving an accident without death or serious injury.
Seat belts provide the primary restraint to all occupants of the vehicle, and every occupant of the vehicle should wear seat belts properly at all times. Children should always be secured in child restraint systems that are appropriate for their age and size. SRS (Supplemental Restraint System) airbags are, as their names imply, designed to work with, and be supplemental to, seat belts and are not substitutes for them. SRS airbags can be very effective in reducing the risk of head and chest injuries by preventing contact of the head and chest with interior portions of the vehicle.
In order to be effective, the SRS airbags must deploy with tremendous speed. The rapid deployment of the SRS airbags makes the SRS airbags themselves potential sources of injury if an occupant is too close to an airbag, or if an object or some part of his or her body has been placed between the occupant and the airbag at the time of deployment. This is just one example of how the instructions in Section 1-3 of this Owner's Manual will help ensure proper use of the occupant restraint systems, and increase the safety they can provide to you and your family in the event of an accident. Scion recommends you to read the provisions in Section 1-3 carefully and refer to them from time to time during your time of ownership of this vehicle.
New vehicle warranty
Your new vehicle is covered by the following Scion limited warranties:
- New vehicle warranty
- Emission control systems warranty
- Others
For further information, please refer to the "Owner's Warranty Information Booklet".
Your responsibility for maintenance
It is the owner's responsibility to make sure the specified maintenance is performed. Section 6 gives details of these maintenance requirements. Also included in Section 6 is general maintenance. For scheduled maintenance information, please refer to the "Scheduled Maintenance Guide".
Accessories, spare parts and modification of your Scion
A wide variety of non-genuine spare parts and accessories for Scion vehicles are currently available in the market. You should know that Scion does not warrant these products and is not responsible for their performance, repair, or replacement, or for any damage they may cause to, or adverse effect they may have on, your Scion vehicle.
This vehicle should not be modified with non-genuine Sclon products. Modification with non-genuine Sclon products could affect its performance, safety or durability, and may even violate governmental regulations. In addition, damage or performance problems resulting from the modification may not be covered under warranty.
Installation of a mobile two-way radio system
As the installation of a mobile two-way radio system in your vehicle could affect electronic systems such as multiport fuel injection system/sequential multiport fuel injection system, anti-lock brake system, SRS airbag system and seat belt pretensioner system, be sure to check with your Scion dealer for precautionary measures or special instructions regarding installation.
Tires and loading on your Scion
Underinflated or overinflated tire pressure and the excess load may result in the deterioration of steering ability and braking ability, leading to an accident. Check the tire inflation pressure periodically and be sure to keep the load limits given in this Owner's Manual. For details about tire inflation pressure and load limits, see page 191 and pages 131 through 132.
Scrapping of your Scion
The SRS airbag and seat belt pretensioner devices in your Scion contain explosive chemicals. If the vehicle is scrapped with the airbags and pretensioners left as they are, this may cause an accident such as a fire. Be sure to have the systems of the SRS airbag and seat belt pretensioner removed and disposed of by a qualified service shop or by your Scion dealer before you dispose of your vehicle.
SECTION 1-1
OPERATION OF INSTRUMENTS AND CONTROLS
Overview of instruments and controls
Instrument panel overview 2
Instrument cluster overview 4
Indicator symbols on the instrument panel 5
Instrument panel overview

- Side vents
- Center vents
- Instrument cluster
- Interior light
- Power door lock switches
- Power window switches
- Glove box
- Rear cup holder
- Parking brake lever
-
Automatic transmission selector lever or manual transmission gear shift lever
-
Front cup holder
- Hood lock release lever
- Window lock switch

- Headlight and turn signal switches
- Wiper and washer switches
- Rear window defogger switch
- Emergency flasher switch
- Air conditioning controls
- Front passenger's seat bell reminder light
- Auxiliary box
- Cigarette lighter
- Ashtray
- Ignition switch
- Tilt steering lock release lever
- Power rear view mirror control switches
- Instrument panel light control dial
Instrument cluster overview

-
Speedometer
-
Clock reset and trip meter reset knob
-
Odometer and two trip meters
-
Service reminder indicators and indicator lights
-
Clock
-
Fuel gauge
-
Tachometer
Indicator symbols on the instrument panel
| BRAKE | Brake system warning light* | ABS | Anti-lock brake system warning light * |
| (AZZ4) | Driver's seat belt reminder light* | [62*3] | Open door warning light* |
| PASSENGER | Front passenger's seat belt reminder light* | [CCC8] | SRS warning light* |
| Discharge warning light* | [1*04] | Low fuel level warning light | |
| MAINTREQD | Engine oil replacement reminder light | [67*55] | Turn signal indicator lights |
| Malfunction indicator lamp* | [7CCK] | Headlight high beam indicator light | |
| Low engine oil pressure warning light* | [2*17A] | Overdrive-off indicator light | |
| (blue) | Low engine coolant temperature indicator light* | *: For details, see "Service reminder indicators and warning buzzers" on page 79. | |
| (red) | High engine coolant temperature warning light* | ||
SECTION 1-2
OPERATION OF INSTRUMENTS AND CONTROLS
Keys and Doors
Keys 8
Side doors 8
Power windows 11
Back door 13
Hood 14
Fuel tank cap 15
Keys
This key works in every lock.
Since the side doors can be locked without a key, you should always carry a spare key in case you accidentally lock your keys inside the vehicle.
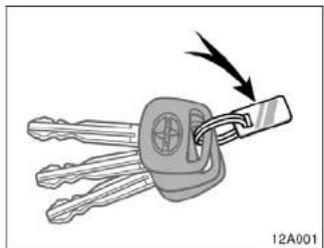
KEY NUMBER PLATE
Your key number is shown on the plate. Keep the plate in a safe place such as your wallet, not in the vehicle.
If you should lose your keys or if you need additional keys, duplicates can be made by a Scion dealer using the key number.
We recommend writing down the key number and storing it in a safe place.
Side doors
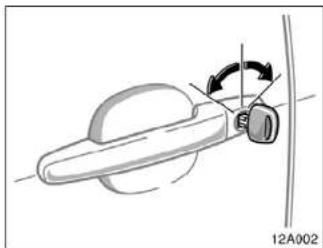
LOCKING AND UNLOCKING WITH KEY
Insert the key into the keyhole and turn it.
To lock: Turn the key forward.
To unlock: Turn the key backward.
All the side doors and back door lock and unlock simultaneously with either front door. In the driver's door lock, turning the key once will unlock the driver's door and twice in succession will unlock all the side doors and back door simultaneously.

LOCKING AND UNLOCKING WITH INSIDE LOCK KNOB
Move the lock knob.
To lock: Push the knob forward.
To unlock: Pull the knob backward.
The front doors can be opened by pulling the inside handle even if the lock knobs are in the locked position.
Closing the door with the lock knob in the lock position will also lock the door. Be careful not to lock your keys in the vehicle.
Driver's side
Passenger's side
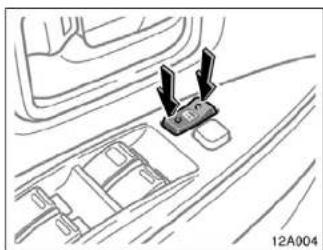
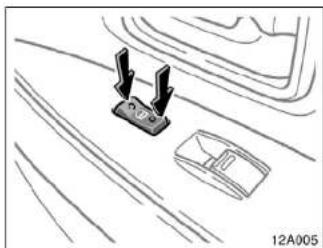
LOCKING AND UNLOCKING WITH POWER DOOR LOCK SWITCH
Push the switch.
To lock: Push the switch down on the front side.
To unlock: Push the switch down on the rear side.
Operating the switch locks or unlocks all the side doors and back door simultaneously.
If you do any of the following, no door can be unlocked with the power door lock switch.
- Lock all the side doors and back door with the key when all the side doors and back door are closed.
- Set the driver's door inside lock knob in the lock position, and close the driver's door.
The power door lock switch can be reset in the following ways.
●Turn the ignition key to "ON".
- Unlock all the side doors and back door with the key.
- Unlock the driver's door with the inside lock knob, and then unlock all the side doors and back door with the power door lock switch.

REAR DOOR CHILD-PROTECTORS
Move the lock lever to the "LOCK" position as shown on the label.
This feature allows you to lock a rear door so it can be opened from the outside only, not from Inside. We recommend using this feature whenever small children are in the vehicle.
CAUTION
Before driving, be sure that the doors are closed and locked, especially when small children are in the vehicle. Along with the proper use of seat belts, locking the doors helps prevent the driver and passengers from being thrown out from the vehicle during an accident. It also helps prevent the doors from being opened unintentionally.
Power windows
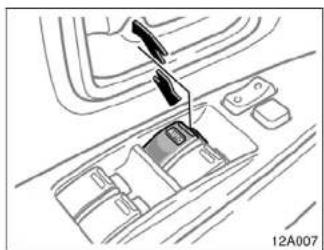

The windows can be operated with the switch on each side door.
The power windows work when the ignition switch is in the "ON" position.
Use the switch on the driver's door.
Normal operation: The window moves as long as you hold the switch.
To open: Lightly push down the switch. To close: Pull up the switch.
Automatic operation (to open only): Push the switch completely down and then release it. The window will fully open. To stop the window partway, lightly pull the switch up and then release it.

Use the switch on each passenger's door or the driver's door that controls each passenger's window.
The window moves as long as you hold the switch.
To open: Push down the switch. To close: Pull up the switch.
If you push in the window lock switch on the driver's door, the passengers' windows cannot be operated.

CAUTION
To avoid serious personal injury, you must do the following.
Before you close the power windows, always make sure there is nobody around the power windows. You must also make sure the heads, hands and other parts of the bodies of all occupants are kept completely inside the vehicle. If someone's neck, head or hands get caught in a closing window, it could result in a serious injury. When anyone closes the power windows, make sure he or she operates the windows safely.
- When small children are in the vehicle, never let them use the power window switches without supervision. Use the window lock switch to prevent them from making unexpected use of the switches.
- Be sure to remove the ignition key when you leave your vehicle.
●Never leave anyone (particularly a small child) alone in your vehicle, especially with the ignition key still inserted. Otherwise, he or she could use the power window switches and get trapped in a window. Unattended person (particularly a small child) can be involved in a serious accident.
Back door
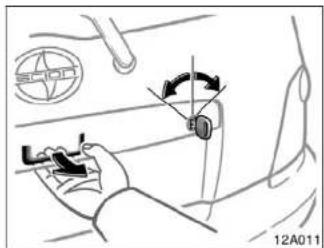

LOCKING AND UNLOCKING WITH KEY Insert the key into the keyhole and tur it.
To lock: Turn the key clockwise. To unlock: Turn the key counterclockwise.
To open the back door, pull the lock release lever.
Operating the power door lock switch locks or unlocks the back door and all the side doors simultaneously (see "Side doors" on page 8).
When closing the back door, the inside handle can be used to make the reach easier.
To close the back door, lower it and press down on it. After closing the back door, try pulling it up to make sure it is securely closed.
See "Cargo and luggage" on page 131 for precautions to observe when loading luggage.
CAUTION
Keep the back door closed while driving. This not only keeps the luggage from being thrown out but also prevents exhaust gases from entering the vehicle.
Hood

To open the hood:
- Pull the hood lock release lever. The hood will spring up slightly.

- In front of the vehicle, pull up the auxiliary catch lever and lift the hood.
CAUTION
Before driving, be sure that the hood is closed and securely locked. Otherwise, the hood may open unexpectedly while driving and an accident may occur.

- Hold the hood open by inserting the support rod into the slot.
To insert the support rod into the slot, move it straight up. If it is moved to the side or toward the inside of the vehicle, it may become detached.
Before closing the hood, check to see that you have not forgotten any tools, rags, etc. and return the support rod to its clip—this prevents rattles. Then lower the hood and make sure it locks into place. If necessary, press down gently on the front edge to lock it.
CAUTION
After inserting the support rod into the slot, make sure the rod supports the hood securely from falling down on to your head or body.
NOTICE
Be sure to return the support rod to its clip before closing the hood. Closing the hood with the support rod up could cause the hood to bend.
Fuel tank cap

This indicates that the fuel filler door is on the left side of your vehicle.

- To open the fuel filler door, pull the lever up. When refueling, turn off the engine.

- To remove the fuel tank cap, turn the cap slowly counterclockwise, then pause slightly before removing it.
The indicator lamp goes off after driving several times. If the indicator lamp does not go off, contact your Scion dealer as soon as possible.

CAUTION
- Do not smoke, cause sparks or allow open flames when refueling. The fumes are flammable.
- When opening the cap, do not remove the cap quickly. In hot weather, fuel under pressure could cause injury by spraying out of the filler neck if the cap is suddenly removed.
It is not unusual to hear a slight swoosh when the cap is opened. When installing, turn the cap clockwise till you hear a click.
If the cap is not tightened securely, the malfunction indicator lamp comes on. Make sure the cap is tightened securely.
SECTION 1-3
OPERATION OF INSTRUMENTS AND CONTROLS
Occupant restraint systems
Seats 18
Front seats 18
Fold-down rear seat 20
Head restraints 22
Seat belts 22
SRS driver airbag and front passenger airbag 32
SRS side airbags and curtain shield airbags 39
Child restraint 47
Seats
While the vehicle is being driven, all vehicle occupants should have the seatback upright, sit well back in the seat and properly wear the seat belts provided.
CAUTION
- Do not drive the vehicle unless the occupants are properly seated. Do not allow any passengers to sit on top of a folded-down seatback, or in the luggage compartment or cargo area. Persons not properly seated and/or not properly restrained by seat belts can be severely injured in the event of emergency braking or a collision.
- During driving, do not allow any passengers to stand up or move around between seats. Otherwise, severe injuries can occur in the event of emergency braking or a collision.
Front seats—
—Front seat precautions
Driver seat
CAUTION
The SRS driver airbag deploys with considerable force, and can cause death or serious injury especially if the driver is very close to the airbag. The National Highway Traffic Safety Administration ("NHTSA") advises:
Since the risk zone for driver airbag is the first 50–75 mm (2–3 in.) of inflation, placing yourself 250 mm (10 in.) from your driver airbag provides you with a clear margin of safety. This distance is measured from the center of the steering wheel to your breastbone. If you sit less than 250 mm (10 in.) away now, you can change your driving position in several ways:
- Move your seat to the rear as far as you can while still reaching the pedals comfortably.
●Slightly recline the back of the seat. Although vehicle designs vary, many drivers can achieve the 250 mm (10 in.) distance, even with the driver seat all the way forward, simply by reclining the back of the seat somewhat. If reclining the back of your seat makes it hard to see the road, raise yourself by using a firm, non-slippery cushion, or raise the seat if your vehicle has that feature.
- If your steering wheel is adjustable, tilt it downward. This points the airbag toward your chest instead of your head and neck.
The seat should be adjusted as recommended by NHTSA above, while still maintaining control of the foot pedals, steering wheel, and your view of the instrument panel controls.
Front passenger seat
CAUTION
The SRS front passenger airbag also deploys with considerable force, and can cause death or serious injury especially if the front passenger is very close to the airbag. The front passenger seat should be as far from the airbag as possible with the seatback adjusted, so the front passenger slits upright.
Front seats (with SRS side airbags)
CAUTION
The SRS side airbags are installed in the driver and front passenger seats. Observe the following precautions.
- Do not lean against the front door when the vehicle is in use, since the side airbag inflates with considerable speed and force. Otherwise, you may be killed or seriously injured.
- Do not use seat accessories which cover the area where the side airbags inflate. Such accessories may prevent the side airbags from activating correctly causing death or serious injury.
- Do not modify or replace the seats or upholstery of the seats with side airbags. Such change may prevent the side airbag system from activating correctly, disable the system or cause the side airbags to inflate accidentally, resulting in death or serious injury.
—Seat adjustment precautions
CAUTION
- Do not adjust the seat while the vehicle is moving as the seat may unexpectedly move and cause the driver to lose control of the vehicle.
- Be careful that the seat does not hit a passenger or luggage.
●After adjusting the seat position, release the lever and try sliding the seat forward and backward to make sure it is locked in position.
●After adjusting the seatback, push your body back against the seat to make sure the seat is locked in position. - Do not put objects under the seats. Otherwise, the objects may interfere with the seat-lock mechanism or unexpectedly push up the seat position adjusting lever and the seat may suddenly move, causing the driver to lose control of the vehicle.
●While adjusting the seat, do not put your hands under the seat or near the moving parts. Otherwise, your hands or fingers may be caught and injured.
—Adjusting front seats

-
SEAT POSITION ADJUSTING LEVER Hold the center of the lever and pull it up. Then slide the seat to the desired position with slight body pressure and release the lever.
-
SEATBACK ANGLE ADJUSTING LEVER
Lean forward and pull the lever up. Then lean back to the desired angle and release the lever.

Fold-down rear seat

BEFORE FOLDING DOWN REAR SEAT Make sure the shoulder belt passes through the hanger when folding the rear seat.
This prevents the shoulder belt from being damaged.

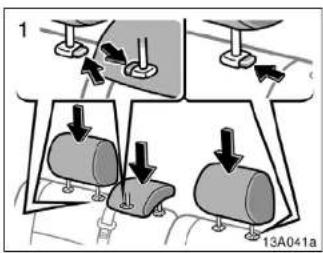
FOLDING REAR SEAT
- Lower the head restraint to the lowest position.

- Pull up the lock release button and fold the seatback down.
Each seatback may be folded separately. This will enlarge the luggage compartment as far as the seatbacks. See "Cargo and luggage" on page 131 for precautions to observe for loading luggage.
CAUTION
When returning the seatback to the upright position, observe the following precautions in order to prevent personal injury In a collision or sudden stop:
●Make sure the seatback is securely locked by pushing forward and rearward on the top of the seatback. Failure to do so will prevent the seat belt from operating properly.
●Make sure the seat belts are not twisted or caught in the seatback and are arranged in the proper position and are ready to use.
Head restraints
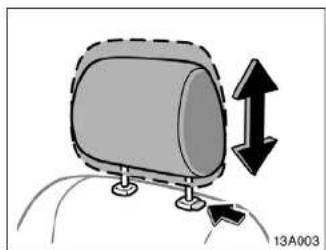
Front seat

Rear seat
For your safety and comfort, adjust the head restraint before driving.
To raise: Pull it up.
To lower: Push it down while pressing the lock release button.
Rear center head restraint—When an occupant sits on the rear center seat, always pull up the rear center head restraint to the lock position.
The head restraint is most effective when it is close to your head. Therefore, using a cushion on the seatback is not recommended.

Seat belts—
—Seat belt precautions
Scion strongly urges that the driver and passengers in the vehicle be properly restrained at all times with the seat belts provided. Failure to do so could increase the chance of injury and/or the severity of injury in accidents.
The seat belts provided for your vehicle are designed for people of adult size, large enough to properly wear them.
Child. Use a child restraint system appropriate for the child until the child becomes large enough to properly wear the vehicle's seat belts. See "Child restraint" on page 47 for details.
If a child is too large for a child restraint system, the child should sit in the rear seat and must be restrained using the vehicle's seat belt. According to accident statistics, the child is safer when properly restrained in the rear seat than in the front seat.
If a child must sit in the front seat, the seat belts should be worn properly. If an accident occurs and the seat belts are not worn properly, the force of the rapid inflation of the airbag may cause death or serious injury to the child.
Do not allow any children to stand up or kneel on either rear or front seats. An unrestrained child could suffer serious injury or death during emergency braking or a collision. Also, do not let the child sit on your lap. Holding a child in your arms does not provide sufficient restraint.
Pregnant woman. Scion recommends the use of a seat belt. Ask your doctor for specific recommendations. The lap belt should be worn securely and as low as possible over the hips and not on the waist.
Injured person. Scion recommends the use of a seat belt. Depending on the injury, first check with your doctor for specific recommendations.
CAUTION
Persons should ride in their seats properly wearing their seat belts whenever the vehicle is moving. Otherwise, they are much more likely to suffer serious bodily Injury or death in the event of sudden braking or a collision.
When using the seat belts, observe the following:
-
Use the belt for only one person at a time. Do not use a single belt for two or more people—even children.
●To reduce the risk of sliding under the lap belt during a collision, avoid reclining the seatback any more than needed. The seat belts provide maximum protection in a frontal or rear collision when the driver and the front passenger are sitting up straight and well back in the seats. If you are reclined, the lap belt may slide past your hips and apply restraint forces directly to the abdomen. In the event of a frontal collision, the more the seat is reclined, the greater the risk of personal injury. -
Be careful not to damage the belt webbing or hardware. Take care that they do not get caught or pinched in the seat or doors.
- Inspect the belt system periodically. Check for cuts, fraying, and loose parts. Damaged parts should be replaced. Do not disassemble or modify the system.
- Keep the belts clean and dry. If they need cleaning, use a mild soap solution or lukewarm water. Never use bleach, dye, or abrasive cleaners, or allow them to come into contact with the belt—they may severely weaken the belts. (See "Cleaning the interior" on page 169.)
-Replace the belt assembly (including bolts) if it has been used in a severe impact. The entire assembly should be replaced even if damage is not obvious.
—Fastening front and rear seat belts

Adjust the seat as needed and sit up straight and well back in the seat. To fasten your belt, pull it out of the retractor and insert the tab Into the buckle.
You will hear a click when the tab locks into the buckle.
The seat belt length automatically adjusts to your size and the seat position.
The retractor will lock the belt during a sudden stop or on impact. It also may lock if you lean forward too quickly. A slow, easy motion will allow the belt to extend, and you can move around freely.
When a passenger's shoulder belt is completely extended and is then retracted even slightly, the belt is locked in that position and cannot be extended. This feature is used to hold the child restraint system securely. (For details, see "Child restraint" on page 47.) To free the belt again, fully retract the belt and then pull the belt out once more.
If the seat belt cannot be pulled out of the retractor, firmly pull the belt and release it. You will then be able to smoothly pull the belt out of the retractor.

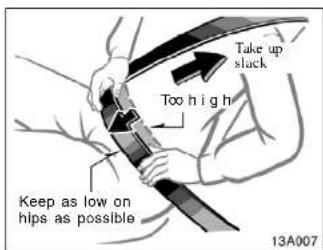
Adjust the position of the lap and shoulder belts.
Position the lap belt as low as possible on your hips—not on your waist, then adjust it to a snug fit by pulling the shoulder portion upward through the latch plate.
CAUTION
- Both high-positioned lap belts and loose-fitting belts could cause serious injuries due to sliding under the lap belt during a collision or other unintended event. Keep the lap belt positioned as low on hips as possible.
- Do not place the shoulder belt under your arm.
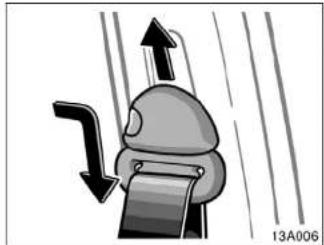
CAUTION
Always make sure the shoulder belt is positioned across the center of your shoulder. The belt should be kept away from your neck, but not falling off your shoulder. Failure to do so could reduce the amount of protection in an accident and cause serious injuries in a collision.
Seat belts with an adjustable shoulder anchor—
Adjust the shoulder anchor position to your size.
To raise: Slide the anchor up. To lower: Push in the lock release button and slide the anchor down.
After adjustment make sure the anchor is locked in position.

To release the belt, press the buckle release button and allow the belt to retract.
If the belt does not retract smoothly, pull it out and check for kinks or twists. Then make sure it remains untwisted as it retracts.
CAUTION
Do not separate the buckle with the light gray buckle release button. Otherwise, the seat belt may not work properly. See the information in the following columns.
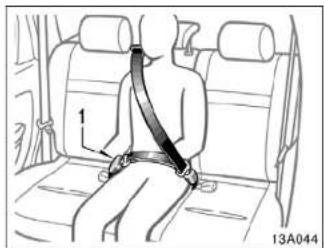
REAR CENTER SEAT BELT
The rear center seal belt is a 3-point type restraint with two buckles. Both seat belt buckles must be correctly located and securely latched for proper operation
Make sure the buckle 1 is securely latched for ready use of the center seat belt.

Two buckles and tabs for rear center seat belt
The two buckles for the rear center seat belt are distinguished with colors of the buckle release button. Also the two tabs have different shapes for ends so that the belt is not buckled in the wrong place.
Buckle 1—Properly matches with the light gray tab
Buckle 2—Properly matches with the interior color tab

CAUTION
Make sure that both buckles are correctly located and securely latched. Failure to properly match the buckle and tab may cause severe Injury in case of an accident or a collision.


CAUTION
Do not use the rear center seat belt with either buckle released. Fastening only the shoulder belt or lap belt may cause severe personal injury in case of sudden braking or a collision.
—Seat belt extender
If your seat belts cannot be fastened securely because they are not long enough, a personalized seat belt extender is available from your Scion dealer free of charge.
Please contact your local Scion dealer so that the dealer can order the proper required length for the extender. Bring the heaviest coat you expect to wear for proper measurement and selection of length. Additional ordering information is available at your Scion dealer.

CAUTION
When using the seat belt extender, observe the following precautions. Failure to follow these instructions could reduce the effectiveness of the seat belt restraint system in case of an accident, increasing the chance of personal injury.
●Remember that the extender provided for you may not be safe when used on a different vehicle, for another person, or at a different seating position than the one originally intended.

- If the seat belt extender has been connected to the driver's seat belt buckle but the other end of the seat belt extender has not been bucked into the vehicle's existing should restraint (as depicted in the picture above), the SRS driver's airbag system will judge that the driver was wearing the seat belt. In this case, the driver will not be properly restrained and this will increase the likelihood of death or serious injury in the event of a collision. It may also result in the driver's airbag activating as if the driver was properly restrained, which would also increase the likelihood of death or serious injury in the event of a collision. Be sure to buckle both ends of the seat belt extender, one end into the driver's seat belt buckle, the other end into the driver's existing seat belt system.
- Be sure to wear the seat belt without the seat belt extender if you can fasten the seat belt without the extender. - Do not use the seat belt extender when installing a child restraint system on the front or rear passenger seat. If installing a child restraint system with the seat belt extender connected to the seat belt, the seat belt will not securely hold the child restraint system, which could cause death or serious injury to the child or other passengers in the event of collision.

To connect the extender to the seat belt, insert the tab into the seat belt buckle so that the "PRESS" signs on the buckle release buttons of the extender and the seat belt are both facing outward as shown.
You will hear a click when the tab locks into the buckle.
When releasing the seat belt, press on the buckle release button on the extender, not on the seat belt. This helps prevent damage to the vehicle interior and extender itself.
When not in use, remove the extender and store in the vehicle for future use.
CAUTION
●After inserting the tab, make sure the tab and buckle are locked and that the lap and shoulder portions of the belt and the seat belt extender are not twisted.
- Do not insert coins, clips, etc. in the buckle as this may prevent you from properly latching the tab and buckle.
- If the seat belt does not function normally, immediately contact your Scion dealer. Do not use the seat until the seat belt is fixed, because it cannot protect an adult occupant or your child from injury.
—Seat belt pretensioners

The driver and front passenger seat belt pretensioners are designed to be activated in response to a severe frontal impact.
When the sensor detects a severe frontal impact, the front seal belts are quickly drawn back by the retractors so that the belts snugly restrain the occupants.
The seat belt pretensioners are activated even with no passenger in the front seat.
The seat belt pretensioners and SRS airbags may not operate together in all collisions.

The seat belt pretensioner system consists mainly of the following components, and their locations are shown in the illustration.
- Front airbag sensors
- SRS warning light
- Seat belt pretensioner assemblies
- Airbag sensor assembly
The seat belt pretensioners are controlled by the airbag sensor assembly. The airbag sensor assembly consists of a safing sensor and airbag sensor.
When the seat belt pretensioners are activated, an operating noise may be heard and a small amount of non-toxic gas may be released. This does not indicate that a fire is occurring. This gas is normally harmless.
Once the seat belt pretensioners have been activated, the seat belt retractors remain locked.

NOTICE
Do not perform any of the following changes without consulting your Scion dealer. Such changes can interfere with proper operation of the seat belt pretensioners in some cases.
◆Installation of electronic devices such as a mobile two-way radio, cassette tape player or compact disc player
◆Repairs on or near the front seat belt retractor assemblies
◆Modification of the suspension system
◆Modification of the front end structure
◆Attachment of a grille guard (bull bar, kangaroo bar, etc.), snowplow, winches or any other equipment to the front end
◆Repairs made on or near the front fenders, front end structure or console
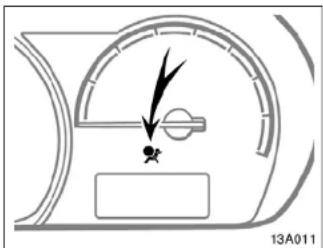
This indicator comes on when the ignition key is turned to the "ON" position. It goes off after about 6 seconds. This means the seat belt pretensioners are operating properly.
This warning light system monitors the airbag sensor assembly, front airbag sensors, side and curtain shield airbag sensors, curtain shield airbag sensors, driver's seat position sensor, driver's seat bell buckle switch, seat belt pretensioner assemblies, Inflators, warning light, Interconnecting wiring and power sources. (For details, see "Service reminder indicators and warning buzzers" on page 79.)
If any of the following conditions occurs, this indicates a malfunction of the airbags or seat belt pretensioners. Contact your Scion dealer as soon as possible.
- When the ignition key is turned to the "ON" position, the light does not come on, remains on or flashes.
●The light comes on or starts flashing while driving. - If any seat belt does not retract or cannot be pulled out due to a malfunction or activation of the relevant seat belt pretensioner.
●The seat belt pretensioner assembly or surrounding area has been damaged.

In the following cases, contact your Scion dealer as soon as possible:
●The front of the vehicle (shaded in the illustration) was involved in an accident that was not severe enough to cause the seat belt pretensioners to operate.
- Either seat belt pretensioner assembly or surrounding area is scratched, cracked, or otherwise damaged.
SRS driver airbag and front passenger airbag

The SRS (Supplemental Restraint System) front airbags are designed to provide further protection for the driver and front passenger in addition to the primary safety protection provided by the seat belts.
In response to a severe frontal impact, the SRS front airbags work together with the seat belts to help reduce injury by inflating. The SRS front airbags help reduce injuries mainly to the driver's or front passenger's head or chest caused by hitting the vehicle interior.
The front passenger airbag is activated even with no passenger in the front seat.
Always wear your seat belt properly.
Your vehicle is equipped with a crash sensing and diagnostic module, which will record the use of the seat belt restraint system by the driver and front passenger when the SRS front airbags are inflated.

CAUTION
●The SRS front airbag system is designed only as a supplement to the primary protection of the driver and front passenger seat belt systems. The driver and front passenger can be killed or seriously injured by the inflating airbags if they do not wear the available seat belts properly. During sudden braking just before a collision, an unrestrained driver or front passenger can move forward into direct contact with or close proximity to the airbag which may then deploy during the collision. To ensure maximum protection in an accident, the driver and all passengers in the vehicle must wear their seat belts properly. Wearing a seat belt properly during an accident reduces the chances of death or serious injury or being thrown out of the vehicle. For instructions and precautions concerning the seat belt system, see "Seat belts" on page 22.
- Improperly seated and/or restrained Infants and children can be killed or seriously injured by the deploying airbags. An infant or child who is too small to use a seat belt should be properly secured using a child restraint system. Sclon strongly recommends that all infants and children be placed in the rear seat of the vehicle and properly restrained. The rear seat is the safest for infants and children. For instructions concerning the installation of a child restraint system, see "Child restraint" on page 47.
The SRS front airbags are designed to deploy in severe (usually frontal) collisions where the magnitude and duration of the forward deceleration of the vehicle exceed the designed threshold level.
The SRS front airbags will deploy if the severity of the impact is above the designed threshold level, comparable to an approximate 25 km/h (15 mph) collision when the vehicle has the impact straight into a fixed barrier that does not move or deform.
However, this threshold velocity will be considerably higher if the vehicle strikes an object, such as a parked vehicle or sign pole, which can move or deform on impact, or if the vehicle is involved in an underride collision (e.g. a collision in which the front of the vehicle "underrides", or goes under, the bed of a truck, etc.). It is possible that in some collisions where the forward deceleration of the vehicle is very close to the designed threshold level, the SRS front airbags and the seat belt pretensioners may not activate together.
Always wear your seat belts properly.

The SRS front airbags are generally not designed to inflate if the vehicle is involved in a side or rear collision, if it rolls over, or if it is involved in a low-speed frontal collision. But, whenever a collision of any type causes sufficient forward deceleration of the vehicle, deployment of the SRS front airbags may occur.

The SRS front airbags may also deploy if a serious impact occurs to the underside of your vehicle. Some examples are shown in the Illustration.
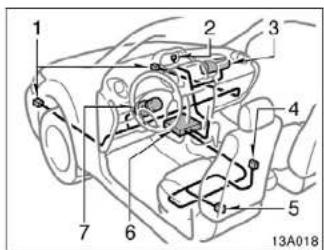
The SRS front airbag system consists mainly of the following components, and their locations are shown in the illustration.
- Front airbag sensors
- SRS warning light
- Airbag module for front passenger
(airbag and inflator) - Driver's seat belt buckle switch
- Driver's seat position sensor
- Airbag sensor assembly
- Airbag module for driver (airbag and inflator)
The airbag sensor assembly consists of a safing sensor and airbag sensor.
The front airbag sensors constantly monitor the forward deceleration of the vehicle. If an impact results in a forward deceleration beyond the designed threshold level, the system triggers the airbag inflators. At this time a chemical reaction in the inflators very quickly fills the airbags with non-toxic gas to help restrain the forward motion of the occupants. The front airbags then quickly deflate so that there is no obstruction of the driver's vision should it be necessary to continue driving.
When the airbags Inflate, they produce a loud noise and release some smoke and residue along with non-toxic gas. This does not indicate a fire. This smoke may remain inside the vehicle for some time, and may cause some minor irritation to the eyes, skin or breathing. Be sure to wash off any residue as soon as possible to prevent any potential skin irritation with soap and water. If you can safely exit from the vehicle, you should do so immediately.
Deployment of the airbags happens in a fraction of a second, so the airbags must inflate with considerable force. While the system is designed to reduce serious injuries, primarily to the head and chest, it may also cause other, less severe injuries to the face, chest, arms and hands. These are usually in the nature of minor burns or abrasions and swelling, but the force of a deploying airbag can cause more serious injuries, especially if an occupant's hands, arms, chest or head is in close proximity to the airbag module at the time of deployment. This is why it is important for the occupant to: avoid placing any object or part of the body between the occupant and the airbag module; sit straight and well back into the seat; wear the available seat belt properly; and sit as far as possible from the airbag module, while still maintaining control of the vehicle.
Parts of the airbag module (steering wheel hub, airbag cover and inflator) may be hot for several minutes after deployment, so do not touch! The airbags inflate only once. The windshield may be damaged by absorbing some of the force of the inflating airbag.
CAUTION
The driver or front passenger who is too close to the steering wheel or dashboard during airbag deployment can be killed or seriously injured. Scion strongly recommends that:
●The driver sit as far back as possible from the steering wheel while still maintaining control of the vehicle.
●The front passenger sit as far back as possible from the dashboard.
●All vehicle occupants be properly restrained using the available seat belts.
- If the seat belt extender has been connected to the driver's seat belt buckle but the other end of the seat belt extender has not been bucked into the vehicle's existing should restraint (as depicted in the picture above), the SRS driver's airbag system will judge that the driver was wearing the seat belt. In this case, the driver will not be properly restrained and this will increase the likelihood of death or serious injury in the event of a collision. It may also result in the driver's airbag activating as if the driver was properly restrained, which would also increase the likelihood of death or serious injury in the event of a collision. Be sure to buckle both ends of the seat belt extender, one end into the driver's seat belt buckle, the other end into the driver's existing seat belt system.
For instructions and precautions concerning the seating position, see “—Front seat precautions” on page 18.

- Do not sit on the edge of the seat or lean against the dashboard when the vehicle is in use, since the front passenger airbag could inflate with considerable speed and force. Anyone who is up against, or very close to, an airbag when it inflates, can be killed or seriously injured. Sit up straight and well back in the seat, and always use your seat belt properly.

- Scion strongly recommends that all Infants and children be placed in the rear seat of the vehicle and be properly restrained. - Do not allow a child to stand up or kneel on the front passenger seat, since the front passenger airbag could inflate with considerable speed and force. Otherwise, the child may be killed or seriously injured.
- Do not hold a child on your lap or in your arms. Use a child restraint system in the rear seat. For instructions concerning the installation of a child restraint system, see "Child restraint" on page 47.

- Do not put anything or any part of your body on or In front of the dashboard or steering wheel pad that houses the front airbag system. They might restrict Inflation or cause death or serious injury as they are projected rearward by the force of the deploying airbags. Likewise, the driver and front passenger should not hold objects in their arms or on their knees.
- Do not modify or remove any wiring. Do not modify, remove, strike or open any components such as the steering wheel pad, steering wheel, column cover, dashboard near the front passenger airbag, front passenger airbag cover, front passenger airbag or airbag sensor assembly. Doing so may prevent the front airbag system from activating correctly, cause sudden activation of the system or disable the system, which could result in death or serious injury.
Failure to follow these instructions can result in death or serious injury. Consult your Sclon dealer about any repair and modification.
NOTICE
Do not perform any of the following changes without consulting your Scion dealer. Such changes can interfere with proper operation of the SRS front airbag system in some cases.
◆Installation of electronic devices such as a mobile two-way radio, cassette tape player or compact disc player
◆Modification of the suspension system
◆Modification of the front end structure
◆Attachment of a grille guard (bull bar, kangaroo bar, etc.), snowplow, winches or any other equipment to the front end
◆Repairs made on or near the front fenders, front end structure, console, steering column, steering wheel or dashboard near the front passenger airbag
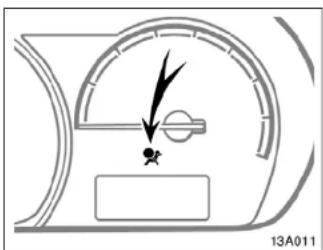
This indicator comes on when the ignition key is turned to the "ON" position. It goes off after about 6 seconds. This means the SRS front airbags are operating properly.
This warning light system monitors the airbag sensor assembly, front airbag sensors, side and curtain shield airbag sensors, curtain shield airbag sensors, driver's seat position sensor, driver's seat belt buckle switch, seat belt pretensioner assemblies, Inflators, warning light, Interconnecting wiring and power sources. (For details, see "Service reminder indicators and warning buzzers" on page 79.)
If any of the following conditions occurs, this indicates a malfunction of the airbags or seat belt pretensioners. Contact your Scion dealer as soon as possible.
- When the ignition key is turned to the "ON" position, the light does not come on, remains on or flashes.
●The light comes on or starts flashing while driving.

In the following cases, contact your Scion dealer as soon as possible:
●The SRS front airbags have been inflated.
●The front of the vehicle (shaded in the illustration) was involved in an accident that was not severe enough to cause the SRS front airbags to inflate.
●The pad section of the steering wheel or front passenger airbag cover (shaded in the illustration) is scratched, cracked, or otherwise damaged.
NOTICE
Do not disconnect the battery cables before contacting your Scion dealer.
SRS side airbags and curtain shield airbags

The SRS (Supplemental Restraint System) side airbags and curtain shield airbags are designed to provide further protection for the driver, front passenger and rear outside passengers in addition to the primary safety protection provided by the seat belts.
In response to a severe side impact, the SRS side airbags and curtain shield airbags work with the seat belts to help reduce injury by inflating. The SRS side airbags help reduce injuries mainly to the driver's or front passenger's chest and the SRS curtain shield airbags help reduce injuries mainly to the driver's, front passenger's or rear outside passenger's head.
The SRS side airbag and curtain shield airbag are activated even with no passenger in the front seat or rear outside seat.
The curtain shield airbags may activate even when the side airbags are not activated.
Always wear your seat belt properly.
Your vehicle is equipped with a crash sensing and diagnostic module, which will record the use of the seat belt restraint system by the driver and front passenger when the SRS side airbags and curtain shield airbags are inflated.
CAUTION
●The SRS side airbag and curtain shield airbag system is designed only as a supplement to the primary protection of the driver and front passenger and rear outside passenger seat belt systems. To ensure maximum protection in an accident, the driver and all passengers in the vehicle must wear their seat belts properly. Wearing a seat belt properly during an accident reduces the chances of death or serious injury or being thrown out of the vehicle. For Instructions and precautions concerning the seat belt system, see "Seat belts—" on page 22.
- Do not allow anyone to lean his/her head or any part of his/her body against the door or the area of the seat, front pillar, rear pillar or roof side rail from which the SRS side airbag and curtain shield airbag deploy even if he/she is a child seated in the child restraint system. It is dangerous if the SRS side airbag and curtain shield airbag inflate, and the impact of the deploying airbags could cause death or serious injury to the occupant.
- Improperly seated and/or restrained infants and children can be killed or seriously injured by the deploying airbags. An Infant or child who is too small to use a seat belt should be properly secured using a child restraint system. Scion strongly recommends that all Infants and children be placed in the rear seats of the vehicle and properly restrained. The rear seats are the safest for infants and children. For instructions concerning the installation of a child restraint system, see "Child restraint—" on page 47.
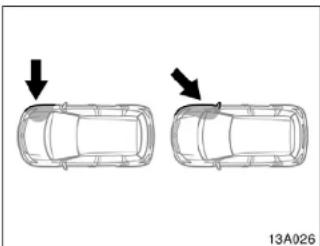
The SRS side airbag and curtain shield airbag system may not activate if the vehicle is subjected to a collision from the side at certain angles, or a collision to the side of the vehicle body other than the passenger compartment as shown in the illustration.
The SRS side airbag and curtain shield airbag are designed to inflate when the passenger compartment area suffers a severe impact from the side.
Always wear your seat belts properly.

The SRS side airbag and curtain shield airbags are not designed to inflate if the vehicle is involved in a front or rear collision, if it rolls over, or if it is involved in a low-speed side collision.
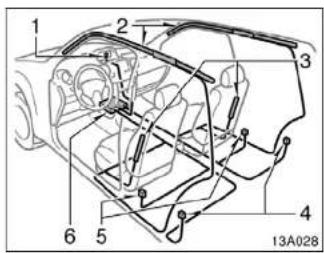
The SRS side airbag and curtain shield airbag system consists mainly of the following components, and their locations are shown in the illustration.
- SRS warning light
- Curtain shield airbag modules (airbag and inflator)
- Side airbag modules (airbag and inflator)
- Curtain shield airbag sensors
- Side and curtain shield airbag sensors
- Airbag sensor assembly
The SRS side airbag and curtain shield airbag system is controlled by the airbag sensor assembly. The airbag sensor assembly consist of a safing sensor and airbag sensor.
In a severe side impact, the side and curtain shield airbag sensor and/or the curtain shield airbag sensor trigger(s) the side airbag inflators and/or the curtain shield airbag inflators. At this time a chemical reaction in the inflators quickly fills the airbags with non-toxic gas to help restrain the lateral motion of the occupants.
When the airbags inflate, they produce a fairly loud noise and release some smoke and residue along with non-toxic gas. This does not indicate a fire. This smoke may remain inside the vehicle for some time, and may cause some minor irritation to the eyes, skin or breathing. Be sure to wash off any residue as soon as possible to prevent any potential skin irritation with soap and water. If you can safely exit from the vehicle, you should do so immediately.
Deployment of the airbags happens in a fraction of a second, so the airbags must inflate with considerable force. While the system is designed to reduce serious injuries, it may also cause minor burns or abrasions and swelling.
Front seats as well as part of the front and rear pillars, and roof side rail may be hot for several minutes, but the airbags themselves will not be hot. The airbags are designed to inflate only once.
CAUTION
SRS side airbags and curtain shield airbags Inflate with considerable force. To reduce the possibility of death or serious injury when they inflate, the driver, front passenger and rear outside passengers must:
●Wear their seat belts properly.
- Remain properly seated with their backs upright and against the seats at all times.

- Do not allow anyone to lean against the door when the vehicle is in use, since the side airbag and curtain shield airbag could inflate with considerable speed and force. Otherwise, he/she may be killed or seriously injured. Special care should be taken especially when you have a small child in the vehicle.
- Sit up straight and well back in the seat, distributing your weight evenly in the seat. Do not apply excessive weight to the outer side of the seats with a side airbag, and to the front pillar, rear pillar and roof side rail with a curtain shield airbag.

- Do not allow anyone to get his/her head closer to the area where the side airbag and curtain shield airbag inflate, since these airbags could inflate with considerable speed and force. Otherwise, he/she may be killed or seriously injured. Special care should be taken especially when you have a small child in the vehicle.

- Do not allow anyone to kneel on the passenger seat, facing the passenger's side door, since the side airbag and curtain shield airbag could inflate with considerable speed and force. Otherwise, he/she may be killed or seriously injured. Special care should be taken especially when you have a small child in the vehicle.
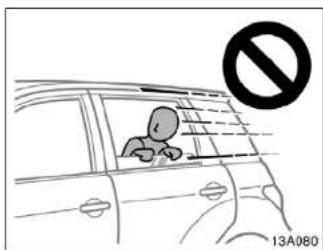
- Do not allow anyone to get his/her head or hands out of windows, since the curtain shield airbags could inflate with considerable speed and force. Otherwise, he/she may be killed or seriously injured. Special care should be taken especially when you have a small child in the vehicle.
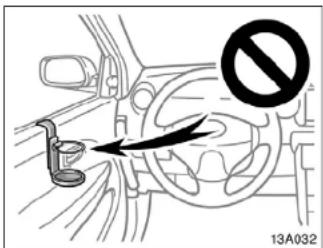
- Do not attach a cup holder or any other device or object on or around the door. When the side airbag inflates, the cup holder or any other device or object will be thrown with great force or the side airbag may not activate correctly, resulting in death or serious injury. Likewise, the driver and front passenger should not hold objects in their arms or on their knees.

- Do not attach a microphone or any other device or object around the area where the curtain shield airbag activates such as on the windshield glass, side door glass, front and rear pillars, roof side rail and assist grips. When the curtain shield airbag inflates, the microphone or other device or object will be thrown away with great force or the curtain shield airbag may not activate correctly, resulting in death or serious injury.
- Do not hook a hanger, heavy or sharp pointed objects on the coat hook. If the curtain shield airbag inflates, those items will be thrown away with great force or the curtain shield airbag may not activate correctly, resulting in death or serious injury. When you hang clothes, hang them on the coat hook directly.
- Do not use seat accessories which cover the parts where the side air bags inflate. Such accessories may prevent the side airbags from activating correctly, causing death or serious injury.
- Do not modify or replace the seats or upholstery of the seats with side airbags. Such changers may prevent the side airbag system from activating correctly, disable the system or cause the side airbags to inflate accidentally, resulting in death or serious injury.
- Do not disassemble or repair the front and rear pillars and roof side rails containing the curtain shield alrbags. Such changes may disable the system or cause the curtain shield alrbags to inflate accidentally, resulting in death or serious injury.
Failure to follow these Instructions can result in death or serious injury. Consult your Sclon dealer about any repair and modification.
NOTICE
Do not perform any of the following changes without consulting your Scion dealer. Such changes can interfere with proper operation of the SRS side airbag and curtain shield airbag system in some cases.
◆Installation of electronic devices such as a mobile two-way radio, cassette tape player or compact disc player
◆Modification of the suspension system
◆Modification of the side structure of the passenger compartment
◆Repairs made on or near the console or front seat

This indicator comes on when the ignition key is turned to the "ON" position. It goes off after about 6 seconds. This means the SRS side airbags and curtain shield airbags are operating properly.
This warning light system monitors the airbag sensor assembly, front airbag sensors, side and curtain shield airbag sensors, curtain shield airbag sensors, driver's seat position sensor, driver's seat belt buckle switch, seat belt pretensioner assemblies, inflators, warning light, interconnecting wiring and power sources. (For details, see "Service reminder indicators and warning buzzers" on page 79.)
If any of the following conditions occurs, this indicates a malfunction of the airbags or seat belt pretensioners. Contact your Scion dealer as soon as possible.
- When the ignition key is turned to the "ON" position, the light does not come on, remains on or flashes.
●The light comes on or starts flashing while driving.

In the following cases, contact your Scion dealer as soon as possible:
●Any of the SRS side airbags and curtain shield airbags have been inflated.
●The portion of the doors (shaded in the illustration) was involved in an accident that was not severe enough to cause the SRS side airbags and curtain shield airbags to inflate.
●The surface of the seals with the side airbag (shaded in the illustration) is scratched, cracked, or otherwise damaged.
●The portion of the front pillars, rear pillars or roof side rall garnishes (padding) containing the curtain shield airbags inside (shaded in the illustration) is scratched, cracked, or otherwise damaged.
NOTICE
Do not disconnect the battery cables before contacting your Scion dealer.
Child restraint—
—Child restraint precautions
Scion strongly urges the use of appropriate child restraint systems for children.
The laws of all 50 states in the U.S.A. now require the use of a child restraint system.
Your vehicle conforms to SAE J1819.
If a child is too large for a child restraint system, the child should sit in the rear seat and must be restrained using the vehicle's seat belt. See "Seat belts" on page 22 for details.

CAUTION
- For effective protection in automobile accidents and sudden stops, a child must be properly restrained, using a seat belt or child restraint system depending on the age and size of the child. Holding a child in your arms is not a substitute for a child restraint system. In an accident, the child can be crushed against the windshield, or between you and the vehicle's interior.
●Scion strongly urges use of a proper child restraint system which conforms to the size of the child, installed on the rear seat. According to accident statistics, the child is safer when properly restrained in the rear seat than in the front seat.
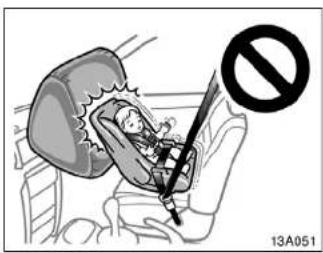
●Never install a rear-facing child restraint system on the front passenger seat. In the event of an accident, the force of the rapid inflation of the front passenger airbag can cause death or serious injury to the child if the rear-facing child restraint system is put on the front passenger seat.
●A forward-facing child restraint system should be allowed to be installed on the front passenger seat only when it is unavoidable. Always move the seat as far back as possible, because the front passenger airbag could inflate with considerable speed and force. Otherwise, the child may be killed or seriously injured.
●On vehicles with side airbags and curtain shield airbags, do not allow the child to lean his/her head or any part of his/her body against the door or the area of the seat, front or rear pillar or roof side rail from which the side airbags or curtain shield airbags deploy even if the child is seated in the child restraint system. It is dangerous if the side airbag and curtain shield airbag inflate, and the impact could cause death or serious injury to the child.
- Do not use the seat belt extender when installing a child restraint system on the front or rear passenger seat. If installing a child restraint system with the seat belt extender connected to the seat belt, the seat belt will not securely hold the child restraint system, which could cause death or serious injury to the child or other passengers in the event of collision.
●Make sure you have complied with all installation instructions provided by the child restraint manufacturer and that the system is properly secured. If it is not secured properly, it may cause death or serious injury to the child in the event of a sudden stop or accident.
—Child restraint system
A child restraint system for a small child or baby must itself be properly restrained on the seat with the lap portion of the lap/shoulder belt. You must carefully consult the manufacturer's Instructions which accompany the child restraint system.
To provide proper restraint, use a child restraint system following the manufacturer's instructions about the appropriate age and size of the child for the child restraint system.
Install the child restraint system correctly following the instructions provided by its manufacturer. General directions are also provided under the following illustrations.
The child restraint system should be installed on the rear seat. According to accident statistics, the child is safer when properly restrained in the rear seat than in the front seat.
When not using the child restraint system, keep it secured with the seat belt or place it somewhere other than the passenger compartment. This will prevent it from injuring passengers in the event of a sudden stop or accident.
—Types of child restraint system
Child restraint systems are classified into the following 3 types depending on the child's age and size.
(A) Infant seat
(B) Convertible seat
(C) Booster seat
Install the child restraint system following the instructions provided by its manufacturer.
Your vehicle has anchor brackets for securing the top strap of a child restraint system.
For instructions about how to use the anchor bracket, see “—Using a top strap” on page 58.
The child restraint lower anchorages approved for your vehicle may also be used. See “—Installation with child restraint lower anchorages” on page 61.

(A) Infant seat

(C) Booster seat
—Installation with seat belt

(A) INFANT SEAT INSTALLATION
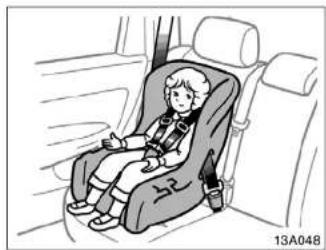
(B) Convertible seat
An infant seat must be used in rear-facing position only.
CAUTION
●Never install a rear-facing child restraint system on the front passenger seat. In the event of an accident, the force of the rapid inflation of the front passenger airbag can cause death or serious injury to the child if the rear-facing child restraint system is installed on the front passenger seat.

- Do not install a child restraint system on the rear seat If it Interferes with the lock mechanism of the front seats. Otherwise, the child or front seat occupant(s) may be killed or seriously injured in case of sudden braking or a collision.
- If the driver's seat position does not allow sufficient space for safe installation, install the child restraint system on the rear right seat.

- Run the lap and shoulder belt through or around the infant seat following the instructions provided by its manufacturer and insert the tab into the buckle taking care not to twist the belt. Keep the lap portion of the belt tight.
CAUTION
●After inserting the tab, make sure the tab and buckle are locked and that the lap and shoulder portions of the belt are not twisted.
- Do not insert coins, clips, etc. in the buckle as this may prevent your child from properly latching the tab and buckle.
- If the seat belt does not function normally, it cannot protect your child from death or serious injury Contact your Scion dealer immediately. Do not install the child restraint system on the seat until the seat belt is fixed.

- Fully extend the shoulder belt to put it in the lock mode. When the belt is then retracted even slightly, it cannot be extended.
To hold the infant seat securely, make sure the belt is in the lock mode before letting the belt retract.
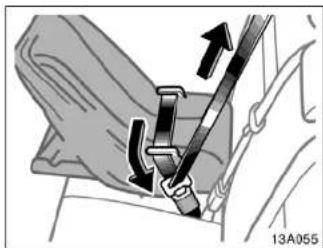
- While pressing the infant seat firmly against the seat cushion and seatback, let the shoulder belt retract as far as it will go to hold the infant seat securely.

CAUTION
Push and pull the child restraint system in different directions to be sure. It is secure. Follow all the Installation Instructions provided by its manufacturer.

- To remove the infant seat, press the buckle release button and allow the belt to retract completely. The belt will move freely again and be ready to work for an adult or older child passenger.

(B) CONVERTIBLE SEAT INSTALLATION A convertible seat must be used in forward-facing or rear-facing position depending on the age and size of the child. When installing, follow the manufacturer's instructions about the applicable age and size of the child as well as directions for installing the child restraint system.

CAUTION
●Never install a rear-facing child restraint system on the front passenger seat. In the event of an accident, the force of the rapid inflation of the front passenger airbag can cause death or serious injury to the child if the rear-facing child restraint system is installed on the front passenger seat.

●A forward-facing child restraint system should be allowed to be installed on the front passenger seat only when it is unavoidable. Always move the seat as far back as possible, because the front passenger airbag could inflate with considerable speed and force. Otherwise, the child may be killed or seriously injured.
●On vehicles with side airbags and curtain shield airbags, do not allow the child to lean his/her head or any part of his/her body against the door or the area of the seat, front or rear pillar or roof side rail from which the side airbags or curtain shield airbags deploy even if the child is seated in the child restraint system. It is dangerous if the side airbag and curtain shield airbag inflate, and the impact could cause death or serious injury to the child.

- Do not install a child restraint system on the rear seat if it interferes with the lock mechanism of the front seats. Otherwise, the child or front seat occupant(s) may be killed or seriously injured in case of sudden braking or a collision. - If the driver's seat position does not allow sufficient space for safe installation, install the child restraint system on the rear right seat.

- Run the lap and shoulder belt through or around the convertible seat following the instructions provided by its manufacturer and insert the tab into the buckle taking care not to twist the belt. Keep the lap portion of the belt tight.
CAUTION
●After inserting the tab, make sure the tab and buckle are locked and that the lap and shoulder portions of the belt are not twisted.
- Do not insert coins, clips, etc. in the buckle as this may prevent your child from properly latching the tab and buckle.
- If the seat belt does not function normally, it cannot protect your child from death or serious injury. Contact your Scion dealer immediately. Do not install the child restraint system on the seat until the seat belt is fixed.

- Fully extend the shoulder belt to put it in the lock mode. When the belt is then retracted even slightly, it cannot be extended.
To hold the convertible seat securely, make sure the belt is in the lock mode before letting the belt retract.
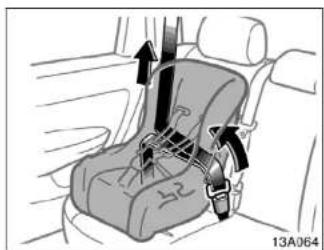
- While pressing the convertible seat firmly against the seat cushion and seatback, let the shoulder belt retract as far as it will go to hold the convertible seat securely.
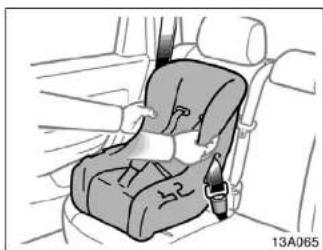


- To remove the convertible seat, press the buckle release button and allow the belt to retract completely. The belt will move freely again and be ready to work for an adult or older child passenger.
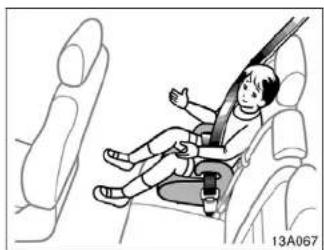
(C) BOOSTER SEAT INSTALLATION A booster seat must be used in forward-facing position only.
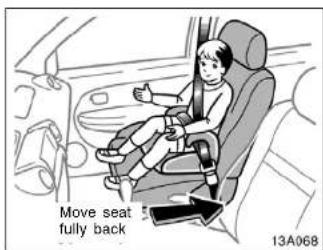

●On vehicles with side airbags and curtain shield airbags, do not allow the child to lean his/her head or any part of his/her body against the door or the area of the seat, front or rear pillar or roof side rail from which the side airbags or curtain shield airbags deploy even if the child is seated in the child restraint system. It is dangerous if the side airbag and curtain shield airbag inflate, and the impact could cause death or serious injury to the child.

- Sit the child on a booster seat. Run the lap and shoulder belt through or around the booster seat and across the child following the instructions provided by its manufacturer and insert the tab into the buckle taking care not to twist the belt.
Make sure the shoulder belt is correctly across the child's shoulder and that the lap belt is positioned as low as possible on child's hips. See "Seat belts" on page 22 for details.
CAUTION
●Always make sure the shoulder belt is positioned across the center of child's shoulder. The belt should be kept away from child's neck, but not falling off the child's shoulder. Otherwise, the child may be killed or seriously injured in case of sudden braking or a collision.
- Both high-positioned lap belts and loose-fitting belts could cause death or serious injuries due to sliding under the lap belt during a collision or other unintended event. Keep the lap belt positioned as low on a child's hips as possible.
- For child's safety, do not place the shoulder belt under the child's arm.
●After Inserting the tab, make sure the tab and buckle are locked and that the lap and shoulder portions of the belt are not twisted.
- Do not insert coins, clips, etc. in the buckle as this may prevent your child from properly latching the tab and buckle.
- If the seat belt does not function normally, it cannot protect your child from death or serious injury. Contact your Sclon dealer immediately. Do not install the child restraint system on the seat until the seat belt is fixed.

- To remove the child restraint system, press the buckle release button and allow the belt to retract.
—Using a top strap
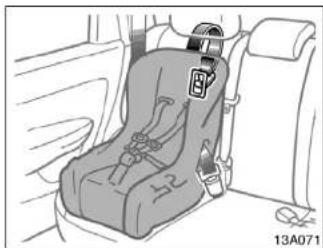
Follow the procedure below for a child restraint system that requires the use of a top strap.

Use the anchor brackets on the back of the rear sealback to attach the strap.
Anchor brackets are installed for each rear seating positions.
This symbol indicates the location of user ready anchor brackets.

TO USE THE ANCHOR BRACKET:
- Remove the head restraint.

- Open the cover of the anchor bracket.
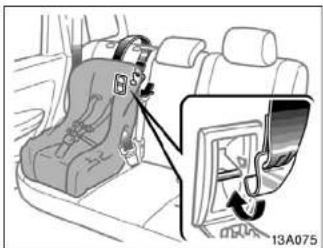
- Fix the child restraint system with the seat belt.
- Latch the hook onto the anchor bracket and tighten the top strap.
For instructions to install the child restraint system, see "Child restraint" on page 47.
CAUTION
●Make sure the top strap is securely latched, and check that the child restraint system is secure by pushing and pulling it in different directions.
●Follow all the installation instructions provided by its manufacturer.

- Replace the head restraint.
Be sure to close the cover when the anchor bracket is not in use.
—Installation with child restraint lower anchorages

The lower anchorages for the child restraint system interfaced with the FMVSS225 specification are installed in the rear seat.
The anchorages are installed in the clearance between the seat cushion and seat-back of both outside rear seats.
Child restraint system interfaced with the FMVSS225 specification can be fixed with these anchorages. In this case, it is not necessary to fix the child restraint system with a seat belt on the vehicle.

Type A Type B
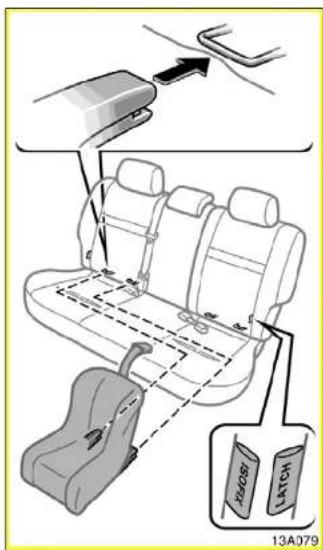
CHILD RESTRAINT SYSTEM INSTALLATION
Type A—
-
Widen the clearance between the seat cushion and seatback a little and confirm the position of the lower anchorages below the tag in the seatback.
-
Latch the hooks of lower straps onto the anchorages and tighten the lower straps.
Type B—
- Widen the clearance between the seat cushion and seatback a little and confirm the position on the lower anchorages below the tag in the seatback.
- Latch the buckles onto the anchorages.
If your child restraint system has a top strap, it should be anchored. (For the installation of the top strap, see “—Using a top strap” on page 58.)
For the installation details, refer to the instruction manual equipped with each product.
CAUTION
- When using the lower anchorages for the child restraint system, be sure that there are no irregular objects around the anchorages or that the seat belt is not caught.
●Push and pull the child restraint system in different directions to be sure it is secure. Follow all the Installation Instructions provided by its manufacturer. - Do not install a child restraint system on the rear seat if it interferes with the lock mechanism of the front seats. Otherwise, the child or front seat occupant(s) may be killed or seriously injured in case of sudden braking or a collision.
SECTION 1-4
OPERATION OF INSTRUMENTS AND CONTROLS
Steering wheel and Mirrors
Tilt steering wheel 64
Outside rear view mirrors 64
Anti-glare inside rear view mirror 66
Vanity mirror 67
Tilt steering wheel

To change the steering wheel angle, hold the steering wheel, push down the lock release lever, tilt the steering wheel to the desired angle and return the lever to its original position.
CAUTION
- Do not adjust the steering wheel while the vehicle is moving. Doing so may cause the driver to mishandle the vehicle and an accident may occur resulting in death or serious injuries.
●After adjusting the steering wheel, try moving it up and down to make sure it is locked in position.
Outside rear view mirrors—

Adjust the mirror so that you can just see the side of your vehicle in the mirror.
Be careful when judging the size or distance of any object seen in the outside rear view mirror on the passenger's side because it is a convex mirror. Any object seen in a convex mirror will look smaller and farther away than when seen in a flat mirror.
When you push the rear window defogger switch, the heater panels in the outside rear view mirrors will quickly clear the mirror surface. (See "Rear window and outside rear view mirror defoggers" on page 74.)
—Power rear view mirror control
CAUTION
- Do not adjust the mirror while the vehicle is moving. Doing so may cause the driver to mishandle the vehicle and an accident may occur resulting in death or serious injuries.
- Since the mirror surfaces can get hot, do not touch them when the defogger switch is on.

NOTICE
If ice should jam the mirror, do not operate the control or scrape the mirror face. Use a spray de-icer to free the mirror.
To adjust mirror, use the switches.
- Master switch—To select the mirror to be adjusted Push the switch to "L" (left) or "R" (right).
- Control switch—To move the mirror Push the switch in the desired direction.
Mirrors can be adjusted when the key is in the "ACC" or "ON" position.
—Folding rear view mirrors

The rear view mirrors can be folded backward for parking in compact areas. To fold the rear view mirror, push backward.
CAUTION
Do not drive with the mirrors folded backward. Both the driver and passenger side rear view mirrors must be extended and properly adjusted before driving.
Anti-glare inside rear view mirror
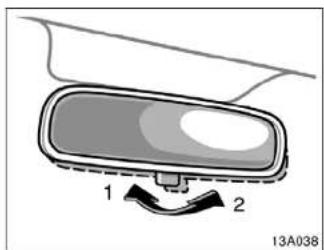
Adjust the mirror so that you can just see the rear of your vehicle in the mirror.
To reduce glare from the headlights of the vehicle behind you during night driving, operate the lever on the lower edge of the mirror.
Daylight driving—Lever at position 1
The reflection in the mirror has greater clarity at this position.
Night driving—Lever at position 2
Remember that by reducing glare you also lose some rear view clarity.
CAUTION
Do not adjust the mirror while the vehicle is moving. Doing so may cause the driver to mishandle the vehicle and an accident may occur resulting in death or serious injuries.
Vanity mirror (driver's side only)

To use the vanity mirror, swing down the sun visor and open the cover.
SECTION 1-5
OPERATION OF INSTRUMENTS AND CONTROLS
Lights, Wipers and Defogger
Headlights and turn signals 70
Emergency flashers 71
Instrument panel light control 72
Interior lights 72
Windshield wipers and washer 73
Rear window wiper and washer 73
Rear window and outside rear view mirror defoggers 74
Headlights and turn signals

NOTICE
To prevent the battery from being discharged, do not leave the lights on for a long period when the engine is not running.
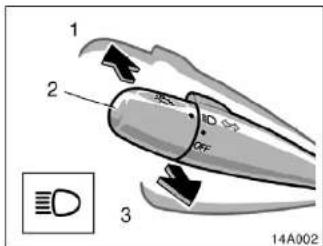
HEADLIGHTS
To turn on the following lights: Twist the headlight/turn signal lever knob.
Position 1—Parking, tail, license plate, side marker and instrument panel lights Position 2—Headlights and all of the above
Light reminder buzzer
A buzzer will remind you to turn the lights off when the driver's door is opened if you remove the key with the headlight switch on.
High-Low beams—For high beams, turn the headlights on and push the lever away from you (position 1). Pull the lever toward you (position 2) for low beams. The headlight high beam indicator light (blue light) on the instrument panel will tell you that the high beams are on.
Flashing the high beam headlights (position 3)—Pull the lever all the way back. The high beam headlights turn off when you release the lever.
You can flash the high beam headlights with the knob turned to "OFF".
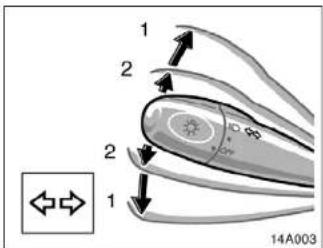
TURN SIGNALS
To signal a turn, push the headlight/turn signal lever up or down to position 1.
The key must be in the "ON" position. The lever automatically returns after you make a turn, but you may have to return it by hand after you change lanes.
To signal a lane change, move the lever up or down to the pressure point (position 2) and hold it.
If the turn signal indicator lights (green lights) on the instrument panel flash faster than normal, a front or rear turn signal bulb is burned out. See "Replacing light bulbs" on page 204.
Emergency flashers

To turn on the emergency flashers, push the switch.
All the turn signal lights will flash. To turn them off, push the switch once again.
Turn on the emergency flashers to warn other drivers if your vehicle must be stopped where it might be a traffic hazard. Always pull as far off the road as possible.
The turn signal light switch will not work when the emergency flashers are operating.
NOTICE
To prevent the battery from being discharged, do not leave the switch on longer than necessary when the engine is not running.
Instrument panel light control

To adjust the brightness of the instrument panel lights, turn the dial.
Interior lights

Front

Rear
To turn on the interior light, slide the switch.
The interior light switch has the following positions:
"ON"—Keeps the light on all the time.
"OFF"—Turns the light off.
"DOOR"—Turns the light on when any door is opened.
ILLUMINATED ENTRY SYSTEM
Front interior light only—
With the switch in the "DOOR" position, the light comes on when the driver's door is opened. After the driver's door is closed, the light remains on for about 5 seconds and then goes out.
However, in the following cases, the light goes out immediately:
- All the side doors and back door are closed when the ignition key is in "ACC" or "ON" position.
●All the side doors and back door are locked when the light is still on.
●One door is closed with the lock button pushed in while the other doors are locked.
Windshield wipers and washer

To turn on the windshield wipers, move the lever to the desired setting.
The key must be in the "ON" position.
| Lever position | Speed setting |
| Position 1 Intermittent | |
| Position 2 Slow | |
| Position 3 Fast | |
For a single sweep of the windshield, push the lever up and release it.
To squirt washer fluid, pull the lever toward you.
If the windshield wipers are off, they will operate a couple of times after the washer squirts.
For instructions on adding washer fluid, see "Adding washer fluid" on page 203. In freezing weather, warm the windshield with the defroster before using the washer. This will help prevent the washer fluid from freezing on your windshield, which can block your vision.
NOTICE
Do not operate the wipers if the wind-shield is dry. It may scratch the glass.
Rear window wiper and washer

To turn on the rear window wiper, twist the lever knob upward. (Position 1)
The key must be in the "ON" position.
To squirt washer fluid on the rear window, twist the knob upward or downward as far as it will go (position 2 or 3). The knob automatically returns from these positions after you release it.
For instructions on adding washer fluid, see "Adding washer fluid" on page 203.
NOTICE
Do not operate the rear wiper if the rear window is dry. It may scratch the glass.
Rear window and outside rear view mirror defoggers

To defog or defrost the rear window, push the switch.
The key must be in the "ON" position.
The thin heater wires on the inside of the rear window and the heater panels in the outside rear view mirrors will quickly clear the surfaces. An indicator light will illuminate to indicate the defoggers are operating.
Push the switch once again to turn the defoggers off.
CAUTION
Since the mirror surfaces can get hot, do not touch them when the defogger switch is on.
Make sure you turn the defoggers off when the surfaces are clear. Leaving the defoggers on for a long time could cause the battery to discharge, especially during stop-and-go driving. The defoggers are not designed for drying rain water or for melting snow.
If the outside rear view mirrors are heavily coated with ice, use a spray de-ler before operating the switch.
NOTICE
◆To prevent the battery from being discharged, turn the switch off when the engine is not running.
When cleaning the inside of the rear window, be careful not to scratch or damage the heater wires or connectors.
SECTION 1-6
OPERATION OF INSTRUMENTS AND CONTROLS
Gauges, Meters and Service reminder indicators
Fuel gauge 76
Engine coolant temperature indicator and warning light 76
Tachometer 77
Odometer and two trip meters 77
Service reminder indicators and warning buzzers 79
Fuel gauge

The gauge indicates the approximate quantity of the fuel remaining in the tank when the ignition switch is on.
Nearly full—Needle at "F" Nearly empty—Needle at "E"
It is a good idea to keep the tank over 1/4 full.
The needle moves when braking, accelerating or making turns. This is caused by the movement of the fuel in the tank.
On inclines or curves, due to the movement of fuel in the tank, the fuel gauge needle may fluctuate or the low fuel level warning light may come on earlier than usual.
If the fuel level approaches "E" or the low fuel level warning light flashes, fill the fuel tank as soon as possible.
If the fuel tank is completely empty, the malfunction indicator lamp comes on. Fill the fuel tank immediately.
The indicator lamp goes off after driving several times. If the indicator lamp does not go off, contact your Scion dealer as soon as possible.
Engine coolant temperature indicator and warning light
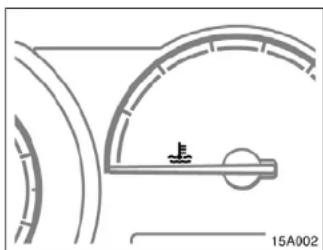
The indicator and warning light indicates the engine coolant temperature when the ignition switch is on. The engine operating temperature will vary with changes in weather and engine load.
The high engine coolant temperature warning light (red) will come on when the ignition key is turned to the "ON" position. After a few seconds, the light will go off.
If your engine coolant temperature is cool with the ignition switch on, the low engine coolant temperature indicator light (blue) comes on. If it keeps lighting on with the engine fully warmed, contact your Scion dealer as soon as possible to service the vehicle.
If the high engine coolant temperature warning light (red) flashes, your engine is too hot. If your vehicle overheats, stop your vehicle and allow the engine to cool. Your vehicle may overheat during severe operating conditions, such as:
●Driving up a long hill on a hot day.
- Reducing speed or stopping after high speed driving.
- Idling for a long period with the air conditioning on in stop-and-go traffic.
NOTICE
◆Do not remove the thermostat in the engine cooling system as this may cause the engine to overheat. The thermostat is designed to control the flow of coolant to keep the temperature of the engine within the specified operating range.
◆Do not continue driving with an overheated engine. See “If your vehicle overheats” on page 147.
Tachometer
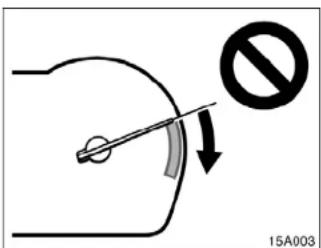
The tachometer indicates engine speed in thousands of rpm (revolutions per minute). Use it while driving to select correct shift points and to prevent engine lugging and over-revving.
Driving with the engine running too fast causes excessive engine wear and poor fuel economy. Remember, in most cases the slower the engine speed, the greater the fuel economy.
NOTICE
Do not let the Indicator segment get into the red zone. This may cause severe engine damage.
Odometer and two trip meters

This meter displays the odometer and two trip meters.
- Odometer—Shows the total distance the vehicle has been driven.
- Two trip meters—Show two different distances independently driven since the last time each trip meter was set to zero.
You can use one trip meter to calculate the fuel economy and the other to measure the distance on each trip. All trip meter data are cancelled if the electrical power source is disconnected.
- Trip meter reset knob—It can reset the two trip meters to zero, and also change the meter display.
To reset the trip meter A to zero, display the meter A reading, then push and hold the knob until the meter is set to zero. The same process can be applied for resetting the trip meter B.
To change the meter display, quickly push and release the knob. The meter display changes in the order from the odometer to trip meter A to trip meter B, then back to the odometer each time you push.
Service reminder indicators and warning buzzers
| If the indicator or buzzer comes on... Do this. | ||
| (a) | BRAKE | If parking brake is off, stop immediately and contact Scion dealer. |
| (b) | (800A)(Indicator and buzzer) | Fasten driver's seat belt. |
| (c) | PASSENGER (84KW) | Fasten front passenger's seat belt. |
| (d) | MAINTREQD | Replace engine oil. |
| (e) | (05HA) | Stop and check. |
| (f) | (CCTC) | Take vehicle to Scion dealer. |
| (g) | (67WT) | Fill up tank. |
| (h) |  | Stop and check. |
| (i) | ABS | Take vehicle to Scion dealer. If brake system warning light is also on, stop immediately and contact Scion dealer. |
| (j) | [30AT] | Close all side doors and back door. |
| (k) | Take vehicle to Scion dealer immediately. | |
| (l) |  | Stop and check. |
| (m) | Key reminder buzzer | Remove key. |
| (n) | Light reminder buzzer | Turn off lights. |
(a) Brake System Warning Light
This light comes on in the following cases when the ignition key is in the "ON" position.
- When the parking brake is applied... The light comes on for a few seconds when the ignition key is turned to the "ON" position even after the parking brake is released.
- When the brake fluid level is low...
CAUTION
It is dangerous to continue driving normally when the brake fluid level is low.
Have your vehicle checked at your Sclon dealer in the following cases:
●The light does not come on even if the parking brake is applied when the ignition key is in the "ON" position.
●The light does not come on even if the ignition key is turned to the "ON" position with the parking brake released.
A warning light turning on briefly during operation does not indicate a problem.
CAUTION
If either of the following conditions occurs, Immediately stop your vehicle at a safe place and contact your Sclon dealer.
●The light does not turn off even after the parking brake is released while the engine is running.
In this case, the brakes may not work properly and your stopping distance will increase. Depress the brake pedal firmly and bring the vehicle to an immediate stop.
●The brake system warning light remains on together with the "ABS" warning light.
In this case, not only the anti-lock brake system will fail but also the vehicle will become extremely unstable during braking.
(b) Driver's Seat Belt Reminder Light and Buzzer
This light and buzzer remind you to buckle up the driver's seat belt.
Once the ignition key is turned to the "ON" or "START" position, the reminder light flashes and the buzzer sounds if the driver's seat belt is not fastened. Unless the driver fastens the belt, the light keeps flashing and the buzzer sounds for about 5 seconds.
(c) Front Passenger's Seat Belt Reminder Light
This light reminds you to buckle up the front passenger's seat belt.
Once the ignition key is turned to the "ON" or "START" position, the reminder light flashes if a passenger sits in the front passenger seat and does not fasten the seat belt. Unless the front passenger fastens the belt, the light keeps flashing.
If luggage or other load is placed on the front passenger seat, depending on its weight and how it is placed on the seat, built-in sensors in the seat cushion may detect the pressure, causing the reminder light to flash.
This light reminds you when to replace the engine oil.
This light will come on when the ignition key is turned to the "ON" position, and will go off after a few seconds.
When you drive for about 8000 km (5000 miles) after the engine oil replacement, this light illuminates for about 3 seconds and then flashes for about 12 seconds after the ignition key is turned to the "ON" position. If you continue driving without engine oil replacement, and if the driving range exceeds 12000 km (7500 miles), the light will come on when the ignition key is turned to the "ON" position. The light will remain on thereafter.
If the light is flashing, we recommend that you replace the engine oil at an early opportunity depending on the driving and road conditions. If the light comes on, replace it as soon as possible.
The system must be reset after the engine oil replacement. Reset the system by following the procedure below:
-
Turn the ignition key to the "OFF" position with the odometer reading shown. (For details, see "Odometer and two trip meters" on page 77.)
-
Turn the ignition key to the "ON" position while holding down the trip meter reset knob.
Hold down the knob for at least 5 seconds. The light goes off, and the display shows zero for 1 second and changes to the odometer reading.
If the system fails to reset, the light will remain on or keep flashing.
(e) Discharge Warning Light
This light warns that the battery is being discharged.
If it comes on while you are driving, there is a problem somewhere in the charging system.
The engine ignition will continue to operate, however, until the battery is discharged. Turn off the air conditioning, blower, radio, etc., and drive directly to the nearest Scion dealer or repair shop.
NOTICE
Do not continue driving if the engine drive belt is broken or loose.
(f) Malfunction Indicator Lamp
This lamp comes on when the ignition key is turned to the "ON" position and goes off after the engine starts. This means that the warning light system is operating properly.
If the lamp remains on, first check the following.
●Empty fuel tank
If the fuel tank is empty, refuel immediately.
- Loose fuel tank cap
If the fuel tank cap is loose, securely tighten it.
These cases are temporary malfunctions. The malfunction Indicator lamp will go off after taking several driving trips.
If the lamp will not go off even after the several trips...
or If the fuel tank is not empty or the fuel tank cap is not loose...
●There is a problem somewhere in the engine, emission control system, automatic transmission electrical system or warning light system itself.
Contact your Scion dealer as soon as possible to service the vehicle.
Emissions Inspection and Maintenance (I/M) programs
Your vehicle may not pass a state emission inspection if the malfunction indicator lamp remains on. Contact your Scion dealer to check your vehicle's emission control system and OBD (On-Board Diagnostics) system before taking your vehicle for the Inspection.
For details, see "Emissions inspection and maintenance (I/M) programs" on page 176. (g) Low Fuel Level Warning Light
This light comes on when the fuel level in the tank becomes very low. Fill up the tank as soon as possible.
On inclines or curves, due to the movement of fuel in the tank, the low fuel level warning light may come on earlier than usual.
(h) Low Engine Oil Pressure Warning Light
This light warns that the engine oil pressure is too low.
If it flickers or stays on while you are driving, pull off the road to a safe place and stop the engine immediately. Call a Sclon dealer or qualified repair shop for assistance.
The light may occasionally flicker when the engine is idling or it may come on briefly after a hard stop. There is no cause for concern if it then goes out when the engine is accelerated slightly.
The light may come on when the oil level is extremely low. It is not designed to indicate low oil level, and the oil level must be checked using the level dlpstick.
NOTICE
Do not drive the vehicle with the warning light on—even for one block. It may ruin the engine.
(i) "ABS" Warning Light
The light comes on when the ignition key is turned to the "ON" position. If the anti-lock brake system works properly, the light turns off after a few seconds. Thereafter, if the system malfunctions, the light comes on again.
When the "ABS" warning light is on (and the brake system warning light is off), the anti-lock brake system does not operate, but the brake system still operates conventionally.
When the "ABS" warning light is on (and the brake system warning light is off), the anti-lock brake system does not operate so that the wheels could lock up during sudden braking or braking on slippery road surfaces.
If either of the following conditions occurs, this indicates a malfunction somewhere in the components monitored by the warning light system. Contact your Sclon dealer as soon as possible to service the vehicle.
●The light does not come on when the ignition key is turned to the "ON" position, or remains on.
●The light comes on while you are driving.
A warning light turning on briefly during operation does not indicate a problem.
CAUTION
If the "ABS" warning light remains on together with the brake system warning light, immediately stop your vehicle at a safe place and contact your Scion dealer. In this case, not only the anti-lock brake system will fall but also the vehicle will become extremely unstable during braking.
(j) Open Door Warning Light
This light remains on until all the side doors and back door are completely closed.
(k) SRS Warning Light
This light will come on when the ignition key is turned to the "ON" position. After about 6 seconds, the light will go off. This means the systems of the airbags and seat belt pretensioners are operating properly.
This warning light system monitors the airbag sensor assembly, front airbag sensors, side and curtain shield airbag sensors, curtain shield airbag sensors, driver's seat position sensor, driver's seat bell buckle switch, seat belt pretensioner assemblies, inflators, warning light, interconnecting wiring and power sources.
If either of the following conditions occurs, this indicates a malfunction somewhere in the components monitored by the warning light system. Contact your Scion dealer as soon as possible to service the vehicle.
- The light does not come on when the ignition key is turned to the "ON" position.
●The light remains on or flashes when the ignition key is turned to the "ON" position.
●The light comes on or flashes while you are driving.
(I) High Engine Coolant Temperature Warning Light
The light operates to warn that the engine is almost overheating.
The light will come on when the ignition key is turned to the "ON" position. After a few seconds, the light will go off.
If it flashes while you are driving, stop the vehicle and check your engine. For detailed instructions, see "If your vehicle overheats" on page 147.
NOTICE
Continued driving with the light on could result in engine overheating.
(m) Key Reminder Buzzer
This buzzer reminds you to remove the key when you open the driver's door with the ignition key in the "ACC" or "LOCK" position.
(n) Light Reminder Buzzer
This buzzer will sound if the headlight switch is left on and the driver's door is opened with the key removed from the ignition switch.
CHECKING SERVICE REMINDER INDICATORS (except the low fuel level warning light)
-
Apply the parking brake.
-
Open one of the side doors or back door.
The open door warning light should come on.
- Close the door.
The open door warning light should go off.
- Turn the ignition key to the "ON" position, but do not start the engine.
All the service reminder indicators except the open door warning light should come on. The "ABS" warning lights and "MAINT REQD" reminder light go off after a few seconds. The SRS warning light goes off after about 6 seconds.
If any service reminder indicator or warning buzzer does not function as described above, have it checked by your Scion dealer as soon as possible.
SECTION 1-7
OPERATION OF INSTRUMENTS AND CONTROLS
Ignition switch, Transmission and Parking brake
Ignition switch with steering lock 88
Automatic transmission 89
Manual transmission 92
Parking brake 93
Ignition switch with steering lock
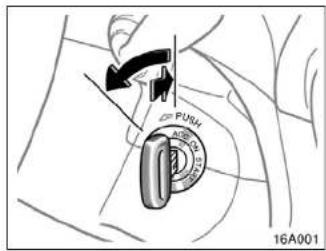
"START"—Starter motor on. The key will return to the "ON" position when released.
For starting tips, see page 136.
"ON"—Engine on and all accessories on.
This is the normal driving position.
"ACC"—Accessories such as the radio operate, but the engine is off.
If you leave the key in the "ACC" or "LOCK" position and open the driver's door, a buzzer will remind you to remove the key.
"LOCK"—Engine is off and the steering wheel is locked. The key can be removed only at this position.
You must push in the key to turn the key from "ACC" to the "LOCK" position. On vehicles with an automatic transmission, the selector lever must be put in the "P" position before pushing the key.
When starting the engine, the key may seem stuck at the "LOCK" position. To free it, first be sure the key is pushed all the way in, and then rock the steering wheel slightly while turning the key gently.
CAUTION
For manual transmission:
Never remove the key when the vehicle is moving, as this will lock the steering wheel and result in loss of steering control.
NOTICE
Do not leave the key in the "ON" position if the engine is not running. The battery will discharge and the ignition could be damaged.
Automatic transmission

Your automatic transmission has a shift lock system to minimize the possibility of incorrect operation. This means you can only move out of "P" position when the brake pedal is depressed (with the ignition switch in "ON" position and the lock release button depressed).
(a) Selector lever
The shift position is displayed on the instrument cluster.
P: Parking, engine starting and key removal
R: Reverse
N: Neutral
D: Normal driving (with overdrive on)
2: Stronger engine braking
L: Maximum engine braking
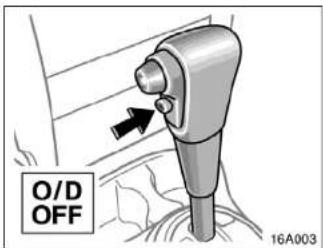
(b) Overdrive switch
You can select either third gear (with overdrive off) or forth gear (with overdrive on) by pushing this switch.
To turn the overdrive off, push the switch. The "O/D OFF" indicator light should come on. To turn the overdrive on again, push the switch again. The "O/D OFF" indicator light should go off.
Always drive your vehicle with the over-drive on for better fuel economy and quieter driving.
If the engine is turned off when the overdrive is off and restarted, the overdrive will automatically be on.
(c) Normal driving
- Start the engine as instructed in "How to start the engine" on page 136. The transmission must be in "P" or "N".
- With your foot holding down the brake pedal, shift the selector lever to "D".
When the lever is in the "D" position, the automatic transmission system will select the most suitable gear for running conditions such as normal cruising, hill climbing, hard towing, etc.
Always turn the overdrive on for better fuel economy and quieter driving. If the engine coolant temperature is low, the transmission will not shift into overdrive gear even with the overdrive on.

- Release the parking brake and brake pedal. Depress the accelerator pedal slowly for smooth starting.
To use engine braking, you can downshift the transmission as follows:
- Push the overdrive switch. The "O/D OFF" indicator light will come on and the transmission will downshift to third gear.
- Shift into the "2" position. The transmission will downshift to second gear when the vehicle speed drops down to or lower than 89 km/h (55 mph), and stronger engine braking will be enabled.
- Shift into the "L" position. The transmission will downshift to first gear when the vehicle speed drops down to or lower than 44 km/h (27 mph), and maximum engine braking will be enabled.

(e) Using "2" and "L" positions
The "2" and "L" positions are used for strong engine braking as described previously.
With the selector lever in "2" or "L", you can start the vehicle in motion as with the lever in "D".
With the selector lever in "2", the vehicle will start in first gear and automatically shift to second gear.
With the selector lever in "L", the transmission is engaged in first gear.
NOTICE
◆Be careful not to over-rev the engine. The approximate maximum allowable speed for each position is given below for your reference:
"2" 107 km/h (66 mph)..... "L" 58 km/h (36 mph)....
◆Do not continue hill climbing for a long time in the "2" or "L" position. This may cause severe automatic transmission damage from overheating. To prevent such damage, "D" position should be used in hill climbing.
(f) Backing up
- Bring the vehicle to a complete stop.
- With the brake pedal held down with your foot, shift the selector lever to the "R" position.
NOTICE
Never shift into reverse while the vehicle is moving.
(g) Parking
- Bring the vehicle to a complete stop.
- Pull the parking brake lever up fully to securely apply the parking brake.
- With the brake pedal pressed down, shift the selector lever to the "P" position.
CAUTION
While the vehicle is moving, never attempt to move the selector lever into "P" position under any circumstances. Serious mechanical damage and loss of vehicle control may result.
(h) Good driving practice
If the transmission repeatedly shifts up and down between third gear and overdrive when climbing a gentle slope, the overdrive switch should be turned off. Be sure to turn the switch on immediately afterward.
CAUTION
Always keep your foot on the brake pedal while stopped with the engine running. This prevents the vehicle from creeping.
NOTICE
Always use the brake pedal or the parking brake to hold the vehicle on an upgrade. Do not attempt to hold the vehicle using the accelerator pedal, as this can cause the transmission to overheat.
(i) If you cannot move the selector lever out of "P" position
If you cannot shift the selector lever from "P" position even though the brake pedal is depressed, use the shift lock override button. For instructions, see "if you cannot shift automatic transmission selector lever" on page 162.
Manual transmission

The shift pattern is conventional as shown above.
Press the clutch pedal down fully while shifting, and then release it slowly. Do not rest your foot on the pedal while driving, because it will cause clutch trouble. And do not use the clutch to hold the vehicle when stopped on an uphill grade—use the parking brake.
Recommended shifting speeds
The transmission is fully synchronized and upshifting or downshifting is easy.
For the best compromise between fuel economy and vehicle performance, you should upshift or downshift at the following speeds:
gear km/h (mph)
1 to 2 or 2 to 1 24 (15)
2 to 3 or 3 to 2 40 (25)
3 to 4 or 4 to 3 64 (40)
4 to 5 or 5 to 4 72 (45)
Downshift to the appropriate gear if acceleration is needed when you are cruising below the above downshifting speeds.
Upshifting too soon or downshifting too late will cause lugging, and possibly plinging. Regularly revving the engine to maximum speed in each gear will cause excessive engine wear and high fuel consumption.
Maximum allowable speeds
To get on a highway or to pass slower traffic, maximum acceleration may be necessary. Make sure you observe the following maximum allowable speeds in each gear:
gear km/h (mph)
1 46 (28)
2 86 (53)
3 125 (77)
NOTICE
Do not downshift if you are going faster than the maximum allowable speed for the next lower gear.
Good driving practice
If it is difficult to shift into reverse, put the transmission in neutral, release the clutch pedal momentarily, and then try again.
CAUTION
Be careful when downshifting on a slippery surface. Abrupt shifting could cause the vehicle to spin or skid.
NOTICE
Make sure the vehicle is completely stopped before shifting into reverse.
Parking brake

When parking, firmly apply the parking brake to avoid inadvertent creeping.
To set: Pull up the lever. For better holding power, first depress the brake pedal and hold it while setting the parking brake.
To release: Pull up the lever slightly (1), press the thumb button (2), and lower (3).
To remind you that the parking brake is set, the parking brake reminder light in the instrument panel remains on until you release the parking brake.
CAUTION
Before driving, be sure the parking brake is fully released and the parking brake reminder light is off.
SECTION 1-8
OPERATION OF INSTRUMENTS AND CONTROLS
Air conditioning system
Controls 96
Air flow selector settings 99
Operating tips 99
Side vents 101
Controls
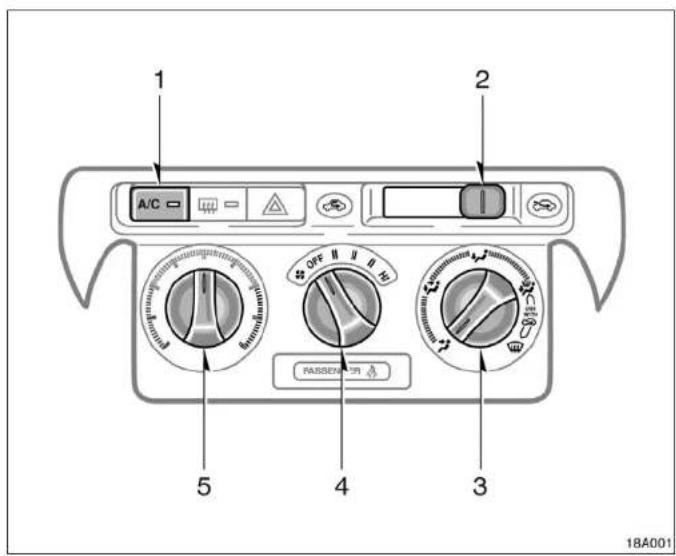
- "A/C" button
- Air intake selector
- Air flow selector
- Fan speed selector
- Temperature selector
Fan speed selector
Turn the knob to adjust the fan speed—to the right to increase, to the left to decrease.
Temperature selector
Turn the knob to adjust the temperature—to the right to warm, to the left to cool.

Air flow selector
Turn the knob to select the vents used for air flow.
- Panel—Air flows mainly from the instrument panel vents.
- Bi-level—Air flows from both the floor vents and the instrument panel vents.
- Floor—Air flows mainly from the floor vents.
- Floor/Windshield—Air flows mainly from the floor vents and windshield vents.
Use with the air intake selector positioned in FRESH.
- Windshield—Air flows mainly from the windshield vents.
Use with the air intake selector positioned in FRESH.
For details about air flow selector settings, see "Air flow selector settings" described below.
Turning the air flow control knob to wind-shield position turns on the defroster-linked air conditioning. This is to clean up the front view more quickly.
When the "A/C" button is not pressed in, turning the air flow control knob to another position turns off the air conditioning.

"A/C" button
To turn on the air conditioning, press the "A/C" button. The "A/C" button indicator will come on. To turn the air conditioning off, press the button again.
Air intake selector
Move the lever to select the air source.
- Recirculate—Recirculates the air inside the vehicle.
- Fresh—Draws outside air into the system.
Air flow selector settings Operating tips

→: When turning the temperature selector fully to the left position, cold air comes out from the center vents regardless of the position of the air flow selector.
●To cool off your Scion after it has been parked in the hot sun, drive with the windows open for a few minutes. This vents the hot air, allowing the air conditioning to cool the interior more quickly.
●Make sure the air intake grilles in front of the windshield are not blocked (by leaves or snow, for example).
- On humid days, do not blow cold air on the windshield. The windshield could fog up because of the difference in air temperature on the inside and outside of the windshield.
- Keep the area under the front seats clear to allow air to circulate throughout the vehicle.
- On cold days, set the fan speed to "high" for a minute to help clear the intake ducts of snow or moisture. This can reduce the amount of fogging on the windows.
- When driving on dusty roads, close all windows. If dust thrown up by the vehicle is still drawn into the vehicle after closing the windows, it is recommended that the air intake selector be set to FRESH and the fan speed selector to any setting except "OFF".
- If following another vehicle on a dusty road, or driving in windy and dusty conditions, it is recommended that the air intake selector be temporarily set to RECIRCULATED, which will close off the outside passage and prevent outside air and dust from entering the vehicle interior.
Heating
For best results, set controls to:
Fan speed—Any setting except "OFF" Temperature—Towards red zone Air intake—FRESH (outside air) Air flow—FLOOR
Air conditioning—OFF
- For quick heating, select recirculated air for a few minutes. To keep the windows from fogging, select fresh after the vehicle interior has been warmed.
- Press the "A/C" button on for dehumidified heating.
- Choose floor/windshield air flow to heat the vehicle interior while defrosting or defogging the windshield.
Air conditioning
For best results, set controls to:
Fan speed—Any setting except "OFF" Temperature—Towards blue zone Air intake—FRESH (outside air) Air flow—PANEL Air conditioning—ON
- For quick cooling, move the air intake selector to recirculate for a few minutes.
Ventilation
For best results, set controls to:
Fan speed—Any setting except "OFF" Temperature—Towards blue zone Air Intake—FRESH (outside air) Air flow—PANEL Air conditioning—OFF
Defogging
The inside of the windshield
For best results, set controls to:
Fan speed—Any setting except "OFF" Temperature—Towards red zone to heat; blue zone to cool Air intake—FRESH (outside air) Air flow—WINDSHIELD
●On humid days, do not blow cold air on the windshield—the difference between the outside and inside temperatures could make the fogging worse.
Defrosting
The outside of the windshield
For best results, set controls to:
Fan speed—Any setting except "OFF" Temperature—Towards red zone Air intake—FRESH (outside air) Air flow—WINDSHIELD
●To heat the vehicle interior while defrosting the windshield, choose floor/windshield air flow.
Side vents

If air flow control is not satisfactory, check the instrument panel vents. The instrument panel vents may be opened or closed as shown.
SECTION 1-9
OPERATION OF INSTRUMENTS AND CONTROLS
Other equipment
Clock 104
Cigarette lighter and ashtray 104
Glove box 105
Auxiliary box 105
Cup holders 105
Grocery bag hooks 106
Luggage storage box 107
Luggage cover 108
Floor mat 108
Clock

The digital clock indicates the time.
The key must be in the "ON" position.
To reset the hour: Turn the knob counterclockwise.
To reset the minutes: Turn the knob clockwise.
If the electrical power source has been disconnected from the clock, the time display will automatically be set to 1:00 (one o'clock).
When the instrument panel lights are turned on, the brightness of the time indication will be reduced.
Cigarette lighter and ashtray
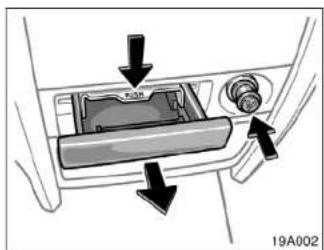
CIGARETTE LIGHTER
To use the cigarette lighter, press it in. After it finishes heating up, it automatically pops out ready for use.
If the engine is not running, the key must be in the "ACC" position to use the lighter.
Do not hold the cigarette lighter pressed in.
Use a genuine cigarette lighter or equivalent for replacement.
ASHTRAY
To use the ashtray, pull it out.
When finished with your cigarette, thoroughly extinguish it in the ashtray to prevent other cigarette butts from catching fire. After using the ashtray, push it back in completely.
To remove the ashtray, press down on the lock spring plate and pull out.
CAUTION
To reduce the chance of injury in case of an accident or sudden stop while driving, always completely close the ashtray after use.
Glove box

To open the glove box door, pull the lever.

Auxiliary box
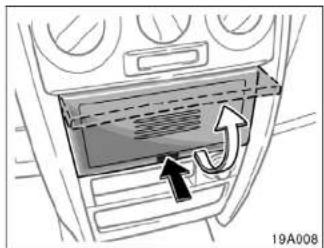
To use the box, push the lid.
The auxiliary box light turns on or off as any door is opened or closed.

Cup holders

Front

Rear
The cup holder is designed for holding cups or drink-cans securely in its holes.
CAUTION
Do not place anything else other than cups or drink-cans in the cup holder as such items may be thrown about and possibly injure people in the vehicle during sudden braking or in an accident.
Grocery bag hooks

Front seatbacks
These hooks are designed to hang things like grocery bags.
To use the hook, pull it down.
NOTICE
To prevent damage to the hook, do not hang any object heavier than 4 kg (8.8 lb.) on it.
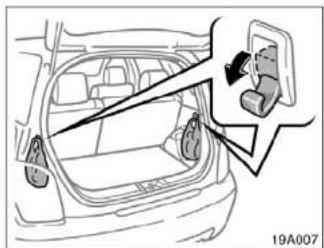
Both sides of luggage compartment
Luggage storage box

To open the luggage storage box, turn the knobs to the "UNLOCK" position and open the lid. To close the luggage storage box, lower the lid and turn the knobs to the "LOCK" position.
CAUTION
To reduce the chance of injury in case of an accident or a sudden stop, always keep the luggage storage boxes closed and locked while driving.
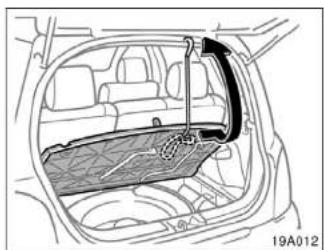
To keep the lid open, attach the hook as shown above.
NOTICE
Do not close the back door with attaching the hook, or the hook may be damaged.

Keep the hook stored in its original position as shown when it is not in use.
Luggage cover

To use the luggage cover, pull it out of the retractor and hook it on the anchors.
CAUTION
Do not place anything on the luggage cover. Such items may be thrown about and possibly injure people in the vehicle during sudden braking or an accident.

To remove the luggage cover, fold down the rear seat on the right side, retract and release the left end, and lift the luggage cover out.
When you remove the luggage cover, place it somewhere other than the passenger compartment. This will prevent passengers from being injured in the event of a sudden stop or an accident.
CAUTION
Make sure the luggage cover is surely stowed.
Floor mat

Use a floor mat of the correct size. If the floor carpet and floor mat have 2 holes, then they are designed for use with locking clips. Fix the floor mat with locking clips into the holes in the floor carpet.
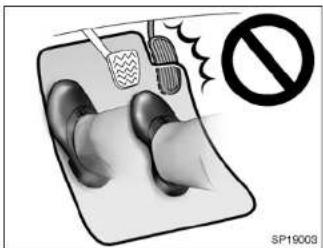
CAUTION
Make sure the floor mat is properly placed on the floor carpet. If the floor mat slips and interferes with the movement of the pedals during driving, it may cause an accident.
SECTION 2
INFORMATION BEFORE DRIVING YOUR SCION
Break-in period 112
Fuel 112
Operation in foreign countries 114
Three-way catalytic converter 114
Engine exhaust cautions 115
Facts about engine oil consumption 116
Brake system 117
Brake pad wear limit indicators 120
Your Scion's identification 121
Theft prevention labels 122
Suspension and chassis 122
Tire information 123
Vehicle load limits 131
Cargo and luggage 131
Types of tires 134
Break-in period
Drive gently and avoid high speeds.
Your vehicle does not need an elaborate break-in. But following a few simple tips for the first 1600 km (1000 miles) can add to the future economy and long life of your vehicle:
- Avoid full throttle acceleration when starting and driving.
●Avoid racing the engine.
●Try to avoid hard stops during the first 300 km (200 miles). - Do not drive slowly with the manual transmission in a high gear.
- Do not drive for a long time at any single speed, either fast or slow.
Fuel
FUEL TYPE
Your new vehicle must use only unleaded gasoline.
To help prevent gas station mix-ups, your Scion has a smaller fuel tank opening. The special nozzle on pumps with unleaded fuel will fit it, but the larger standard nozzle on pumps with loaded gas will not.
At a minimum, the gasoline you use should meet specifications of ASTM D4814 in the U.S.A. and CGSB 3.5-M93 in Canada.
NOTICE
Do not use leaded gasoline. Use of leaded gasoline will cause the three-way catalytic converter to lose its effectiveness and the emission control system to function improperly. Also, this can increase maintenance costs.
OCTANE RATING
Select Octane Rating 87 (Research Octane Number 91) or higher.
Use of unleaded gasoline with an octane rating or research octane number lower than stated above will cause persistent heavy knocking. If it is severe, this will lead to engine damage.
If your engine knocks...
If you detect heavy knocking even when using the recommended fuel, or if you hear steady knocking while holding a steady speed on level roads, consult your Scion dealer.
However, occasionally, you may notice light knocking for a short time while accelerating or driving up hills. This is normal and there is no need for concern.
GASOLINES CONTAINING DETERGENT ADDITIVES
Scion recommends the use of gasoline that contain detergent additives to avoid build-up of engine deposits.
However, all gasoline sold in the U.S. contains detergent additives to keep clean and/or clean intake systems.
QUALITY GASOLINE
Automotive manufacturers In the U.S., Europe and Japan have developed a specification for quality fuel named World-Wide Fuel Charter (WWFC) that is expected to be applied worldwide. The WWFC consists of three categories that depend on required emission levels. In the U.S., category 3 has been adopted. The WWFC improves air quality by providing for better emissions in vehicle fleets, and customer satisfaction through better vehicle performance. CLEANER BURNING GASOLINE
Cleaner burning gasoline, including reformulated gasoline that contains oxygenates such as ethanol or MTBE is available in many areas.
Scion recommends the use of cleaner burning gasoline and appropriately blended reformulated gasoline. These types of gasoline provide excellent vehicle performance, reduce vehicle emissions, and improve air quality.
OXYGENATES IN GASOLINE
Scion allows the use of oxygenate blended gasoline where the oxygenate content is up to 10% ethanol or 15% MTBE. If you use gasohol in your Scion, be sure that it has an octane rating no lower than 87.
Scion does not recommend the use of gasoline containing methanol.
GASOLINE CONTAINING MMT
Some gasoline contains an octane enhancing additive called MMT (Methylcyclopentadienyl Manganese Tricarbonyl).
Scion does not recommend the use of gasoline that contains MMT. If fuel containing MMT is used, your emission control system may be adversely affected. The Malfunction Indicator Lamp on the instrument cluster may come on. If this happens, contact your Scion dealer for service.
GASOLINE QUALITY
In a very few cases, you may experience drivability problems caused by the particular gasoline that you are using. If you continue to have unacceptable drivability, try changing gasoline brands. If this does not rectify your problem, then consult your Scion dealer.
NOTICE
◆Do not use gasohol other than stated above. It will cause fuel system damage or vehicle performance problems.
◆If drivability problems are encountered (poor hot starting, vaporizing, engine knock, etc.), discontinue the use.
◆Take care not to spill gasohol during refueling. Gasohol may cause paint damage.
FUEL TANK CAPACITY
45 L (11.9 gal., 9.9 Imp. gal.)
Operation in foreign countries
If you plan to drive your Scion in another country...
First, comply with the vehicle registration laws.
Second, confirm the availability of the correct fuel (unleaded and minimum octane number).
Three-way catalytic converter


CAUTION
- Keep people and combustible materials away from the exhaust pipe while the engine is running. The exhaust gas is very hot.
- Do not drive, idle or park your vehicle over anything that might burn easily such as grass, leaves, paper or rags.
The three-way catalytic converter is an emission control device installed in the exhaust system.
The purpose is to reduce pollutants in the exhaust gas.
NOTICE
A large amount of unburned gases flowing into the three-way catalytic converter may cause it to overheat and create a fire hazard. To prevent this and other damage, observe the following precautions:
◆Use only unleaded gasoline.
◆Do not drive with an extremely low fuel level; running out of fuel could cause the engine to misfire, creating an excessive load on the three-way catalytic converter.
◆Do not allow the engine to run at idle speed for more than 20 minutes.
◆Avoid racing the engine.
◆Do not push-start or pull-start your vehicle.
◆Do not turn off the ignition while the vehicle is moving.
◆Keep your engine in good running order. Malfunctions in the engine electrical system, electronic ignition system/distributor ignition system or fuel system could cause an extremely high three-way catalytic converter temperature.
◆If the engine becomes difficult to start or stalls frequently, take your vehicle in for a check-up as soon as possible. Remember, your Scion dealer knows your vehicle and its three-way catalytic converter system best.
◆To ensure that the three-way catalytic converter and the entire emission control system operate properly, your vehicle must receive the periodic Inspections required by the Sclon Maintenance Schedule. For scheduled maintenance information, refer to the "Scheduled Maintenance Guide".
Engine exhaust cautions
CAUTION
- Avoid inhaling the engine exhaust. It contains carbon monoxide, which is a colorless and odorless gas. It can cause unconsciousness or even death.
●Make sure the exhaust system has no holes or loose connections. The system should be checked from time to time. If you hit something, or notice a change in the sound of the exhaust, have the system checked immediately. - Do not run the engine in a garage or enclosed area except for the time needed to drive the vehicle in or out. The exhaust gases cannot escape, making this a particularly dangerous situation.
- Do not remain for a long time in a parked vehicle with the engine running. If it is unavoidable, however, do so only in an unconfined area and adjust the heating or cooling system to force outside air into the vehicle.
Facts about engine oil consumption
FUNCTIONS OF ENGINE OIL
- Keep the back door closed while driving. An open or unsealed back door may cause exhaust gases to be drawn into the vehicle.
●To allow proper operation of your vehicle's ventilation system, keep the inlet grilles in front of the windshield clear of snow, leaves, or other obstructions. - If you smell exhaust fumes in the vehicle, drive with the windows open and the back door closed. Have the cause immediately located and corrected.
Engine oil has the primary functions of lubricating and cooling the inside of the engine, and plays a major role in maintaining the engine in proper working order.
ENGINE OIL CONSUMPTION
It is normal that an engine should consume some engine oil during normal engine operation. The causes of oil consumption in a normal engine are as follows.
-
Oil is used to lubricate pistons, piston rings and cylinders. A thin film of oil is left on the cylinder wall when a piston moves downwards in the cylinder. High negative pressure generated when the vehicle is decelerating sucks some of this oil into the combustion chamber. This oil as well as some part of the oil film left on the cylinder wall is burned by the high temperature combustion gases during the combustion process.
-
Oil is also used to lubricate the stems of the intake valves. Some of this oil is sucked into the combustion chamber together with the intake air and is burned along with the fuel. High temperature exhaust gases also burn the oil used to lubricate the exhaust valve stems.
The amount of engine oil consumed depends on the viscosity of the oil, the quality of the oil and the conditions the vehicle is driven.
More oil is consumed by high-speed driving and frequent acceleration and deceleration.
A new engine consumes more oil, since its pistons, piston rings and cylinder walls have not become conditioned.
Oil consumption: Max. 1.0 L per 1000 km (1.1 qts./600 miles, 0.9 Imp. qts./600 miles)
When judging the amount of oil consumption, note that the oil may become diluted and make it difficult to judge the true level accurately.
As an example, if a vehicle is used for repeated short trips, and consumes a normal amount of oil, the dipstick may not show any drop in the oil level at all, even after 1000 km (600 miles) or more. This is because the oil is gradually becoming diluted with fuel or moisture, making it appear that the oil level has not changed.
The diluting ingredients evaporate out when the vehicle is then driven at high speeds, as on an express way, making it appear that oil is excessively consumed after driving at high speeds.
IMPORTANCE OF ENGINE OIL LEVEL CHECK
One of the most important points in proper vehicle maintenance is to keep the engine oil at the optimum level so that oil function will not be impaired. Therefore, it is essential that the oil level be checked regularly. Scion recommends that the oil level be checked every time you refuel the vehicle.
NOTICE
Failure to check the oil level regularly could lead to serious engine trouble due to insufficient oil.
For detailed information on oil level check, see "Checking the engine oil level" on page 186.
Brake system
The tandem master cylinder brake system is a hydraulic system with two separate sub-systems. If either sub-system should fail, the other will still work. However, the pedal will be harder to press, and your stopping distance will increase. Also, the brake system warning light may come on.
CAUTION
Do not drive your vehicle with only a single brake system. Have your brakes fixed immediately.
BRAKE BOOSTER
The brake booster uses engine vacuum to power-assist the brakes. If the engine should quit while you are driving, you can bring the vehicle to a stop with normal pedal pressure. There is enough reserved vacuum for one or two stops but no more!
CAUTION
- Do not pump the brake pedal if the engine stalls. Each push on the pedal uses up your reserved vacuum.
●Even if the power assist is completely lost, the brakes will still work. But you will have to push the pedal hard, much harder than normal. And your braking distance will increase.
The anti-lock brake system is designed to automatically help prevent lock-up of the wheels during a sudden braking or braking on slippery road surfaces. This assists in providing directional stability and steering performance of the vehicle under these circumstances.
Effective way to press the ABS brake pedal:
When the anti-lock brake system function is in action, you may feel the brake pedal pulsating and hear a noise. In this situation, to let the anti-lock brake system work for you, just hold the brake pedal down more firmly. Do not pump the brake in a panic stop. This will result in reduced braking performance.
The anti-lock brake system becomes operative after the vehicle has accelerated to a speed in excess of approximately 10 km/h (6 mph). It stops operating when the vehicle decelerates to a speed below approximately 5 km/h (3 mph).
Depressing the brake pedal on slippery road surfaces such as on a manhole cover, a steel plate at a construction site, joints in a bridge, etc. on a rainy day tends to activate the anti-lock brake system.
You may hear a click or motor sound in the engine compartment for a few seconds when the engine is started or just after the vehicle begins to move. This means that the anti-lock brake system is in the self-check mode, and does not indicate a malfunction.
When the anti-lock brake system is activated, the following conditions may occur. They do not indicate a malfunction of the system:
- You may hear the anti-lock brake system operating and feel the brake pedal pulsating and the vibrations of the vehicle body and steering wheel. You may also hear the motor sound in the engine compartment even after the vehicle is stopped.
- At the end of the anti-lock brake system activation, the brake pedal may move a little forward.
CAUTION
Do not overestimate the anti-lock brake system: Although the anti-lock brake system assists in providing vehicle control, it is still important to drive with all due care and maintain a moderate speed and safe distance from the vehicle in front of you, because there are limits to the vehicle stability and effectiveness of steering wheel operation even with the anti-lock brake system on.
If tire grip performance exceeds its capability, or if hydroplaning occurs during high speed driving in the rain, the anti-lock brake system does not provide vehicle control.
Anti-lock brake system is not designed to shorten the stopping distance: Always drive at a moderate speed and maintain a safe distance from the vehicle in front of you. Compared with vehicles without an anti-lock brake system, your vehicle may require a longer stopping distance in the following cases:
- Driving on rough, gravel or snow-covered roads.
●Driving with tire chains installed.
●Driving over the steps such as the joints on the road.
●Driving on roads where the road surface is plotted or has other differences in surface height.
Install all 4 tires of specified size at appropriate pressure: The anti-lock brake system detects vehicle speeds using the speed sensors for respective wheels' turning speeds. The use of tires other than specified may fall to detect the accurate turning speed resulting in a longer stopping distance.
ABS
SU21010
"ABS" warning light
This light comes on when the ignition key is turned to the "ON" position. If the anti-lock brake system works properly, the light turns off after a few seconds. Thereafter, if the system malfunctions, the light comes on again.
When the "ABS" warning light is on (and the brake system warning light is off), the anti-lock brake system does not operate, but the brake system still operates conventionally.
When the "ABS" warning light is on (and the brake system warning light is off), the anti-lock brake system does not operate so that the wheels could lock up during a sudden braking or braking on slippery road surfaces.
If either of the following conditions occurs, this indicates a malfunction somewhere in the components monitored by the warning light system. Contact your Sclon dealer as soon as possible to service the vehicle.
●The light does not come on when the ignition key is turned to the "ON" position, or remains on.
●The light comes on while you are driving.
A warning light turning on briefly during operation does not indicate a problem.
CAUTION
If the "ABS" warning light remains on together with the brake system warning light, immediately stop your vehicle at a safe place and contact your Sclon dealer.
In this case, not only the anti-lock brake system will fall but also the vehicle will become extremely unstable during braking.
Brake pad wear limit indicators

The brake pad wear limit indicators on your disc brakes give a warning noise when the brake pads are worn to where replacement is required.
If you hear a squealing or scraping noise while driving, have the brake pads checked and replaced by your Scion dealer as soon as possible. Expensive rotor damage can result if the pads are not replaced when necessary.
Your Scion's identification—Vehicle identification number

The vehicle identification number (VIN) is the legal identifier for your vehicle. This number is on the left top of the instrument panel, and can be seen through the windshield from outside.
This is the primary identification number for your Scion. It is used in registering the ownership of your vehicle.

The vehicle identification number (VIN) is also on the Certification Label.
—Engine number
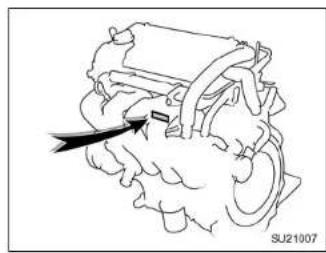
The engine number is stamped on the engine block as shown.
Theft prevention labels
Your new vehicle carries theft prevention labels which are approximately 56 mm (2.20 in.) by 16 mm (0.63 in.).
The purpose of these labels is to reduce the incidence of vehicle thefts by facilitating the tracing and recovery of parts from stolen vehicles. The label is designed so that once it is applied to a surface, any attempt to remove it will result in destroying the integrity of the label. Transferring these labels intact from one part to another will be impossible.
NOTICE
You should not attempt to remove the theft prevention labels as it may violate certain state or federal laws.
Suspension and chassis
CAUTION
Do not modify the suspension/chassis with lift kits, spacers, springs, etc. It can cause dangerous handling characteristics, resulting in loss of control.
Tire information—
—Tire symbols
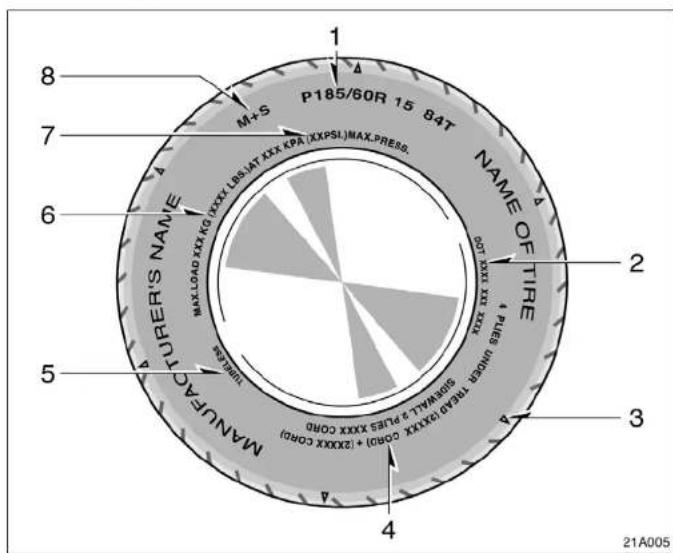
This illustration indicates typical tire symbols.
- Tire size—For details, see "Tire size" on page 125.
- DOT and Tire Identification Number (TIN)—For details, see "DOT and Tire Identification Number (TIN)" on page 124.
- Location of tread wear indicators—For details, see "Checking and replacing tires" on page 194.
- Tire ply composition and materials—Plies mean a layer of rubber-coated parallel cords. Cords mean the strands forming the plies in the tire.
- "TUBELESS" or "TUBE TYPE" —Tubeless tire does not have a tube inside the tire and air is directly filled in the tire, avoiding rapid air leakage even if the tire is nailed and preventing the tire from bursting with a shock. Tube type tire has a tube inside the tire and that tube maintains the air pressure.
—DOT and Tire Identification Number (TIN)
- Load limit at maximum cold tire inflation pressure—For details, see "Checking and replacing tires" on page 194.
- Maximum cold tire inflation pressure—This means the pressure to which a tire may be inflated. For details about recommended cold tire inflation pressure, see "Tires" on page 215.
- Summer tire or all season tire—An all season tire has "M+S" on the sidewall. The tire not marked with "M+S" is a summer tire. For details, see "Types of tires" on page 134.

The "DOT" symbol certifies tire manufacturer's compliance with Department of Transportation Tire Safety Standards.
This illustration indicates typical DOT and Tire Identification Number (TIN).
- Department of Transportation
- Tire Identification Number (TIN)
- Tire manufacturer's identification mark
- Tire size code
- Manufacturer's optional tire type code (2 digits or 3 digits)
- Manufacturing week
- Manufacturing year
—Tire size —Name of each section of tire

This illustration indicates typical tire size.
- Tire use (P=Passenger car, T=Temporary use)
- Section width (in millimeters)
- Aspect ratio (tire height to section width)
- Tire construction code (R=Radial, D=Diagonal)
- Wheel diameter (in inch)
- Load index (2 digits or 3 digits)
- Speed symbol (alphabet with one letter)
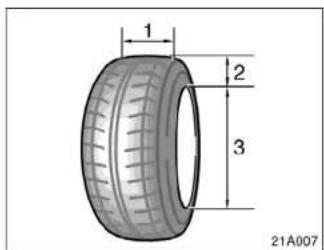
- Section width
- Tire height
- Wheel diameter
[Non-Text]
[Non-Text]
[Non-Text]
[Non-Text]
9. Rim lines
10. Bead wires
11. Chafer
5. Belt
6. Inner liner
8. Carcass
9. Rim lines
10. Bead wires
11. Chafer

- Bead
- Sidewall
- Shoulder
- Tread
- Reinforcing rubber
—Uniform tire quality grading
This information has been prepared in accordance with regulations issued by the National Highway Traffic Safety Administration of the U.S. Department of Transportation. It provides the purchasers and/or prospective purchasers of Scion vehicles with information on uniform tire quality grading.
Your Scion dealer will help answer any questions you may have as you read this information.
DOT quality grades—All passenger vehicle tires must conform to Federal Safety Requirements in addition to these grades. Quality grades can be found where applicable on the tire sidewall between tread shoulder and maximum section width.
For example:
Treadwear 200 Traction AA
Temperature A
Treadwear—The treadwear grade is a comparative rating based on the wear rate of the tire when tested under controlled conditions on a specified government test course. For example, a tire graded 150 would wear one and a half (1-1/2) times as well on the government course as a tire graded 100. The relative performance of tires depends upon the actual conditions of their use, however, and may depart significantly from the norm due to variations in driving habits, service practices and differences in road characteristics and climate.
Traction AA, A, B, C—The traction grades, from highest to lowest, are AA, A, B, and C, and they represent the tire's ability to stop on wet pavement as measured under controlled conditions on specified government test surfaces of asphalt and concrete. A tire marked C may have poor traction performance.
Warning: The traction grade assigned to this tire is based on braking (straight ahead) traction tests and does not include cornering (turning) traction.
Temperature A, B, C—The temperature grades are A (the highest), B, and C, representing the tire's resistance to the generation of heat and its ability to dissipate heat when tested under controlled conditions on a specified indoor laboratory test wheel. Sustained high temperature can cause the material of the tire to degenerate and reduce tire life, and excessive temperature can lead to sudden tire failure. The grade C corresponds to a level of performance which all passenger car tires must meet under the Federal Motor Vehicle Safety Standard No. 109. Grades B and A represent higher levels of performance on the laboratory test wheel than the minimum required by law. Warning: The temperature grades for this tire are established for a tire that is properly inflated and not overloaded. Excessive speed, underinflation, or excessive loading, either separately or in combination, can cause heat buildup and possible tire failure.
—Tire related terms
| Cold tire inflation pressure | Tire inflation pressure when the vehicle has been parked at least 3 hours or more, or it has not been driven more than 1.5 km or 1 mile under that condition |
| Maximum inflation pressure | The maximum cold inflation pressure to which a tire may be inflated and shown on the sidewall of the tire |
| Recommended inflation pressure | Cold tire inflation pressure recommended by a manufacturer |
| Accessory weight | The combined weight (in excess of those standard items which may be replaced) of automatic transmission, power steering, power brakes, power windows, power seats, radio, and heater, to the extent that these items are available as factory-installed equipment (whether installed or not) |
| Curb weight | The weight of a motor vehicle with standard equipment including the maximum capacity of fuel, oil, and coolant, and, if so equipped, air conditioning and additional weight optional engine |
| Maximum loaded vehicle weight | The sum of—(a) Curb weight;(b) Accessory weight;(c) Vehicle capacity weight; and(d) Production options weight |
| Normal occupant weight | 68 kg (150 lb.) times the number of occupants specified in the second column of Table 1 on page 130 |
| Production options weight | The combined weight of those installed regular production options weighing over 2.3 kg (5 lb.) in excess of those standard items which they replace, not previously considered in curb weight or accessory weight, including heavy duty brakes, ride levelers, roof rack, heavy duty battery, and special trim |
| Vehicle capacity weight(Total load capacity) | The rated cargo and luggage load plus 68 kg (150 lb.) times the vehicle's designated seating capacity |
| Intended outboard sidewall | (A) The sidewall that contains a whitewall, bears white lettering or bears manufacturer, brand, and/or model name molding that is higher or deeper than the same molding on the other sidewall of the tire, or(B) The outward facing sidewall of an asymmetrical tire that has a particular side that must always face outward when mounted on a vehicle |
| Occupant distribution | Distribution of occupants in a vehicle as specified in the third column of Table 1 on page 130 |
| Rim | A metal support for a tire or a tire and tube assembly upon which the tire beads are seated |
| Rim diameter (Wheel diameter) Nominal diameter of the bead seat | |
| Rim size designation Rim diameter | and width |
| Rim type designation The industry of manufacturer's designation for a rim by style or code | |
| Rim width Nominal distance between rim flanges | |
| Vehicle maximum load on the tire | The load on an individual tire that is determined by distributing to each axle its share of the maximum loaded vehicle weight and dividing by two |
| Vehicle normal load on the tire | The load on an individual tire that is determined by distributing to each axle its share of the curb weight, accessory weight, and normal occupant weight (distributed in accordance with Table 1 on page 130) and dividing by two |
| Weather side | The surface area of the rim not covered by the inflated tire |
Table 1 – Occupant loading and distribution for vehicle normal load for various designated seating capacities
| Designated seating capacity, number of occupants | Vehicle normal load, number of occupants | Occupant distribution in a normally loaded vehicle |
| 2 through 4 2 2 in front | ||
| 5 through 10 3 2 in front, 1 in second seat | ||
Vehicle load limits
Vehicle load limits include total load capacity, seating capacity, towing capacity and cargo capacity. Follow the load limits shown below.
Total load capacity, kg (lb.): 375 (825)
Total load capacity means combined weight of occupants, cargo and luggage. Tongue load is included when trailer towing.
Seating capacity:
Total 5 (Front 2, Rear 3) Seating capacity means the maximum number of occupants whose weight is supposed to be 68 kg (150 lb.) per person. Depending on the weight of person, the seating capacity given may exceed the total load capacity.
NOTICE
Even if the number of occupants are within the seating capacity, do not exceed the total load capacity.
Towing capacity
Scion does not recommend towing a trailer with your vehicle. Your vehicle is not designed for trailer towing.
Cargo capacity
Cargo capacity may increase or decrease depending on the size (weight) and the number of occupants. For details, see "Capacity and distribution" that follows.
CAUTION
Do not apply the load more than each load limit. That may cause not only damage to the tires, but also deterioration to the steering ability and braking ability, causing an accident.
Cargo and luggage—Stowage precautions
When stowing cargo and luggage in the vehicle, observe the following:
- Put cargo and luggage in the luggage compartment when at all possible. Be sure all items are secured in place.
- Be careful to keep the vehicle balanced. Locating the weight as far forward as possible helps maintain balance.
- For better fuel economy, do not carry unneeded weight.
CAUTION
- To prevent cargo and luggage from sliding forward during braking, do not stack anything in the luggage compartment. Keep cargo and luggage low, as close to the floor as possible.
●Never allow anyone to ride in the luggage compartment. It is not designed for passengers. They should ride in their seats with their seat belts properly fastened. Otherwise, they are much more likely to suffer serious bodily injury, in the event of sudden braking or a collision.
- Do not drive with objects left on top of the instrument panel. They may interfere with the driver's field of view. Or they may move during sudden vehicle acceleration or turning, and impair the driver's control of the vehicle. In an accident they may injure the vehicle occupants.
—Capacity and distribution
Cargo capacity depends on the total weight of the occupants.
(Cargo capacity) = (Total load capacity) - (Total weight of occupants)
STEPS FOR DETERMINING COR- RECT LOAD LIMIT
- Locate the statement "The combined weight of occupants and cargo should never exceed XXX pounds" on your vehicle's placard.
- Determine the combined weight of the driver and passengers that will be riding in your vehicle.
-
Subtract the combined weight of the driver and passengers from XXX kilograms or XXX pounds.
-
The resulting figure equals the available amount of cargo and luggage load capacity. For example, if the "XXX" amount equals 1400 lbs. and there will be five 150 lb. passengers in your vehicle, the amount of available cargo and luggage load capacity is 650 lbs. (1400–750 (5×150)=650 lbs).
-
Determine the combined weight of luggage and cargo being loaded on the vehicle. That weight may not safely exceed the available cargo and luggage load capacity calculated in Step 4.
-
If your vehicle will be towing a trailer, load from your trailer will be transferred to your vehicle. Consult this manual to determine how this reduces the available cargo and luggage load capacity of your vehicle.
Scion does not recommend towing a trailer with your vehicle. It is not designed for trailer towing.
![graph LR A["Human silhouettes"] --> B["Cargo capacity"] B --> C["Human silhouettes"] D["Total load capacity"] --> B style A fill:#f9f,stroke:#333 style B fill:#ccf,stroke:#333 style C fill:#cfc,stroke:#333 note right of B: Cargo capacity note left of C: Total load capacity note right of C: 21A008](/content/2026/05/941964/images/ac5f9b72150feacf052cd67828c697bb35fa3e1a6aba0ea312cb79e9ba0c3d1a.jpg)
EXAMPLE ON YOUR VEHICLE
In case that 2 people with the combined weight of 166 kg (366 lb.) are riding in your vehicle with the total load capacity of 375 kg (825 lb.), the available amount of cargo and luggage load capacity will be as follows:
3 7 5 kg - 1 6 6 kg = 2 0 9 kg. (8 2 5 lb. - 3 6 6 lb. = 4 5 9 lb.)
From this condition, if 3 more passengers with the combined weight of 176 kg (388 lb.) get on, the available cargo and luggage load will be reduced as follows:
209 kg - 176 kg = 33 kg
(4 5 9 lb. - 3 8 8 lb. = 7 1 lb.)
As shown in the above example, if the number of occupants increases, the cargo and luggage load equaling the combined weight of occupants who got on later must be reduced. In other words, if the increase in the number of occupants causes the excess of the total load capacity (combined weight of occupants plus cargo and luggage load), you have to reduce the cargo and luggage on your vehicle.
For details about total load capacity, see "Vehicle load limits" on page 131.
CAUTION
Even if the total load of occupant's weight and the cargo load is less than the total load capacity, do not apply the load unevenly. That may cause not only damage to the tires but also deterioration to the steering ability due to unbalance of the vehicle, causing an accident.
Types of tires
Determine what kind of tires your vehicle is originally equipped with.
1. Summer tires
Summer tires are high-speed capability tires best suited to highway driving under dry conditions.
Since summer tires do not have the same traction performance as snow tires, summer tires are inadequate for driving on snow-covered or icy roads. For driving on snow-covered or icy roads, we recommend using snow tires. If installing snow tires, be sure to replace all four tires.
2. All season tires
All season tires are designed to provide better traction in snow and to be adequate for driving in most winter conditions, as well as for use all year round.
All season tires, however, do not have adequate traction performance compared with snow tires in heavy or loose snow. Also, all season tires fall short in acceleration and handling performance compared with summer tires in highway driving.
The details about how to distinguish summer tires from all season tires are described on page 123.
CAUTION
- Do not mix summer and all season tires on your vehicle as this can cause dangerous handling characteristics, resulting in loss of control.
- Do not use tires other than the manufacturer's designated tires, and do not mix tires or wheels of the sizes different from the originally equipped tires and wheels.
SECTION 3
STARTING AND DRIVING
Before starting the enginee 136
How to start the engine 136
Tips for driving in various conditions 137
Winter driving tips 138
Dinghy towing 139
Trailer towing 141
How to save fuel and make your vehicle last longer, too 141
Before starting the engine
- Check the area around the vehicle before entering it.
- Adjust seat position, seatback angle, head restraint height and steering wheel angle.
- Adjust Inside and outside rear view mirrors.
- Lock all side doors and back door.
- Fasten seat belts.
How to start the engine—(a) Before cranking
- Apply the parking brake firmly.
- Turn off unnecessary lights and accessories.
- Manual transmission: Press the clutch pedal to the floor and shift the transmission into neutral. Hold the clutch pedal to the floor until the engine is started. A starter safety device will prevent the starter from operating if the clutch pedal is not fully depressed.
Automatic transmission: Put the selector lever in "P". If you need to restart the engine while the vehicle is moving, put the selector lever in "N". A starter safety device will prevent the starter from operating if the selector lever is in any drive position. - Automatic transmission only: Depress the brake pedal and hold it to the floor until driving off.
(b) Starting the engine
Before starting the engine, be sure to follow the instructions in "(a) Before cranking".
Normal starting procedure
The multiport fuel injection system/sequential multiport fuel injection system in your engine automatically controls the proper air-fuel mixture for starting. You can start a cold or hot engine as follows:
- With your foot off the accelerator pedal, crank the engine by turning the key to "START". Release it when the engine starts.
- After the engine runs for about 10 seconds, you are ready to drive.
If the weather is below freezing, let the engine warm up for a few minutes before driving.
If the engine stalls...
Simply restart it, using the correct procedure given in normal starting.
If the engine will not start...
See "If your vehicle will not start" on page 144.
NOTICE
◆Do not crank for more than 30 seconds at a time. This may overheat the starter and wiring systems.
◆Do not race a cold engine.
◆If the engine becomes difficult to start or stalls frequently, have the engine checked immediately.
Tips for driving in various conditions
●Always slow down in gusty crosswinds. This will allow you much better control.
- Drive slowly onto curbs and, if possible, at a right angle. Avoid driving onto high, sharp-edged objects and other road hazards. Failure to do so can lead to severe tire damage such as a tire burst.
Drive slowly when passing over bumps or travelling on a bumpy road. Otherwise, the impact could cause severe damage to the tires and/or wheels.
- When parking on a hill, turn the front wheels until they touch the curb so that the vehicle will not roll. Apply the parking brake, and place the transmission in "P" (automatic) or in first or reverse (manual). If necessary, block the wheels.
- Washing your vehicle or driving through deep water may get the brakes wet. To see whether they are wet, check that there is no traffic near you, and then press the pedal lightly. If you do not feel a normal braking force, the brakes are probably wet. To dry them, drive the vehicle cautiously while lightly pressing the brake pedal with the parking brake applied. If they still do not work safely, pull to the side of the road and call a Scion dealer for assistance.

CAUTION
●Before driving off, make sure the parking brake is fully released and the parking brake reminder light is off.
- Do not leave your vehicle unattended while the engine is running.
- Do not rest your foot on the brake pedal while driving. It can cause dangerous overheating, needless wear, and poor fuel economy.
- To drive down a long or steep hill, reduce your speed and downshift. Remember, if you ride the brakes excessively, they may overheat and not work properly.
- Be careful when accelerating, up-shifting, downshifting or braking on a slippery surface. Sudden acceleration or engine braking could cause the vehicle to spin or skid.
- Do not drive in excess of the speed limit. Even if the legal speed limit permits it, do not drive over 140 km/h (85 mph) unless your vehicle has high-speed capability tires. Driving over 140 km/h (85 mph) may result in tire failure, loss of control and possible injury. Be sure to consult a tire dealer to determine whether the tires on your vehicle are high-speed capability tires or not before driving at such speeds.
- Do not continue normal driving when the brakes are wet. If they are wet, your vehicle will require a longer stopping distance, and it may pull to one side when the brakes are applied. Also, the parking brake will not hold the vehicle securely.
Winter driving tips
Make sure your coolant is properly protected against freezing.
Only use "Toyota Super Long Life Coolant" or similar high quality ethylene glycol based non-silicate, non-amine, non-nitrite, and non-borate coolant with long-life hybrid organic acid technology.
See "Checking the engine coolant level" on page 188 for details of coolant type selection.
"Toyota Super Long Life Coolant" is premixed with 50% coolant and 50% distilled water. This coolant provides protection down to about -35°C (-31°F).
NOTICE
Do not use plain water alone.
When it is extremely cold, we recommend to use 60% solution for your Scion, to provide protection down to about -50°C ( -58°F ). Do not use more than 70% solution for better coolant performance.
Check the condition of the battery and cables.
Cold temperatures reduce the capacity of any battery, so it must be in top shape to provide enough power for winter starting. Section 7-3 tells you how to visually inspect the battery. Your Scion dealer and most service stations will be pleased to check the level of charge.
Make sure the engine oil viscosity is suitable for the cold weather.
See page 187 for recommended viscosity. Leaving a heavy summer oil in your vehicle during winter months may cause harder starting. If you are not sure about which oil to use, call your Scion dealer—they will be pleased to help.
Keep the door locks from freezing.
Squirt lock de-icer or glycerine Into the locks to keep them from freezing. To open a frozen lock, try heating the key before inserting it.
Use a washer fluid containing an anti-freeze solution.
This product is available at your Scion dealer and most auto parts stores. Follow the manufacturer's directions for how much to mix with water.
NOTICE
Do not use engine antifreeze or any other substitute because it may damage your vehicle's paint.
Do not use your parking brake when there is a possibility it could freeze.
When parking, put the transmission into "P" (automatic) or into first or reverse (manual) and block the rear wheels. Do not use the parking brake, or snow or water accumulated in and around the parking brake mechanism may freeze, making it hard to release.
Keep ice and snow from accumulating under the fenders.
Ice and snow built up under your fenders can make steering difficult. During bad winter driving, stop and check under the fenders occasionally.
Depending on where you are driving, we recommend you carry some emergency equipment.
Some of the things you might put in the vehicle are tire chains, window scraper, bag of sand or salt, flares, small shovel, jumper cables, etc.
Dinghy towing (with automatic transmission)

If your vehicle has automatic transmission, your vehicle is not designed to be dinghy towed (with four wheels on the ground) behind a motorhome.
NOTICE
Do not tow your vehicle with four wheels on the ground. This may cause serious damage to your vehicle.
Dinghy towing
(with manual transmission)

If your vehicle has manual transmission, your vehicle can be dinghy towed (with four wheels on the ground) from the front behind a motorhome.

CAUTION
Dinghy towing requires special equipment and accessories. Please refer to your service outlet of the motorhome manufacturer for the recommended equipment.
NOTICE
Dinghy towing does not eliminate the possibility of damage to your vehicle.
DINGHY TOWING TIPS
Before dinghy towing, be sure to observe the following in order to reduce the damage to your vehicle.
-
Put the selector lever in neutral.
-
Turn the Ignition switch to the "ACC" position.
NOTICE
To avoid the locking of the steering wheel, turn the ignition switch to the "ACC" position.
- Release the parking brake.
After dinghy towing, let the engine idle for more than 3 minutes before driving the vehicle.
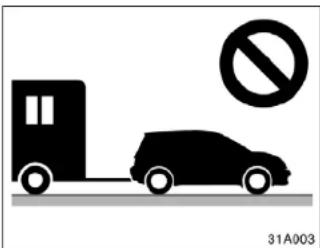
NOTICE
Do not tow your vehicle from the rear. This may cause serious damage to your vehicle.
Trailer towing

Sclon does not recommend towing a trailer with your vehicle. It is not designed for trailer towing.
How to save fuel and make your vehicle last longer, too
Improving fuel economy is easy—just take it easy. It will help make your vehicle last longer, too. Here are some specific tips on how to save money on both fuel and repairs:
- Keep your tires Inflated at the correct pressure. Underinflation causes tire wear and wastes fuel. See page 191 for instructions.
- Do not carry unneeded weight in your vehicle. Excess weight puts a heavier load on the engine, causing greater fuel consumption.
- Avoid lengthy warm-up idling. Once the engine is running smoothly, begin driving—but gently. Remember, however, that on cold winter days this may take a little longer.
- Keep the automatic transmission overdrive turned on when engine braking is not required. Driving with the overdrive off will reduce the fuel economy. (For details, see "Automatic transmission" on page 89.)
-
Accelerate slowly and smoothly. Avoid jackrabbit starts. Get into high gear as quickly as possible.
-
Avoid long engine idling. If you have a long wait and you are not in traffic, it is better to turn off the engine and start again later.
- Avoid engine lugging or over-revving. Use a gear position suitable for the road on which you are travelling.
- Avoid continuous speeding up and slowing down. Stop-and-go driving wastes fuel.
●Avoid unnecessary stopping and braking. Maintain a steady pace. Try to time the traffic signals so you only need to stop as little as possible or take advantage of through streets to avoid traffic lights. Keep a proper distance from other vehicles to avoid sudden braking. This will also reduce wear on your brakes.
●Avoid heavy traffic or traffic jams whenever possible. - Do not rest your foot on the clutch or brake pedal. This causes needless wear, overheating and poor fuel economy.
-
Maintain a moderate speed on highways. The faster you drive, the greater the fuel consumption. By reducing your speed, you will cut down on fuel consumption.
-
Keep the front wheels in proper alignment. Avoid hitting the curb and slow down on rough roads. Improper alignment not only causes faster tire wear but also puts an extra load on the engine, which, in turn, wastes fuel.
- Keep the bottom of your vehicle free from mud, etc. This not only lessens weight but also helps prevent corrosion.
- Keep your vehicle tuned-up and in top shape. A dirty air cleaner, improper valve clearance, dirty plugs, dirty oil and grease, brakes not adjusted, etc. all lower engine performance and contribute to poor fuel economy. For longer life of all parts and lower operating costs, keep all maintenance work on schedule, and if you often drive under severe conditions, see that your vehicle receives more frequent maintenance. (For scheduled maintenance information, please refer to the "Scheduled Maintenance Guide".)
CAUTION
Never turn off the engine to coast down hills. Your power steering and brake booster will not function without the engine running. Also, the emission control system operates properly only when the engine is running.
SECTION 4
IN CASE OF AN EMERGENCY
If your vehicle will not startt 144
If your engine stalls while driving 147
If your vehicle overheats 147
If you have a flat tire 148
If your vehicle becomes stuck 157
If your vehicle needs to be towed 158
If you cannot shift automatic transmission selector lever 162
If you lose your keys 163
If your vehicle will not start—(a) Simple checks
Before making these checks, make sure you have followed the correct starting procedure given in "How to start the engine" on page 136 and that you have sufficient fuel.
If the engine is not turning over or is turning over too slowly—
- Check that the battery terminals are tight and clean.
- If the battery terminals are O.K., switch on the interior light.
- If the light is out, dim or goes out when the starter is cranked, the battery is discharged. You may try jump starting. See "(c) Jump starting" for further instructions.
If the light is O.K., but the engine still will not start, it needs adjustment or repair. Call a Scion dealer or qualified repair shop.
NOTICE
Do not pull- or push-start the vehicle. It may damage the vehicle or cause a collision when the engine starts. Also the three-way catalytic converter may overheat and become a fire hazard.
If the engine turns over at its normal speed but will not start—
- The engine may be flooded because of repeated cranking. See "(b) Starting a flooded engine" for further instructions.
- If the engine still will not start, it needs adjustment or repair. Call a Scion dealer or qualified repair shop.
(b) Starting a flooded engine
If the engine will not start, your engine may be flooded because of repeated cranking.
If this happens, turn the key to "START" with the accelerator pedal held down. Keep the key and accelerator pedal in these positions for 15 seconds and release them. Then try starting the engine with your foot off the accelerator pedal.
If the engine does not start after 30 seconds of cranking, release the key, wait a few minutes and try again.
If the engine still will not start, it needs adjustment or repair. Call a Scion dealer or qualified repair shop for assistance.
NOTICE
Do not crank for more than 30 seconds at a time. This may overheat the starter and wiring systems.
(c) Jump starting
To avoid serious personal injury and damage to your vehicle which might result from battery explosion, acid burns, electrical burns, or damaged electronic components, these Instructions must be followed precisely.
If you are unsure about how to follow this procedure, we strongly recommend that you seek the help of a competent mechanic or towing service.
CAUTION
●Batteries contain sulfuric acid which is poisonous and corrosive. Wear protective safety glasses when jump starting, and avoid spilling acid on your skin, clothing, or vehicle.
- If you should accidentally get acid on yourself or in your eyes, remove any contaminated clothing and flush the affected area with water immediately. Then get immediate medical attention. If possible, continue to apply water with a sponge or cloth while en route to the medical office.
●The gas normally produced by a battery will explode if a flame or spark is brought near. Use only standardized jumper cables and do not smoke or light a match while jump starting.
Warning: Battery posts, terminals and related accessories contain lead and lead compounds, chemicals known to the State of California to cause cancer and reproductive harm. Wash hands after handling.
NOTICE
The battery used for boosting must be 12 V. Do not jump start unless you are sure that the booster battery is correct.
- If the booster battery is installed in another vehicle, make sure the vehicles are not touching. Turn off all unnecessary lights and accessories.
- If required, remove all the vent plugs from the booster and discharged batteries. Lay a cloth over the open vents on the batteries. (This helps reduce the explosion hazard, personal injuries and burns.)
- If the engine in the vehicle with the booster battery is not running, start it and let it run for a few minutes. During jump starting, run the engine at about 2000 rpm with the accelerator pedal lightly depressed.

- Make the cable connections in the order a, b, c, d.
a. Connect the clamp of the positive terminal on the booster battery. (red) Jumper cable to the positive (2) terminal on charged battery, the other end of the negative (black) jumper cable to a solid, stationary, unpainted, metallic point of the vehicle with the discharged battery. b. Connect the clamp at the other end of the positive (red) jumper cable to the positive (2) terminal on the booster battery.
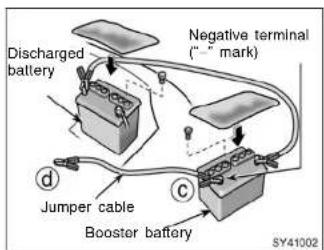
c. Connect the clamp of the negative (black) jumper cable to the negative (-) terminal on the booster battery.
I don't own electric battery the other end of the negative (black) jumper cable to a solid, stationary, unpainted, metallic point of the vehicle with the discharged battery.
The recommended connecting point is shown in the following illustration:

Connecting point
Do not connect the cable to or near any part that moves when the engine is cranked.

If your engine stalls while driving
- Start your engine in the normal way. After starting, run it at about 2000 rpm for several minutes with the accelerator pedal lightly depressed.
- Carefully disconnect the cables in the exact reverse order: the negative cable and then the positive cable.
- Carefully dispose of the battery cover cloths—they may now contain sulfuric acid.
- If removed, replace all the battery vent plugs.
If the cause of your battery discharging is not apparent (for example, lights left on), you should have it checked at your Scion dealer.
If your engine stalls while driving..
- Reduce your speed gradually, keeping a straight line. Move cautiously off the road to a safe place.
- Turn on your emergency flashers.
- Try starting the engine again.
If the engine will not start, see "If your vehicle will not start" on page 144.
| CAUTION |
| If the engine is not running, the power assist for the brakes and steering will not work so steering and braking will be much harder than usual. |
If your vehicle overheats
If your engine coolant temperature gauge indicates overheating, if you experience a loss of power, or if you hear a loud knocking or pinging noise, the engine has probably overheated. You should follow this procedure...
- Pull safely off the road, stop the vehicle and turn on your emergency flashers. Put the transmission in "P" (automatic) or neutral (manual) and apply the parking brake. Turn off the air conditioning if it is being used.
- If coolant or steam is boiling out of the radiator or reservoir, stop the engine. Wait until the steam subsides before opening the hood. If there is no coolant boiling over or steam, leave the engine running and make sure the electric cooling fan is operating. If it is not, turn the ignition off.

- Look for obvious coolant leaks from the radiator, hoses, and under the vehicle. However, note that water draining from the air conditioning is normal if it has been used.
CAUTION
When the engine is running, keep hands and clothing away from the moving fan and engine drive belts.
- If the coolant is leaking, stop the engine immediately. Call a Scion dealer for assistance.
- If there are no obvious leaks, check the coolant reservoir. If it is dry, add coolant to the reservoir while the engine is running. Fill it about half full.
CAUTION
Do not attempt to remove the radiator cap when the engine and radiator are hot. Serious injury could result from scalding hot fluid and steam blown out under pressure.
- After the engine coolant temperature has cooled to normal, again check the coolant level in the reservoir. If necessary, bring it up to half full again. Serious coolant loss indicates a leak in the system. You should have it checked as soon as possible at your Sclon dealer.
If you have a flat tire—
- Reduce your speed gradually, keeping a straight line. Move cautiously off the road to a safe place well away from the traffic. Avoid stopping on the center divider of a highway. Park on a level spot with firm ground.
- Stop the engine and turn on your emergency flashers.
- Firmly set the parking brake and put the transmission in "P" (automatic) or reverse (manual).
- Have everyone get out of the vehicle on the side away from traffic.
- Read the following instructions thoroughly.
CAUTION
When jacking, be sure to observe the following to reduce the possibility of personal injury:
- Follow jacking instructions.
- Do not put any part of your body under the vehicle supported by the jack. Personal injury may occur.
- Do not start or run the engine while your vehicle is supported by the jack.
-
Stop the vehicle on a level firm ground, firmly set the parking brake and put the transmission in "P" (automatic) or reverse (manual). Block the wheel diagonally opposite to the one being changed if necessary.
-
Make sure to set the jack properly in the jack point. Raising the vehicle with jack improperly positioned will damage the vehicle or may allow the vehicle to fall off the jack and cause personal injury.
●Never get under the vehicle when the vehicle is supported by the jack alone. - Use the jack only for lifting your vehicle during wheel changing.
- Do not raise the vehicle with someone in the vehicle.
- When raising the vehicle, do not put an object on or under the jack.
- Raise the vehicle only high enough to remove and change the tire.
NOTICE
Do not continue driving with a deflated tire. Driving even a short distance can damage a tire and wheel beyond repair.

Compact spare tire
The compact spare tire is designed for temporary emergency use only
The compact spare tire is identified by the distinctive wording "TEMPORARY USE ONLY" molded into the side wall of the tire.
To keep the compact spare tire noticeable, do not hide the wheel by a wheel cover or such.
The compact spare tire saves space in your luggage compartment, and its lighter weight helps to improve fuel economy and permits easier installation in case of a flat tire.
The compact spare tire can be used many times, if necessary. It has tread life of up to 4800 km (3000 miles) depending on road conditions and your driving habits. When tread wear indicators appear on the tire, replace the tire.
See also the tire section in Section 7-2 for details on the tread wear indicators and other service information.

CAUTION
•The compact spare tire was designed especially for your Sclon. Do not use it on any other vehicle.
- Do not use more than one compact spare tire at the same time.
- The pressure for the compact spare tire must be 420 kpa (4.2 kgf/cm 2 or bar, 60 psi).
- Do not exceed 80 km/h (50 mph) when driving with the compact spare tire.
•The standard tire should be repaired and reinstalled as soon as possible.
- Avoid sudden acceleration, sudden deceleration and sharp turns with the compact spare tire.
NOTICE
Your ground clearance is reduced when the compact spare tire is installed so avoid driving over obstacles and drive slowly on rough, unpaved roads and speed bumps. Also, do not attempt to go through an automatic car wash as the vehicle may get caught, resulting in damage.
—Required tools and spare tire

To prepare yourself for an emergency, you should familiarize yourself with the use of the jack, each of the tools and their storage locations.
-
Open the luggage storage box and get the required tools and spare tire.
-
Wheel nut wrench
- Jack handle
- Tool bag
- Spare tire
To open the luggage storage box, see "Luggage storage box" on page 107.
You will find a jack and a flat tire bolt in the tool bag.
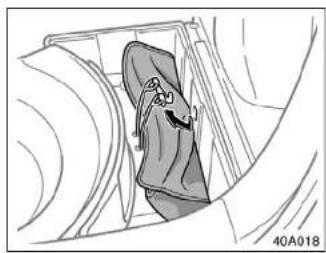
To remove the tool bag, unlock the tightening strap.
To store the tool bag, make sure it is securely held by the tightening strap.

To remove the spare tire:
-
Remove the spare tire cover.
-
Loosen the spare tire bolt and remove it.
Then take the spare tire out of the vehicle.
When storing the spare tire, put it in place with the inner side of the wheel facing up. Then secure the tire by repeating the above removal steps in reverse order to prevent it from flying forward during a collision or sudden braking.
The spare tire bolt is designed only for a compact spare tire. Standard size tire cannot be secured with it.
—Blocking the wheel

- Block the wheel diagonally opposite the flat tire to keep the vehicle from rolling when it is jacked up.
When blocking the wheel, place a wheel block in front of one of the front wheels or behind one of the rear wheels.
—Loosening wheel nuts

- Loosen all the wheel nuts.
Always loosen the wheel nuts before raising the vehicle.
The nuts turn counterclockwise to loosen. To get maximum leverage, fit the wrench to the nut so that the handle is on the right side, as shown above. Grasp the wrench near the end of the handle and pull up on the handle. Be careful that the wrench does not slip off the nut.
Do not remove the nuts yet—just unscrew them about one-half turn.
CAUTION
Never use oil or grease on the bolts or nuts. The nuts may loosen and the wheels may fall off, which could cause a serious accident.
—Positioning the jack

- Position the jack at the correct jack point as shown.
Make sure the jack is positioned on a level and solid place.
—Raising your vehicle

- After making sure that no one is in the vehicle, raise it high enough so that the spare tire can be installed.
Remember you will need more ground clearance when putting on the spare tire than when removing the flat tire. To raise the vehicle, insert the jack handle into the jack (it is a loose fit) and turn it clockwise. As the jack touches the vehicle and begins to lift, double-check that it is properly positioned.

CAUTION
Never get under the vehicle when the vehicle is supported by the jack alone.
—Changing wheels

6. Remove the wheel nuts and change tires.
Lift the flat tire straight off and put it aside.
Roll the spare wheel into position and align the holes in the wheel with the bolts. Then lift up the wheel and get at least the top bolt started through its hole. Wiggle the tire and press it back over the other bolts.

Before putting on wheels, remove any corrosion on the mounting surfaces with a wire brush or such. Installation of wheels without good metal-to-metal contact at the mounting surface can cause wheel nuts to loosen and eventually cause a wheel to come off while driving.
—Reinstalling wheel nuts

7. Reinstall all the wheel nuts finger tight.
Reinstall the wheel nuts (tapered end inward) and tighten them as much as you can by hand. Press back on the tire and see if you can tighten them more.
—Lowering your vehicle
CAUTION
Never use oil or grease on the bolts or nuts. Doing so may lead to overtightening the nuts and damaging the bolts. The nuts may loosen and the wheels may fall off, which could cause a serious accident. If there is oil or grease on any bolt or nut, clean it.
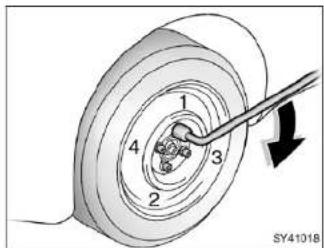
8. Lower the vehicle completely and tighten the wheel nuts.
Turn the jack handle counterclockwise to lower the vehicle.
Use only the wheel nut wrench to tighten the nuts. Do not use other tools or any additional leverage other than your hands, such as a hammer, pipe or your foot. Make sure the wrench is securely engaged over the nut.
Tighten each nut a little at a time in the order shown. Repeat the process until all the nuts are tight.
CAUTION
- When lowering the vehicle, make sure all portions of your body and all other persons around will not be injured as the vehicle is lowered to the ground.
- Have the wheel nuts tightened with torque wrench to 103 N·m (10.5 kgf·m, 76 ft·lbf), as soon as possible after changing wheels. Otherwise, the nuts may loosen and the wheels may fall off, which could cause a serious accident.
—After changing wheels
9. Check the air pressure of the replaced tire.
Adjust the air pressure to the specification designed on page 215. If the pressure is lower, drive slowly to the nearest service station and fill to the correct pressure.
Do not forget to reinstall the tire inflation valve cap as dirt and moisture could get into the valve core and possibly cause air leakage. If the cap is missing, have a new one put on as soon as possible.
10. Restow all the tools, jack and flat tire securely.
To secure the flat tire, use the flat tire bolt in the tool bag. Stow the spare tire bolt into the tool bag.
As soon after changing wheels as possible, tighten the wheel nuts to the torque specified on page 215 with a torque wrench and have a technician repair the flat tire.
CAUTION
Before driving, make sure all the tools, jack and flat tire are securely in place in their storage location to reduce the possibility of personal injury during a collision or sudden braking.
If your vehicle becomes stuck
If your vehicle becomes stuck in snow, mud, sand, etc., then you may attempt to rock the vehicle free by moving it forward and backward.
CAUTION
Do not attempt to rock the vehicle free by moving it forward and backward if people or objects are anywhere near the vehicle. During the rocking operation the vehicle may suddenly move forward or backward as it becomes unstuck, causing injury or damage to nearby people or objects.
If your vehicle needs to be towed—
NOTICE
if you rock your vehicle, observe the following precautions to prevent damage to the transmission and other parts.
◆Do not depress the accelerator pedal while shifting the selector lever or before the transmission is completely shifted to forward or reverse gear.
◆Do not race the engine and avoid spinning the wheels.
◆If your vehicle remains stuck after rocking the vehicle several times, consider other ways such as towing.
(a) Towing with wheel lift type truck
—From front
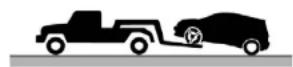
— From rear
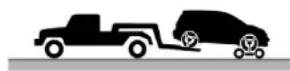
(b) Using flat bed truck

40A003
If towing is necessary, we recommend you to have it done by your Scion dealer or a commercial tow truck service. In consultation with them, have your vehicle towed using either (a) or (b).
Only when you cannot receive a towing service from a Scion dealer or commercial tow truck service, tow your vehicle carefully in accordance with the instructions given in “—Emergency towing” on page 160.
Proper equipment will help ensure that your vehicle is not damaged while being towed. Commercial operators are generally aware of the state/provincial and local laws pertaining to towing.
Your vehicle can be damaged if it is towed incorrectly. Although most operators know the correct procedure, it is possible to make a mistake. To avoid damage to your vehicle, make sure the following few precautions are observed. If necessary, show this page to the tow truck driver.
TOWING PRECAUTIONS:
Use a safety chain system for all towing, and abide by the state/provincial and local laws. The wheels and axle on the ground must be in good condition. If they are damaged, use a towing dolly.
(a) Towing with wheel lift type truck From front—Release the parking brake.
NOTICE
When lifting wheels, take care to ensure adequate ground clearance for towing at the opposite end of the raised vehicle. Otherwise, the bumper and/or underbody of the towed vehicle will be damaged during towing.
From rear—
●Manual transmission:
We recommend using a towing dolly under the front wheels. If you do not use a towing dolly, place the ignition key in the "ACC" position and put the transmission in neutral.
NOTICE
Do not tow with the key removed or in the "LOCK" position when towing from the rear without a towing dolly. The steering lock mechanism is not strong enough to hold the front wheels straight.
●Automatic transmission:
Use a towing dolly under the front wheels.
NOTICE
Never tow a vehicle with an automatic transmission from the rear with the front wheels on the ground, as this may cause serious damage to the transmission.
(b) Using flat bed truck
(c) Towing with sling type truck

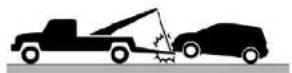
40A009
(c) Towing with sling type truck
NOTICE
Do not tow with sling type truck, either from the front or rear. This may cause body damage.
—Emergency towing

Front
If towing is necessary, we recommend you to have it done by your Scion dealer or a commercial tow truck service. If a towing service is not available in an emergency, your vehicle may be temporarily towed by a cable or chain secured to either the emergency towing eyelet on the front or the rear of the vehicle. Use extreme caution when towing vehicles.
To install the towing eyelet, see "—Installing towing eyelet" on page 161.
NOTICE
Only use specified towing eyelet; otherwise your vehicle may be damaged.

Rear
A driver must be in the vehicle to steer it and operate the brakes.
Towing in this manner may be done only on hard-surfaced roads for a short distance and at low speeds. Also, the wheels, axles, drive train, steering and brakes must all be in good condition.

CAUTION
Use extreme caution when towing vehicles. Avoid sudden starts or erratic driving maneuvers which would place excessive stress on the emergency towing eyelets and towing cable or chain. The eyelets and towing cable or chain may break and cause serious injury or damage.
NOTICE
Use only a cable or chain specifically intended for use in towing vehicles. Securely fasten the cable or chain to the towing eyelet provided.
Before towing, release the parking brake and put the transmission in neutral (manual) or "N" (automatic). The key must be in "ACC" (engine off) or "ON" (engine running).
CAUTION
If the engine is not running, the power assist for the brakes and steering will not work so steering and braking will be much harder than usual.
—Installing towing eyelet

- Remove the towing eyelet cover on the bumper, using a flat-bladed screwdriver which is wrapped with a cloth.

- Use the towing eyelet in the tool bag. Secure it to the hole on the bumper by turning clockwise. (For the tool bag storage location, see “—Required tools and spare tire” on page 151.)
If you cannot shift automatic transmission selector lever

- Tighten the towing eyelet securely by a wheel nut wrench.
CAUTION
When installing the eyelet on the vehicle, be sure to tighten the eyelet securely. If the eyelet is loose, it may come off when being towed and result in death or serious injury.

If you cannot move the selector lever out of "P" position to other positions even though the brake pedal is depressed, use the shift lock override button as follows:
- Turn the ignition key to "LOCK" position. Make sure the parking brake is applied.
- Pry up the cover with a flat-bladed screwdriver or equivalent.

-
Insert your finger into the hole to push down the shift lock override button. You can move out of "P" position only while pushing the button.
-
Shift into "N" position.
- Insert the cover.
- Start the engine. For your safety, keep the brake pedal depressed.
Be sure to have the system checked by your Scion dealer as soon as possible.
If you lose your keys
You can purchase a new key at your Scion dealer if you can give them the key number.
See the suggestion given in "Keys" on page 8.
If your keys are locked in the vehicle and you cannot get a duplicate, many Scion dealers can still open the door for you, using their special tools. If you must break a window to get in, we suggest breaking the smallest side window because it is the least expensive to replace. Be extremely cautious to avoid cuts from the glass.
SECTION 5
CORROSION PREVENTION AND APPEARANCE CARE
Protecting your Scion from corrosionn 166
Washing and waxing your Scion 167
Cleaning the interior 169
Protecting your Scion from corrosion
Scion, through its diligent research, design and use of the most advanced technology available, helps prevent corrosion and provides you with the finest quality vehicle construction. Now, it is up to you. Proper care of your Scion can help ensure long-term corrosion prevention.
The most common causes of corrosion to your vehicle are:
●The accumulation of road salt, dirt and moisture in hard-to-reach areas under the vehicle.
● Chipping of paint, or undercoating caused by minor accidents or by stones and gravel.
Care is especially important if you live in particular areas or operate your vehicle under certain environmental conditions:
●Road salt or dust control chemicals will accelerate corrosion, as will the presence of salt in the air near the sea-coast or in areas of industrial pollution.
●High humidity accelerates corrosion especially when temperatures range just above the freezing point.
- Wetness or dampness to certain parts of your vehicle for an extended period of time, may cause corrosion even though other parts of the vehicle may be dry.
●High temperatures will cause corrosion to those components of the vehicle which do not dry quickly due to lack of proper ventilation.
The above signifies the necessity to keep your vehicle, particularly the underside, as clean as possible and to repair any damage to paint or protective coatings as soon as possible.
To help prevent corrosion on your Scion, follow these guidelines:
Wash your vehicle frequently. It is, of course, necessary to keep your vehicle clean by regular washing, but to prevent corrosion, the following points should be observed: - If you drive on salted roads in the winter or if you live near the ocean, you should hose off the undercarriage at least once a month to minimize corrosion.
●High pressure water or steam is effective for cleaning the vehicle's underside and wheel housings. Pay particular attention to these areas as it is difficult to see all the mud and dirt. It will do more harm than good to simply wet the mud and debris without removing. The lower edge of doors, rocker panels and frame members have drain holes which should not be allowed to clog with dirt as trapped water in these areas can cause corrosion.
●Wash the underside of the vehicle thoroughly when winter is over.
See "Washing and waxing your Scion" for more tips.
Check the condition of your vehicle's paint and trim. If you find any chips or scratches in the paint, touch them up immediately to prevent corrosion from starting. If the chips or scratches have gone through the bare metal, have a qualified body shop make the repair.
Washing and waxing your Scion
Check the interior of your vehicle. Water and dirt can accumulate under the floor mats and could cause corrosion. Occasionally check under the mats to make sure the area is dry. Be particularly careful when transporting chemicals, cleansers, fertilizers, salt, etc.; these should be leak should occur, immediately clean and dry the area.
Use mud shields on your wheels. If you drive on salted or gravel roads, mud shields help protect your vehicle. Full-size shields, which come as near to the ground as possible, are the best. We recommend that the fittings and the area where the shields are installed be treated to resist corrosion. Your Scion dealer will be happy to assist in supplying and installing the shields if they are recommended for your area.
Keep your vehicle in a well ventilated garage or a roofed place. Do not park your vehicle in a damp, poorly ventilated garage. If you wash your vehicle in the garage, or if you drive it covered with water or snow, your garage may be so damp and it will cause corrosion. Even if your garage is heated, a wet vehicle can corrode if the ventilation is poor.
Washing your Scion
Keep your vehicle clean by regular washing.
The following cases may cause weakness to the paint or corrosion to the body and parts. Wash your vehicle as soon as possible transported in proper containers. If a spill or
●When driving in a coastal area
- When driving on a road sprinkled with antifreeze
- When having coal tar, tree sap, bird droppings and carcass of an insect
- When driving in the areas where there is a lot of smoke, soot, dust, iron dust and chemical substances
- When the vehicle becomes remarkably dirty with dust and mud
Hand-washing your Scion
Work In the shade and wait until the vehicle body is not hot to the touch.
| CAUTION |
| When cleaning under floor or chassis,be careful not to injure your hands. |
-
Rinse off loose dirt with a hose. Remove any mud or road salt from the underside of the vehicle or in the wheel wells.
-
Wash with a mild car-wash soap, mixed according to the manufacturer's instructions. Use a soft cotton mitt and keep it wet by dipping it frequently into the wash water. Do not rub hard—let the soap and water remove the dirt.
Fuel filler door: Do not apply water (high-pressure car wash, for example) at or near the fuel tank inlet with the fuel filler door opened. If the water enters the air vent, you may experience trouble with refueling or rough engine idling.
Plastic bumpers: Wash carefully. Do not scrub with abrasive cleaners. The bumper faces are soft.
Road tar: Remove with turpentine or cleaners that are marked safe for painted surfaces.
NOTICE
Do not use organic substances (gasoline, kerosene, benzine or strong solvents), which may be toxic or cause damage.
- Rinse thoroughly—dried soap can cause streaking. In hot weather you may need to rinse each section right after you wash it.
- To prevent water spots, dry the vehicle using a clean soft cotton towel. Do not rub or press hard—you might scratch the paint.
Automatic car wash
Your vehicle may be washed in an automatic car wash, but remember that the paint can be scratched by some types of brushes, unfiltered washing water, or the washing process itself. Scratching reduces paint durability and gloss, especially on darker colors. The manager of the car wash should be able to advise you whether the process is safe for the paint on your vehicle.
NOTICE
To prevent damage to the antenna, make sure it is removed before driving your Scion through an automatic car wash.
Waxing your Scion
Polishing and waxing is recommended to maintain the original beauty of your Scion's finish.
Apply wax once a month or if the vehicle surface does not repel water well.
- Always wash and dry the vehicle before you begin waxing, even if you are using a combined cleaner and wax.
- Use a good quality polish and wax. If the finish has become extremely weathered, use a car-cleaning polish, followed by a separate wax. Carefully follow the manufacturer's instructions and precautions. Be sure to polish and wax the chrome trim as well as the paint.
- Wax the vehicle again when water does not bead but remains on the surface in large patches.
NOTICE
Always remove the plastic bumpers if your vehicle is re-painted and placed in a high heat paint waxing booth. High temperatures could damage the bumpers.
Cleaning the interior
CAUTION
●Vehicles with side airbags:
Be careful not to splash water or spill liquid on the floor. This may prevent the slide airbags from activating correctly, resulting in serious injury.
- Do not wash the vehicle floor with water, or allow water to get onto the floor when cleaning the vehicle interior or exterior. Water may get into audio components or other electrical components above or under the floor carpet (or mat) and cause a malfunction; and it may cause body corrosion.
Vinyl interior
The vinyl upholstery may be easily cleaned with a mild soap or detergent and water.
First vacuum over the upholstery to remove loose dirt. Then, using a sponge or soft cloth, apply the soap solution to the vinyl. After allowing it to soak in for a few minutes to loosen the dirt, remove the dirt and wipe off the soap with a clean damp cloth. If all the dirt do not come off, repeat the procedure. Commercial foaming-type vinyl cleaners are also available which work well. Follow the manufacturer's instructions.
NOTICE
Do not use solvent, thinner, gasoline or window cleaner on the interior.
Carpets
Use a good foam-type shampoo to clean the carpets.
Begin by vacuuming thoroughly to remove as much dirt as possible. Several types of foam cleaners are available; some are in aerosol cans and others are powders or liquids which you mix with water to produce a foam. To shampoo the carpets, use a sponge or brush to apply the foam. Rub in overlapping circles.
Do not apply water—the best results are obtained by keeping the carpet as dry as possible. Read the shampoo instructions and follow them closely.
Seat belts
The seat belts may be cleaned with mild soap and water or with lukewarm water.
Use a cloth or sponge. As you are cleaning, check the belts for excessive wear, fraying, or cuts.
NOTICE
◆Do not use dye or bleach on the belts—it may weaken them.
◆Do not use the belts until they become dry.
Windows
The windows may be cleaned with any household window cleaner.
NOTICE
When cleaning the inside of the rear window, be careful not to scratch or damage the heater wires or connectors.
Air conditioning control panel, instrument panel, console panel, and switches
Use a soft damp cloth for cleaning.
Soak a clean soft cloth in water or lukewarm water then lightly wipe off dirt.
NOTICE
◆Do not use organic substances (solvents, kerosene, alcohol, gasoline, etc.) or alkaline or acidic solutions. These chemicals can cause discoloring, staining or peeling of the surface.
◆If you use cleaners or polishing agents, make sure their ingredients do not include the substances mentioned above.
If you use a liquid car freshener, do not spill the liquid onto the vehicle's interior surfaces. It may contain the ingredients mentioned above. Immediately clean any spill using the method mentioned above.
If you have any questions about the cleaning of your Scion, your local Scion dealer will be pleased to answer them.
SECTION

VEHICLE MAINTENANCE AND CARE
Maintenance requirementss 172
General maintenance 173
Does your vehicle need repairing? 175
Emissions inspection and maintenance (I/M) programs ..... 176
For scheduled maintenance information, please refer to the "Scheduled Maintenance Guide".
Maintenance requirements
Your Scion vehicle has been designed for fewer maintenance requirements with longer service Intervals to save both your time and money. However, each regular maintenance, as well as day-to-day care, is more important than ever before to ensure smooth, trouble-free, safe, and economical drivings.
It is the owner's responsibility to make sure the specified maintenance, including general maintenance service, is performed. Note that both the new vehicle and emission control system warranties specify that proper maintenance and care must be performed. See "Owner's Warranty Information Booklet" for complete warranty information.
General maintenance
General maintenance items are those day-to-day care practices that are important to your vehicle for proper operation. It is the owner's responsibility to insure that the general maintenance items are performed regularly.
These checks or inspections can be done either by yourself or a qualified technician, or if you prefer, your Scion dealer will be pleased to do them at a nominal cost.
Scheduled maintenance
The scheduled maintenance items listed in the "Scheduled Maintenance Guide" are those required to be serviced at regular intervals.
For details of your maintenance schedule, read the "Scheduled Maintenance Guide".
It is recommended that any replacement parts used for maintenance or for the repair of the emission control system be Scion supplied.
The owner may elect to use non-Scion supplied parts for replacement purposes without invalidating the emission control system warranty. However, use of replacement parts which are not of equivalent quality may impair the effectiveness of the emission control systems.
You may also elect to have maintenance, replacement, or repair of the emission control devices and system performed by any automotive repair establishment or Individual without invalidating this warranty. See "Owner's Warranty Information Booklet" for complete warranty information.
Where to go for service?
Scion technicians are well-trained specialists and are kept up to date with the latest service information through technical bulletins, service tips, and In-dealership training programs. They learn to work on Scions before they work on your vehicle, rather than while they are working on it.
You can be confident that your Scion dealer's service department performs the best job to meet the maintenance requirements on your vehicle—reliably and economically.
Your copy of the repair order is proof that all required maintenance has been performed for warranty coverage. If any problems should arise with your vehicle while under warranty, your Scion dealer will promptly take care of it. Again, be sure to keep a copy of the repair order for any service performed on your Scion.
What about do-it-yourself maintenance?
Many of the maintenance items are easy to do yourself if you have a little mechanical ability and a few basic automotive tools. Simple Instructions for how to perform them are presented on page 177.
If you are a skilled do-it-yourself mechanic, the Scion service manuals are recommended. Please be aware that do-it-yourself maintenance can affect your warranty coverage. See "Owner's Warranty Information Booklet" for the details.
General maintenance
Listed below are the general maintenance items that should be performed as frequently as specified. In addition to checking the items listed, if you notice any unusual noise, smell or vibration, you should investigate the cause or take your vehicle to your Scion dealer or a qualified service shop immediately. It is recommended that any problem you notice be brought to the attention of your dealer or the qualified service shop for their advice.
| CAUTION |
| Make these checks only with ade-quate ventilation if you run the engine. |
IN THE ENGINE COMPARTMENT
Items listed below should be checked from time to time, e.g. each time when refueling.
Washer fluid
Make sure there is sufficient fluid in the tank. See page 203 for additional information.
Engine coolant level
Make sure the coolant level is between the "FULL" and "LOW" lines on the see-through reservoir when the engine is cold. See page 188 for additional information.
Radiator, condenser, and hoses
Check that the front of the radiator and condenser are clean and not blocked with leaves, dirt or insects. See page 189 for additional information.
Battery electrolyte level
Your Sclon has a maintenance free battery. You do not have to add distilled water. For longer life of the battery, however, see page 202 for additional information.
Brake fluid level
Make sure the brake fluid level is correct. See page 189 for additional information.
Engine oil level
Check the level on the dipstick with the engine turned off and the vehicle parked on a level spot. See page 186 for additional information.
Power steering fluid level
Check the level through the reservoir. The level should be in the "HOT" or "COLD" range depending on the fluid temperature. See page 190 for additional information.
Exhaust system
If you notice any change in the sound of the exhaust or smell exhaust fumes, have the cause located and corrected immediately. (See "Engine exhaust cautions" on page 115.)
INSIDE THE VEHICLE
Items listed below should be checked regularly, e.g. while performing periodic services, cleaning the vehicle, etc.
Lights
Make sure the headlights, stop lights, tall lights, turn signal lights, and other lights are all working. Check headlight aim.
Service reminder indicators and warning buzzers
Check that all service reminder Indicators and warning buzzers function properly.
Steering wheel
Check that it has specified free play. Be alert for changes in steering condition, such as hard steering or strange noise.
Seats
Check that all front seat controls such as seat adjusters, seatback recliner, etc. operate smoothly and that all latches lock securely in any position. Check that the head restraints move up and down smoothly and that the locks hold securely in any latched position. For folding-down rear seatbacks, check that the latches lock securely.
Seat belts
Check that the seat belt system such as buckles, retractors and anchors operate properly and smoothly. Make sure the belt webbing is not cut, frayed, worn or damaged.
Accelerator pedal
Check the pedal for smooth operation and uneven pedal effort or catching.
Clutch pedal
Check the pedal for smooth operation.
Brake pedal
Check the pedal for smooth operation and that the pedal has the proper clearance. Check the brake booster function.
Brakes
At a safe place, check that the brakes do not pull to one side when applied.
Parking brake
Check that the lever has the proper travel and that, on a safe incline, your vehicle is held securely with only the parking brake applied.
Automatic transmission "Park" mechanism
Check the lock release button of the selector lever for proper and smooth operation. On a safe incline, check that your vehicle is held securely with the selector lever in "P" position and all brakes released.
OUTSIDE THE VEHICLE
Items listed below should be performed from time to time, unless otherwise specified.
Fluid leaks
Check underneath for leaking fuel, oil, water or other fluid after the vehicle has been parked for a while. If you smell fuel fumes or notice any leak, have the cause found and corrected immediately.
Doors and engine hood
Check that all the side doors and back door operate smoothly and all latches lock securely. Make sure the engine hood secondary latch secures the hood from opening when the primary latch is released.
Tire inflation pressure
Check the pressure with a gauge every two weeks, or at least once a month. See page 191 for additional information.
Tire surface and wheel nuts
Check the tires carefully for cuts, damage or excessive wear. See page 194 for additional information. When checking the tires, make sure no nuts are missing, and check the nuts for looseness. Tighten them if necessary.
Tire rotation
Rotate the tires according to the maintenance schedule. (For scheduled maintenance information, please refer to the "Scheduled Maintenance Guide".) See page 196 for additional information.
Does your vehicle need repairing?
Be on the alert for changes in performance, sounds, and visual tip-offs that indicate service is needed. Some important clues are as follows:
●Engine missing, stumbling, or pinging
●Appreciable loss of power
●Strange engine noises
●A fluid leak under the vehicle (however, water dripping from the air conditioning after use is normal.)
- Change in exhaust sound (This may indicate a dangerous carbon monoxide leak. Drive with the windows open and have the exhaust system checked immediately.)
- Flat-looking tire; excessive tire squeal when cornering; uneven tire wear
●Vehicle pulls to one side when driving straight on a level road
●Strange noises related to suspension movement
- Loss of brake effectiveness; spongy feeling brake or clutch pedal; pedal almost touches floor; vehicle pulls to one side when braking
●Engine coolant temperature continually higher than normal
If you notice any of these clues, take your vehicle to your Scion dealer as soon as possible. It probably needs adjustment or repair.
CAUTION
Do not continue driving with the vehicle unchecked. It could result in serious vehicle damage and possibly personal injury.
Emissions inspection and maintenance (I/M) programs
Some states have vehicle emission inspection programs which include OBD (On-Board Diagnostics) checks.
The OBD system monitors the operation of the emission control system. When the OBD system determines that a problem exists somewhere in the emission control system, the malfunction indicator lamp comes on. In this case, your vehicle may not pass the I/M test and need to be repaired. Contact your Scion dealer to service the vehicle.
Even if the malfunction indicator lamp does not come on, your vehicle may not pass the I/M test as readiness codes have not been set in the OBD system.
Readiness codes are automatically set during ordinary driving. However, when the battery is disconnected or run down, the codes are erased. Also, depending on your driving habits, the codes may not be completely set.
Also, if the malfunction indicator lamp had come on recently due to temporary malfunction such as a loose fuel tank cap, your vehicle may not pass the I/M test.
The malfunction indicator lamp will go off after taking several driving trips, but the error code in the OBD system will not be cleared unless about 40 trips or more are taken.
If your vehicle does not pass the I/M test even the malfunction indicator lamp does not come on, contact your Scion dealer to prepare the vehicle for re-testing.
SECTION 7-1
DO-IT-YOURSELF MAINTENANCE
Introduction
Engine compartment overview 178
Fuse locations 179
Do-it-yourself service precautions 179
Parts and tools 181
Positioning the jack 182
Engine compartment overview

- Windshield washer fluid tank
- Power steering fluid reservoir
- Engine oil filler cap
- Engine oil level dipstick
- Brake fluid reservoir
- Battery
- Fuse block
- Engine coolant reservoir
- Electric cooling fan
- Radiator
Fuse locations
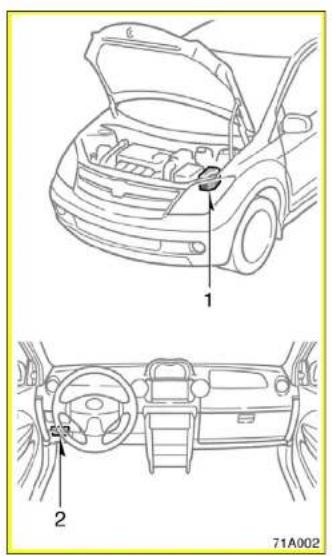


Do-it-yourself service precautions
If you perform maintenance by yourself, be sure to follow the correct procedure given in this section.
You should be aware that improper or incomplete servicing may result in operating problems.
Performing do-it-yourself maintenance during the warranty period may affect your warranty coverage. Read the separate Scion Warranty statement for details and suggestions.
This section gives instructions only for those items that are relatively easy for an owner to perform. As explained in Section 6, there are still a number of items that must be done by a qualified technician with special tools.
For information on tools and parts for do-it-yourself maintenance, see "Parts and tools" on page 181.
Ulmost care should be taken when working on your vehicle to prevent accidental injury. Here are a few precautions that you should be especially careful to observe:
CAUTION
- When the engine is running, keep hands, clothing, and tools away from the moving fan and engine drive belts. (Removing rings, watches, and ties is advisable.)
●Right after driving, the engine compartment—the engine, radiator, exhaust manifold and spark plug boots, etc.—will be hot. So be careful not to touch them. Oil, fluids and spark plugs may also be hot. - If the engine is hot, do not remove the radiator cap or loosen the drain plugs to prevent burning yourself.
- Do not smoke, cause sparks or allow open flames around fuel or the battery. Their fumes are flammable.
-
Be extremely cautious when working on the battery. It contains poisonous and corrosive sulfuric acid.
●Warning: Battery posts, terminals and related accessories contain lead and lead compounds, chemicals known to the State of California to cause cancer and reproductive harm. Wash hands after handling. -
Do not get under your vehicle with just the body jack supporting it. Always use automotive jack stands or other solid supports.
- Be sure that the ignition is off if you work near the electric cooling fans or radiator grille. With the ignition on, the electric cooling fans will automatically start to run if the engine coolant temperature is high and/or the air conditioning is on.
- Use eye protection whenever you work on or under your vehicle where you may be exposed to flying or falling material, fluid spray, etc.
●Used engine oil contains potentially harmful contaminants which may cause skin disorders such as inflammation or skin cancer, so care should be taken to avoid prolonged and repeated contact with it. To remove used engine oil from your skin, wash thoroughly with soap and water. -
Do not leave used oil within the reach of children.
-
Dispose of used oil and filter only in a safe and acceptable manner. Do not dispose of used oil and filter in household trash, in sewers or onto the ground. Call your dealer or a service station for information concerning recycling or disposal.
●Take care when filling the brake and clutch fluid reservoirs because brake fluid can harm your eyes and damage painted surfaces. If fluid gets in your eyes, flush your eyes with clean water immediately. If you still feel uncomfortable with your eyes, go to the doctor.
NOTICE
◆Remember that battery and ignition cables carry high currents or voltages. Be careful of accidentally causing a short circuit.
◆Add only demineralized or distilled water to fill the radiator. And if you spill some of the coolant, be sure to wash off with water to prevent it from damaging the parts or paint.
◆Do not allow dirt or anything else to fall through the spark plugholes.
◆Use only spark plugs of the specified type. Using other types will cause engine damage, loss of performance or radio noise.
◆Do not overfill automatic transmission fluid, or the transmission could be damaged.
◆Do not drive with the air cleaner filter removed, or excessive engine wear could result. Also backfiring could cause a fire in the engine compartment.
◆Be careful not to scratch the glass surface with the wiper frame.
When closing the engine hood, check to see that you have not forgotten any tools, rags, etc.
Parts and tools
Here is a list of parts and tools you will need to perform do-it-yourself maintenance. Remember all Sclon parts are designed in metric sizes, so your tools must be metric.
CHECKING THE ENGINE OIL LEVEL
Parts (if level is low):
● "Genuine Motor Oil" or equivalent. See page 187 for details about engine oil selection.
Tools:
●Rag or paper towel
●Funnel (only for adding oil)
CHECKING THE ENGINE COOLANT LEVEL
Parts (if level is low):
• "Toyota Super Long Life Coolant" is filled in your Scion vehicle at factory fill. In order to avoid technical problems, only use "Toyota Super Long Life Coolant" or similar high quality ethylene glycol based non-silicate, non-amine, non-nitrite, and non-borate coolant with long-life hybrid organic acid technology. See page 188 for details about coolant type selection.
●Demineralized or distilled water
Tools:
●Funnel (only for adding coolant)
Parts (If level is low):
●SAE J1703 or FMVSS No.116 DOT 3 brake fluid
Tools:
●Rag or paper towel
●Funnel (only for adding fluid)
CHECKING POWER STEERING FLUID
Parts (If level is low):
●Automatic transmission fluid DEXRON®II or III
Tools:
●Rag or paper towel
●Funnel (only for adding fluid)
CHECKING BATTERY CONDITION
Tools:
●Warm water
●Baking soda
• Grease
●Conventional wrench (for terminal clamp bolts)
CHECKING AND REPLACING FUSES
Parts (If replacement is necessary):
●Genuine fuse or equivalent with same amperage rating as original
ADDING WASHER FLUID
Parts:
Water
●Washer fluid containing antifreeze (for winter use)
Tools:
●Funnel (only for adding washer fluid)
REPLACING LIGHT BULBS
Parts:
- Bulb with same number and wattage rating as original (See the table in "Replacing light bulbs" on page 204.)
Positioning the jack
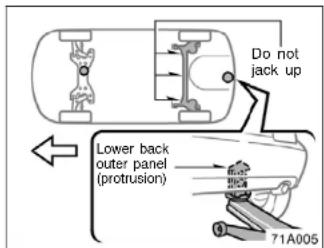
When jacking up your vehicle with the jack, position the jack correctly as shown in the illustration.
Jack position.....

Front—Front suspension member Rear—Lower back outer panel

CAUTION
When jacking, be sure to observe the following to reduce the possibility of personal injury:
●Follow Jacking Instructions.
- Do not put any part of your body under the vehicle supported by a jack. Personal Injury may occur.
- Do not start or run the engine while your vehicle is supported by the jack.
- Stop the vehicle on a level firm ground, firmly set the parking brake and put the transmission in "P" (automatic) or reverse (manual).
●Make sure to set the jack properly in the jack point. Raising the vehicle with jack improperly positioned will damage the vehicle or may allow the vehicle to fall off the jack and cause personal injury.
●Never get under the vehicle when the vehicle is supported by the jack alone; use vehicle support stands.
- Do not raise the vehicle with someone in the vehicle.
- When raising the vehicle, do not place any objects on top of or underneath the jack.
NOTICE
Make sure to place the jack correctly, or your vehicle may be damaged.
SECTION 7-2
DO-IT-YOURSELF MAINTENANCE
Engine and Chassis
Checking the engine oil level 186
Checking the engine coolant level 188
Checking the radiator and condenser 189
Checking brake fluid 189
Checking power steering fluid 190
Checking tire inflation pressure 191
Checking and replacing tires 194
Rotating tires 196
Installing snow tires and chains 196
Replacing wheels 198
Checking the engine oil level

With the engine at operating temperature and turned off, check the oil level on the dipstick.
- To get a true reading, the vehicle should be on a level ground. After turning off the engine, wait a few minutes for the oil to drain back into the bottom of the engine.
- Pull the dipstick out, hold a rag under the end and wipe it clean.
- Reinsert the dipstick—Push it in as far as it will go, or the reading will not be correct.
- Pull the dipstick out and look at the oil level while holding a rag under the end.
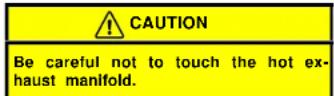
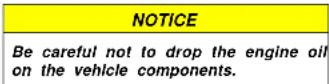
If the oil level is below or only slightly above the low level, add engine oil of the same type as already in the engine. Remove the oil filler cap and add engine oil in small quantities at a time, checking the dipstick. We recommend that you use a funnel when adding oil.
The approximate quantity of oil needed to fill between the low level and the full level on the dipstick is indicated below for reference.
When the level reaches within the correct range, install the filler cap hand-tight.
Oil quantity, L (qt., Imp. qt.): 1.5 (1.6, 1.3)
| NOTICE |
| ◆Be careful not to spill the engine oil on the vehicle components. ◆Avoid overfilling, or the engine could be damaged. ◆Check the oil level on the dipstick once again after adding the oil. |
ENGINE OIL SELECTION
"Genuine Motor Oil" is filled in your Scion vehicle. Use Scion approved "Genuine Motor Oil" or equivalent to satisfy the following grade and viscosity.
Oil grade:
API grade SL "Energy-Conserving" or ILSAC multigrade engine oil.
Recommended viscosity:
SAE 5W-30

SAE 5W-30 Is the best choice for good fuel economy, and good starting in cold weather.
If SAE 5W-30 oil is not available, SAE 10W-30 oil may be used. However, it should be replaced with SAE 5W-30 at the next oil change.

API service symbol
ILSAC certification mark
Oil Identification marks
Either or both API registered marks are added to some oil containers to help you select the oil you should use.
The API Service Symbol is located anywhere on the outside of the container.
The top portion of the label shows the oil quality by API (American Petroleum Institute) designations such as SL. The center portion of the label shows the SAE viscosity grade such as SAE 5W-30. "Energy-Conserving" shown in the lower portion, indicates that the oil has fuel-saving capabilities.
The ILSAC (International Lubricant Standardization and Approval Committee) Certification Mark is displayed on the front of the container.
To ensure excellent lubrication performance for your engine, "Genuine Motor Oil" is available, which has been specifically tested and approved for all Scion engines.
Please contact your Scion dealer for further details about "Genuine Motor Oil".
Checking the engine coolant level
Look at the see-through coolant reservoir when the engine is cold. The coolant level is satisfactory if it is between the "FULL" and "LOW" lines on the reservoir. If the level is low, add the coolant. (For the coolant type, see "Coolant type selection" described below.)
The coolant level in the reservoir will vary with engine temperature. However, if the level is on or below the "LOW" line, add coolant. Bring the level up to the "FULL" line.
Always use ethylene–glycol type coolant for a proper corrosion protection of aluminum components. See information in the next column.
If the coolant level drops within a short time after replenishing, there may be a leak in the system. Visually check the radiator, hoses, engine coolant filler cap, radiator cap and drain cock and water pump.
If you can find no leak, have your Scion dealer test the cap pressure and check for leaks in the cooling system.

CAUTION
To prevent burning yourself, do not remove the radiator cap when the engine is hot.
Coolant type selection
Use of improper coolants may damage your engine cooling system.
Only use "Toyota Super Long Life Coolant" or similar high quality ethylene glycol based non-silicate, non-amine, non-nitrite, and non-borate coolant with long-life hybrid organic acid technology. (Coolant with long-life hybrid organic acid technology consists of the combination of low phosphates and organic acids.)
"Toyota Super Long Life Coolant" is pre-mixed with 50% coolant and 50% distilled water. This coolant provides protection down to about -35°C ( -31°F ).
NOTICE
Do not use plain water alone.
Checking the radiator and condenser
Scion recommends "Toyota Super Long Life Coolant" which has been tested to ensure that it will not cause corrosion nor result in malfunction of your engine coolant system with proper usage. "Toyota Super Long Life Coolant" is formulated with long-life hybrid organic acid technology and has been specifically designed to avoid engine cooling system malfunction on Scion vehicles.
"Toyota Super Long Life Coolant" is pre-mixed with 50% coolant and 50% distilled water. This coolant provides protection down to about -35°C (-31°F).
Please contact your Scion dealer for further details.
If either of the above parts are extremely dirty or you are not sure of their condition, take your vehicle to a Scion dealer.

Checking brake fluid

To check the fluid level, simply look at the see-through reservoir. The level should be between the "MAX" and "MIN" lines on the reservoir.
It is normal for the brake fluid level to go down slightly as the brake pads wear. So be sure to keep the reservoir filled.
If the reservoir needs frequent refilling, it may indicate a serious mechanical problem.
If the level is low, add SAE J1703 or FMVSS No.116 DOT 3 brake fluid to the brake reservoir.
Checking power steering fluid
Remove and replace the reservoir cap by hand. Fill the brake fluid up to the "MAX" line. This brings the fluid to the correct level when you put the cap back on. Use only newly opened brake fluid. Once opened, brake fluid absorbs moisture from the air, and excess moisture can cause a dangerous loss of braking.
CAUTION
Take care when filling the reservoir because brake fluid can harm your eyes and damage painted surfaces. If fluid gets in your eyes, flush your eyes with clean water immediately. If you still feel uncomfortable with your eyes, go to the doctor.
NOTICE
If you spill some of the fluid, be sure to wash it off with water to prevent it from damaging the parts or paint.

Check the fluid level through the reservoir. If necessary, add automatic transmission fluid DEXRON®II or III.
If the vehicle has been driven around 80 km/h (50 mph) for 20 minutes (a little more in frigid temperatures), the fluid is hot (60°C—80°C or 140°F—175°F). You may also check the level when the fluid is cold (about room temperature, 10°C—30°C or 50°F—85°F) if the engine has not been run for about five hours.
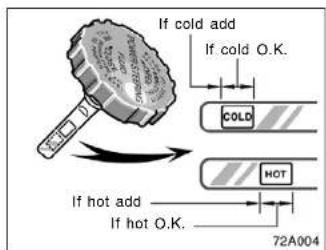
a. Clean all dirt from outside of the reservoir tank.
b. Remove the rubber cap.
c. Remove the reservoir cap by turning it counterclockwise and wipe the dipstick clean.
d. Reinstall the reservoir cap.
e. Remove the reservoir cap again and look at the fluid level. If the fluid is cold, the level should be in the "COLD" range on the dipstick. Similarly, if it is hot, the fluid level should be in the "HOT" range. If the level is at the low side of either range, add automatic transmission fluid DEXRON ® II or III to bring the level within the range.
f. After replacing the reservoir cap and rubber cap, visually check the steering box case, vane pump and hose connections for leaks or damage.

Checking tire inflation pressure

Keep your tire inflation pressures at the proper level.
The recommended cold tire inflation pressures, tire sizes and the combined weight of occupants and cargo (vehicle capacity weight) are described on page 212 and 215. They are also described on the tire and loading information label as shown. You should check the tire inflation pressures every two weeks, or at least once a month. And do not forget the spare!
The following instructions for checking tire inflation pressure should be observed:
●The pressure should be checked only when the tires are cold. If your vehicle has been parked for at least 3 hours and has not been driven for more than 1.5 km or 1 mile since, you will get an accurate cold tire inflation pressure reading.
●Always use a tire pressure gauge. The appearance of a tire can be misleading. Besides, tire inflation pressures that are even just a few pounds off can degrade ride and handling.
●Take special care when adding air to the compact spare tire. The smaller tire size can gain pressure very quickly. Add compressed air in small quantities and check the pressure often until it reaches the specified pressure.
- Do not bleed or reduce tire inflation pressure after driving. It is normal for the tire inflation pressure to be higher after driving.
●Never exceed the vehicle capacity weight. The passenger and luggage weight should be located so that the vehicle is balanced.

INSPECTION AND ADJUSTMENT PROCEDURE
- Remove the tire valve cap.
- Press the tip of the tire pressure gauge to the tire valve.
- Read the pressure using a graduation of the gauge.
-
In case that the tire inflation pressure is not within the prescribed range, insert the compressed air from the valve. In case of applying too much air, press the center of the valve and release the air to adjust.
-
After completing the tire inflation pressure measurement and adjustment, apply soap water to the valve and check the leakage.
- Install the tire valve cap. If the gauge and the air pump are not available, have your vehicle checked by your Scion dealer.
CAUTION
Be sure to reinstall the tire valve caps. Without the valve caps, dir or moisture could get into the valve core and cause air leakage. If the caps have been lost, have new ones put on as soon as possible.
Incorrect tire inflation pressure may waste fuel, reduce the comfort of driving, reduce tire life and make your vehicle less safe to drive.
If a tire frequently needs refilling, have it checked by your Scion dealer.
CAUTION
Keep your tires properly inflated. Otherwise, the following conditions may occur and cause an accident resulting in death or serious injuries.
Low tire pressure (underinflation)—
- Excessive wear
- Uneven wear
●Poor handling - Possibility of blowouts from overheated tire.
●Poor sealing of the tire bead
●Wheel deformation and/or tire separation
●A greater possibility of tire damage from road hazards
High tire pressure (overinflation)—
●Poor handling
- Excessive wear
- Uneven wear
•A greater possibility of tire damage from road hazards
Checking and replacing tires
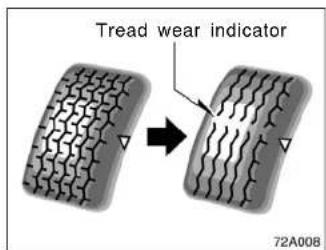
CHECKING YOUR TIRES
Check the tires tread for the tread wear indicators. If the indicators show, replace the tires. The location of the tread wear indicators is shown by the "TWI" or "Δ" marks, etc., molded on the sidewall of each tire.
The tires on your Scion have built-in tread wear indicators to help you know when the tires need replacement. When the tread depth wears to 1.6 mm (0.06 in.) or less, the indicators will appear. If you can see the indicators in two or more adjacent grooves, the tire should be replaced. The lower the tread, the higher the risk of skidding.
The effectiveness of snow tires is lost if the tread wears down below 4 mm (0.16 in.).
If you have tire damage such as cuts, splits, cracks deep enough to expose the fabric, or bulges indicating internal damage, the tire should be replaced.
If a tire often goes flat or cannot be properly repaired due to the size or location of a cut or other damage, it should be replaced. If you are not sure, consult with your Scion dealer.
If an air loss occurs while driving, do not continue driving with a deflated tire. Driving even a short distance can damage a tire beyond repair.
Any tires which are over 6 years old must be checked by a qualified technician even if damage is not obvious.
Tires deteriorate with age even if they have never or seldom been used.
This applies also to the spare tire and tires stored for future use.
REPLACING YOUR TIRES
When replacing a tire, use a tire of the same size and construction, and the same or greater maximum load as the originally installed tires.
Using any other size or type of tire may seriously affect handling, ride, speedometer/odometer calibration, ground clearance, and clearance between the body and tires or snow chains.
Check that the maximum load of the replaced tire is greater than 1/2 of the Gross Axle Weight Ratings (GAWR) of either the front axle or the rear axle, whichever greater. As for the maximum load of the tire, see the load limit at maximum cold tire inflation pressure mentioned on the sidewall of the tire, and as for the Gross Axle Weight Ratings (GAWR), see the Certification Label. For details about the sidewall of the tire and the Certification Label, see pages 123 and 121.
CAUTION
Observe the following instructions. Otherwise, an accident may occur resulting in death or serious injuries.
- Do not mix radial, bias belted, or bias-ply tires on your vehicle, as this may cause dangerous handling characteristics resulting in loss of control.
- Do not use tires other than the manufacturer's recommended size, as this may cause dangerous handling characteristics resulting in loss of control.
Scion recommends all four tires, or at least both of the front or rear tires be replaced at a time as a set. See "If you have a flat tire" on page 148 for tire change procedure.
When a tire is replaced, the wheel should always be balanced.
An unbalanced wheel may affect vehicle handling and tire life. Wheels can get out of balance with regular use and should therefore be balanced occasionally.
When replacing a tubeless tire, the air valve should also be replaced with a new one.
Rotating tires
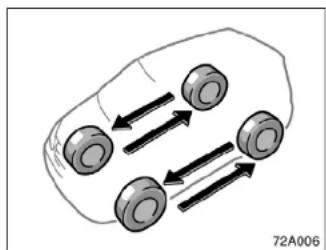
To equalize the wear and help extend tire life, Scion recommends that you rotate your tires according to the maintenance schedule. (For scheduled maintenance information, please refer to the "Scheduled Maintenance Guide".) However, the most appropriate timing for tire rotation may vary according to your driving habits and road surface conditions.
See "If you have a flat tire" on page 148 for tire change procedure.
When rotating tires, check for uneven wear and damage. Abnormal wear is usually caused by incorrect tire inflation pressure, improper wheel alignment, out-of-balance wheels, or severe braking.
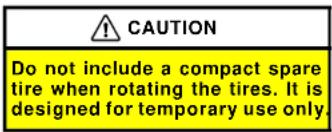
Installing snow tires and chains
WHEN TO USE SNOW TIRES OR CHAINS
Snow tires or chains are recommended when driving on snow or ice.
On wet or dry roads, conventional tires provide better traction than snow tires. SNOW TIRE SELECTION
If you need snow tires, select tires of the same size, construction and load capacity as the originally installed tires.
Do not use tires other than those mentioned above. Do not install studded tires without first checking local regulations for possible restrictions.

SNOW TIRE INSTALLATION
Snow tires should be installed on all wheels.
Installing snow tires on the front wheels only can lead to an excessive difference in road grip capability between the front and rear tires which could cause loss of vehicle control.
When storing removed tires you should store them in a cool dry place.
Mark the direction of rotation and be sure to install them in the same direction when replacing.
CAUTION
- Do not drive with the snow tires incorrectly inflated.
●Never drive over 120 km/h (75 mph) with any type of snow tires.
TIRE CHAIN SELECTION
Use the tire chains of correct size and type.
Use SAE Class "S" type radial tire chains except radial cable chains or V-bar type chains.
Regulations regarding the use of tire chains vary according to location or type of road, so always check the local regulations before installing chains.
CHAIN INSTALLATION
Install the chains on the front tires as tightly as possible. Do not use tire chains on the rear tires. Retighten chains after driving 0.5—1.0 km (1/4—1/2 mile).
When installing chains on your tires, carefully follow the instructions of the chain manufacturer.
If wheel covers are used, they will be scratched by the chain band, so remove the covers before putting on the chains.
CAUTION
- Do not exceed 50 km/h (30 mph) or the chain manufacturer's recommended speed limit, whichever is lower.
●Drive carefully avoiding bumps, holes, and sharp turns, which may cause the vehicle to bounce.
- Avoid sharp turns or locked-wheel braking, as use of chains may adversely affect vehicle handling.
- When driving with chains installed, be sure to drive carefully. Slow down before entering curves to avoid losing control of the vehicle. Otherwise an accident may occur.
NOTICE
Do not attempt to use a tire chain on the compact spare tire, as it may result in damage to the vehicle as well as the tire.
Replacing wheels
WHEN TO REPLACE YOUR WHEELS
If you have wheel damage such as bending, cracks or heavy corrosion, the wheel should be replaced.
If you fail to replace damaged wheels, the tire may slip off the wheel or cause loss of handling control.
WHEEL SELECTION
When replacing wheels, care should be taken to ensure that the wheels are replaced by ones with the same load capacity, diameter, rim width, and offset.
This must be observed on compact spare tires, too.
Correct replacement wheels are available at your Scion dealer.
A wheel of a different size or type may adversely affect handling, wheel and bearing life, brake cooling, speedometer/odometer calibration, stopping ability, headlight aim, bumper height, vehicle ground clearance, and tire or snow chain clearance to the body and chassis.
Replacement with used wheels is not recommended as they may have been subjected to rough treatment or high mileage and could fail without warning. Also, bent wheels which have been straightened may have structural damage and therefore should not be used. Never use an inner tube in a leaking wheel which is designed for a tubeless tire.
CAUTION
Observe the following Instructions. Otherwise, an accident may occur resulting in death or serious injuries.
Do not use wheels other than the manufacturer's recommended size, as this may cause dangerous handling characteristics resulting in loss of control.
SECTION 7-3
DO-IT-YOURSELF MAINTENANCE
Electrical components
Checking battery condition 200
Battery recharging precautions 202
Checking and replacing fuses 202
Adding washer fluid 203
Replacing light bulbs 204
Checking battery condition—Precautions
CAUTION
BATTERY PRECAUTIONS
The battery produces flammable and explosive hydrogen gas.
- Do not cause a spark from the battery with tools.
- Do not smoke or light a match near the battery.
The electrolyte contains poisonous and corrosive sulfuric acid.
●Avoid contact with eyes, skin or clothes.
●Never ingest electrolyte.
●Wear protective safety glasses when working near the battery.
- Keep children away from the battery.
EMERGENCY MEASURES
- If electrolyte gets in your eyes, flush your eyes with clean water immediately and get immediate medical attention. If possible, continue to apply water with a sponge or cloth while en route to the medical office.
- If electrolyte gets on your skin, thoroughly wash the contact area. If you feel pain or burning, get medical attention immediately.
- If electrolyte gets on your clothes, there is a possibility of its soaking through to your skin, so immediately take off the exposed clothing and follow the procedure above, if necessary.
- If you accidentally swallow electrolyte, drink a large quantity of water or milk. Follow with milk of magnesia, beaten raw egg or vegetable oil. Then go immediately for emergency help.
Warning: Battery posts, terminals and related accessories contain lead and lead compounds, chemicals known to the State of California to cause cancer and reproductive harm. Wash hands after handling.
—Checking battery exterior
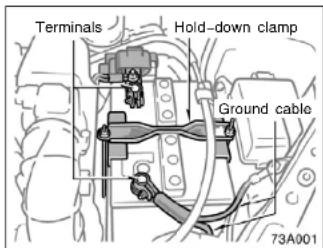
Check the battery for corroded or loose terminal connections, cracks, or loose hold-down clamp.
a. If the battery is corroded, wash it off with a solution of warm water and baking soda. Coat the outside of the terminals with grease to prevent further corrosion.
b. If the terminal connections are loose, tighten their clamp nuts—but do not overlighten.
c. Tighten the hold-down clamp only enough to keep the battery firmly in place. Overtightening may damage the battery case.
NOTICE
◆Be sure the engine and all accessories are off before performing maintenance.
When checking the battery, remove the ground cable from the negative terminal ("-" mark) first and reinstall it last.
◆Be careful not to cause a short circuit with tools.
◆Take care no solution gets into the battery when washing it.
—Checking battery condition
Type A
Green

Type B
Blue

Dark

White

Clear or light yellow


SU73002
| DARK WHITE | Charging necessary.Have battery checked by your Scion dealer. | |
| CLEAR or LIGHT YELLOW | RED | Have battery checked by your Scion dealer. |
CHECKING BY THE INDICATOR
Check the battery condition by the indicator color.
| Indicator color | Condition | |
| Type A Type B | ||
| GREEN BLUE Good | ||
Battery recharging precautions
During recharging, the battery is producing hydrogen gas.
Therefore, before recharging:
-
If recharging with the battery installed on the vehicle, be sure to disconnect the ground cable.
-
Be sure the power switch on the re charger is off when connecting the charger cables to the battery and when disconnecting them.
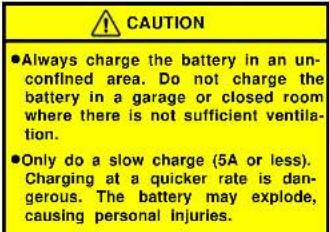
NOTICE
Never recharge the battery while the engine is running. Also, be sure all accessories are turned off.
Checking and replacing fuses
Type A

Good Blown
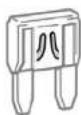
Type B
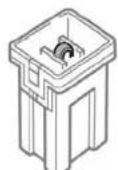
Good Blown
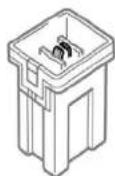
73A021

If the headlights or other electrical components do not work, check the fuses. If any of the fuses are blown, they must be replaced.
See "Fuse locations" on page 179 for locations of the fuses.
Turn the ignition switch and inoperative component off. Pull a suspected fuse straight out and check it.
Determine which fuse may be causing the problem. The lid of the fuse box shows the name of the circuit for each fuse. See page 216 for the functions controlled by each circuit.
Type A fuses can be pulled out by the pull-out tool. The location of the pull-out tool is shown in the illustration.
If you are not sure whether the fuse has blown, try replacing the suspected fuse with one that you know is good.
If the fuse has blown, push a new fuse into the clip.
Only install a fuse with the amperage rating designated on the fuse box lid.
If you do not have a spare fuse, in an emergency you can pull out the "A.C" fuse, which may be dispensable for normal driving, and use it if its amperage rating is the same.
If you cannot use one of the same amperage, use one that is lower, but as close as possible to, the rating. If the amperage is lower than that specified, the fuse might blow out again but this does not indicate anything wrong. Be sure to get the correct fuse as soon as possible and return the substitute to its original clip.
It is a good idea to purchase a set of spare fuses and keep them in your vehicle for emergencies.
If the new fuse immediately blows out, there is a problem with the electrical system. Have your Sclon dealer correct it as soon as possible.
| CAUTION |
| Never use a fuse with a higher am- perage rating, or any other object, in place of a fuse. This may cause ex- tensive damage and possibly a fire. |
Adding washer fluid
If any washer does not work, the washer tank may be empty. Add washer fluid.
You may use plain water as washer fluid. However, in cold areas where temperatures range below freezing point, use washer fluid containing antifreeze. This product is available at your Scion dealer and most auto parts stores. Follow the manufacturer's directions for how much to mix with water.
NOTICE
Do not use engine antifreeze or any other substitute because it may damage your vehicle's paint.
Replacing light bulbs—
The following illustrations show how to gain access to the bulbs. When replacing a bulb, make sure the ignition switch and light switch are off. Use bulbs with the wattage ratings given in the table.
CAUTION
●To prevent burning yourself, do not replace the light bulbs while they are hot.
●Halogen bulbs have pressurized gas inside and require special handling. They can burst or shatter if scratched or dropped. Hold a bulb only by its plastic or metal case. Do not touch the glass part of a bulb with bare hands.
NOTICE
Only use a bulb of the listed type.
The inside of the lens of exterior lights such as headlights may temporarily fog up when the lens becomes wet in the rain or in a car wash. This is not a problem because the fogging is caused by the temperature difference between the outside and Inside of the lens, just like the windshield fogged up in the rain. However, if there is a large drop of water on the inside of the lens, or if there is water pooled inside the light, contact your Scion dealer.
| Light bulbs | Bulb No. | W Type | |
| Headlights HB2 60/55 | A | ||
| Front turn signal lights | 7440 21 | B | |
| Parking lights — 5 B | |||
| Front side marker lights | — 3.8 | B | |
| Side turn signal lights | — 5 C | ||
| Rear turn signal lights | 7440 21 | B | |
| Stop/tail lights | 7443 21 | /5 | B |
| Back-up lights | 921 | 18 | B |
| License plate lights | — 5 B | ||
| High mounted stoplights | — 5 B | ||
| Front Interior light | — 8 D | ||
| Rear interior light | — 8 | D | |
| Auxiliary box light | — | 4.9 | D |
A: HB2 halogen bulbs
B: Wedge base bulbs
C: Wedge base bulbs (amber)
D: Double end bulbs
—Headlights

- Unplug the connector. Remove the rubber cover.
If the connector is tight, wiggle it.

- Release the bulb retaining spring and remove the bulb. Install a new bulb and the bulb retaining spring.
To install a bulb, align the labs of the bulb with the cutouts of the mounting hole.
—Front turn signal lights —Parking lights

- Install the rubber cover as shown and fit it securely on the boss. Plug in the connector.
Make sure the rubber cover fits securely on the connector and the headlight body. Alming is not necessary after replacing the bulb. When aiming adjustment is necessary, contact your Scion dealer.
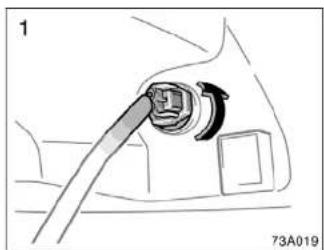


—Front side marker lights —Side turn signal lights
If either the left or right front side marker lights burns out, contact your Scion dealer.
NOTICE
Do not try to replace the front side marker light bulbs by yourself. You may damage the vehicle.


—Stop/tail, rear turn signal, back-up lights

![graph TD A["Component a"] --> B["Component b"] B --> C["Component c"] C --> D["Output 73A013"] style A fill:#f9f,stroke:#333 style B fill:#f9f,stroke:#333 style C fill:#f9f,stroke:#333 style D fill:#ccf,stroke:#333](/content/2026/05/941964/images/c06d2103d93e590063e6c2bbf7c0440432ab2b6e0903f9a1a2a8c132d798d2d3.jpg)
—License plate lights
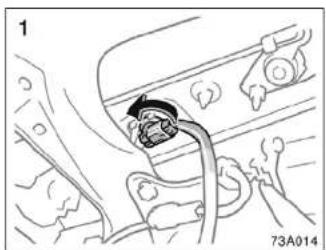
a: Rear turn signal light
b: Stop/tall light
c: Back-up light

c. Back-up light

—High mounted stoplights


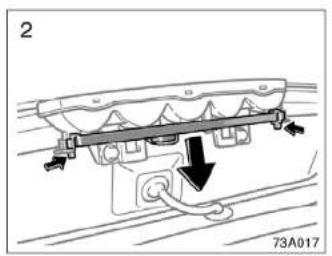
SECTION

SPECIFICATIONS
Dimensions and weightss 212
Engine 212
Fuel 212
Service specifications 213
Tires 215
Fuses 216
Dimensions and weights
Overall length mm (in.): 3915 (154.1)
Overall width mm (In.): 1695 (66.7)
Overall height mm (in.): 1530 (60.2)
Wheelbase mm (in.): 2370 (93.3)
Front tread mm (in.): 1455 (57.3)
Rear tread mm (in.): 1430 (56.3)
Vehicle capacity weight
(occupants+cargo) kg (lb.): 375 (825)
Engine
Model: 1NZ-FE
Type: 4 cylinder in line, 4 cycle, gasoline
Bore and stroke, mm (in.): 75.0 84.7 (2.95 3.33)
Displacement, cm 3 (cu. in.): 1497 (91.3)
Fuel
Fuel type: Unleaded gasoline, Octane Rating 87 (Research Octane Number 91) or higher
Fuel tank capacity, L (gal., Imp. gal.): 45 (11.9, 9.9)
Service specifications
ENGINE
| Valve clearance (engine cold), mm (in.): | API grade SL "Energy-Conserving" or | |
| Intake | 0.15—0.25 | (0.006—0.010)ILSAC multigrade engine oil |
| Exhaust | 0.25—0.35 | (0.010—0.014)Please contact your Scion dealer for fur- |
Spark plug type:
DENSO K16R-U
NGK BKR5EYA
Spark plug gap, mm(in.):
0.8 (0.031)
ENGINE LUBRICATION
Oil capacity (drain and refill), L (qt., Imp. qt.):
With filter 3.7 (3.9, 3.3)
Without filter 3.4 (3.6, 3.0)
"Genuine Motor Oil" is filled in your Scion vehicle. Use Scion approved "Genuine Motor Oil" or equivalent to satisfy the following grade and viscosity.
Oil grade:
| API grade SL "Energy-Conserving" or (10)ILSAC multigrade engine oilPlease contact your Scion dealer for further details. |
Recommended oil viscosity:
SAE 5W-30

COOLING SYSTEM
Total capacity, L (qt., Imp. qt.):
Manual transmission 4.4 (4.7, 3.9)
Automatic transmission 4.3 (4.5, 3.8)
Coolant type:
"Toyota Super Long Life Coolant" is filled in your Scion vehicle at factory fill. In order to avoid technical problems, only use "Toyota Super Long Life Coolant" or similar high quality ethylene glycol based non-silicate, non-amine, non-nitrite, and non-borate coolant with long-life hybrid organic acid technology.
Do not use plain water alone.
Please contact your Scion dealer for further details.
BATTERY
Open voltage ® at 20°C (68°F):
12.6—12.8 V Fully charged
12.2—12.4 V Half charged
11.8—12.0 V Discharged
* : Voltage that is checked 20 minutes after the key is removed with all the lights turned off
Charging rates: 5 A max.
CLUTCH
Pedal free play, mm (in.): 5—15 (0.2—0.6)
Fluid type
SAE J1703 or FMVSS No. 116 DOT 3
MANUAL TRANSAXLE
Oil capacity, L (qt., Imp. qt.):
1.9 (2.0, 1.7)
Oil type:
Gear oil API GL-4 or GL-5
Recommended oil viscosity:
SAE 75W-90
AUTOMATIC TRANSAXLE
Fluid capacity (drain and refill),
L (qt., Imp. qt.):
2.9 (3.1, 2.6)
Fluid type:
Genuine ATF Type T-IV
Change automatic transmission fluid only
as necessary.
Generally, it is necessary to change automatic transmission fluid only if your vehicle is driven under one of the Special Operating Conditions listed in your "Scheduled Maintenance Guide". When changing the automatic transmission fluid, use only "Genuine ATF Type T-IV" (ATF JWS3309 or NWS6500) to aid in assuring optimum transaxile performance.
Notice: Using automatic transmission fluid other than "Genuine ATF Type T-IV" may cause deterioration in shift quality, locking up of your transmission accompanied by vibration, and ultimately damage the automatic transmission of your vehicle.
BRAKES
Minimum pedal clearance when depressed
with the pressure of 490 N (50 kgf, 110
of) with the engine running, mm (in.):
50 (2.0)
Pedal free play, mm (In.):
1—6 (0.04—0.24)
Pad wear limit, mm (in.):
1.0 (0.04)
Lining wear limit, mm (in.):
1.0 (0.04)
Parking brake adjustment when pulled with
ne force of 196 N (20 kgf, 44 lbf):
6—9 clicks
Fluid type
SAE J1703 or FMVSS No. 116 DOT 3
STEERING
Wheel free play:
Less than 30 mm (1.2 in.)
Power steering fluid type:
Automatic transmission fluid DEXRON®II
or III
Tires
Tire size and cold tire inflation pressure:
Except spare tire
kPa (kgf/cm² or bar, psi)
| Tire size Front Rear Wheel size | ||
| P185/60R15 84T 200 (2.0, 29) 200 (2.0, 29) 15 x | 5 1/2 JJ |
Spare tire
| Tire size Tire inflation pressure kPa (kgf/cm 2 or bar, psi) Wheel size | |
| T125/70D16 96M 420 (4.2, 60) 16 x 4T | |
Wheel nut torque, N·m (kgf·m, ft·lbf):
103 (10.5, 76)
NOTE: For complete information on tires (e.g. replacing tires or replacing wheels), see "Checking tire inflation pressure" through "Replacing wheels", page 191 through 198.
Fuses

Engine compartment
![14 15 16 17 [18] [19] [20] [21] [22] [23] [24] [25] [26] [27] [28] [29] 81A002](/content/2026/05/941964/images/0f960c3e5b25391e94b7ce5c91554e9923d07c4279eac980a7f8fc52c2df6e55.jpg)
Instrument panel
Fuses
- RDI 30 A: Electric cooling fan
- HTR SUB1 50 A: Air conditioning system
- ABS NO.1 40 A: Anti-lock brake system
- DOME 15 A: Clock, interior light, gauges of meters
-
EFI 15 A: Multiport fuel injection system/sequential multiport fuel injection system
-
HORN 15 A: Horn
- AM2 15 A: Starter system, SRS airbag system, multiport fuel injection system/sequential multiport fuel injection system, discharge warning system
- ST 30 A: Starter system
- H-LP LH/H-LP LO LH 10 A: Left-hand headlight
- H-LP RH/H-LP LO RH 10 A: Right-hand headlight
-
A/C2 7.5 A: Air conditioning system
-
SPARE 30 A: Spare
- SPARE 15 A: Spare
- AM1 40 A: "ACC", "GAUGE", "WIPER", and "ECU-IG" fuses
- POWER 30 A: Power windows
- HTR 40 A: Air conditioning system
- DEF 30 A: Rear window defogger system.
- GAUGE 10 A: Back-up lights, charging system, air conditioning system, power window system, gauges of meters
- D/L 25 A: Power door lock system
- TAIL 10 A: Tail lights, parking lights, license plate lights
- WIPER 20 A: Windshield wipers and washer
- ECU-B 7.5 A: SRS airbag system
- FOG 15 A: Front fog lights
- ACC 15 A: Clock, cigarette lighter
- ECU-IG 7.5 A: Anti-lock brake system, electric cooling fan
-
OBD 7.5 A: On-board diagnosis system
-
HAZ 10 A: Turn signal lights, emergency flashers
- A.C 7.5 A: Air conditioning system
- STOP 10 A: Stop lights, high mounted stop light, anti-lock brake system, shift lock system, multiport fuel injection system/sequential multiport fuel injection system
SECTION 9
REPORTING SAFETY DEFECTS FOR U.S. OWNERS
Reporting safety defects for U.S. owners 220
Reporting safety defects for U.S. owners
If you believe that your vehicle has a defect which could cause a crash or could cause injury or death, you should immediately inform the National Highway Traffic Safety Administration (NHTSA) in addition to notifying Toyota Motor Sales, U.S.A., Inc.
(Toll-free: 1-866-707-2460).
If NHTSA receives similar complaints, it may open an investigation, and if it finds that a safety defect exists in a group of vehicles, it may order a recall and remedy campaign. However, NHTSA cannot become involved in individual problems between you, your dealer, or Scion, a marque of TMS, U.S.A., Inc.
To contact NHTSA, you may either call the Auto Safety Hotline toll-free at 1-800-424-9393 (or 366-0123 in Washington,D.C. area) or write to: NHTSA, U.S.Department of Transportation, Washington,D.C. 20590. You can also obtain other information about motor vehicle safety from the Hotline.
Quick index
- If a service reminder indicator or warning buzzer comes on .... 79
- If your vehicle will not start 144
- If your engine stalls while driving 147
- If your vehicle overheats .... 147
- If you have a flat tire 148
- If your vehicle needs to be towed 158
- Tips for driving during break-in period.... 112
- How to start the engine 136
- General maintenance 173
- Complete index ...... NO TAG
Gas station Information
Fuel type:
UNLEADED gasoline, Octane Rating 87 (Research Octane Number 91)
or higher
See page 112 for detailed information.
Fuel tank capacity
45 L (11.9 gal., 9.9 Imp.gal.)
Engine oil:
API grade SL "Energy-Conserving" or ILSAC
multigrade engine oil is recommended.
See page 187 for detailed information.
Automatic transmission fluid:
Genuine ATF Type T-IV
See page 214 for detailed information.
Tire information: See pages 191 through 198.
Tire pressure: See page 215.
iU-1
Publication No. OM52518U
Part No. 01999-52518
Printed in Japan 01-0304-00
xA(
You should know as much about the quality and importance of proper maintenance of your new vehicle as the people who built it.
The Scion authorized Repair Manual tells you how to maintain your vehicle and enables you to correctly perform your own maintenance.

The best way to keep your new vehicle in top running order is to maintain it properly from the moment you drive it off the showroom floor.
The Scion authorized Repair Manual is packed with literally everything you need to know to perform your own maintenance in virtually every area of your new vehicle.
Maintenance procedures for the engine, chassis, body, electrical system, and more, are clearly explained and illustrated.
Periodic maintenance and tune-up
Periodic maintenance and tune-up helps to prevent small problems from growing into larger ones later on. The repair manual outlines exactly what maintenance is required and clearly explains how to do the work yourself step-by-step.
Areas covered include such things as spark plug replacement, valve clearance adjustment and engine oil and filter replacement.
Where to obtain the Repair Manual
The repair manual for xA, written in English, may be purchased as applicable from any Scion dealer.
Pub. Name: 2004 xA Repair Manual Pub. No.: RM1030U
WE REALLY CARE ABOUT YOU — PLEASE BUCKLE UP
Scion has made a special effort to encourage use of seat belts.
Scion belts are:
- Comfortable
- Easy to use
- Convenient
We encourage you to use your belts every time you drive.
U
表2
- TOYOTA MOTOR CORPORATION
- IMPORTANT INFORMATION ABOUT THIS MANUAL
- SAFETY AND VEHICLE DAMAGE WARNINGS
- CAUTION
- NOTICE
- IMPORTANT INFORMATION ABOUT YOUR SCION
- OCCUPANT RESTRAINT SYSTEMS
- NEW VEHICLE WARRANTY
- YOUR RESPONSIBILITY FOR MAINTENANCE
- ACCESSORIES, SPARE PARTS AND MODIFICATION OF YOUR SCION
- INSTALLATION OF A MOBILE TWO-WAY RADIO SYSTEM
- TIRES AND LOADING ON YOUR SCION
- SCRAPPING OF YOUR SCION
- SECTION 1-1
- OPERATION OF INSTRUMENTS AND CONTROLS
- SECTION 1-2
- KEYS
- KEY NUMBER PLATE
- LOCKING AND UNLOCKING WITH KEY
- LOCKING AND UNLOCKING WITH POWER DOOR LOCK SWITCH
- REAR DOOR CHILD-PROTECTORS
- HOOD
- SECTION 1-3
- SEATS
- FRONT SEATS
- FRONT SEAT PRECAUTIONS
- SEAT ADJUSTMENT PRECAUTIONS
- SEAT BELTS
- SEAT BELT PRECAUTIONS
- SEAT BELT EXTENDER
- SRS DRIVER AIRBAG AND FRONT PASSENGER AIRBAG
- SRS SIDE AIRBAGS AND CURTAIN SHIELD AIRBAGS
- CHILD RESTRAINT
- CHILD RESTRAINT PRECAUTIONS
- CHILD RESTRAINT SYSTEM
- TYPES OF CHILD RESTRAINT SYSTEM
- CHILD RESTRAINT SYSTEM INSTALLATION
- TYPE A
- TYPE B
- SECTION 1-4
- POWER REAR VIEW MIRROR CONTROL
- TO ADJUST MIRROR, USE THE SWITCHES
- SECTION 1-5
- HEADLIGHTS
- LIGHT REMINDER BUZZER
- TURN SIGNALS
- ILLUMINATED ENTRY SYSTEM
- REAR WINDOW AND OUTSIDE REAR VIEW MIRROR DEFOGGERS
- SECTION 1-6
- BRAKE SYSTEM WARNING LIGHT
- DISCHARGE WARNING LIGHT
- MALFUNCTION INDICATOR LAMP
- EMISSIONS INSPECTION AND MAINTENANCE (I/M) PROGRAMS
- LOW ENGINE OIL PRESSURE WARNING LIGHT
- ABS" WARNING LIGHT
- OPEN DOOR WARNING LIGHT
- SRS WARNING LIGHT
- HIGH ENGINE COOLANT TEMPERATURE WARNING LIGHT
- KEY REMINDER BUZZER
- CHECKING SERVICE REMINDER INDICATORS (EXCEPT THE LOW FUEL LEVEL WARNING LIGHT)
- SECTION 1-7
- SELECTOR LEVER
- OVERDRIVE SWITCH
- NORMAL DRIVING
- USING "2" AND "L" POSITIONS
- BACKING UP
- PARKING
- GOOD DRIVING PRACTICE
- RECOMMENDED SHIFTING SPEEDS
- MAXIMUM ALLOWABLE SPEEDS
- SECTION 1-8
- FAN SPEED SELECTOR
- TEMPERATURE SELECTOR
- AIR FLOW SELECTOR
- A/C" BUTTON
- AIR INTAKE SELECTOR
- AIR FLOW SELECTOR SETTINGS OPERATING TIPS
- HEATING
- AIR CONDITIONING
- VENTILATION
- DEFOGGING
- DEFROSTING
- SECTION 1-9
- OTHER EQUIPMENT
- SECTION 2
- INFORMATION BEFORE DRIVING YOUR SCION
- BREAK-IN PERIOD
- FUEL
- OCTANE RATING
- QUALITY GASOLINE
- OXYGENATES IN GASOLINE
- GASOLINE CONTAINING MMT
- GASOLINE QUALITY
- FUEL TANK CAPACITY
- OPERATION IN FOREIGN COUNTRIES
- THREE-WAY CATALYTIC CONVERTER
- ENGINE EXHAUST CAUTIONS
- FACTS ABOUT ENGINE OIL CONSUMPTION
- FUNCTIONS OF ENGINE OIL
- ENGINE OIL CONSUMPTION
- IMPORTANCE OF ENGINE OIL LEVEL CHECK
- BRAKE SYSTEM
- BRAKE BOOSTER
- EFFECTIVE WAY TO PRESS THE ABS BRAKE PEDAL
- ABS
- THEFT PREVENTION LABELS
- SUSPENSION AND CHASSIS
- DOT AND TIRE IDENTIFICATION NUMBER (TIN)
- UNIFORM TIRE QUALITY GRADING
- VEHICLE LOAD LIMITS
- TOTAL LOAD CAPACITY, KG (LB.): 375 (825)
- SEATING CAPACITY
- TOWING CAPACITY
- CARGO CAPACITY
- CARGO AND LUGGAGE—STOWAGE PRECAUTIONS
- CAPACITY AND DISTRIBUTION
- EXAMPLE ON YOUR VEHICLE
- TYPES OF TIRES
- SUMMER TIRES
- ALL SEASON TIRES
- SECTION 3
- STARTING AND DRIVING
- BEFORE STARTING THE ENGINE
- HOW TO START THE ENGINE—(A) BEFORE CRANKING
- STARTING THE ENGINE
- NORMAL STARTING PROCEDURE
- IF THE ENGINE STALLS
- IF THE ENGINE WILL NOT START
- TIPS FOR DRIVING IN VARIOUS CONDITIONS
- WINTER DRIVING TIPS
- DO NOT USE PLAIN WATER ALONE
- DINGHY TOWING
- (WITH MANUAL TRANSMISSION)
- DINGHY TOWING TIPS
- HOW TO SAVE FUEL AND MAKE YOUR VEHICLE LAST LONGER, TOO
- SECTION 4
- IN CASE OF AN EMERGENCY
- IF YOUR VEHICLE WILL NOT START—(A) SIMPLE CHECKS
- STARTING A FLOODED ENGINE
- JUMP STARTING
- IF YOUR ENGINE STALLS WHILE DRIVING
- IF YOUR VEHICLE OVERHEATS
- IF YOU HAVE A FLAT TIRE
- COMPACT SPARE TIRE
- REQUIRED TOOLS AND SPARE TIRE
- REMOVE THE WHEEL NUTS AND CHANGE TIRES
- REINSTALL ALL THE WHEEL NUTS FINGER TIGHT
- LOWERING YOUR VEHICLE
- LOWER THE VEHICLE COMPLETELY AND TIGHTEN THE WHEEL NUTS
- AFTER CHANGING WHEELS
- CHECK THE AIR PRESSURE OF THE REPLACED TIRE
- RESTOW ALL THE TOOLS, JACK AND FLAT TIRE SECURELY
- IF YOUR VEHICLE BECOMES STUCK
- IF YOUR VEHICLE NEEDS TO BE TOWED
- TOWING PRECAUTIONS
- FROM REAR
- IF YOU LOSE YOUR KEYS
- SECTION 5
- CORROSION PREVENTION AND APPEARANCE CARE
- PROTECTING YOUR SCION FROM CORROSION
- WASHING AND WAXING YOUR SCION
- WASHING YOUR SCION
- HAND-WASHING YOUR SCION
- AUTOMATIC CAR WASH
- WAXING YOUR SCION
- CLEANING THE INTERIOR
- VINYL INTERIOR
- CARPETS
- WINDOWS
- SECTION
- VEHICLE MAINTENANCE AND CARE
- MAINTENANCE REQUIREMENTS
- GENERAL MAINTENANCE
- SCHEDULED MAINTENANCE
- WHERE TO GO FOR SERVICE
- WHAT ABOUT DO-IT-YOURSELF MAINTENANCE
- IN THE ENGINE COMPARTMENT
- WASHER FLUID
- ENGINE COOLANT LEVEL
- RADIATOR, CONDENSER, AND HOSES
- BATTERY ELECTROLYTE LEVEL
- BRAKE FLUID LEVEL
- ENGINE OIL LEVEL
- POWER STEERING FLUID LEVEL
- EXHAUST SYSTEM
- INSIDE THE VEHICLE
- LIGHTS
- STEERING WHEEL
- ACCELERATOR PEDAL
- CLUTCH PEDAL
- BRAKE PEDAL
- BRAKES
- PARKING BRAKE
- OUTSIDE THE VEHICLE
- FLUID LEAKS
- DOORS AND ENGINE HOOD
- TIRE INFLATION PRESSURE
- TIRE SURFACE AND WHEEL NUTS
- TIRE ROTATION
- DOES YOUR VEHICLE NEED REPAIRING
- SECTION 7-1
- DO-IT-YOURSELF MAINTENANCE
- INTRODUCTION
- DO-IT-YOURSELF SERVICE PRECAUTIONS
- PARTS AND TOOLS
- CHECKING THE ENGINE OIL LEVEL
- CHECKING THE ENGINE COOLANT LEVEL
- CHECKING POWER STEERING FLUID
- CHECKING BATTERY CONDITION
- CHECKING AND REPLACING FUSES
- ADDING WASHER FLUID
- PARTS
- TOOLS
- REPLACING LIGHT BULBS
- SECTION 7-2
- ENGINE AND CHASSIS
- ENGINE OIL SELECTION
- OIL IDENTIFICATION MARKS
- COOLANT TYPE SELECTION
- CHECKING THE RADIATOR AND CONDENSER
- INSPECTION AND ADJUSTMENT PROCEDURE
- CHECKING AND REPLACING TIRES
- CHECKING YOUR TIRES
- REPLACING YOUR TIRES
- INSTALLING SNOW TIRES AND CHAINS
- SNOW TIRE INSTALLATION
- TIRE CHAIN SELECTION
- CHAIN INSTALLATION
- REPLACING WHEELS
- WHEN TO REPLACE YOUR WHEELS
- WHEEL SELECTION
- SECTION 7-3
- ELECTRICAL COMPONENTS
- CHECKING BATTERY CONDITION—PRECAUTIONS
- BATTERY PRECAUTIONS
- EMERGENCY MEASURES
- CHECKING BATTERY EXTERIOR
- CHECKING BY THE INDICATOR
- BATTERY RECHARGING PRECAUTIONS
- FRONT SIDE MARKER LIGHTS —SIDE TURN SIGNAL LIGHTS
- SPECIFICATIONS
- DIMENSIONS AND WEIGHTS
- ENGINE
- SERVICE SPECIFICATIONS
- ENGINE LUBRICATION
- COOLING SYSTEM
- BATTERY
- CLUTCH
- MANUAL TRANSAXLE
- AUTOMATIC TRANSAXLE
- STEERING
- TIRES
- FUSES
- SECTION 9
- REPORTING SAFETY DEFECTS FOR U.S. OWNERS
- QUICK INDEX
- GAS STATION INFORMATION
- FUEL TYPE
- MAINTENANCE PROCEDURES FOR THE ENGINE, CHASSIS, BODY, ELECTRICAL SYSTEM, AND MORE, ARE CLEARLY EXPLAINED AND ILLUSTRATED
- PERIODIC MAINTENANCE AND TUNE-UP
- WHERE TO OBTAIN THE REPAIR MANUAL
- WE REALLY CARE ABOUT YOU — PLEASE BUCKLE UP
Brand : Scion
Model : xA (2004)
Category : Car