
Biltong King BC002 - Kitchen machine Mellerware - Free user manual and instructions
Find the device manual for free Biltong King BC002 Mellerware in PDF.


| Product Type | Biltong Maker |
| Model | BC002 |
| Brand | Mellerware |
| Dimensions (H x W x D) | 35 x 35 x 35 cm |
| Weight | 4.5 kg |
| Power Supply | 220-240V, 50/60Hz |
| Power Consumption | 150 W |
| Heating Element | 500 W (approx) |
| Number of Trays | 5 |
| Tray Size (each) | 30 x 30 cm |
| Material | ABS plastic housing, stainless steel trays |
| Temperature Range | 30°C - 70°C |
| Timer | 0-24 hours |
| Fan Speed | Adjustable (low, high) |
| Functions | Biltong drying, jerky, fruit leather, herbs |
| Safety Features | Overheat protection, auto shut-off |
| Cleaning & Maintenance | Wipe exterior with damp cloth; trays dishwasher safe |
| Spare Parts Available | Trays, fan filter |
| Warranty | 2 years |
Frequently Asked Questions - Biltong King BC002 Mellerware
User questions about Biltong King BC002 Mellerware
0 question about this device. Answer the ones you know or ask your own.
Ask a new question about this device
Download the instructions for your Kitchen machine in PDF format for free! Find your manual Biltong King BC002 - Mellerware and take your electronic device back in hand. On this page are published all the documents necessary for the use of your device. Biltong King BC002 by Mellerware.
USER MANUAL Biltong King BC002 Mellerware
natural_image
Assorted dried herbs and root vegetables arranged on a wooden cutting board (no text or symbols visible)Anti bacterial cutting block
Detachable knife
Built in tungsten - carbide knife sharpener

Dear customer,
Thank you for choosing to purchase a Mellerware brand product. Thanks to its technology, design and operation and the fact that it exceeds the strictest quality standards, a fully satisfactory use and long product life can be assured.
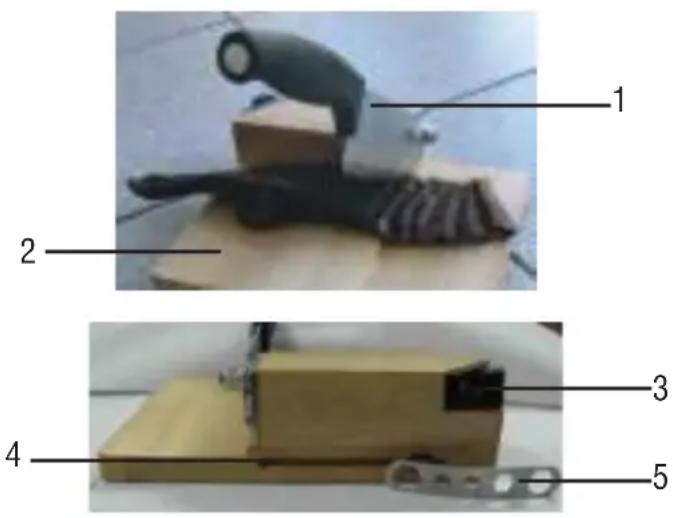
1. Parts description
- Cutter blade
- Cutting block
- Tungsten-carbide sharpner
- Spanner cavity
- Spanner
2. Safety advice and warnings!
Read these instructions carefully before using the appliance and keep them for future reference. Failure to follow and observe these instructions could lead to an accident. Clean all the parts of the product that will be in contact with food, as indicated in the cleaning section, before use.
2.1. Use or working environment:
2.1.1. Keep the working area clean and well lit. Cluttered and dark areas invite accidents.
2.1.2. Use the cutter in a well ventilated area.
2.1.3. Do not place the cutter on hot surfaces, such as cooking plates, gas burners, ovens or similar items.
2.1.4. Keep children and bystanders away when using this cutter.
2.1.5. Place the cutter on a horizontal, flat, stable surface and away from other heat sources and contact with water.
2.1.6. Do not use the appliance if it has fallen on the floor or if there are visible signs of damage.
2.2. Personal safety:
2.2.1. WARNING - The blade of the cutter is extremely sharp and could lead to serious injury is mishandled. Avoid contact with the blade and exercise caution when using the cutter.
2.2.2. This appliance is only for domestic use, not for industrial or professional use. It is not intended to be used by guests in hospitality environments such as bed and breakfast, hotels, motels, and other types of residential environments, even in farm houses, areas of the kitchen staff in shops, offices and other work environments.
2.2.3. This appliance is not intended for use by persons (including children) with reduced physical, sensory or mental capabilities, or lack of experience and knowledge, unless they have been given supervision or instruction concerning use of the appliance by a person responsible for their safety.
2.2.5. This appliance is not a toy. Children should be supervised to ensure that they do not play with the appliance.
2.3. Use and care:
2.3.1. Do not use the cutter if the parts or accessories are not properly fitted.
2.3.2. This appliance should be stored out of reach of children.
2.4. Service:
2.4.1. Make sure that the appliance is serviced only by suitably qualified technician, and that only original spare parts or accessories are used to replace existing parts/accessories.
2.4.2. Any misuse or failure to follow the instructions for use renders the guarantee and the manufacturer's liability null and void.
3. Instructions for use
3.1. Before use:
3.1.1. Remove the appliance's protective film (if applicable).
3.1.2. Before using the product for the first time, clean in the manner described in the cleaning section.
3.2. Assembly:
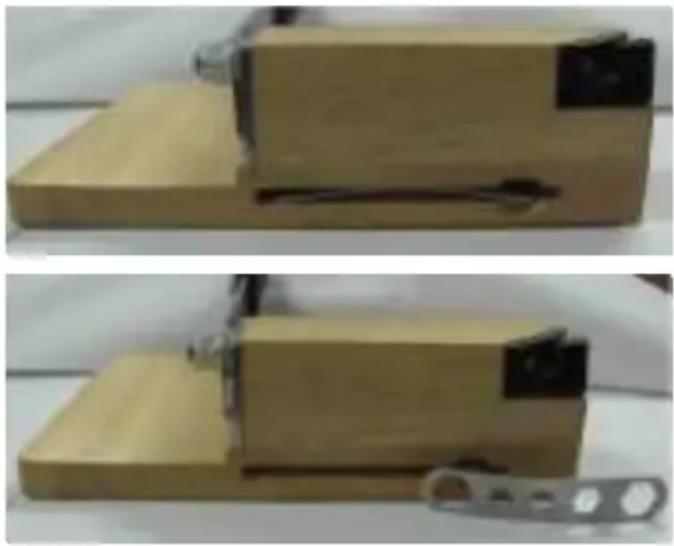
3.2.1. A compact Spanner is stored within a cavity
natural_image
Two views of a wooden mechanical device with a metal bracket and a small inset showing a black clip (no text or symbols visible)at the rear of the raised wooden block. Remove the spanner.
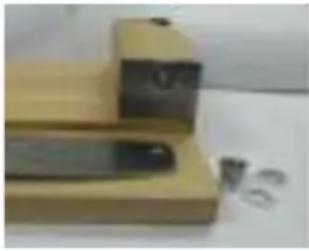
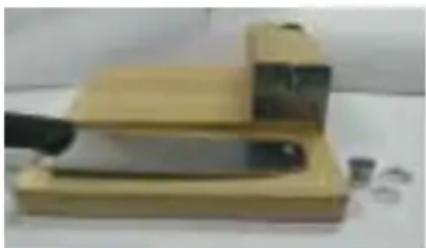
3.2.2. Attach the blade to the bolt extending from the raised wooden block. Position a white nylon washer on either side of the blade and then tighten the Nylon
natural_image
Two beige rectangular blocks with metallic surfaces and small circular components on a white surface (no visible text or symbols)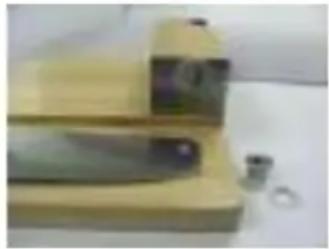
natural_image
Wooden mechanical device with a small metallic ring nearby (no visible text or symbols)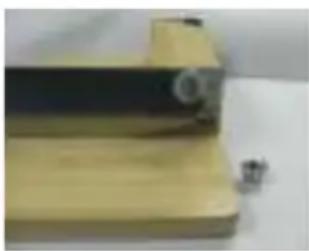
natural_image
Close-up of a wooden plank with a small metallic object attached (no visible text or symbols)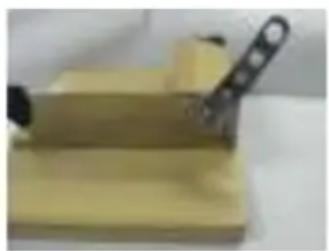
natural_image
Close-up of a wooden block with a metal tool inserted, no visible text or symbolsfastening nut using the spanner provided. Re-position the spanner within it's storage cavity and your biltong slicer is ready to use.
3.2.3. In cutting biltong or any other wide range of food products, the upright rear block can be used as a guide. Press the biltong (or other product) against the guide and push towards the blade as you slice, while carefully ensuring fingers are kept well clear of the cutting edge.

natural_image
Close-up of a mechanical tool with a curved handle and textured base, resting on a wooden surface (no visible text or symbols)3.2.4. The knife can be detached for independent use and cleaning if required, and the wooden board can be used with or without the attached knife.
natural_image
Wooden mechanical component with a black tool inserted, no visible text or symbols3.3. Using the tungsten-carbide sharpener:
3.3.1. Ensure that the sharpener is placed on a stable base when using, and hold the slicing knife handle with the left hand to keep a steady grip on the unit. This keeps the sharpener steady and your left hand well clear of the blade being sharpened.
3.3.2. With your right hand, hold the knife in a vertical position (at 90 degrees to floor or table-top) and using slight downward pressure run the blade from it's heel to the tip through the slot.
3.3.3. Repeat this action 3 or 4 times, or more if necessary until sharp.
3.3.4. After sharpening, clean the knife blade and dry well before storing.
3.4. CAUTION IN USE OF YOUR TUNGSTEN-CARBIDE SHARPENER:
3.4.1. Do not use the Tungsten Carbide sharpener to sharpen serrated knives or scissors.
3.4.2. Do not use a backwards and forwards motion, sharpen in one direction only.
3.4.3. Use only light pressure - do not apply extreme force.
3.4.4. Do not put the sharpener or wooden block in a dishwasher or submerge.
4. Cleaning
4.1. Clean the cutter and its accessories with a damp cloth and a few drops of washing-up liquid and then dry thoroughly
4.2. Do not use solvents, or products with an acid or base pH such as bleach, or abrasive products, for cleaning the cutter.
4.3. Never submerge the cutter in water or any other liquid or place it under running water.
4.4. This cutter and all of its accessories are not dishwasher safe.
5. Anomalies and repair
5.1. Take the cutter to an authorised support centre if product is damaged or other problems arise.
A quick guide to biltong
A brief history of Biltong.
The word “biltong” is from the Dutch “bil” (rump) and “tong” (strip or tongue).
Biltong as we know this delicacy today, is a rich inheritance from pioneering South African forefathers who sun dried meat during their trek across the African Subcontinent.
In 17th century South Africa, Dutch settlers bought recipes for dried meat from Europe, as the need for preservation in the new colony was pressing. Building up herds of livestock took a long time and although there was an abundance of native game around it could take hunters days to track and kill a large animal such as an eland and they were then faced with the problem of preserving a large mass of meat in a short time in a hot climate.
Unfortunately for the settlers, iceboxes had not yet been invented. Desiccation solved the problem. Biltong, as we understand it today, evolved from the dried meat carried by the wagon-travelling Voortrekkers, who needed stocks of durable food as they migrated from Cape Town north-eastward (away from British rule) into the interior of Southern Africa during the Great Trek. The raw meat was preserved from decay and insects within 2 days and within 2 weeks it would be black and rock-hard after it had fully cured.
The Basic Ingredients
The most common ingredients of biltong are:
Vinegar
Salt
Coriander
Black Pepper
Sugar / brown sugar

Other ingredients often found in biltong include:
Garlic
Ground chili pepper
Nutmeg
Onion powder
Saltpetre
Worcestershire Sauce
Bicarb of soda
Balsamic Vinegar
Malt Vinegar

natural_image
Fresh greens and cubed tofu with a small red liquid container nearby (no text or symbols visible)How its made...
Step 1: The Meat
Today, biltong is most commonly made from beef, primarily due to its widespread availability. (Although prior to the introduction of refrigeration, this curing process was used to preserve all kinds of meat in South Africa). Other types of biltong commonly found in South Africa include:
• Game such as kudu and springbok
- Ostrich (Very red meat, often resembles game)
- Chicken
- Fish (more commonly, shark biltong)
Step 2: The Preparation
The chosen meat is marinated in a vinegar solution (traditionally cider vinegar but balsamic works just as well) for a couple of hours, and is poured off before the meat is flavoured.
A traditional spice mix/rub consists of equal amounts of rock salt, brown sugar, coriander and black pepper. This mix is ground roughly together and generously sprinkled onto the meat and rubbed in. Saltpetre can be added as an optional preservative and this would only be necessary for a wet biltong that is not going to be frozen.
Step 3: Drying the meat
Biltong is typically dried out in the cold air (rural areas), wooden or cardboard boxes (urban areas), or climate controlled drying rooms (commercial preparation).
The flavours produced depend entirely on the variety of spices used in the preparation.
Biltong can be made in colder climates by making use of an electric lamp to dry the meat, however care should be taken to adequately ventilate so that mould does not begin to form on the drying meat.
A traditional slow dry will deliver a medium cure in roughly 4 days. An electric fan-assisted oven set to 40-70°C can dry the meat in roughly 4 hours (be sure to leave the oven door open a fraction to allow the moist air to escape). Slow dried meat is considered by some to be tastier however oven dried meat is ready to eat a day or two after preparation.
Recipes
Recipe 1:
2,5kg (5.5 pounds) lean meat (venison, beef, ostrich, eland or kudu)
1/4 cup coriander seeds
1/4 cup salt
1 tablespoon sugar
1 teaspoon black pepper
Method
Cut the meat into strips of more or less 2cm thick x 5 cm wide. Roast the coriander seeds in a dry frying pan to bring out the flavour. Crush lightly with a pestel and mortar. Mix all ingredients and rub the mixture into the meat strips. Pack the meat in layers in a dish. Refrigerate for a day, turning the meat every couple of hours so that the meat flavours evenly. Then hang it up in a cool place to dry (away from flies or insects). Leave it to dry for about 5 days, depending on the weather and whether you prefer your biltong crisp or slightly moist. Et voila, you have made South African biltong!
To eat it, cut thin slices across the width and that is where you will appreciate a good knife, because it is very hard! So eat it gently....
South African's commonly give biltong sticks to teething babies.
Recipe 2:
25lb beef (top round/sirloin/London broil/eye of round)
4 Pints warm water
1 1/4lb fine salt
1 / 2 cup brown sugar
12 cup coriander, coarsely ground
2tbsp bicarbonate of soda
1 tbsp black pepper, ground
1 cup red wine vinegar
2 tsp saltpetre (optional)
Method
Cut the meat along the natural dividing lines of the muscles of the meat of choice. Cut into strips of approximately 2-inch thick and any desired length, always cutting with the grain. Mix the salt, sugar, bicarbonate of soda, saltpetre, pepper and coriander together. Rub the seasoning mixture thoroughly into the strips of meat. Layer the meat with the more bulky pieces at the bottom, in a glass or stainless steel container. Sprinkle a little vinegar over each layer, as you add them.
mellerware®
makes life easier

Thank you for purchasing a Mellerware product. Mellerware guarantees that your product has been thoroughly inspected and tested before being dispatched and is free from mechanical and electrical defects and complies with the applicable safety standards. With every Mellerware product purchased you get a 2 year warranty as detailed in the terms and conditions below.
First Year – 1 Year Retail Warranty:
Should defects due to faulty parts or workmanship develop, under normal use, within 12 months from the original purchase date, please return the product to the store from where it was purchased for repair free of charge. However, for the customer's convenience we will replace products where the purchase price is equal to or less than R750 incl. VAT
Second Year – 1 Year Extended Warranty
Mellerware takes pride in their product quality and therefore offer an extended 12 month warranty over and above the 1 Year Retail Warranty. Should defects due to faulty material or workmanship develop, under normal domestic use, after the 12 month period and within 24 months from the original date of purchase, please return the product postage pre-paid to Mellerware for repair. Mellerware will repair the product free of charge and return it to you directly. Mellerware will replace a product with a similar product in the same or better condition, if the repair cannot be conducted for whatever reason.
NB: The 1 Year Extended Warranty is only valid for customers who have registered their warranty online at www.mellerware.co.za within the first year after making their purchase. See overleaf for details and instructions.
Before returning your product, check the following:
- Your household mains supply socket is in good condition, working and switched on.
- The mains supply circuit is not overloaded (White trip switch on your DB board is off).
- You have read the trouble shooting guide in your Instructions for Use.
• All accessories and parts are present.
The following conditions apply:
-
Please ensure you retain your receipt as this must be presented when making a claim under the terms of the guarantee. It is impossible to determine the guarantee period without proof of purchase, so please keep this in a safe place. (NB. Your guarantee can be scanned onto the Mellerware web site for safe storage – see reverse side for details.)
-
If a refund or exchange is required the product must be complete with all accessories, parts and packaging. Missing parts will render the guarantee void.
-
Upon receipt of your appliance, check it for any transport damage to ensure it is safe for use. Return it to the store as soon as possible for exchange if damaged. The guarantee is void if products are damaged after use, so please do not use the damaged product.
-
Your product is designed for normal domestic household use. Failure to read and comply with the instructions for use, cleaning and maintenance will render your guarantee void, so please read these instructions carefully to ensure your safety, and to get the most effective use from the product. (e.g. not removing lime scale; water deposits; insect infestation, and/or burnt products)
- Any abuse, negligent, improper or accidental use or care will render the guarantee void and Creative Housewares (Pty) Ltd will not be liable for any loss or damage.
- Any attempted repair, or replacement of unauthorised parts will render the guarantee void, so please contact an authorised service centre or service agent for any service or repair requirements.
- NB: The guarantee on replaced products will be from the original date of purchase and not from when the date replacement was made.
- All repairs carry a 3 month guarantee even if this falls outside of the 2 year guarantee period.
- Mellerware will attempt to conduct repairs within reasonable time in line with industry standards but cannot be held responsible or liable for any circumstances not under our control.
- Terms and Conditions are subject to change without prior notice.
Repairs Out of the Warranty Period
If service or repair becomes necessary outside the warranty period, this service is still available however all transport/postage, spares and labour costs will be for the customers' account. All chargeable repairs will require the customers' written acceptance of the quote. Once the go-ahead has been received Mellerware will undertake to conduct the repair within a reasonable time and maintain the condition of the product as received. All repairs are guaranteed for 3 months from the date of the repair.
For any service, enquiries and complaints please contact our Customer Care on 086 111 5006 or e-mail help@creativehousewares.co.za from 08h00 to 15h00 Monday to Friday excluding public holidays. Please also note that the company is normally closed for 2 weeks around Christmas and New Year.
Please send all products for repair postage pre-paid to one of the service centres listed on the back of this page.
ONLINE WARRANTY REGISTRATION
Why register your warranty?
We at Mellerware pride ourselves on bringing premium quality appliances to market, and as a commitment to this level of quality we offer a 2 year warranty (1 Year Retail + 1 Year Extended) on all of our products. We often hear that our customers lose their receipts and can therefore no longer claim if they have a problem. To take advantage of the 1 Year Extended Warranty you will need to register your warranty online within the first year of purchase in order to make a valid claim. Now you can register your product, upload your warranty online, never have to worry about losing your receipt again and enjoy the benefit of your 2 year warranty.
Added Benefits
In addition to providing you with an online profile of your registered products we will also provide a host of value added benefits:
- Incentives and Competitions for registered users
- New recipes or ideas for your products
- New product developments – be the first to get the latest appliances
- Special offers on promotional items
How to Register your Online Warranty?
STEP1 Create your user profile:
If you haven't done so already, simply visit www.mellerware.co.za, click on the "Product Registration" link and follow the easy instructions. You will receive a username and password once registered. This will give you access to your user profile.

STEP2 Pick a registration method:

DESKTOP/LAPTOP
- Open your internet browser and visit www.mellerware.co.za
- Click on the "Registration" link and login using your user name and password.
- Click on "Register your products and upload receipts" and follow the easy instructions.
- Scan and upload your receipt

SMART PHONE/ TABLET
- Scan the QR code above or visit www.mellerware.co.za
- Click on the "Registration" link and login using your user name and password.
- Click on "Register your products and upload receipts" and follow the easy instructions.
- Scan or take a photo and upload your receipt.

FAX
• Fax the following to 021 931 4058
- First Name and Surname
- Contact telephone and fax number.
• Product Model number and Type.
- Traceability Code (found on a label on the product)
• A clear and legible copy of your receipt.
Notes:
- The online warranty system is a safe storage facility for your receipt.
- You will be required to register on the Mellerware website. You will receive a username and password once registered. This will give you access to your profile.
- From your profile you will be able to load products that you have purchased. In order to successfully register your warranty you will need to either scan and upload, or fax through your receipt to us.
- All instructions on how to load your products are available
inside your profile.
- Please note that you must check that your receipt has been uploaded correctly. Creative Housewares cannot be held responsible for faxes or files not received.
- For assistance with registration please email: marketing@creativehousewares.co.za.
NB: Your 1 year extended warranty is only valid if your product is registered online within the first year after purchasing your Mellerware product. Failure to register your product on-line within the first year will render the extended warranty as void.
creative housewares
National Service Centre: 086 111 5006
e-mail: help@creativehousewares.co.za
www.creativehousewares.co.za
Cape Town
20 Tekstiel Street, Parow, Cape Town, 7493,
South Africa • P.O. Box 6156 Parow East, 7501,
South Africa Tel: +27 21 931 8117
Fax: +27 21 931 4058
Durban
35 Adrain Road, Windermere,
Durban, South Africa, 4001
Tel: +27 31 303 3465
Fax: +27 31 303 8259
Johannesburg
Unit 25 & 26 San Croy Office Park
Die Agora Road, Croydon, 1619
Tel:+27 11 392 5652
Fax:+27 11 392 1694
Durban
35 Adrain Road, Windermere,
Durban, South Africa, 4001
Tell: +27 31 303 3465
Fax: +27 31 303 8259
creative housewares
20 Tekstiel Street, Parow, Cape Town, 7493, South Africa
P.O. Box 6156 Parow East, 7501, South Africa
+27 21 931 8117 +27 21 931 4058
Service Centre Helpline: 086 111 5006
www.creativehousewares.co.za
Johannesburg
Unit 25 & 26 San Croy Office Park
Die Agora Road, Croydon, 1619
Tell: +27 11 392 5652
Fax: +27 11 392 1694
- Dear customer,
- Parts description
- Safety advice and warnings!
- Use or working environment:
- Personal safety:
- Use and care:
- Service:
- Instructions for use
- Before use:
- Assembly:
- A compact Spanner is stored within a cavity
- Attach the blade to the bolt extending from the raised wooden block. Position a white nylon washer on either side of the blade and then tighten the Nylon
- Using the tungsten-carbide sharpener:
- CAUTION IN USE OF YOUR TUNGSTEN-CARBIDE SHARPENER:
- Cleaning
- Anomalies and repair
- A quick guide to biltong
- A brief history of Biltong.
- The Basic Ingredients
- How its made...
- Recipes
- Recipe 1:
- Method
- Recipe 2:
- mellerware®
- First Year – 1 Year Retail Warranty:
- Second Year – 1 Year Extended Warranty
- Before returning your product, check the following:
- The following conditions apply:
- Repairs Out of the Warranty Period
- ONLINE WARRANTY REGISTRATION
- Why register your warranty?
- Added Benefits
- How to Register your Online Warranty?
- STEP1 Create your user profile:
- STEP2 Pick a registration method:
- DESKTOP/LAPTOP
- SMART PHONE/ TABLET
- FAX
- Notes:
- creative housewares
- Cape Town
- Durban
- Johannesburg
Brand : Mellerware
Model : Biltong King BC002
Category : Kitchen machine