KAMN14TFDEA - Screen Kogan - Free user manual and instructions
Find the device manual for free KAMN14TFDEA Kogan in PDF.


| Product Type | 14-inch LED Monitor |
| Brand | Kogan |
| Model | KAMN14TFDEA |
| Screen Size | 14 inches (diagonal) |
| Resolution | 1920 x 1080 (Full HD) |
| Refresh Rate | 60 Hz |
| Panel Type | TN (Twisted Nematic) |
| Connectivity | 1 x HDMI, 1 x VGA, 1 x 3.5mm audio out |
| Power Consumption | Typical 15W, Standby <0.5W |
| Power Input | AC 100-240V, 50/60Hz (external adapter) |
| Dimensions (with stand) | 13.4 x 9.7 x 7.1 inches (340 x 246 x 180 mm) |
| Weight (with stand) | 3.5 lbs (1.6 kg) |
| VESA Mount Compatible | Yes, 75 x 75 mm |
| Speakers | Built-in 2 x 1W |
| Adjustable Stand | Tilt only (-5° to 20°) |
| Color Support | 16.7 million colors |
| Viewing Angle | 170° horizontal / 160° vertical |
| Warranty | 1 year limited |
| Cleaning Instructions | Use a soft, dry cloth. Do not use liquid cleaners. |
| Spare Parts Availability | Power adapter and cables available from Kogan support. |
Frequently Asked Questions - KAMN14TFDEA Kogan
User questions about KAMN14TFDEA Kogan
0 question about this device. Answer the ones you know or ask your own.
Ask a new question about this device
Download the instructions for your Screen in PDF format for free! Find your manual KAMN14TFDEA - Kogan and take your electronic device back in hand. On this page are published all the documents necessary for the use of your device. KAMN14TFDEA by Kogan.
USER MANUAL KAMN14TFDEA Kogan
natural_image
Line drawing of a laptop with three open panels, no text or symbols presentPRO DUAL SCREEN TRI- FOLD PORTABLE MONITOR
14" FULL HD
KAMN14TFDEA
SAFETY & WARNINGS
- Handle the tri-screen with care and do not press the screens to avoid damage.
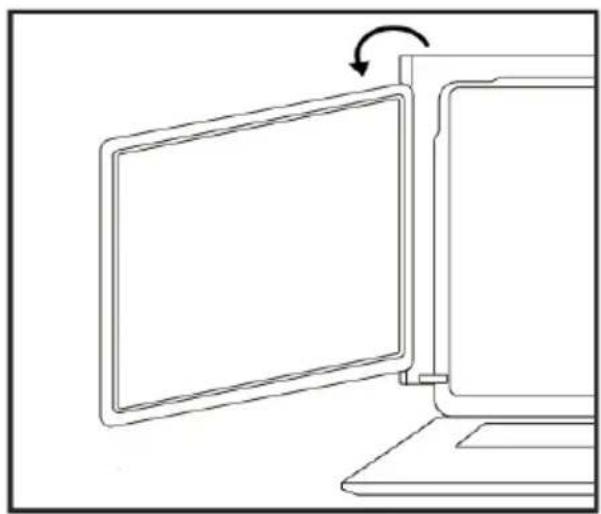
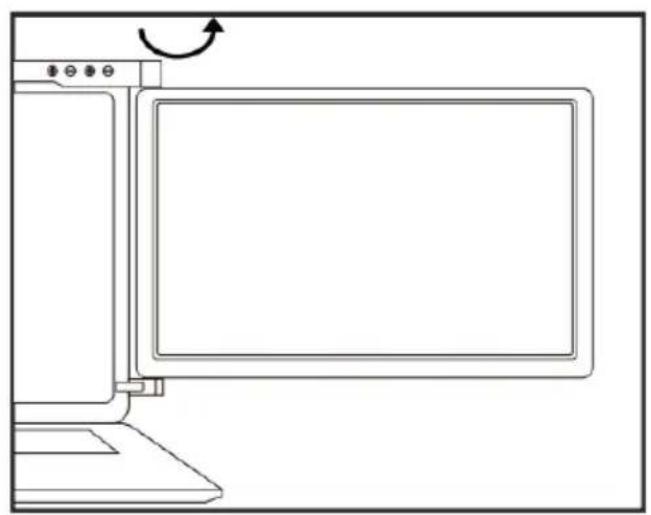
- Do not exceed its maximum turning angle showing as below:
Turning angle of screens
Left screen (0° - 235°)
natural_image
Line drawing of a computer monitor with an open screen and a curved arrow indicating rotation (no text or symbols)Right screen (0° - 180°)
natural_image
Line drawing of a computer monitor with an arrow indicating rotation (no text or symbols)- This screen consumes small amount of power when it's on standby status. For energy saving, waste less and low carbon living style, it's highly recommended to remove cable connections when the Tri-Screen is not in use.
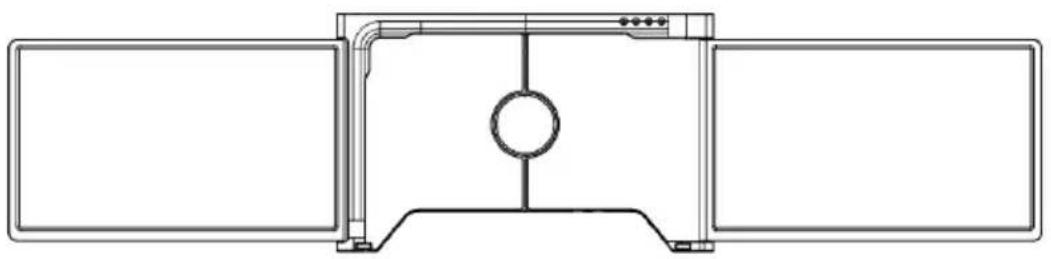
COMPONENTS
natural_image
Technical line drawing of a mechanical assembly with no visible text or symbolsMonitor
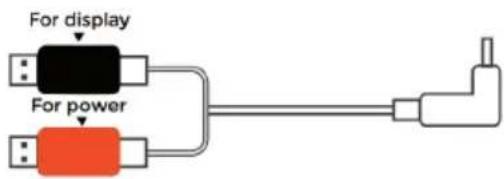
USB-C to USB-A Cable (x2)
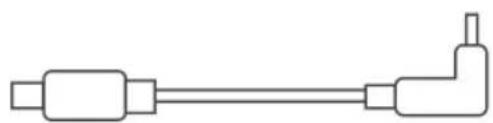
natural_image
Pure electrical circuit lines without any symbolsUSB-C to USB-C Cable
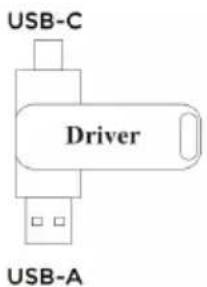
USB Thumb Drive Carry Bag
natural_image
Empty rounded rectangle with a small arrow in the top-right corner (no text or symbols)
Protective Caps (x6)
OVERVIEW
Inputs and Buttons
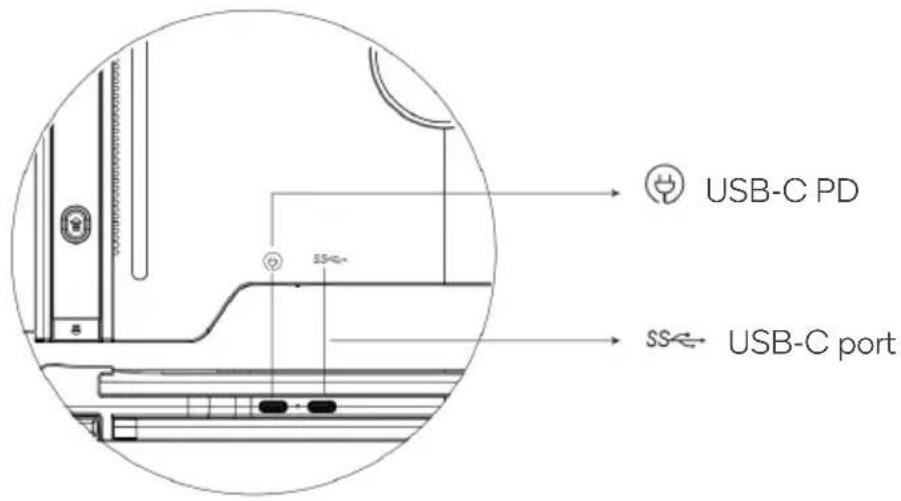
USB-C PD
Power supply, reverse charging, compatible with PD2.0 power supply protocol, Supporting 5-20V voltage input.
USB-C Port
To receive various inputs from USB-A or USB-C ports.
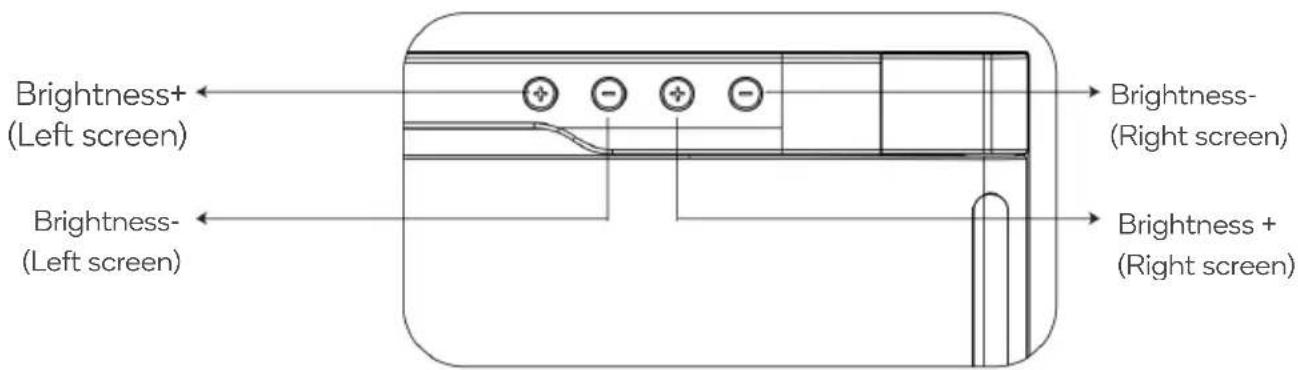
OPERATION
Protective cap
Using the protective cap if your laptop is an ultra-thin style (laptop screen thickness ≤6mm), this helps keep your laptop in place.
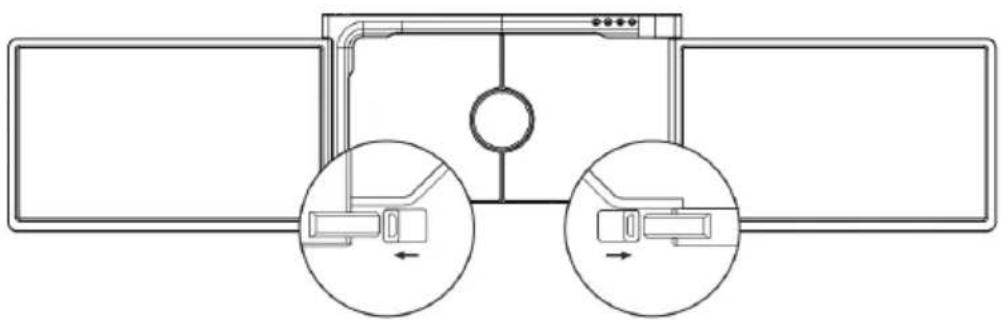
natural_image
Diagram of a mechanical assembly with two circular components and directional arrows, no text or symbols present.Installation
- Unpack the monitor.
- Open the two screens in the direction shown.
- Place the bracket at the back of the laptop screen and install it well with the bracket clamping the screen.
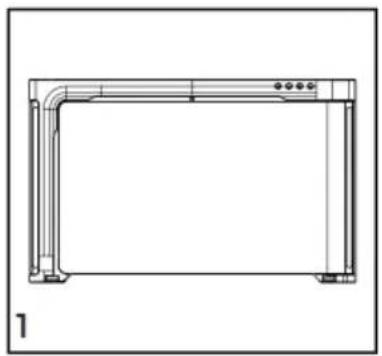
natural_image
Technical line drawing of a rectangular frame with corner connectors and mounting points (no text or symbols)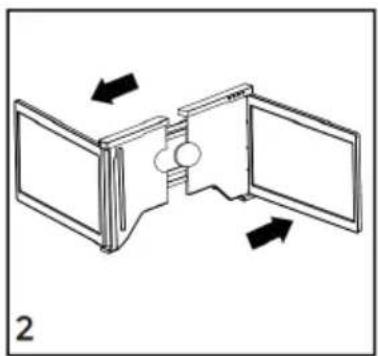
natural_image
Diagram of a mechanical or electronic component with two open panels and directional arrows indicating rotation (no text or symbols)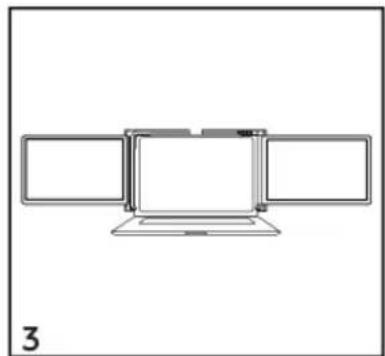
natural_image
Simple line drawing of a three-panel computer monitor with no text or symbols-
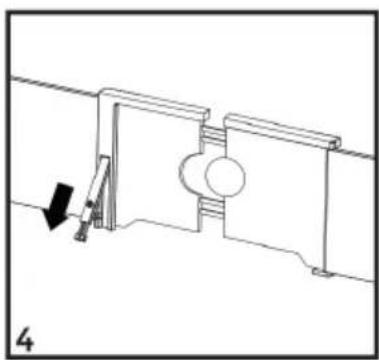
Place the bracket over the back of the screen and clamp, allowing the bracket to hug the edges and sit on top of the laptop screen.
-
Lift up the stand and stretch to its end. Press and hold the button to retract the stand. (The stand is embedded in the rear of the triple monitor, which can offer extra support to the monitor.)
natural_image
Technical line drawing of a mechanical assembly with a downward arrow and numbered label (4), no readable text or symbols present.- Using the supplied cables plug one end into the portable monitor and the other into your laptop. For long term use an external power adapter 5V/3A (or PD power) or laptop power supply (with USB-C).
CONNECTIVITY
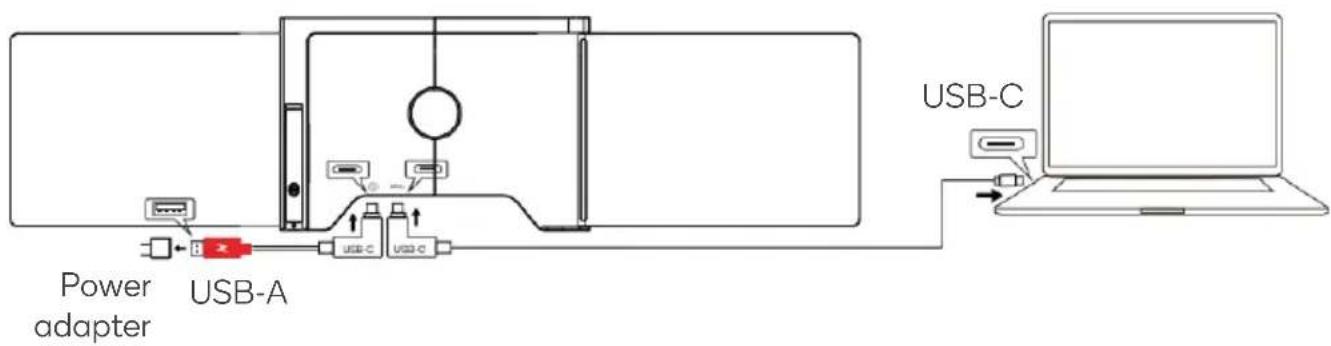
Connecting using USB-C to USB-C Cable
Connect the USB-C cable to the portable monitor's USB-C port and connect the other end to your laptop's USB-C port.

Notes:
- Ensure that the laptop USB-C ports support power & data transmission and has enough power supply above 5V/2A.
- After the driver is installed, the screen can be powered using one cable if the power output is >10W.
Note: If the output power of the laptop port is lower than 10W, an external power supply is required for the portable monitor.
Connecting using USB-C to USB-A Cable
- Connect both USB-A male connectors to your laptop (or one to laptop and the other to a USB power adapter) first.
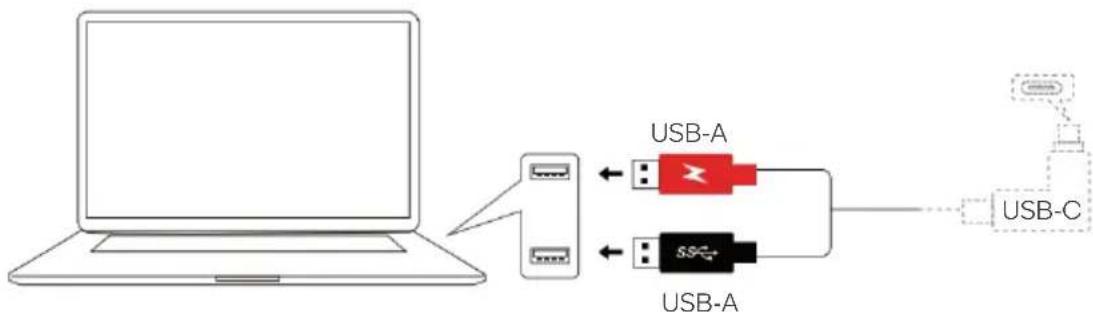
flowchart
graph TD
    A["Laptop"] --> B["USB-A"]
    A --> C["USB-A"]
    B <--> D["Router"]
    C <--> D
    D --> E["USB-C"]
- Connect the USB-C connector to the portable monitor.
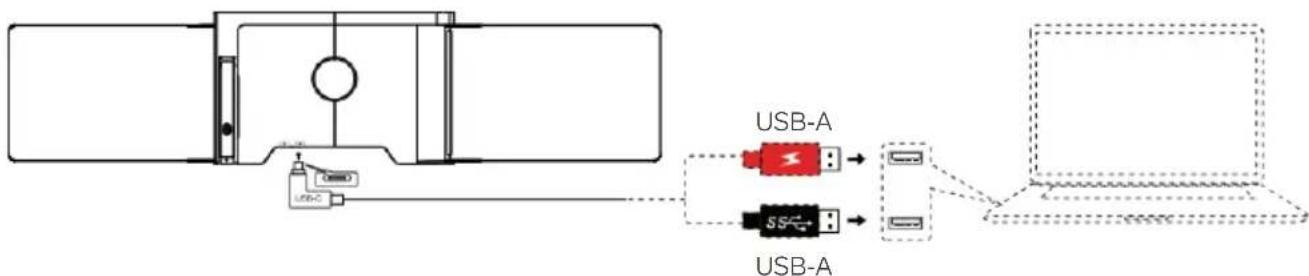
flowchart
graph LR
    A["Device"] --> B["USB-C"]
    B --> C["USB-A"]
    C --> D["Laptop"]
Reverse Charging Mode
- Connect a USB-C power adaptor to the USB-C PD port.
- Connect the portable monitor to your laptop using the USB-C to USB-C cable. The laptop will begin charging.
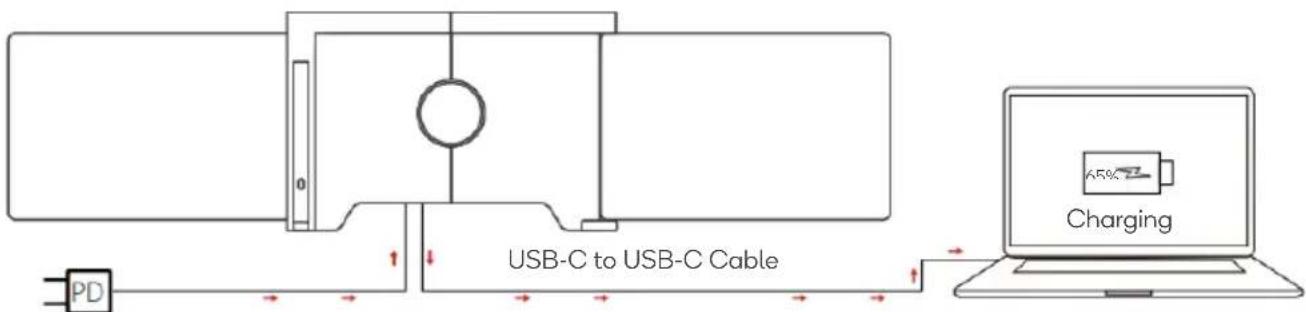
flowchart
graph LR
    A["PD"] --> B["USB-C to USB-C Cable"]
    B --> C["Charging"]
    style A fill:#f9f,stroke:#333
    style C fill:#ccf,stroke:#333
INSTALLATION
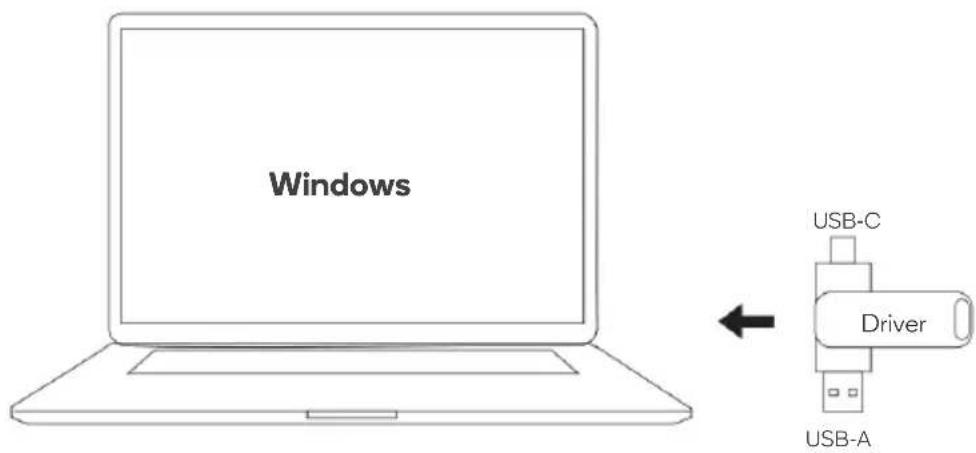
Windows 10 or Higher
The driver will be automatically installed when the portable monitor is first connected to your laptop. Ensure that your laptop is connected to the internet. After successful installation, restart the laptop to use it.
If the driver isn't installed automatically, install it manually using the provided USB thumb drive.
Other Windows Versions
- To install the driver, insert the supplied thumb drive into your laptop. The folder "Drivers" will be displayed on your laptop desktop or in "My Computer (PC)".
- Open the subfolder and double click the executive drivers and follow the instruction to complete driver installation.
- After successful installation, restart the laptop.
- The portable monitor is now ready to use.
Windows 7
-
For laptops with Windows 7, if the driver cannot be installed properly, your laptop may need to be updated using the following method. "Control Panel → System and Security → Windows update → Check for updates" and update to the latest version.
-
Open the "driver" folder and double click the executive drivers and follow the instruction to complete driver installation.
-
After successful installation, restart the laptop.
-
The portable monitor is now ready to use.
MacOS:
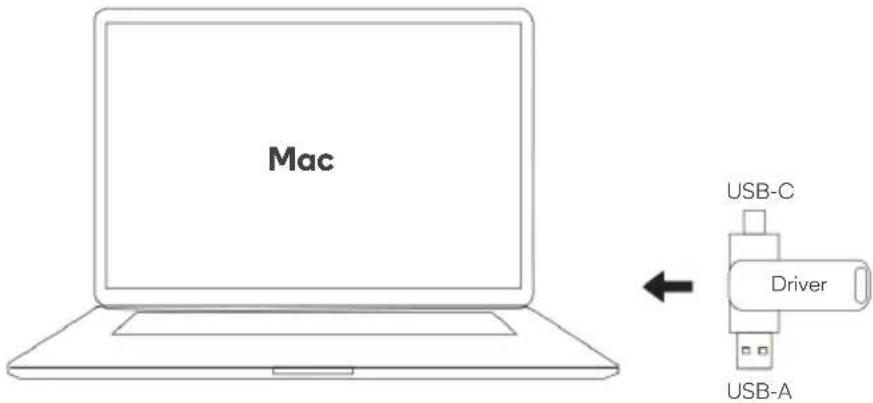
- To load the driver, insert the thumb drive into your laptop. The folder "Drivers" will be displayed on your laptop desktop.
- Open the "Drivers" folder and find the "mac OS".
- Enter "System Preferences → Security & Privacy → Screen Recording → Unlock (Apple ID and password are required) → Tick "USB Display".
- After successful installation, restart the laptop.
- The portable monitor is now ready to use.
Note: When the driver cannot be found, follow the steps below:
- Enter "System Preferences → Security & Privacy → Screen Recording".
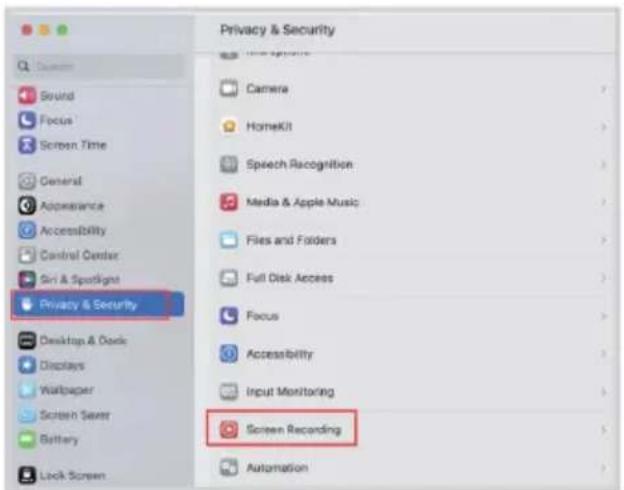
- Click the "+" symbol as shown in the figure to add the driver.
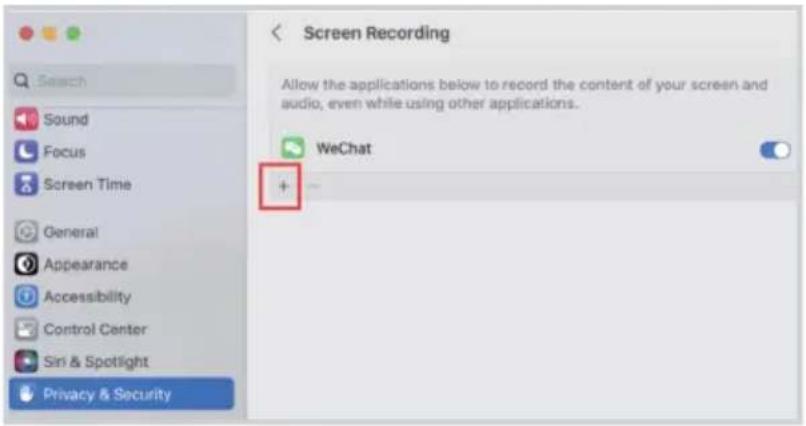
- Click "Applications → Racer USB → USB Display → Open"
- Follow the steps to add the driver.
- After successful installation, restart the laptop.
- The portable monitor is now ready to use.
Laptop Display Configuration
PC / WINDOWS
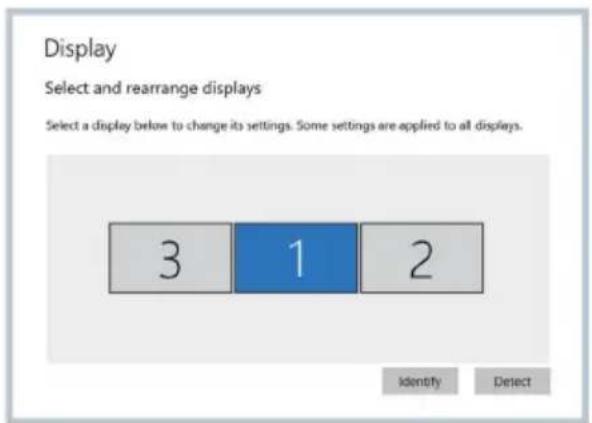
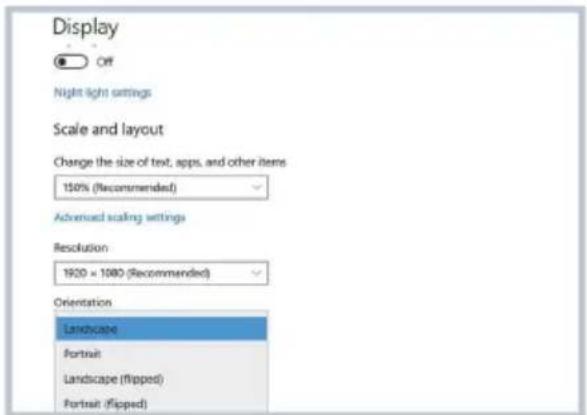
- Go to your Display Settings (Start Settings > System > Display)
-
Click and drag screens to configuration shown
-
If you need to set different display modes for multiple screens, please click 1/2/3 (click the "Identify" button down the screen to find the corresponding screen) and select the one, then enter into the "Multiple displays" menu to set
- If any of the screens are upside down, click on the screen in the display menu.
- Then click on the "Orientation" dropdown menu and select "Landscape (flipped)"
- To increase the zoom, click the "Change the size of text, apps and other items" dropdown and select "150%"
MAC
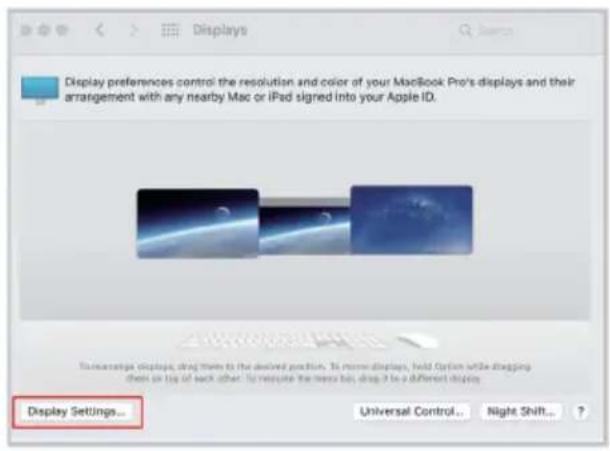
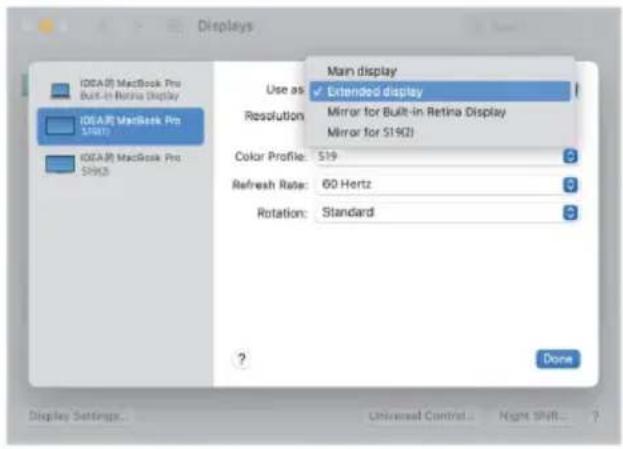
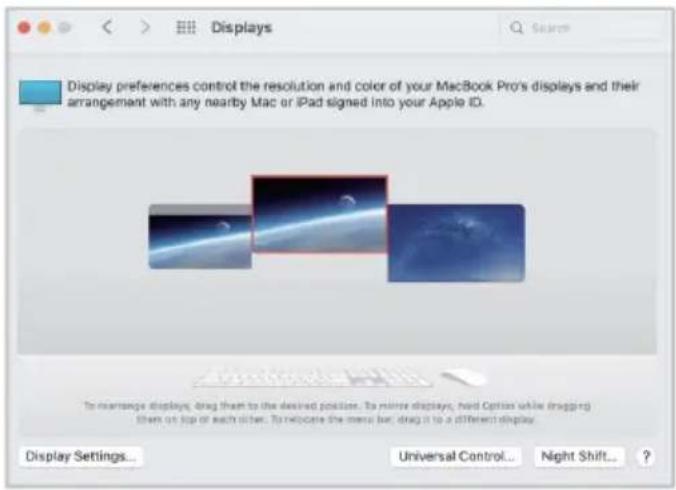

- Open "System Preferences"
- Select "Displays" from the menu
- Click "Display Settings" from display menu.
- Click monitor name to set Mirror or Extended display.
- Click any display screen in the interface to adjust the screen position.
- To increase the zoom, click the "Scaled" radio button.
SPECIFICATIONS
| Screen size 14" | ||
| Panel | Length 309-425mm | |
| Width >209mm | ||
| Thickness <8.5mm | ||
| Resolution 1920 x 1080 | ||
| Aspect ratio 16:9 | ||
| Backlight type W-LED | ||
| Power 5V 3A | ||
| Speaker NA | ||
| USB-C | 1920 x 1080 (Video and Power) | |
| USB-C PD Power only | ||
| Dimension 360 x 221 x 29mm | ||
| Weight 1.42 kg | ||
FAQ
1. There is a black screen and no display after connection.
- Confirm if the laptop power indicator light is on.
- Check if the two ends of the cable are plugged in place and confirm if the laptop output power is enough to support the device.
2. The screen is not stable, flickers or has intermittent black screen after connection.
Check if the laptop output power is enough to support this device, it is necessary to connect an external power supply (laptop USB-C charger or DC5V 3A or PD charger) to the device.
3. How to connect If your laptop doesn't have USB C port?
- Connect to two of the laptop's USB-A ports. The black USB-A end connects to transmit data and the red USB-A end connects to transmit power.
- If your laptop has only one USB-A port, connect the black USB-A end to your laptop, then you can connect the red USB-A to a USB power adapter.
4. There is a boot LOGO, but no display after connecting to Macbook?
Install the driver on the supplied USB thumb drive and restart your laptop.
Need more information?
We hope that this user guide has given you the assistance needed for a simple set-up.
For the most up-to-date guide for your product, as well as any additional assistance you may require, head online to help.kogan.com
kogan.com
- PRO DUAL SCREEN TRI- FOLD PORTABLE MONITOR
- SAFETY & WARNINGS
- Turning angle of screens
- COMPONENTS
- OVERVIEW
- USB-C PD
- USB-C Port
- OPERATION
- Protective cap
- Installation
- CONNECTIVITY
- Connecting using USB-C to USB-C Cable
- Notes:
- Connecting using USB-C to USB-A Cable
- Reverse Charging Mode
- Windows 10 or Higher
- Other Windows Versions
- Windows 7
- MacOS:
- Laptop Display Configuration
- PC / WINDOWS
- MAC
- SPECIFICATIONS
- FAQ
- There is a black screen and no display after connection.
- The screen is not stable, flickers or has intermittent black screen after connection.
- How to connect If your laptop doesn't have USB C port?
- There is a boot LOGO, but no display after connecting to Macbook?
- Need more information?
Brand : Kogan
Model : KAMN14TFDEA
Category : Screen