EH1116H-4 - Video recorder AVer - Free user manual and instructions
Find the device manual for free EH1116H-4 AVer in PDF.


| Product Type | 16-Channel Digital Video Recorder (DVR) |
| Brand | AVer |
| Model | EH1116H-4 |
| Video Channels | 16 (up to 4 IP cameras on CH01-04) |
| Video Compression | H.264 / MPEG4 / MJPEG |
| Analog Camera Input | BNC connectors (16 channels) |
| IP Camera Support | Up to 4 channels, 1.3 MP (H.264/MPEG4/MJPEG) on first 4, 2.3 MP MJPEG on 1st channel |
| Hard Drive | 1 internal SATA HDD (user-installable) |
| Video Output | DVI (for main monitor), Analog Spot Monitor (BNC) |
| Audio | Audio input per channel (via BNC or separate audio ports) |
| Backup | USB port (front) for pendrive or external HDD; network backup via CMS |
| Remote Access | PC Viewer, iPhone Viewer, CM3000 (over network) |
| PTZ Control | Supported via RS-485 or network |
| Alarm I/O | 4 sensor inputs, 1 alarm output |
| Network Interface | Ethernet (RJ-45) |
| Power Supply | DC 12V, 4A (included adapter) |
| Dimensions (approx.) | 300 x 200 x 50 mm (12 x 8 x 2 in) |
| Weight (approx.) | 2 kg (4.4 lbs) without HDD |
| Operating Temperature | 0°C to 40°C (32°F to 104°F) |
| Package Contents | DVR unit, power adapter, remote control, DVI cable, screws, software CD, quick guide |
Frequently Asked Questions - EH1116H-4 AVer
User questions about EH1116H-4 AVer
0 question about this device. Answer the ones you know or ask your own.
Ask a new question about this device
Download the instructions for your Video recorder in PDF format for free! Find your manual EH1116H-4 - AVer and take your electronic device back in hand. On this page are published all the documents necessary for the use of your device. EH1116H-4 by AVer.
USER MANUAL EH1116H-4 AVer
© 2011 AVer Information Inc. All rights reserved.
No part of this document may be reproduced or transmitted in any form, or by any means without the prior written permission of AVer Information Inc. AVer Information Inc. reserves the rights to modify its models, including their characteristics, specifications, accessories and any other information stated herein without notice. The official printout of any information shall prevail should there be any discrepancy between the information contained herein and the information contained in that printout.
TRADEMARKS
“AVer” is a trademark owned by AVer Information Inc. Other trademarks used herein for description purpose only belong to each of their companies.
NOTICE
SPECIFICATIONS ARE SUBJECT TO CHANGE WITHOUT PRIOR NOTICE.
THE INFORMATION CONTAINED HEREIN IS TO BE CONSIDERED FOR REFERENCE ONLY.
WARNING
TO REDUCE RISK OF FIRE OR ELECTRIC SHOCK. DO NOT EXPOSE THIS APPLIANCE TO RAIN OR MOISTURE.
WARRANTY VOID FOR ANY UNAUTHORIZED PRODUCT MODIFICATION.
INFORMATION
For more information, please refer to the user manual in the software CD.
Contents
I. Package Contents .... 1
EH1004H-4 Nano/Nano ^+ (4CH) 1
EH1008H-4 Nano/Nano ^+ (8CH) 1
EH1116H-4 Nano(16CH) 2
II. Hardware Installation .... 3
A. Install the hard disk 3
B. Device Connection.... 5
III. First Time Using the DVR Unit 9
IV. Recording the Live Video 13
V. Familiarizing the Buttons in Preview Mode....14
VI. Playback Recoded Video....17
VII. Familiarizing the Buttons in Playback Mode 18
I. Package Contents

If there is any damage, shortage or inappropriate item in the package contents, please contact with local dealer
EH1004H-4 Nano/Nano ^+ (4CH)
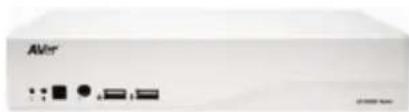
natural_image
Front view of a white electronic device labeled 'AVIR' with indicator lights and ports (no readable text beyond branding)a.
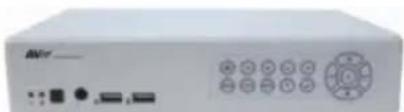
natural_image
Front view of a white electronic device with buttons and ports (no visible text or symbols)b.
(2)
(3)
(1)
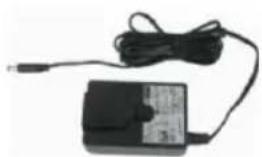
natural_image
Electric power adapter with attached cable and terminal connector (no visible text or symbols)(4)
(5)
(6)
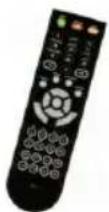
(7)
(1) DVR unit(4CH)
a. EH1004H-4 Nano b. EH1004H-4 Nano
(2) Quick Installation Guide
(3) Software CD (Manual is included)
(4) Power adaptor
(5) Power plug (*The power plug may vary according to the local electricity system.)
(6) Screws for internal HDD installation
(7) Remote Control
EH1008H-4 Nano/Nano ^+ (8CH)
natural_image
Front view of a white electronic device labeled 'AVir' with four small components on the side (no readable text beyond label)a.
natural_image
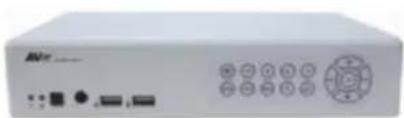
Front view of a white electronic device with ports and buttons (no visible text or symbols)b.
(2)
(3)
(1)
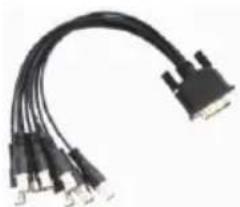
natural_image
Coiled black cable with multiple connectors, no visible text or symbols(4)
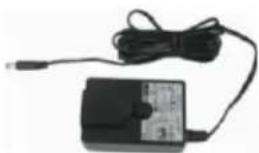
natural_image
Electric power adapter with attached cable and connector (no visible text or symbols)(5)
(6)
(7)
(8)
(1) DVR unit(8CH)
a. EH1008H-4 Nano b. EH1008H-4 Nano
(2) Quick Installation Guide
(3) Software CD (Manual is included)
(4) DVI video cable
(5) Power adaptor
(6) Power Plug (*The power plug may vary according to the local electricity system.)
(7) Screws for internal HDD installation
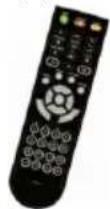
(8) Remote Control
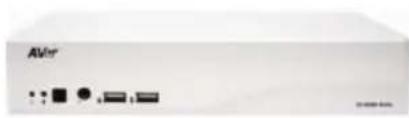
EH1116H-4 Nano(16CH)
natural_image
Front view of a white electronic device labeled 'AVir' with ports and indicators (no readable text beyond label)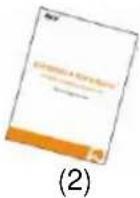
natural_image
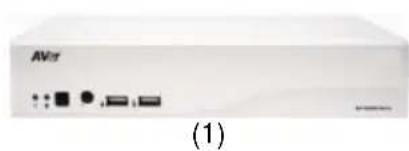
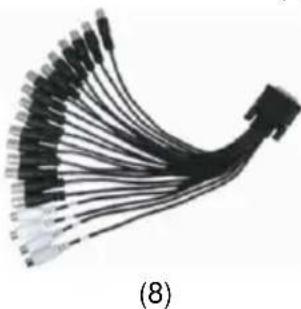
Black cable connector with multiple connectors, labeled (8) at bottom (no text or symbols on diagram itself)(1) EH1116H-4 Nano
(2) Quick Installation Guide
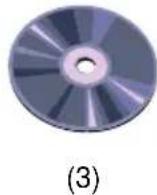
(3) Software CD (Manual is included)
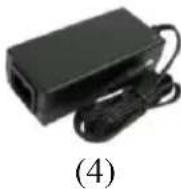
(4) Power adaptor
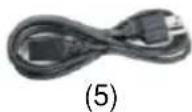
(5) Power Plug (* The power plug may vary according to the local electricity system.)
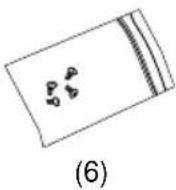
(6) Screws for internal HDD installation
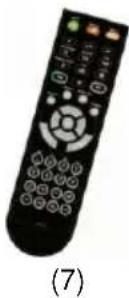
(7) Remote Control
(8) DVI cable
II. Hardware Installation
A. Install the hard disk
User can install 1 SATA hard disks inside the DVR unit.
Follow the illustrated instructions below to install the hard disk:
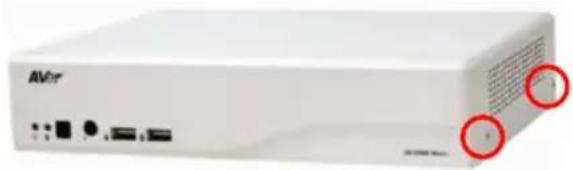
- Loosen all screws(2 sides and rear side)
natural_image
Front view of a white electronic device labeled 'AVer' with two red circular annotations pointing to ports (no readable text beyond label)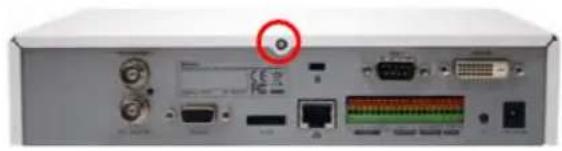
natural_image
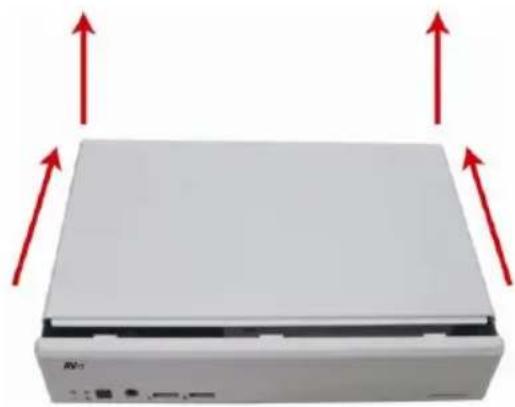
Back view of a network equipment unit with ports, connectors, and a highlighted circular component (no visible text or symbols)- Push the cover backward and lift. The cover is a little bit tight, please be carefully the hands.
natural_image
White rectangular electronic device with red upward arrows indicating orientation or force (no text or symbols visible)- Turn the cover over and place the SATA hard disk (face down) inside the HDD holder.
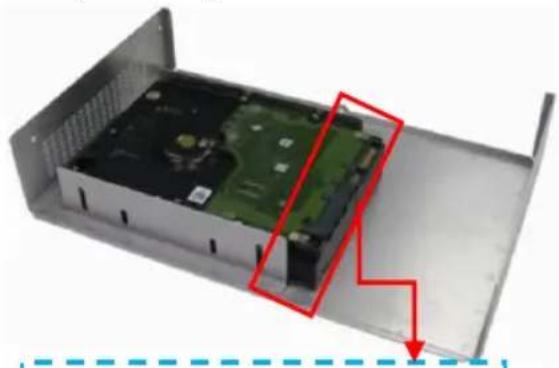
natural_image
Interior view of an electronic device chassis showing a green internal card and black ports, with a red arrow pointing to a component (no text or symbols visible)Place the hard disk face down and connector interface of hard disk in this direction.
- Screw the hard disk(both side)
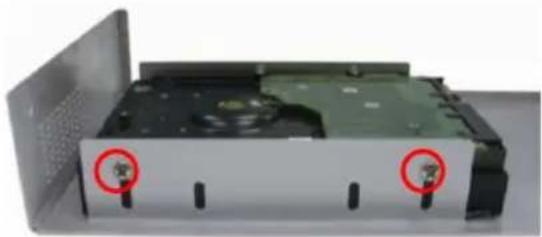
natural_image
Exterior view of a CD-ROM drive showing internal components and mounting holes (no text or symbols visible)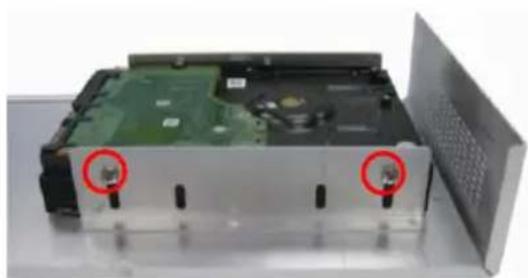
natural_image
Exterior view of a computer drive chassis showing internal components and a patterned cover (no text or symbols visible)- Hold the cover and connect the power cable and SATA cable to the hard disk.
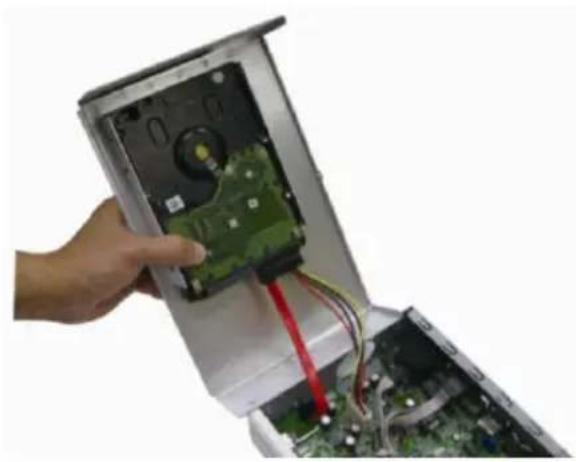
natural_image
Close-up of a hand inserting a green internal circuit into an open computer case (no visible text or symbols)- Hold the cover parallel with DVR unit and put the cover back to the DVR unit and be carefully the hard disk that inside the cover.
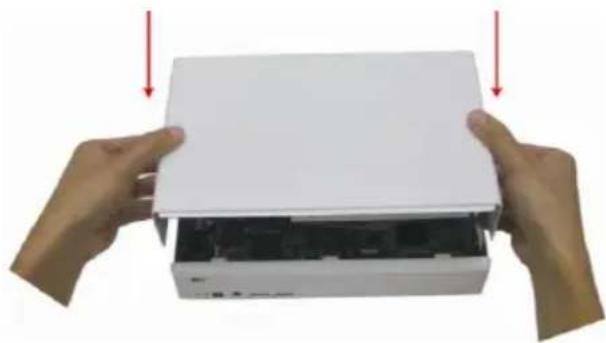
natural_image
Two hands opening a white electronic device into a black case, with red arrows indicating the process (no text or symbols visible)- And then, turn the cover over carefully.
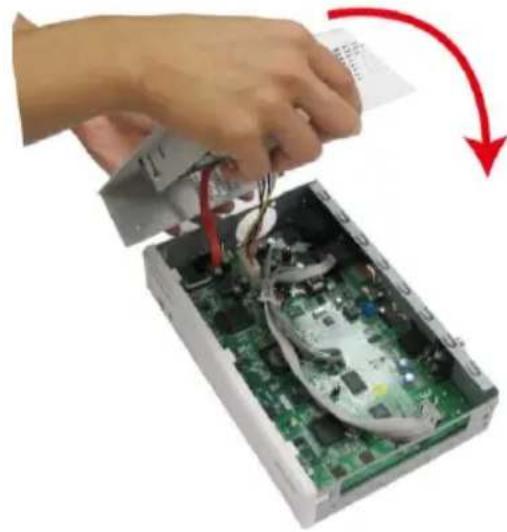
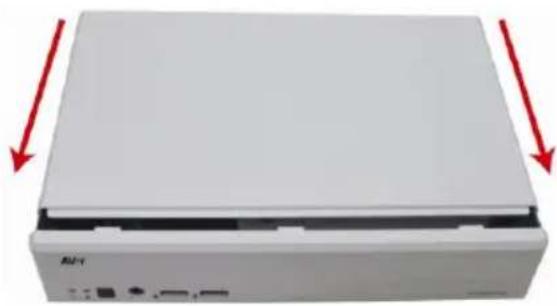
natural_image
Hand inserting a component into an open electronic device with visible circuitry and wiring (no text or symbols)- Finally, Push the cover forward and secure the cover
natural_image
White electronic device with red arrows pointing to its side panel (no visible text or symbols)- You may now connect all the cables and power on the DVR unit.
B. Device Connection

Pen drive and external hard disk must be FAT32 format.

All connected devices have their own power supply are necessary.
■ EH1004H-4 Nano/Nano +

- EH1004H-4 Nano/Nano ^+ support both Analog and IP camera in 4 channels.
- 1.3 MP with H.264/MPEG4/ MJPEG on the first 4 channels and 2.3MP with MJPEG on the 1st channel for IP cam connection.
The back panel of the EH1004H-4 Nano/Nano ^+ user can connect up to 4 cameras in combination of analog and IP camera (EH1004H-4 Nano/Nano ^+ supports both analog and IP camera in 4 channels.). The DVR unit also can connect 4 sensor devices, 1 alarm devices, and output video to a LCD monitor.
Follow the illustration below to make the connection:
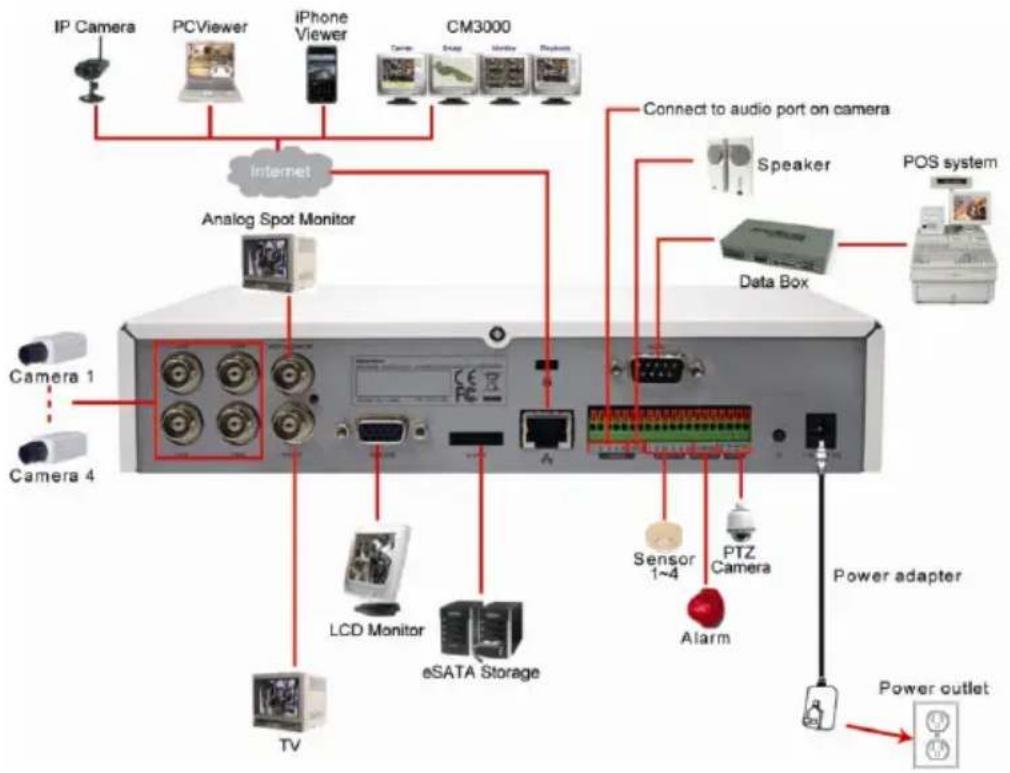
flowchart
graph TD
    A["IP Camera"] --> B["PCViewer"]
    B --> C["iPhone Viewer"]
    C --> D["CM3000"]
    D --> E["Internet"]
    E --> F["Analog Spot Monitor"]
    F --> G["Camera 1"]
    F --> H["Camera 4"]
    G --> I["LCD Monitor"]
    H --> J["eSATA Storage"]
    I --> K["TV"]
    J --> L["Monitor"]
    K --> M["Radio Station"]
    L --> N["Sensor 1~4"]
    M --> O["PTZ Camera"]
    N --> P["Alarm"]
    O --> Q["Power adapter"]
    P --> R["Power outlet"]
    S["Connect to audio port on camera"] --> T["Speaker"]
    T --> U["Data Box"]
    U --> V["POS system"]

- EH1008H-4 Nano/Nano ^+ only supports first 4 channels for IP camera connection.
- 1.3 MP with H.264/MPEG4/ MJPEG on the first 4 channels and 2.3MP with MJPEG on the 1st channel for IP cam connection.
The back panel of the EH1008H-4 Nano/Nano ^+ user can connect up to 8 cameras in combination of analog and IP camera (EH1008H-4 Nano/Nano ^+ only support first 4 channels for IP camera connection). The DVR unit also can connect 4 sensor devices, 1 alarm devices, and output video to a LCD monitor.
Follow the illustration below to make the connection:
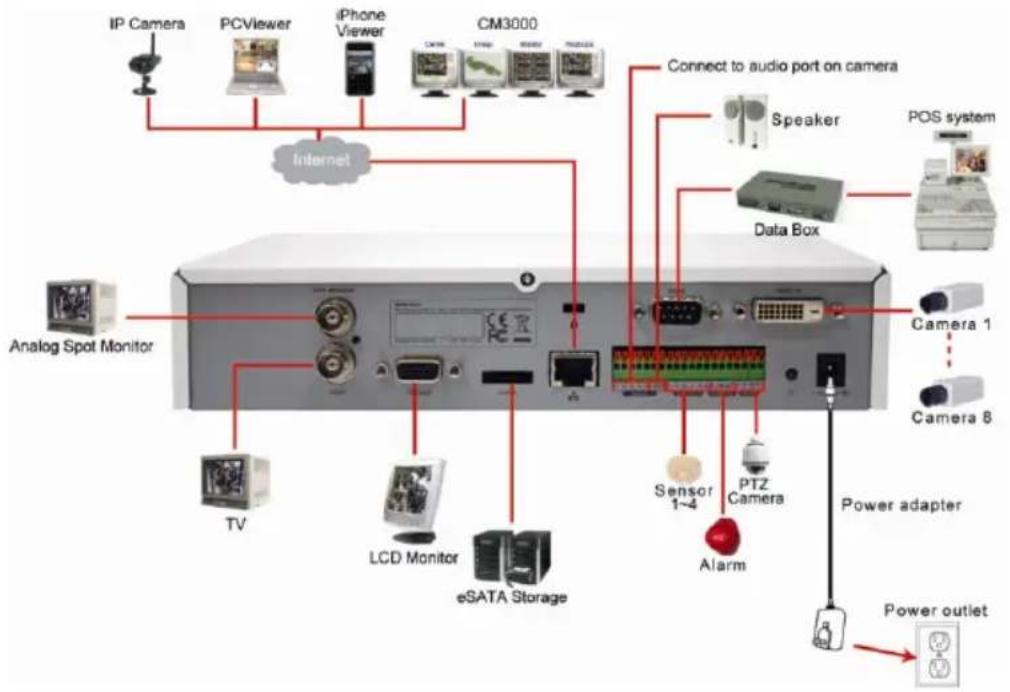
flowchart
graph TD
    A["IP Camera"] --> B["PCViewer"]
    B --> C["iPhone Viewer"]
    C --> D["CM3000"]
    D --> E["Connect to audio port on camera"]
    E --> F["Speaker"]
    F --> G["Data Box"]
    G --> H["POS system"]
    H --> I["Camera 1"]
    H --> J["Camera 8"]
    I --> K["Power adapter"]
    J --> L["Power outlet"]
    M["Analog Spot Monitor"] --> N["TV"]
    N --> O["LCD Monitor"]
    O --> P["eSATA Storage"]
    P --> Q["Sensor 1~4"]
    Q --> R["PTZ Camera"]
    R --> S["Alarm"]
    S --> T["Power outlet"]
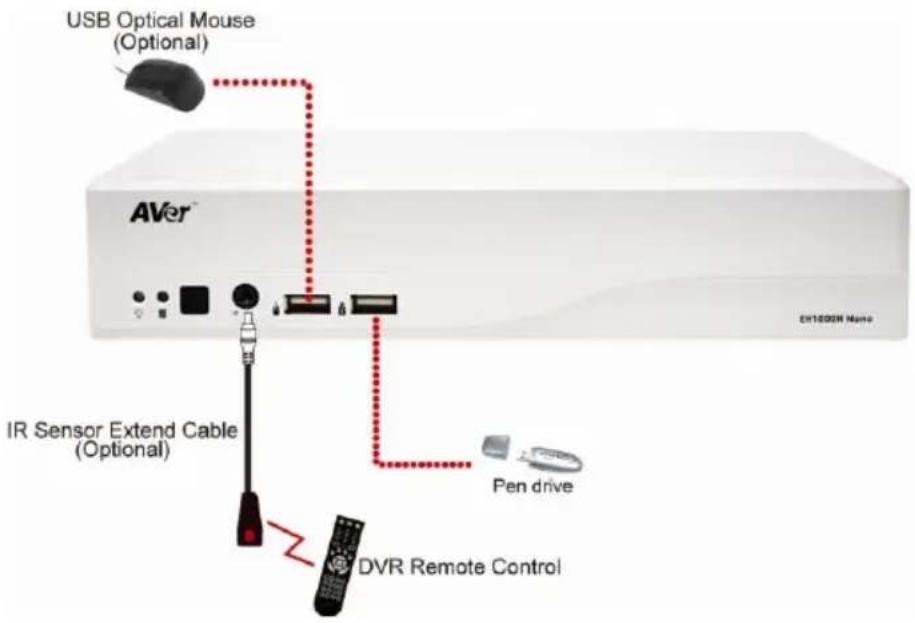
■ EH1004H-4 Nano/EH1008H-4 Nano
For backup recorded video, plugging the pen drive or external hard disk through USB port that are located at front panel of DVR unit, and then, use the bundled software enables user to transfer, playback and segment the video.
Follow the illustration below to make the connection:
■ EH1004H-4 Nano ^+ /EH1008H-4 Nano ^+
For backup recorded video, plugging the pen drive or external hard disk through USB port that are located at front panel of DVR unit, and then, use the bundled software enables user to transfer, playback and segment the video.
Follow the illustration below to make the connection:
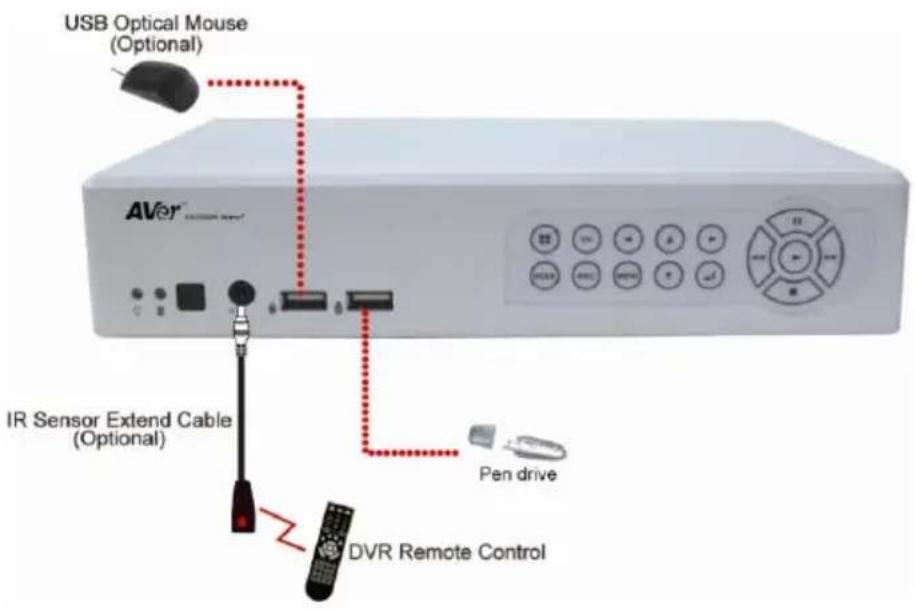


- All connected devices have their own power supply are necessary.
- EH1116H-4 Nano only supports first 4 channels (CH01\~04) for IP cameras.
The back panel of the EH1116H-4 Nano user can connect up to 16 cameras in combination of analog and IP camera. The DVR unit also can connect 4 sensor devices, 1 alarm devices, and output video to a LCD monitor.
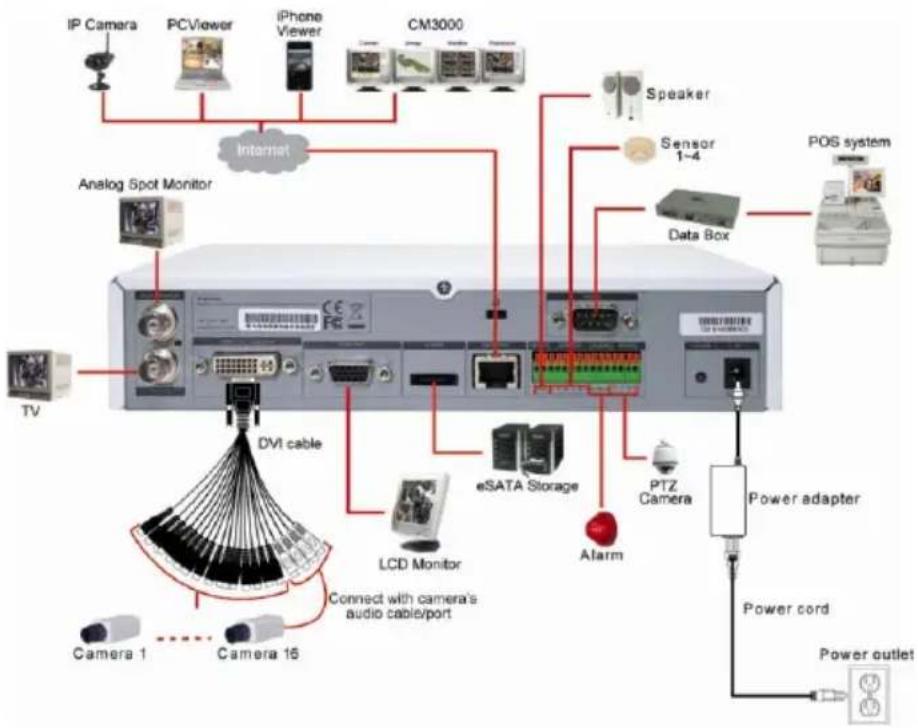
flowchart
graph TD
    A["IP Camera"] --> B["Analog Spot Monitor"]
    C["PCViewer"] --> B
    D["iPhone Viewer"] --> B
    E["CM3000"] --> B
    F["TV"] --> G["DVI cable"]
    H["Camera 1"] --> I["Connect with camera's audio cable/port"]
    J["Camera 15"] --> I
    K["LCD Monitor"] --> I
    L["eSATA Storage"] --> I
    M["Alarm"] --> I
    N["PTZ Camera"] --> O["Power adapter"]
    P["Power cord"] --> Q["Power outlet"]
    R["POS system"] --> S["Data Box"]
    T["Internet"] --> B
    U["Speaker"] --> B
    V["Sensor 1-4"] --> B
    W["Internet"] --> B
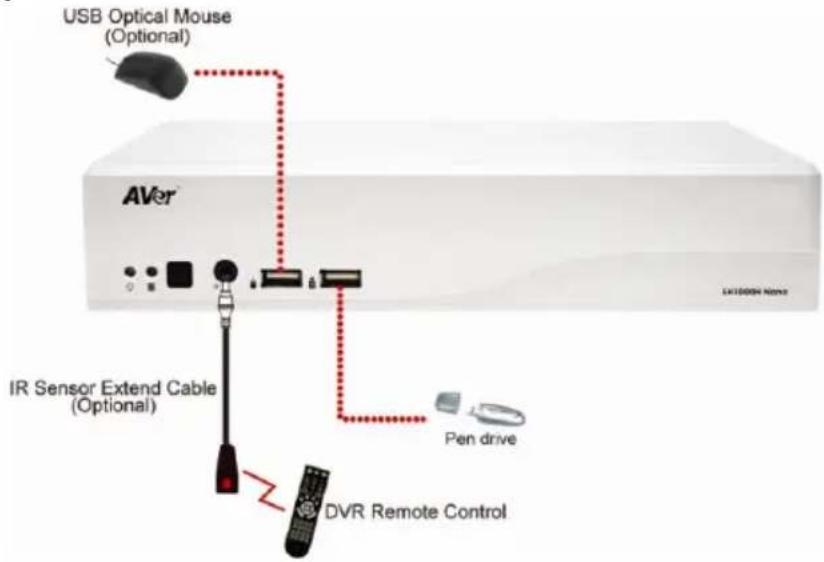
For backup recorded video, plugging the pen drive or external hard disk through USB port that are located at front panel of DVR unit, and then, use the bundled software enables user to transfer, playback and segment the video. Follow the illustration below to make the connection:
III. First Time Using the DVR Unit
-
Connect the mouse to DVR unit (through USB port).
-
Connect all necessary external devices.

DVR unit doesn't supply the power to connected external devices.
-
Plug the power to turn on the DVR unit.
-
Please wait for a while until start up process is completed. And then, the preview screen will show up on surveillance screen.
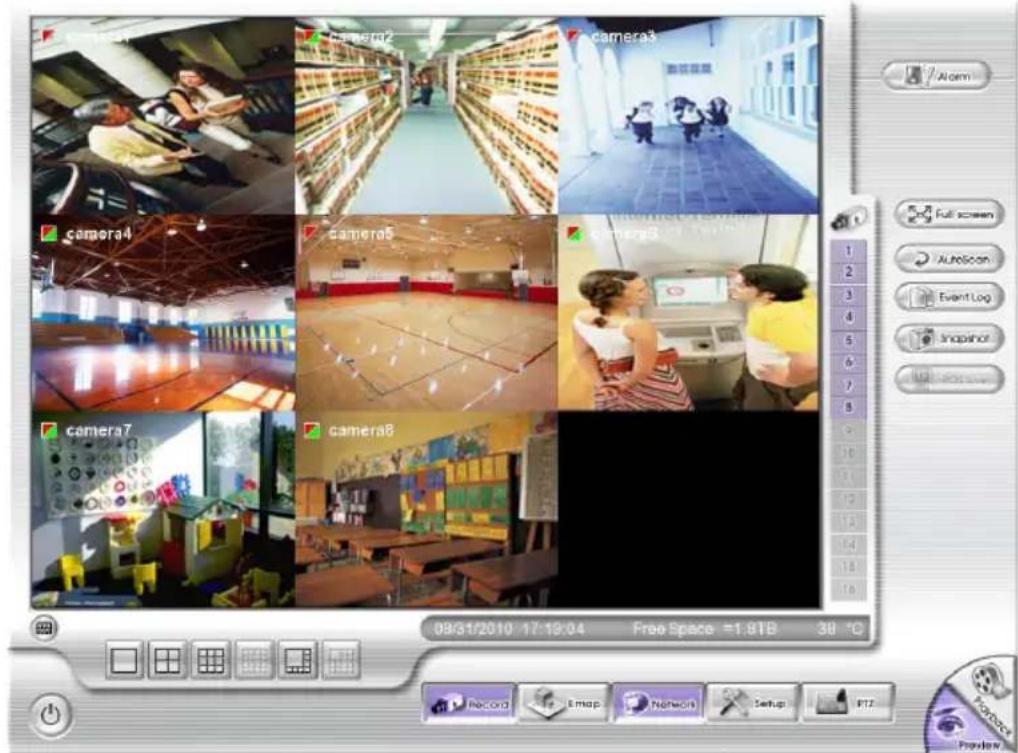
EH1008H-4 Nano/Nano ^+ Preview UI
- Format hard disk: If the hard disk is first time installed in the DVR unit, please format the hard disk. Following the below steps to format the hard disk.

- Before formatting hard disk, please stop recording.
- While formatting hard disk, the CPU usage will be near to 100% and might slow down the DVR system response.
a. Click Setup and enter the password (If this is the first time, enter the default password [admin]. The default ID will be admin).
b. Click System → Add
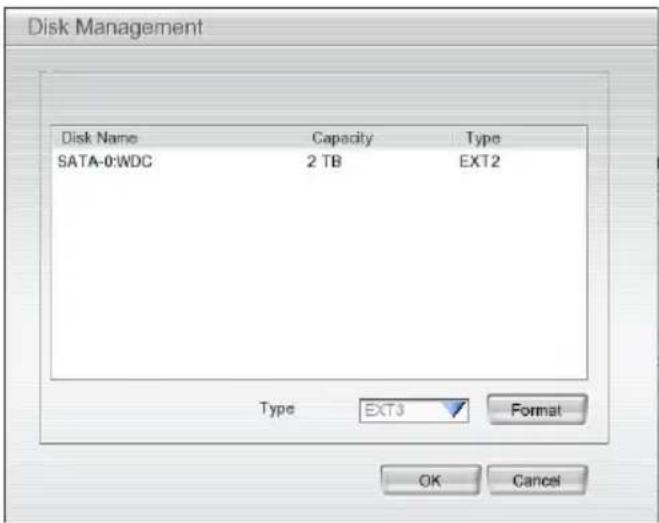
c. Select the hard disk from list.
d. Click Format button and click Start to begin formatting
e. When formatting is done, click OK.
- Adjust time and date: Setup the DVR system date and time in order to have corrected recording time and date. Following the below steps to setup date and time:
a. Click Setup and enter the password (If this is the first time, enter the default password "admin". The default ID will be "admin").
b. Select System.
c. In Date and Time Setting, click Setting button of System Date and Time.
d. Select the Year and Month by click arrow button, click on the date to select the date. And adjust the time, and then, click OK.
- Connecting the cameras: DVR supports IP and Analog camera.
■ Analog camera
a. Plug the video cable which included in package contents to audio port on DVR unit.
b. Connect the analog camera video cable to video-in port.
c. Click Setup → Camera
d. Select camera channel and mark Enable to enable the channel.
e. Select Input as Analog Camera.
f. In Camera section, mark Display to allow the live video of camera to display on surveillance screen. And then, enter the Name and Description of the channel.
g. Enable Audio: select the audio input channel. Mark Enable Audio to record the sound. For example: The camera 1 is connected with audio channel 2, then, user needs to select audio channel 2 as camera 1's audio channel (audio connection refer to Device Connecting section).
h. Adjust the bright, contrast, hue, and saturation of the camera.
i. Click OK
IP camera

- EH1008H-4 Nano/Nano ^+ and EH1116H-4 Nano only supports first 4 channels (CH1\~4) for IP camera.
- EH1004H-4 Nano/Nano ^+ supports both analog and IP camera in 4 channels.
- 1.3 MP with H.264/MPEG4/ MJPEG on the first 4 channels and 2.3MP with MJPEG on the 1st channel for IP cam connection.
a. Click Setup → Camera.
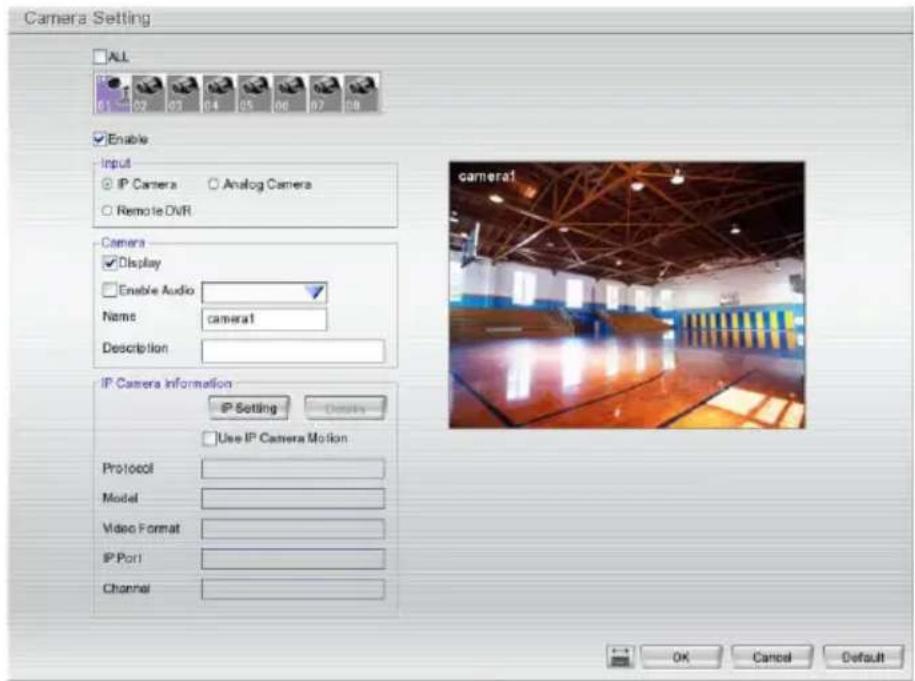
b. Select camera channel (1\~4) and mark Enable to enable the channel.
c. Select Input as IP Camera.
d. In Camera section, mark Display to allow the live video of camera to display on surveillance screen. And then, enter the Name and Description of the channel.
e. In Camera Information section, click IP Setting for detail setting.
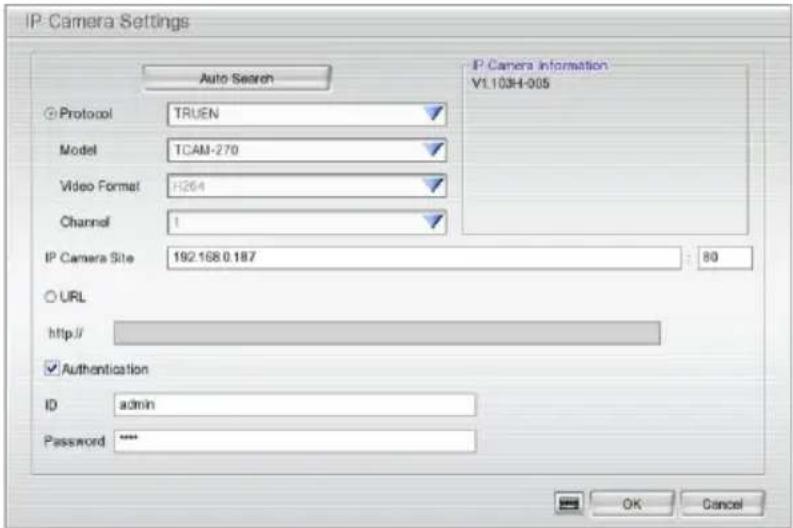
f. In IP Camera Setting window, click Protocol radio button, then, select Protocol, Mode, and Video Format. User also can click Auto Search button to find the IP cameras that can be detected on your LAN network.
g. Enter IP address in IP Camera site column or enter the URL of IP camera.
h. Enable Authentication and enter ID and password if IP camera's access authority is required.
i. Click OK to save the setting.
j. When the IP camera has connected, user should see the camera information of Protocol, Model, Video Format, IP port, and Channel.
k. To connect another IP camera, follow the above steps.
IV. Recording the Live Video
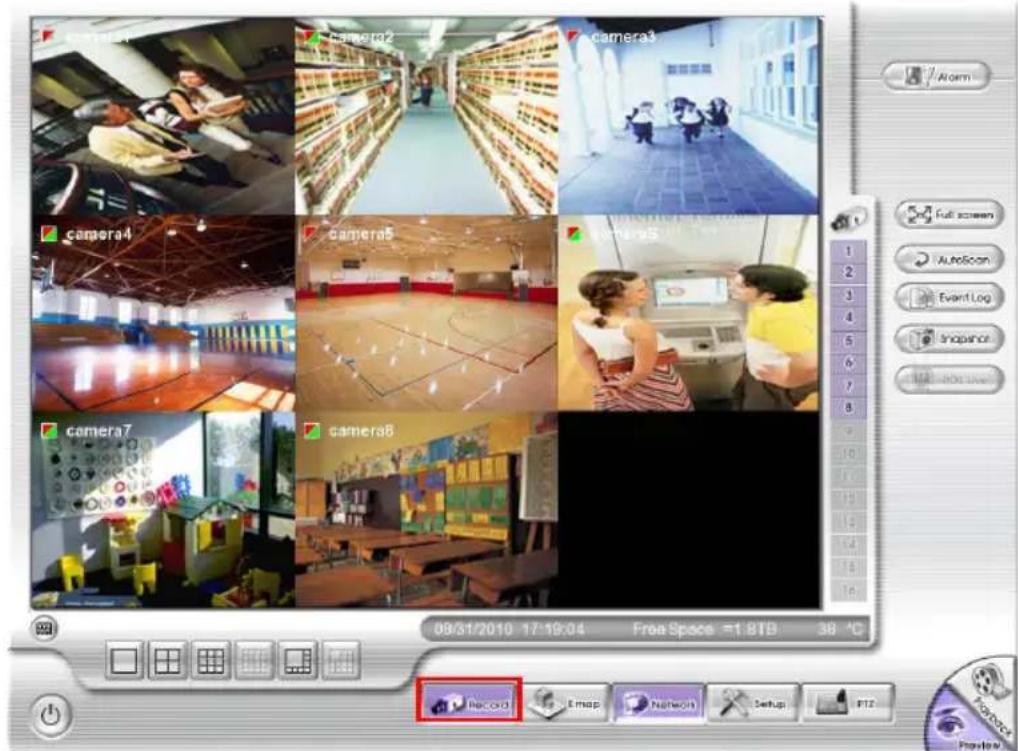
While monitoring, user can click Record (button to save the live video on hard disk and recorded video can playback in local site.
To stop recording, press Record button again and enter the authentication password.
EH1008H-4 Nano/Nano ^+ Preview UI
V. Familiarizing the Buttons in Preview Mode
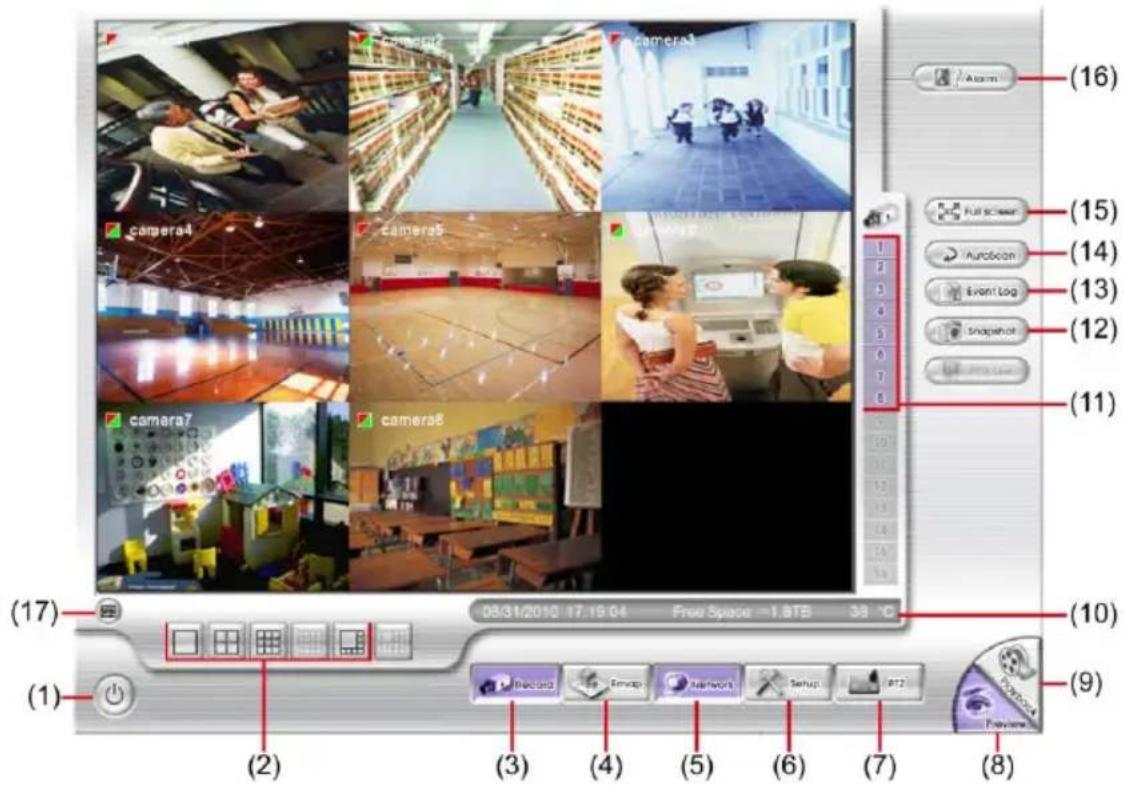
EH1008H-4 Nano/Nano ^+ Preview UI
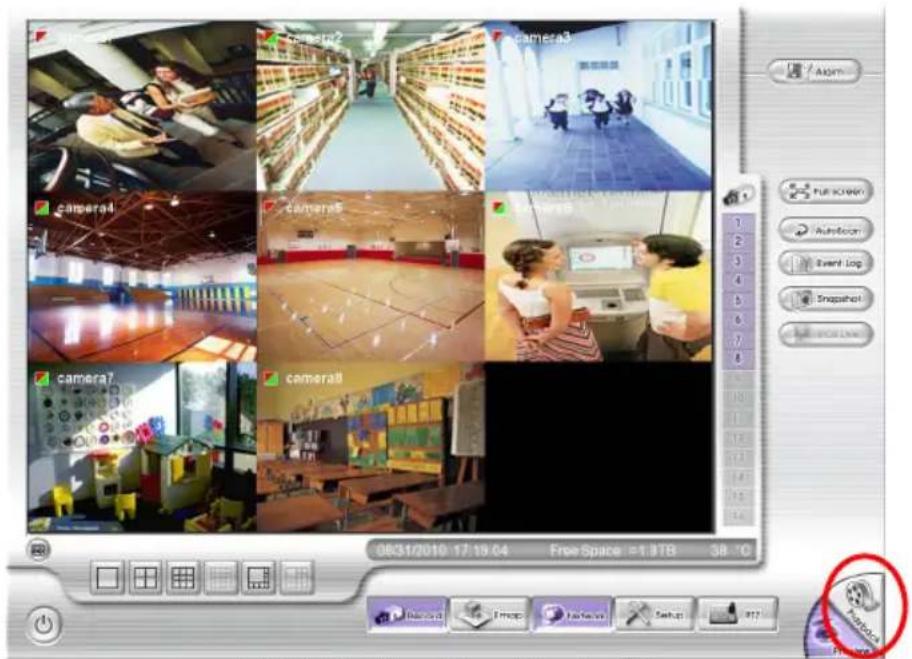
| Name | Function |
| (1) Logout | - Reboot: To restart the DVR system. It is required to enter the password- Power Off: To shut down the DVR system. It is required to enter the password- Login: Using different ID to login to DVR system.- Cancel: To return to DVR application.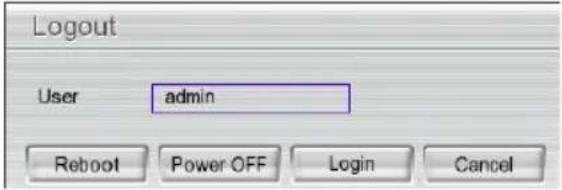 |
| (2) Split Screen Mode | Select from four (4) different split screen types to view all the camera, or one camera over the other or alongside on a single screen. It also allows you to switch and view different camera number. |
 | - When you are in single screen mode, Right click and Drag a square on the area you want to enlarge. Right-click on screen again, the screen view will back to normal view.- When you are in full screen mode, partial enlarges does not support. |
| (3) Record | Start/stop video recording. |
| (4) EMap | Display the map in each area, and the location of camera/ sensor/ relay and the warning. |
| (5) Network | Enable/disable remote system access. This feature allows you to access DVR server from a remote location via internet connection. The default is disabled. |
| (6) Setup | Configure the system settings. |
| (7) PTZ | Access PTZ control panel. |
| (8) Preview | Switch to Preview mode. This allows you to view live camera display. |
| (9) Playback | Switch to Playback mode. This allows you to view the recorded video file. |
| (10) Status bar | Display the current date, time, hard disk free space and temperature of unit. |
| (11) Camera ID | Show the number of cameras that are being viewed. When you are in single screen mode, click the camera ID number to switch and view other camera. |
| (12) Snapshot | Capture and save the screen shot in *.jpg format. |

Please plug the USB pen drive to DVR server before press Snapshot button.
| (13) Event log | Show the record of activities that take place in the system. |
| (14) AutoScan | Start/Stop video screen cycle switch. |
| (15) Full screen | View in full screen. To return, press the right button of the mouse or ESC on the keyboard or click the arrow icon. |
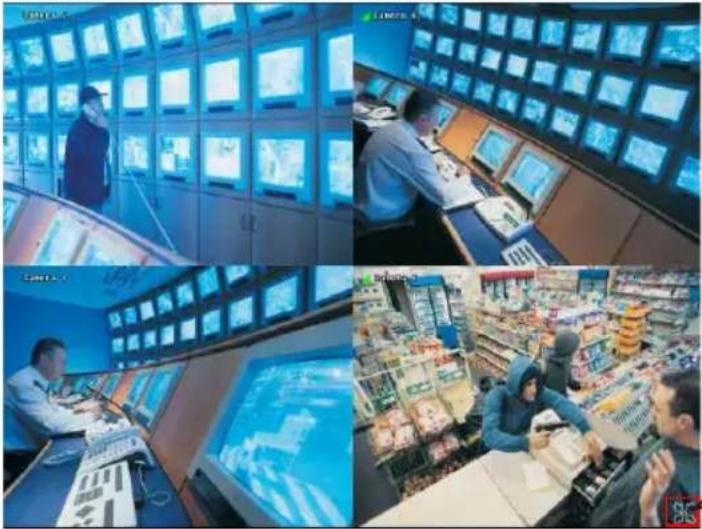  | |
| When you switch to full screen in multiple-screen mode, Left click to toggle to only display one of the video in the multiple-screen mode or all. | |
| (16) Alarm | Alert and display warning info. |
| (17) Virtual | Click to enable virtual keyboard. |
Name
Function
Keyboard
VI. Playback Recoded Video
- In preview mode, click the Playback button.
EH1008H-4 Nano/Nano ^+ Preview UI
- In Time and Date Selection window, select the date and time to playback. The numbers from 00 to 23 represent the time in 24-hour clock. The numbers from 01 to 08 represent the camera ID. The blue colored column indicates that there is a recorded video file on that period of time. While the red colored column indicates on where to start playing the recorded video file.
- After selected the date and time, click OK to start playback. User will see the selected video file playback on the screen.
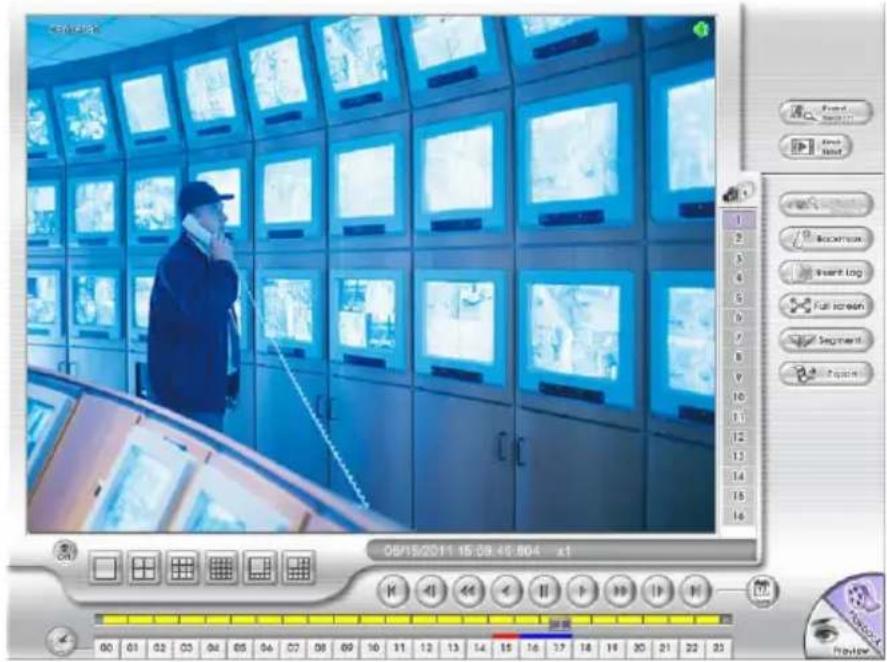
Playback Mode
VII. Familiarizing the Buttons in Playback Mode
To switch in Playback mode, click Playback button at the lower right corner of Preview mode.
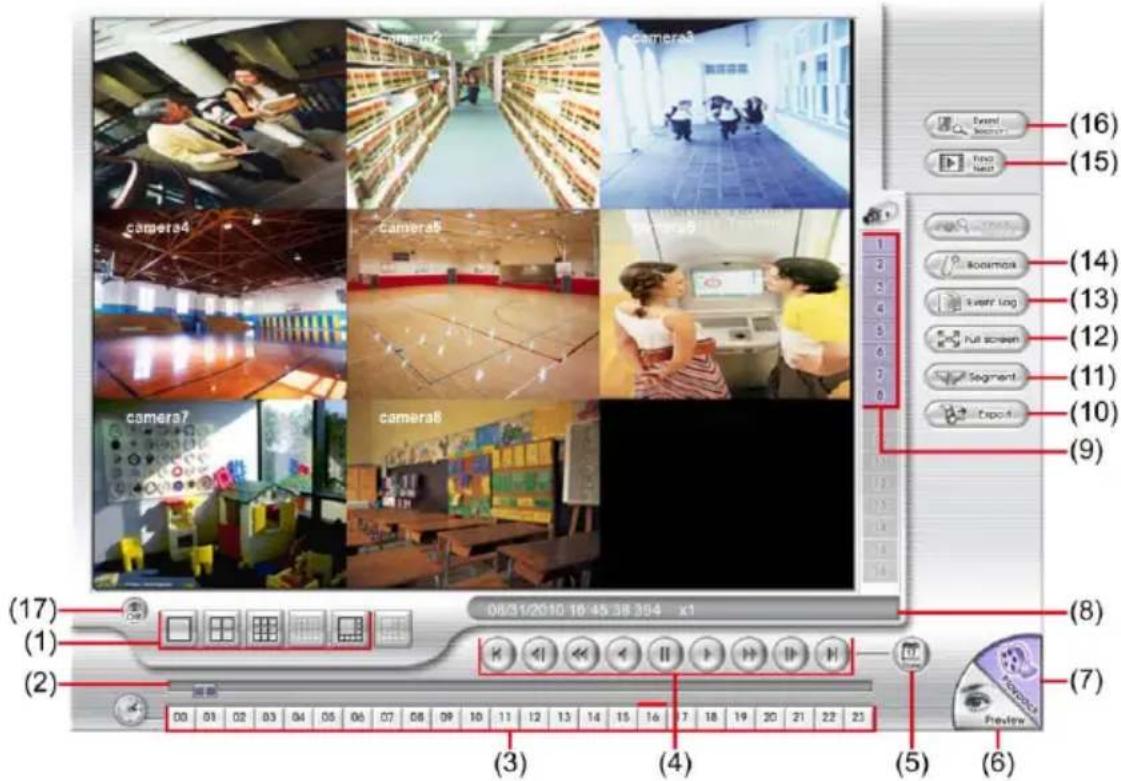
EH1008H-4 Nano/Nano ^+ Playback UI
| Name | Function |
| (1) Split Screen Mode | Select from 4 different split screen type to playback the recorded video file of all the camera, or one camera over the other or alongside on a single screen. |
| (2) Progress bar | Show the progress of the file being played. You may move the bar to seek at any location of the track. |
| (3) Hour Buttons | Select and click to playback the recorded video file on the specific time frame. |
 The Hour buttons represent the time in 24-hour clock. The blue bar on top of the hour button indicates that there is a recorded video file on that period of time. While the red bar indicates that you are currently viewing the recorded video file. The Hour buttons represent the time in 24-hour clock. The blue bar on top of the hour button indicates that there is a recorded video file on that period of time. While the red bar indicates that you are currently viewing the recorded video file. | |
| (4) Playback Control Buttons | Begin: Move at the beginning of the recorded video file.Previous: Go back to the previous frame.Slower: Play the recorded video file at the reduce speed from 64x, 32x, 16x, 8x, 4x, 2x, 1x, 1/2X, 1/4X.Rewind: Wind back the recorded video file.Pause: Briefly stop playing the recorded video file.Play: Play the recorded video file. |
| (4) PlaybackControl Buttons | Faster: Play the recorded video file at the speed of 2x, 4x, 8x, 16x, 32x or 64x.Next: Go to the next frame.End: Go to the end of the recorded video file. |
| (5) Date | Select the date on the calendar and the time from 00 to 23 to where to start playing the recorded video file. |
 The numbers from 00 to 23 represent the time in 24-hour clock. The numbers from 01 to 04 or 08 represent the camera ID. The blue colored column indicates that there is a recorded video file on that period of time. While the red colored column indicates on where to start playing the recorded video file. The numbers from 00 to 23 represent the time in 24-hour clock. The numbers from 01 to 04 or 08 represent the camera ID. The blue colored column indicates that there is a recorded video file on that period of time. While the red colored column indicates on where to start playing the recorded video file. | |
| (6) Preview | Switch to Preview mode. |
| (7) Playback | Switch to Playback mode to view the recorded video file. |
| (8) Status bar | Display the recorded date, time and play speed. |
| (9) Camera ID | Show the number of cameras that are being viewed. When you are in single screen mode, click the camera ID number to switch and view other camera. |
| (10) Export | Export includes Snapshot, Output Video Clip, and Backup function.Snapshot: Capture and save the screen shot in *.jpg format.Output Video Clip: Save the segmented file in *.dvr format to external USB storage device.Backup: Save the playback file to USB device or DVD disk |
| (11) Segment | Keep a portion of the recorded video.Use the Playback Control buttons or drag the bar on the playback progress bar and pause on where you want to start the cut. Then, click Segment to set the begin mark.Use the Playback Control buttons or drag the bar on the playback progress bar and pause on where you want to end the cut. Then, click Segment to set the end mark. To cancel segmentation or set the segment marks from the start, click Segment button again.Click Export button → Output Video Clip to save the video segment to the USB storage device. |
| (12) Full screen | View in full screen. To return, press the right button of the mouse or ESC on the keyboard or click the arrow icon.When you switch to full screen in multiple-screen mode, Left click to toggle to only display one of the video in the multiple-screen mode or all. |
| (13) Event log | Show the record of activities that take place in the system. To filter the records, select and click the option button to only display Event, System, Operation, Network or All. |
Name
Function
| (14) Bookmark | Mark a reference point when reviewing the recorded video file to which you may return for later reference.1. ClickBookmarkbutton2. In the Bookmark dialog box, you may do the following:-Addto create the new reference mark in the bookmark list.-Editto change the mark description.-Deleteto remove the selected reference mark in the list.-DeleteAllto remove all the reference marks in the list.-Exitto close Bookmark dialog box.3. Select and click one in the bookmark list to review the file. |
| (15) Find Next | Search for the next event or changes in the motion detector frame. You can use this when you are using Event Search function. |
| (16) Event Search | Search from the recorded activities that were recorded in event log (i.e., Sensor, Motion, Video Loss). |
| (17) De-interlace | To enhance the video quality. Set the de-interlace mode to #1, if you are capturing motionless picture and #2, if it captures lots of movement. |
- TRADEMARKS
- NOTICE
- WARNING
- INFORMATION
- Contents
- Package Contents
- EH1004H-4 Nano/Nano + (4CH)
- EH1008H-4 Nano/Nano + (8CH)
- Hardware Installation
- Install the hard disk
- Device Connection
- ■ EH1004H-4 Nano/Nano +
- ■ EH1004H-4 Nano/EH1008H-4 Nano
- ■ EH1004H-4 Nano + /EH1008H-4 Nano +
- First Time Using the DVR Unit
- ■ Analog camera
- IP camera
- Recording the Live Video
- Familiarizing the Buttons in Preview Mode
- Playback Recoded Video
- Familiarizing the Buttons in Playback Mode
- Name
- Function
Brand : AVer
Model : EH1116H-4
Category : Video recorder