
VWM198PBA - Wine cellar Vintec - Free user manual and instructions
Find the device manual for free VWM198PBA Vintec in PDF.


| Product Type | Wine Cooler |
| Brand | Vintec |
| Model | VWM198PBA, VWM198PBA-R, VWM198PBA-L |
| Power Supply | 220-240 V / 50 Hz |
| Refrigerant | R600a (hydrocarbon, flammable) |
| Climate Class | SN, N, ST, T (ambient +10°C to +43°C) |
| Dimensions (H x W x D) | 1072 x 595 x 609 mm |
| Shelving | 1 display shelf, 1 fixed shelf, 7 telescopic shelves, 1 fixed 3/4 shelf |
| Lighting | LED with dimmable levels and multiple modes (always on, door-activated, etc.) |
| Temperature Control | Electronic dual zone (upper and lower), adjustable |
| Operating Modes | Single zone, Multi zone, Cellaring mode (fixed 12°C) |
| Special Functions | Child lock, Sabbath mode, Demo mode, Mute sounds |
| Alarms | High/low temperature, door open, filter change |
| Defrosting | Automatic |
| Filter | Charcoal filter, replace every 6 months |
| Installation | Free-standing or built-in; requires ventilation gap (min 30mm sides, 50mm rear) |
| Cleaning | Warm water with mild detergent; no abrasive cleaners |
| Safety Features | Anti-tip device, lock, warnings for flammable refrigerant |
| Warranty | 24 months (Australia and New Zealand) |
| Country of Origin | Made in Denmark |
Frequently Asked Questions - VWM198PBA Vintec
User questions about VWM198PBA Vintec
0 question about this device. Answer the ones you know or ask your own.
Ask a new question about this device
Download the instructions for your Wine cellar in PDF format for free! Find your manual VWM198PBA - Vintec and take your electronic device back in hand. On this page are published all the documents necessary for the use of your device. VWM198PBA by Vintec.
USER MANUAL VWM198PBA Vintec
VWM198PBA-R, VWM198PBA-L
As the appliance contains a flammable refrigerant, it is essential to ensure that the refrigerant pipes are not damaged.
The quantity and type of the refrigerant used in your appliance is indicated on the rating plate.
Standard EN378 specifies that the room in which you install your appliance must have a volume of 1m^3 per 8g of hydrocarbon refrigerant used in the appliances. This is to avoid the formation of flammable gas/air mixtures in the room where the appliance is located in the event of a leak in the refrigerant circuit.
WARNING:
Keep ventilation openings in the appliance's cabinet or in the built-in structure clear of obstruction.
WARNING:
Do not use mechanical devices or other means to accelerate the defrosting process than those recommended by the manufacturer.
WARNING:
Do not damage the refrigerant system.
WARNING:
Do not use electrical appliances inside the refrigerated storage compartment, unless they are of a type recommended by the manufacturer.
WARNING:
This appliance is suitable for indoor use only.
WARNING:
This appliance is not intended for use by persons (including children) with reduced physical, sensory or mental capabilities, or lack of experience and knowledge, unless they have been given supervision or instruction concerning use of the appliance by a person responsible for their safety.
Children should be supervised to ensure that they do not play with the appliance.
WARNING:
Children must not clean the appliance or carry out general maintenance unless they are at least 8 years old and are being supervised.
WARNING:
Children must not play with, on, or around the appliance.
WARNING:
This appliance contains insulation formed with flammable blowing gases. Avoid safety hazards by carefully disposing of this appliance.
WARNING:
Do not store explosives, such as aerosol cans with flammable propellants in the appliance.

WARNING:
When this symbol is used, it indicates flammable materials are used. To avoid relevant hazards, it is required to carefully dispose of this appliance.
!R600A REFRIGERANT WARNING:
This appliance contains R600a refrigerant. Avoid safety hazards by carefully installing, handling, servicing and disposing of this appliance.
- It is hazardous for anyone other than an Authorised Service Person to service this appliance. In Queensland – the authorised Service Person MUST hold a Gas Work Authorisation for hydrocarbon refrigerants, to carry out Servicing or repairs which involve the removal of covers.
- Ensure that the tubing of the refrigerant circuit is not damaged during transportation and installation.
WARNING:
When positioning the appliance, ensure the power cord is not trapped or damaged.
WARNING:
Do not locate multiple portable socket-outlets or portable power supplies at the rear of the appliance.
VINTEC
WARNING:
If the power cord is damaged, it must be replaced by the manufacturer, its service agent or similarly qualified persons in order to avoid a hazard (For Australia and New Zealand).
• Always keep the keys in a separate place and out of reach of children.
- Before servicing or cleaning the appliance, unplug the appliance from the mains or disconnect the electrical power supply.
- Frost formation on the interior evaporator wall and upper parts is a natural phenomenon. Therefore, the appliance should be defrosted during normal cleaning or maintenance.
- Please note that changes to the appliance construction may cancel all warranty and product liability.
- If the supply cord is damaged, it must be replaced by the manufacturer, its service agent, or similarly qualified persons inorder to avoid a hazard.
- Do not use extension cords.
- This appliance is intended to be used exclusively for the storage of wine.
CLASS 1 LED PRODUCT

WARNING:
LED lighting
Your appliance is fitted with long life LED lighting. In the unlikely event the LED lights should fail, then the LED lights should be serviced by the service agent, to avoid a safety hazard. Refer to the warranty page for contact details.
Contents
Warning 2
Before use 6
Savings in energy consumption in the use . 6
Get to know your wine cooler 7
Electrical connection 9
Installation and start-up 9
Installation 10
Operation and function ......13
Defrosting, cleaning and maintenance .....18
Fault finding 19
Charcoal Filter Location & removal .....20
Disposal 21
Warranty for Australia and New Zealand ..22
VINTEC
Before use
On receipt, check to ensure that the appliance has not been damaged during transport. Transport damage should be reported to the local distributor before the wine cooler is put to use.
Remove the packaging. Clean the inside of the cabinet using warm water with a mild detergent. Rinse with clean water and dry thoroughly (see cleaning instructions). Use a soft cloth.
If during transport the appliance has been laid down, or if it has been stored in cold surroundings (colder than +5°C), it must be allowed to stabilise in an upright position for at least 24 hours before being switched on.
Note: Do not switch on for at least 24 hours
Note: for household use only
This appliance is intended to be used in household and similar applications such as
- staff kitchen areas in shops, offices and other working environments;
- farm houses and by clients in hotels, motels and other residential type environments;
- bed and breakfast type environments;
- catering and similar non-retail applications.
Savings in energy consumption in the use
The energy consumption reduces ..
- the lower the ambient temperature is.
- the warmer thermostat set point is.
- the lower the number and the shorter the length of the door openings is.
Important Information that may impact your Manufacturer's Warranty
Adherence to the directions for use in this manual is extremely important for health and safety. Failure to strictly adhere to the requirements in this manual may result in personal injury, property damage and affect your ability to make a claim under the Vintec manufacturer's warranty provided with your product. Products must be used, installed and operated in accordance with this manual. You may not be able to claim on the Vintec manufacturer's warranty in the event that your product fault is due to failure to adhere to this manual.
Get to know your wine cooler

Get to know you wine cooler
User Manual
Electrical connection
Wiring and connections in power supply systems must been all applicable (local and national) electrical codes. Consult these codes lengths and sizes prior to cabinet installation.
The socket should be freely accessible.
Connect the appliance only to 220/240 V / 50Hz alternating current via a correctly installed earthed socket.
The socket must be fused with a 10-13 A fuse.
Information regarding voltage, current or power are given on the rating plate
The power cord may be replaced by a technician only.
CAUTION: Never put the appliance in a location that is too cold or unprotected, for example in a garage or on a verandah.
The rating plate provides various technical information as well as type and serial number.
Installation and start-up
Placement
For safety and operational reasons, the appliance must not be installed outdoors.
The appliance should be placed on a level surface in a dry, well ventilated room (max. 75% relative air humidity). Never place the appliance close to sources of heat such as cookers or radiators, and avoid placing it in direct sunlight.
Ambient temperature
The climate class is stated on the name plate. This specifies the optimum ambient temperature. Wine coolers with winter position, however, function at ambient temperatures as low as 5^ C.
| Climate class Optimum room temperature | |
| SN +10 °C to +32 | °C |
| N +16 °C to +32 | °C |
| ST +16 °C to +38 | °C |
| T +16 °C to +43 | °C |
VINTEC
Model...xxxxxxxxxxxxxxxxx
Made in Denmark
GROSS VOLUME REFRIG. I NET VOLUME REFRIG. 220-240V\~50Hz W A Temperature Class.
Serial No....00000000

REFRIG. R600a x.xxx KG

fig.3
| Max ambient temperature class. | |
| Class 3 | 25 °C |
| Class 4 | 30 °C |
| Class 5 | 40 °C |
| Class 7 | 35°C |
VINTEC
Installation
The surface on which the appliance is to be placed must be level. Do not use a frame or similar.
The appliance can be installed as a free-standing unit against a wall, built into a closet or lined up with other appliances.
It is important that the appliance be well ventilated and that air can circulate unhindered above, below and around it.
The figures below illustrate how the necessary air circulation around the appliance can be ensured (fig 4).
Ensure the plug is accessible when the appliance is in position, or a switch is incorporated in the fixed wiring according to the wiring rules. (See a licensed electrician for further advice).
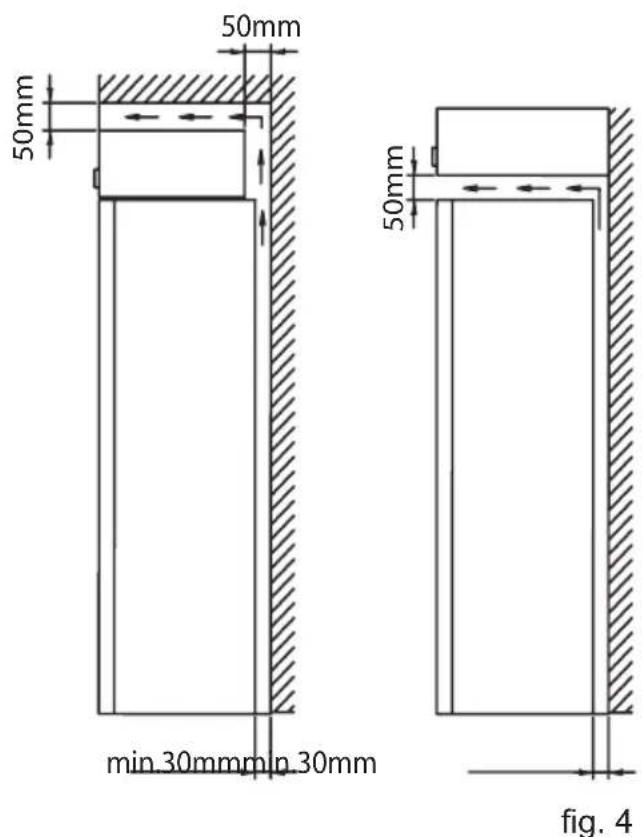

fig. 5
natural_image
Technical line drawing of a structural panel with two embedded circular components and two small human figures, no text or symbols present.fig. 6
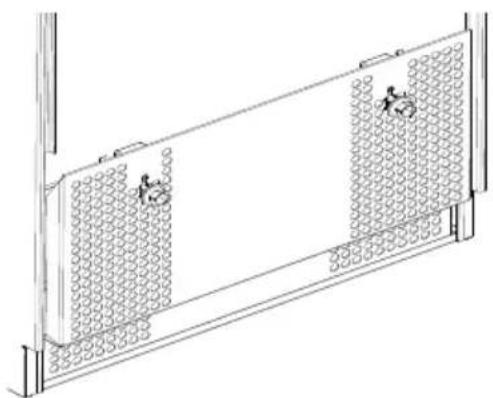
The spacers on the rear of the appliance ensure sufficient air circulation. Fit the two spacers with the appliance as shown in fig. 6
Anti-tip
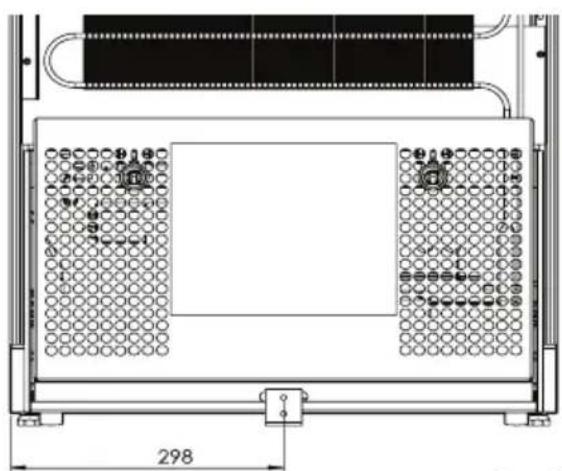
It is recommended to install the anti-tip device to avoid the unit from tipping over.
The anti-tip device must either be secured to the floor or wall, whatever is most appropriate.
Please note a distance part must be applied if anti-tip is secured to wall.

natural_image
Isometric line drawing of a mechanical bracket or housing with internal compartments and a central hole (no text or symbols)fig. 7
natural_image
Technical line drawing of a rectangular electronic device with grid patterns and a central panel, shown with dimension标注 (no text or symbols)fig. 8 fig. 9

natural_image
Technical line drawing of a door frame with diagonal hatching and dimension label (53), no readable text or symbols present.VINTEC
Setting up
It is important that the appliance be absolutely level. It can be levelled by screwing the adjustable feet at the front of the appliance up or down (fig. 10). Use a spirit level to check that the appliance is absolutely level sideways.

natural_image
Technical line drawing of a mechanical device with no visible text or symbolsFixed shelf Max. 65 kg.

Telescopic shelf Max. 13 kg.
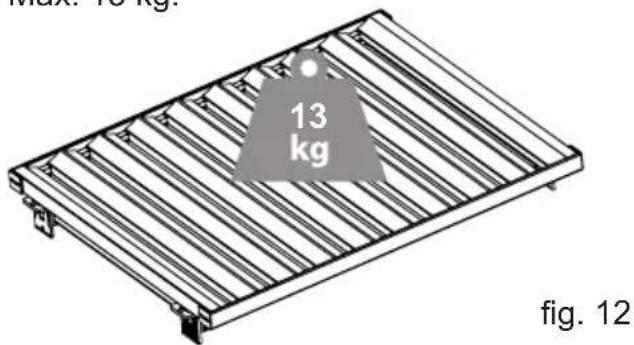
To optimise the storage capacity of you wine cabinet it has been designed so that only Bordeaux can be stored on the outer position of the shelf.

natural_image
Technical line drawing of a multi-level rack-mounted storage unit with multiple cylindrical tanks and meshed panels (no text or labels)fig. 13
Operation and function

fig. 14
Electronic control
The electronic control ensures that the temperatures set at the top and at the bottom of the appliance are maintained. This is achieved by means of an advanced control of the refrigeration system, the heating element, and the fan. The set temperature will be stored in the event of power failure.
The electronic control has the following functions:
- Light switch
- Temperature setting
• Temperature indication - Alarm for too high and too low temperatures
- Door alarm / Filter alarm
- Muliti / Single / Cellar mode
- Child lock
- Sabbath mode
* The light may either be turned on constantly or only when the door is open. 7 different modes.
Temperature indication
The display shows the actual temperature. The left digits of the display indicate the temperature at the top of the appliance, and the right digits of the display indicate the temperature at the bottom of the appliance.
Upper temperature set

Single press to decrease/increase the Set temperature. First press shows the current Set temperature and don't increase/decrease it. The numbers blink to indicate that is being change. After 5 seconds without any interaction with the “-/+”, the numbers stop blink and show the Current temperature.
Bottom temperature set

Single press to decrease/increase the Set temperature. First press shows the current Set temperature and don't increase/decrease it. The numbers blink to indicate that is being change. After 5 seconds without any interaction with the “-/+”, the numbers stop blink and show the Current temperature.
Lights On/Off

Press to turn the lights ON/OFF.
The light should take less than 1 second to transition from on to off and vice versa.
Lights settings menu

Press & hold Light button for 3 seconds to enter the Lights settings menu.
Both temperature displays blink and show a specific code.
Any alert turns off temporarily.

Press “-/+” to increase/decrease the light “level”.
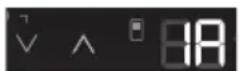
Light behaviour
Upper temperature display enables the following settings.
1A: Lights always ON bright when door is open. Lights dim to selected level when the door is closed. This is the factory default setting.
2A: Lights always ON bright when door is open. Light turn OFF when the door is closed.
3A: Lights always ON.
4A: Lights always ON at selected dim level when door is open. Lights change to the highest dim level when the door is closed.

Light dim level
Lower temperature display controls light dim level. There are 9 light levels
1L: Lowest level / least bright
9L: Highest level / brightest. This is the factory default dim level.
Child Lock

Press and hold Mode button for 3 seconds to activate/deactivate child lock.

Child lock indicator. Enabling Child lock prevents changes to the UI until disabled.
Sabbath mode Activation


Simultaneously press and hold Upper Zone “-/+” button and Lower Zone "-" button for 5 seconds to activate/deactivate Sabbath mode. When activated, both Upper and Lower temperature displays show "Sb" and "On" until it is deactivated.
While inSabbath mode:
- All button functionality is disabled except for deactivating Sabbath Mode
- All lights except for Upper and Lower temperature displays are disabled, and all sounds are munted.
- Opening or closing the door will not enable any notifications or alarms. The compressor will only engage or change speeds after the door has been left open for at least 30 seconds.
- No alerts will be displayed until the Sabbath Mode is deactivated, except the High/Low temperature alerts.
- All sounds are muted except the audio alarm for High/Low temperature alerts.
Sabbath Mode exception:

The High/Low Temperature alert will displayed in case of a high or low temperature inside the appliance. The alert icon will turn On, but will not blink and it will remain until the Sabbath mode is deactivated. An audio alarm will sound and automatically turn Off after 10 minutes.

When Sabbath mode is deactivation, temperature displays will show the current temperatures.
Changing between°C/°F

Single combined press & release on increase bottom temperature set & Light button to change the temperature type (°C/°F).
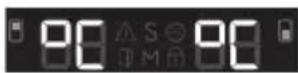
When °C is set, Bottom & Upper temperature display shows and blinks "°C" for 5 seconds before returning to set temperature & "°C" for 5 seconds. Any alert turns off temporarily.

When F^ is set, Bottom & Upper temperature display shows and blinks “ F^ ” & “ F^ ” for 5 seconds. Any alert turns off temporarily.
Reset Filter alert

Press & Hold combined on Mode & decrease bottoms for 5 seconds to reset the filter change counter.

If the alert is on, it turns off.
Single/Muliti/Cellaring zone set

Single press Mode to change the Single zone, Multi zone, and Cellaring mode.

If the mode set is Single, the Single zone feedback will light-up, and blink and both temperatures change to 18°C. After 5 seconds without any interaction with the Mode button, the Single zone feedback stops blinking and keeps steady, and both temperatures show the current temperature. In Single zone mode, both temperature controls will work in sync.

If the mode set is Multi, the Multi zone feedback will light-up, and blink and the upper temperature changes to 18^ C and 8^ C on the bottom. After 5 seconds without any interaction with the Mode button, the Multi zone feedback stops blinking and keeps steady and both temperatures show the current temperature.
In Multi zone mode, each temperature control will work separately.

If the mode set is Cellaring, the Single and Multi zone feedback will be Off, and Bottom & Upper temperature display shows "CE" & "CE" blinking. After 5 seconds without any interaction with the Mode button, the "CE" stops blinking and keeps showing "CE" until the Cellaring mode is deactivated. In Cellaring mode, the temperature is fixed and can not be changed - 12°C.
Demo mode
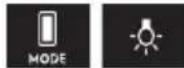
Press & Hold combined on Mode & Lights buttons for 5 seconds to activate/deactivate Demo mode.

When activated, the bottom & Upper temperature display shows and blinks "dE & "ON" for 5 seconds. Any alert turns off temporarily. To keep communication that the machine is in Demo mode, - every 5 minutes the Bottom & Upper temperature display shows and blinks "dE & "OF" for 5 seconds.

When deactivated, Bottom & Upper temperature display shows and blinks "dE" & "OF for 5 seconds. Any alert turns off temporarily.
Mute sounds
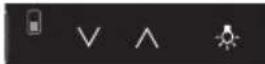
Press & Hold combined on decrease bottom temperature set & Light buttons for 5 seconds to activate/deactivate Mute sounds.
High / Low temperature alert
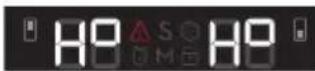
If the Current temperature is 5^ C above the Set temperature for more than 60 minutes, High Temperature alert shows “H°” and blinks the alert icon.
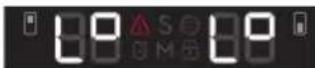
If the Current temperature is 2^ C below the Set temperature for more than 60 minutes, Low Temperature alert shows “L°” and blinks the alert icon.
The alerts will not sound in the first 90 minutes after power on.
Door open alert

When the door stays open for some amount of time (5 minutes) the icon turns On and the lights start to dim up and down. If the door is kept open, after more than 2 minutes a sound is played.
Any interaction on the Control panel disables the blinking and audio signal. The icon stays on as long the door is open and the lights go back to normal.
Change filter alert

After 6 months the icon turns On.
See "Reset" filter alert, to know how to reset the alert. After reset, the icon turns Off and the count is reset.
Defrosting, cleaning and maintenance
Automatic defrosting
The wine cooler is defrosted automatically. Defrost water runs through a pipe and is collected in a tray above the compressor where the heat generated by the compressor causes it to evaporate. The defrost water tray should be cleaned at intervals.
Cleaning
Before cleaning the appliance, unplug it from the main supply. The cabinet is best cleaned using warm water (max.65°C) with a little mild detergent. Never use cleaning agents that scour. Use a soft cloth. Rinse with clean water and dry thoroughly. The defrost water channel, in which condensation from the evaporator runs, is located at the bottom of the rear inside wall of the cabinet and must be kept clean. Add a few drops of disinfectant, e.g. Rodalon, to the defrost water drain a couple of times a year, and clean the drain using a pipe cleaner or similar. Never use sharp or pointed implements.
The sealing strip around the door must be cleaned regularly to prevent discolouration and prolong service life. Use clean water. After cleaning the sealing strip, check that it continues to provide a tight seal.
Dust collecting on the condenser on the rear of the cabinet, the compressor and in the compressor compartment is best removed using a vacuum cleaner.
Spare parts
When ordering spare parts, please state the type, serial and product numbers of your appliance. This information is given on the rating plate. The rating plate contains various technical information, including type and serial numbers.
VINTEC
Model...xxxxxxxxxxxxxxxxx
Made in Denmark
Serial No....00000000
GROSS VOLUME REFRIG.
I NET VOLUME REFRIG.
220-240V\~ 50Hz
A Temperature Class.
REFRIG. R600a x.xxx KG
PNC:XXXXXXXXXX
ML:00
Polyurethane foam with Cyclopentane
Refrigerating circuit with R600a


fig. 15
Fault finding
| Fault Possible cause | Remedy | |
| The appliance is not working. | Power failure; the fuse is blown; the appliance is not plugged in correctly. | Check that power is connected. Reset the fuse. |
| Water collects in the bottom of the cabinet. | The defrost water pipe is blocked. | Clean the defrost water channel and the drain hole on the rear wall of the cabinet. |
| Vibration or bothersome noise. | The appliance is not level. The appliance is resting against other kitchen elements. Containers or bottles inside the cabinet are rattling against one another. | Level the appliance using a spirit level.Move the appliance away from the kitchen elements or appliances it is in contact with. Move containers and/or bottles apart. |
| Compressor runs continuously. | High room temperature. Ensure adequate ventilation. | |
| Error code (E1) Top sensor not working. The appliance continues to run as a single zone. | Call service agent to repair sensor. | |
| Error code (E2) Defrost sensor not working. Call service agent to repair sensor. | ||
| Error code (E3) Bottom sensor not working. The appliance continues to run as a single zone. | Call service agent to repair sensor. | |
VINTEC
Charcoal Filter Location & removal
Removal method:
Open main door & simply pull out (towards the front of the cabinet)

natural_image
Interior view of a stainless steel oven with slatted shelves and a circular vent on the right side (no text or symbols visible)User Manual
Disposal
Information for Users on Collection and Disposal of Old Equipment and used Batteries

These symbols on the products, packaging, and/or accompanying documents mean that used electrical and electronic products and batteries should not be mixed with general household waste. For proper treatment, recovery and recycling of old products and used batteries, please take them to applicable collection points, in accordance with your national legislation and the Directives 2012/19/EU and 2006/66/EC.
By disposing of these products and batteries correctly, you will help to save valuable resources and prevent any potential negative effects on human health and the environment which could otherwise arise from inappropriate waste handling.
For more information about collection and recycling of old products and batteries, please contact your local municipality, your waste disposal service or the point of sale where you purchased the items.
Penalties may be applicable for incorrect disposal of this waste, in accordance with national legislation.
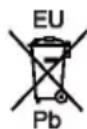
For business users in the European Union.
If you wish to discard electrical and electronic equipment, please contact your dealer or supplier for further information.
Information on Disposal in other Countries outside the European Union
These symbols are only valid in the European Union. If you wish to discard this product, please contact your local authorities or dealer and ask for the correct method of disposal.
Note for the battery symbol:
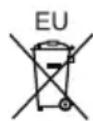
This symbol might be used in combination with a chemical symbol. In this case it complies with the requirement set by the Directive for the chemical involved.
Warranty for Australia and New Zealand
This document sets out the terms and conditions of the product warranties for Vintec/Transtherm Appliances. It is an important document. Please keep it with your proof of purchase documents in a safe place for future reference should there be a manufacturing defect in your Appliance. This warranty is in addition to other rights you may have under the Australian Consumer Law.
1. In this warranty:
(a) ‘ACL’ or ‘Australian Consumer Law’ means Schedule 2 to the Competition and Consumer Act 2010;
(b) ‘Appliance’ means any Electrolux product purchased by you and accompanied by this document;
(c) 'ASC' means Electrolux's authorised serviced centres;
(d) 'Vintec/Transtherm' is the brand controlled by Electrolux Home Products Pty Ltd of 163 O'Riordan Street, Mascot NSW 2020, ABN 51 004 762 341 in respect of Appliances purchased in Australia and Electrolux (NZ) Limited (collectively "Electrolux") of 3-5 Niall Burgess Road, Mount Wellington, in respect of Appliances purchased in New Zealand;
(e) 'Warranty Period' means the period specified in clause 3 of this warranty;
(f) ‘you’ means the purchaser of the Appliance not having purchased the Appliance for re-sale, and ‘your’ has a corresponding meaning.
2. Application:
This warranty only applies to new Appliances, purchased and used in Australia or New Zealand and is in addition to (and does not exclude, restrict, or modify in any way) other rights and remedies under a law to which the Appliances or services relate, including any “non-excludable” statutory guarantees in Australia and New Zealand.
3. Warranty Period:
Subject to these terms and conditions, this warranty continues for in Australia for a period of 24 months and in New Zealand for a period of 24 months, following the date of original purchase of the Appliance.
4. Repair or replace warranty:
During the Warranty Period, Electrolux or its ASC will, at no extra charge if your Appliance is readily accessible for service, without special equipment and subject to these terms and conditions, repair or replace any parts which it considers to be defective. Electrolux may, in its absolute discretion, choose whether the remedy offered for a valid warranty claim is repair or replacement. Electrolux or its ASC may use refurbished parts to repair your Appliance. You agree that any replaced Appliances or parts become the property of Electrolux.
5. Travel and transportation costs:
Subject to clause 7, Electrolux will bear the reasonable cost of transportation, travel and delivery of the Appliance to and from Electrolux or its ASC. Travel and transportation will be arranged by Electrolux as part of any valid warranty claim.
6. Proof of purchase:
is required before you can make a claim under this warranty.
7. Exclusions:
You may not make a claim under this warranty unless the defect claimed is due to faulty or defective parts or workmanship. This warranty does not cover:
(a) light globes, batteries, filters or similar perishable parts;
User Manual
(b) parts and Appliances not supplied by Electrolux;
(c) cosmetic damage which does not affect the operation of the Appliance;
(d) damage to the Appliance caused by:
(i) negligence or accident;
(ii) misuse or abuse, including failure to properly maintain or service;
(iii) improper, negligent or faulty servicing or repair works done by anyone other than an Electrolux authorised repairer or ASC;
(iv) normal wear and tear;
(v) power surges, electrical storm damage or incorrect power supply;
(vi) incomplete or improper installation;
(vii) incorrect, improper or inappropriate operation;
(viii)insect or vermin infestation;
(ix) failure to comply with any additional instructions supplied with the Appliance; In addition, Electrolux is not liable under this warranty if:
(a) the Appliance has been, or Electrolux reasonably believes that the Appliance has been, used for purposes other than those for which the Appliance was intended, including where the Appliance has been used for any non-domestic purpose;
(b) the Appliance is modified without authority from Electrolux in writing;
(c) the Appliance's serial number or warranty seal has been removed or defaced.
8. How to claim under this warranty:
To enquire about claiming under this warranty, please follow these steps:
(a) carefully check the operating instructions, user manual and the terms of this warranty;
(b) have the model and serial number of the Appliance available;
(c) have the proof of purchase (e.g. an invoice) available;
(d) telephone the numbers shown below.
9. Australia:
For Appliances and services provided by Electrolux in Australia: Electrolux goods come with guarantees that cannot be excluded under the Australian Consumer Law. You are entitled to a replacement or refund for a major failure and for compensation for any other reasonably foreseeable loss or damage. You are also entitled to have the Appliance repaired or replaced if the Appliance fails to be of acceptable quality and the failure does not amount to a major failure. ‘Acceptable quality’ and ‘major failure’ have the same meaning as referred to in the ACL.
10. New Zealand:
For Appliances and services provided by Electrolux in New Zealand, the Appliances come with a guarantee by Electrolux pursuant to the provisions of the Consumer Guarantees Act, the Sale of Goods Act and the Fair Trading Act. Where the Appliance was purchased in New Zealand for commercial purposes the Consumer Guarantee Act does not apply.
11. Confidentiality:
You accept that if you make a warranty claim, Electrolux and its agents including ASC may exchange information in relation to you to enable Electrolux to meet its obligations under this warranty.
Important Notice
Before calling for service, please ensure that the
steps listed in clause 8 above have been followed.
| FOR SERVICEor to find the address of your nearest authorised service centre in AustraliaPLEASE CALL1800 771 776For the cost of a local call (Australia only) | AUSTRALIA ELECTROLUX HOME PRODUCTS163 O’Riordan Street, Mascot NSW 2020vintec.com.au | FOR ACCESSORIESPLEASE CALL1800 666 778For the cost of a local call (Australia only)or visit www.vintecclub.com |
| FOR SERVICEor to find the address of your nearest authorised service centre in New ZealandPLEASE CALL 0800 550 020(New Zealand only) | NEW ZEALANDELECTROLUX (NZ) Limited3-5 Niall Burgess Road, Mount Wellingtonvintec.co.nz | FOR ACCESSORIESPLEASE CALL0800 550 020(New Zealand onlyor visit www.vintecclub.com |
Service and support
In the rare event that your Vintec cabinet does not perform to your satisfaction, contact our dedicated support team:
1800 771 776
concierge@vintecclub.com
Vintec. We are part of the Electrolux Family. To add a touch of professional inspiration to your home, visit electrolux.com.au
Stay in touch and share your user experience by following us:


@vintecclub

- WARNING:
- !R600A REFRIGERANT WARNING:
- VINTEC
- LED lighting
- Contents
- Before use
- Note: Do not switch on for at least 24 hours
- Note: for household use only
- Savings in energy consumption in the use
- Important Information that may impact your Manufacturer's Warranty
- Get to know your wine cooler
- Get to know you wine cooler
- Electrical connection
- Information regarding voltage, current or power are given on the rating plate
- Installation and start-up
- Placement
- Ambient temperature
- Installation
- Anti-tip
- Setting up
- Operation and function
- Electronic control
- Temperature indication
- Upper temperature set
- Bottom temperature set
- Lights On/Off
- Lights settings menu
- Light behaviour
- Light dim level
- Child Lock
- Sabbath mode Activation
- Sabbath Mode exception:
- Changing between°C/°F
- Reset Filter alert
- Single/Muliti/Cellaring zone set
- Demo mode
- Mute sounds
- High / Low temperature alert
- Door open alert
- Change filter alert
- Defrosting, cleaning and maintenance
- Automatic defrosting
- Cleaning
- Spare parts
- Charcoal Filter Location & removal
- Removal method:
- Disposal
- For business users in the European Union.
- Information on Disposal in other Countries outside the European Union
- Note for the battery symbol:
- Warranty for Australia and New Zealand
- In this warranty:
- Application:
- Warranty Period:
- Repair or replace warranty:
- Travel and transportation costs:
- Proof of purchase:
- Exclusions:
- How to claim under this warranty:
- Australia:
- New Zealand:
- Confidentiality:
- Important Notice
- Before calling for service, please ensure that the
- steps listed in clause 8 above have been followed.
- Service and support
Brand : Vintec
Model : VWM198PBA
Category : Wine cellar