
EFP128 - Electric stove Healthy Choice - Free user manual and instructions
Find the device manual for free EFP128 Healthy Choice in PDF.


| Product Type | Electric Skillet Frypan |
| Brand | Healthy Choice |
| Model | EFP128 |
| Power | 1500W |
| Voltage | 220-240V |
| Frequency | 50/60Hz |
| Temperature Control | Adjustable thermostat with 5 heat levels (100°C-240°C) plus warm setting |
| Non-Stick Coating | Yes, PTFE-based (avoid metal utensils) |
| Lid Material | Tempered glass with heat-resistant knob |
| Control Probe | Removable, must be fully inserted before use |
| Indicator Light | Yes, illuminates when heating |
| Body Material | Aluminum (estimated) with non-stick interior |
| Dimensions (Approx.) | 40 x 30 x 15 cm (length x width x height) |
| Weight (Approx.) | 2.5 kg |
| Cord Length | Approximately 1 meter |
| Safety Features | Auto-off when unplugged; do not immerse probe; keep away from water |
| Care & Cleaning | Hand wash only; use soft sponge; never abrasive cleaners; dry probe before reinserting |
| Usage | Indoor household use only |
| Included Accessories | Glass lid, temperature control probe |
Frequently Asked Questions - EFP128 Healthy Choice
User questions about EFP128 Healthy Choice
0 question about this device. Answer the ones you know or ask your own.
Ask a new question about this device
Download the instructions for your Electric stove in PDF format for free! Find your manual EFP128 - Healthy Choice and take your electronic device back in hand. On this page are published all the documents necessary for the use of your device. EFP128 by Healthy Choice.
USER MANUAL EFP128 Healthy Choice
Electric Skillet Frypan
natural_image
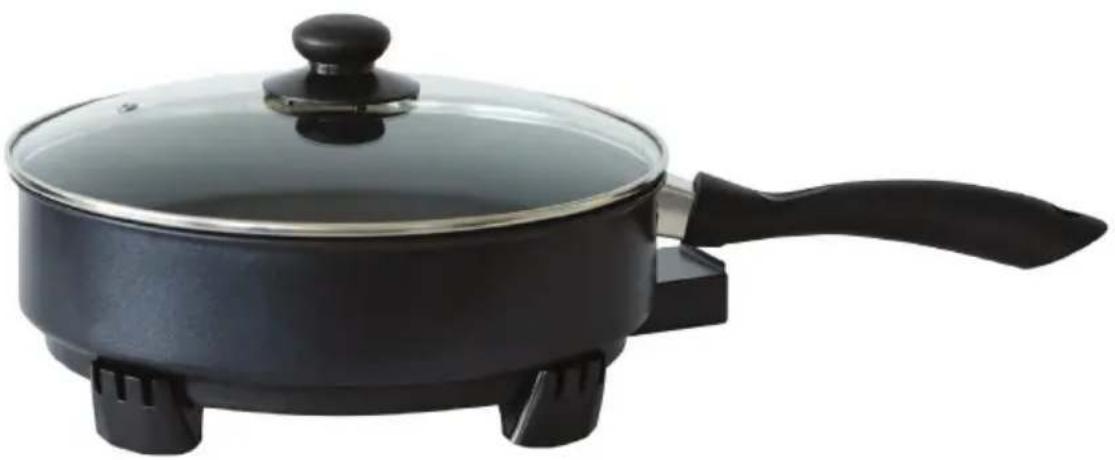
Black frying pan with lid and handle, isolated on white background (no text or symbols)Model: EFP128 | Batch: PR4937
HOUSEHOLD USE ONLY Carefully read all instructions before use and save for future reference.
IMPORTANT SAFEGUARDS
The illustrations used in this manual demonstrate the operation method and the structure of the product. Where there is a small difference between the physical item and the illustrations, please take the physical as the standard.
PLEASE READ AND SAVE THIS INSTRUCTION MANUAL FOR FUTURE REFERENCE
This user manual contains important information on the use and care of this product. When using the appliance, basic safety precautions should be followed, including:
- Check that the power used corresponds with the one indicated on the rating label of the appliance.
- Make sure that the lid knob is securely assembled before use.
- Always insert the temperature control probe into the unit before plugging the appliance into the power outlet.
- After use, turn the control dial to '0', switch off the appliance and disconnect it from the power outlet. Always unplug from the wall outlet when the unit is not in use and before cleaning it.
- The frying pan must only be used with the control probe provided.
- Do not leave plastic utensils in hot frying pan.
- Always place the unit on a flat, level surface.
- To disconnect the plug, grasp firmly at the wall outlet and pull. Never pull on the cord to unplug the unit.
- Do not use the unit with an extension lead or power board.
- Keep the cable away from hot surfaces and open flames or sharp edges.
- Never touch the electric cable and plug with wet hands.
- Never immerse the unit, or electric cable or plug into water or other liquids. Danger to life through electric shock!
- Never leave the unit unattended during use.
-
Keep children away from the unit.
-
This appliance is not intended for use by persons (including children) with reduced physical, sensory or mental capability or lack of experience and knowledge unless they have been given supervision or instruction concerning the use of the appliance by a person responsible for their safety.
- Children should be supervised to ensure they do not touch or play with the appliance.
- Indoor use only.
-
This appliance is only intended to be used in household and similar applications such as:
-
staff kitchen areas in shops, offices, and other work environments
- farmhouses
-
by clients in hotels, motels & B&Bs
-
Only use plastic or wooden utensils when cooking to protect the non-stick surface of the electric fry pan from becoming scratched. Do not use a sharp knife to cut food items on the surface of the electric fry pan
- Regular high-heat cooking may discolour the non-stick surface, this is normal and will not affect the performance of the non-stick coating.
- Check the unit, electric cable and plug regularly for visible damage. Do not use the unit under any circumstances if you have noted any damage.
- Have damage repaired by a qualified specialist only. Never attempt to repair any damages yourself.
- Only use the unit on a steady, heat-resistance surface. Never position the unit close to hot surfaces or open flames.
- Do not use the unit on an unsteady surface or a flammable surface such as a carpet or a tablecloth. Ensure there is at least 15cm clearance space around the unit while it is in operation.
- Do not move the electric fry pan during operation.
- The electric fry pan is not designed to be operated with an external timer or a separate remote control system.
Technical Parameters
Product Name Electric Skillet Frypan
Model No.
EFP128
Rated Voltage 220-240V
Rated Frequency 50/60Hz
Total Power
1500W
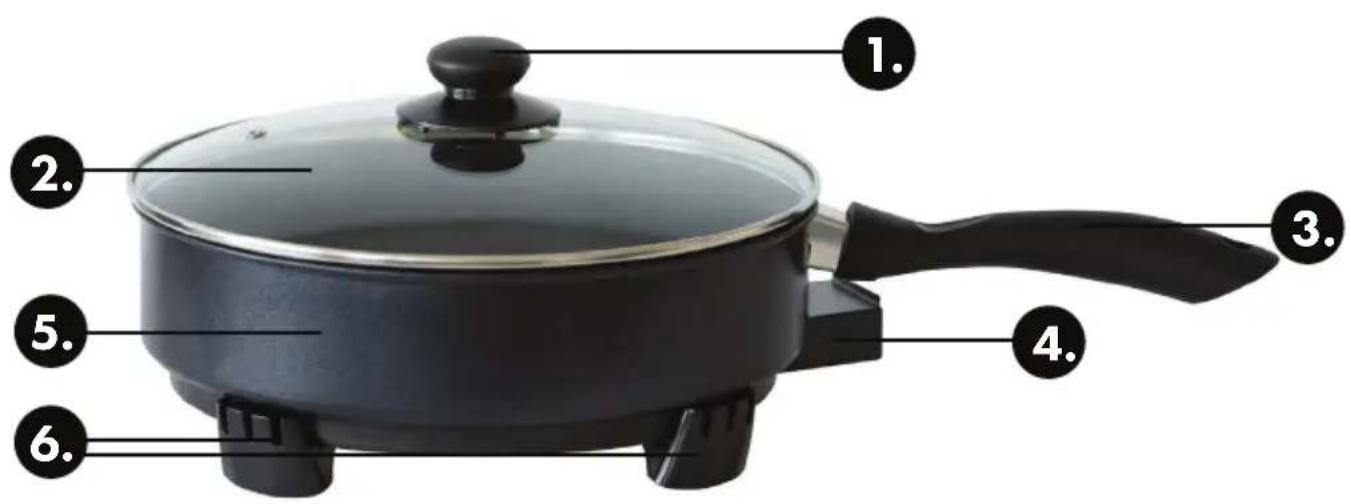
PRODUCT OVERVIEW
-
Knob
-
Glass lid
-
Handle
-
Power connection base
-
Skillet body
-
Legs
BEFORE FIRST USE
- Remove all packing material and check carefully to ensure that the appliance is in good condition. It must not have any cracks on the unit and no damage to the cord/plug.
- Confirm that the voltage indicated on the appliance corresponds with the voltage in your home.
- If you are using the appliance for the first time, you should boil a full frypan of water twice and then discard the water. Afterwards, wipe the surface with a damp cloth.
- Never connect the plug to the power supply if there is no water or food in the frypan.
CONNECTING THE UNIT
- Connect the temperature regulator to the base of the frypan. Make sure that the plug is connected properly.
- Set the temperature selector switch to heat level "0".
- Connect the plug to a 220-240 V 50/60 Hz power point.
NOTE: Do not use a power board or an extension lead
PREPARING FOODS
-
- Brush the cooking surface with a little cooking oil.
- Set the temperature regulator to the required heat level.
- The control lamp will light up to signal that the unit is ready for use (ON).
Heating Levels Temperature °C
| 1 & 2 | 100°C | Roasted food, simmering (eg. sauces) |
| 3 & 4 | 150-200°C | Pancakes, scrambled eggs, bacon, braising, stewing. |
| 5 | 240°C | Stir frying, grilled foods, pizza. |
| Thermostat | Warming function. |
- It takes 5-10 minutes after the unit is switched on before the control light will be on. You can then start cooking the food.
- Once cooking is complete, the unit can be kept warm. To do this, set the temperature regulator to the thermostat level.
- The control light may come on and off during your cooking process. This is not an error. The temperature regulator is automatically functioning and regulating the temperature.
CARE & CLEANING
Always ensure the frying pan has cooled down and is unplugged before cleaning. Following a few general tips can prolong the life of your frying pan:
- Always wash the pan and lid as soon as possible after each use.
- Do not pour cold water into a hot pan.
- Never scrape with hard or sharp utensils while cleaning.
- Wash the frying pan after each use to avoid stains caused by a build-up of food or grease residues. Never leave food in the pan overnight.
- To wash the unit: Wash the inside surface of the pan in hot soapy water, using a sponge or soft cloth. Do not use any harsh abrasive cleaners. Normal dishwashing liquid should be sufficient. Rinse and dry thoroughly.
- Hold it at a 45^ angle with the plug connector side facing upwards. This will prevent or at least minimise the water getting into the socket.
Control Probe
If cleaning is necessary, wipe over with a damp cloth. NEVER IMMERSE THE CONTROL PROBE IN ANY LIQUIDS. Always ensure that the probe is completely dry before inserting it into the socket.
Glass lid
Wash the lid in warm soapy water using a soft sponge, rinse and dry thoroughly.
Chicken and capsicum stir-fry with oyster sauce
Ingredients:
• 500g chicken breast strips
• 3 tablespoons oyster sauce
• 2 tablespoons sherry cooking wine
• 14 teaspoon ground black pepper
- 14 teaspoon salt
- 12 cup chicken stock
- 12 teaspoon cornstarch
• 3 tablespoons cooking oil
- 1 ½ cups red capsicum, chopped and deseeded
Method:
- Combine oyster sauce, sherry cooking wine, ground black pepper, and salt in a bowl. Mix well.
- Add the thinly sliced chicken. Marinate for 10 minutes.
- Heat 1 tablespoon cooking oil in the electric fry pan.
- Once the oil becomes hot, stir-fry the capsicum for 1 minute. Remove from the electric fry pan and set aside.
- Pour the remaining cooking oil on the electric fry pan. Once the oil gets hot, put the marinated chicken in the pan. Discard the remaining marinade. Stir fry for 2 minutes or until the chicken turns light to medium brown.
- Add the cooked capsicum. Continue to stir fry for another 30 seconds – 1 minute.
- Combine the chicken stock and cornstarch. Mix well and then pour into the electric fry pan.
- Stir fry until the texture of the sauce thickens.
- Transfer to a serving plate. Serve with rice or noodles.
Chicken and cashew stir-fry
Ingredients:
- 500g chicken breast strips
- 1 raw egg, beaten
- 1 cup cornstarch
- 1 red onion, sliced
- 12 cup red capsicum, cut into strips and deseded
- 1½ cups broccoli, cut into bite sized pieces
• 2 tablespoon soy sauce
• 2 tablespoon cooking rice wine
• 1 tablespoon oyster sauce
• 12 cup cashew nuts, roasted
• 12 cup spring onion, chopped - 14 cup cooking oil
Method:
- Beat the egg and pour over the chicken strips then mix well until properly distributed.
- Heat the electric fry pan and add the cooking oil.
- Dip the chicken strips (coated with egg) in corn starch and stir fry until the color of the chicken turns golden brown. Set aside.
- In electric fry pan, add some cooking oil and allow to heat up.
- Stir fry the onion, capsicum, and broccoli.
- Add the cooking rice wine, soy sauce, and oyster sauce then allow to cook for a few minutes.
- Add the stir-fried chicken and cook for 2 minutes while mixing with the rest of the ingredients.
- Add the cashew nuts, spring onion, salt, and ground black pepper.
- Transfer to a serving plate. Serve with rice or noodles.
Beef black bean
Ingredients
- 500g beef strips
• 1 tablespoon grated ginger
• 2 cloves garlic, crushed
• 2 red onions, finely sliced
• 2 red capsicums, deseeded, sliced
• 300g snow peas, trimmed
• 125g baby corn, halved
• 1 handful of green beans, cut into 4cm lengths
• 1/2 cup reduced-salt chicken stock
• 2 tablespoons tinned black beans
• 2 tablespoons reduced-salt soy sauce
• 4 teaspoons cooking oil
Method
- Combine beef, ginger, garlic and onion in a bowl and marinate for 5 minutes.
- Heat the electric fry pan and add 2 teaspoons of cooking oil.
- Stir-fry the capsicum, snow peas, corn and green beans until just tender. Then, remove from the electric fry pan and keep aside.
- Combine stock, black beans and soy sauce in a small bowl.
- Add the remaining cooking oil to the electric fry pan.
- Add the beef mixture.
- Stir-fry for 2 - 3 minutes.
- Add the black bean mixture and vegetables to the electric fry pan.
- Toss to combine and heat.
- Transfer to a serving plate. Serve with rice or noodles.
Thai pork mince
Ingredients
• 1 tbsp oil
- 1 x 500g pork mince
• 1 red pepper, deseeded and sliced
• 250g chestnut mushrooms, quartered
• 2 tablespoons from a jar of Thai base paste
• 2 tablespoons corn flour
• 300ml chicken stock
• 1 tablespoon Thai fish sauce
• 400g pack beansprouts, rinsed
- juice of 1 lime
• 2 tablespoons chopped coriander leaves
Method
- Heat the oil in the electric fry pan.
- Add the pork mince and stir-fry until cooked. Ensure it is broken up and not in clumps.
- Add the red pepper, mushrooms and Thai base paste and stir fry for a further 2 minutes
- Mix in the corn flour and stir.
- Add the chicken stock and Thai fish sauce.
- Lower the heat and simmer uncovered for 10 minutes.
- Add the bean sprouts to a serving plate.
- Stir the lime juice into the pork mince.
- Add the pork mince to the bean sprouts on the serving plate.
- Serve with rice or an Asian salad.
- Stir the lime juice into the pork mince.
LENOXX
www.lenoxx.com.au

1300 666 848

LenoxxElectronics LenoxxElectronics
- Electric Skillet Frypan
- IMPORTANT SAFEGUARDS
- PLEASE READ AND SAVE THIS INSTRUCTION MANUAL FOR FUTURE REFERENCE
- Technical Parameters
- PRODUCT OVERVIEW
- BEFORE FIRST USE
- CONNECTING THE UNIT
- PREPARING FOODS
- CARE & CLEANING
- Control Probe
- Glass lid
- Chicken and capsicum stir-fry with oyster sauce
- Ingredients:
- Method:
- Chicken and cashew stir-fry
- Beef black bean
- Ingredients
- Method
- Thai pork mince
- LENOXX
Brand : Healthy Choice
Model : EFP128
Category : Electric stove