
SC-800AU9FLMK2 - Washing machine Seiki - Free user manual and instructions
Find the device manual for free SC-800AU9FLMK2 Seiki in PDF.


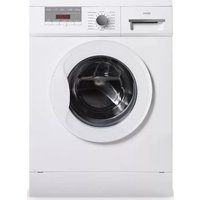
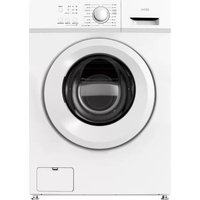
| Product Type | Front Load Washing Machine |
| Brand | Seiki |
| Model | SC-800AU9FLMK2 |
| Washing Capacity | 8 kg |
| Dimensions (W x D x H) | 595 x 475 x 850 mm |
| Net Weight | 60 kg |
| Gross Weight | 63 kg |
| Power Supply | 220-240 V ~ 50 Hz |
| Rated Power | 1950 W |
| Water Pressure Range | 0.05 MPa - 1 MPa (min 0.03 MPa) |
| Wash Programs | Cotton, Synthetic, Baby Care, Rapid 45', Mix, Jeans, 20°C, Quick 15', Wool, Spin Only, Rinse & Spin, Sport Wear, Bulky, Steam Wash, Eco Wash, Drum Clean |
| Additional Functions | Extra Rinse, Pre-Delay (up to 24h), Child Lock |
| Noise Reduction | Acoustic sponge included |
| Control Type | Electronic with display |
| Door Lock | Automatic safety lock during operation |
| Transport Bolts | Must be removed before use; kept for future moves |
| Leveling Feet | Adjustable with lock nuts |
| Water Inlet Hose | Cold water only; new hoses required |
| Drain Hose | Maximum height 120 cm; do not kink |
| Cleaning | Inlet filter, detergent dispenser, drain pump filter, door seal and glass |
| Accessories Included | Cover caps, supply hose (cold water), manual, acoustic sponge |
| Customer Support | info@ayonz.com, 02 8279 8606 |
Frequently Asked Questions - SC-800AU9FLMK2 Seiki
User questions about SC-800AU9FLMK2 Seiki
0 question about this device. Answer the ones you know or ask your own.
Ask a new question about this device
Download the instructions for your Washing machine in PDF format for free! Find your manual SC-800AU9FLMK2 - Seiki and take your electronic device back in hand. On this page are published all the documents necessary for the use of your device. SC-800AU9FLMK2 by Seiki.
USER MANUAL SC-800AU9FLMK2 Seiki
Please read this manual carefully before using, and keep it for future reference.
CONTENTS
| General | Safety | 4 | ||||
| Product | Overview | |||||
| Accessories | 8 | |||||
| Control | Panel | |||||
| Getting | Started | 10 | ||||
| Unpackaging | 10 | |||||
| Transportation and removal of Transport Bolts | 10 | |||||
| Levelling | the | appliance | ||||
| Connecting the water inlet hose | 12 | |||||
| Connecting | the | Drain | Hose | |||
| Instructions | ||||||
| Before | First | Use | ||||
| Wash | Care | Symbols | ||||
| Detergent | Dispenser | |||||
| Wash | Programs | 18 | ||||
| Cleaning | and | Maintenance | ||||
| FAQs | 24 | |||||
| ERROR | CODES | |||||
| Specifications | 26 | |||||
| Customer | Helpline | Last | ||||
GENERAL SAFETY
IMPORTANT INFORMATION
Read this manual thoroughly before you start using the Front Load Washing Machine.
The safety precautions instructions reduces the risk of fire, electric shock and injury when correctly complied to.
Please follow all instructions and take notice of all warnings.
Pay close attention to messages that follow this safety alert symbol or the words DANGER, WARNING or CAUTION. These words will be used to alert you of potential hazards that and injure you and others. Following these instruction will tell you how to reduce the chance of injury and the possible dangers if instructions aren't followed.

WARNING
This symbol indicates when there is a serious risk of injury if you do not pay attention to the warnings.

CAUTION
This symbol indicates when to be careful to avoid a serious risk of injury to oneself or damage to property.
GENERAL SAFETY INSTRUCTIONS (Cont.)
ELECTRICAL SAFETY
- Voltage: Plug the appliance to a 220-240V, 50Hz, properly earthed power outlet, it must be in good working order.
- Power connection: Do not use an adaptor or an extension cord.
Plug the power plug directly into a separate power point that cannot be accidentally turned off, and that is easily accessible so you can switch it off if needed.
- Power cord: Do not kink or damage the power supply cord. Make sure it is behind the appliance so no one can step on or place anything on the power supply cord or against it. A damaged power plug may overheat and cause a fire.
- Damaged cord: Do not use a cord that shows cracks or damage. Any damage to the cord may cause a short circuit, fire and/or electric shock.
Contact our support centre on info@ayonz.com for advice
- Disconnection: Never pull the power cord to unplug appliance. Grip the plug and pull straight out from the power point.
- Electrical work: If the installation of this appliance requires any electrical work, make sure it is carried out by an electrician.
To reduce risk of fire, electric shock or injury, always follow these basic precautions and accident prevention measures when using this appliance, including the below:
NOTE: This appliance should be installed by an authorised technician else warranty will be void.
INSTALLATION
- The product is heavy, be careful when moving it. To avoid back or other injury, have 2 people lift or mechanical aid when installing.
- When unboxing, thoroughly inspect the appliance carefully for any damage. If there is any damage, do not install the appliance. Contact our support centre on info@ayonz.com for advice.
- While installing the appliance make sure that the power cord is not bent or flattened.
- Make sure to remove all packaging materials such as foams and tapes before installing the appliance.
- Make sure if the machine is to be placed on carpet that the ventilation openings in the base are not obstructed
• Install the washing machine on a flat level and stable ground.
GENERAL SAFETY INSTRUCTIONS (Cont.)
USAGE CONDITIONS AND RESTRICTIONS
- Supervision over children is to ensure that they do not play with the appliance. Never allow them to use, play with or crawl inside the appliance. Cleaning and maintenance must not be done by children.
- This appliance is not to be used by persons (including children) with reduced physical, sensory or mental capabilities, or lack of experience and knowledge, unless they are being supervised or been given instructions on how to use of the appliance in a safe way and understand the hazards with using this appliance incorrectly.
- Only for indoor domestic use only. It is not to be used for industrial or commercial use.
- Do not use this product for anything other than its intended purpose, and only use it as described in this manual. Do not attempt to alter or modify this appliance.
- In the process of a hot wash, the door window can become hot. Make sure not to touch it or that no children or pets come into contact with the door window.
- Ensure that emptying all pockets of every item to make sure that there is no hard, sharp objects such as coins, safety pins, bra wires, nails or screws can cause damage to the appliance and has a chance to block the pump.
- Damage or malfunction caused from foreign objects is not covered by your warranty to the appliance.
- Do not operate this appliance outdoors.
- Incorrect use can result in property damage, injury or death. We assume no liability for misuse of the appliance or noncompliance with these instructions.
• Maximum load of dry clothes is 8kg
GENERAL SAFETY INSTRUCTIONS (Cont.)
CLEANING AND MAINTENANCE
- Before cleaning or maintenance, always unplug the appliance from the power socket. Make sure you pull by the plug, not the cord as this can damage the power cord and cause a hazard.
- Only the filter requires regular cleaning, everything else is non user-serviceable parts. Do not try to repair, disassemble or modify the appliance.
- Check and clean the lint filter on a regular basis
- Service: Never try to repair, modify or replace any part of the appliance, unless this manual says you can do so. All other servicing is to be done by a qualified technician, or contact our support centre on info@ayonz.com for advice.
PRODUCT OVERVIEW

ACCESSORIES
| Cover Caps | Supply hose cold water | manual Acoustic sponge | ||
 |  |  |  |  |
 |  | |||
PRODUCT OVERVIEW (Cont.)
CONTROL PANEL

- OFF
- START/PAUSE
Select between extra rinse or standard.
- OPTION
When using Pre-Delay, you can delay washing of up to 24 hours.
- PROGRAMMES
- DISPLAY
- DRUM CLEAN
CHILD LOCK
Press and hold *Temp. and Function for 3 seconds to activate child lock, follow same sequence to unlock.

GETTING STARTED
Before installing your appliance, read all safety instructions in this manual, especially the sections on electrical safety and installation.
UNPACKING
- When unpacking the appliance, be sure to keep all the packaging materials until you have made sure your new appliance is undamaged and in good working order. Plastic can be a suffocation hazard for babies and young children, make sure the materials are out of their reach.
TRANSPORTATION
- CAUTION: VERY HEAVY! Be sure to team lift the appliance with someone or mechanical aid is required when moving the appliance. Keep the appliance upright as possible when moving the appliance.
REMOVE TRANSPORT BOLTS
- IMPORTANT! Make sure before you install the appliance, you must remove the transit bolts from the back of the appliance and cover the holes with the hole covers provided. A spanner is required to remove the bolts.
NOTE: Keep the transit bolts for future needs if you are going to move the appliance again to another location. The bolts hold the drum in place during transportation but MUST be removed before use so the drum can move during a wash. Leaving the bolts in can result in strong shock, noise and malfunction.

natural_image
Diagram of a hand using a tool to adjust or install a mechanical component, showing no text or symbols present.GETTING STARTED (Cont.)
LEVELLING THE APPLIANCE
IMPORTANT! Make sure to level the appliance carefully with a spirit level to ensure the most accurate levelling of the appliance. This is a must if your floor in unbalanced to level the washing machine.
- Make sure to position the appliance on a level and stable ground. If the floor is uneven you can adjust the feet by twisting foot then with a spanner you twist the lock nut to the top to lock it in place.

- By placing a spirit level on top of the appliance you can check correctly to aid you in adjusting the feet levelling nuts to adjust the appliance to be completely level.
INSTALLATION AREA
IMPORTANT! When installing the appliance the spacing on the side and behind the appliance must not be less the 20mm to allow proper ventilation.

Note: Make sure to avoid direct sunlight onto the appliance.
GETTING STARTED (Cont.)
CONNECTING THE WATER INLET HOSE
IMPORTANT! To prevent leakage or water damage please follow the below instructions. Do not kink, crush, modify or sever the water inlet hose.
Minimum Inlet Water Pressure: 0.03MPa/Maximum Inlet Water Pressure: 1MPa
Be sure to only use new hose sets when connecting the washing machine. Do not re-use old hoses.
INSTALL INLET PIPE
- Connect the elbow to tap and fasten it clockwise.
- Connect the other end of inlet pipe to the inlet valve at the backside of washing machine and fasten the pipe tightly clockwise.
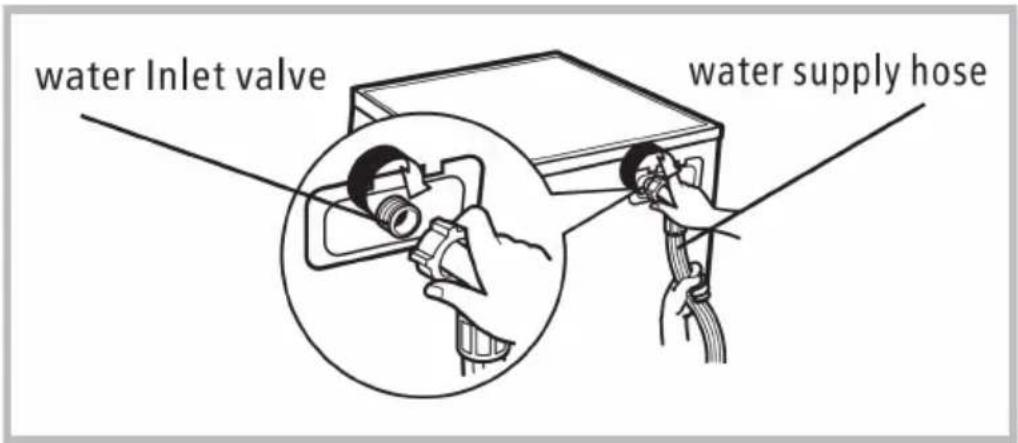
Notes: If there is any leakage with hose after connecting, then repeat the steps to connect inlet pipe. The most common type of tap shall be used to supply water. If the tap is square or too big, then the tap should be changed to a standard one.
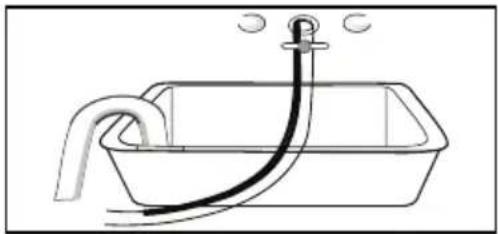
PLACE OUTLET HOSE
There is 1 way to place the end of outlet hose:
- Put it beside the water trough.
Connect the other end of the inlet pipe to the inlet valve on the back of the
appliance and fasten the pipe tightly clockwise.
natural_image
Simple line drawing of a bathtub with a piping bag and a handle (no text or symbols)GETTING STARTED (Cont.)
CONNECTING THE DRAIN HOSE
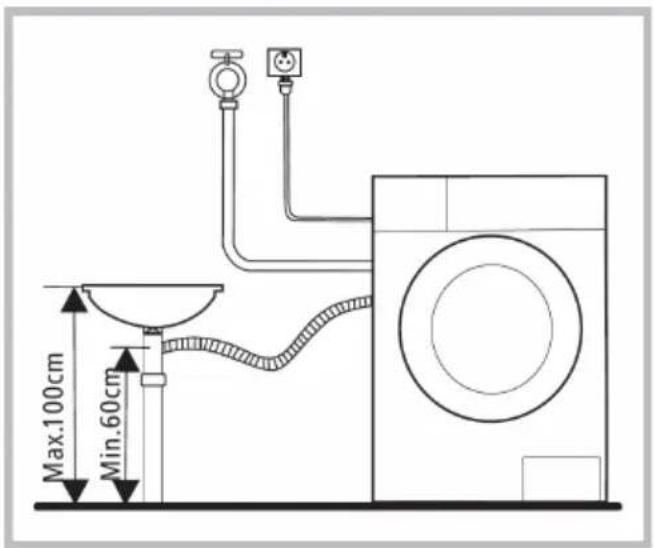
Do not kink or protract the drain hose. Position the drain hose correctly otherwise damage will result in water leakage.
There are two ways to place the end of drain hose:
- Put it through the water trough.
- Connect it to the branch drain pipe.
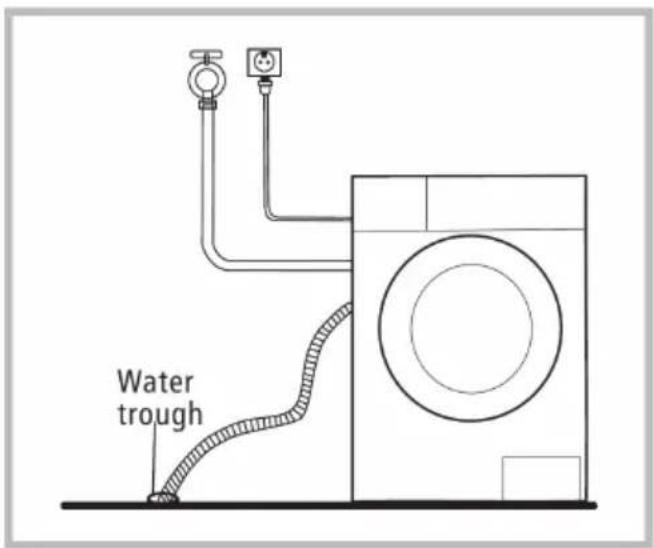
When installing the drain hose into the laundry sink, make sure it is properly fitted with rope to hold it in place. If the hose is too long, do not try to push the end were it comes from the appliance in to shorten length, this can damage it.

natural_image
Line drawing of a kitchen sink with faucet and chain, no text or symbols present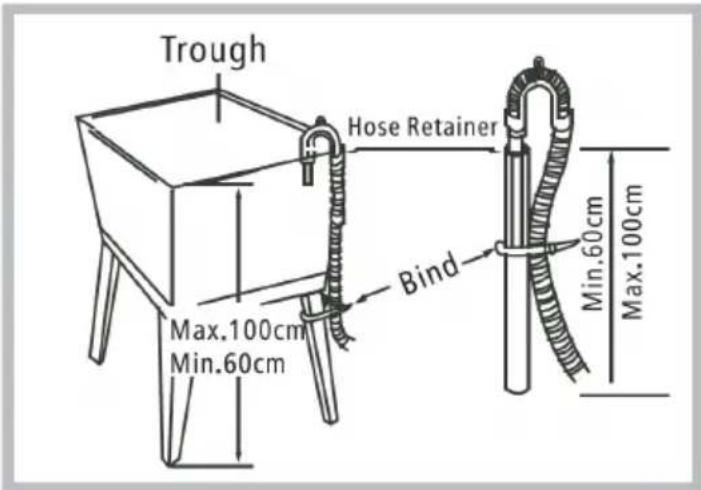
WARNING
- Make sure that the hose is not higher than 120cm above the ground, otherwise appliance will not drain the water well.
- Never lay down the drain hose otherwise water will pour out.
• Make sure the hose has no kinks so it can drain properly.
INSTRUCTIONS
BEFORE FIRST USE
- Before any first wash make sure everything is installed correctly. Make sure to do one wash with no items inside to clean out the tube before your first loaded wash.

After the above steps have been completed, In a few simple steps shown below you can select the type of wash you want and get started.

natural_image
Simple diagram showing two concentric circles with curved arrows indicating rotation or direction (no text or symbols)Select programme

Select function or remain default settings

Press
Start/Pause to
start the program
ACOUSTIC SPONGE
Notes: Please make sure to assemble the acoustic sponges, which can effectively reduce the noise caused by the machine while working, in order to provide you with a more peaceful and quiet living environment.

- Get the machine laid on the floor, using some soft material like foam or clothes between the machine and floor for a protection;
- Stick the 2x longer sponges to the longer bottom edges of machine, and the 2x shorter sponges to the shorter bottom edges.
INSTRUCTIONS (Cont.)
- Make sure that the appliance is in a correct working temperature (0-40°C). If the appliance is used under 0°C the inlet valve and draining system may be damaged.
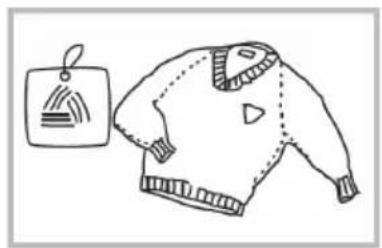
• Make sure that all labels are checked on items if they can be washed. - Use non-foaming or less-foaming detergents which are more suitable for washing machines to wash correctly.
natural_image
Line drawing of a sweater with a tag and tie, no text or symbols presentCheck the label

Take out the items out of the pockets

natural_image
Line drawing of two bags with circular patterns, no text or symbols presentKnot the long strips,zip or button

natural_image
Simple line drawing of a bag with internal objects, no text or symbols presentPut small clothes into the pillow slip
natural_image
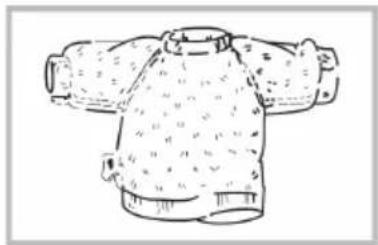
Line drawing of a T-shirt with pleated collar and shoulder strap (no text or symbols)Turn easy-pilling and long-pile fabric inside out
natural_image
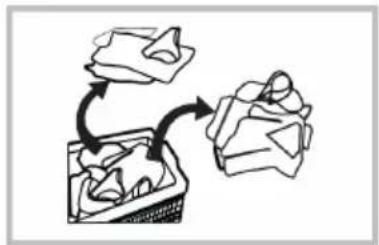
Simple line drawing of a bag being folded into a basket (no text or symbols)Separate clothes with different textures
WARNING
- Never use the washing machine to wash a single item at any given time, if you need to urgently wash an item, we suggest placing a few clothing items in there.
• Make sure that all labels are checked on items if they can be washed. - Use non-foaming or less-foaming detergents which are more suitable for washing machines to wash correctly.
INSTRUCTIONS (Cont.)
WASH CARE SYMBOLS
When choosing a wash program, check for any labels on your clothes and follow the instructions. below are some commonly used symbols.

INSTRUCTIONS (Cont.)
DETERGENT DISPENSER
Only use low-subsiding detergents and clothing care preparations that are for use in a front load washing machine.
I Pre wash
II Main wash
Softener
Release button to pull out the dispenser

① Caution!
- Detergent only need to be added in "compartment | " after selecting pre-wash function.
| Programme | | | || | Programme | | | || | ||
| Cotton | ○ | ● | ○ | Bulky | ○ | ● | ○ |
| Synthetic | ○ | ● | ○ | Baby Care | ○ | ● | ○ |
| Mix | ○ | ● | ○ | Wool | ● | ○ | |
| Jeans | ○ | ● | ○ | Sport Wear | ○ | ● | ○ |
| Spin Only | Rapid 45' | ● | ○ | ||||
| Rinse & Spin | ○ | Quick 15' | ● | ○ | |||
| ECO Wash | ● | ○ | Steam Wash | ○ | ● | ○ | |
| 20°C | ● | ○ | Drum Clean |
● Mandatory ○ Optional
INSTRUCTIONS (Cont.)
WASHING PROGRAMS TABLE
| Programmes | |
| Cotton | Hard-wearing textiles, heat-resistant textiles made of cotton or linen. |
| Synthetic | Wash synthetic articles, for example: shirts, coats, blending. While washing the knitting textiles, detergent quantity shall be reduced due to its loose string construction and easily forming bubbles. |
| BabyCare | Washing the baby's clothes, it can make the baby's wear cleaner and make the rinse performance better to protect the baby skin. |
| Rapid 45' | Washing few and not very dirty clothes quickly. |
| Mix | Mixed load consisting of textiles made of cotton and synthetics. |
| Jeans | Specially for jeans. |
| 20°C | Washing brightly colored dothes, it can protect the colors better . |
| Quick 15' | Extra short programme approx, suitable for lightly soiled washing as a small amounts of laundry. |
| Wool | Hand or machine-washable wool or richwool textiles.Especially gentle wash programme to prevent shrinkage, longer programme pauses (textiles rest in wash liquor). |
| Spin Only | Spins and drains the water. |
| Rinse&Spin | Rinses and then spins the laundry, and then drains the water. |
| Sport Wear | Washing the activewear. |
| Bulky | This program is specially designed for washing Bulky. |
| SteamWash | The SteamWash can deeply penetrate the fiber, which effectively eliminate bacteria and germs, preventing odors and protecting health. |
| ECO Wash | The standard washing programs,they are suitable to clean normally soiled cotton laundry efficiently. |
| Drum Clean | Specially set in this machine to clean the drum and tube. It applies 90 °C high temperature sterilization to make the clothes washing more green. When this programme is performed, the clothes or other washing cannot be added. When proper amount of chlorine bleaching agent is put in, the barrel cleaning effect will be better. The customer can use this programme regularly according to the need. |
INSTRUCTIONS (Cont.)
WASHING PROGRAMS TABLE
| Programme | Load(kg) | Default Temp. (°C) | DisplayTime |
| SteamWash | 4.0 | 40 | 1:26 |
| Cotton | 8.0 | 40 | 1:28 |
| Synthetic | 4.0 | 40 | 1:25 |
| Mix | 8.0 | 40 | 0:58 |
| Jeans | 8.0 | 40 | 1:40 |
| ECOWash | 8.0 | 20 | 0:59 |
| 20°C | 4.0 | 20 | 1:01 |
| Spin Only | 8.0 | -- | 0:12 |
| Rinse & Spin | 8.0 | -- | 0:20 |
| Bulky | 8.0 | 40 | 1:48 |
| Baby Care | 8.0 | 60 | 2:01 |
| Wool | 2.0 | 40 | 1:07 |
| SportWear | 4.0 | 20 | 0:47 |
| Rapid 45' | 2.0 | 20 | 0:45 |
| Quick 15' | 2.0 | Cold | 0:15 |
| Drum Clean | -- | 90 | 1:18 |
• Energy test program: ECO Wash.
Speed: the highest speed; Temp.: 60°C, Other as the default.
Half load for 8.0Kg machine:4.0Kg.
- "ECOWash" is the standard washing programs to which the information in the label and the fiche relates, and they are suitable to clean normally soiled cotton laundry and that they are the most efficient programmes in terms of combined energy and water consumptions for washing that type of cotton laundry, that the actual water temperature may differ from the declared cycle temperature.
CLEANING AND MAINTENANCE
WARNING:
- Before starting maintenance, ensure that the appliance is unplugged and close the tap.
CLEANING THE CABINET
Proper maintenance on the washing machine can extend its working life.
The surface can be cleaned with diluted non-abrasive neutral detergents when necessary. If there is any water overflow, use a wet cloth to wipe it off immediately. Make sure no sharp items are used to clean the appliance.

natural_image
Line drawing of a hand cleaning a washing machine with a cloth (no text or symbols)CLEANING THE DOOR SEAL AND GLASS
Wipe the glass and seal after each wash to remove lint and stains. If lint builds up it can eventually cause leaks. Remove any coins, buttons or other objects from the seal (if any) after each wash.

natural_image
Line drawing of a hand gripping a curved object, possibly a tool or device (no text or symbols present)CLEANING AND MAINTENANCE (Cont.)
CLEANING THE INLET FILTER
Washing the filter in the tap
1 Close the tap
2 Remove the water supply hose from the tap
3 Clean the filter
4 Reconnect the water supply hose

natural_image
Diagram showing a faucet with rotating arrows indicating clockwise motion, no text or symbols present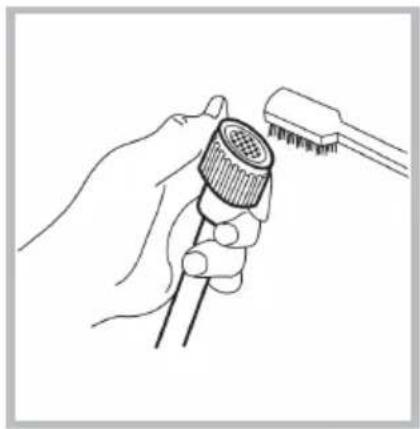
natural_image
Line drawing of a hand holding a connector with a plug inserted (no text or symbols)Washing the filter in the washing machine
1 Screw off the inlet pipe from the back of appliance
2 Pull out the filter with long nose pliers and reinstall after being washed
3 Use the brush to clean the filter
4 Reconnect the inlet pipe and turn on the tap

natural_image
Hand holding a small mechanical component with a magnified inset showing rotational motion (no text or symbols)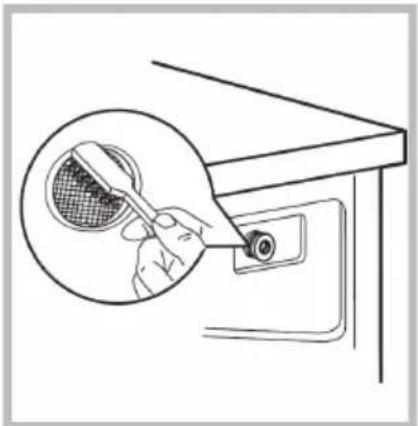
natural_image
Line drawing of a hand using a tool to insert a component into a device (no text or symbols present)CLEANING AND MAINTENANCE (Cont.)
CLEANING THE DETERGENT DISPENSER
1 Press down the arrow location on the softener cover inside the washing machine dispenser.
2 Lift the clip up and take out the softener cover and wash all the grooves with water.
3 Restore the softener cover and push the drawer into position.

natural_image
Line drawing of a mechanical component with internal channels and a labeled arrow (no text or symbols)Pull out the dispenser drawer with press the A

natural_image
Line drawing of a mechanical device with a lever and internal components (no text or symbols)Clean the dispenser drawer under water

natural_image
Line drawing of a hand using a tool to insert or remove a dark object into a rectangular frame (no text or symbols)Clean inside the recess with an old toothbrush

natural_image
Line drawing of a mechanical device with internal compartments and a handle (no text or symbols)Insert the dispenser drawer
NOTE
Do not use alcohol, solvents or chemical products to clean the machine.
CLEANING AND MAINTENANCE (Cont.)
CLEANING THE DRAIN PUMP FILTER
1 Be careful of the hot water.
2 Allow the detergent solution to cool down.
3 Drain pump filter can filter the yarns and small foreign matters from the washing.
4 Clean the filter periodically to ensure the washing machine operates normally.

natural_image
Line drawing of a mechanical component with a circular feature and rotation arrow (no text or symbols)Open the lower cover cap

natural_image
Hand holding a tool interacting with a tray device (no text or symbols visible)Open the filter by turning to the counter clockwise
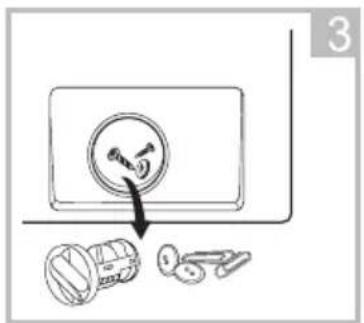
Remove extraneous matter

natural_image
Technical line drawing of a mechanical component with rotational arrows indicating motion (no text or symbols)Close the lower cover cap
CAUTION
- Make sure that the valve cap is reinstalled properly.
Cap plates should be inserted aligning to hole plates otherwise water may leak. - When the appliance is in use and depending on the program selected there can be hot water in the pump.
Never remove the pump cover during a wash cycle, always wait until the appliance has finished the cycle and is empty. When replacing the cover ensure it is tightly secured.
FAQs
| Problem Possible Cause Solution | ||
| Washing machine is not starting | Door is not closed properly | Restart after the door is closed, check if the clothes are stuck |
| Door can’t be opened | Washer’s safety protection is active | Disconnect the power and restart the appliance |
| Water Leakage | The connection between inlet pipe or outlet hose is not tight | check and fasten water pipes.Clean up outlet hose. |
| Detergent residues are in the dispenser | detergent might be dampened | Clean and wipe the detergent dispenser |
| Indicator or display isnt working | Disconnect the power, PC board or harness may have a connection problem. | Check if the power is on and the power plug is connected correctly. |
| Abnormal Noise | Check if the Transport bolts at the back of the appliance have been removed.Check it’s installed on a level and solid floor. | |
ERROR CODES
| E30 | Door is not closed properly | Restart after the door is closedCheck if the clothes is stuck |
| E10 | Water injecting problem while washing | Check if the water pressure is too lowStraighten the water pipeCheck if the inlet valve filter is blocked |
| E21 | Overtime water draining | Check if the drain hose is blocked |
| E12 | Water overflow | Restart the washer |
| EXX | Others | Please try again first, call up service line if there are still troubles |
CUSTOMER SERVICE ON info@ayonz.com IF THERE ARE ANY OTHER ISSUES.
SPECIFICATIONS
| Power Supply 220-240V~50Hz | |
| Standard Water Pressure 0.05MPa~1MPa | |
| Washing Capacity 8KG | |
| Rated Power 1950W | |
| Dimensions 595 (w) x 475 (d) x 850 (h) mm | |
| Weight Net: 60 kg / Gross: 63 kg |
SEIKI
SHOME
CUSTOMER HELPLINE:
info@ayonz.com
02 8279 8606
DISTRIBUTED BY:
Ayonz Pty Ltd
- CONTENTS
- GENERAL SAFETY
- IMPORTANT INFORMATION
- WARNING
- CAUTION
- GENERAL SAFETY INSTRUCTIONS (Cont.)
- ELECTRICAL SAFETY
- INSTALLATION
- USAGE CONDITIONS AND RESTRICTIONS
- CLEANING AND MAINTENANCE
- PRODUCT OVERVIEW
- PRODUCT OVERVIEW (Cont.)
- CHILD LOCK
- GETTING STARTED
- UNPACKING
- TRANSPORTATION
- REMOVE TRANSPORT BOLTS
- GETTING STARTED (Cont.)
- LEVELLING THE APPLIANCE
- INSTALLATION AREA
- CONNECTING THE WATER INLET HOSE
- INSTALL INLET PIPE
- PLACE OUTLET HOSE
- CONNECTING THE DRAIN HOSE
- INSTRUCTIONS
- BEFORE FIRST USE
- ACOUSTIC SPONGE
- INSTRUCTIONS (Cont.)
- WASH CARE SYMBOLS
- DETERGENT DISPENSER
- ① Caution!
- WARNING:
- CLEANING THE CABINET
- CLEANING THE DOOR SEAL AND GLASS
- CLEANING AND MAINTENANCE (Cont.)
- CLEANING THE INLET FILTER
- Washing the filter in the tap
- Washing the filter in the washing machine
- CLEANING THE DETERGENT DISPENSER
- NOTE
- CLEANING THE DRAIN PUMP FILTER
- FAQs
- SPECIFICATIONS
- SEIKI
- SHOME
Brand : Seiki
Model : SC-800AU9FLMK2
Category : Washing machine