
HDFS10HPB - Tumble dryer HISENSE - Free user manual and instructions
Find the device manual for free HDFS10HPB HISENSE in PDF.
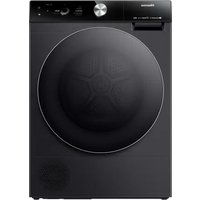


| Product Type | Tumble Dryer |
| Brand | Hisense |
| Model | HDFS10HPB |
| Capacity | 10 kg |
| Dimensions (W x H x D) | 595 x 845 x 640 mm |
| Depth with Door Closed | 670 mm |
| Depth with Door Open | 1150 mm |
| Weight | 54 kg |
| Rated Voltage | 220-240 V ~ 50 Hz |
| Nominal Power | 550 W |
| Refrigerant Type | R290 (flammable, 135 g) |
| IP Rating | IPX4 |
| Energy Efficiency Program | Cotton + Cupboard Dry |
| Programs | Cotton, Synthetics, Delicates, Towels, Bedding, Duvet, Sportswear, Baby Care, Allergy Care, Quick 30', Shirts, Denim, Power Speed 79', AI Dry, Ion Refresh, Wool, Rack Dry, Time Dry, Warm Dry, Cool Air |
| Additional Functions | Anti Crease, Steam, Night Dry, Child Lock, WLAN, Remote Control, Energy Saving, Drum Light |
| Door Reversal | Yes (reversible) |
| Stacking Kit Compatible | Yes (for Hisense washing machines with 536 mm side plate) |
| Condensate Drain | Manual tank or direct drain hose |
| Filters | Net filter (after each cycle), Heat exchanger filter (every 5 cycles), Heat exchanger fins (every 20 cycles) |
| Smart Connectivity | ConnectLife app (Wi-Fi, remote control, monitoring) |
| Safety Features | Overheating auto shut-off, child lock, door lock, refrigerant circuit protection |
Frequently Asked Questions - HDFS10HPB HISENSE
User questions about HDFS10HPB HISENSE
0 question about this device. Answer the ones you know or ask your own.
Ask a new question about this device
Download the instructions for your Tumble dryer in PDF format for free! Find your manual HDFS10HPB - HISENSE and take your electronic device back in hand. On this page are published all the documents necessary for the use of your device. HDFS10HPB by HISENSE.
USER MANUAL HDFS10HPB HISENSE
Before operating this unit, please read this manual thoroughly, and retain for future reference.
HDFS10HP HDFS10HPB HDFS10HP*
EN
English
Thank you very much for choosing our products.
■ Please install and use this product correctly. ■ The pictures in the manual are schematic diagrams, and the appearance and printing shall be subject to the actual products. ■ The product is subject to technical changes without prior notice for overall performance improvement. ■ This dryer is intended solely for household use. Please do not use it to dry clothes that are not suitable for machine wash.
The symbols used in this manual are as follows:

Warning
It is used for matters related to safety and may cause personal injury.

Warning
Risk of fire / Flammable materials

Read the instructions.
TABLE OF CONTENTS
| 4 SAFETY INFORMATION | INTRODUCTION |
| 14 PRODUCT DESCRIPTION15 Technical information | |
| 16 INSTALLATION AND CONNECTION16 Selecting the room20 Adjusting the dryer feet21 Changing the door opening direction23 Draining the condensate24 Connecting to the power mains25 Moving and transport after installation | PREPARING THEDRYER BEFOREFIRST USE |
| 26 BEFORE USING THE APPLIANCE FOR THE FIRST TIME | |
| 27 DRYING PROCESS, STEP BY STEP (1 - 5)27 Step 1: Heed the labels on the laundry28 Step 2: Preparing for the laundry drying process33 Step 3: Choosing the drying programme35 Step 4: Selecting additional settings and functions41 Step 5: Program display and end | DRYING PROCESS,STEP BY STEP |
| 42 MAINTENANCE & CLEANING | |
| 43 Cleaning the net filter in the door44 Cleaning the heat exchanger filter45 Cleaning of the heat exchanger46 Emptying the condensate tank48 Cleaning the dryer | DRYER CLEANINGAND MAINTENANCE |
| 49 TROUBLESHOOTING49 What to do ...?53 Servicing | TROUBLESHOOTING |
| 55 TIPS FOR DRYING AND ECONOMIC USE YOUR DRYER56 DISPOSAL57 Connecting your appliance to the application ConnectLife | MISCELLANEOUS |
SAFETY INFORMATION
◇ Carefully read the instructions for use before using the dryer. ◇ Please, do not use the dryer without reading and understanding these instructions for use first.
These instructions for use of a dryer are supplied with different types or models of dryers. Therefore, they may include descriptions of settings or equipment that are not available in your dryer.
Failure to observe the instructions for use or inappropriate use of the dryer may result in damage to the laundry or the appliance, or injury to the user. Keep the instruction manual handy, near the dryer.
Your dryer is intended solely for household use. If the dryer is used for professional, for-profit purpose or purpose exceeding normal use in a household, or if the dryer is used by a person who is not a consumer, the warranty period shall be equal to the shortest warranty period required by relevant legislation.
The dryer is made in compliance with all relevant safety standards.

WARNING:
To reduce the risk of explosion, fire, death, electric shock, injury or scalding to persons when using this product, follow basic precautions, including the following.
INSTALLATION
Follow the instructions for correct installation of the Hisense dryer and connection to the power mains.
For appliances with ventilation openings in the base, a carpet must not obstruct the openings.
The appliance must not be installed behind a lockable door, a sliding door or door with a hinge on the opposite side to that of the tumble dryer, in such a way that a full opening of the tumble dryer door is restricted.
All and any repairs or maintenance tasks on the dryer should only be done by trained experts. Unprofessional repair may result in an accident or major malfunction.
To avoid danger, a damaged power cord may only be replaced by the manufacturer, a service technician, or an authorized person.
After installation, the dryer should stand still for two hours before it is connected to the power mains.
At least two persons are required to install the tumble dryer on top of a washing machine.
Install the dryer in a room with adequate ventilation and a temperature between 10°C and 25°C.
• Always use the ducts or hoses supplied with the dryer.
- Place the dryer on a level and stable solid (concrete) base.
- Do not place the dryer behind a lockable or sliding door, or a door with a hinge on the opposite side of the dryer door hinge. Install the dryer in such a way that the door can always be freely opened.
- Never block the air exhaust (evacuation opening).
- Do not place the dryer on a carpet with long fibres as this may impede air circulation.
• Air in the dryer environment should not contain dust particles.
- The appliance may not be in contact with a wall or adjacent furniture.
- This appliance must not be stored or used in any outdoor location.
- Adequate ventilation has to be provided to avoid the back flow of gases into the room from appliances burning other fuels, including open fires.
ELECTRICAL SAFETY
- If the supply cord is damaged, it must be replaced by the manufacturer, its service agent or similarly qualified persons in order to avoid a hazard.
- The dryer may not be connected to the power mains using an extension cord.
- Do not connect the tumble dryer to an electrical outlet intended for an electric shaver or a hair dryer.
- The dryer is protected with an automatic switch-off system in case of overheating. This system will switch off the dryer if the temperature is too high.
- If the net filter is clogged, the overheating automatic switch-off system may be activated. Clean the filter, wait for the dryer to cool down, and try running it again. If the dryer still fails to start, call a service technician.
- Do not use multiple outlet sockets, an extension power cable or double adapter with this appliance.
- This appliance must be earthed via the power cord. In the event of malfunction or breakdown, grounding will reduce the risk of electric shock by providing a path of least resistance for electric current.
- Improper connection of the equipment-grounding conductor can result in risk of electric shock. Check with a qualified electrician or service personnel if you are in doubt as to whether the appliance is properly grounded.
- This appliance is equipped with a power cord having an equipment-grounding earthing pin and a grounding power plug. The power plug must be plugged into an appropriate outlet socket that is installed and grounded in accordance with all local codes and ordinances.
- Never unplug the appliance by pulling on the power cable. Always grip the power plug firmly and pull straight out from the outlet socket.
- Do not spray water inside or outside the appliance to clean it.

WARNING:
- The appliance must not be supplied through an external switching device, such as a timer, or connected to a circuit that is regularly switched on and off by a utility.
- There is a risk of electric shock as the dryer is operated with electricity.
- Check the dryer for visible damage.
- You must not operate the dryer if it is damaged.
- Before connecting the dryer to the power supply, ensure that the electric voltage specified on the rating plate matches the voltage of your socket.
- Only use residual current circuit breakers with the following symbol.
- Ensure that the mains cable is not kinked or trapped, and it does not come into contact with heat sources or sharp edges.
CHILDREN SAFETY
- This appliance is not intended for use by persons (including children) with reduced physical, sensory or mental capabilities, or lack of experience and knowledge, unless they have been given supervision or instruction concerning use of the appliance by a person responsible for their safety.
- Children should be supervised to ensure that they do not play with the appliance.
- This appliance can be used by children aged from 8 years and above and persons with reduced physical, sensory or mental capabilities or lack of experience and knowledge if they have been given supervision or instruction concerning use of the appliance in a safe way and understand the hazards involved. Children shall not play with the appliance. Cleaning and user maintenance shall not be made by children without supervision.
• Children of less than 3 years should be kept away unless continuously supervised.
- Prevent your children and pets from entering the dryer drum.
- Before closing the dryer door and running the programme, make sure there is nothing except laundry in the drum (e.g. if a child climbed into the dryer drum and closed the door from the inside).
- Do not leave the appliance door open. Children may hang on the door or crawl inside the appliance, causing damage or injury.
USE
- The tumble dryer is not to be used if industrial chemicals have been used for cleaning.
- The lint trap has to be cleaned frequently.
- Do not dry unwashed items in the tumble dryer.
- Items that have been soiled with substances such as cooking oil, acetone, alcohol, petrol, kerosene, spot removers, turpentine, waxes and wax removers should be washed in hot water with an extra amount of detergent before being dried in the tumble dryer.
- Items such as foam rubber (latex foam), shower caps, waterproof textiles, rubber backed articles and clothes or pillows fitted with foam rubber pads should not be dried in the tumble dryer.
- Fabric softeners, or similar products, should be used as specified by the fabric softener instructions.
- Remove all objects from pockets such as lighters and matches.
- Oil-affected items can ignite spontaneously, especially when exposed to heat sources such as in a tumble dryer. The items become warm, causing an oxidation reaction in the oil. Oxidation creates heat. If the heat cannot escape, the items can become hot enough to catch fire. Piling, stacking or storing oil-affected items can prevent heat from escaping and so create a fire hazard.
- If it is unavoidable that fabrics that contain vegetable or cooking oil or have been contaminated by hair care products be placed in a tumble dryer they should first be washed in hot water with extra detergent - this will reduce, but not eliminate, the hazard.
- In case of a defect, only use approved spare parts by authorized manufacturers.
- If the condensate tube is blocked or clogged, then tumble dryer operation is stopped.
- Before moving the dryer or before storing it in a non-heated room during the winter, the condensate tank has to be emptied.
- Clean the dryer filters after each drying cycle. If you have removed the filters, replace them before the next drying cycle.
- Do not use any solvents or cleaning agents that could damage the dryer (please observe the recommendations and warnings provided by the manufacturers of the cleaning agents).
- Never add chemicals or fragrances into the condensate tank. • After the drying process, unplug the dryer power cord from the power outlet. • The dryer uses a heat pump system to heat the air.
- The system consists of a compressor and a heat exchanger. When the dryer is started, compressor operation (the sound of flowing liquid) or flow of refrigerant may be louder as long as the compressor operates. This is not a sign of malfunction and it will not affect useful life of the dryer. In time and with use of the dryer this noise will become quieter.
- Do not drink or prepare food with the condensed water/distilled water. It can cause health problems to people and pets.
- Remove clothes from the product immediately when drying is complete or the power is turned off during the drying process. Leaving clothes that has been dried in the appliance unattended could result in fire. Clothes not removed from the appliance after drying could result in fire. Remove clothes immediately after drying, and then hang or lay the clothes flat to cool.
- Never attempt to operate the appliance if it is damaged, malfunctioning, partially disassembled, or has missing or broken parts, including a damaged cord or plug.
- Do not attempt to separate any panels or disassemble the appliance. Do not apply any sharp objects to the control panel in order to operate the appliance.
- Never reach into the appliance while it is operating. Wait until the drum has completely stopped.
- In case of flood, disconnect the power plug and contact the After-sales Service Center.
- Do not push down on the door when the appliance door is open.
- Do not touch the power plug or the appliance controls with wet hands.
- Do not bend the power cable excessively or place a heavy object on it.
- Lint must not be allowed to accumulate around the tumble dryer.
- Keep the area underneath and around the appliance free of combustible materials such as fibres, paper, rags, chemicals, etc.
- As the dryer is heavy, you could injure yourself by trying to lift it. Do not lift the dryer on your own.
- You could cut your hands on the sharp edges of the dryer. Do not hold the dryer by the sharp edges.
- Protruding parts on the dryer may break off when it is lifted or pushed.
- Do not move the dryer by holding onto protruding parts.
- Check the dryer for damage caused during transportation. Never operate a dryer if it is damaged.
- Any residual water in the dryer may freeze and damage the dryer.
- Do not install the dryer in rooms that are at risk of frost.
The appliance contains refrigerant which, although it is environmentally friendly, is flammable R290. Failure to dispose of it properly may result in a fire or poisoning. Dispose of the appliance properly and do not damage the pipes in the refrigerant circuit.

WARNING:
Never stop a tumble dryer before the end of the drying cycle unless all items are quickly removed and spread out so that the heat is dissipated.

WARNING:
In the appliance enclosure or in the built-in structure, keep ventilation openings clear of obstruction.

WARNING:
Do not damage the refrigerant circuit.
Maximum Capacity
The maximum capacity of dry textile material to be used in the appliance is:
| HDFS10HP* |
| 10 kg |
DANGER OF HOT SURFACE
- At higher drying temperatures, the door glass will heat up. Be careful to avoid burns. Make sure children do not play near the door glass.
- The back of the dryer may get very hot during operation. Wait for the dryer to cool down completely before touching its back side.
- If you open the dryer door during the drying process, the clothes may be very hot and there is a risk of burning.
SERVICE
- In case of incorrect dryer connection, incorrect use, or servicing by an unauthorized person, the user shall bear the cost of any damage as such damage shall not be covered by warranty.
- The warranty does not cover consumables, minor deviations in colour, increased noise that results from appliance age and which does not affect the functionality of the dryer, and aesthetic defects on components, which do not affect the dryer's functionality and safety.
Queensland Service Notes: In Queensland, the Authorized Service Person must hold a Gas Work Authorization for hydrocarbon refrigerants to carry out servicing or repairs which involve removal of covers.
PRODUCT DESCRIPTION
1 Condensate tank 2 Programme selector knob 3 Control unit 4 Door 5 Net filter 6 Air vent 7 Heat exchanger filter

1 Power cord 2 Condensate discharge hose 3 Adjustable feet

TECHNICAL INFORMATION (DEPENDING ON THE MODEL)
The rating plate with basic information about the dryer is fitted on the front wall of the dryer door opening (see chapter »DESCRIPTION OF THE DRYER«).
| Width 595 mm | |
| Height 845mm | |
| Dryer depth (a) 640 mm | |
| Depth with door closed 670 mm | |
| Depth with door open (b) 1150 mm | |
| Weight 54 kg | |
| Rated voltage See rating plate | |
| Nominal power See rating plate | |
| Amount of refrigerant See rating plate | |
| Refrigerant type R290 | |
| Maximum load See rating plate |
Rating plate
Hisense
Clothes Dryer
HDFS10HP*
220-240V\~ 50Hz
IPX4
Dryer Capacity: 10kg
Input Power: 550W
Refrigerant: R290 (135g)

E6101
Made in China
APPROVAL NO.
SGS-230030-EA
Hisense Australia Pty Ltd.
INSTALLATION AND CONNECTION
Remove all packaging. When removing the packaging, make sure not to damage the dryer with a sharp object.
SELECTING THE ROOM

The dryer may not be in contact with a wall or adjacent furniture. For optimum dryer operation, we recommend observing the clearance from the walls as indicated in the figure. In case of failure to heed the required minimum clearance, the dryer may overheat.
- Vents on the back wall and the air exhaust opening on the front side of the dryer should never be obstructed.
The room in which you will install the dryer should be sufficiently ventilated, with a temperature between 10°C and 25°C. Dryer operation at a lower environment temperature may result in condensate accumulation in the dryer interior. Do not place the dryer into a place where there is danger of freezing. Frozen water in the condensate tank and pump may damage the dryer.
The dryer emits heat. Therefore, do not place it in a very small room, as the drying process may take longer due to limited amount of available air.
Lighting in the room should be sufficient to allow reading the information on the display unit on the control panel.
DRYER PLACEMENT
If you have a Hisense washing machine with 536mm, the Hisense dryer can be placed on the top of it. In this case, the stacking kit must be used. Below are the steps for installation.
(1) Unscrew the four adjustable feet of the clothes dryer, put them into the foot caps respectively, and then install them back on the clothes dryer. (2) Lift the dryer onto the washing machine and place it in alignment with the washing machine. Do not place the washing machine on the dryer or install it in a staggered manner.


dryer washing machine
(3) Remove one screw connecting the lower rear cover plate and the side plate of the dryer on each side. (4) Align the stacking kit holes and the rear cover holes in a line.


(5) Screw on the removed screw and the same screw in the accessory box to fix the front of the stacking kit on one side. (6) Use the 2 special screws in the accessory box to assemble the washing machine rear cover and stacking kit.

(7) Fix the stacking kit on the other side in the same way.
Also you can use the dryer stacking bracket (figure a) to stacked with a Hisense washing machine with 536mm side plate of the box (figure 1). Alternatively, the dryer can be placed next to the washing machine (figure 2). You can contact aftersales for purchase figure a, and install it according to user manual.

At least two persons are required to install the tumble dryer on top of a washing machine.
Dimensions(mm)

| Index | Dimension(mm) |
| A | 595 |
| B | 845 |
| C | 610 |
| D | 640 |
| E | 670 |
| F | 1150 |
Do not place the dryer behind lockable or sliding door, or door with a hinge on the opposite side of the dryer door hinge. Install the dryer in such way that the door can always be freely opened.
Do not place the dryer on a carpet with long fibres as this may impede air circulation.

After installation, wait for 24 hours without moving the appliance before using it for the first time. If the dryer has to be laid down on one of the sides during transport or servicing, place it with its left side, viewing from the appliance front, downwards.
Level the dryer in longitudinal and traverse direction by rotating the adjustable feet which allow levelling by +/- 1 cm. Use a spirit level and spanner No. 22.

Floor on which the dryer is placed must have a concrete base. It should be clean and dry; otherwise, the dryer may slide. Also clean the adjustable feet. The dryer must stand level and stable on a solid base. Incorrect levelling of the dryer with the adjustable legs may cause vibration, appliance sliding across the room, and loud operation. Incorrect levelling of the dryer shall not be subject to warranty. Sometimes, unusual or louder noise may appear during appliance operation; these are mostly the result of improper installation.
CHANGING THE DOOR OPENIG DIRECTION
To change the direction of door opening, proceed as follows.


![graph LR A["Component 1"] --> B["Component 2"] B --> C["Component 3"] C --> D["Component 4"]](/content/2026/05/940732/images/9ebde2399636e94b9cd0aad898e35b787836018504201a331b940b9fb7a9d621.jpg)
![graph LR A["Circular Component"] --> B["Rotation Arrow"] B --> C["Arrow to Right"] C --> D["Final Component with Screwhead"]](/content/2026/05/940732/images/a6e185e77431f0b35847182dc3c460e3c688b5b9f908fd452b88e2d0083a1c2f.jpg)
1 Fully open the door (take the example of reversing from left opening to right opening).
2 Unscrew the two fastening screws of the door hinge with a Phillips screwdriver (or 8 mm socket spanner) to remove the whole door body.
3 Unscrew the two screws of the door hook cover plate with a Phillips screwdriver, and remove the whole door hook cover plate (including the door hook).
4 Unscrew the two screws of the hinge cover plate, pull it out horizontally with a little force, and then remove the two screws (stainless steel pan head screws) on the reinforcing iron plate. Press the door body with one hand, grasp the hinge with the other hand, lift it up little by little, and slowly remove the hinge from the positioning pin. If necessary, use a flat head screwdriver to pry it.
5 Rotate the hinge assembly 180° to the other side, install the hinge assembly on the stud and press it tightly, and then tighten the two screws in the middle.
![graph LR A["Circular Component"] --> B["Rectangular Component"] B --> C["Rectangular Component"]](/content/2026/05/940732/images/76a09605f5c989fc420493d0b4c880a8e164409646fee16caba60cec48cd9107.jpg)
6 Rotate the hinge cover plate and the door hook cover plate 180° respectively and install them at the corresponding positions on the other side of the inner frame, and then tighten the screws.

7 Remove the door lock screw of front assembly, pull down the door lock vertically by hand, take it down and rotate it 180° to the other side. Then install it to the hole of front assembly, pull it down to clamp it, and tighten the screws. Now, the reversing of door lock is completed.

8 Finally, install the door hinge on the front assembly, tighten the two screws, and close the door. At present, the door reversing (from left opening to right opening) is completed.
DRAINING THE CONDENSATE
The moisture from the laundry is extracted in the condenser unit and accumulated in the condensate tank.
During drying, the screen will display a prompt indicating the condensate water tank is full and should be emptied.
To avoid emptying the condensate tank, run the condensate discharge hose located at the back of the appliance directly into a drain.

1 Remove discharge hose from the machine and hang it on the back.
2 Attach the hose in the attachment to the plastic opening on the discharge hose.
If you decide to run the condensate drain hose into a drain, make sure the hose is securely fastened. This will prevent any water spillage which could result in unexpected damage.
⚠️ Always use the hoses supplied with the dryer.
CONNECTING TO THE POWER MAINS

After installation, the dryer should stand still for two hours before it is connected to the power mains; this allows the dryer to stabilize.
Connect the dryer to a grounded power outlet. After installation, the wall outlet should be freely accessible. The outlet should be fitted with an earth contact (in compliance with the relevant regulations).
Information on your dryer is indicated on the rating plate (see chapter »DESCRIPTION OF THE DRYER/Technical information«).
⚠️ We recommend using over-voltage protection to protect the appliance in case of a lightning strike.
⚠ The dryer may not be connected to the power mains using an extension cord.
Do not connect the tumble dryer to an electrical outlet intended for an electric shaver or a hair dryer. Any repair and maintenance pertaining to safety or performance should be done by trained experts. A damaged power cord may only be replaced by a person authorized by the manufacturer.
MOVING AND TRANSPORT AFTER INSTALLATION
After every drying cycle, a small amount of condensed water will remain in the dryer. Switch on the dryer and choose one of the programmes, then let the appliance operate for approximately half a minute. This will pump out the remaining water and prevent damage to the dryer during transport. If the dryer cannot be transported in the upright position, tilt it to the left side.
After transport, the dryer should be left to stand still for at least two hours before it is connected to the power mains. The appliance should be installed and connected by a trained technician. If the appliance was not transported in compliance with the instructions, the dryer should be left to stand still at least 24 hours before it is reconnected to the power mains.
Failure to do so may result in a heat pump failure which shall not be covered by the warranty. Be careful not to damage the cooling system (see chapter »INSTALLATION AND CONNECTION/Dryer placement«).
⚠️ Carefully read the instructions for use before connecting the dryer. Repair or any warranty claim resulting from incorrect connection or use of the dryer shall not be covered by the warranty.
BEFORE USING THE APPLIANCE FOR THE FIRST TIME
Make sure the dryer is disconnected from the power mains; then, open the door by pulling the left side of the door towards you (figures 1 and 2).
Before using the dryer for the first time, clean the dryer drum using a soft damp cotton cloth and water (figure 3).


2
1
3

⚠ Do not use any solvents or cleaning agents that could damage the dryer (please observe the recommendations and warnings provided by the manufacturers of the cleaning agents).
DRYING PROCESS, STEP BY STEP (1 - 5)
STEP 1: HEED THE LABELS ON THE LAUNDRY
| Normal wash;Sensitive laundry | Max.washing temp.95°C9595 | Max.washing temp.60°C6060 | Max.washing temp.40°C4040 | Max.washing temp.30°C3030 | Hand wash only | Do not wash |
| Bleaching | Bleaching in cool water | Bleaching not allowed | ||||
| Dry cleaning | Dry cleaning with all agentsA | Petroleum solvent R11, R113P | Dry cleaning in kerosene, pure alcohol, and R113F | Dry cleaning not allowed | ||
| Ironing | Hot ironing, max.200°C... | Hot ironing, max.150°C... | Hot ironing, max.110°C... | Ironing not allowed | ||
| Drying | Dry flat (place on a flat surface)— | Drip dryIIILine dry☐ | High temperature...Low temperature☐ | Do not tumble dry☒ | ||
STEP 2: PREPARING FOR THE LAUNDRY DRYING PROCESS
- Sort the laundry by type and thickness of the fabric (see PROGRAMME TABLE).
- Close the buttons and zips, tie any ribbons, and turn the pockets inside out.
- Place very sensitive clothes in a special-purpose laundry bag. (The special-purpose laundry bag is available as an optional accessory.)

Drying laundry made of particularly delicate fabrics that may be deformed is not recommended. The following types of laundry may not be dried in the dryer as this may cause your garments to deform:
• leather garments and other leather products; • garments that are waxed or treated in any other way; • garments with major wooden, plastic, or metal parts; • garments with spangles; • garments with metal parts subject to rusting.
DRYING IN A BASKET
Before the first drying cycle, remove the basket and all packaging from the drum.
Laundry may only be dried in the basket when using the timed drying programme. (The basket is available for purchase as an optional accessory at the service centre.)

1. Open the dryer door and insert the drying basket.
2. Insert the drying basket by securing it to the net filter and front support (as shown in the figure).
3. The basket can be used for drying sports shoes, slippers, or any other item you do not wish to be tumbled around the dryer drum during the drying process (max. load: 2.5 kg).
4. After the drying process, remove the drying basket and close the dryer door.
Only dry clean sports shoes or slippers that have been wrung just enough to prevent water from dripping from them.
As the drum rotates, the laundry basket will be still. Therefore, make sure the items you are drying in the basket are not in contact with the drum, as this could result in damage to the item and the dryer.
SWITCHING ON THE DRYER
Connect the dryer to the power mains by plugging in the power cord.
Press the (1) ON/OFF button to switch on the dryer (figure 1).
With some models, the dryer drum is lit as well (figure 2). (The light in the dryer drum is not suitable for any other use.)
The light in the dryer drum may only be replaced by the manufacturer, a service technician or an authorized person.


Before first use, configure the preferences of Language, Country and Region, Time Zone and User agreement according to the boot navigation and user's actual needs. (The energy efficiency requirement varies with the country and region. If the country/region selected is inconsistent with reality, the energy efficiency grade and data will be different.)
1. Configure the language

2. Select the time zone

3. Confirm whether network configuration is necessary

3.1 Skip network configuration, and set system date and time
Note: After skipping network configuration, you can subsequently set the network again under System Settings

3.2 If network configuration is not skipped, the network can be connected as prompted on the screen.
Note: For detailed steps of network connection, see "WLAN".

CONTROL PANEL
This device is controlled by a touchscreen + a rotary knob; program selection can be realized by touching the touchscreen or rotating the knob; the Power and Start/Pause buttons can be pressed by touching the touchscreen.

| Icon Name Description | ||
 | Power button For powering on/off the washing machine. | |
 | Start/Pause button For starting/suspending a program. | |
| [0WY0] | Back Go back to the previous interface. | |
| — | Settings | Enter Setting Options to set WLAN, Drum Light, Mute, Settings, etc. |
| [W036] | WLAN WLAN icon of the washing machine. | |
| [6842] | Child Lock icon | After a program is started, all operations except the Power button will be locked if the child lock is turned on. |
| [7442] | Wash & Dry icon | For combined control of the washing machine and the dryer in the same home network. |
 | Intelligent Report | Touch this icon to show the local weather, total power consumption and other data. |
| [HK68] | Favorites icon Touch this icon to add the current program to your favorites. | |
| [DSAH] | Reserve icon Touch this icon to enter the Reserve interface. | |
POWER ⏻
Switch between "OFF" and "Standby". In OFF state, all displays and outputs are turned off and remote startup is not supported. Press the Power button; the screen will turn on and the dryer will enter standby mode.
When the dryer is in standby mode, or after the screen displays the program end interface, long press the Power button for 3s to enter the power-off state.
In standby mode, or in the program end interface or Wash & Dry retry reminder interface, if no operation is performed within 10 minutes, the appliance will turn off automatically.
START/PAUSE ▶||
Press this key to start/pause the program.
When the program is paused, the settings cannot be changed. To change the program or function during operation, press the Back button to go back and end the current program; or long press the Power button for 3s to turn off the appliance, and then restart it to reset the program or function.
LOADING THE DRYER
Open the dryer door by pulling the left side of the door towards you (figure 1). Insert the laundry into the drum (after making sure the drum is empty) (figure 2). Close the dryer door (figure 3).

Do not insert laundry into the dryer if it has not been wrung or spun (recommended minimum spinning cycle: 800 rpm).
Do not overload the drum! See PROGRAMME TABLE and observe your nominal load as indicated on the rating plate.
If the dryer drum is overloaded, the laundry will be more wrinkled and perhaps unevenly dried.
When drying larger items (bedding, towels etc.), loosen them and then insert them into the dryer drum.
STEP 3: CHOOSING THE DRYING PROGRAMME
Choose the program by rotating the program selector knob or touching the touchscreen (depending on the type of laundry and dry level desired). See Program Table.
Program Table
| Program Type of laundry | End mode | |||
| Rated Capacity (kg) | Just in Time | Manual Dry | ||
| Cotton | This program is suitable for thicker, non-sensitive cotton laundry. It will be completely dry after the drying program ends. | 10√ | ||
| Synthetics This program is suitable for synthetics. 5√ | ||||
| Delicates | This program is suitable for highly delicate laundry made of synthetic fiber, which may be slightly moist after the drying program ends. A special-purpose laundry bag is recommended. | 1√ | ||
| Towels | This program is suitable for non-sensitive items (towels, kitchen clothes...). After the drying program ends, it will be dry and ready to be stored in the cupboard. | 4√ | ||
| Bedding | This program is suitable for larger items. After the program ends, it will be completely dry. Adjusted drum rotation would prevent the laundry from tangling. | 2.5√ | ||
| Duvet | This program is suitable for textiles stuffed or padded with down feather (pillows, duvets, jackets, etc.). Please dry larger items separately, and use the Extra Dry or Time Dry if necessary. | 2√ | ||
| Sportswear | This program is suitable for clothes with films, and sportswear made of mixed materials and breathable fabrics. | 2√ | ||
| Baby Care | This program is suitable for baby clothes. The clothes will be completely dry. | 2√ | ||
| Allergy Care This program is used for removing allergens such as mites. 2√ | ||||
| Quick 30' This program is used for quick drying of lightweight clothes. 0.5√ | ||||
| Shirts | This program is suitable for shirts and tops. Adjusted drum rotation would prevent the laundry from creasing. | 2√ | ||
| Denim This program is suitable for denim and clothes that fade easily. 3√ | ||||
| Power Speed 79' This program is suitable for drying cotton clothes with □ label. 2√ | ||||
| AI Dry | This program is suitable for drying clothes mixing cotton clothes and non-iron clothes. | 5√ | ||
| Ion Refresh | When this program is enabled, the heater will be turned off. This program is suitable for refreshing clothes by adding ions. | / | √ | |
| Wool | This program is suitable for softening or fluffing wool and silk clothes, which must be dried thoroughly according to the manufacturer's instructions. | / | √ | |
| Rack Dry | To use this program, please place laundry (such as small stuffed toys, sneakers, etc.) on the rack for drying. | / | √ | |
| Time Dry | This program is suitable for non-sensitive laundry that is slightly moist and must be thoroughly dried. In this program, remaining moisture is not detected automatically. If the laundry is still damp after the program ends, please repeat the program; if the laundry is too dry and therefore creased and rough to touch, it indicates that the drying time selected is too long. | / | √ | |
| Warm Dry | This program is suitable for drying daily items that can be dried, such as bath towels, bathrobes, towels, small articles and wet clothes. | / | √ | |
| Cool Air | This program is suitable for fabrics that need to be refreshed by cool air; the dryer drum will not heat. | / | √ | |
* Energy efficiency test program: Cotton+Cupboard Dry.
* These programs have reversing function specially for big load.
If your laundry is not dried to the desired dryness level, use extra functions or use a more suitable programme.
STEP 4: SELECTING ADDITIONAL SETTINGS AND FUNCTIONS
The settings of most programs are adjustable: Slide up or down in the program display area on the left side of the screen to select the desired program; touch the parameter display area on the right side of the screen to enter the parameter setting interface; after setting the relevant parameters, press Start key to start running the selected program.
Touch the selected program time to change the Level and Target settings, and to set additional functions such as the Anti Crease, Night Dry and Steam. Additional functions that can be selected vary with the program.


Intelligent Laundry Report
When network is connected, touch this icon to enter the Intelligent Laundry Report interface, where information such as energy consumption and weather is displayed.
Fav.
Press this icon to add the current program to Favorites, and favored programs will be listed at the top of the program list.
Delay End: Ⓤ
- The reserved time is the end time, which can be set when the machine is in standby;
- After reservation, if user switches the program or sets parameters or functions, the reservation will be canceled automatically;
- When the reservation is in progress, the screen will display "Delaying" and the End Time; after the washing program starts, the remaining time will be displayed;
- The reserved time must be longer than the program running time, and the maximum time should not exceed 24h.


Additional functions
when the icon lights up, it indicates the corresponding function is selected.
Anti Crease
If the laundry cannot be timely taken out after drying, the "Anti Crease" function can be selected. The drum will rotate intermittently to prevent crease of clothes. Press any button or open the machine door to exit the Anti Crease mode. If no operation is performed, the program will end automatically after the default maximum duration of 12 h.
Steam
Used to prevent a small amount of laundry from creasing (the anti-crease effect will be significantly reduced when drying a large amount of laundry).
Night Dry
Used to reduce drying noise and suitable for drying during nighttime.

Drying Level and Target
Touch the parameter display area to enter the Parameter Settings interface.
The left side is for setting the Level; there are three options: Low, Middle, High (not selectable for some programs). Users can select a proper drying level according to the quantity and material of clothes.
The right side is for setting the Target; there are three options: Iron Dry (dry and iron), Cupboard Dry (dry and wear), and Drya (dry and put away).
Back <
Press this button to return to the Program Selection interface. This button can be used if you want to abandon setting relevant parameters and end the current program.

Child Lock
This is a safety feature. To enable this function, press the Child Lock icon. When the icon lights up, it indicates the Child Lock function is enabled. Press the Child Lock icon for 3s to unlock this function.
- When Child Lock is set, all function buttons except the Power button are disabled.
- If power failure occurs or the device is turned off when the Child Lock function is ON, this function will be deactivated. Child Lock will unlock automatically after the program is completed.


Setting Options:
After touching the Settings icon, a drop-down list of setting options will appear, for setting WLAN, Remote Control, Energy Saving, Drum Light, Mute, Wash & Dry, Settings, Detergent and Softener.
WLAN
This function can be used to turn on/off WLAN. After the washing machine is successfully connected to WLAN, it can be controlled via the app on your mobile phone.
Remote Control

This function can be used to remotely control the machine via the app.
Energy Saving

This function can be used to set the time for the screen to enter the Energy Saving mode, and the duration during which the drum light stays on.
Drum Light

This function can be used to manually turn on/off the Drum Light. When the machine is in standby, when a program is suspended, or when laundry is ended, the drum light will turn on automatically.
Mute

This option can be used to turn on/off the prompt tone of the machine. When it is turned off, all sounds of the machine except the alarm tone will be disabled.
Settings
Press this icon to enter the Settings interface, where you can set General, System Volume, Screen Brightness, WLAN, Energy Saving, User Program, APP and Pairing, System Upgrade, etc.

| Name Function Description | |
| General Set the language, date and temperature unit. | |
| System Volume Set the system volume. | |
| Screen Brightness Set the screen brightness. | |
| WLAN Configure network connection. | |
| Energy Saving Turn on Energy Saving. | |
| User Program Users can set the number of programs shown on the home page. | |
| APP and Pairing View the QR code for App downloading and binding. | |
| System Turn on system upgrade and restore factory settings. |
WASH & DRY DESCRIPTION
This function can realize intelligent inter-connection between the washing machine and the dryer. Prior to use, both the washing machine and the dryer should be connected to the same WLAN, or bound to the same account in the app. When this function on the washing machine is enabled, the dryer will automatically match the corresponding program and starts preheating 15 minutes before the end of laundry in the washing machine. (Preheating is an optional feature; the dryer needs to enable the 'remote control' function to ensure successful preheating.) Directly transfer the spun clothes from the washing machine to the dryer drum, and the cycle can be started without manual selection procedure, which is time-saving and efficient. This function is not available for some programs.
FUNCTION TABLE
Note: When the Steam function is added, the maximum rated capacity changes to 3 shirts under the Shirts program, and to 1 kg under other programs.
STEP 5: PROGRAM DISPLAY AND END
During program operation, the display screen will show information such as time left.
The time left displayed may differ from the actual running time. The actual drying time will be automatically adjusted based on such factors as type and amount of laundry, dry level and ambient temperature.
When the program is ended, the appliance will produce a prompt tone; the screen will display the end interface; long press the Power button for 3s to turn off the appliance. If no operation is performed within 10min, the dryer will shut down automatically.

Report:
Click it to view the energy consumption and time used of this drying.
Favorites:
Click it to add the program and settings of function parameters of this drying to your favorites. The added program will appear at the top of the program list so that it can be selected with priority during next use.
HOME:
Click it to go back to the home page.
Evaluate:
Users can evaluate the star level of this drying to help us in continuous improvement.
MAINTENANCE & CLEANING
Before cleaning, make sure to switch off the dryer and disconnect it from the power mains (unplug the power cord from the outlet).
The dryer is fitted with a filtering system consisting of several filters that prevent any impurities from entering the heat exchanger system.

1 Net filter
2 Heat exchanger filter
3 Condensate tank
The dryer may never be operated without the filters in place or with damaged filters, as excessive amount of accumulated fibres from the fabric could cause malfunction or failure of the dryer.
CLEANING THE NET FILTER IN THE DOOR
Clean the net filter after each drying cycle.

1 Pull out the net filter.
2 Open the filter housing.
3 Gently scrape the filter to remove the lint, i.e. the lining of fibres and threads, with your hand or with a cloth.
4 If necessary, clean the filter housing and door gasket as well.
5 Insert the net filter and close the filter housing.
Make sure you do not pinch your fingers with the filter cover.
CLEANING THE HEAT EXCHANGER FILTER
During cleaning, some water may be spilled. It is therefore recommended to place an absorbent cloth on the floor.

1 Press the buckle of the clean door cover at the lower left to open the clean door cover.
2 Turn the locking knob of the clean cover to the unlock position.
3 Remove the clean cover and take out the heat exchanger filter. After several uses, clean the dust on the heat exchanger filter with a wet cloth or running water. After a period of use, if there is dust on the heat exchanger, remove the dust with tools. Do not touch the heat exchanger directly with your hands to avoid injury.
4 Install the heat exchanger filter and the clean cover back to their original positions, lock the knob, and close the clean door cover.
Insert the heat exchanger filter into the housing and close the clean cover (push it toward the machine and turn the locking knob until it latches into place). The heat exchanger filter must be correctly inserted into its slot. Otherwise, the heat exchanger installed inside the dryer may be clogged or damaged. Clean the heat exchanger filter at least after every five drying cycles.
CLEANING OF THE HEAT EXCHANGER
Do not touch the inner metal parts of the heat exchanger with bare hands. Danger of injury on sharp parts. Use appropriate protective gloves when cleaning the heat exchanger.
⚠️ Incorrect cleaning of the metal fins of the heat exchanger can permanently damage the tumble dryer. Do not press on the metal fins with hard objects like, for example, the plastic tube of a vacuum cleaner.
The dust and dirt in the metal fins of the heat exchanger can be cleaned with a vacuum cleaner, soft brush, etc.
Access to the heat exchanger is possible when the heat pump filter is removed as described in the chapter »Cleaning the heat pump filter«.
Without pressing, gently move the brush attachment only in the direction of the metal fins from top to bottom. Too much pressure can damage or bend the metal fins of the heat exchanger.
We recommend you clean the heat exchanger once after every twenty drying cycles.

EMPTYING THE CONDENSATE TANK
Empty the condensate tank after each drying cycle.
If the condensate tank is full, the drying programme will be paused automatically.
The screen will display a prompt indicating the condensate water tank is full and should be emptied.

1 Pull out the condensate tank from the dryer (using both hands as shown in the figure), then turn it upside down over a washbasin, sink, or any suitable vessel.
2,3 Empty the condensate tank. Pull out the spout at the opening for easier emptying. Replace the condensate tank.
Water from the condensate tank is not potable. If thoroughly filtered, it can be used for ironing.
⚠️ Never add chemicals or fragrances into the condensate tank.
It is not necessary to empty the condensate tank if the drain hose is connected directly to a drain (see chapter »INSTALLATION AND CONNECTION/Draining the condensate«).
ADD WATER FOR THE STEAM FUNCTION AND CLEAN THE FILTER MESH
The Steam function can be selected under some programs. It is needed to guarantee that water in the water tank is adequate enough to form steam. For first use, please add purified water (about 500ML) If the screen displays a prompt indicating a lack of water during use, please use a container to add purified water (about 500ML) according to the operation steps below

The water tank filter mesh could be blocked by impurities after long use; it is suggested to clean it on a monthly basis. Hold out your fingers to pinch and take out the lower water tank filter mesh; after washing the filter mesh, reinstall it properly.

CLEANING THE DRYER
Always disconnect the dryer from the power mains before cleaning.
Clean the dryer exterior using a soft damp cotton cloth.
Do not use any solvents or cleaning agents that could damage the dryer (please observe the recommendations and warnings provided by the manufacturers of the cleaning agents).
Wipe all parts of the dryer with a soft cloth until dry.
Do not clean the dryer with a jet of water!

TROUBLESHOOTING
WHAT TO DO ...?
Disturbances from the environment (e.g. the power grid) may result in various error reports (see TROUBLESHOOTING TABLE). In such case:
- Switch off the dryer and wait at least one minute.
- Switch on the dryer and repeat the drying programme. • Most errors during operation can be resolved by the user (see TROUBLESHOOTING TABLE). • If the error persists, call an authorized service unit. • Repairs may only be carried out by an adequately trained person. • Repair or any warranty claim resulting from incorrect connection or use of the dryer shall not be covered by the warranty. In such cases, the costs of repair shall be charged to the user.
TROUBLESHOOTING AND ERROR TABLE
| Fault phenomenon | Recommended handling method |
| The dryer cannot be started | ◇ Check the power connection;◇ Confirm the "Start Pause" key is pressed down;◇ Confirm the door is closed properly;◇ House fuse is blown, circuit breaker has tripped, or power outage has occurred. |
| The dryer do not operate | ◇ Check whether the program setting is correct;◇ Confirm there are clothes in the drum; |
| Excessive drying time | ◇ Check whether the program setting is correct;◇ Confirm whether there are too many clothes wrapping into clusters;◇ Check whether the filter screen is cleaned;◇ There will be air supply for cooling after drying in some programs; |
| Poor drying effect | ◇ Confirm that the clothes have been dehydrated;◇ Check whether the program setting is correct;◇ Confirm that there are too many clothes;◇ Load is not properly sorted. Whether clothes that are not easy to dry are mixed with clothes that are easy to dry;◇ Large load of heavy fabrics.◇ Check whether the filter screen is cleaned; |
| The remaining time of the display stops or jumps | ◇ The remaining time varies with clothing type, load, dehydration and ambient temperature, which is a normal phenomenon; |
| Clothes are wrinkled. | ◇ Clothes have dried too long. Try a shorter drying time.◇ Clothes have been left in the appliance for too long after cycle ends. |
| The dryer is too loud. | ◇ Look for coins, loose buttons, nails, and other objects and remove them immediately.◇ Check the lint filter. Remove any items stuck inside the lint filter.◇ Make sure the dryer is level and standing firmly on the floor.◇ The dryer may hum due to air moving through the drum and fan. This is normal. |
| Clothes are shrinking. | ◇ Garment care instructions are not being followed. Use a low or no heat setting. |
| Lint is left on clothes. | ◇ Lint filter has not been cleaned properly.◇ Clothes have not been sorted properly.◇ Some fabrics cause more lint and should be dried separately from fabrics that lint attaches easily.◇ Tissue, paper, etc., has been left in pockets. |
| The appliance has an odour. | ◇ The smell is caused by rubber material that is attached to the appliance inside. This kind of smell is a rubber's own smell and disappears automatically after using the appliance several times.◇ When washing the clothes, use the detergent in accordance with the manufacturers recommendations. If you use the detergent excessively not according to the recommendations, undissolved detergent may accumulate on the clothes and cause an odour.◇ You can smell odours from the clothes if the clothes were left in the appliance after drying or in the washing machine after washing. Unload the clothes promptly at the end of the drying or washing cycle.◇ Ensure you can smell same odour in the washing machine. If so, clean the tub of the washing machine referring to the washing machine user manual.◇ Always take care of both lint filters clean. If any residues were left in the lint filter after drying, it may cause odours. And also dry the lint filter completely after cleaning. |
| The machine is powered on and started directly after power failure, but does not work | ◇ When the program is suspended, the set functions cannot be changed. If the program or function needs to be changed during operation, or the power is off during operation and the power needs to be powered on again, select the required program and function, and finally start it. |
| Code | Interpretation | Recommended handling method |
| F50/F51 | Abnormal sensor | ◇ Please contact after-sales service. |
| F22 | Abnormal display the motor control board and the power board | ◇ Press the POWER for 3 seconds, and press the "start/pause" button again.◇ If the abnormality is not removed, please contact after-sales service. |
| F21 | Abnormal display panel and the power board | ◇ Press the POWER for 3 seconds, and press the "start/pause" button again.◇ If the abnormality is not removed, please contact after-sales service. |
SERVICING
Before calling a service technician
When you contact a service centre, please state your washing machine's type (1).
When you contact a service centre, please state your hypertype(1).
Type, code/ID, model, and serial number are indicated on the back of the dryer.
⚠ In case of a failure, only use approved spare parts by authorized manufacturers.
⚠️ Repair or any warranty claim resulting from incorrect connection or use of the dryer shall not be covered by the warranty. In such cases, the costs of repair shall be charged to the user.

Hisense
Clothes Dryer
HDFS10HP*
220-240V~ 50Hz
IPX4
Dryer Capacity: 10kg
Input Power: 550W
Refrigerant: R290 (135g)

Made in China
APPROVAL NO.
SGS-230030-EA
Hisense Australia Pty Ltd.
PROGRAM TABLE
The table indicates the power consumption and duration for drying of a test batch of laundry with various loads that go through spinning at various speeds, in compliance with EN 61121.
The following requirements apply to the programs specified below.
Inlet air temperature: Room temperature
Inlet air humidity: 50-60%
Drying temperature: Normal
| Program Amount Spinning | Program consumption, approximately (kWh)* | Program duration, approximately (h:min)* | ||
| AI Dry | ⊖ | 1000 1.05 2:20 | ||
| ⊖ | 1400 0.78 1:50 | |||
| ⊖ | 1400 0.51 1:10 | |||
| Allergy Care | ⊖ | 1200 0.96 2:02 | ||
| Bedding | ⊖ | 1400 1.02 2:05 | ||
| ⊖ | 1400 0.58 1:20 | |||
| Baby Care | ⊖ | 1000 0.72 1:48 | ||
| Shirts | ⊖ | 1000 0.34 0:50 | ||
| Cotton | ⊖ | 1000 1.78 3:48 | ||
| ⊖ | 1200 0.98 2:10 | |||
| ⊖ | 1200 0.70 1:45 | |||
| Synthetics | ⊖ | 1000 0.65 1:45 | ||
| ⊖ | 1000 0.46 1:10 | |||
| Delicates | ⊖ | 1000 0.48 1:15 | ||
| Quick 30' | ⊖ | 1400 0.15 0:30 | ||
| Sportswear | ⊖ | 1000 0.64 1:35 | ||
| Towels | ⊖ | 1000 1.15 2:25 | ||
| ⊖ | 1400 0.70 1:45 | |||
| ⊖ | 1400 0.51 1:10 | |||
| Denim | ⊖ | 1400 0.79 1:55 | ||
| Duvet | ⊖ | 1400 1.68 1:40 | ||
| Power Speed | ⊖ | 1200 0.58 1:19 | ||
Full load
Partial load
Small load
* Due to deviations in terms of type and amount of laundry, spinning, power supply, temperature and humidity, the program duration and power consumption measured at the end may differ from the ones stated in the table.
TIPS FOR DRYING AND ECONOMIC USE OF YOUR DRYER
The most economical way of drying is to dry the recommended amount of laundry in each batch (see PROGRAMME TABLE).
Drying laundry made of particularly delicate fabrics that may be deformed is not recommended.
Use of conditioner in the washing cycle is not necessary as the laundry is soft and smooth after drying in the dryer. Drying time will be shorter and power consumption will be lower if the garments are thoroughly wrung or spun before drying. By selecting the appropriate drying programme, you will avoid over-drying your laundry and problems with ironing or shrinkage of fabric.
Regular cleaning of the filters will lead to optimum drying time and minimum power consumption.
When drying smaller amounts of laundry or individual garments, the sensor may not perceive the actual level of moisture in the laundry. In such cases, it is recommended to dry smaller items or amounts with programmes for dryer laundry or with the timed programme.
DISPOSAL

Packaging is made of environmentally friendly materials that can be recycled, disposed of, or destroyed without any hazard to the environment. To this end, packaging materials are labelled appropriately.
The symbol on the product or its packaging indicates that the product should not be treated as normal household waste. Take the product to an authorized collection centre for waste electric and electronic equipment processing.
When disposing of the dryer at the end of its useful life, remove all power cords, and destroy the door latch and switch to prevent the door from locking or latching (child safety).
Correct disposal of the product will help prevent any negative effects on the environment and health of people, which could occur in case of incorrect product removal. For detailed information on removal and processing of the product, please contact the relevant municipal body in charge of waste management, your waste disposal service, or the store where you bought the product.
Connecting your appliance to the ConnectLife application
1. ConnectLife
ConnectLife is a smart home platform that connects people, devices, and services. The ConnectLife application includes advanced digital services and carefree solutions that allow users to monitor and control appliances, receive notifications from a smartphone, and update software (supported features vary depending on your appliance and your region/country).
To connect your smart device, you need a home Wi-Fi network and a smartphone with the ConnectLife application.

To download the ConnectLife application, scan the QR code or search for ConnectLife in your favorite app store.
- Install the ConnectLife application and create an account.
- In the ConnectLife application, go to the "+" menu and select the appropriate type of device. Then scan the QR/SN code (it can be found on the rating plate of the appliance; you can also enter the AUID/SN code manually).
- The application then guides you through the entire process of connecting the appliance to your smartphone.
- After a successful connection, the appliance can be operated remotely via the mobile application.
Do you have more questions? Visit us at www.connectlife.io or contact us at hello@connectlife.io.
2. WLAN
2.1 Enabling Wi-Fi on the appliance
Click on the "WLAN" button in the top right corner of the dropdown menu to enable or disable the Wi-Fi function.
2.2 Connection setup
For first start up: follow the boot to complete device settings and app account binding.
If you have rejected to finish the WiFi setting and binding, you can start like below:
1) Click on the "Settings" button in the top right corner of the dropdown menu to enter the "Settings", and go to "WLAN" settings to set up the WiFi; 2) Or long press on the "WLAN" button in the top right corner of the dropdown menu to enter the "WLAN" directly.
2.3 Pairing
Click on the "Settings" button in the top right corner of the dropdown menu to enter the "Settings" page.
1) Click on "App and Pairing" to enter the pairing page. 2) Click on "Bind A New Account" to start the pairing process for a new user. 3) Click "Next" and the dedicated QR code will be shown up for device pairing.
2.4 Unpairing
1) On the appliance side:
A. Click on the "Settings" button in the top right corner of the dropdown menu to enter the "Settings" page.
B. Click on "App and Pairing" to enter the pairing page.
C. Click on "Unbind" to unbind the connected account.
D. Tick the accounts that you want to unbind and click "Unbind" to disconnect.
2) On the smartphone side:
A. Select and click the device you want to unbind in "Devices" page.
B. Click "Settings" to enter the Settings page.
C. Click "Remove Device" to unbind the device on the ConnectLife app.
2.5 Remote start
Click on "Remote Control" button in the top right corner of the dropdown menu to enable or disable this function.
2.6 System Upgrade
Click on the "Settings" button in the top right corner of the dropdown menu to enter the "Settings" page. Then click to open "System" page. Choose "System Upgrade", then you can check whether a new version has been released or not.
Hisense
life reimagined
- SAFETY INFORMATION
- WARNING
- INSTALLATION
- ELECTRICAL SAFETY
- CHILDREN SAFETY
- USE
- MAXIMUM CAPACITY
- DANGER OF HOT SURFACE
- SERVICE
- PRODUCT DESCRIPTION
- TECHNICAL INFORMATION (DEPENDING ON THE MODEL)
- HISENSE
- HDFS10HP
- INSTALLATION AND CONNECTION
- SELECTING THE ROOM
- DRYER PLACEMENT
- DIMENSIONS(MM)
- CHANGING THE DOOR OPENIG DIRECTION
- DRAINING THE CONDENSATE
- CONNECTING TO THE POWER MAINS
- MOVING AND TRANSPORT AFTER INSTALLATION
- BEFORE USING THE APPLIANCE FOR THE FIRST TIME
- DRYING PROCESS, STEP BY STEP (1 - 5)
- STEP 2: PREPARING FOR THE LAUNDRY DRYING PROCESS
- DRYING IN A BASKET
- SWITCHING ON THE DRYER
- CONFIGURE THE LANGUAGE
- SELECT THE TIME ZONE
- CONFIRM WHETHER NETWORK CONFIGURATION IS NECESSARY
- SKIP NETWORK CONFIGURATION, AND SET SYSTEM DATE AND TIME
- IF NETWORK CONFIGURATION IS NOT SKIPPED, THE NETWORK CAN BE CONNECTED AS PROMPTED ON THE SCREEN
- CONTROL PANEL
- POWER ⏻
- START/PAUSE
- LOADING THE DRYER
- STEP 3: CHOOSING THE DRYING PROGRAMME
- STEP 4: SELECTING ADDITIONAL SETTINGS AND FUNCTIONS
- INTELLIGENT LAUNDRY REPORT
- FAV
- DELAY END: Ⓤ
- ADDITIONAL FUNCTIONS
- ANTI CREASE
- STEAM
- NIGHT DRY
- DRYING LEVEL AND TARGET
- BACK
- CHILD LOCK
- SETTING OPTIONS
- WLAN
- REMOTE CONTROL
- ENERGY SAVING
- DRUM LIGHT
- MUTE
- SETTINGS
- WASH & DRY DESCRIPTION
- STEP 5: PROGRAM DISPLAY AND END
- REPORT
- FAVORITES
- HOME
- EVALUATE
- MAINTENANCE & CLEANING
- CLEANING THE NET FILTER IN THE DOOR
- CLEANING THE HEAT EXCHANGER FILTER
- CLEANING OF THE HEAT EXCHANGER
- EMPTYING THE CONDENSATE TANK
- ADD WATER FOR THE STEAM FUNCTION AND CLEAN THE FILTER MESH
- CLEANING THE DRYER
- TROUBLESHOOTING
- WHAT TO DO
- TROUBLESHOOTING AND ERROR TABLE
- SERVICING
- BEFORE CALLING A SERVICE TECHNICIAN
- PROGRAM TABLE
- TIPS FOR DRYING AND ECONOMIC USE OF YOUR DRYER
- DISPOSAL
- CONNECTING YOUR APPLIANCE TO THE CONNECTLIFE APPLICATION
- CONNECTLIFE
- ENABLING WI-FI ON THE APPLIANCE
- CONNECTION SETUP
- PAIRING
- UNPAIRING
- REMOTE START
- SYSTEM UPGRADE
Brand : HISENSE
Model : HDFS10HPB
Category : Tumble dryer