
AFO2300 - Deep fryer Healthy Choice - Free user manual and instructions
Find the device manual for free AFO2300 Healthy Choice in PDF.


| Product Type | Deep Fryer |
| Brand | Healthy Choice |
| Model | AFO2300 |
| Dimensions (W x D x H) | 30 x 25 x 20 cm |
| Weight | 2.5 kg |
| Power | 1800 W |
| Oil Capacity | 2.5 L |
| Temperature Range | 150 °C - 190 °C |
| Adjustable Thermostat | Yes |
| Indicator Lights | Power and Ready |
| Housing Material | Stainless Steel |
| Basket Material | Wire mesh with handle |
| Non-stick Coating | Yes |
| Cool-Touch Handle | Yes |
| Automatic Shut-Off | Yes |
| Overheat Protection | Yes |
| Removable Oil Tank | Yes |
| Dishwasher Safe Parts | Basket and tank |
| Cleaning Method | Wipe with damp cloth; wash removable parts |
| Replacement Parts Available | Basket, tank, heating element |
| Warranty | 1 year |
Frequently Asked Questions - AFO2300 Healthy Choice
User questions about AFO2300 Healthy Choice
0 question about this device. Answer the ones you know or ask your own.
Ask a new question about this device
Download the instructions for your Deep fryer in PDF format for free! Find your manual AFO2300 - Healthy Choice and take your electronic device back in hand. On this page are published all the documents necessary for the use of your device. AFO2300 by Healthy Choice.
USER MANUAL AFO2300 Healthy Choice
23L DIGITAL AIR FRYER CONVECTION OVEN

Model: AFO2300 | Batch: PR4765
CAUTION: TO AVOID DAMAGE TO YOUR BENCHTOP AND SPLASHBACK, DO NOT PLACE THE AIR FRYER DIRECTLY ON BENCHTOP.
HOUSEHOLD USE ONLY
Carefully read all instructions before use and save for future reference.
CAUTION: TO AVOID DAMAGE TO YOUR BENCHTOP AND SPLASHBACK, DO NOT PLACE THE AIR FRYER DIRECTLY ON BENCHTOP.
Please use air fryer on heat-proof material and on a dry, level and even surface. Leave a minimum distance of 20cm from walls and other heat-sensitive materials.
Do not place the appliance against a wall or against other appliances. Hot air up to 160 Degrees expels through the rear vent of the appliance. Leave at least 20cm clearance around the entire appliance, including directly above it.
Additional care should be taken when placing appliances on benchtop surfaces or near splashbacks where such materials (acrylics, timber, stone etc.) do not have high heat-resistant properties.
IMPORTANT SAFEGUARDS
PLEASE READ AND SAVE THIS INSTRUCTION MANUAL FOR FUTURE REFERENCE
When using the appliance, basic safety precautions should be followed, including:
- Remove and safely discard any packaging material and labels before using this product for the first time. Ensure children and babies do not play with plastic bags or any packaging materials.
- Before use, check that your local voltage corresponds with the specifications shown on the appliance nameplate located under the appliance.
- Always operate the appliance on a horizontal surface that is level, stable and non-combustible. Do not operate the appliance on or near combustible materials such as tablecloths or curtains.
- Do not place the appliance on or near a hot gas or electric burner, or in a heated oven.
-
Never connect this appliance to an external timer or a separate remote-control system.
-
Never use this appliance with an extension cord or power board. Ensure it is plugged into a dedicated power point and without any other appliances on the same outlet.
-
Do not turn on the power until the appliance and parts are in place as required.
-
To protect against electric shock, do not immerse the cord, plug, or appliance in water or any other liquid. Do not expose the appliance to dripping or splashing and ensure that no objects filled with liquids such as vases are placed on the appliance. Do not put any water or other liquid into the main housing of the appliance through the vents. Do not rinse it under the tap.
-
Do not touch the appliance, power cord or power plug with wet hands.
-
Unplug from the outlet when not in use and before cleaning. Allow the appliance to cool down before putting on or taking off the parts, and before cleaning.
-
The appliance does not contain any serviceable parts inside. Do not attempt to open and repair the appliance yourself. All components should only be serviced by a qualified technician.
-
Do not use the appliance if the plug, power cable or unit itself are damaged. If the power cord is damaged, you must have it replaced at a service centre by qualified persons in order to avoid a hazard.
-
Do not use the appliance for anything other than the intended use. It is for household use only. It is not to be used outdoors or for commercial purposes.
-
Close supervision is necessary when the appliance is used near children. Keep the appliance and power cord out of reach of children when it is in operation or during the cooling process.
-
This appliance is intended to be used in household and similar applications such as:
- staff kitchen areas in shops, offices and other working environments;
- farmhouses;
- by clients in hotels, motels and other residential-type environments;
- bed and breakfast type environments.
-
Extreme caution must be used when moving an air fryer containing hot food.
-
Leave enough open space from other objects while in use. Do not block air intakes or exhausts.
-
Do not place the appliance against a wall or against other appliances. Leave at least 20 centimetres of free space on the back and sides and above the appliance. Do not place anything on top of the appliance.
-
When the appliance is in operation, hot air is released through the air outlet vent. Keep your hands and face at a safe distance from the air outlet vent.
-
Do not touch the hot surfaces. The appliance's outer surfaces may become hot during use. The rotisserie basket and rotisserie fork set will be hot. Wear oven mitts or use the rotisserie remover tool to remove them. Wear oven mitts when handling the crisper trays and drip tray.
-
Do not cover the appliance while in use.
-
Do not let the cord hang over the edge of the table or counter.
-
Do not unplug the appliance by pulling on the cord.
-
This appliance can be used by children 8 years and above and people with a physical, sensory or mental impairment, or people without knowledge or experience if they are supervised or given prior instructions concerning the use of the appliance by someone responsible for their safety. Children must be supervised to ensure that they do not play with the appliance.
-
Do not leave the appliance operating while unattended.
-
The appliance may emit light smoke during its first use. It is not defective, and the smoke will burn off within a few minutes.
-
Should the appliance emit black smoke, unplug it immediately. Wait for the smoke to stop before removing the contents inside.
-
To prevent the food from contacting the inner upper wall and heating element, do not overfill the rotisserie fork or crisper trays.
-
Cleaning and user maintenance shall not be made by children unless they are older than 8 and supervised. Keep the appliance and its cord out of reach of children younger than 8 years.
Technical Parameters
| Voltage | 220-240V~ | 50/60Hz | |
| Power | 1700 | Watts | |
| Capacity | 23L | ||
| Adjustable temperature | 40°C - 230°C | ||
| Timer | 1 - 990 min | ||
Before first use
- Remove all packaging and promotional materials.
- Thoroughly clean the accessories with hot soapy water or in a dishwasher.
- Wipe the inside and outside of the appliance with a soft moist cloth.
Note: When your air fryer is heated for the first time, it may emit slight smoke or odour. This is normal with many brand-new appliances. This does not affect the safety of your appliance. It is recommended to operate an empty air fryer at 150° C for 10 minutes to remove any smells from the heating elements.
CONTROL PANEL INSTRUCTIONS


OFF - start/pause key

/TIMER - time and temperature control key

U - function selection key

SSERIE - rotisserie selection key

T - light on/off key

AY TIMER - timer delay key


OWN - time and temperature adjustment keys
USING THE APPLIANCE
After powering on, the screen will show time and temperature, then with a beep, all lights will flash, and the machine will enter standby mode.
Standby mode: ON/OFF key blinks. The machine will enter standby mode after 5 minutes of inactivity.
Function selection mode: Press the MENU key until the chosen function is highlighted. The temperature and time are displayed at the same time and can be adjusted at any time.
Temperature & time adjustment: press the TEMP/TIME key once to adjust the temperature and twice to adjust the time - use the UP and DOWN keys to adjust.
Cooking: after the chosen function is selected, press ON/OFF key to start. Long-press the ON/OFF key for 3 seconds to stop cooking and return to standby mode.
Finish cooking: the "End End" alarm is displayed 3 times, press any key to exit. The machine will enter standby mode after 5 minutes of inactivity.
Rotisserie function: some cooking programs start the rotisserie function automatically. If the selected program doesn't start the rotisserie function on its own, you can start it manually by pressing the rotisserie key when you want to use it. If the rotisserie function starts automatically and you don't want to use it, simply press the rotisserie key to turn it off.
Light function: When you power on the air fryer oven and need to use the light, simply press the key to turn it on. The light will remain on unless manually turned off. After the machine has finished its operation, the light will turn on automatically, and unless manually turned off, it will continue to stay on. Please be aware that the light does not have a memory function.
Delay start function:
Begin by selecting the desired function and setting the time and temperature accordingly. Next, press the delay start key (the key will flash). Adjust the desired delayed start time and press the start/pause key. The machine will then initiate a countdown for the delayed start. If you need to extend or shorten the delayed start time, press the increase or decrease key to adjust the time. (If there is no activity within 5 seconds, the delayed start reservation will be automatically cancelled.)
The available range for delayed start time is 30 to 720 minutes. For the initial 30 to 60 minutes, time will progress in 1-minute increments. For durations between 60 to 720 minutes, time will progress in 10-minute increments.
MENU SETTINGS
Keep in mind that the pre-programmed settings are an indication only. As ingredients differ in origin, size, shape as well as brand, we cannot guarantee the best setting for your ingredients.
| Program | Default Temperature | Default Time | Automatic Rotisserie |
| Hot Chips | 200°C | 17 min | |
| Wings | 180°C | 14 min | |
| Pizza | 230°C | 7 min | |
| Steak | 200°C | 15 min | |
| Fish | 200°C | 9 min | Yes |
| Toast | 230°C | 4 min | |
| Chicken | 200°C | 32 min | Yes |
| Broil | 180°C | 15 min | Yes |
| Vegetables | 180°C | 10 min | |
| Defrost | 60°C | 30 min | |
| Yogurt | 50°C | 420 min | |
| Bake | 140°C | 40 min | |
| Dehydrate | 70°C | 240 min | |
| Keep warm | 70°C | 60 min |
ACCESSORIES

Baking tray
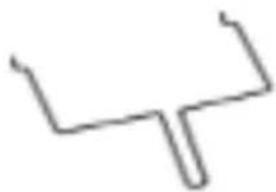
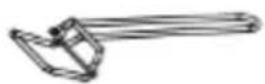
Rotisserie handle

Baking rack

Air frying rack
Tray handle

Rotisserie
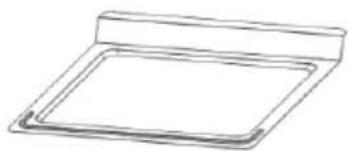
Crumb tray
Baking tray & baking rack: Use to cook a variety of food.
Tray handle: Use to remove the bake tray, bake rack and air frying rack from the air fryer oven.
Rotisserie: Use to cook large-sized food, such as a whole chicken.
Rotisserie handle: Use to remove the rotisserie from the oven.
Air frying rack: Use for fries, chicken wings, onion rings etc. It can also be used as the dehydrating rack.
Crumb tray: Use to catch crumbs and drippings from the cooking food.
Preparing for use
-
Place the appliance on a stable, horizontal, and even surface. Do not place the appliance on a non-heat-resistant surface.
-
Place the cleaned accessories inside the machine. Do not put anything on top of the appliance, the airflow will be disrupted and affect the hot air frying result.
USING THE APPLIANCE
-
Plug in the power cord.
-
Place food on your chosen accessories.
-
Select a preset function or manually set time & temperature. Press ON/OFF to start cooking.
Note: if the machine is cold, it is recommended to preheat it for 3 minutes before putting the food inside.
-
When you hear the timer buzzer, the set preparation time has elapsed and the cooking has finished.
-
Check if the food is ready. If it isn't ready yet, simply put it back into the appliance and set the timer to a few extra minutes.
-
When one batch of ingredients has been cooked, the machine can immediately cook another batch.
CLEANING AND MAINTENANCE
Unplug the appliance and allow it to cool down completely before handling, cleaning or storing.
Wash all accessories in hot soapy water or in a dishwasher after every use.
Tip: In case of there's food sticking to the accessories, please soak them in hot soapy water for about 10 min before cleaning.
Wipe the inner and outer surfaces of the oven with a soft damp cloth. Do not directly clean the product with water.
Before using or storing the product, clean all parts, dry them with dry cloth, and then assemble them back to the original position for next use.
STORING
Allow the appliance to cool down completely before storing it. Store the appliance in an upright position in a dry location. Do not place any heavy items on top of the appliance during storage as this may result in possible damage to the appliance.
LENOXX®
www.lenoxx.com.au

1300 666 848

LenoxxElectronics LenovoxElectronics


Brand : Healthy Choice
Model : AFO2300
Category : Deep fryer